


Scale Modifications to the 1/3 Scale Balsa USA Sopwith Pup
 12-21-2014, 02:52 PM
#101

I has a similar idea. they do make a tool that creates goves in sheet metal. It works very much like you described. The problem is that all the wheels they supply make the grove too large for our purposes.
Plus I don't know how difficult it is to keep the cowl aligned if working alone?
The crip method does work. I made the grove deep only to discover that it made adding the side parts so that it all fit around the wood parts was a bother.
The JW kit's wood is sized to have the top and side bits screwed into place. The cowl is then attached to a fixture in the front. This becomes a butt joint and not overlapping like the Full scale is.. So.. i had to make the grove in the wood and reduce the diameter of the whole front for everything to fit..
Where did you get your Evo engine?
Andy
 12-23-2014, 06:42 AM
#103

My Feedback: (2)
This particular kit doesn't "do" scale per se. The aft section of the fin and the fore section of the rudder use flat hinges with pins. The TE and LE edges are also flat. So some modification is in order. The TE edge of the fin has the ply removed so I can fit a 5/8 dowel in place to accept Robart hinges. Similar will be done for the LE of the rudder.
The FS plane uses only two hinges for the rudder. I may go that route or add one more just to be safe..
12-23-2014, 07:03 AM
#104
That's nice Bob. I've gone done a rabbit trail with my lathe so I haven't been working on my pup for a couple of weeks.
Today I plan to finish the new instrument panel. The compass is giving my cause for thought because I made the housing out of aluminum I am looking for a way to attach the mounting brackets to the housing. I have just about settled on using steel epoxy to glue them to the sides of the housing. Once I do that, I might put a small screw through the bracket into the housing to make sure it doesn't come lose.
I have decided to redo the tail surfaces on my pup too. The BUSA is not to scale. I'm not going to use metal to outline the surfaces but I am going to add a symmetrical airfoil to the horizontal stabilizer and I am going to taper the elevator and the rudder to make them more scalelike.
Andy
12-24-2014, 09:45 AM
#105
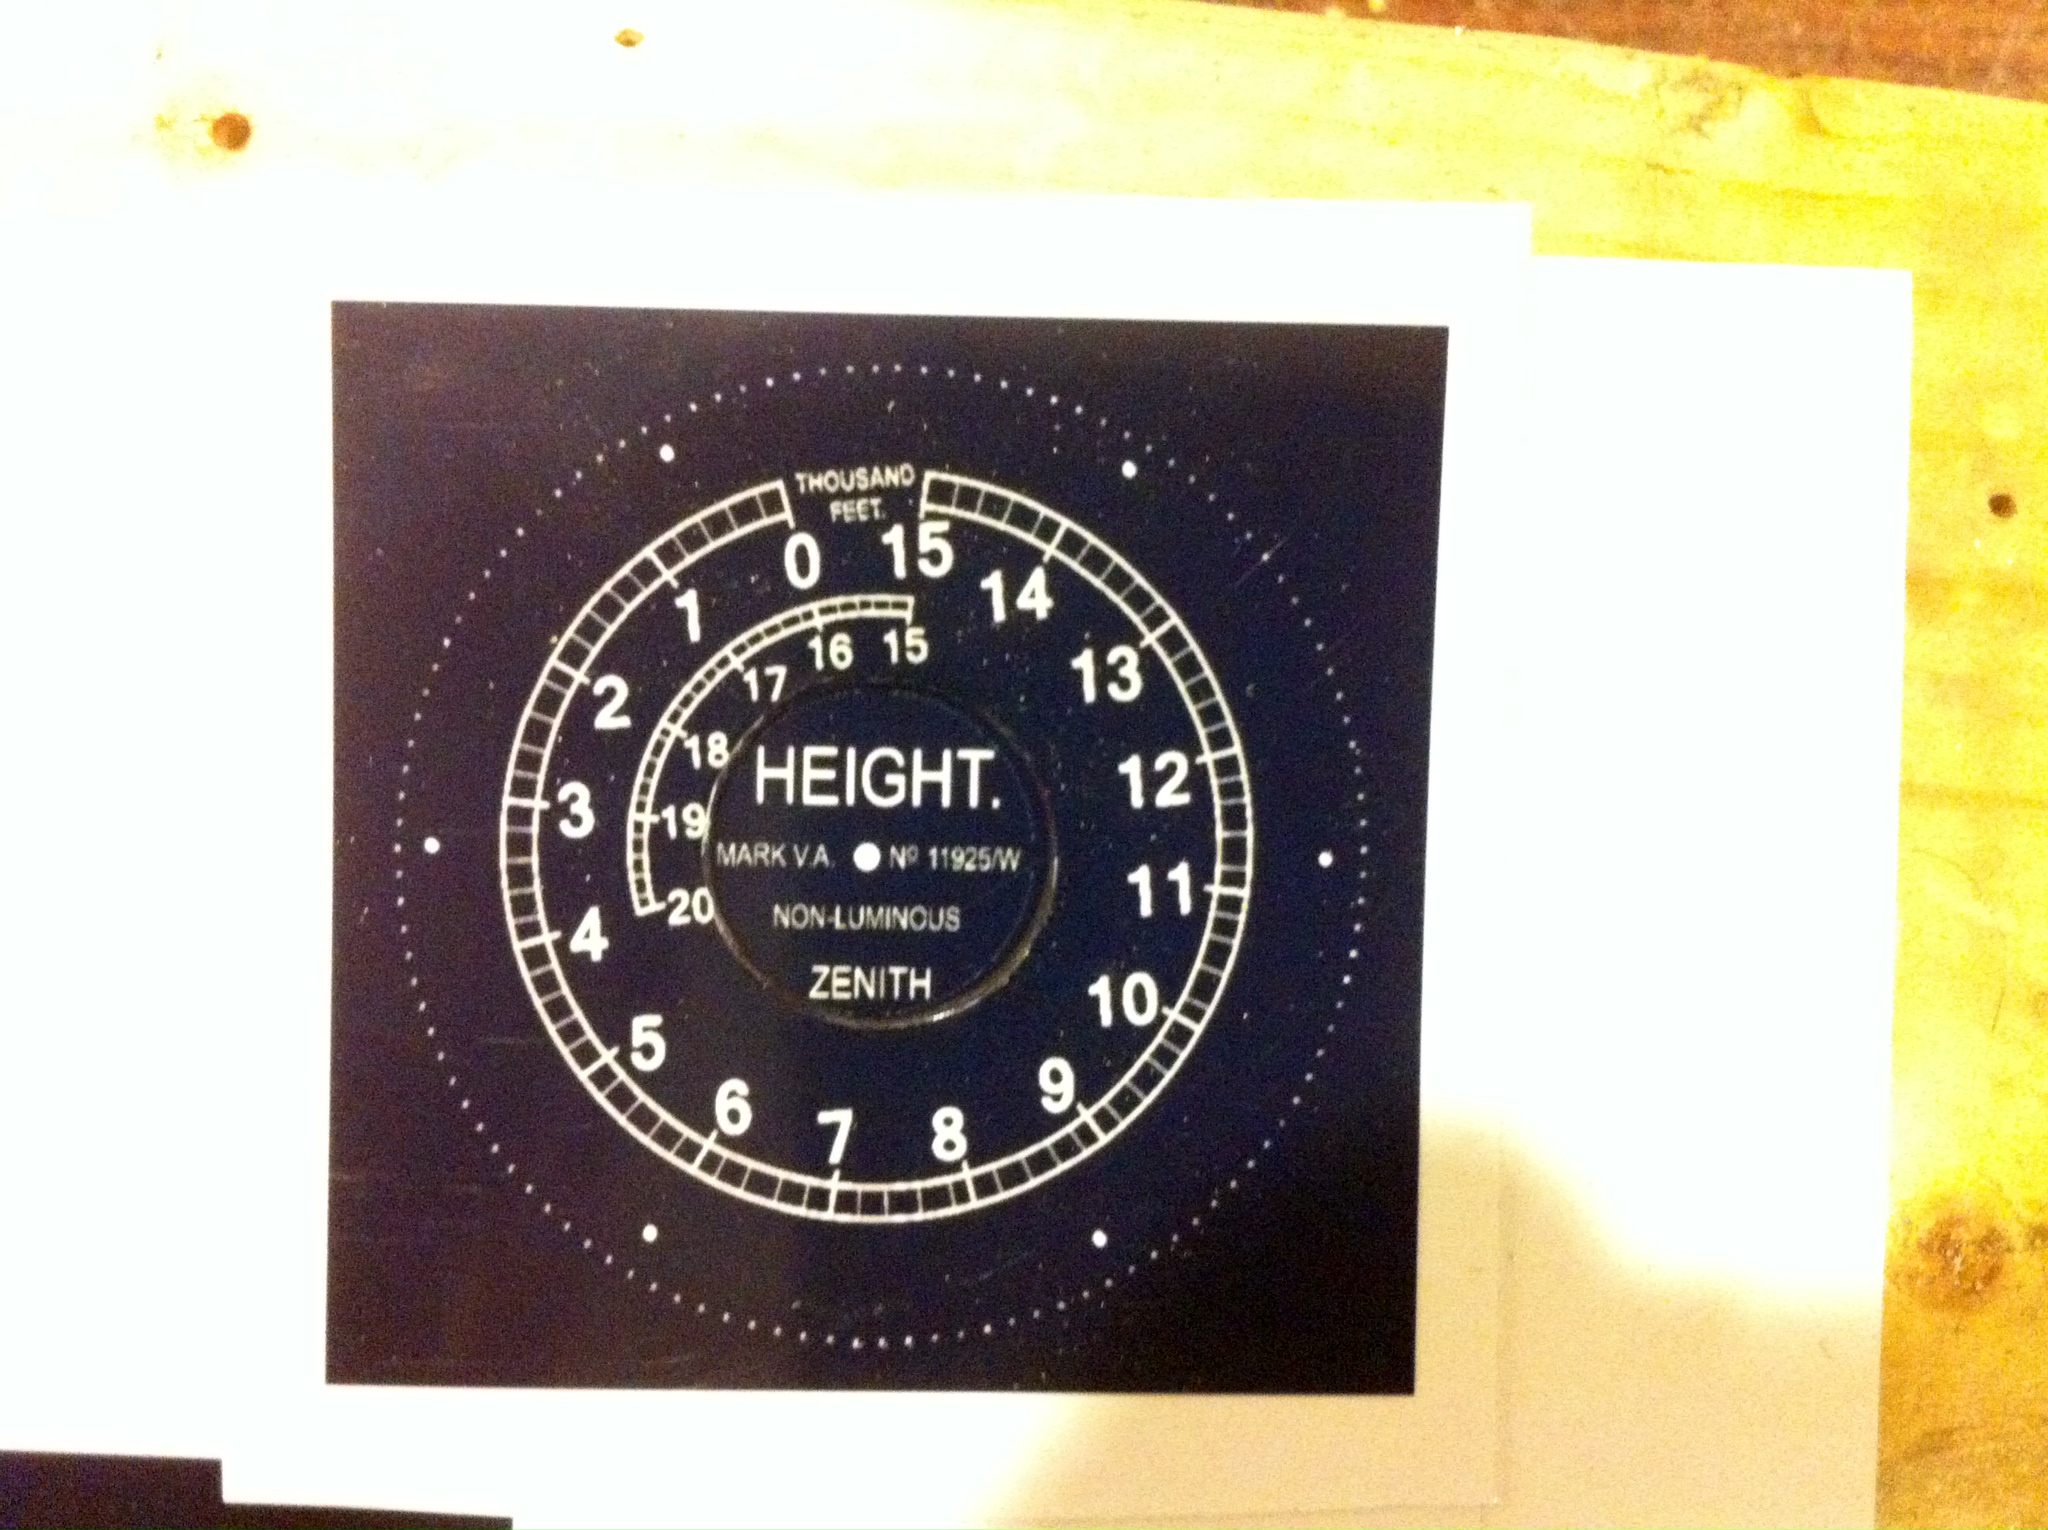
I finally got back to working on my Pup last night. I added a spacer to the back of the instrument panel and cut out the holes to add some depth to the gauges. I also painted the inside of the opening black for each or the instruments. Today, I'll attach the gauge faces and create the needles. My intent is to create layers so that when you look at the instrument you get the impression that you are looking a a real instrument. The altimeter actually had two dials the top one that moved so the pilot could set the altitude for the airfield, and the inner dial that did not turn. I am thinking of creating that effect. We'll see if it turns out.
Merry Christmas everyone! Thanks for reading this.
Andy
Merry Christmas everyone! Thanks for reading this.
Andy

 12-25-2014, 12:54 PM
#108
I worked a little on my Pup last night.
I added filler pieces to the back of the panel to make the gauges sit a little deeper in the panel and I painted the openings


I cut the center out of the altimeter using a homemade brass hole punch. In the second picture I laid the two faces on top of each other to see the effect.

I mounted the gauges. This picture is a closeup of the altimeter


This last picture I tried the bezels to see how it looked. Next I have to make the pointers and cut out the plastic for the gauge glass.

More later.
Andy
I added filler pieces to the back of the panel to make the gauges sit a little deeper in the panel and I painted the openings
I cut the center out of the altimeter using a homemade brass hole punch. In the second picture I laid the two faces on top of each other to see the effect.
I mounted the gauges. This picture is a closeup of the altimeter
This last picture I tried the bezels to see how it looked. Next I have to make the pointers and cut out the plastic for the gauge glass.
More later.
Andy
12-25-2014, 08:38 PM
#109
I worked on the instrument panel today and finished the three main gauges.
First I bent the indicators using my Z-Bend pliers and then I cut each one to length for each size of instrument. Then I painted each one white.


Then I test fit and positioned each indicator and glued them in place by adding a drop of glue to the back side of the indicator.


Next I drilled the holes and test fit the bezels. Finally I cut out the plastic and installed the glass for each gauge and screwed everything down.


Merry Christmas to all and to all a good night!
Andy
First I bent the indicators using my Z-Bend pliers and then I cut each one to length for each size of instrument. Then I painted each one white.
Then I test fit and positioned each indicator and glued them in place by adding a drop of glue to the back side of the indicator.
Next I drilled the holes and test fit the bezels. Finally I cut out the plastic and installed the glass for each gauge and screwed everything down.
Merry Christmas to all and to all a good night!
Andy

 12-27-2014, 12:10 PM
#113
Andy
 .. Bummer!!!!!
12-28-2014, 07:32 AM
.. Bummer!!!!!
12-28-2014, 07:32 AM
#117
You would be amazed at the stuff everyone notices. My Buddy entered his Otter at Toledo and there were many comments on the pencil in the pilots pocket, the miniature folded map on the dash, the fish and sea weed in the simulated water in the diorama. It’s the little details that amaze and entertain the observer.
12-28-2014, 04:23 PM
#121
That's a beauty Bob! I didn't move to Fort Wayne until 2007 and my first show was in 2009. Toledo is about an hour and 40 minutes from here so we usually go up on Friday and then again on Saturday.
What kit is that? I have a BUSA SE5A that I am customizing but I'm not going to go crazy like I did on the Pup.
Andy
What kit is that? I have a BUSA SE5A that I am customizing but I'm not going to go crazy like I did on the Pup.
Andy
12-29-2014, 10:18 AM
#123


Join Date: Feb 2007
Location: Los Gatos, CA
Posts: 797
Likes: 0
Received 0 Likes
on
0 Posts
Bob,
Nice SE5a. Is that � scale and what engine? Did you fly it?
Andy,
Great work on the panel. Keep it up!
I'm just about to wrap up my � scale scout "Pup" and my maiden flight is scheduled for the first of January!
I took the Pup to the field to run the engine.


Nice SE5a. Is that � scale and what engine? Did you fly it?
Andy,
Great work on the panel. Keep it up!
I'm just about to wrap up my � scale scout "Pup" and my maiden flight is scheduled for the first of January!
I took the Pup to the field to run the engine.
12-29-2014, 01:46 PM
#125
My Feedback: (2)
The Se5a is 90% 1/4 scale flown with a Saito 150 engine. It flew well.
Andy, what do you plan to use for covering for your pup?
I may venture over to linen fabric. Or stits.. something like that. Linen is very nice and it feels great after its glued and doped on. VERY durable too. No wrinkles etc..
Andy, what do you plan to use for covering for your pup?
I may venture over to linen fabric. Or stits.. something like that. Linen is very nice and it feels great after its glued and doped on. VERY durable too. No wrinkles etc..
Last edited by BobH; 12-29-2014 at 07:30 PM.

