New Kit offering
 05-19-2018, 09:58 AM
#26
I looked at the web site and other posts about this build. A few questions? If I use the muffler for the 85cc motor, I see that it goes back into the fuselage. Where does the exhaust exit the airframe? And when I get this thing started, would anybody mind my doing a build thread? Are there many others that have this kit yet that could build along and show me the errors of my build before I get in to deep? Just thinking about this bird at the field (next year?) puts a smile on my face. I think I need a longer build table.
 05-19-2018, 10:08 AM
#27

Thread Starter
Hello Jeff
Everyone Is trying to finish other projects before starting their Pfalz. Both Joey and I have built the kit and it�s very straight forward. We�re always here either via phone or email if you have any questions or need some direction. There are 200 plus build photos that come with the kit as well. Joey has the exhaust with his, I put a Kolm 100 in mine. I will have Joey let you know where he�s exiting the fuse with the exhaust.
Everyone Is trying to finish other projects before starting their Pfalz. Both Joey and I have built the kit and it�s very straight forward. We�re always here either via phone or email if you have any questions or need some direction. There are 200 plus build photos that come with the kit as well. Joey has the exhaust with his, I put a Kolm 100 in mine. I will have Joey let you know where he�s exiting the fuse with the exhaust.
05-19-2018, 10:19 AM
#28
Thread Starter
Here is Mario�s with the muffler, you can see he exited in front of the right front gear leg. You can also see it in the first pics of the thread.
Last edited by vogel605; 05-19-2018 at 10:21 AM. Reason: More info
05-19-2018, 10:23 AM
#29
Join Date: Jan 2011
Location: Flat Rock, IN
Posts: 7
Likes: 0
Received 0 Likes
on
0 Posts
Hello Jeff
Everyone Is trying to finish other projects before starting their Pfalz. Both Joey and I have built the kit and it�s very straight forward. We�re always here either via phone or email if you have any questions or need some direction. There are 200 plus build photos that come with the kit as well. Joey has the exhaust with his, I put a Kolm 100 in mine. I will have Joey let you know where he�s exiting the fuse with the exhaust.
Everyone Is trying to finish other projects before starting their Pfalz. Both Joey and I have built the kit and it�s very straight forward. We�re always here either via phone or email if you have any questions or need some direction. There are 200 plus build photos that come with the kit as well. Joey has the exhaust with his, I put a Kolm 100 in mine. I will have Joey let you know where he�s exiting the fuse with the exhaust.
Joey Leach
05-20-2018, 04:32 AM
#31
Thread Starter
Hello Steve, no hard time line. The plans and metal parts are done but we need to rework the wood parts and make sure all goes together the way they should. We are working on it ,there just doesn�t seem to be enough hours in the day.
05-20-2018, 09:31 AM
#32

I looked at the web site and other posts about this build. A few questions? If I use the muffler for the 85cc motor, I see that it goes back into the fuselage. Where does the exhaust exit the airframe? And when I get this thing started, would anybody mind my doing a build thread? Are there many others that have this kit yet that could build along and show me the errors of my build before I get in to deep? Just thinking about this bird at the field (next year?) puts a smile on my face. I think I need a longer build table.
05-20-2018, 04:27 PM
#33
My Feedback: (14)

Join Date: Feb 2002
Location: Noblesville,
IN
Posts: 1,503
Likes: 0
Received 0 Likes
on
0 Posts
I understand that not enough hour thing. I really like the Pfalz, its different and the DP's need some different. I'm pretty much done with the 1/3 scale stuff. Too big to store and haul around. Getting old and it's getting harder and harder to mess with a 50 lb airplane. 1/4 scale is a nice size. Remember when it was huge? I know you all will argue, go ahead. I can wait on your 1/4 version. Hope I have the time.
05-21-2018, 11:12 AM
#34
Quarter scale was big. I was a member of the QSAA. Quarter Scale Association of America. We had a big gathering each year in Las Vegas at the dry lake bed. But when the ARF's started being made in 1/4 scale and bigger, it was the end of the QSAA. How times change.
05-21-2018, 11:41 AM
#35
My Feedback: (14)
Join Date: Feb 2002
Location: Noblesville,
IN
Posts: 1,503
Likes: 0
Received 0 Likes
on
0 Posts
I've started trying to encourage participation of the 1/5, 1/6, and 1/4 models in the DP events. When I started HDP, we would see quite a few "smaller models'. Hell we all used to have all the Hobbico electrics and small foamies and flew them often. But the tide flowed to the bigger stuff and anything under 1/4 dried up. There are a lot of these so called smaller models at the club level, but the guys won't fly in the events because of peer pressure. I would like that to change, but it will be tough if not impossible. And , in my opinion, that's too bad. That's not the way it was perceived. The cost of 1/3 scale is huge. the covering alone for my Se5a is over $400. So you end up having a $3000-$5000 airplane you fly 3 times a year. I know I'm rambling.
steve out
steve out
05-22-2018, 08:17 AM
#36
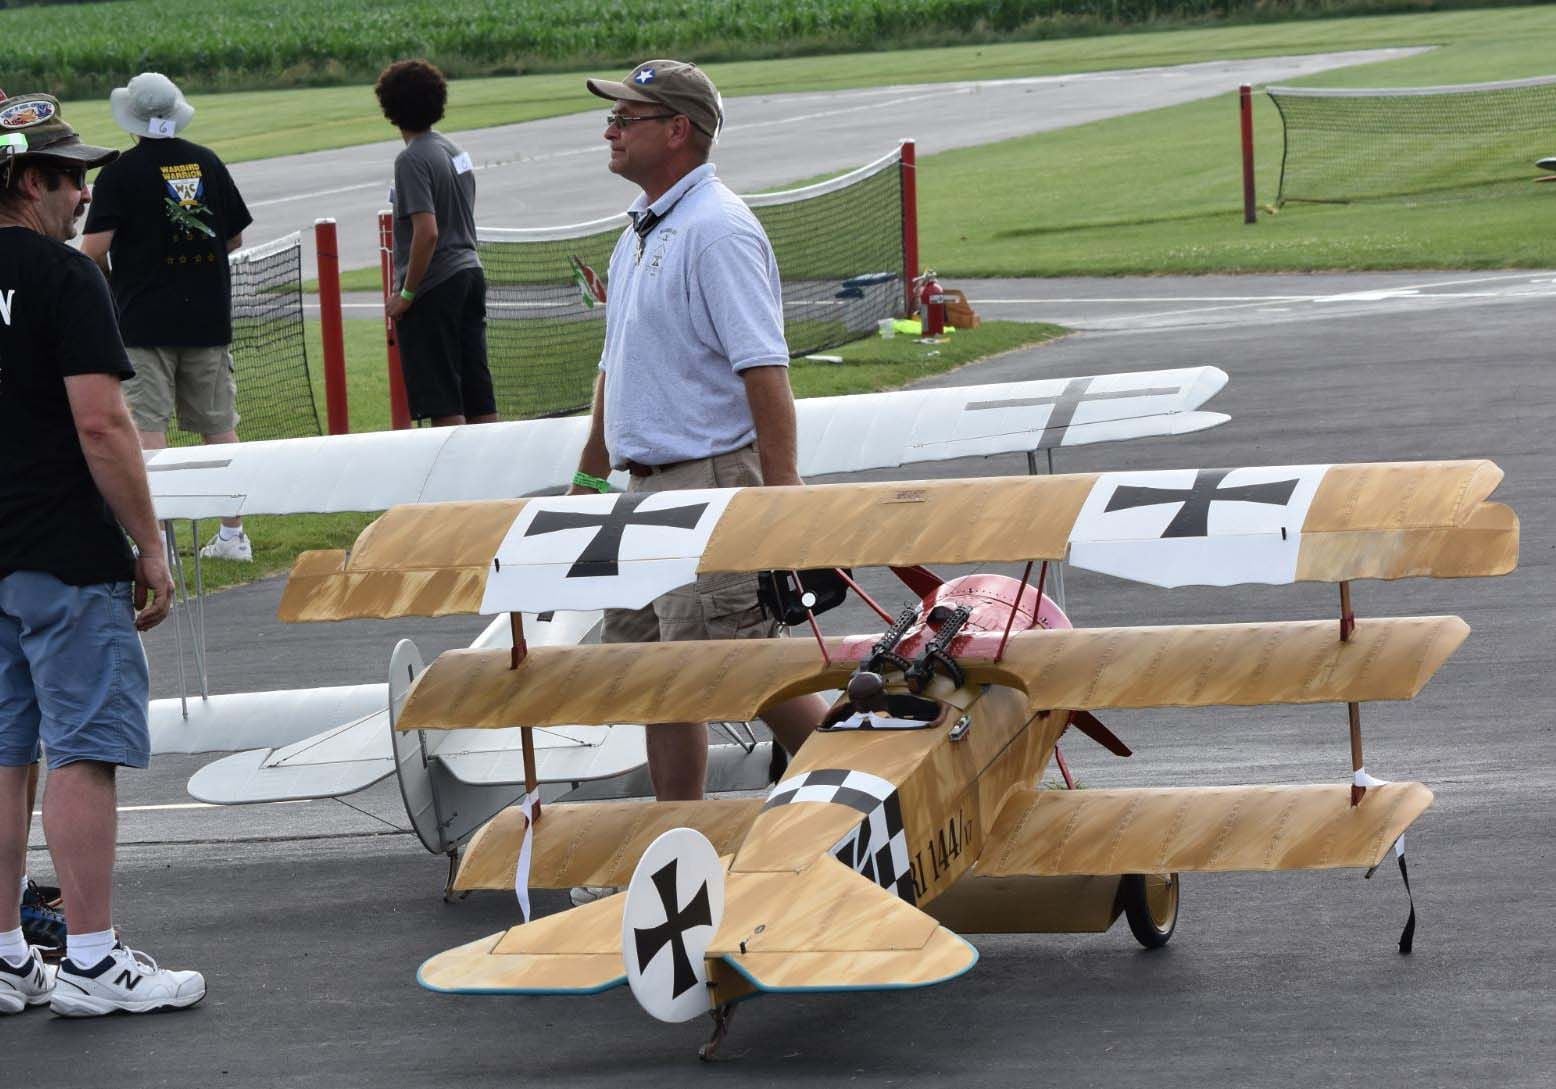
It makes me think of a bumper sticker. An MGB is parked next to a monster truck and the sticker on the car says: MGB, when you're okay with the size of your genitals. Seriously though, The 1/3 scale birds are a thing of beauty and there is a place for them but they are outside of my budget both in terms of cash and storage. Tying up $500-600 in a model is a MAJOR cash outlay for me. Some of the smaller WWI birds do seem to work better at 1/4 scale, in particular the Fokker Triplane but for a lot of us on a budget, 1/6 scale is just as tasty at a fraction of the cost. I wish the guys at Indiana Air Works lots of success. I don't know how the profit margins work on such things but their big birds should make a nice flagship for their product line and hopefully they can scale down some of their products for those of us with shallower pockets.
06-12-2018, 03:23 PM
#37
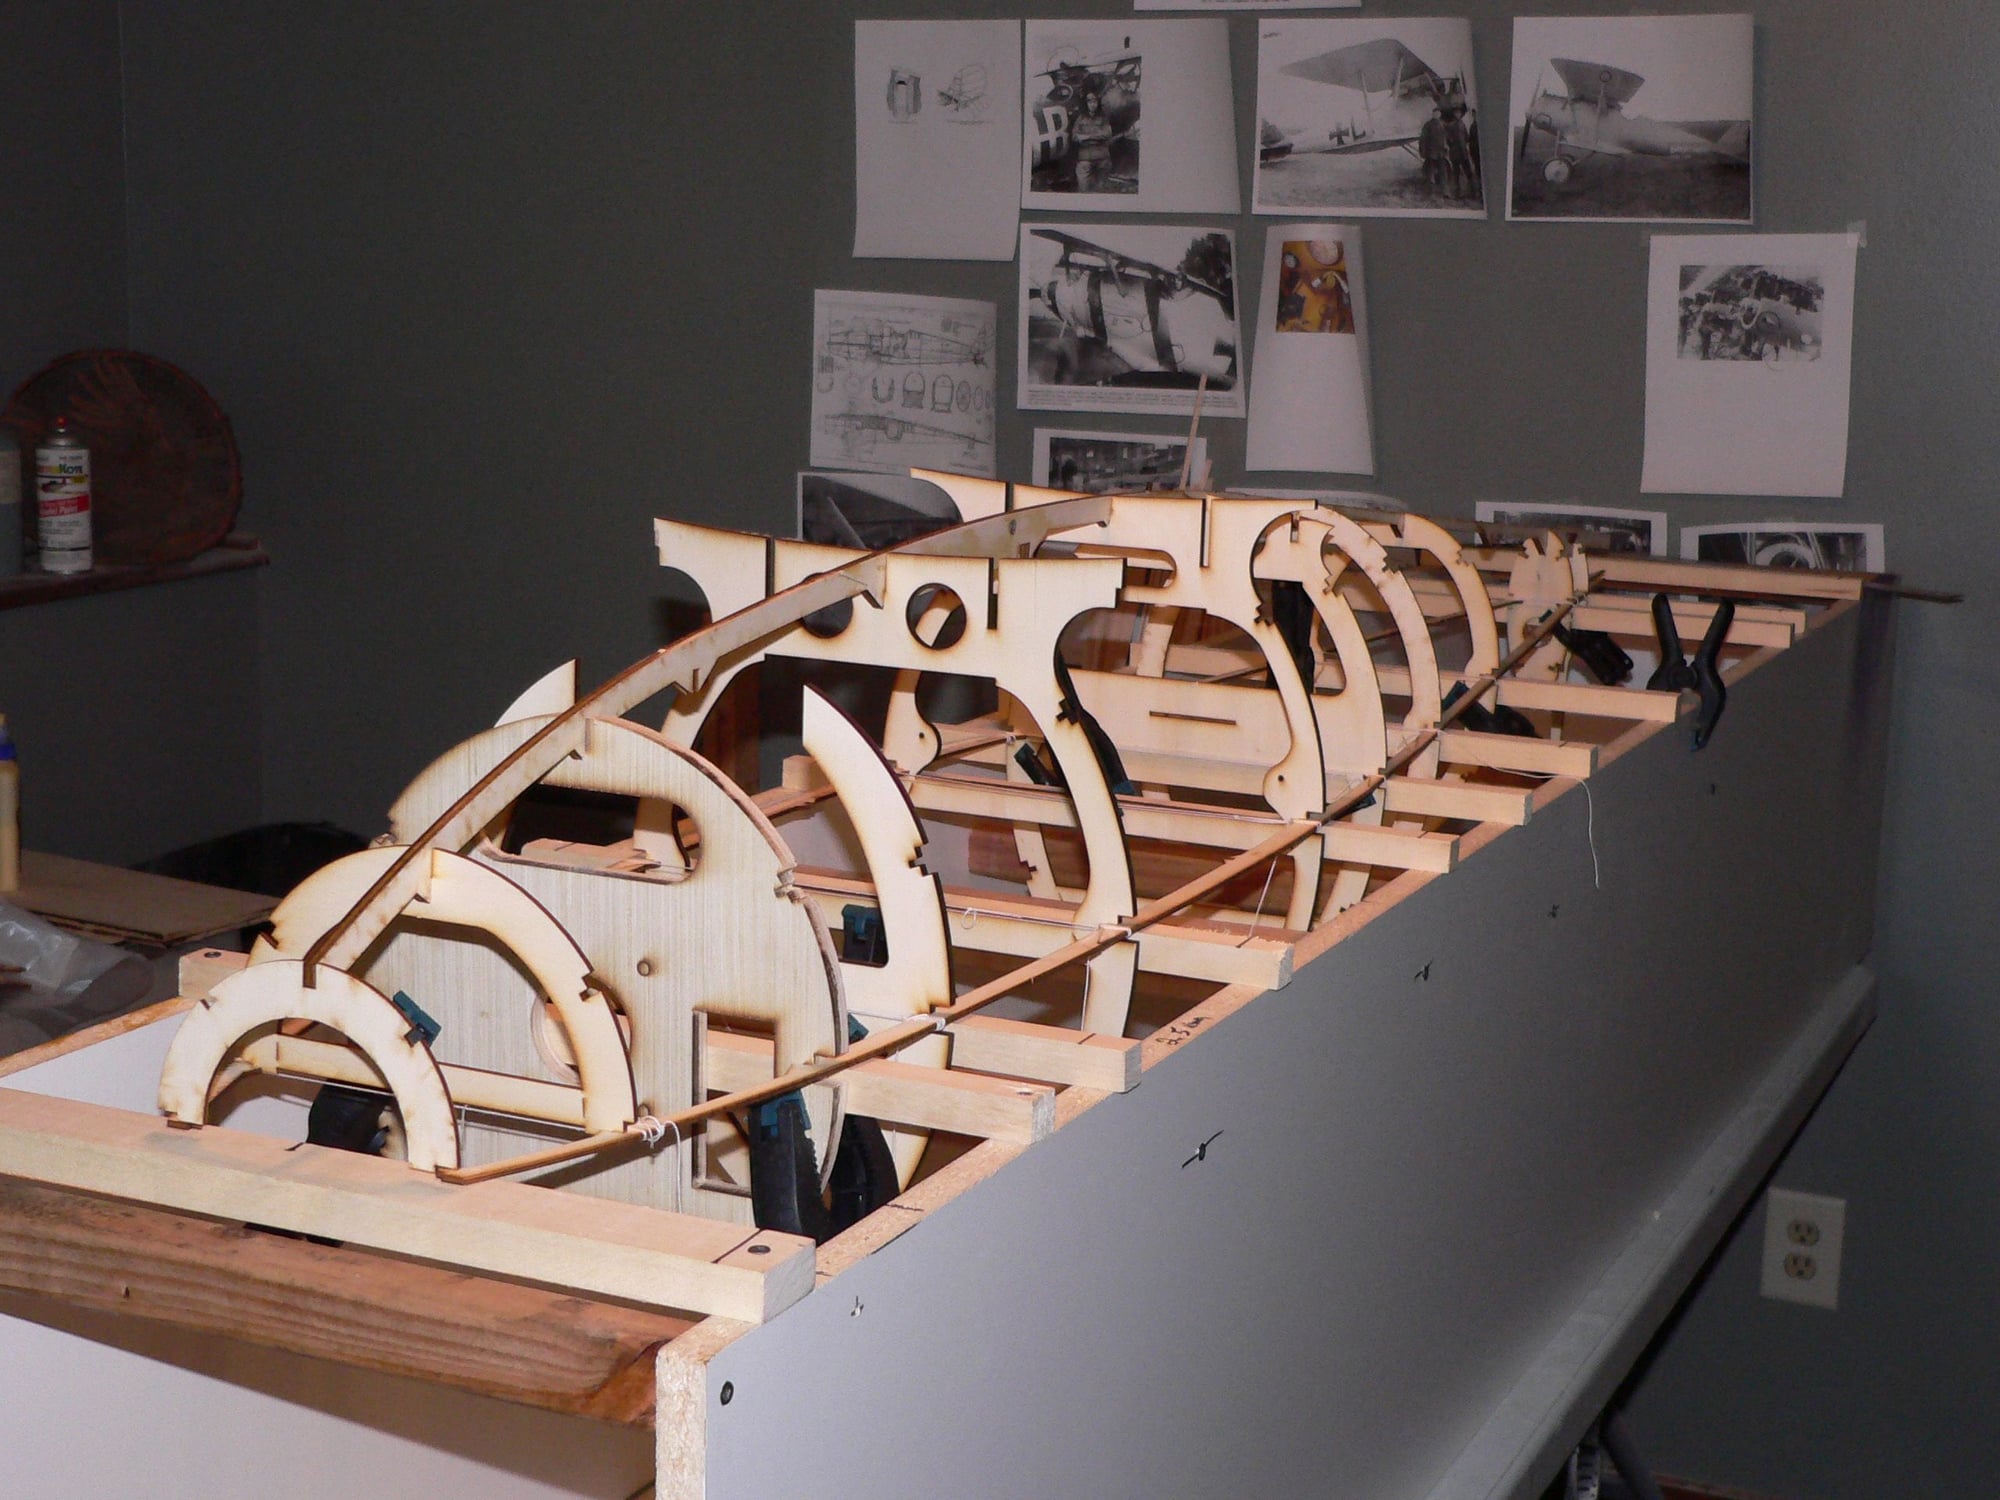
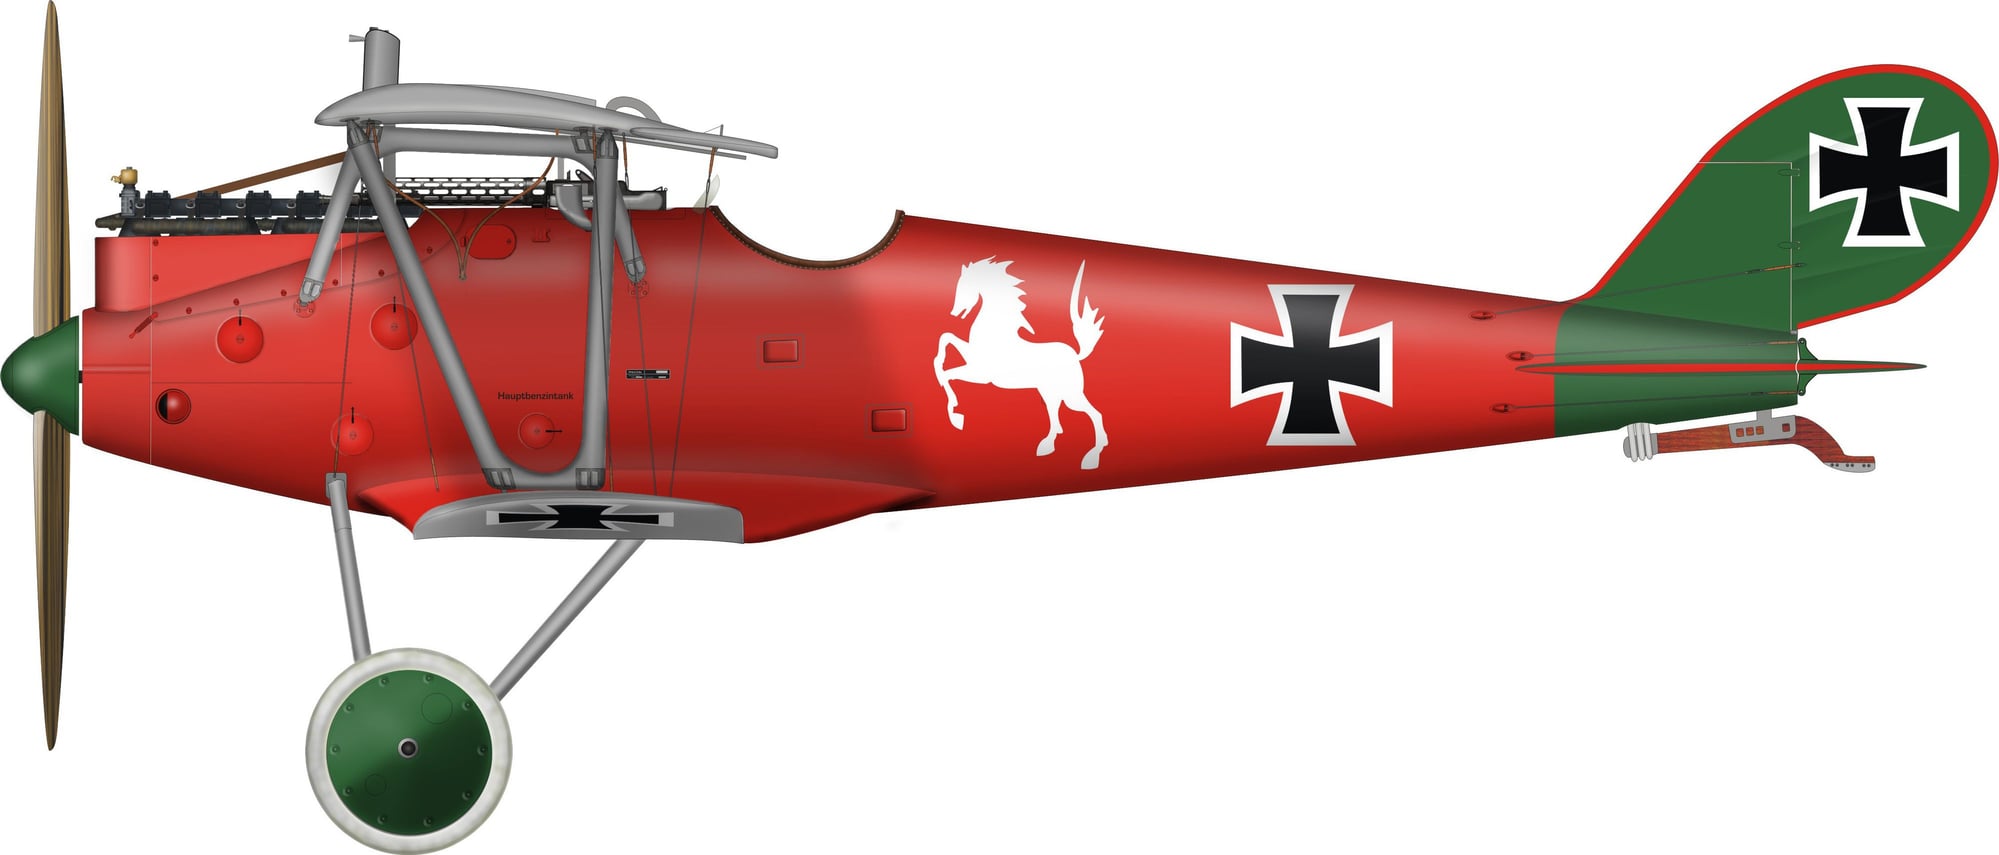
Now the fun part of the build. The research. Where this part fits, where this stripe goes, is it a D III or D IIIa? One big difference I have found is in the wire bracing on the wings. One picture shows a cable running from the very outside center tip of the top wing to the mid section of the bottom wing. Another picture shows the cable the same place on the bottom wing but half way between the strut and the wing tip on the top wing. Other pics show the wire running from the center of the strut on the bottom wing and still other pics show no wire at all. Gotta look careful and study. Trying to pick just a single aircraft and its pilot/color scheme is not that easy for me. I love this stuff! Of course I could just build it for easy set up at the field, and add very little detail............Naw....That wouldn't be right. 
06-12-2018, 04:03 PM
#38
jeffEE:
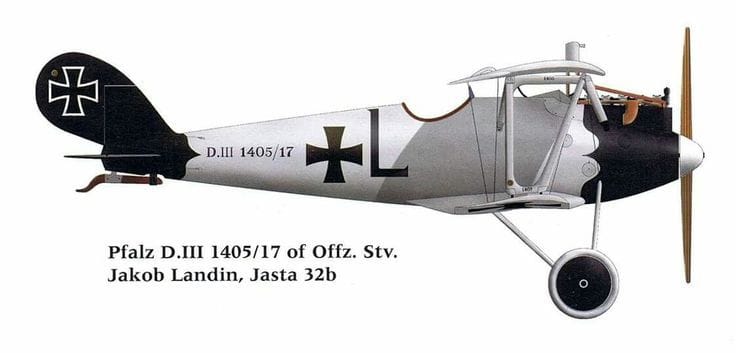
One of the most notable differences between the D-III and D-IIIa is that the D-III had buried machine guns making them almost impossible to unjam in combat, then there is the smaller horizontal stab and the different shaped wing tips on the lower wing.
Dan Schmidt
One of the most notable differences between the D-III and D-IIIa is that the D-III had buried machine guns making them almost impossible to unjam in combat, then there is the smaller horizontal stab and the different shaped wing tips on the lower wing.
Dan Schmidt
06-13-2018, 08:34 AM
#39
True, so true. The list of things is almost as endless as a person wants it to be. The horizontal stab is mounted upside down to help with pulling out of a dive (so I have read).
If a D'III is built, then the cowl at the rear of the pistons needs to be changed to allow the guns to peak out and the cockpit needs to have the gun butts inside, and, and, and, and. LOL As I say, it's mostly a choice of how far I want to go. But doing the research is first. And when you find that one little thing that makes your airplane stand out from others and is scale, well then its all worth it. Of course, I never build to the level of Top Gun. I don't have that kind of money or the shop to go that deep. But I will add as much as I need to make me happy. I just wish that Solartex was still being made. I could use about 15 meters of silver/grey.
If a D'III is built, then the cowl at the rear of the pistons needs to be changed to allow the guns to peak out and the cockpit needs to have the gun butts inside, and, and, and, and. LOL As I say, it's mostly a choice of how far I want to go. But doing the research is first. And when you find that one little thing that makes your airplane stand out from others and is scale, well then its all worth it. Of course, I never build to the level of Top Gun. I don't have that kind of money or the shop to go that deep. But I will add as much as I need to make me happy. I just wish that Solartex was still being made. I could use about 15 meters of silver/grey.
Last edited by jeffEE; 06-13-2018 at 08:36 AM.
06-13-2018, 08:39 AM
#40
Now the fun part of the build. The research. Where this part fits, where this stripe goes, is it a D III or D IIIa? One big difference I have found is in the wire bracing on the wings. One picture shows a cable running from the very outside center tip of the top wing to the mid section of the bottom wing. Another picture shows the cable the same place on the bottom wing but half way between the strut and the wing tip on the top wing. Other pics show the wire running from the center of the strut on the bottom wing and still other pics show no wire at all. Gotta look careful and study. Trying to pick just a single aircraft and its pilot/color scheme is not that easy for me. I love this stuff! Of course I could just build it for easy set up at the field, and add very little detail............Naw....That wouldn't be right.
 06-13-2018, 08:52 AM
#42
WOW, the pictures came out really big for some reason. Detail, yep, lots of little details. Like getting the correct looking rocker arms on the motor. Is it a Mercedes DII, DIII or DIIIa motor. Each was really different. And so it goes. Gotta love it. I think that I will chat with Callie's Graphics about the lettering details. I have two airplanes with work by them and they are the best. Just my opinion of course.
07-05-2018, 03:57 PM
#43

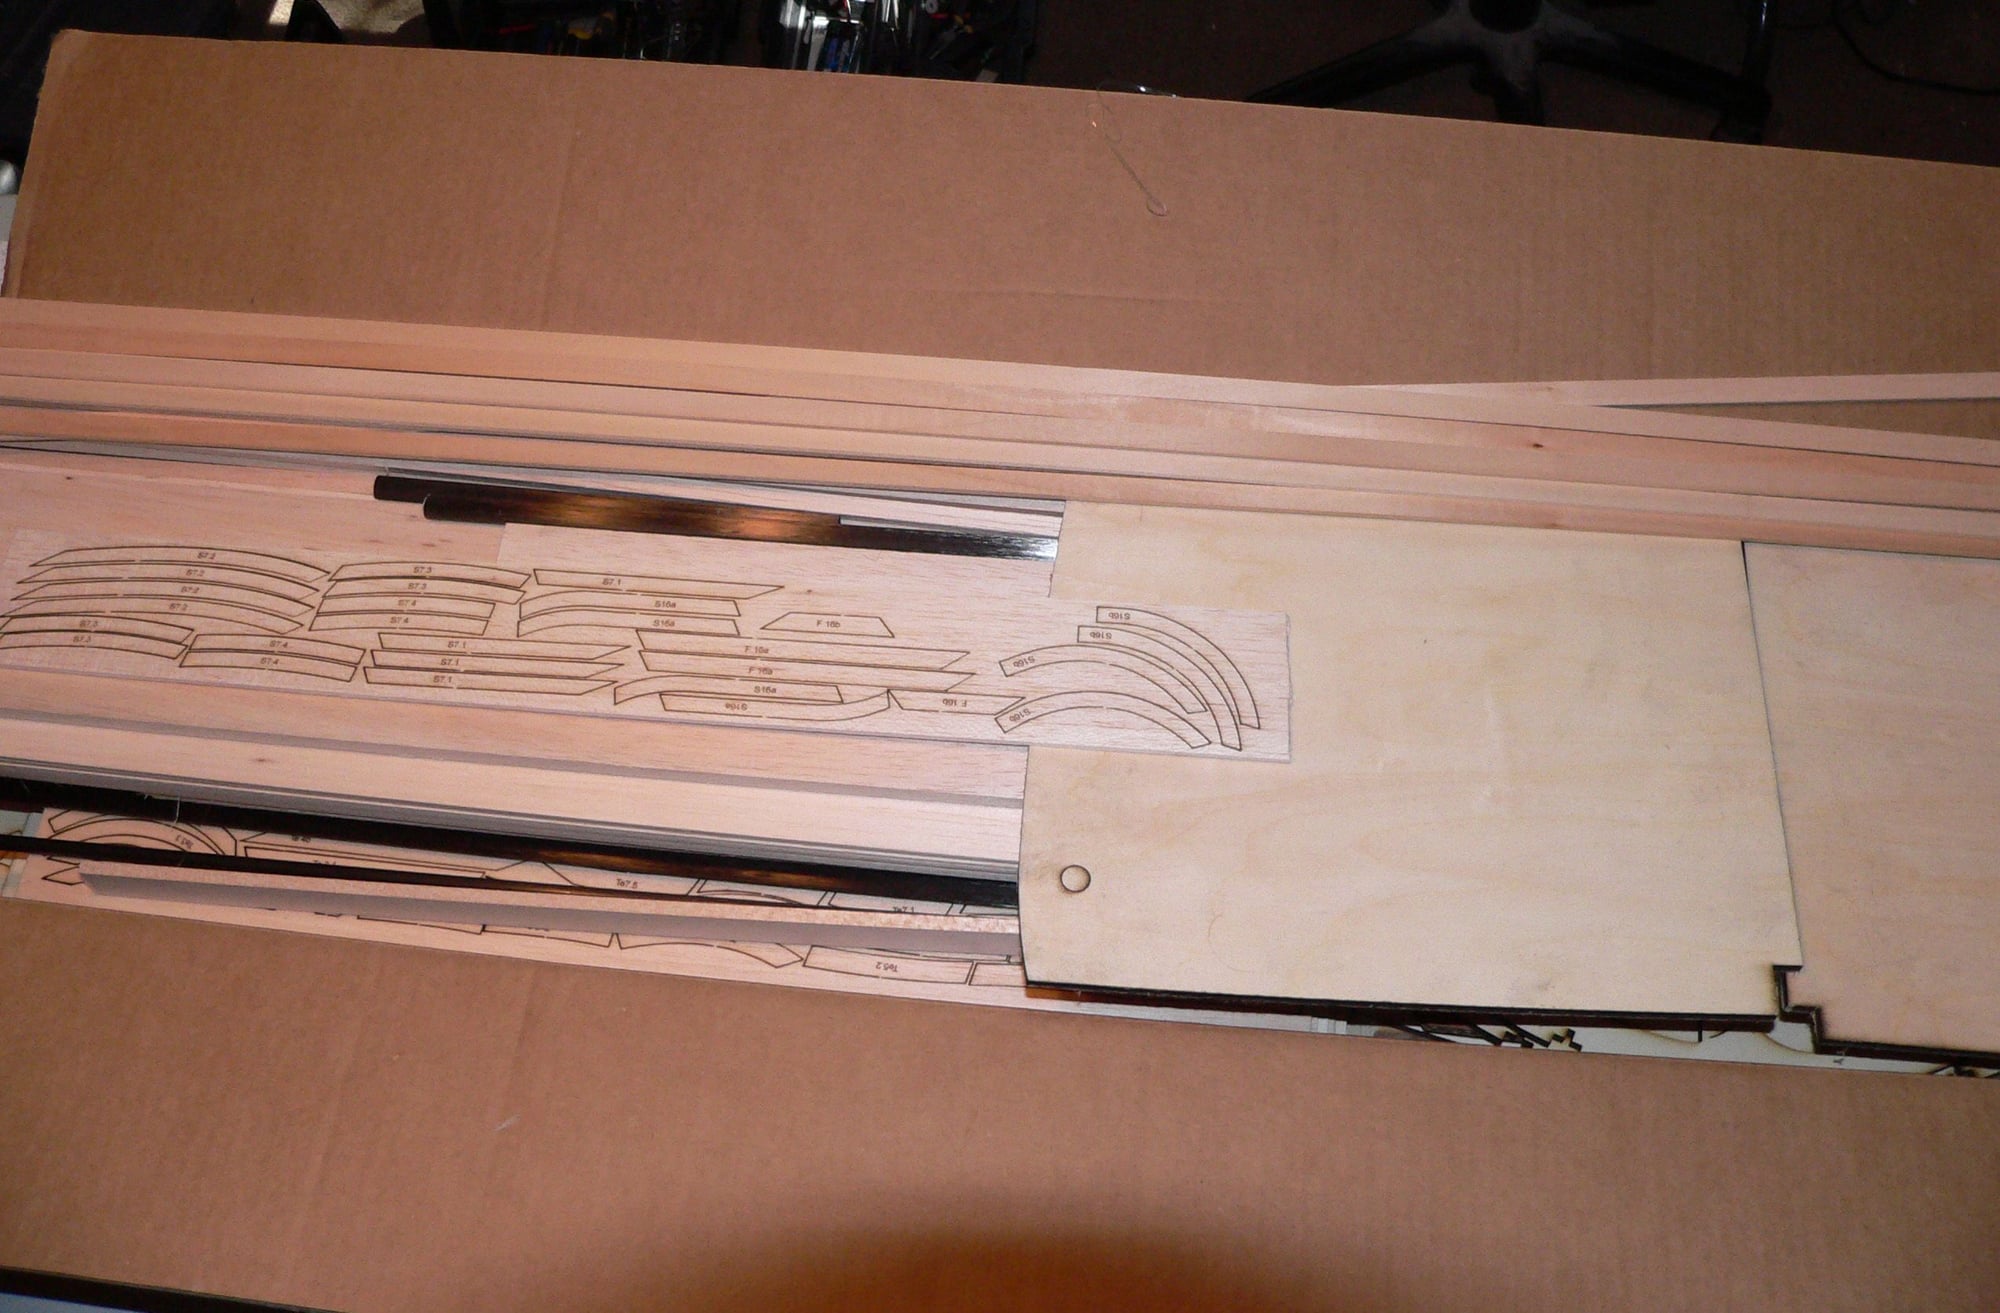

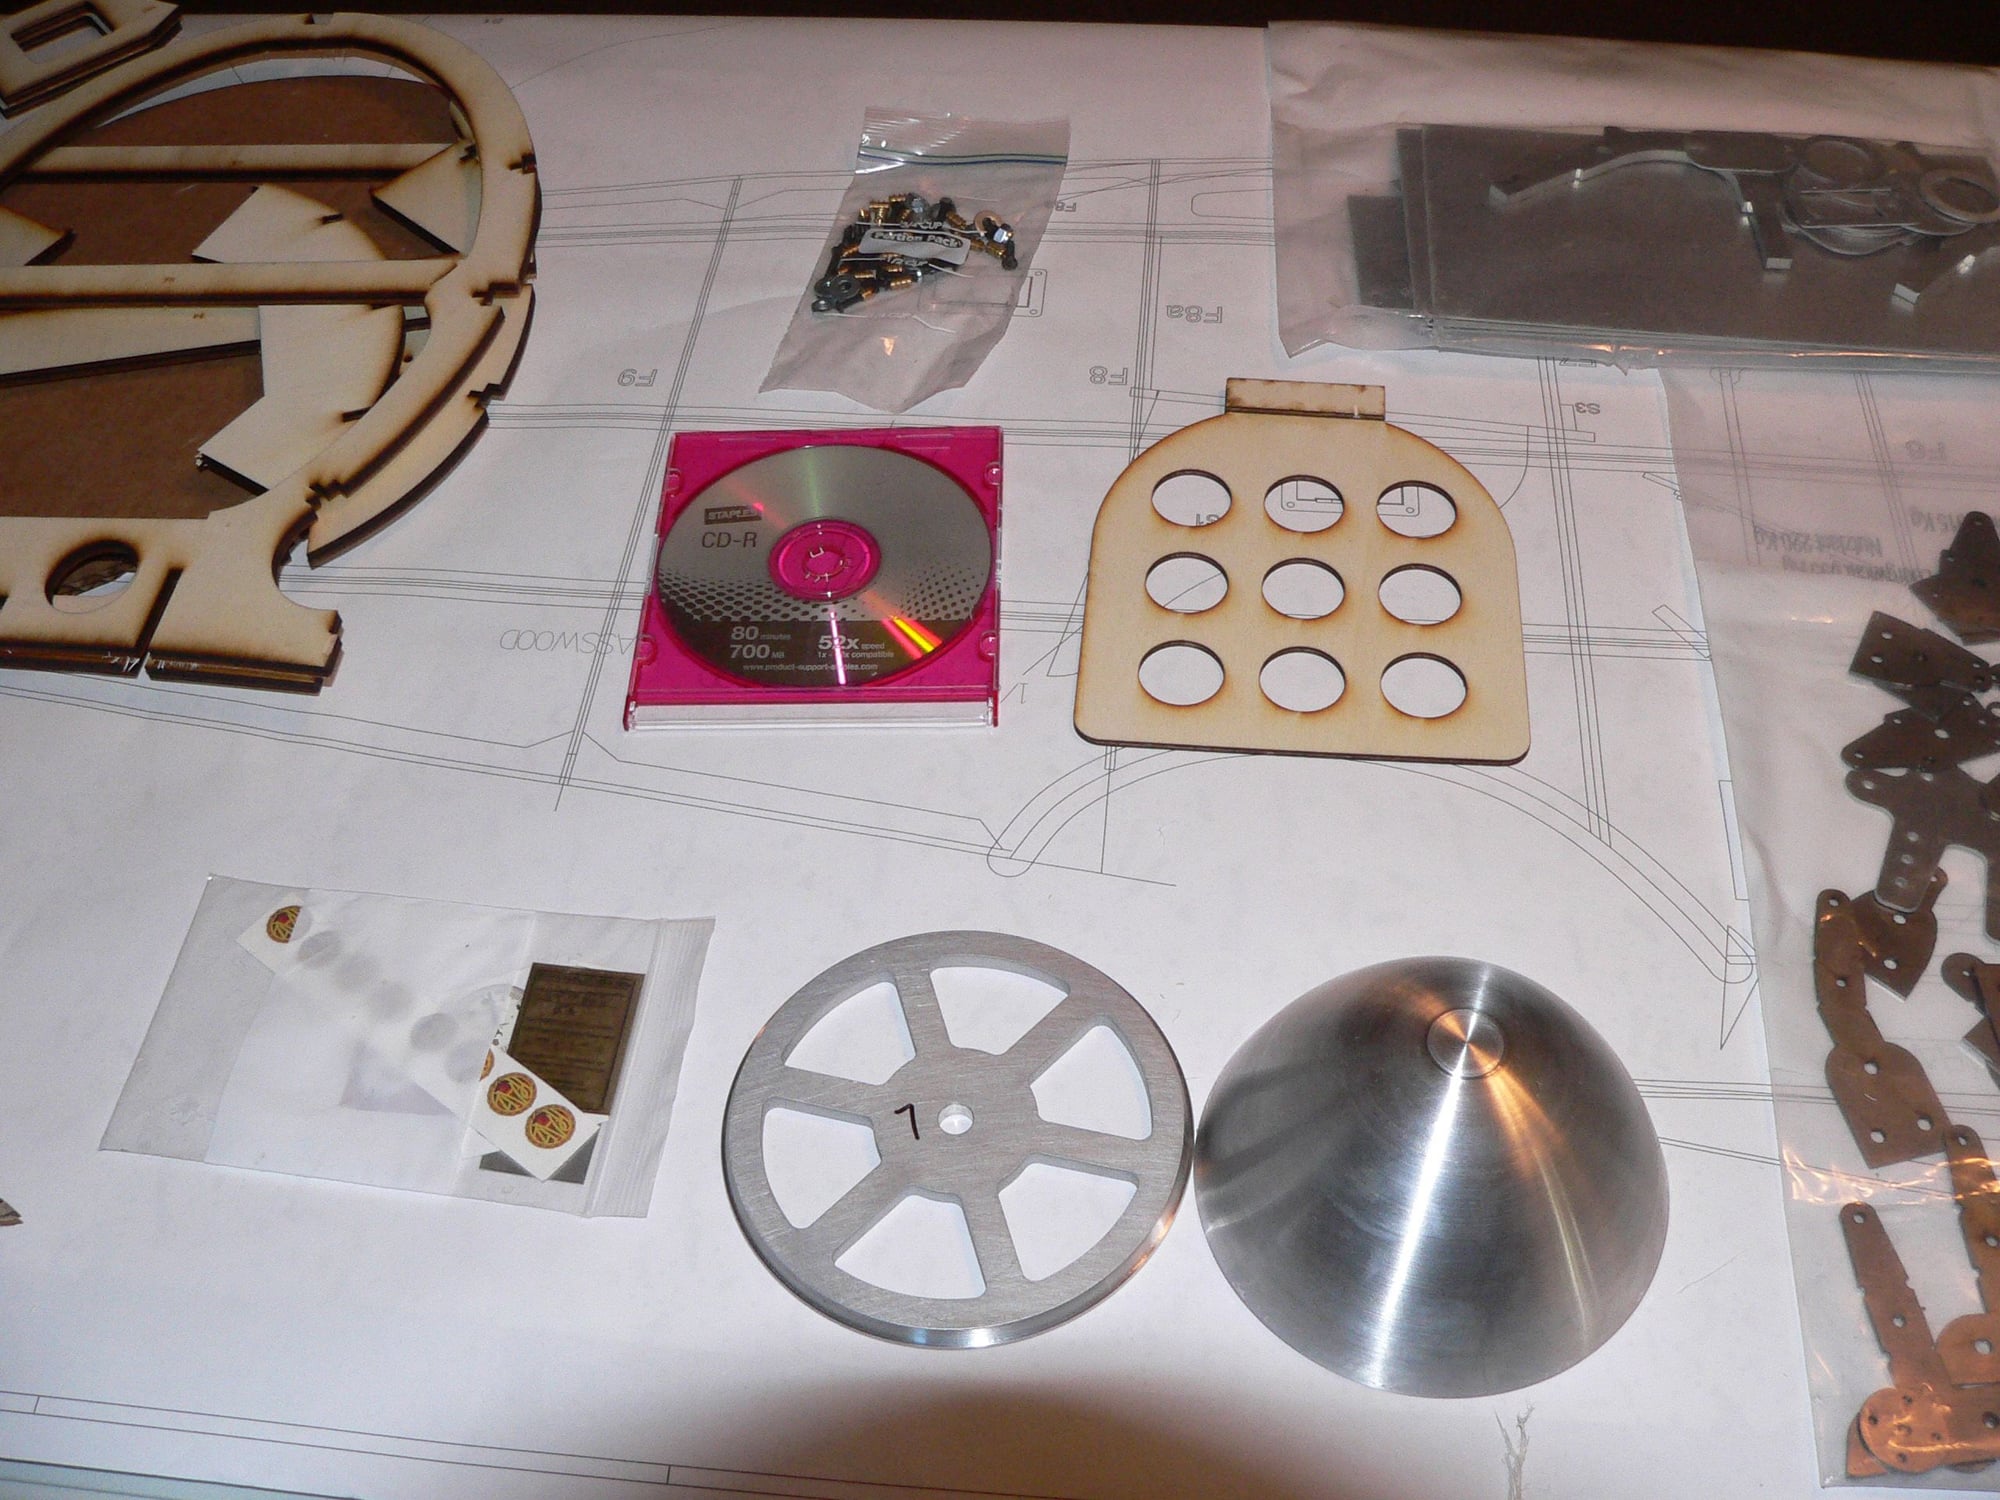
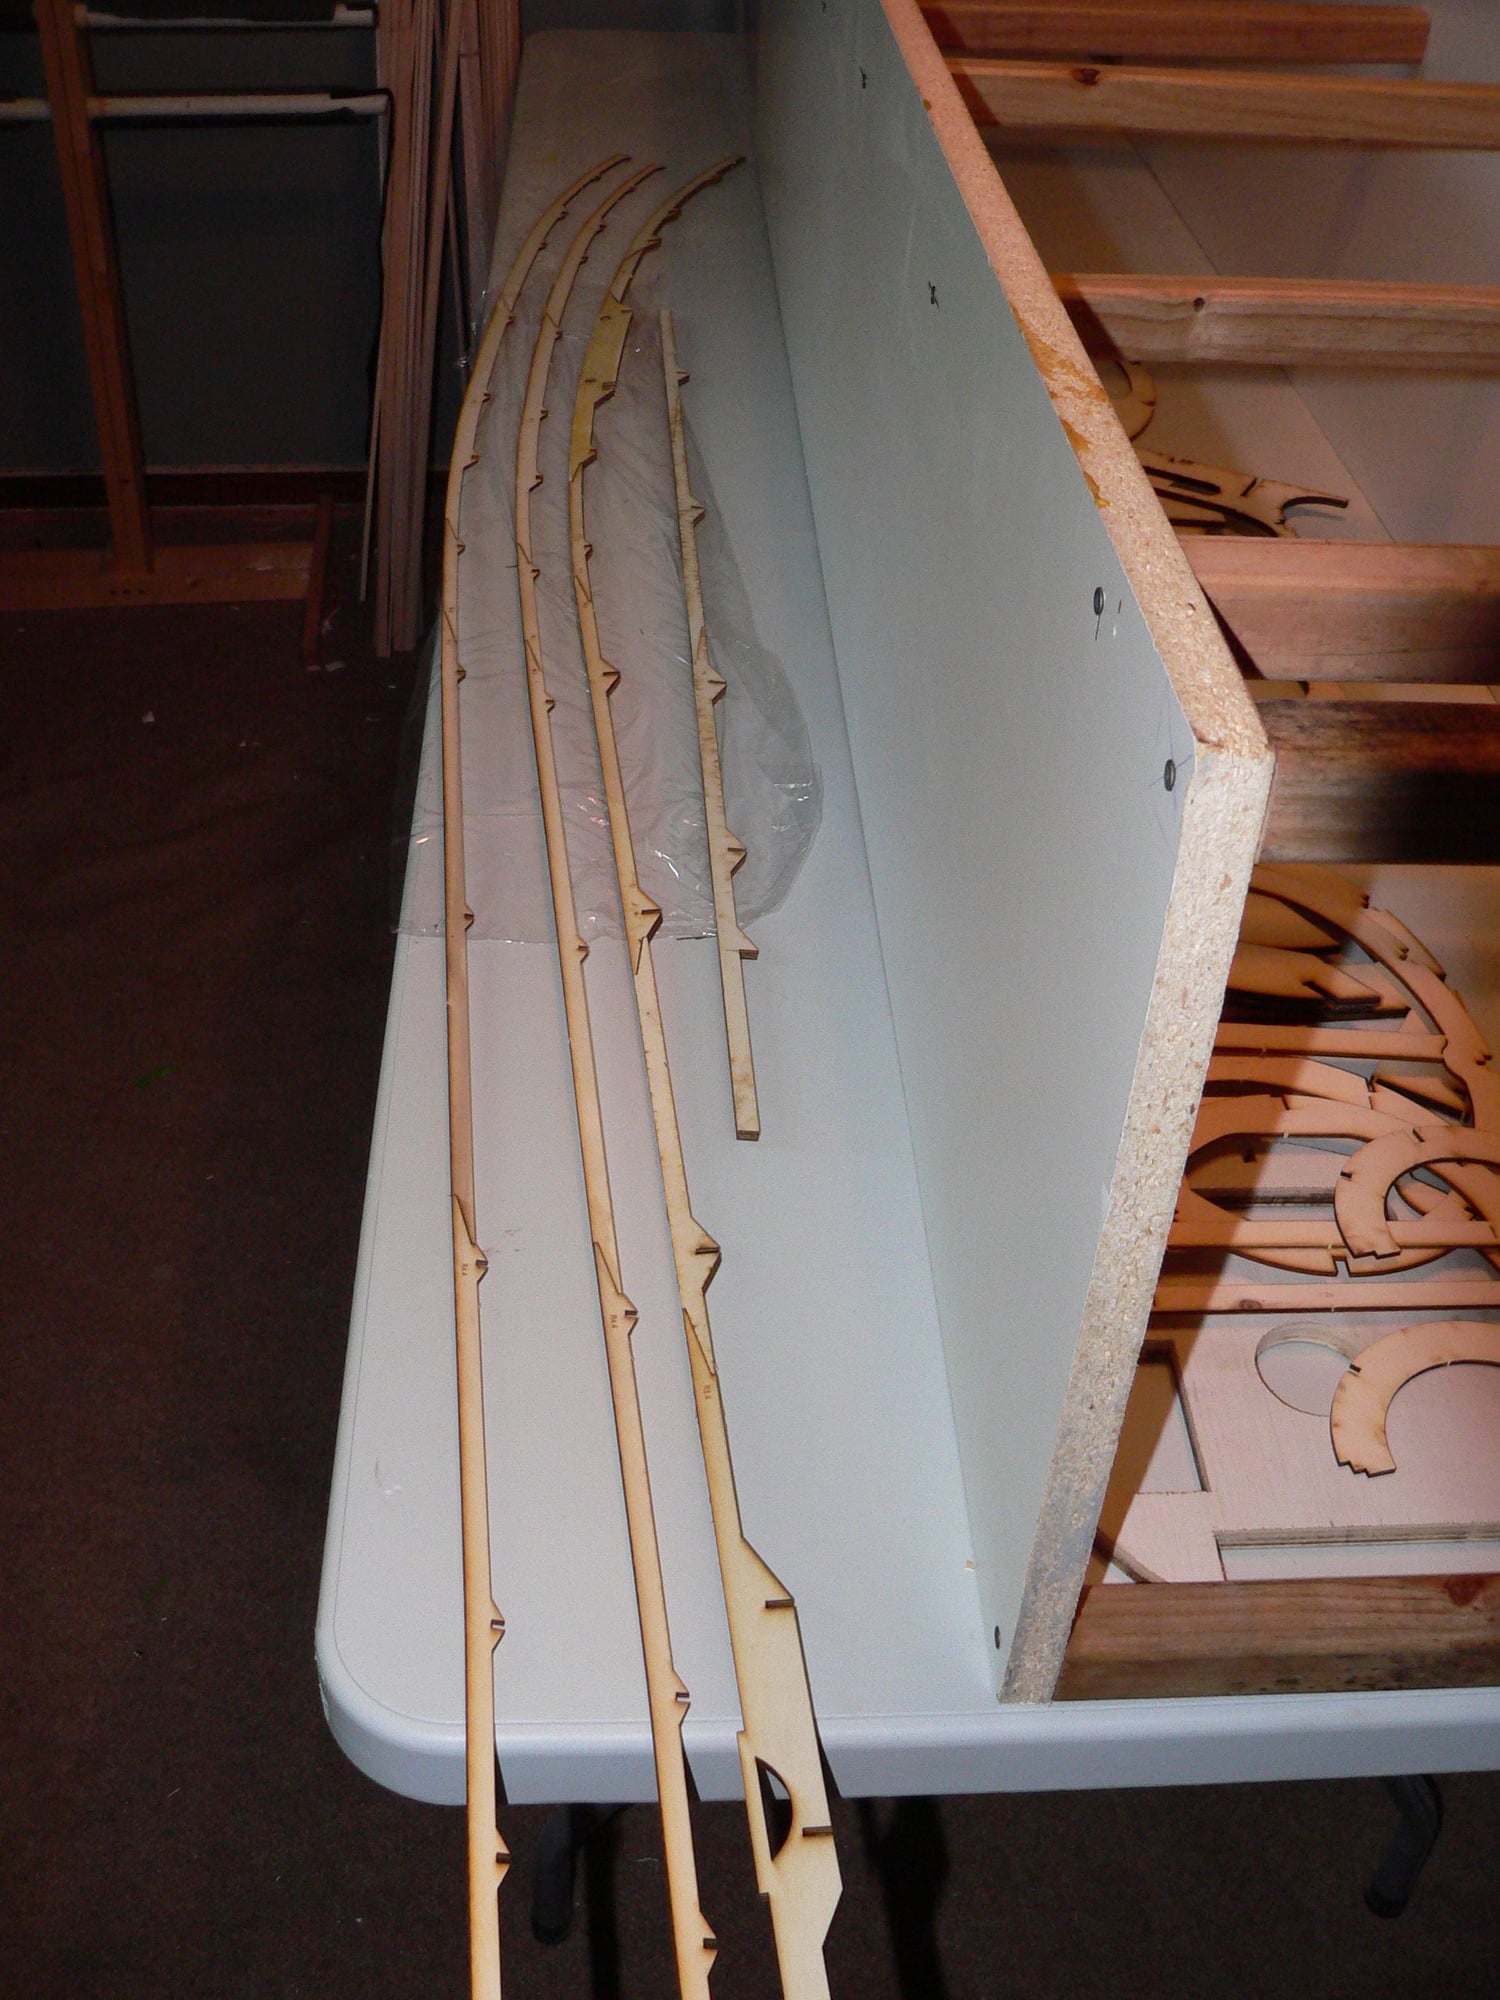
Well, it has waited as long as its going to. Time to start the build. I thought the box would be bigger. Its about the same size as the Balsa USA 1/4 scale DVII. But a lot heavier. Open the box and found it very well packed. Lots of bags and not much room for movement during shipping. My 8 foot table is just about too small, but it will work. The laser cutting is great, as are the metal parts. An added surprise was a set of Pfalz decals. That will save me time trying to make them myself or trying to get them printed. There are 12 rolled sheets of plans. Sweet. A CD with lots of pictures of a build. And other things that should come in a kit but seldom do. So far.....REALLY happy.
07-05-2018, 07:38 PM
#45
Sigh, Now I have to shake all of the drool out of my keyboard.