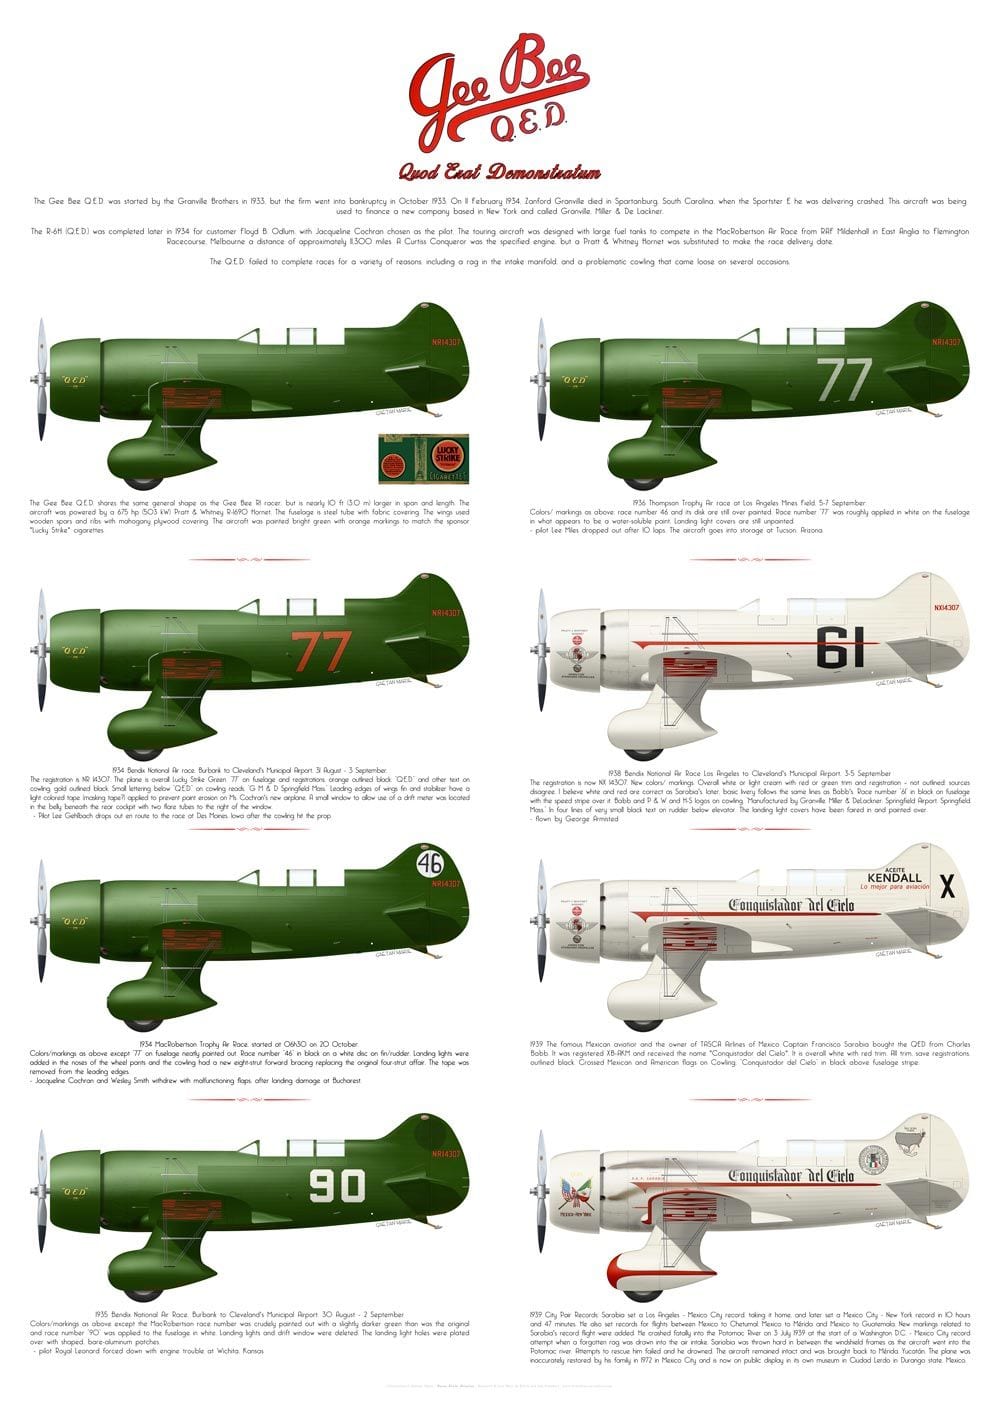
Gee Bee Conquistador

The following users liked this post:
Planet (03-16-2022)

The following users liked this post:
Planet (03-16-2022)

The following users liked this post:
Planet (03-16-2022)
 02-16-2020, 03:11 AM
#129
I worked on the gears last days and ass
embled
them on Saturday so the base for the 1.st try asy was made I screwed the legs to the fuselage some foam under the tale a added wings stabs and cowling i was bit suprised by the result bigger then in my imagination ad aleays when parts come togethet for the first time.
cheer Matze
embled
them on Saturday so the base for the 1.st try asy was made I screwed the legs to the fuselage some foam under the tale a added wings stabs and cowling i was bit suprised by the result bigger then in my imagination ad aleays when parts come togethet for the first time.
cheer Matze
 10-22-2021, 08:31 AM
#131
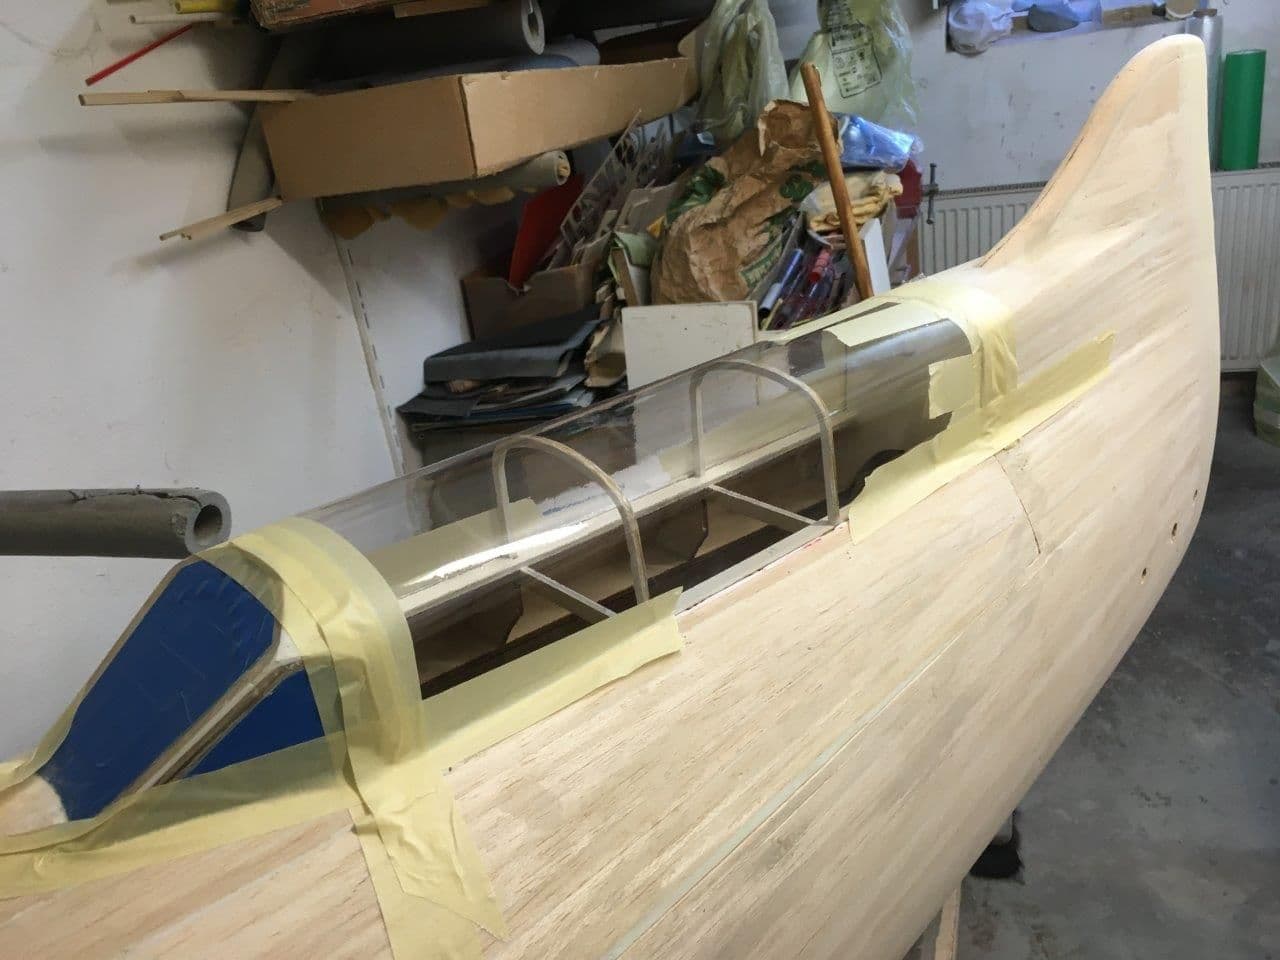
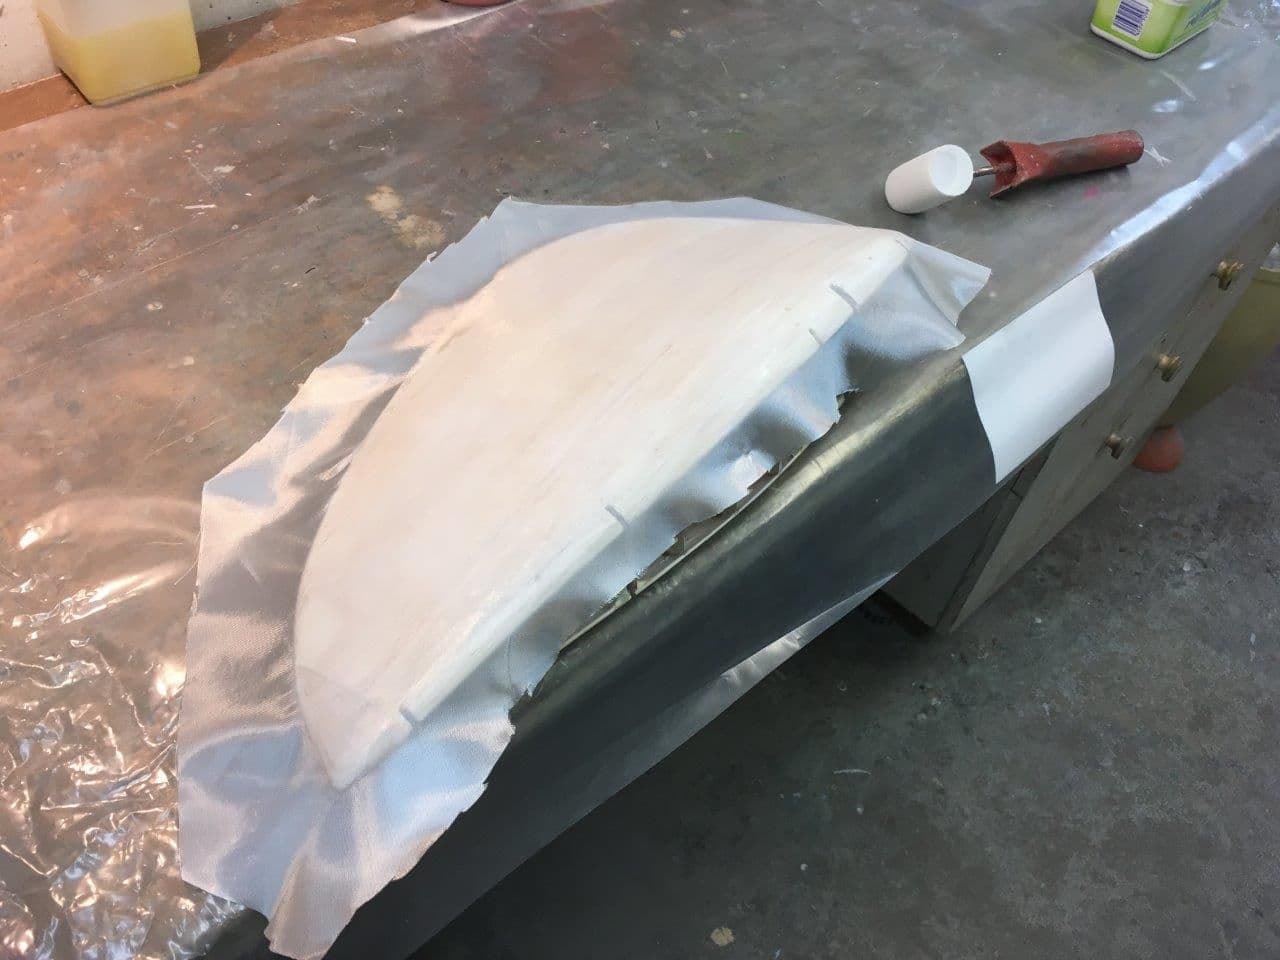
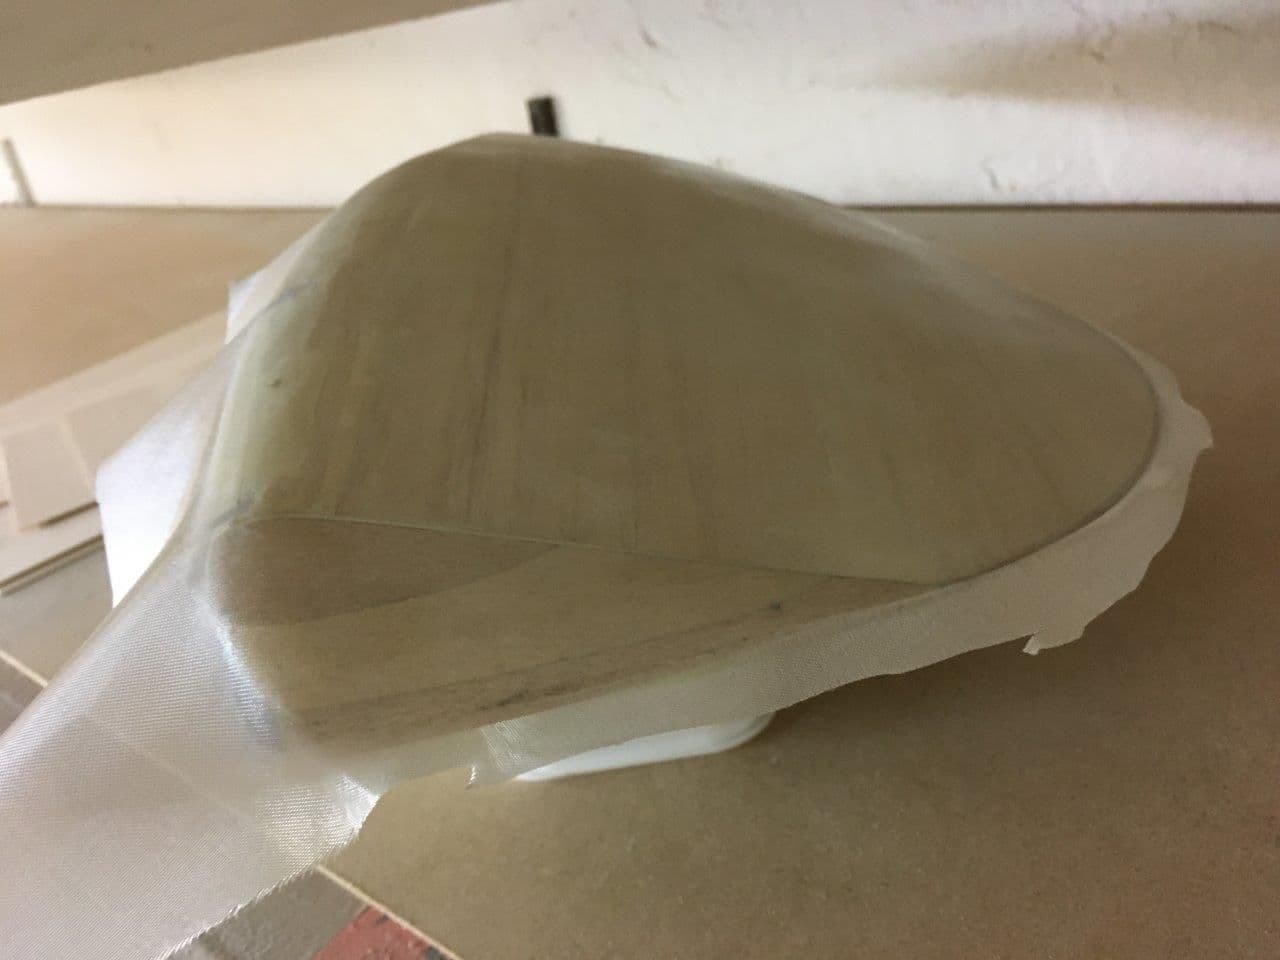
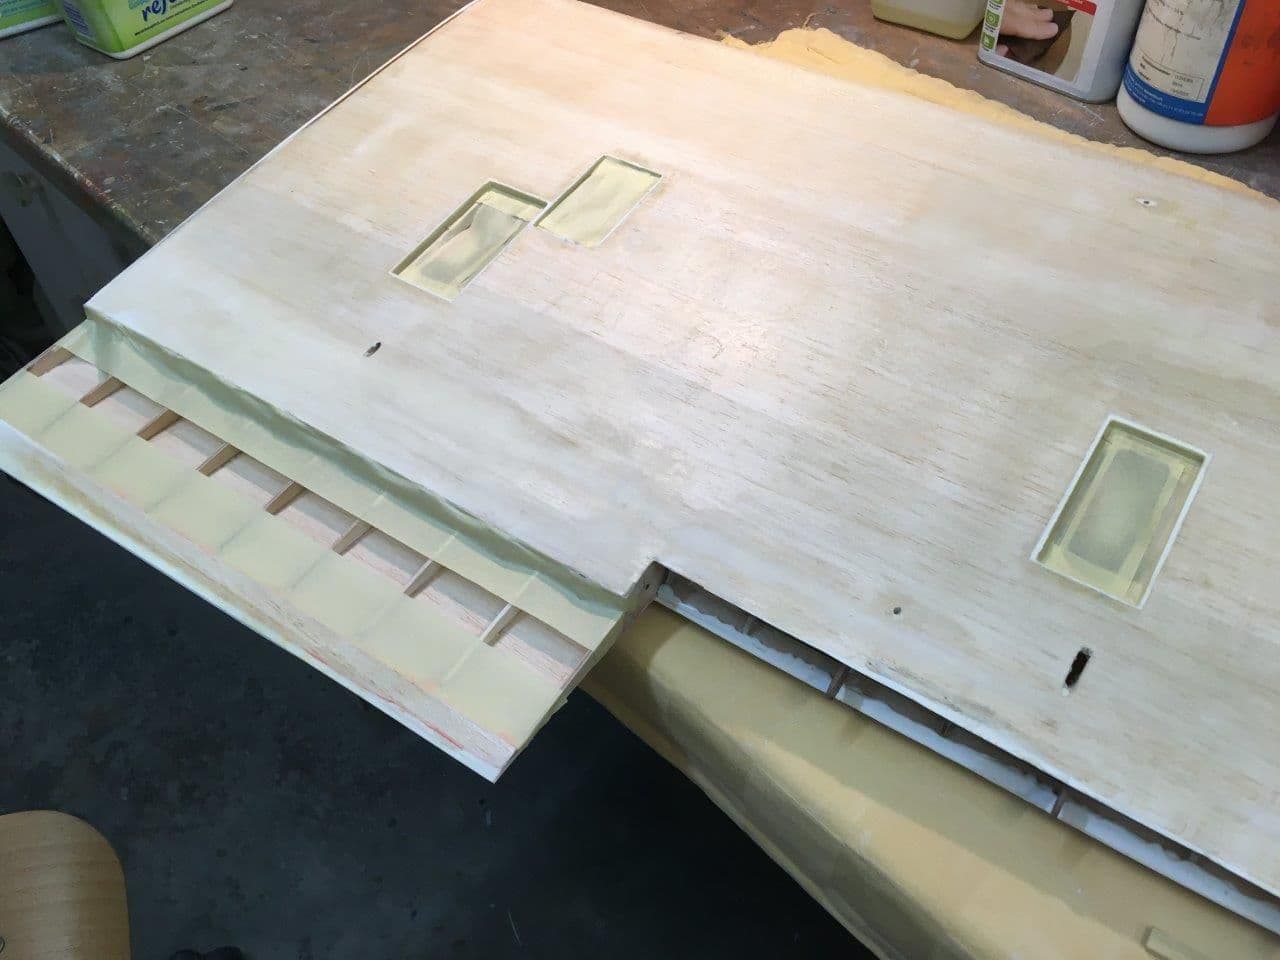
Started to build the orig intakes

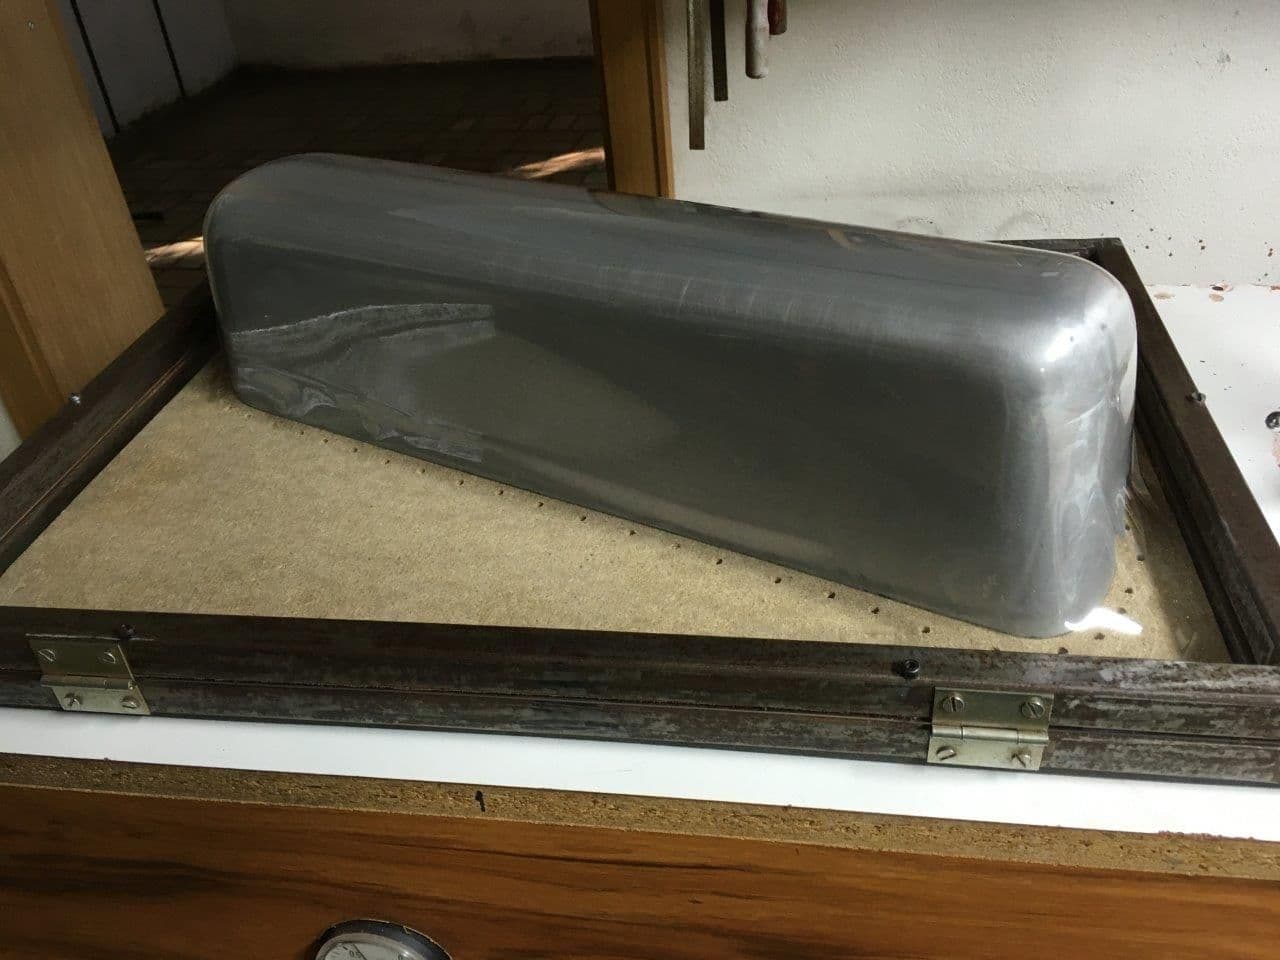
A second Canopy Master was made in Aluminum:
Alu shaped to perfektion, for Vakuumforming mean 360er sandpaper is o.k. so the Vivak / PETG can glide above very good:
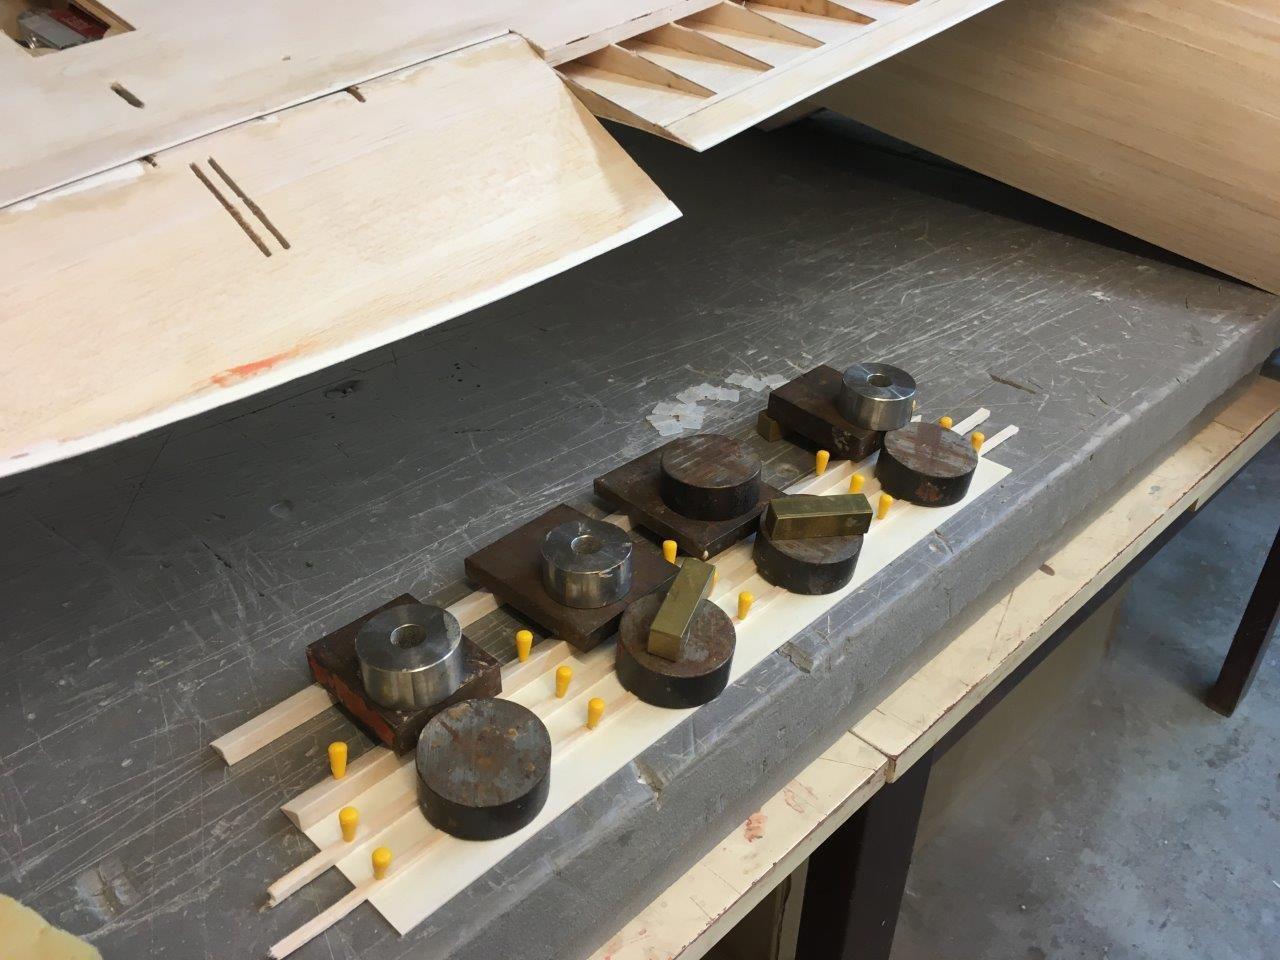
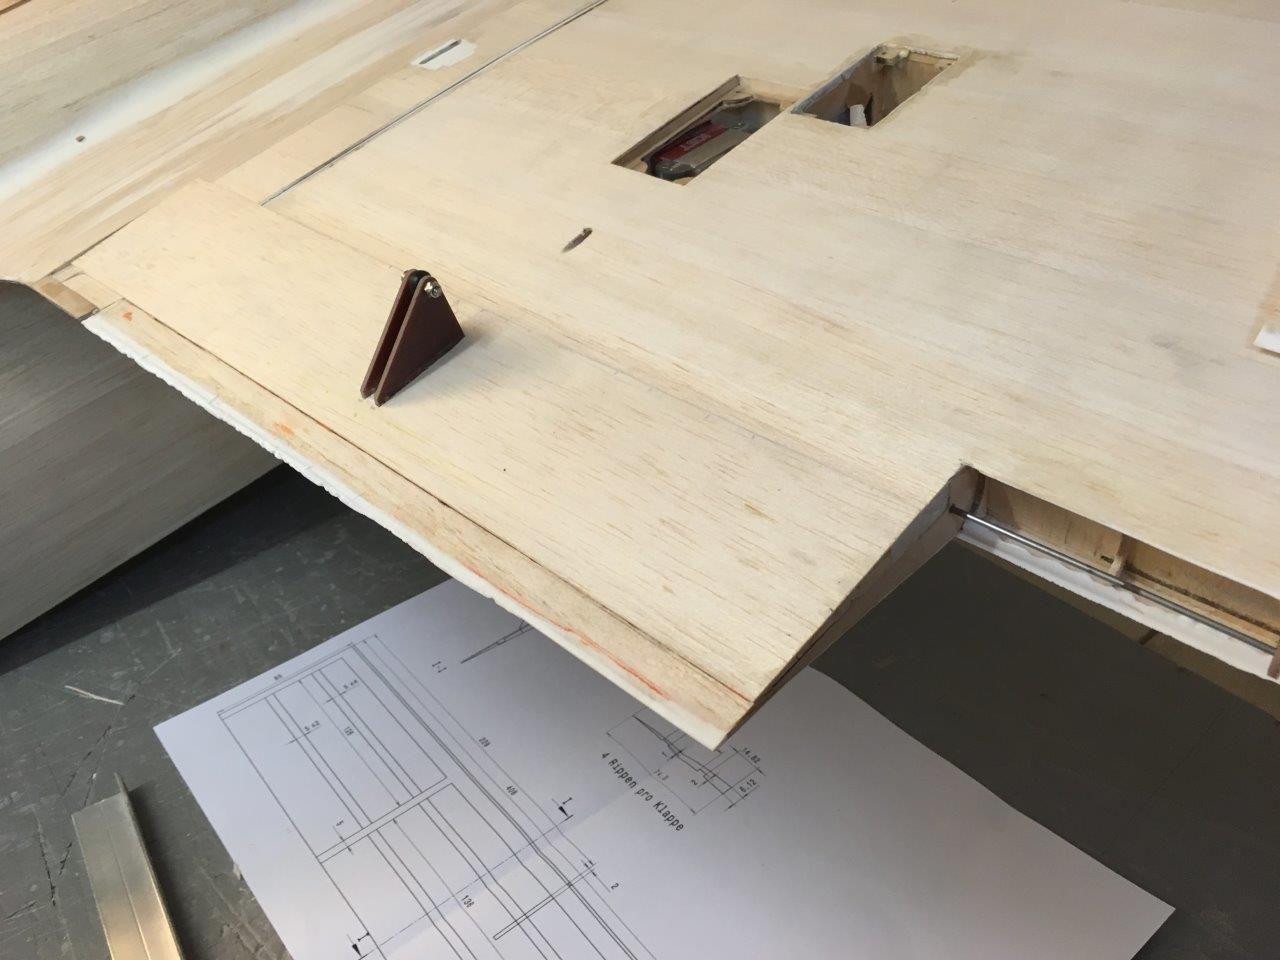
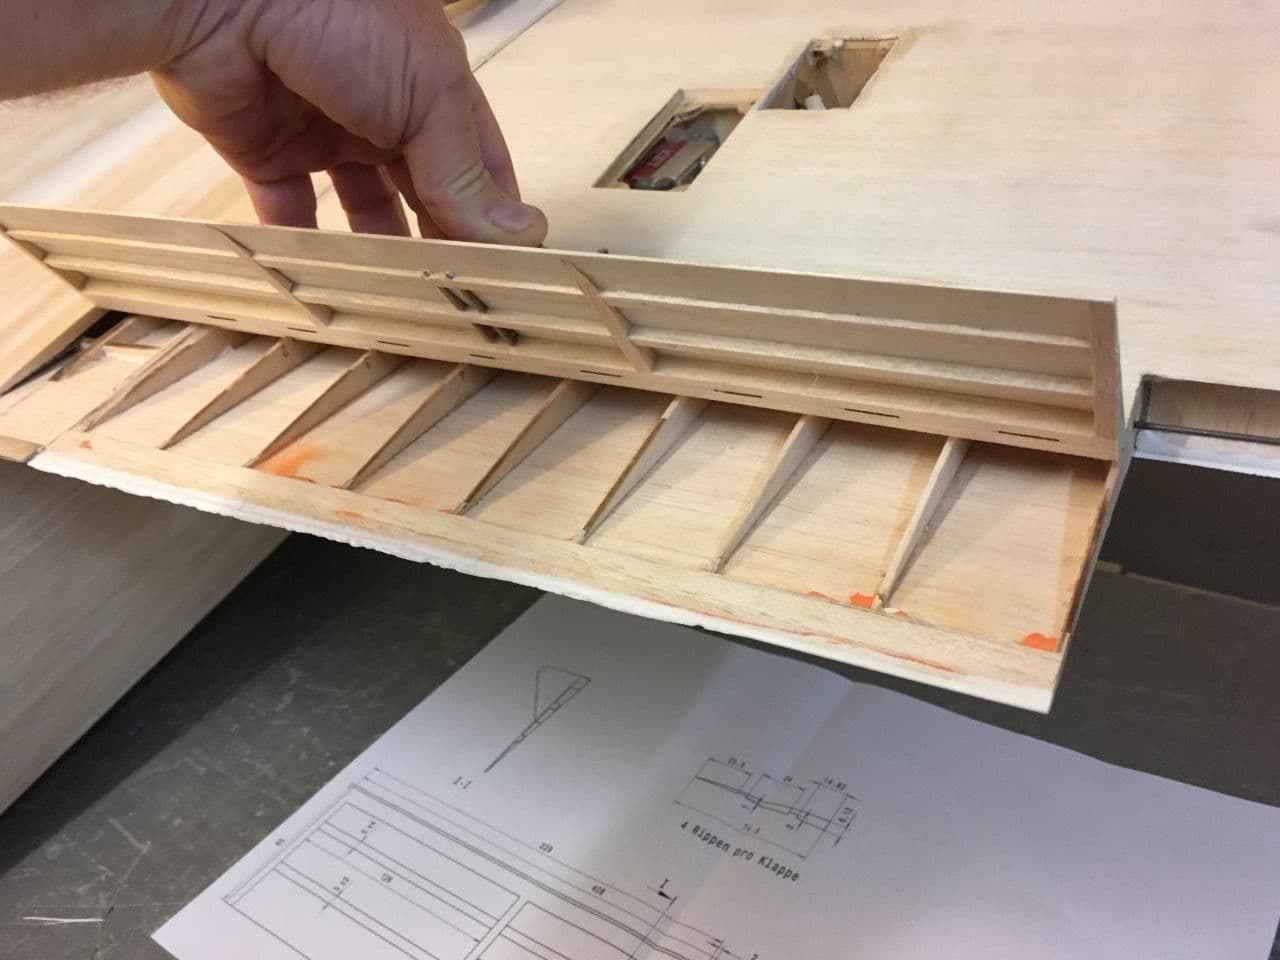
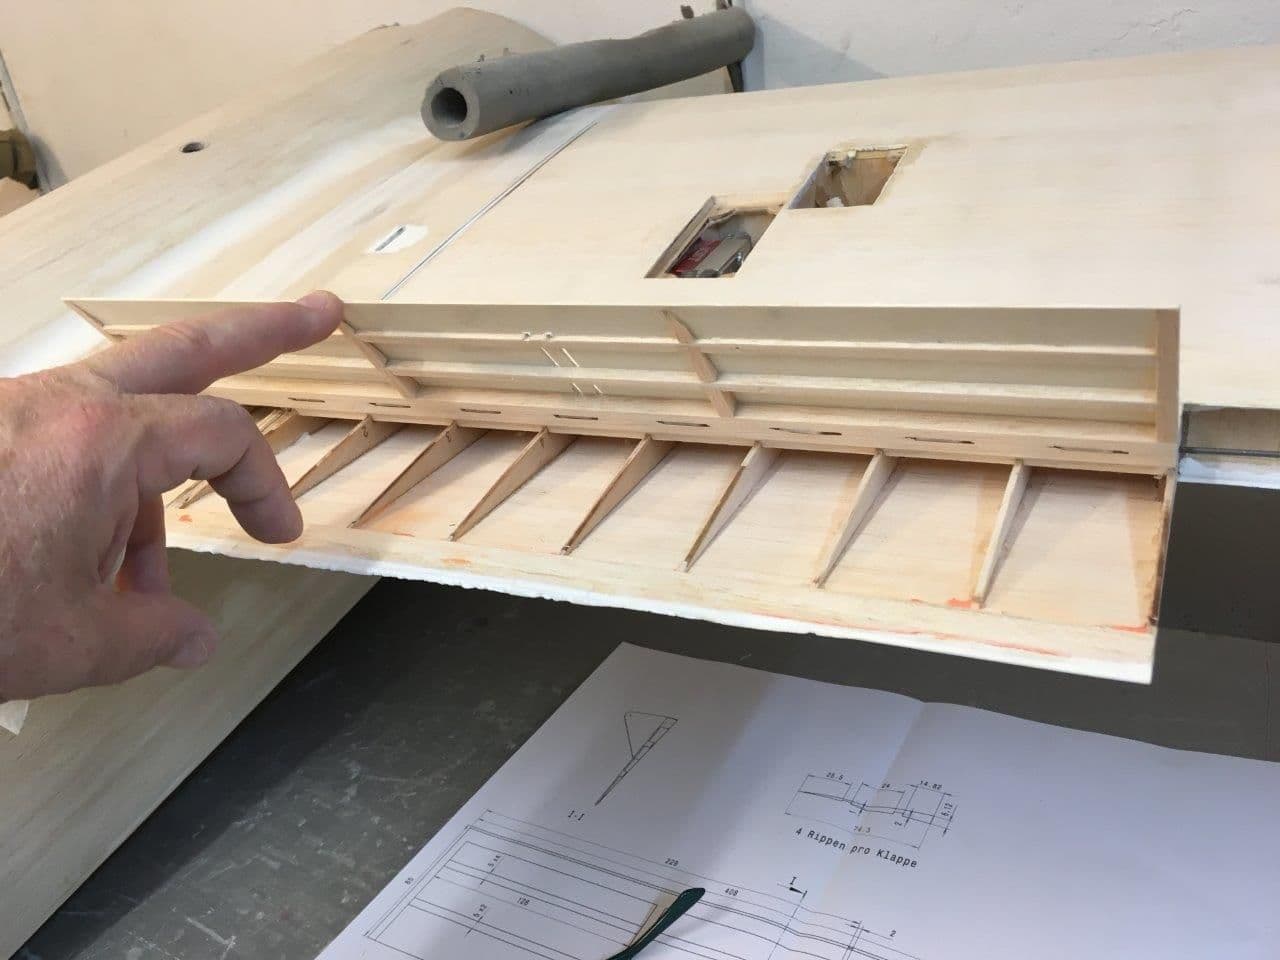
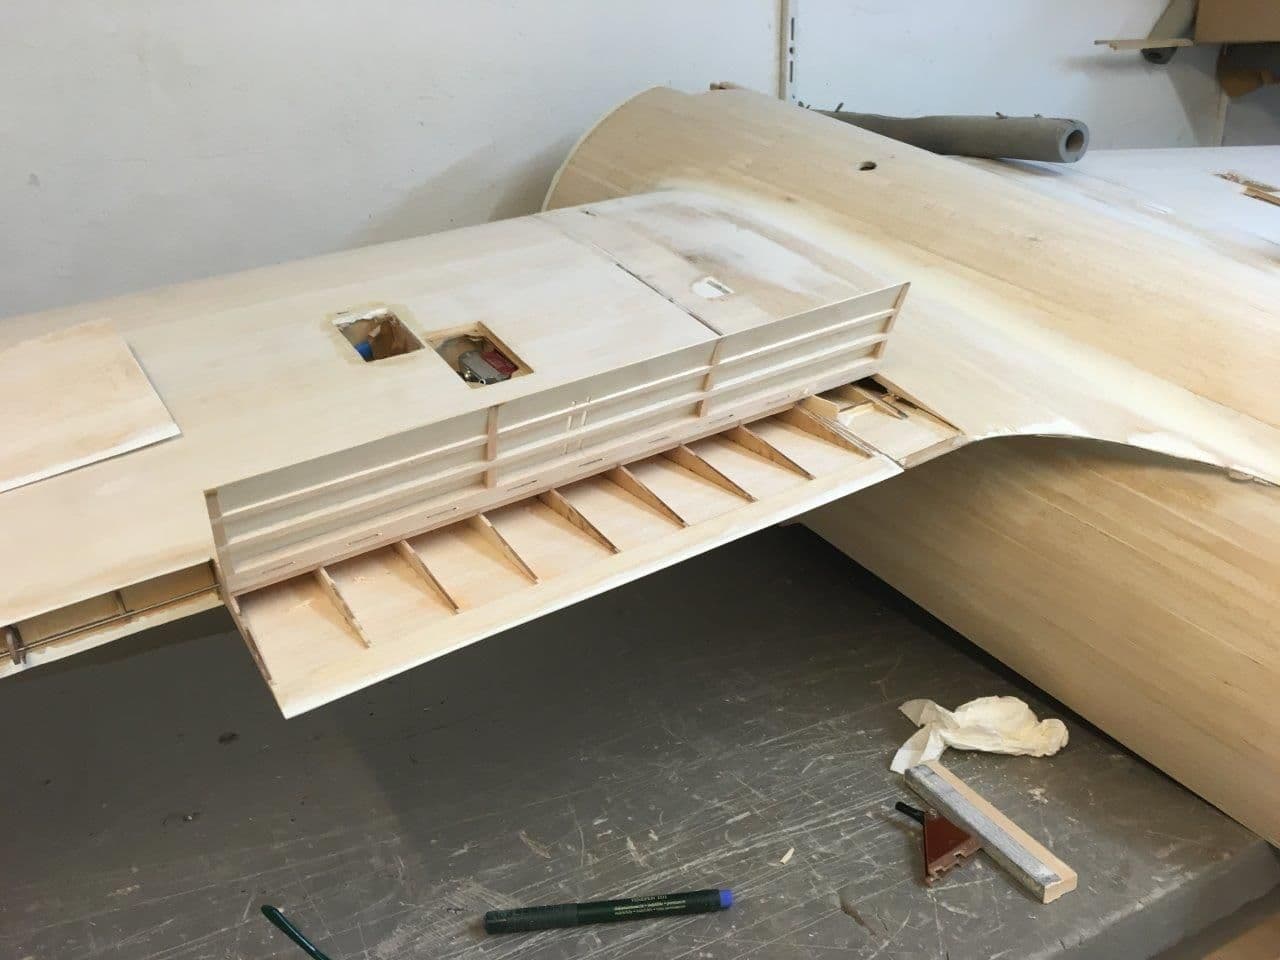
Started to build the Splitflaps, difficult due the low profile is not easy to get it stiff enough
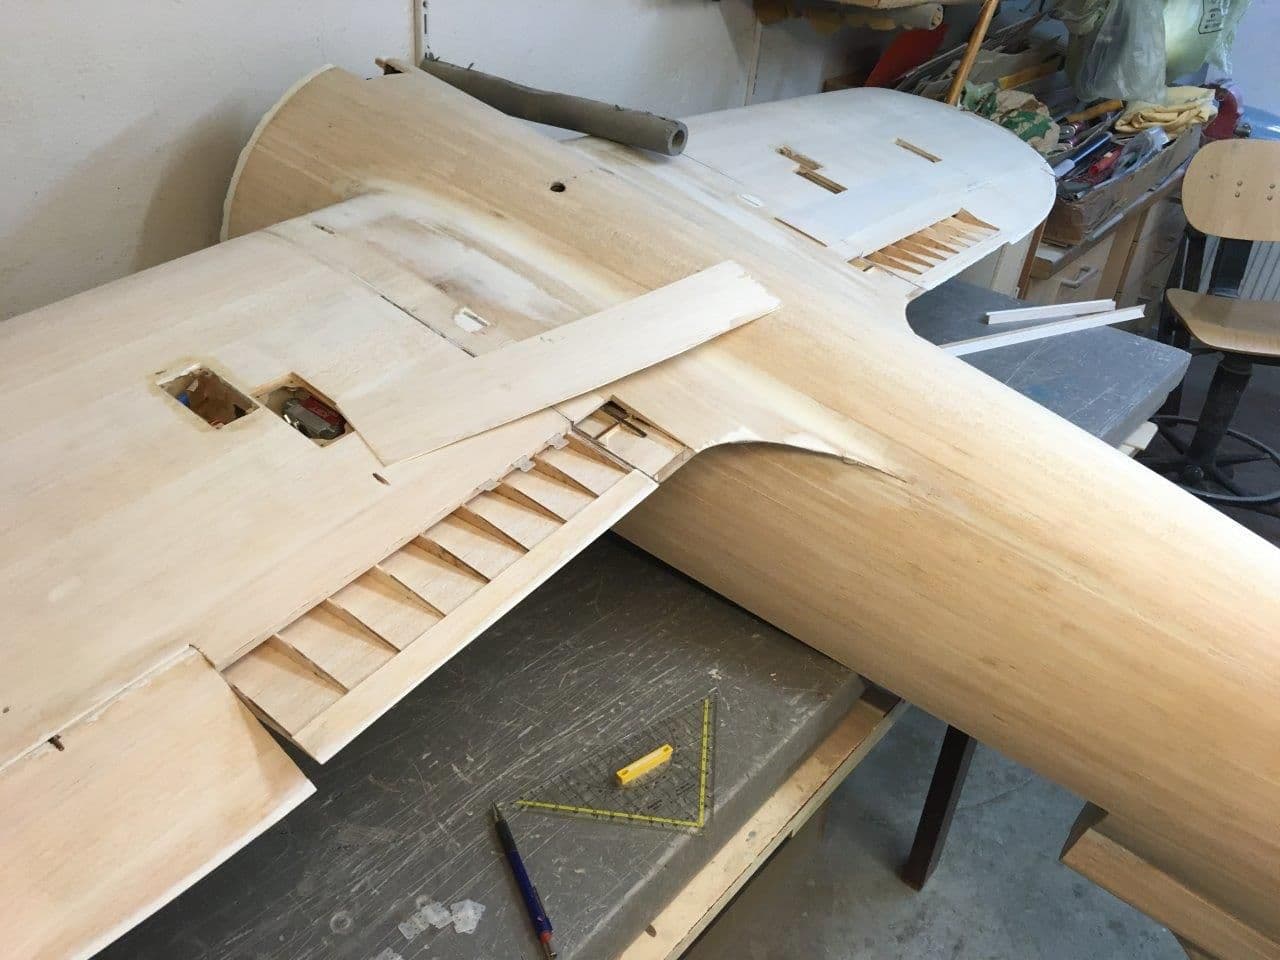
The fat body blocks my complete workshop for days...
A second Canopy Master was made in Aluminum:
Alu shaped to perfektion, for Vakuumforming mean 360er sandpaper is o.k. so the Vivak / PETG can glide above very good:
Started to build the Splitflaps, difficult due the low profile is not easy to get it stiff enough
The fat body blocks my complete workshop for days...
10-22-2021, 08:37 AM
#132
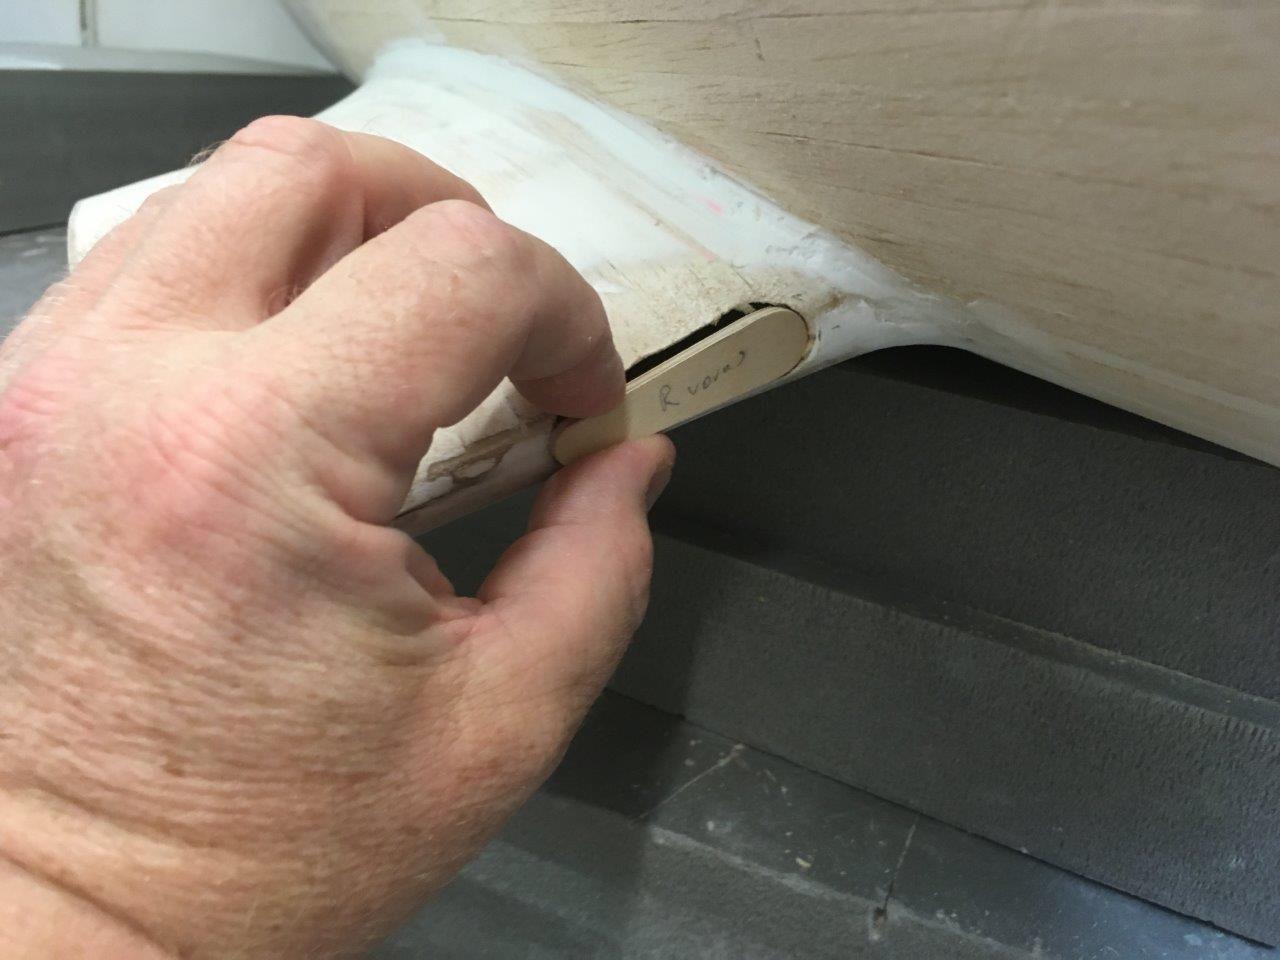
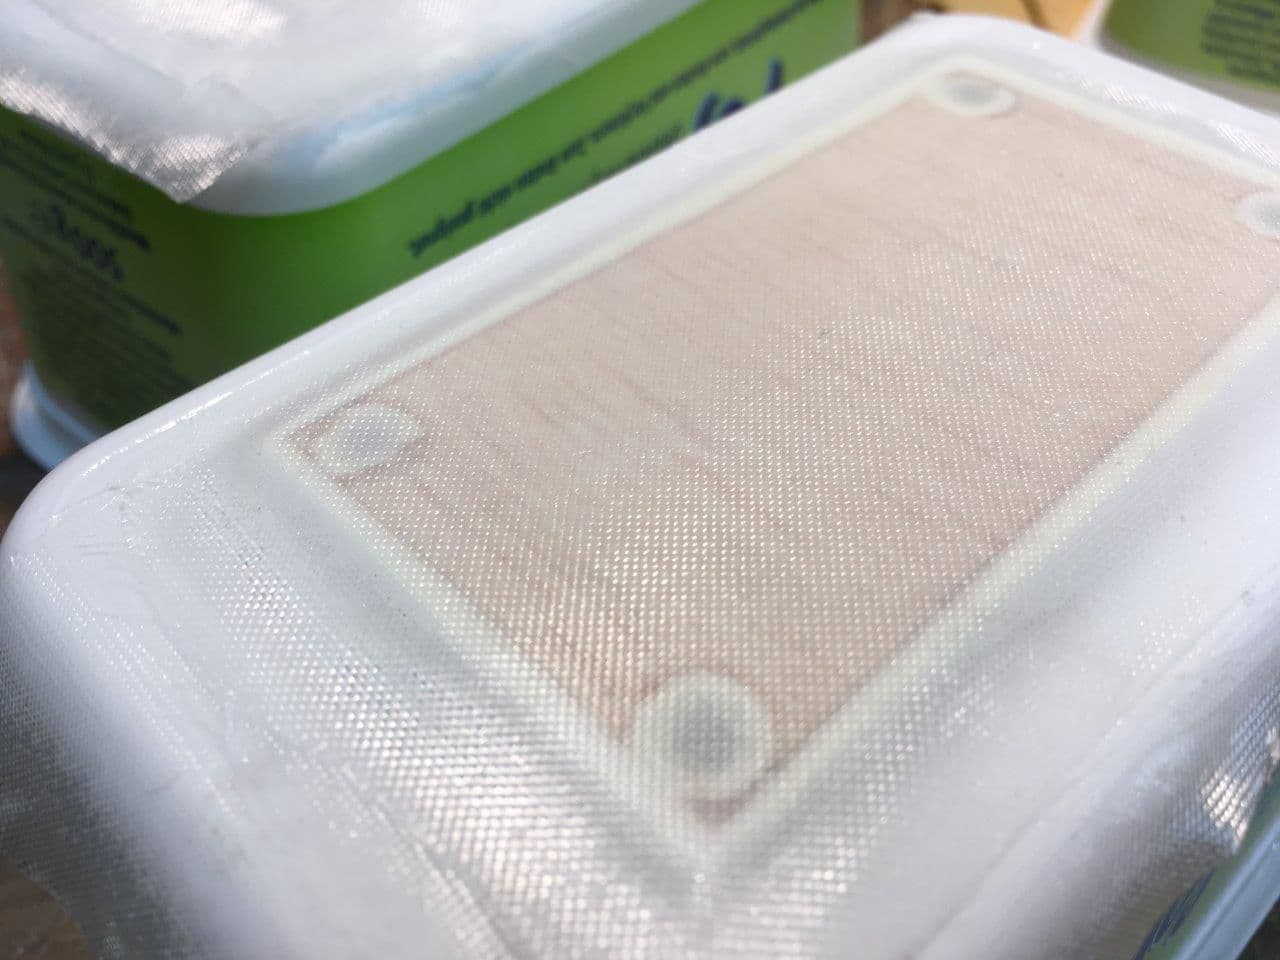
the lower board dives in the frame during forming with vacuum, the air is sucked through these holes near the canopy

lower wing surface nearly ready

just 1 try, didn`t had over material so it was success that the 1st try was ok
quick cut and try

only glued at the outer corners, the inner structure is not glued, due to optical perfection
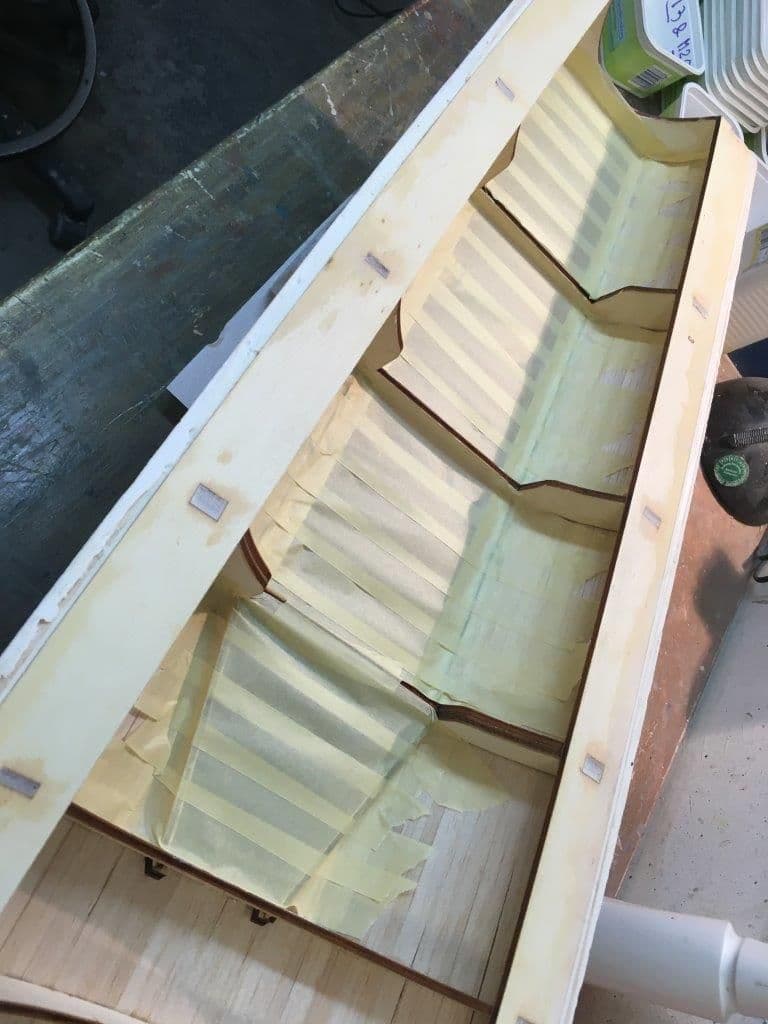
Already protected for further steps
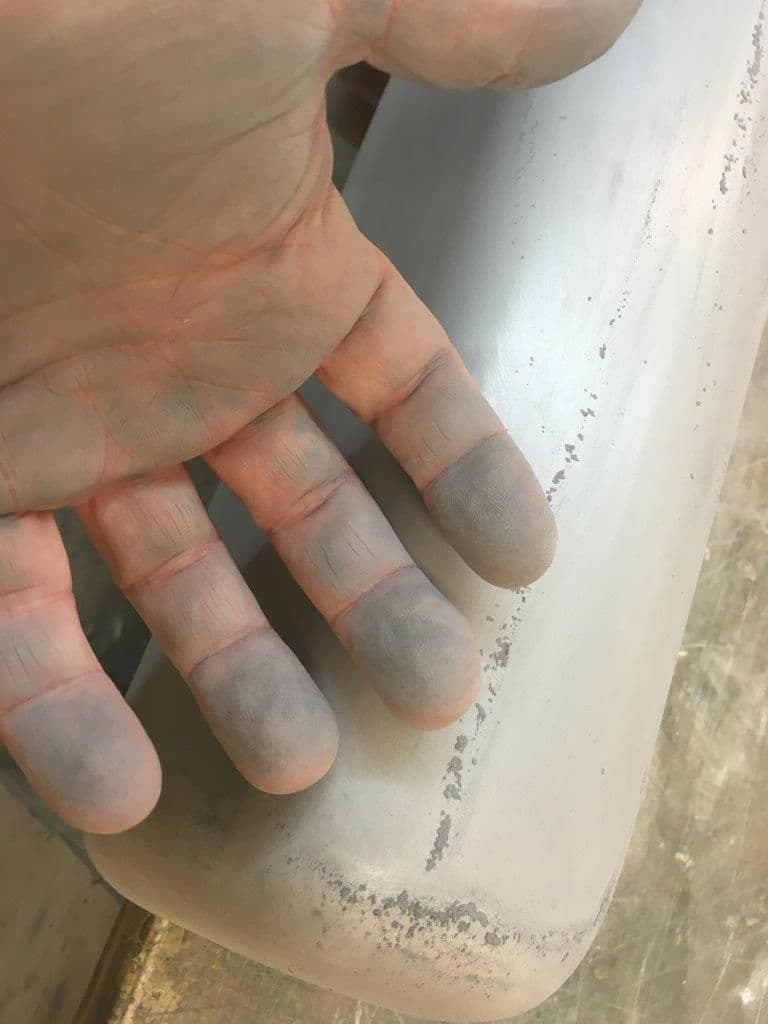
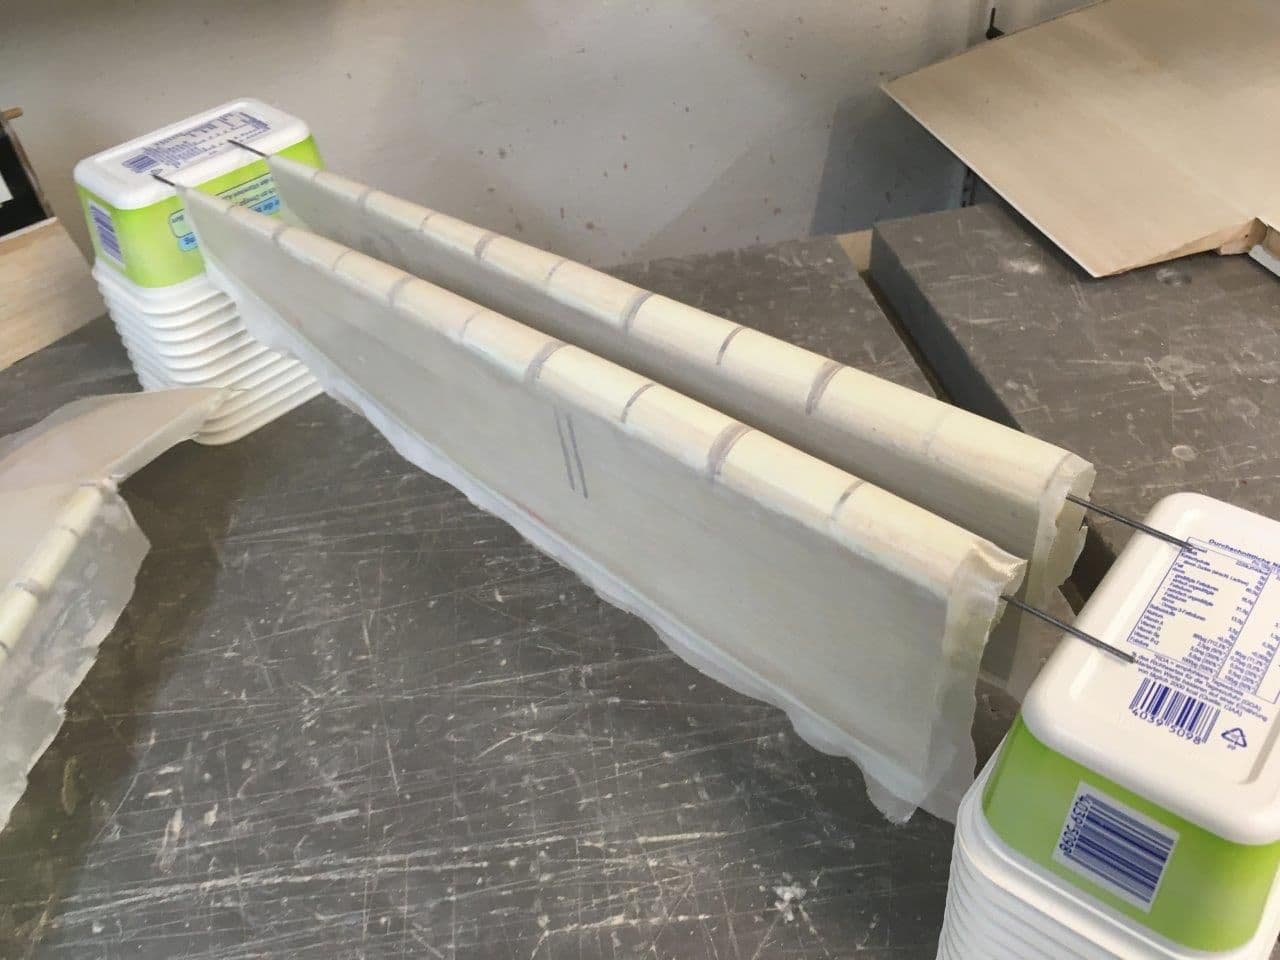
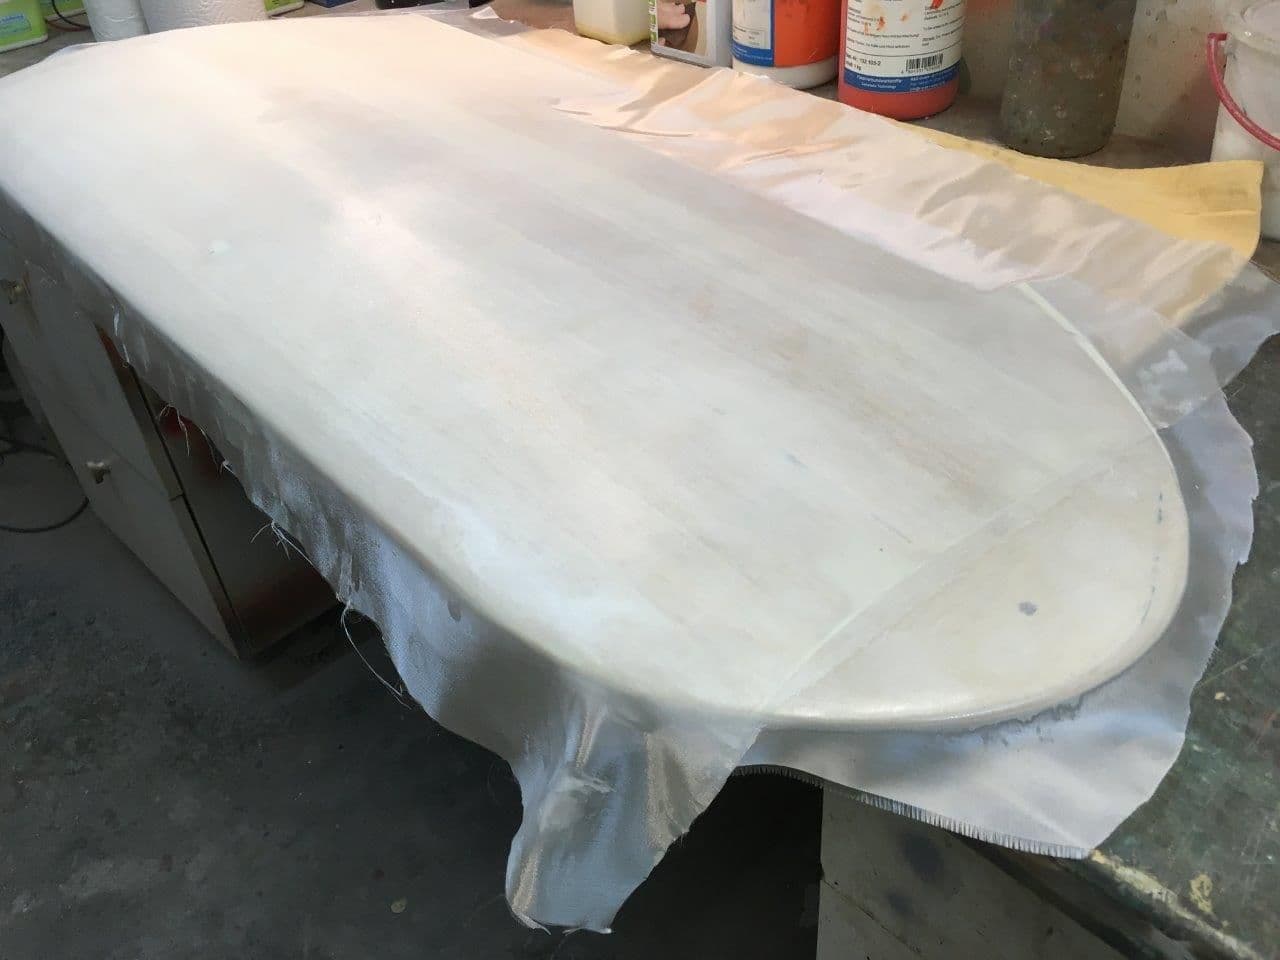
I started to glas all surfaces with 55gr/m2 diagonal, just the wings had only 1,2mm Balsa so they needed 2 times 55gr, 1st diagonal 2nd dihedral
The following users liked this post:
Planet (03-16-2022)
10-22-2021, 08:41 AM
#133
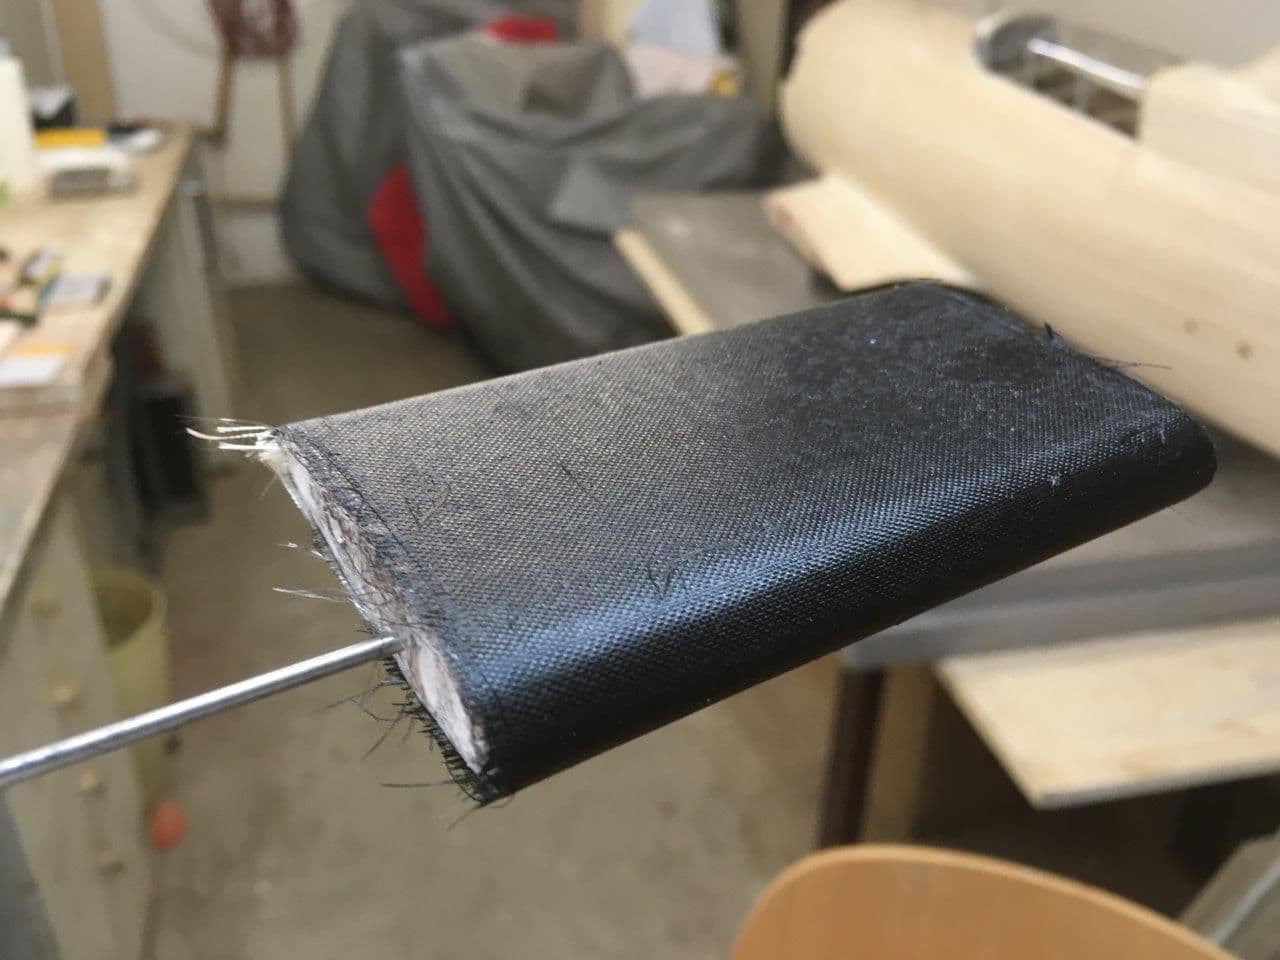
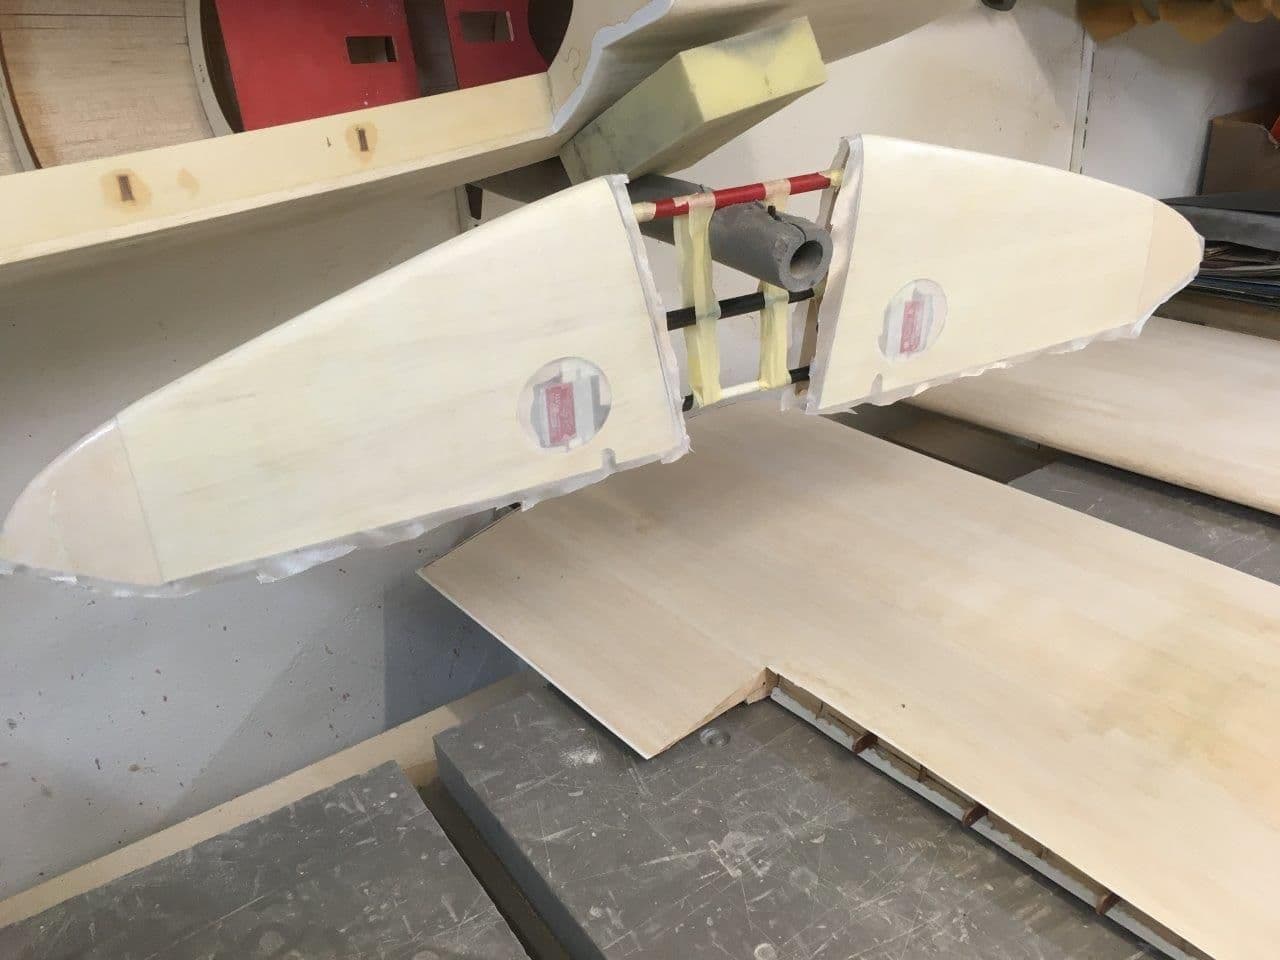
All the servo covers glassed:
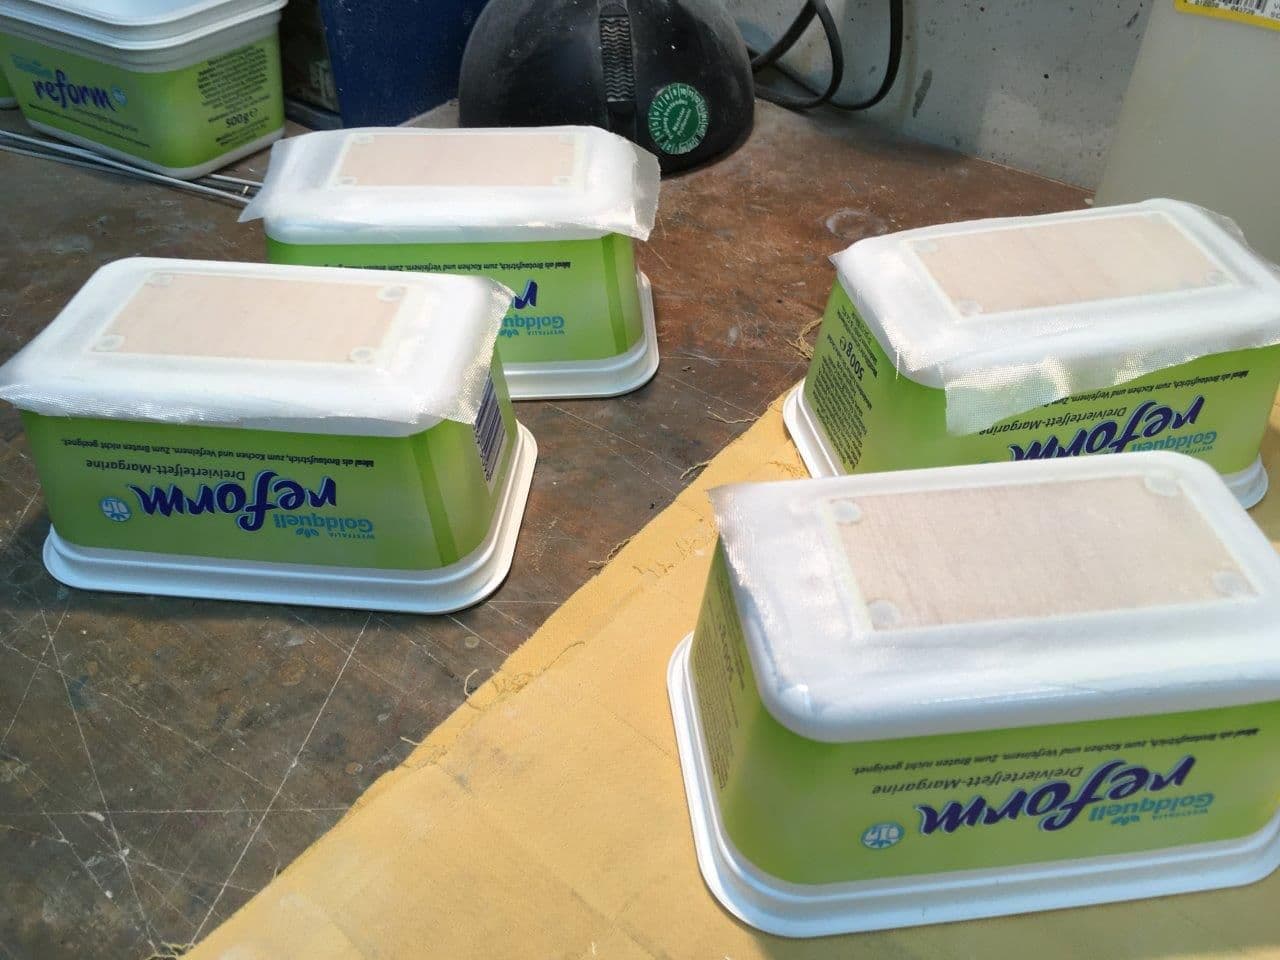
Protections for some areas
lower side g�assed 2 times 55gr :
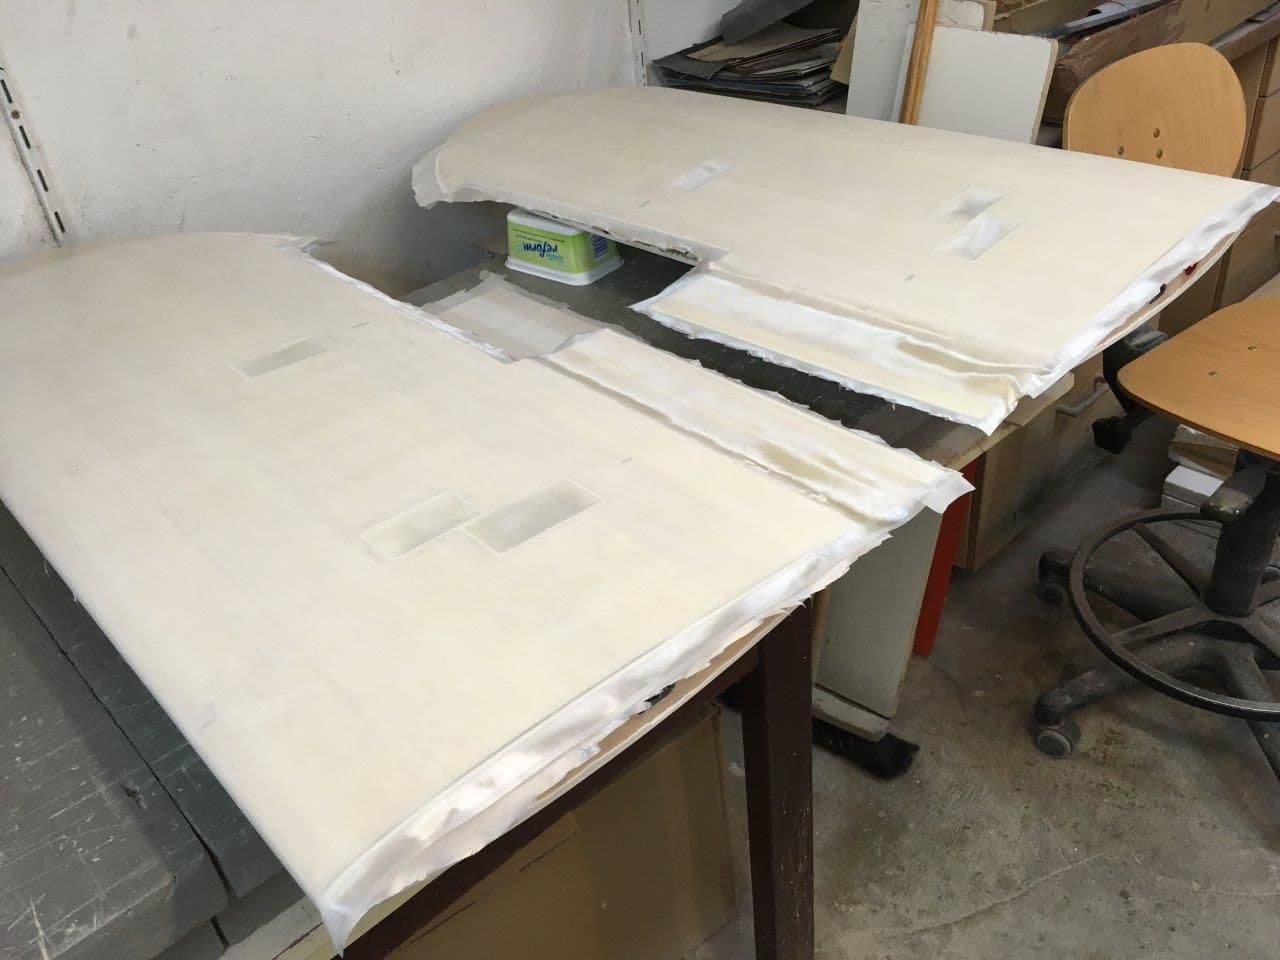

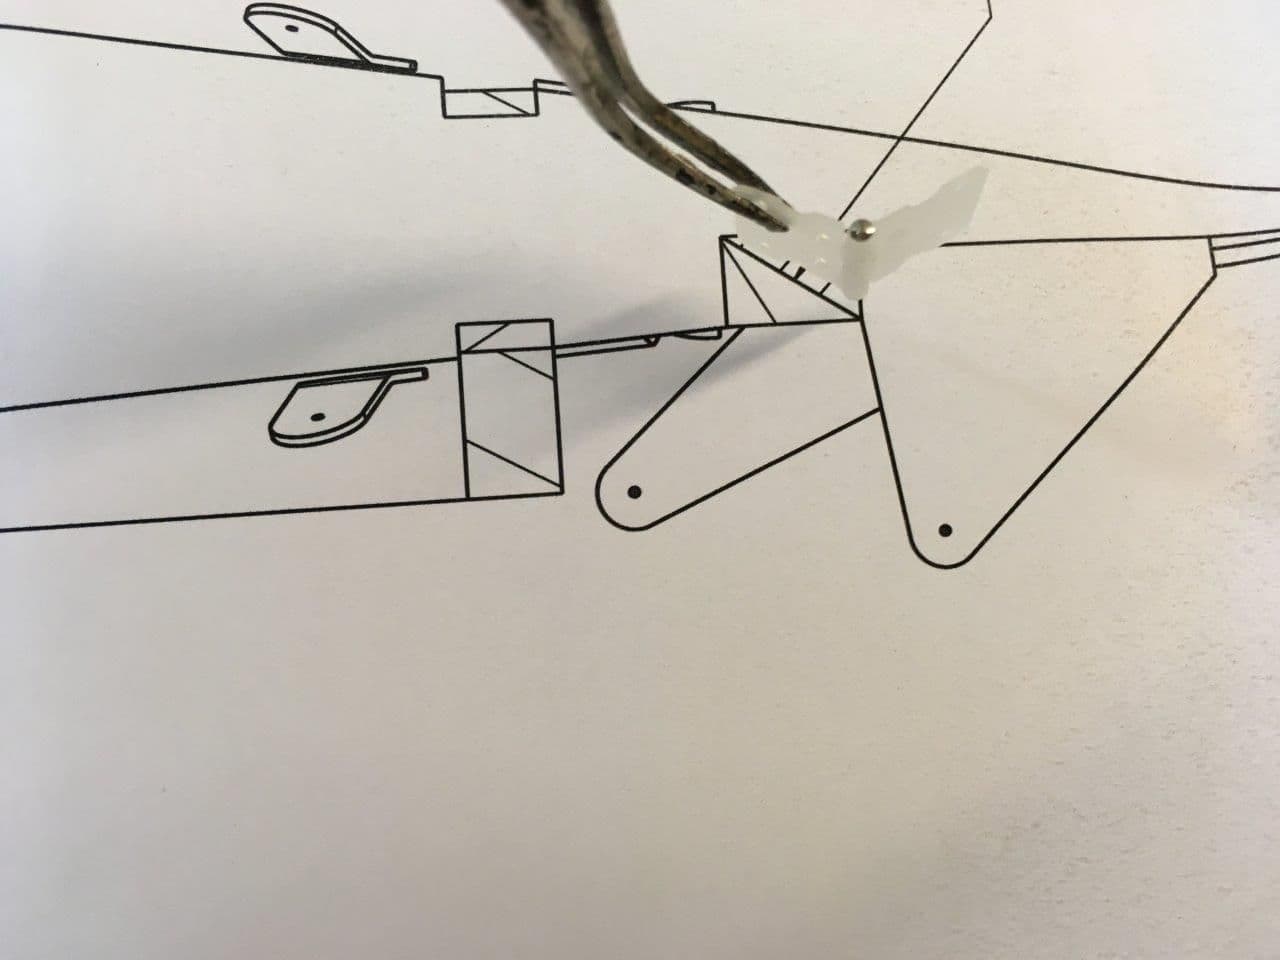
Hingeslot for Ailerons
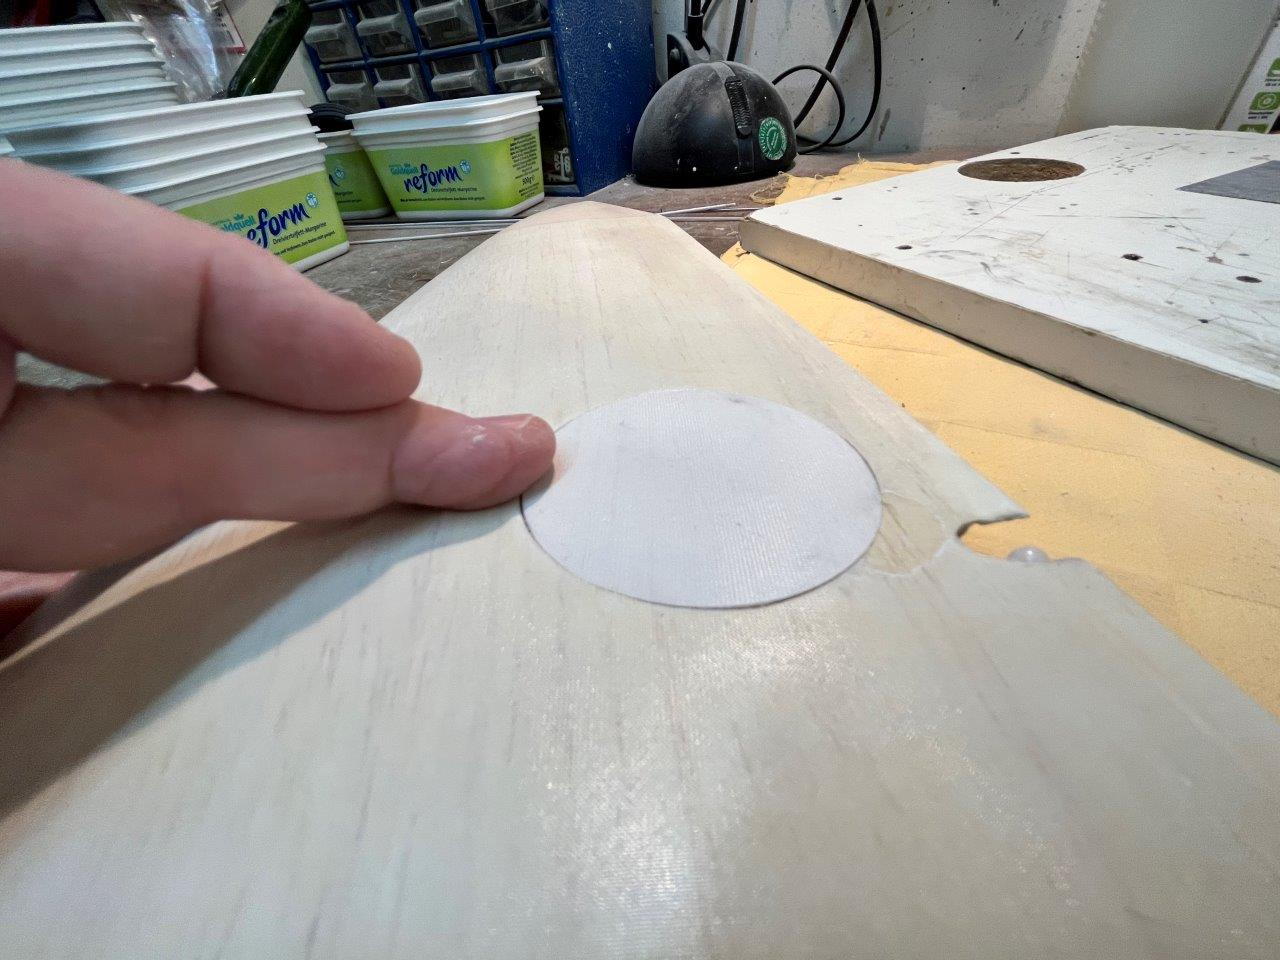
Cover for elevator servo
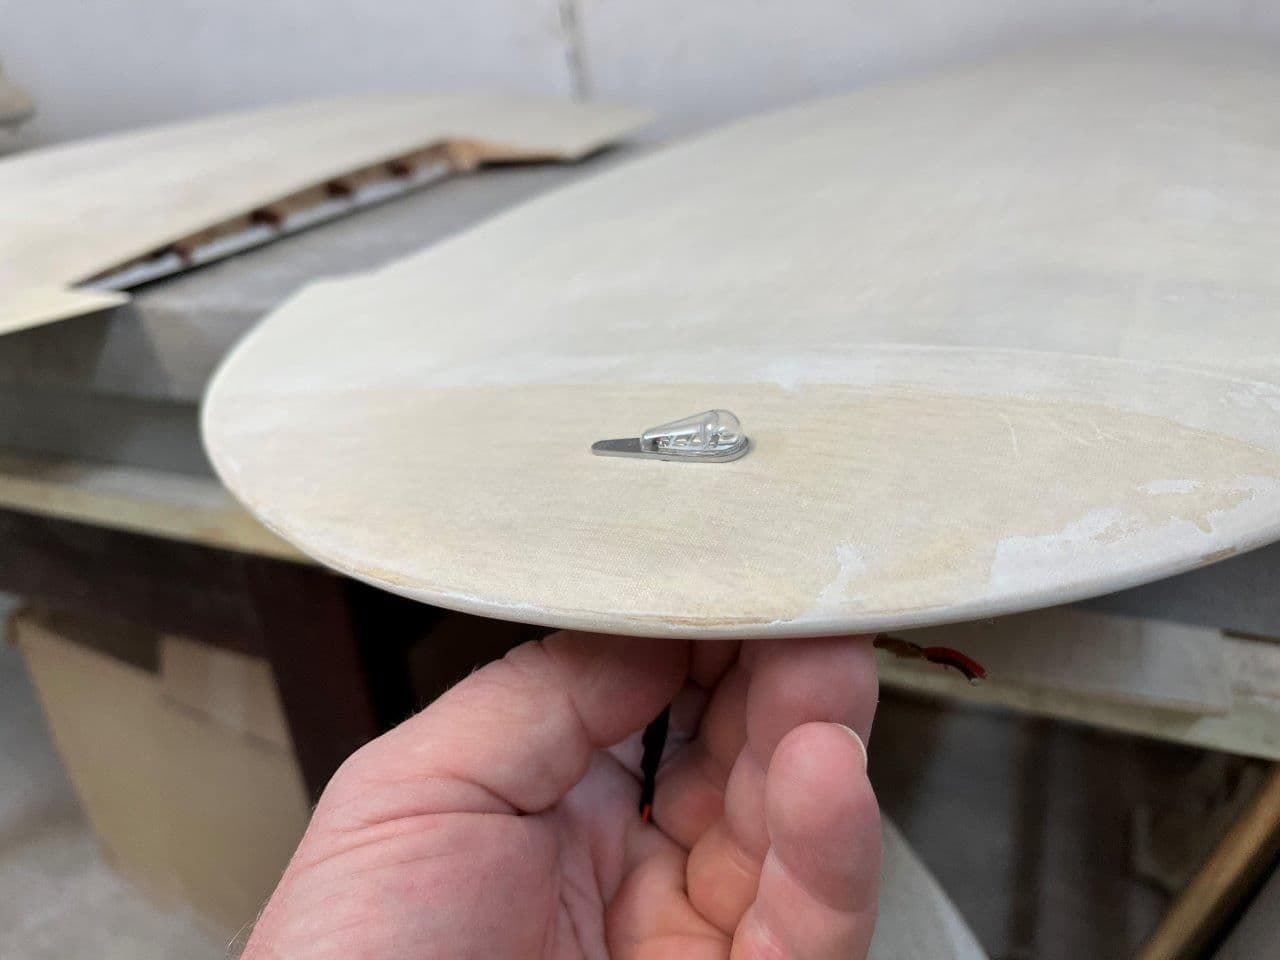
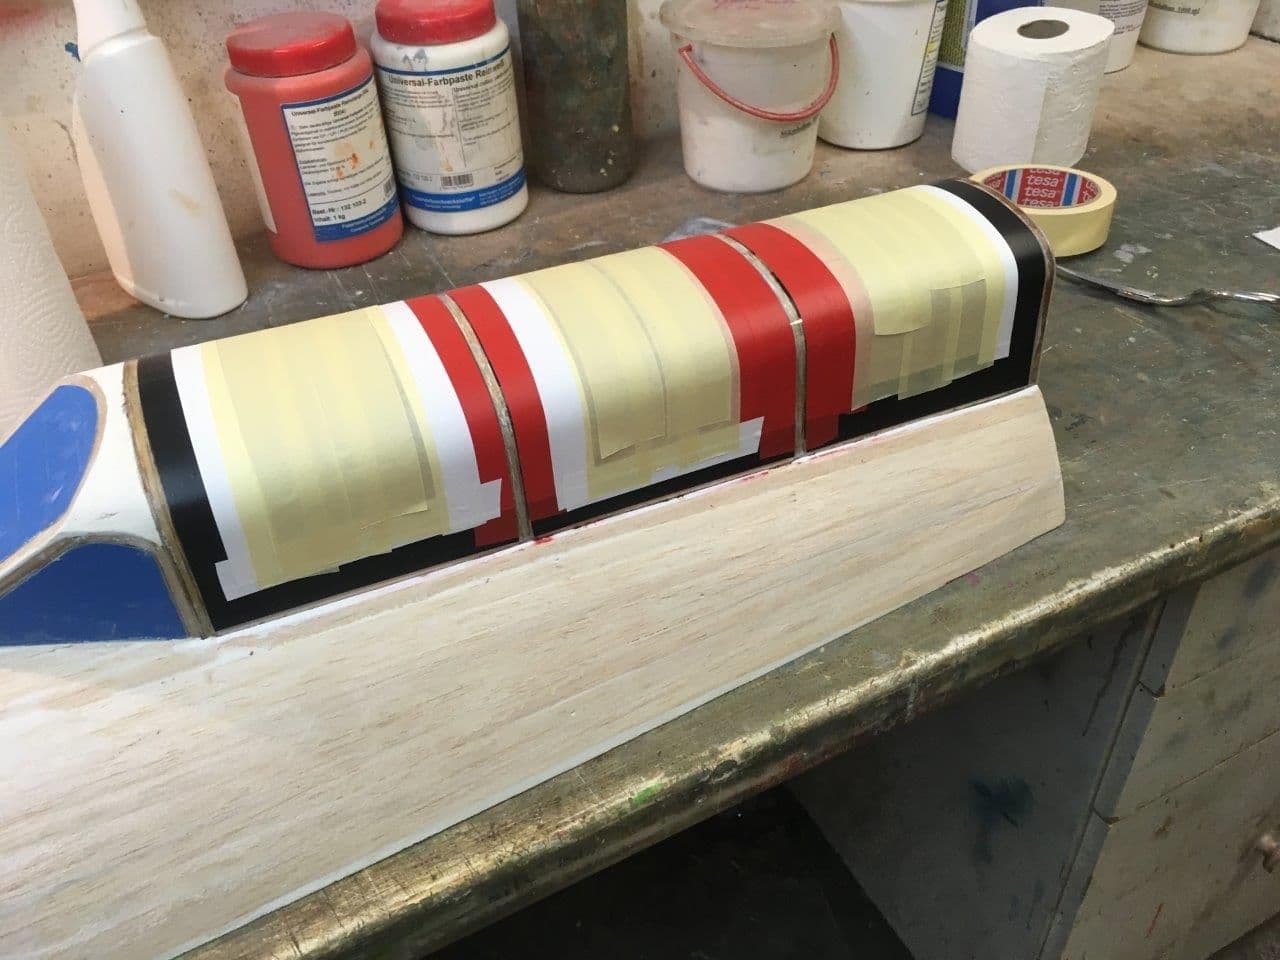
Positionlight on wingtips will be located on upper and lower surface later
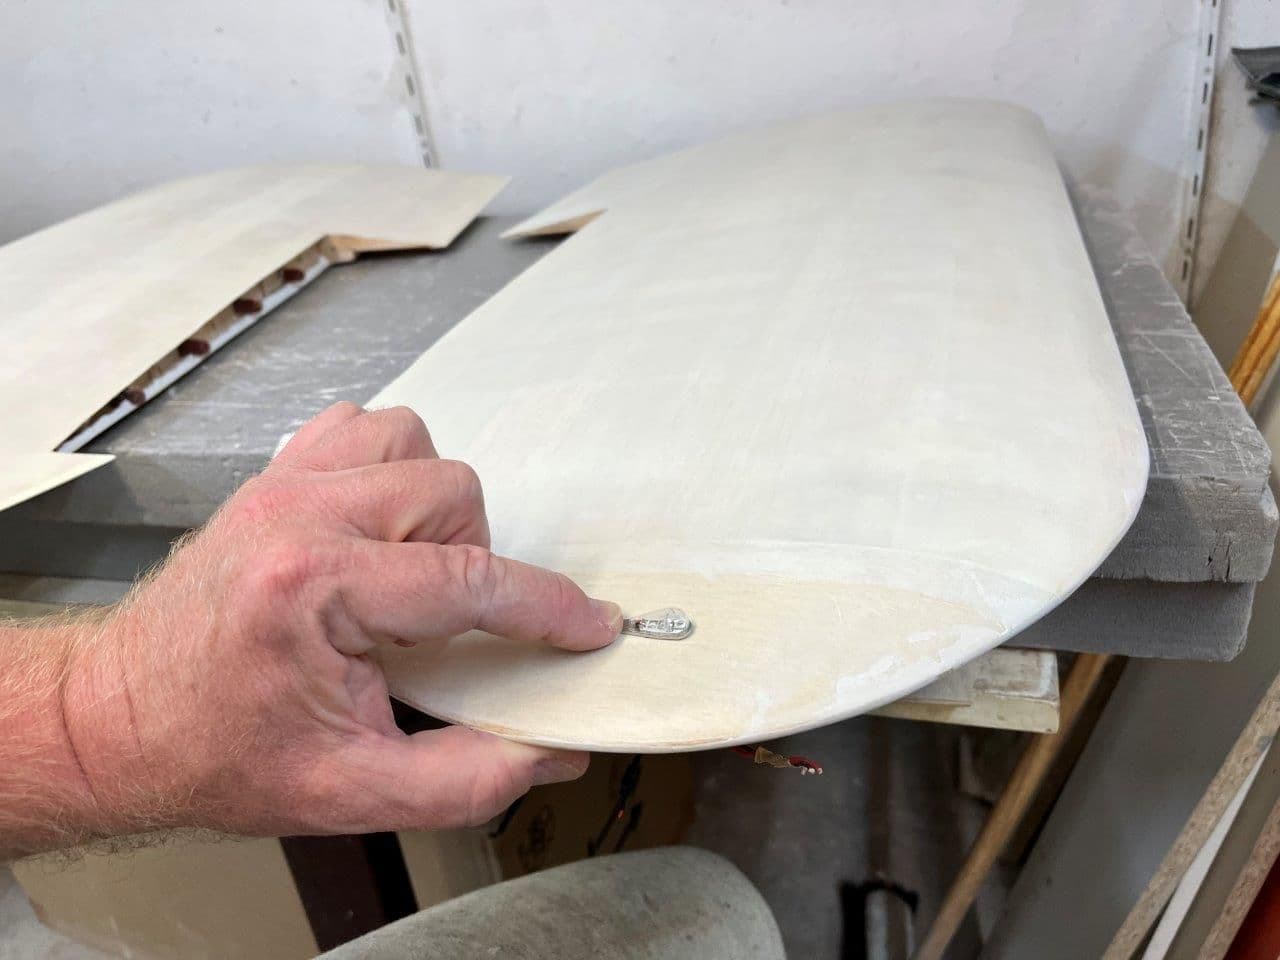
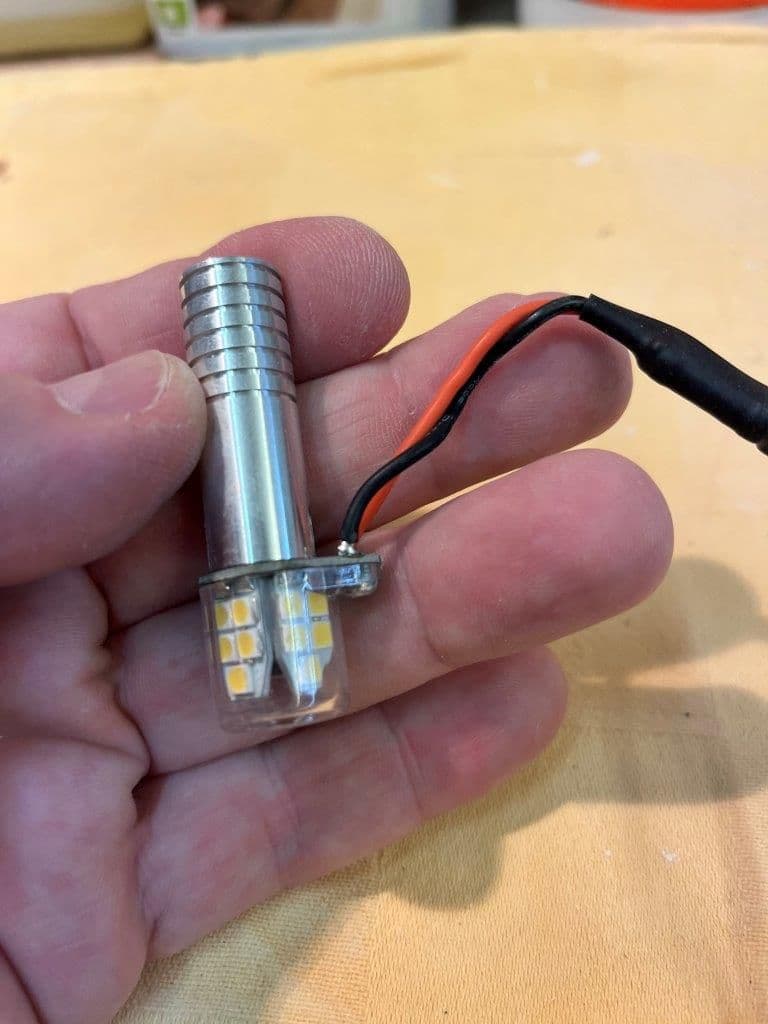
The ACL Anti Collision Light
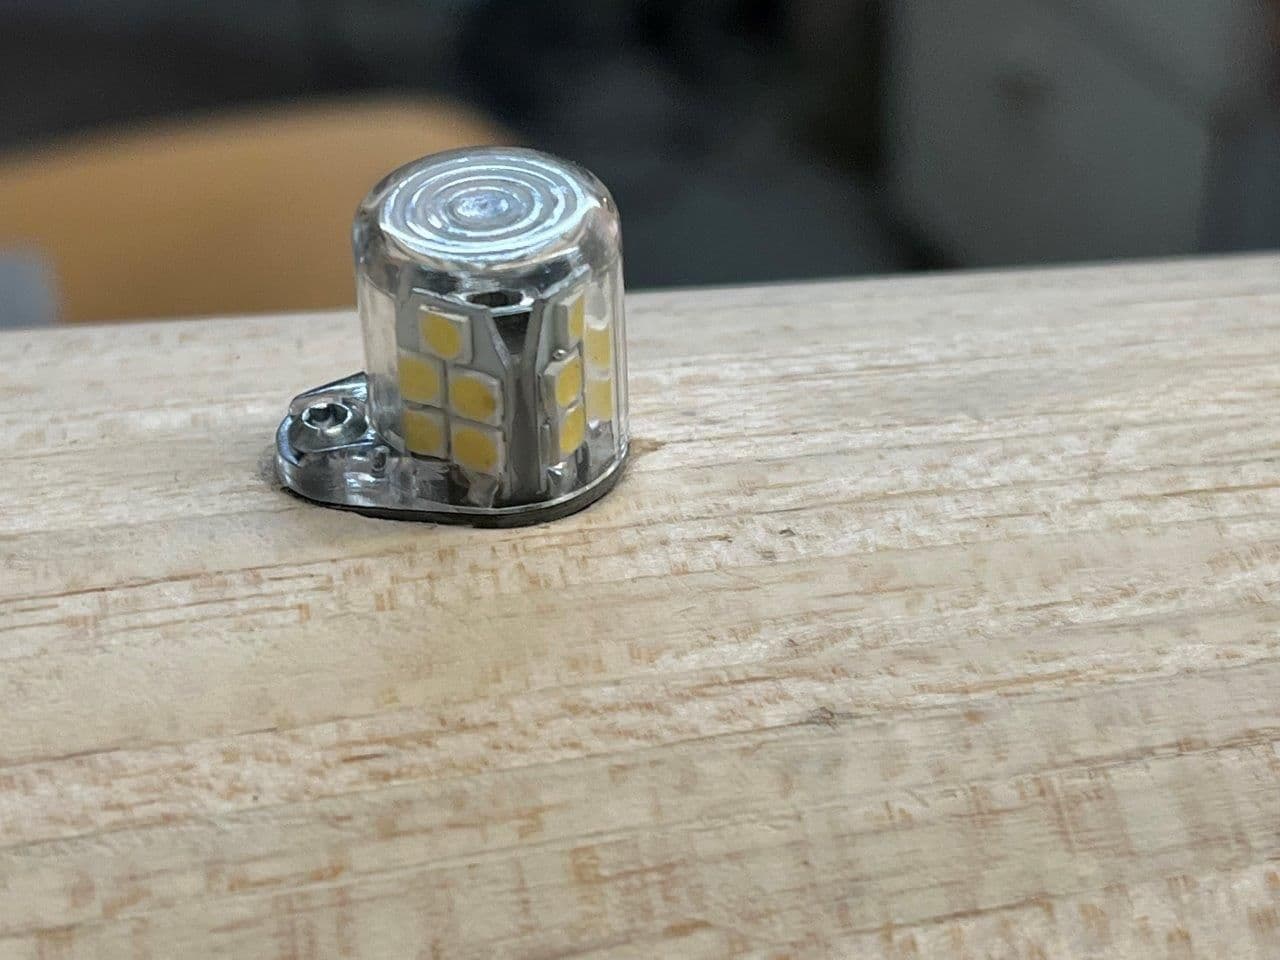
...in orig Position
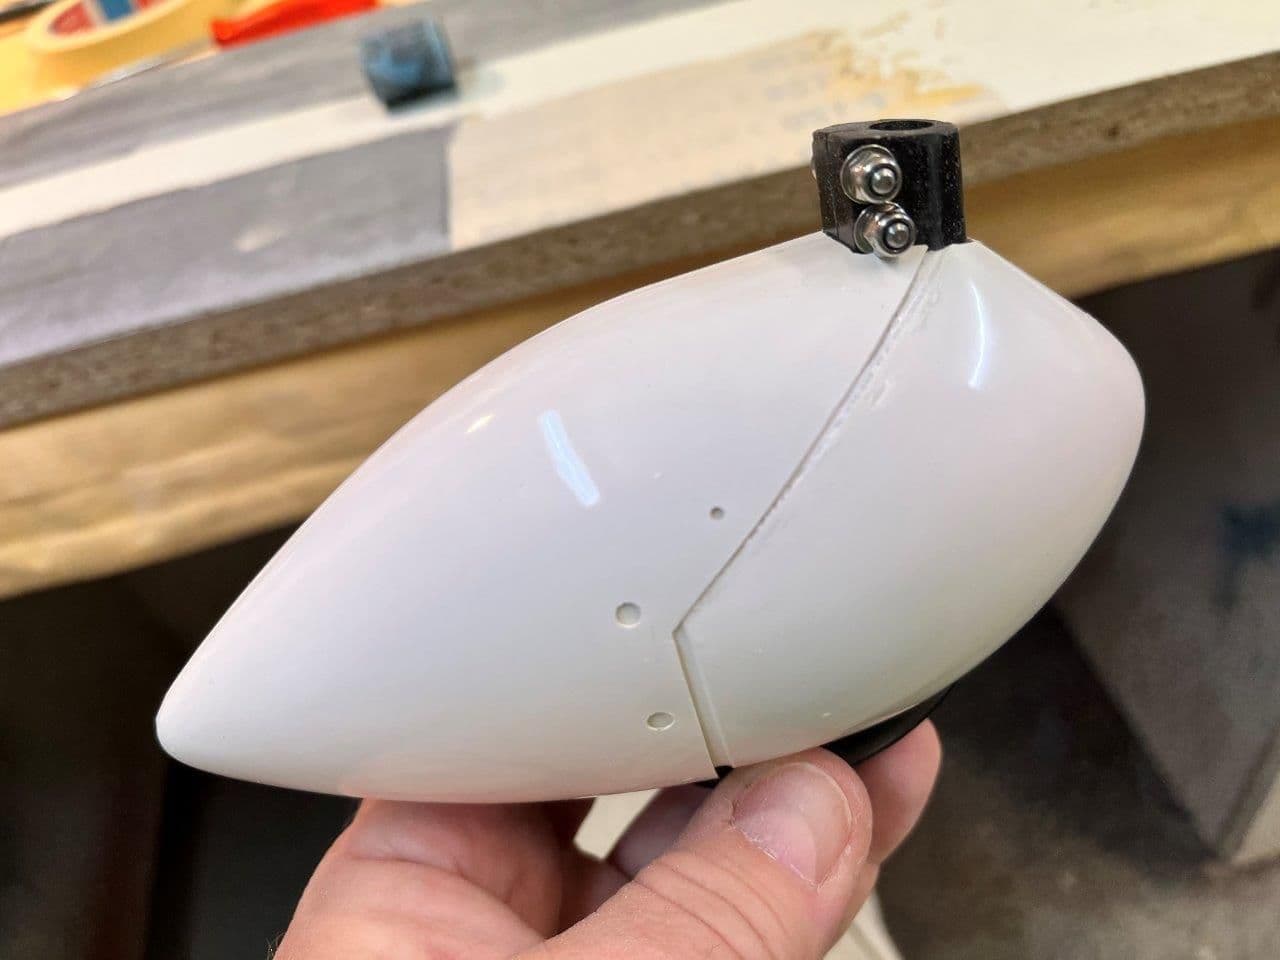
Tailwheelfork:
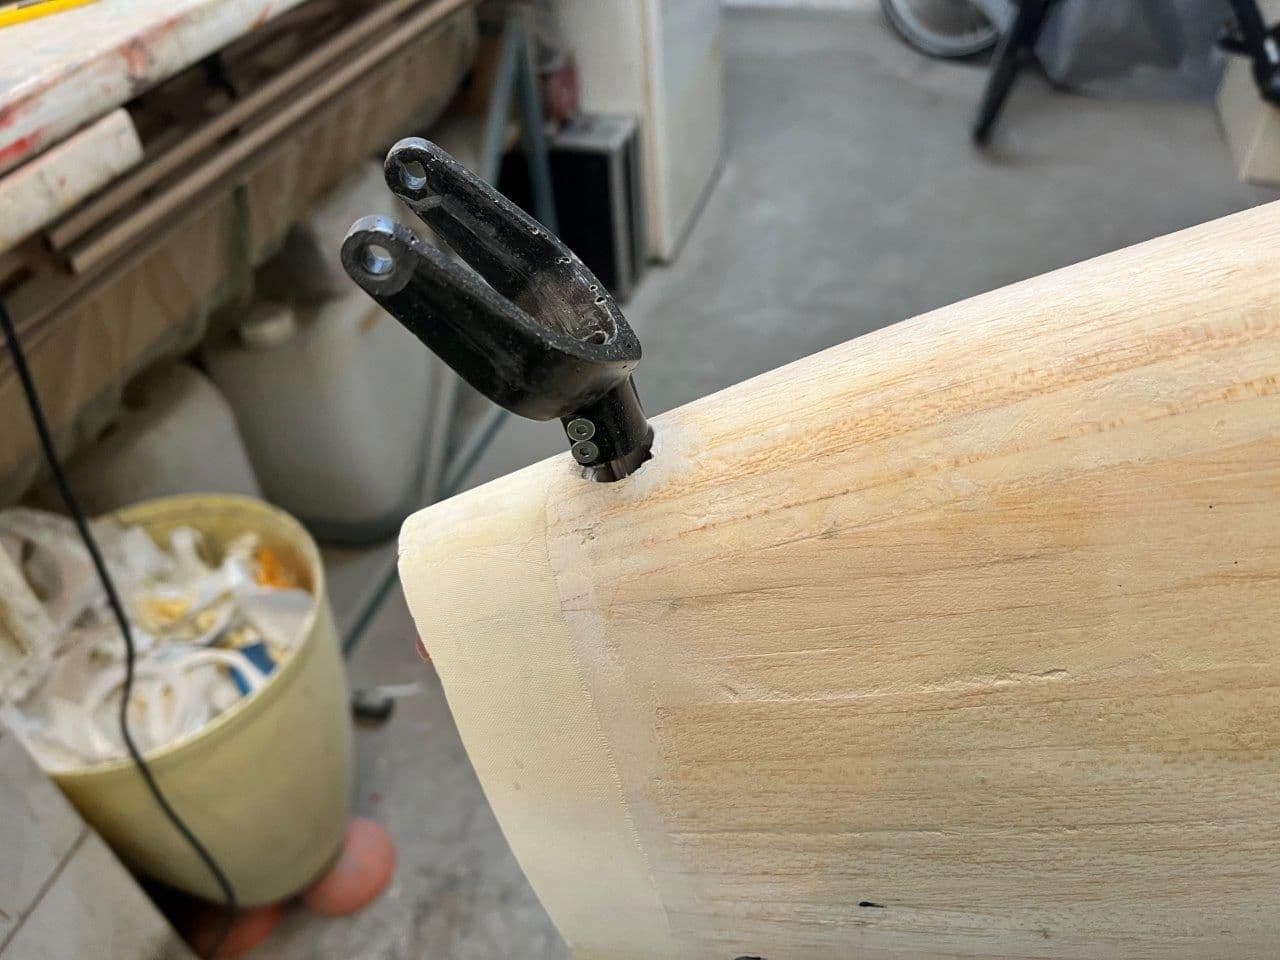

and the "egg" that covers the tailwheel/fork
Protections for some areas
lower side g�assed 2 times 55gr :
Hingeslot for Ailerons
Cover for elevator servo
Positionlight on wingtips will be located on upper and lower surface later
The ACL Anti Collision Light
...in orig Position
Tailwheelfork:
and the "egg" that covers the tailwheel/fork
10-22-2021, 02:10 PM
#134

Matze......As usual you totally amaze me.
Doug Farwig here and. I am still with you my friend.
This model is going to be a piece of Art when finished and I for one can't wait to see the final product.
Your building skill are truly on another level and your dedication stands Proud.
After the hours and hours that you have put into this model flying it is going to take a true test of Intestinal Fortitude.
I wish you Good Wishes.
Best Regards As Always,
Doug Farwig
The following users liked this post:
Camel65 (11-25-2022)
10-23-2021, 03:47 AM
#135
Hi Doug,
good to hear that you are well,
I was off for the Coronatime, due I build 8, in words eight planes, you can chase outerzone and search for matthias, than you find em.
QED: The maiden is planned for AMD-meeting in Havelberg next year thats in June/July, may be if I'm fast in Ahnsbeck on "Pfingsten". Will see. Presently my only project, but,... a few projects in the pipeline, there will be a Star 13 a vintage glider next and I help a friend to create an MQ9 Reaper.
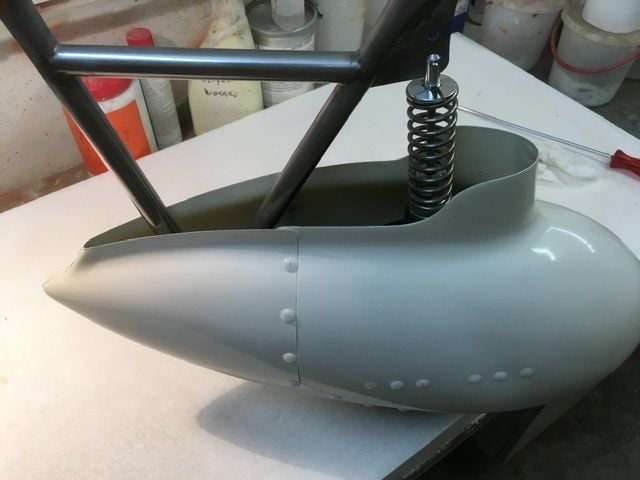
Today I finalised the cowling mounting and closed the gap and Shaped and will shape the fuselage to the cowling contour.
good to hear that you are well,
I was off for the Coronatime, due I build 8, in words eight planes, you can chase outerzone and search for matthias, than you find em.
QED: The maiden is planned for AMD-meeting in Havelberg next year thats in June/July, may be if I'm fast in Ahnsbeck on "Pfingsten". Will see. Presently my only project, but,... a few projects in the pipeline, there will be a Star 13 a vintage glider next and I help a friend to create an MQ9 Reaper.
Today I finalised the cowling mounting and closed the gap and Shaped and will shape the fuselage to the cowling contour.
11-23-2021, 01:01 PM
#136
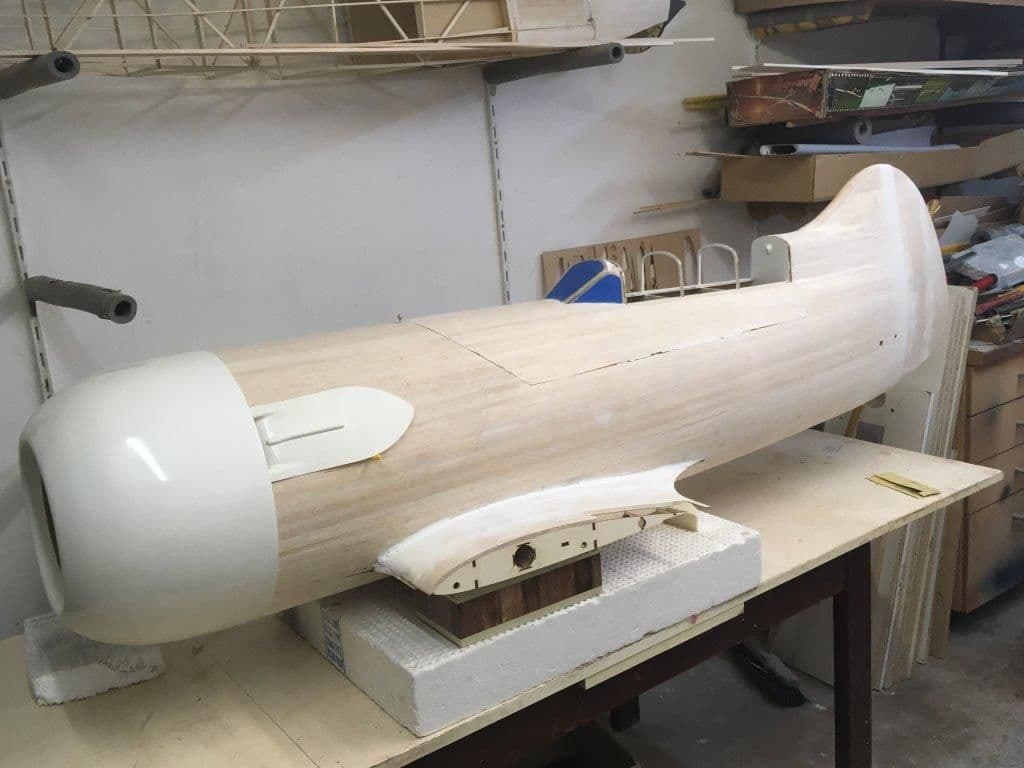
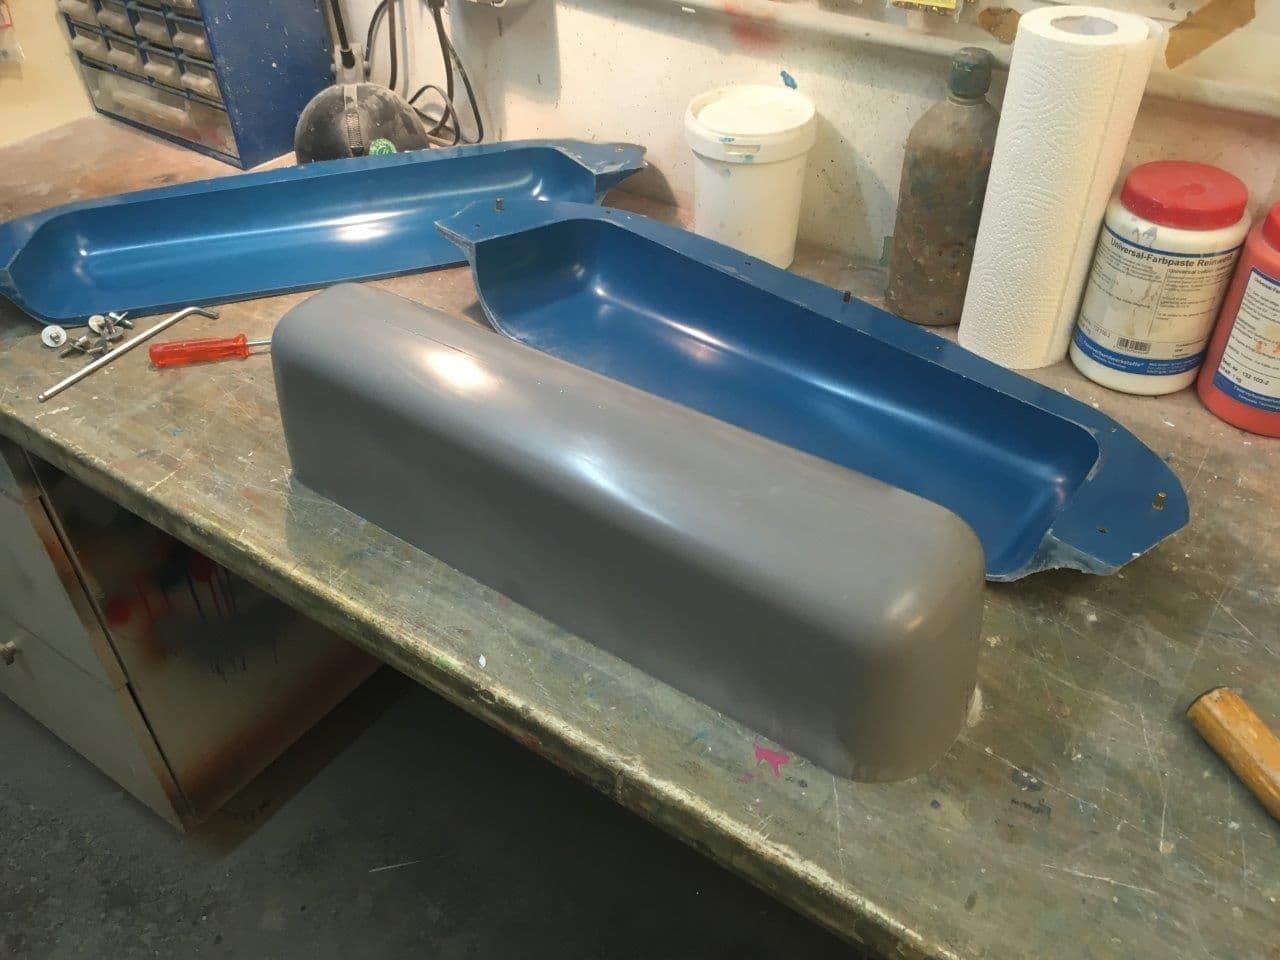
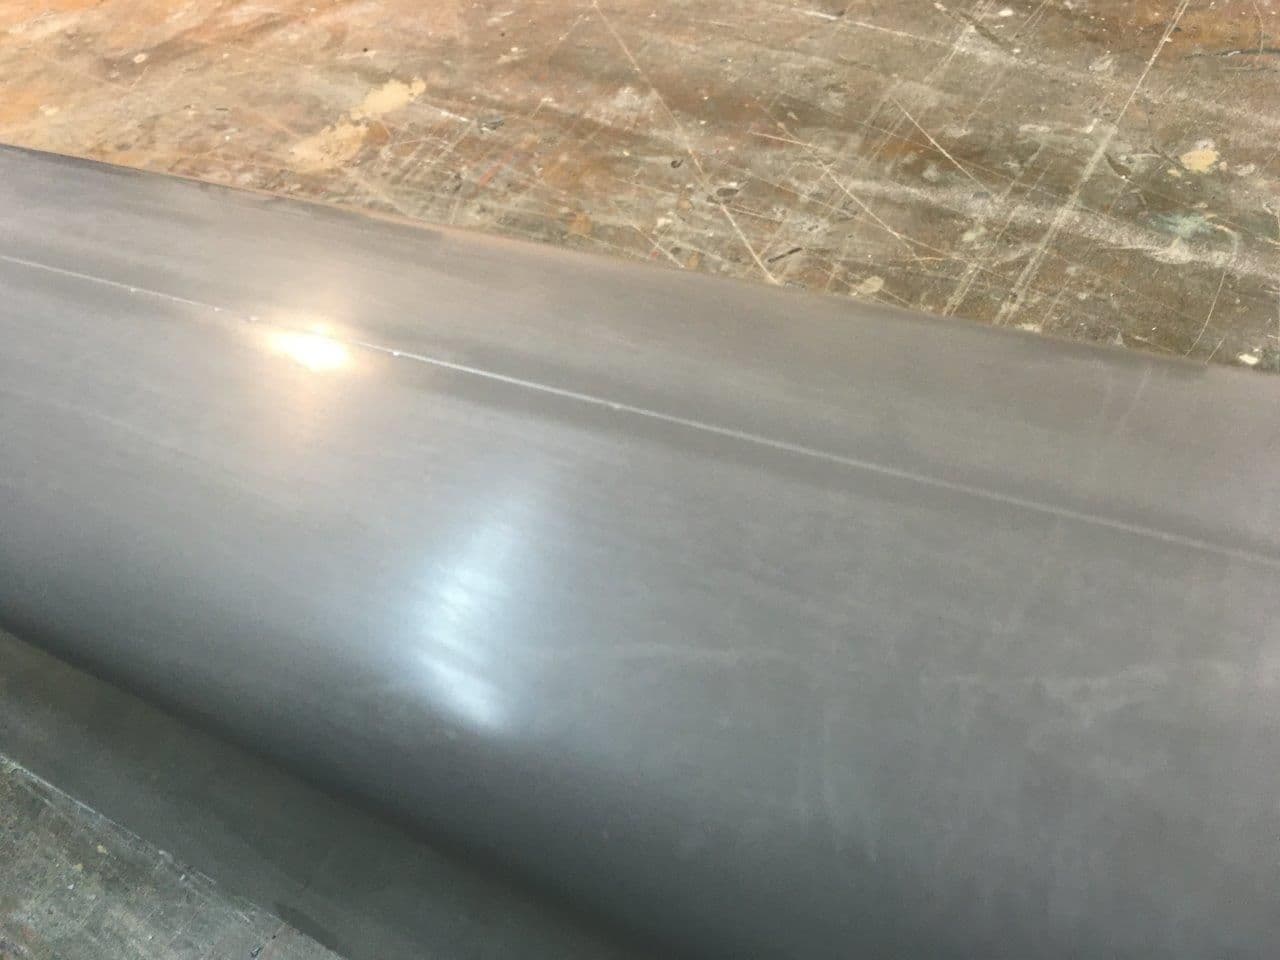
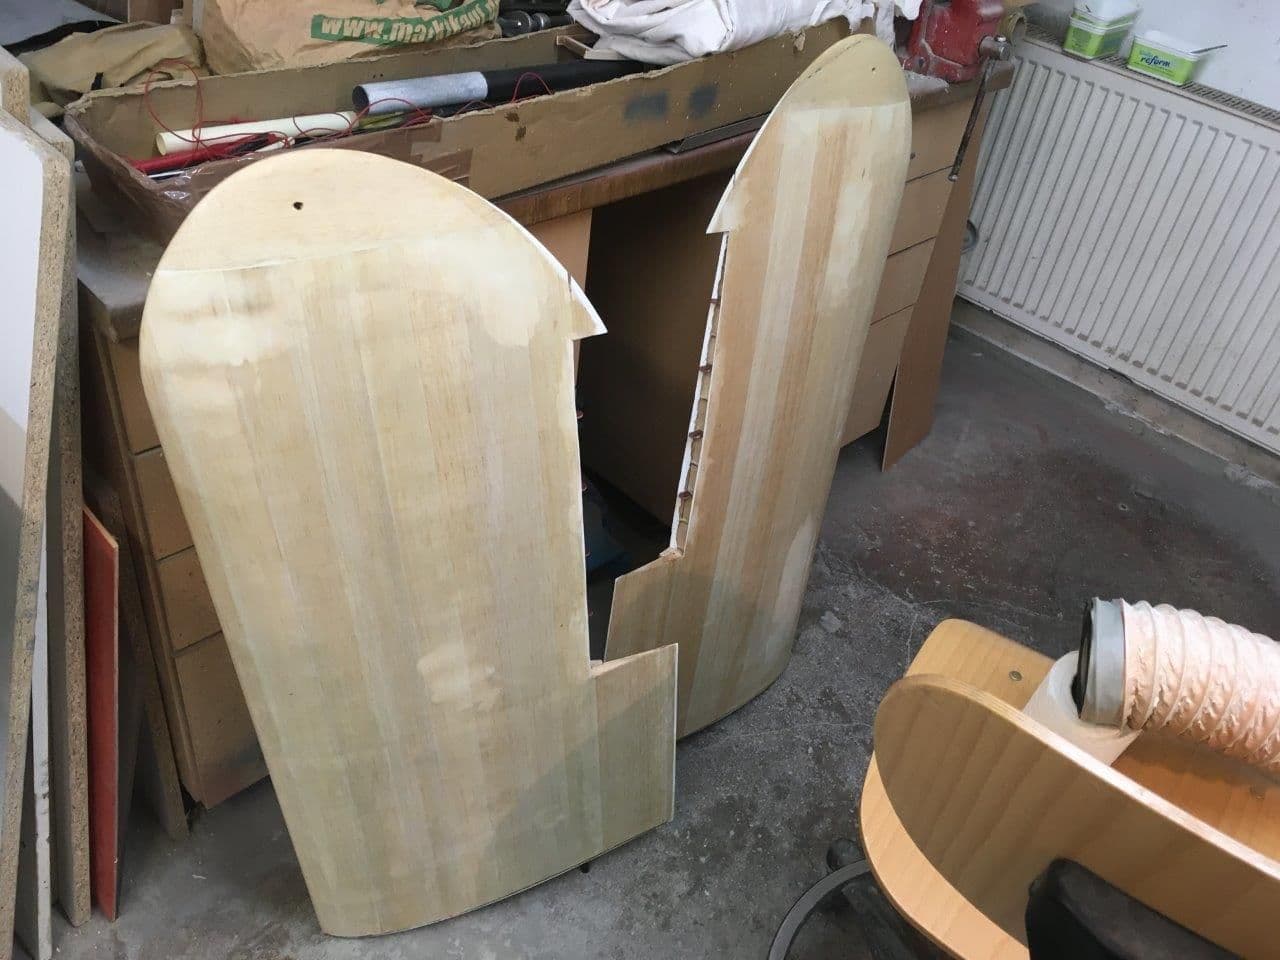
All Parts are now in fibre glas and I*m happy with the result, further steps done and in Decembre parts will go to the paint shop foer first layer of filler, hopefully sufficient and light
all parts ready glassed
Ecaust areas were made on a plotted mould from thin layers
Stabilizer forming contour also made in plotted mould from thiny layers,light like paper.
all parts ready glassed
Ecaust areas were made on a plotted mould from thin layers
Stabilizer forming contour also made in plotted mould from thiny layers,light like paper.
11-25-2021, 01:54 PM
#137
Matze, things are looking spectacular. Yes, the glass work came out fantastic. Can't wait to see it with some color on it.
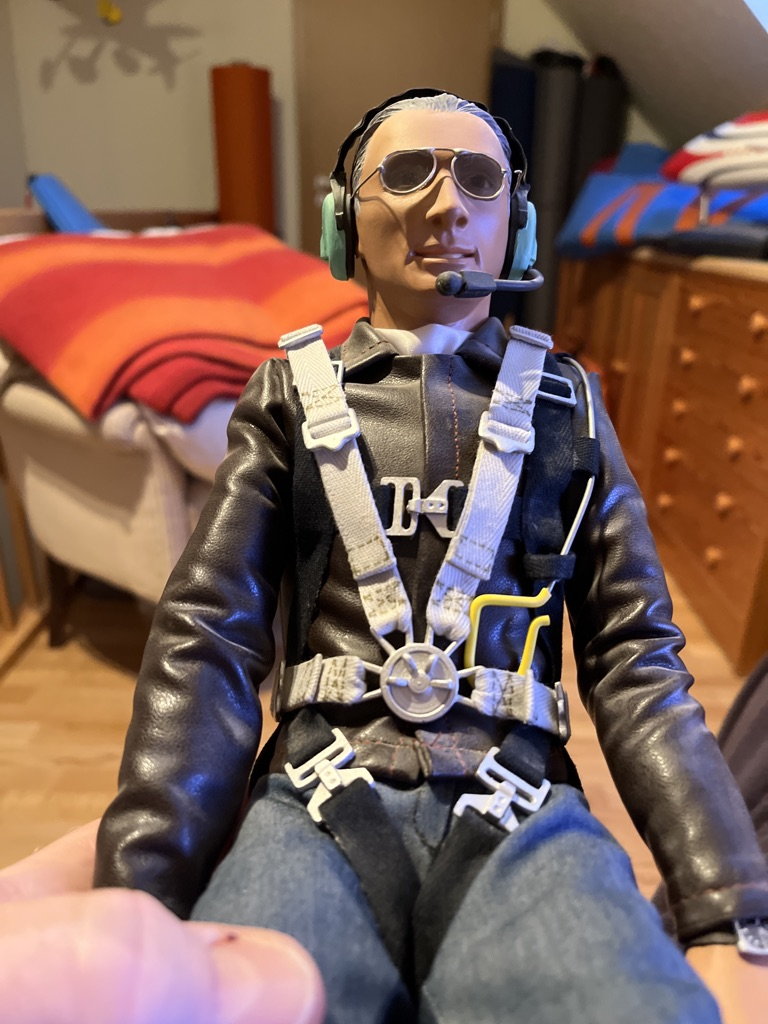
Have you decided on a pilot figure yet....?
Maybe two pilot figures which would look fantastic.
December is right around the corner so I'm sure you are hard at it if you want to meet your dead line..
Great work as usual Matze.....
Have you decided on a pilot figure yet....?
Maybe two pilot figures which would look fantastic.
December is right around the corner so I'm sure you are hard at it if you want to meet your dead line..
Great work as usual Matze.....
11-25-2021, 09:16 PM
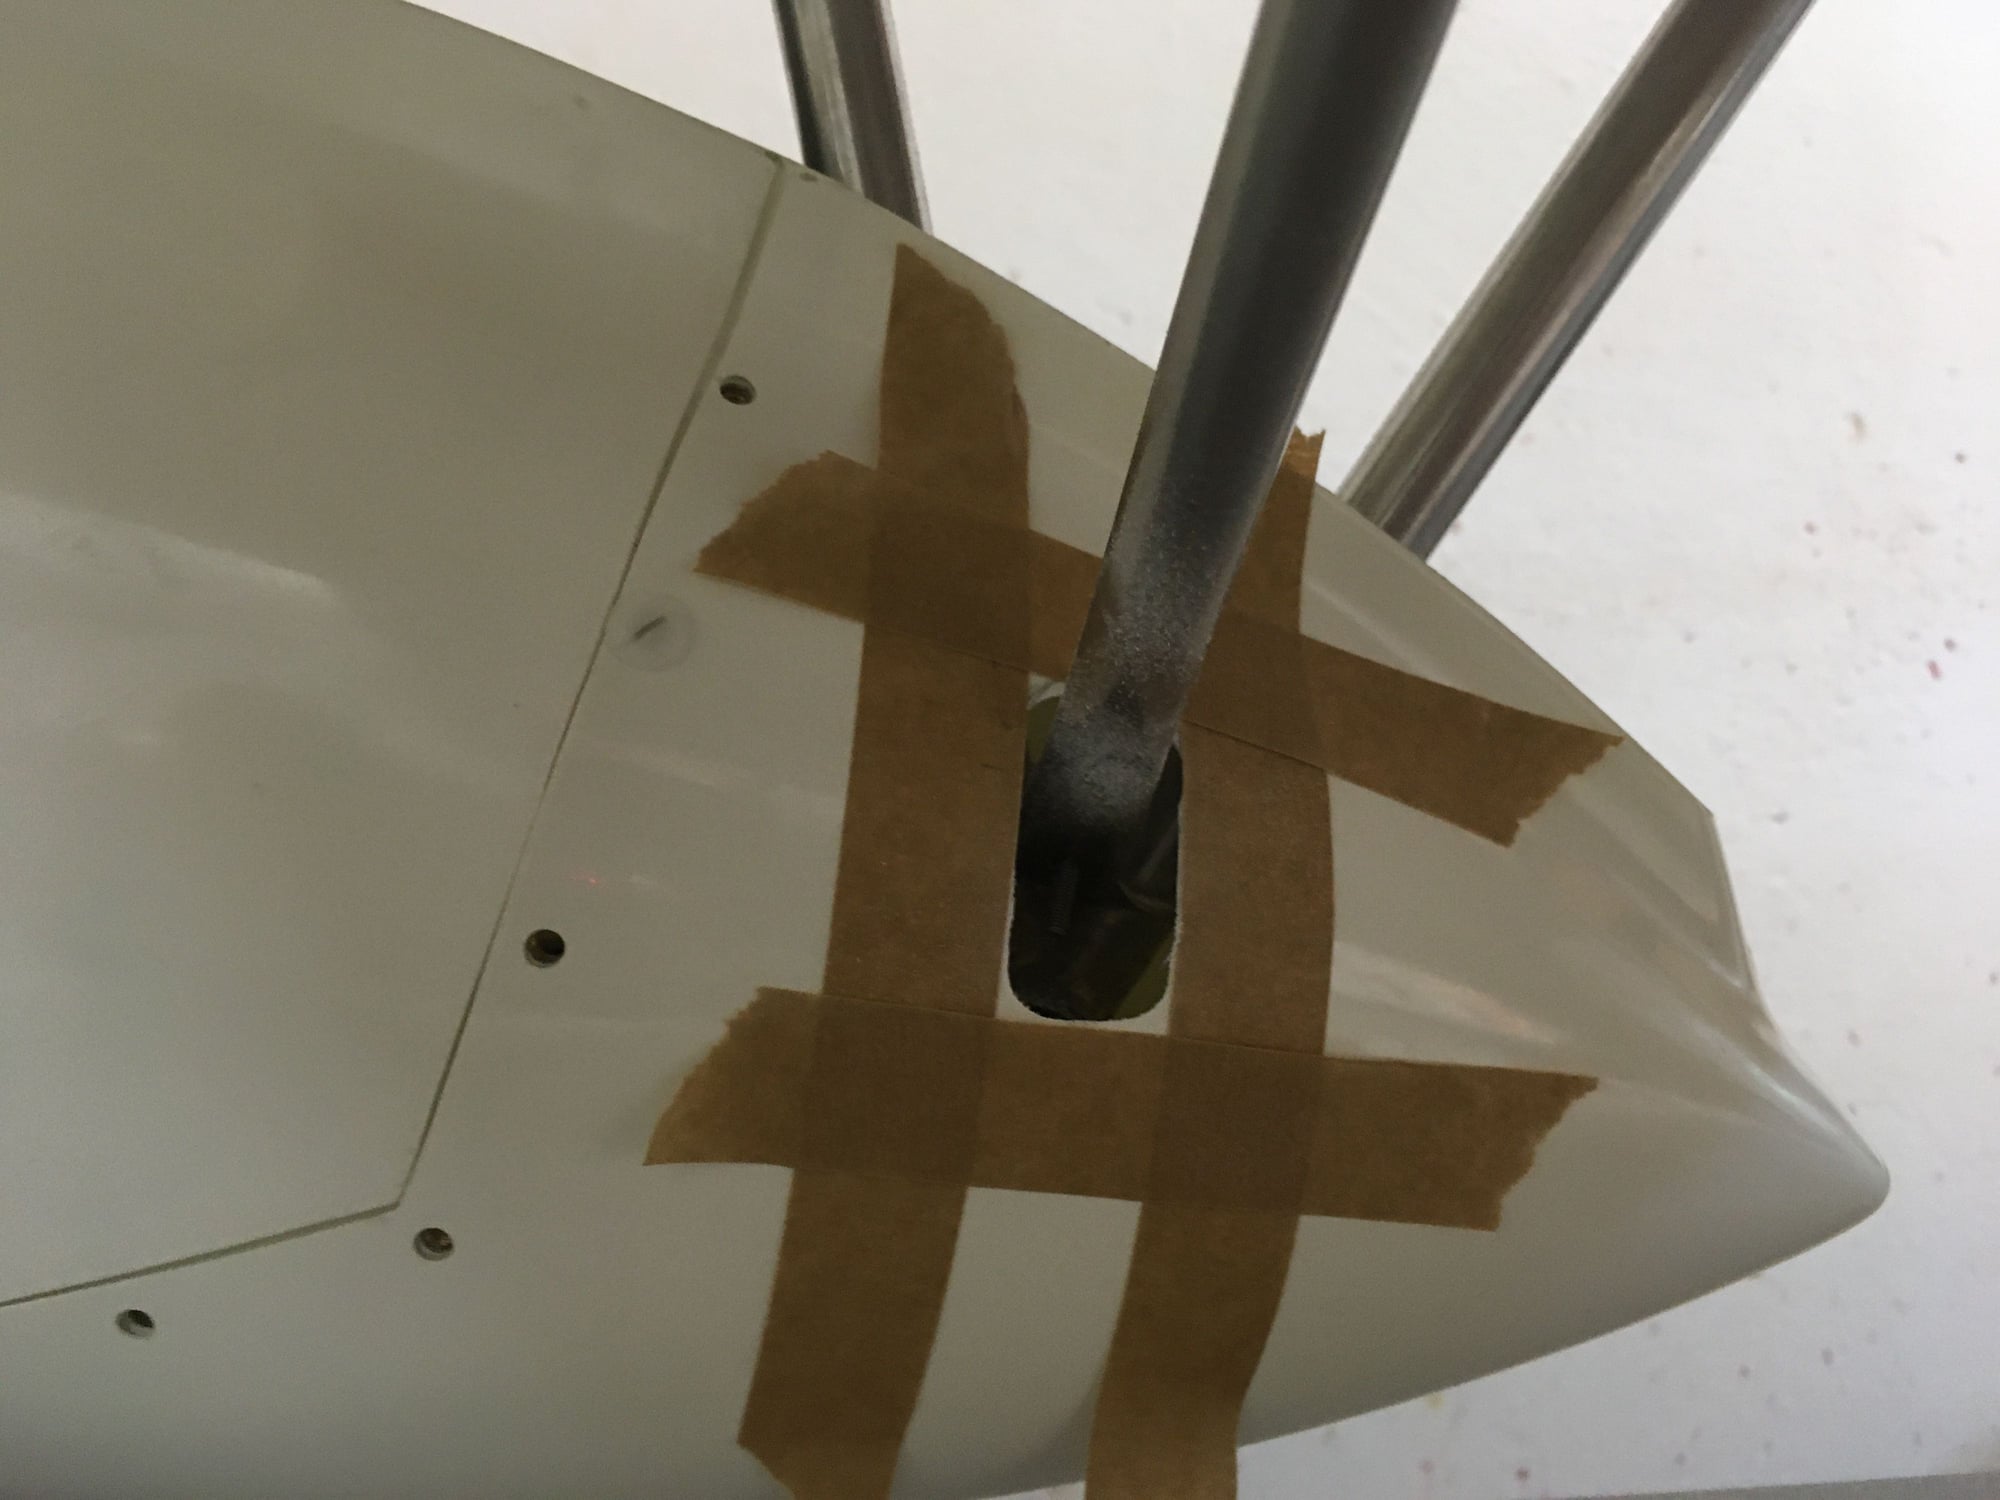
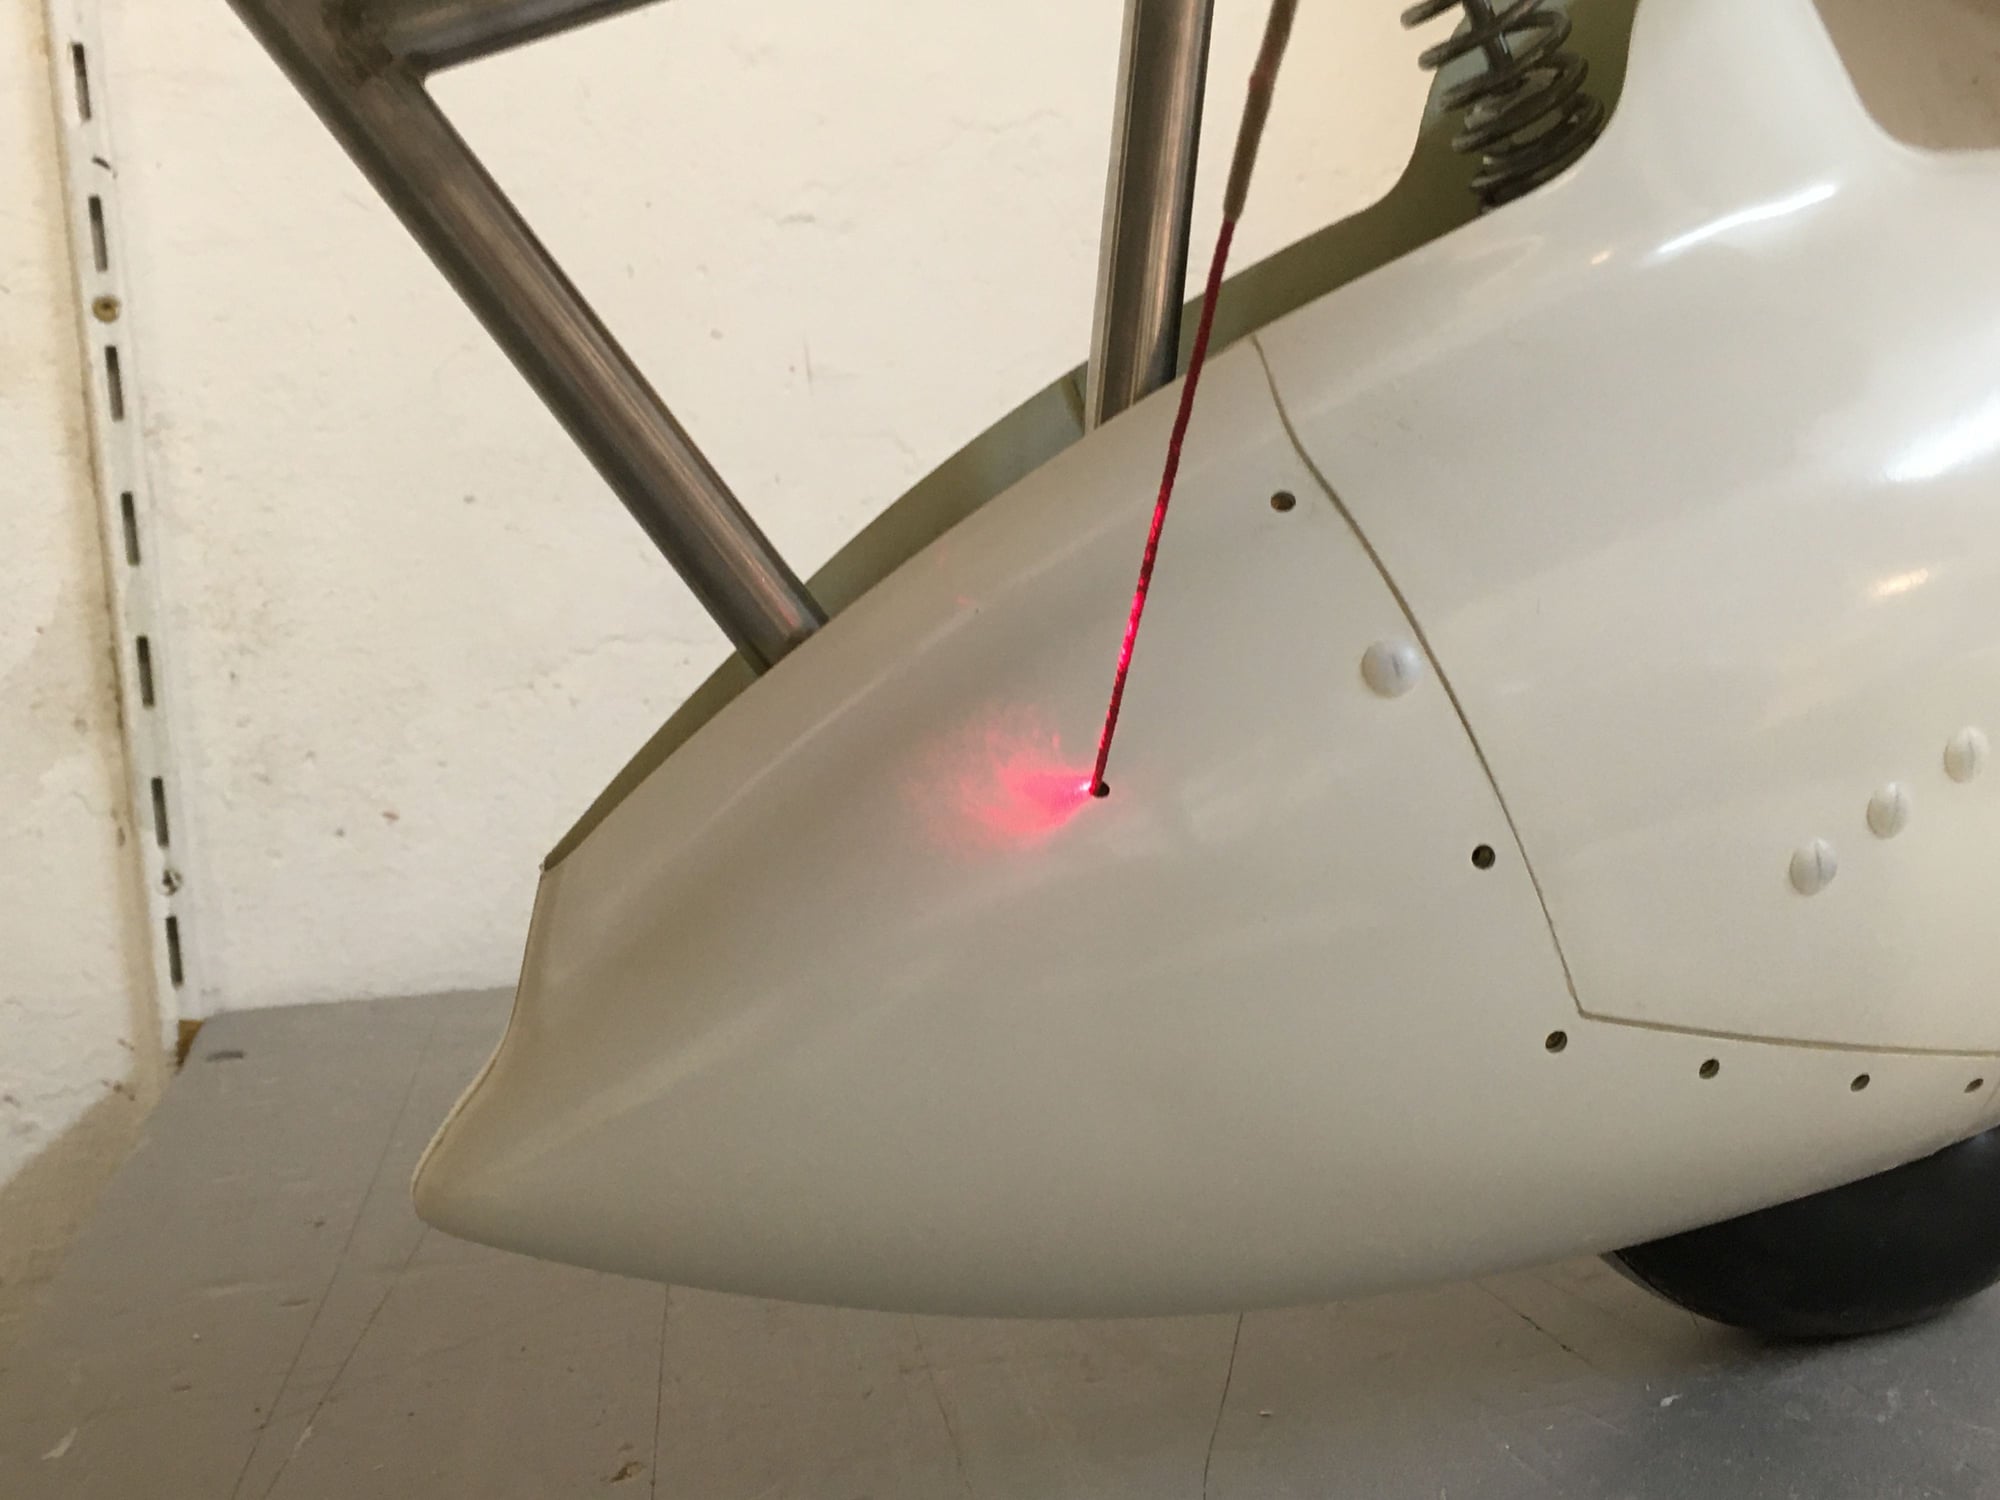
#138
Hi Doug,
presently nothing is scheduled with the cockpit, First step is a good maiden flight may be I reschedule later. For the first flight there will be no pilots inside. Yes I know if you do not do the things directly and say I can do this later than it fall off the board. Presently I startet to tape things that should not get in touch with filler. So fist step is filler, thats not really colour in this grey tone. but you can easily see any surface issue. I hope to get it back with filler before xmas to work on it between he years.
cheers matze
10-15-2022, 03:48 AM
#140
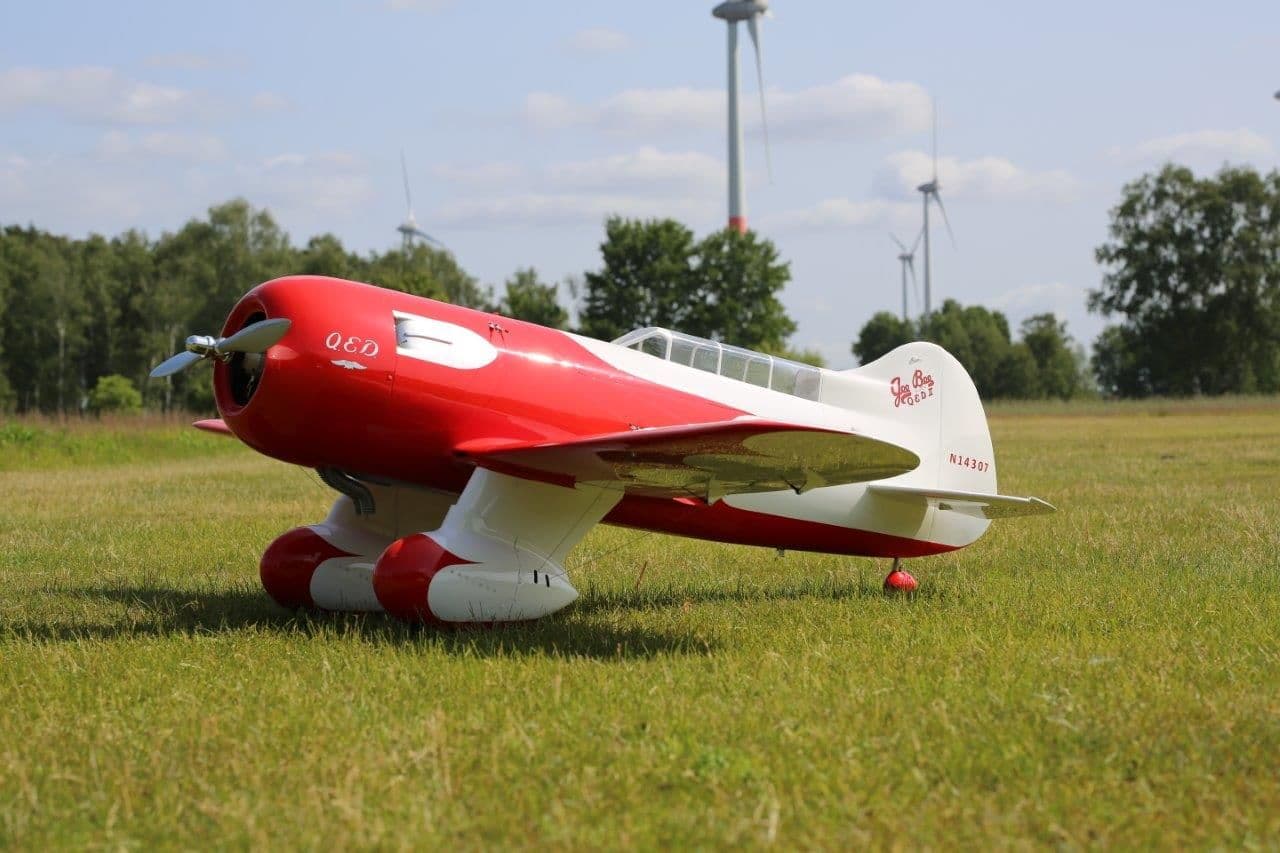
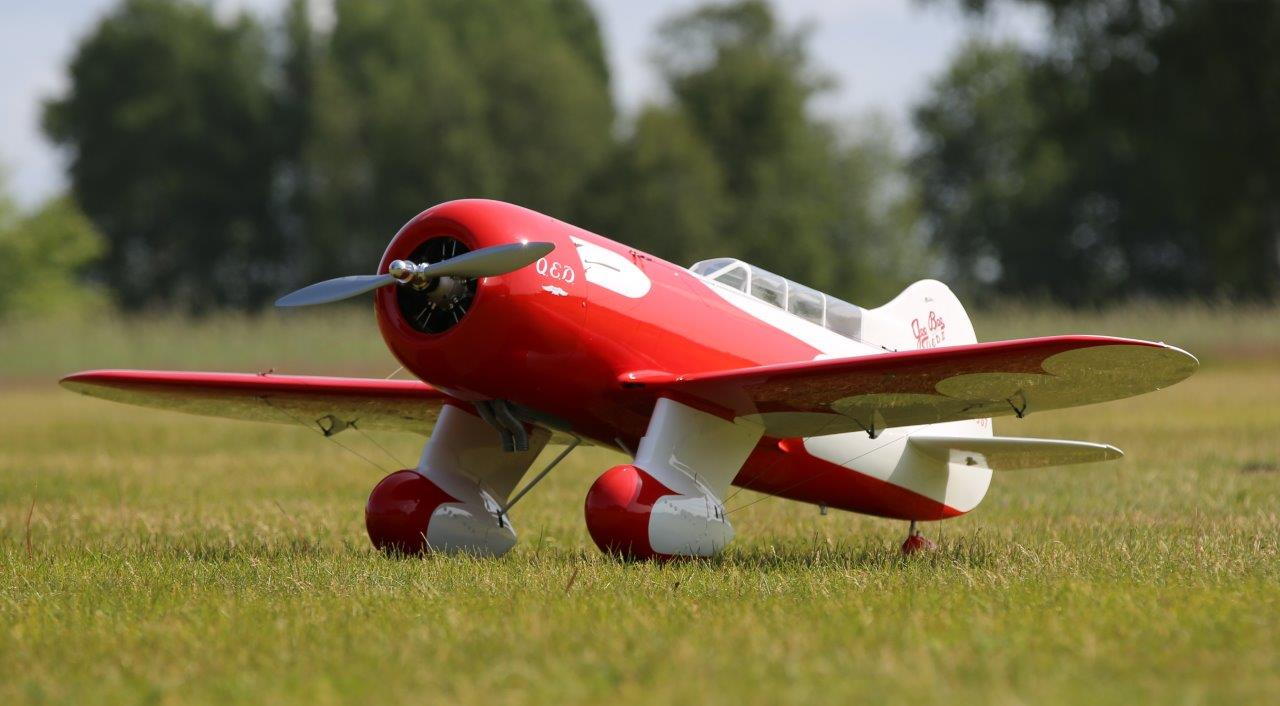
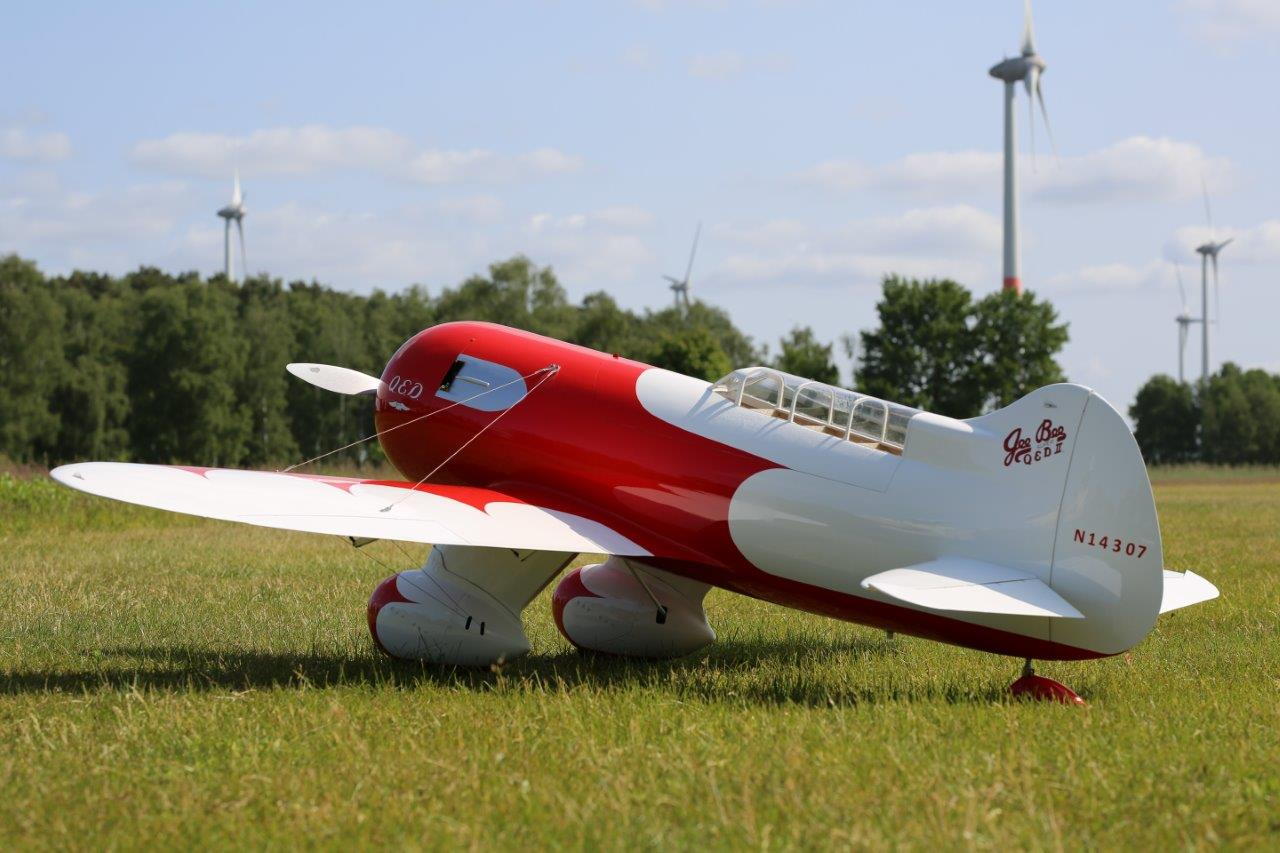
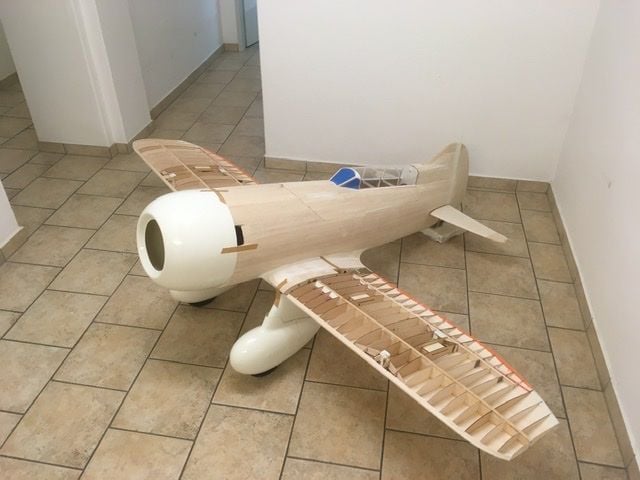
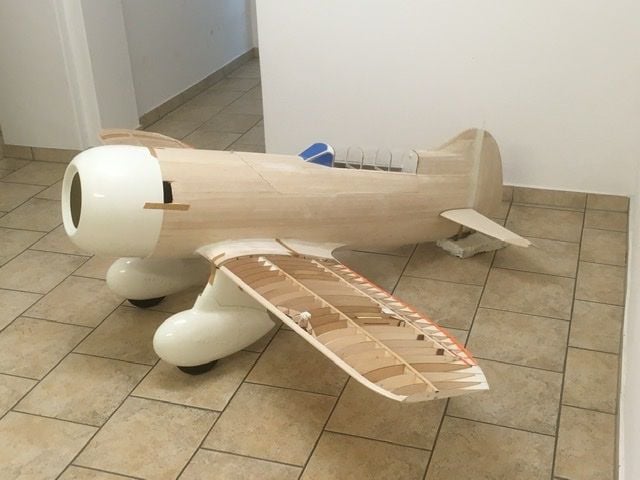
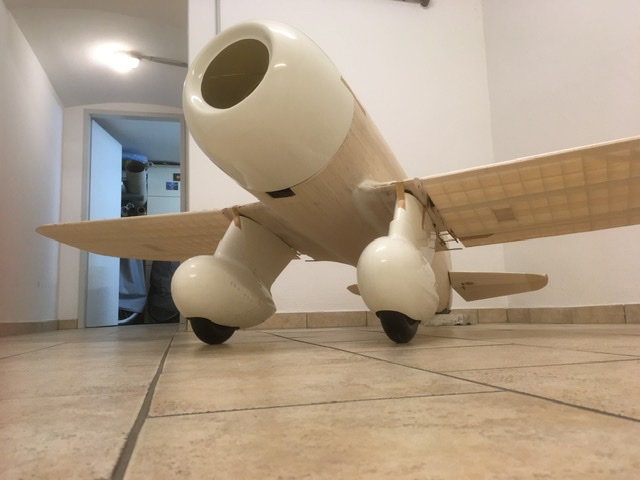
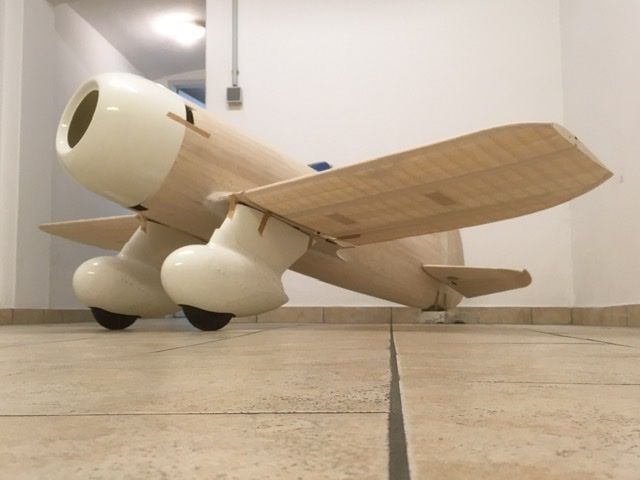
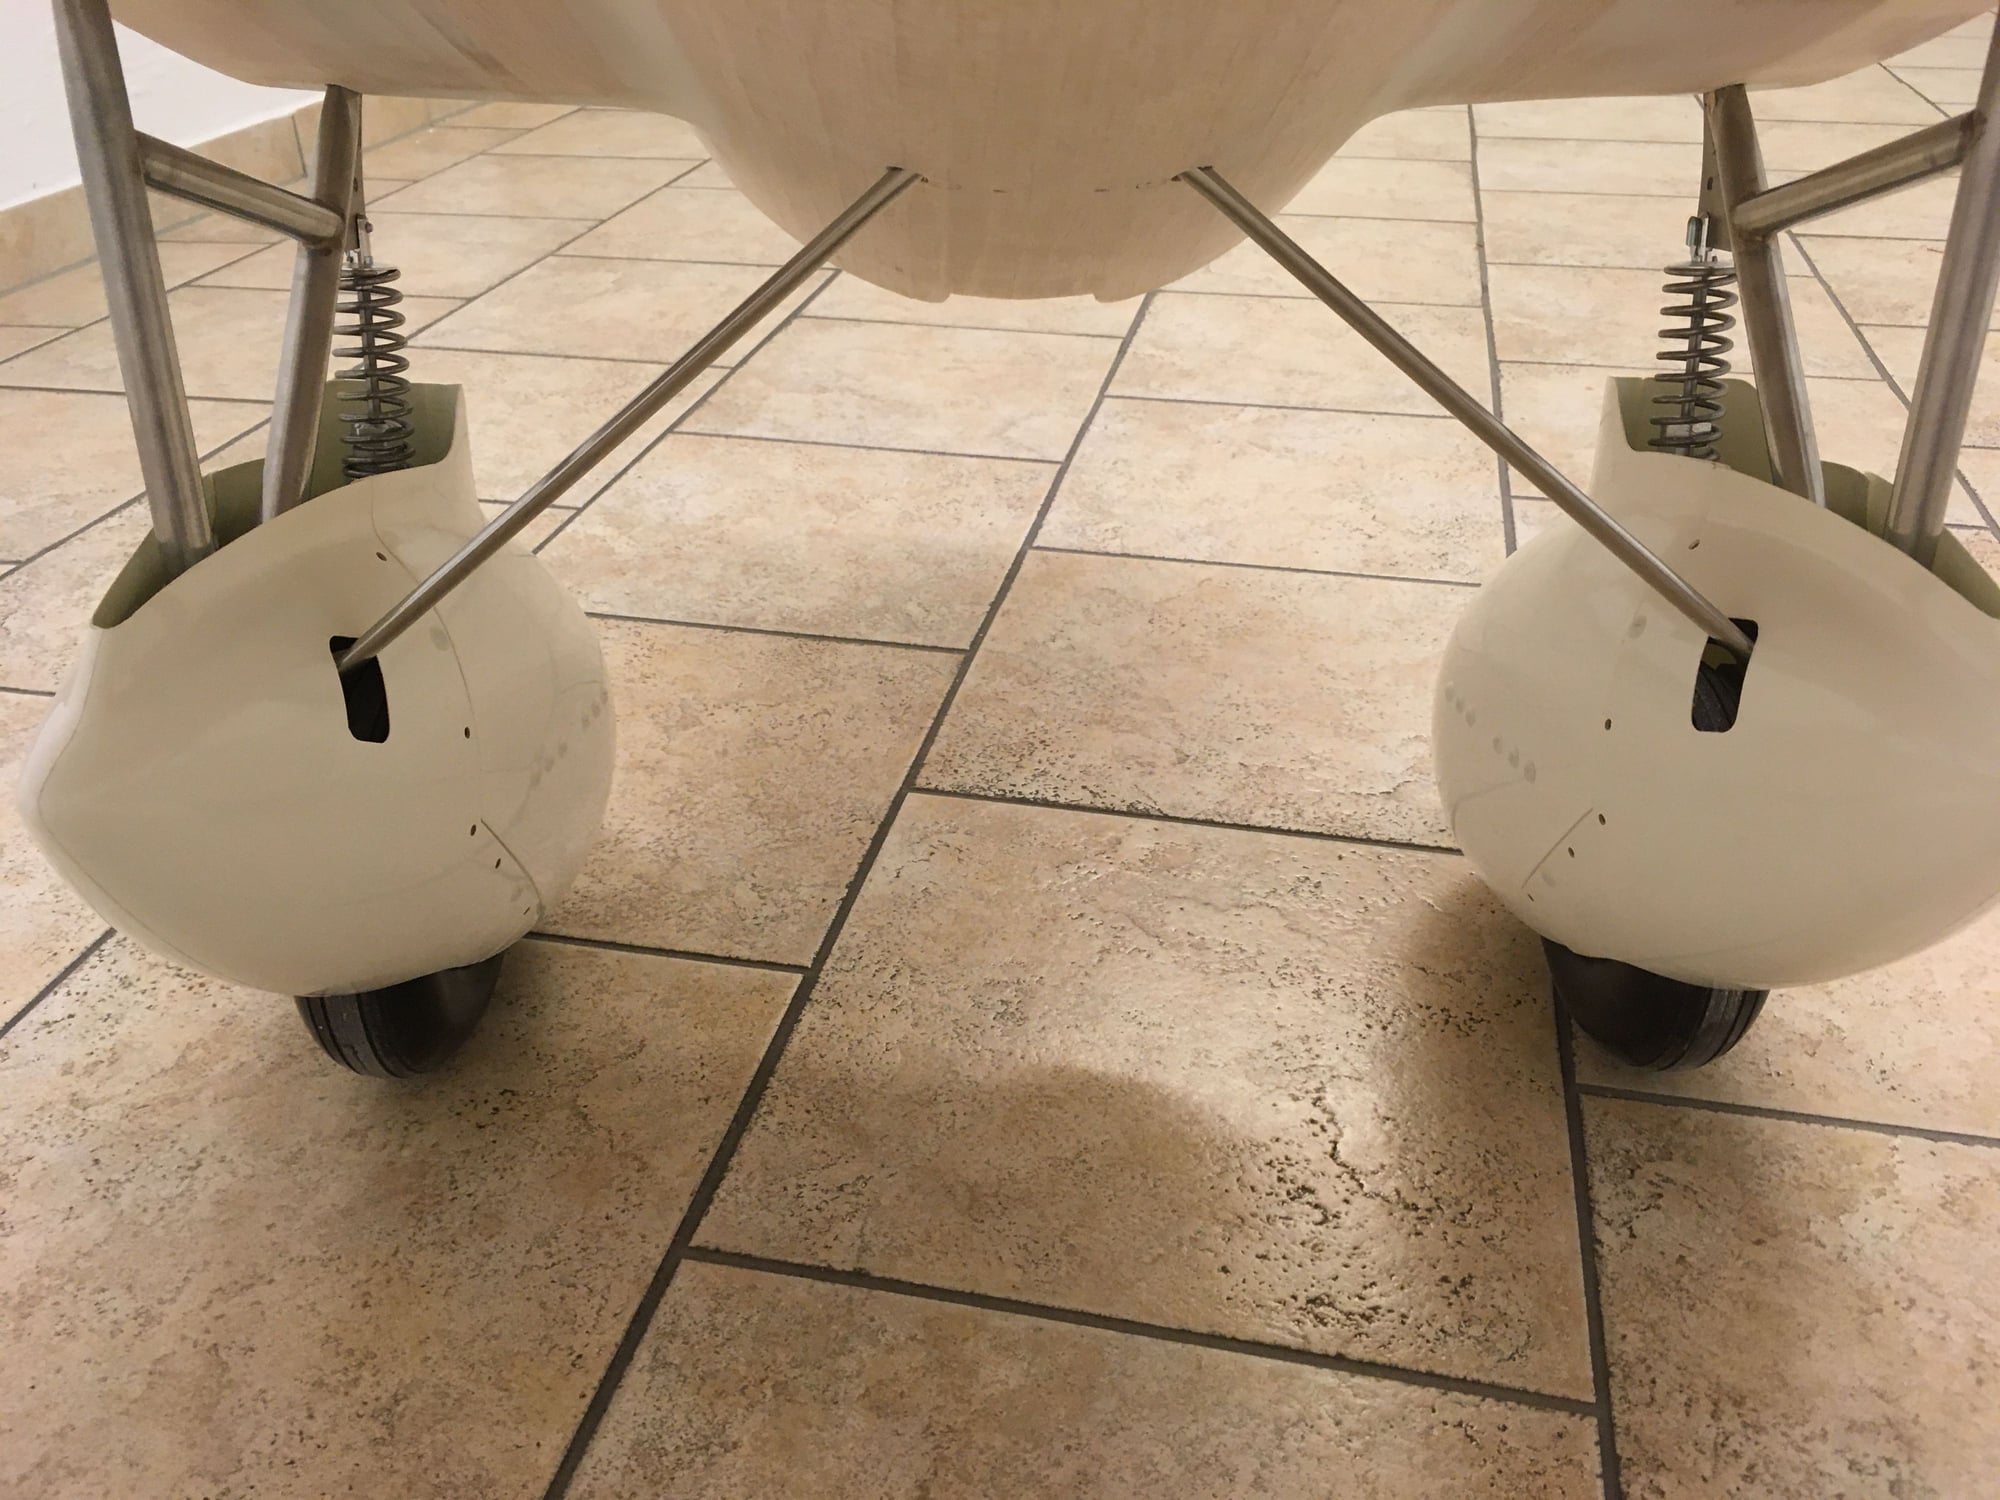
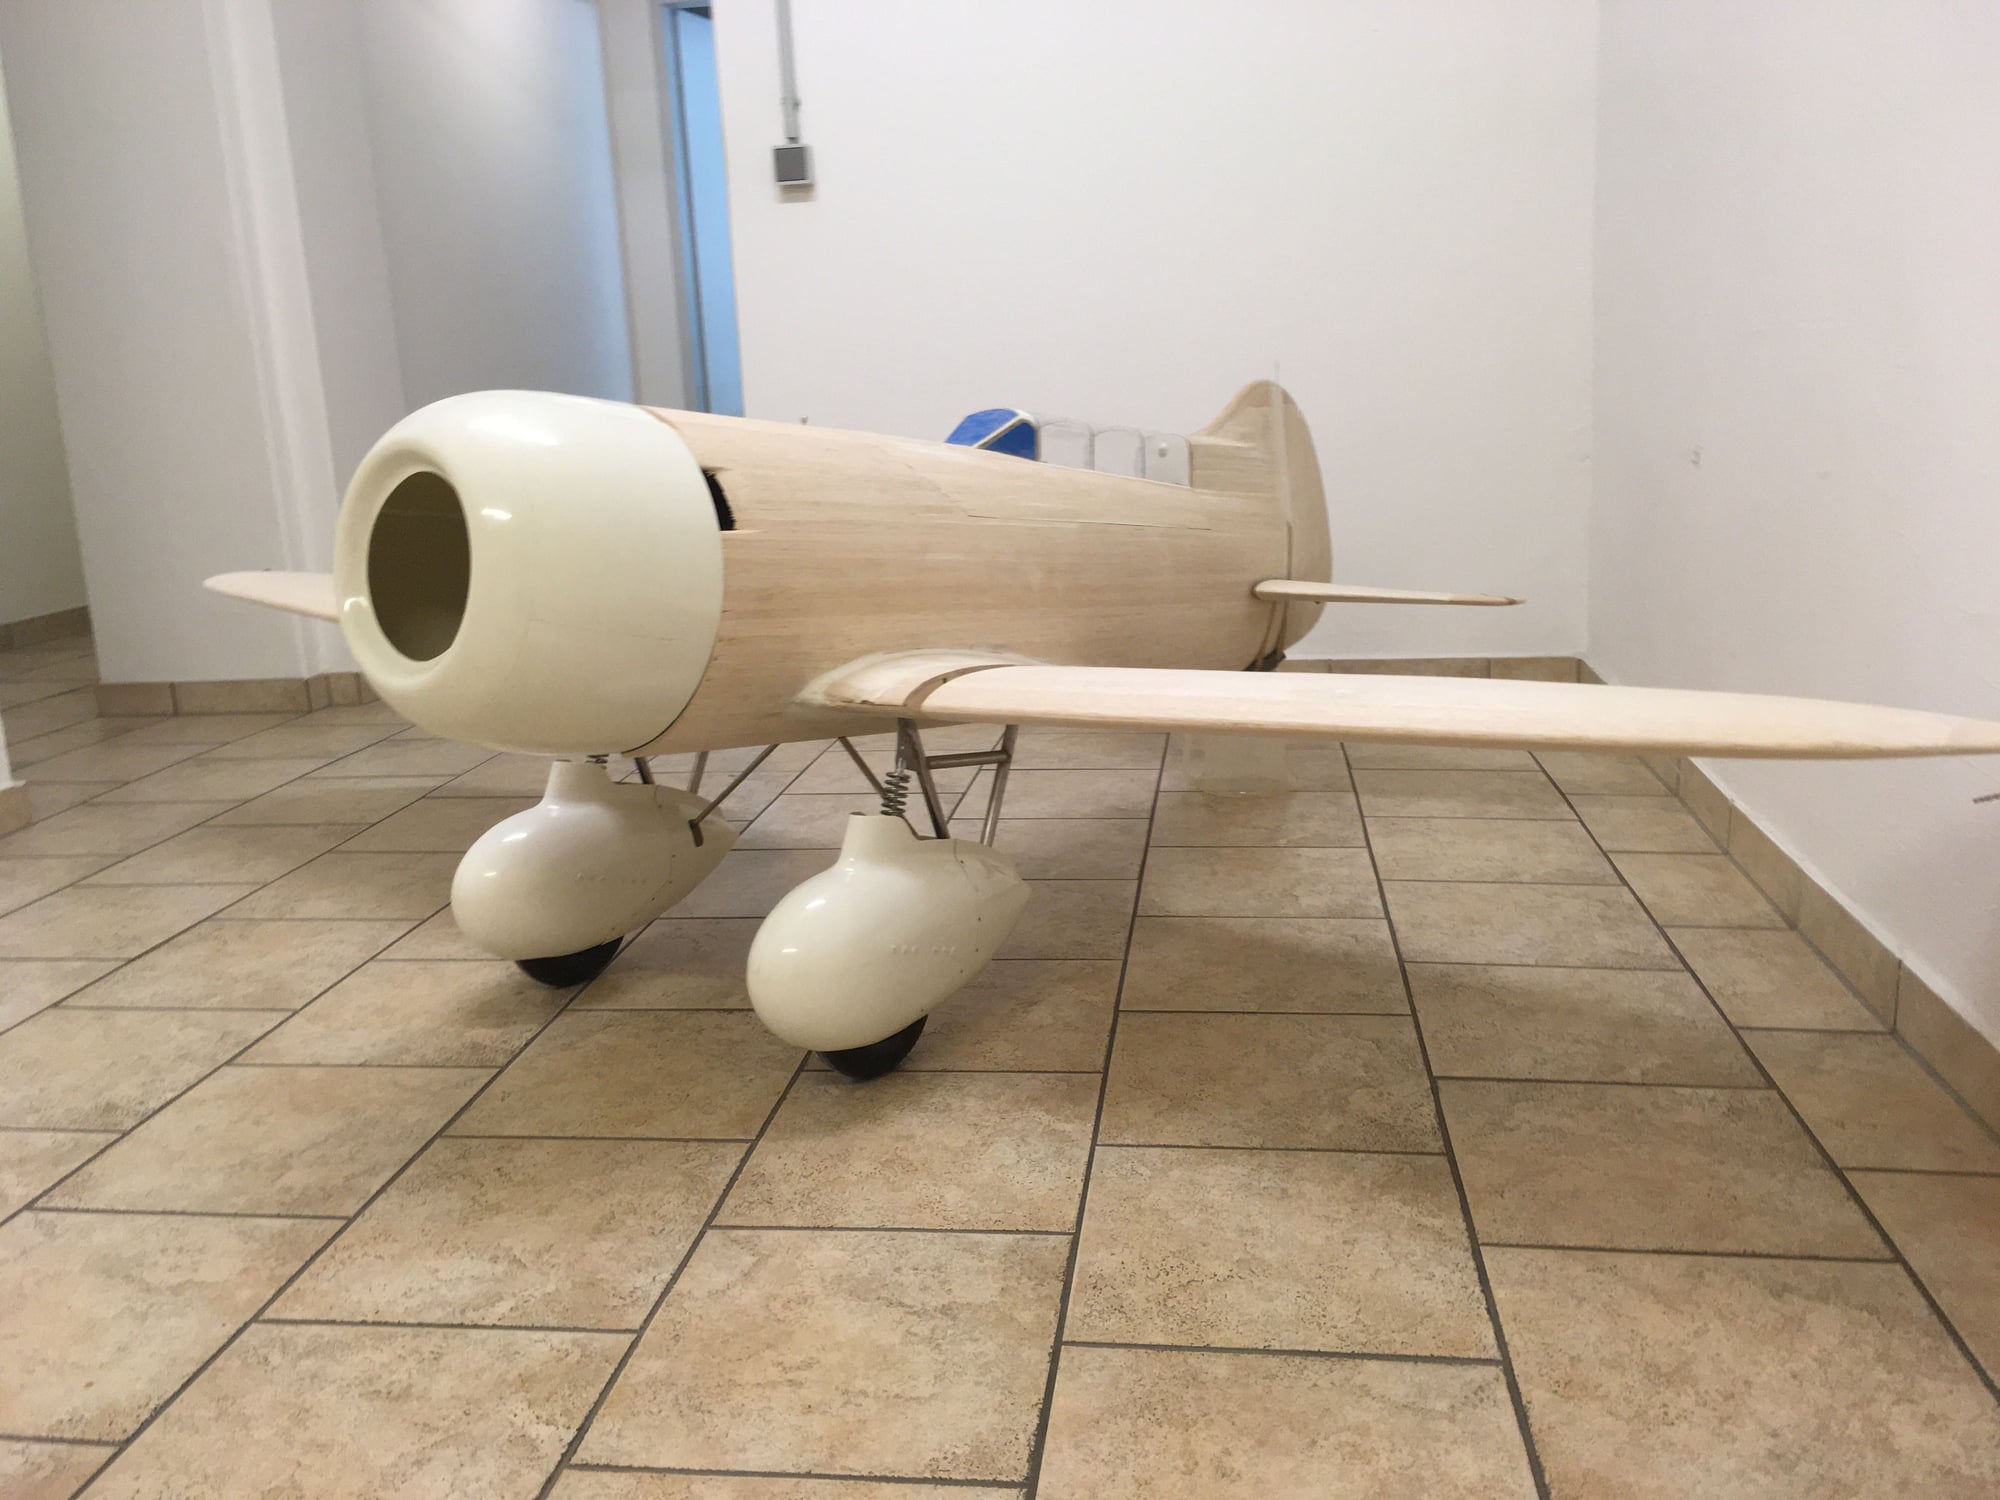
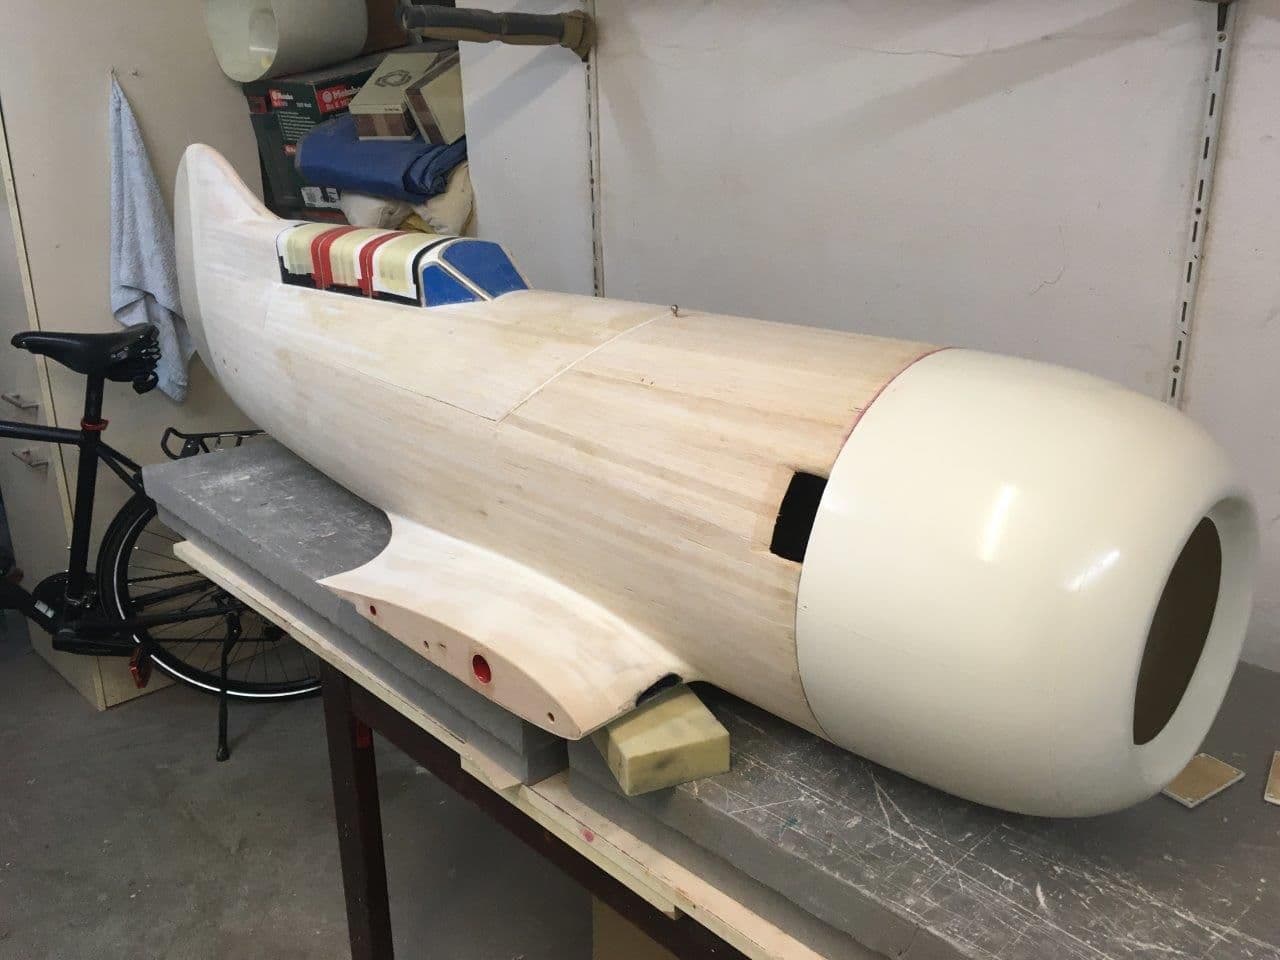
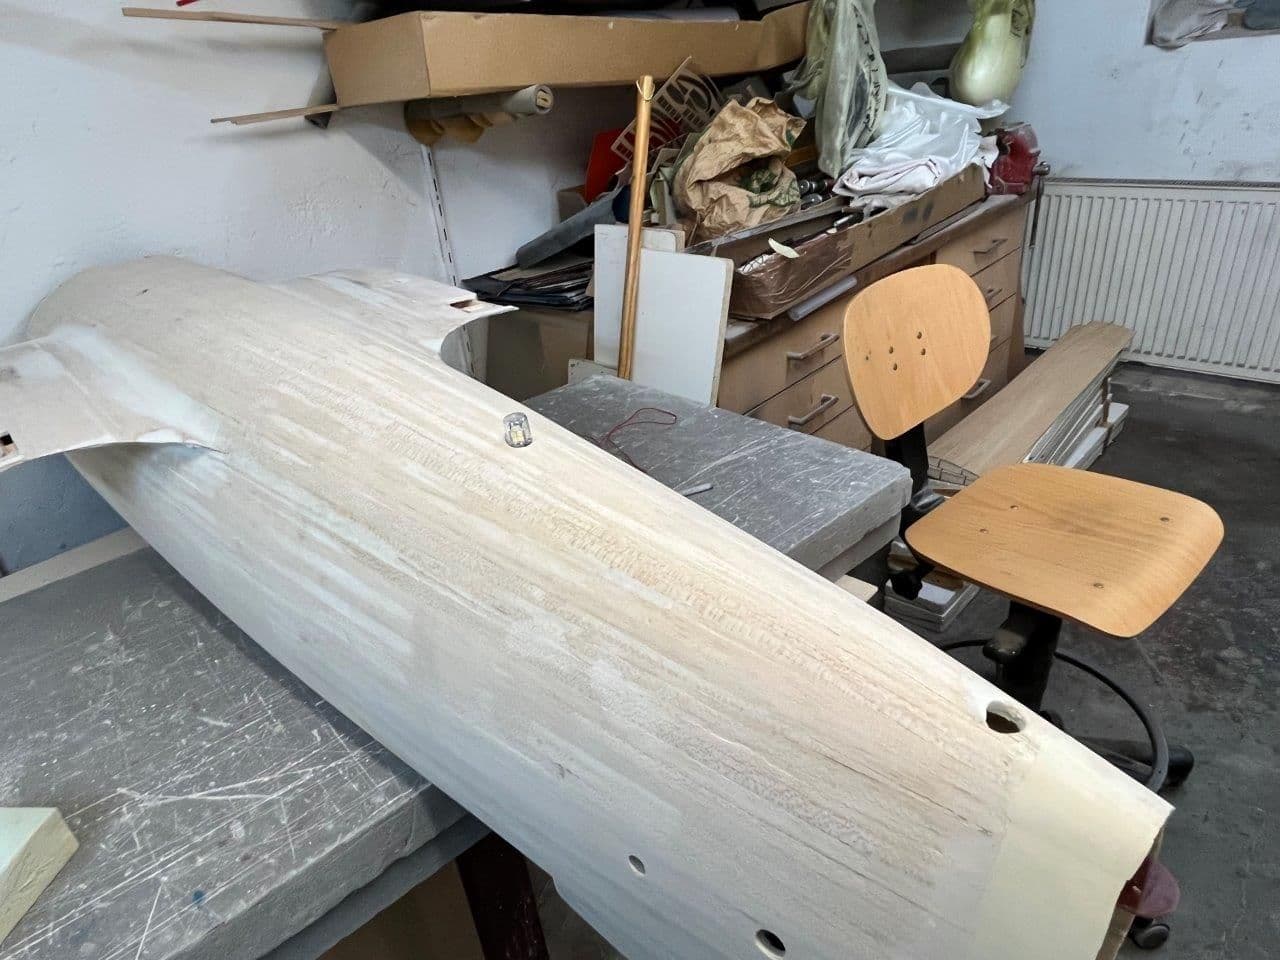
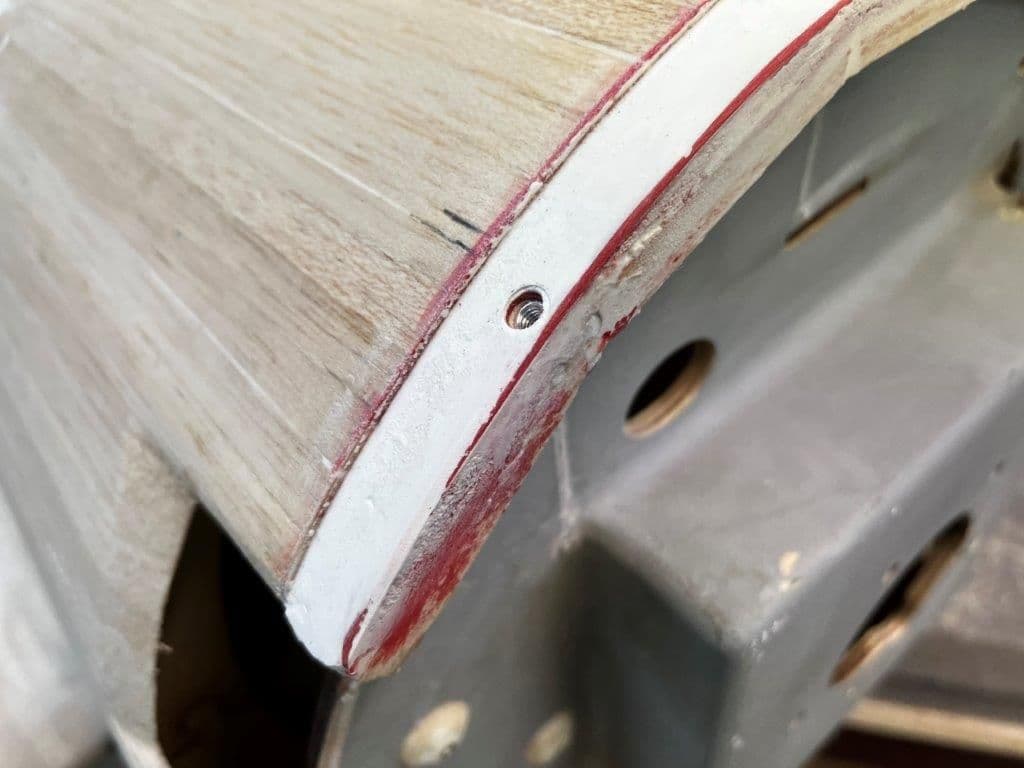
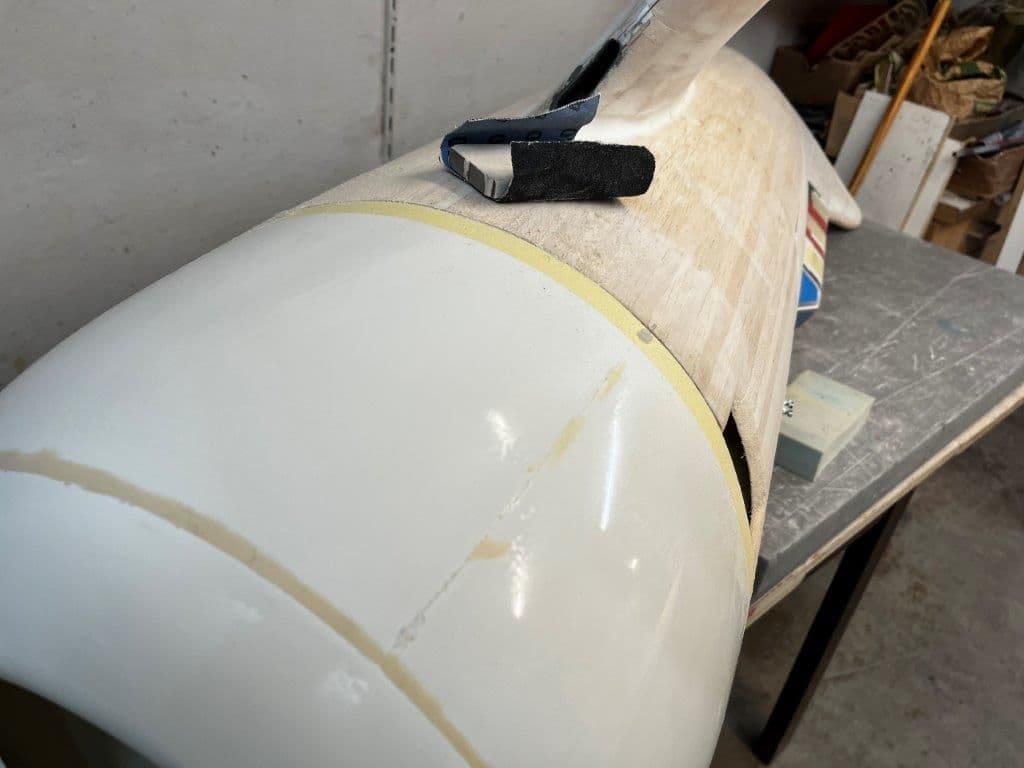
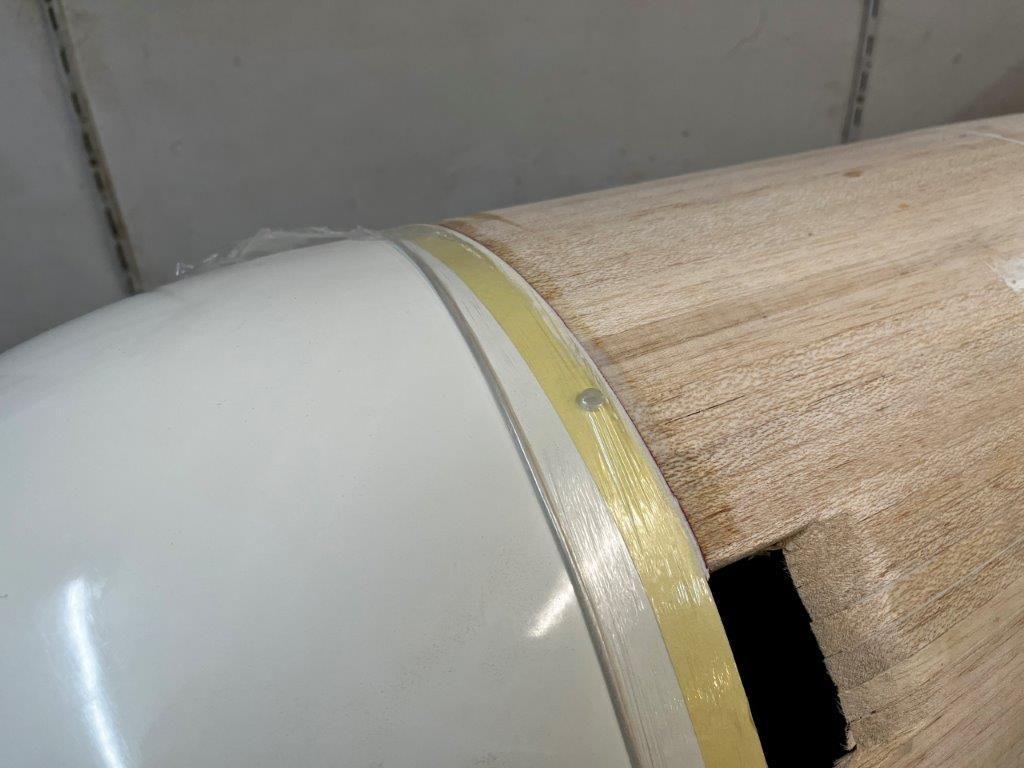
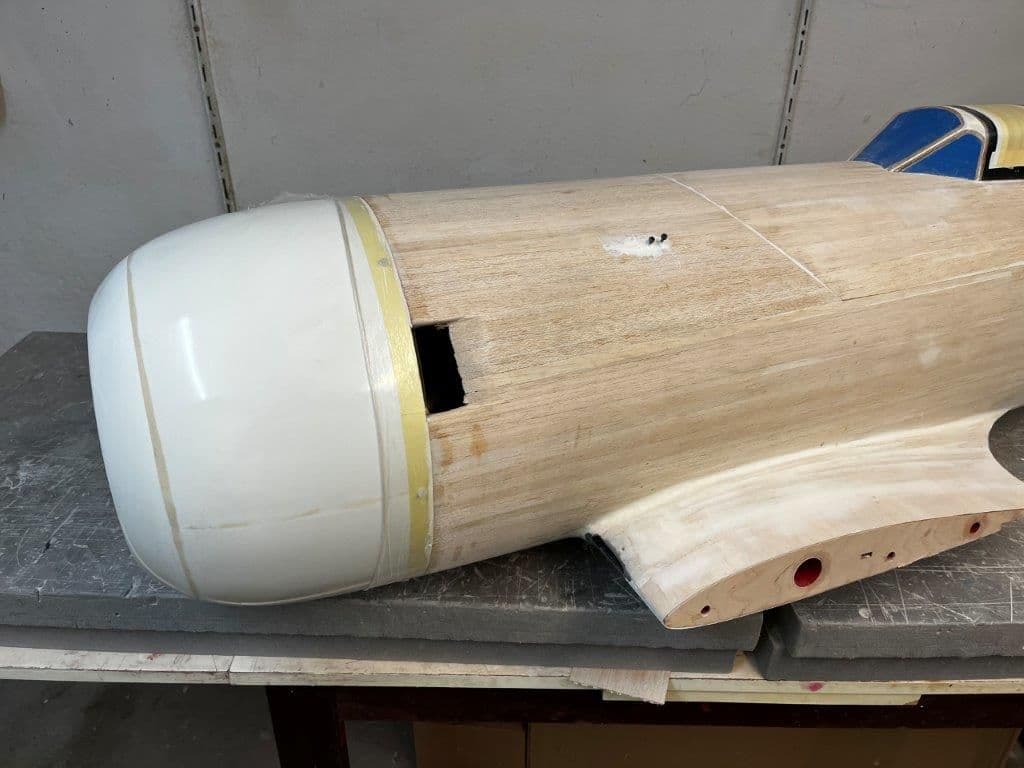
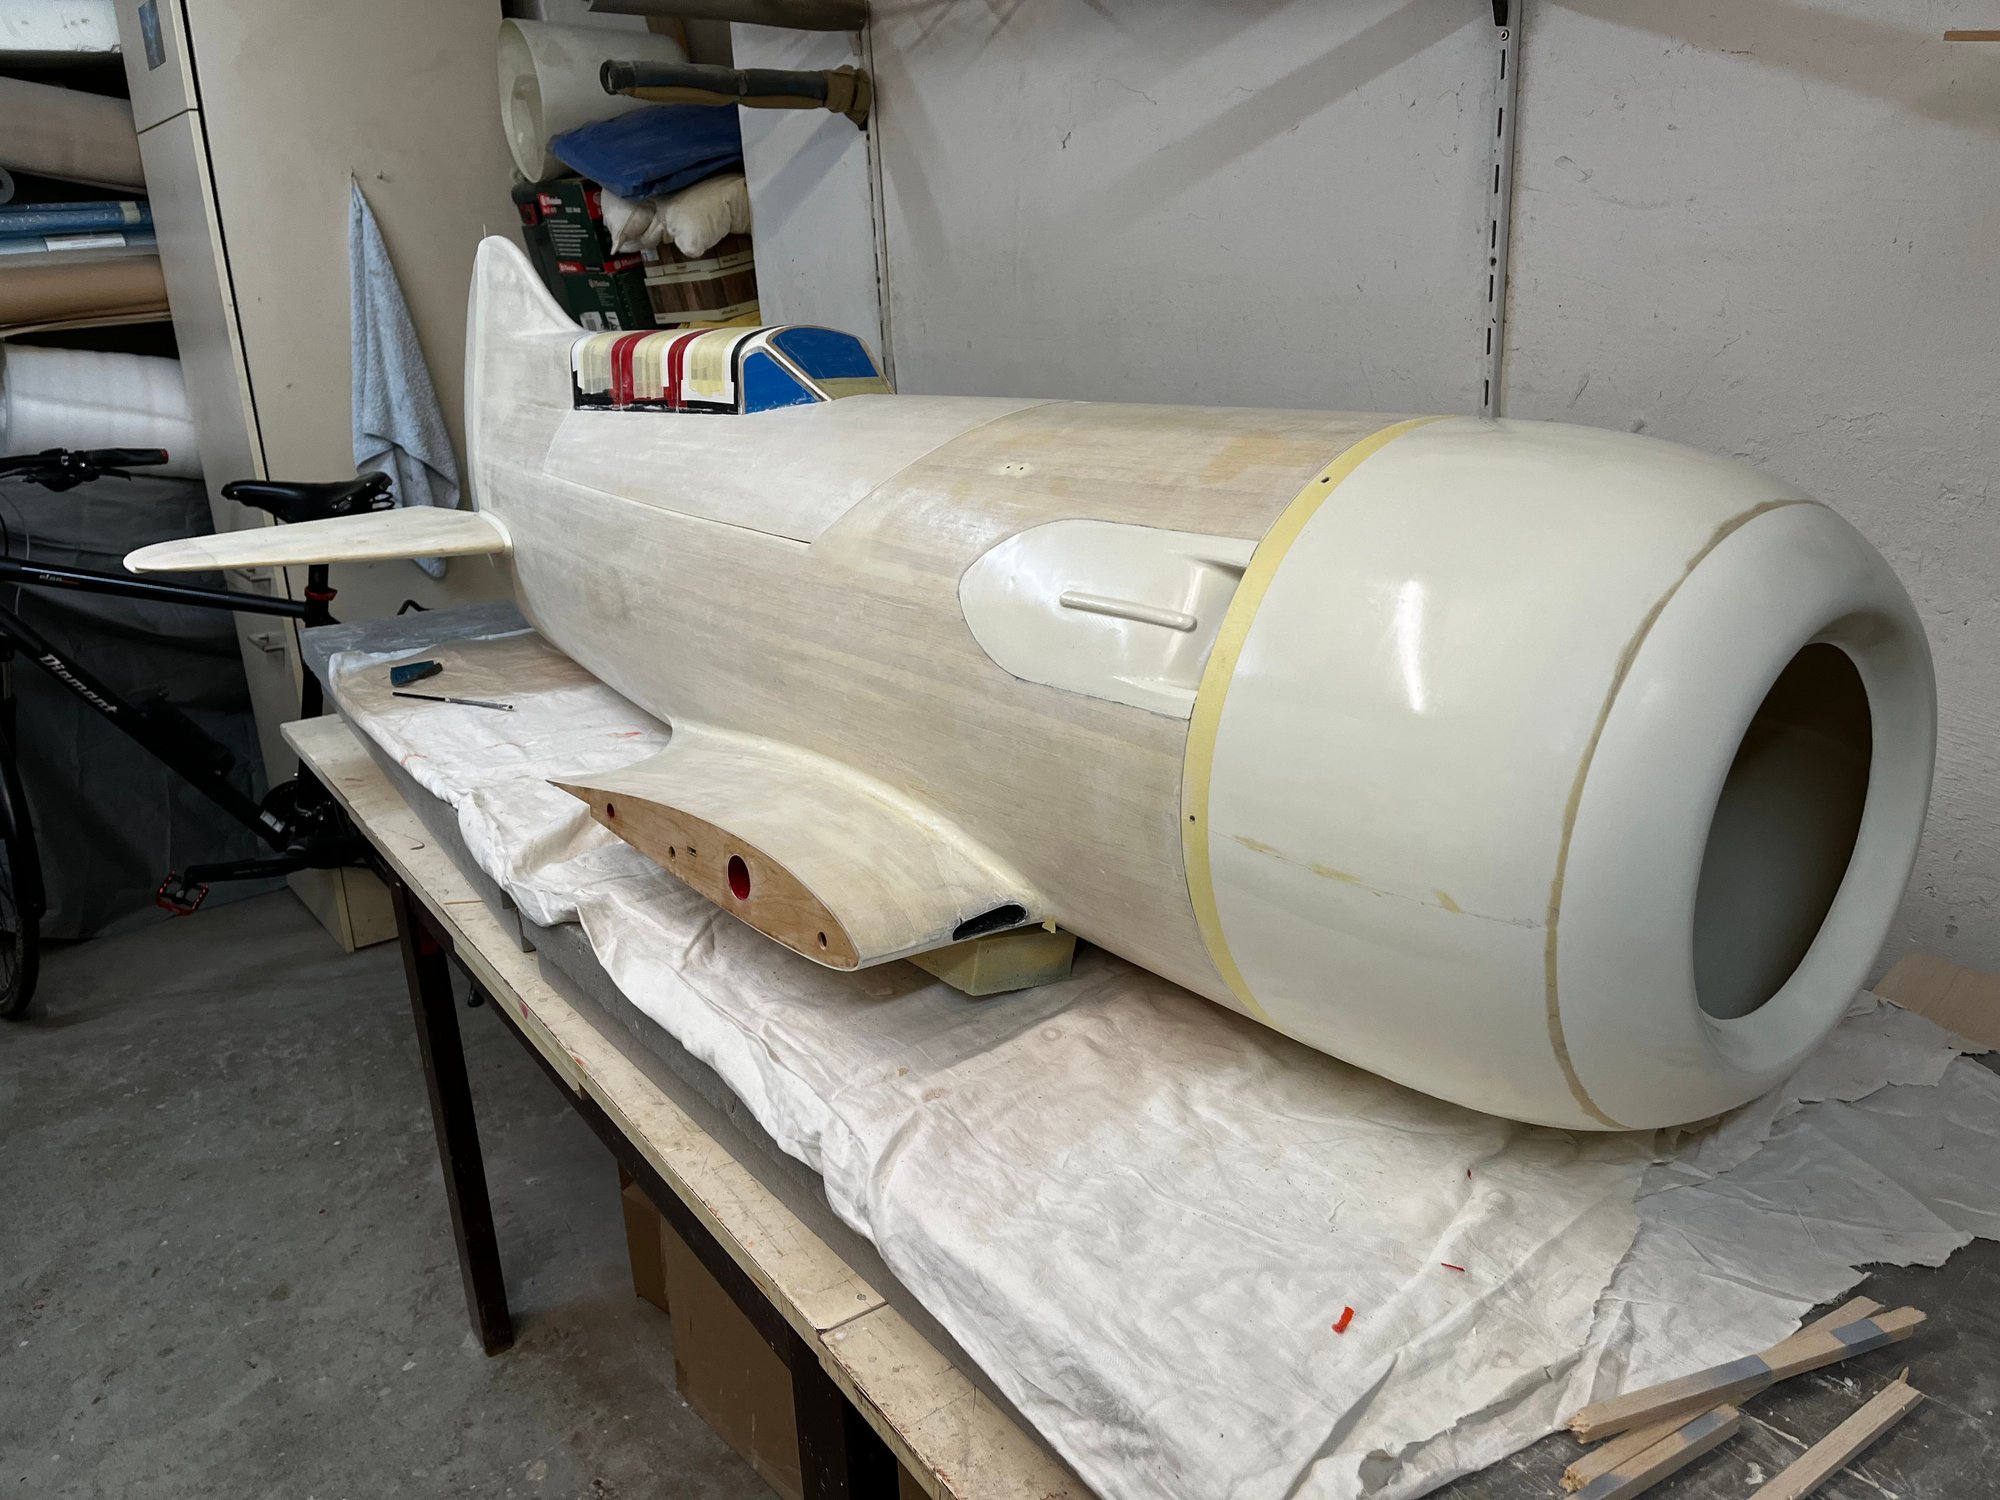
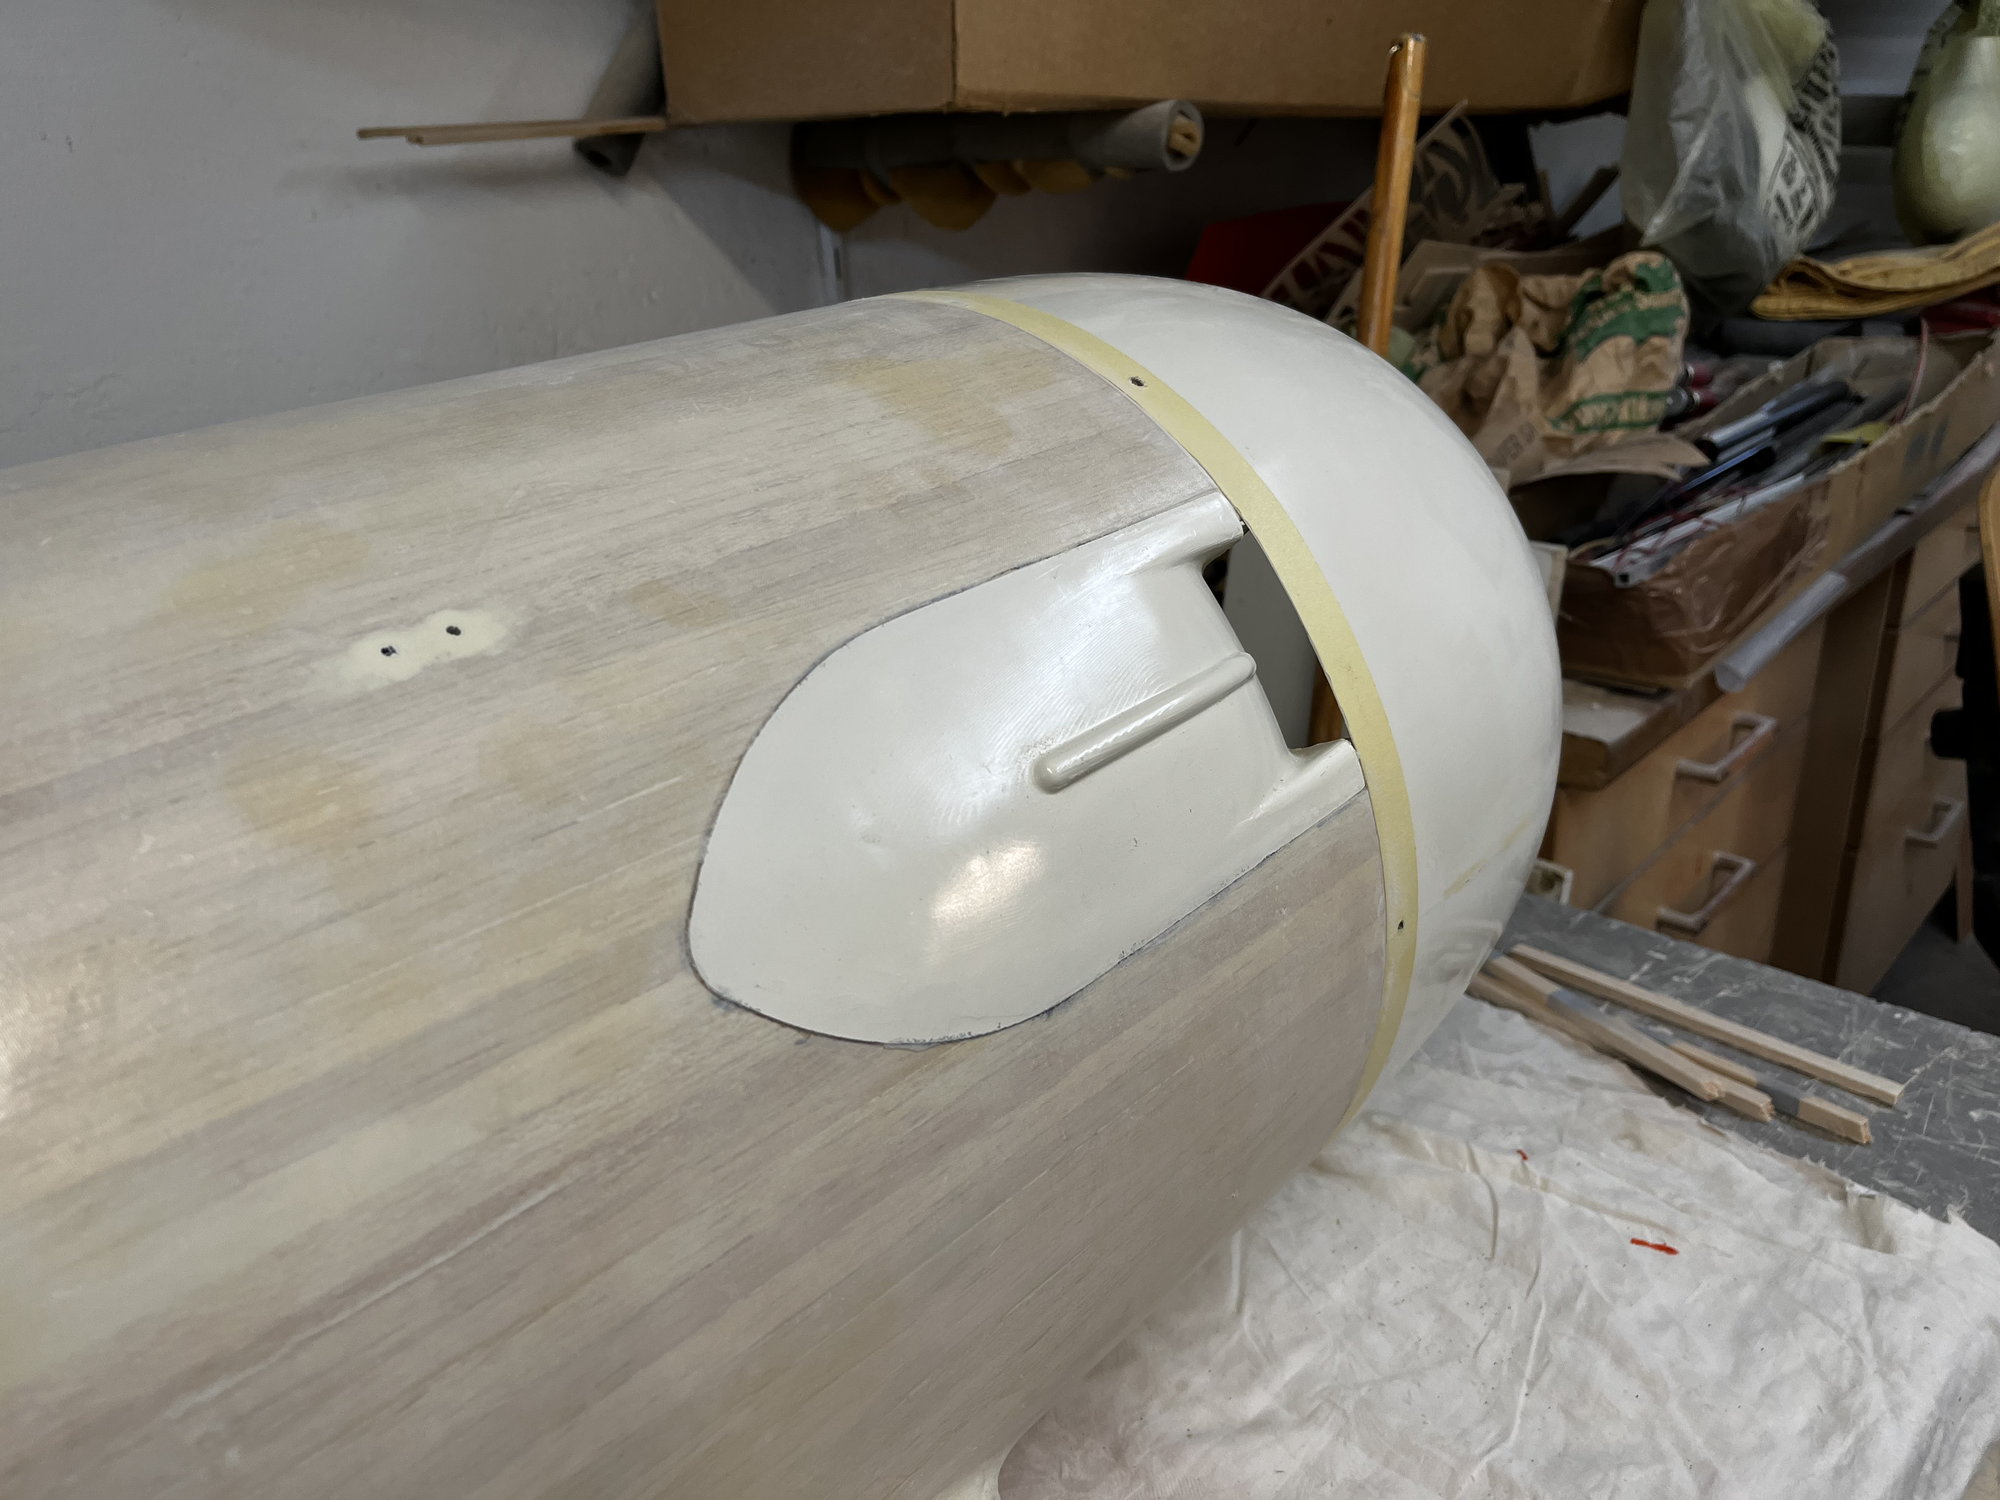
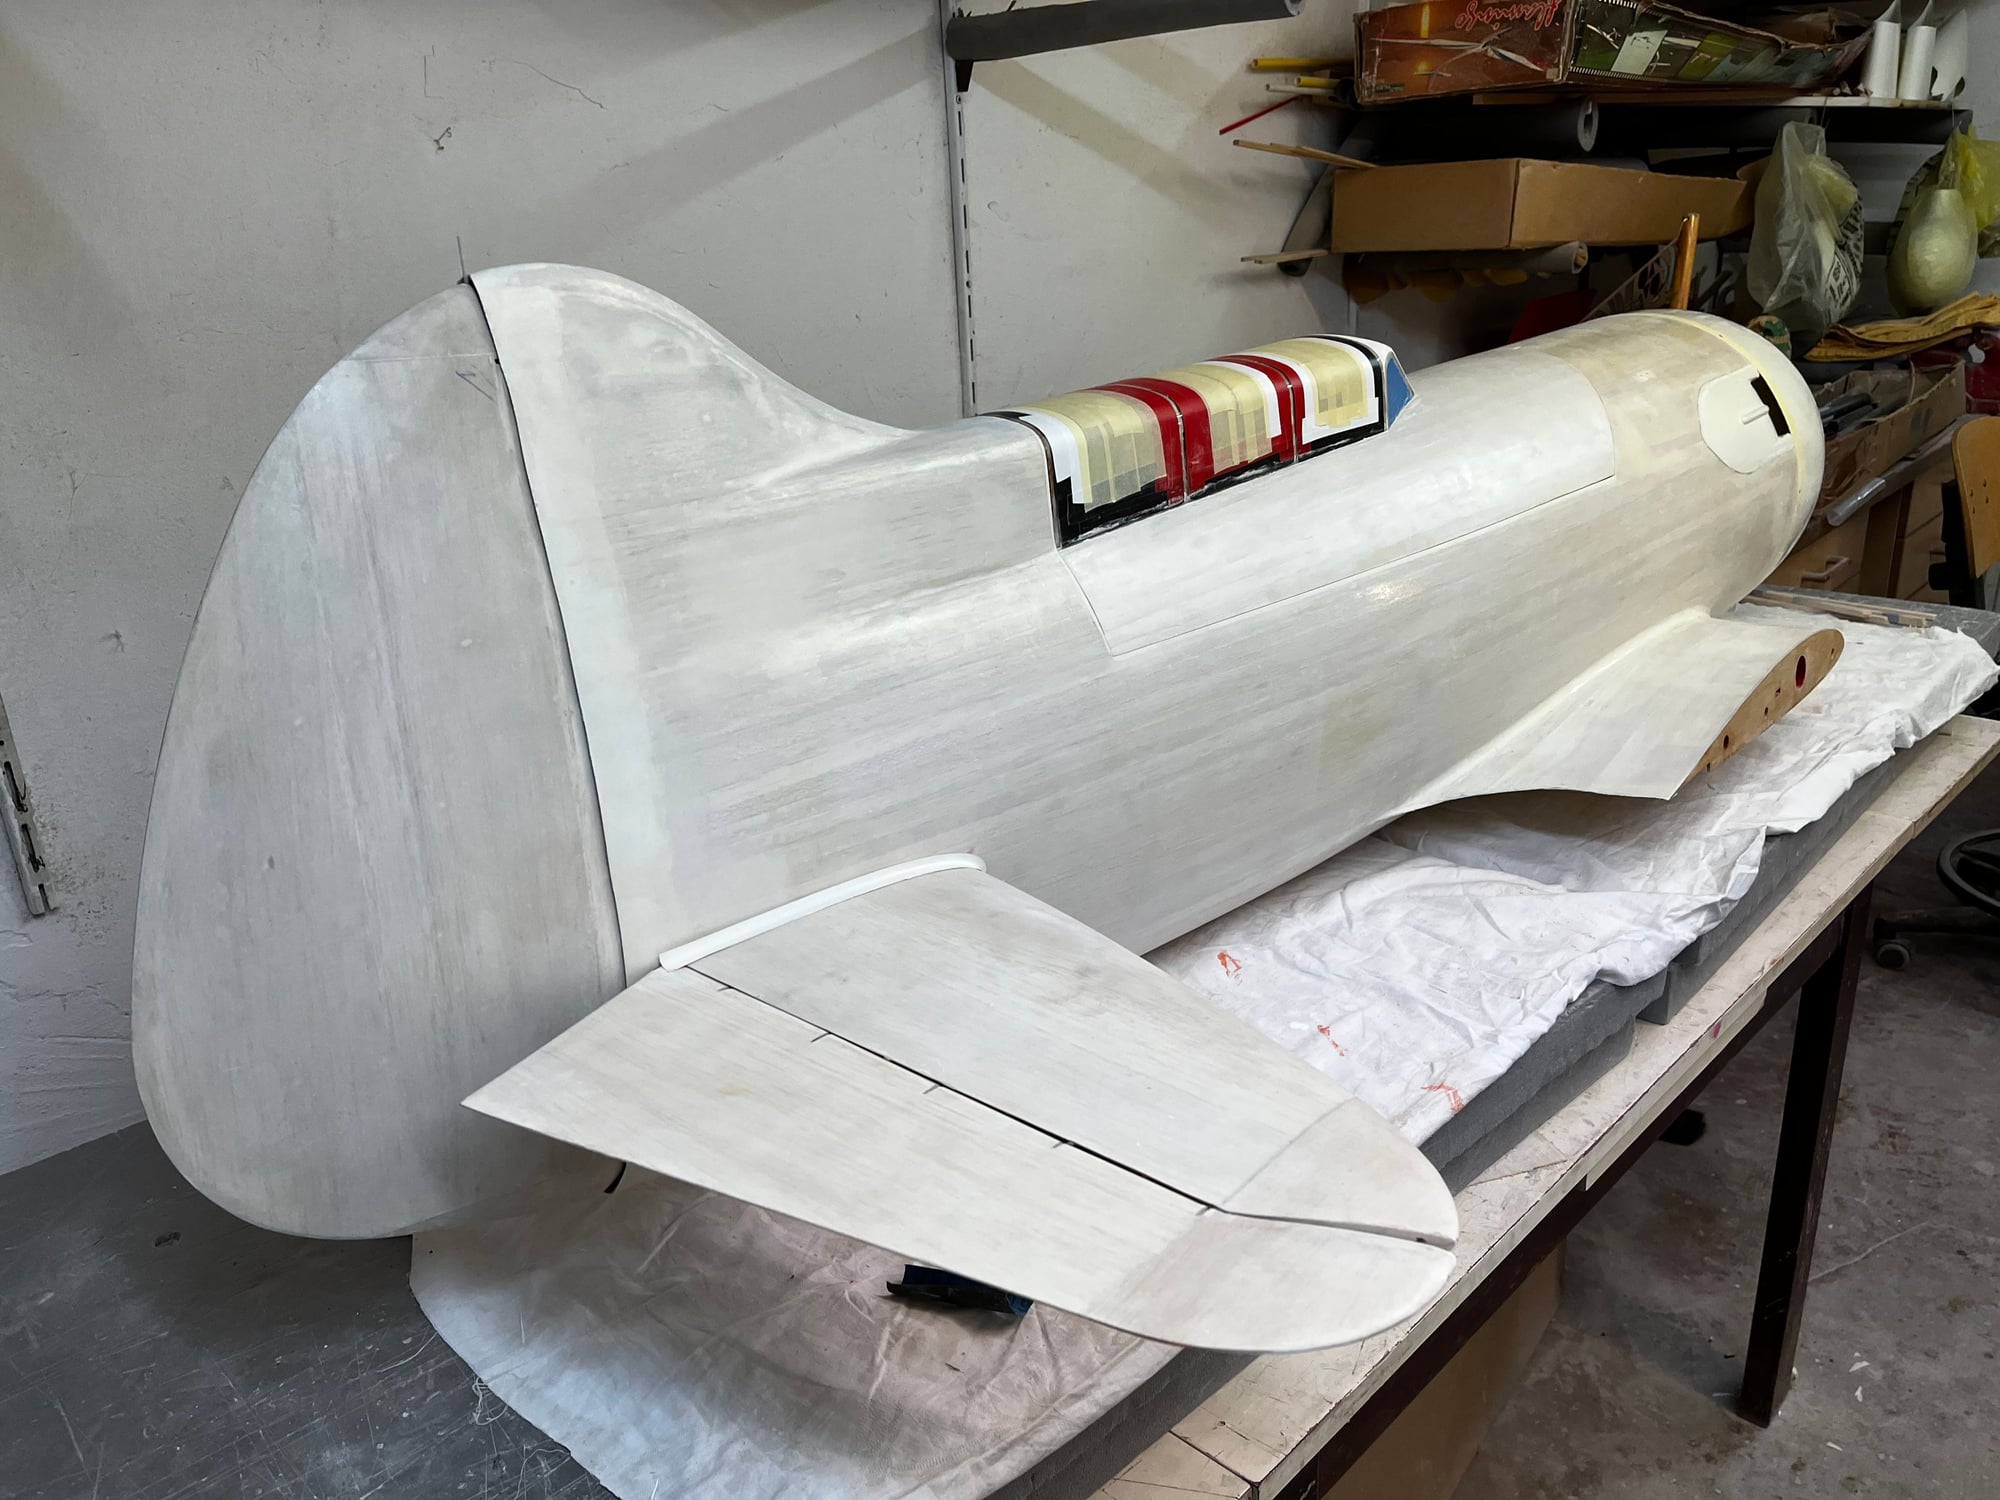
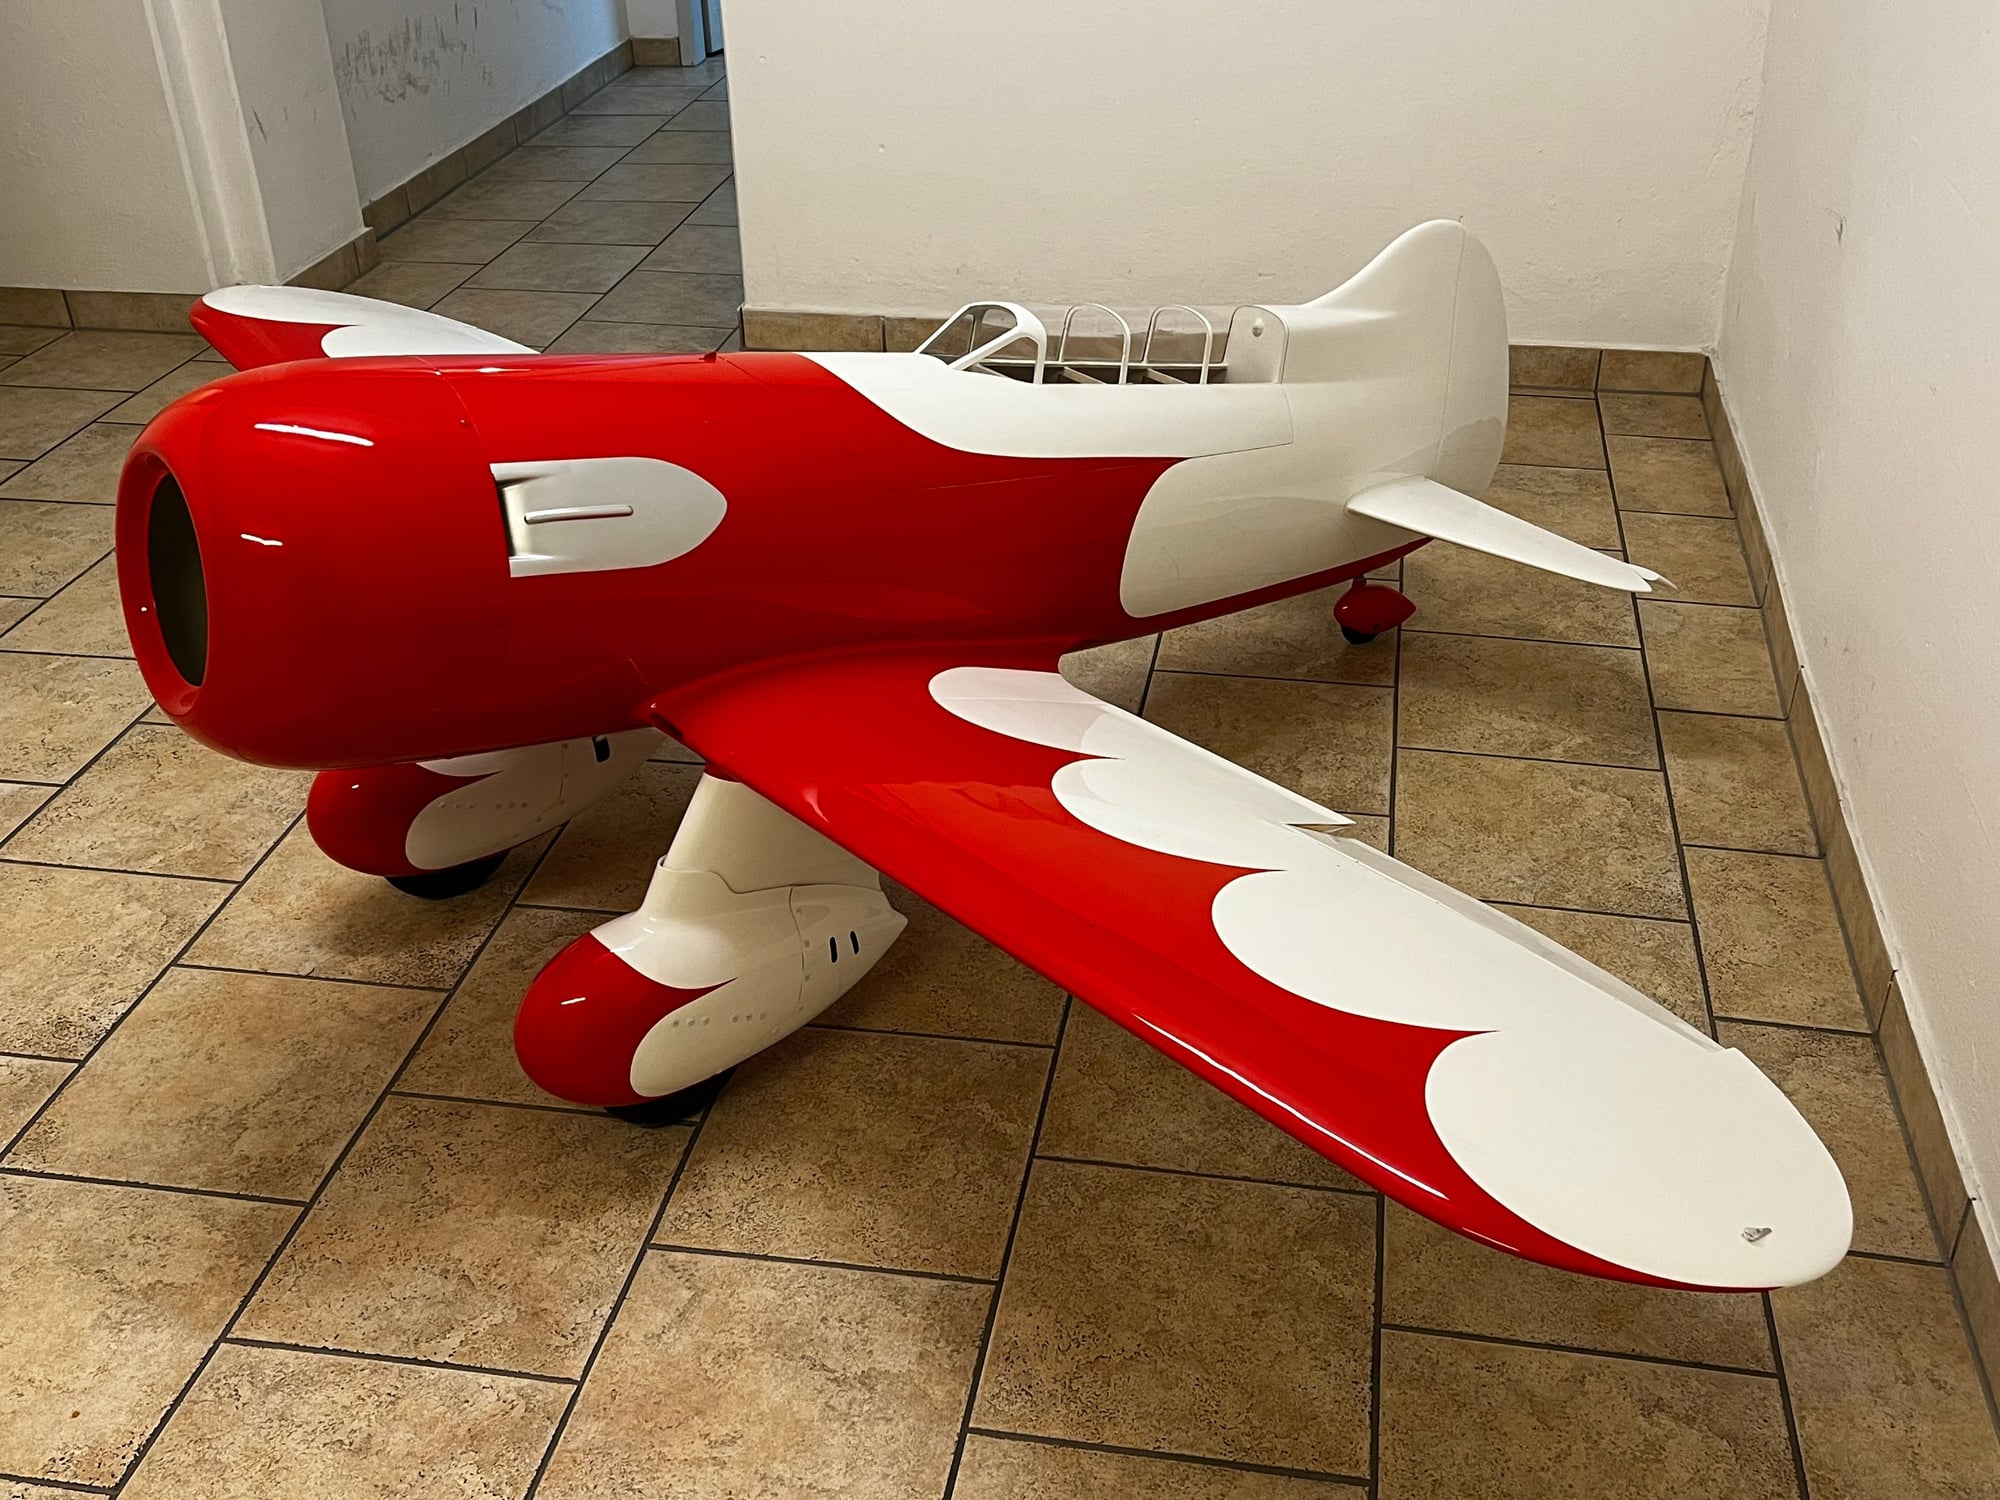
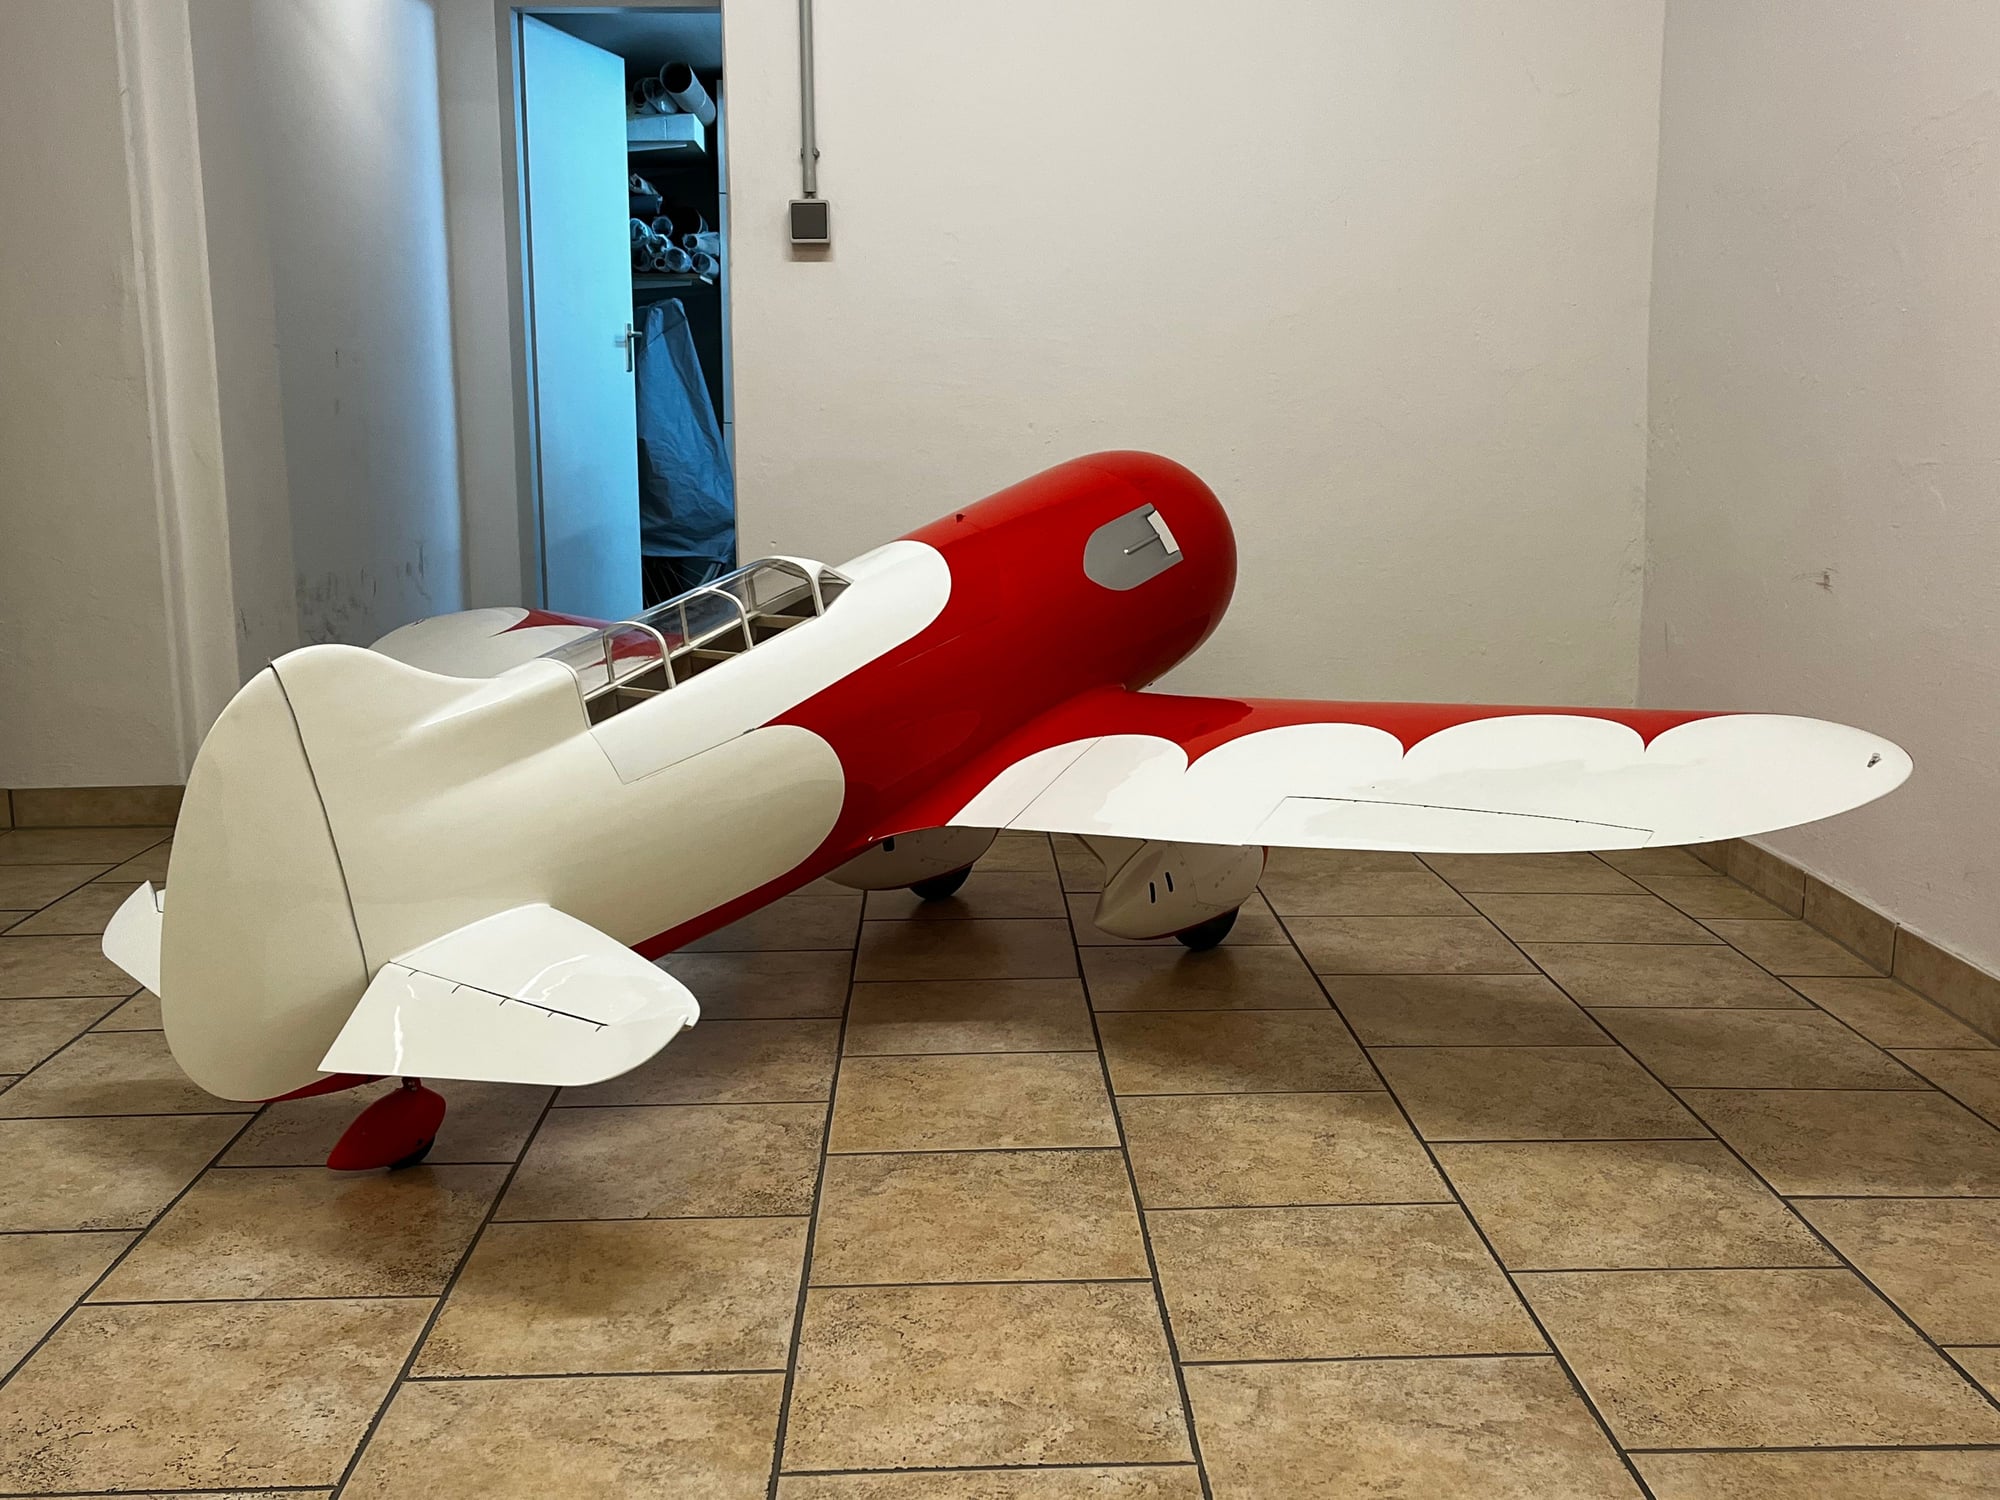
The thing is I fetched the Machine from the first paintshop and chased for a ver good different one with good result. Got the parts back and sanded up to 1000 wet, soon the parts are finished an ca get their final white color. Short before leaving to the paintshop again a final trial assy to see how everything comes together, I'm a bit stunned by thee final size and impression, here some pictures, cheers Matze
 01-27-2023, 12:50 PM
#142
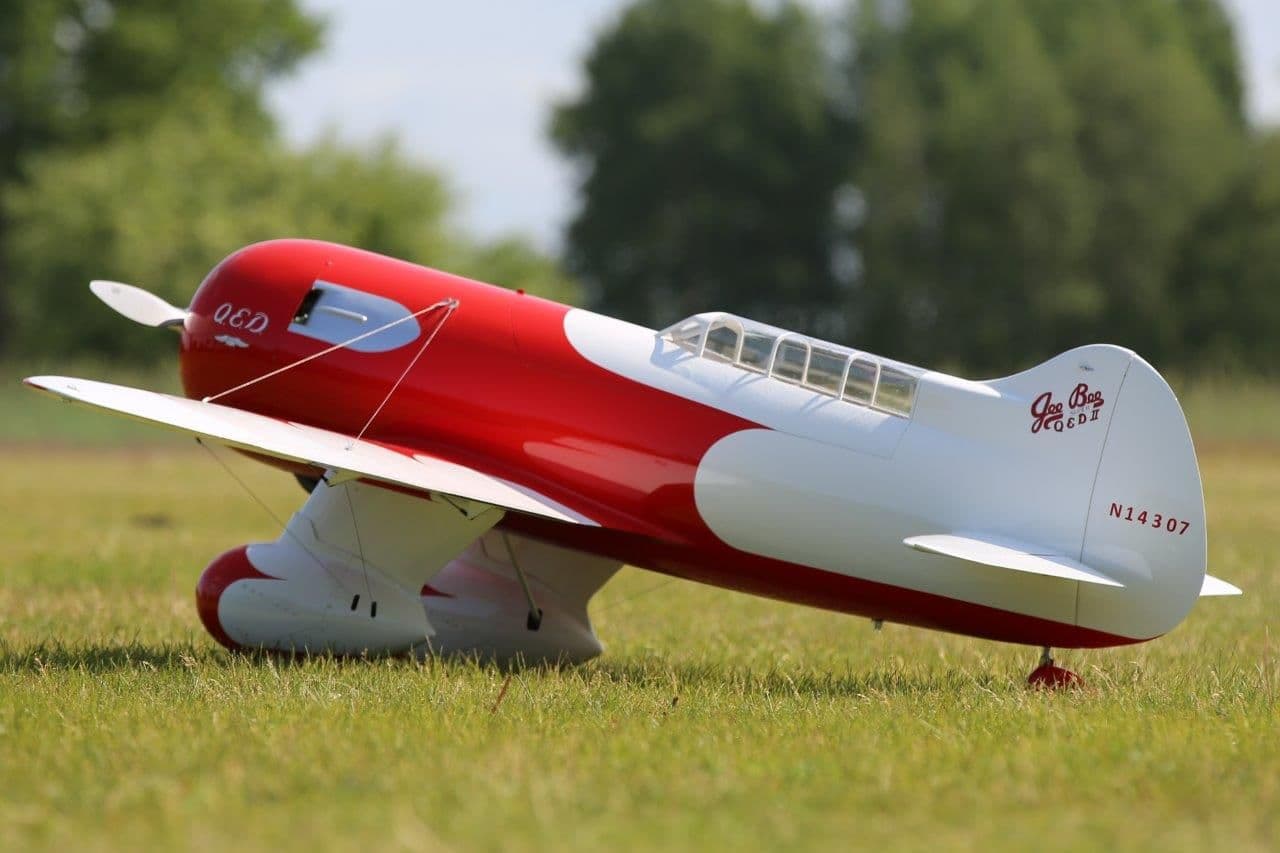
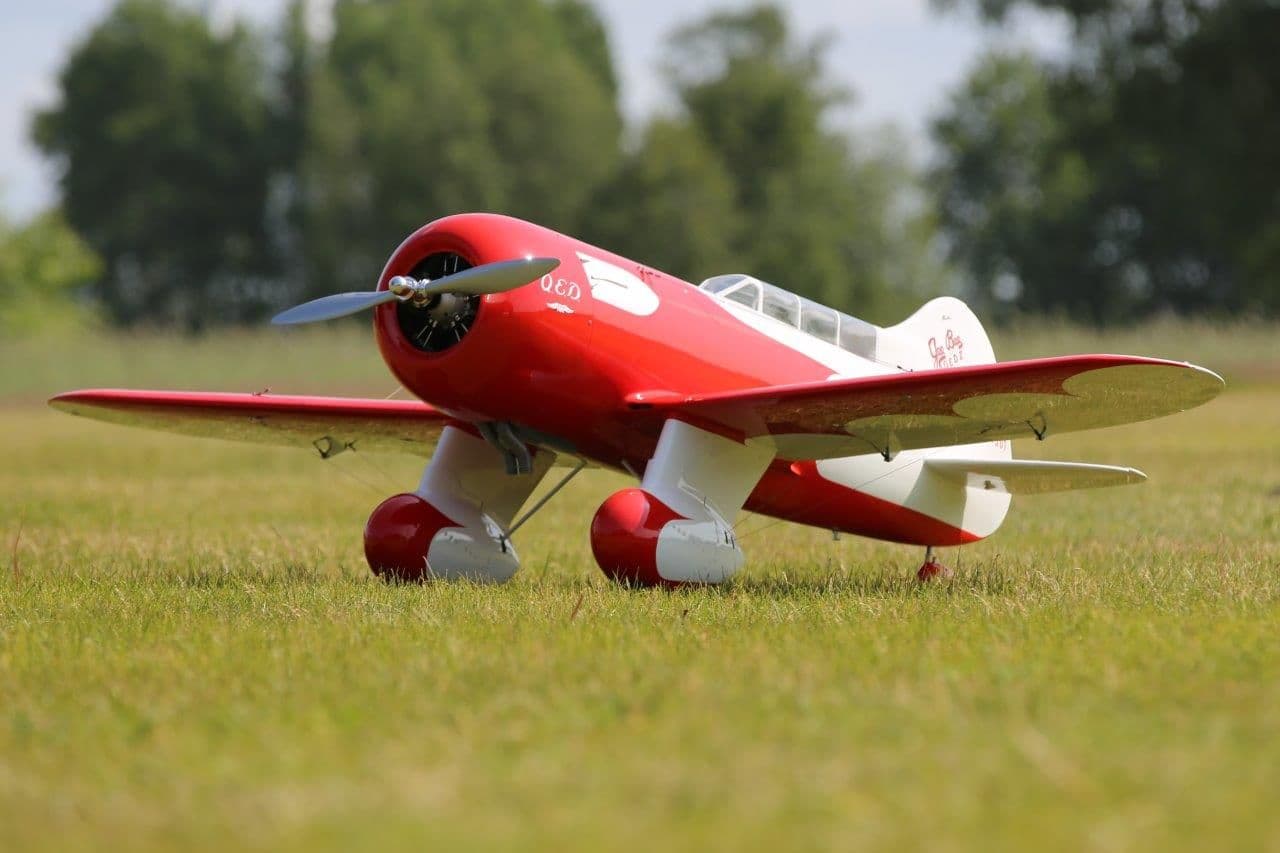
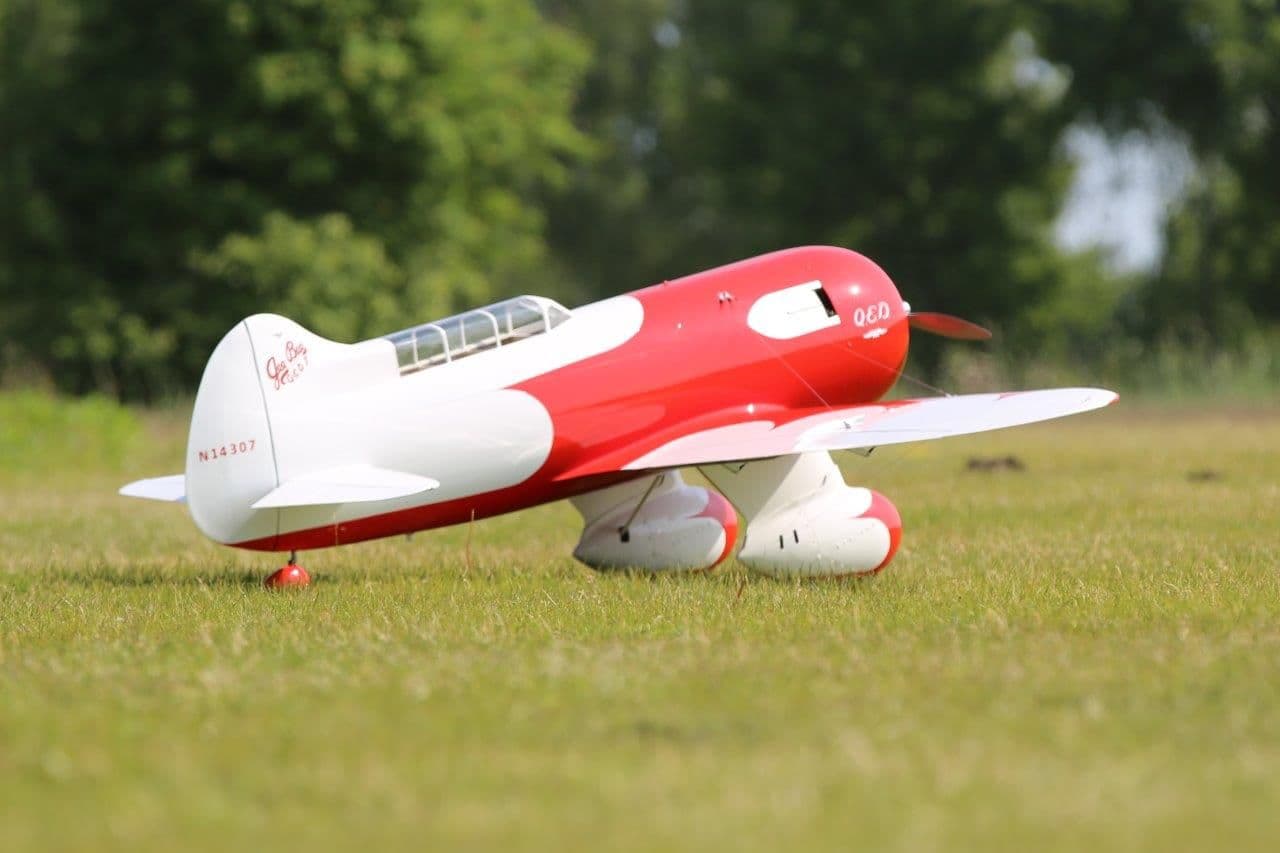
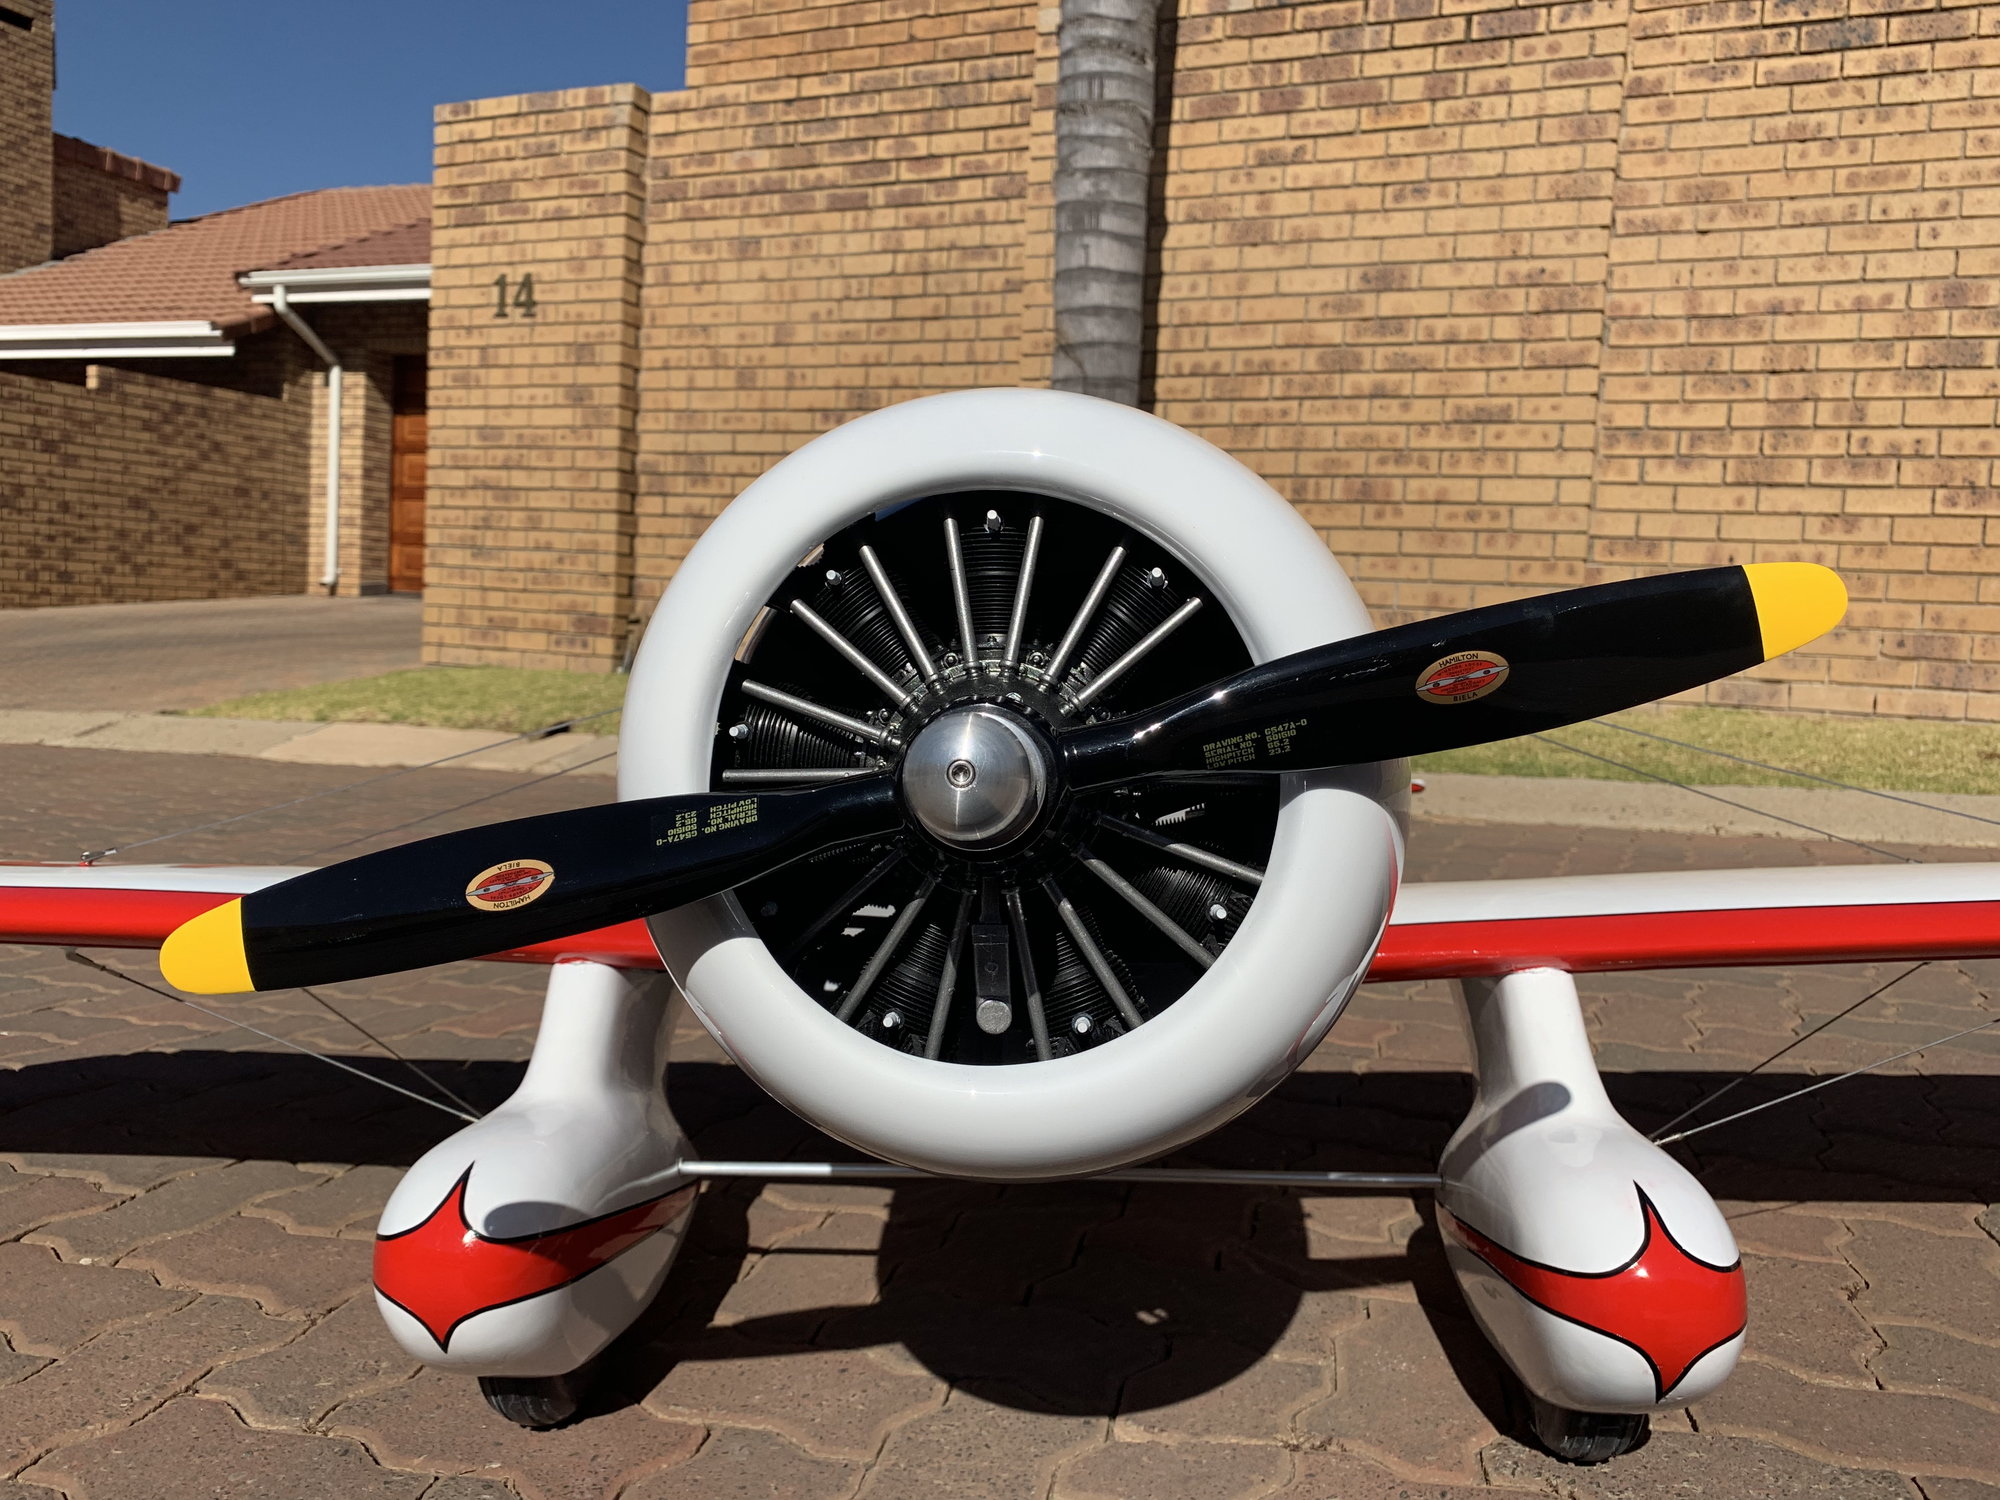
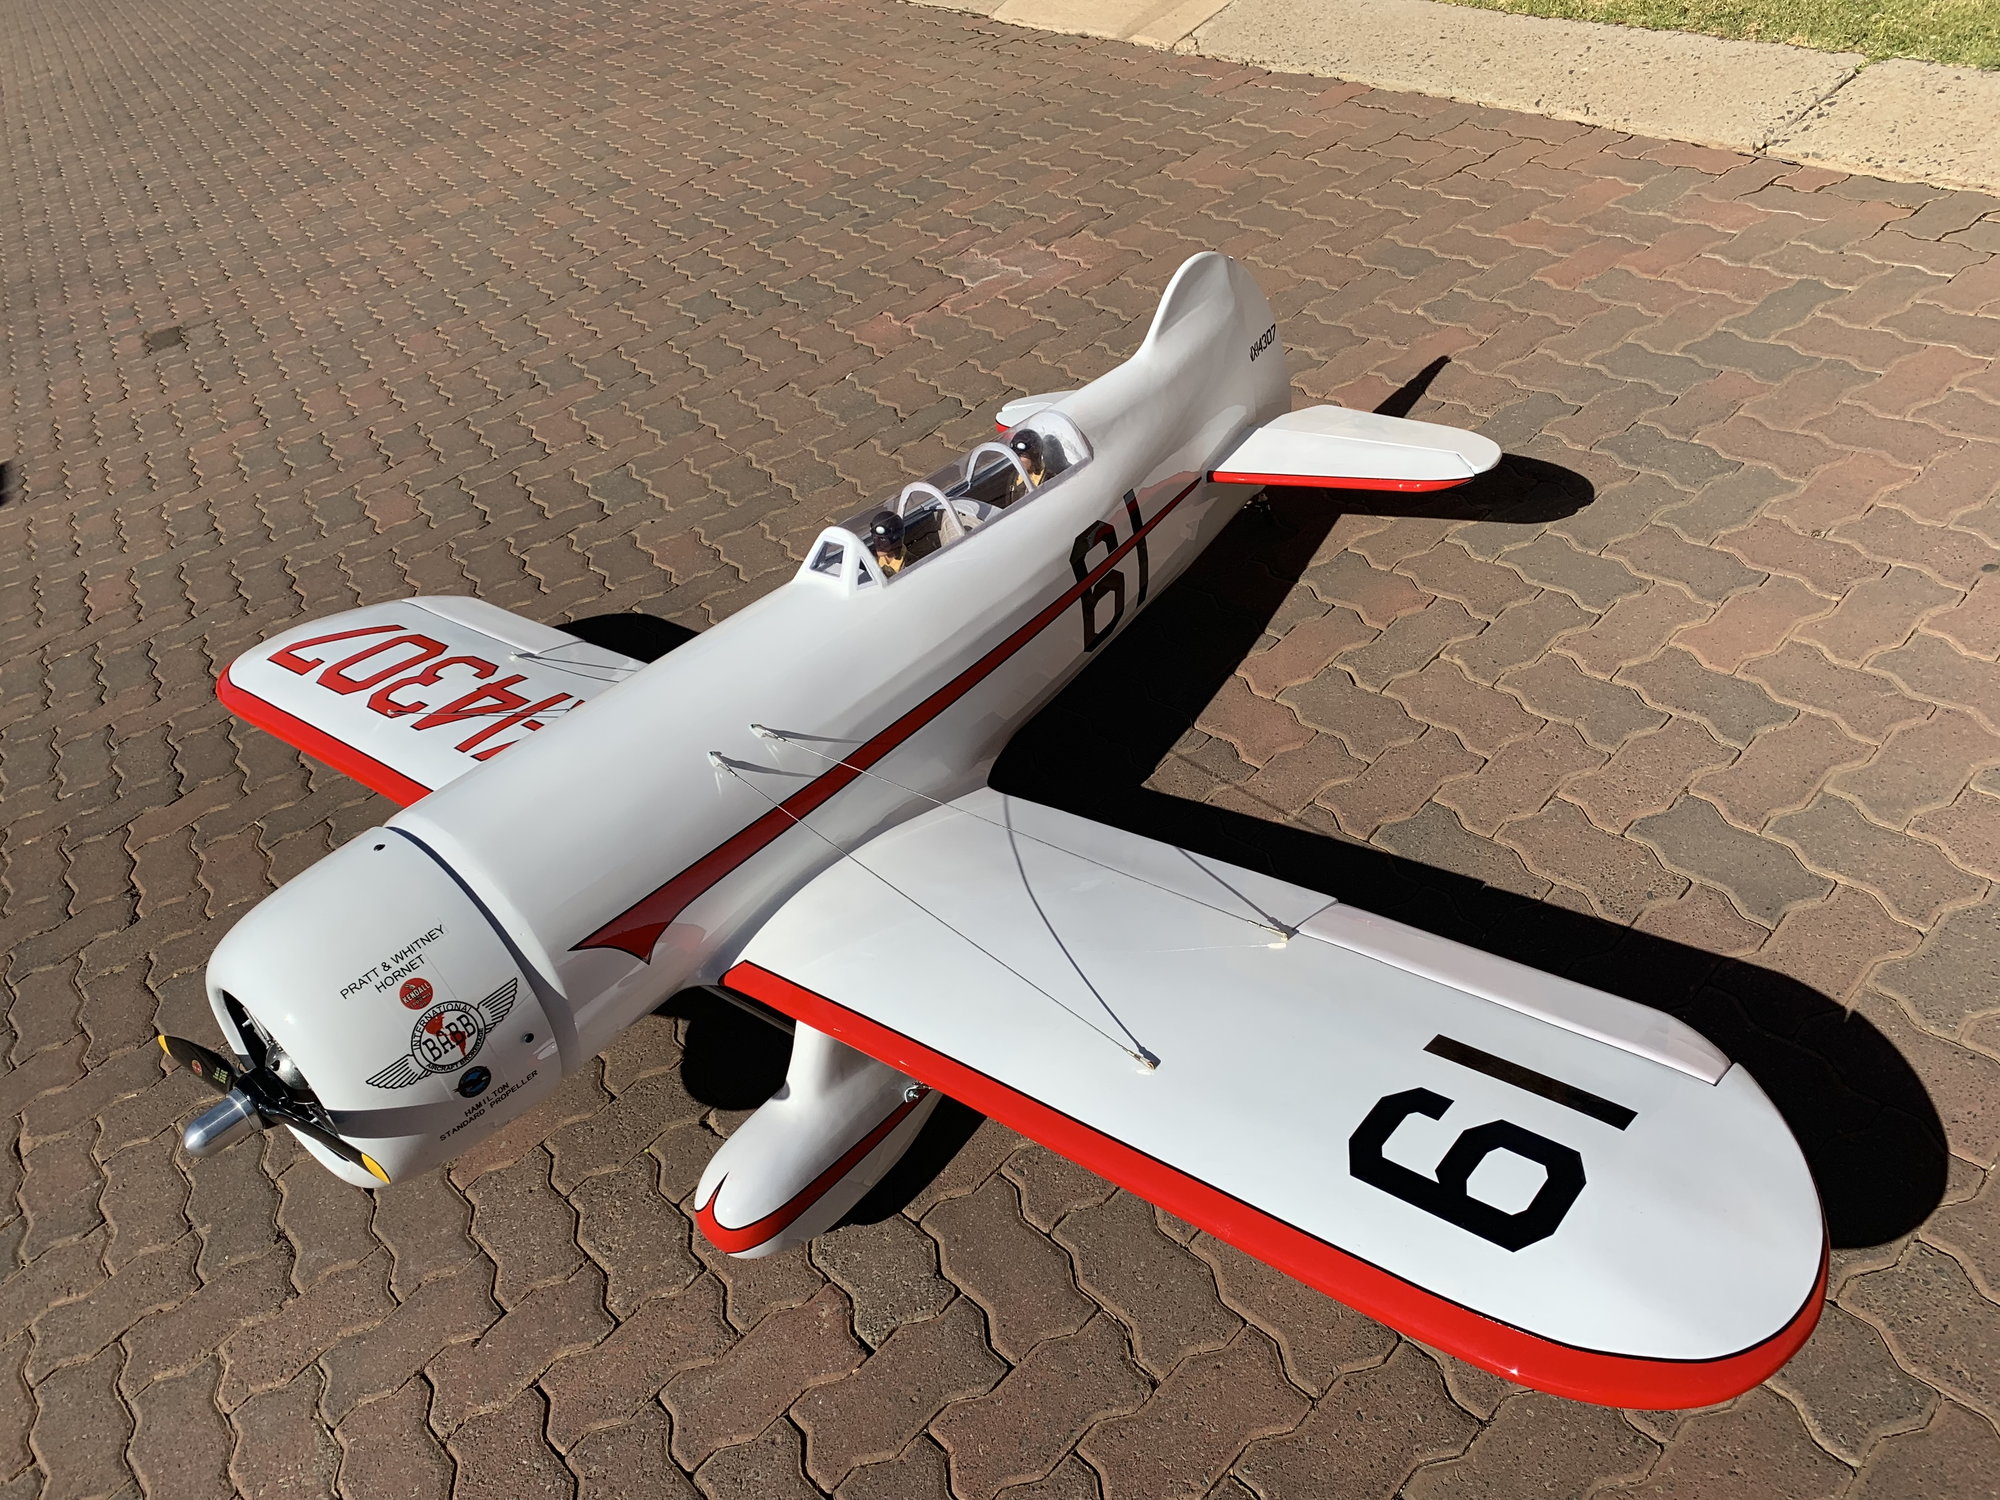
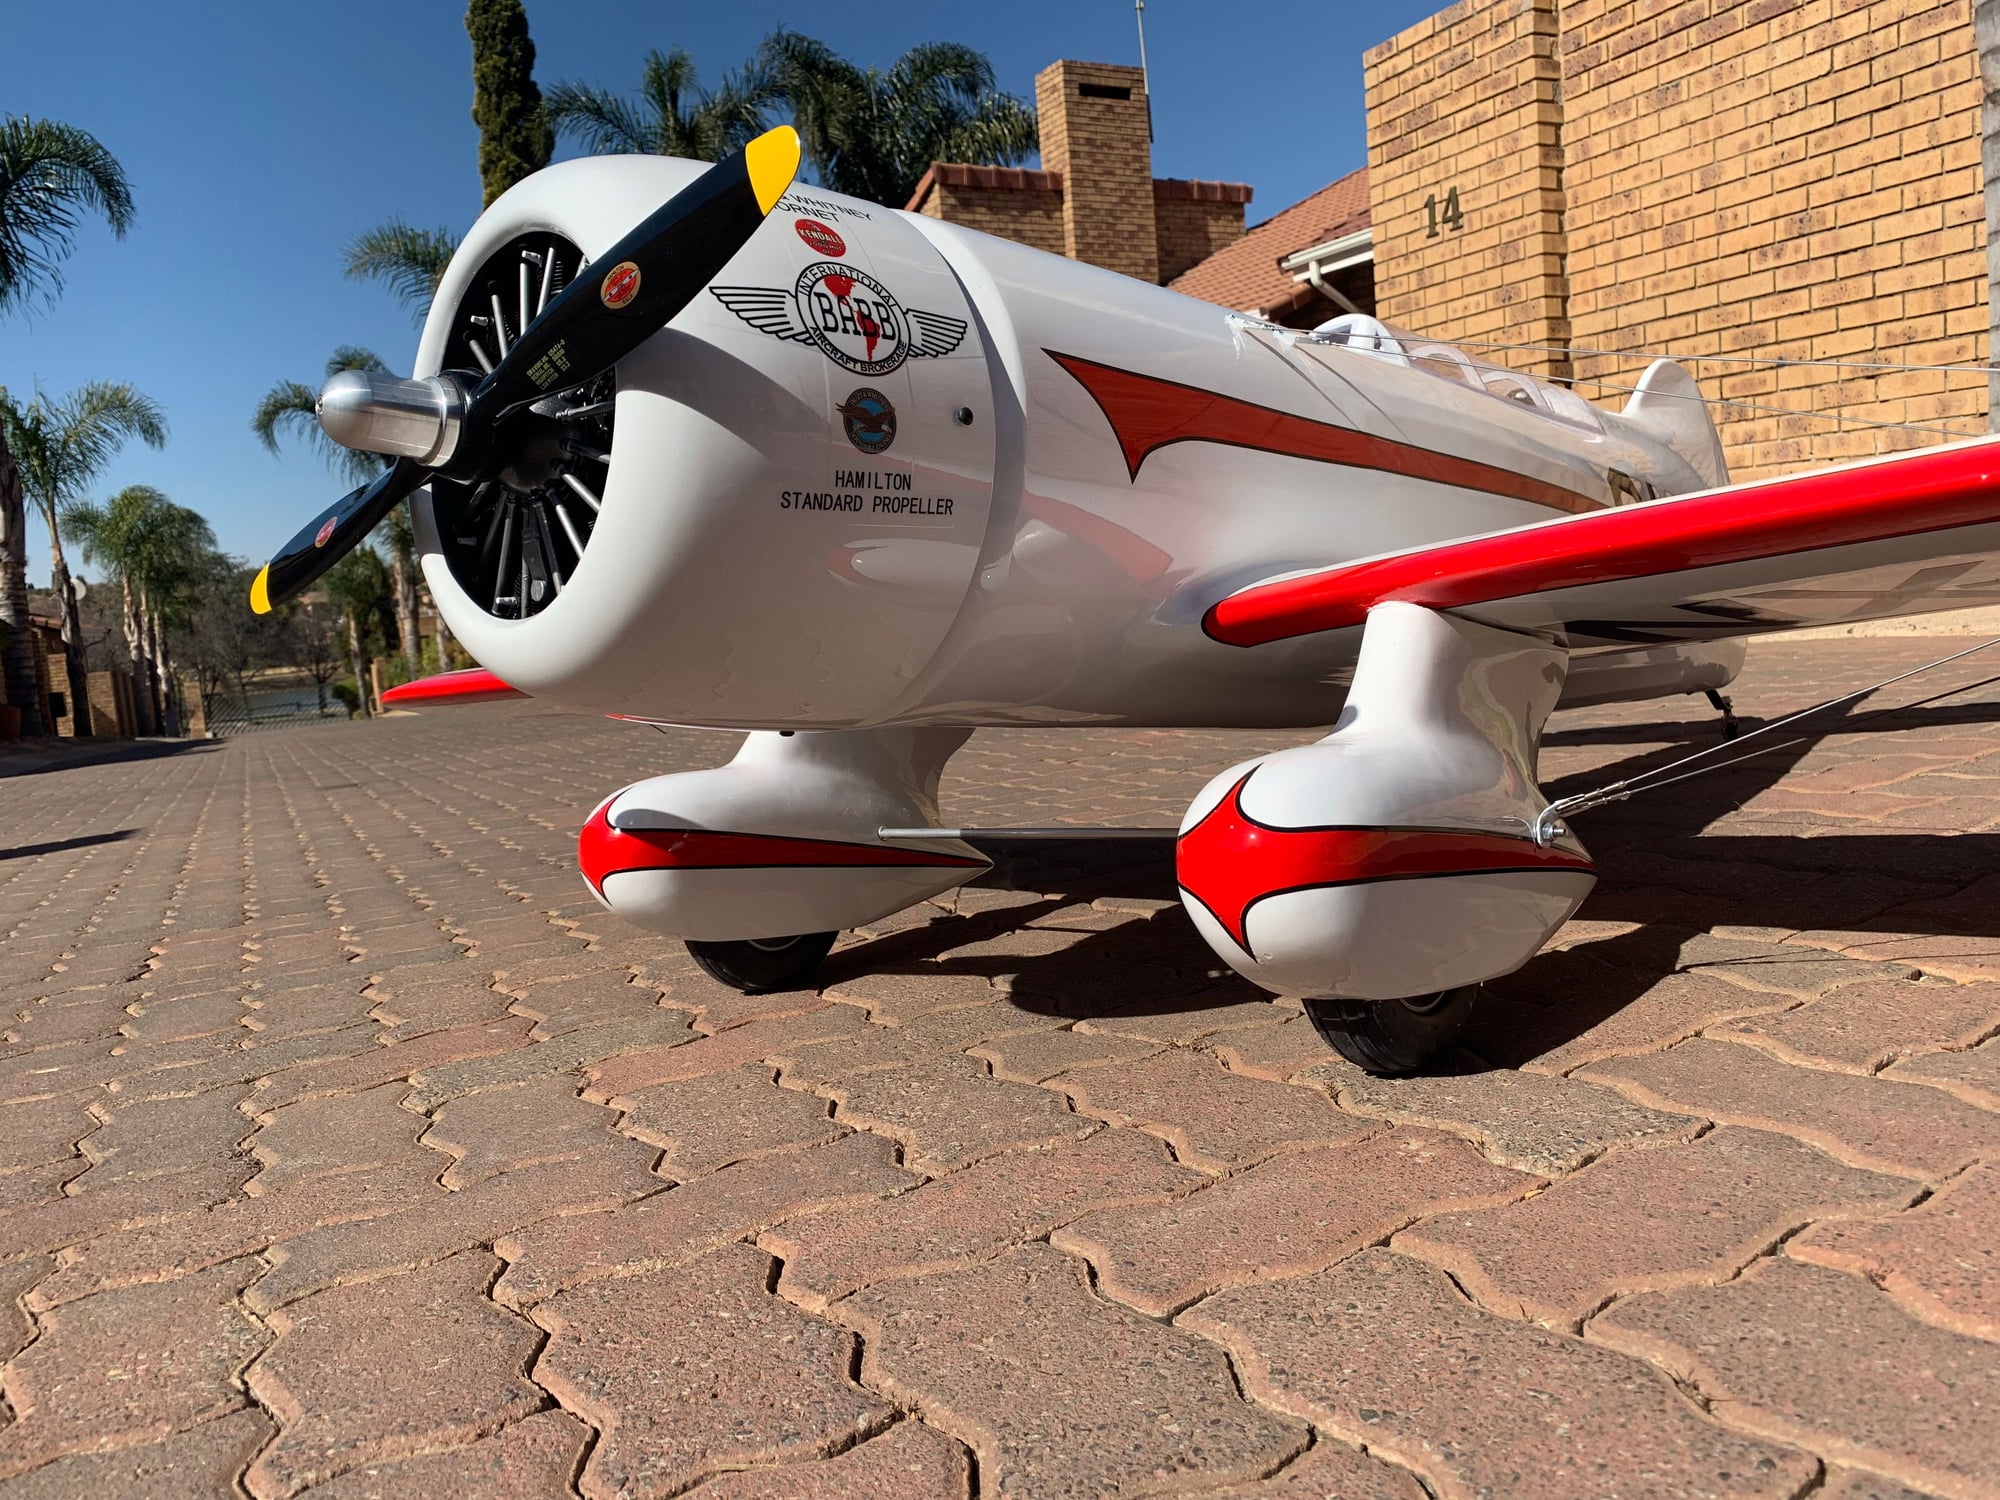
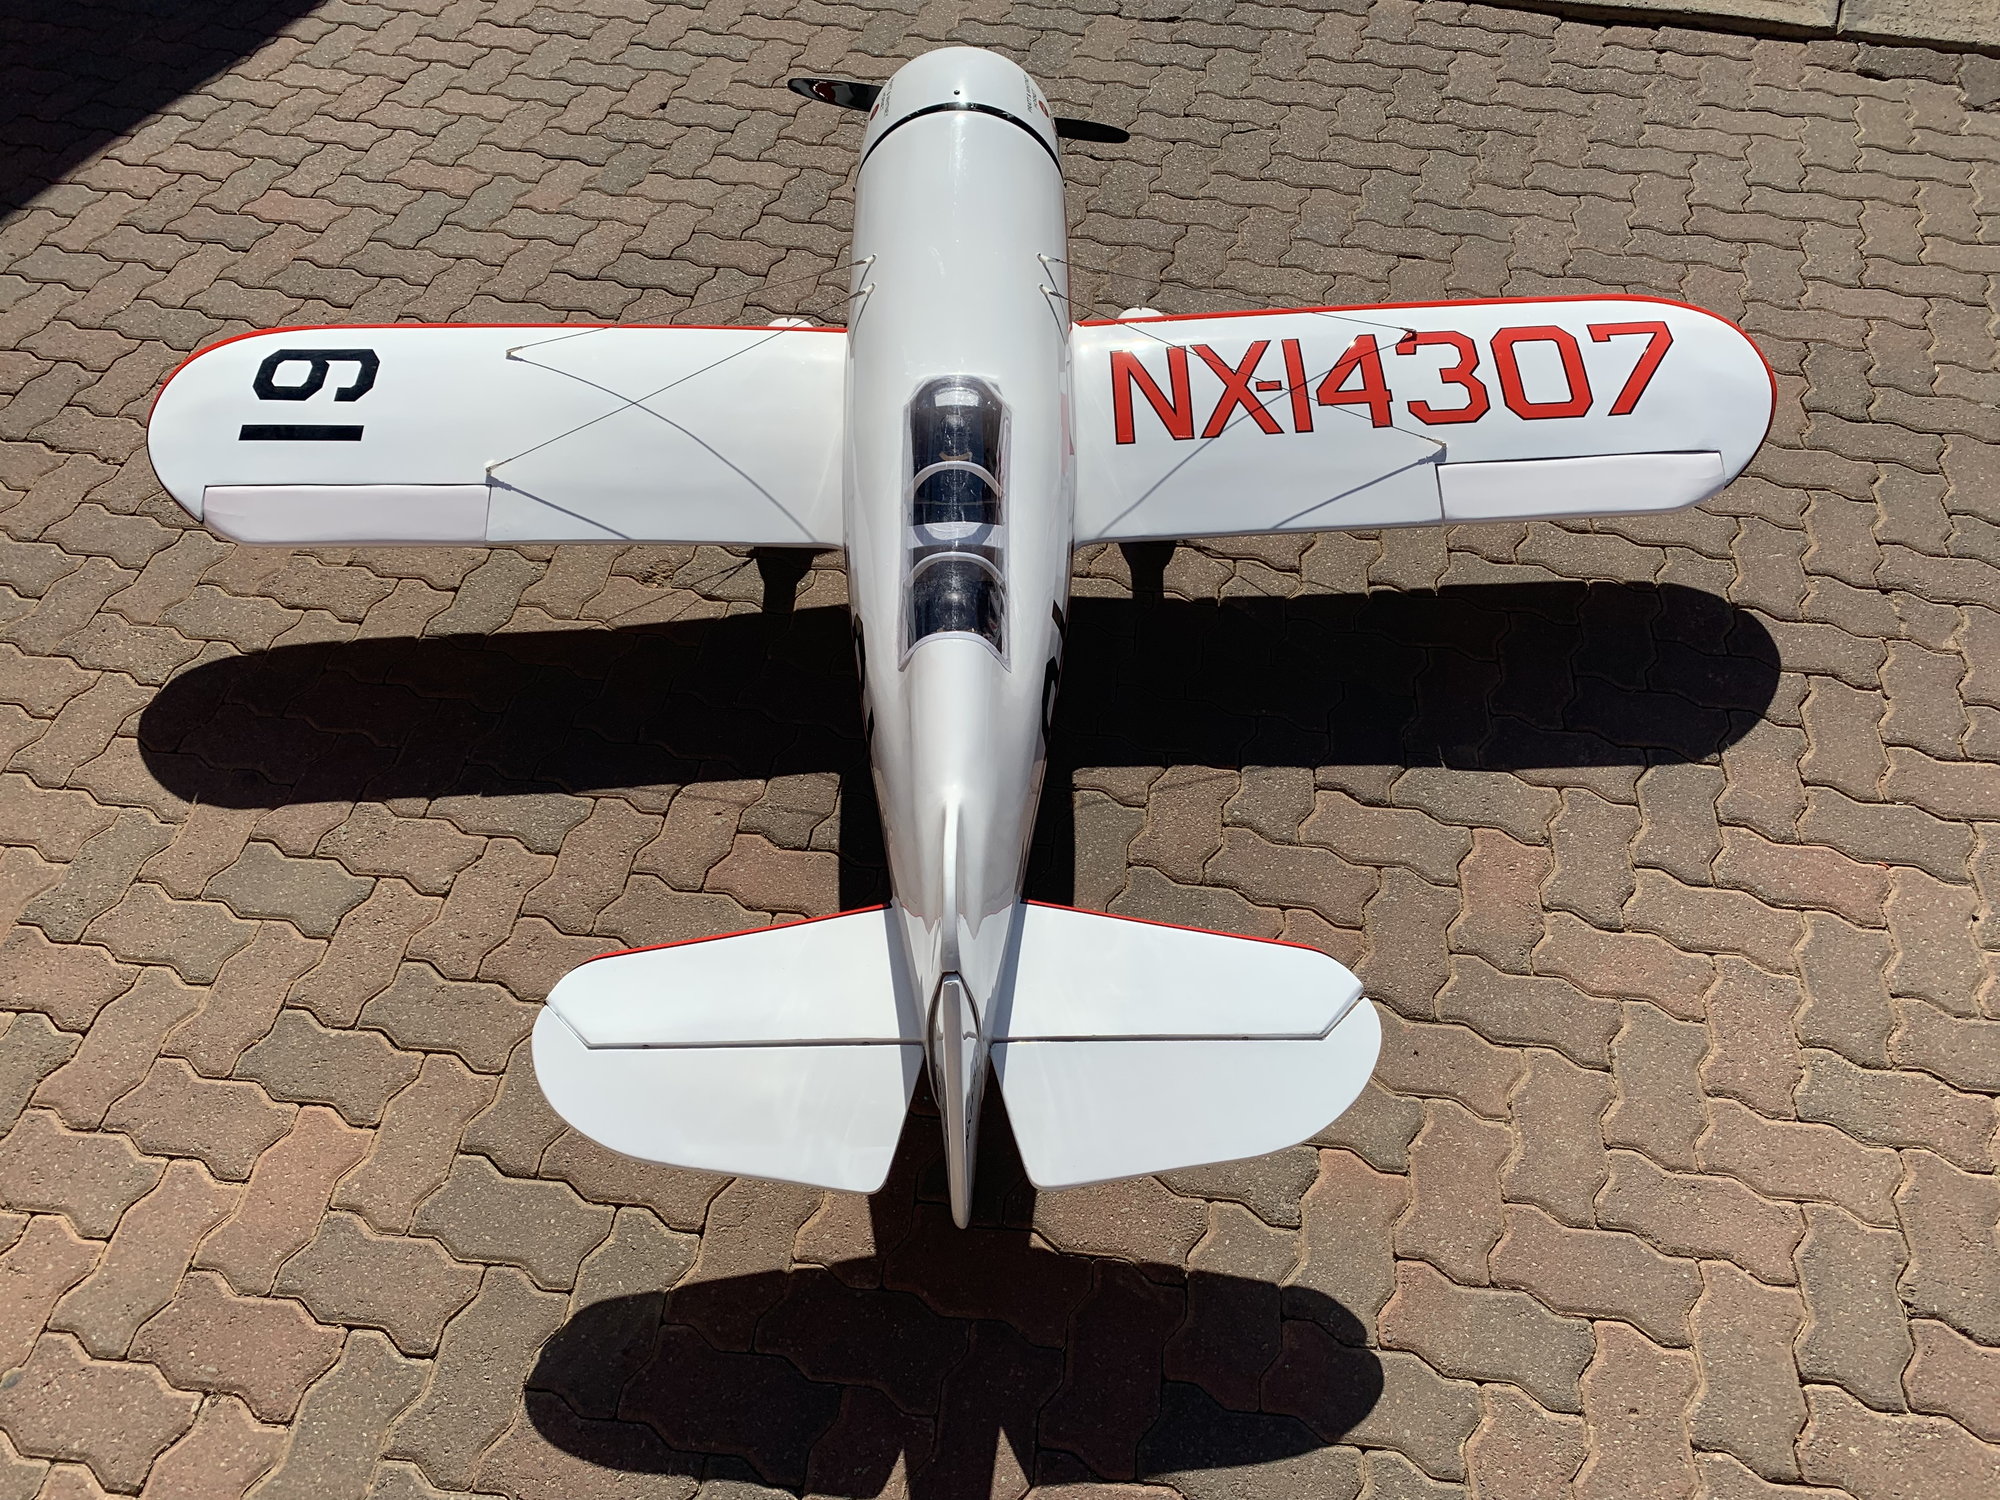
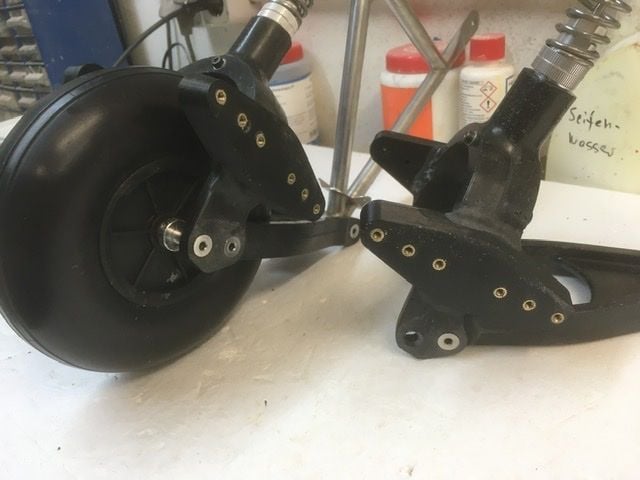
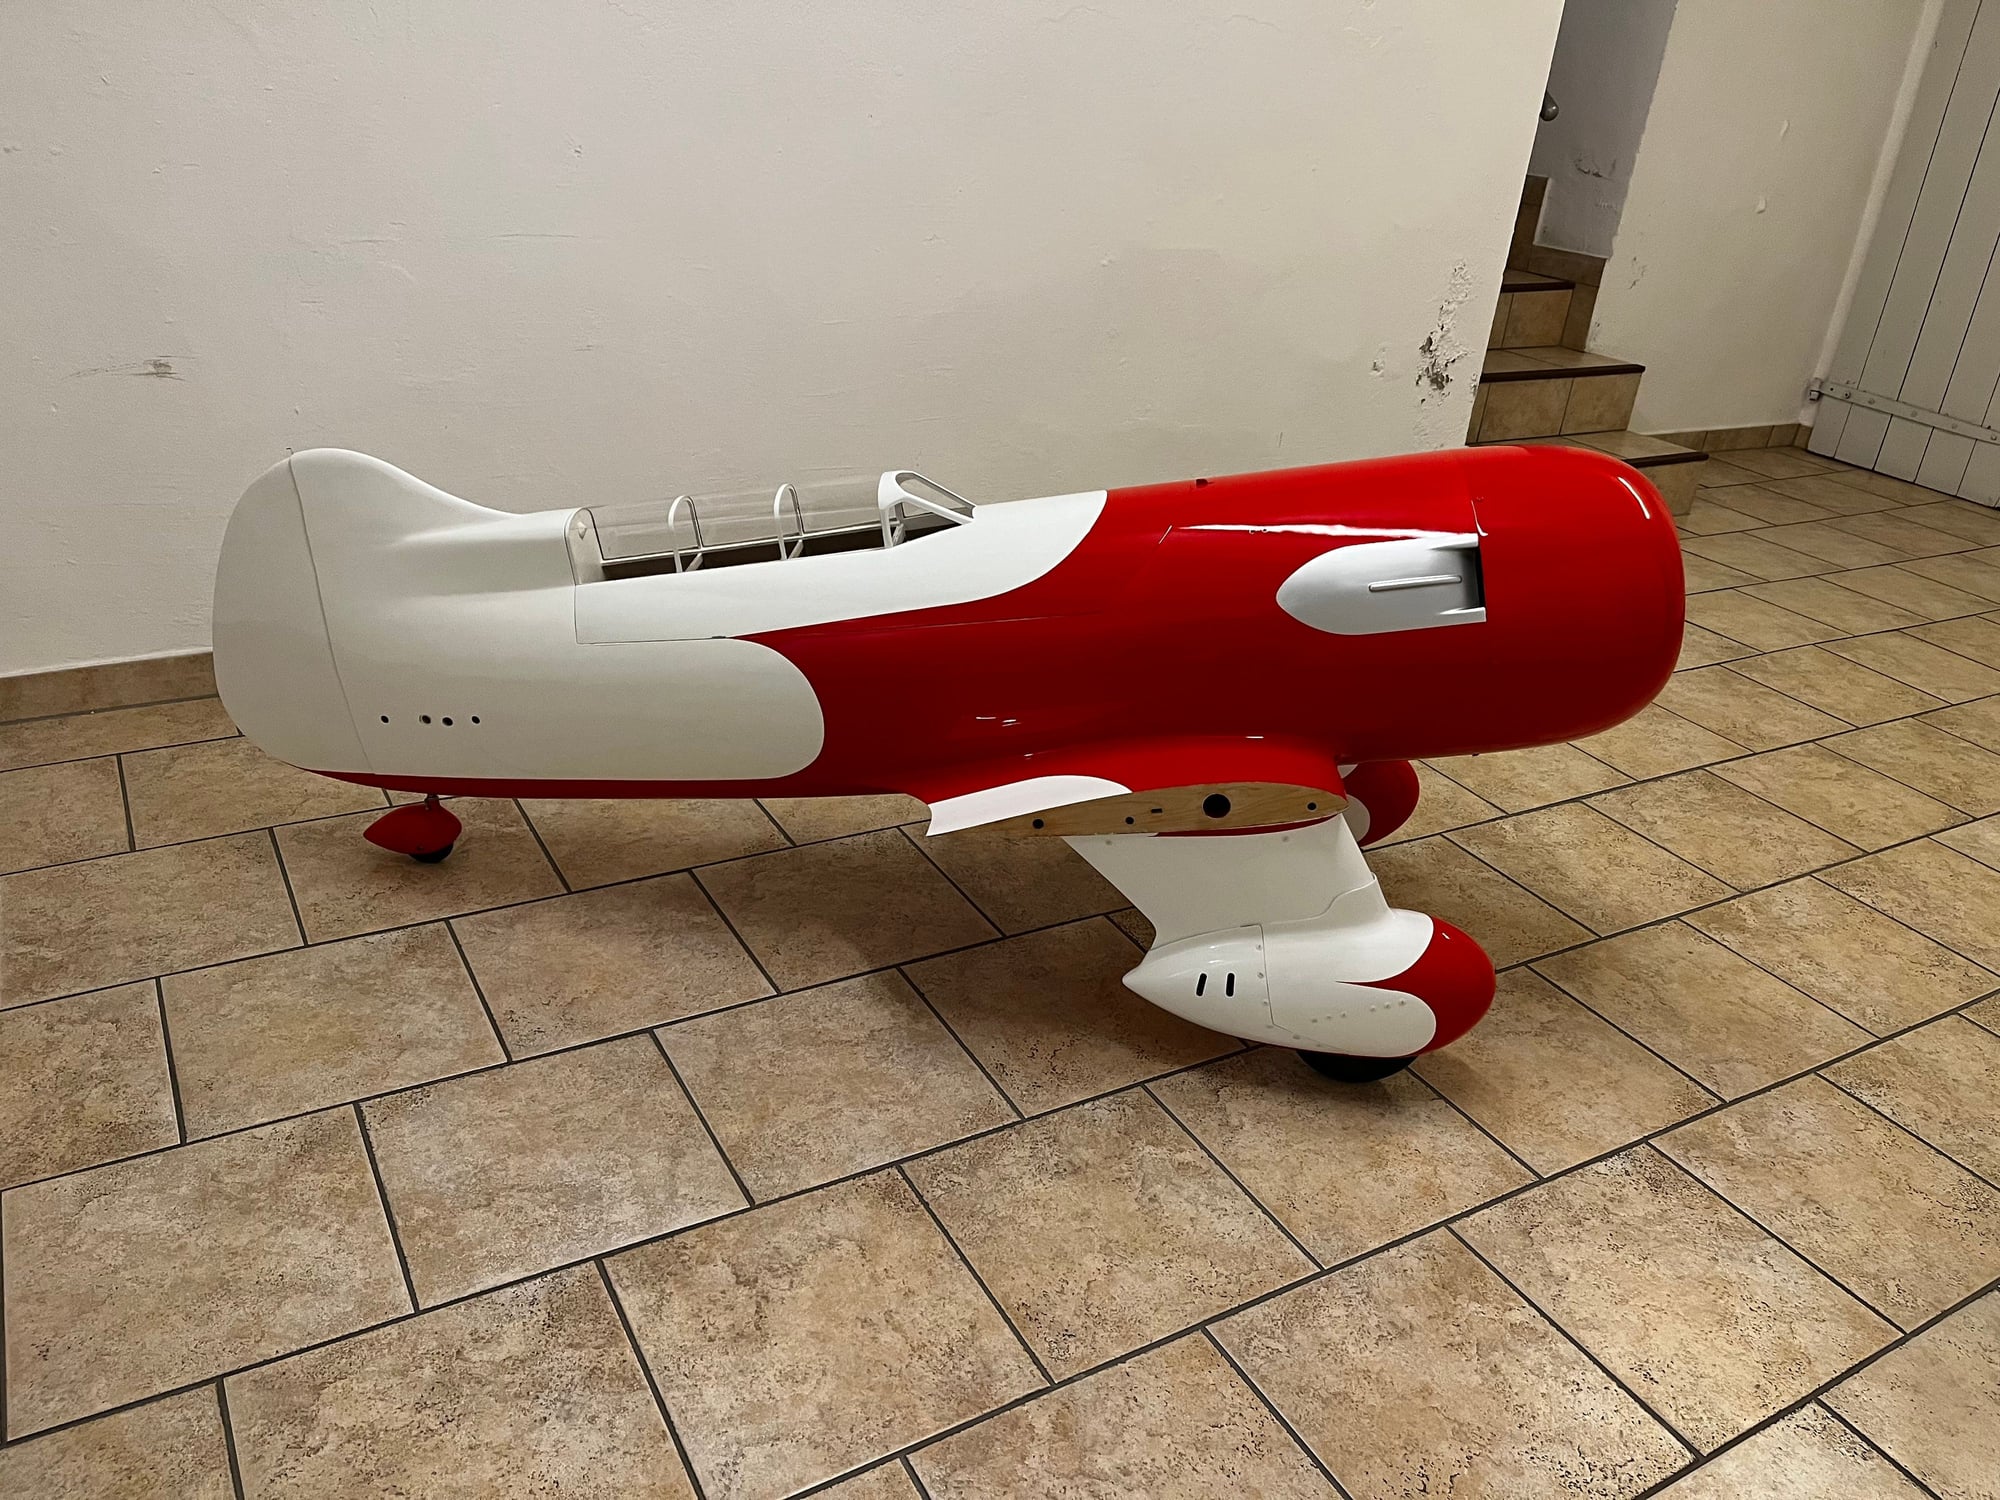
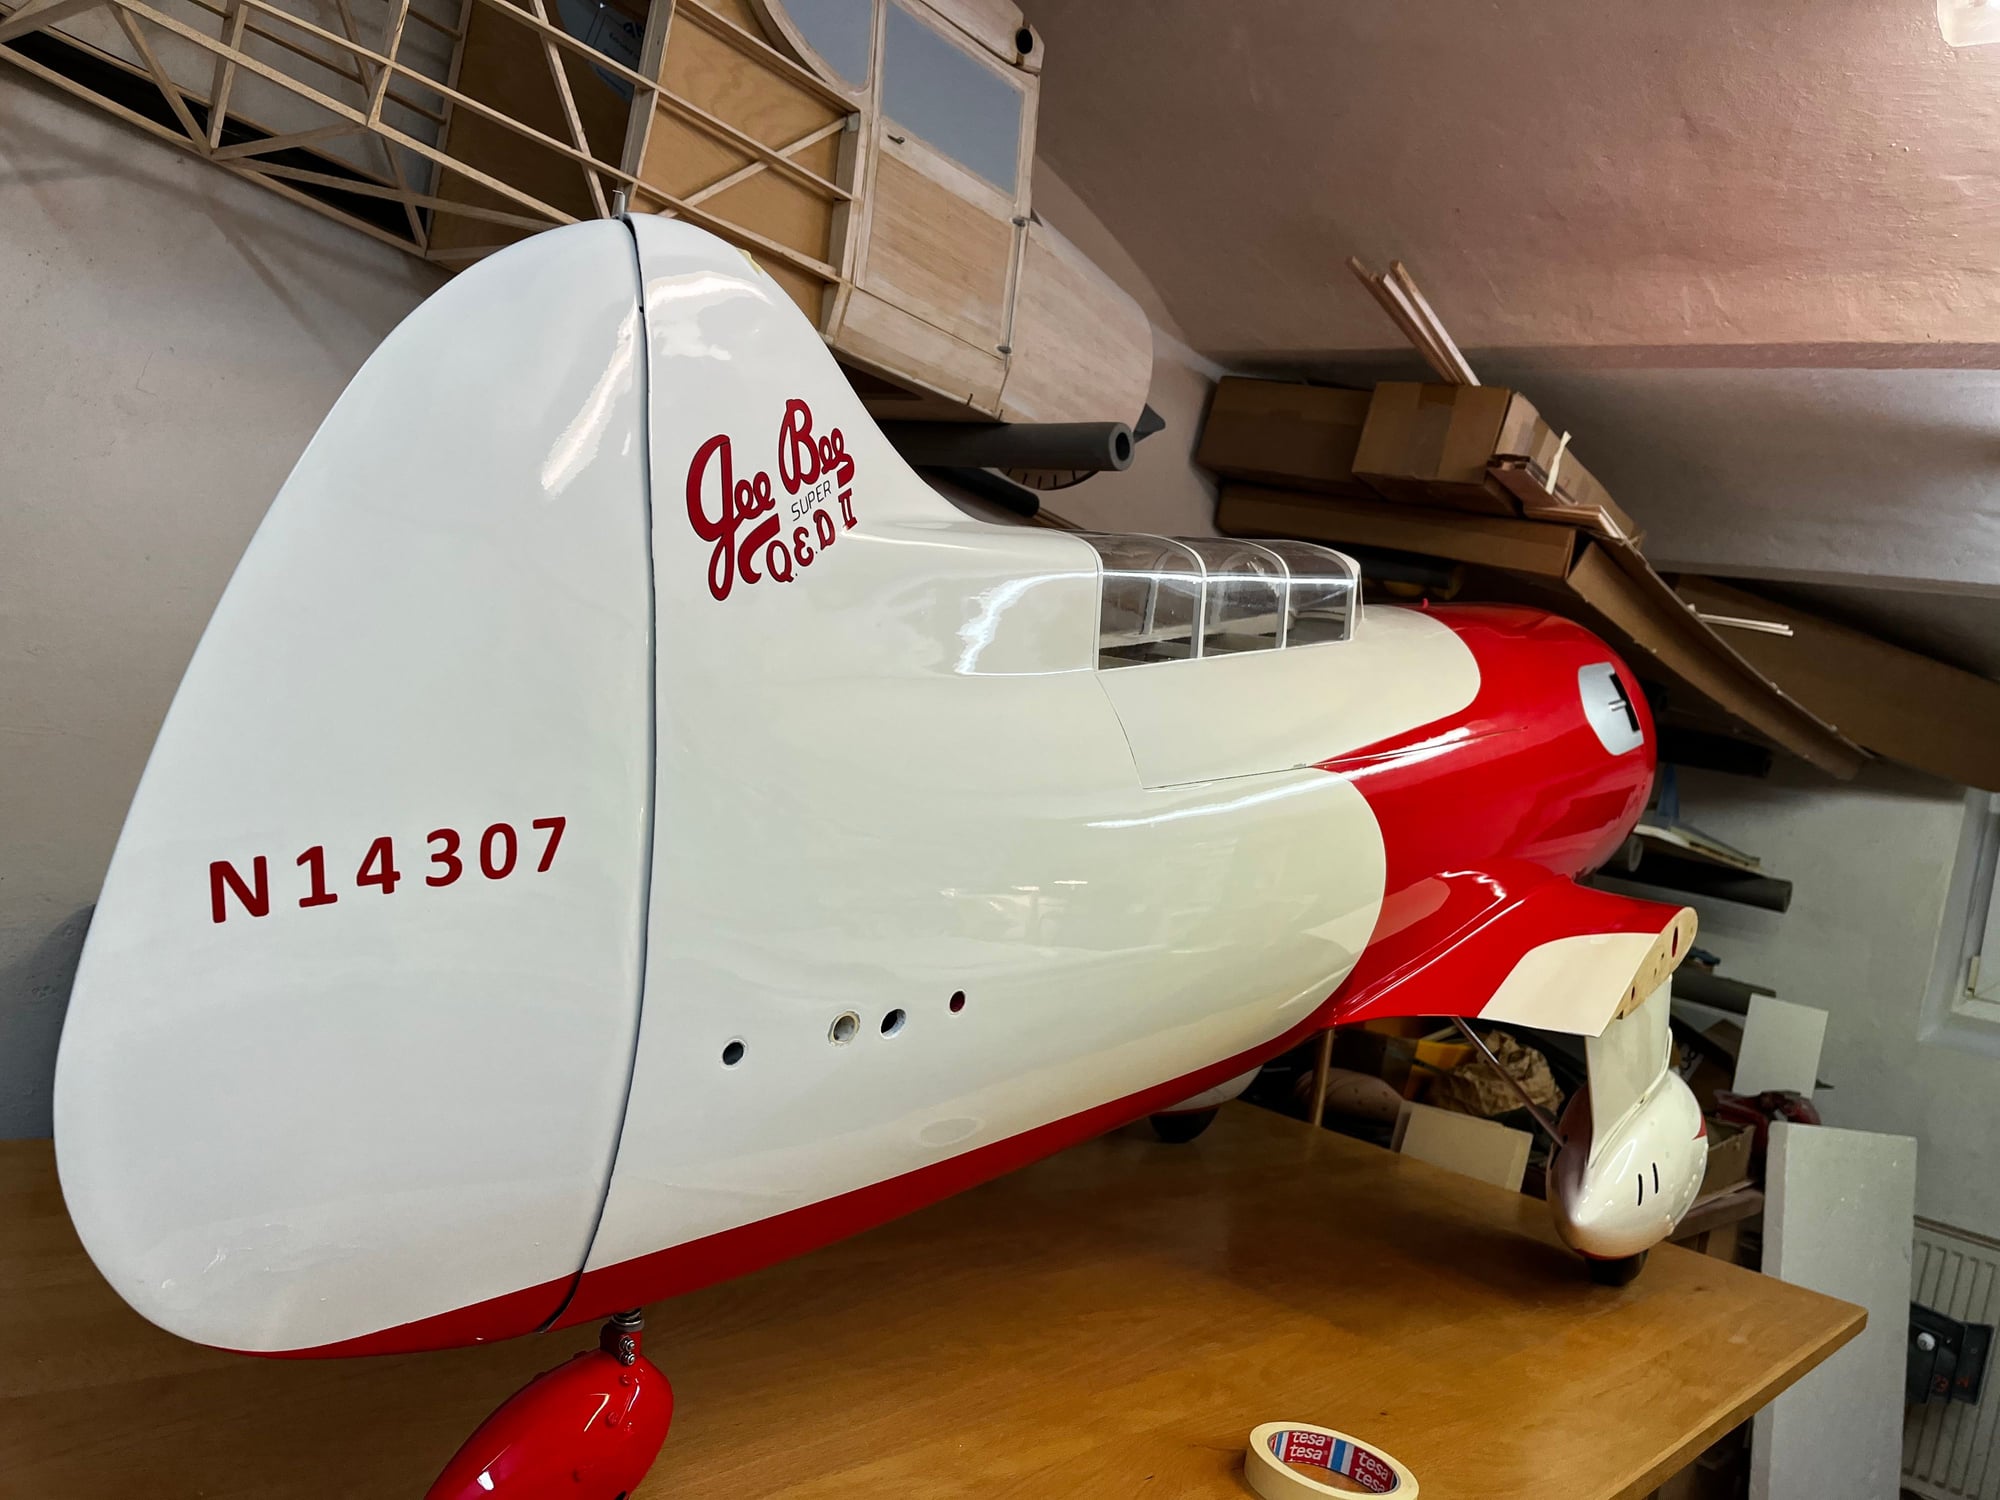
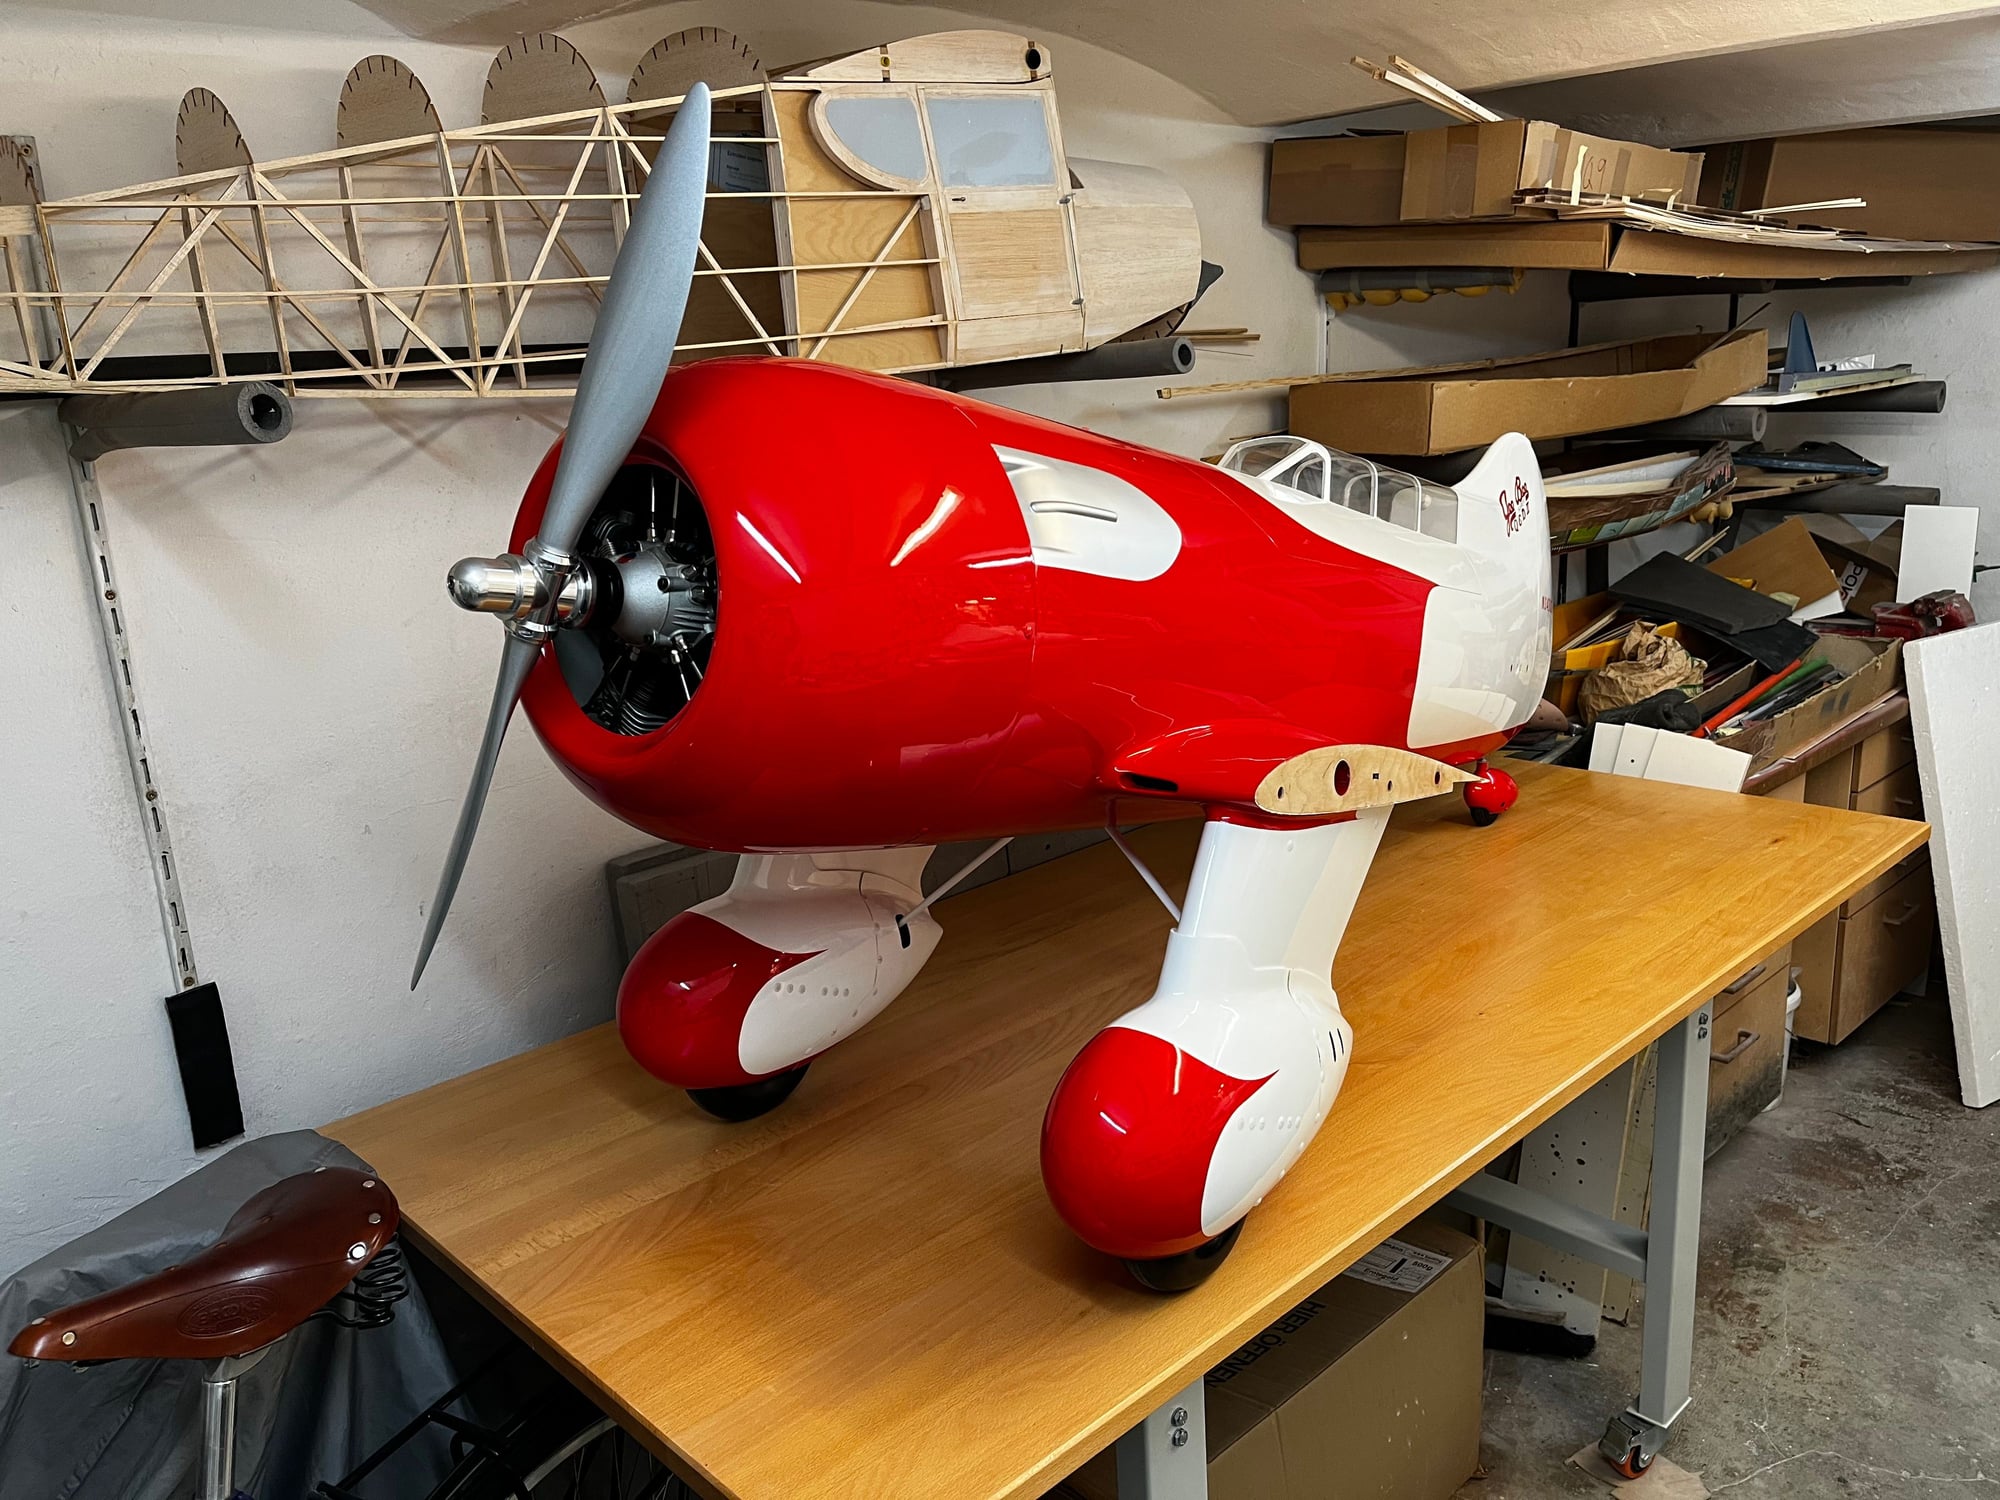
last Paintjob finished yesterday and today assambled the gear and engine proforma with 2 bolts of 5 and add decals to the fin. The tailwheel need some more work the next days. hopefully I van fly the Machine in May this year, cheers Matzito


01-27-2023, 12:55 PM
#143
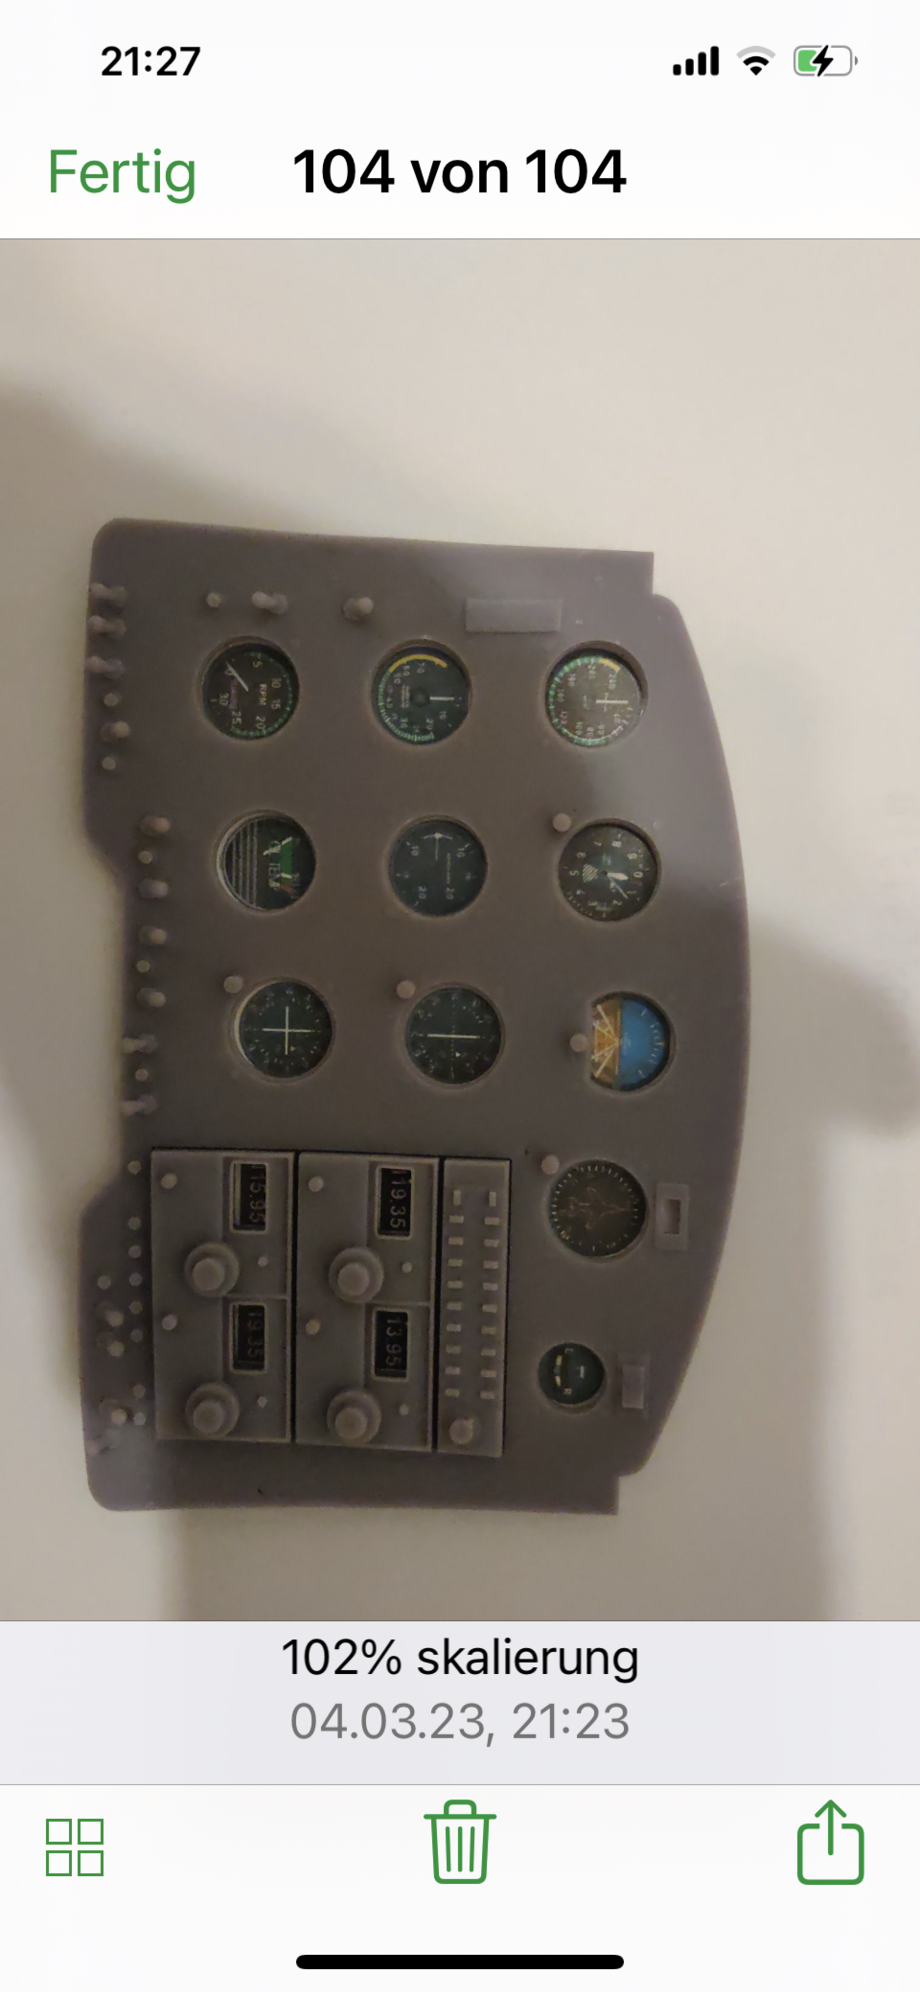
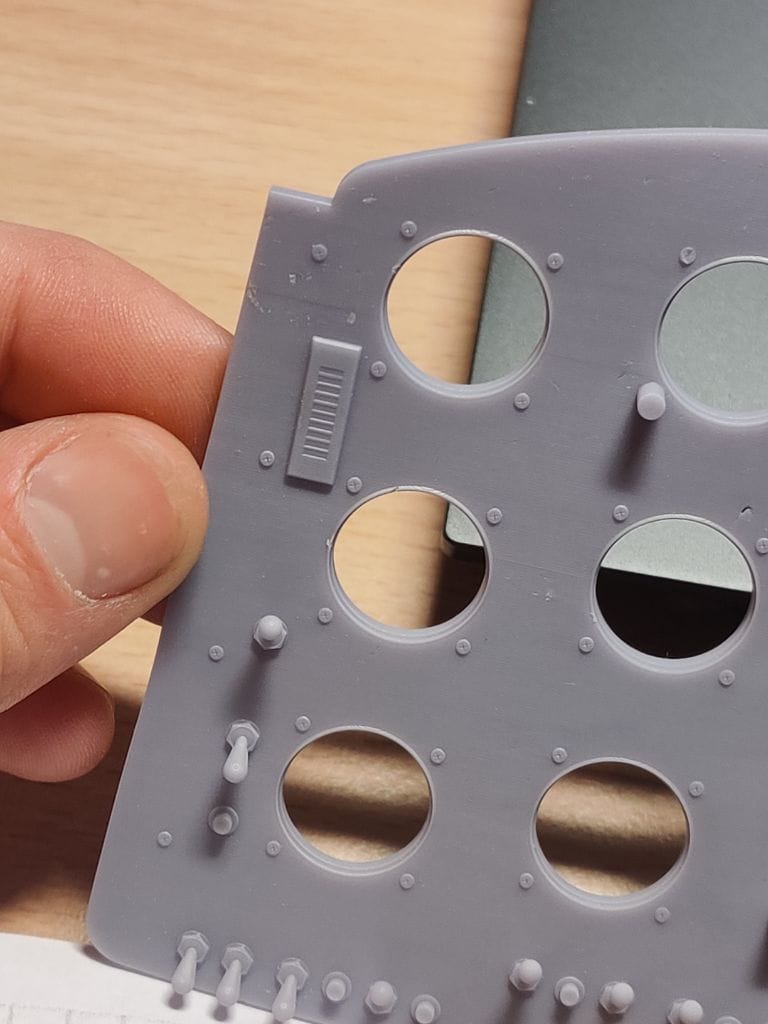
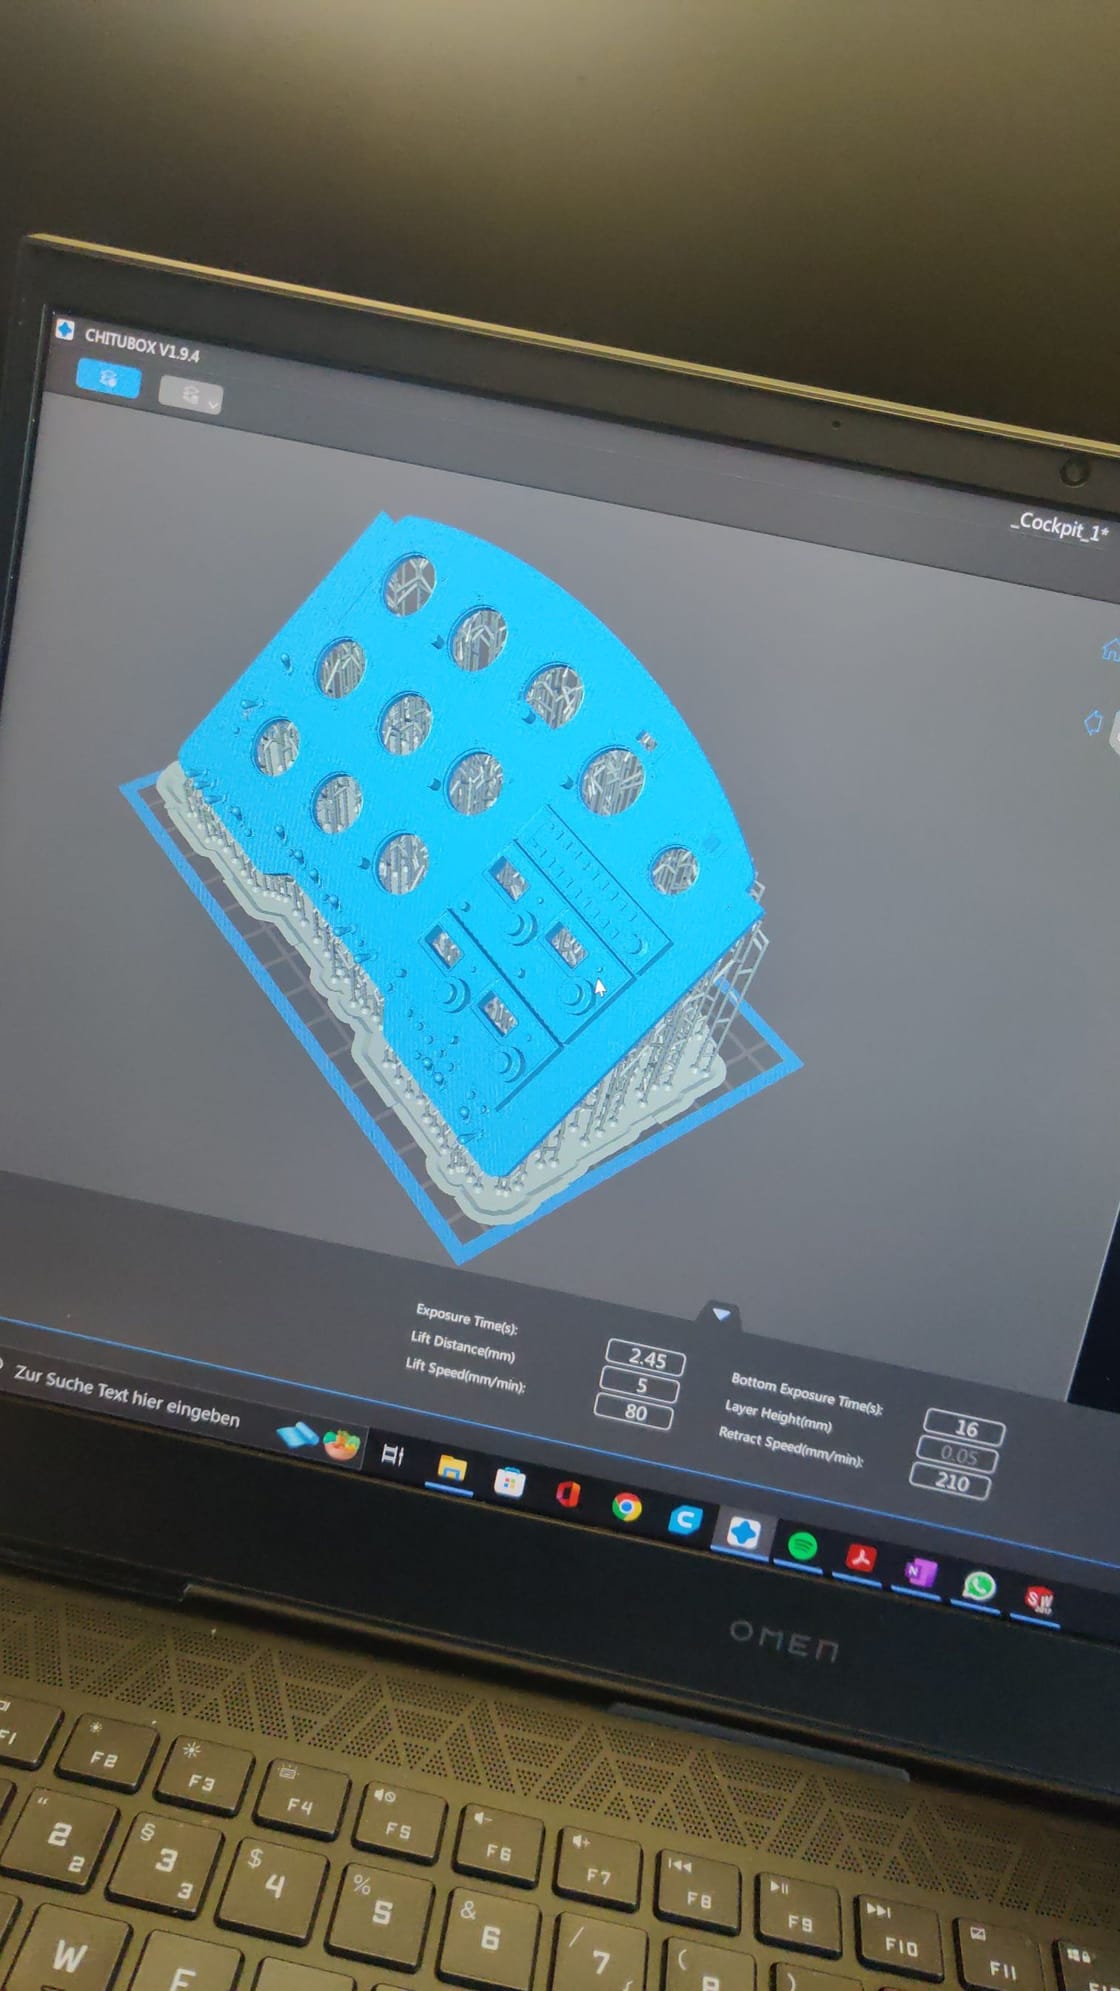
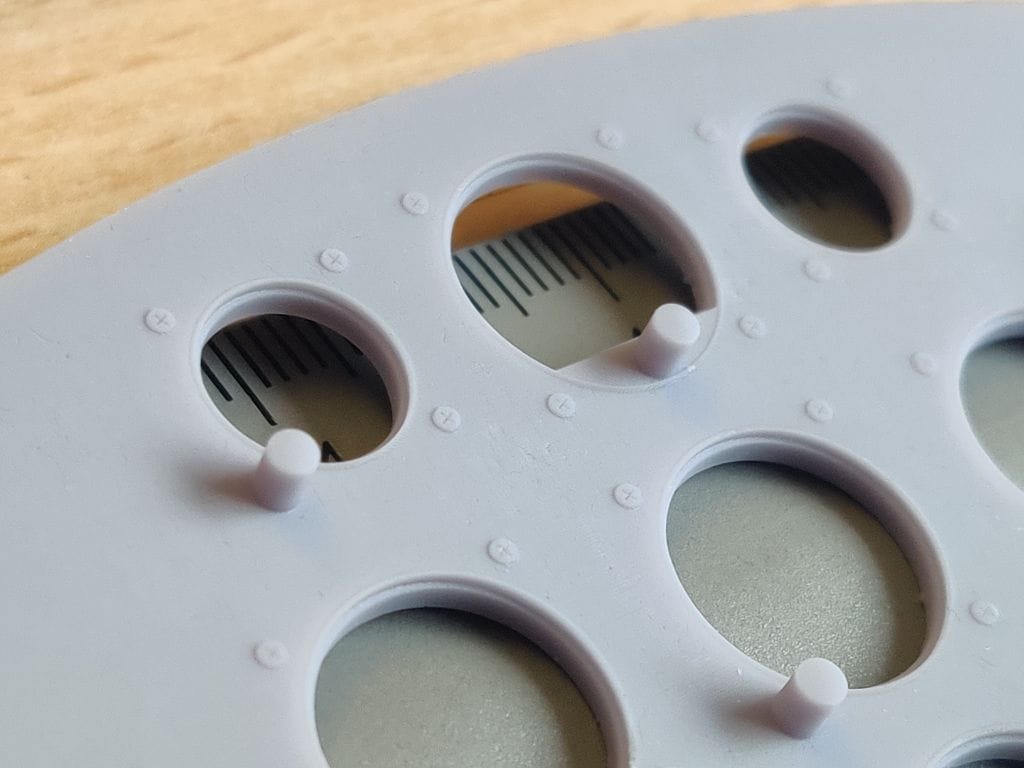
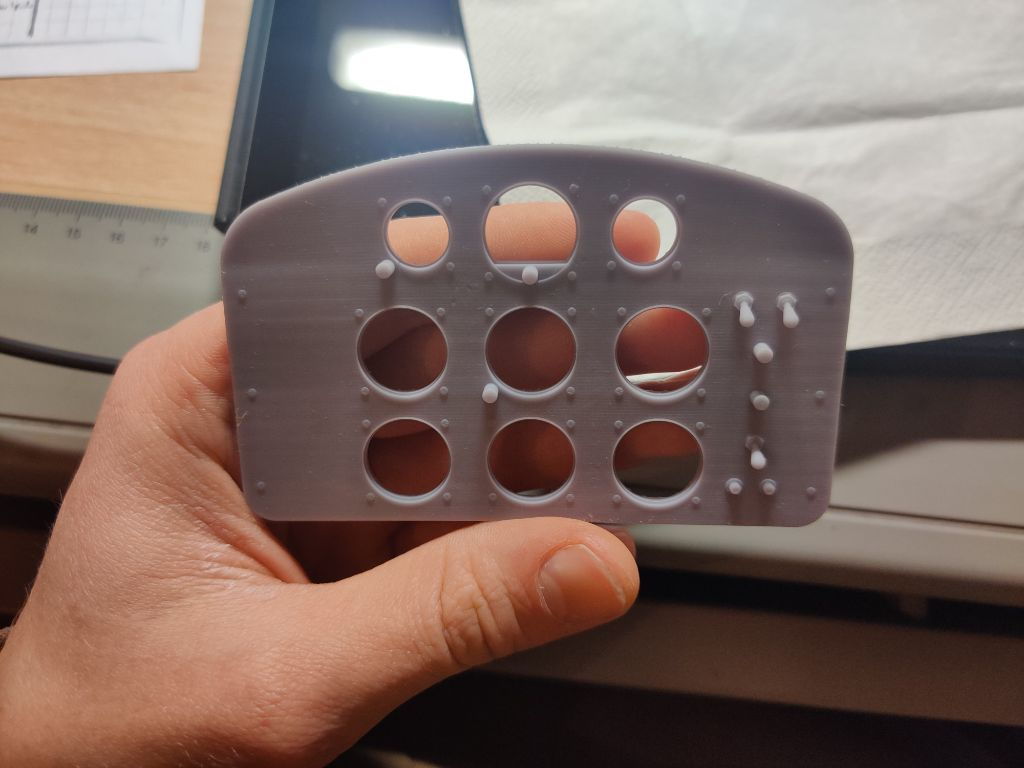
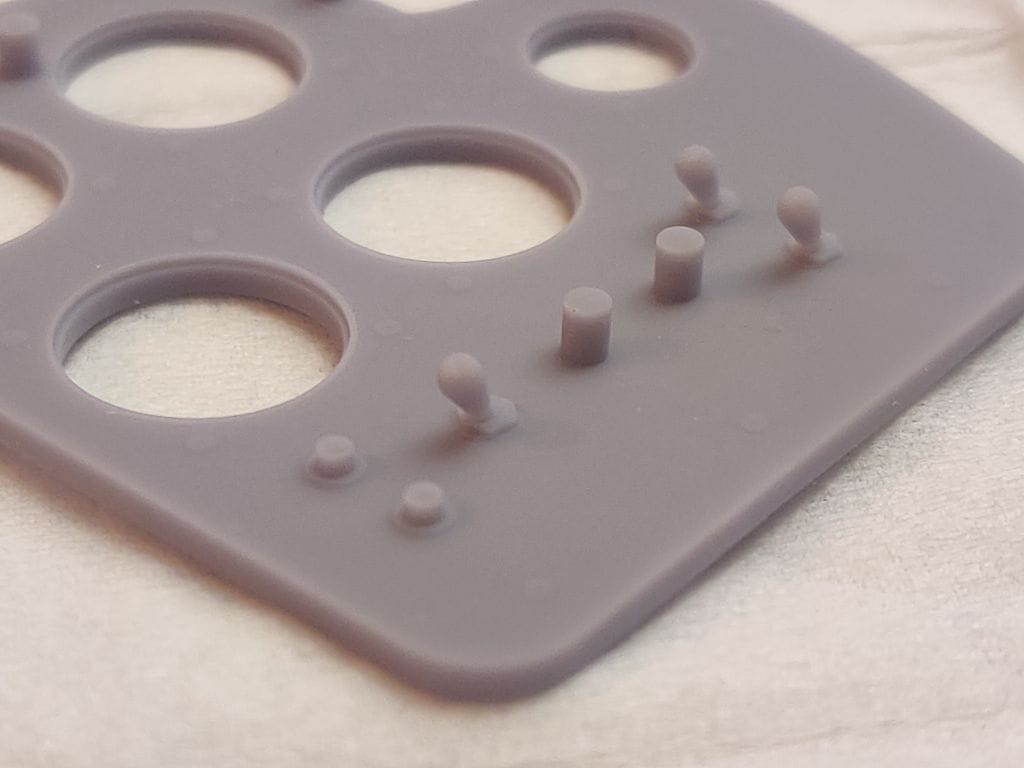
Engine is a 150/5 Moki but the space is good for a 250/5 Moki too. When I made the construction I blew it up until both rotation bodies suit into the cowling this leads to a scale of 1:4,4 approx and wingspan of 100 inch. As soon as the plane is airborne all constrution details including cockpit resin 3d prints etc can be downloaded on outerzone.
Matze
Matze
Last edited by Matzito; 01-27-2023 at 12:57 PM.

 03-02-2023, 12:41 PM
#145