


Here she is!!!
 07-13-2007, 08:18 PM
#51


Flite-Metal weighs .0022222 ounce to the square inch. Hate to see you abandon plans to do the polished natural scheme...had looked forward to seeing your fabulous work of art.
Ed
Ed
 07-14-2007, 05:32 AM
#52

ORIGINAL: FliteMetal
Flite-Metal weighs .0022222 ounce to the square inch.
Flite-Metal weighs .0022222 ounce to the square inch.
07-14-2007, 05:54 AM
#53
Senior Member
Thread Starter
Join Date: Sep 2003
Location: Weeze, GERMANY
Posts: 381
Likes: 0
Received 0 Likes
on
0 Posts
Don't need that really. I estimated the area of the B-17 as 1,000 square inches, which would make the total weight of Flite Metal appr. 500 gramms. I'm sure we can reduce some of the weight at the tail end to save those 500 beforehand.
You going to need a smooth hard surface for your Flite Metal, which you also need for your paint work. Glass covering is necessary for both versions, so you're replacing the actual paint with Flite Metal. I'd assume the weight of paint per square inch isn't even measurable, but overall I'd say the additional weight of FM for the B-17 is nothing to get all bent out of shape about.
You going to need a smooth hard surface for your Flite Metal, which you also need for your paint work. Glass covering is necessary for both versions, so you're replacing the actual paint with Flite Metal. I'd assume the weight of paint per square inch isn't even measurable, but overall I'd say the additional weight of FM for the B-17 is nothing to get all bent out of shape about.
07-14-2007, 05:59 AM
#54
Senior Member
Thread Starter
Join Date: Sep 2003
Location: Weeze, GERMANY
Posts: 381
Likes: 0
Received 0 Likes
on
0 Posts
Oops! Got my decimals wrong, at 1000 sq" Flite Metal at 0.0022 ounces would be appr. 62 grammes, which is close to zero compared to an overall weight of about 18kg now. I think I'll check the 1000sq" again, when I get back home (I'm in the office right now)
07-14-2007, 06:29 AM
#55
Senior Member
Thread Starter
Join Date: Sep 2003
Location: Weeze, GERMANY
Posts: 381
Likes: 0
Received 0 Likes
on
0 Posts
I can see I'm making a fool of myself here  , 5000sq" is more likely the area of a 1/10th scale B-17 (and I'm supposed to have an engineer's degree
  )
)
Still 'only' 300 gramms
, 5000sq" is more likely the area of a 1/10th scale B-17 (and I'm supposed to have an engineer's degree )Still 'only' 300 gramms
07-14-2007, 10:37 AM
#56
The comparable paint finish is where it gets twisted when people want to compare Flite-Metal to
the painted surface of "comparable" visual appearance. For most of us who have been at this for a
while the only comparable visual appearance would be achieved with an epoxy paint which unto itself
will not add much weight when it is silver or aluminum color. It covers effeciently with minimum build-up.
Where the paint begins to gain weight is in the multiple stages of paint application and finishing that
are required to achieve a realistic final appearance. Read as painting coat 1, sanding coat 1 in single
direction to knock down surface imperfections and inconsistancy...mask every other panel off then
shoot coat 2 followed by curing and sanding coat 2 panels at right angles to shoot 1 coat. This will
result in a surface with a faux aluminum grain turned in proper directions to achieve as close to the
look of the real thing...after a clear coat to bring the lustre to what it should be.
Flite-Metal can be "knocked down" to about 1/2 its thickness while achieving an authentic grain
as seen below in Joe Grice's SEA F-100. Because it is the ral thing it only gets better with time. This is
achieved with knocking down, citric acid (orange, grape fruit, and lemon juice), and a few evenings.
07-14-2007, 12:07 PM
#57
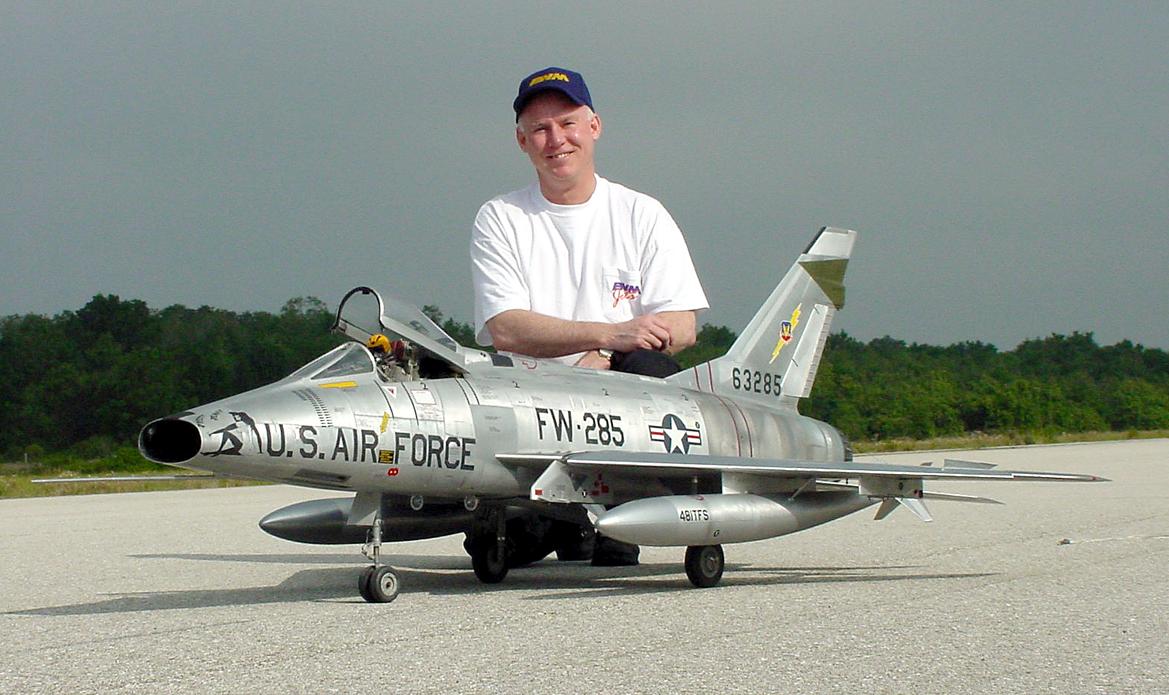
Ed, no matter how many times I see that photo it just blows me away!
In terms of the comparison, I think we were thinking in terms of FliteMetal vs. the camo paint scheme Chris was thinking of. I think in terms of simulating a metal skin there's just nothing better than FliteMetal.
In terms of the comparison, I think we were thinking in terms of FliteMetal vs. the camo paint scheme Chris was thinking of. I think in terms of simulating a metal skin there's just nothing better than FliteMetal.
07-14-2007, 01:35 PM
#58


- 14 Carat No. 741 - MSDS inert
- Copper No. 742 - MSDS inert
- Silver No. 743 - MSDS inert
The Behr Silver acrylic is a very good alternative to metal and can be played with tint-wise so it looks very close to virgin natural alloy. Polished surfaces however leave few options outside of Morph's alu plating processes $ $ $ $ or Bob's MetalKote II which will polish to some degree. Still as often stated by our customers, nothing looks like the real thing.
Evaluation with 2.4 radio technology relieved us of concerns we were more than a little worried about to say the least
The dynamics of all three systems evaluated disclosed their individual strengths to show how conservative each is in their marketing. That was a welcomed sight not often seen in their competitve marketplace All too often it has been a "mine's bigger than yours" approach.Looking forward to seeing your 17 in its final scheme. I am sure you will be a lot happier at that point. It flew as if it were on rails. Your engine choice worked out to be rewarding.
Later,
07-29-2007, 11:10 AM
#59
Senior Member

Join Date: Jan 2007
Posts: 765
Likes: 0
Received 0 Likes
on
0 Posts
A few more pic's from the B17-C made at my homefield yesterday and flown by Frank. There is also made a movie whitch you can find at [link=http://nl.youtube.com/watch?v=5JbrTrY3dEA]this link[/link]. The flight is made with 15 knots wind speed.
Teus
Teus
10-19-2008, 02:04 PM
#60
Senior Member
Thread Starter
Join Date: Sep 2003
Location: Weeze, GERMANY
Posts: 381
Likes: 0
Received 0 Likes
on
0 Posts
We've started painted our B-17. Sorry to you guys that were hoping to see a natural metal finsih, we had something more surprising up our sleeves. This should raise a few eyebrows. More next week.
10-20-2008, 05:52 AM
#63


Join Date: Jan 2007
Location: Westervoort, NETHERLANDS
Posts: 219
Likes: 0
Received 0 Likes
on
0 Posts
Got some pictures of the finishing process,
First get the spray booth (my garage ) ready,

Then it really 'pays off' that we made about ten flights in the primer: degreasing the whole thing; man what a job,


Next is masking all the windows, also very time consuming.............


Then start with the lightest colour: azur blue (quite uniqe; never seen this colour before on a plane)


Then masking for earth brown, I use a circular foam here to create a vague transition between the colours otherwise the result would be a sharp line,

Earth brown:


And masking for the green colour, the plane looks rather funny now:


And at last the green colour,


And after removing the masking we can have a look at the result: not bad, not bad at all!!!


Frank
First get the spray booth (my garage ) ready,
Then it really 'pays off' that we made about ten flights in the primer: degreasing the whole thing; man what a job,
Next is masking all the windows, also very time consuming.............
Then start with the lightest colour: azur blue (quite uniqe; never seen this colour before on a plane)
Then masking for earth brown, I use a circular foam here to create a vague transition between the colours otherwise the result would be a sharp line,
Earth brown:
And masking for the green colour, the plane looks rather funny now:
And at last the green colour,
And after removing the masking we can have a look at the result: not bad, not bad at all!!!
Frank
 10-20-2008, 04:55 PM
#66
Senior Member
Thread Starter
Join Date: Sep 2003
Location: Weeze, GERMANY
Posts: 381
Likes: 0
Received 0 Likes
on
0 Posts
Hi Allan and everyone else,
these pictures pretty much show the final stage of the paint job apart from Frank's protective PUR coat that he will apply this week. Then we hope to get some good glamorous flying shots next weekend if the weather isn't too bad, for an advertizing campaign we want get going in the German model magazines in time for the christmas frenzy.
Next project? Well I'm still working on the Ju-88 prototype and Abu is still waiting patiently for that Albatros CI kit I promised him, I'm in the final stages of the DH-2 plans and there's still that DH-9A I'm hoping to get started on, so, as you can see, we still have a very busy schedule. But how about that ultimate scale model of the ultimate aircraft as far as proportions and design skills (=beauty) goes - that Heinkel He-70 in 1/6th scale? Now that would make a great next project, or were you asking Frank?
 10-21-2008, 03:42 AM
#68
Join Date: Jan 2007
Location: Westervoort, NETHERLANDS
Posts: 219
Likes: 0
Received 0 Likes
on
0 Posts
If you want to know my personal projects for the coming years:
now: finish and fly the 1/5 scale Mig 15 from Composite ARF, (and a 1/3.3 scale Tiger Moth from Toni Clark)
Next year: 1/5 Scale Gloster Meteor !! [8D]
The year after that: 1/3 scale Fokker DVII (Group build; gonna build 4 of them !)
In between: jobs from Chris
Frank
(I have this problem of never ever get bored, do you guys?........................... )
)
now: finish and fly the 1/5 scale Mig 15 from Composite ARF, (and a 1/3.3 scale Tiger Moth from Toni Clark)
Next year: 1/5 Scale Gloster Meteor !! [8D]
The year after that: 1/3 scale Fokker DVII (Group build; gonna build 4 of them !)
In between: jobs from Chris
Frank
(I have this problem of never ever get bored, do you guys?...........................
)
10-21-2008, 04:24 AM
#69
Senior Member
Join Date: Jan 2007
Posts: 765
Likes: 0
Received 0 Likes
on
0 Posts
The plane looks outstanding in this colors Chris and Frank [8D] Looking forward to see the flying picture's.
No, 5 Frank[sm=biggrin.gif]
ps,
How far are you with the 5 dummy engine's [sm=drowning.gif] I am starting this week I think with the gun kits [sm=rolleyes.gif]
ORIGINAL: Frank Sopwith
If you want to know my personal projects for the coming years:
The year after that: 1/3 scale Fokker DVII (Group build; gonna build 4 of them !)
If you want to know my personal projects for the coming years:
The year after that: 1/3 scale Fokker DVII (Group build; gonna build 4 of them !)
No, 5 Frank[sm=biggrin.gif]
ps,
How far are you with the 5 dummy engine's [sm=drowning.gif]
I am starting this week I think with the gun kits [sm=rolleyes.gif]
10-21-2008, 06:04 AM
#70
Join Date: Aug 2005
Location: Mississauga,
ON, CANADA
Posts: 4,196
Likes: 0
Received 1 Like
on
1 Post
Frank,
Your B-17C is very Impressive!!, wow what a beauty she is turning out to be.
I have to admit, we see way too many "G" models compared to other models of B-17 and your "C" is just not very sweet looking bird but one very unique also!!. Now i can see it takes alot more time to build these birds then we actually predict when starting the project!, i have no doubt now that my Super Constellation may take 3 years to become flying bird, i have been working on it for last 2 years now and due to various reasons including health problems i might take another year!. I have few questions for you:
1- How did you set you your fuel system and where did you placed tanks.
2- You mentioned that you are using fuel pumps, now are these on IB engines only or on 4 of them.
3- Where did you placed your servos, rx and battries and how many rx's are you using.
4- What kind of flaps do you have on your model and what methods did you used to construct them and ways of achieving there full movements.
On the whole i am very happy with your model wish you best of luck flying her for many years to come.
Cheers,
Sam
10-21-2008, 08:20 AM
#71
Join Date: Jan 2007
Location: Westervoort, NETHERLANDS
Posts: 219
Likes: 0
Received 0 Likes
on
0 Posts
Thanks for the compliments Sam, but I have to mention of course that Miss 'C' is the prototype of CD Scaledesigns and the result of a joint afford between Chris and me, Chris basically build the plane and I made (keep)
her flight ready.
I will be glad to answer all your questions later (with pictures!).
(And better not put a strict timetable to a project like this otherwise it 'll look like working
Get back to you later
Frank
her flight ready.
I will be glad to answer all your questions later (with pictures!).
(And better not put a strict timetable to a project like this
otherwise it 'll look like working Get back to you later
Frank
10-22-2008, 01:55 AM
#72
Join Date: Aug 2005
Location: Mississauga,
ON, CANADA
Posts: 4,196
Likes: 0
Received 1 Like
on
1 Post
Hey No problemo there Frank, i always compliment what deserves to be complimented from list of my likes. Sure i'll wait for your response of my questions as i'm taking time off from my major build also. I haven't had chance yet to see this cool stuff called Flite Metal but what i read and see pictures of makes me deeply want to use it on my model, heck Ed i'm thinking to do my Connie in delivery TCA livery now, so whole plane will polished aluminum!...Frank make sure you guys to a project to utilize all that Flite Metal you have there..hehe
. Sure i'll wait for your response of my questions as i'm taking time off from my major build also. I haven't had chance yet to see this cool stuff called Flite Metal but what i read and see pictures of makes me deeply want to use it on my model, heck Ed i'm thinking to do my Connie in delivery TCA livery now, so whole plane will polished aluminum!...Frank make sure you guys to a project to utilize all that Flite Metal you have there..hehe
10-22-2008, 05:57 AM
#73
Join Date: Jan 2007
Location: Westervoort, NETHERLANDS
Posts: 219
Likes: 0
Received 0 Likes
on
0 Posts
Sam,
to start with your first two questions,
The placement of the tanks is way behind the engines,
here a pictures of the tank bays without the tanks,

The two little hatches visible behind the tank bays hide the servo's for the flaps: two servo's per flap!)
Due to the shape of the wing (and ribs) we had to 'split' the tank and use two per engine , so eight in total!

Fuel pumps are choosen for all the engines because of the distance,
after ten flights I can say that the Perry fuel pumps qwork perfectly!

The engine bay look like this,


Lay out of the electronics look like this:

A total of 14 servo's used, 4 mini's for the throttle, 2 for each flap, 1 for each aileron and 1 for elevator and 1 for rudder,
1 for the tailwheel and the last one, a mini for the retract valve!
To split the throttle channel we used a Deutsch powerbox with two battery packs and we use a 8channel PCM reciever.
Electronics are basically placed in the belly between the wing tubes,

Closed by a quik release hatch,

Batteries are in the nose together with 1 (one! ) kilo of lead

The servo's for tailwheel elevator and rudder are way back in the fuselage.

This was not wise to do (that is the reason of so much lead needed up front) so we changed that in the design to a place in front of the CG !
The flaps (split flaps) look like this:two servo's are used to actuate them,

And just by trial and error we came up with 40 deg flap setting for landing and 20 deg. for take off
Hope this answers your questions a bit, or there are even more !
Frank
to start with your first two questions,
The placement of the tanks is way behind the engines,
here a pictures of the tank bays without the tanks,
The two little hatches visible behind the tank bays hide the servo's for the flaps: two servo's per flap!)
Due to the shape of the wing (and ribs) we had to 'split' the tank and use two per engine , so eight in total!
Fuel pumps are choosen for all the engines because of the distance,
after ten flights I can say that the Perry fuel pumps qwork perfectly!
The engine bay look like this,
Lay out of the electronics look like this:
A total of 14 servo's used, 4 mini's for the throttle, 2 for each flap, 1 for each aileron and 1 for elevator and 1 for rudder,
1 for the tailwheel and the last one, a mini for the retract valve!
To split the throttle channel we used a Deutsch powerbox with two battery packs and we use a 8channel PCM reciever.
Electronics are basically placed in the belly between the wing tubes,
Closed by a quik release hatch,
Batteries are in the nose together with 1 (one! ) kilo of lead
The servo's for tailwheel elevator and rudder are way back in the fuselage.
This was not wise to do (that is the reason of so much lead needed up front
) so we changed that in the design to a place in front of the CG !The flaps (split flaps) look like this:two servo's are used to actuate them,
And just by trial and error we came up with 40 deg flap setting for landing and 20 deg. for take off
Hope this answers your questions a bit, or there are even more !
Frank
10-22-2008, 06:24 AM
#74
Again, I am just blown away with the complexity of these large multi-engine projects. I can barely manage one fuel tank and four servos! [ ] I stand in awe of model-gods like you and Chris.
"We're not worthy, we're not worthy."
] I stand in awe of model-gods like you and Chris. "We're not worthy, we're not worthy."
10-22-2008, 06:38 AM
#75
Join Date: Jan 2007
Location: Westervoort, NETHERLANDS
Posts: 219
Likes: 0
Received 0 Likes
on
0 Posts
ORIGINAL: abufletcher
I stand in awe of model-gods like you and Chris.
"We're not worthy, we're not worthy."
I stand in awe of model-gods like you and Chris.
"We're not worthy, we're not worthy."
Frank
(Look forward to (probably) meet you
 )
)