


CD ScaleDesigns Albatros CI build


 09-25-2010, 08:27 AM
#902

Thread Starter

Here are some of the hobby goodies that I transported back from the US. The Proctor wheels are, of course, cool (and a perfect fit for the CI) but I'm just as excited about the cheap hand seamer and sanding belts from Harbor Freight and the Brass Black (from the gun shop). The Che "radio strap" cost $1 at a swap meet (in Reedley, CA). And then there's the PC10 and a quart of clear from Nelson's (for my SE5a). Let's see, what else? A 1/6 scale head sculpt from a gun show, some sculpey (bakeable clay) for small parts, a good supply of Dremel cutting disks (you can never have too many), and another 10m roll of Natural Solartex...which may be the only fabric covering I'll ever use. These are all things that would be very hard to find here in Japan.
 09-25-2010, 04:14 PM
#904
Thread Starter
There are still a few details to work out on these fittings, specifically how to anchor them to the spar. Also the metal ring that the turnbuckles attach to needs to be strong enough to support flying loads since the rigging needs to be fully functional.
The thing to keep in mind is that the rigging ultimately holds the SPARS in place, not the struts. The struts are just there to keep the wings apart.
The thing to keep in mind is that the rigging ultimately holds the SPARS in place, not the struts. The struts are just there to keep the wings apart.
09-26-2010, 02:16 AM
#905
Senior Member
Join Date: Aug 2007
Location: RiminiRN, ITALY
Posts: 269
Likes: 0
Received 0 Likes
on
0 Posts
Abu
in the real one the stud of the fork ends was long enough to pass through the spar and was secured with a visible (costellated?) nut.
I used the fork ends from Mick Reeves with a 2 mm. threaded rod screwed in it and a nut in the other side of the spar; in your case you have to screw in the "screw with an eye" a conveniently screwed 2,5 MA socket "epoxydied" to the spar, or fixed to it by a threaded rod and nut (for me = better).
In 1/6 scale was unable to solve the "ring - cup" problem and opted for tabs and false cups held in position by the forkends; I am very curious to see how you get it....
09-26-2010, 10:21 AM
#908
Thread Starter
Thanks! That looks very convincing which of course is the whole point of scale modeling. How did you make the "cups?" It's unfortunate that the threaded ends on the parts I'm using are only about 6mm long. So not nearly long enough to go all the way through the wing.
09-26-2010, 10:58 AM
#909
Senior Member
Join Date: Aug 2007
Location: RiminiRN, ITALY
Posts: 269
Likes: 0
Received 0 Likes
on
0 Posts
Your exemple appear a lot more convincing than my!
I made the "cups" in brass on my lathe and are not hollowed; I have supposed that would be (for me) too much difficult accomodate the ring inside the hollow "cup" and to be sure that the whole could support the flying loads.
In to the spars you can accomodate some threaded female tubes to which you can screw the "screw with an eye".
09-27-2010, 12:23 AM
#910
Thread Starter
OK, the CI is out of the closet and back on the building table...and the shop is semi-clean! So now I can get rolling again. Lots of interesting tasks coming up, including:
1. Finish the cabane pylon.
2. Finalize the method for mounting the wings.
3. Finish the UC.
4. Locate and make (metal, card, plastic?) all of the fittings and covers found on the fuselage surface.
5. Finalize and cover the tail surfaces.
6. Work out the rigging.
1. Finish the cabane pylon.
2. Finalize the method for mounting the wings.
3. Finish the UC.
4. Locate and make (metal, card, plastic?) all of the fittings and covers found on the fuselage surface.
5. Finalize and cover the tail surfaces.
6. Work out the rigging.
09-27-2010, 03:18 PM
#911
Thread Starter
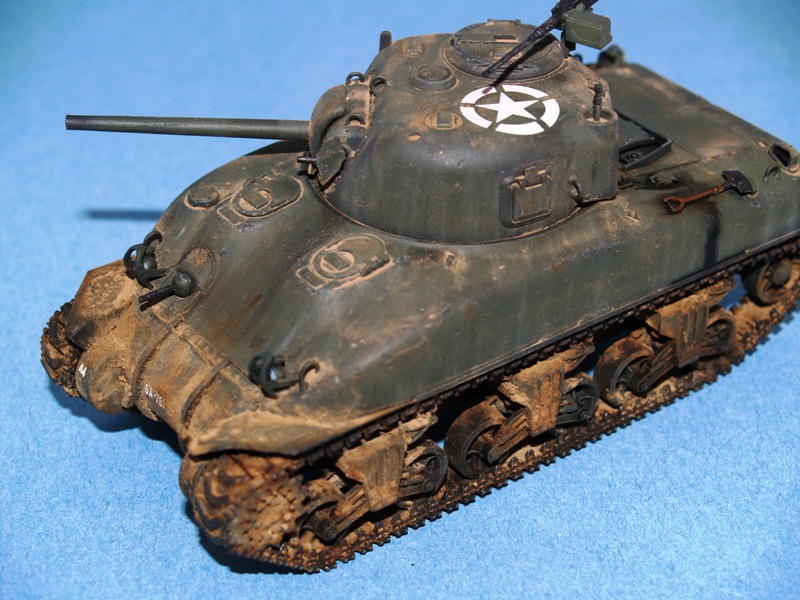
Looks pretty sweet with the Proctor wheels. I can use the WB wheels for "every day" flying and put on the Proctor wheels for special occasions. I'd like experiment (on an old pair of Flair wheels) how to paint the rudder grey and also have to create a "dark mud" effect (seen on most photos). What do the plastic model tank guys use? I'm sure it would flake off in use, but maybe that would just make it look better.
09-27-2010, 05:41 PM
#912
Senior Member

Join Date: Sep 2003
Location: Cherry hill NJ, NJ
Posts: 131
Likes: 0
Received 0 Likes
on
0 Posts
What do the plastic model tank guys use?
Looks like this:
 09-27-2010, 06:19 PM
#914
Thread Starter
Tank modeling is ALL about weathering! It almost doesn't matter what's underneath all that mud and grim!  And I want in on a bit of the action! Why should the tank guys have all the fun. We WWI modelers should cake on the muck!
So anyone have experience painting rubber wheels? What kind of paint sticks best?
And I want in on a bit of the action! Why should the tank guys have all the fun. We WWI modelers should cake on the muck!So anyone have experience painting rubber wheels? What kind of paint sticks best?
09-27-2010, 08:20 PM
#915
Senior Member
Join Date: Sep 2003
Location: Cherry hill NJ, NJ
Posts: 131
Likes: 0
Received 0 Likes
on
0 Posts
ORIGINAL: abufletcher
Tank modeling is ALL about weathering! It almost doesn't matter what's underneath all that mud and grim! And I want in on a bit of the action! Why should the tank guys have all the fun. We WWI modelers should cake on the muck!
So anyone have experience painting rubber wheels? What kind of paint sticks best?
Tank modeling is ALL about weathering! It almost doesn't matter what's underneath all that mud and grim!
And I want in on a bit of the action! Why should the tank guys have all the fun. We WWI modelers should cake on the muck!So anyone have experience painting rubber wheels? What kind of paint sticks best?
Well, I'd definitely be lying if I said that weathering wasn't my favorite part of the finishing.
09-28-2010, 06:42 AM
#916
Thread Starter
What's this, you say? Well, it's the scale fitting for the "mid-spar" flying wire that goes from this fitting attached to the rear spar attachment point to a fitting on the upper spar about mid-way between the cabane and the inner wing struts. It took me a lot of starring at the Krakaw CI photos to figure out what this was. And then it took me a ling time to figure out how to make it. I started with a "5-4" electrical lug and shaped it and drilled it, then shaped it some more.
And, yes, I need to order some shorter 0-90 machine screws! Oh, and I've got to confirm that this actually clears the airfoil.
And, yes, I need to order some shorter 0-90 machine screws! Oh, and I've got to confirm that this actually clears the airfoil.
09-28-2010, 10:20 PM
#918
Thread Starter
Next fitting. Since this one that goes around the forward attachment point is purely cosmetic I used 1mm aluminum. Easy to work with and weighs nothing.
09-29-2010, 01:30 AM
#920
Thread Starter
Clearly visible on the fuse just in front of the elevator cable exits are some little metal panels. My guess is that these allow access to the cable and may even had had a pulley on the inside. Anyway, here's my first attempt to replicate these. Making the blanks from lithoplate was simple enough (drill, then score, then break off). But getting the shape just right was a bit difficult and I didn't succeed very well on this first try. It looks fine at a distance, but up close the poor workmanship shows. Actually, I think this is a vision problem as much as anything else. At this size I really can't see what I'm doing. The next time I'll try doing it under a magnifying glass.
It would be great if the kit could provide these are photo-etched parts. As far as I can tell, 6 are needed. There are four by the cable exits and another two very similar looking plates near the forward cabane strut.
It would be great if the kit could provide these are photo-etched parts. As far as I can tell, 6 are needed. There are four by the cable exits and another two very similar looking plates near the forward cabane strut.
09-29-2010, 06:04 AM
#921
Thread Starter
Four done. Not much better up really close by they really do look the part from a foot away. I guess that's good enough. So the next question is this: What color to paint the fittings? Grey? Black? Green? I'm tempted to make all the metal parts (panels, cowlings, wing strut fittings, etc.) grey.
Also I need to figure out how to make the other attachment points for the flying wires (which attach to the top of the UC legs) and the drag wire, that attached to the lower corner of the firewall. Ideally, I'd like to work out something that looks sort of like that ball-type socket that the original used.
Also I need to figure out how to make the other attachment points for the flying wires (which attach to the top of the UC legs) and the drag wire, that attached to the lower corner of the firewall. Ideally, I'd like to work out something that looks sort of like that ball-type socket that the original used.
09-29-2010, 07:31 AM
#922
Senior Member
Join Date: Aug 2007
Location: RiminiRN, ITALY
Posts: 269
Likes: 0
Received 0 Likes
on
0 Posts
Abu
are you thinking to something like this ?
The balls come from commercial 2 mm. ball-jonts; the sockets are made of 0,3 mm sheet of brass pressed in a vice in a male-female steel mould; the screws are 2 MA Allen type that ares screwed (for assemblying the model) to the "right " threads of the turnbuckles with wich terminated the flying wires (and vice-versa for disassemblying).
09-29-2010, 07:52 AM
#923
Thread Starter
Yep! Something EXACTLY like that! That certainly gives me some ideas. Seems like I spent the whole day cutting out little bits of aluminum. Here what I'm trying to replicate with my primitive skills. It may seem like a lot of work for such little pieces but it's details like this that break up the large expanses of real estate on the sides of our WWI fuselages. I mean if the WWII boys can put on 20,000 rivets by hand, we can do a lousy dozen brackets! 
That certainly gives me some ideas. Seems like I spent the whole day cutting out little bits of aluminum. Here what I'm trying to replicate with my primitive skills. It may seem like a lot of work for such little pieces but it's details like this that break up the large expanses of real estate on the sides of our WWI fuselages. I mean if the WWII boys can put on 20,000 rivets by hand, we can do a lousy dozen brackets!
09-29-2010, 08:14 AM
#924
Senior Member
Join Date: Aug 2007
Location: RiminiRN, ITALY
Posts: 269
Likes: 0
Received 0 Likes
on
0 Posts
For making all the steel parts for the 1/4 scale Sopwith Strutter I used this method: insted of shaping every part separately from the other ,I glued all parts (roughly cut) together with contact glue and I have cut/ filed/drilled all together; you can even make 1 part as a prototipe and use it as a template for the further.