Panther F/jagdpanther builds (two in one!) finally updated with figures!
 12-31-2012, 12:45 PM
#1

Thread Starter
So I bought stevies panther 2 that's shown in the display cabinet. After looking at options for making its running gear more accurate and looking through panzer tracts I decided it was impractical and would necessitate damaging all the good work already done. So I've decided to rebuild it as a panther F with a whole load of goodies from asiatam and rctank.de mentioned in my jagdpanther build which is intended to run concurrently to this. I will be using a set of Tamiya panther tus left over from when I upgraded my Tamiya panther.
So here's my starting point, all the aforementioned goodies from asiatam and rctank.de

First step if to install the Tamiya tus using the tried and tested nail polish method to get the right alignment (ahem) well it seemed to work!
I used the impact standoffs which don't actually fit Tamiya tanks but seem fine here!
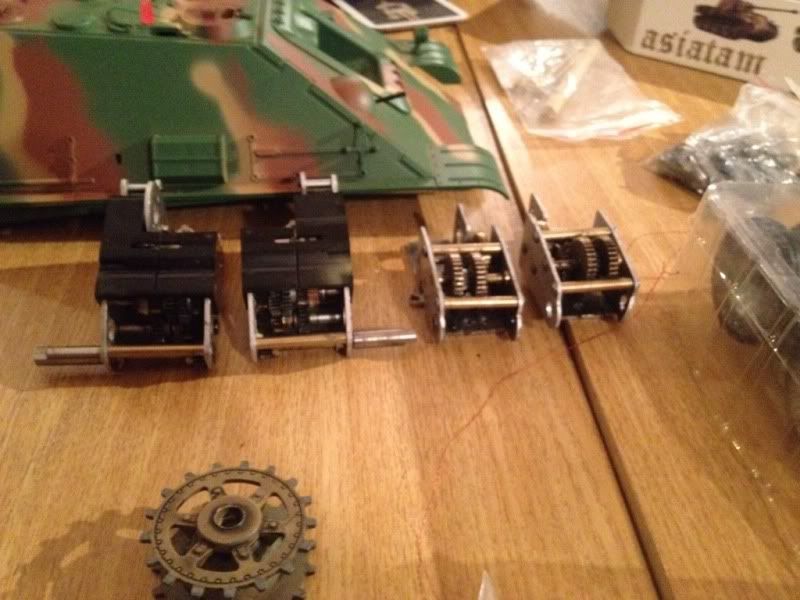
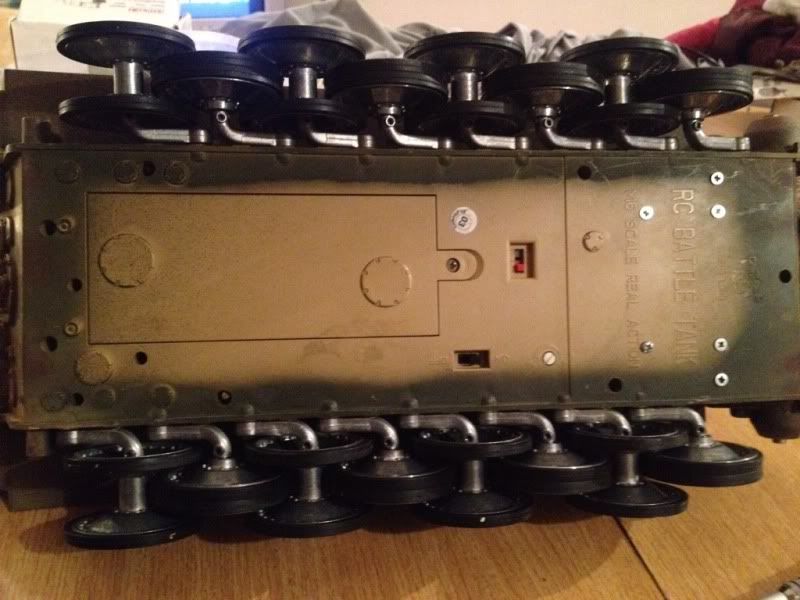
Success! Next up are the metal suspension arms and road wheels (first time I've used metal wheels in a build). These fitted perfectly and roll beautifully.
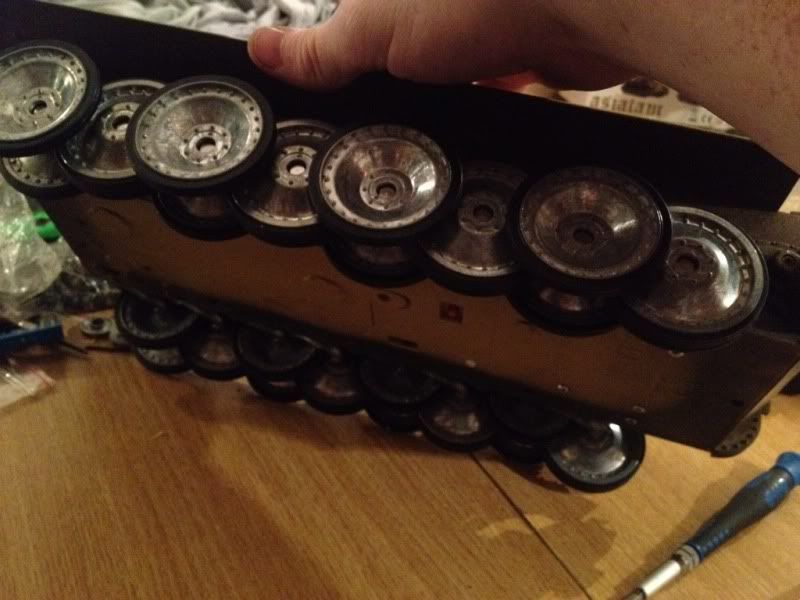
Alignment looks good!
Now the only problem I've had so far is that the asiatam sprockets don't fit the asiatam tracks (strange eh) but the HL metal sprockets work great (sollie gave me the idea after his tiger issues). I'm awaiting dominiques reply about this.
Now it's time to party like its 1999, more updates next year!!
 12-31-2012, 01:31 PM
#2
Looking good there Tom! 
~ Jeff
~ Jeff
12-31-2012, 01:33 PM
#3
Senior Member
Join Date: Jan 2006
Location: C.C.,
TX
Posts: 237
Likes: 0
Received 0 Likes
on
0 Posts
Hi,
Great article. Can you tell me what camo colors are used. I have a gray Jagdpanther I would like to repaint maybe in D-Day colors.
Harle
Great article. Can you tell me what camo colors are used. I have a gray Jagdpanther I would like to repaint maybe in D-Day colors.
Harle
12-31-2012, 11:43 PM
#4
Senior Member
ORIGINAL: harleridr
Hi,
Great article. Can you tell me what camo colors are used. I have a gray Jagdpanther I would like to repaint maybe in D-Day colors.
Harle
Hi,
Great article. Can you tell me what camo colors are used. I have a gray Jagdpanther I would like to repaint maybe in D-Day colors.
Harle
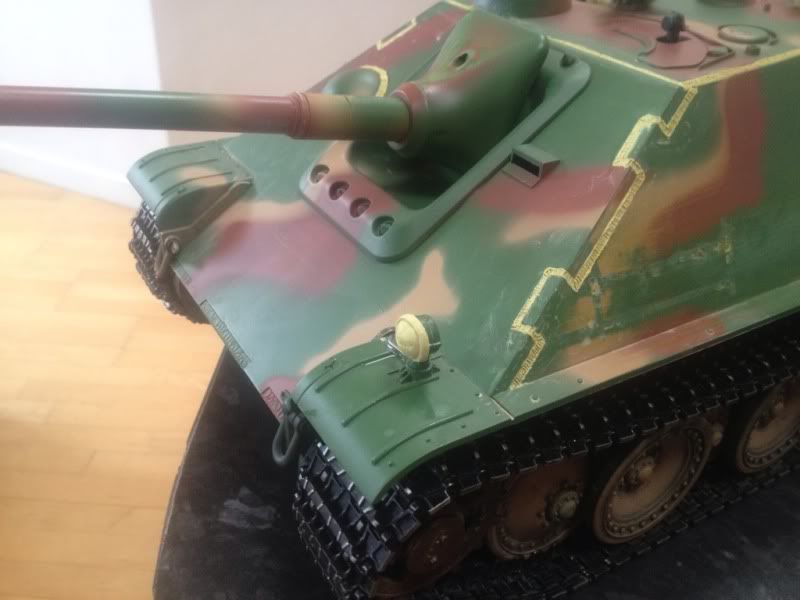
What the heck was H L thinking with that Panzer Grey (Blue). Here are a few pix to get you off to a running start. Give my best to the rest ot the T A guys. Bob
01-30-2013, 09:50 AM
#6
Thread Starter
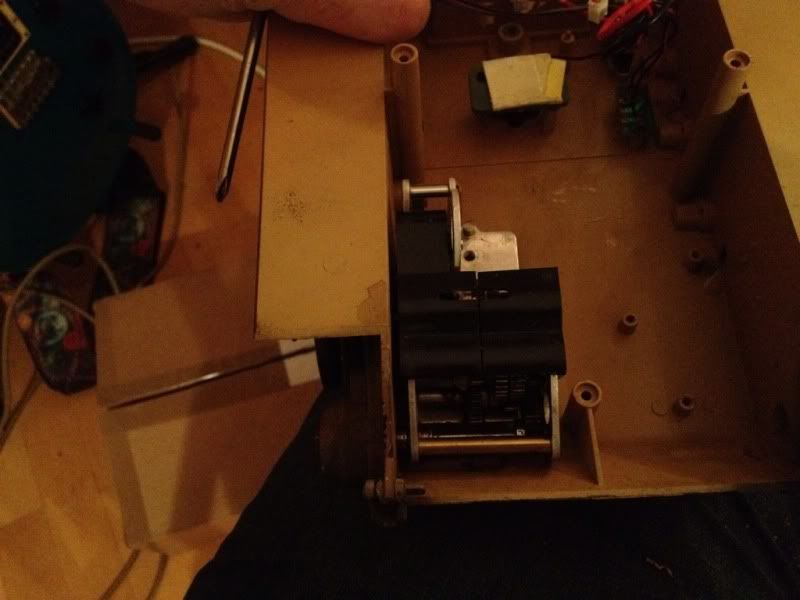
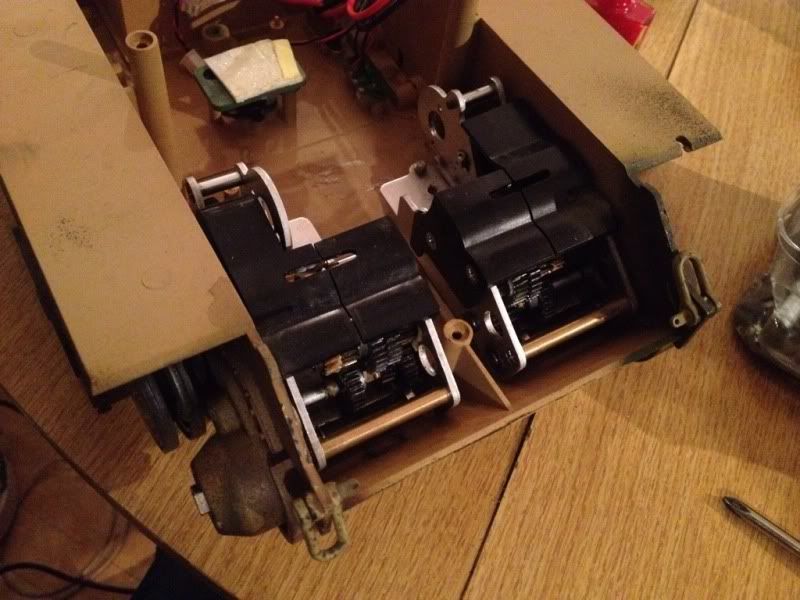
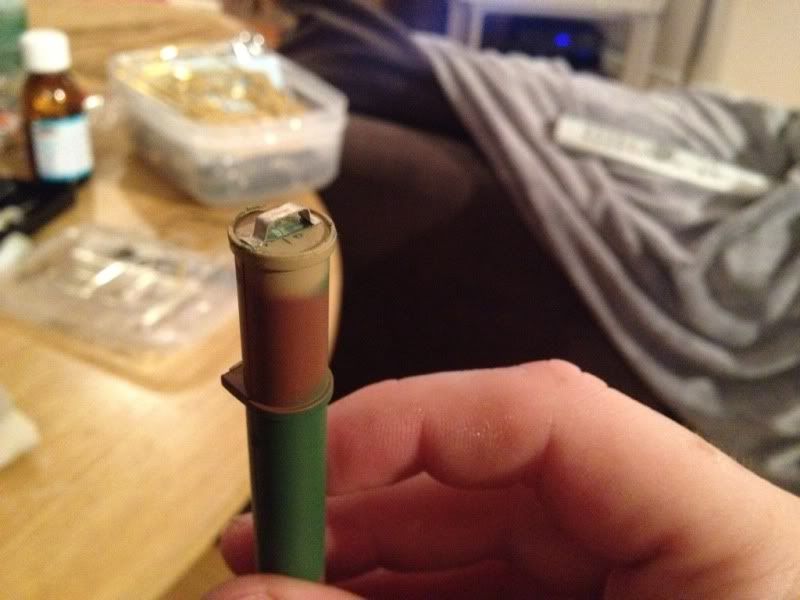
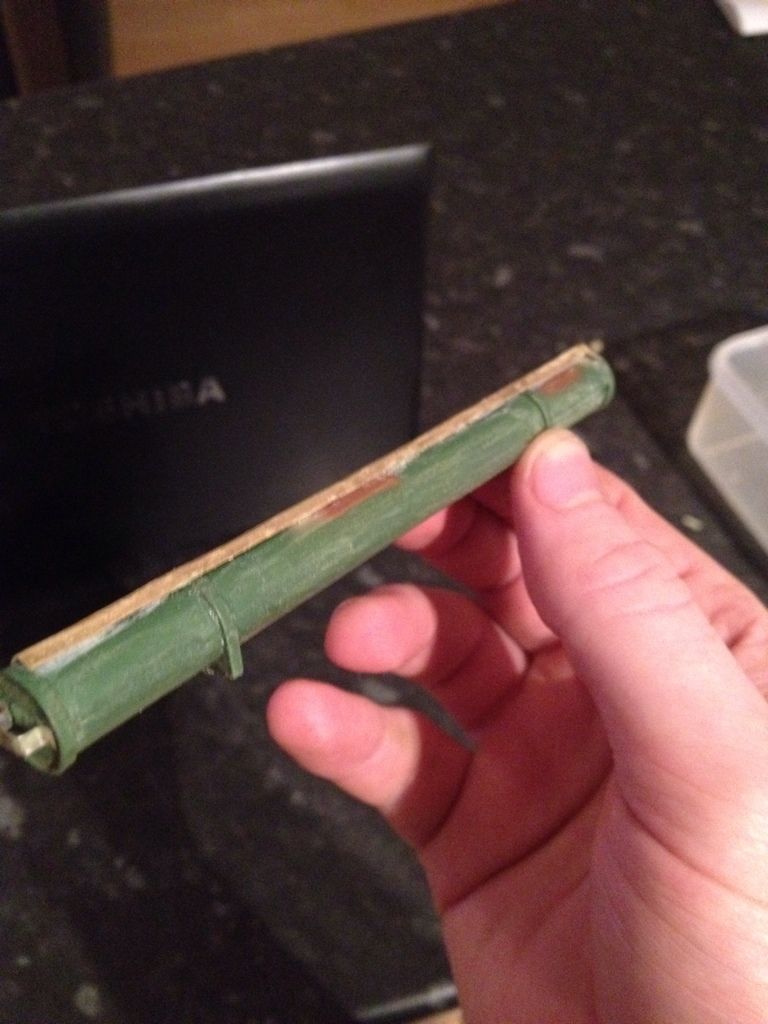
Ok first step was rebuilding a set of asiatam tus I'd found, one had no bearing so I had to enlarge the holes where they go and fit some Tamiya ones off their tus. Refitted the final drive, reattached grub screws and ta-da sorted!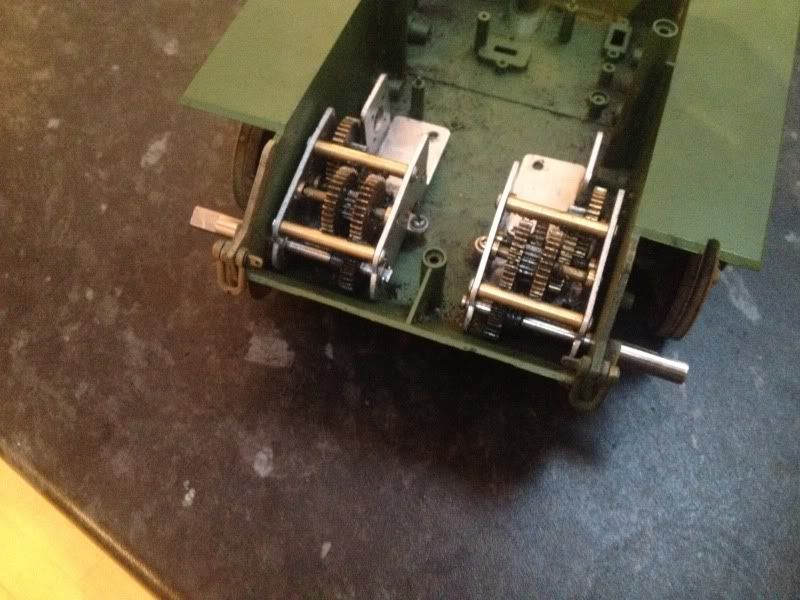
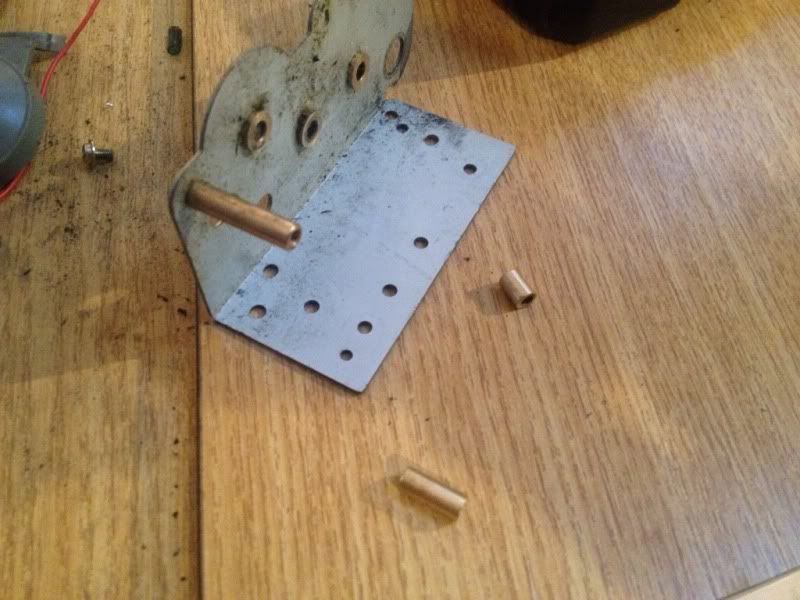
Realised I'd lost a standoff so made on out of the brass rod off the HL tus.
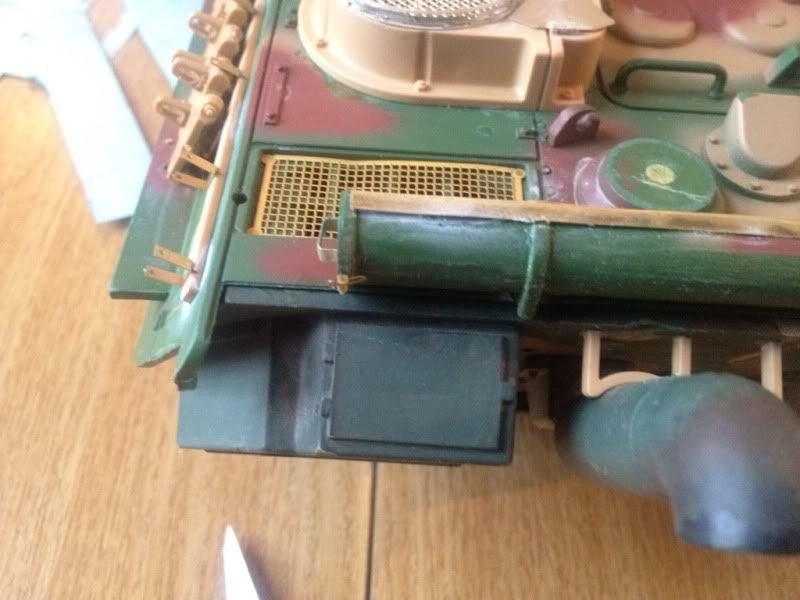
Next up removed the tools off the hull and filled the hull in.
Filled in the holes for the smoker on the back panel
Next I added a repositioned ariel with proper base from schumo.
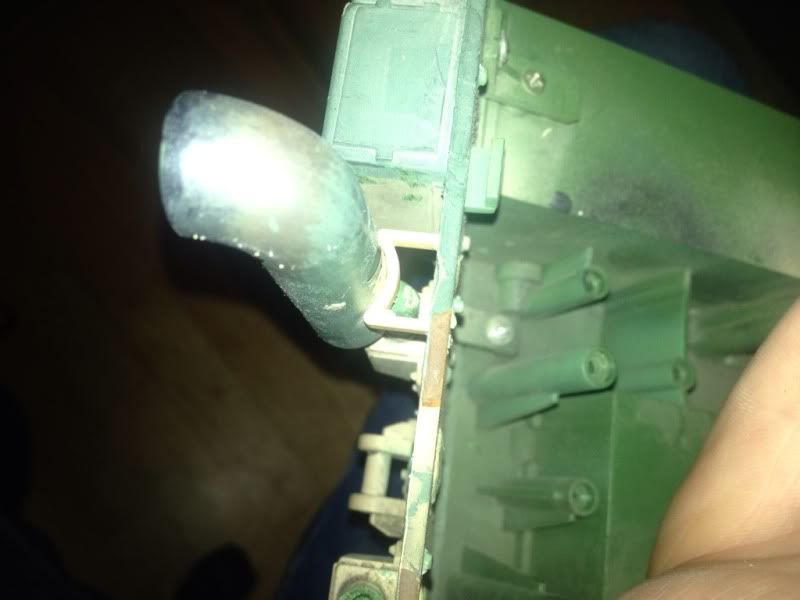
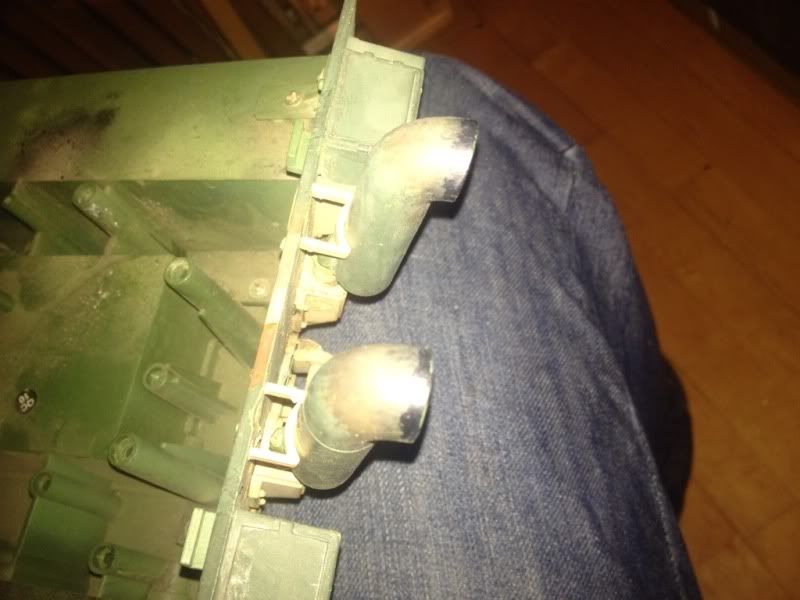
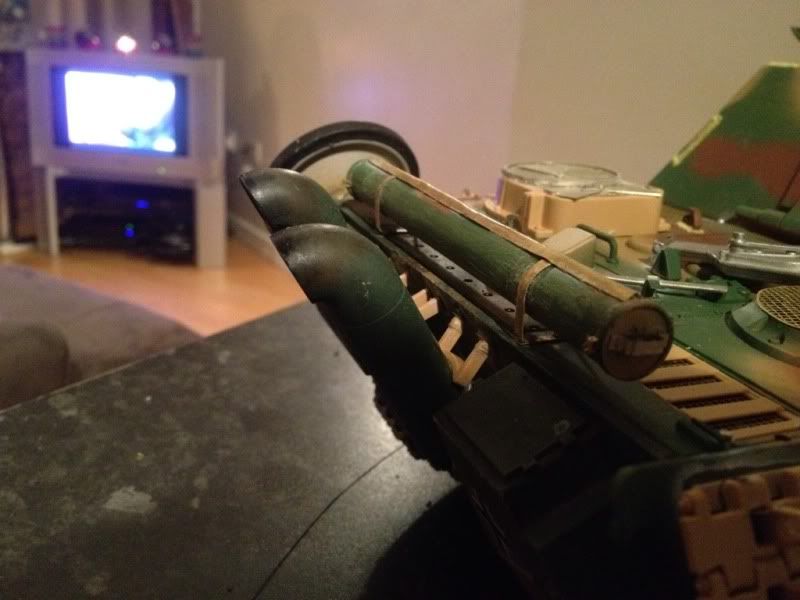
Repaired the rear exhausts and added the supports
01-30-2013, 09:51 AM
#7
Thread Starter
Finally feeling better so been doing some more work: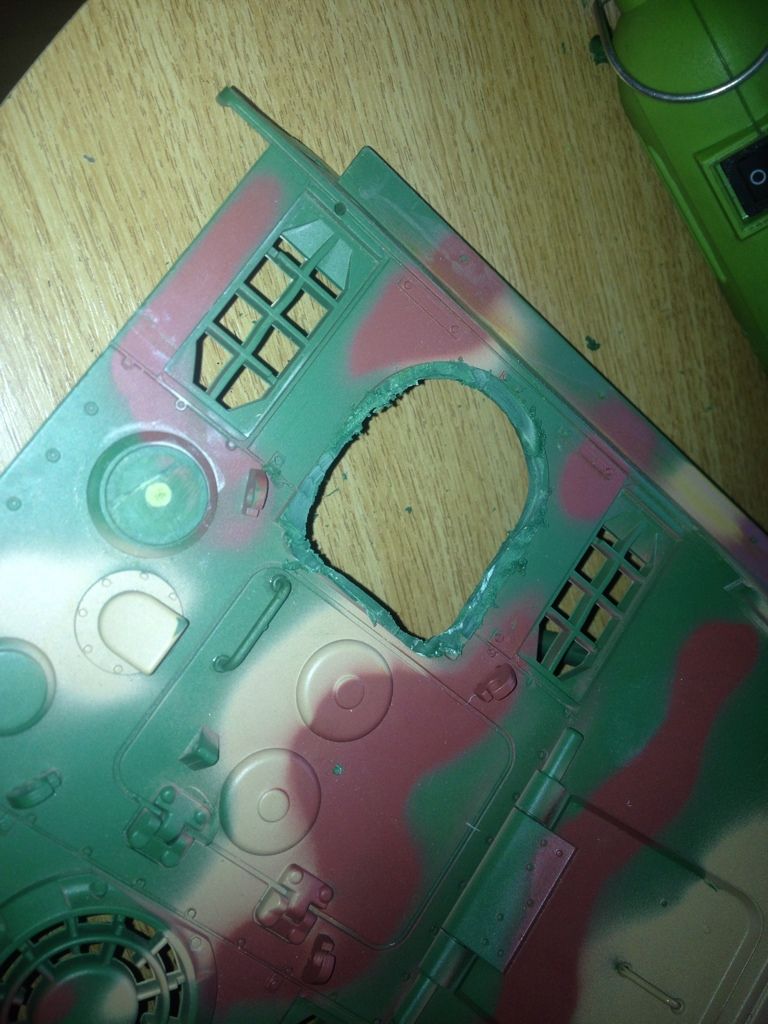
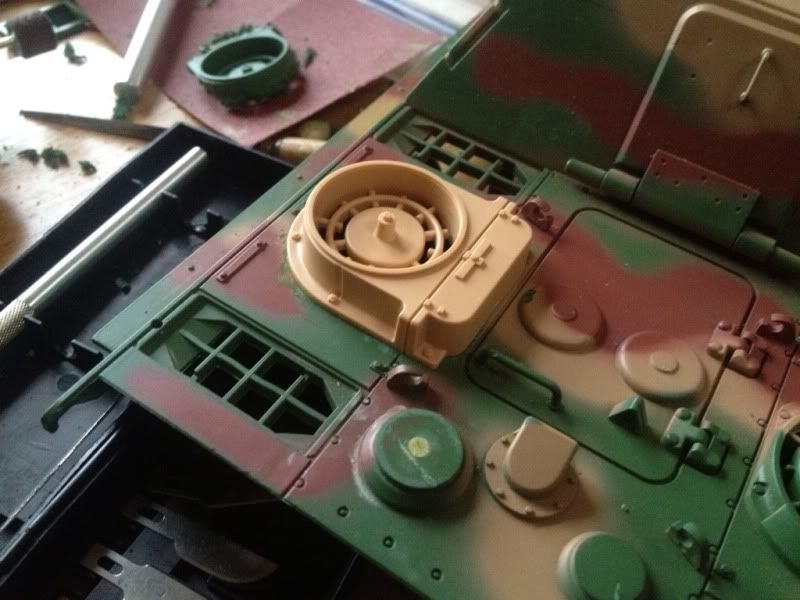
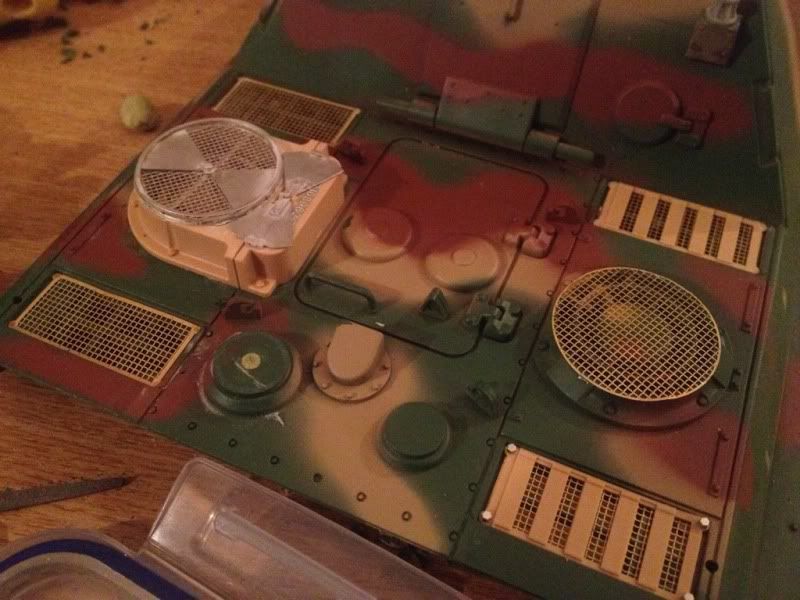
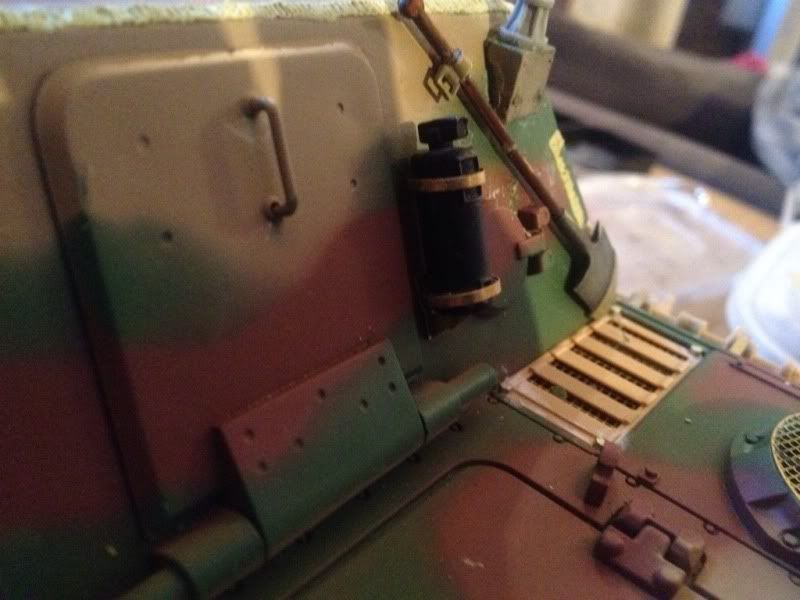
I removed the HL crew heater and added the part from the Tamiya panther.
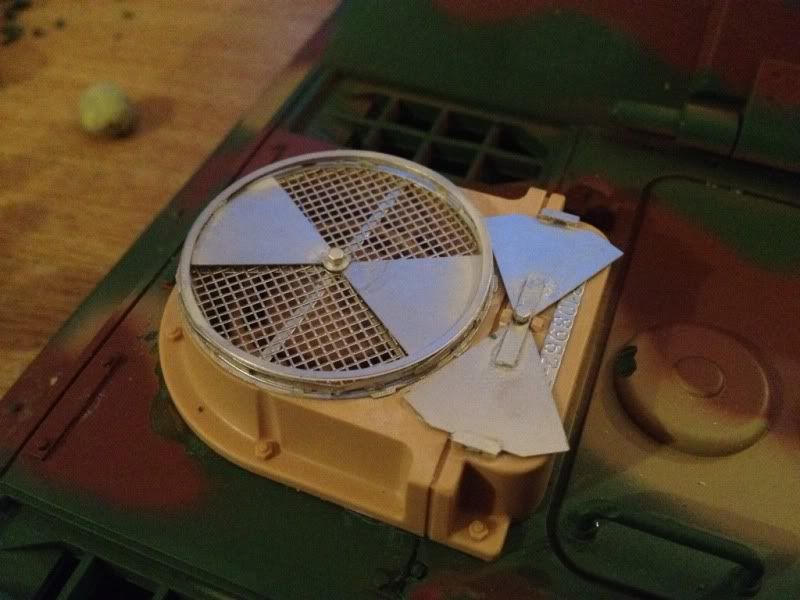
Then added the Aber PE kit
And added PE grills and bolts, also the Tamiya covers for the left side
Next I added PE track hangers which are tbh rather flimsy so I might need to rethink this
01-30-2013, 09:52 AM
#8
Thread Starter
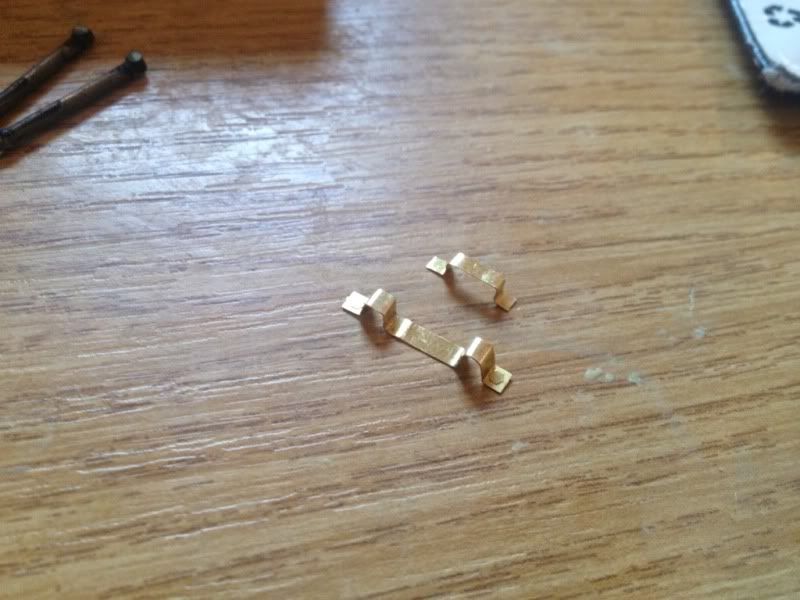
Next up came some brass scratch work. This is something I've never tried before and as I found I probably need some better way of folding large sheets.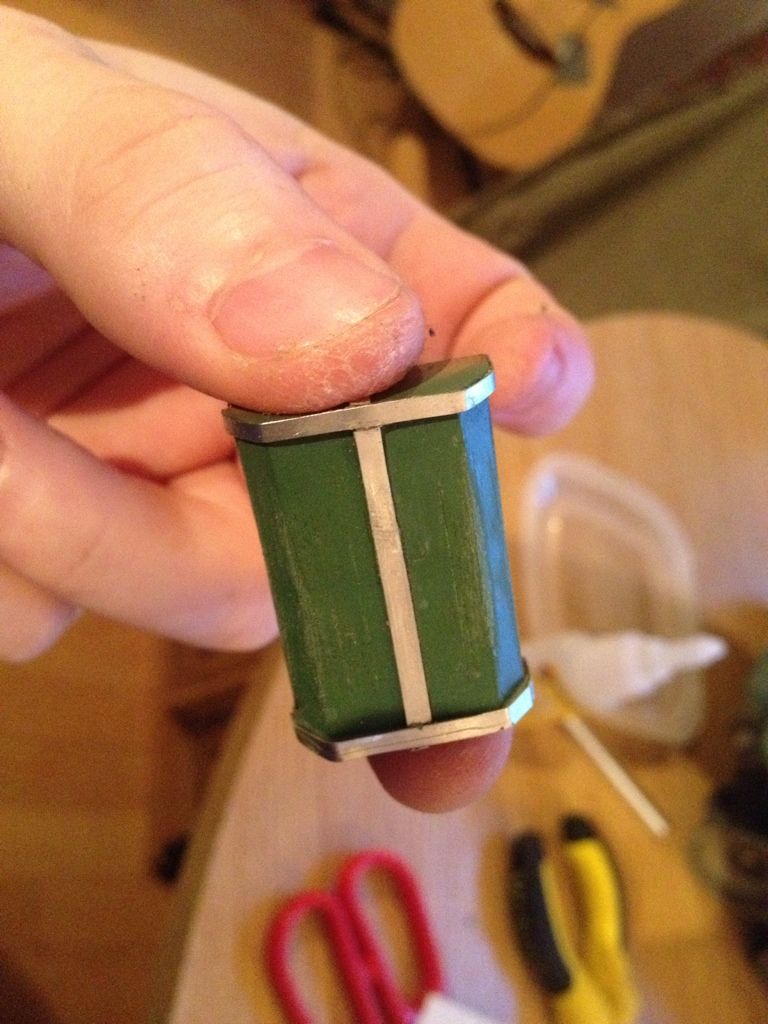
I started off making the holder for the jack block
First attempt which I realised was wrong....let's try that again:
Brass strips on the right side now. Next I started adding to the area holder which is being relocated to the rear. Not sure if I'm going to scratch some new legs as with the two halves of the hull makes securing them tricky.
I scratched some handles and the v shaped bit on top (which was a pain to bend).
01-30-2013, 09:57 AM
#9
Thread Starter
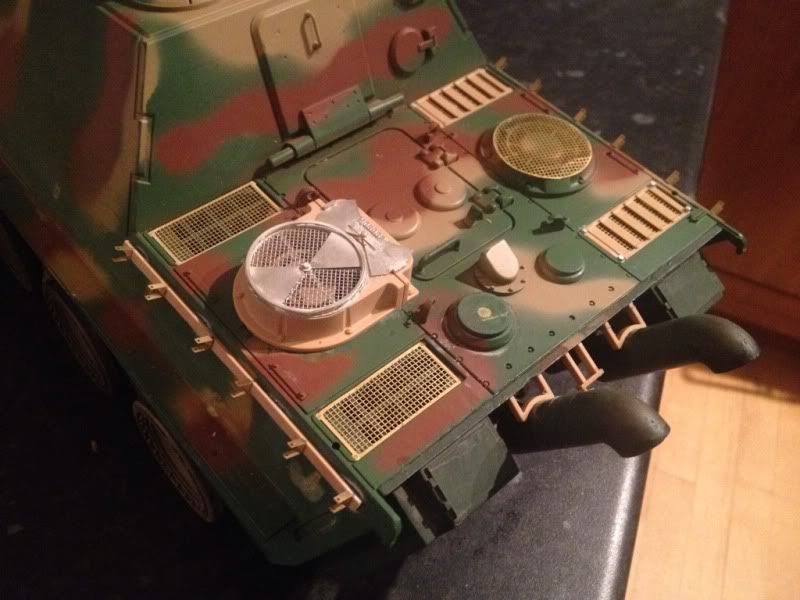
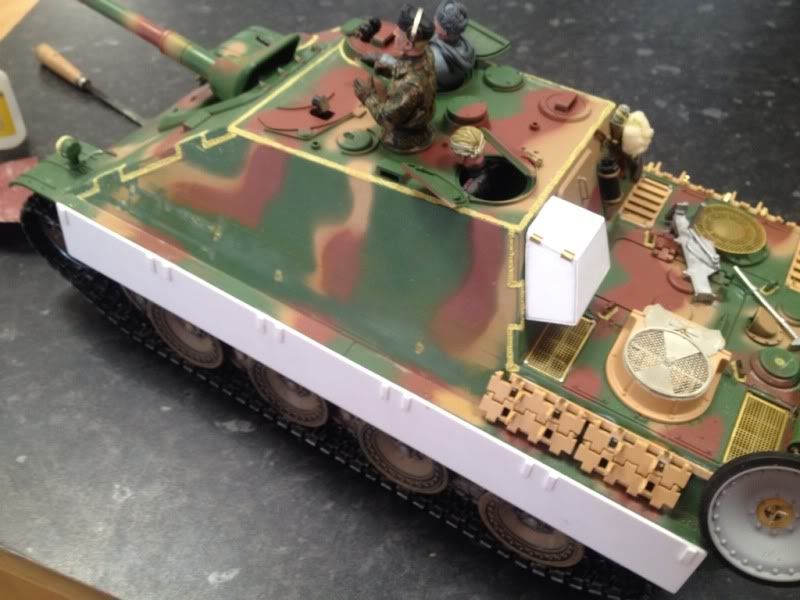
Hey guys, got back from my travels yesterday so got a little bit more work done on the jagdpanther.
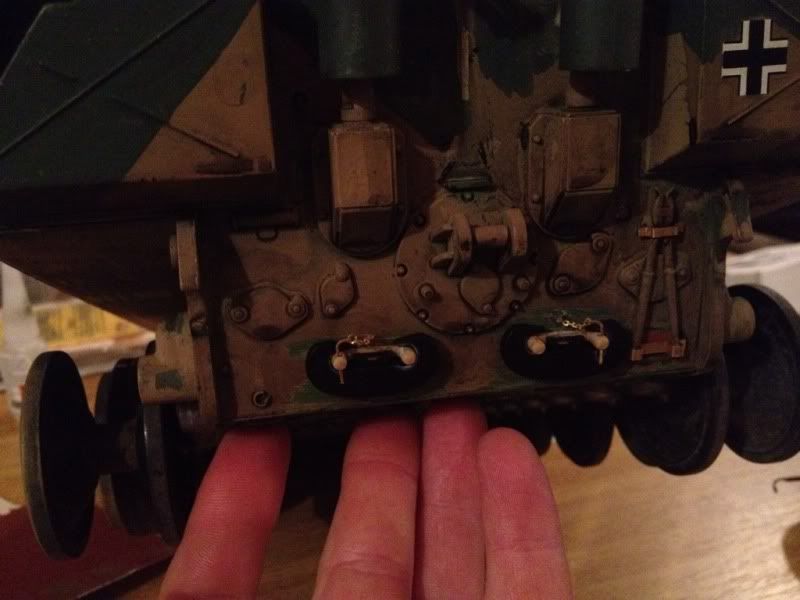
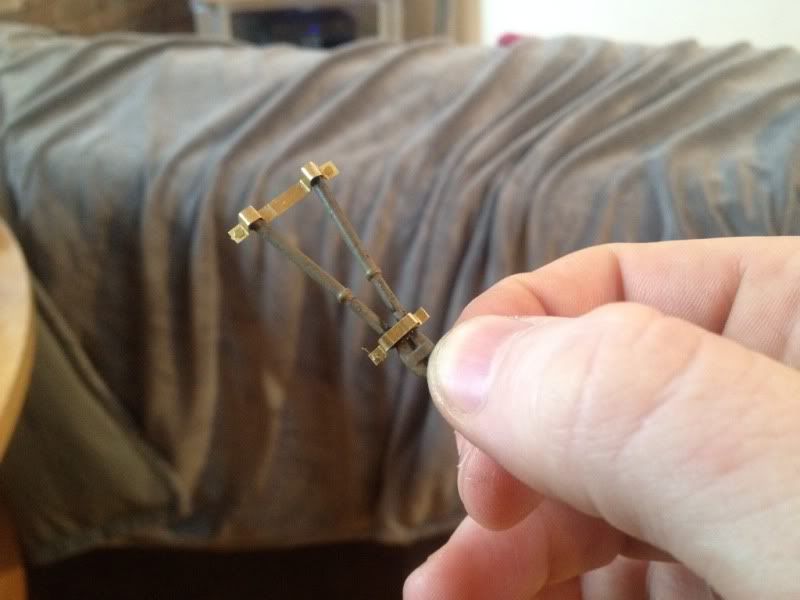

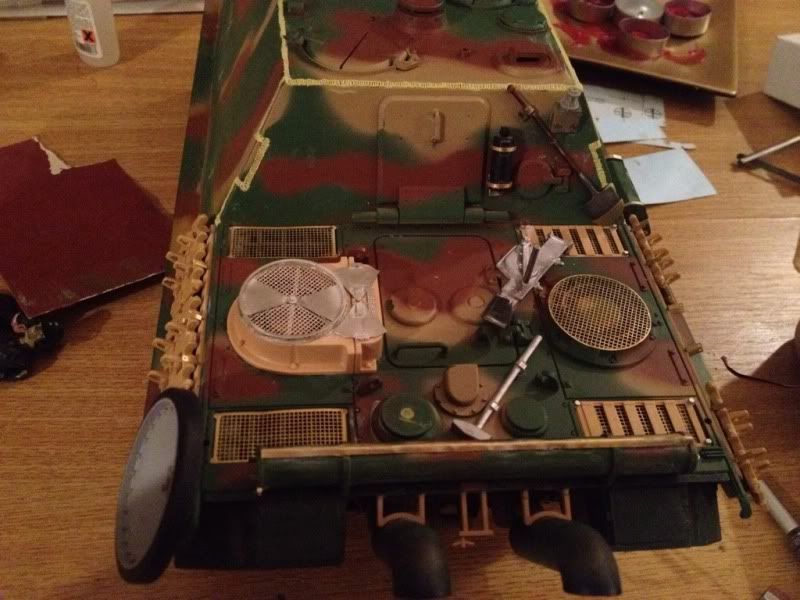
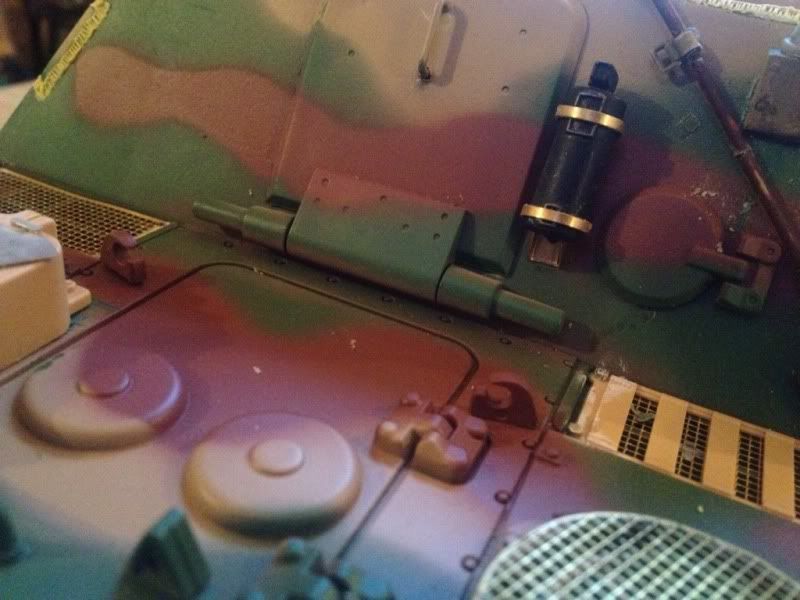
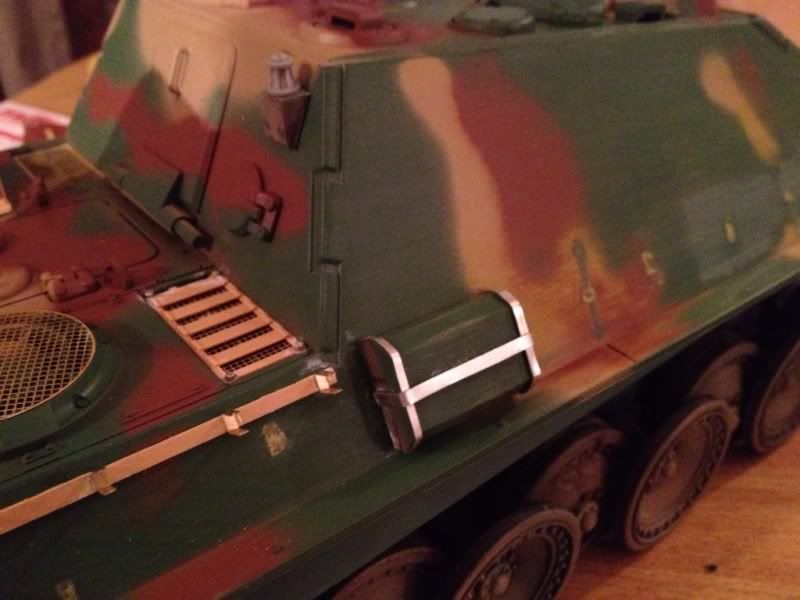
First order of business has been to add the main weld lines to the casemate. Then I needed to add some tools to the rear deck and back panel. I also added some PE clamps to the ariel tube and scratched some holders for the bolt cutters. I also added some brass straps and some extra detail to the fire extinguisher and alter the clamp position on the shovel so it fits properly.
Some pictures:
Preparing c clips
In situ with restraining pins added:
Holder for bolt cutters:
Spare outer road wheel (thanks blue Danube!) added to spare track holder with restraining pin.
Fire extinguisher, not clear is the triangular section of the holder under the extinguisher, it's not 100% scale but it's better than nothing!
Clamp and other brass work on the ariel tube:
Finally some overal shots showing the rear deck and some weld lines.
Next up is butchering a HL recoil to work with a servo! Still deciding how best to produce a traverse mechanism, if your reading this Nigel I'm looking at you
01-30-2013, 09:58 AM
#10
Thread Starter
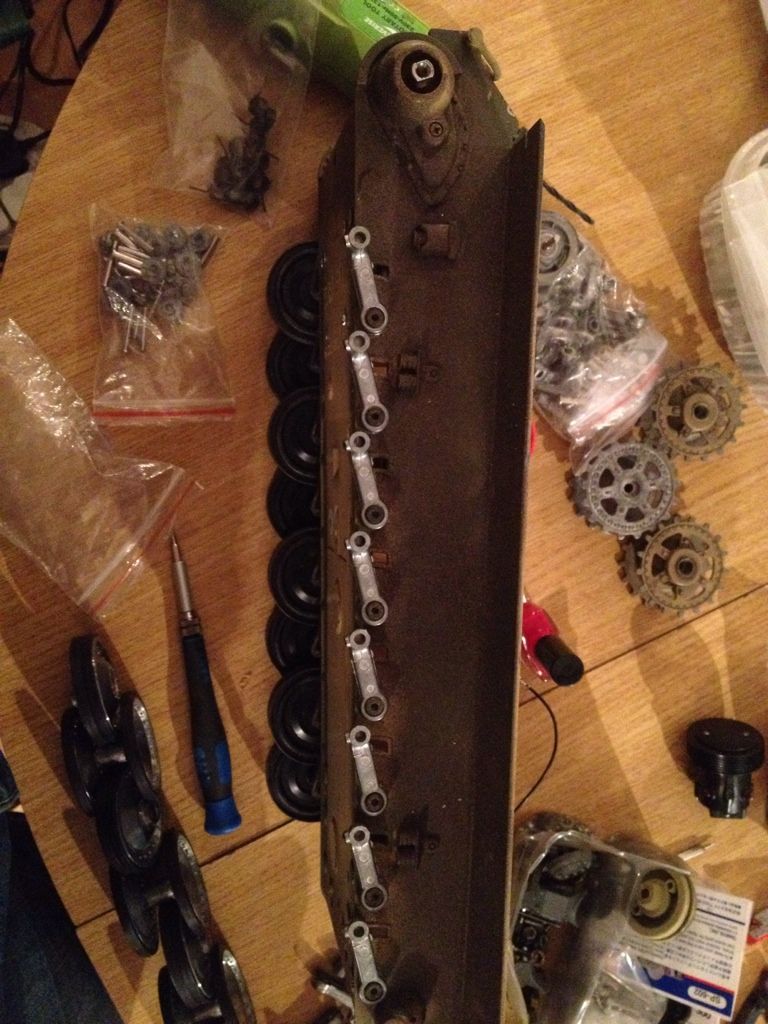
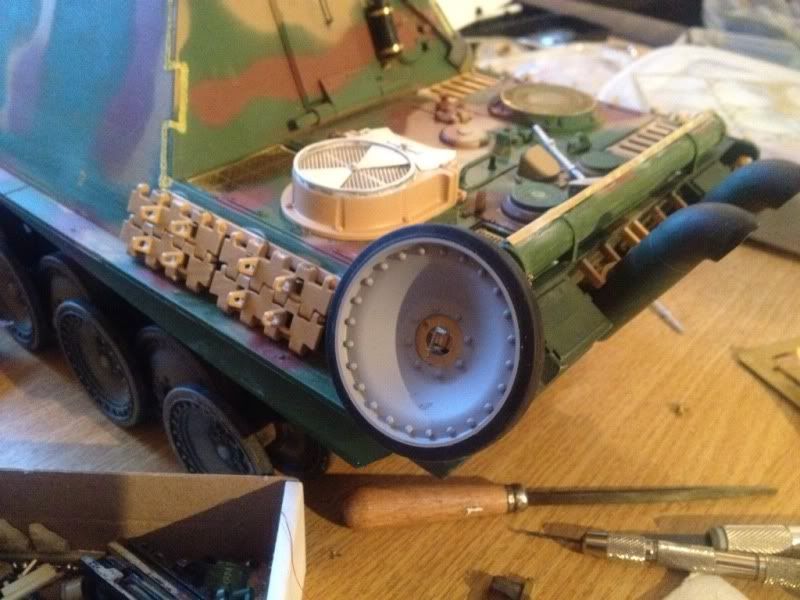
Some pictures with the asiatam tracks and idlers fitted. Only plastic sprockets but they do fit...

01-30-2013, 10:00 AM
#11
Thread Starter
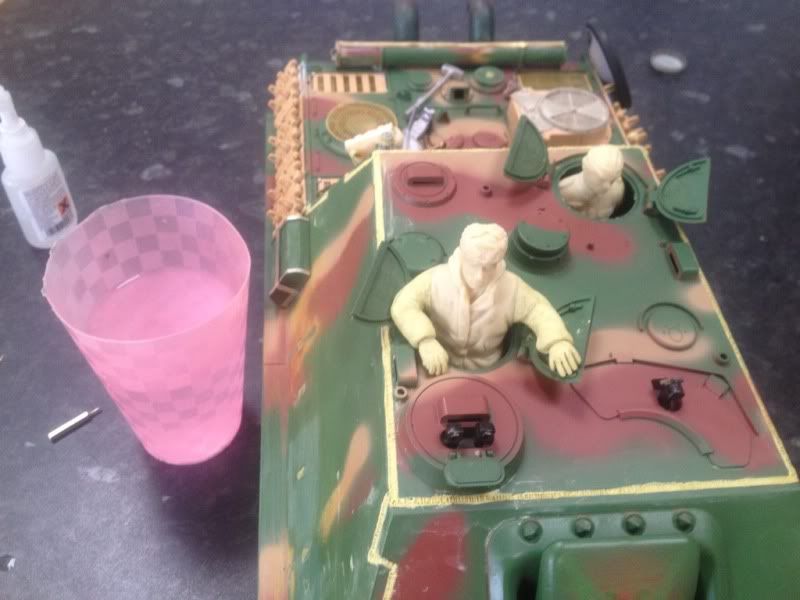
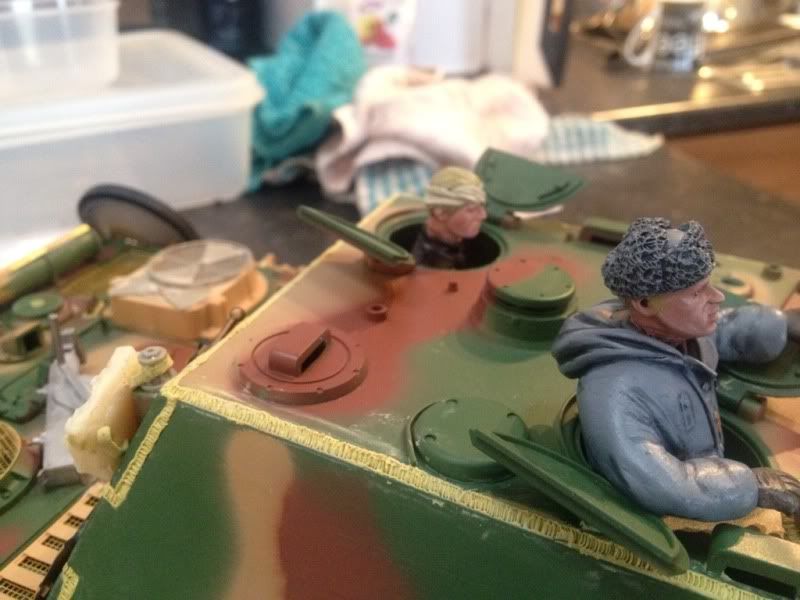
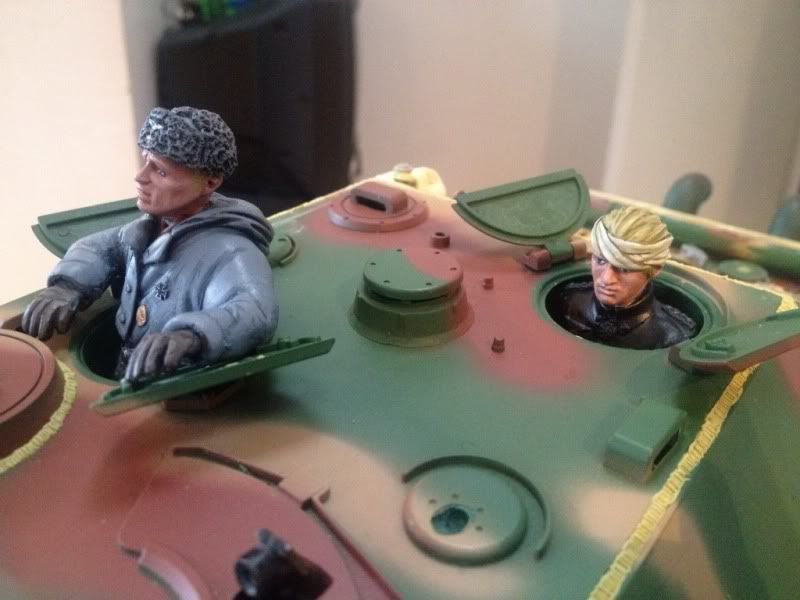
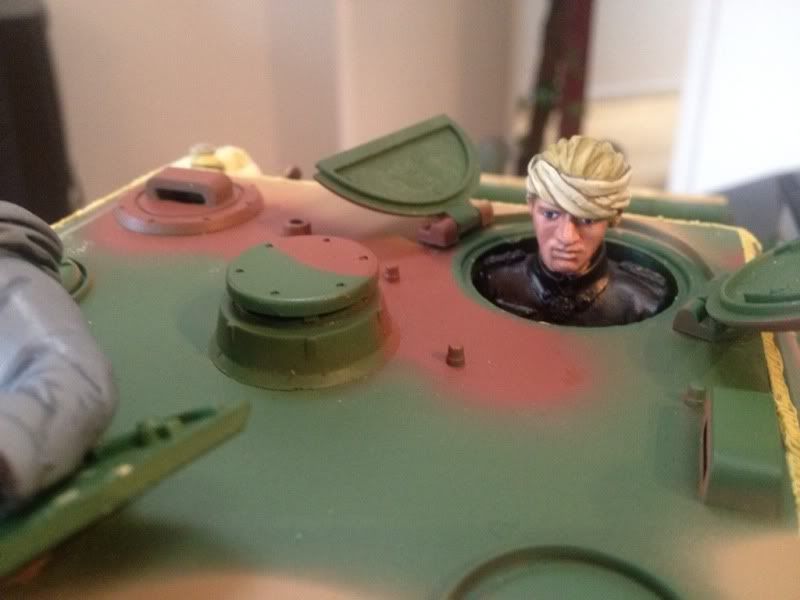
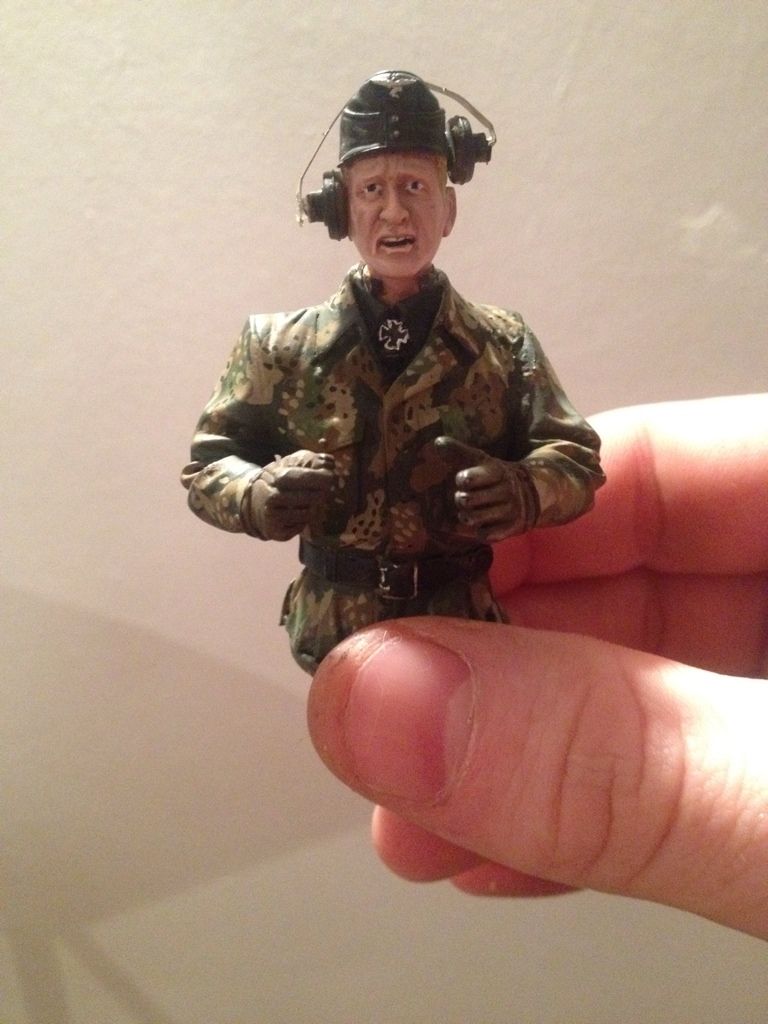
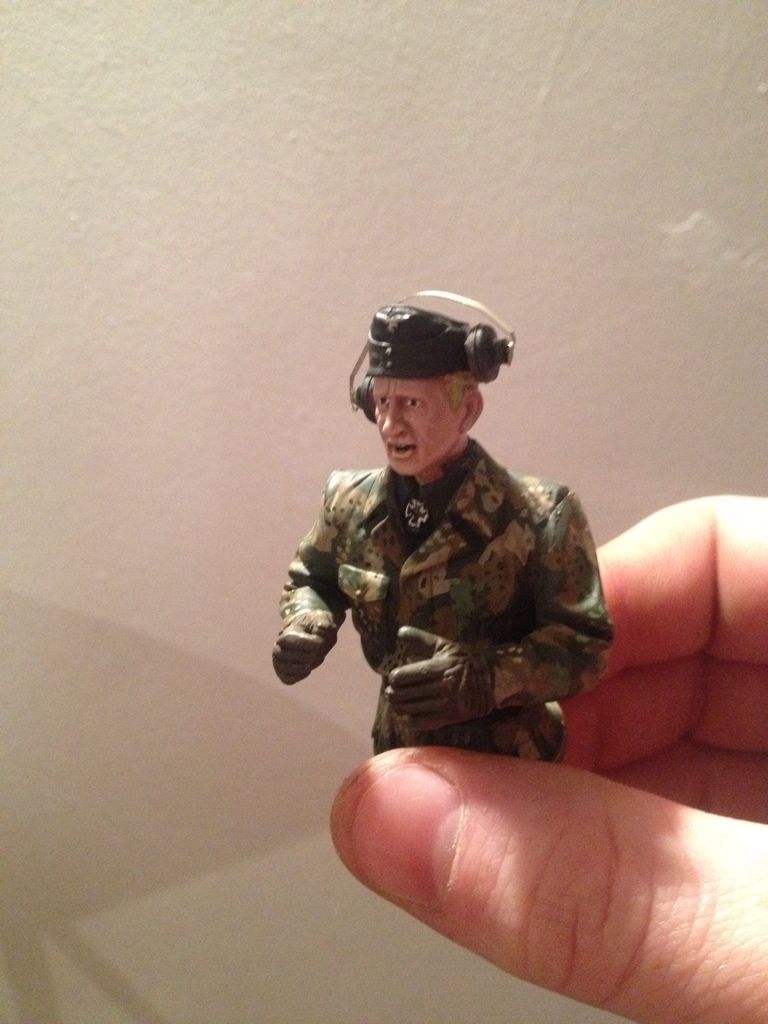
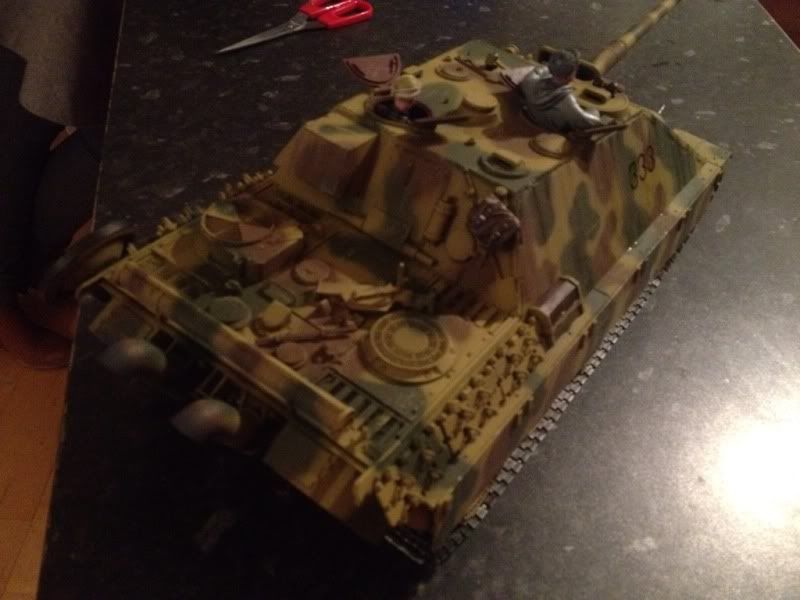
Today I attempted some sculpting. I bought some torsos and heads off custom commander. Alas no arms so I had to improvise, started with a bent wire frame then added miliput. Not 100% on the results (hands are a bit Wallace and grommit) but it will have to do. Also added some stowage and sculpted straps.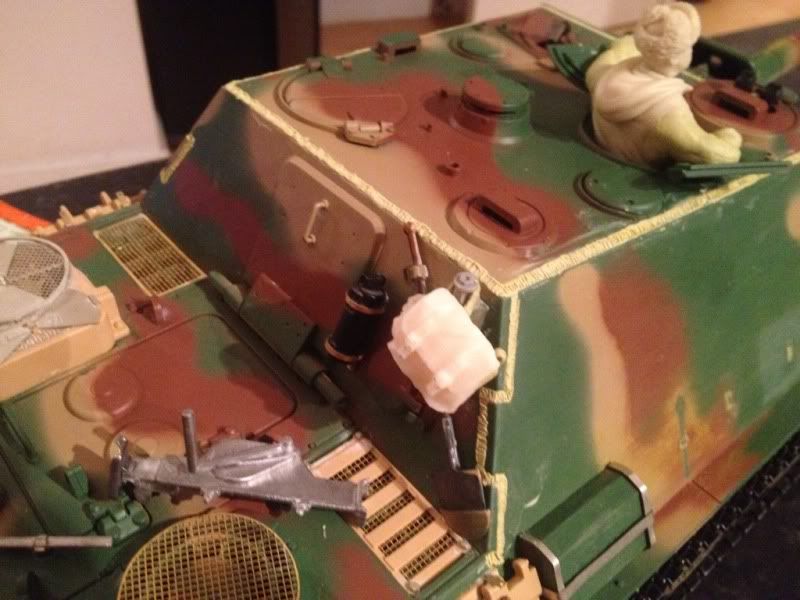
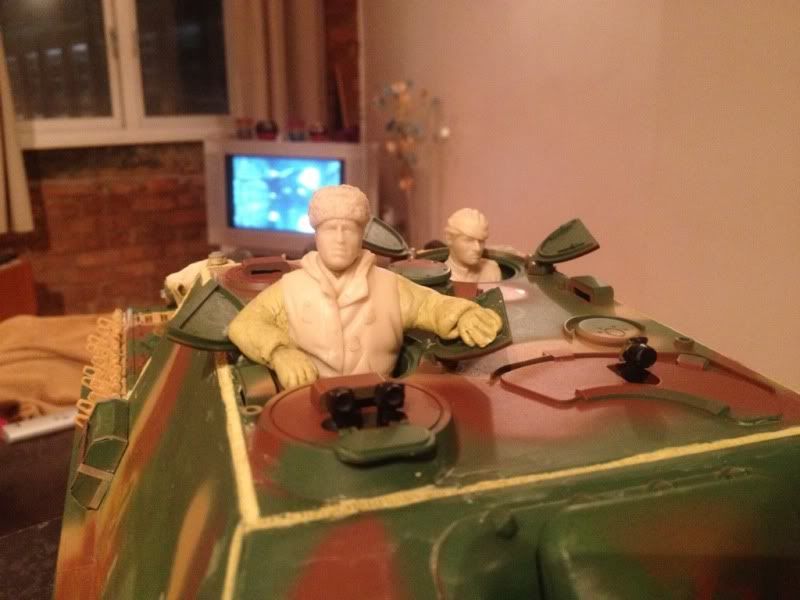

Hoping I can improve the hands once the putty has dried. I'm just waiting on some side skirts from battle front models and then I can get rolling with the paint.
01-30-2013, 10:02 AM
#12
Thread Starter
Have tried to refine the "sculpting" on the commanders hands, sculpted a head light cover and added the cable conduit.
 01-30-2013, 10:04 AM
#13
Thread Starter
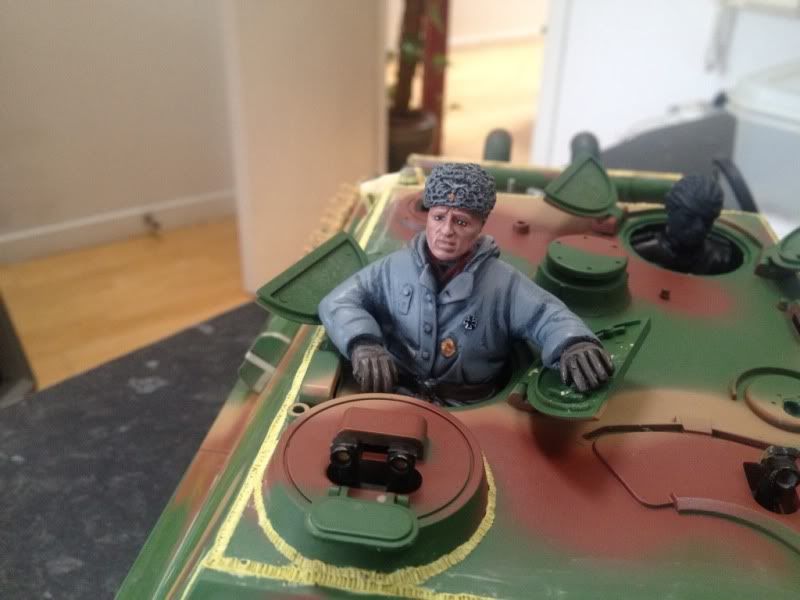
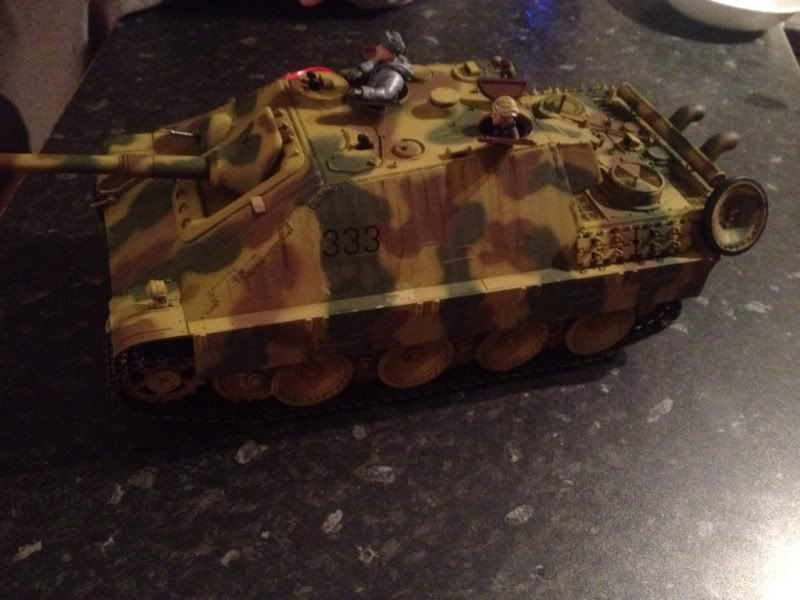
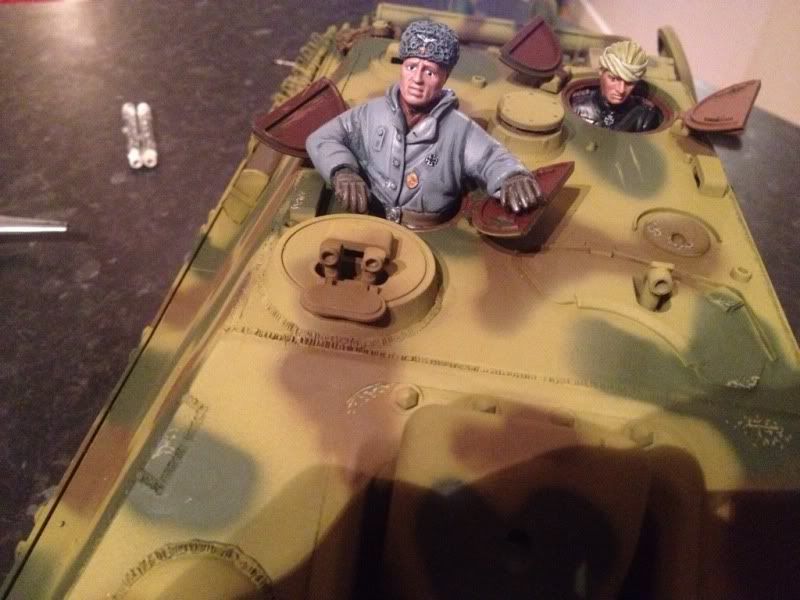
Got some paint on the figures, didn't want to go for full winter white on the commander as it will probably look out of place on the final scheme. Instead went for a medium grey which is pretty neutral, not sure how realistic but hey ho. The gunner is a work in progress, heads done but the rest needs highlighting and detailing.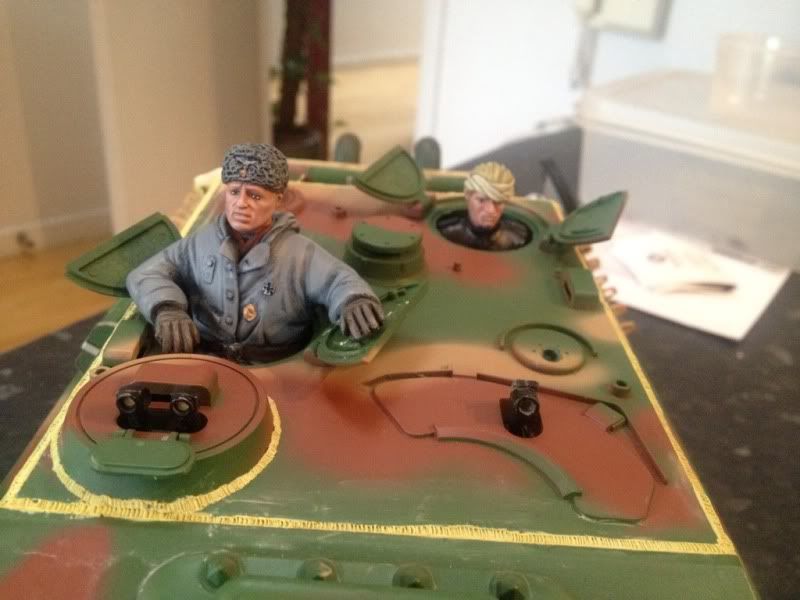
01-30-2013, 10:06 AM
#14
Thread Starter
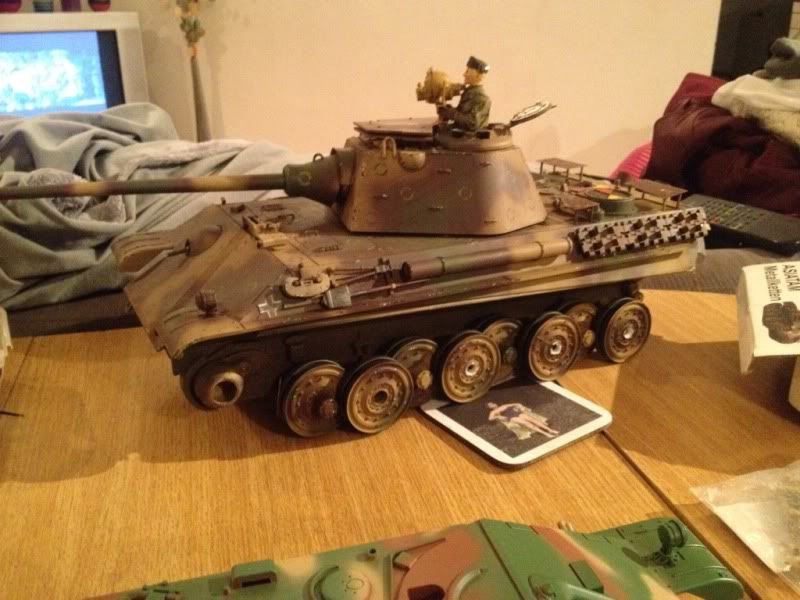
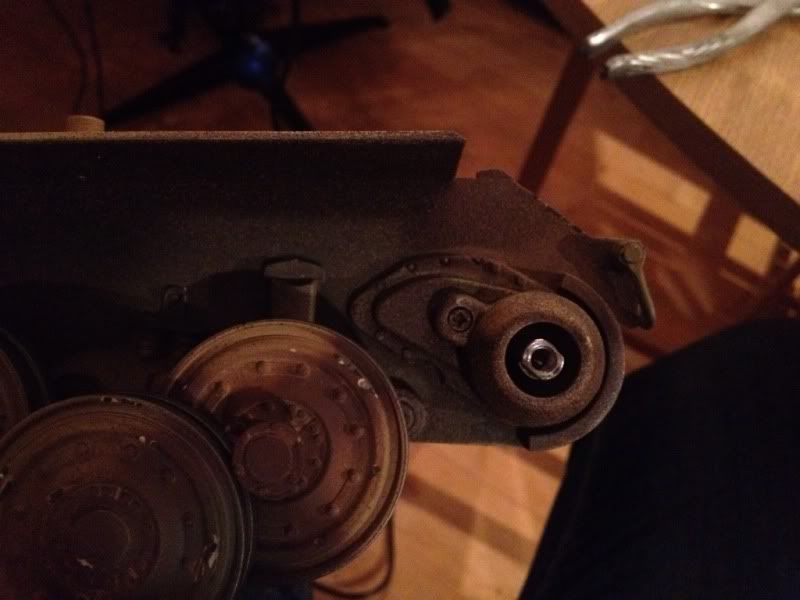
Hey folks, finally got my drive sprockets back from the engineering firm. So I have finally managed to get some tracks on. I've also sussed out how to fix the dodgy asiatam sprockets. By sanding the teeth on the inside to a slight angle they now seem to work better!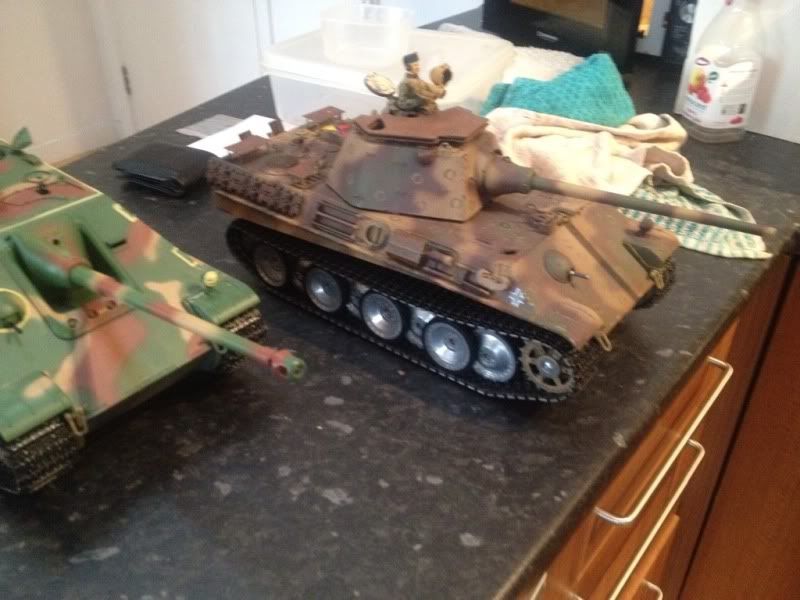
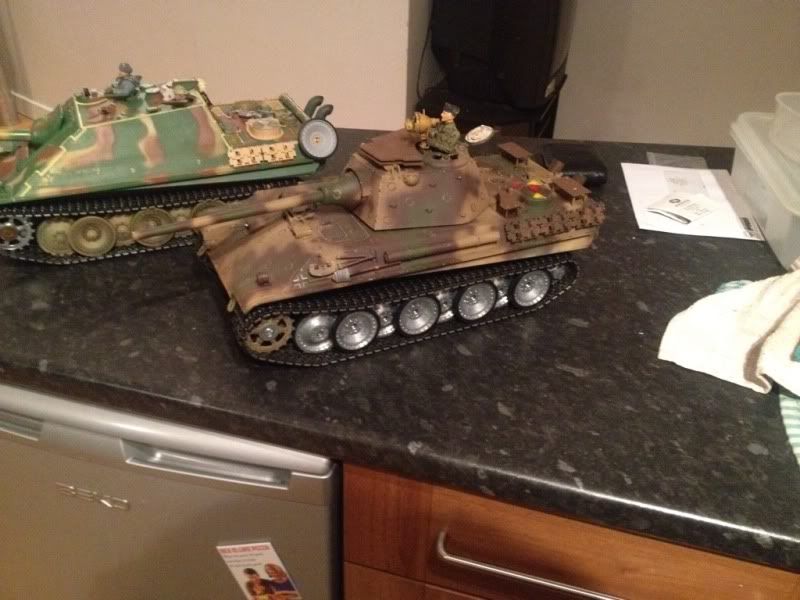
Just need to work out a way of getting the hubcaps to fit!
Also got another figure painted up for the panther F:
Enjoy!
Also got another figure painted up for the panther F:
Enjoy!
01-30-2013, 10:23 AM
#15
Did you forget? He is wearing his winter gloves right? Hands look great!!!!
Hands look great!!!!
01-30-2013, 10:36 AM
#16
Senior Member
That JP sure is shaping up nice. I love the metal work....if only I had the time.
01-30-2013, 11:49 AM
#17
Like what you did to the Jagd as well great detail mods and weld beads. Those metal road wheels from Asiatam look great especially the center wheels. They have the correct metal ring to protect the rubber and will look great as the paint wears off just like the real thing, shiny metal rims instead of plastic.
01-30-2013, 12:04 PM
#18
Thread Starter
They are really nice wheels, add a good bit of weight to the tank. The only issue is fitting the hub caps...which don't fit. Altering them all is quite soul destroying so I'm putting it off like a boss!
01-30-2013, 07:00 PM
#19
There is a vender that sells resin hub covers that would fit and you should be able use elmer's whit glue or thread lock to get them to stick to the wheels, put you could still remove them without breaking them. I will try and find the company and I will share it here. I was thinking it was Wecho, but not sure.
01-30-2013, 11:45 PM
#20

well those builds sure turned out nice. Figures to, you got some skills in that department man , great stuff
02-01-2013, 11:58 AM
#21
Thread Starter
Cheers guys, just a quick update:
I've added an ariel made from a guitar string (not sure if it's thick enough), added side skirts courtesy of battlefront models, very very solid! Finally I've added brass mounts for the ariel tube.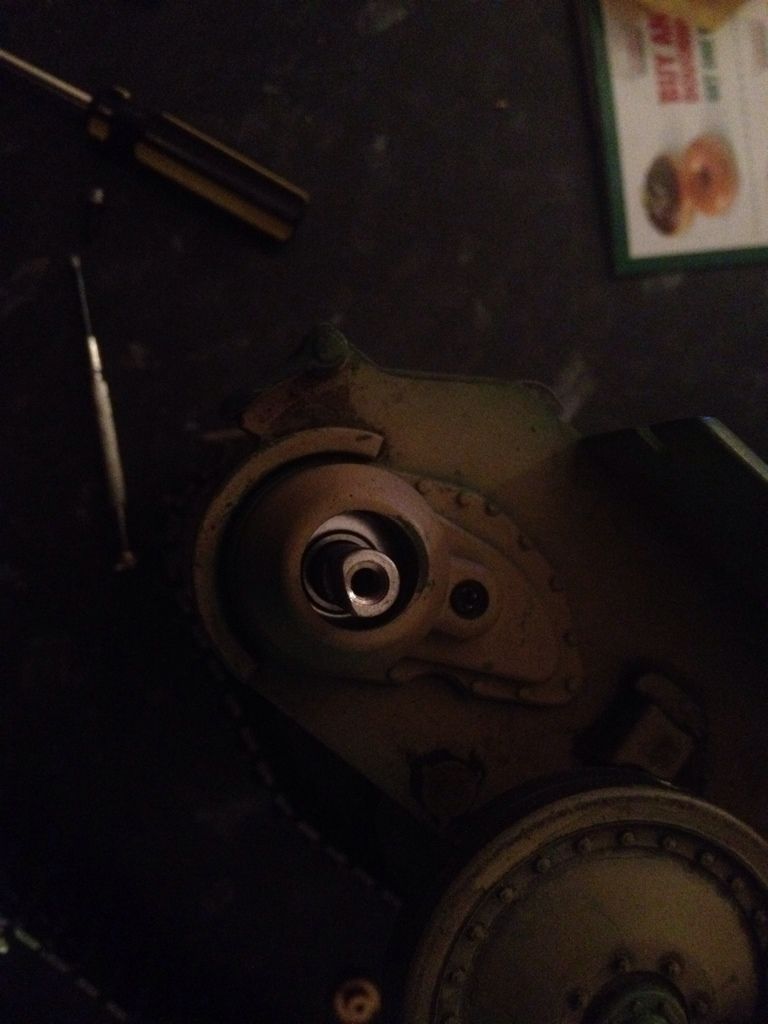
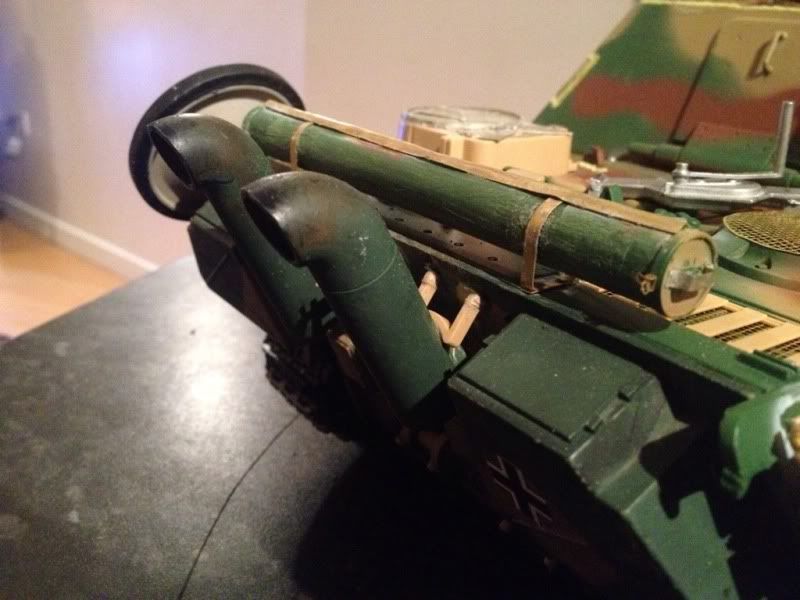
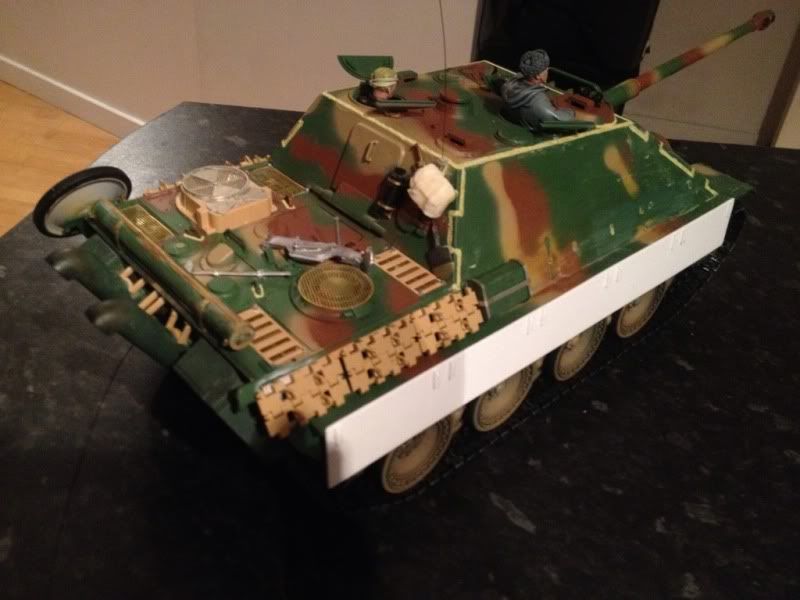
I've added an ariel made from a guitar string (not sure if it's thick enough), added side skirts courtesy of battlefront models, very very solid! Finally I've added brass mounts for the ariel tube.
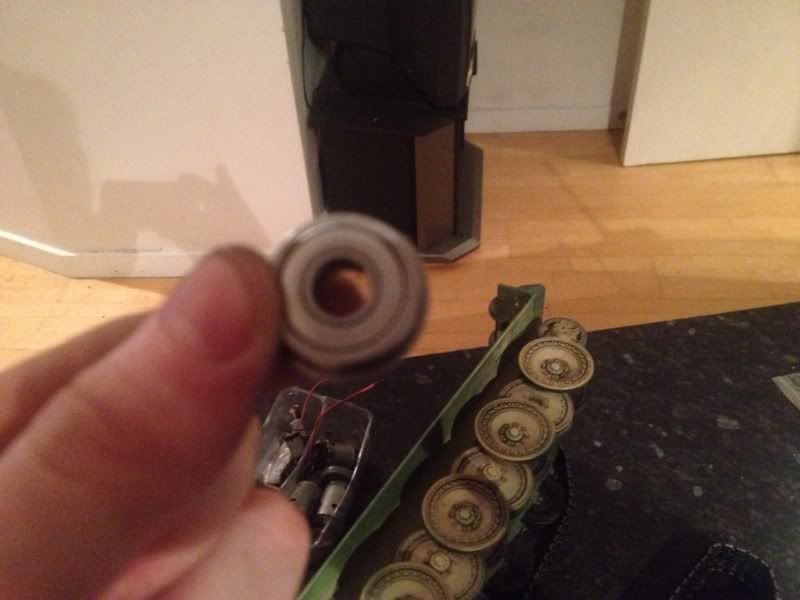
Finally from rob I got some wheel bearings, had to sand down the shafts slightly, they've really helped sprocket stability!
02-02-2013, 12:23 PM
#23
Thread Starter
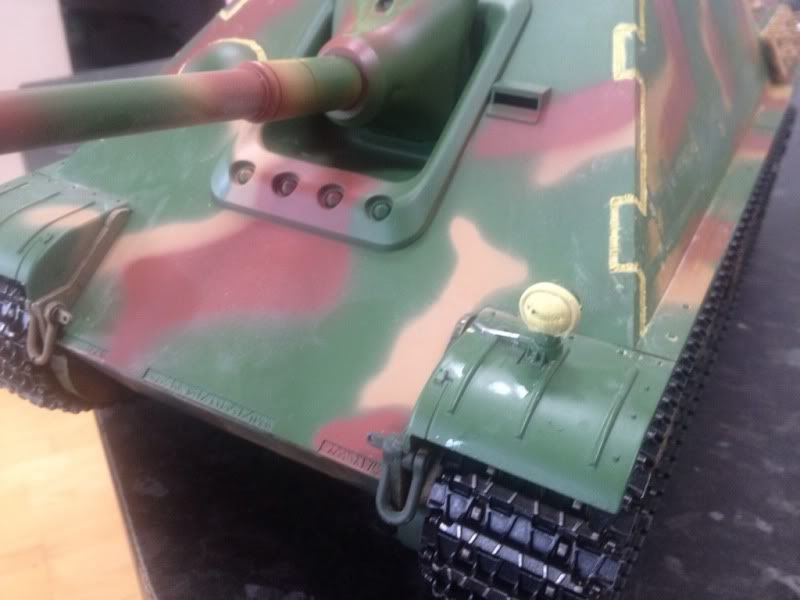
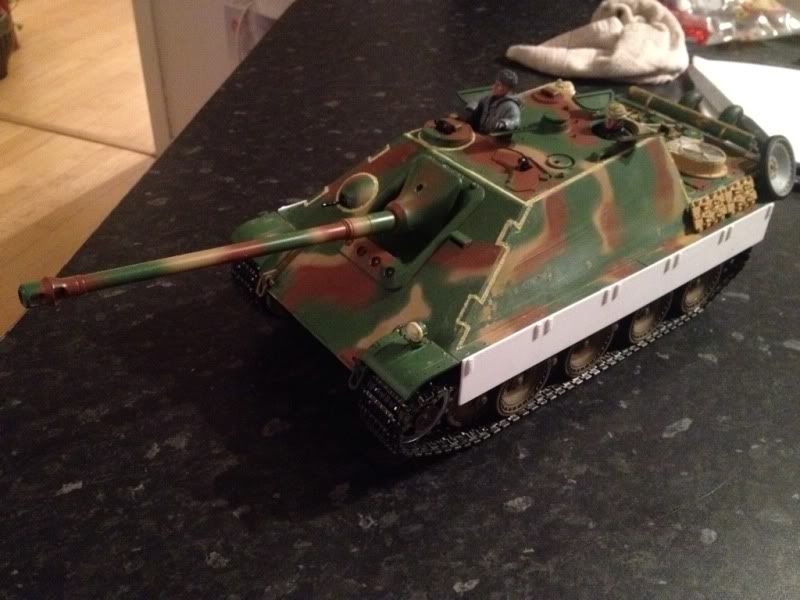
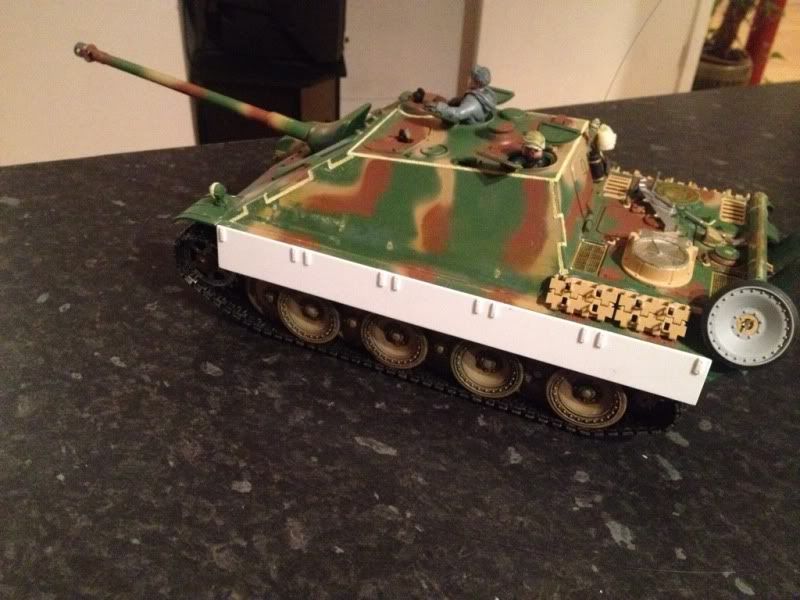
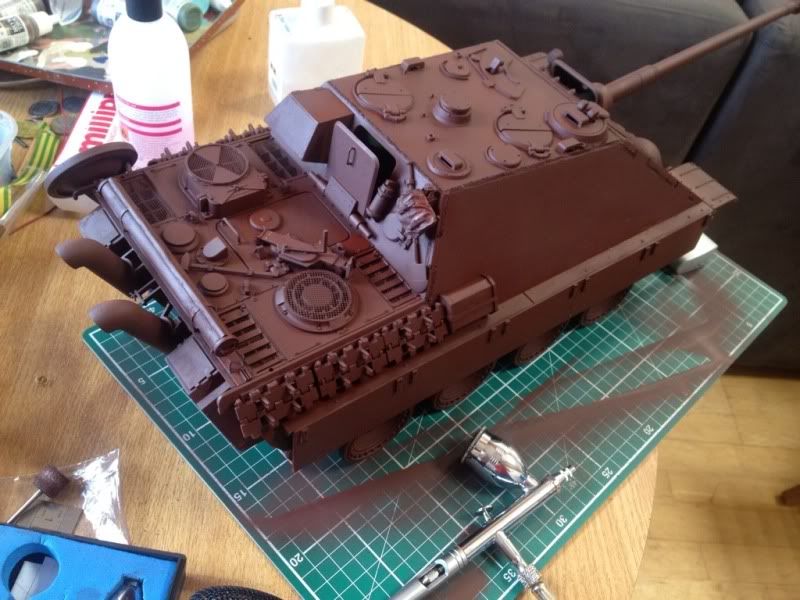
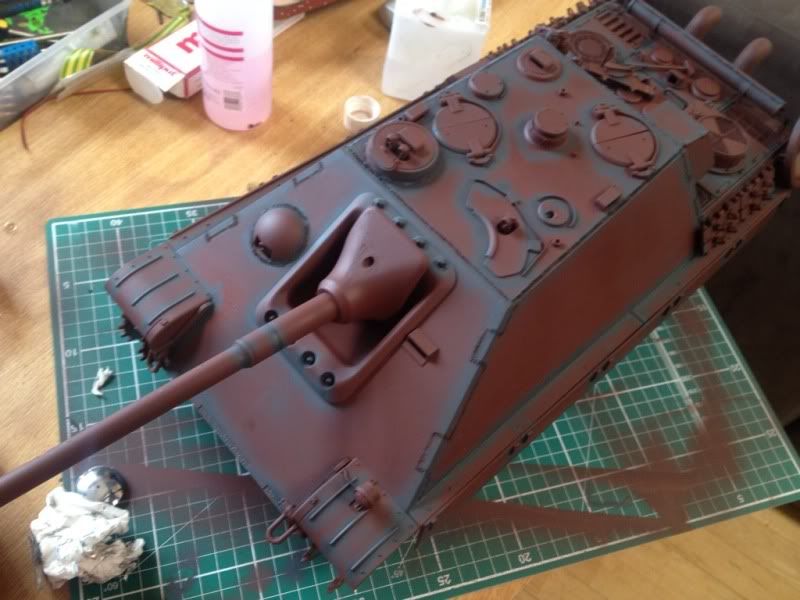
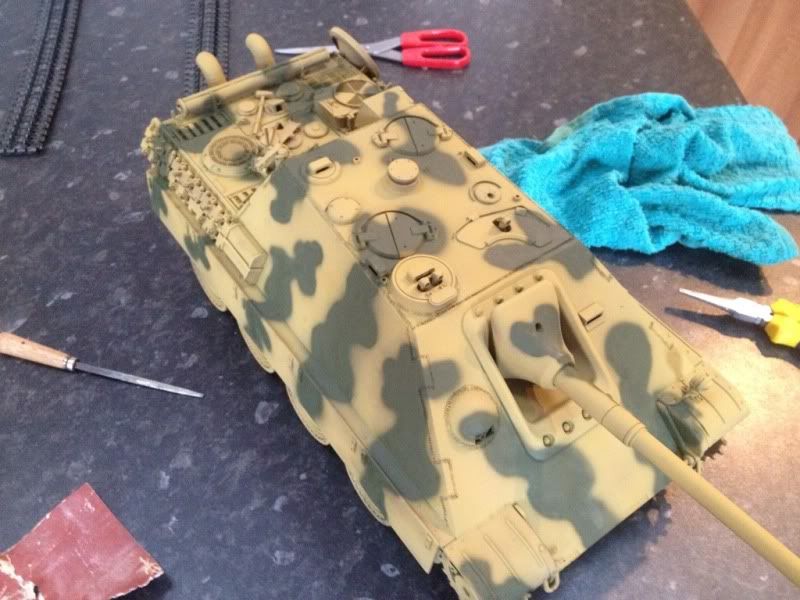
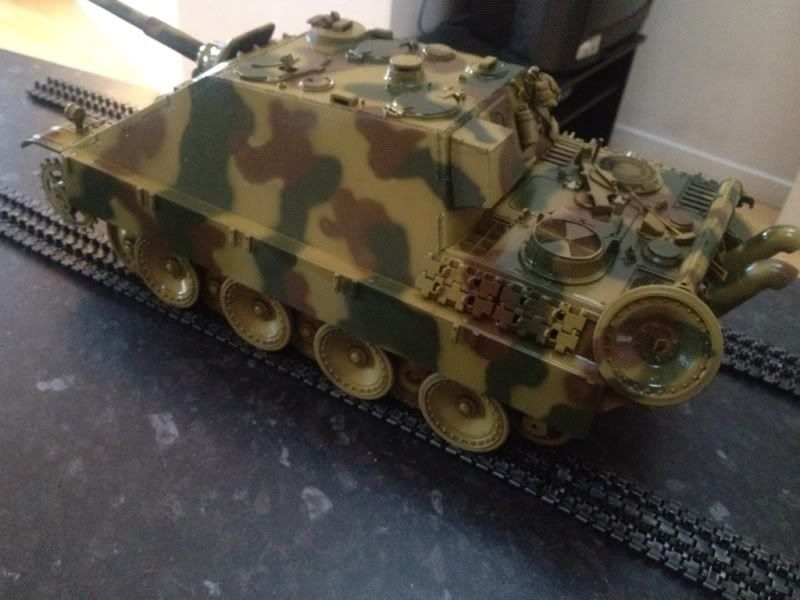
Made a big push with my jagdpanther today. Finally got my hands on some extortionately priced plasticard to build the stowage bin on the rear of the casemate. Then I got down to the nitty gritty of painting the beast. I did try some per shading but it didn't really do much. My airbrush was being a massive paint which did hamper things.
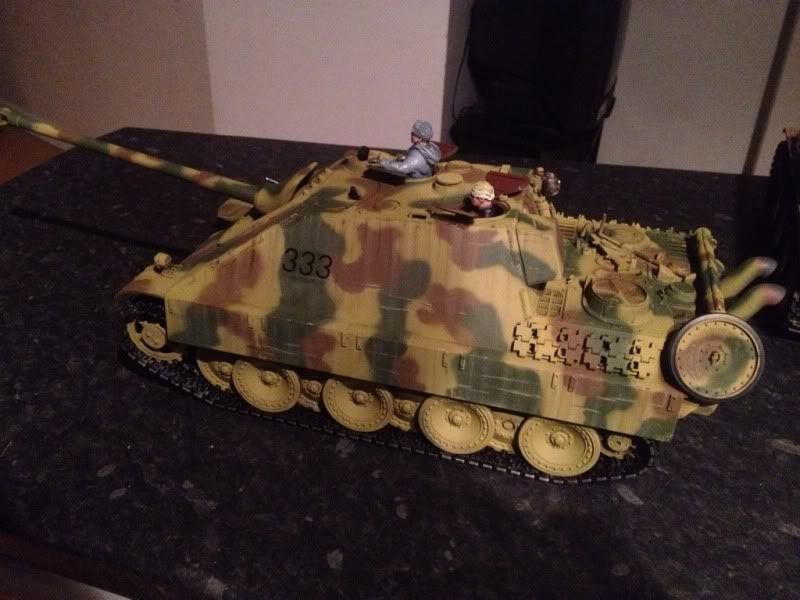
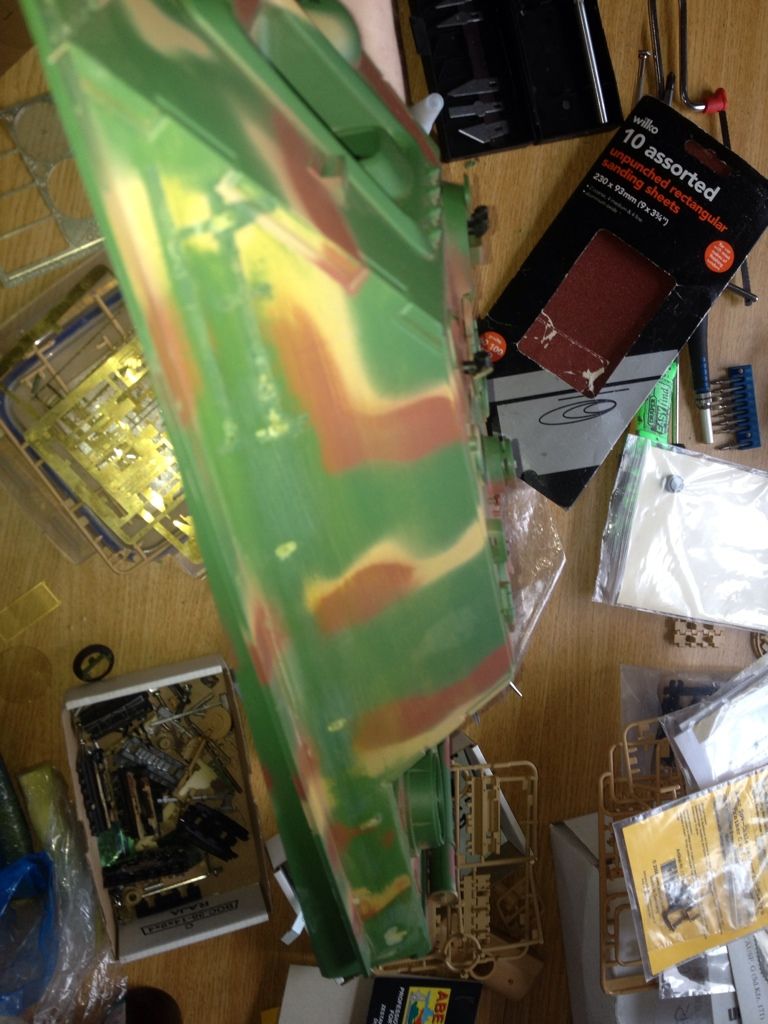
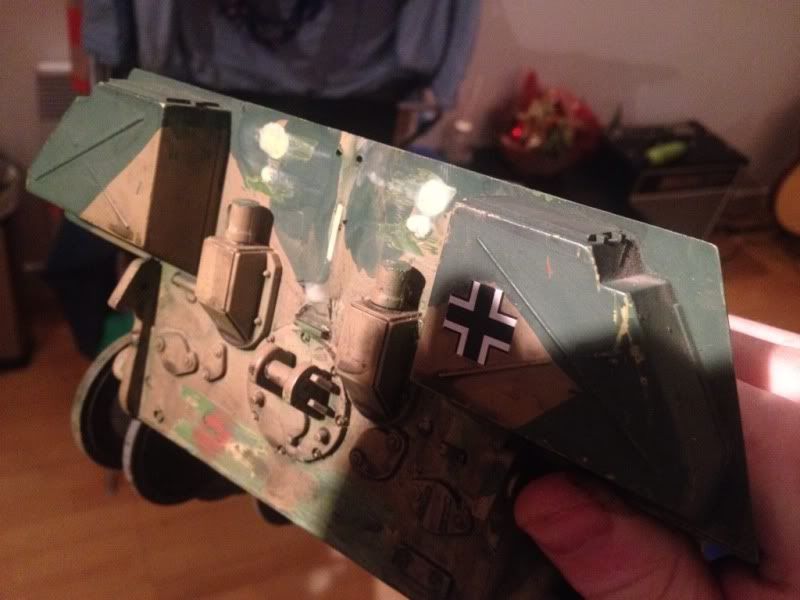
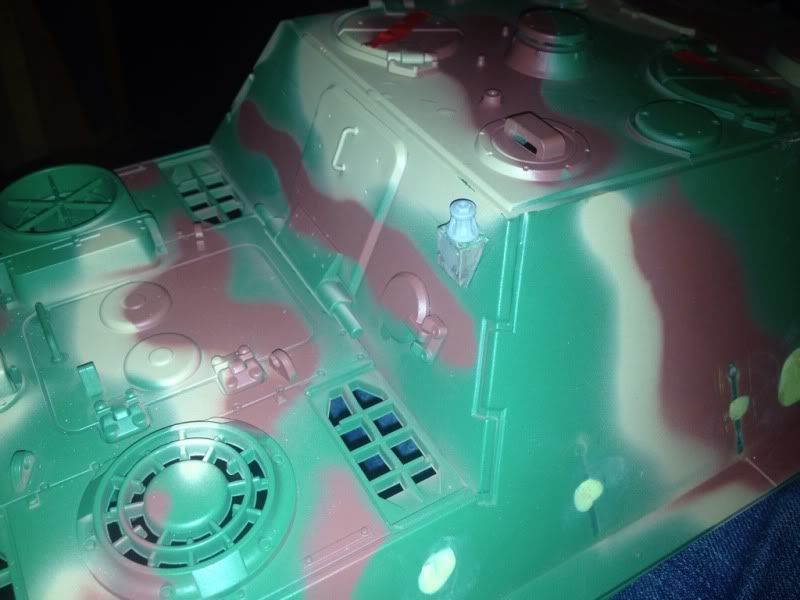
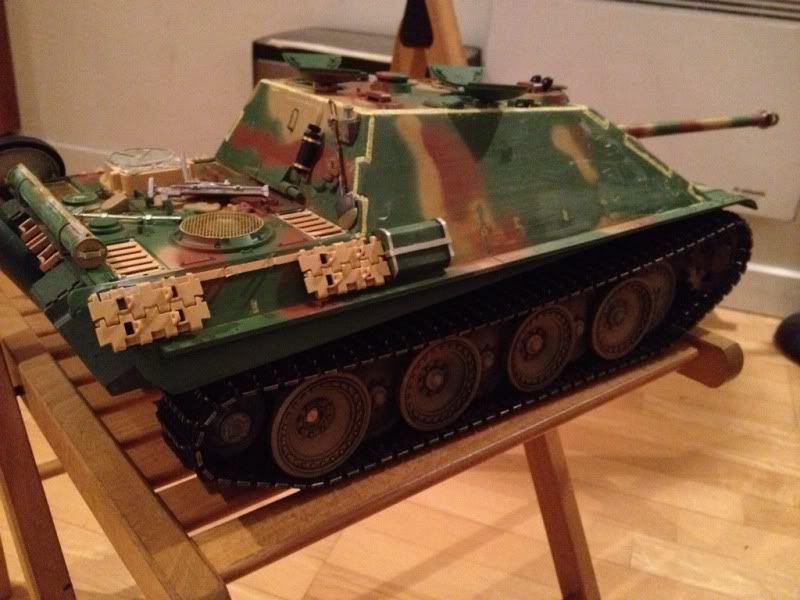
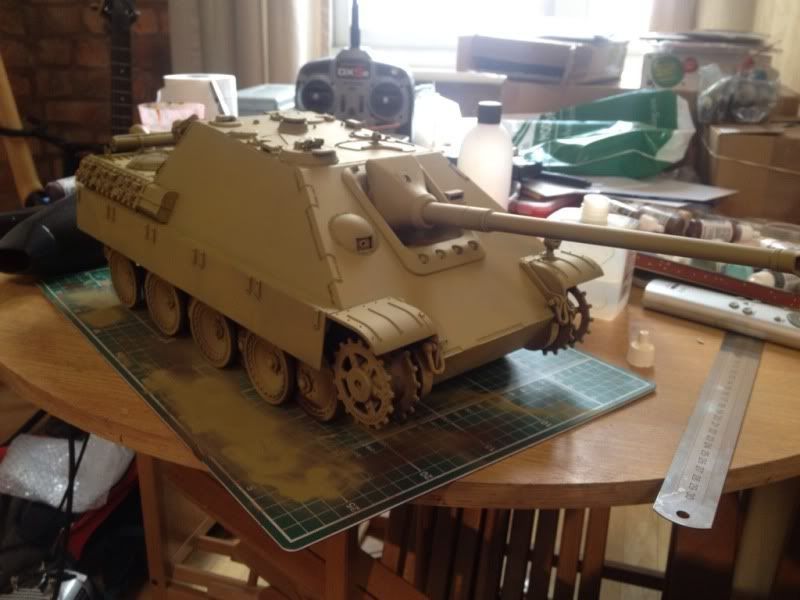
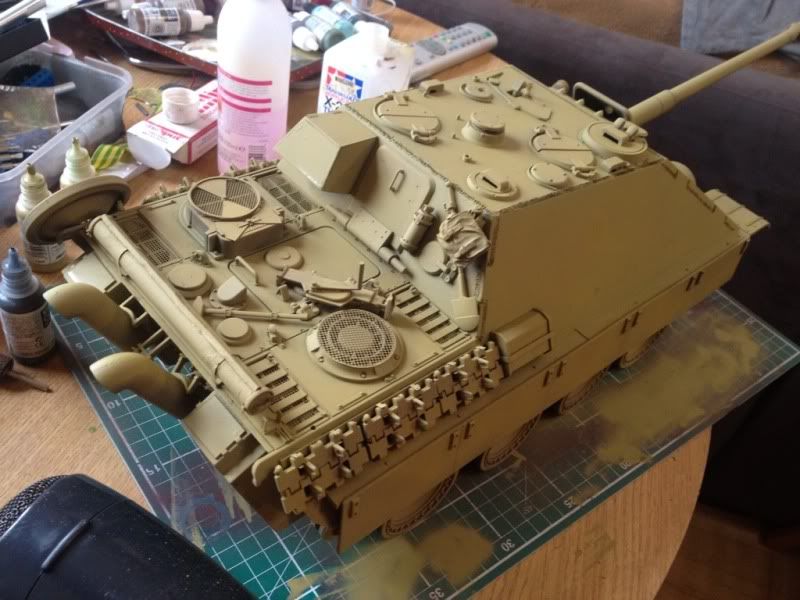
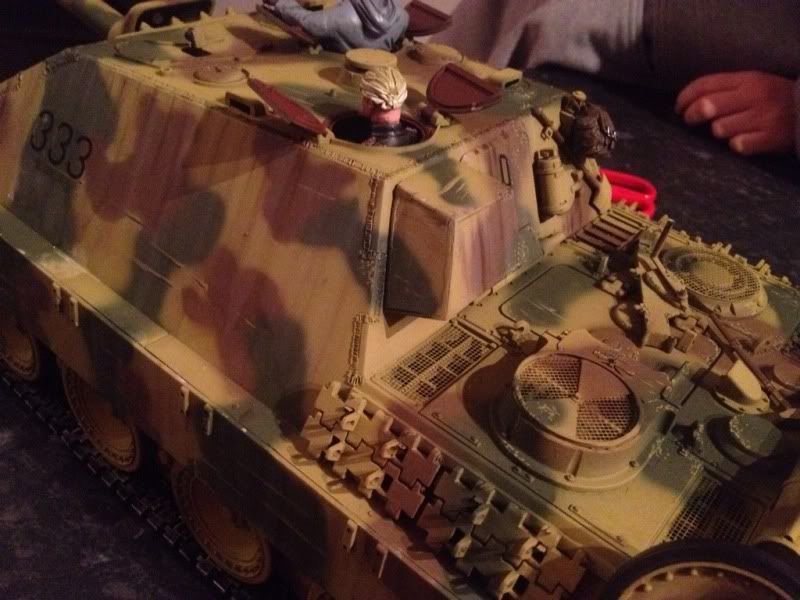
As to the colour scheme initially I had no idea, I did a lot of reading and nothing really stood out. I've already got two tanks in ambush camo so that was a no no. Some of the two color schemes seemed intresting so I started with a yellow base then added green. This looked ok but in the end I added brown for a tri color scheme but not banded like my king tiger.
I added chips and scratches and then sprayed a sin industries filter for panzer yellow or it. Next I used some ak interactive streaking grime and rain marks. I've not quite decided on weather to add any rust marks. I shall be adding mud and general grime when I can find my Tamiya tank makeup!


Enjoy