


Tamiya jagdpanther build updated 3/5 (almost done!)
 04-29-2013, 02:43 PM
#76
Senior Member

Join Date: Apr 2013
Location: Burnaby, BC, CANADA
Posts: 132
Likes: 0
Received 0 Likes
on
0 Posts
Cool, ill have to start hunting commanders i want an anime chick poping out of the hatch (With a german uniform of course!) lol!
ORIGINAL: tomhugill
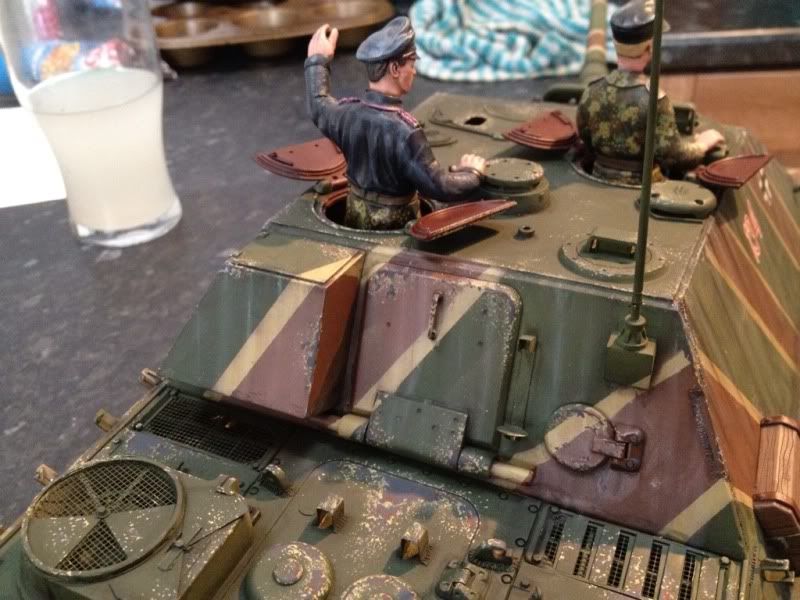
Cheers white, it's based on the banded camo on the MHN panthers. The commander is made of a verlinden resin torso and head with custom sculpted arms and hands.
Cheers white, it's based on the banded camo on the MHN panthers. The commander is made of a verlinden resin torso and head with custom sculpted arms and hands.
 04-29-2013, 03:18 PM
#78
Senior Member
Join Date: Apr 2013
Location: Burnaby, BC, CANADA
Posts: 132
Likes: 0
Received 0 Likes
on
0 Posts
ORIGINAL: tomhugill
Been watching too much girls und panzer?! : P
Been watching too much girls und panzer?! : P
04-30-2013, 10:10 AM
#79

Thread Starter
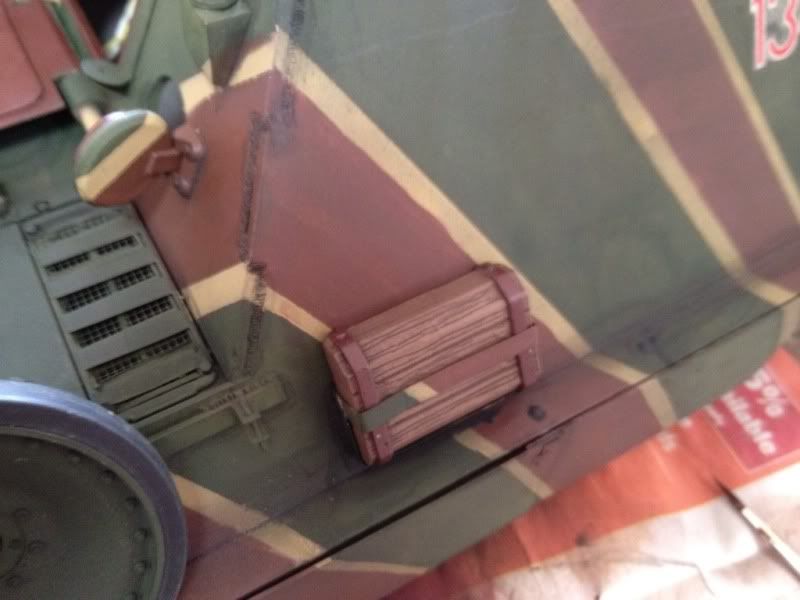
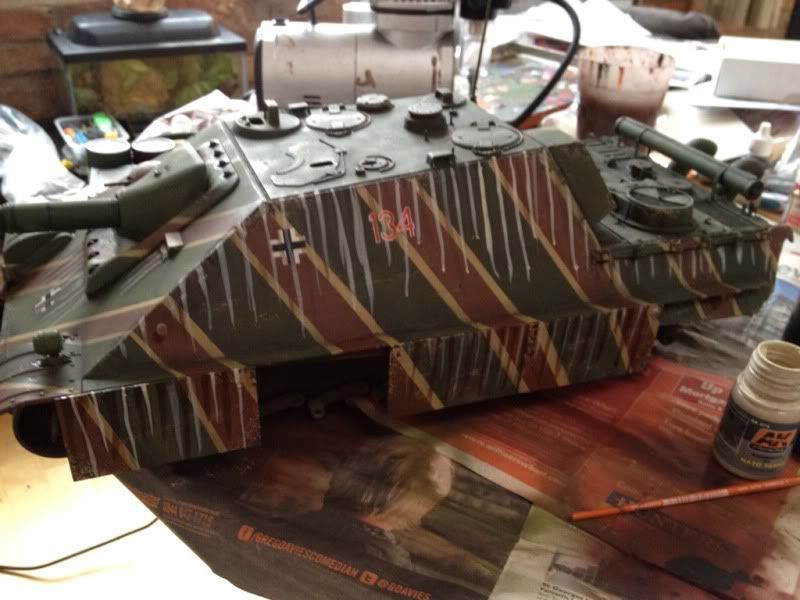
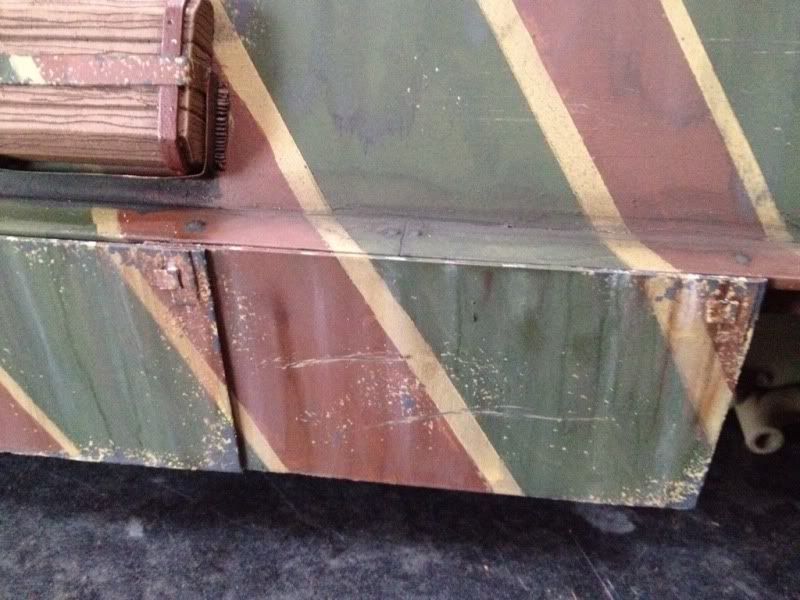
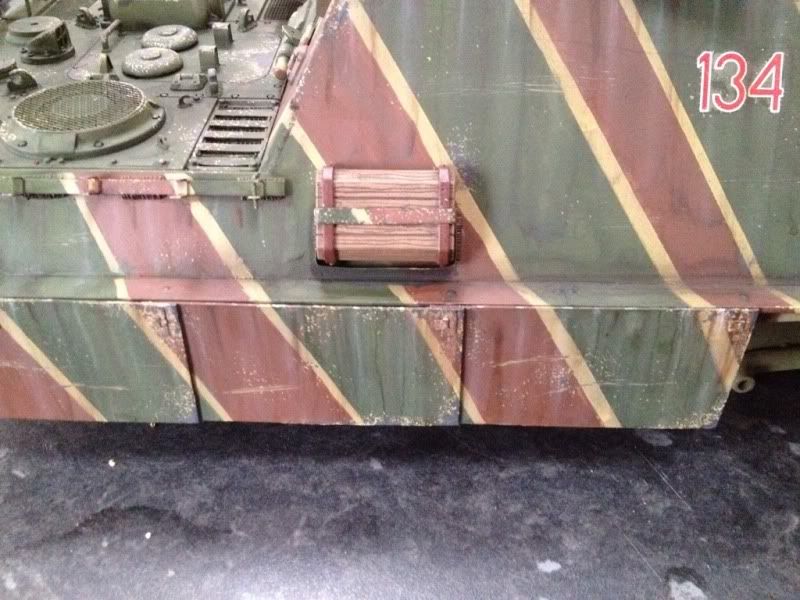
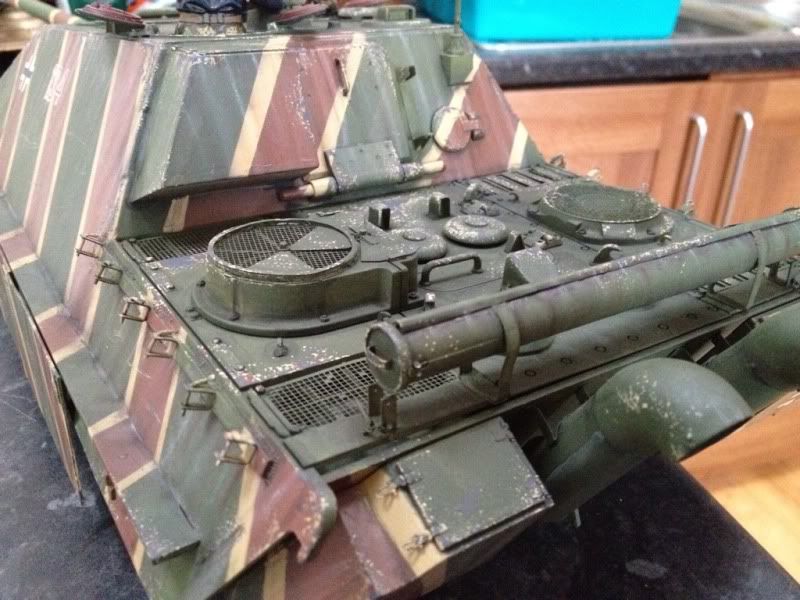
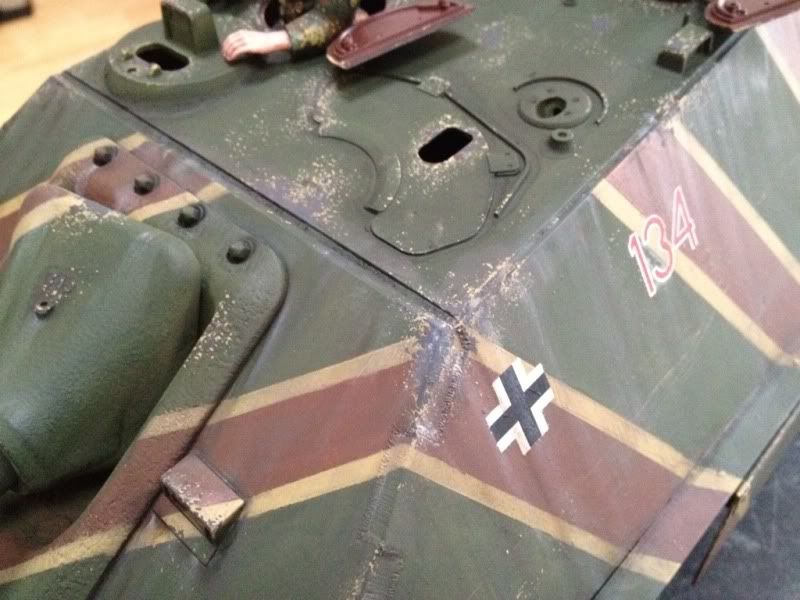
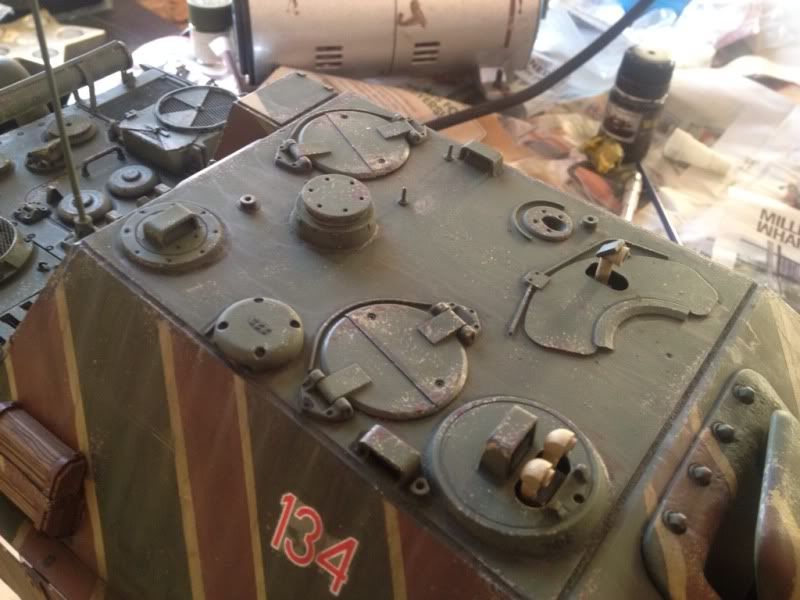
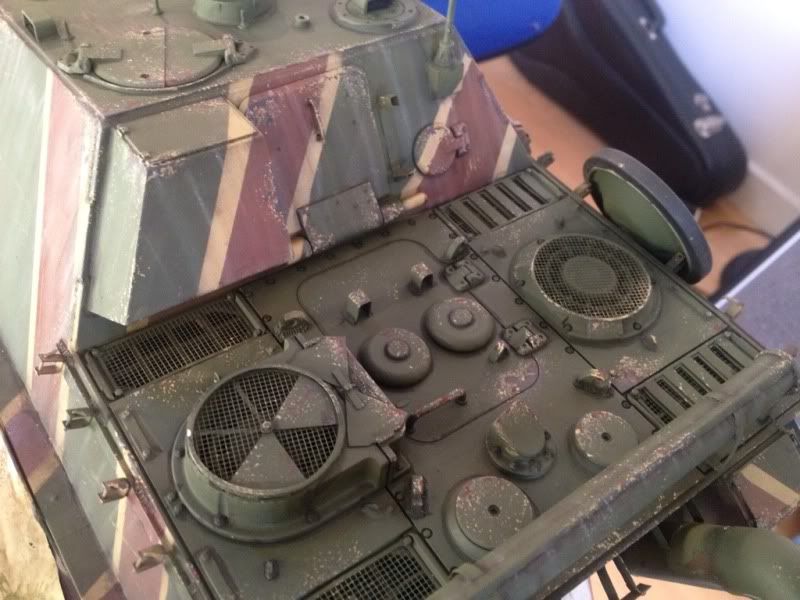
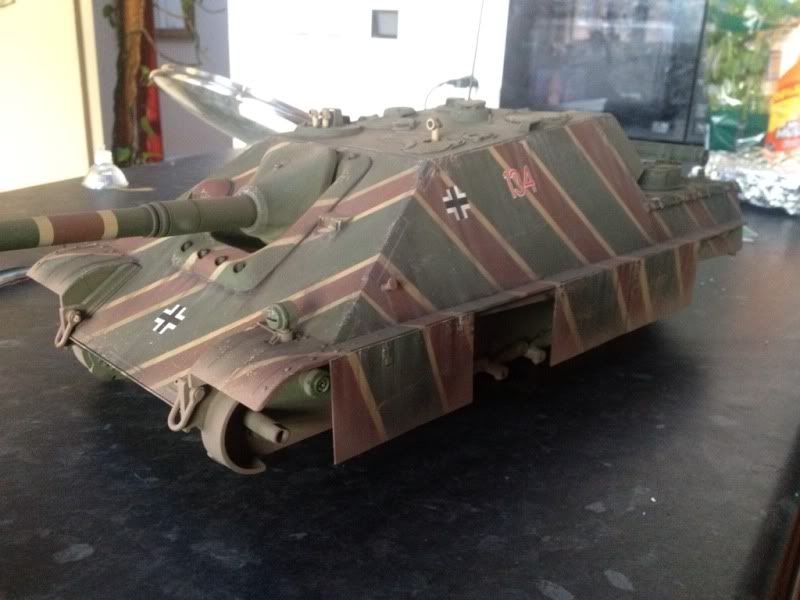
Today came weathering. First I over sprayed a layer of sin filter for tritonal camo. Then I added shading, building up the layers till I was happy. Next came chips using martins method of yellow base, grey brown chips then sparing red oxide flecks. Finally I've used rust streaks on the skirts and rain marks and streaking grime all over. I also painted the jack block and spare tracks.
Wash:

Chips:

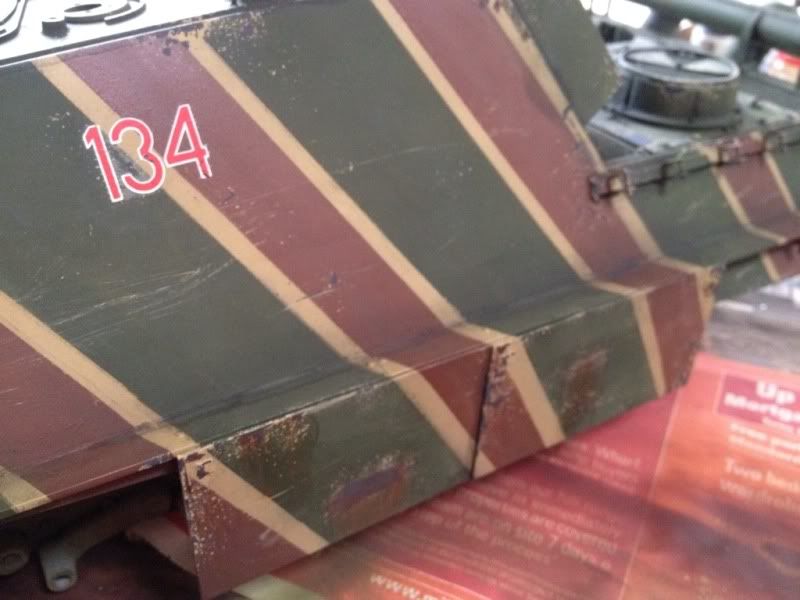
Grime, rust and rain:

 04-30-2013, 10:31 AM
#80

Join Date: Apr 2012
Location: Sellersville, PA
Posts: 775
Likes: 0
Received 0 Likes
on
0 Posts
Wow, that is really coming together excellently Tom. Looking fantastic!
~ Craig ~
PS: Please beat up that wood jack block some ... the wood just looks, welllll, too perfect & clean. lol
ohhh, maybe it's because you haven't added damage yet, dohhh ... are you adding damage?
~ Craig ~
PS: Please beat up that wood jack block some ... the wood just looks, welllll, too perfect & clean. lol
ohhh, maybe it's because you haven't added damage yet, dohhh ... are you adding damage?

 05-01-2013, 12:05 PM
#83
Thread Starter
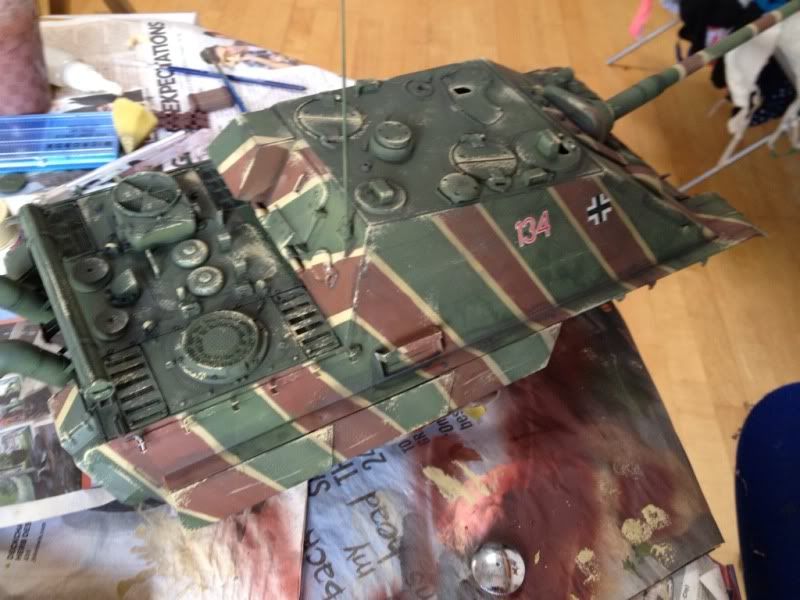
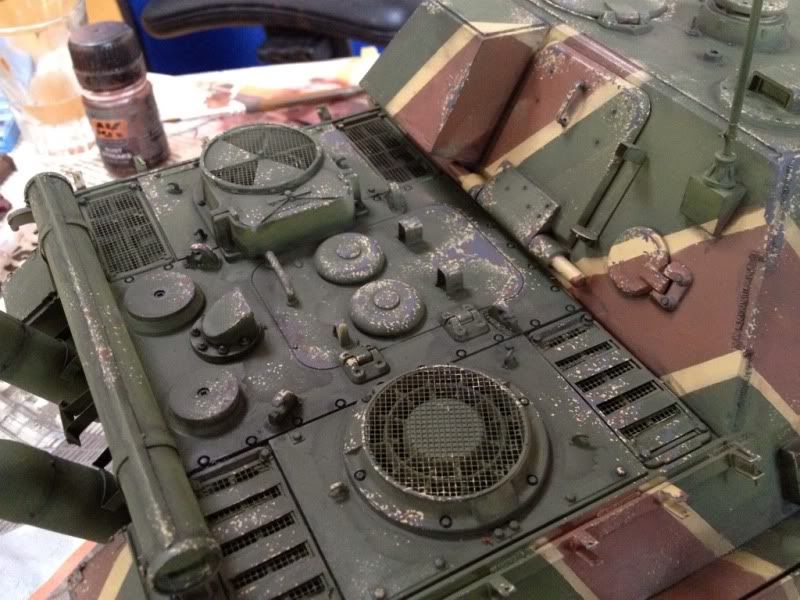
I had a slight accident last night when over painting some of the chipping on the roof, the brushed color was much lighter even after filters had been applied :/ Took the decision to respray the roof and rear deck and tone down some of chipping slightly. I've added a light overspray of flat earth and started for add dust and grim on the side skirts. I also rusted up the scratches on the fenders very slightly as sheet steel would be the area that would oxides fastest. I lost the light just as I finished so I apolgise for the pics.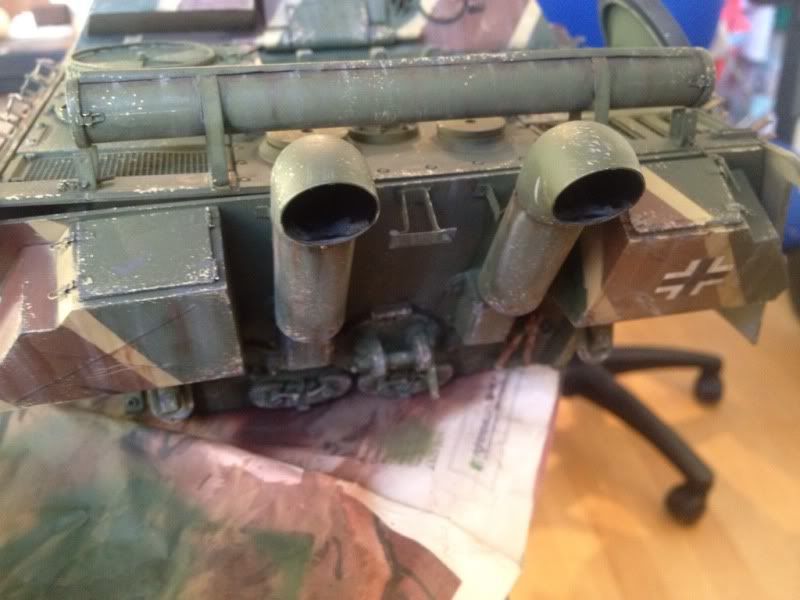
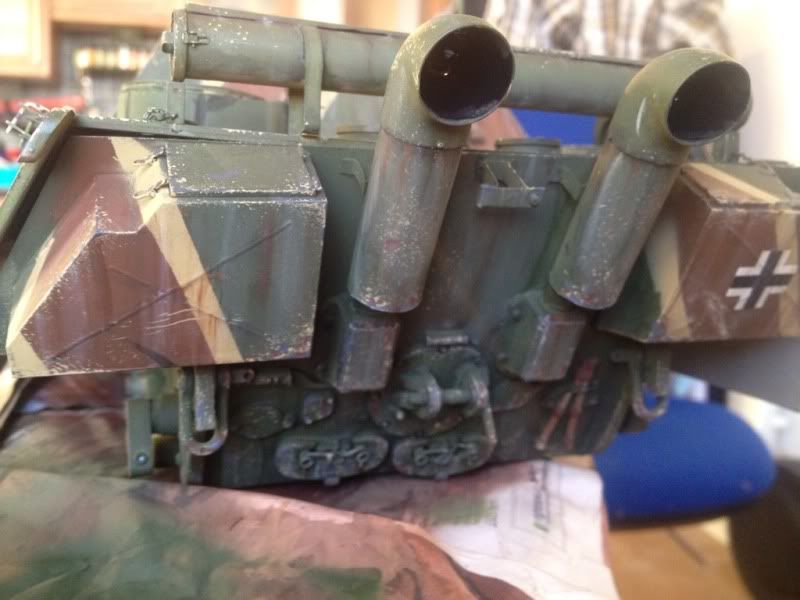
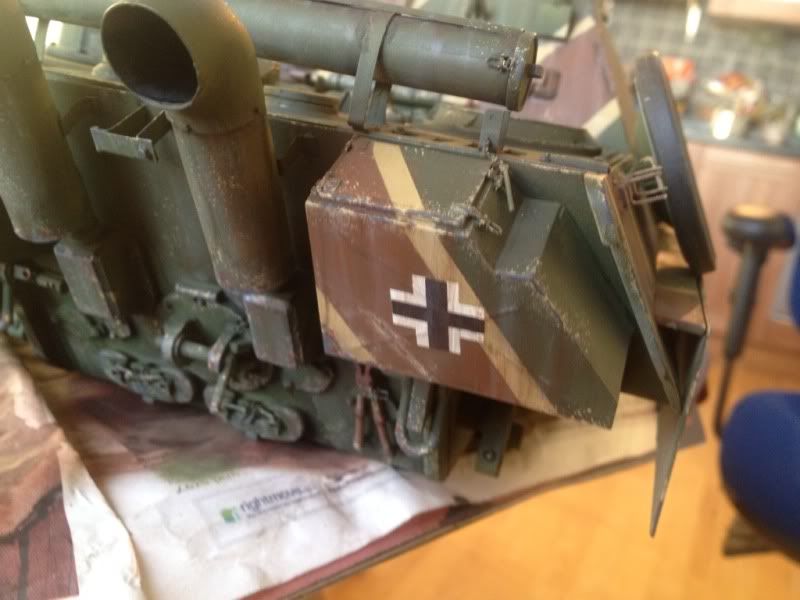
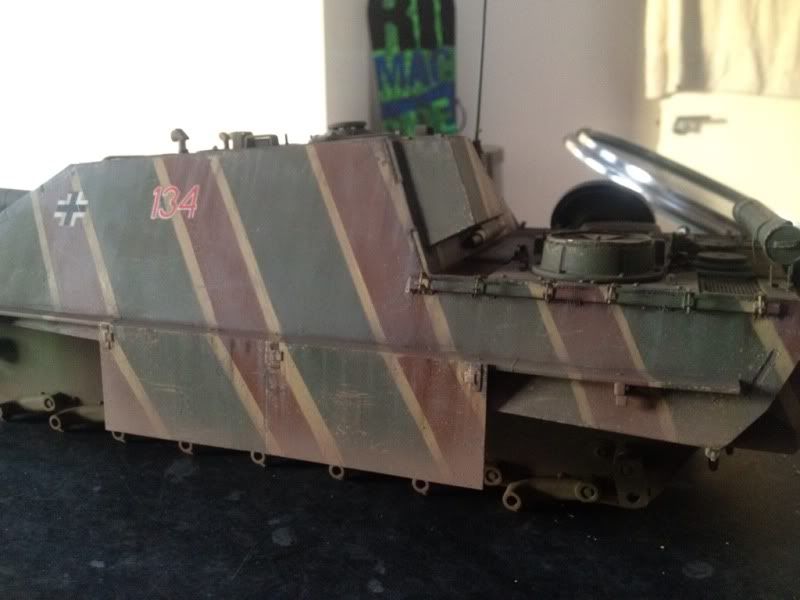
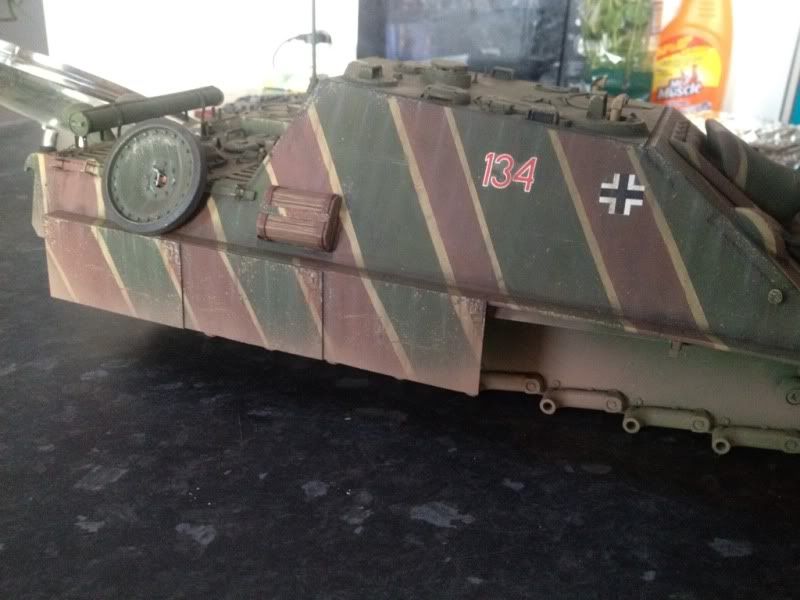

Weathered rear:
New roof and deck:
Overspray and initial mud/grime with some splatter:
Enjoy!
05-01-2013, 12:23 PM
#84
Senior Member
I have always liked that camo pattern. I have a Panther with it, but I can't bear to put it on the battlefield. Your's looks much nicer than mine. Great work.
05-01-2013, 12:29 PM
#85
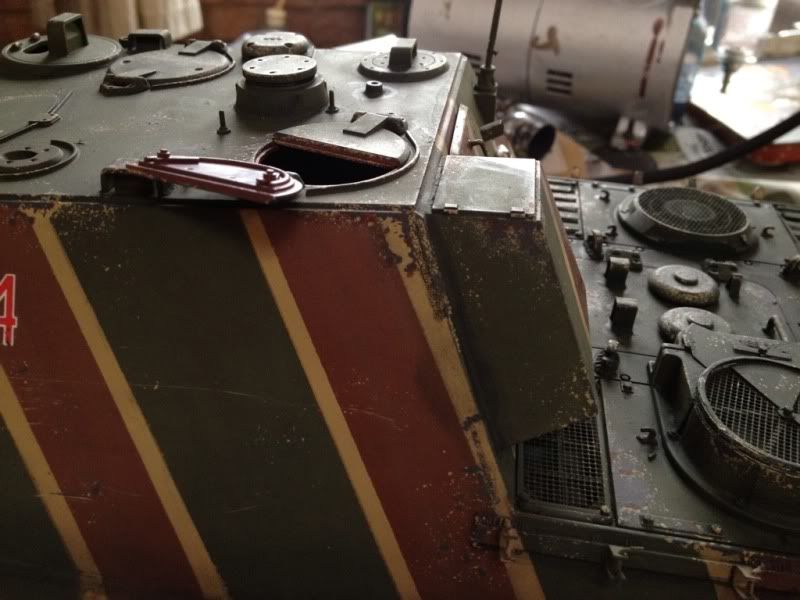
Tom, I really like the way you are allowing the sub-layers of paint to come through as you scuff things up. Looks more realistic. I have seen some modelers overdo the metal/rust showing through as in reality the camo would wear to the base coat to the red primer and then to bare metal/rust. It would take a really hard scrap or fender bender kind of hit to cause the bare metal to show. What you are doing is more subtle and realistic.
05-01-2013, 12:38 PM
#86
Thread Starter
That's a beautiful looking panter there Bob! I know what you mean about taking it on the battlefield. I'm anti shelf queen but after the trouble I had with the photo etch I might get slightly sweary when I (inevitably) break some off!
05-01-2013, 01:06 PM
#87
Senior Member

Join Date: Nov 2006
Location: Grande Prairie,
AB, CANADA
Posts: 8,976
Likes: 0
Received 4 Likes
on
4 Posts
Top shelf stuff, and please don't take this the wrong way as I don't like being critical of others work, but my only comment would be on the transfers. I would go with some good decals or paint them on using a stencil. You have done such a great job, I really think the transfers are letting you down a bit, as they are the only thing that stand out as being out of place with the work and effort put into the rest of the model.
Cheers
Cheers
 05-01-2013, 01:31 PM
#89
Thread Starter
No offence taken dan! I bought the elite armour ones in the hope they would be less shiney! Sadly not the case. What I usually do is paint over the decals using them as a guide. I'll either do this or dry some dull cote and seeing how that works out!
Maus glad you like it! I've shamelessly used one of the rctr members chipping methods so all credit goes to him!
05-01-2013, 02:18 PM
#90
Senior Member
Join Date: Nov 2006
Location: Grande Prairie,
AB, CANADA
Posts: 8,976
Likes: 0
Received 4 Likes
on
4 Posts
I usually spray Future floor polish over the entire tank, and then add the decals. It prevents the silvering that can be caused when air is trapped beneath the decal and the rough paint texture. Just brusing on the Future at the decal application point works well too. Future also has a bit of a solvent action on the decal causing it to sit down real nice.
05-03-2013, 07:35 AM
#91
Thread Starter
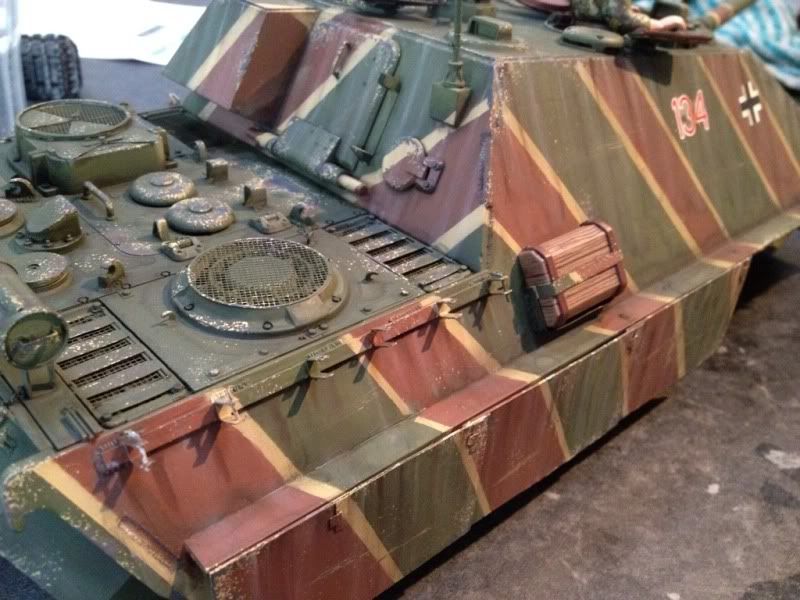
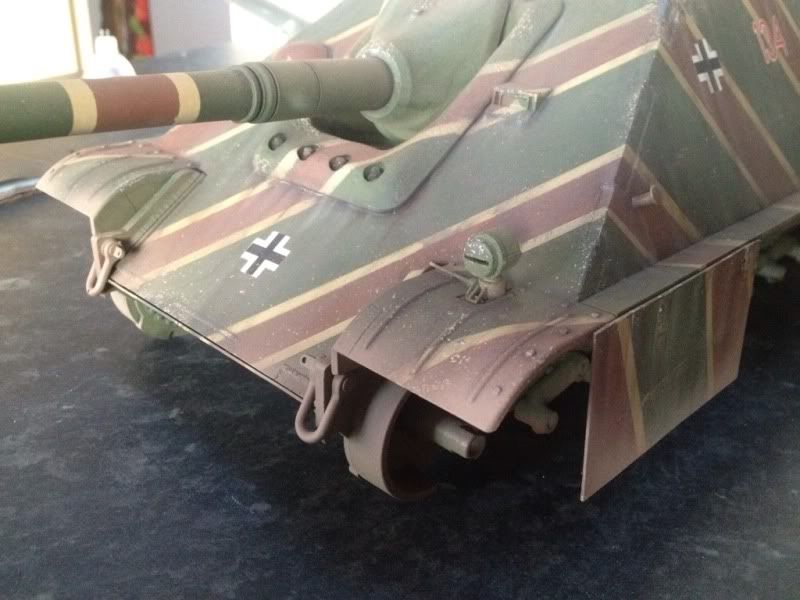
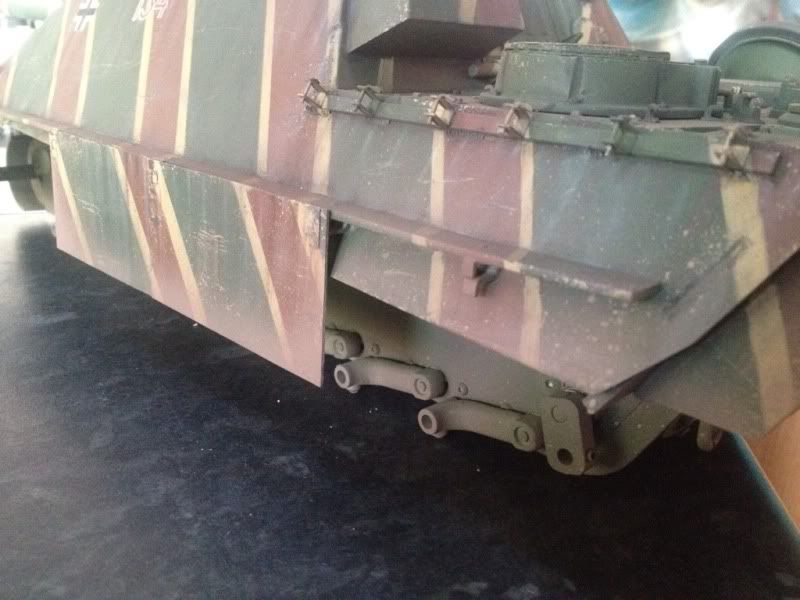
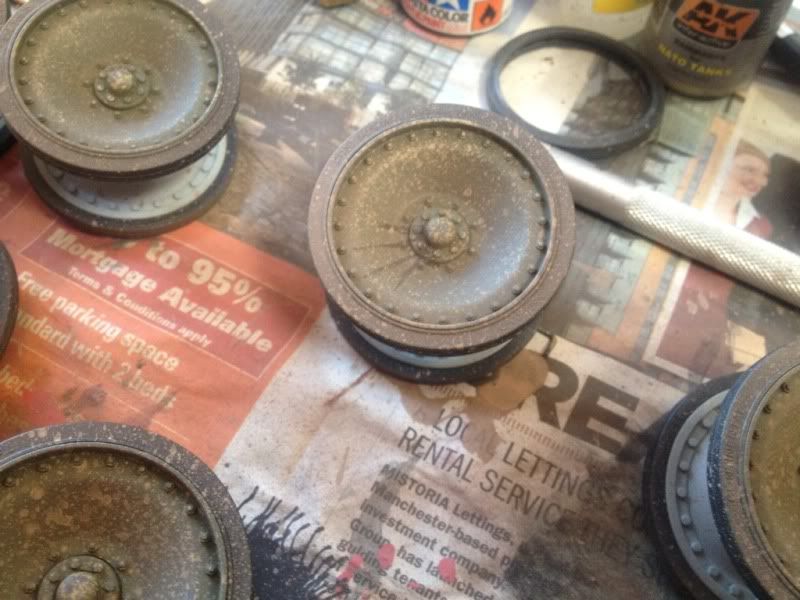
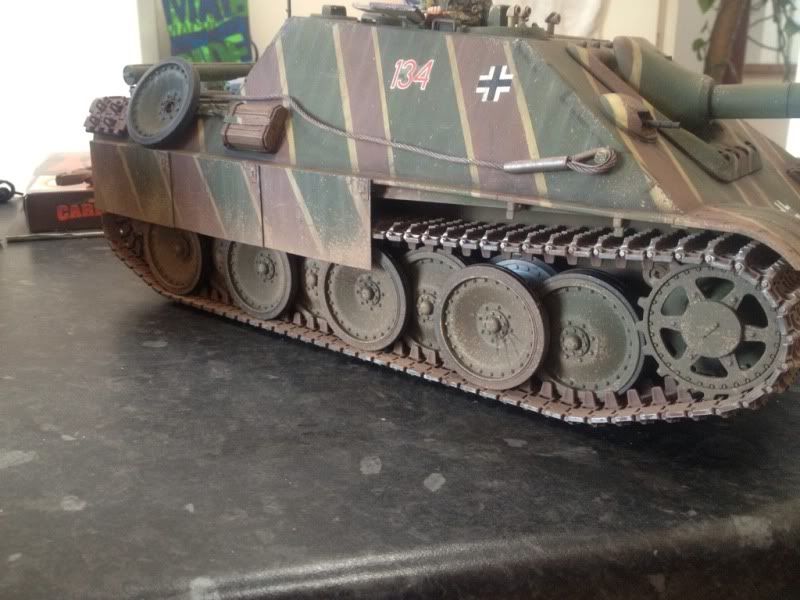
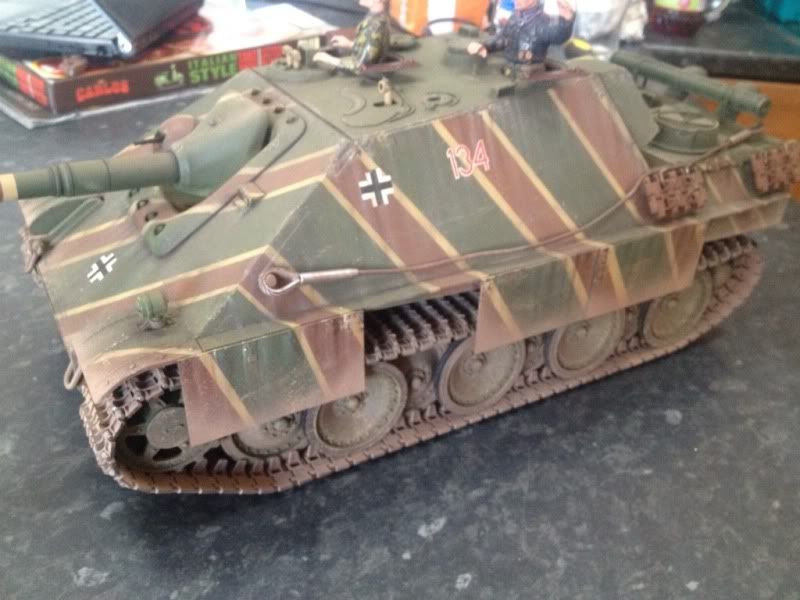
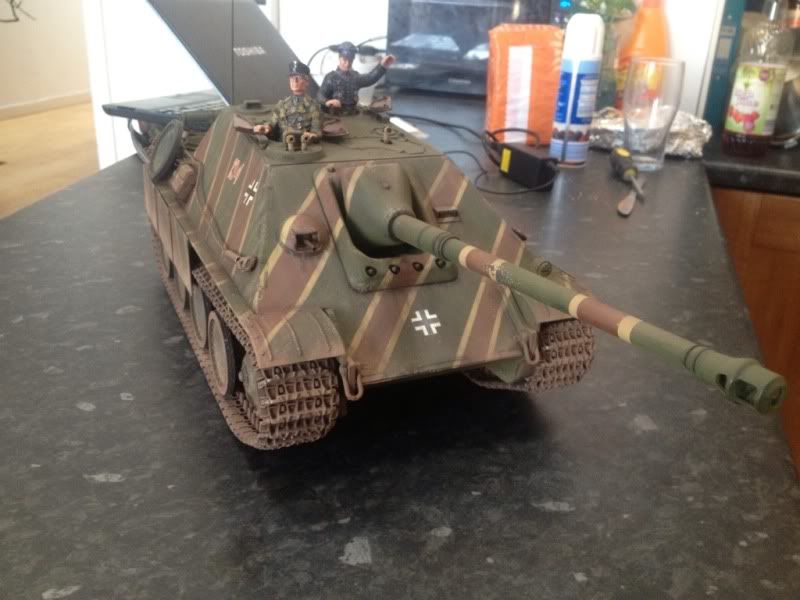
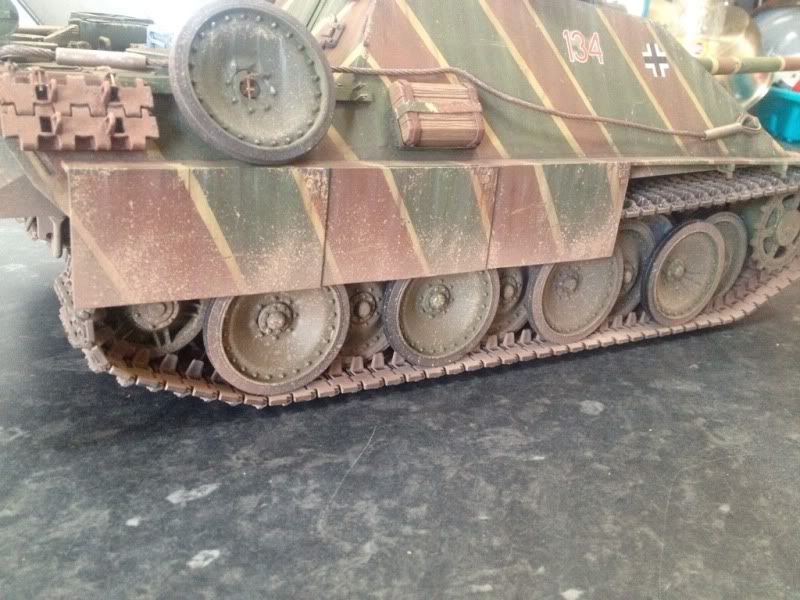
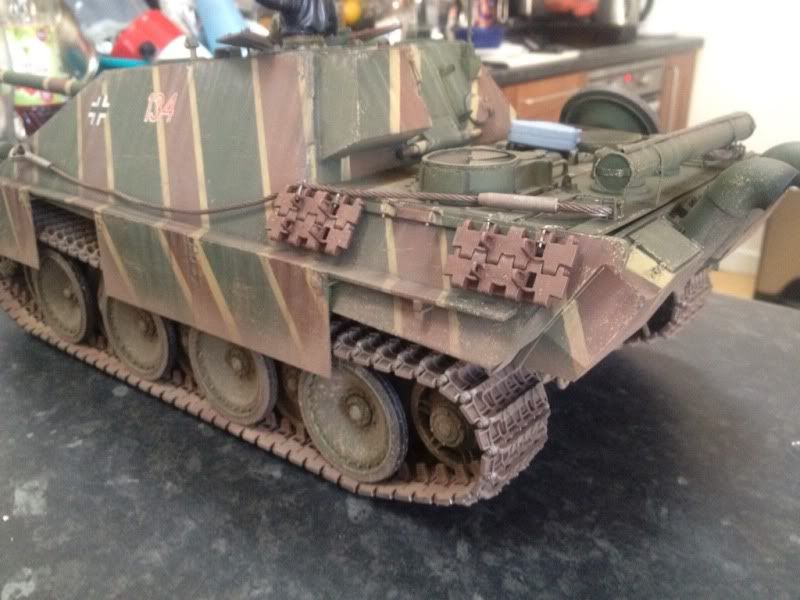
Nearly there, got the wheels, sprockets, idlers and tracks done. Done in a similar fashion to the rest of the tank. Added some oil stains on a couple of the wheels (not sure how realistic it is but it looked nice on some other panthers!). I primed the tracks hull red, dry brushed with steel, sprayed with a black wash to dull things down. Finally I over sprayed with flat earth. Once this was done I spattered flat earth over the sprayed mud on the tank, heavier on the skirts rear and frot fenders and lighter up on the rest. Painted up a couple of jerry cans to go on the rear deck. She's now about 95% done, just need to add some spent shell casings and get the fire extinguisher done.
I ran her out the first time today and ran into some serious issues, the left tu was slipping badly, new tu job I thought but the frame had worn allowing the gears to move away from each other. Once the frame had been replace it meshed fine. Next issue was the idlers lost tension which meant having to take the rear off which I promptly dropped, then trying to catch it caught the ariel and bent that *facepalm*. Luckily all damage repaired like new! Then had to recalibrate the Dmd as I'd calibrated the Dmd on low rate setting which meant it was difficult to control at low speed. Finally its running ok, inner track breaking seems more violent than the tiger Dmd (using the Pershing Dmd atm). Might go back to the tiger one.

I ran her out the first time today and ran into some serious issues, the left tu was slipping badly, new tu job I thought but the frame had worn allowing the gears to move away from each other. Once the frame had been replace it meshed fine. Next issue was the idlers lost tension which meant having to take the rear off which I promptly dropped, then trying to catch it caught the ariel and bent that *facepalm*. Luckily all damage repaired like new! Then had to recalibrate the Dmd as I'd calibrated the Dmd on low rate setting which meant it was difficult to control at low speed. Finally its running ok, inner track breaking seems more violent than the tiger Dmd (using the Pershing Dmd atm). Might go back to the tiger one.
Wheels:
Running gear added:
Overall shots:
Quick video of her running:
[youtube]http://www.youtube.com/watch?v=Cn-IMLywqwc[/youtube]

