


Tamiya jagdpanther build updated 3/5 (almost done!)
 04-10-2013, 01:36 PM
#1

Thread Starter
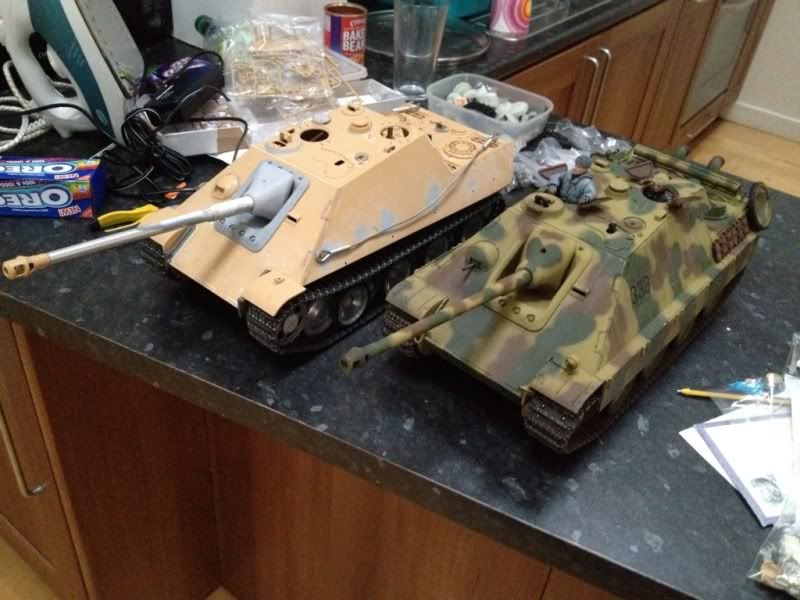
Well ive been fairly quiet on the building front this month owing to having to pay a lock smith this months tank budget! But never the less I have another project in the works. Currently Ive a late jagdpanther cosmetically finished but awaiting a traverse elevation and recoil, also a panther f which I still can't decide whether to strip and detail or leave as is. Both are needing a Clark board.
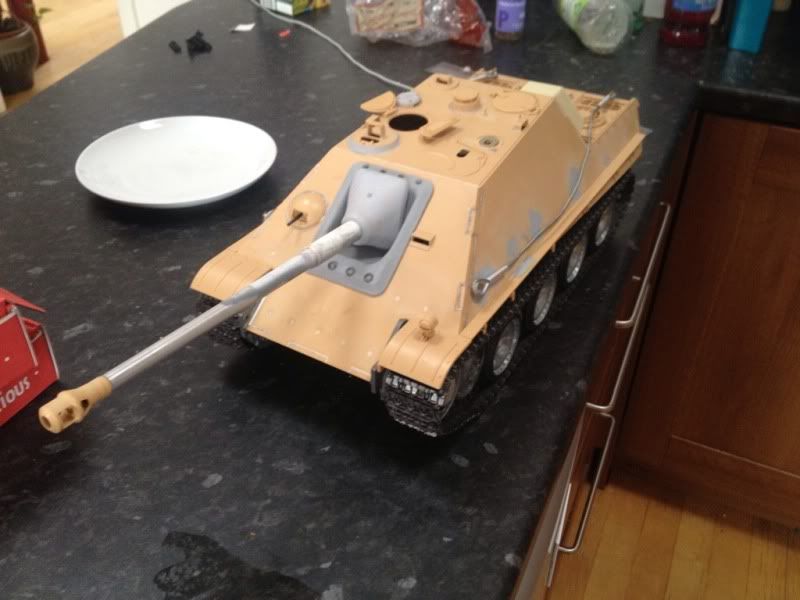
In a theme of not being able to finish what I start I recently bought a part built Tamiya jagdpanther off bluedanube at a far too reasonable price (my missus had words about that one!). It is currently short of electronics, recoil, elevation traverse etc. The first step in this project has been to order most of these and the missing bits from axels and jasons store. I want to get all this in place before diving into the cosmetic part of the build.
Annoyingly (probably not thé right words!) the work done so far is stunning with all the fixings been attached with threaded rod and scale fixings. Everything assembled with presision soldering...you get the picture. With this build I'm aiming for something with near the detail of a shelf queen but robust enough to battle (ie something built by nigel). For this I'm going to have to fully embrace the dark art of brass and solder, wish me luck!!
Ps pictures to follow!
 04-10-2013, 01:37 PM
#2
Thread Starter
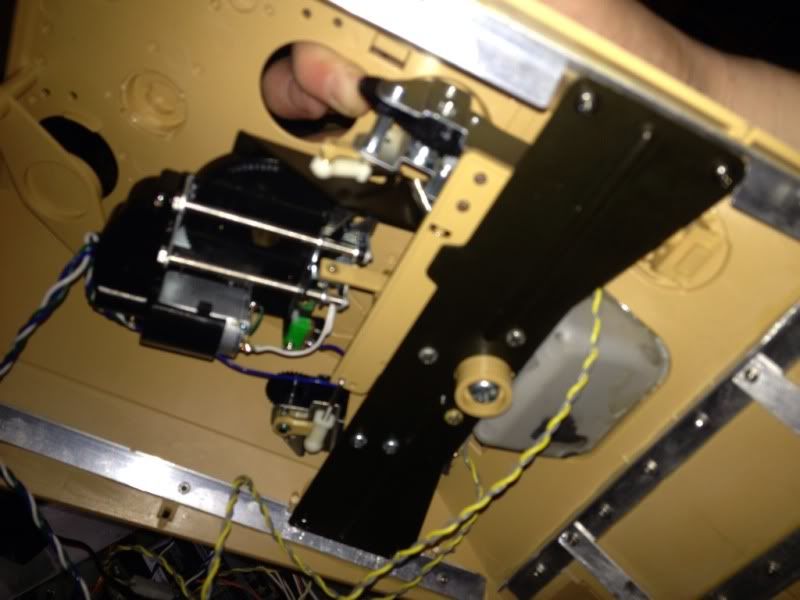
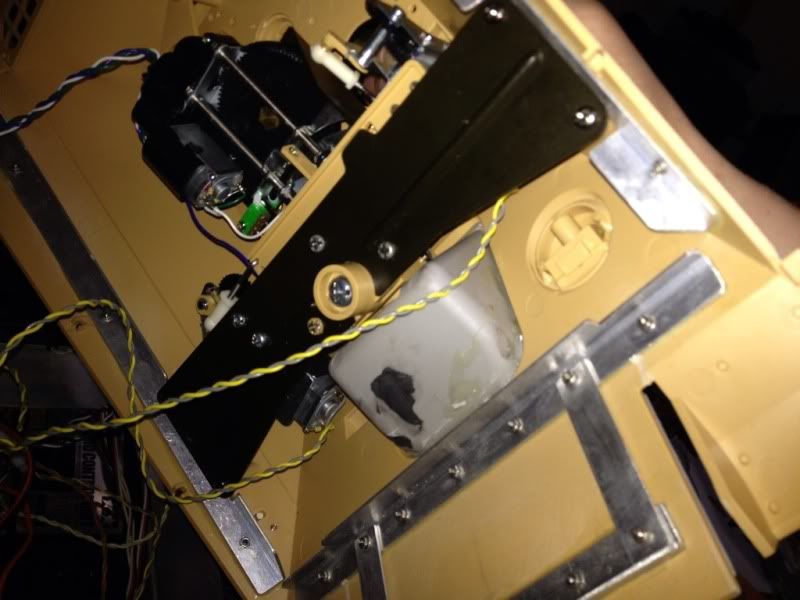
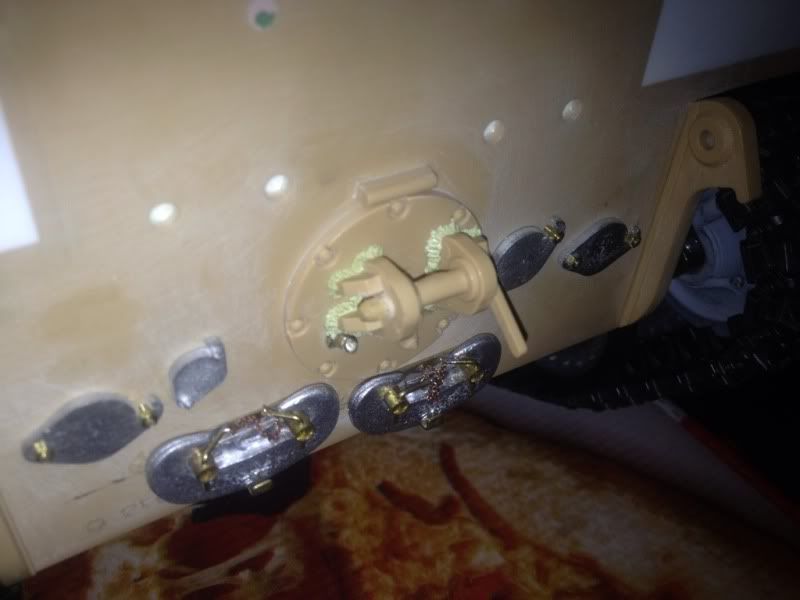
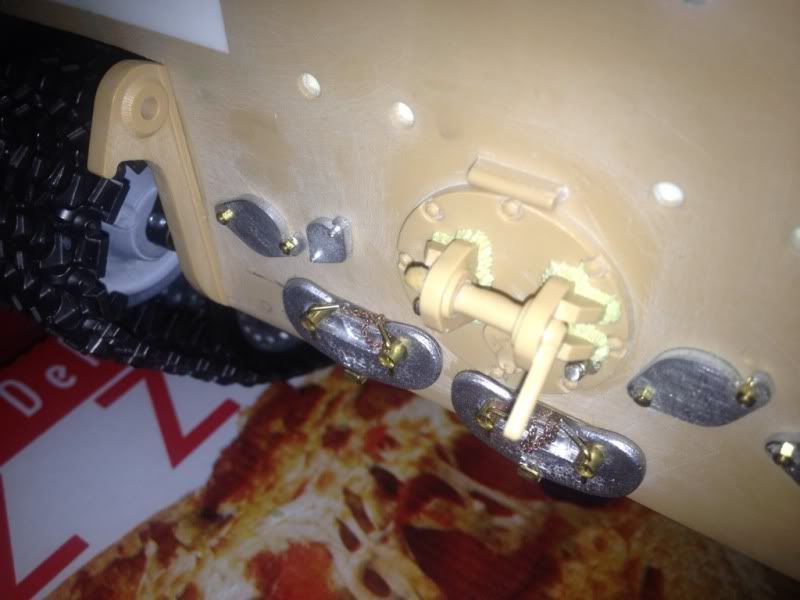
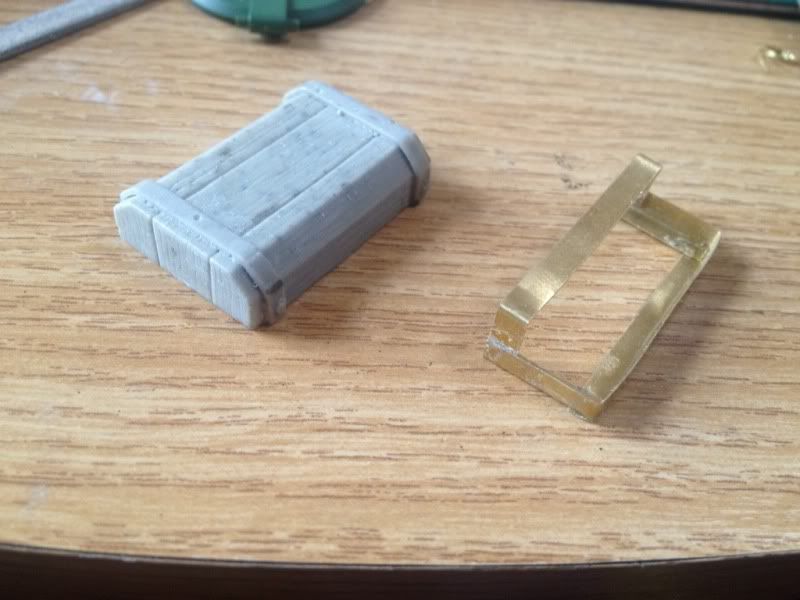
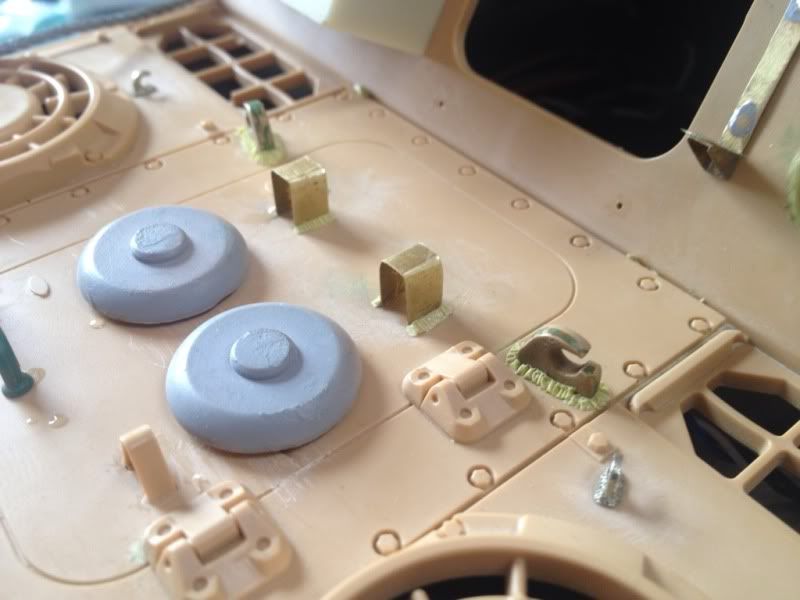
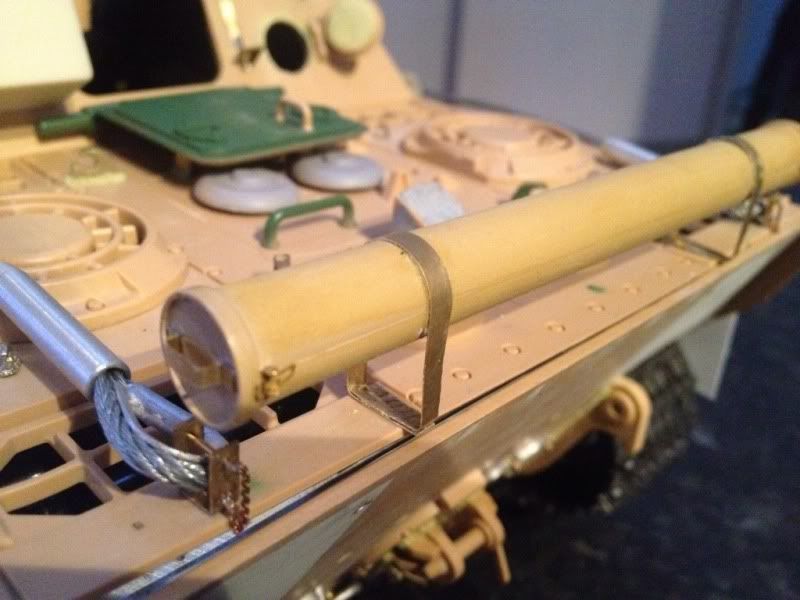
So I have had some nice packages from Jason's store and axels so I have been able to do some mechanical work on the jagdpanther. When putting together the elevation/traverse/recoil I realised some elements such as the pivot where missing. So I fabricated (bodged) something together. It was supposed to consist of a hex head bolt which ran through two bearing that was then screwed together. I used a long brass bush glued into the where the bearings should go with a machine screw and modified nut to get it all working. Other things fabricated where the pivot for the elevation and new linkages as I'd ordered the wrong tool bag.
Pictures!
04-10-2013, 01:38 PM
#3
Thread Starter
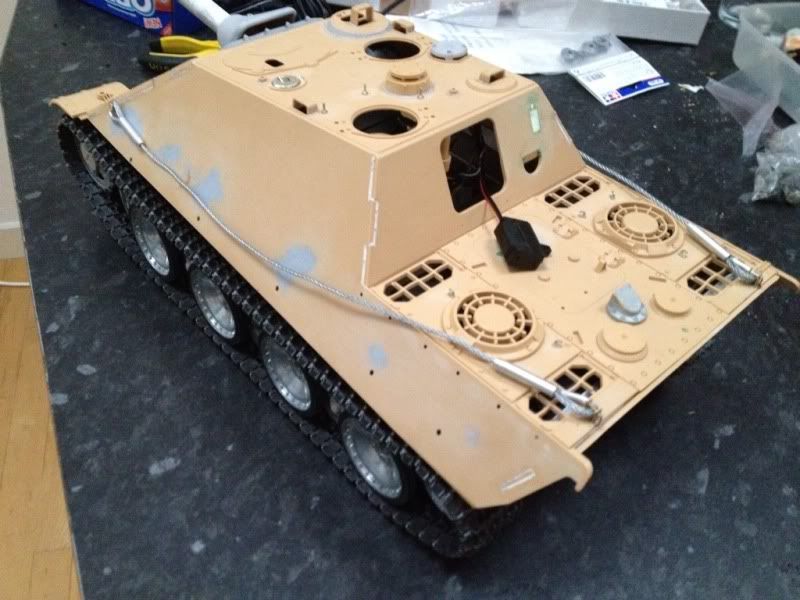
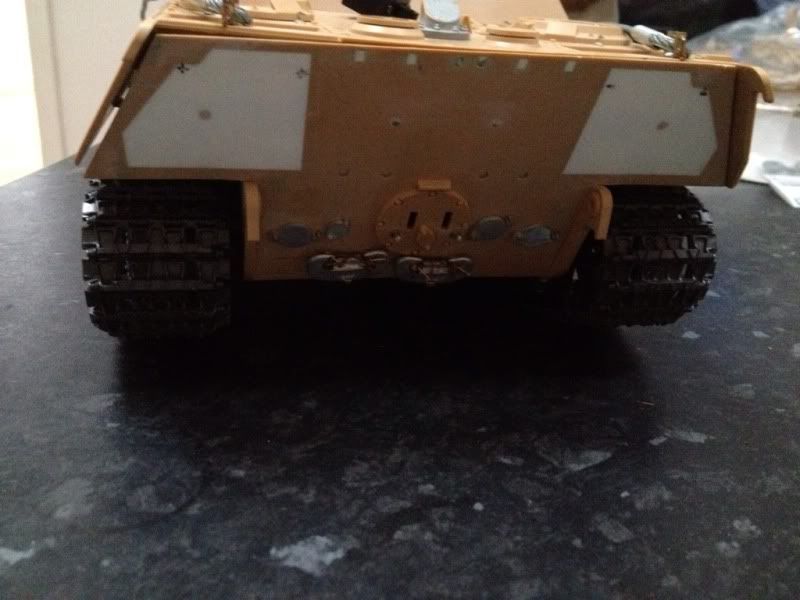
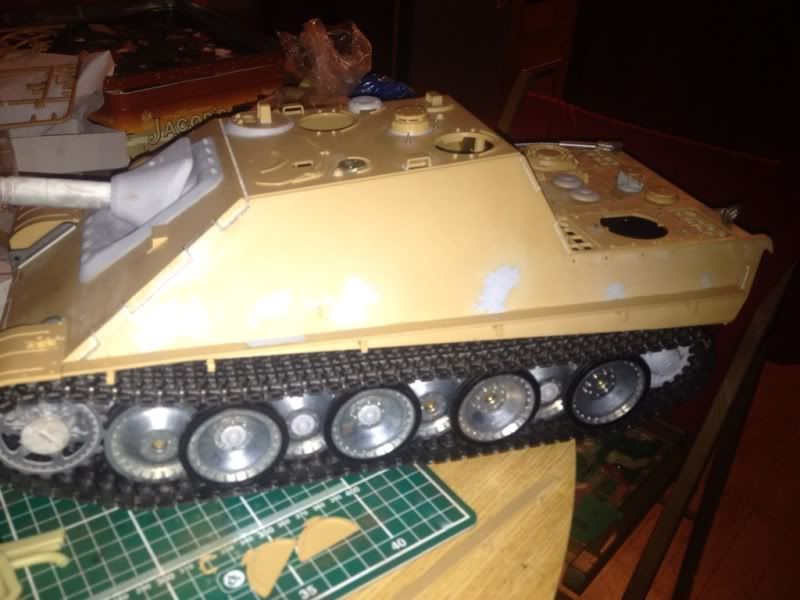
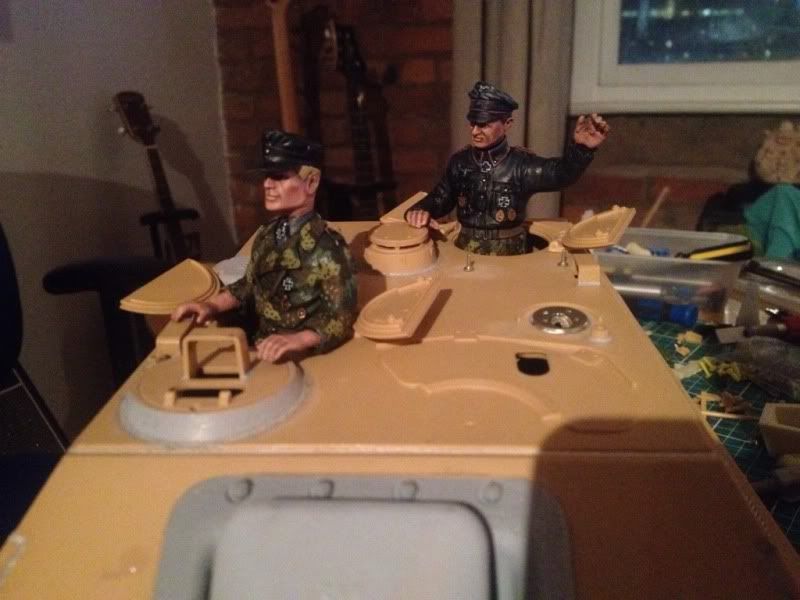
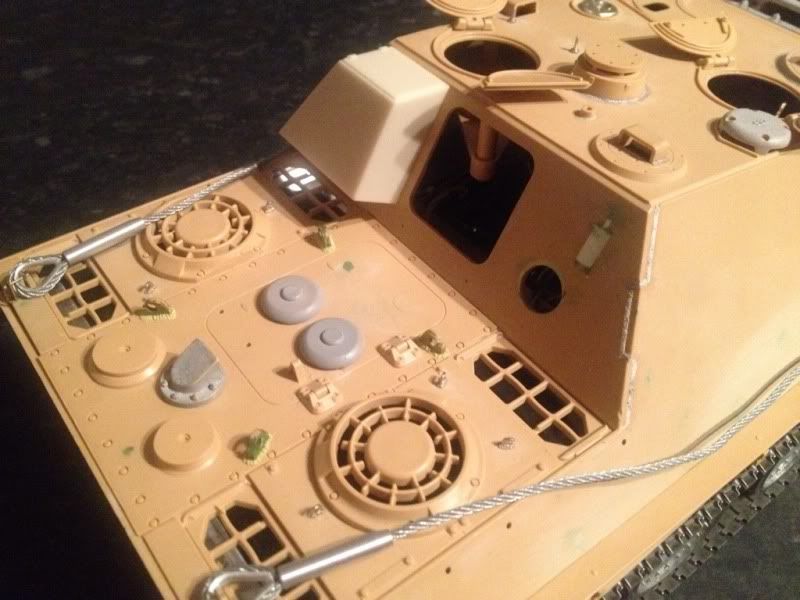
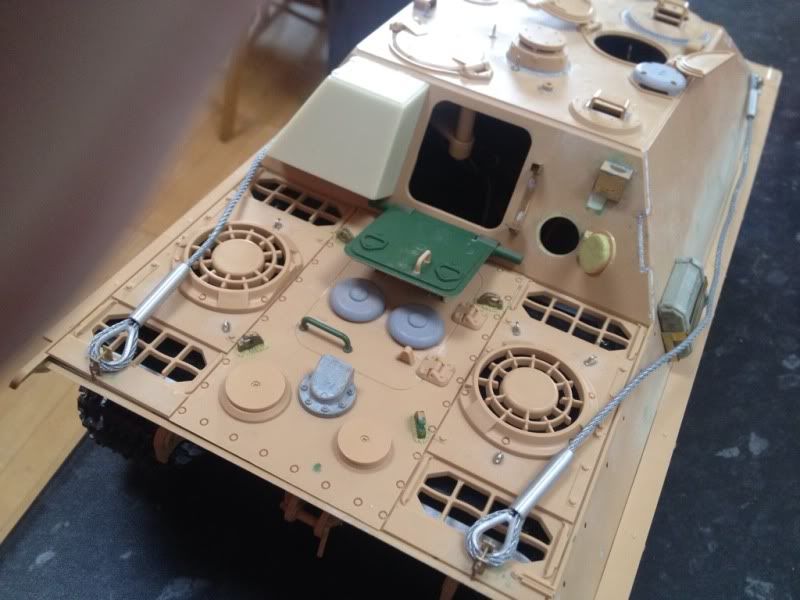
Last night decide to crack on with the bits of this build I had parts for, have added the hatches on the top of the casemate, the running boards on the sides which the skirts will attach to and added some rear deck detail and weld lines. Have also finished the crew which where a combination of resin parts with bits and bobs sculpted by me.
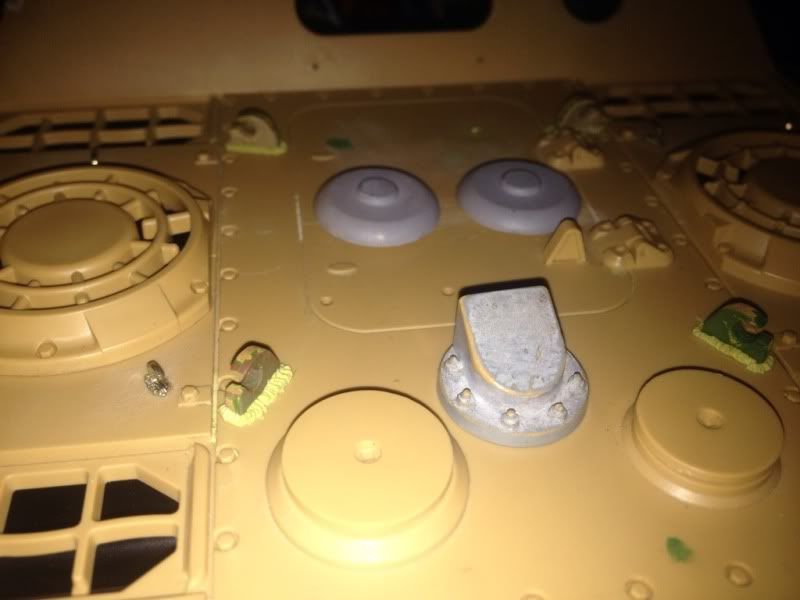
Next up I've got some work to do on the rear plate details, I have a set of resin exhausts but these are early pattern so I'm not sure whether to run with these and say they've been butchered off a damaged one, or buy the proper ones.
04-10-2013, 01:40 PM
#4
Thread Starter
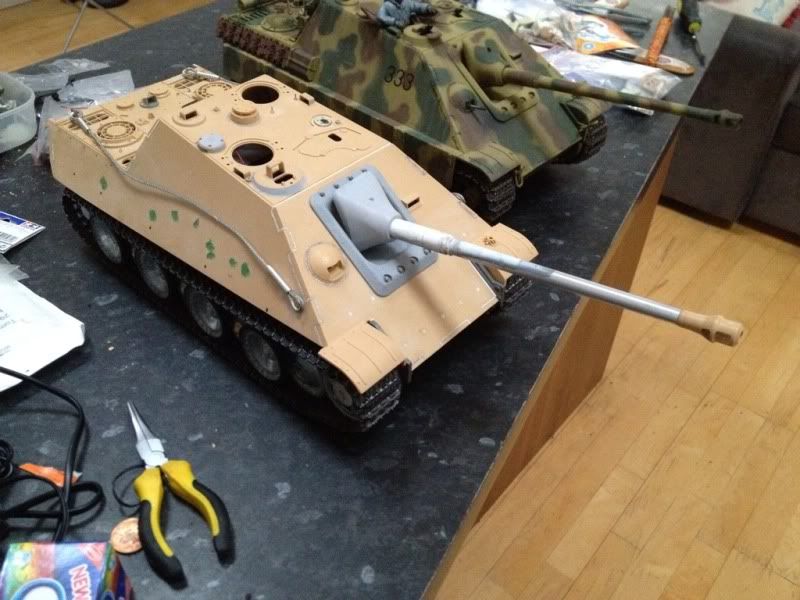
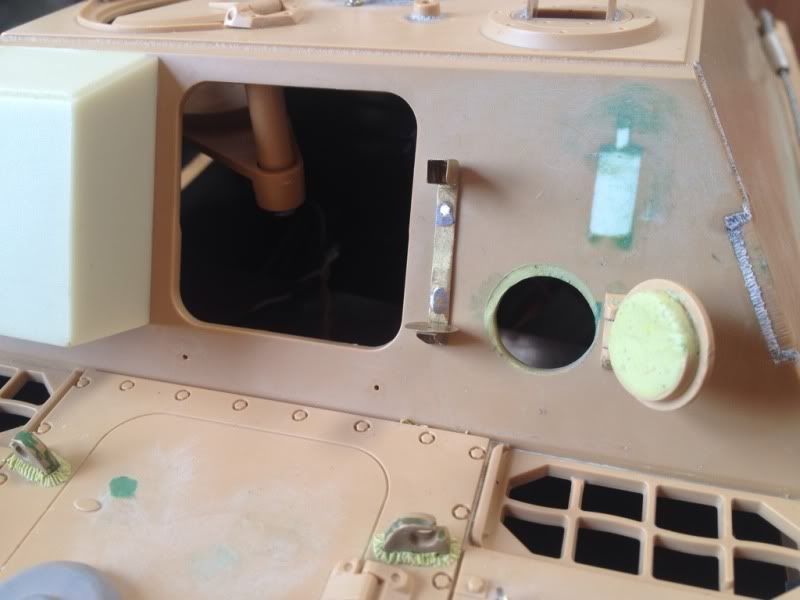
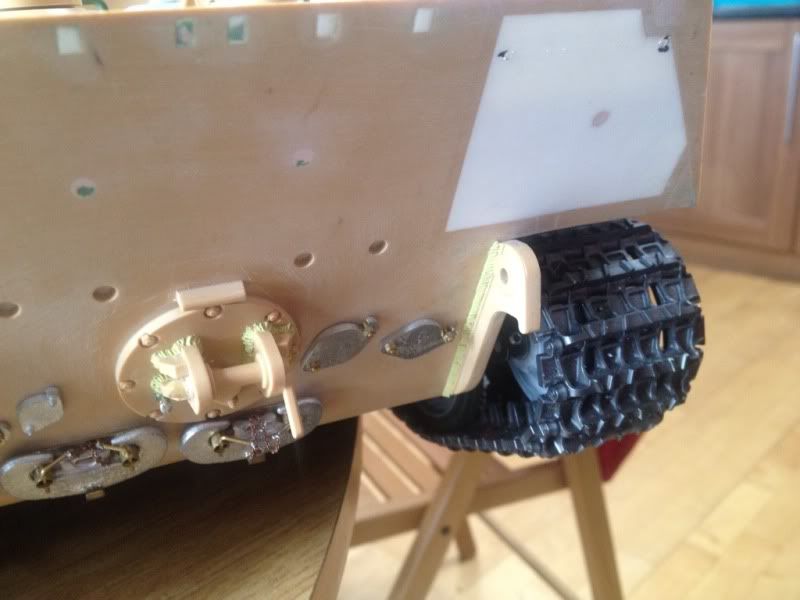
So more work done tonight, working to get a working shell ejection hatch, had to re shape the hole. Separated the hatch from the hinges. I was looking into the schumo rear tow hitch, but not having bottomless pockets I decided I could adapt the Tamiya to pretty much thé same thing. Added weld lines and extended the tapered part of the bar. Just need to find a tiny split pin.

 04-10-2013, 01:42 PM
#5
Looks nice with all that extra metal on it!
~ Jeff
~ Jeff
04-10-2013, 01:52 PM
#6
Thread Starter
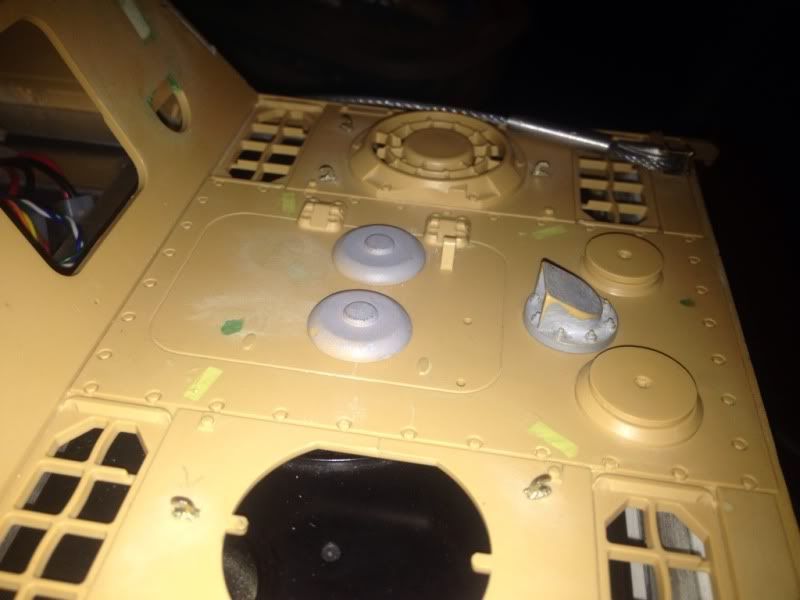
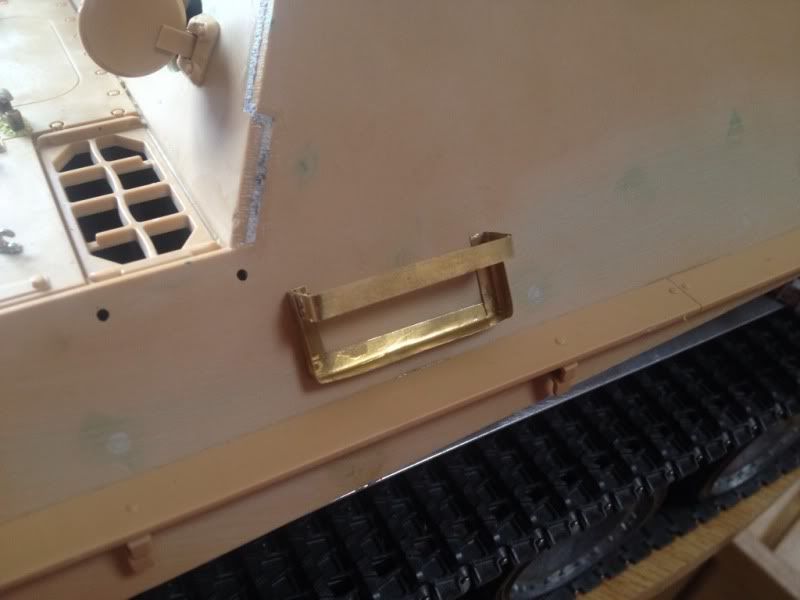
So accidentally ended up in Carlisle on the wrong day so had an early dart from work, sooo more work on my jagdpanther. Attached the fire extinguisher holder, finished the shell ejection port, now fully functional and correct thickness. I built a holder for a jack block from brass scrap, some details on the rear deck, started on adding detail to a hl rear hatch and added some weld lines on the back plate. Have tidied up both exhausts but still not sure which to use!
Pictures:
 04-10-2013, 02:03 PM
#7
Senior Member
Nice work Tom. The detail is what sets a great tank apart from the rest. I IR battle most of my tanks so I cannot go too far on the details just to see them break off on the field of honor. Please keep the pix coming. Carry on.....
04-10-2013, 02:55 PM
#8
Thread Starter
The plan is to continue to attach all the fragile stuff using threaded rod and small scale bolts like with the fire extinguisher. There's afew of the track holders done like this so which gives me something to aspire to and make the detail pretty durable. I am debating whether to add some more photo etch for this reason, I don't want a shelf queen!
 04-12-2013, 11:12 AM
#11
Thread Starter
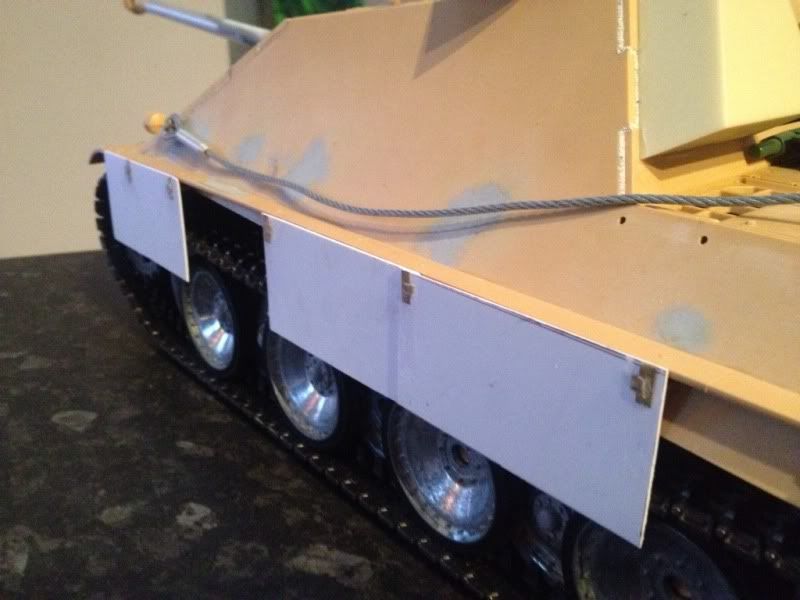
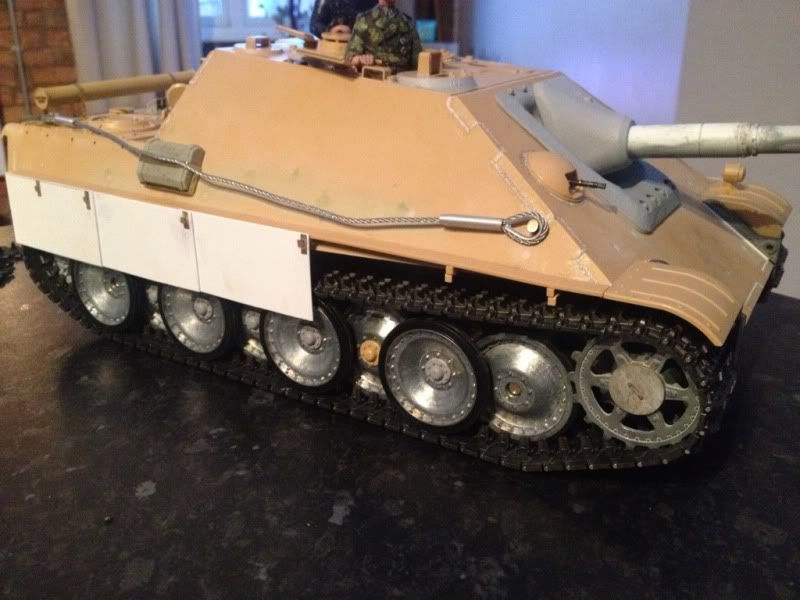
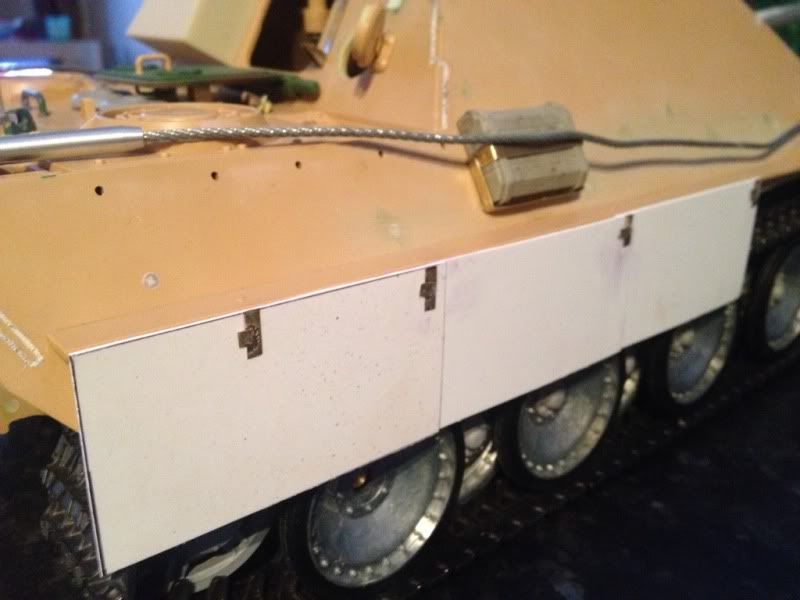
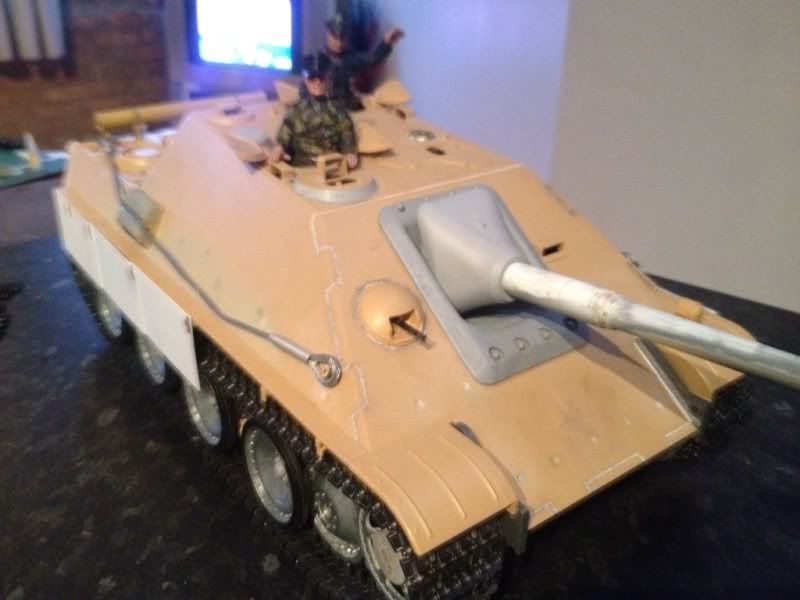
Another update, I know it flys in the face of good sense but I like my panthers with their skirts on (in know I know!), however after getting some measurements I found that the battlefront ones I bought where a bit off. Sooo I had some plasticard and scrap brass and knocked up some of my own.
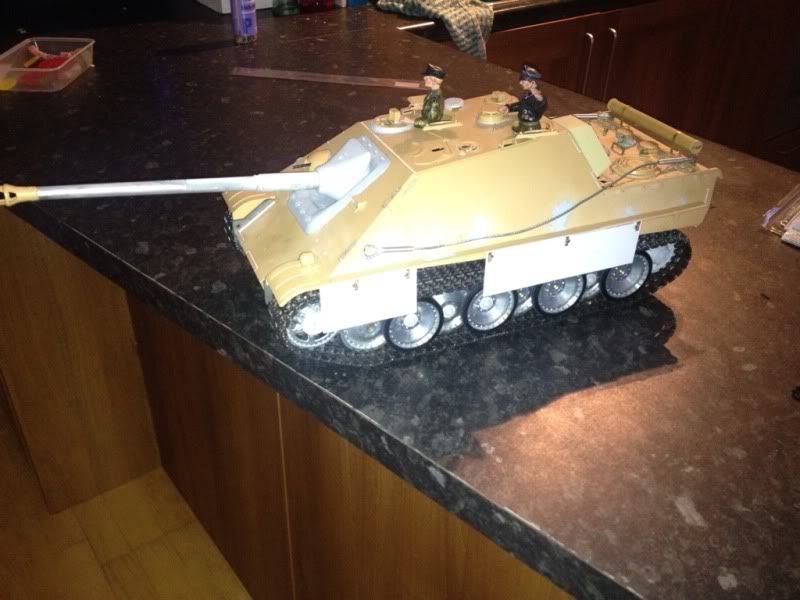
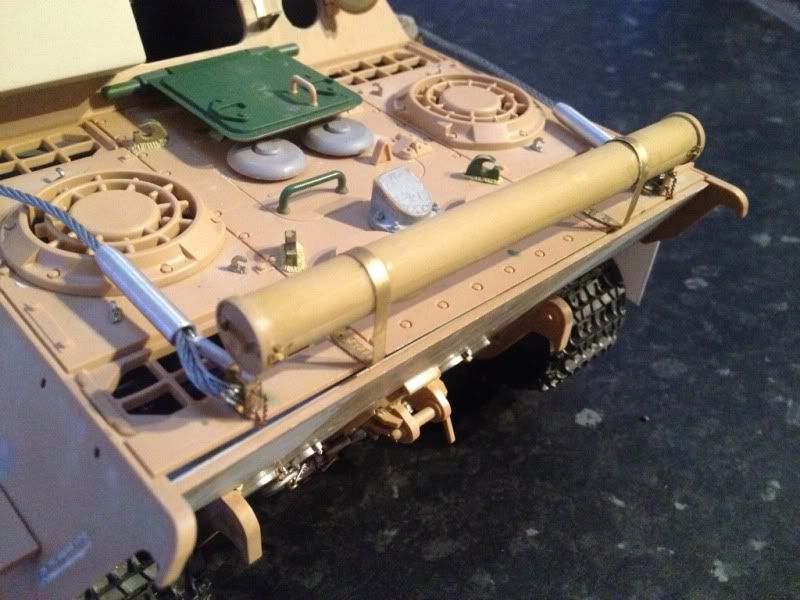
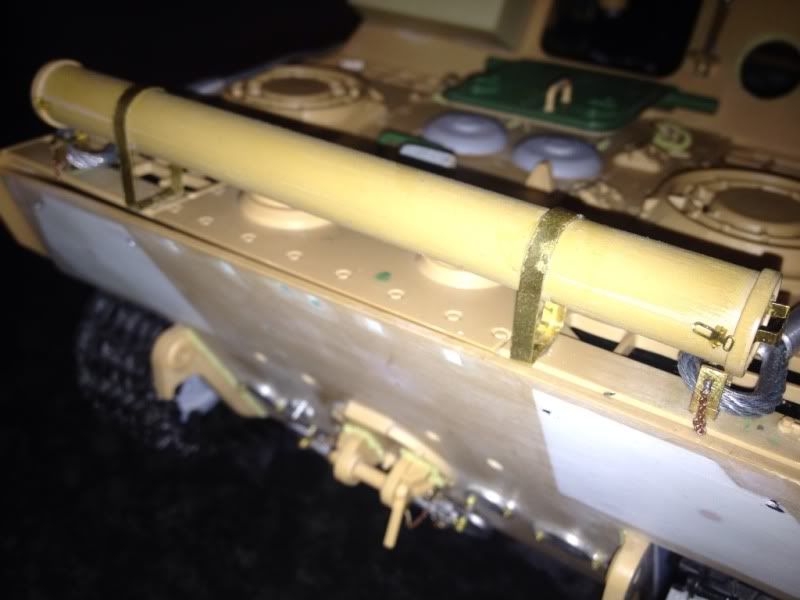
I also decided not so spend 17 quid on the Aber antenna tube and adapted one off a HL. Enter some brass and some PE clasps left over from another build.
And a full model shot
 04-12-2013, 11:50 AM
#12
Looks Good Tom!!!
04-12-2013, 12:04 PM
#13
Thread Starter
Cheers Maus, I need to add the little hat to the top of the antenna tube but I need some more brass sheet.
04-12-2013, 12:15 PM
#14
I meant to say in my last post that I just got that set of Asiatam replacement wheels as well and they are fabulous!!! I have the Impact photo-etch set for the Panther G and it includes a lot of detail that could be used on the Jagdpanther as well. It was inexpensive compared to the Aber set, $65 U.S. shipped. The rear tool/storage boxes are the only detail it did not include, but it did have replacement latch and hinge detail for the attached plastic boxes on the back plate. The Aber boxes cost almost as much as the complete Impact set!!! Crazy!!!
04-12-2013, 12:26 PM
#15
Thread Starter
Funnily enough I've used the impact PE On my panther G. I found it to be pretty good and there plenty of extras with it. Some bits like the spare track holders aren't great but aside from that all good. The Aber set has far more detail (it's mental) but looks like a nightmare to build and you probably wouldn't notice a lot of it when painted.
04-12-2013, 12:41 PM
#16
I agree, the detail may be slightly better on the Aber sets, but like you said, paint make cover some of it and the prices are not even close. The only Aber set I am tempted to get is the rear storage boxes, but the price makes me almost cry. The least expensive price I have seen for them is on ebay for $45 U.S., but most other vendors carry them at $50-$60 U.S. and that dose not include shipping. I may just cut the plastic boxes off the rear armor plate and thin them out from behind with a Dremel tool and close off the back of the armored plate and boxes with thin plastic card. Then I could dent them up and attach them via the hangers fro them on the back plate. Crazy but possible!!![&:] Is that what you are doing? I see you already cut them off and closed the holes in the back armored plate?
04-12-2013, 12:56 PM
#17
Thread Starter
I've got a part complete set of the Aber rear boxes, the main bits are there but its missing the hinges and clasps. It is very very nice but scary to build. Agree on the asiatam wheels! I've got them on my HL panther f build and they're great!
04-12-2013, 01:00 PM
#18

great stuff man. I to like the look with some of the side skirts on . I'm waiting for a friend of mine to laser cut some hangers for the sideskirts on my JP . If they turn out well I'll have him try to make some side boards aswell.
04-12-2013, 01:02 PM
#19
Those are Asiatam road wheels? They look GREAT!!
How much were they and where can I get a set from?
~ Jeff
How much were they and where can I get a set from?
~ Jeff
04-12-2013, 01:04 PM
#20
Thread Starter
Welsh dragon have them for about £80, they're really really nice, no rubbing, smooth, no need to alter them etc! I wish I knew some one with a laser cutter! I've used the PE skirts on my panther g and whilst nice they're quite flimsy and you can't see the nice hanger detail!
04-12-2013, 01:37 PM
#21
Try rctank.de or asiatam.com. I ordered mine from rctank.de and got them in about six days. Cost was 99 euros or $129 U.S. Makes sure when you order them you let them know you want the set for Tamiya or HL. Welsh Dragon may have them as well?
04-12-2013, 02:47 PM
#22
What about these:
http://www.ebay.com/itm/390358376046...84.m1423.l2649
Are they any good and are they just for HL tanks? I want to build a Panther F so I'll need rubber rimmed wheels.
~ Jeff
http://www.ebay.com/itm/390358376046...84.m1423.l2649
Are they any good and are they just for HL tanks? I want to build a Panther F so I'll need rubber rimmed wheels.
~ Jeff
04-12-2013, 03:37 PM
#23
They are made just for the HL. That said, someone on this forum or another used them on a Tamyia. The axles are 3mm and they slipped metal tubing over the axles to make them fit the Tamiya swing arms. I think the Tamiya swing arm are bored out to 4mm. The only thing I do not like about the Mato metal Panther wheels is that lip or rim around just inside the outer edge of the metal part of the wheel. The flat part where the bolts are on the rim. When you look at the Tamiya wheels and the real thing. They do not have this rim or flat lip. I am not sure if these come with bearings, but the Asiatam wheels do have bearings. Real bearings nor bushings!!!
04-16-2013, 01:50 AM
#25
Thread Starter
Got some goodies comming in the post today. Realised I only had two mesh screens for the rear vents and only one without the hole for the crew heater so I've bit the bullet and gotten the Aber rear grill set and will probably add the crew heater back as its a nice bit of detail with the PE. Also got the periscopes, proper antenna, antenna base and a load of German tool clamps and clasps so I can finish the rear stowage boxes. Still no rear exhausts to be found but patience is a virtue!