


HL-Tiger 1: Smoke discharger
 05-15-2013, 11:43 PM
#1
Senior Member
Thread Starter

Join Date: Sep 2010
Location: Luedenscheid, GERMANY
Posts: 188
Likes: 0
Received 0 Likes
on
0 Posts
Hi guys,
today your are going to modify the smoke dischargers.
On the first picture you see the ones from the HL.
Mmh, there is something missing.
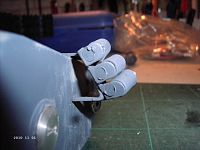
If you take a look at the original ones, you can see a wiring.

Lets try to simulate it with simple things.
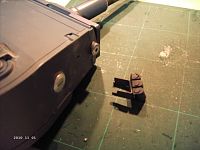
Dismount the dischargers from the turret. Normally the are just sticked to the turret.
If you got a new Tiger, they should be inside the accessory box.
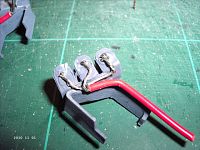
Then take a small stranded wire. As thinner as better.

Skin half of the wires.

Divide the strings in three bundles and twist them.
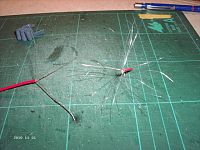
Then glue the wire to the dischargers as shown.
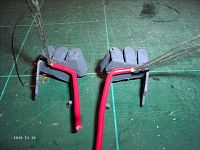
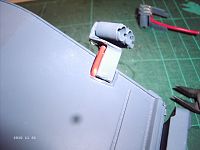
Now drill a hole to each discharger. The size of the hole depends on the size of the strings.

Cut the strings and put them into the holes as shown.
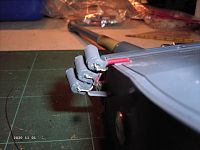
The other end is to be cut, too. Drill a hole to the turret roof and glue the other end of the wire as shown.

If you did it right, it shoul look like this.
Greetings
Birger
For a lot more help with your Heng Long Tiger I tank, follow the below link ...
HL-TIGER I, Basics, Failures and how to remove them.
today your are going to modify the smoke dischargers.
On the first picture you see the ones from the HL.
Mmh, there is something missing.
If you take a look at the original ones, you can see a wiring.
Lets try to simulate it with simple things.
Dismount the dischargers from the turret. Normally the are just sticked to the turret.
If you got a new Tiger, they should be inside the accessory box.
Then take a small stranded wire. As thinner as better.
Skin half of the wires.
Divide the strings in three bundles and twist them.
Then glue the wire to the dischargers as shown.
Now drill a hole to each discharger. The size of the hole depends on the size of the strings.
Cut the strings and put them into the holes as shown.
The other end is to be cut, too. Drill a hole to the turret roof and glue the other end of the wire as shown.
If you did it right, it shoul look like this.
Greetings
Birger
For a lot more help with your Heng Long Tiger I tank, follow the below link ...
HL-TIGER I, Basics, Failures and how to remove them.

