


Panzer IV F1
 06-09-2013, 10:49 AM
#1
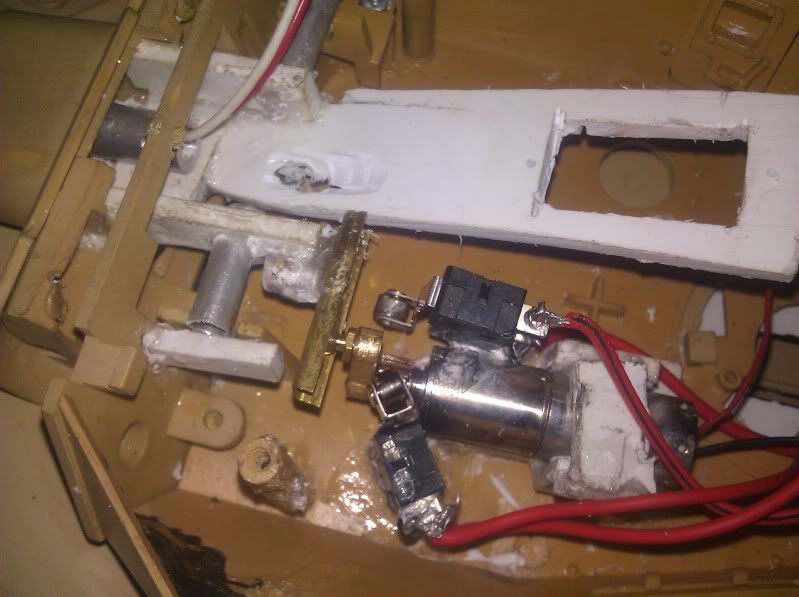
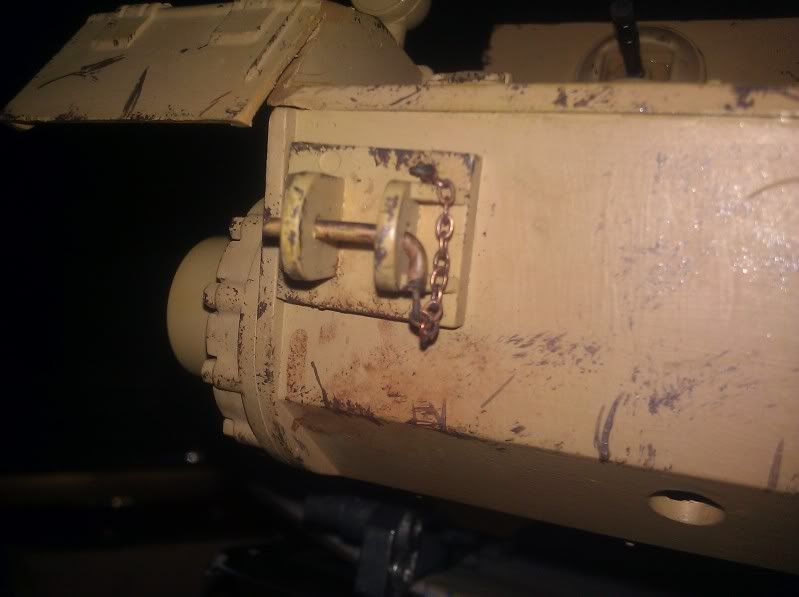
Finally got my hands on a PIV to play around with. I wanted to build one for a while, so this is one i am looking forward to. I bought in a WIP condition, and it had the Asaita recoil unit partially installed. After messing arounda bit, I decided to deep six the unit annd make up my own elevationa nd recoil system for this one.Concentrating on durability, I suded thick styrene to asemble it.I added aluminum stock to make the pivot points and used a gearhead motor with limit switches for the elevation. I was panning to use a Tamiya recoil unit, but the throw seems to be too much for this little barrel.I opted to ue a servo instead so I can program the ElMod for the amount of throw I need.
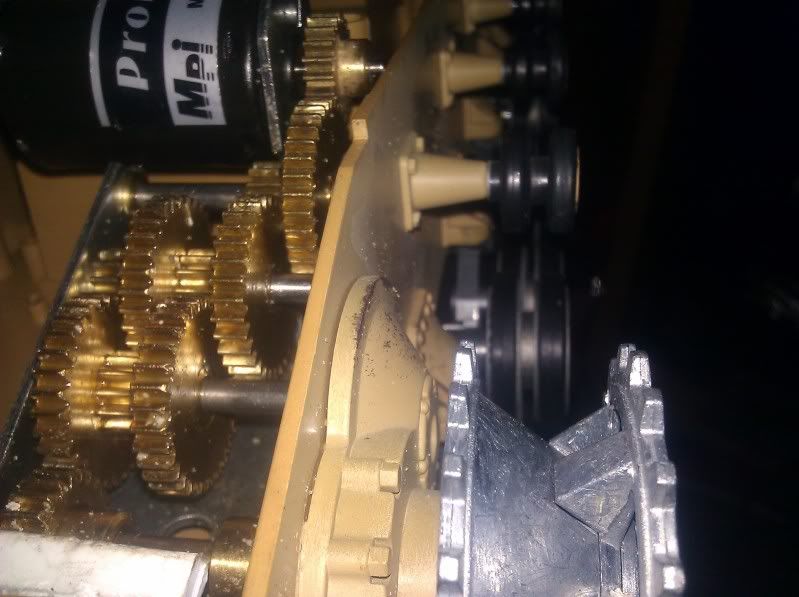
I have already installed the Asiatam suspension and tank modelbau tensioning system, and I fitted the Mato 2.0 gearboxes with speed 400 motors too. I am still waiting on the asiatam road wheels, return rollers and mounts for same. This tank is a lot of fun to work with and should be a good fighter when completed.
I have already installed the Asiatam suspension and tank modelbau tensioning system, and I fitted the Mato 2.0 gearboxes with speed 400 motors too. I am still waiting on the asiatam road wheels, return rollers and mounts for same. This tank is a lot of fun to work with and should be a good fighter when completed.

 06-09-2013, 12:17 PM
#2

This will be a fun build to watch. Since you're getting the steel return rollers, does that mean that you'll be updating this one to be a late Ausf H or an Ausf J?
Curiosity question...why the Mato 2.0 gearboxes rather than the Asiatam/Taigen brass low profile boxes? I've considered both and was wondering your opinion.
Curiosity question...why the Mato 2.0 gearboxes rather than the Asiatam/Taigen brass low profile boxes? I've considered both and was wondering your opinion.
06-09-2013, 12:41 PM
#3
I am actually not planning to update this to a late model. I am undecided on if it is goingt o be a "what if" build, or maybe a late survivor that had these wheels added...not going for historical correct, just having some fun with it.
As for the gearboxes, I had these in my parts box and figured I'd use them...seeing as they ft in the hull anyway.
As for the gearboxes, I had these in my parts box and figured I'd use them...seeing as they ft in the hull anyway.

 [/url
06-10-2013, 04:55 PM
[/url
06-10-2013, 04:55 PM
#5
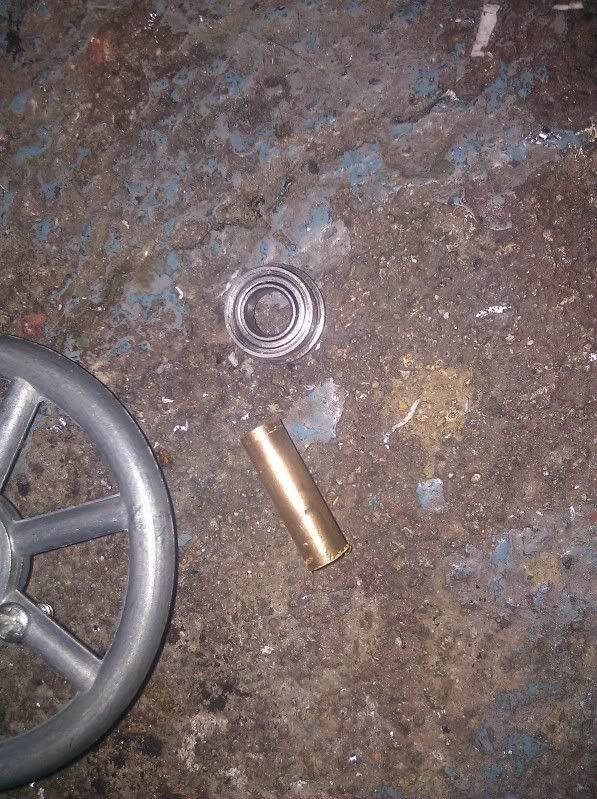
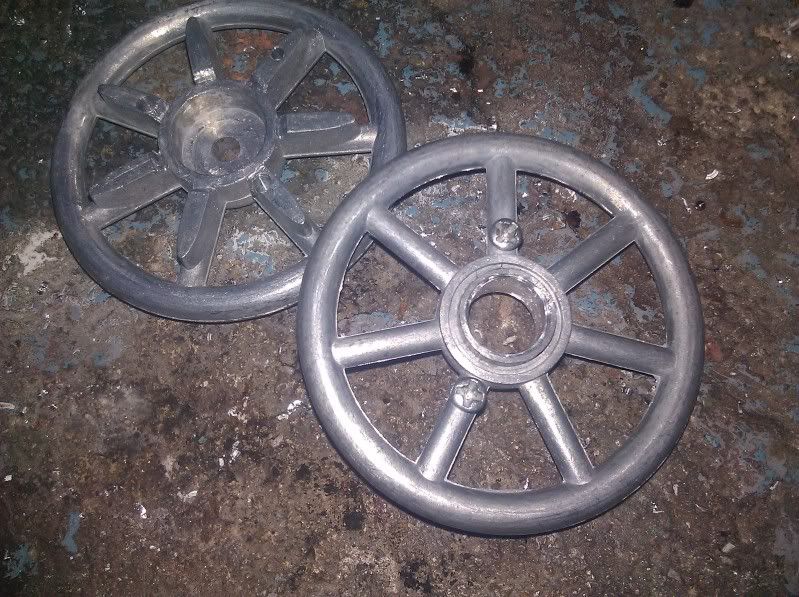
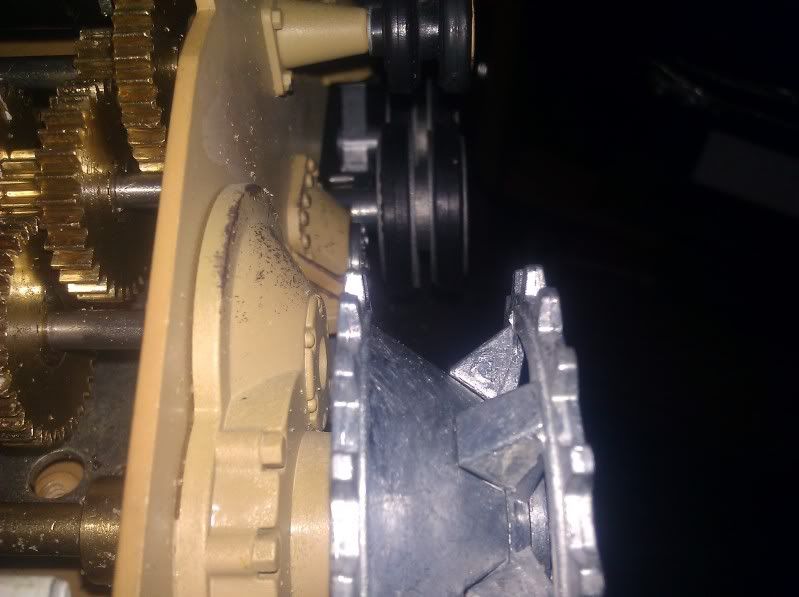
Ok, so today the road wheels, return rollers, mounts and sprockets/idlers showed up...The road wheels went on without any trouble and are rather nice. Would be nicer with a brass bushing, but that is asking too much, I guess.The idlers are another story completely. The two halves screw together wth 2 philips screws. Of course they did not fit the tensioner and once the screw was tihtened down, they hit and would not turn. I figured I'd give a try to install bearings into them and a small brass spacer thrugh the center of the double bearings...It worked out well. I drilled them out and the bearings snapped right in. I then cut the brass to size and screwed it together. Tight and spins perfectly free. I threw on one track and ran it off a power supply. So ar, so good.


 06-10-2013, 06:29 PM
#7
Thank you, Jim. I am still tryint o decide if I wan to go further. I might drill out the tensioner to accept a set screw and make an axle for th3e idler instead of using the screw from the kit. Not that it isn't tight and solid, but an axle is always a better way to go.
06-10-2013, 06:34 PM
#8

Join Date: Jan 2006
Location: Hamilton,
ON, CANADA
Posts: 1,422
Likes: 0
Received 7 Likes
on
7 Posts
Can you post a picture of the back side of the metal road wheels? The Mato metal wheels have an indent that's giving me the alignment issues, whereas the plastic HL ones stick out further.
Hehe I suppose I should also ask if the suspension is the same size as the stock units too!
I like the bearing job I'm considering it for mine too!
Hehe I suppose I should also ask if the suspension is the same size as the stock units too!
I like the bearing job I'm considering it for mine too!
06-10-2013, 08:00 PM
#12
No, the inside is not recessed.
I did run into a small problem now. The hubs appear to be made as a snap fit...well, they don't fit at all. This is going to be a challenge becasue they are so sall. I guess I will have to use a file to take off some material and get them in place....Why can no one make parts that fit?
I did run into a small problem now. The hubs appear to be made as a snap fit...well, they don't fit at all. This is going to be a challenge becasue they are so sall. I guess I will have to use a file to take off some material and get them in place....Why can no one make parts that fit?
06-10-2013, 09:02 PM
#13
Join Date: Jan 2006
Location: Hamilton,
ON, CANADA
Posts: 1,422
Likes: 0
Received 7 Likes
on
7 Posts
Ah I see. With Mato both sides are recessed.
I really don't mean to take over your thread so I'll move this to mine after, hehe.. but here at what the Mato wheels look like. Top row : Front side (darker), rear side (unpainted), bottom row: Left inner hub, mounts on the axle, right outer hub, slides over inner hul.
As you can see there is no difference on the outside, both sides sit too closely.. really dumb on Mato's part
Thanks!
06-11-2013, 03:49 AM
#14
Interesting...I've been looking at a similar setup for the suspension. Your brass spacer on the idler...is that to push the idler away from the tank hull? Does that mess up the alignment or is the idler too close to the hull anyways? What size bearings did you use?
06-11-2013, 05:20 AM
#15
The idler, like most of these parts is not made to fit the asiatam tensioner. When you tighten it down, the idler is tight against the tensioner and will not turn. I modded it with bearings and the shaft so that it could turn free and fit this tensioner. It did not throw off alignment. As for the bearing size...I honestly don't know. I had a few bearings laying around from previous projects and the brass was in the box which fit through the center...I went with it. I will check and see if I have any more bearings and check sizes for you later on.
06-11-2013, 12:06 PM
#16
ORIGINAL: yellowshaker
The idler, like most of these parts is not made to fit the asiatam tensioner. When you tighten it down, the idler is tight against the tensioner and will not turn. I modded it with bearings and the shaft so that it could turn free and fit this tensioner. It did not throw off alignment. As for the bearing size...I honestly don't know. I had a few bearings laying around from previous projects and the brass was in the box which fit through the center...I went with it. I will check and see if I have any more bearings and check sizes for you later on.
The idler, like most of these parts is not made to fit the asiatam tensioner. When you tighten it down, the idler is tight against the tensioner and will not turn. I modded it with bearings and the shaft so that it could turn free and fit this tensioner. It did not throw off alignment. As for the bearing size...I honestly don't know. I had a few bearings laying around from previous projects and the brass was in the box which fit through the center...I went with it. I will check and see if I have any more bearings and check sizes for you later on.
 I like your solution to the problem.
06-11-2013, 02:50 PM
I like your solution to the problem.
06-11-2013, 02:50 PM
#17
Join Date: Jan 2006
Location: Hamilton,
ON, CANADA
Posts: 1,422
Likes: 0
Received 7 Likes
on
7 Posts
ORIGINAL: philipat
I think that I read somewhere that the Asiatam tensioner was made for the HL idler and the Tank-Modellbau tensioner for the Asiatam idler. Seems rather confusing...make the part for your own parts. [img][/img] I like your solution to the problem.
ORIGINAL: yellowshaker
The idler, like most of these parts is not made to fit the asiatam tensioner. When you tighten it down, the idler is tight against the tensioner and will not turn. I modded it with bearings and the shaft so that it could turn free and fit this tensioner. It did not throw off alignment. As for the bearing size...I honestly don't know. I had a few bearings laying around from previous projects and the brass was in the box which fit through the center...I went with it. I will check and see if I have any more bearings and check sizes for you later on.
The idler, like most of these parts is not made to fit the asiatam tensioner. When you tighten it down, the idler is tight against the tensioner and will not turn. I modded it with bearings and the shaft so that it could turn free and fit this tensioner. It did not throw off alignment. As for the bearing size...I honestly don't know. I had a few bearings laying around from previous projects and the brass was in the box which fit through the center...I went with it. I will check and see if I have any more bearings and check sizes for you later on.
06-11-2013, 03:23 PM
#18
ell, I can understand making parts that are atched, but if that's the case, they should sell them as a kit form.In any case, my solution worked and the tank will roll. Now to figure out what position the return rollers are supposed to be in... I have read that stock, they are in the wrong position, but so far no luck in finding the correct mounting spots...
06-11-2013, 06:17 PM
#19
Join Date: Jan 2006
Location: Hamilton,
ON, CANADA
Posts: 1,422
Likes: 0
Received 7 Likes
on
7 Posts
ORIGINAL: yellowshaker
ell, I can understand making parts that are atched, but if that's the case, they should sell them as a kit form.In any case, my solution worked and the tank will roll. Now to figure out what position the return rollers are supposed to be in... I have read that stock, they are in the wrong position, but so far no luck in finding the correct mounting spots...
ell, I can understand making parts that are atched, but if that's the case, they should sell them as a kit form.In any case, my solution worked and the tank will roll. Now to figure out what position the return rollers are supposed to be in... I have read that stock, they are in the wrong position, but so far no luck in finding the correct mounting spots...
06-12-2013, 04:59 AM
#20
ORIGINAL: Strato50
I had just recently read it on here, but cannot find the exact amount but with HL, it's simply the most rearward return roller that has to be lowered by 3-4mm, from what I've been seeing.
ORIGINAL: yellowshaker
ell, I can understand making parts that are atched, but if that's the case, they should sell them as a kit form.In any case, my solution worked and the tank will roll. Now to figure out what position the return rollers are supposed to be in... I have read that stock, they are in the wrong position, but so far no luck in finding the correct mounting spots...
ell, I can understand making parts that are atched, but if that's the case, they should sell them as a kit form.In any case, my solution worked and the tank will roll. Now to figure out what position the return rollers are supposed to be in... I have read that stock, they are in the wrong position, but so far no luck in finding the correct mounting spots...
06-13-2013, 05:48 AM
#24
Maybe one of these? One is a captured F1 in Russia. The other is B in Normandy 1944. The B would take a little work to back date from the F1 though.[8D]


06-15-2013, 02:29 PM
#25
Hmm, I am liking the captured Soviet...decisions....
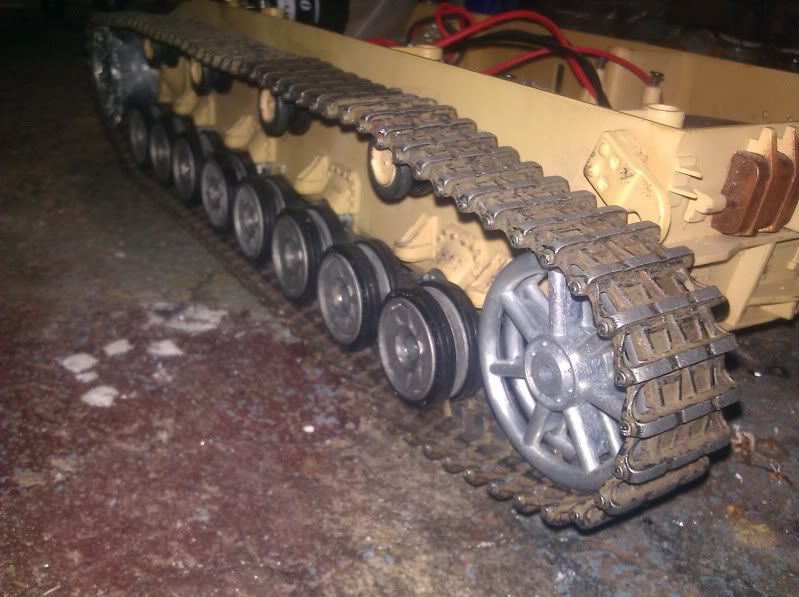
Well, I finally found the time to install the steel return rolles...In my opinion this should have been done better. They use E-clips to hold them in place...they should have threaded the ends of the axle and used a nut to hold them, but they do work, so it is what it is. Yes, I did move the rear most roller down. Here area few pics with the track in place.
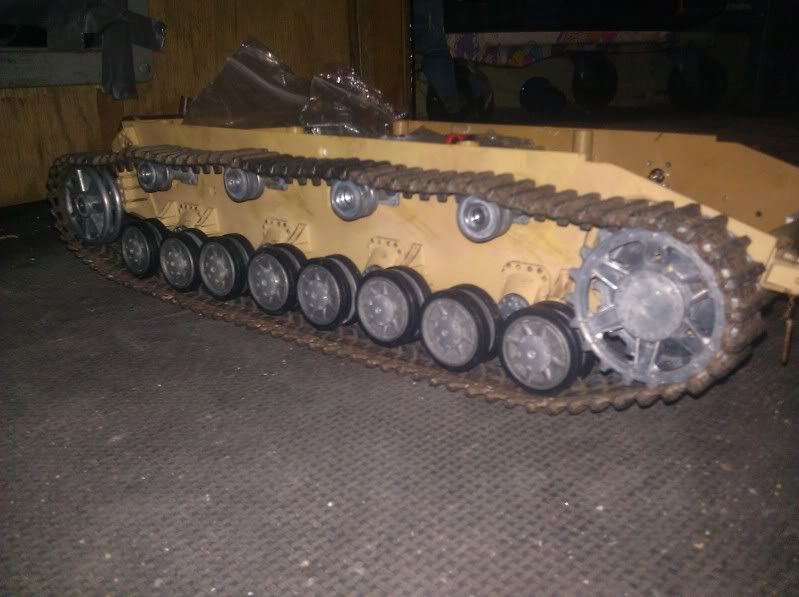
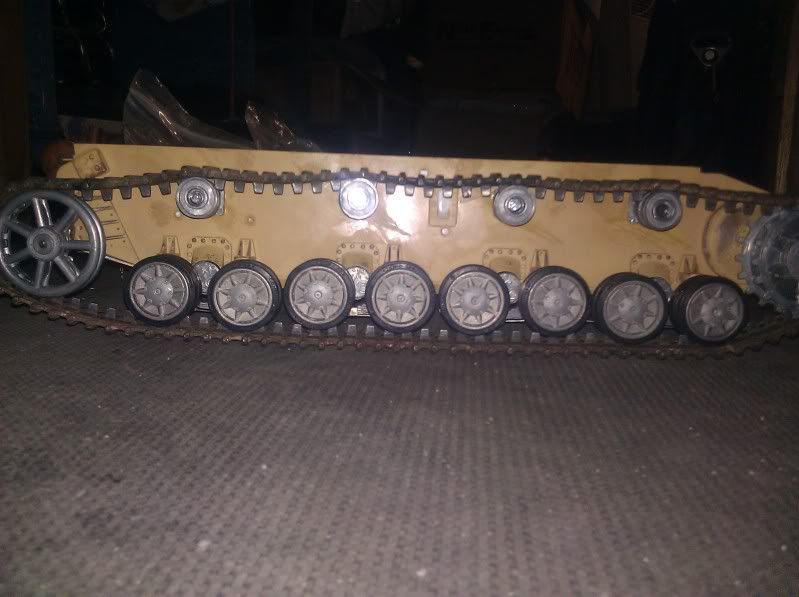

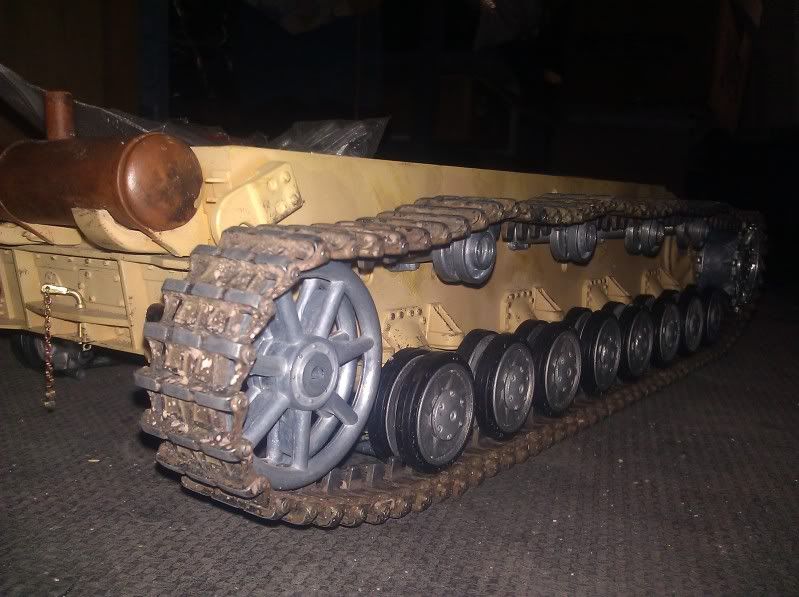
Well, I finally found the time to install the steel return rolles...In my opinion this should have been done better. They use E-clips to hold them in place...they should have threaded the ends of the axle and used a nut to hold them, but they do work, so it is what it is. Yes, I did move the rear most roller down. Here area few pics with the track in place.


