Tamiya m51 (hopefully done properly)
 05-11-2014, 05:25 PM
#26
Senior Member
I am in the same boat with you Jeff. I j got a IFD Sherman from Bill (Patton Commander) years ago but never battled it. H
is was loaded with stowage. But still has HL guts.
Now I have a Tamiya FO M51 and you are welcome to battle it at Danville if you come next weekend. I'll trade you a chance battling your Kelly's Heroes Sherman. I was very intrigued by the Isherman after I built a M51 for a customer last spring. I couldn't believe how small the decal sheet was. I really love the look and all the add on stowage.
I have seen the Merkava in Munster and even got inside a bit. I don't think anyone has done that in 1/16.
I am a bit worried about that L O N G barrel at Danville if I head into town. But what can you do. I am also concerned about the momentum feature. I hated it in the KV But will try again with the M51. They both have fantastic sounds. I did sell it off. If you flip-flop back and forth between tank with and without momentum it effects your driving.
I am looking forward to seeing this thing finished Tom. I hope you get a lot of free time this weekend.
Last edited by thecommander; 05-11-2014 at 05:32 PM.
 05-12-2014, 06:28 AM
#29

Thread Starter
Hey bob, it's not an ideal fix but did you know if you use an older dmd (ie tiger) with the kv mfu it removes the momentum. I managed eight hours building yesterday which was good to get stuff done! I've never appreciated how long fabricating stuff out of styrene takes!
First off ...this is coming alone great Tom. Much better than mine.
I am in the same boat with you Jeff. I j got a IFD Sherman from Bill (Patton Commander) years ago but never battled it. H
is was loaded with stowage. But still has HL guts.
Now I have a Tamiya FO M51 and you are welcome to battle it at Danville if you come next weekend. I'll trade you a chance battling your Kelly's Heroes Sherman. I was very intrigued by the Isherman after I built a M51 for a customer last spring. I couldn't believe how small the decal sheet was. I really love the look and all the add on stowage.


I have seen the Merkava in Munster and even got inside a bit. I don't think anyone has done that in 1/16.


I am a bit worried about that L O N G barrel at Danville if I head into town. But what can you do. I am also concerned about the momentum feature. I hated it in the KV But will try again with the M51. They both have fantastic sounds. I did sell it off. If you flip-flop back and forth between tank with and without momentum it effects your driving.
I am looking forward to seeing this thing finished Tom. I hope you get a lot of free time this weekend.
I am in the same boat with you Jeff. I j got a IFD Sherman from Bill (Patton Commander) years ago but never battled it. H
is was loaded with stowage. But still has HL guts.
Now I have a Tamiya FO M51 and you are welcome to battle it at Danville if you come next weekend. I'll trade you a chance battling your Kelly's Heroes Sherman. I was very intrigued by the Isherman after I built a M51 for a customer last spring. I couldn't believe how small the decal sheet was. I really love the look and all the add on stowage.
I have seen the Merkava in Munster and even got inside a bit. I don't think anyone has done that in 1/16.
I am a bit worried about that L O N G barrel at Danville if I head into town. But what can you do. I am also concerned about the momentum feature. I hated it in the KV But will try again with the M51. They both have fantastic sounds. I did sell it off. If you flip-flop back and forth between tank with and without momentum it effects your driving.
I am looking forward to seeing this thing finished Tom. I hope you get a lot of free time this weekend.
 05-12-2014, 11:42 PM
#31
Thread Starter
I'll be honest I'm not really a Sherman fan usually but I love the cluttered look of the Israeli tanks, they really have that properly going to war look. I also love the 105mm gun and the massive turret bussel it necessitates!
05-14-2014, 10:13 AM
#32
Thread Starter
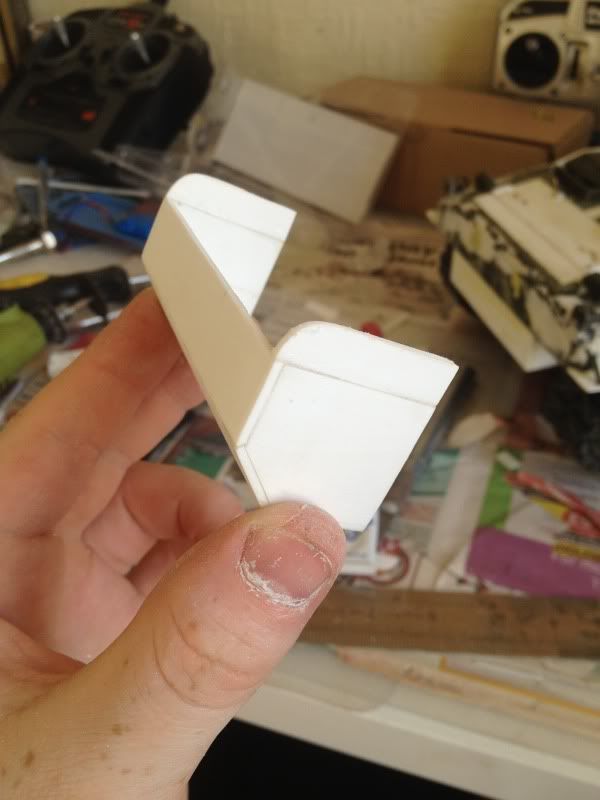
Some little completions have arose. I was going to start building the rear stowage and realised there was a whole but at the rear I hadn't made so I had to do that first:


Im not sure why I bothered with the louvre detai as I've realised no one will see it!
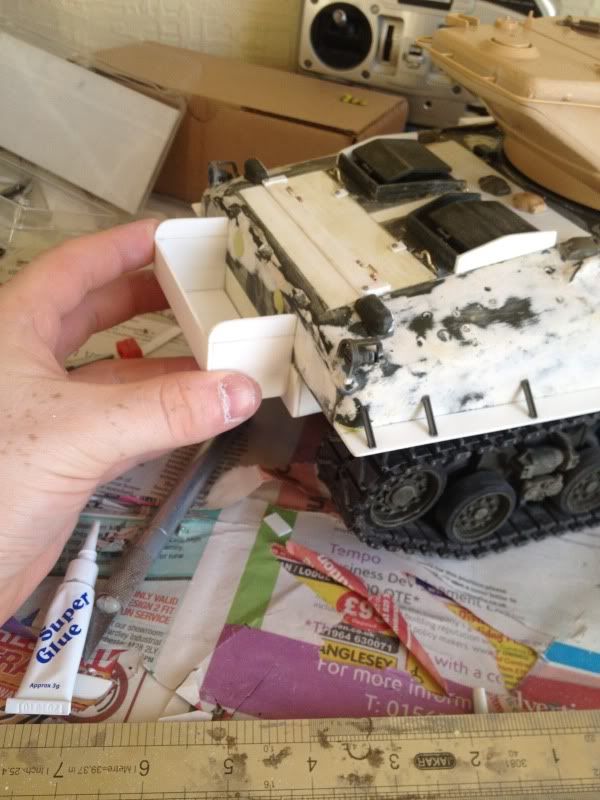
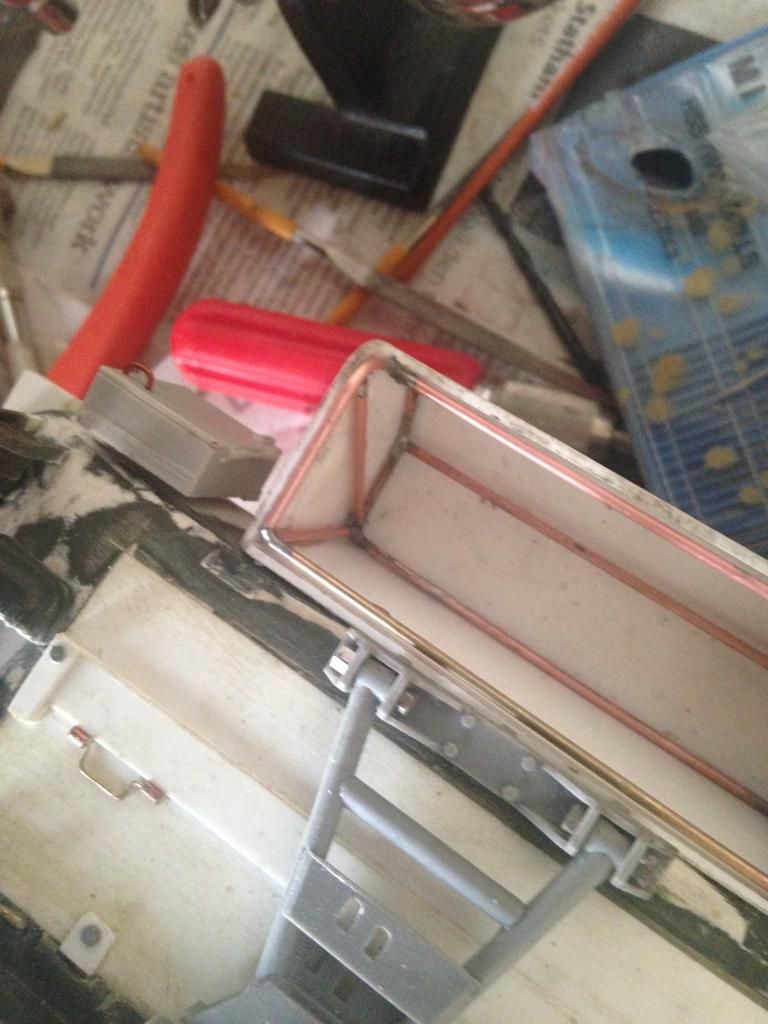
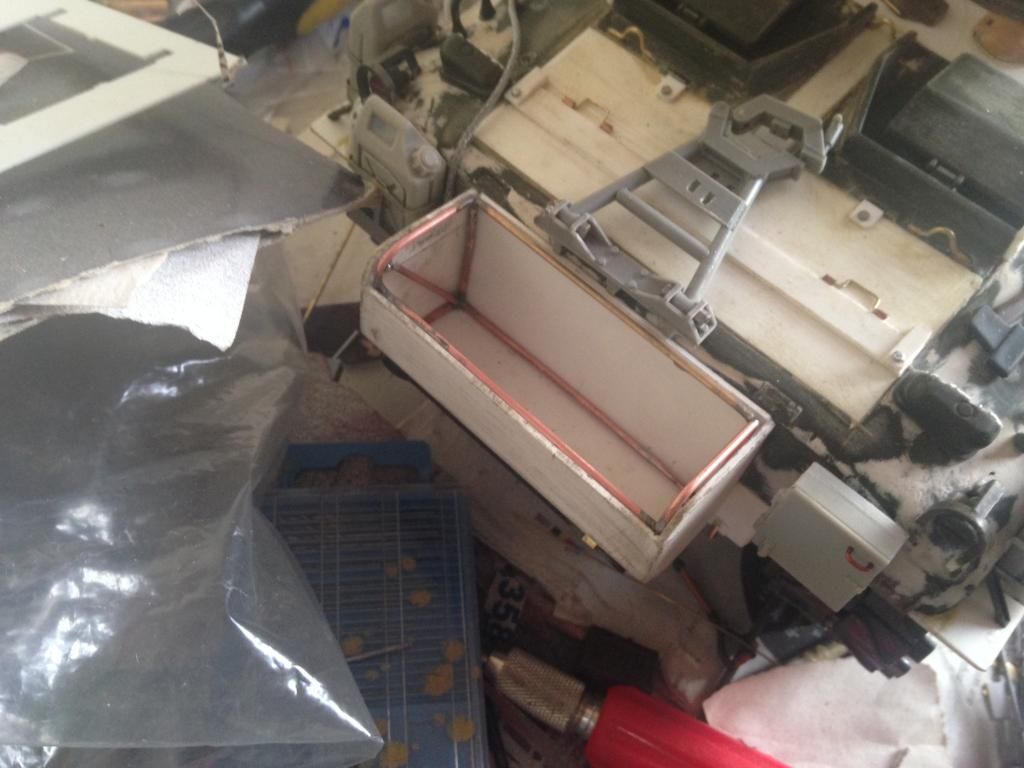
Next up I started building the rear stowage, I've only got as far as the carcass, the pictures show its a tube frame with metal sheet made up over it. I'll be making up the frame with brass tube soldered together.


Im not sure why I bothered with the louvre detai as I've realised no one will see it!
Next up I started building the rear stowage, I've only got as far as the carcass, the pictures show its a tube frame with metal sheet made up over it. I'll be making up the frame with brass tube soldered together.
05-14-2014, 10:47 AM
#33
Great work. Tom sometimes I make things that wouldn't be seen, but I know it is there!!! Keeps the rivet counters at bay!!! 
05-14-2014, 11:54 AM
#35
Thread Starter
A quick video showing the M-51 with the kv-1 WWII
www.youtube.com/watch?v=JdhA6qi8NGo
Some reason the kv-1 mfu doesn't like the Sherman wireline loom :/
www.youtube.com/watch?v=JdhA6qi8NGo
Some reason the kv-1 mfu doesn't like the Sherman wireline loom :/
05-15-2014, 12:28 PM
#36
Senior Member
A quick video showing the M-51 with the kv-1 WWII
www.youtube.com/watch?v=JdhA6qi8NGo
Some reason the kv-1 mfu doesn't like the Sherman wireline loom :/
www.youtube.com/watch?v=JdhA6qi8NGo
Some reason the kv-1 mfu doesn't like the Sherman wireline loom :/
05-15-2014, 01:22 PM
#38
The only hesitation is when you see another build and you comment about items left off, they will call you a RC! LOL
Jeff
06-13-2014, 11:44 AM
#39
Thread Starter
Well my M51 was feeling a bit neglected, happily my parts have arrived from axels....finally. So cracking on first up was the tubular frame for the rear stowage bin. This was scratched from bronze tube and soldered together.


Next up was the rear plate, with exhaust. Lots of nice detail on this:

The barrel traverse lock (fully working)


The infantry phone:

Spare wheel holders:
And the first jerry can holder:


Next up was the rear plate, with exhaust. Lots of nice detail on this:

The barrel traverse lock (fully working)


The infantry phone:

Spare wheel holders:
And the first jerry can holder:
 06-14-2014, 06:41 AM
#41

WOW i don't know how you do all those small details you must be way younger than i am, i couldn't even hold parts like that any more they go flying out of my hand and i lose them on the floor
Awesome job as usual
Awesome job as usual
06-14-2014, 08:16 AM
#42
Thread Starter
At 27 I guess I'm still a young whippersnapper! I don't wear glasses (yet) but some of the small photo etch makes me feel very cross eyed after a couple ours staring at it!
 06-15-2014, 09:52 AM
#44
Thread Starter
Some more done on the m51 today, done the jerry can holders and the tow rope and holders.


Next up are the tools, the antenna and the auxiliary generator exhaust.


Next up are the tools, the antenna and the auxiliary generator exhaust.
06-16-2014, 07:27 AM
#45
Tom, Was the tubular frame for the rear stowage bin meant to reinforce the sheet metal stowage bins construction or was it used to tie things down in the sheet metal storage box on the real M-51?
06-16-2014, 08:54 AM
#46
Thread Starter
I think it is what the panels where attached to. Unfortunately I've not got a picture showing if there was a back actually against the tank, so I've had to take some licence there!
06-17-2014, 04:58 AM
#47
Thanks, Tom. I understand, ya gotta do what you got to do!!! Did the tow rope holders come from Alex as well?
Edit: Tom, just found these photos. I am not suggesting that you redo your stowage box, but these photos answer the question I had about the tubular frame work and how it attaches to the tank.
Did the tow rope holders come from Alex as well?Edit: Tom, just found these photos. I am not suggesting that you redo your stowage box, but these photos answer the question I had about the tubular frame work and how it attaches to the tank.
Last edited by MAUS45; 06-17-2014 at 06:09 AM.
06-21-2014, 01:04 PM
#48
Thread Starter
Mr Maus, I recently saw some more references too and came to the same conclusion  I really need to get this finished so I can start my KV-2. So I've been beavering away today! Main bits have been getting the tools on (for now as they'll come off for painting) so I can make the holders in brass:

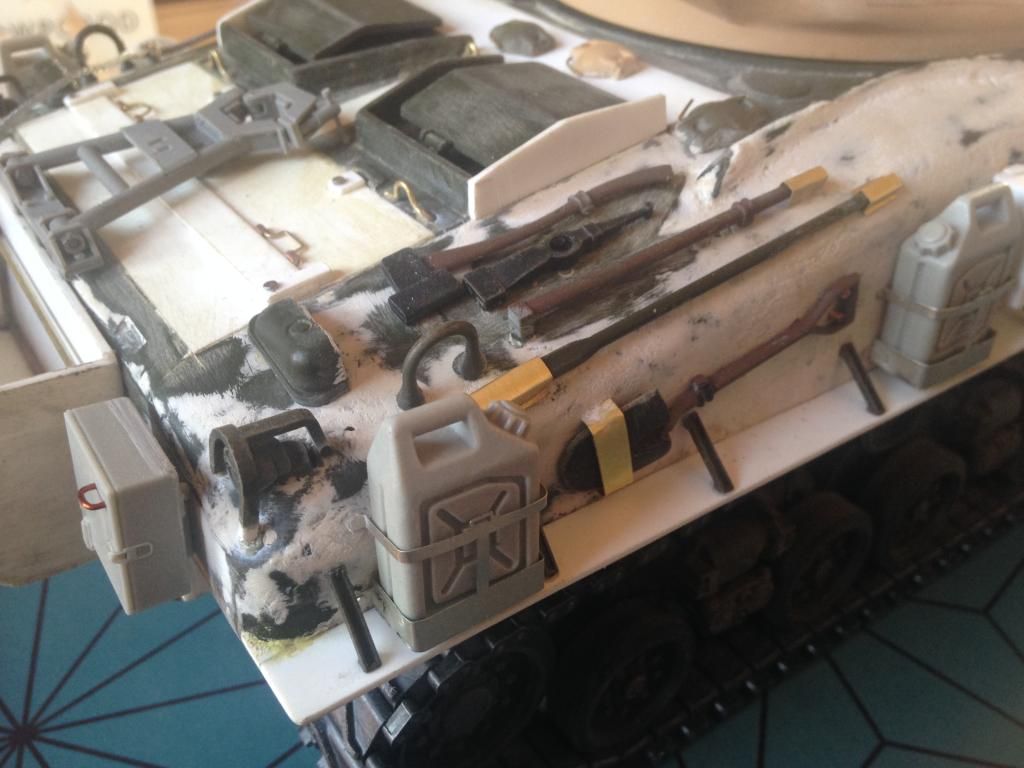


The aux jenny exhaust:


The little hoops for the straps that hold the jerry cans

Tow hoops on the rear stowage:


Last but not least when I was rechecking my references I realised the tubular frame should extend over the whole stowage bin:
I really need to get this finished so I can start my KV-2. So I've been beavering away today! Main bits have been getting the tools on (for now as they'll come off for painting) so I can make the holders in brass:


The aux jenny exhaust:


The little hoops for the straps that hold the jerry cans

Tow hoops on the rear stowage:


Last but not least when I was rechecking my references I realised the tubular frame should extend over the whole stowage bin:

 06-23-2014, 12:13 PM
#49
You are welcome, on the storage box Photos. Looks good!!! I can not wait to see some primer or paint on this tank. I think your casting on the hull is going to really pop out when you paint it!!!
Looks good!!! I can not wait to see some primer or paint on this tank. I think your casting on the hull is going to really pop out when you paint it!!!
Last edited by MAUS45; 06-23-2014 at 12:25 PM.
06-23-2014, 03:29 PM
#50
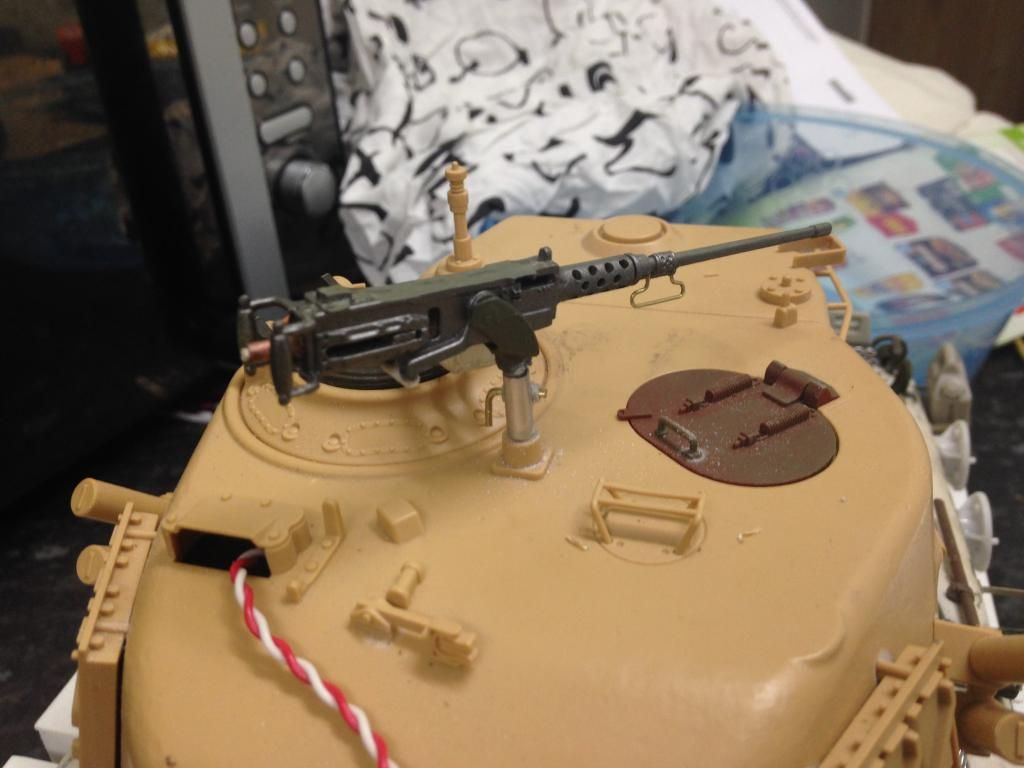
Thread Starter
It's almost certainly a well known fact that shermans look better with a 50cal mounted. So it was time to tart up the henglong offering I had left over from some Pershing bits. I've rebuilt the wire bit under the barrel, constructed the holder for the ammo box, reworked the swivel mount, bored out the holes on the barrel and finally built a better pintle mount.