


Tamiya m51 (hopefully done properly)
 06-24-2014, 10:46 AM
#51
That 50 cal looks fantastic!!!
 06-24-2014, 01:14 PM
#52

Thread Starter
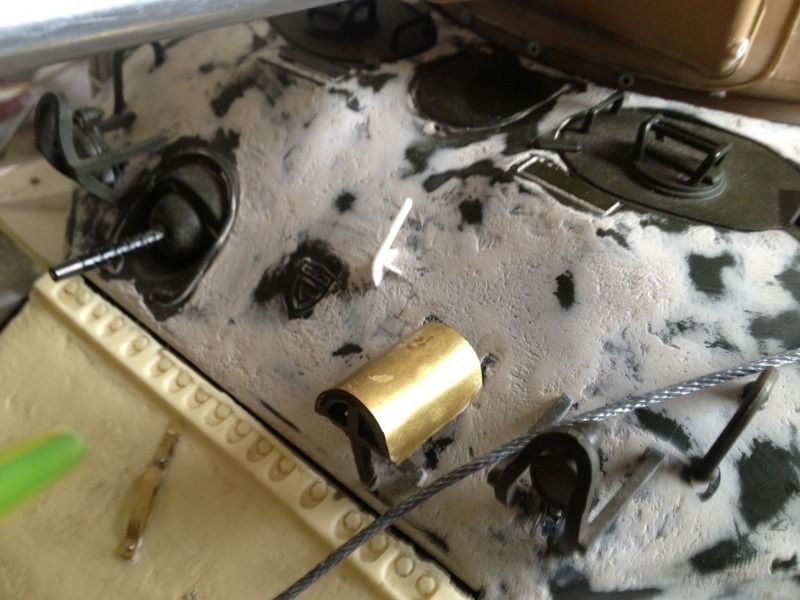
Cheers Maus! A bit of brass and some styrene goes a long way!
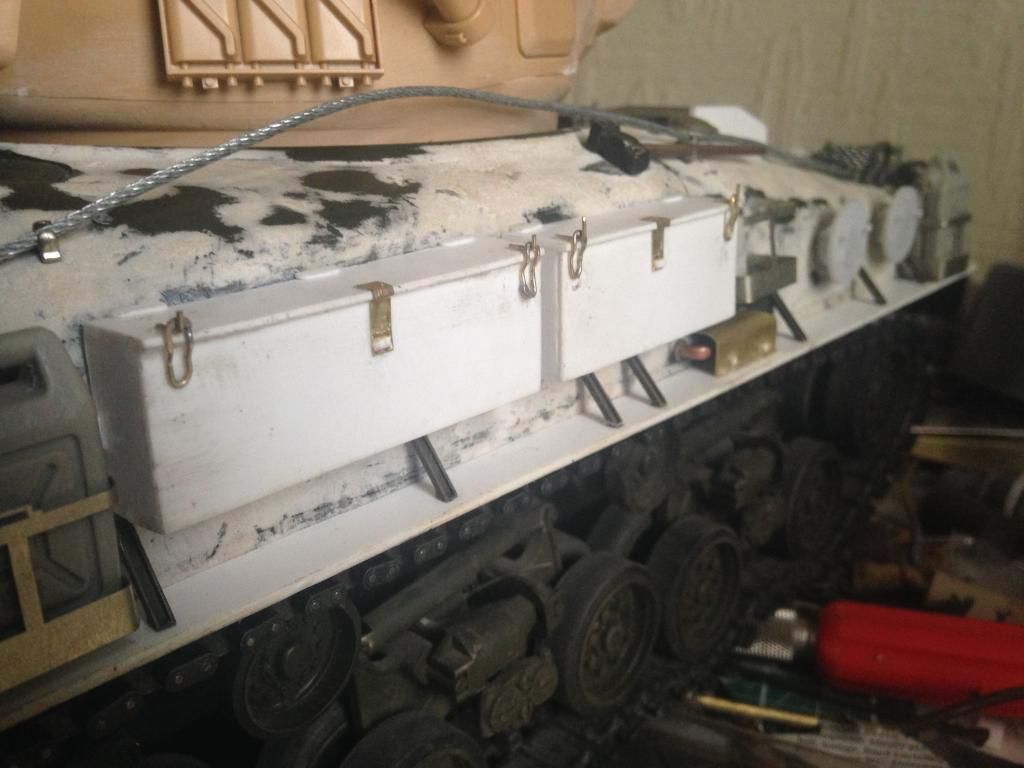
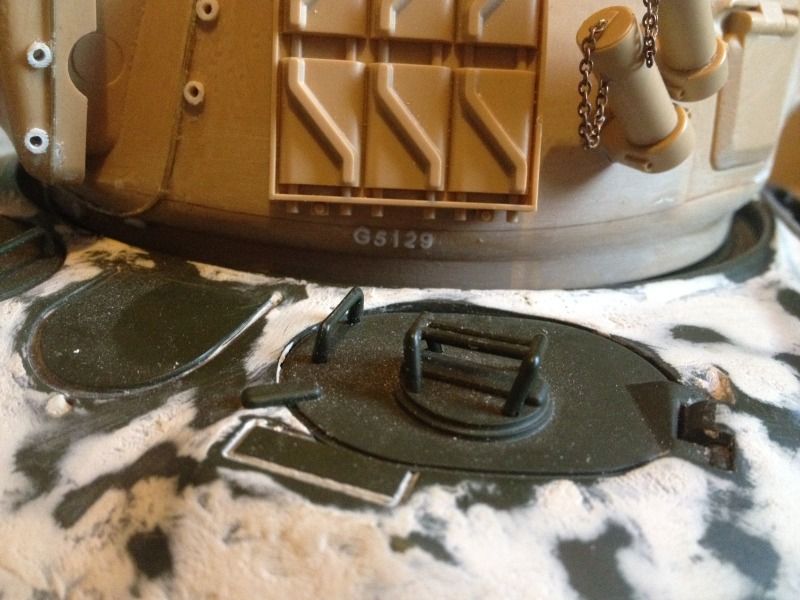
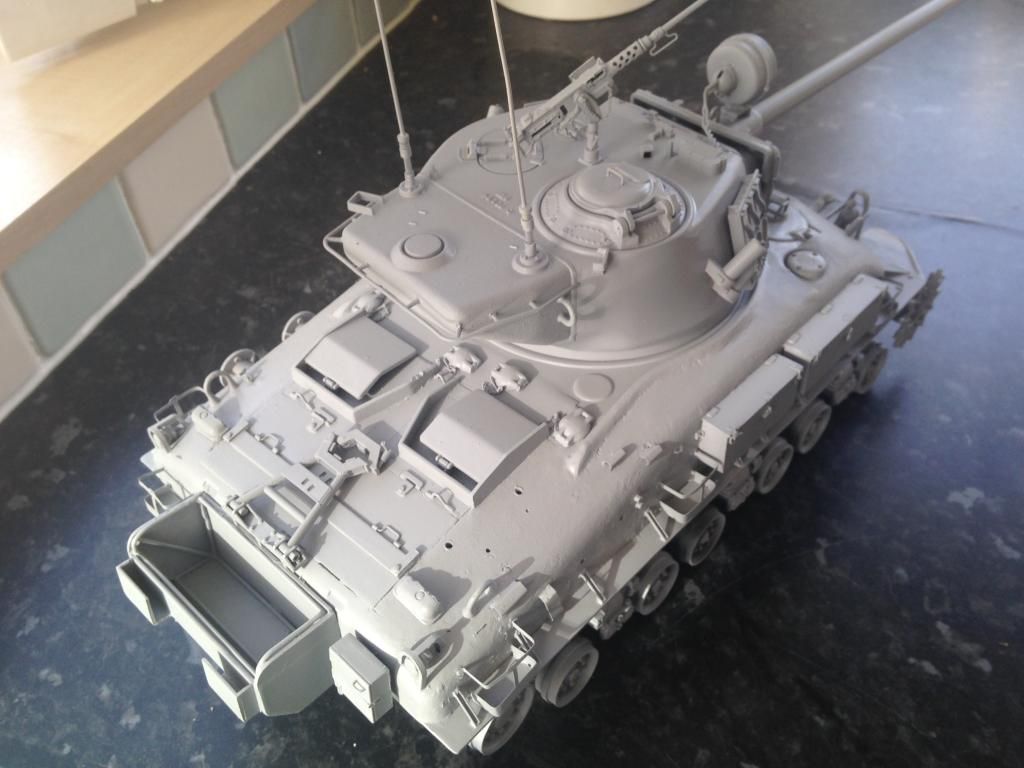
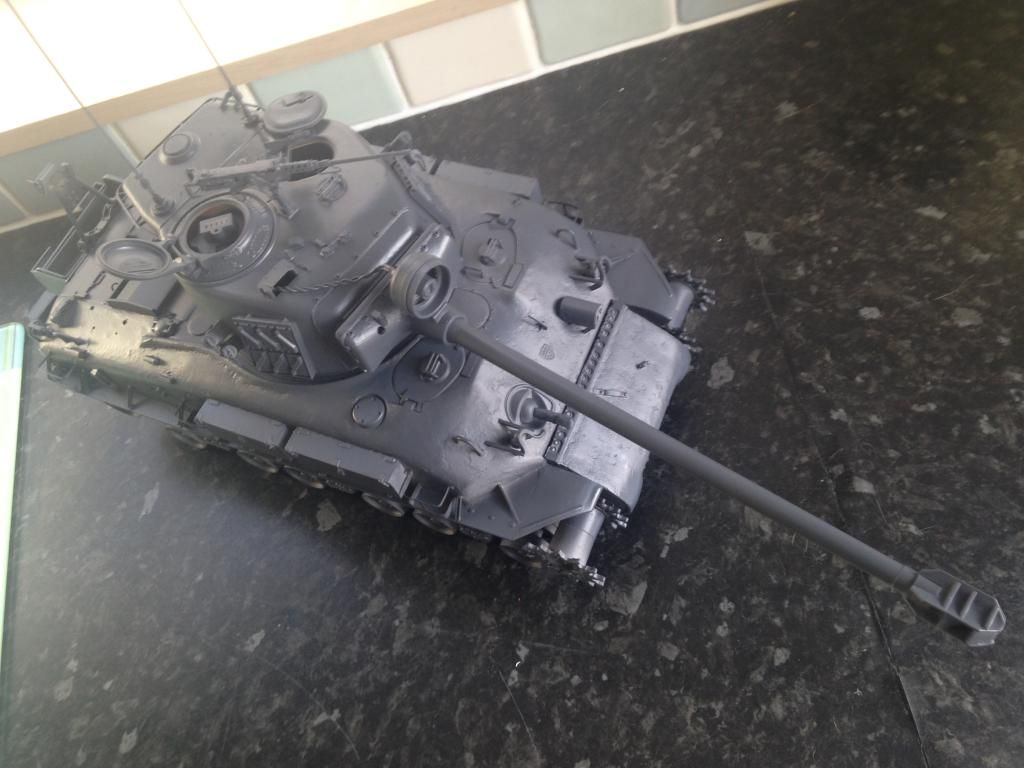
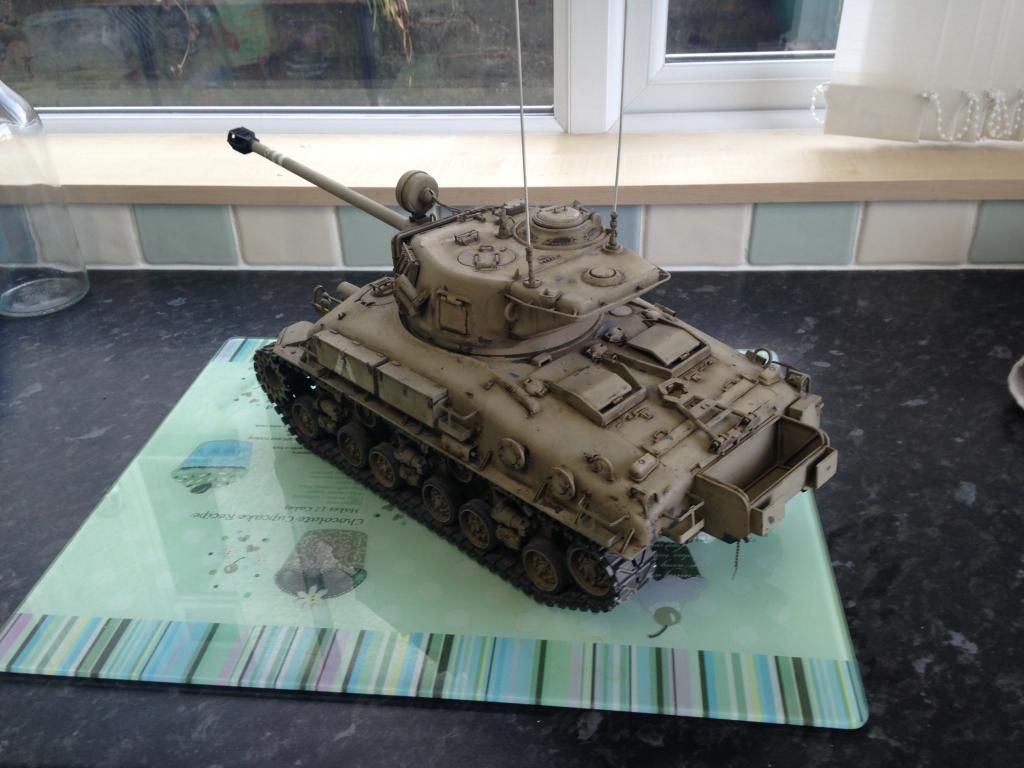
Tonight ive ive crossed another bit off the list and done the clasps on the bins. I was going to use PE ones left over from my German builds but they where too small. I've had to bodge it a bit but you get the idea of what they are!
Hopefully my chain and springs will arrive tomorrow so I can finish the build phase!
Tonight ive ive crossed another bit off the list and done the clasps on the bins. I was going to use PE ones left over from my German builds but they where too small. I've had to bodge it a bit but you get the idea of what they are!


Hopefully my chain and springs will arrive tomorrow so I can finish the build phase!
06-25-2014, 12:36 PM
#53
Thread Starter
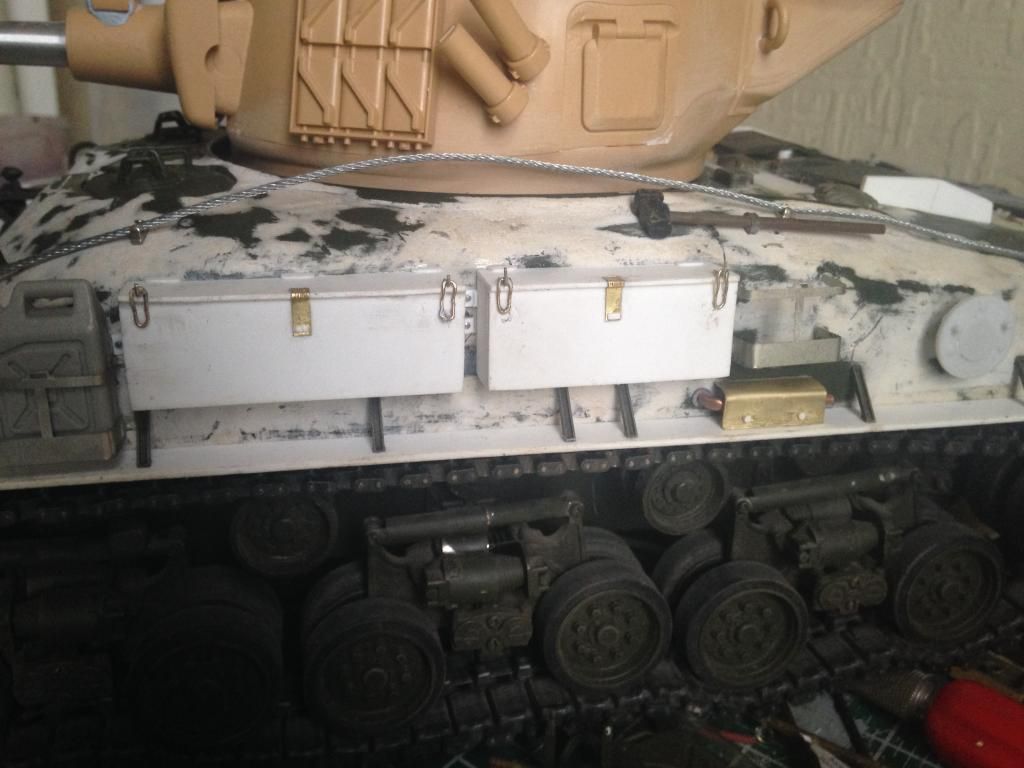
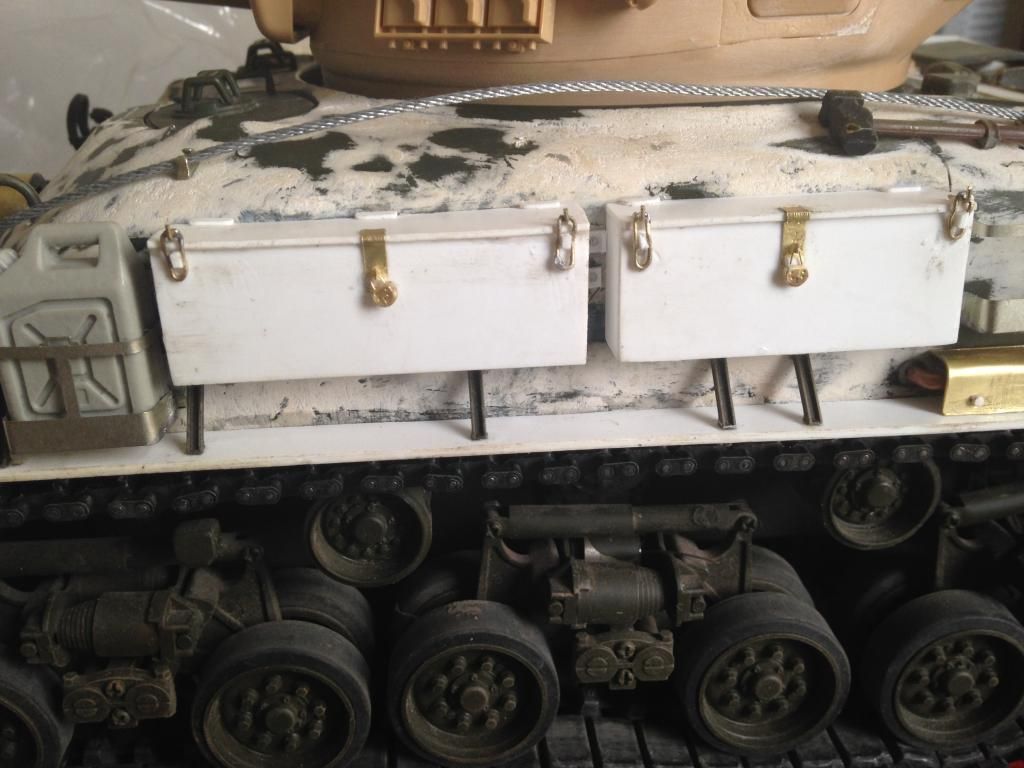
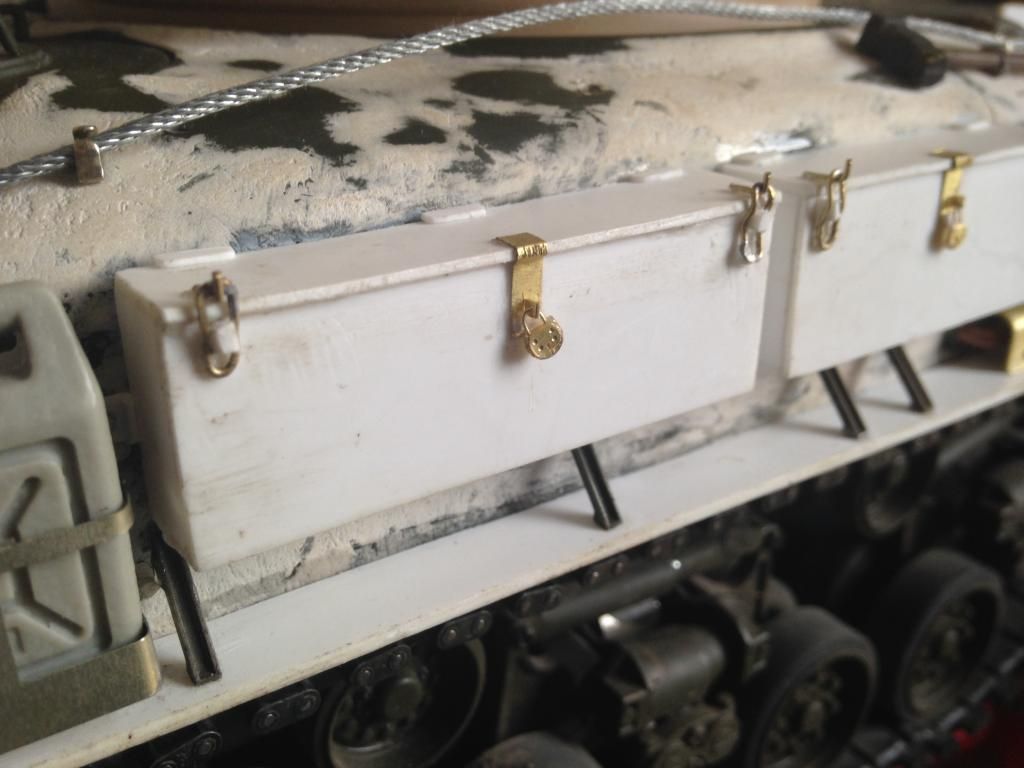
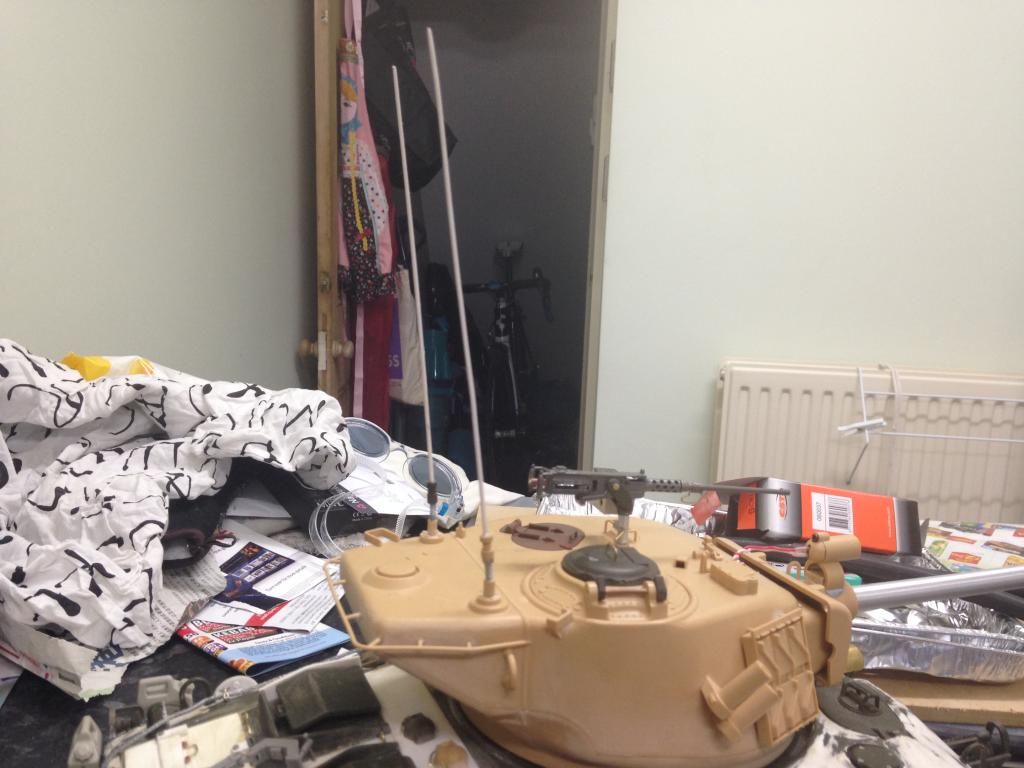
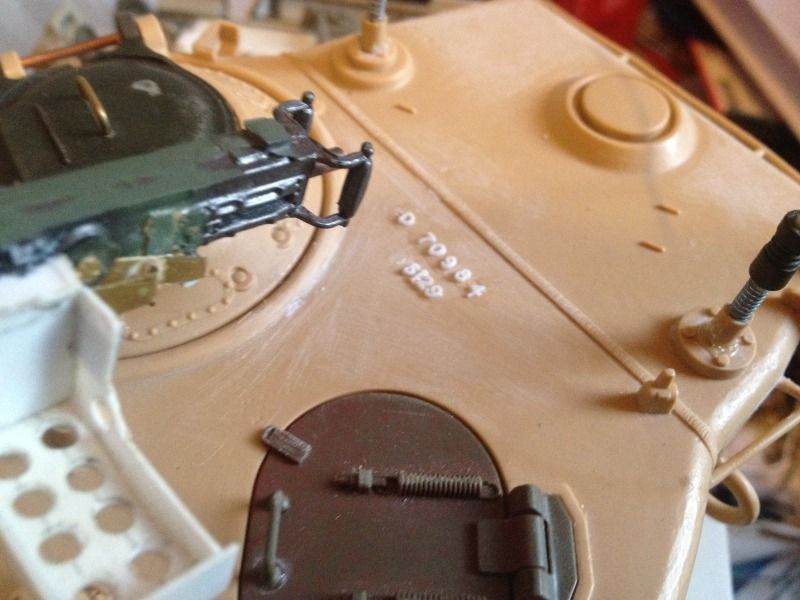
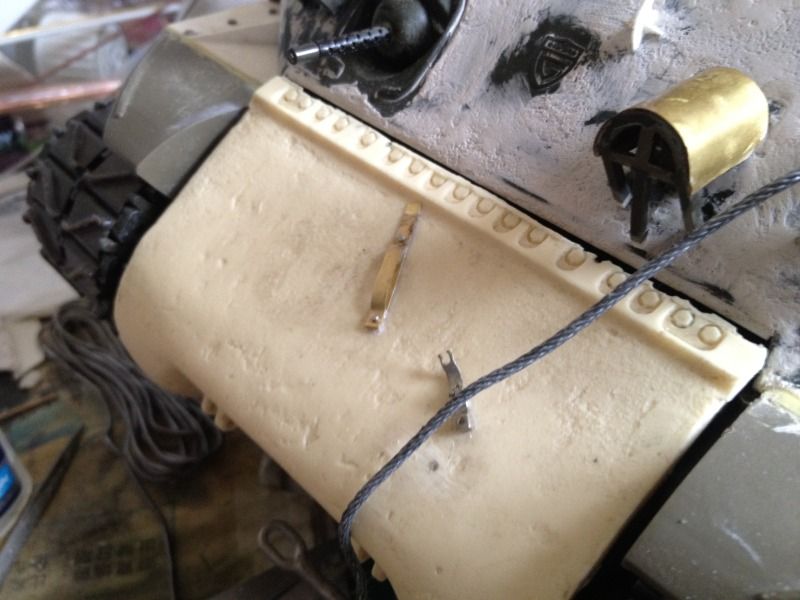
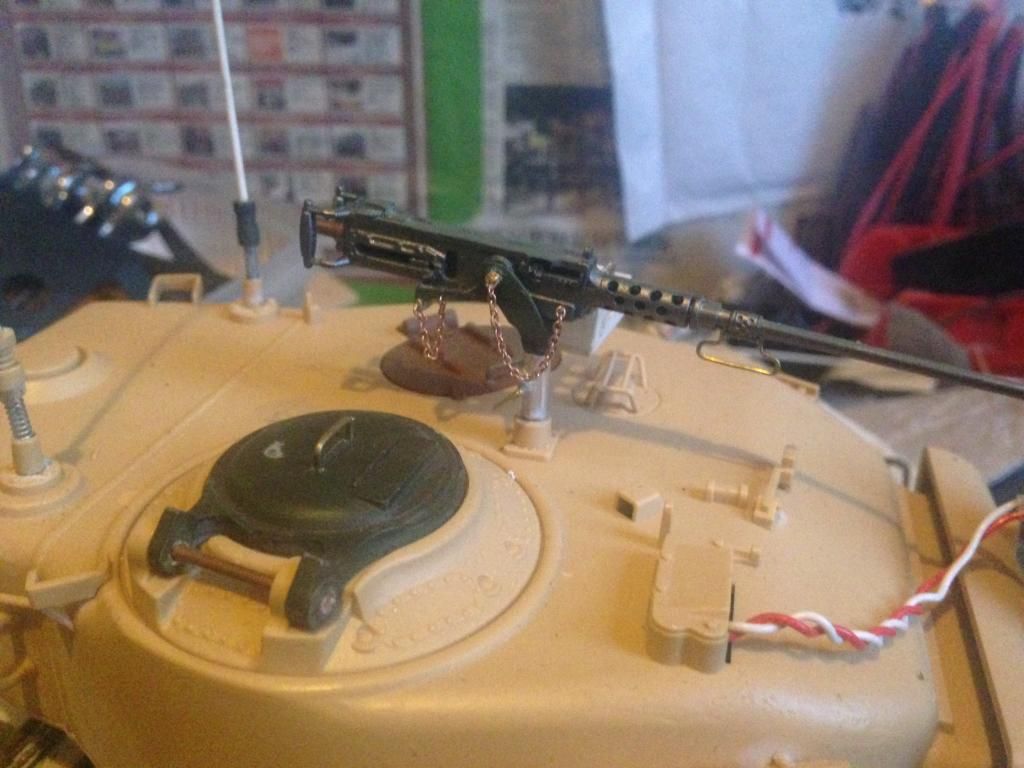
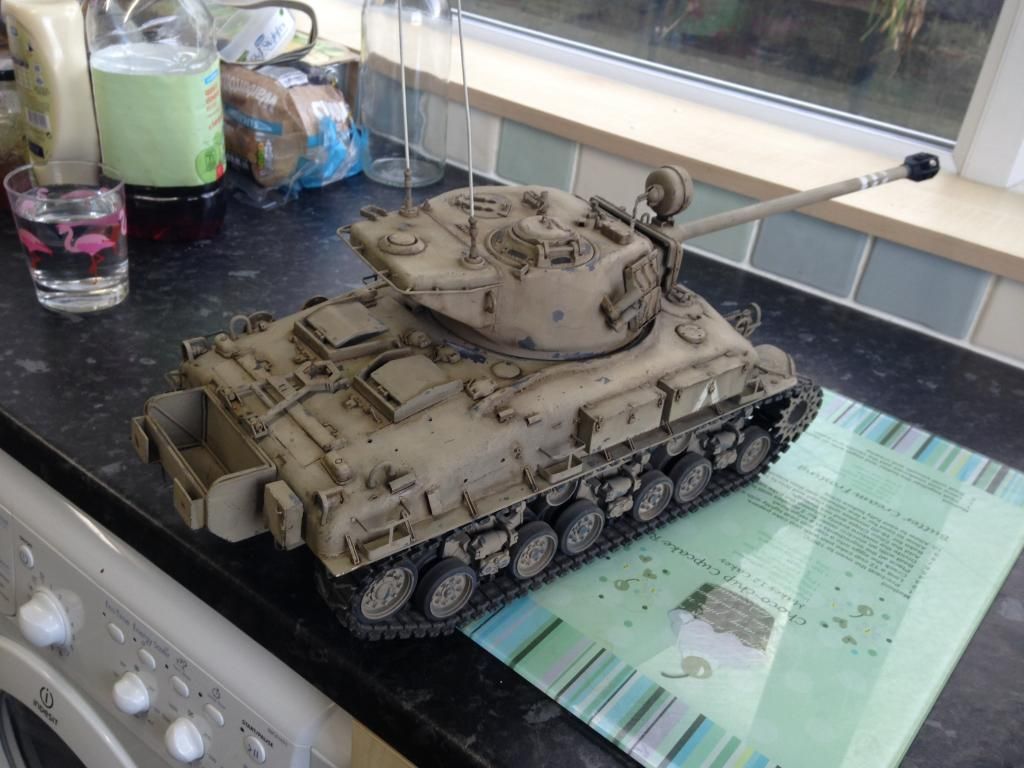
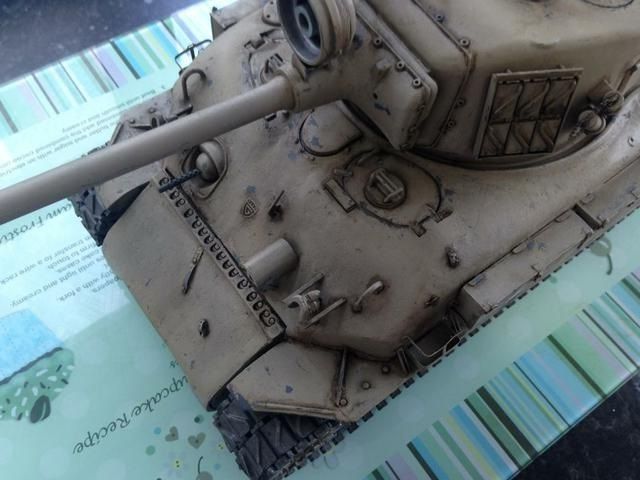
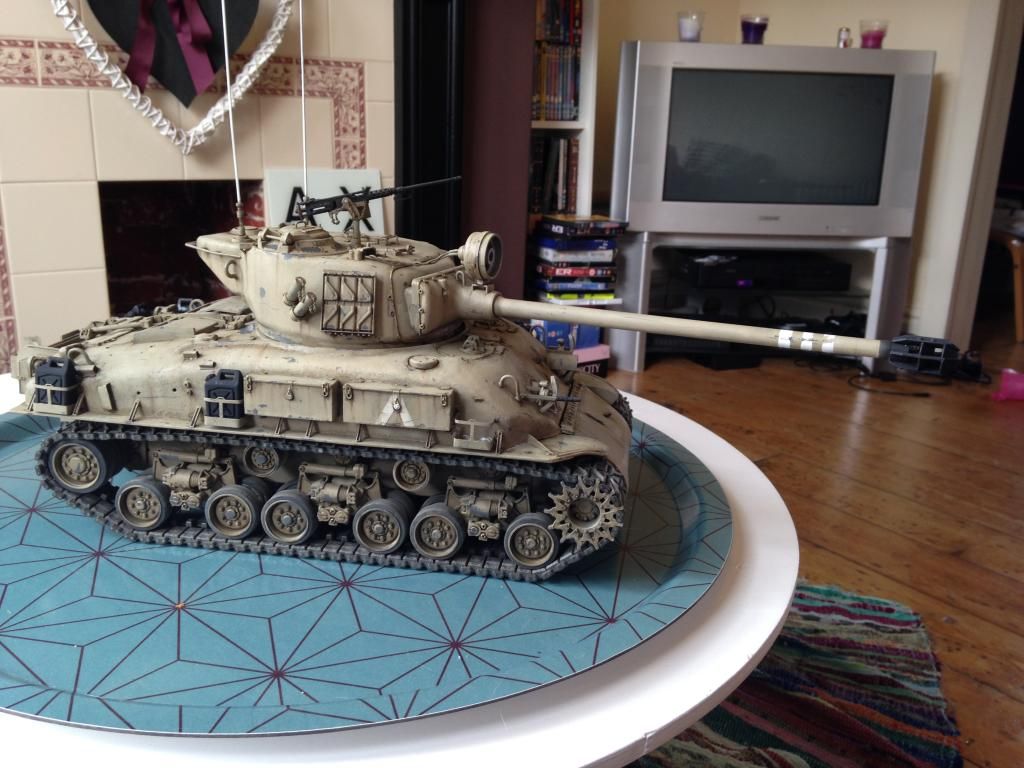
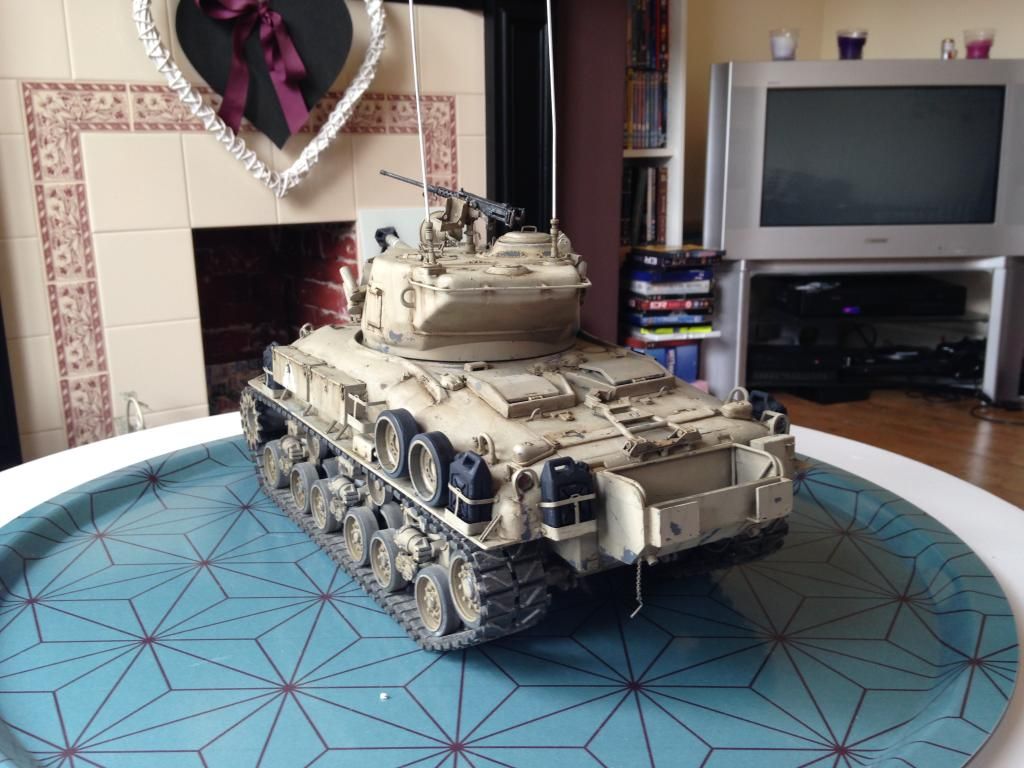
The build phase is nearly done, need to add the chains to various bits like the fuel filler caps etc, need to add the barbed wire hook, bit you pull to cock the 50cal and some weld lines. Tonight I've detailed the clips on the stowage boxes and added clips and padlocks . I've also added the sprung antenna which will need to be tied back:


 06-25-2014, 04:10 PM
#54
Sure looks good Tom, I want one I'm so envious of it! 
But, I digress... I have 3 Sherman projects ahead of any IDF version so I must wait.
I know one thing for sure, isn't it refreshing to get positive comments and compliments instead of the same old guy rivet-counting on it.") Keep on it strong pal!
Keep on it strong pal! 
Jeff
But, I digress... I have 3 Sherman projects ahead of any IDF version so I must wait.
I know one thing for sure, isn't it refreshing to get positive comments and compliments instead of the same old guy rivet-counting on it.
Keep on it strong pal! Jeff


 06-26-2014, 03:09 PM
#56
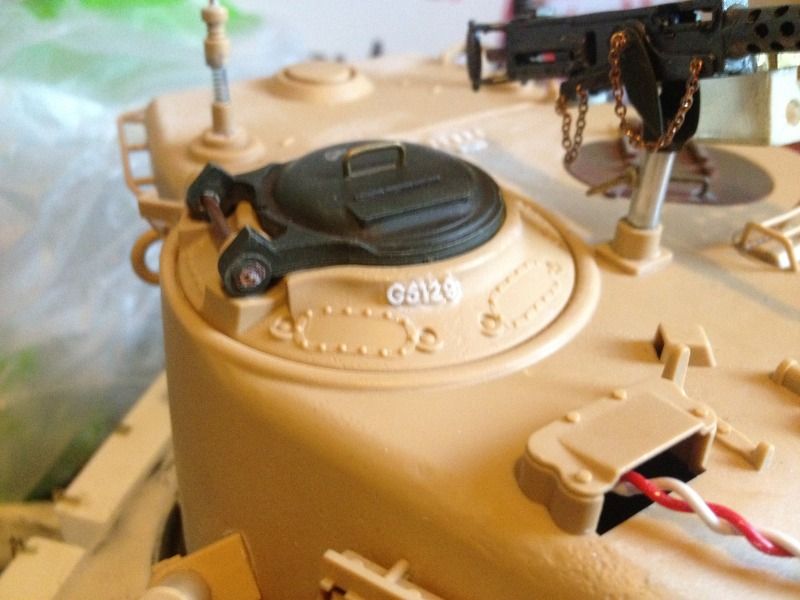
Clever way to hide the IR in the search light!!!
08-13-2014, 10:53 PM
#57
Thread Starter
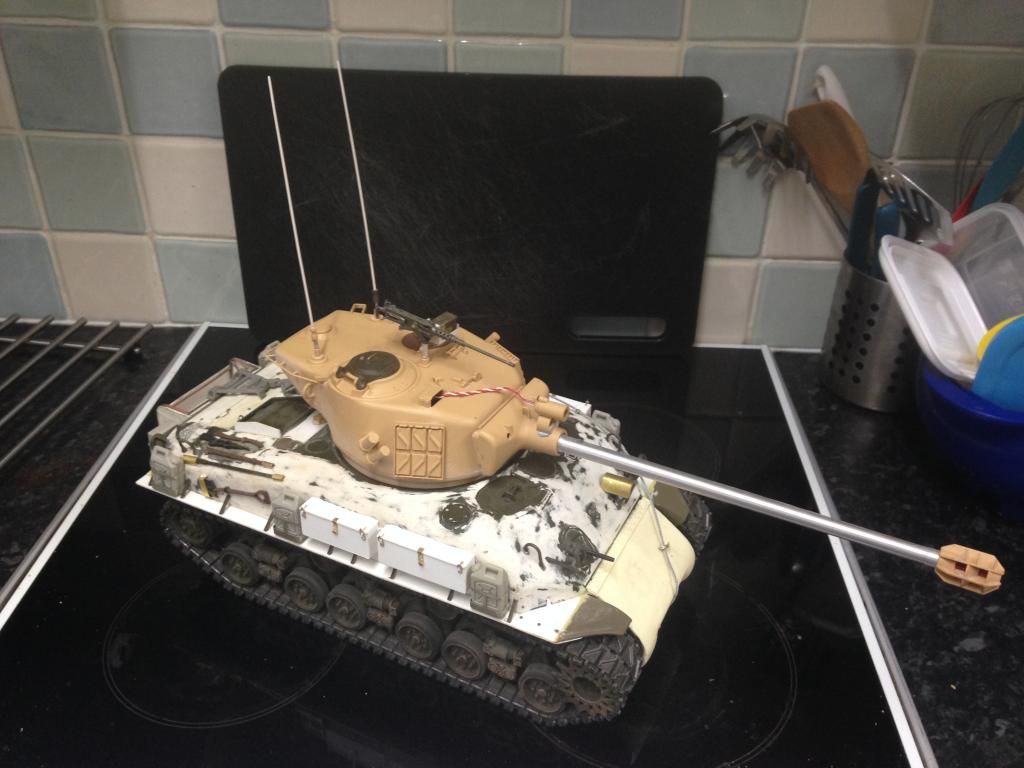
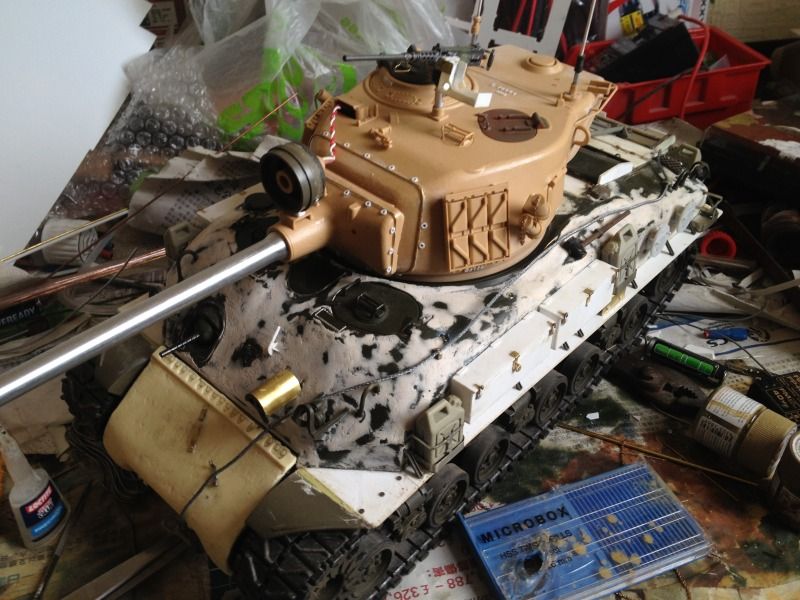
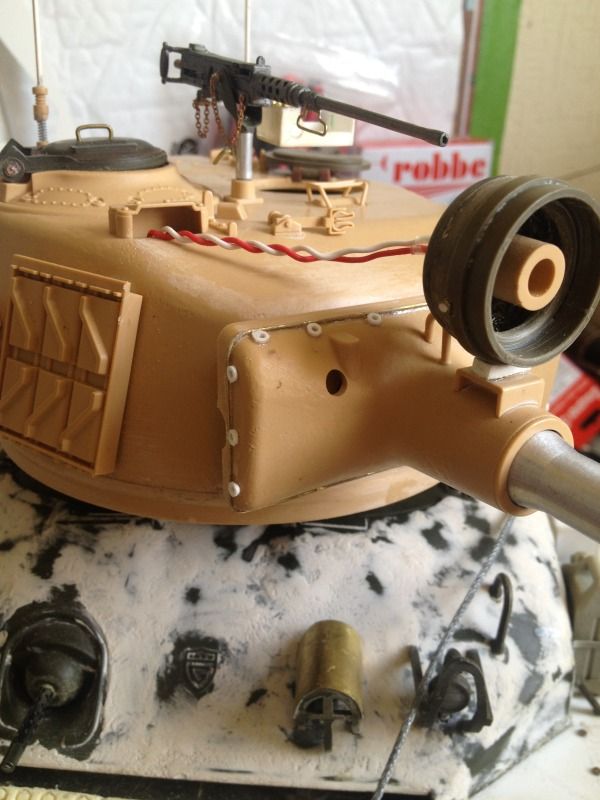
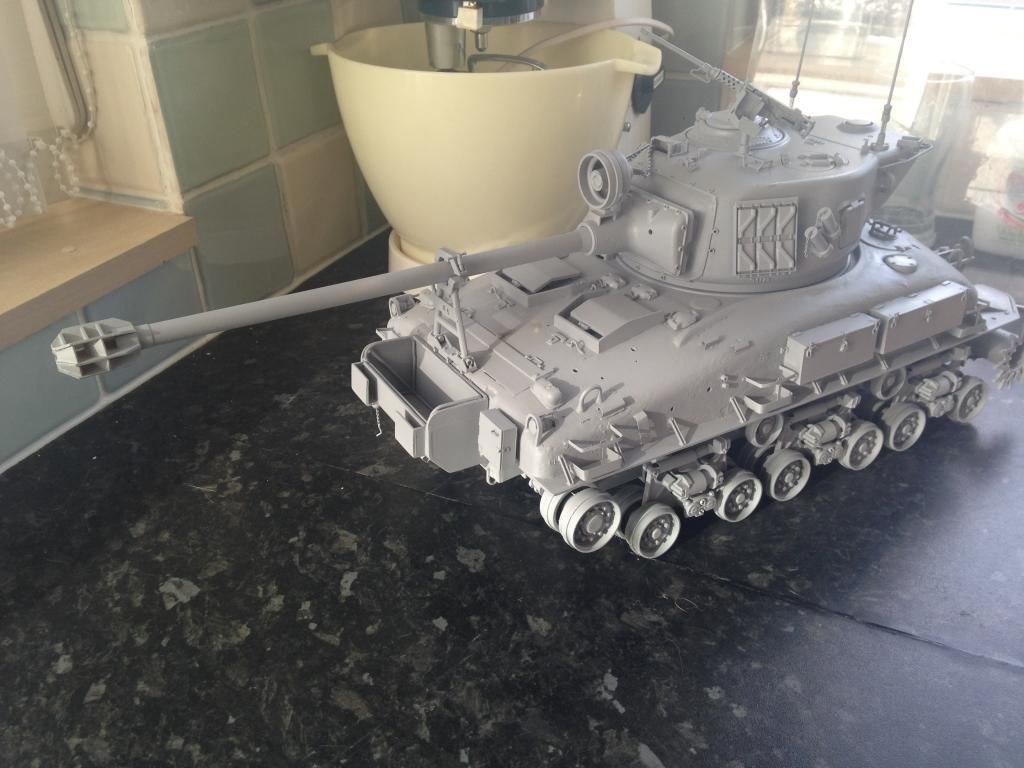
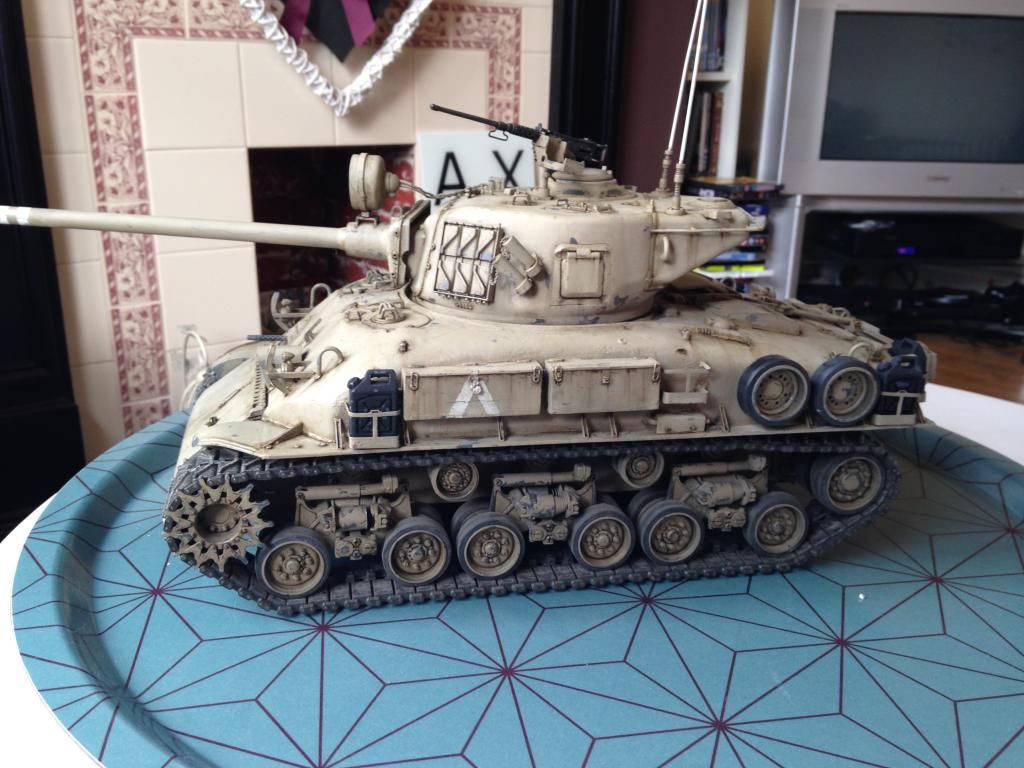
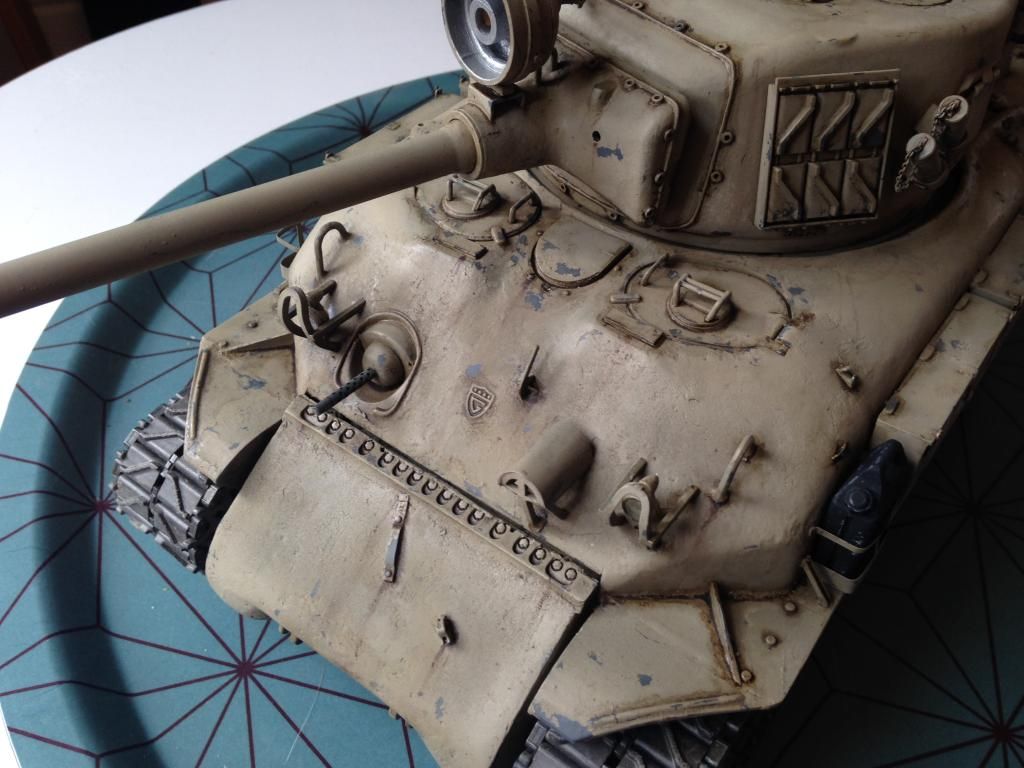
Nearly there, currently adding the last little details; casting numbers, tow rope holder and the hook for the barbed wire. All that's left is the spare wheels and the plastic cover which goes next to the idler, all kindly supplid by Thetankman (cheers Gary!). Paint soon!
08-13-2014, 10:54 PM
#58
Thread Starter
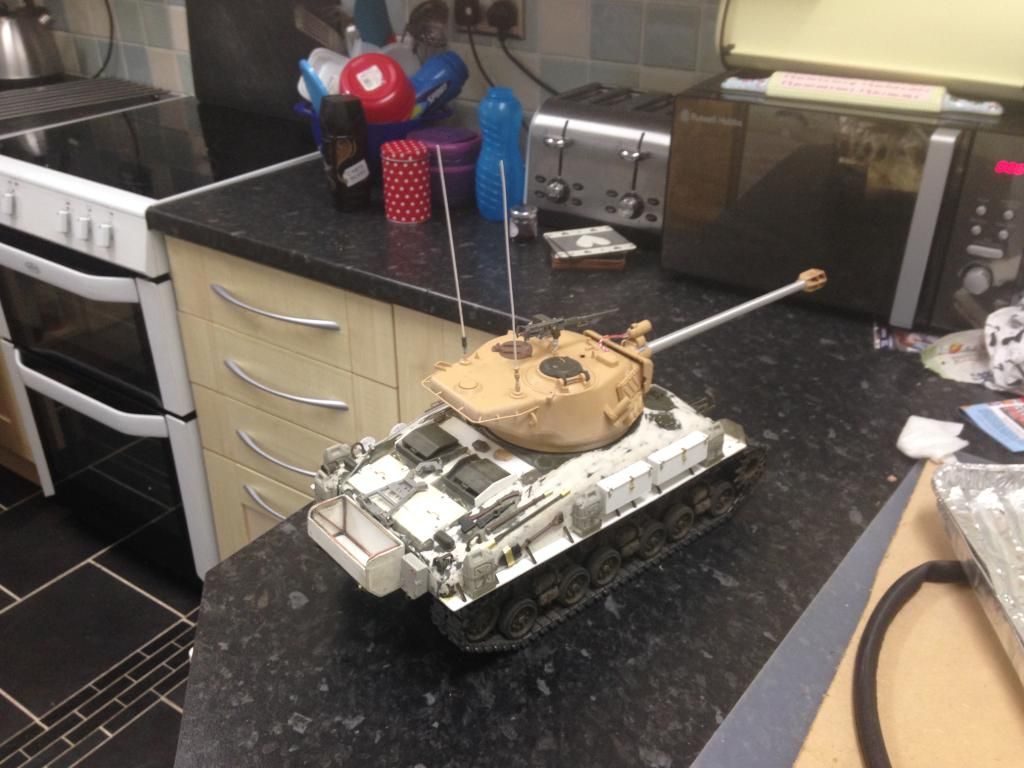
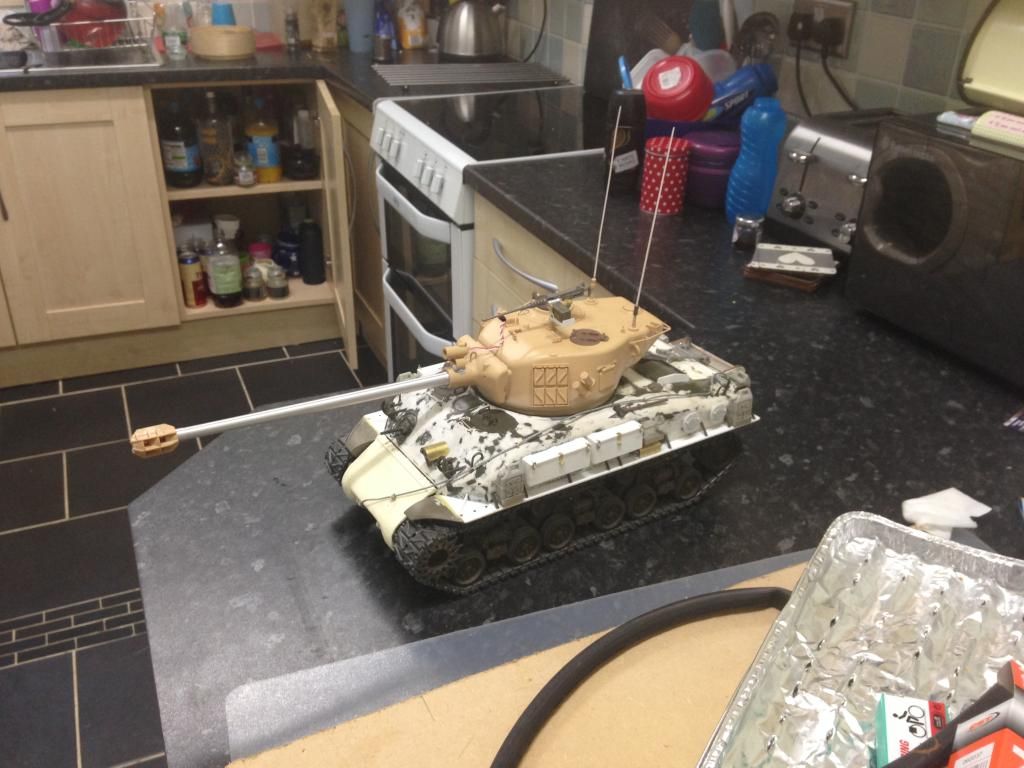
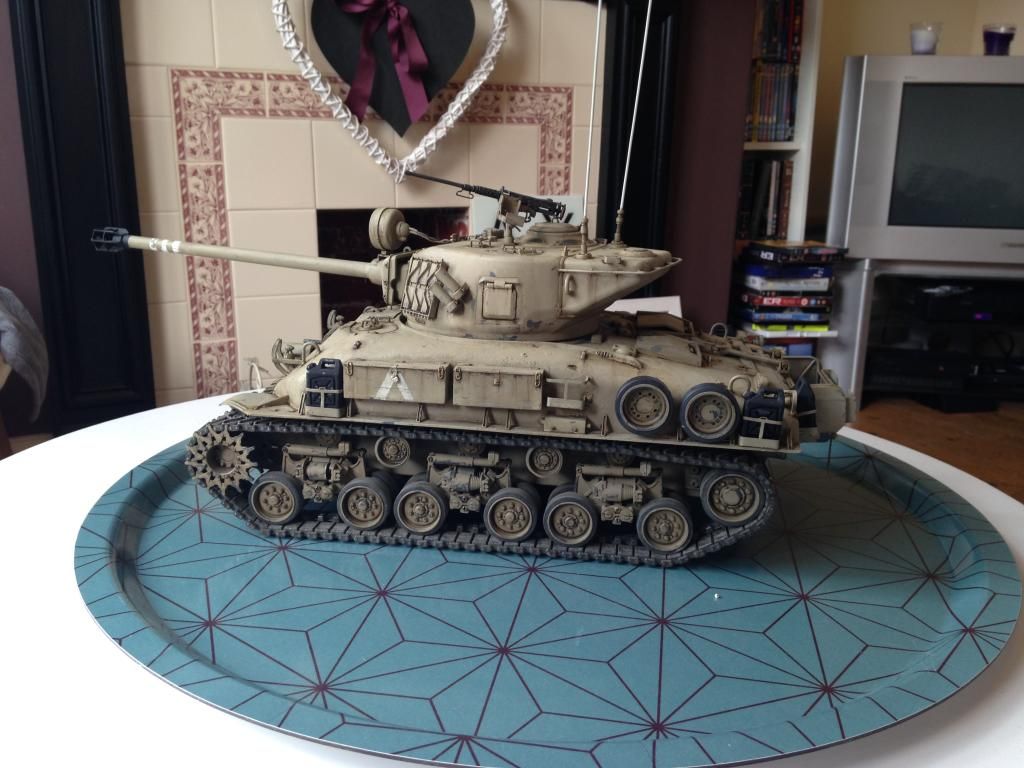
After rather a big tangent into some rather large model boats and a Trafalgar submarine I've yanked my attentions back to tanks, hopefully for long enough to finish the m51 and kv2!
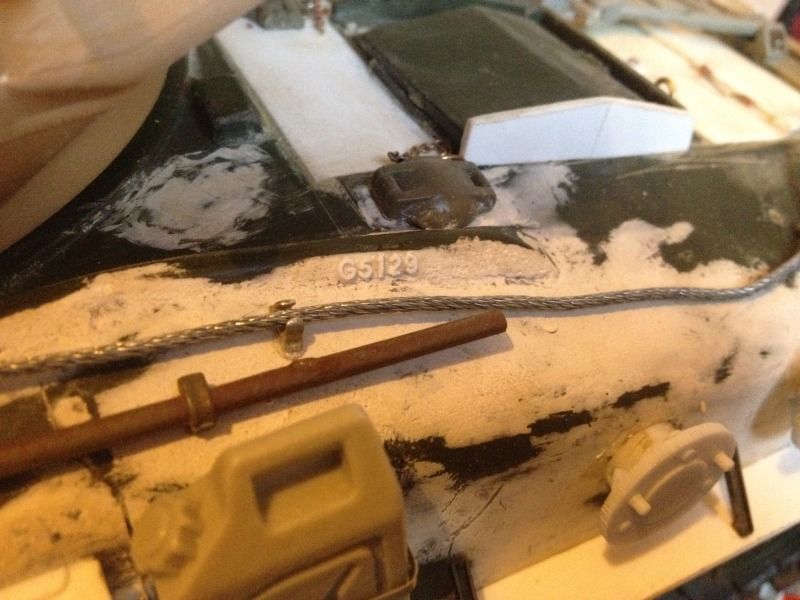
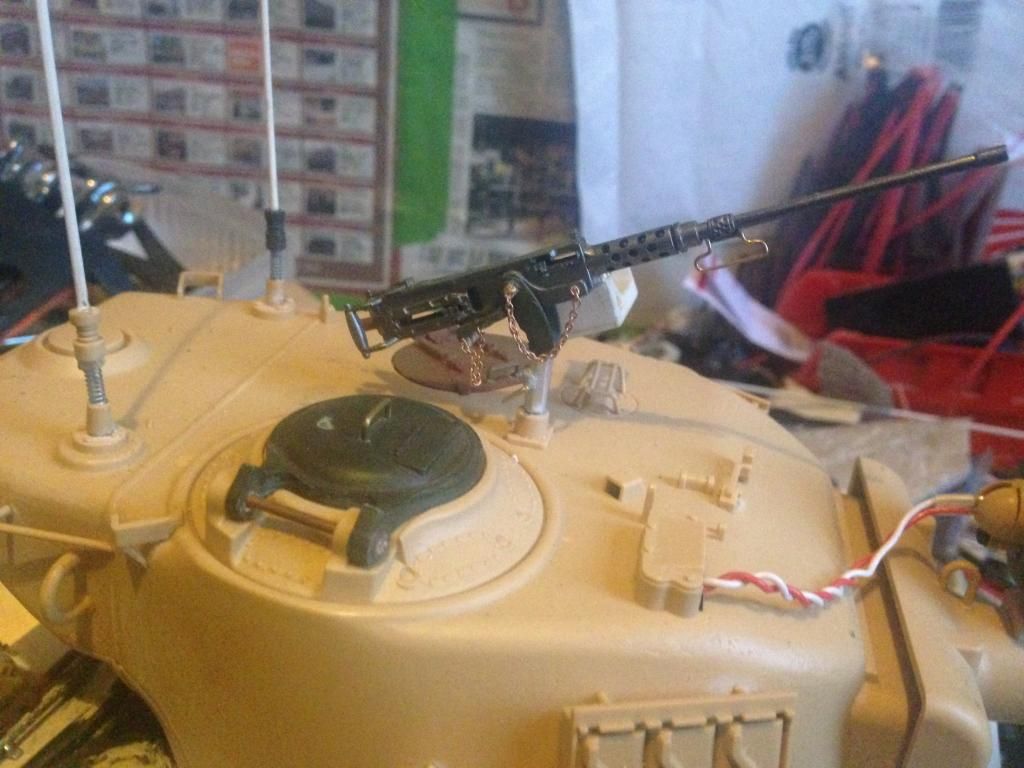
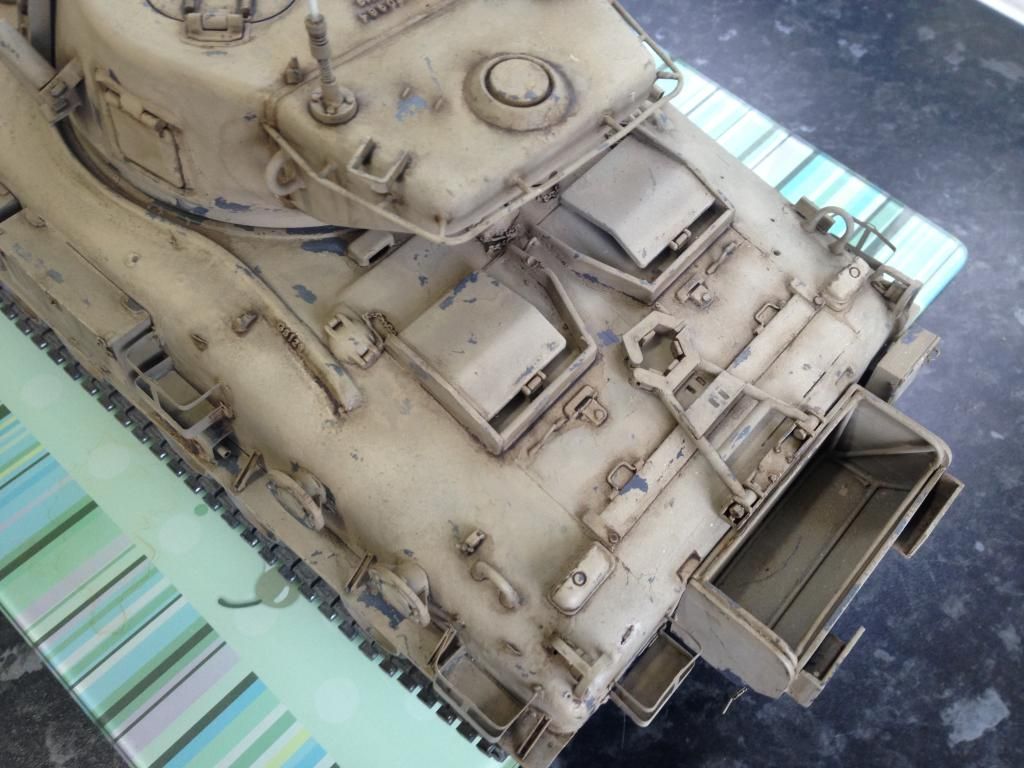
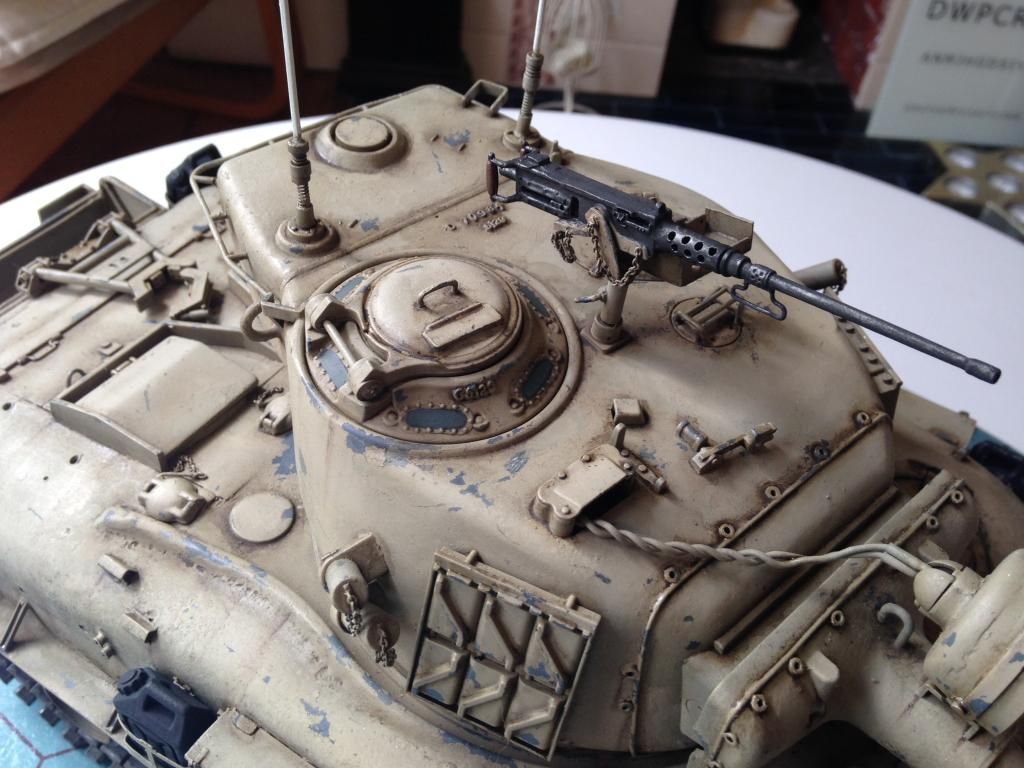
It's a small start but I've done the chains on the fuel filler caps and on the 50cal
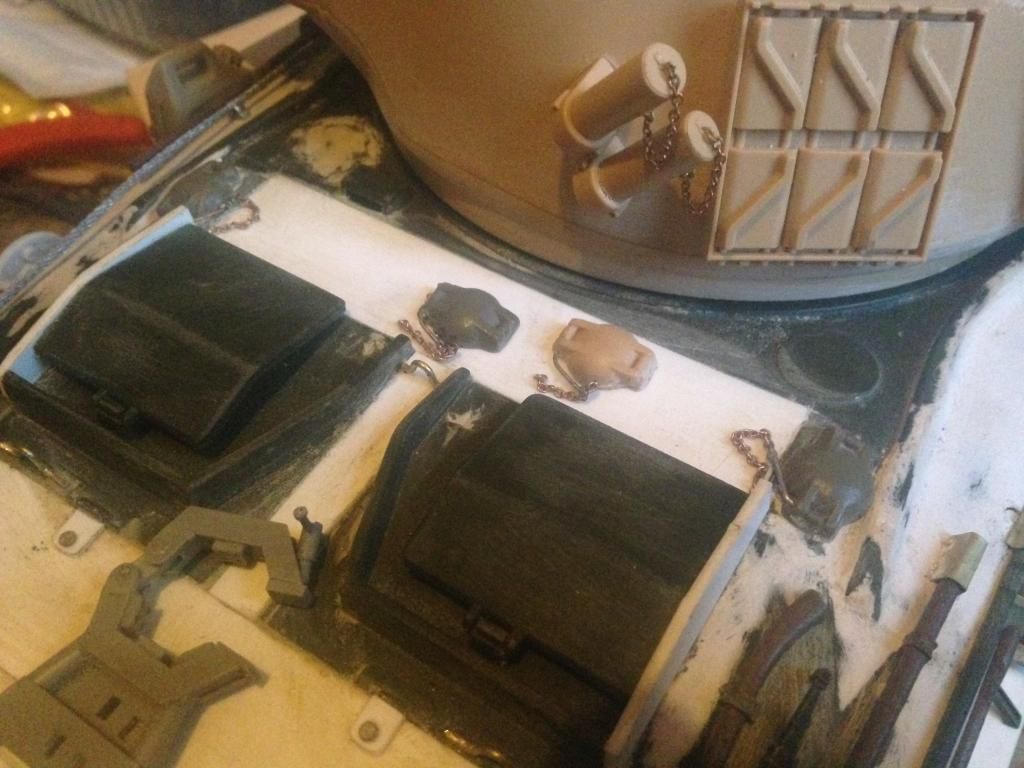
It's a small start but I've done the chains on the fuel filler caps and on the 50cal


 08-14-2014, 05:47 AM
#61
Senior Member

Join Date: Nov 2006
Location: Grande Prairie,
AB, CANADA
Posts: 8,976
Likes: 0
Received 4 Likes
on
4 Posts
Very nice. Inspiring actually, I have seen a couple of tanks on here in the last few days that are really taking the detailing to the top shelf. Well done.
08-14-2014, 11:15 PM
#62
Thread Starter
Cheers dan! Given the standard of the other m-51s that are out there I felt I needed to step it up with this one! However I'm quite looking forward to doing my late tiger with a few less bells and whistles!
08-15-2014, 04:30 AM
#63
Tom, I am inspired to do the M-51 now!!!! I have a Tamiya lower hull and a Mato upper, so all I need is the turret. 
08-15-2014, 10:03 AM
#65
Thread Starter
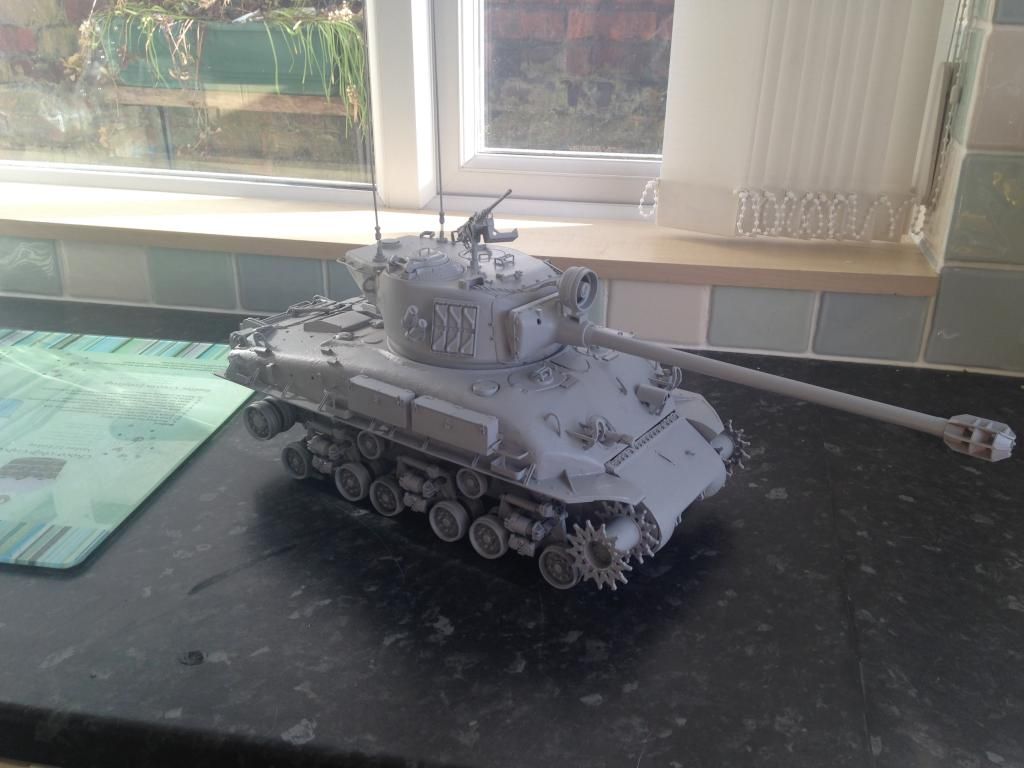
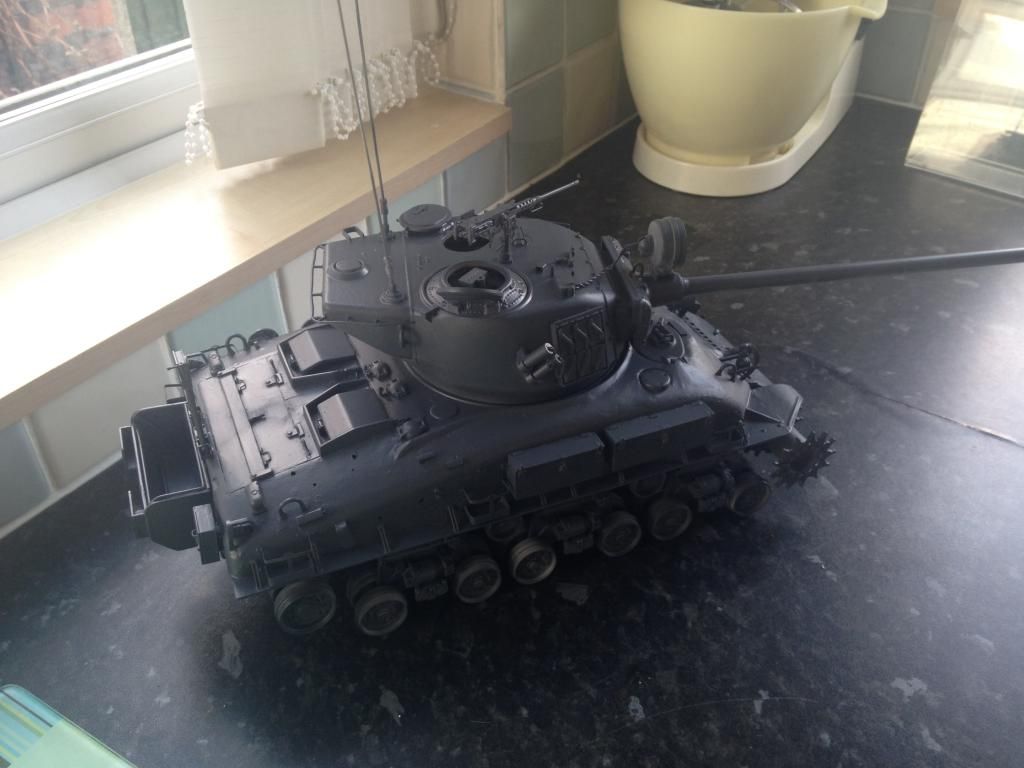
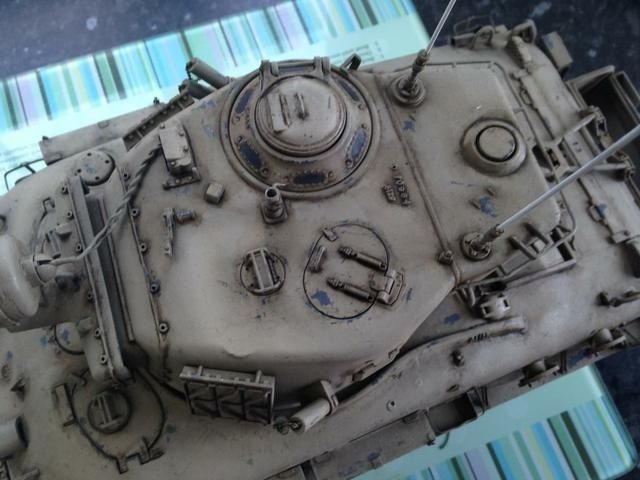
Paint paint paint! Base of tamiya primer, then dark grey which will act as a metal chip colour when I hairspray over the main colour. Also gave it the mr surfaced treatment!


 08-17-2014, 11:56 PM
#67
Thread Starter
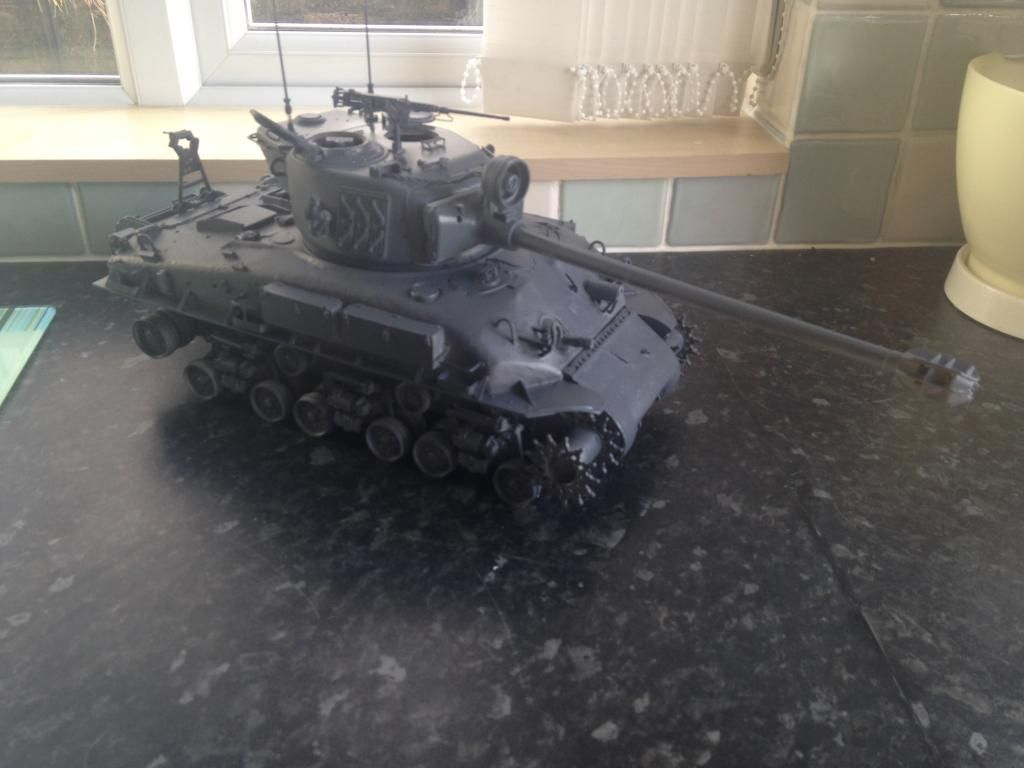
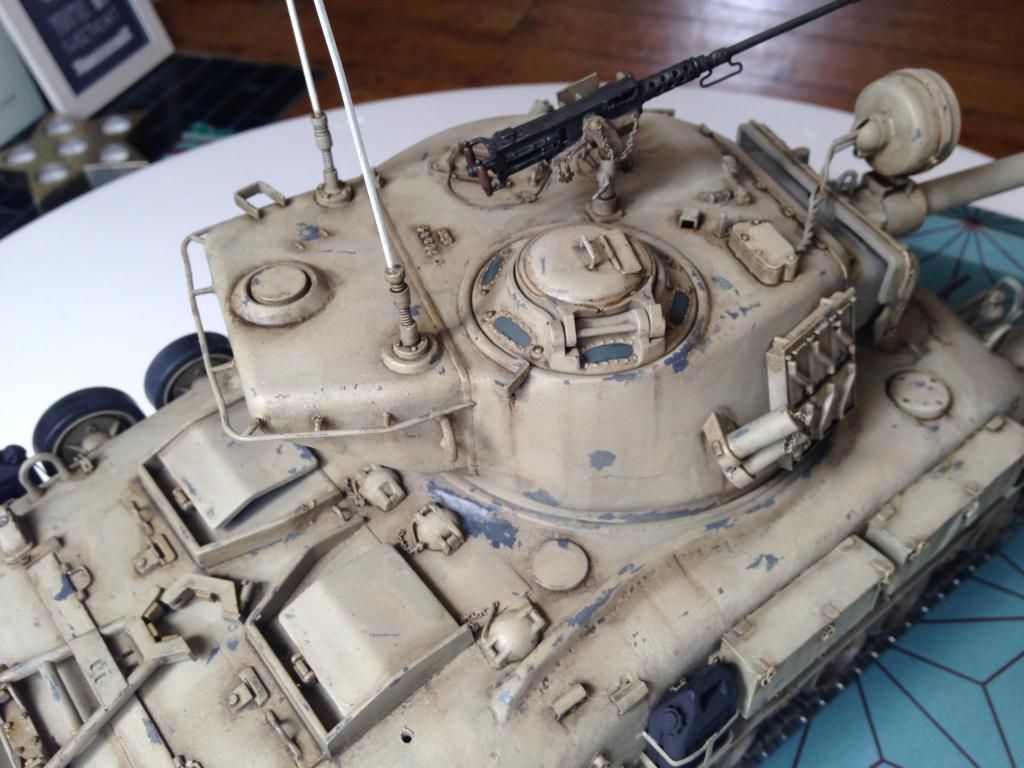
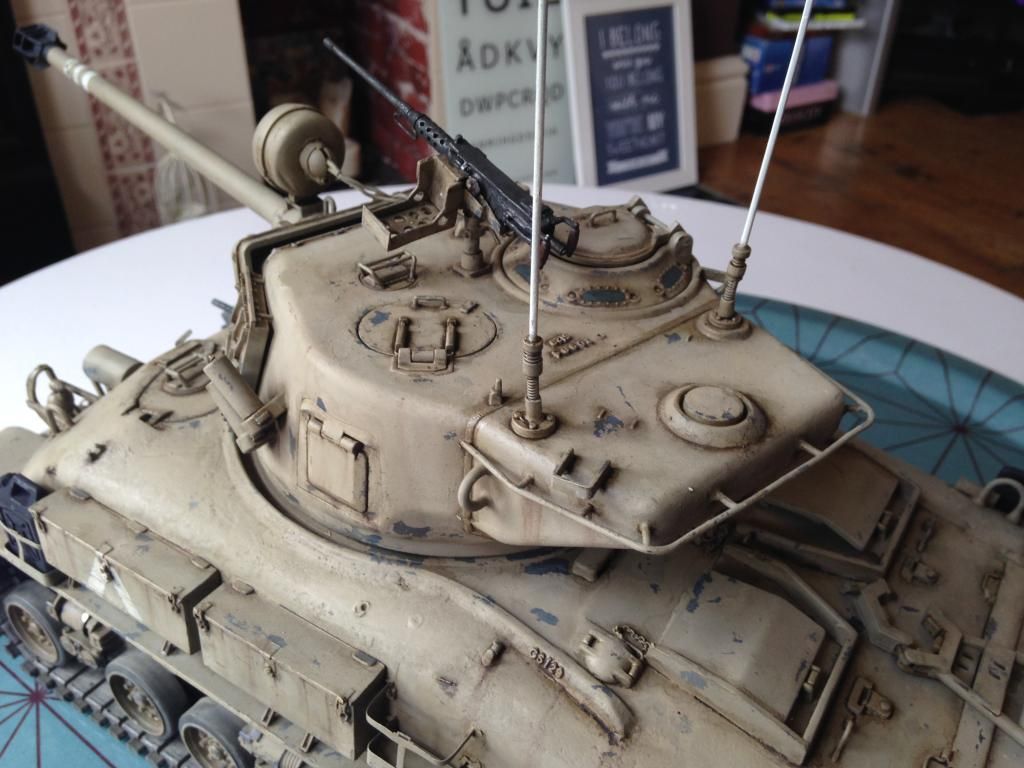
Had some issues with paint flaking, think due to the new (expensive) hairspray I borrowed off my missus; back to the cheap aldi stuff me thinks! Anyway, chips are tones down slightly. Usually I chip more heavily because when you weather it everything gets toned down so if I started subtle then its going to get much less noticeable.
I digress, under natural light I felt the colour had too many brick/orangey tones in so used a super secret filter (yeah right....its heavily thinned dak streaking grime by AK) to remove some of these.
Result:
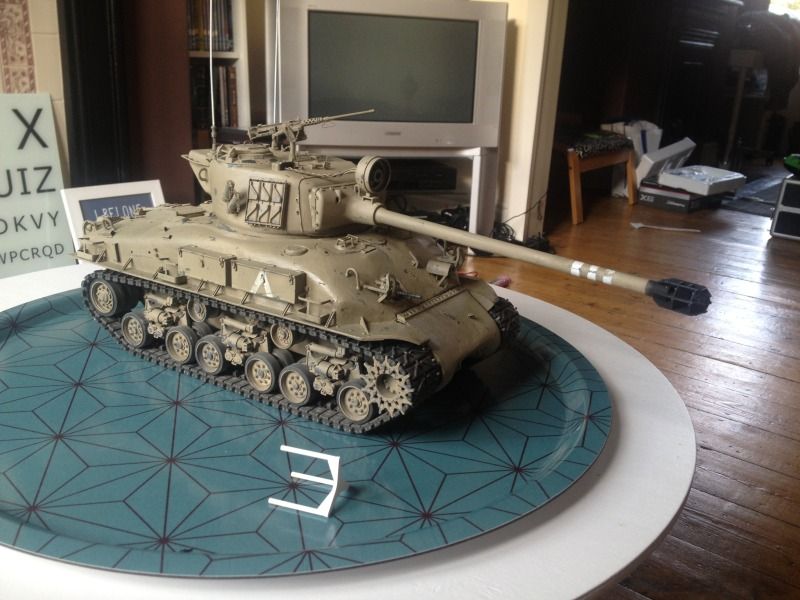
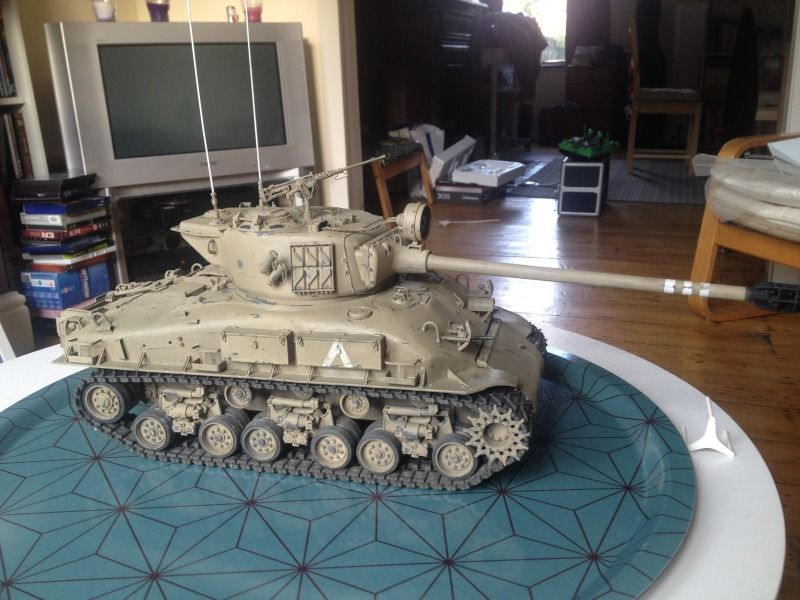
What they say about it being a pig of a colour to get right is so true!
Alpha, not sure they used female crew back in the 60s/70s but you never know! I had a flick through of the Israeli tank school pictures and they do look like kids, without the military look other nations soldiers get
Never fear I got a video, also some more pictures post pin wash. Still needs tidying in some areas but you get the ideas!
08-18-2014, 05:58 AM
#69
Finish looks great Tom!!! I like the chipping and weathering. Really nice work.
08-22-2014, 04:56 AM
#70
Thread Starter
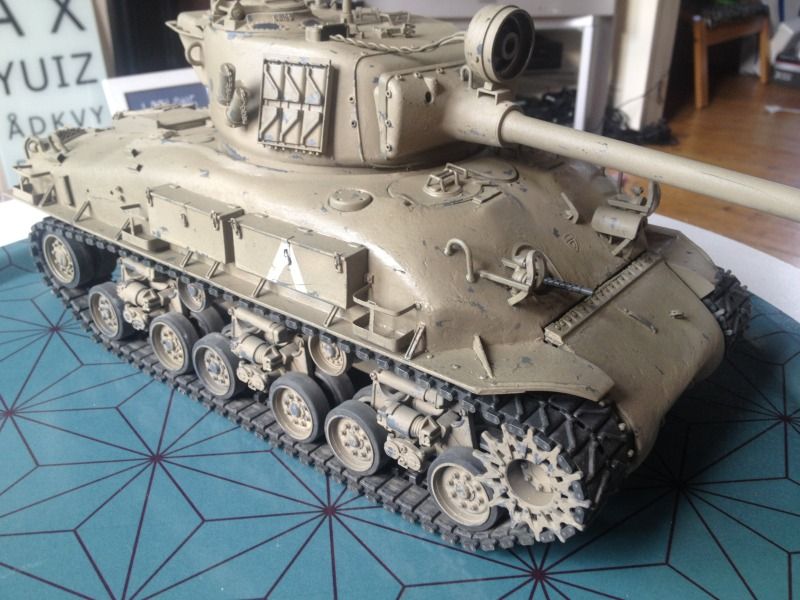
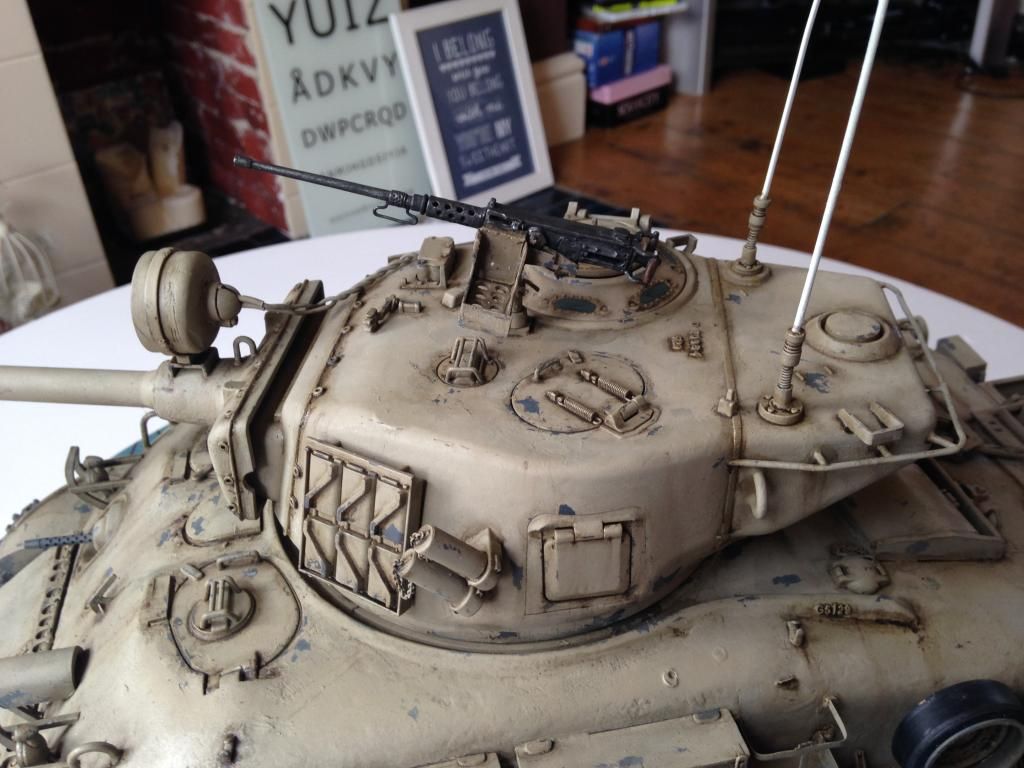
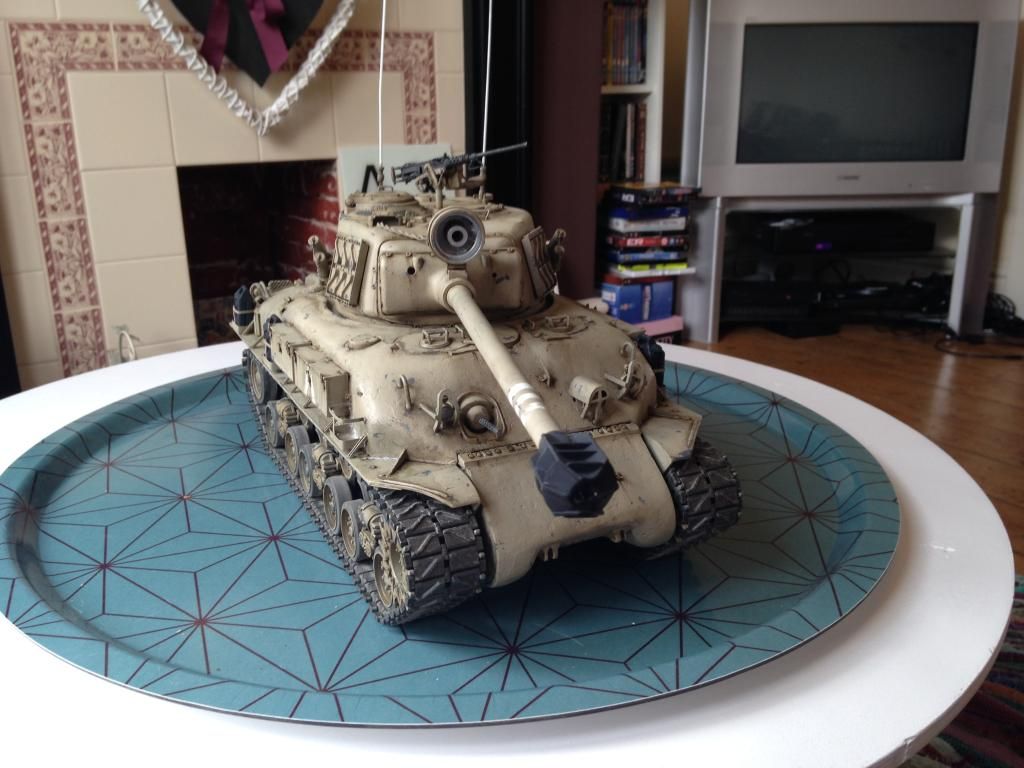
Closing in on completion! Finished painting the 50cal, done some more tidying of the pin wash, some streaking and done the commanders hatch glass. Also started on the stowage, painting and chipping the jerry cans.


 08-29-2014, 09:33 AM
#73
Looks really nice Tom!!! The weathering looks great. makes it look like a used, not abused tank. Your storage boxes and storage ben on the rear look good as well. Thanks for sharing your work in photos!!!
08-29-2014, 08:37 PM
#74
Senior Member

Here is a good trick: When dealing with really small parts that just love to fly away into the Bermuda Triangle.... never to be seen again ...grab a clear thin dry cleaning bag (...the kind that covered your suit) and do the assembly inside that bag....no more lost flying parts. You only need it for the tricky pieces.