


HL Tiger 1 my first RC project
 05-18-2014, 01:26 PM
#1

Thread Starter
finally got to sit down and start on the Tiger tonight.
My first time using miliput, I spent an hour adding welds to the turret. I may have overdone it? But I must admit, It was fun and I am quite pleased with the results
I found Miliput quite easy to work with, although what I thought was a small amount hardend quite quickly, so will have to mix smaller quantities next time.

Mark
My first time using miliput, I spent an hour adding welds to the turret. I may have overdone it? But I must admit, It was fun
and I am quite pleased with the results 

I found Miliput quite easy to work with, although what I thought was a small amount hardend quite quickly, so will have to mix smaller quantities next time.
Mark
 05-19-2014, 04:21 AM
#2
Senior Member

Join Date: Nov 2006
Location: Grande Prairie,
AB, CANADA
Posts: 8,976
Likes: 0
Received 4 Likes
on
4 Posts
Looks good. I believe this is the part of the hobby that perhaps is the most rewarding. When I bought my first RC tank it was a novelty purchase. When I learned they presented such great modeling opportunities is when I became hooked on them.
Keep us posted on your progression. .
Keep us posted on your progression. .
05-19-2014, 04:42 AM
#3
Yes, what Dan said!!! I was an avid 1/35 scale armor builder. Once I had my first Tamiya 1/16 scale Sherman in my hands I thought wow a model that moves and can be detailed up!!! Weld seams look great!!! 
05-20-2014, 09:49 AM
#4
Join Date: Mar 2014
Posts: 146
Likes: 0
Received 0 Likes
on
0 Posts
That's some awesome detailing right there! When you do the hull please post more pics.
I have this tank, along with the HL king tiger. I had no idea I was going to be spending so much on the hobby, the KT taught me what to mod and what to leave alone..
If you're already an expert, please ignore what I'm gonna say, but I have some expensive lessons that might help you or anybody else modelling these fine little tanks. My advice, if your tank came with the tk01 board (says it on the board in tiny letters it's the non smoke and sound board) do not bother fooling around with it, it can't be made to work right, period! My advice is to bite the bullet, and buy either the taigen or the heng long 2.4 radio system. They're about $70-80 - a hard hit on the wallet I know. But for the money I wasted buying transmitters, new boards etc. In futile attempts to make the cheap tk01 board work, i could have bought TWO Of the better 2.4 ghz radio systems!
The 2.4 ghz runs bulletproof, there is no antenna or receiver and works to about 75 feet. I bought mine from amazon the tpa store and they bind the transmitter to the board for you-it comes ready to run. If you already have the rx18 board (the one in the plastic box) it's a straight swap of the cables that's all. I modded the circuit board box by cutting a hole (tthe size of a penny)to glue on and add a 25 mm size 8000 rpm fan to keep that board cool and also added a 5 amp fuse- essential mods, I have learned.
I put Zimmerit on mine and I didn't want the mess and bother. So I bought the Zimmerit applique set from welsh dragon and you just glue them on. They look great. Cost me about $25 (he is in England but there's no problem paying in dollars).
If you want to see how it looks I have pics on rctankwarfare, same username in heng long builds section.
Last edited by Marc780; 05-20-2014 at 09:55 AM.
05-20-2014, 10:01 PM
#5
Thread Starter
Looks good. I believe this is the part of the hobby that perhaps is the most rewarding. When I bought my first RC tank it was a novelty purchase. When I learned they presented such great modeling opportunities is when I became hooked on them.
Keep us posted on your progression. .
Keep us posted on your progression. .
05-20-2014, 10:04 PM
#6
Thread Starter
That's some awesome detailing right there! When you do the hull please post more pics.
I have this tank, along with the HL king tiger. I had no idea I was going to be spending so much on the hobby, the KT taught me what to mod and what to leave alone..
If you're already an expert, please ignore what I'm gonna say, but I have some expensive lessons that might help you or anybody else modelling these fine little tanks. My advice, if your tank came with the tk01 board (says it on the board in tiny letters it's the non smoke and sound board) do not bother fooling around with it, it can't be made to work right, period! My advice is to bite the bullet, and buy either the taigen or the heng long 2.4 radio system. They're about $70-80 - a hard hit on the wallet I know. But for the money I wasted buying transmitters, new boards etc. In futile attempts to make the cheap tk01 board work, i could have bought TWO Of the better 2.4 ghz radio systems!
The 2.4 ghz runs bulletproof, there is no antenna or receiver and works to about 75 feet. I bought mine from amazon the tpa store and they bind the transmitter to the board for you-it comes ready to run. If you already have the rx18 board (the one in the plastic box) it's a straight swap of the cables that's all. I modded the circuit board box by cutting a hole (tthe size of a penny)to glue on and add a 25 mm size 8000 rpm fan to keep that board cool and also added a 5 amp fuse- essential mods, I have learned.
I put Zimmerit on mine and I didn't want the mess and bother. So I bought the Zimmerit applique set from welsh dragon and you just glue them on. They look great. Cost me about $25 (he is in England but there's no problem paying in dollars).
If you want to see how it looks I have pics on rctankwarfare, same username in heng long builds section.
I have this tank, along with the HL king tiger. I had no idea I was going to be spending so much on the hobby, the KT taught me what to mod and what to leave alone..
If you're already an expert, please ignore what I'm gonna say, but I have some expensive lessons that might help you or anybody else modelling these fine little tanks. My advice, if your tank came with the tk01 board (says it on the board in tiny letters it's the non smoke and sound board) do not bother fooling around with it, it can't be made to work right, period! My advice is to bite the bullet, and buy either the taigen or the heng long 2.4 radio system. They're about $70-80 - a hard hit on the wallet I know. But for the money I wasted buying transmitters, new boards etc. In futile attempts to make the cheap tk01 board work, i could have bought TWO Of the better 2.4 ghz radio systems!
The 2.4 ghz runs bulletproof, there is no antenna or receiver and works to about 75 feet. I bought mine from amazon the tpa store and they bind the transmitter to the board for you-it comes ready to run. If you already have the rx18 board (the one in the plastic box) it's a straight swap of the cables that's all. I modded the circuit board box by cutting a hole (tthe size of a penny)to glue on and add a 25 mm size 8000 rpm fan to keep that board cool and also added a 5 amp fuse- essential mods, I have learned.
I put Zimmerit on mine and I didn't want the mess and bother. So I bought the Zimmerit applique set from welsh dragon and you just glue them on. They look great. Cost me about $25 (he is in England but there's no problem paying in dollars).
If you want to see how it looks I have pics on rctankwarfare, same username in heng long builds section.
this one has newer parts not tk01 i have lots to learn, I have seen your posts on the other forum
cheers, hopefully another update soon
mark

 05-24-2014, 11:35 PM
#8
Join Date: Mar 2014
Posts: 146
Likes: 0
Received 0 Likes
on
0 Posts
Your super-detailing is coming along well! At the other forum they have a "Master class" section that other people can nominate your tank for, this one might be a candidate once its finished if you ask me. Myself I'm not very good at detailing, a bit too ham fisted and lacking in the hand-eye coordination dept. that kept me from being the expert draftsman i wanted to be, even after 4 years of high school classes (They used t-squares and 2h pencils etc. - that was a LONG time ago!). Fortunately they did offer an airbrushing class and still doing THAT today, at least. Also like any HL tank that get used my tanks get handled a lot, laid upside down, and the occasional bonking into objects etc. so any detail i add is probably going to get broken off...i usually take the minimalist path.
I have the King Tiger that needs to be redone as i am still not satisfied with it-its almost there not quite! The problem a lot of modellers make, including me, is forgetting that a scale model needs scale CAMO patterns too! I've seen photos of how the panzers were painted and often the pattern was done in the field by the tank crew, esp late war. The logic of the Waffenamt was that the panzer units in the field would know what pattern would be most effective in their AO better then the factory, which often sent the tanks to the field in their base "dunkel gelb" (dark yellow) only. A paint gun was standard issue with every German tank, along with the tins of brown and green that were designed to be thinned with gasoline if that was all that was available. It's safe to say no two panzer camo patterns were ever alike.
Anyway I have found my mistake when painting the camo is making the greens and browns WAY too wide. Remember this was being done by a tank crewman with an automotive type paint gun and thats how the model should probably look. To fool the eye keep in mind, the camocolors are almost equal in coverage with no color predominating the other two. Also straight lines are out, i find myself making an awful lot of "Y" shapes and blobs, and the thinner the stripes are the better-about 1/4" spray pattern is usually about right.
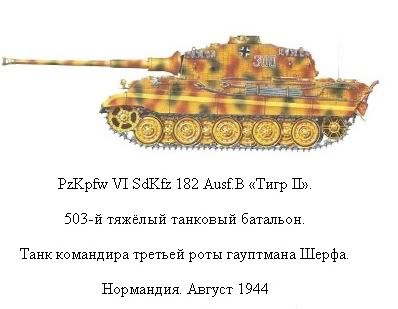
Here's how i wanted my Kt to look:
And here's how it came out:
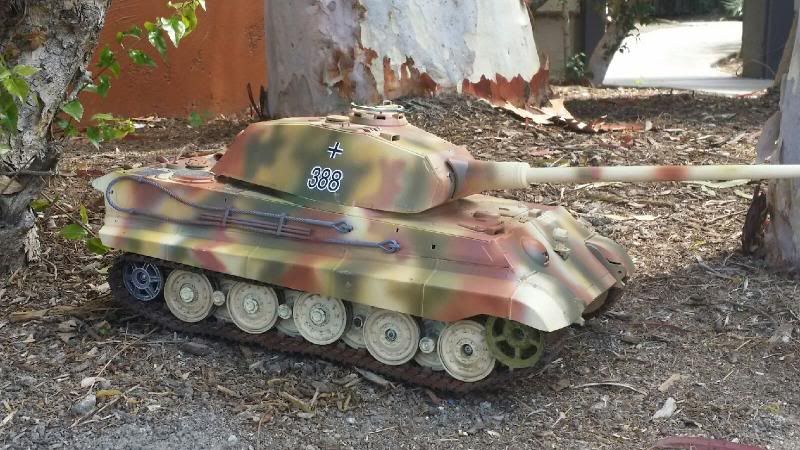
It's close but not close enough! I think i will repaint it sometime soon and going to make the camo stripes MUCH narrower.
Building the second tank, the tiger, hasd much better results. Some people say to prime with black but i used dark grey primer on the tiger, and the results were encouraging. After allowing the primer to dry 24 hours I airbrushed the base dunkel gelb yellow over that. I went slightly more thin then complete covereage with the airbrush and did not try to cover 100%- painting a fence or something- instead I just allowed a little of the primer to show through the yellow. I was surprised at the result, it gave the model a subtle dark undertone more closely mimics the patina of steel that the real thing had, and the effect is much more realistic to the eye. I was having problems with my tank coming out too bright (like in the KT in the picture), the under-coverage trick fixes that.
Also i was tried a different technique on the Tiger, as the King tiger was pretty much the lesson on how NOt to paint. I airbrushed the base dark yellow outwards from the center, and in streaks with varying coverage of the paint, not back and forth and this too produced pleasing results.
An old trick i would use on solid colored models, like olive drab shermans and M-48's-use a cloud pattern, spritzing small areas only. Then adding a drop or two of white, or black to the mix, then repeat until full coverage is achieved. The technique is hard to describe, but the results can be striking, as you get a very slightly mottled finish of a solid color, that is actually no longer solid (just like the real thing would be) and when done properly, is impossible to tell where the changes of shade begins or ends.
I am thinking of trying this trick when i repaint the KT, i'll just keep redoing it til i get the results i want but it is far easier to do it right, then do it over...
I have the King Tiger that needs to be redone as i am still not satisfied with it-its almost there not quite! The problem a lot of modellers make, including me, is forgetting that a scale model needs scale CAMO patterns too! I've seen photos of how the panzers were painted and often the pattern was done in the field by the tank crew, esp late war. The logic of the Waffenamt was that the panzer units in the field would know what pattern would be most effective in their AO better then the factory, which often sent the tanks to the field in their base "dunkel gelb" (dark yellow) only. A paint gun was standard issue with every German tank, along with the tins of brown and green that were designed to be thinned with gasoline if that was all that was available. It's safe to say no two panzer camo patterns were ever alike.
Anyway I have found my mistake when painting the camo is making the greens and browns WAY too wide. Remember this was being done by a tank crewman with an automotive type paint gun and thats how the model should probably look. To fool the eye keep in mind, the camocolors are almost equal in coverage with no color predominating the other two. Also straight lines are out, i find myself making an awful lot of "Y" shapes and blobs, and the thinner the stripes are the better-about 1/4" spray pattern is usually about right.
Here's how i wanted my Kt to look:

And here's how it came out:

It's close but not close enough! I think i will repaint it sometime soon and going to make the camo stripes MUCH narrower.
Building the second tank, the tiger, hasd much better results. Some people say to prime with black but i used dark grey primer on the tiger, and the results were encouraging. After allowing the primer to dry 24 hours I airbrushed the base dunkel gelb yellow over that. I went slightly more thin then complete covereage with the airbrush and did not try to cover 100%- painting a fence or something- instead I just allowed a little of the primer to show through the yellow. I was surprised at the result, it gave the model a subtle dark undertone more closely mimics the patina of steel that the real thing had, and the effect is much more realistic to the eye. I was having problems with my tank coming out too bright (like in the KT in the picture), the under-coverage trick fixes that.
Also i was tried a different technique on the Tiger, as the King tiger was pretty much the lesson on how NOt to paint. I airbrushed the base dark yellow outwards from the center, and in streaks with varying coverage of the paint, not back and forth and this too produced pleasing results.
An old trick i would use on solid colored models, like olive drab shermans and M-48's-use a cloud pattern, spritzing small areas only. Then adding a drop or two of white, or black to the mix, then repeat until full coverage is achieved. The technique is hard to describe, but the results can be striking, as you get a very slightly mottled finish of a solid color, that is actually no longer solid (just like the real thing would be) and when done properly, is impossible to tell where the changes of shade begins or ends.
I am thinking of trying this trick when i repaint the KT, i'll just keep redoing it til i get the results i want but it is far easier to do it right, then do it over...
Last edited by Marc780; 05-24-2014 at 11:59 PM.
05-24-2014, 11:42 PM
#10
Junior Member
Join Date: Apr 2014
Location: Tucson Az., USA
Posts: 22
Likes: 0
Received 0 Likes
on
0 Posts
Nice job on the welds. Does it take any kind of prep or priming before applying? It almost looks like the corners were sanded or filed to a 45 degree angle before application. I am not familiar with the Miliput product. Where can I order some?
05-24-2014, 11:44 PM
#11
Thread Starter
Marc, I think your king tiger looks great, I see what your saying about the scale of the cammo, but honestly it doesn't look bad on your tiger at all. I am having fun detailing mine, finding it quite relaxing, I just wish there we're more hours in the day to work on it. Thanks for the kind words
freddy , I have seen miliput in most hobby shops , it's a 2 part epoxy putty and comes in a few different colours as far as I know no priming required, I am new to this as well and the stuff seems to stick just fine
freddy , I have seen miliput in most hobby shops , it's a 2 part epoxy putty and comes in a few different colours as far as I know no priming required, I am new to this as well and the stuff seems to stick just fine
05-24-2014, 11:48 PM
#12
Thread Starter
I used a Dremel to deepen the channel where the welds go, and rolled the putty into long skinny worms , pressed it into the grooves and smoothed with a wet finger , then I used a tiny flat screwdriver to create the welds. If you type milliput into eBay or Amazon it will pop right up. Cheers Mark
Last edited by Markocaster; 05-24-2014 at 11:54 PM.
05-25-2014, 05:51 PM
#13
Thread Starter
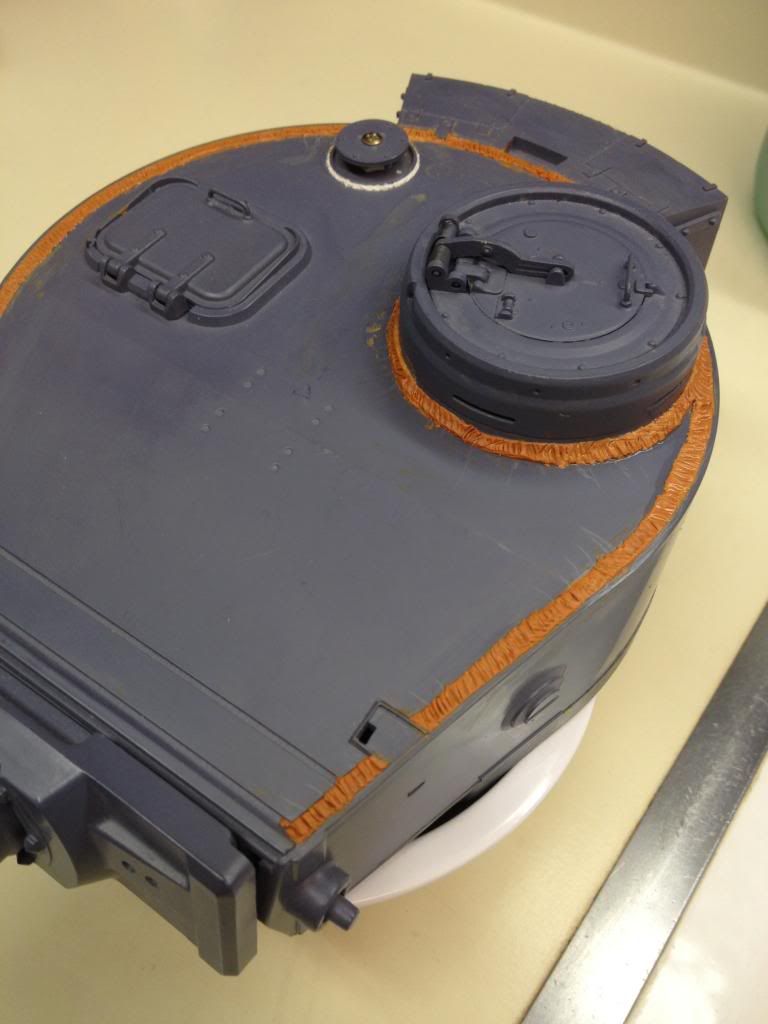
Spent another hour on the air cleaners. Pleased so far with the result.
Added little chain details and have them 80% done, a bit of Miliput and they should be ready for primer. Added the bits to the front of the tank I got from forgebear and cut the front flaps loose from side skirts.
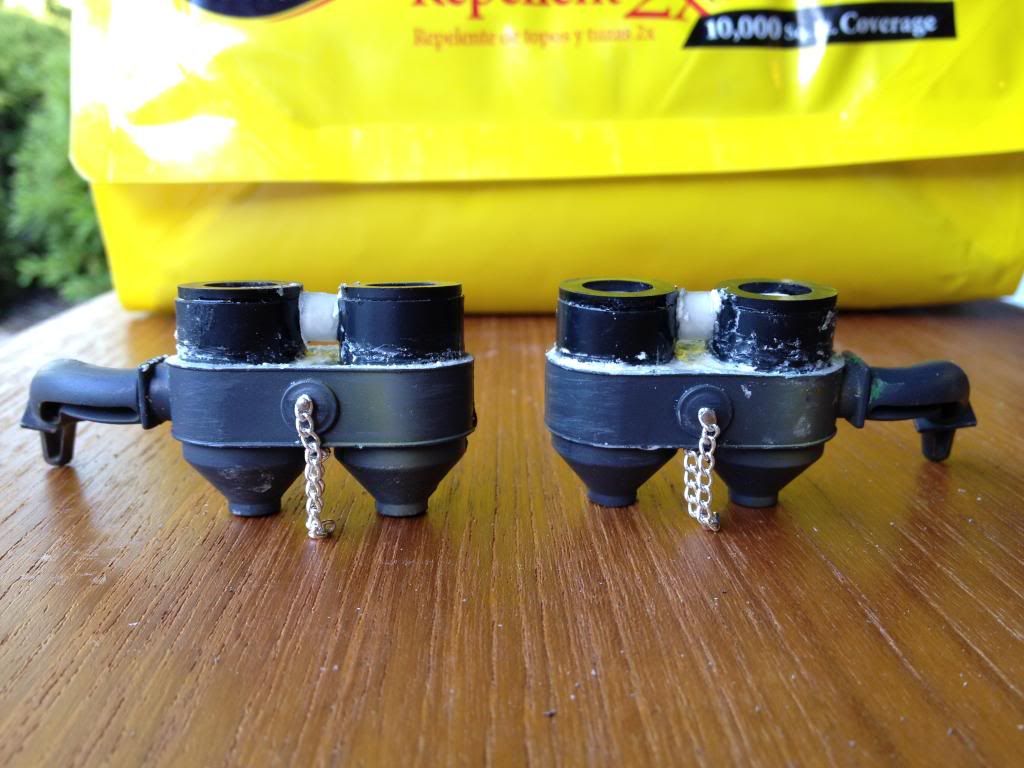
Added little chain details and have them 80% done, a bit of Miliput and they should be ready for primer. Added the bits to the front of the tank I got from forgebear and cut the front flaps loose from side skirts.


Last edited by Markocaster; 05-25-2014 at 08:42 PM.
06-07-2014, 12:46 AM
#15
Thread Starter
A bit of an update. I had to miss work today after injuring my back lifting boxes, so I spent a few hours working on the tank.
First the air cleaners are mostly complete, they are nowhere near the quality of those some of you guys have made but I am quite pleased with them. This is my first modeling in quite a few years. They need a little smoothing out, any ideas on how to do that?

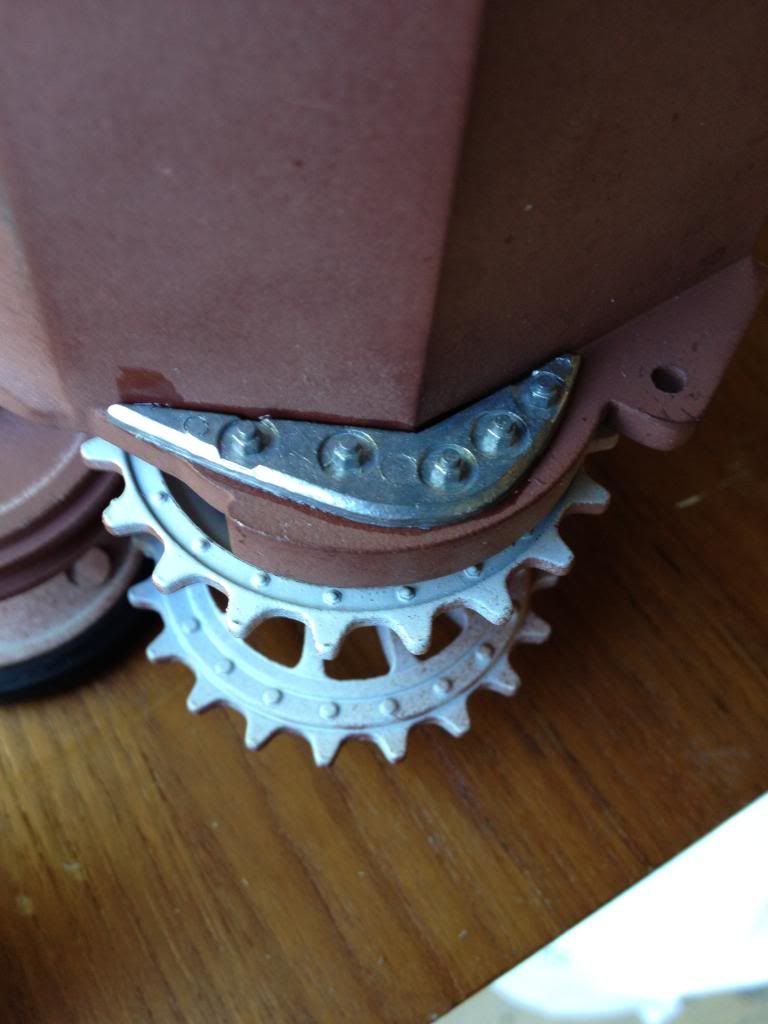
Next I ground down the HL mantelet to resemble the earlier one using photos of tiger 131 as a guide I also added the ends on the lifting lugs. Do the lugs look too long to you?

I added more welds in a few spots and put in the drivers vision port, added the 2 little holes above it and filled them in to resemble welds. Also a handle like on 131.

Finally I added the wire for the Bosch lights and a little detail to the wire. Tiger 131 doesn't have the lights but I like the look and assume it had them at some point.


I am a little heavy handed with the CA glue :{ but I think it will look ok once primer is added.
I am learning lots from this process and can't wait to do more. Any suggestions, comments etc welcomed. Cheers Mark
First the air cleaners are mostly complete, they are nowhere near the quality of those some of you guys have made but I am quite pleased with them. This is my first modeling in quite a few years. They need a little smoothing out, any ideas on how to do that?

Next I ground down the HL mantelet to resemble the earlier one using photos of tiger 131 as a guide I also added the ends on the lifting lugs. Do the lugs look too long to you?

I added more welds in a few spots and put in the drivers vision port, added the 2 little holes above it and filled them in to resemble welds. Also a handle like on 131.

Finally I added the wire for the Bosch lights and a little detail to the wire. Tiger 131 doesn't have the lights but I like the look and assume it had them at some point.


I am a little heavy handed with the CA glue :{ but I think it will look ok once primer is added.
I am learning lots from this process and can't wait to do more. Any suggestions, comments etc welcomed. Cheers Mark
06-09-2014, 08:55 PM
#16

Join Date: Jan 2006
Location: Hamilton,
ON, CANADA
Posts: 1,422
Likes: 0
Received 7 Likes
on
7 Posts
Wicked job so far!
The great thing about tanks in this scale is that you really can't mess up too badly, nothing needs to be perfect.... and if you tend to over-exaggerate the details, they just are more catching to the eye.
I wouldnt say your welds are exaggerated though, they look good!
The great thing about tanks in this scale is that you really can't mess up too badly, nothing needs to be perfect.... and if you tend to over-exaggerate the details, they just are more catching to the eye.
I wouldnt say your welds are exaggerated though, they look good!
06-09-2014, 09:42 PM
#17
Thread Starter
Wicked job so far!
The great thing about tanks in this scale is that you really can't mess up too badly, nothing needs to be perfect.... and if you tend to over-exaggerate the details, they just are more catching to the eye.
I wouldnt say your welds are exaggerated though, they look good!
The great thing about tanks in this scale is that you really can't mess up too badly, nothing needs to be perfect.... and if you tend to over-exaggerate the details, they just are more catching to the eye.
I wouldnt say your welds are exaggerated though, they look good!
thanks, I removed that weld around the gun it's not correct, but added a few more and I am really enjoying this part of the build. I am not looking forward to figuring out how to wire up this thing , never done an RC before cheers Mark
06-10-2014, 01:48 AM
#18
Join Date: Jan 2006
Location: Hamilton,
ON, CANADA
Posts: 1,422
Likes: 0
Received 7 Likes
on
7 Posts
Glad you're enjoying your build!
Have you considered anything beyond driving it around? There's probably a bunch of tankers in your area. You mentioned wiring it up; what's in there now and what does it need?
Have you considered anything beyond driving it around? There's probably a bunch of tankers in your area. You mentioned wiring it up; what's in there now and what does it need?
06-10-2014, 02:25 PM
#19
Thread Starter
Apparently it is tamiya battle ready it has all the wiring I just need to sort thru the mess of wires and figure it out. I will need a radio and
whatever it takes to make that go. It has the henglong 18 plug and several other bits and pieces. I am a total noob so it should be interesting
cheers Mark
07-28-2014, 01:27 PM
#20
Thread Starter
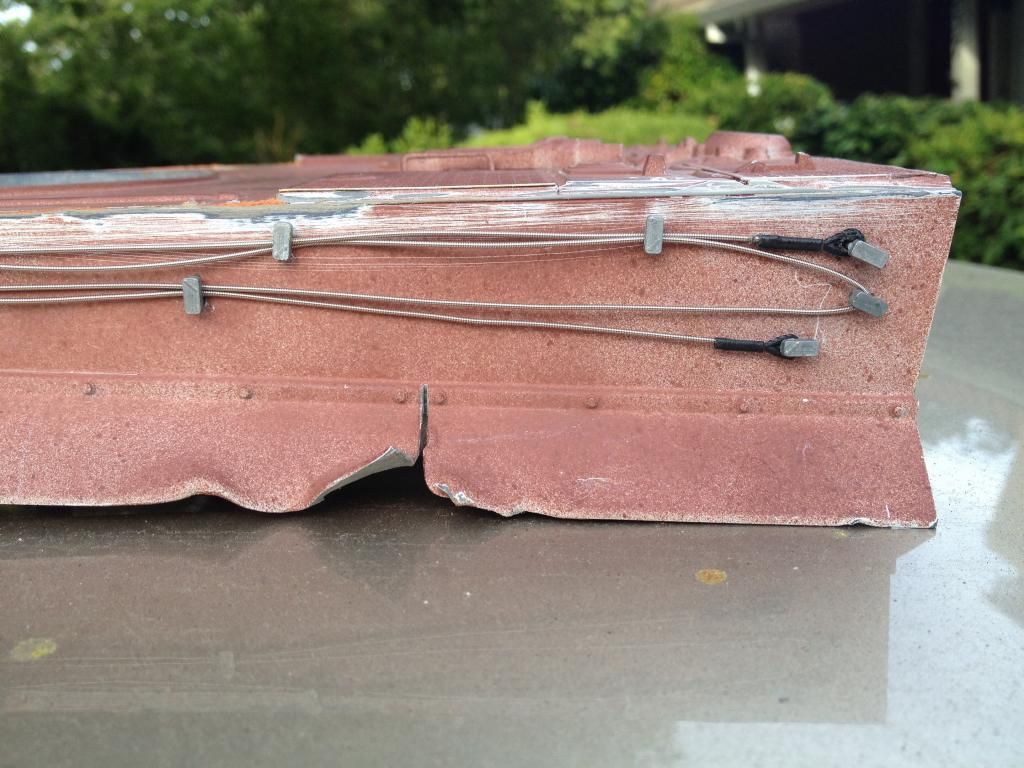
Done a bit more since the last post
Pleased with the results of the side hull brackets and cable. I used an electric guitar string for the cable and the end bits are from the plastic heng long cables.
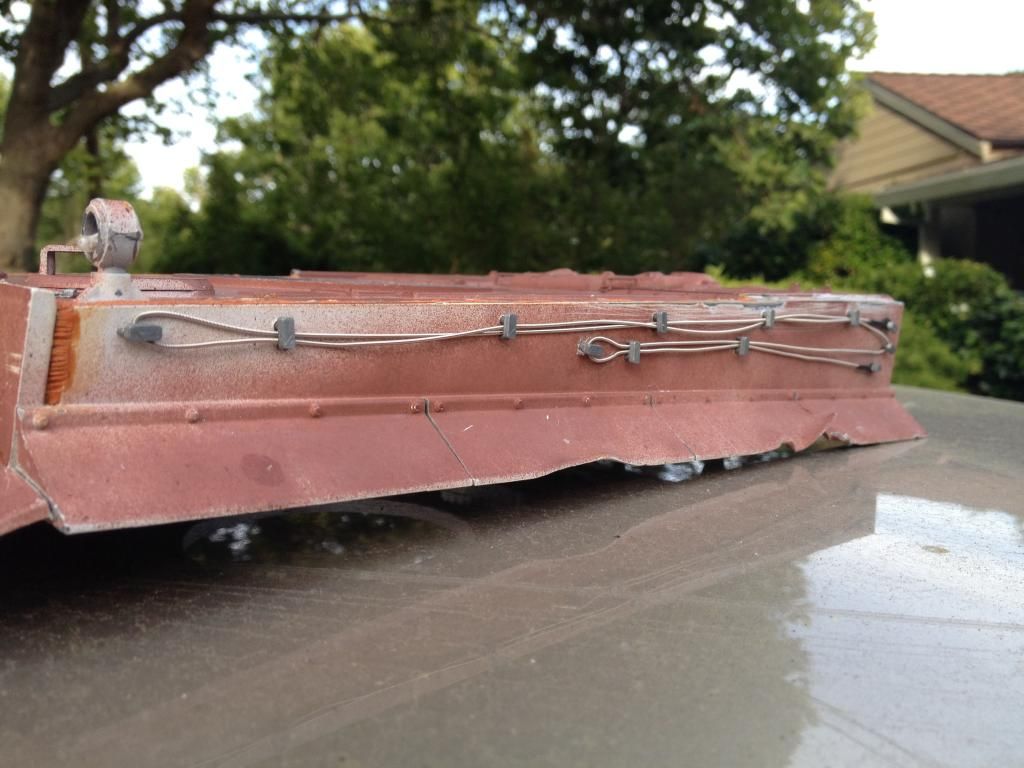
Pleased with the results of the side hull brackets and cable. I used an electric guitar string for the cable and the end bits are from the plastic heng long cables.

 07-28-2014, 01:30 PM
#21
Thread Starter
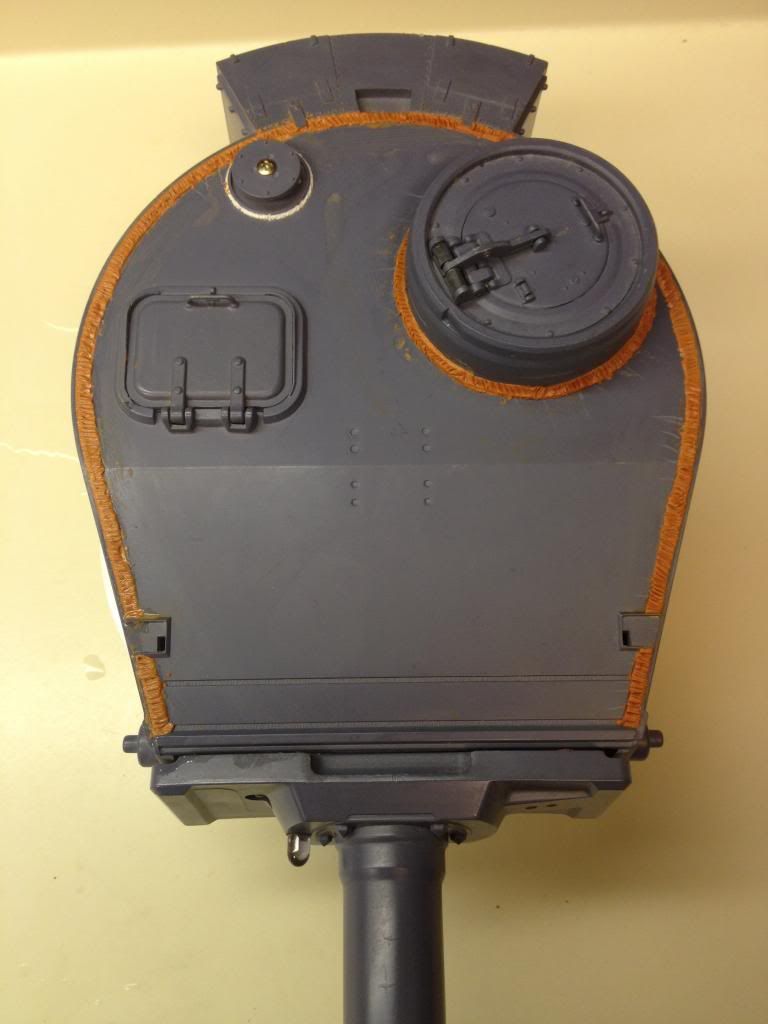
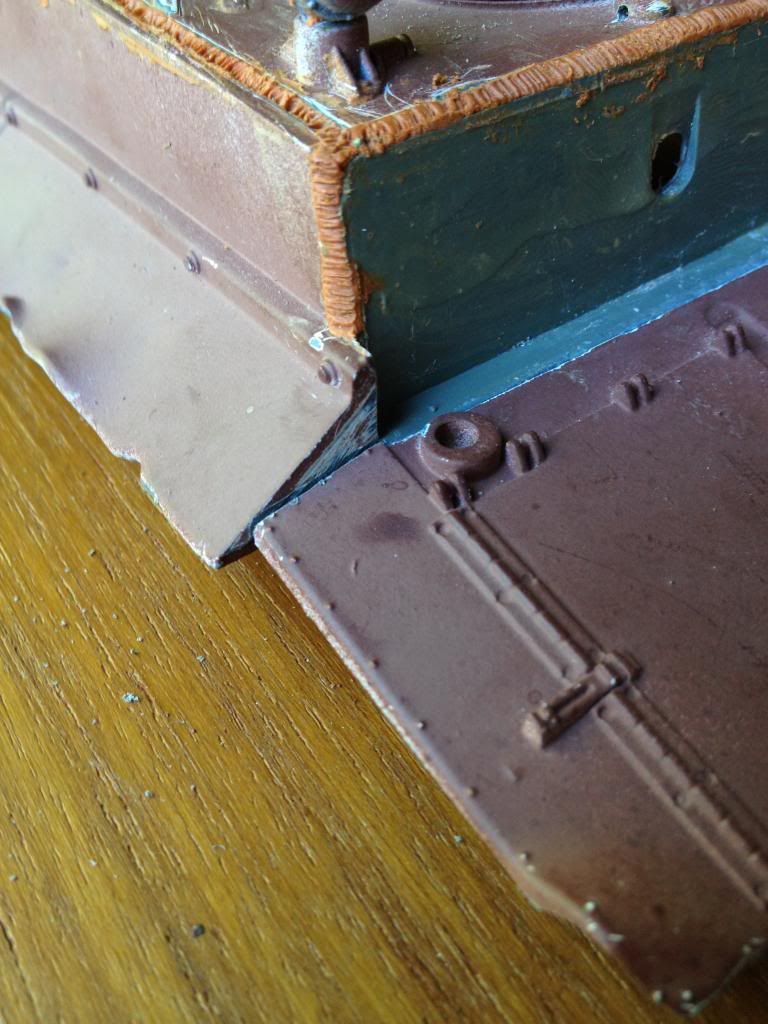
I dove right in and did part one of the turret relocation, I followed wildboar44 's fantastic how to https://www.rctankwarfare.co.uk/foru...hatch&start=60 to the letter except I chose to move the turret back 13.5mm . So far so good ,
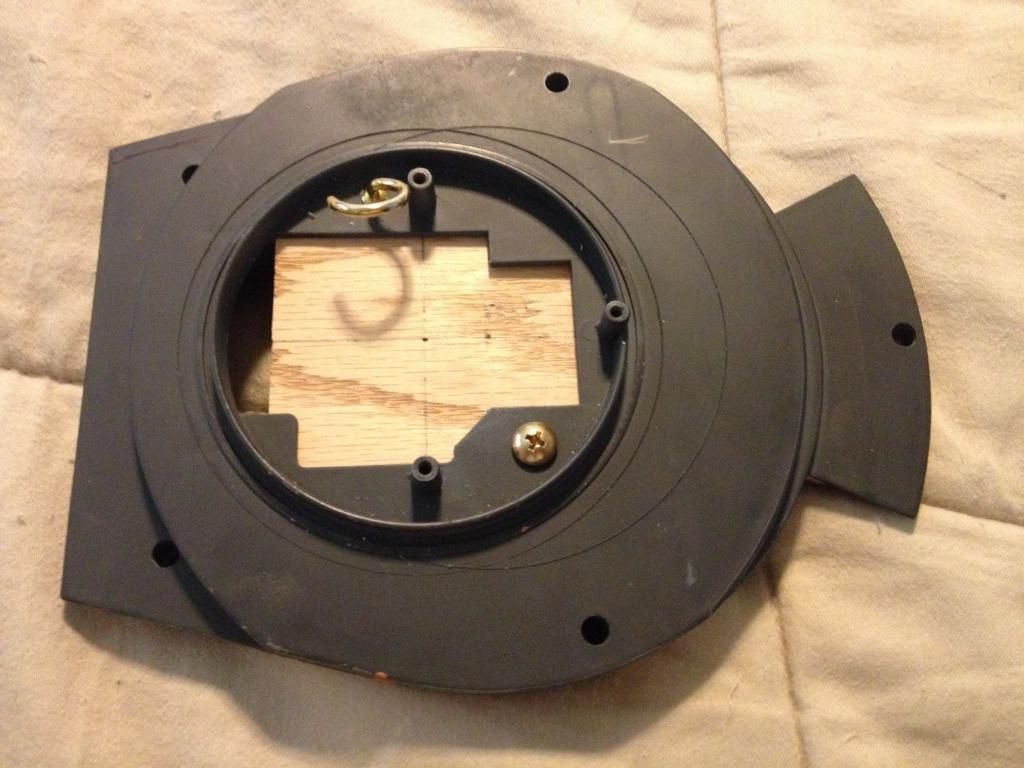
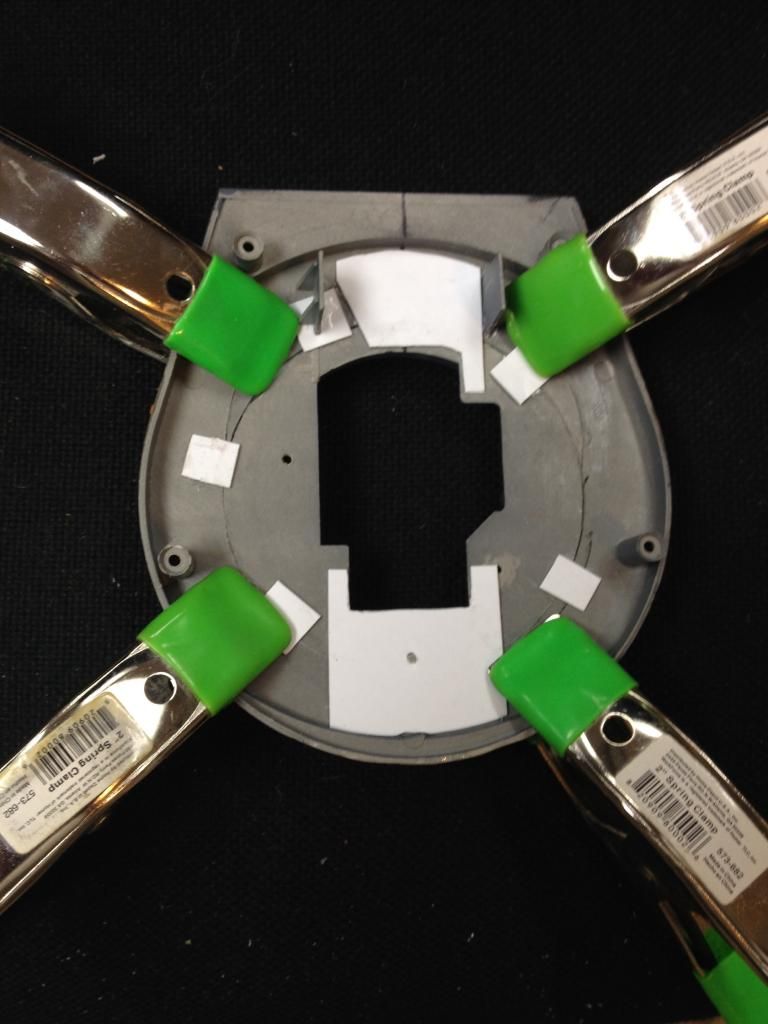
I also added the turret side slits and ground off the HL Rommel box to add the tamiya one :crazy:
Tomorrow I am attempting to move the upper hull turret hole back 13.5mm
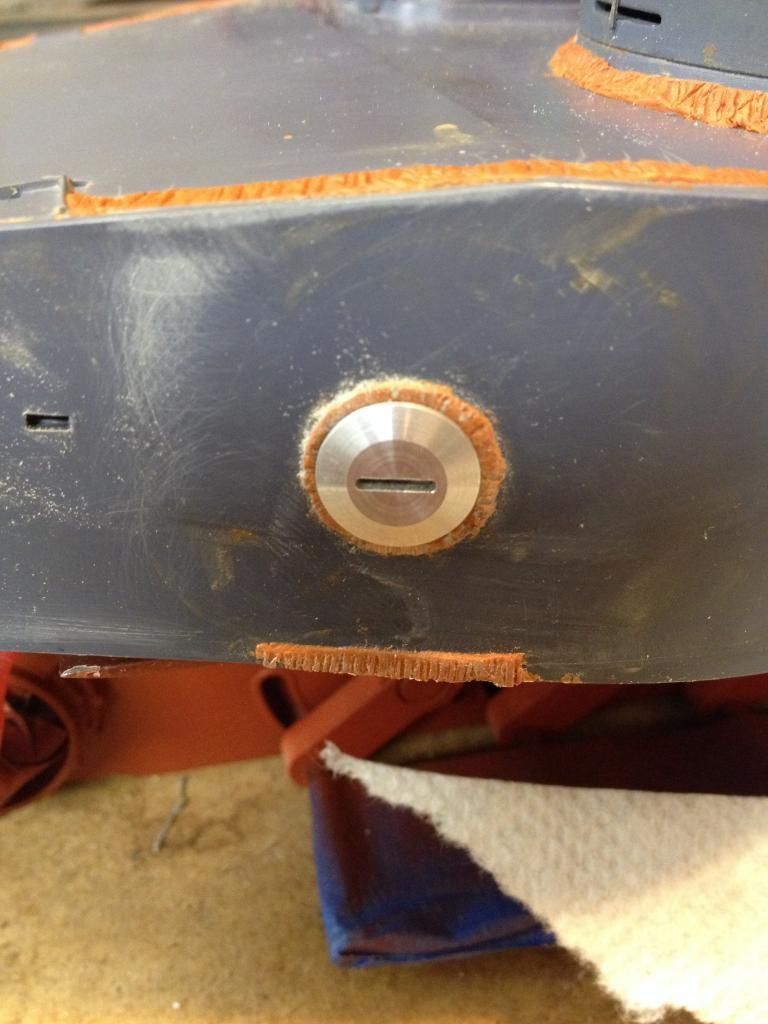

The lower half was much easier to cut than the turret,
Here are a few pics.
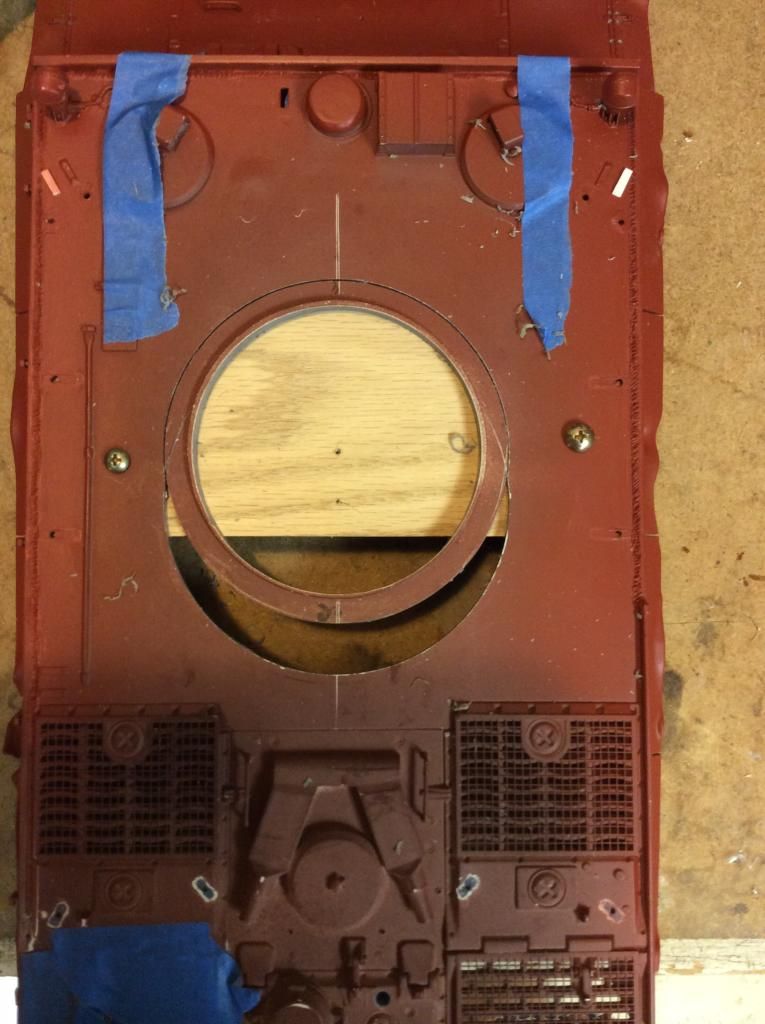
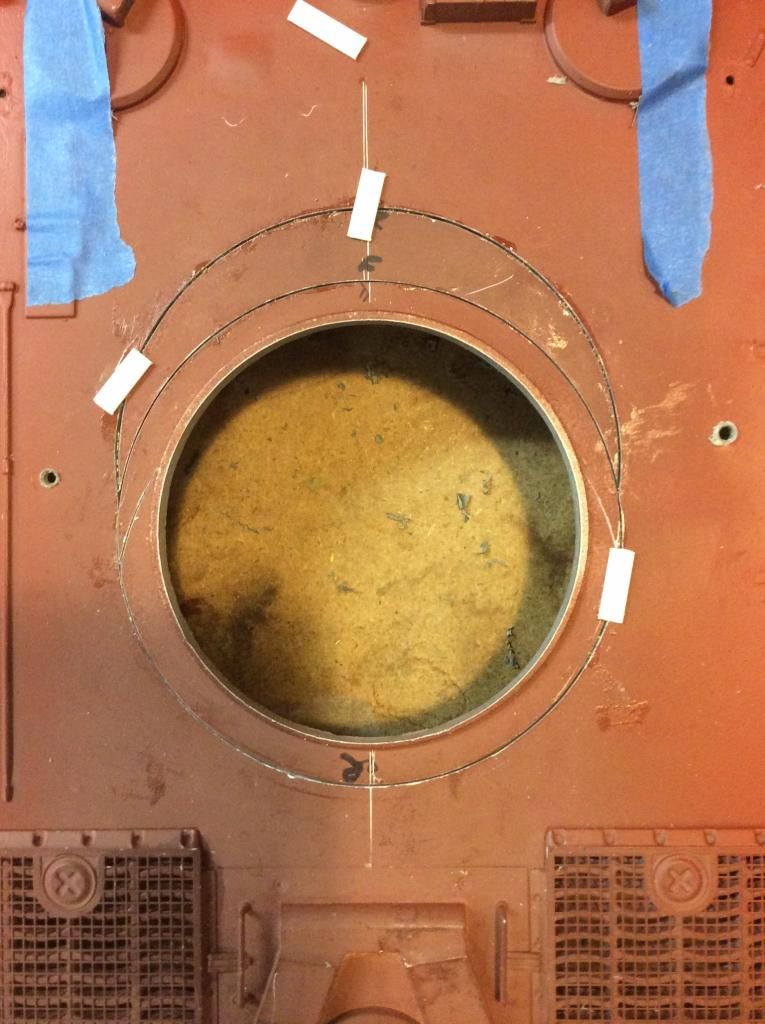
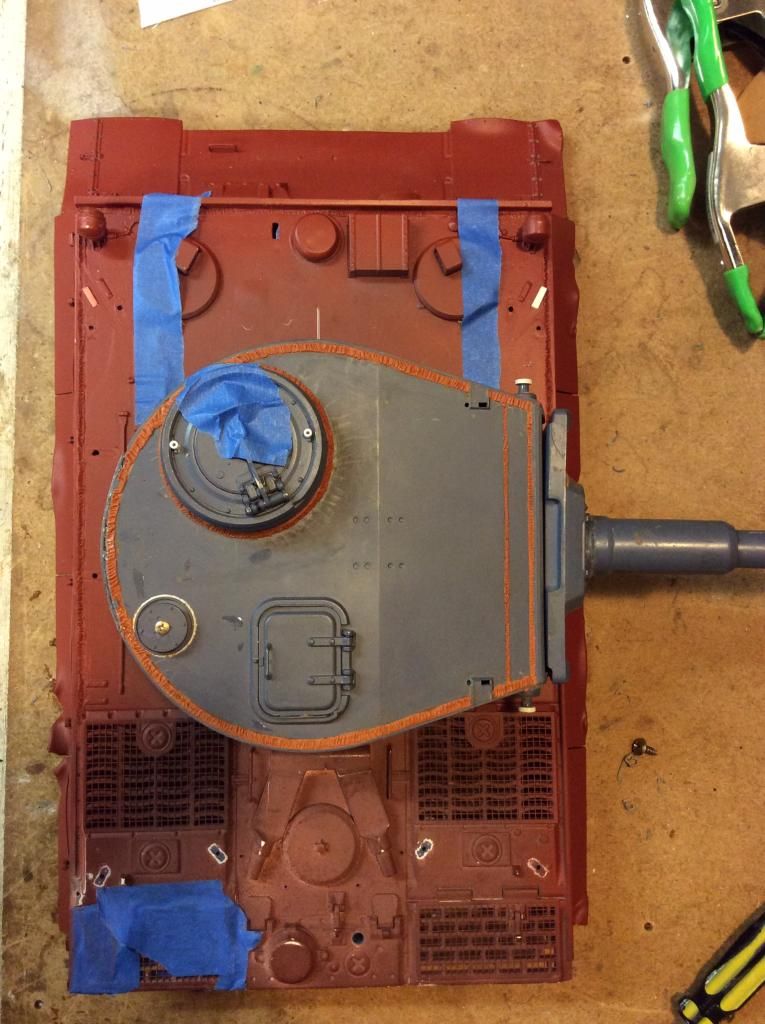
Just some cleaning up to do now.


I also added the turret side slits and ground off the HL Rommel box to add the tamiya one :crazy:
Tomorrow I am attempting to move the upper hull turret hole back 13.5mm


The lower half was much easier to cut than the turret,
Here are a few pics.


Just some cleaning up to do now.
 07-29-2014, 09:57 AM
#23
Member
Join Date: Jul 2014
Location: Bay Area, CA
Posts: 86
Likes: 0
Received 0 Likes
on
0 Posts
I want to battle it eventually and am trying to get hooked up with a local club. A few closed but I just got on an email list for a new startup. Fingers crossed.
Apparently it is tamiya battle ready it has all the wiring I just need to sort thru the mess of wires and figure it out. I will need a radio and
whatever it takes to make that go. It has the henglong 18 plug and several other bits and pieces. I am a total noob so it should be interesting
cheers Mark
I'm not anywhere near that with my tanks right now just making sure electronics are all running properly then I'd look into getting it Tamiya compatible. I do have a project I can start but I'll do a post here when I'm ready.
