


Converting an HL Panther "G" into a late "A"
 09-30-2015, 06:42 PM
#126

Thanks for following CGNoorloos! I really appreciate the compliments guys... Hope it all gives you some ideas...
Shaky hands and the eyes are no good without the glasses and jewelers head magnifier!
O.K. so here is about 14 hours of painful work!
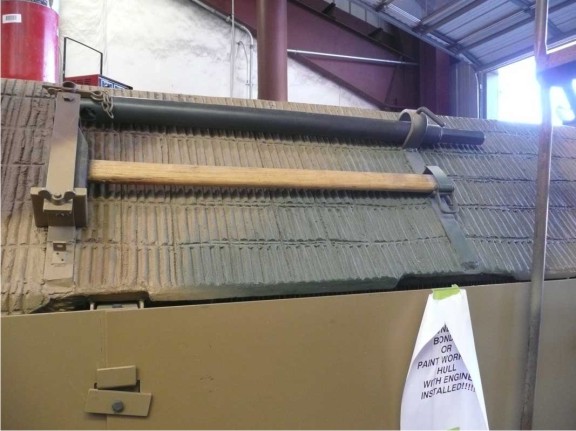
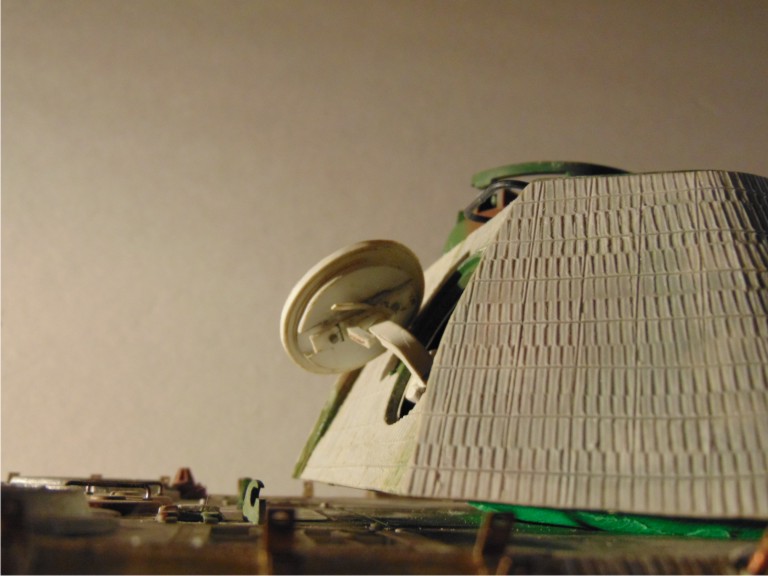
The second tool rack on the "A" only contains the sledge and one rod tool with large hex driver on one end. (The "G" has 3 tools) I wanted to make the holes on the one end like you see in this pic of the Littlefield Panther. And I must say thanks to Vladimir Yakubov who has an invaluable gallery of at least 500 or 600 pictures of the Littlefield Panther build. If you want to do any kind of detailed build use that source. It is absolutely awesome with high resolution pictures.

 Panther A 292.JPG (59.04 KiB) Not viewed yet
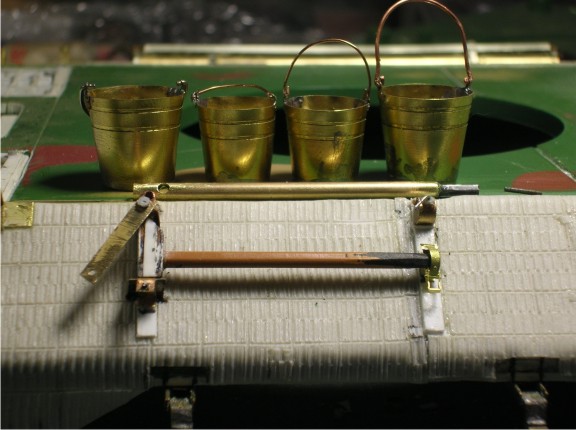
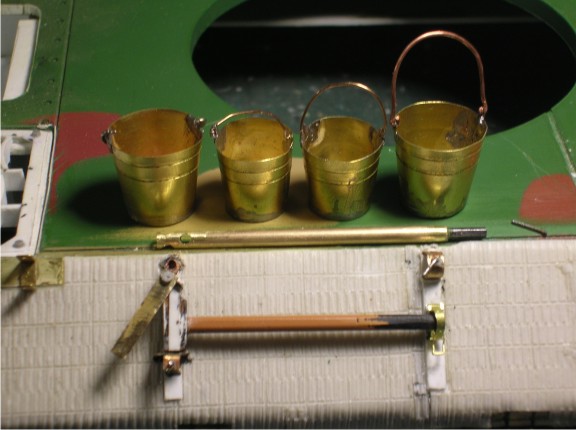
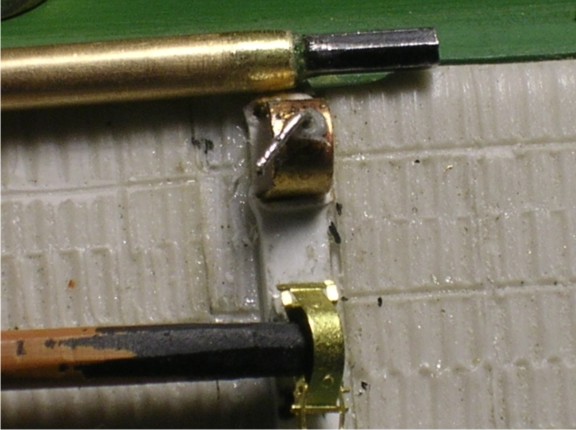
So it was really hard to make that hex tool! (Sorry, the actual name for the tool escapes me at the moment) I first tried to form the tool using an old one but drilled it and it was too thin. Broke. Tried a piece of styrene. Broke. finally brass tube about the right size. First one broke. Second one success! Once the holes were successful I took a small hex driver I had and cut the end off to place in the brass rod. This is the one you see here. I didn't mount it because I need to be able to remove right now for paint. Also I am now waiting on wingnuts to finish the frame to match the Littlefield. Also you will see my first attempt at the Voyager buckets. They really are awesome! I find the standard after market ones to heavy and thick. These are great and you get 4 in a pack in 2 sizes. I must also say the Voyager early clamp set is relatively easy to work with compared to Aber. They don't require any solder and only glue for the frame of the clamp to the hull mount. Very nice price too! :-) So like I said, wingnuts, cotter pins, and small chains will all be added later once we paint. Speaking of which I think it is pretty much ready FINALLY!!!
 Panther A 288.JPG (58.99 KiB) Not viewed yet
 Panther A 289.JPG (51.71 KiB) Not viewed yet
 Panther A 290.JPG (53.85 KiB) Not viewed yet
 Panther A 291.JPG (55.69 KiB) Not viewed yet
Shaky hands and the eyes are no good without the glasses and jewelers head magnifier!
O.K. so here is about 14 hours of painful work!
The second tool rack on the "A" only contains the sledge and one rod tool with large hex driver on one end. (The "G" has 3 tools) I wanted to make the holes on the one end like you see in this pic of the Littlefield Panther. And I must say thanks to Vladimir Yakubov who has an invaluable gallery of at least 500 or 600 pictures of the Littlefield Panther build. If you want to do any kind of detailed build use that source. It is absolutely awesome with high resolution pictures.
So it was really hard to make that hex tool! (Sorry, the actual name for the tool escapes me at the moment) I first tried to form the tool using an old one but drilled it and it was too thin. Broke. Tried a piece of styrene. Broke. finally brass tube about the right size. First one broke. Second one success! Once the holes were successful I took a small hex driver I had and cut the end off to place in the brass rod. This is the one you see here. I didn't mount it because I need to be able to remove right now for paint. Also I am now waiting on wingnuts to finish the frame to match the Littlefield. Also you will see my first attempt at the Voyager buckets. They really are awesome! I find the standard after market ones to heavy and thick. These are great and you get 4 in a pack in 2 sizes. I must also say the Voyager early clamp set is relatively easy to work with compared to Aber. They don't require any solder and only glue for the frame of the clamp to the hull mount. Very nice price too! :-) So like I said, wingnuts, cotter pins, and small chains will all be added later once we paint. Speaking of which I think it is pretty much ready FINALLY!!!
 10-12-2015, 07:11 PM
#128
Not put anyone to shame... just takes time and effort and a little imagination... and patience, oh god the patience! LOL!
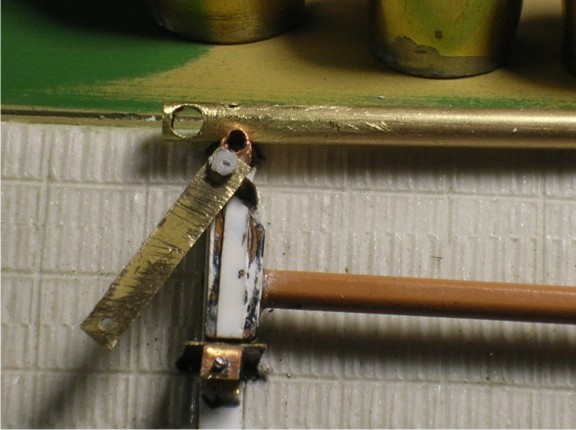
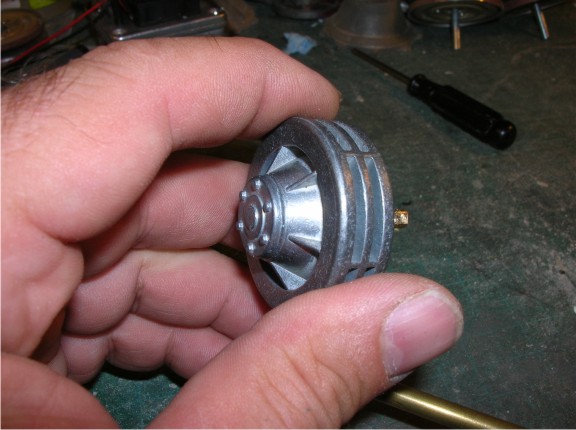
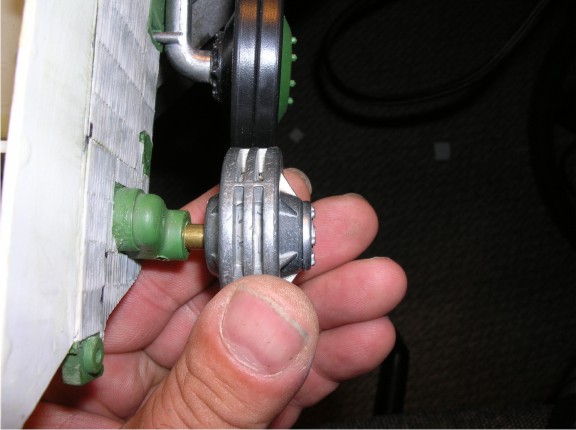
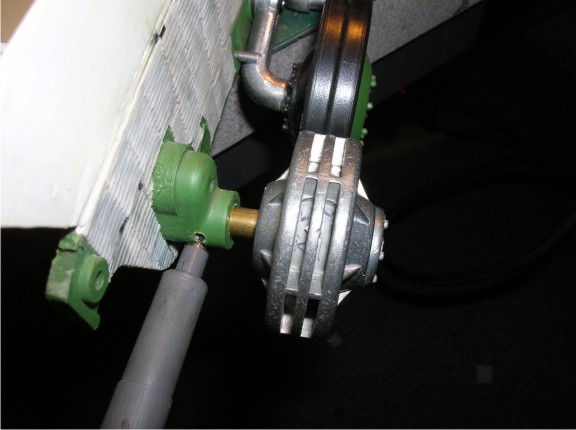
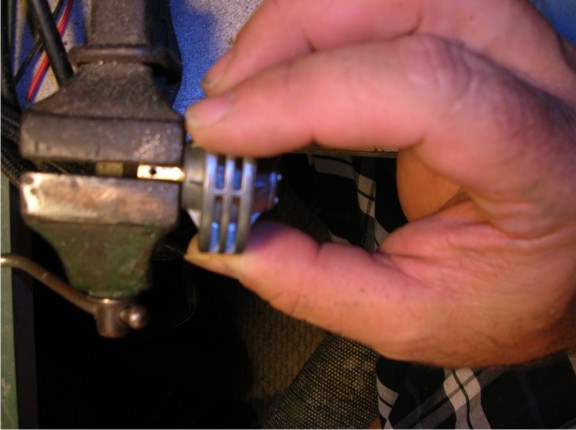
So one of the things I have sort of puzzled over almost from the beginning was how to install the early idler. I purchased the idlers and early sprockets but of course they are set up for Asiatam/Taigen. So then I picked up a Henntec idler system. Well it is a great piece of kit I am trying to make this build at least cosmetically accurate as much as possible and there are plates and screws which would be very visible if I used it so had to come up with plan B...
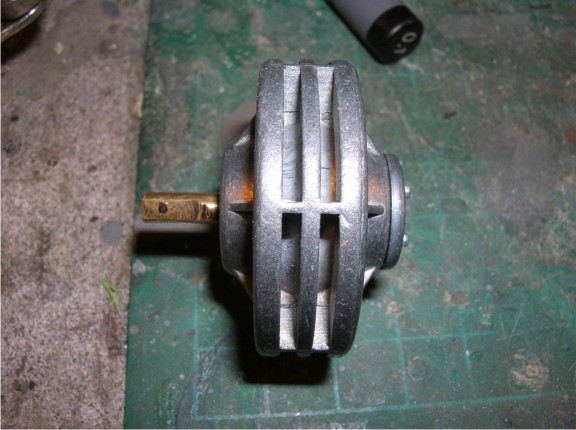
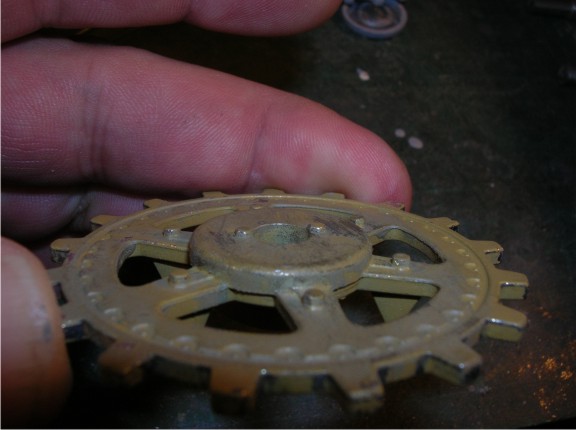
Here is the early idler in case some where wondering what it lookes like compared to the regular Panther "G" idler
 Panther A 293.JPG (56.72 KiB) Not viewed yet
So here is what I decided to do. First, I found some brass pipe that would fit fairly tight on the idler shaft.
 Panther A 294.JPG (67.12 KiB) Not viewed yet
Next I drilled out the existing idler hole just large enough to slide the brass pipe into.
 Panther A 295.JPG (71.38 KiB) Not viewed yet
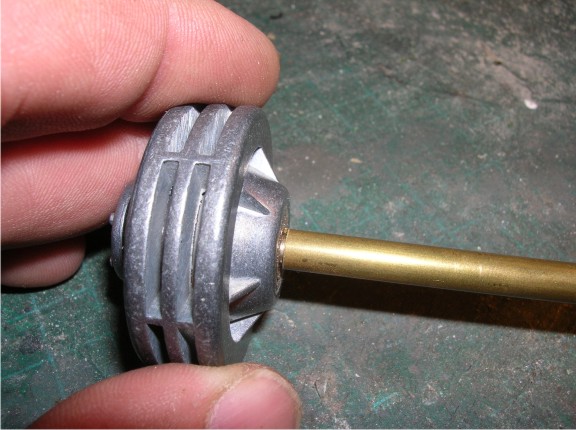
Next adjusted the brass pipe so that the idler was inline with the center of the first boogie. Well, actually not perfectly centered. On my blueprints it is just slightly out further.
 Panther A 296.JPG (47.13 KiB) Not viewed yet
Next I found some small dia. ( 1.5mm I think) threaded steel rod. Steel is important as I will show later. So I drilled through the plastic and though the wall of the brass tube but not all the way through.
 Panther A 297.JPG (50.47 KiB) Not viewed yet
I then threaded the hole using the steel rod. The steel is hard enough to thread the brass rod.
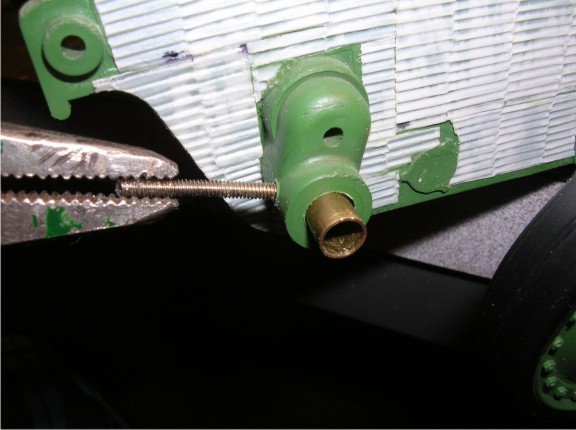 Panther A 298.JPG (50.28 KiB) Not viewed yet
I then flattened one side of the idler shaft with my dremel
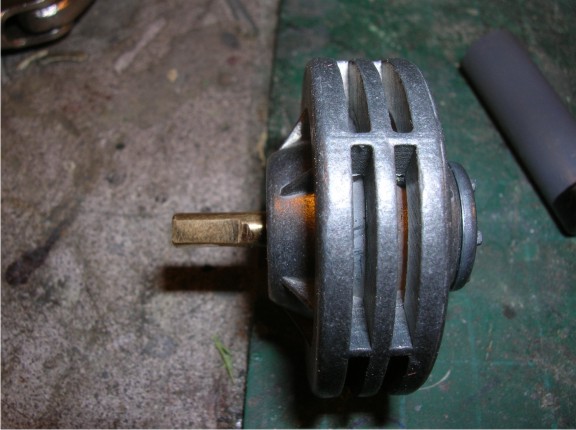 Panther A 299.JPG (57.71 KiB) Not viewed yet
I then put the idler in the tube and used one of my drafting fine point marked the shaft
 Panther A 300.JPG (42 KiB) Not viewed yet
 Panther A 301.JPG (61.25 KiB) Not viewed yet
Into the vice and drilled it out with a bit just a hair smaller than the steel threaded rod.
 Panther A 302.JPG (43.96 KiB) Not viewed yet
So one of the things I have sort of puzzled over almost from the beginning was how to install the early idler. I purchased the idlers and early sprockets but of course they are set up for Asiatam/Taigen. So then I picked up a Henntec idler system. Well it is a great piece of kit I am trying to make this build at least cosmetically accurate as much as possible and there are plates and screws which would be very visible if I used it so had to come up with plan B...
Here is the early idler in case some where wondering what it lookes like compared to the regular Panther "G" idler
So here is what I decided to do. First, I found some brass pipe that would fit fairly tight on the idler shaft.
Next I drilled out the existing idler hole just large enough to slide the brass pipe into.
Next adjusted the brass pipe so that the idler was inline with the center of the first boogie. Well, actually not perfectly centered. On my blueprints it is just slightly out further.
Next I found some small dia. ( 1.5mm I think) threaded steel rod. Steel is important as I will show later. So I drilled through the plastic and though the wall of the brass tube but not all the way through.
I then threaded the hole using the steel rod. The steel is hard enough to thread the brass rod.
I then flattened one side of the idler shaft with my dremel
I then put the idler in the tube and used one of my drafting fine point marked the shaft
Into the vice and drilled it out with a bit just a hair smaller than the steel threaded rod.
10-18-2015, 05:23 PM
#134
Thanks for the kind words guys! Hopefully some of the tricks here will help someone pondering the same exercise... 
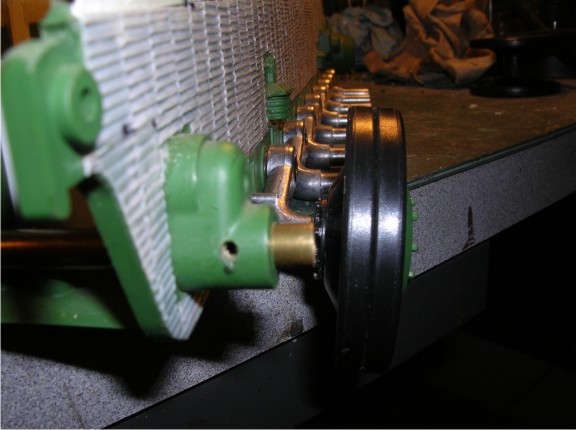
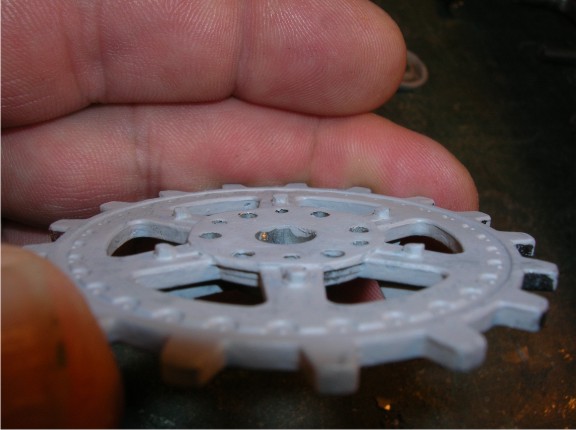
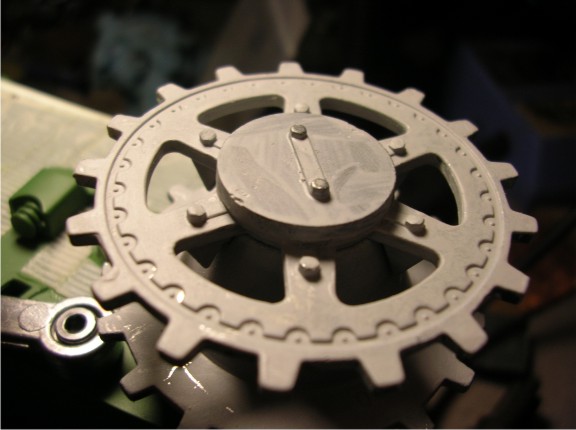
Now the the front sprockets. I wanted to put the early ones on and again issues with Mato to HL.
As you can see here the later sprocket center that comes with the "G" is raised up
 Panther A 305.JPG (42.22 KiB) Not viewed yet
So I had to grind this down. Easy to tell when you have it flush the holes appear on the inner hub. I then primed it.
 Panther A 306.JPG (43.86 KiB) Not viewed yet
Here is the early cover
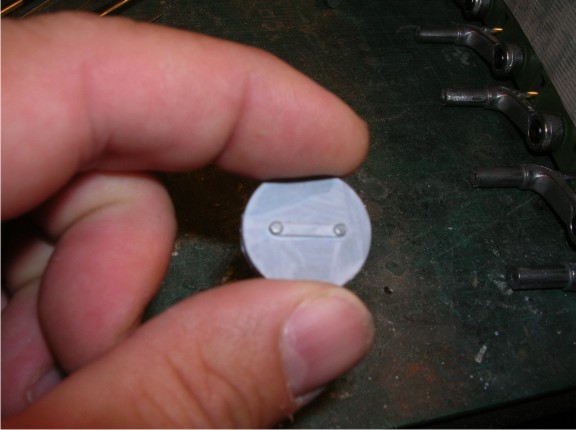 Panther A 307.JPG (42.12 KiB) Not viewed yet
On the back side I made the inner ring flush with the outer by grinding it down too. Then 2 part epoxied a wafer magnet into the center
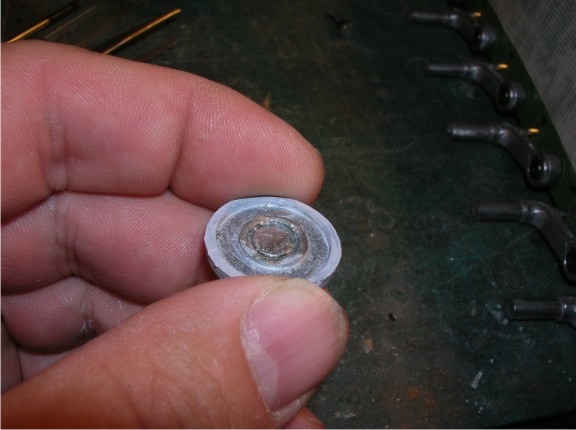 Panther A 308.JPG (47.48 KiB) Not viewed yet
As you can see the hex bolts are magnetic and 2 of these wafer magnets measure out perfectly for a tight fit!
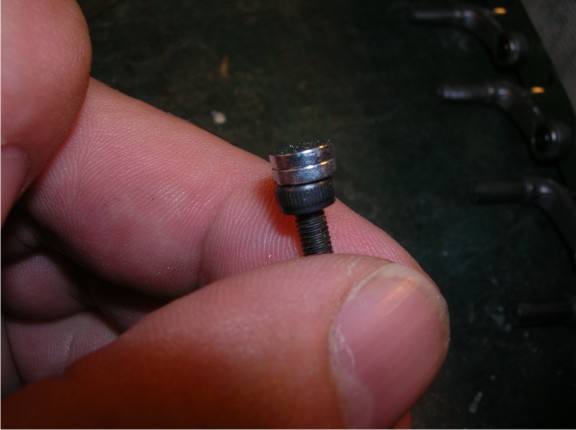 Panther A 309.JPG (35.68 KiB) Not viewed yet
so screwed the assembly into the hull then popped the magnet in on the hex bolt head.
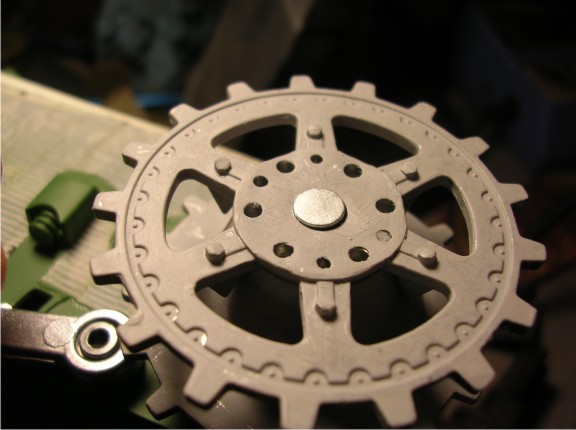 Panther A 310.JPG (48.47 KiB) Not viewed yet
Brought the cover close to it and snap! It went right to it. Viola! You have the early sprocket and no issues getting into it when you need to...
 Panther A 311.JPG (45.75 KiB) Not viewed yet
Now the the front sprockets. I wanted to put the early ones on and again issues with Mato to HL.
As you can see here the later sprocket center that comes with the "G" is raised up
So I had to grind this down. Easy to tell when you have it flush the holes appear on the inner hub. I then primed it.
Here is the early cover
On the back side I made the inner ring flush with the outer by grinding it down too. Then 2 part epoxied a wafer magnet into the center
As you can see the hex bolts are magnetic and 2 of these wafer magnets measure out perfectly for a tight fit!
so screwed the assembly into the hull then popped the magnet in on the hex bolt head.
Brought the cover close to it and snap! It went right to it. Viola! You have the early sprocket and no issues getting into it when you need to...
10-19-2015, 12:28 PM
#136

Just thought I'd check in to see how this build is progressing and it all looks really good. Nice work sofar. Would be nice to have an optional "A" upper hull to knock down some of the custom fab work that needs to be down for such a seemingly easy conversion, but it aint that easy. Again nice job so far.
10-19-2015, 01:16 PM
#137
I agree, you would think it would be a lot easier to do but really the whole damn thing has to be modified and if you want to do things fairly accurately there really is a lot to change. Things like the wheels, sprockets, idlers, hatches, tool placement, mantle, etc... and the main structures of the upper hull and lower have to be remade as well and I didn't do things like the lower glacis plate angle, sprocket height, idler height and distance. At some point I will pick up an asiatam lower and mod the walls to fit for an "A" or be brave and try and mod an HL...
10-28-2015, 06:03 AM
#138

Join Date: Nov 2011
Location: Barboursville , VA
Posts: 268
Likes: 0
Received 0 Likes
on
0 Posts
A great job so far...I look through these images and am blown away by the amount of detail you are putting into this Panther... I understand the level and time commitment needed to pull this off!..
Dominique just had a sale on the Panther / Jagdpanther lower hull... and it solved tons of problems for me... But I guess the fun is in the "Doing " of it in the end .... so you must be having a ball ...either way, I tip
my hat to you... it's just so helpful to watch you do such a great job... step by step..
keep posting images.... I'm all eyes!
I saw on a past post a guy who did a Touch Panzer III ... and I believe it actually functioned... very kool ... That was another massive build...
Joe
Last edited by Jhdumas; 10-28-2015 at 06:08 AM.
07-01-2018, 08:04 AM
#139
Alright, I can't stand it anymore! I keep looking at my poor Panther A and it is calling to me, please, finish me!  S o while I wait for some mechanical parts to finish the 3 Firefly's I have on the bench now, I have taken some steps to move closer to at least getting it running a little. Man, I forgot how much detail I have on this damn thing! Anyway Planning on priming it this weekend as it is our holiday weekend. July 1st Happy Canada Day! 151 years old!
so thought I would take some last shots before it hits the primer...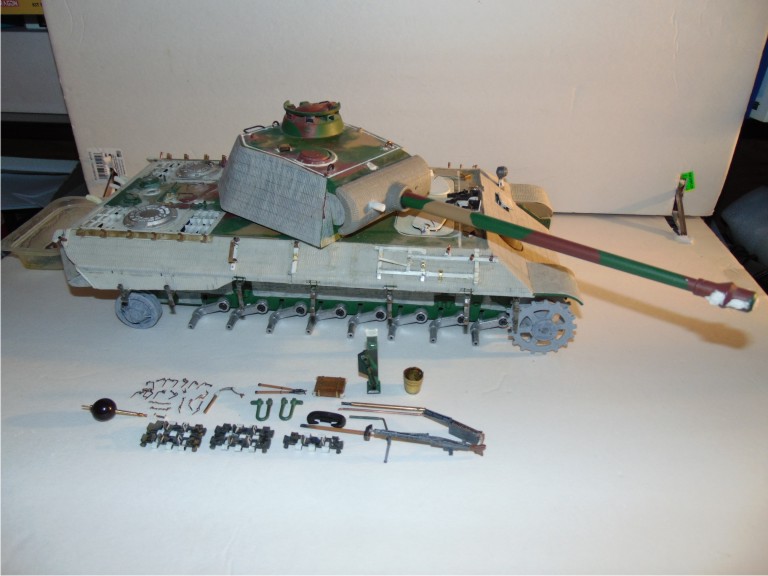 Panther A 312.JPG (75.58 KiB) Not viewed yet
  Panther A 313.JPG (90 KiB) Not viewed yet
 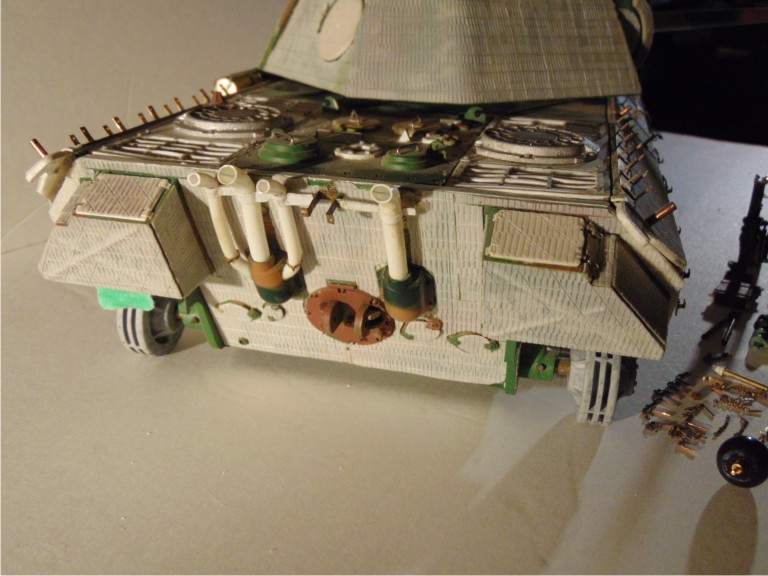 Panther A 314.JPG (95.26 KiB) Not viewed yet
  Panther A 315.JPG (92.62 KiB) Not viewed yet
  Panther A 316.JPG (92.99 KiB) Not viewed yet
 Panther A 318.JPG (68.65 KiB) Not viewed yet
 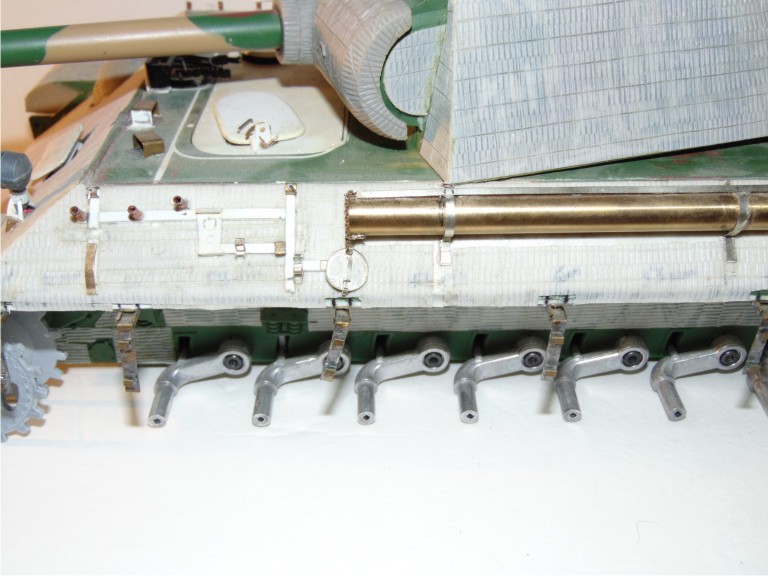 Panther A 319.JPG (91.66 KiB) Not viewed yet
  Panther A 320.JPG (76.71 KiB) Not viewed yet
so thought I would take some last shots before it hits the primer...
 07-03-2018, 04:31 PM
#141
I had not looked at my wheels in a couple of years and forgot I did get rid of that annoying ridge on the rims. They look far more accurate without them.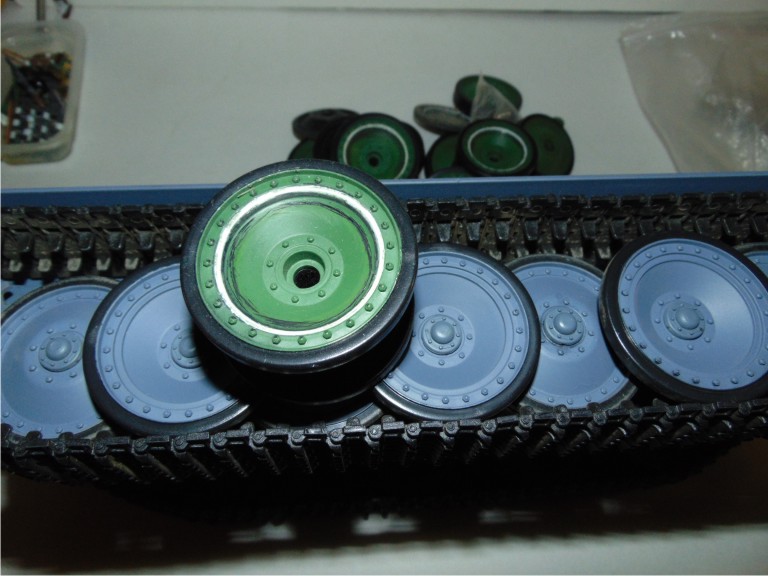 Panther A 322.JPG (89.98 KiB) Viewed 1 time
WE NOW HAVE PRIMER!!! On little secret for new guys using Tamiya primer. The fine white is about the best overall primer I have used in 45 years of modeling. BUT, do NOT be in a hurry to add paint after using it. The lacquer needs at least a couple of days to set up. I leave mine for a full week if it is humid like it is now! you will find you use less paint to cover and it sticks better...
Next up base dark yellow or Dunkelgelb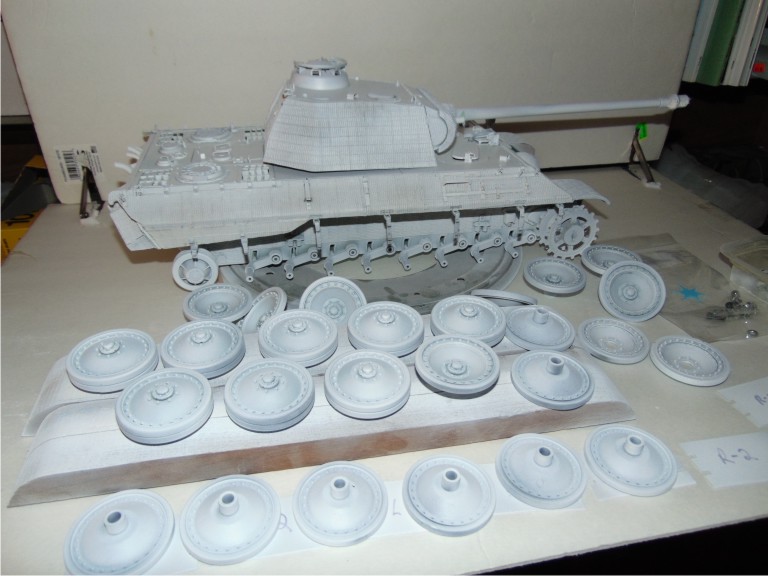
08-15-2018, 03:48 PM
#142
so gave it the overall Tamiya dark yellow and then added some further details. I like to do this so that you get the nice base coat on but you don't want it to go too thick on some of the detail work so I add that after the base coat and then do a light coat on the details. Added debris screens with scratch built frames, open sights, etc.. Also installed magnetic antenna. This works great when you want to do service on the inside of the tank. Just pop the antenna off . Also it means that anything striking the antenna won't break it it will just bend away but the magnet will pull it back in position. did some test fitting of some of the tools.Also started on periscopes. What I did for this was use the PE ones, fill the lens area with 2 part epoxy, then cut them in 1/2 to fit under the guards. Also planning on mounting spare wheels to the turret so drilled out the bolt mounts and using a little threaded rod made the mounts.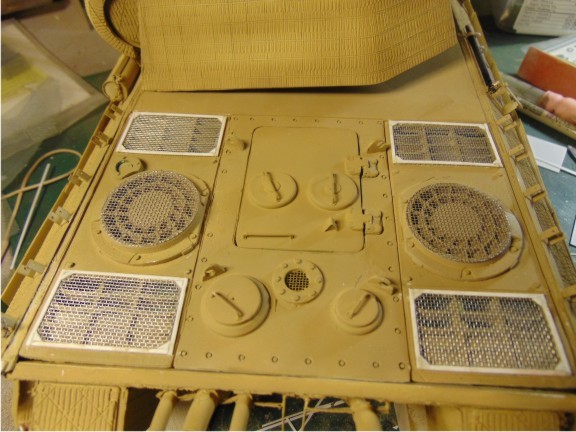 1.JPG (74.1 KiB) Not viewed yet
 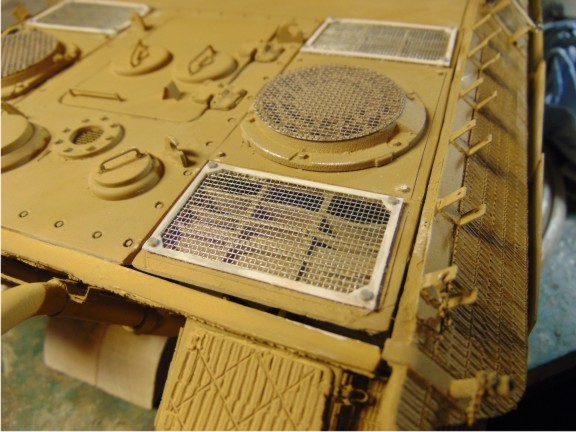 2.JPG (72.01 KiB) Not viewed yet
 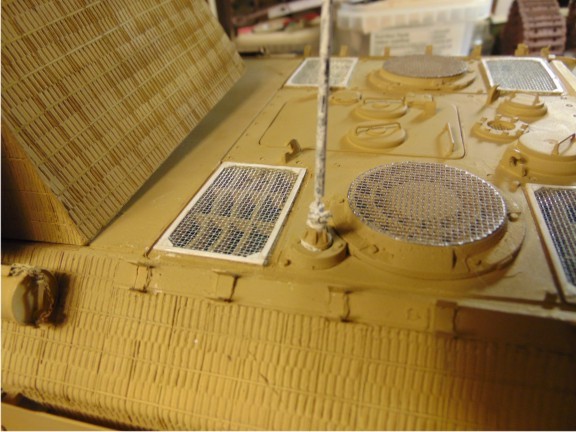 3.JPG (69.17 KiB) Not viewed yet
 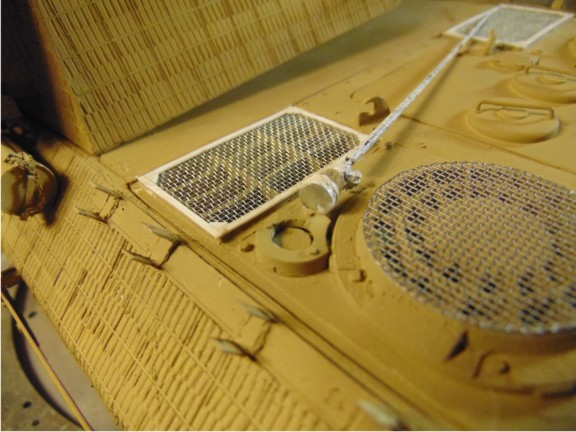 4.JPG (69.25 KiB) Not viewed yet
 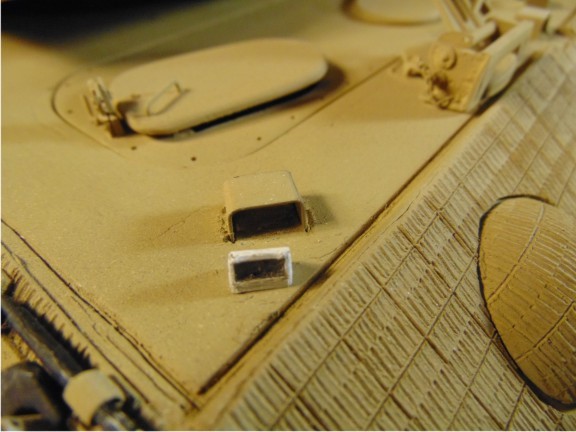 5.JPG (56.15 KiB) Not viewed yet
 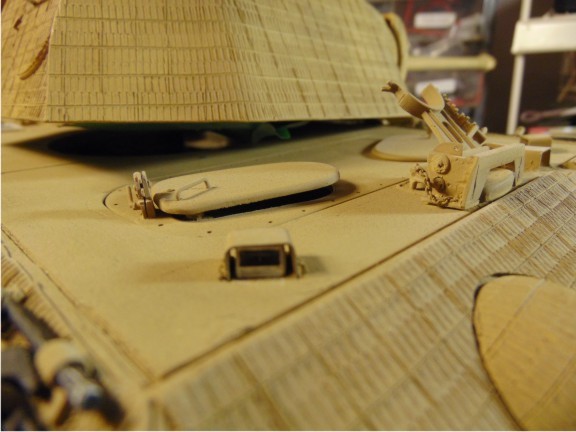 6.JPG (52.01 KiB) Not viewed yet
 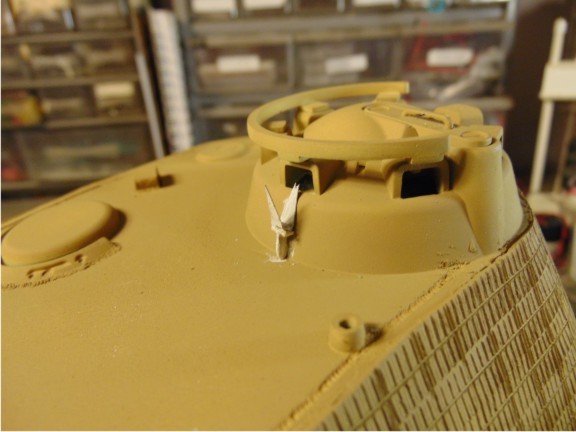 8.JPG (47.26 KiB) Not viewed yet
 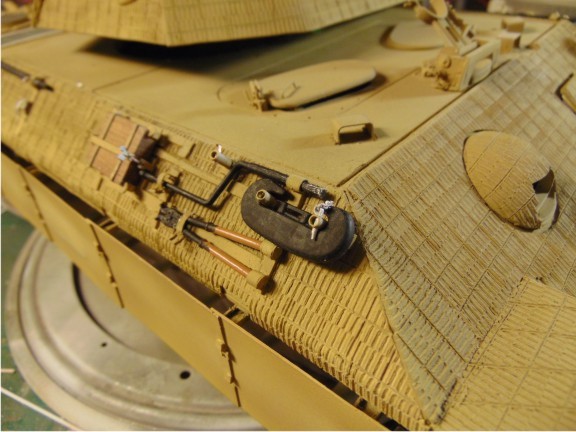 9.JPG (67.5 KiB) Not viewed yet
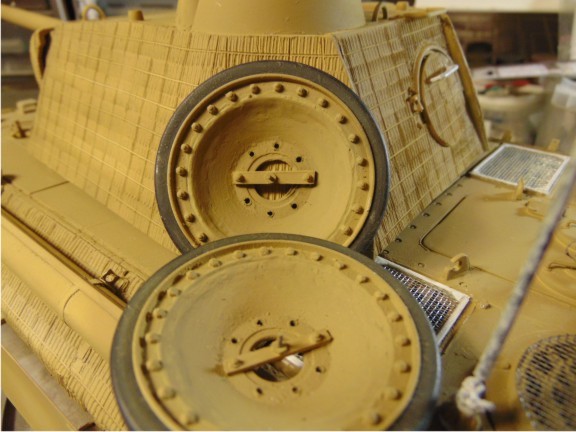
 08-15-2018, 03:57 PM
#144
Also added that stupid little "Bosch" PE to the headlight. For the convoy light I decided to make it look like the original was damaged and torn off and that the crew did a field mount of the one below the storage box. This light will be lit up on the model of course. And, couldn't forget to mount my padlock! 
 7.JPG (61.13 KiB) Not viewed yet
  11.JPG (70.49 KiB) Not viewed yet
 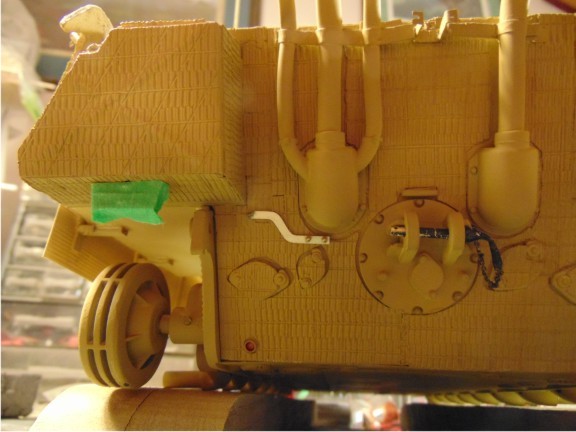 12.JPG (54.49 KiB) Not viewed yet
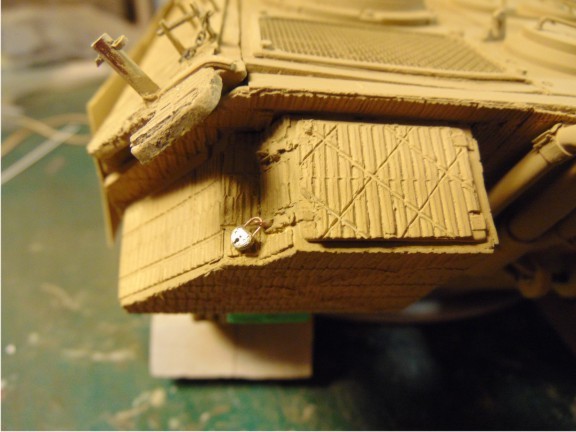
08-15-2018, 04:03 PM
#145
And last for tonight...
so much of this tank has been trial and error. I try something and don't like it and take another approach. So it is with the brass fenders. I really couldn't get them to hang properly and I really wasn't happy with the openings for them to hang. Thought they were too big so I went back to styrene and simply glued them on the brass hull mounts I had created. I like the look of these much, much better!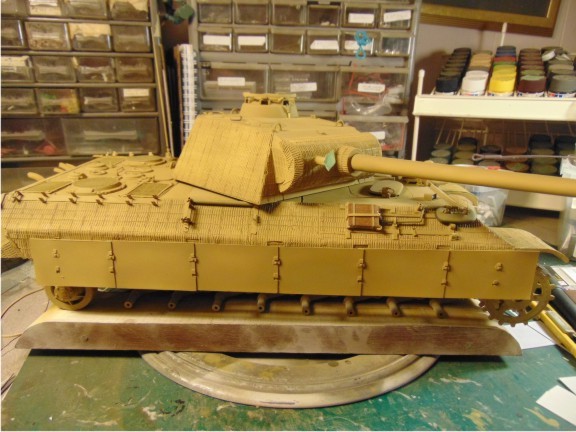 14.JPG (73.62 KiB) Not viewed yet
 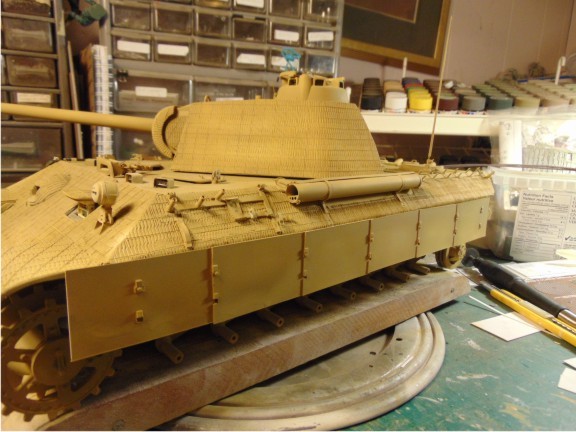 15.JPG (69.49 KiB) Not viewed yet
 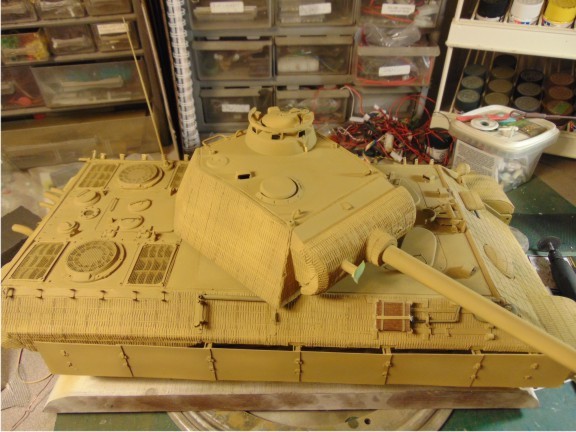 16.JPG (73.07 KiB) Not viewed yet
 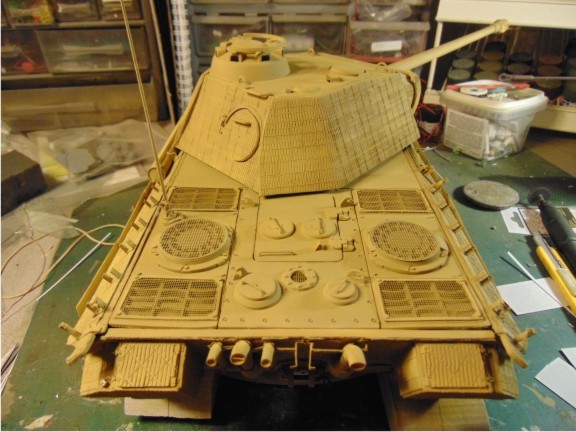 17.JPG (74.31 KiB) Not viewed yet
 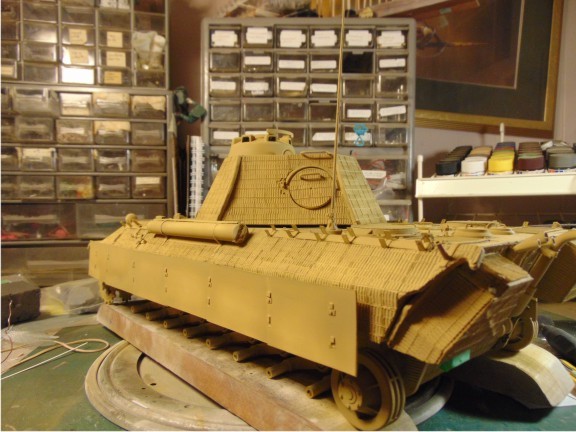 18.JPG (71.95 KiB) Not viewed yet
 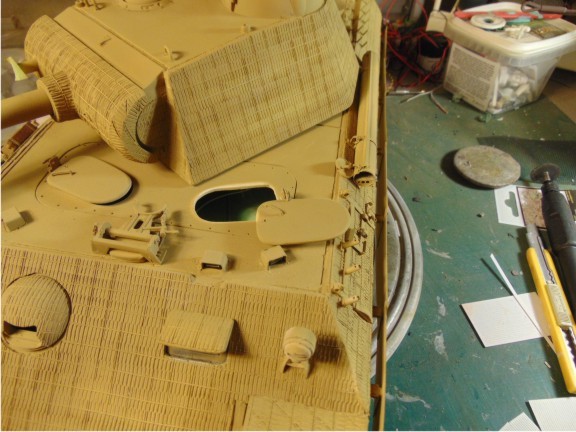 19.JPG (73.02 KiB) Not viewed yet
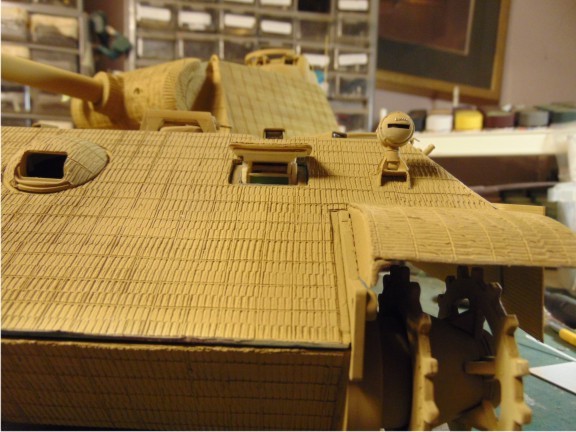
so much of this tank has been trial and error. I try something and don't like it and take another approach. So it is with the brass fenders. I really couldn't get them to hang properly and I really wasn't happy with the openings for them to hang. Thought they were too big so I went back to styrene and simply glued them on the brass hull mounts I had created. I like the look of these much, much better!
08-26-2018, 06:13 PM
#147
So, a lot of work for a little progress...
So you plug along putting all you fancy details on and there is something you say you are going to add. Then you forget, do some more and say to yourself that you still have to do that detail, and then you forget again, and again, and AGAIN! LOL! Well, I remembered! Add the damn welds to the cupola!!!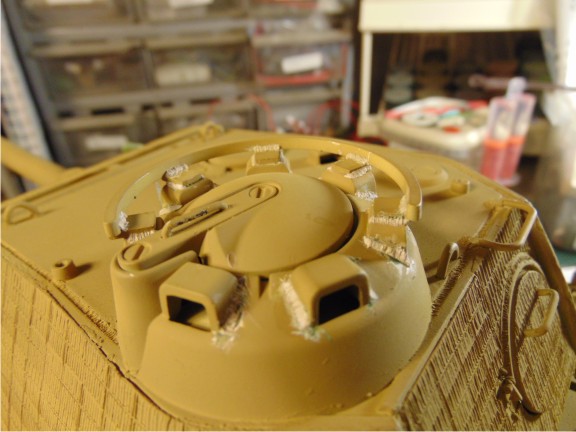 244.JPG (57.2 KiB) Not viewed yet
Also added the brackets that hold the spare track brackets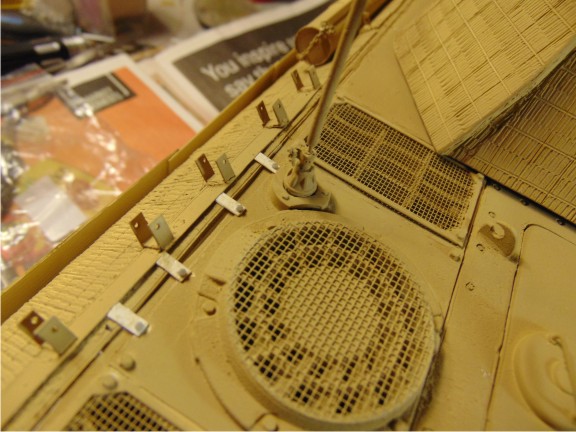 245.JPG (73.89 KiB) Not viewed yet
And added the Mantlet stop for keeping the gun from depressing too far...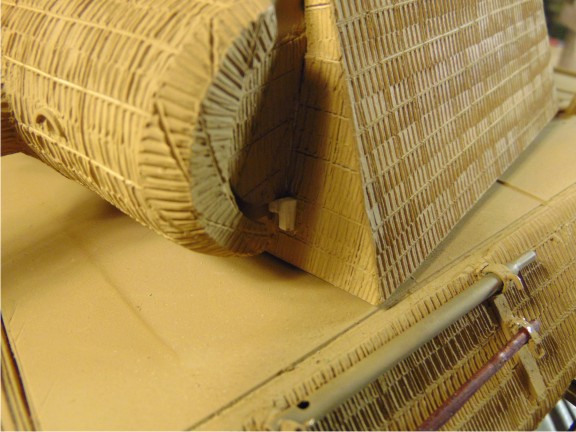 246.JPG (68.22 KiB) Not viewed yet
  247.JPG (70.71 KiB) Not viewed yet
So many damn wheels!!!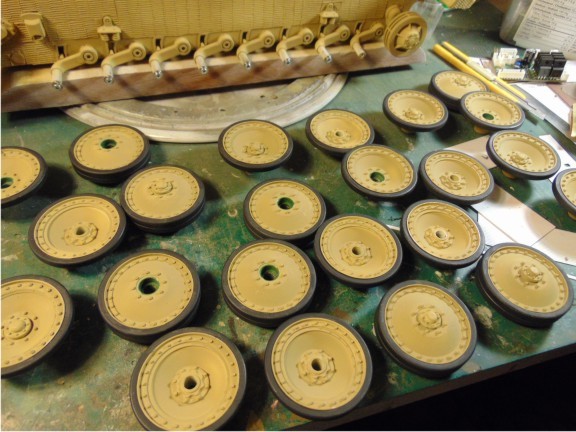 248.JPG (80.81 KiB) Not viewed yet
I decided to rethread all the armatures and use some nice 2.5mm stainless steel screws. The thread is much finer and they just feel more solid.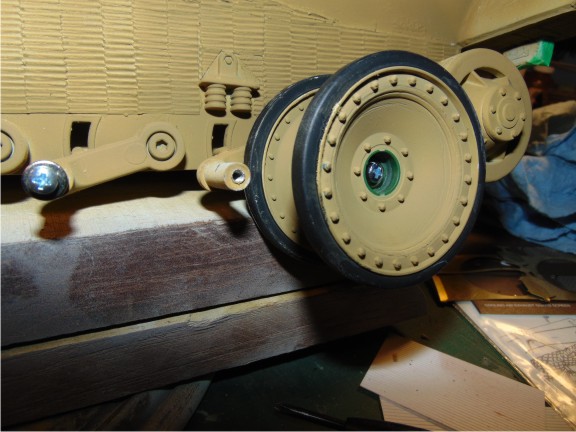 249.JPG (65.2 KiB) Not viewed yet
And I finally decided on which pattern to do. since a lot of our field is supposed to be Normandy or at least will be when we are done, going for 130 Panzer Lehr regiment Late June 44. I also wanted to get away from the regular patterns as there is so much detail on this model I like the idea of the thinner spray lines. I decided to test fit my new tracks and just sort of get a look at the assembled vehicle. I apologize for the bad lighting!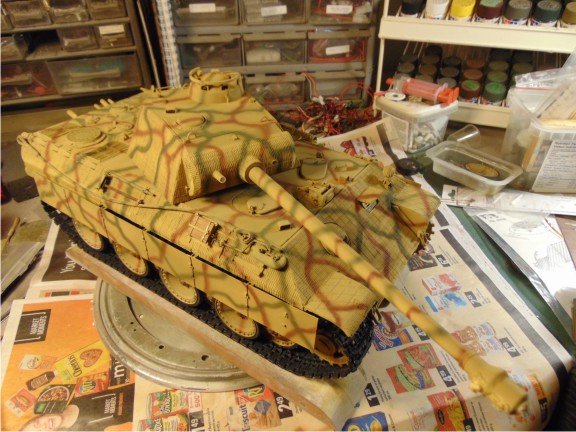 250.JPG (87.55 KiB) Not viewed yet
 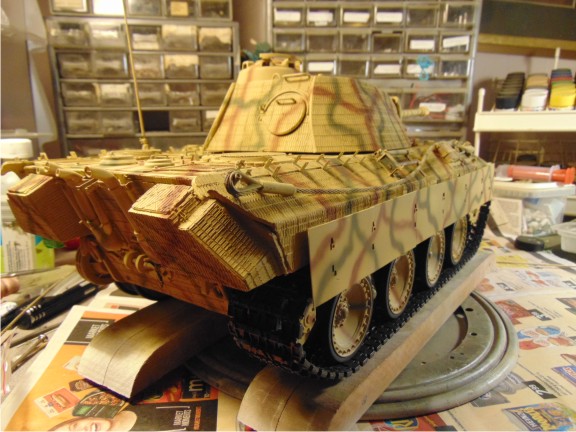 252.JPG (79.63 KiB) Not viewed yet
 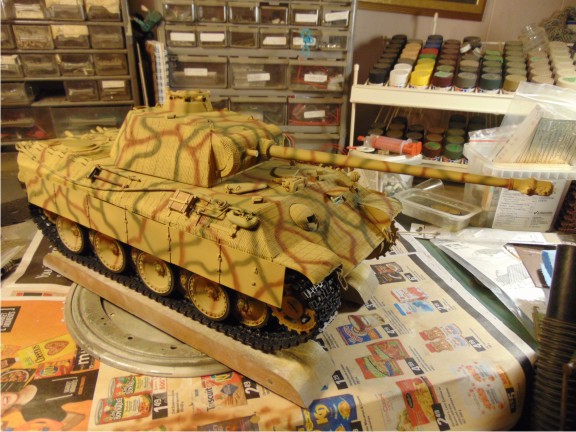 253.JPG (89.44 KiB) Not viewed yet
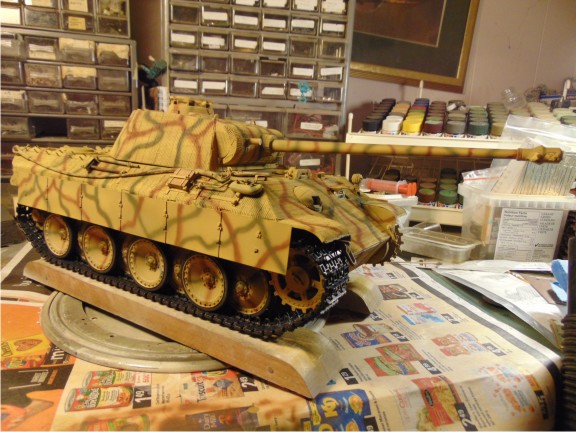
So you plug along putting all you fancy details on and there is something you say you are going to add. Then you forget, do some more and say to yourself that you still have to do that detail, and then you forget again, and again, and AGAIN! LOL! Well, I remembered! Add the damn welds to the cupola!!!
Also added the brackets that hold the spare track brackets
And added the Mantlet stop for keeping the gun from depressing too far...
So many damn wheels!!!
I decided to rethread all the armatures and use some nice 2.5mm stainless steel screws. The thread is much finer and they just feel more solid.
And I finally decided on which pattern to do. since a lot of our field is supposed to be Normandy or at least will be when we are done, going for 130 Panzer Lehr regiment Late June 44. I also wanted to get away from the regular patterns as there is so much detail on this model I like the idea of the thinner spray lines. I decided to test fit my new tracks and just sort of get a look at the assembled vehicle. I apologize for the bad lighting!
 08-27-2018, 08:35 AM
#150
Really nice Panther A!!!

