


Strato's SU-76i Build
 09-20-2014, 11:58 PM
#1

Thread Starter

Join Date: Jan 2006
Location: Hamilton,
ON, CANADA
Posts: 1,422
Likes: 0
Received 7 Likes
on
7 Posts
Hey all,
Airbrushler posting his SG-122 build here made me want to transfer over my build thread as well
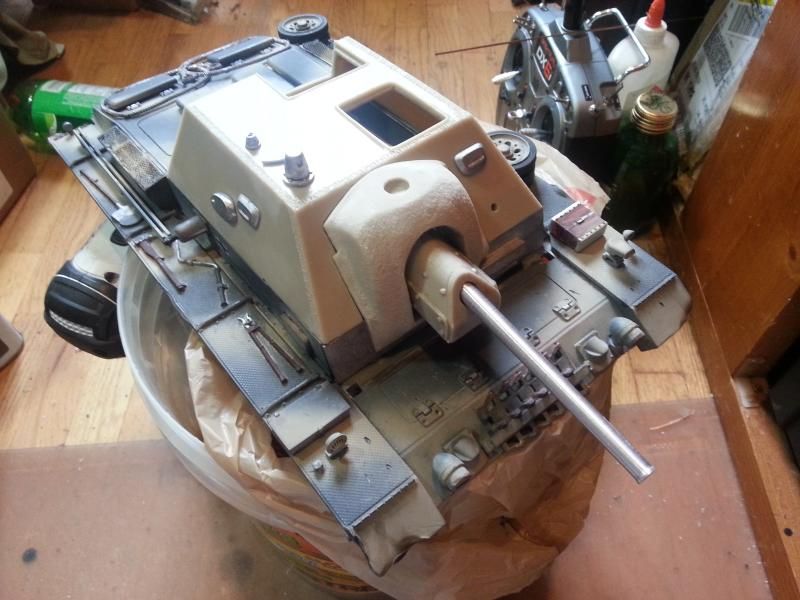
This is a SU-76i from kit PanzerParts found here http://www.panzerparts.com/product_i...3-HL-1-16.html
It's economical and pretty easy to do. I'm really enjoying this kit.
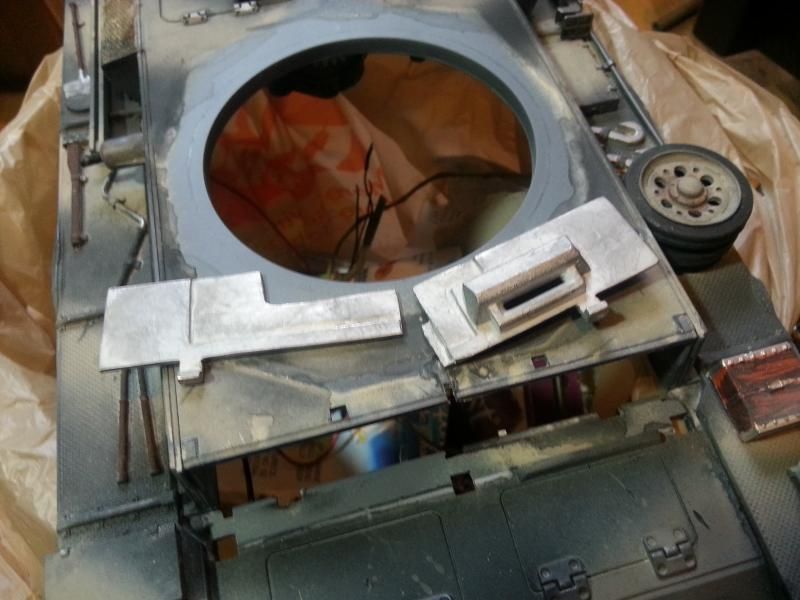
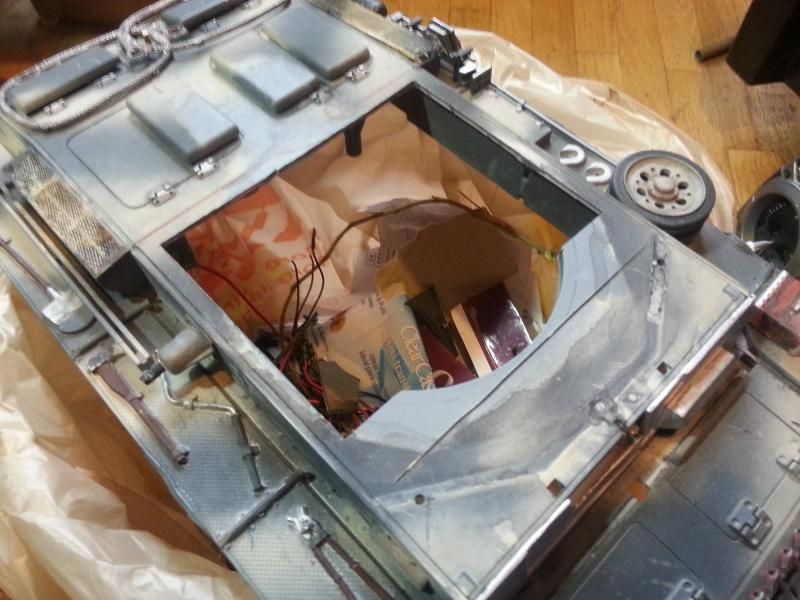
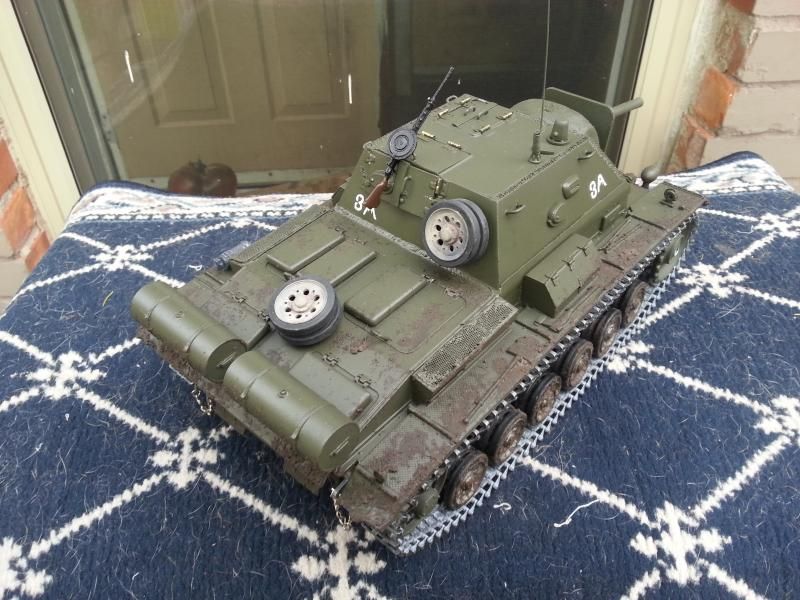
The casemate basically sits right ontop of the Panzer III upper hull. In this kit you have to remove the entire front armor plate including the ball machine gun and drivers view port. The kit provides replacement plates in cast metal that mate up with the gun shield. I opened up the inner hull underneath the casemate just to give me more room to work with.
This tank will have elevation, recoil and barrel flash, Taigen steel gears and a track tensioner.

Airbrushler posting his SG-122 build here made me want to transfer over my build thread as well
This is a SU-76i from kit PanzerParts found here http://www.panzerparts.com/product_i...3-HL-1-16.html
It's economical and pretty easy to do. I'm really enjoying this kit.
The casemate basically sits right ontop of the Panzer III upper hull. In this kit you have to remove the entire front armor plate including the ball machine gun and drivers view port. The kit provides replacement plates in cast metal that mate up with the gun shield. I opened up the inner hull underneath the casemate just to give me more room to work with.
This tank will have elevation, recoil and barrel flash, Taigen steel gears and a track tensioner.


 09-20-2014, 11:59 PM
#2
Thread Starter
Join Date: Jan 2006
Location: Hamilton,
ON, CANADA
Posts: 1,422
Likes: 0
Received 7 Likes
on
7 Posts
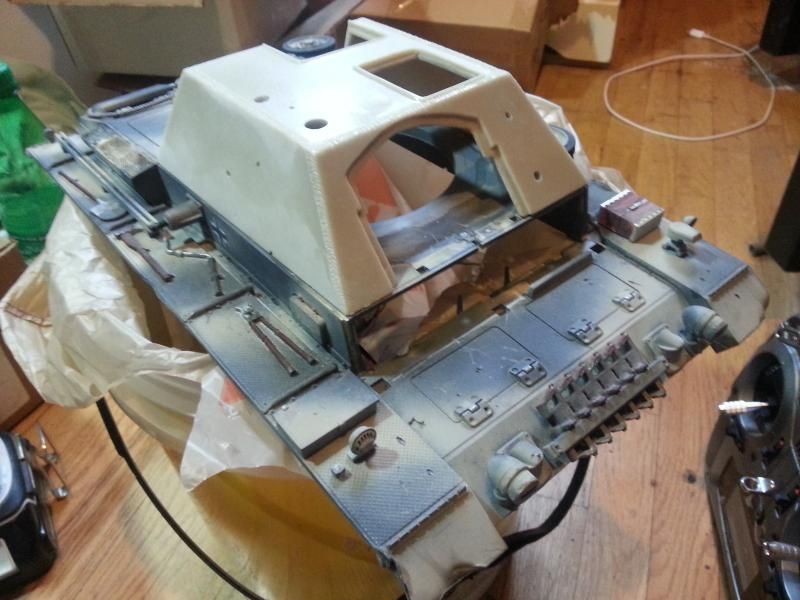
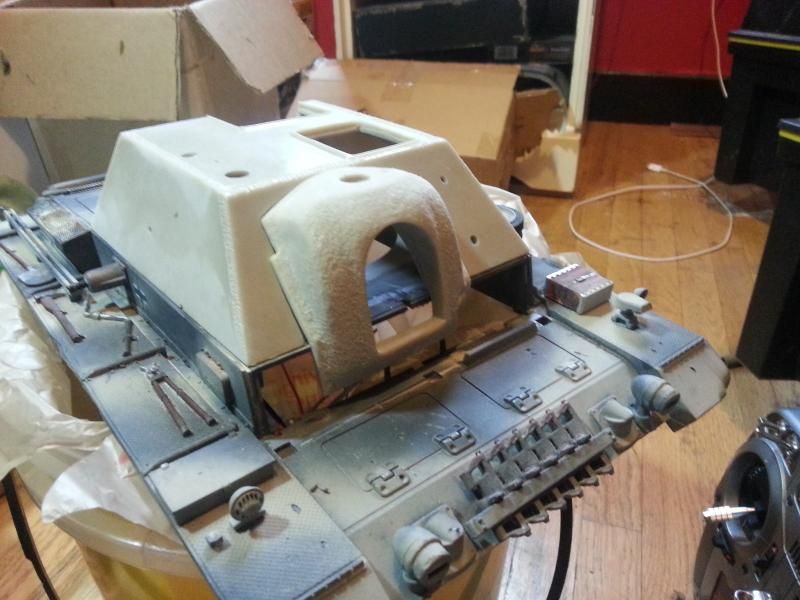
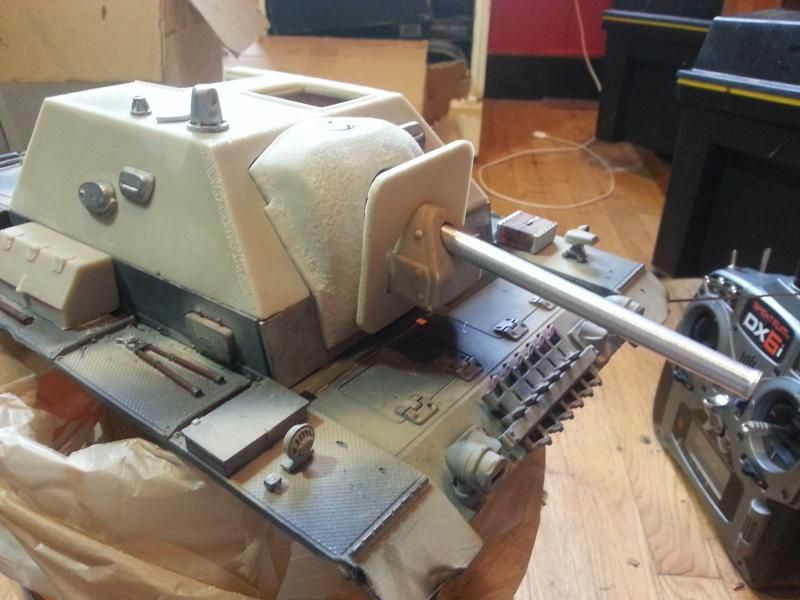
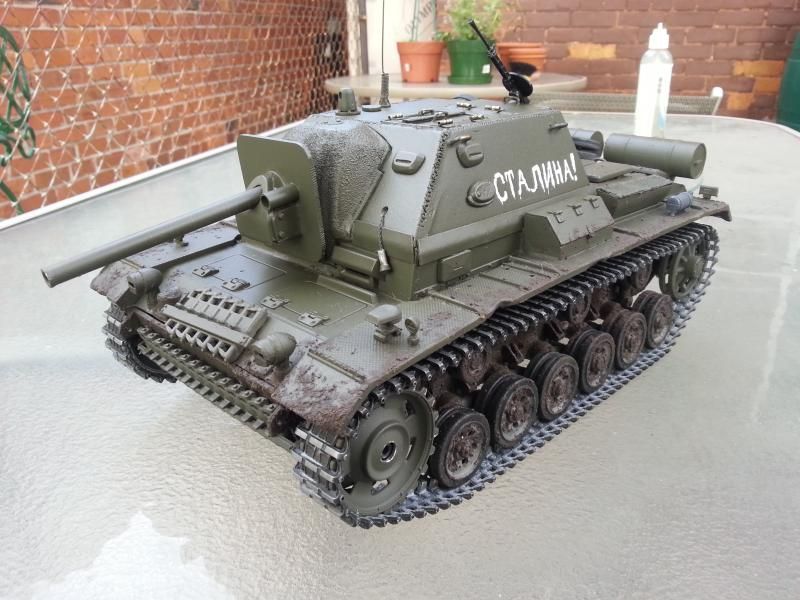
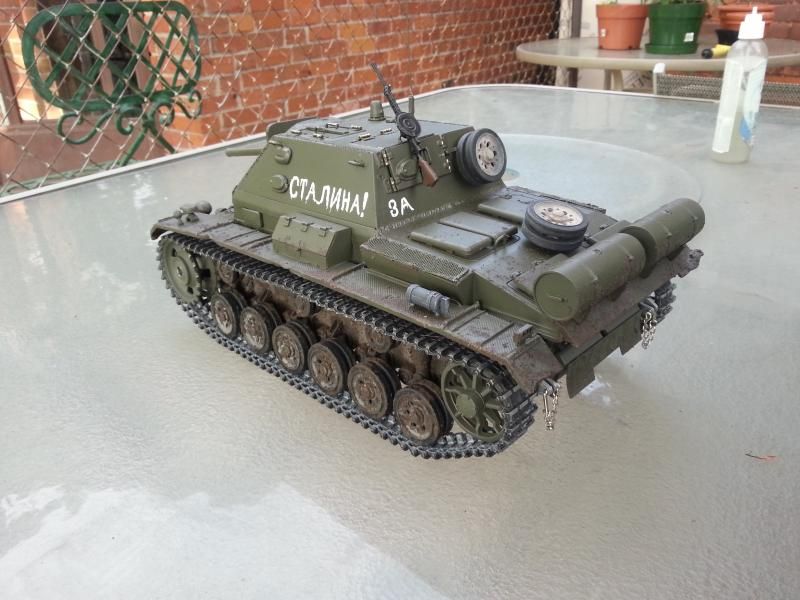
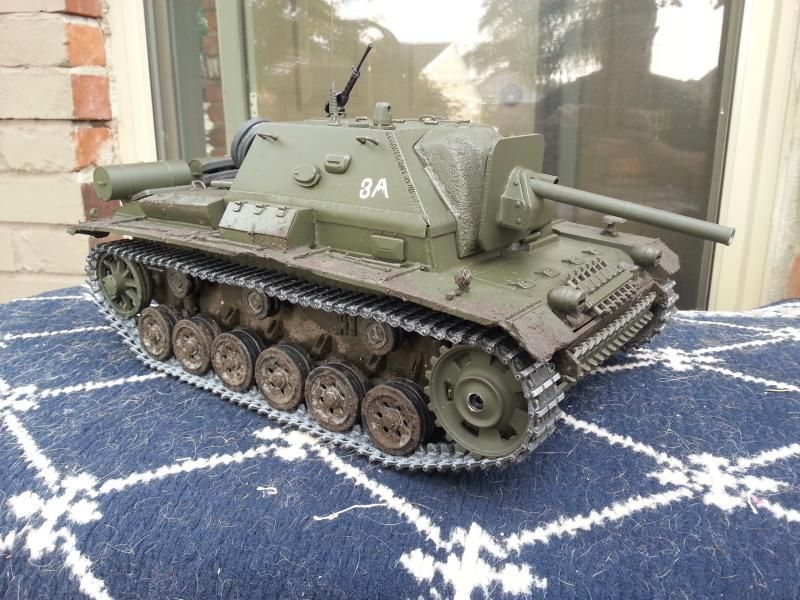
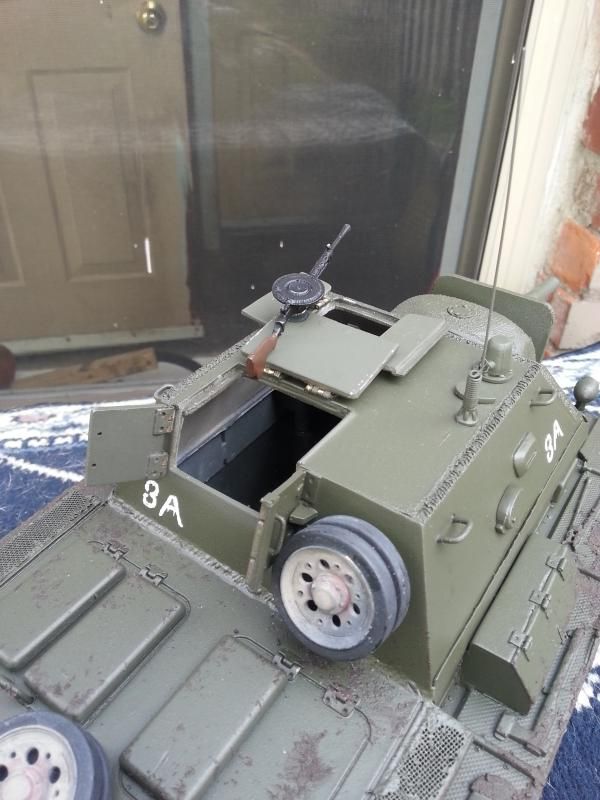
Added the flashing that was around the base of the casemate. It came partially molded in resin but on the actual vehicles it extended past the base, so I sanded the molded bits off and made my own out of aluminium.
Used my trusty drywall gap filler putty to fill in a few places, and add a weld seam line on the rear. This stuff doesn't have much strength at all but it's very easy to sand and shape for moderate fill jobs... add some CA glue after it's cured and it get's pretty tough.

Used my trusty drywall gap filler putty to fill in a few places, and add a weld seam line on the rear. This stuff doesn't have much strength at all but it's very easy to sand and shape for moderate fill jobs... add some CA glue after it's cured and it get's pretty tough.


 09-21-2014, 12:00 AM
#3
Thread Starter
Join Date: Jan 2006
Location: Hamilton,
ON, CANADA
Posts: 1,422
Likes: 0
Received 7 Likes
on
7 Posts
Progress!
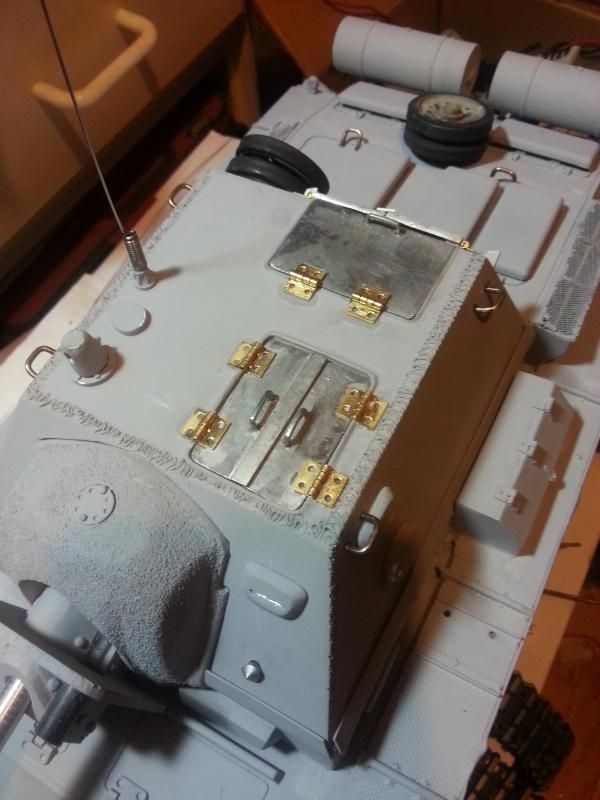
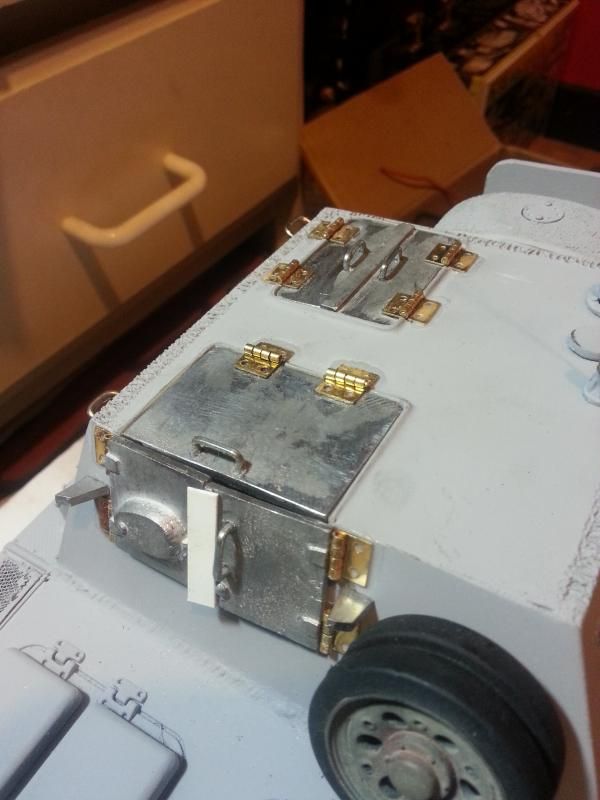
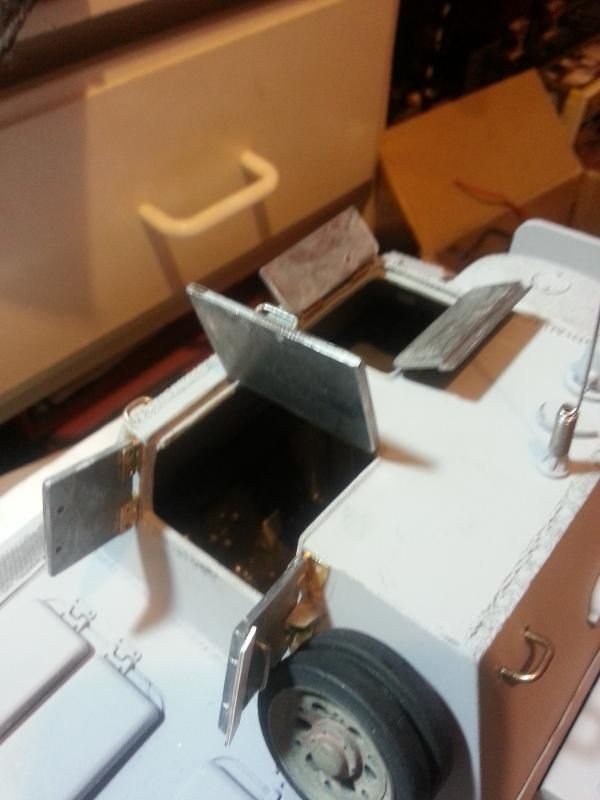
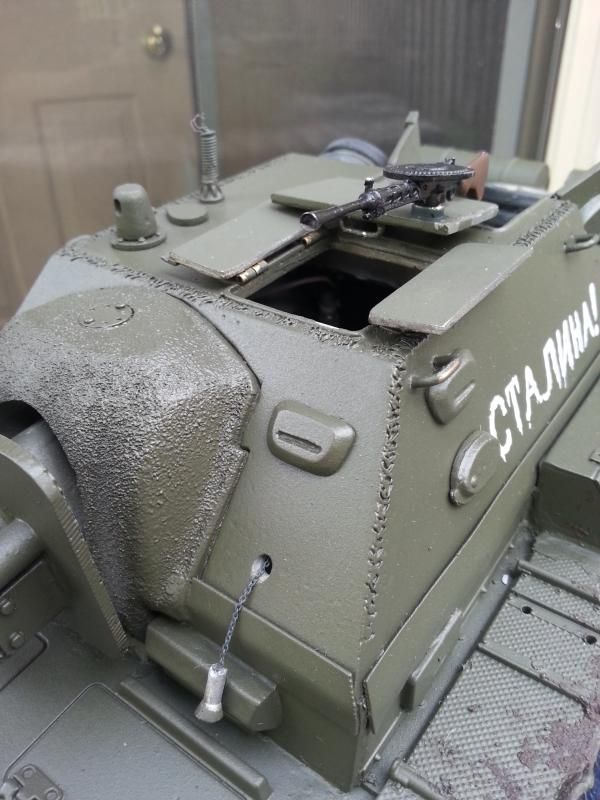
Got my hinges in the mail.. not bad, more than enough hinges for this tank for about $6 inc. shipping. Yay eBay.
I also ordered a pin vise / micro hand-drill after watching Dean do all sorts of fine details that my full sized power drill isn't really meant for.. once that arrives I'll drill out the hinges and glue in some bolt or rivet heads too. I simply don't trust the hinges just being glued

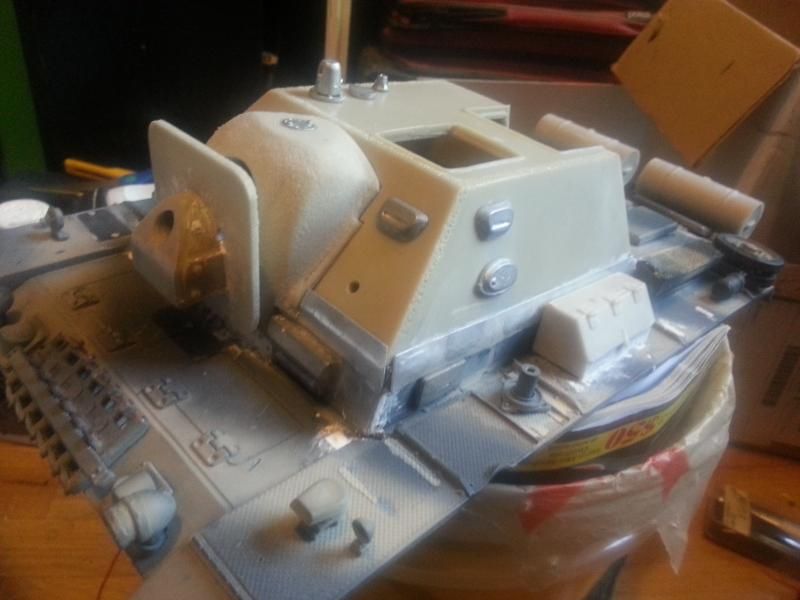
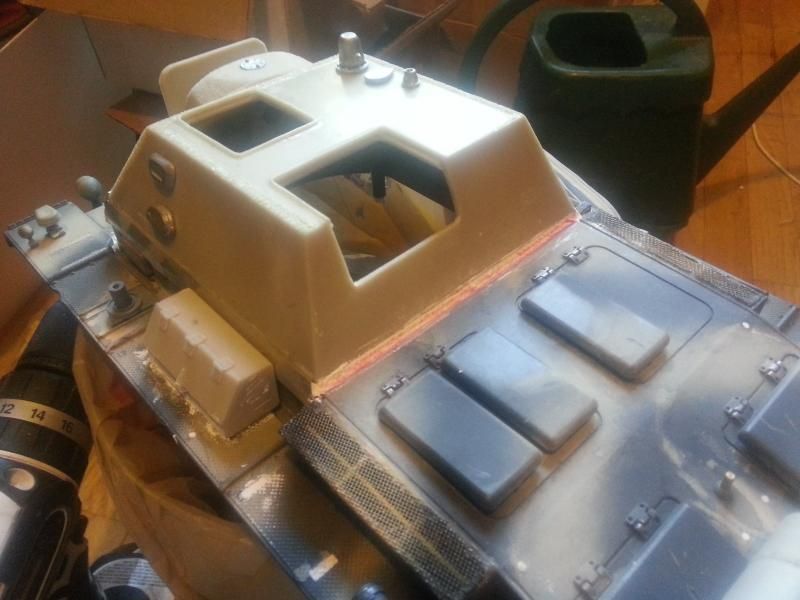
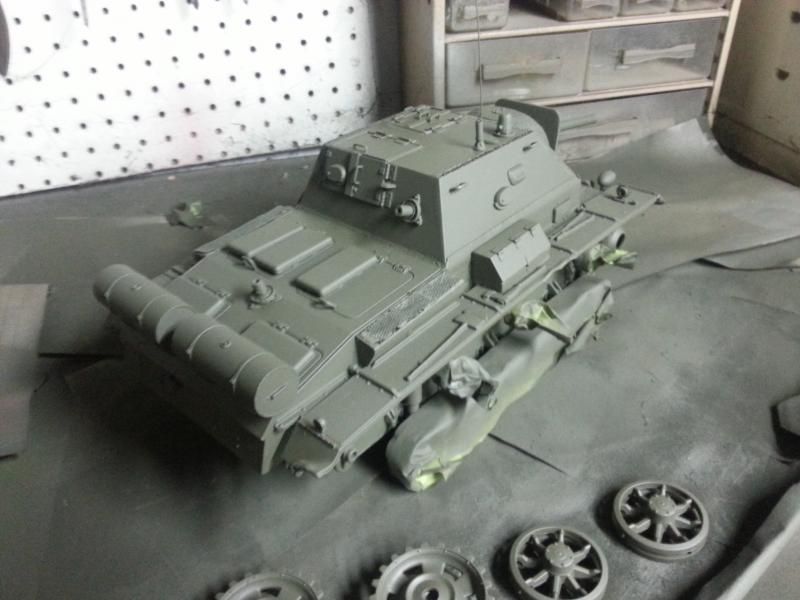
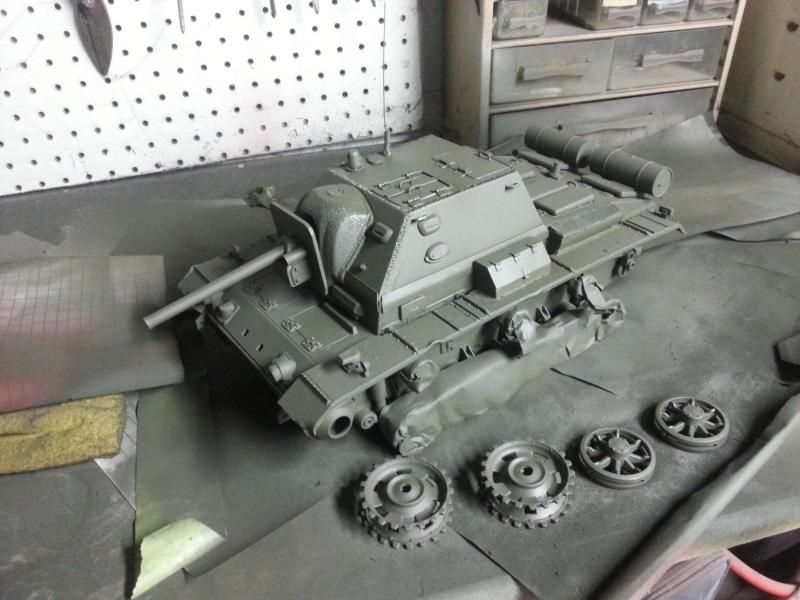
...and now the painting begins. Again Krylon Ultra-Flat camo green from Crappy Tire. Love this stuff.
I bought a can of Krylon Clear Coat, Satin finish to see how that works.. Don't really need it for this tank but if it seals in details like rust, mud and whatever extra decals go on then I'll use it more also.
Got my hinges in the mail.. not bad, more than enough hinges for this tank for about $6 inc. shipping. Yay eBay.
I also ordered a pin vise / micro hand-drill after watching Dean do all sorts of fine details that my full sized power drill isn't really meant for.. once that arrives I'll drill out the hinges and glue in some bolt or rivet heads too. I simply don't trust the hinges just being glued


...and now the painting begins. Again Krylon Ultra-Flat camo green from Crappy Tire. Love this stuff.
I bought a can of Krylon Clear Coat, Satin finish to see how that works.. Don't really need it for this tank but if it seals in details like rust, mud and whatever extra decals go on then I'll use it more also.

 09-21-2014, 12:02 AM
#4
Thread Starter
Join Date: Jan 2006
Location: Hamilton,
ON, CANADA
Posts: 1,422
Likes: 0
Received 7 Likes
on
7 Posts
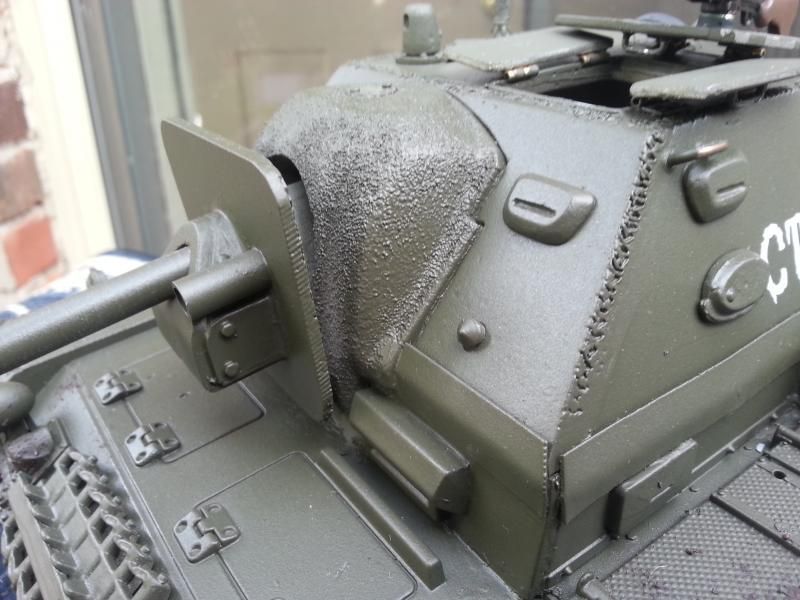
Hurrah for new parts! Got a nice big box in the mail today including a bunch of new gearboxes and idler-tensioners from rctank.de (one set for my new-ish Stug) I highly recommend rctank.de and Dominique over in Germany. Simply flawless service and communication & excellent parts to choose from.
Gearboxes are steel with final drive ball bearings. I have this same set in my Chi-Nu Kai, T-34 and Panzer III
Installed the new gears, metal idlers from Artistic Hobbies came with ball bearings and M3 screws and a bushing. They're on rock solid and spin very freely. This is the single best, and cheapest, upgrade that a Panzer 3 should get.

 http://www.rctank.de/Steel-Gearboxes...III-/-STUG-III
Gearboxes are steel with final drive ball bearings. I have this same set in my Chi-Nu Kai, T-34 and Panzer III
Installed the new gears, metal idlers from Artistic Hobbies came with ball bearings and M3 screws and a bushing. They're on rock solid and spin very freely. This is the single best, and cheapest, upgrade that a Panzer 3 should get.


 09-21-2014, 06:30 AM
#7
Your black steel gearboxes have 48mm shafts, right? I only ask because the boxes in the photo are clearly 58mm. I've found that almost ALL the websites have mistakes in their photos like that. I know Erik is constantly having to check up on their site to make sure they're posting the correct photos.
EDIT: Almost forgot! GREAT work. I'm in awe. Those hinges are the coolest. Brand? Do you know if there are any more available? Those would be good just to have on hand. And PLEASE post photos/review of the new pin vise when you get it.
EDIT: Almost forgot! GREAT work. I'm in awe. Those hinges are the coolest. Brand? Do you know if there are any more available? Those would be good just to have on hand. And PLEASE post photos/review of the new pin vise when you get it.
Last edited by Max-U52; 09-21-2014 at 06:33 AM.
09-21-2014, 06:33 AM
#8
Senior Member

Join Date: Nov 2006
Location: Grande Prairie,
AB, CANADA
Posts: 8,976
Likes: 0
Received 4 Likes
on
4 Posts
Nice job. The Krylon paint is awesome. I use it like primer now. If I want a different shade I paint over it with a light airbrushed acrylic coat. For modern Canadian Amor it is almost bang on out of the can.
Last edited by YHR; 09-21-2014 at 01:30 PM.
09-21-2014, 07:27 AM
#9
I think I like this almost better than the Sturm-Infanteriegesch�tz 33B SPG!
Nice work and a very clean build!
Jeff
Nice work and a very clean build!
Jeff
09-21-2014, 03:14 PM
#11
Thread Starter
Join Date: Jan 2006
Location: Hamilton,
ON, CANADA
Posts: 1,422
Likes: 0
Received 7 Likes
on
7 Posts
Your black steel gearboxes have 48mm shafts, right? I only ask because the boxes in the photo are clearly 58mm. I've found that almost ALL the websites have mistakes in their photos like that. I know Erik is constantly having to check up on their site to make sure they're posting the correct photos.
EDIT: Almost forgot! GREAT work. I'm in awe. Those hinges are the coolest. Brand? Do you know if there are any more available? Those would be good just to have on hand. And PLEASE post photos/review of the new pin vise when you get it.
EDIT: Almost forgot! GREAT work. I'm in awe. Those hinges are the coolest. Brand? Do you know if there are any more available? Those would be good just to have on hand. And PLEASE post photos/review of the new pin vise when you get it.
Simple cheap hinges here : http://www.ebay.ca/itm/221458455746?...84.m1439.l2649
09-21-2014, 09:09 PM
#14
Thread Starter
Join Date: Jan 2006
Location: Hamilton,
ON, CANADA
Posts: 1,422
Likes: 0
Received 7 Likes
on
7 Posts
09-22-2014, 06:46 AM
#15
Looks Great. Nice upgrade to a Panzer III lower hull.
09-22-2014, 07:04 AM
#16

Join Date: Nov 2012
Location: USA
Posts: 903
Likes: 0
Received 0 Likes
on
0 Posts
Awesome Job! Damn you for posting this, now I have to get another kit to add to the long list of future projects! I already have an E-100, four PZiv variants and a Stug in the works. I will never get back to the Americans!!  Very Cool.
Very Cool.
