


M4A3 Sherman Build

 10-22-2014, 03:41 AM
#27
Looking great so far! 
Jeff
Jeff
10-22-2014, 04:04 PM
#28

Thread Starter
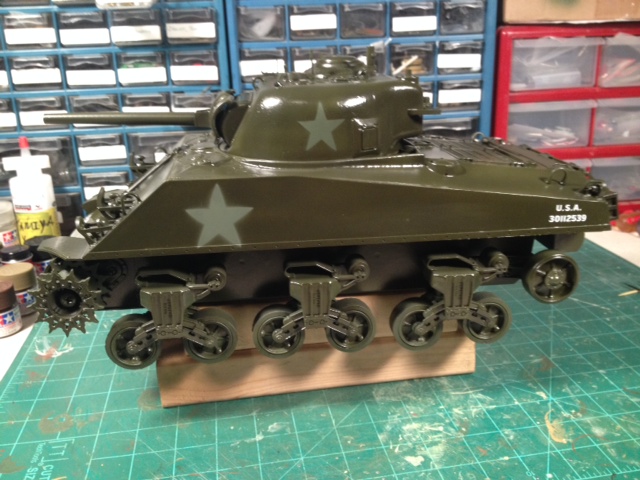
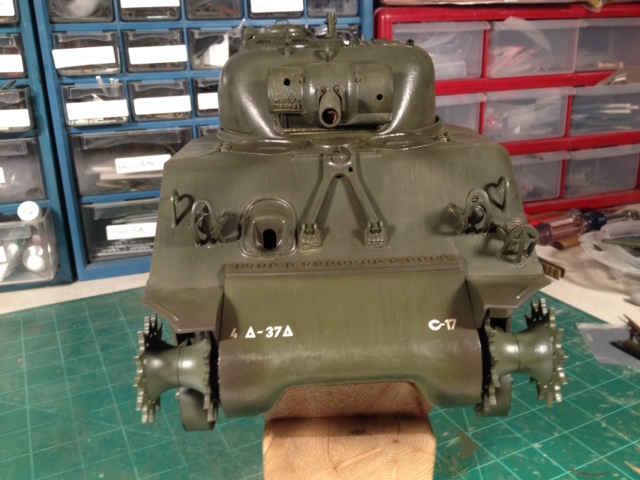
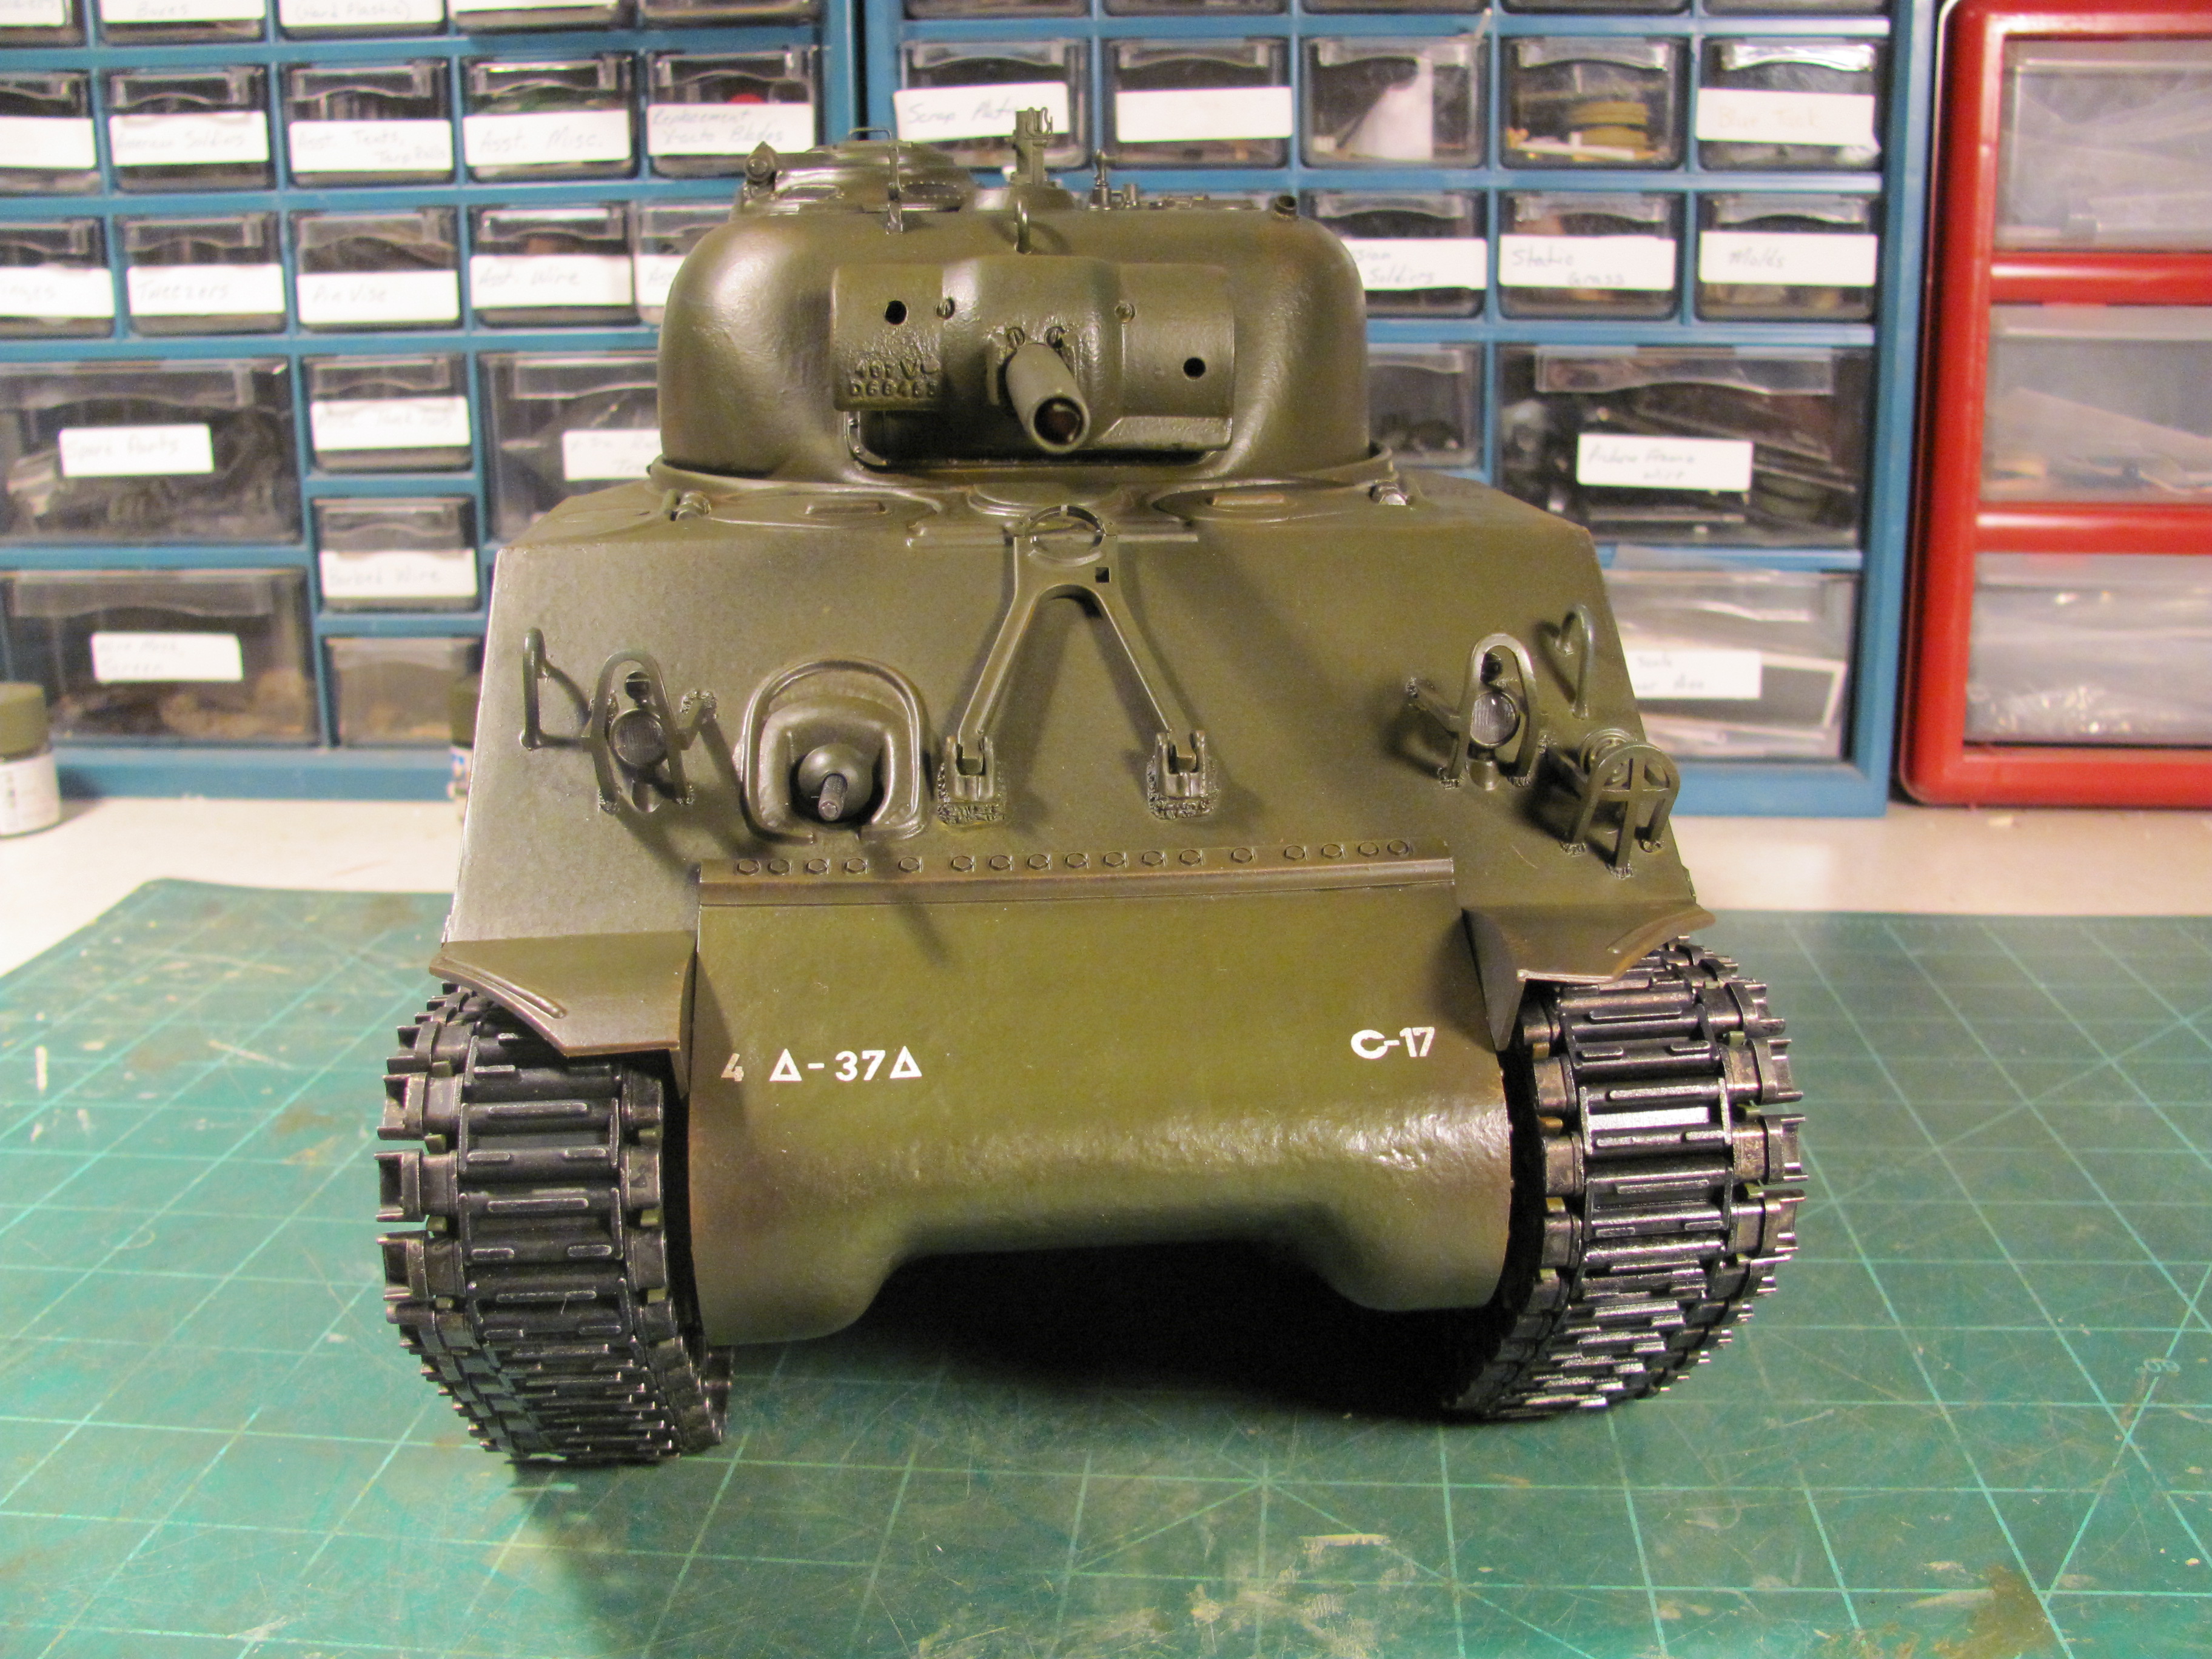
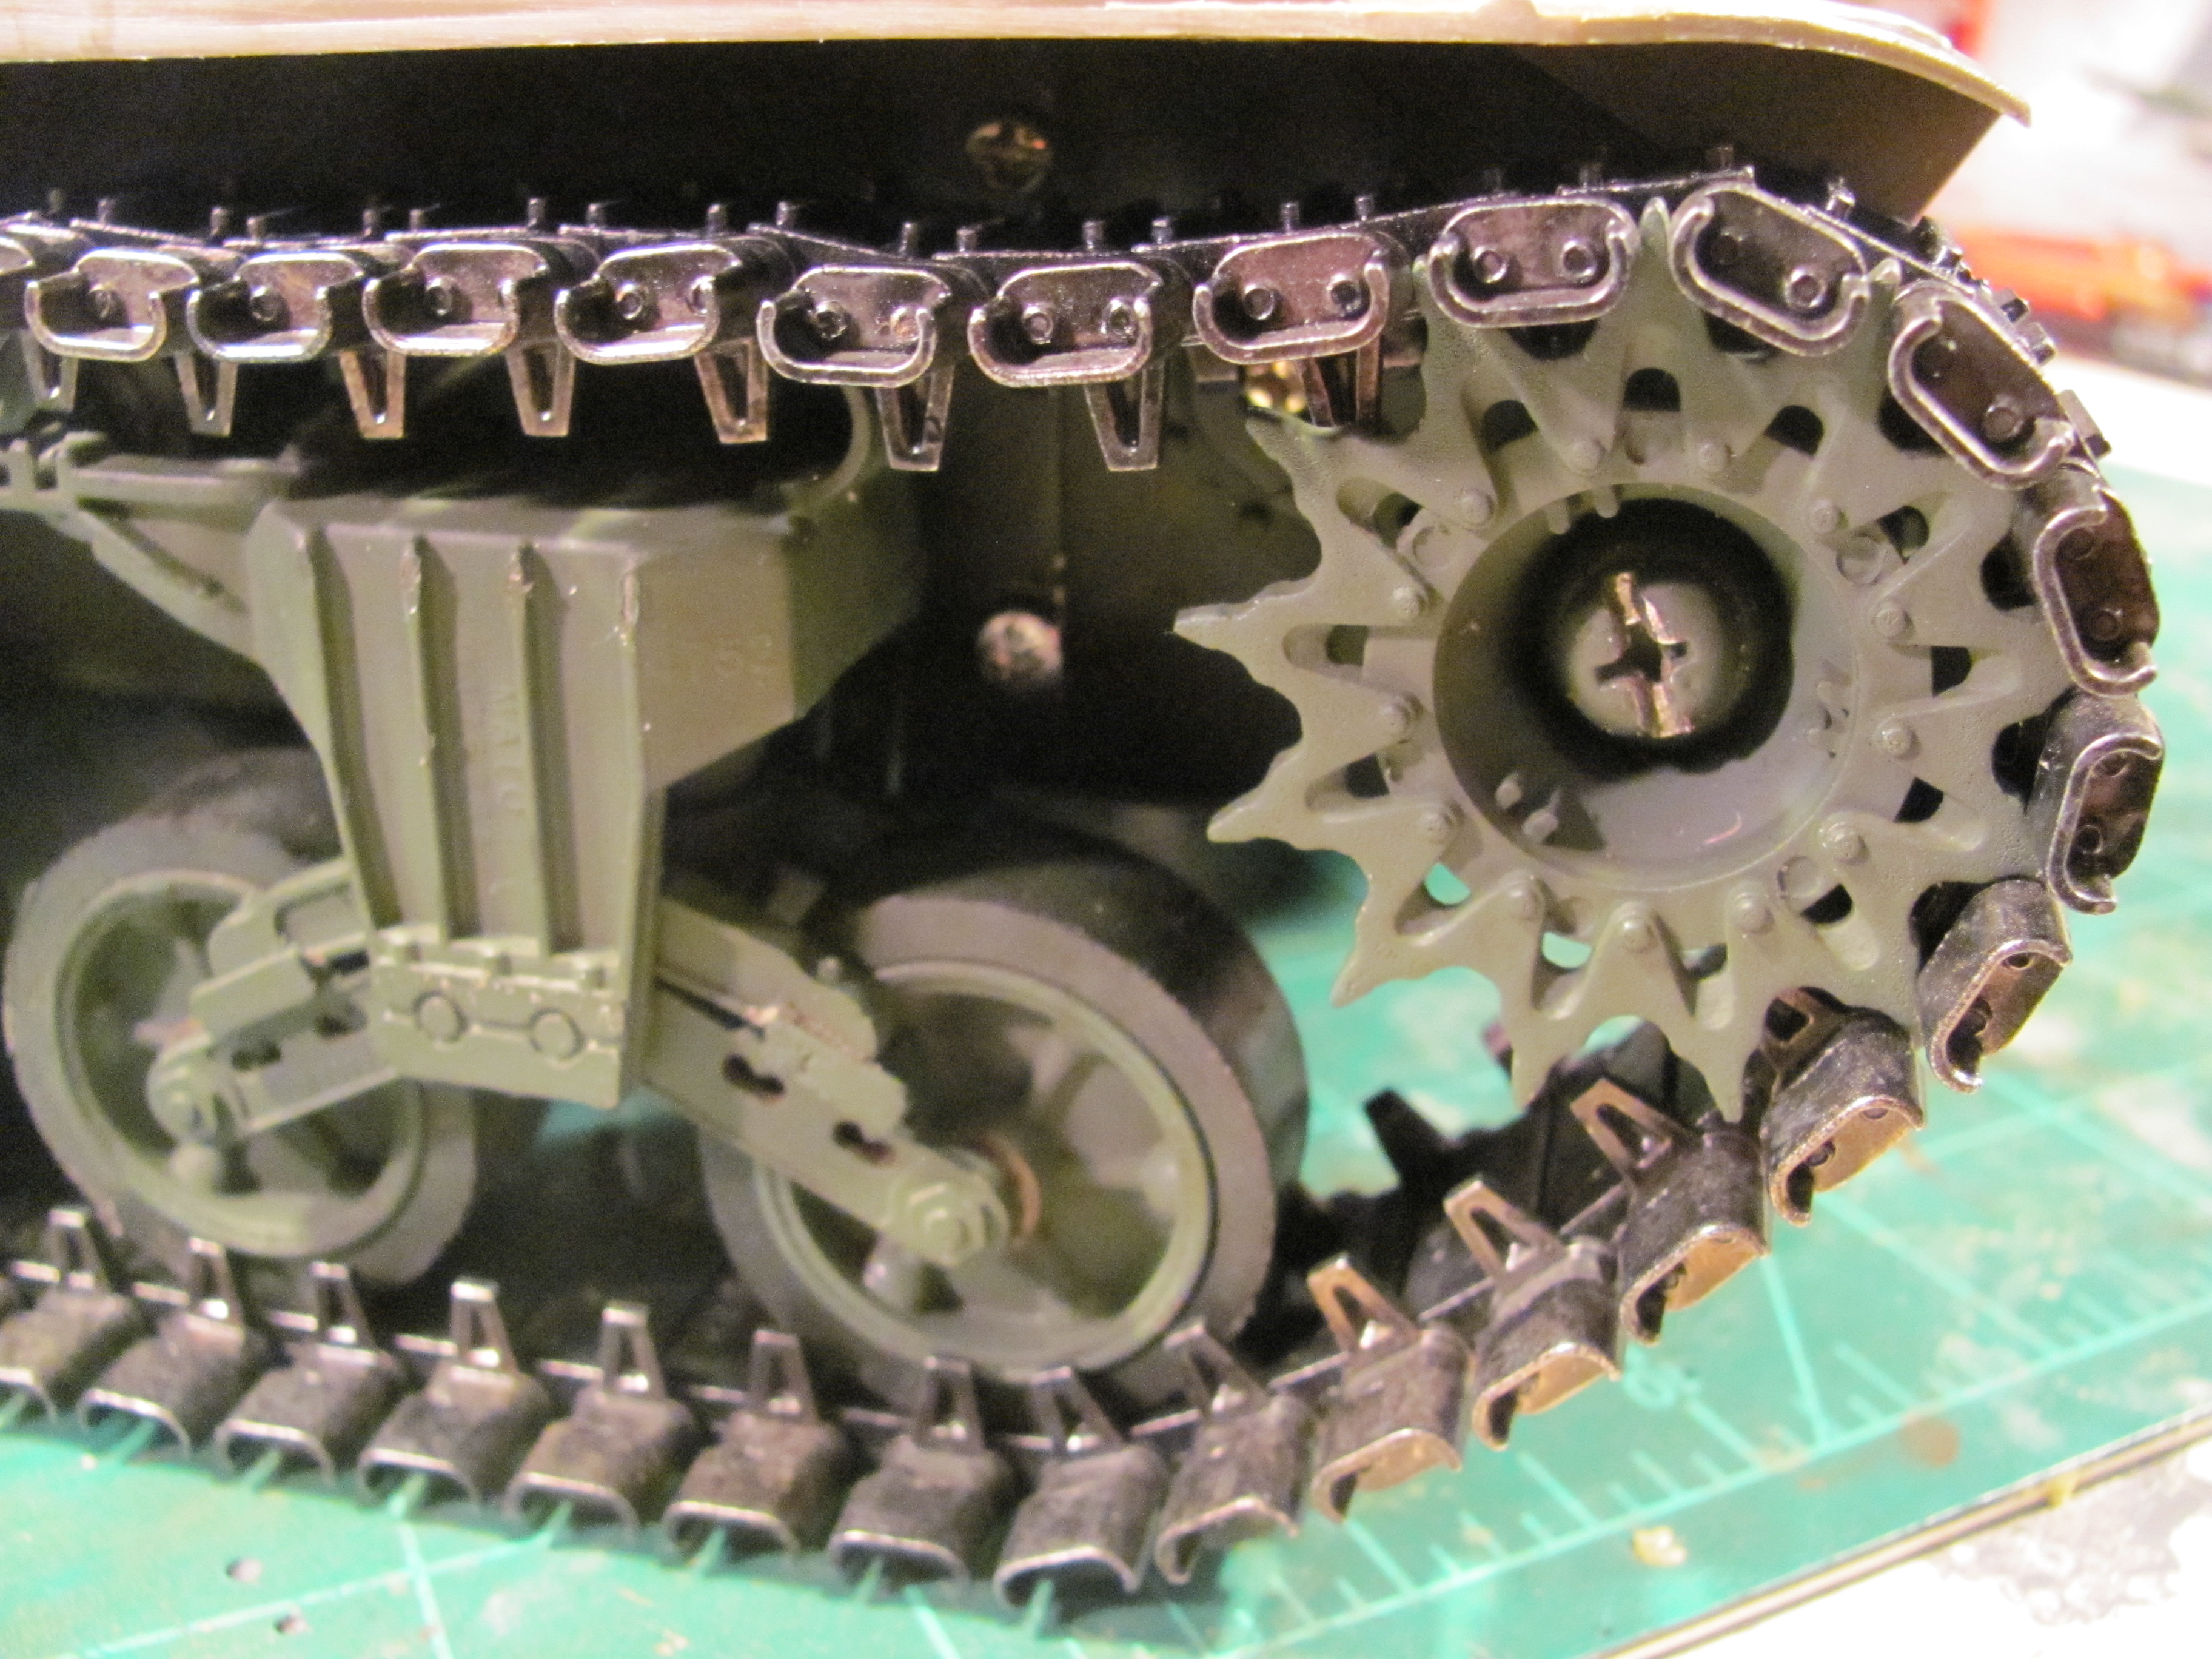
thanks for the compliments during this build, it is motivating. I have started installing the pioneer tools and here are some more pics of the Sherman in progress. I added brass
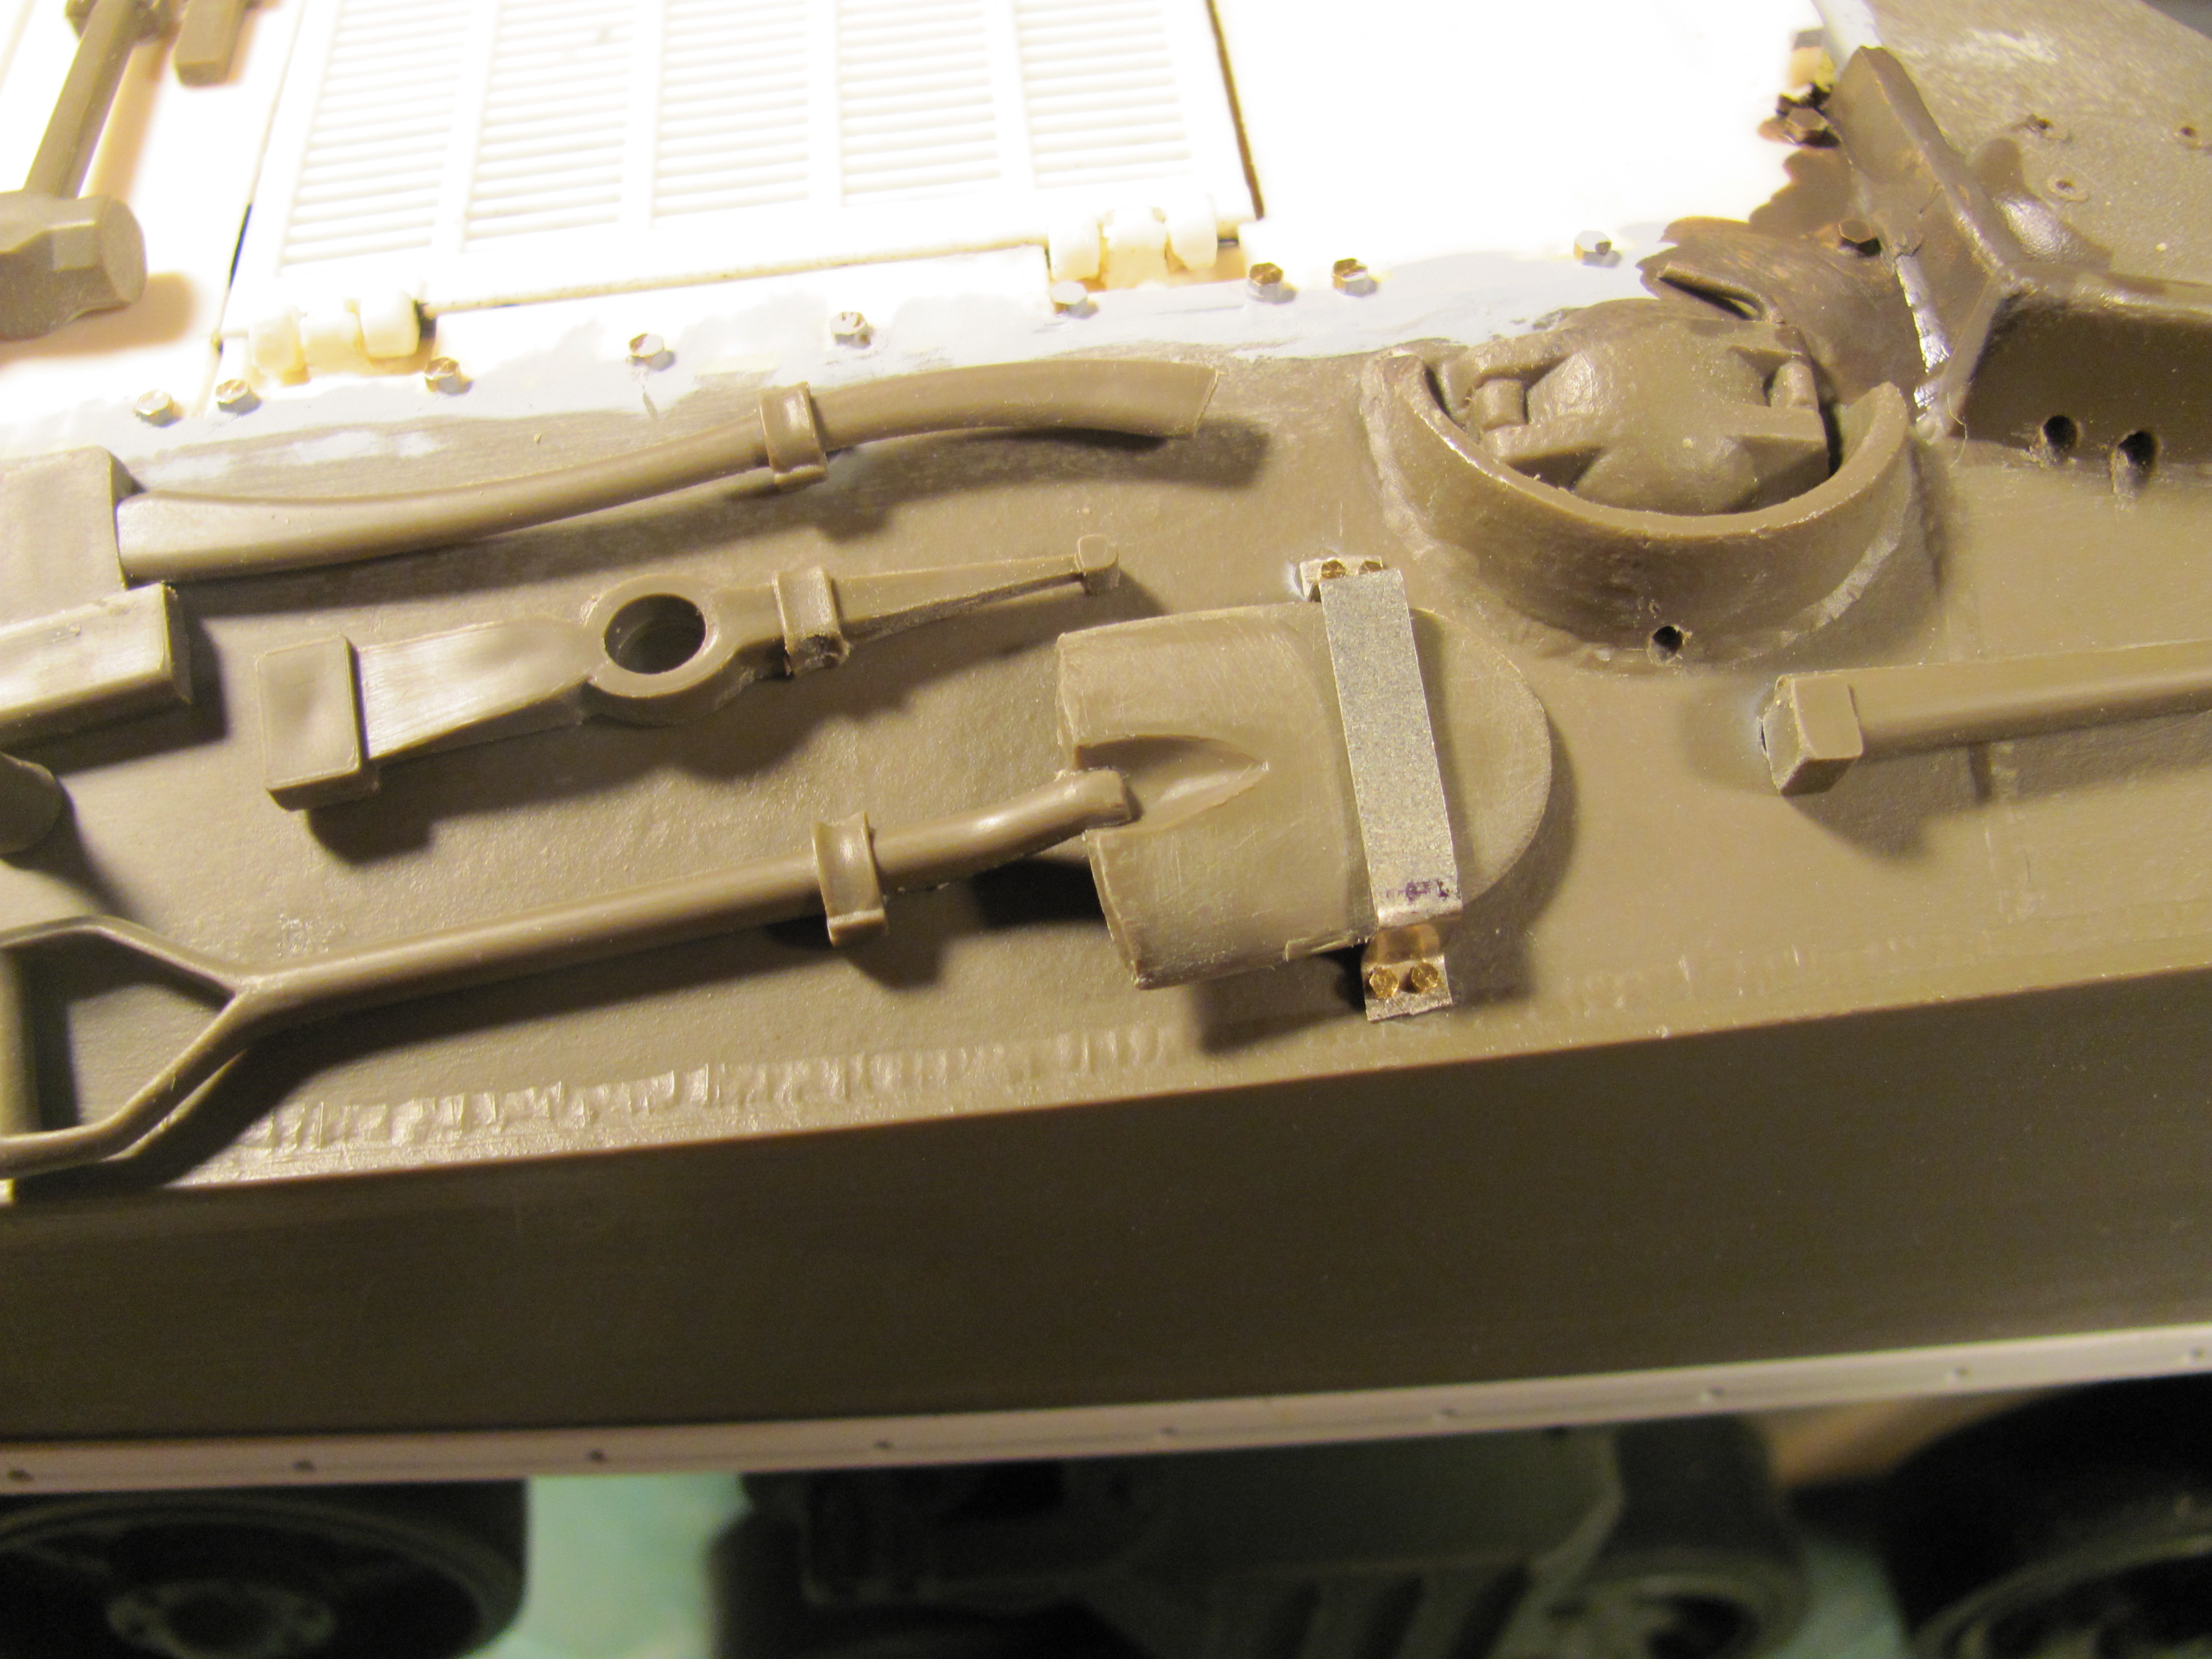
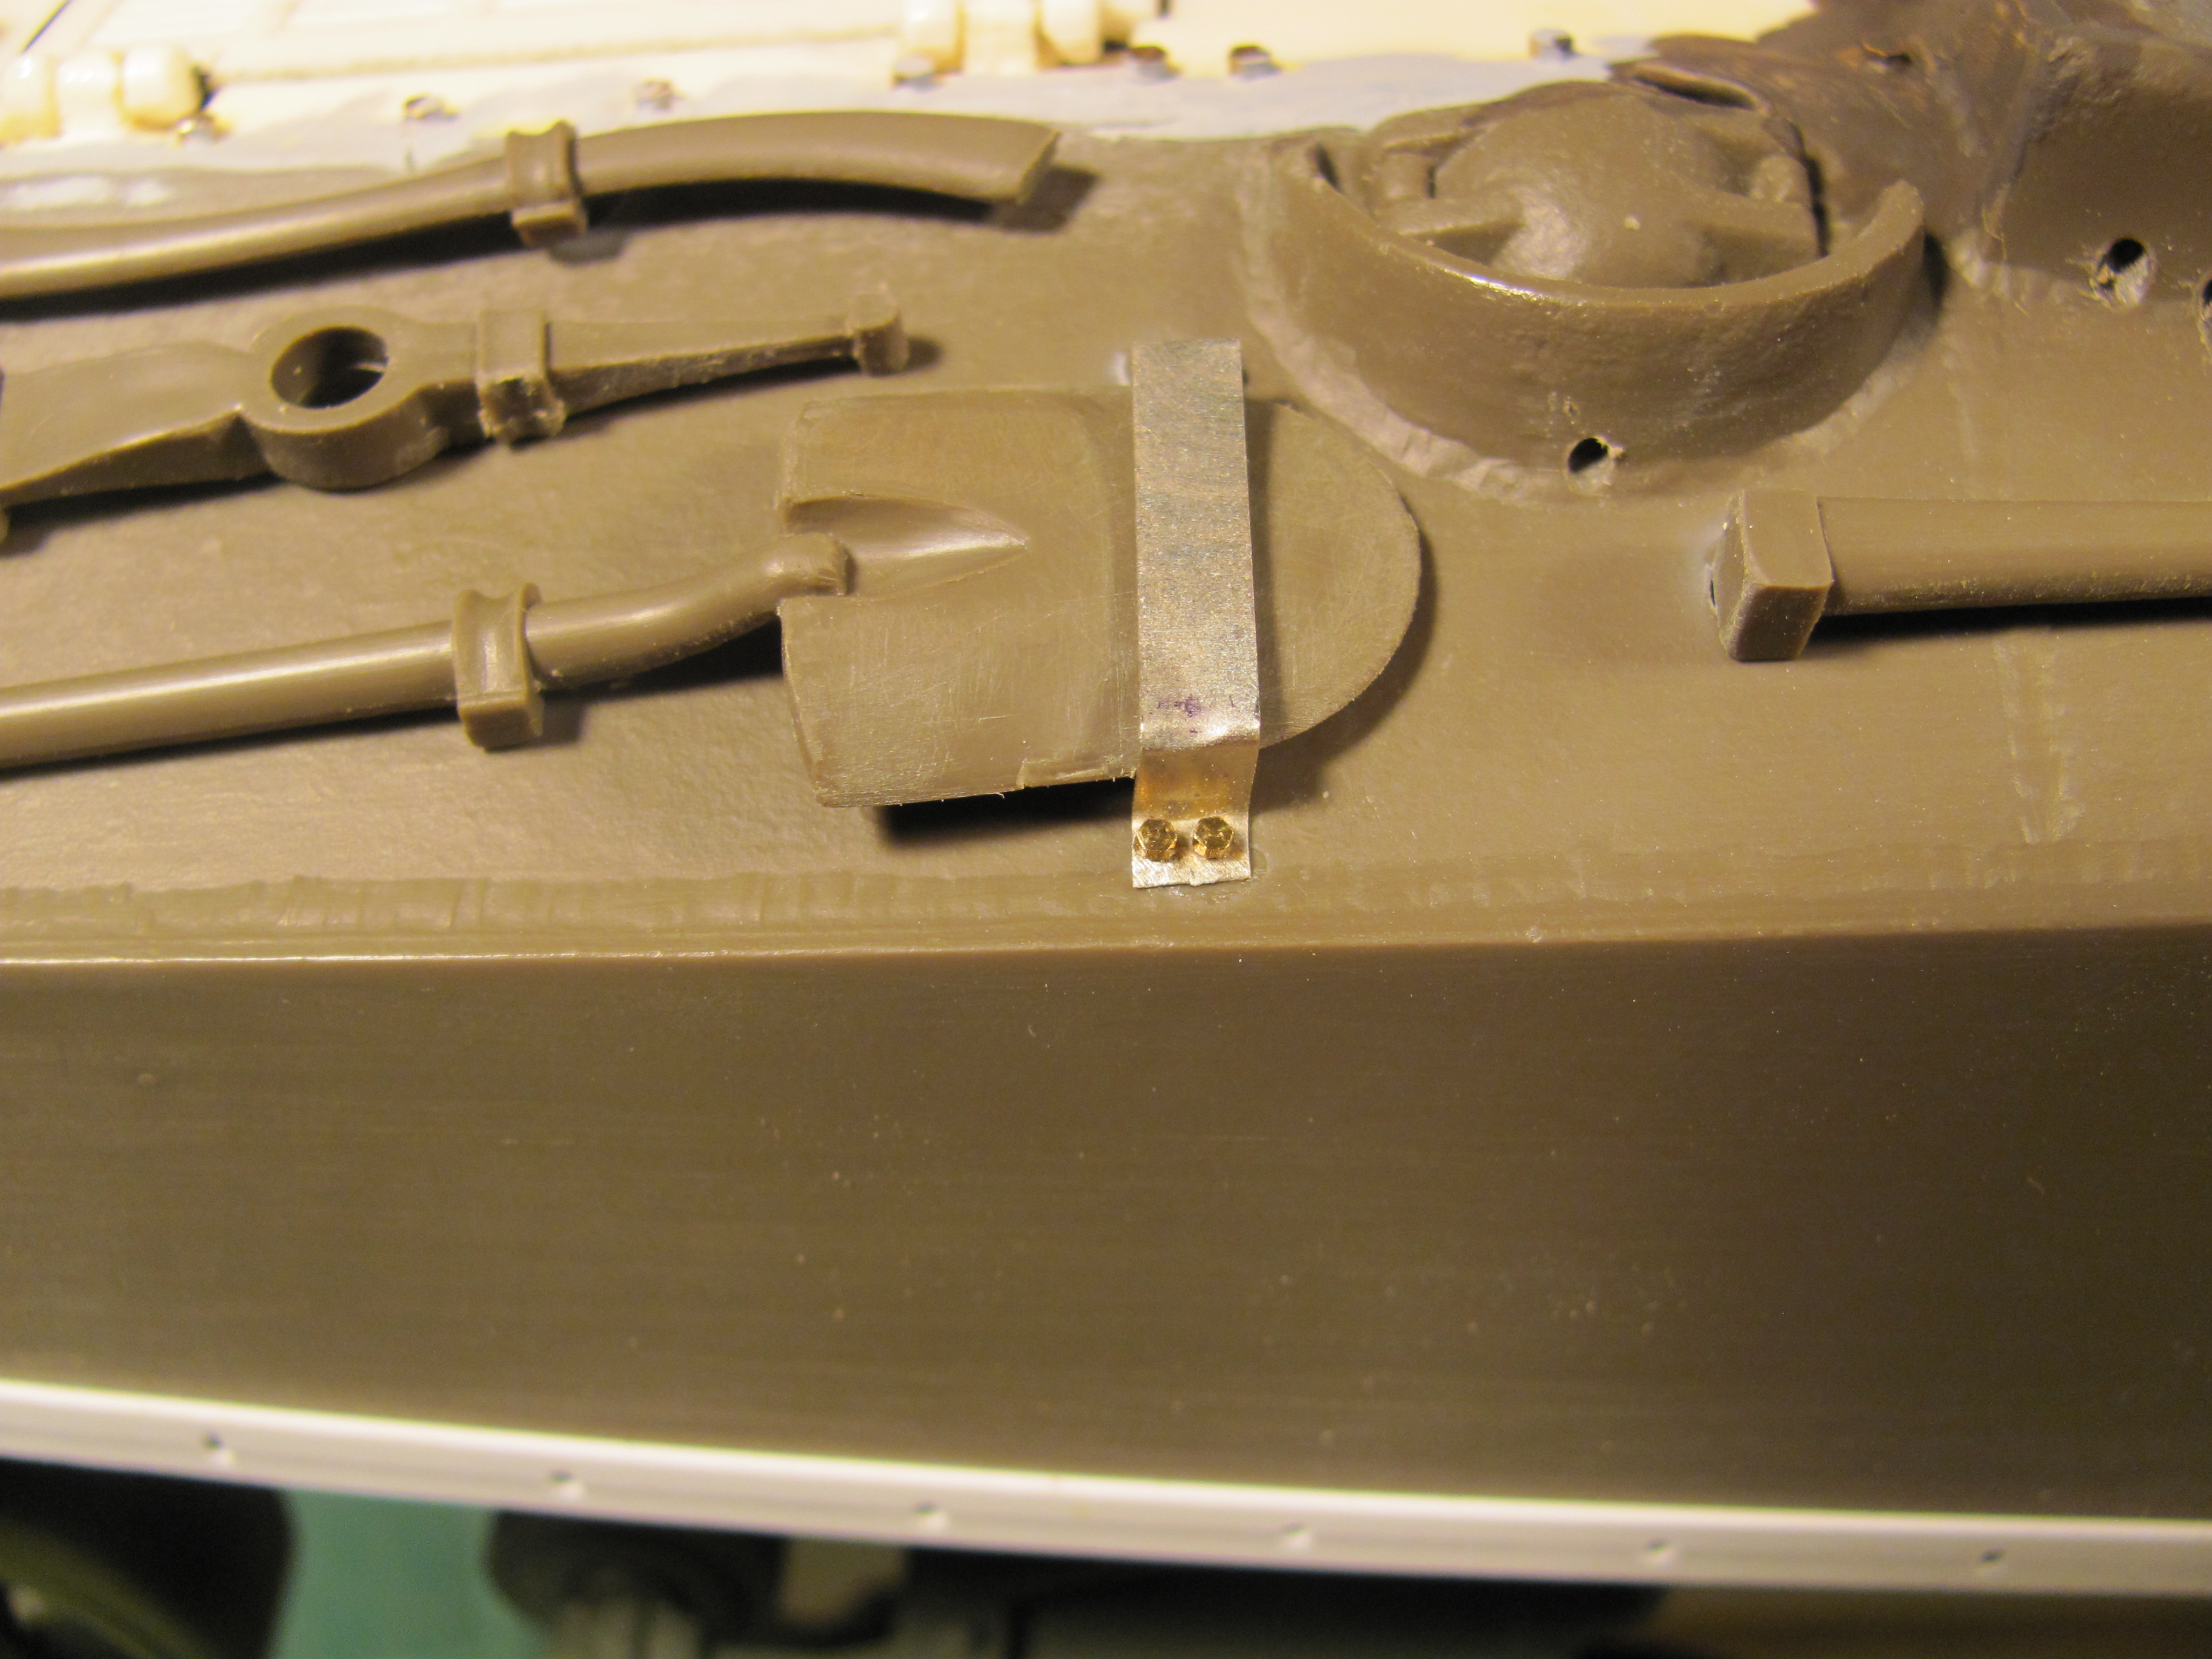
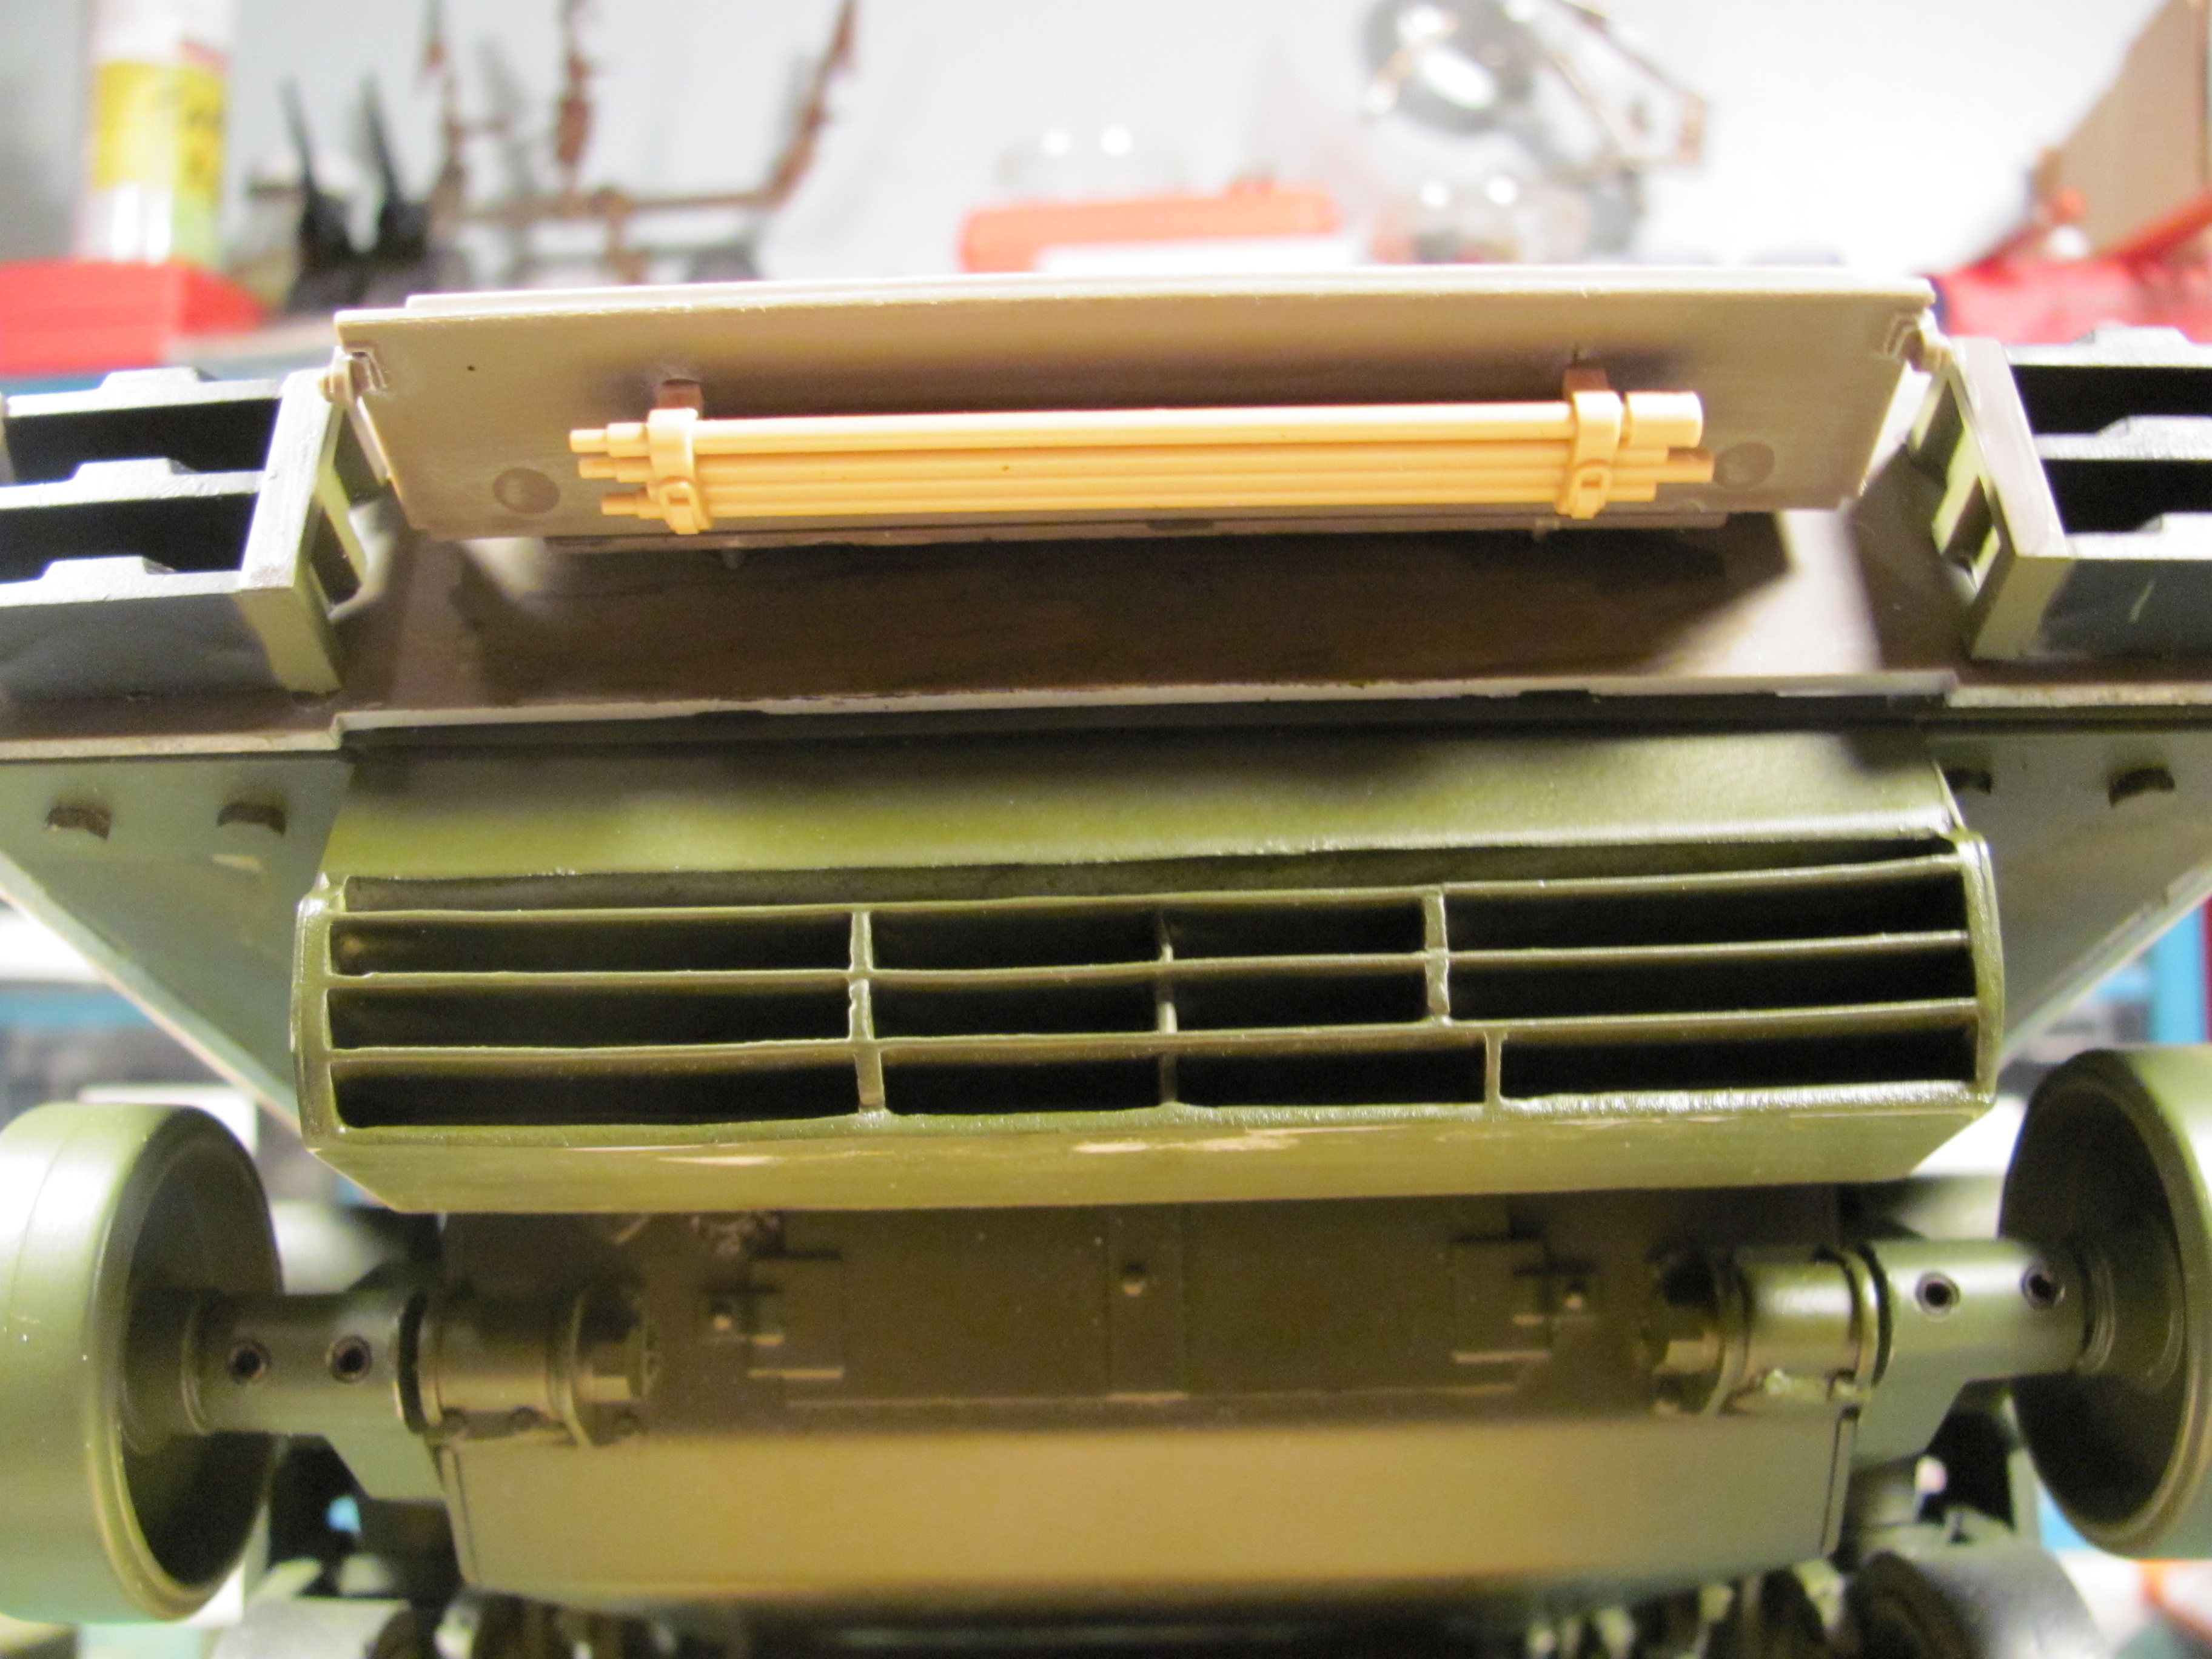
tube for the track adjuster wrench and some brass PE sprue for the shovel, (thanks to the Shermanholic, ). I used the Panzer IV gun cleaning rods for the this
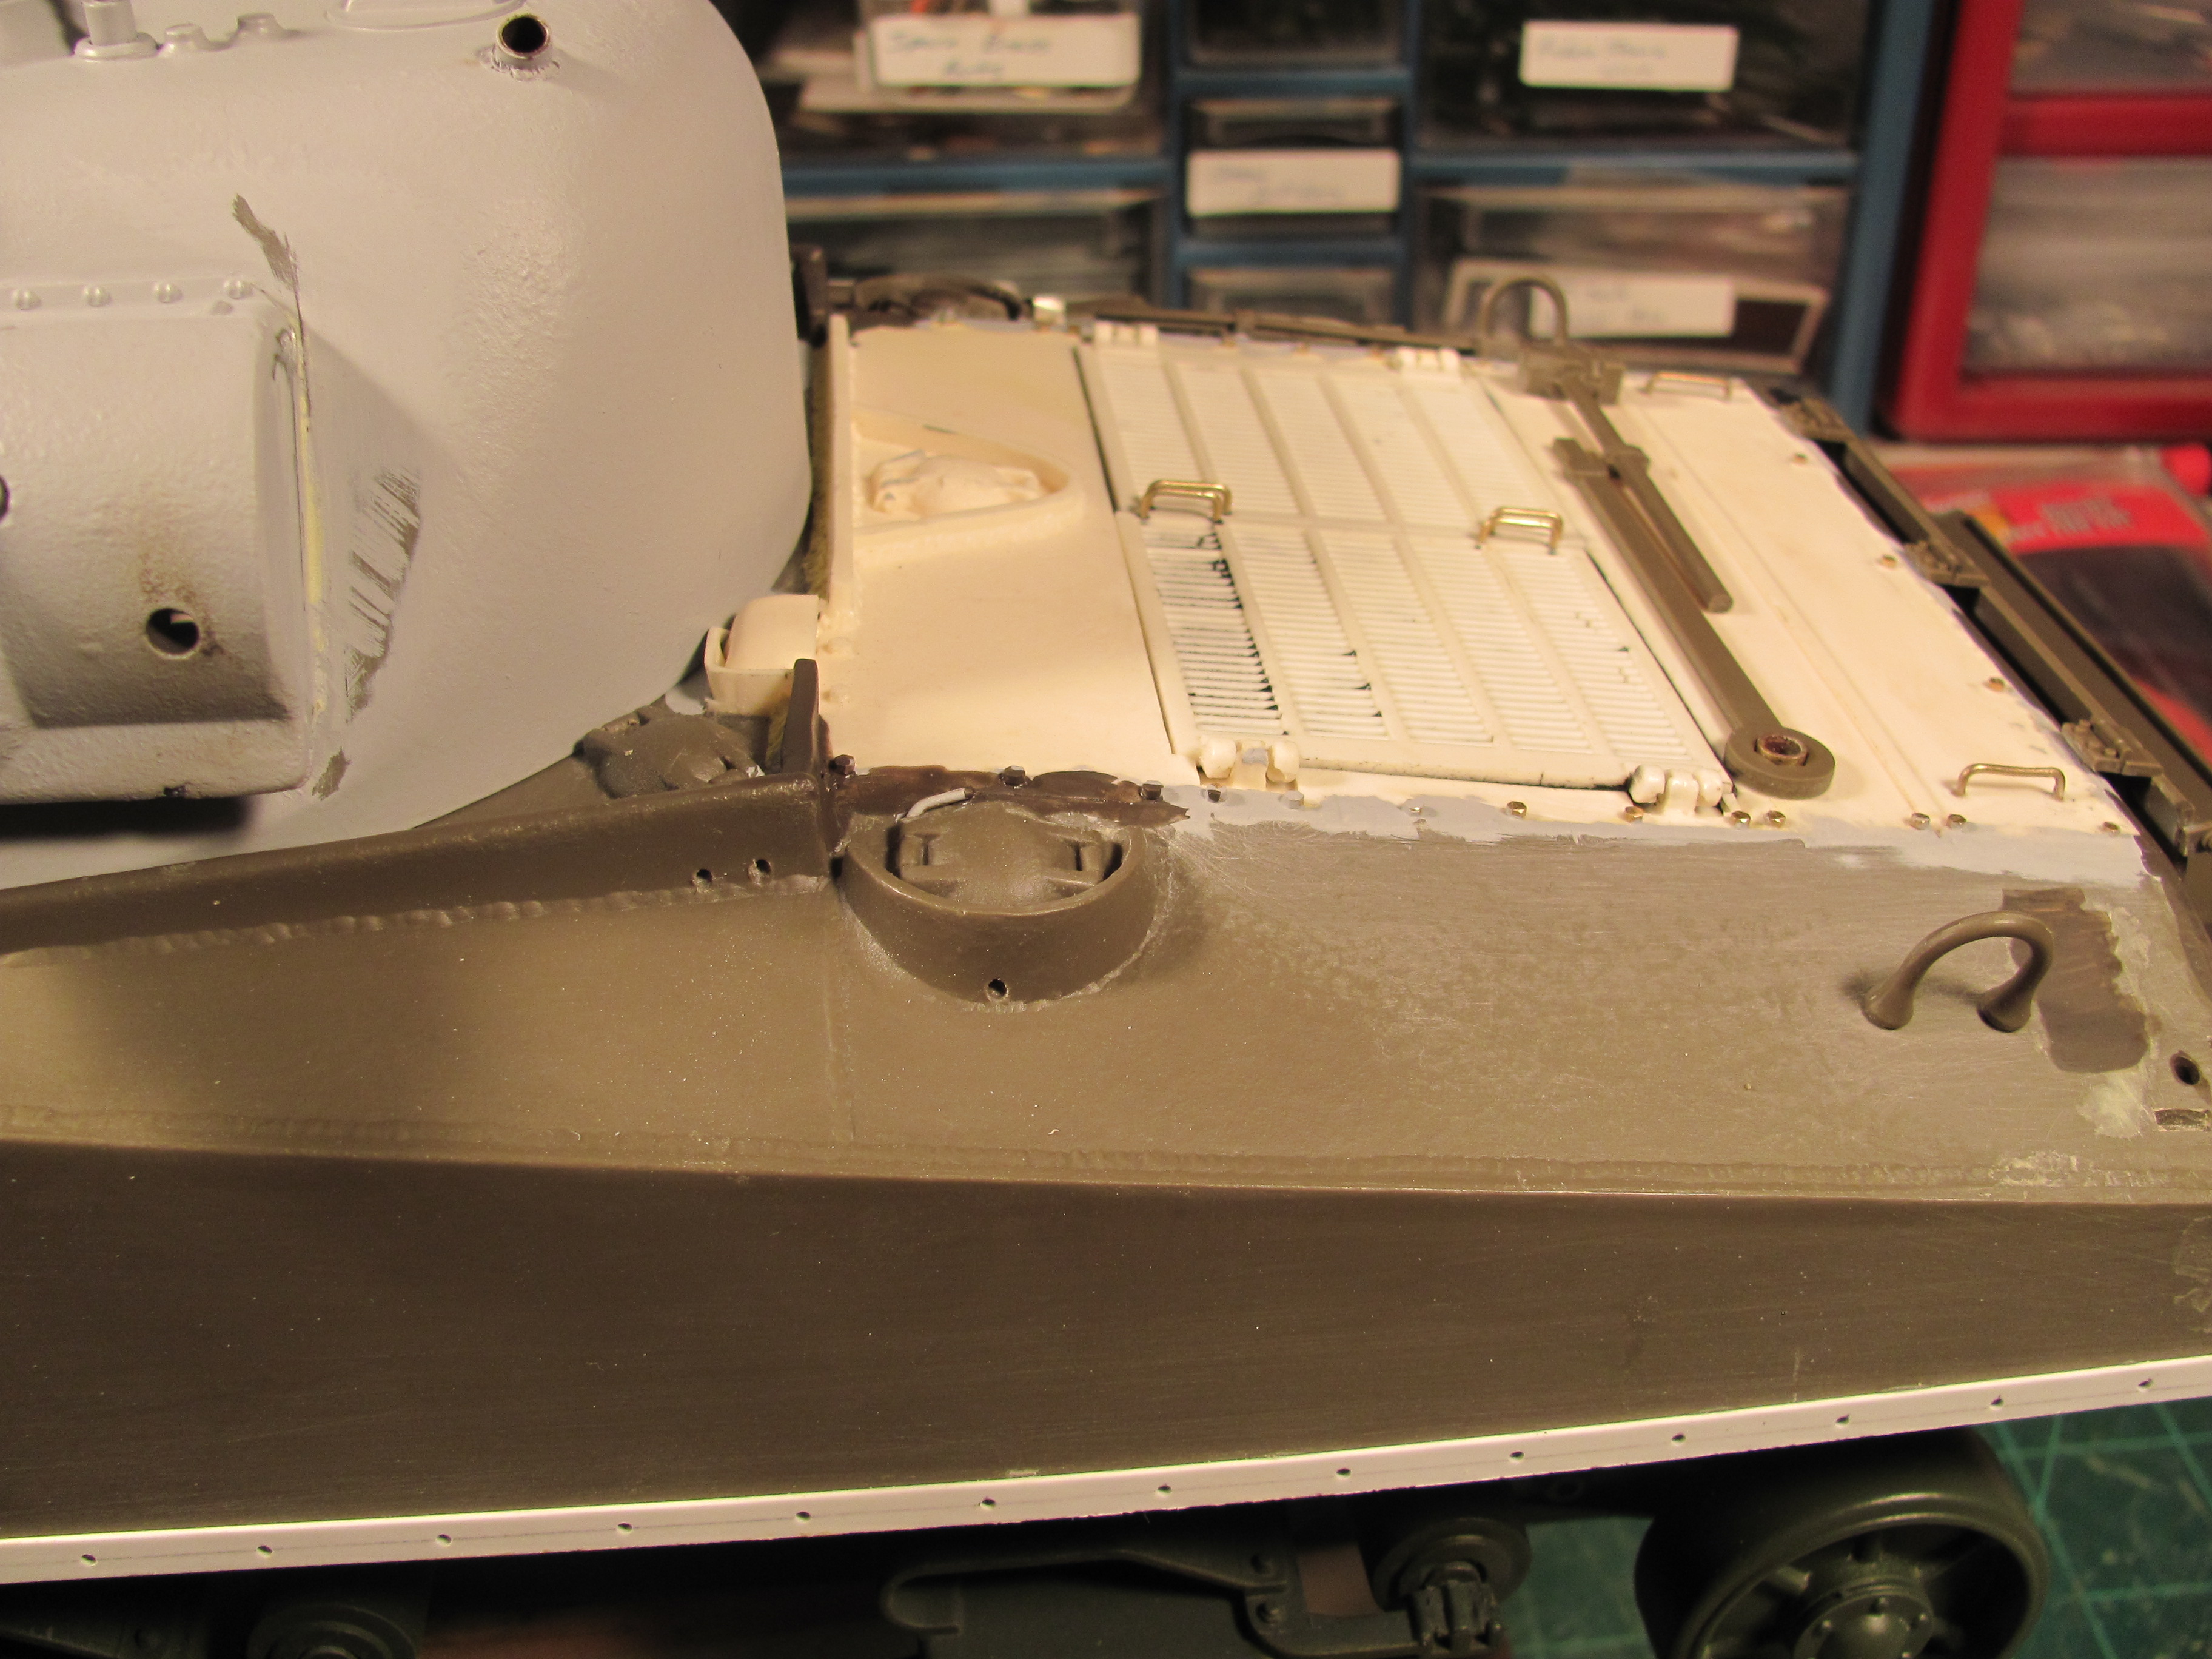
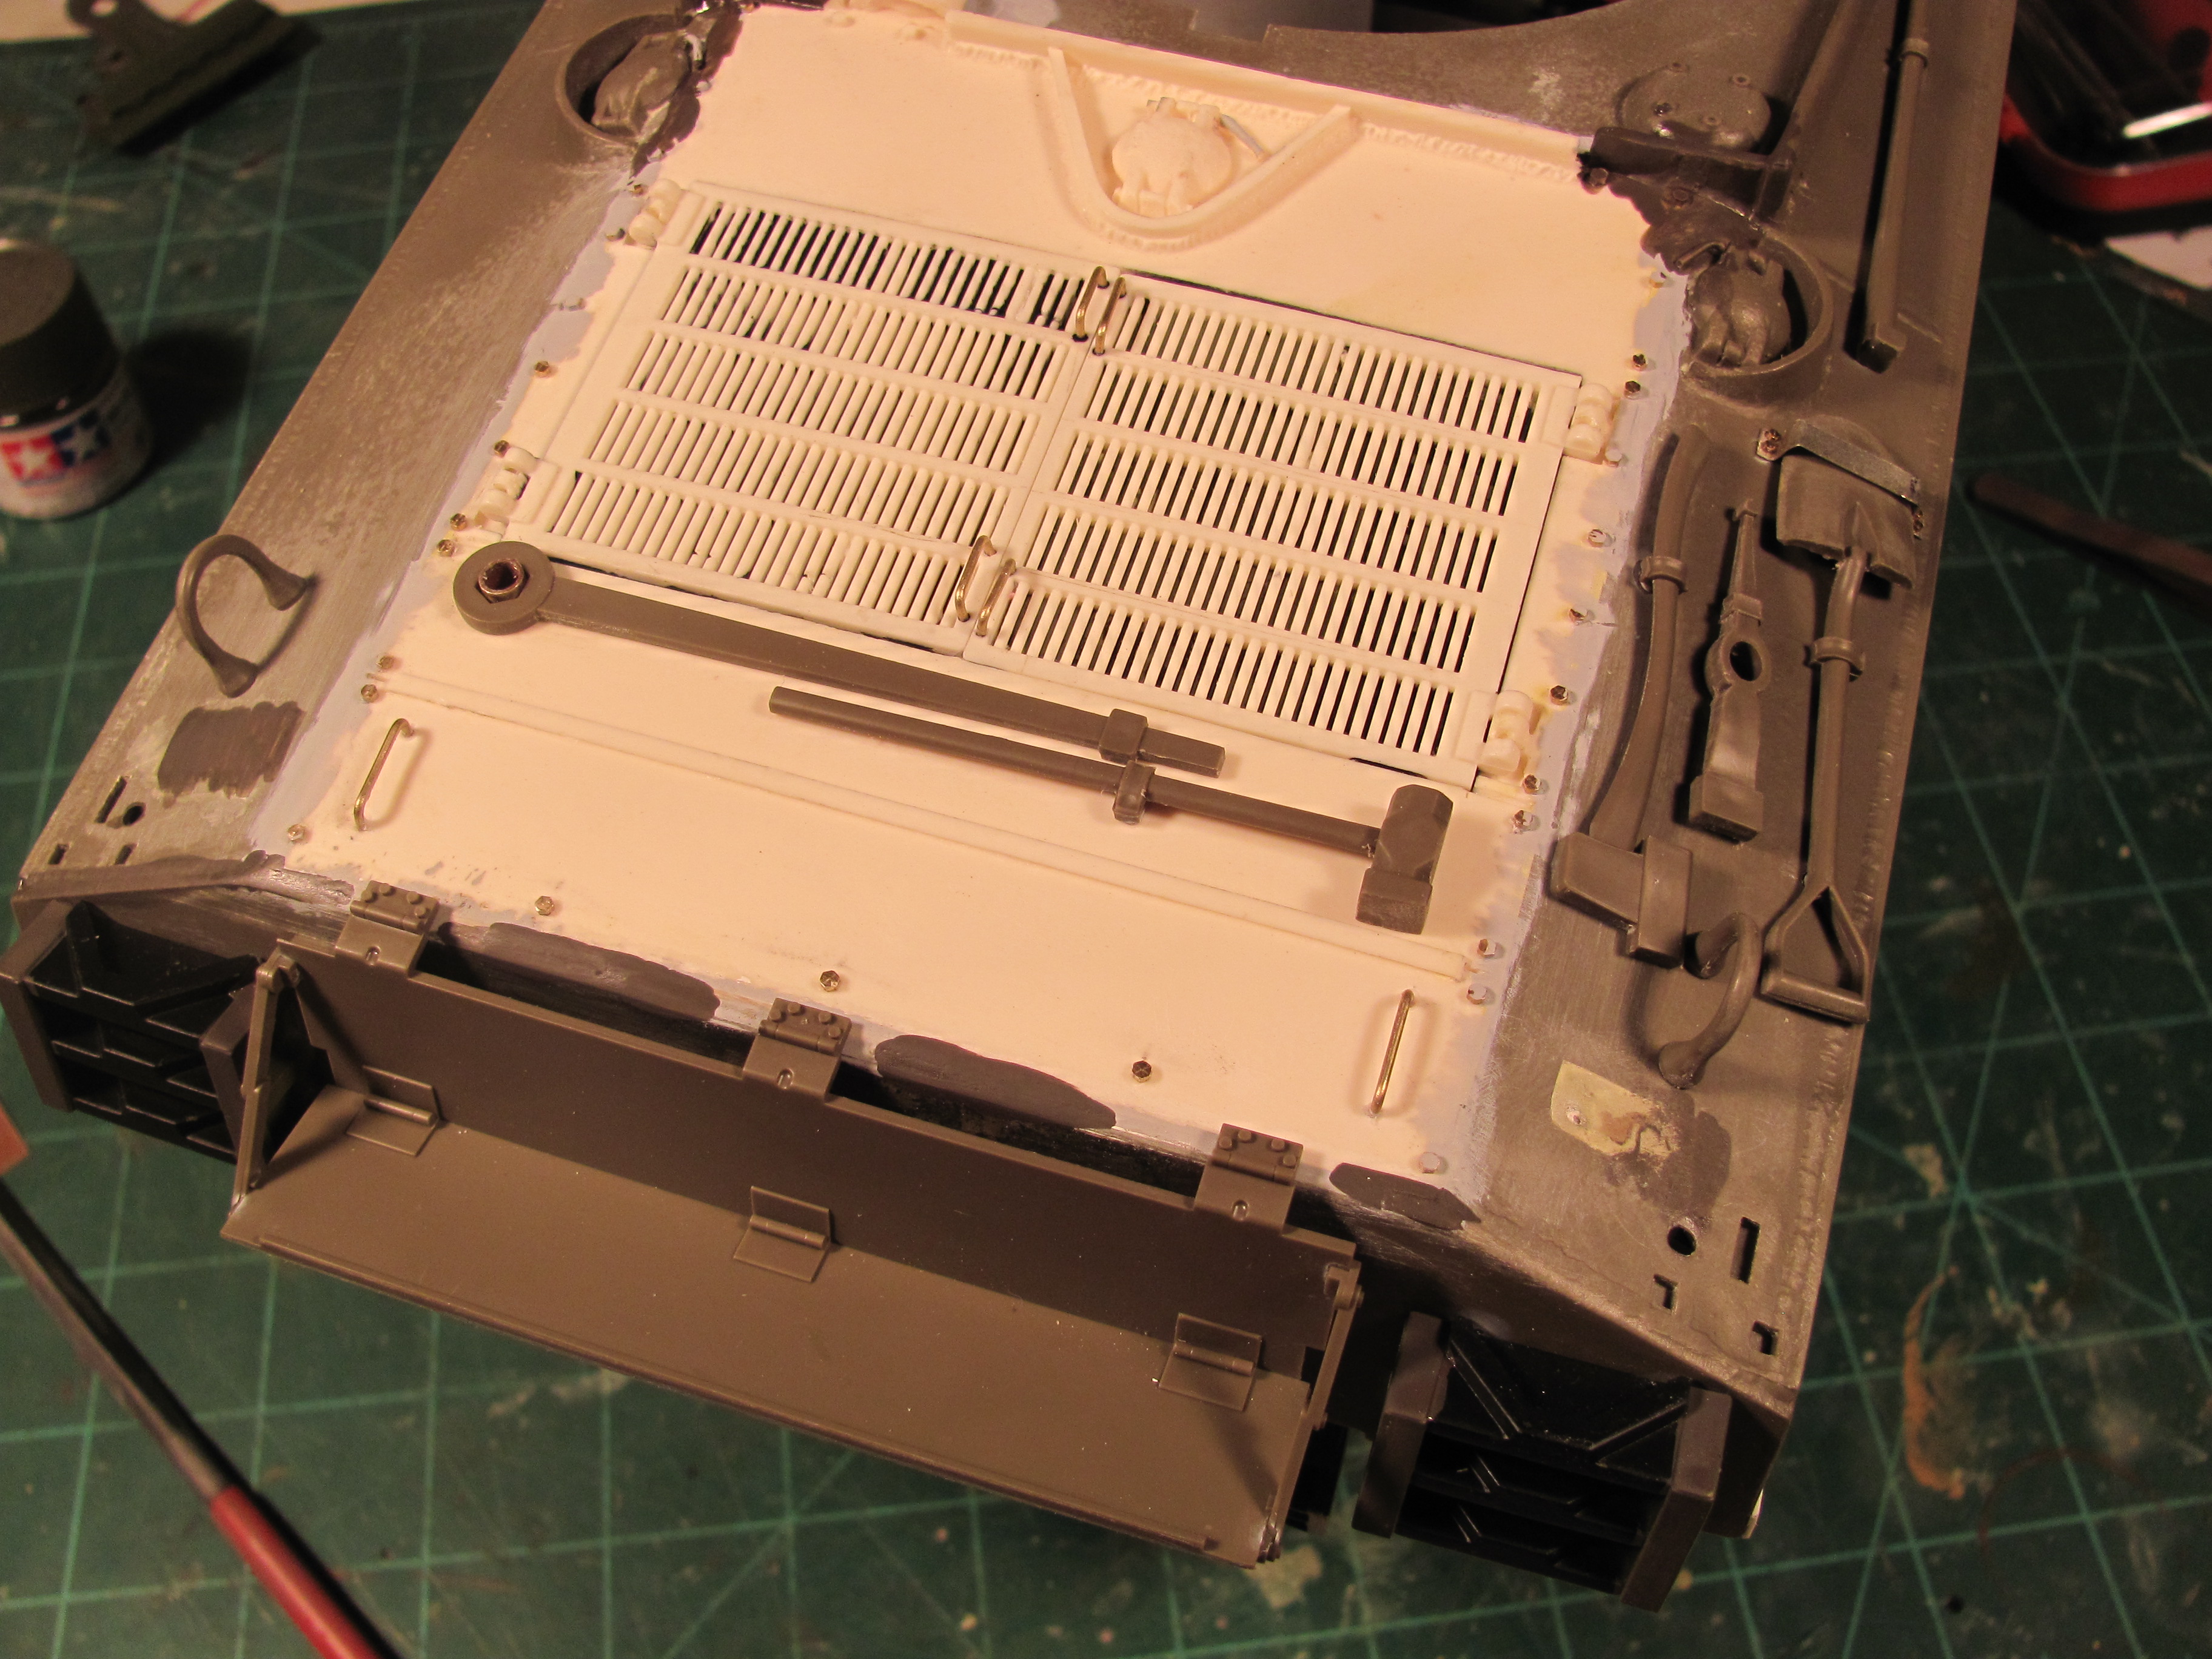
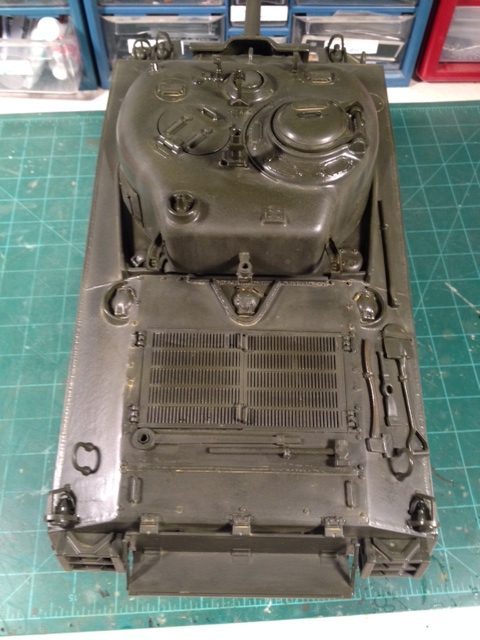
Sherman under the stowage rack. The turret is about done, i had to do some additional sanding and will re-apply the casting texture with Mr. Surfacer 500. That stuff works really well replicating the cast texture on the turret and on the tranny cover. I added weld details to the gun travel lock, i know it should be a little shorter than it is, but i think it looks pretty good as is. Hopefully, this weekend i will get the first coat of paint on it this weekend.
tube for the track adjuster wrench and some brass PE sprue for the shovel, (thanks to the Shermanholic,
). I used the Panzer IV gun cleaning rods for the this Sherman under the stowage rack. The turret is about done, i had to do some additional sanding and will re-apply the casting texture with Mr. Surfacer 500. That stuff works really well replicating the cast texture on the turret and on the tranny cover. I added weld details to the gun travel lock, i know it should be a little shorter than it is, but i think it looks pretty good as is. Hopefully, this weekend i will get the first coat of paint on it this weekend.
10-25-2014, 12:01 PM
#31
Thread Starter
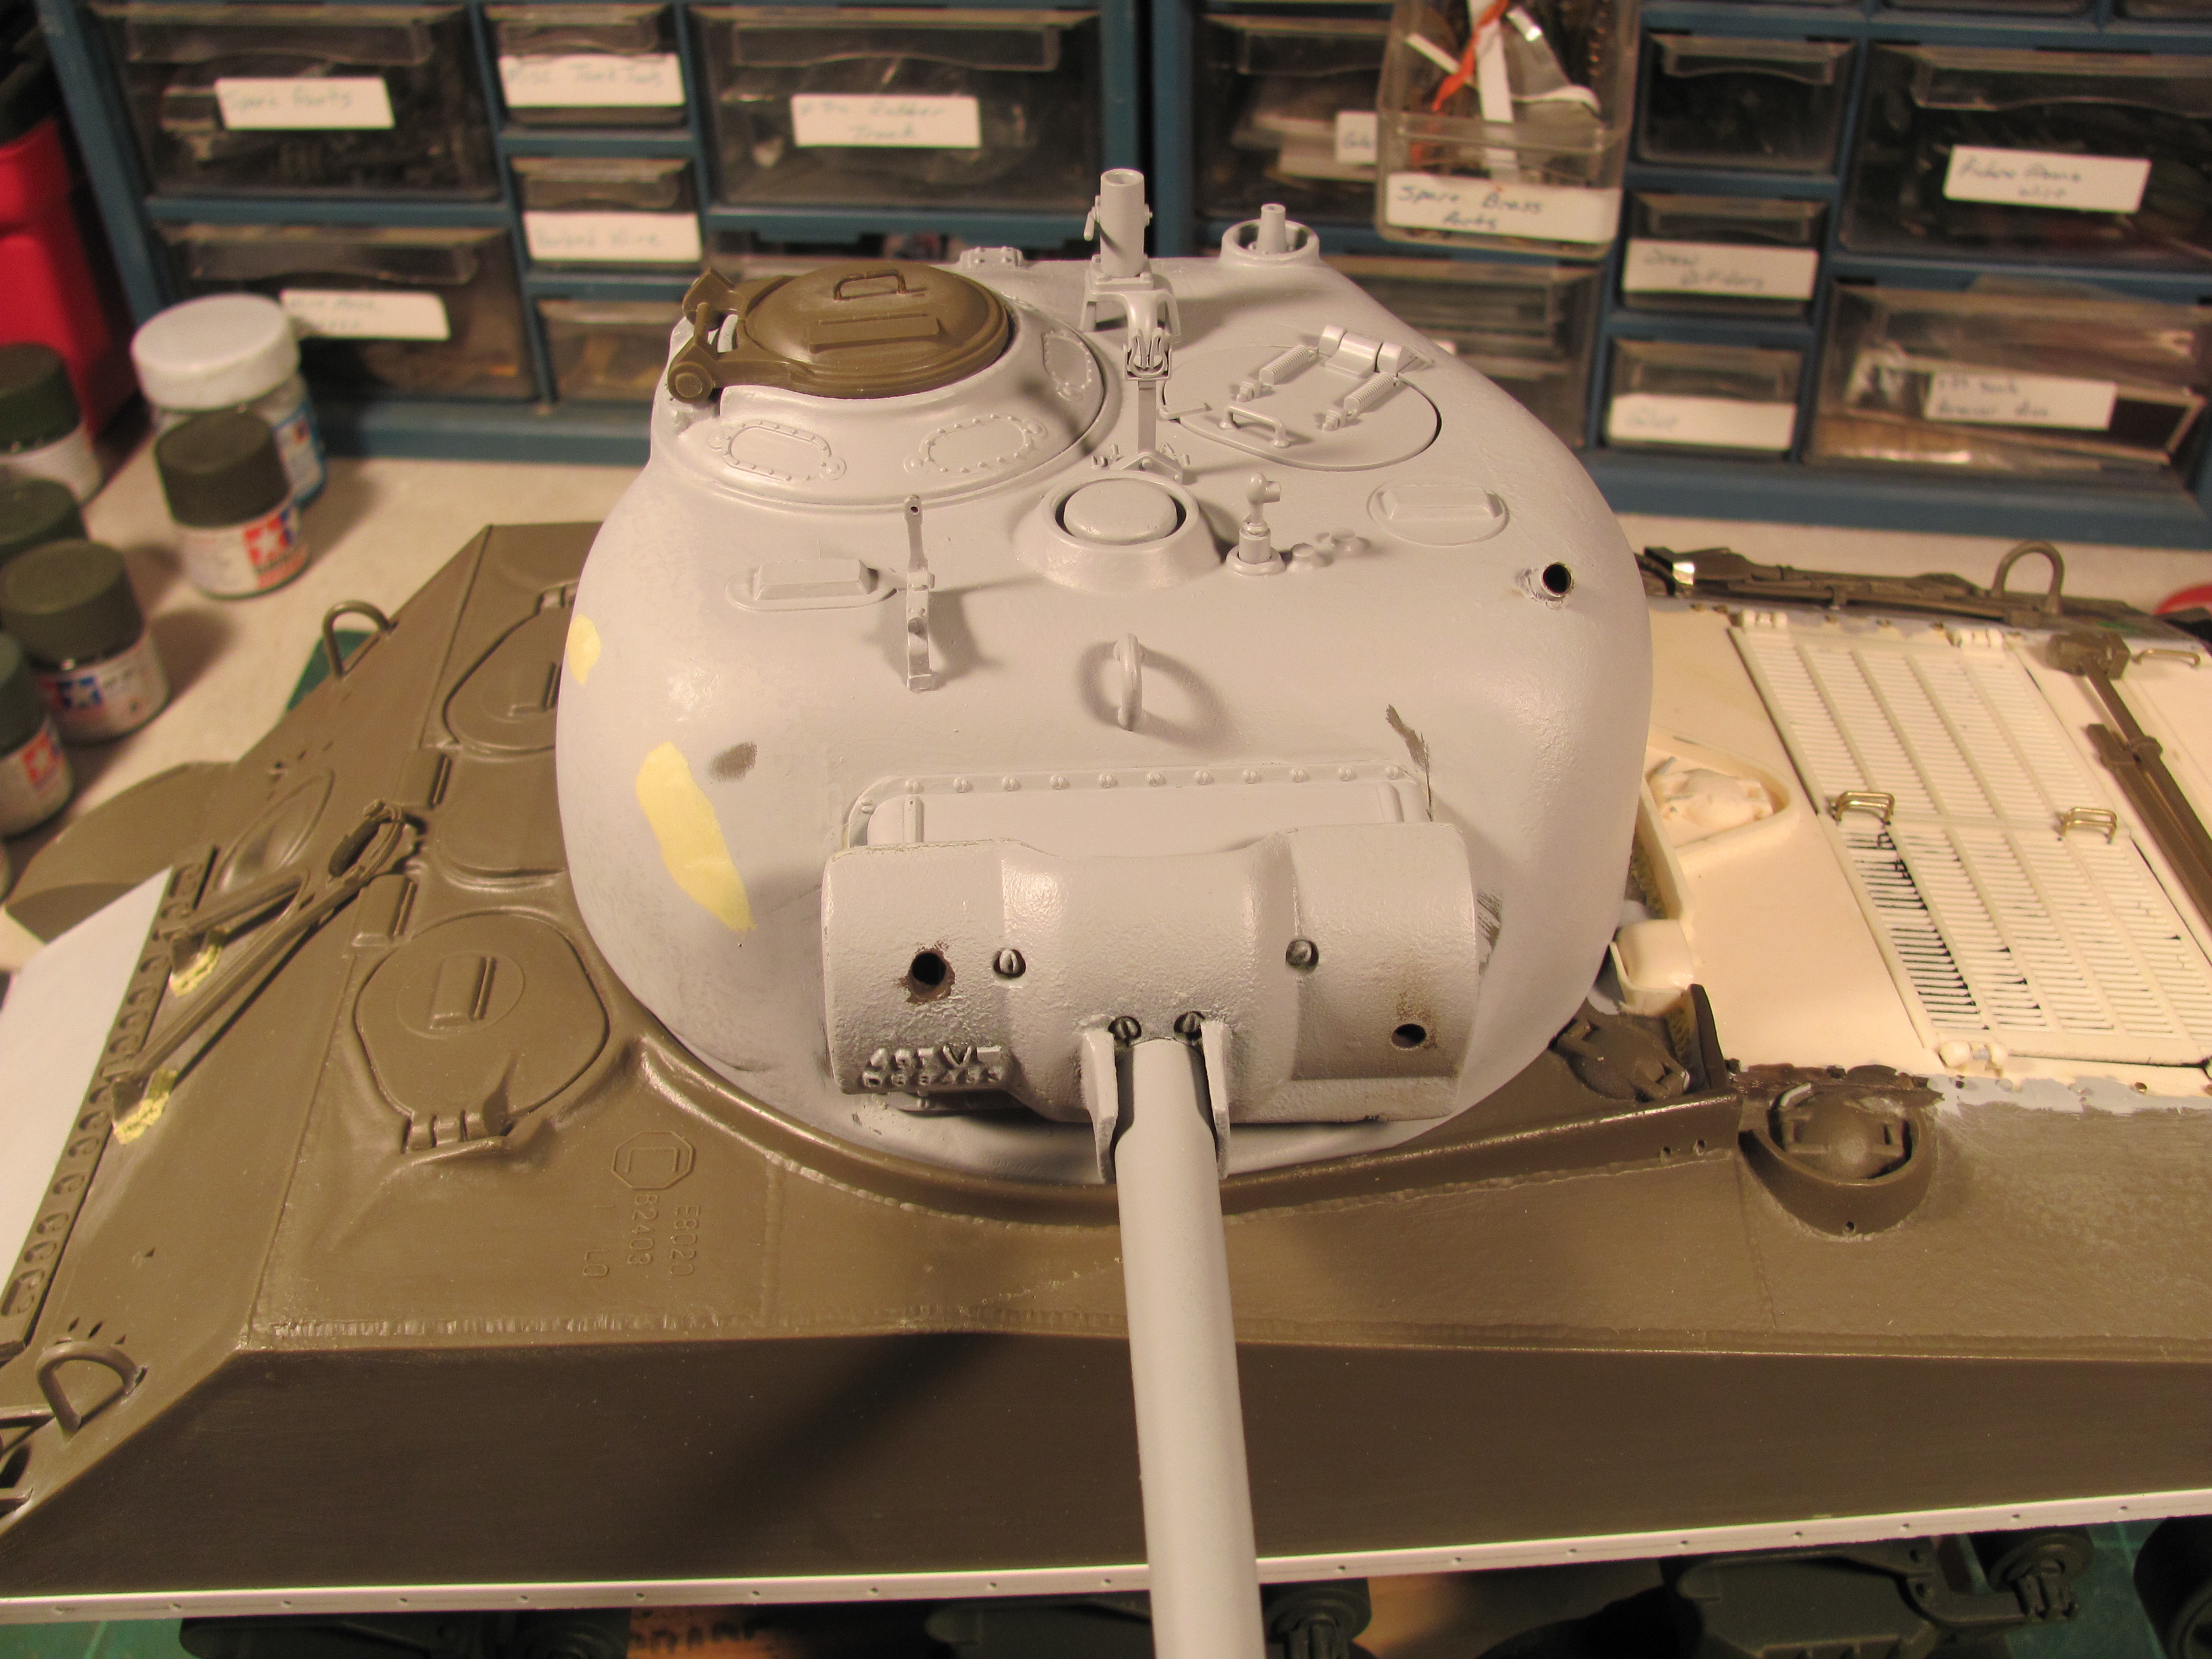
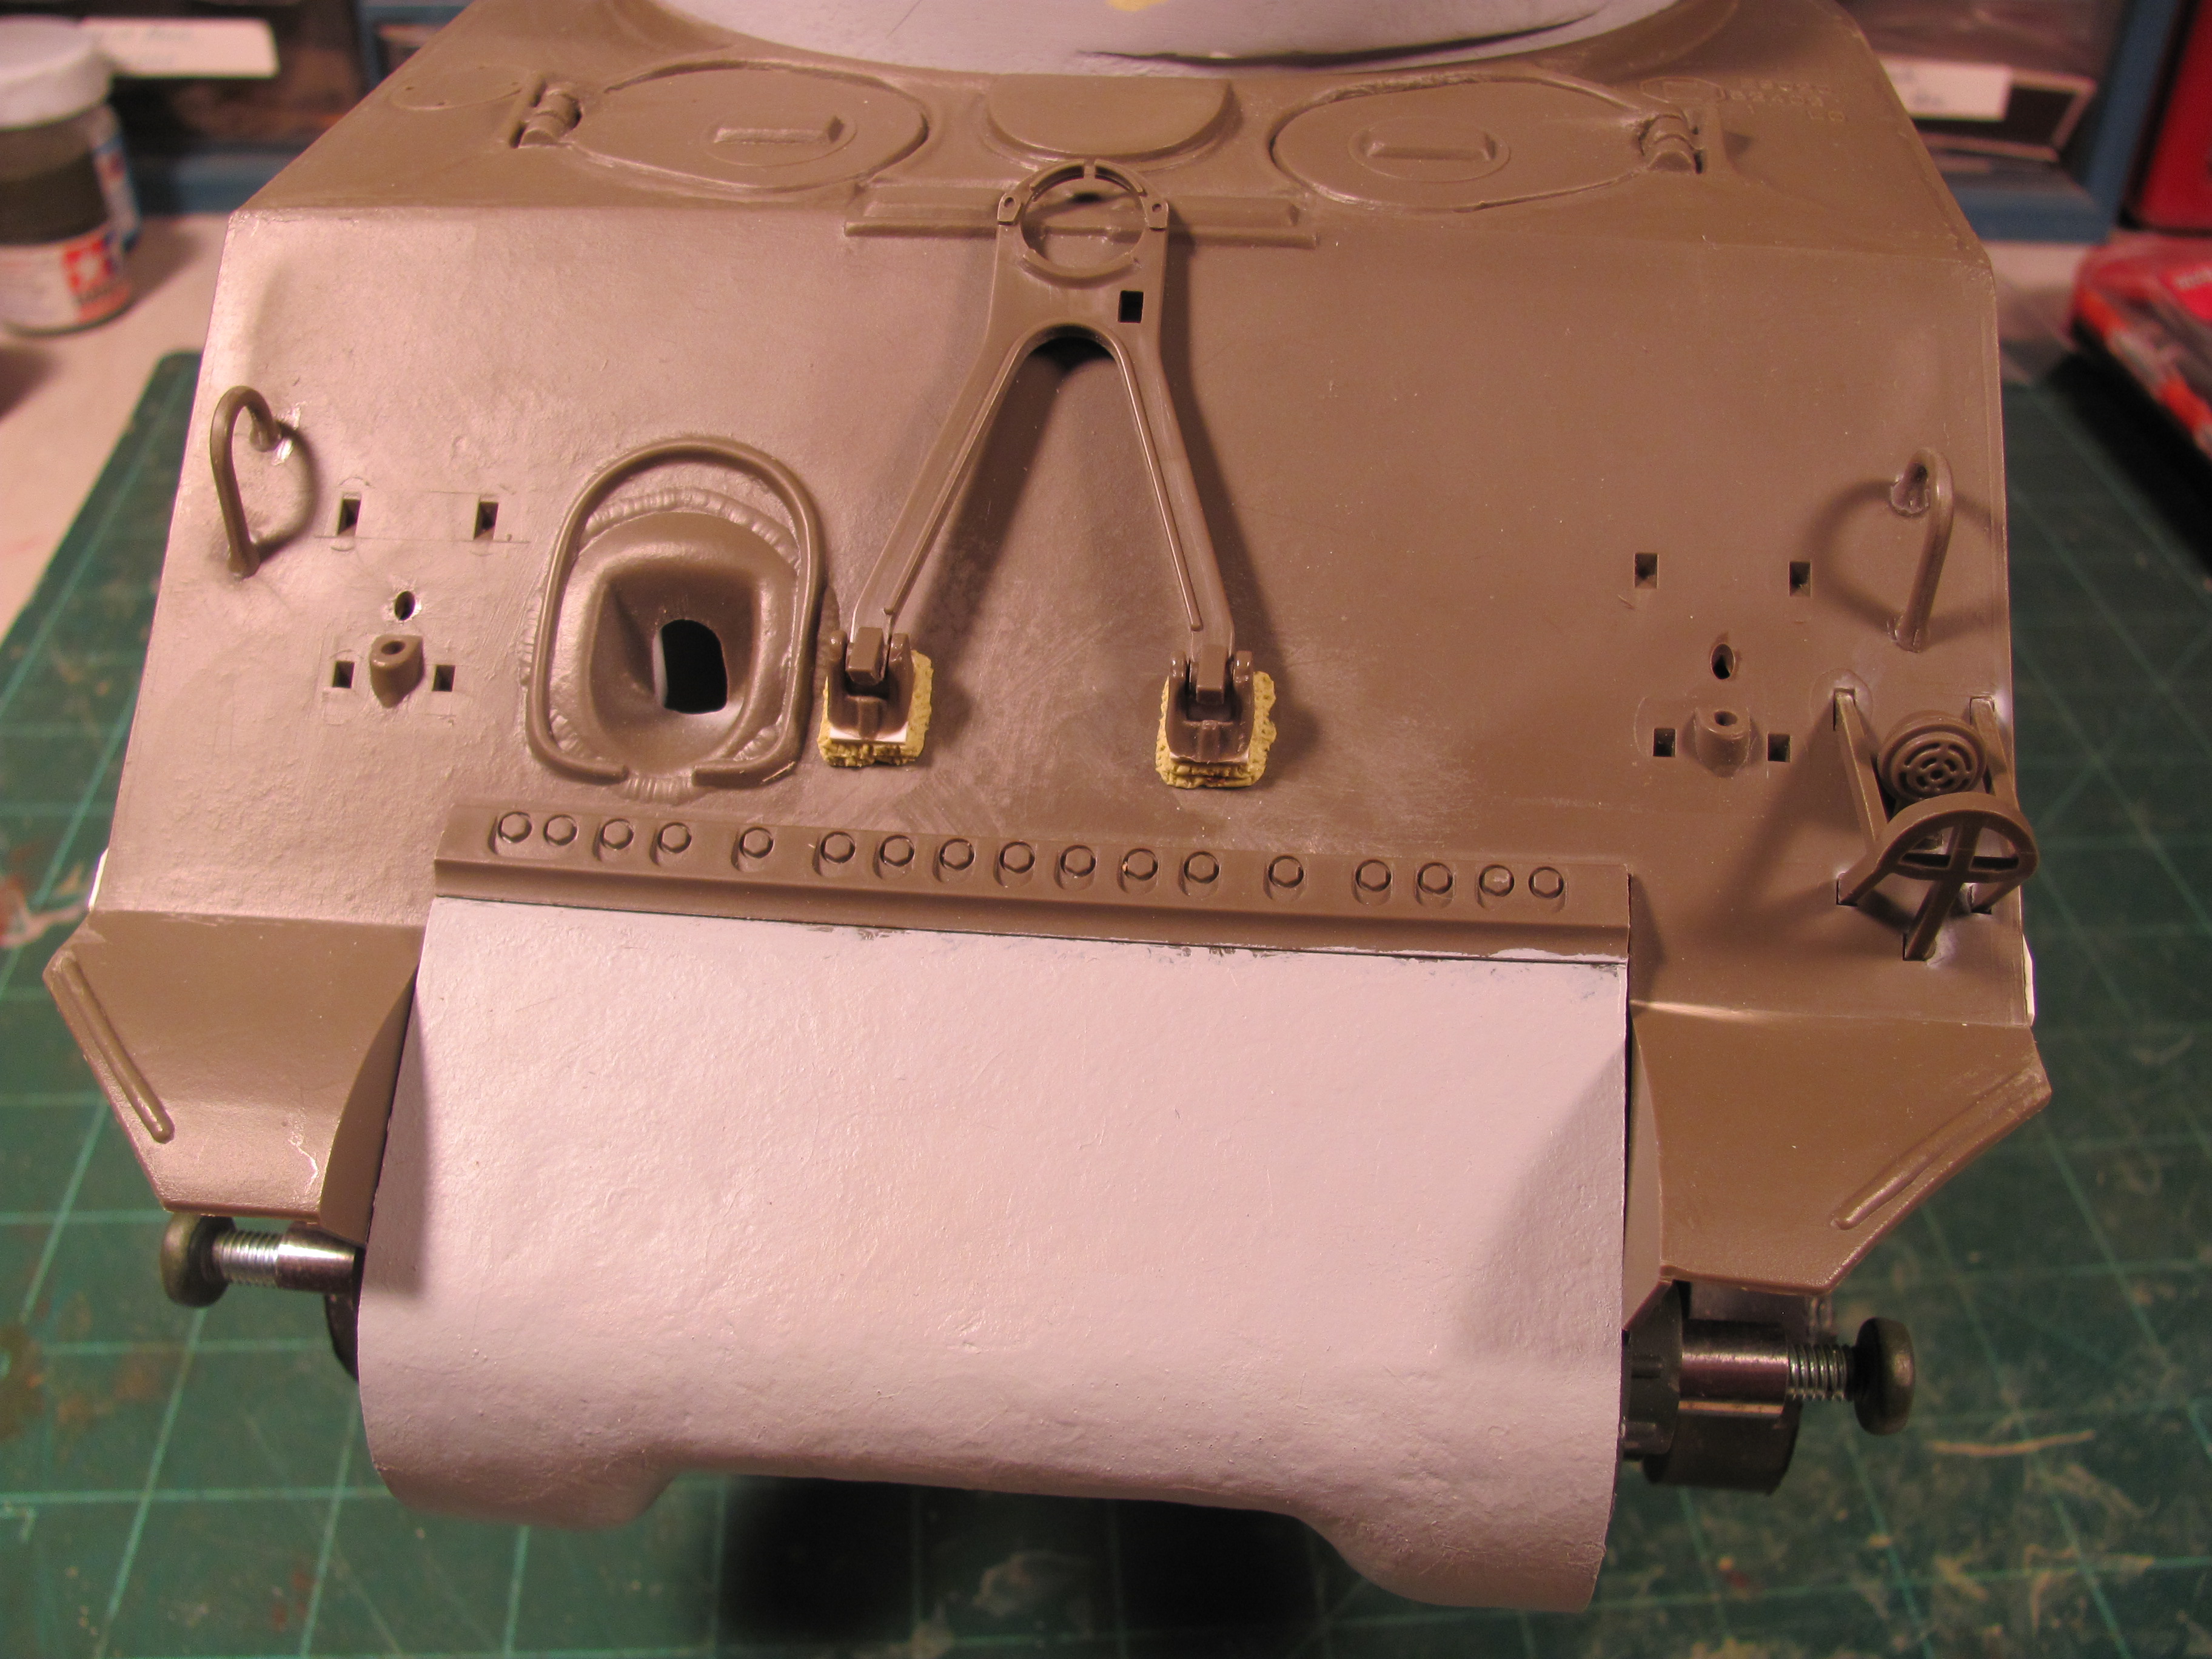
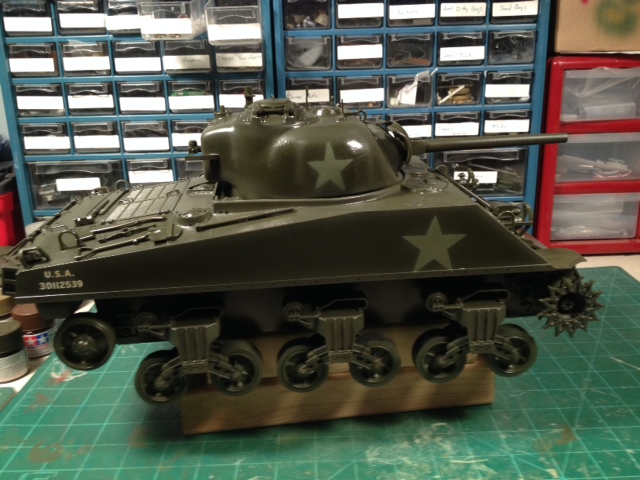
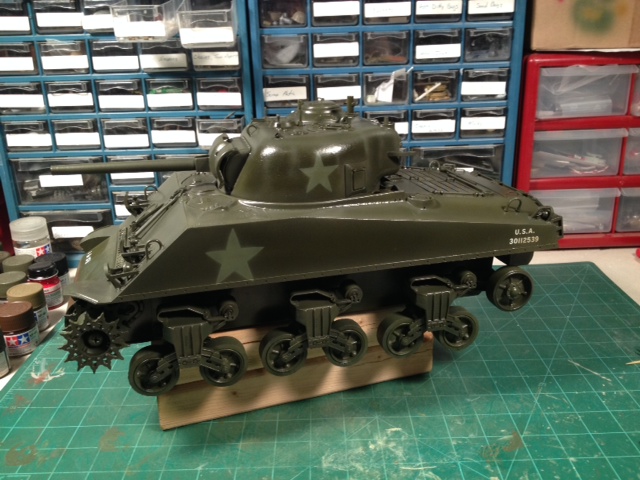
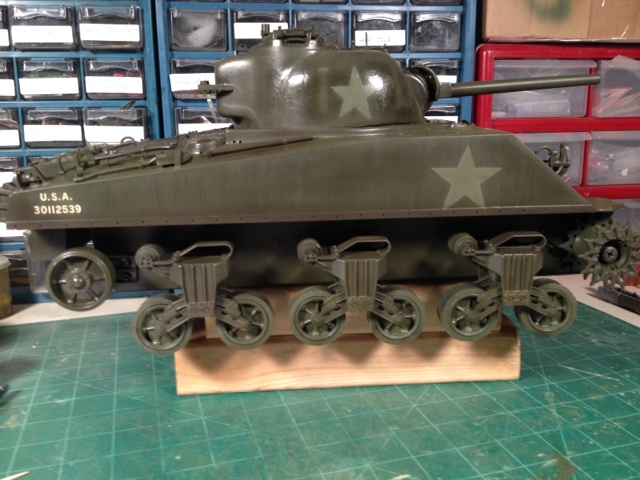
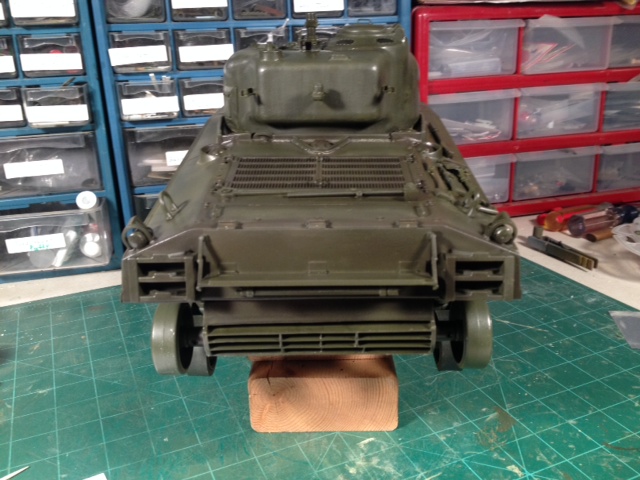
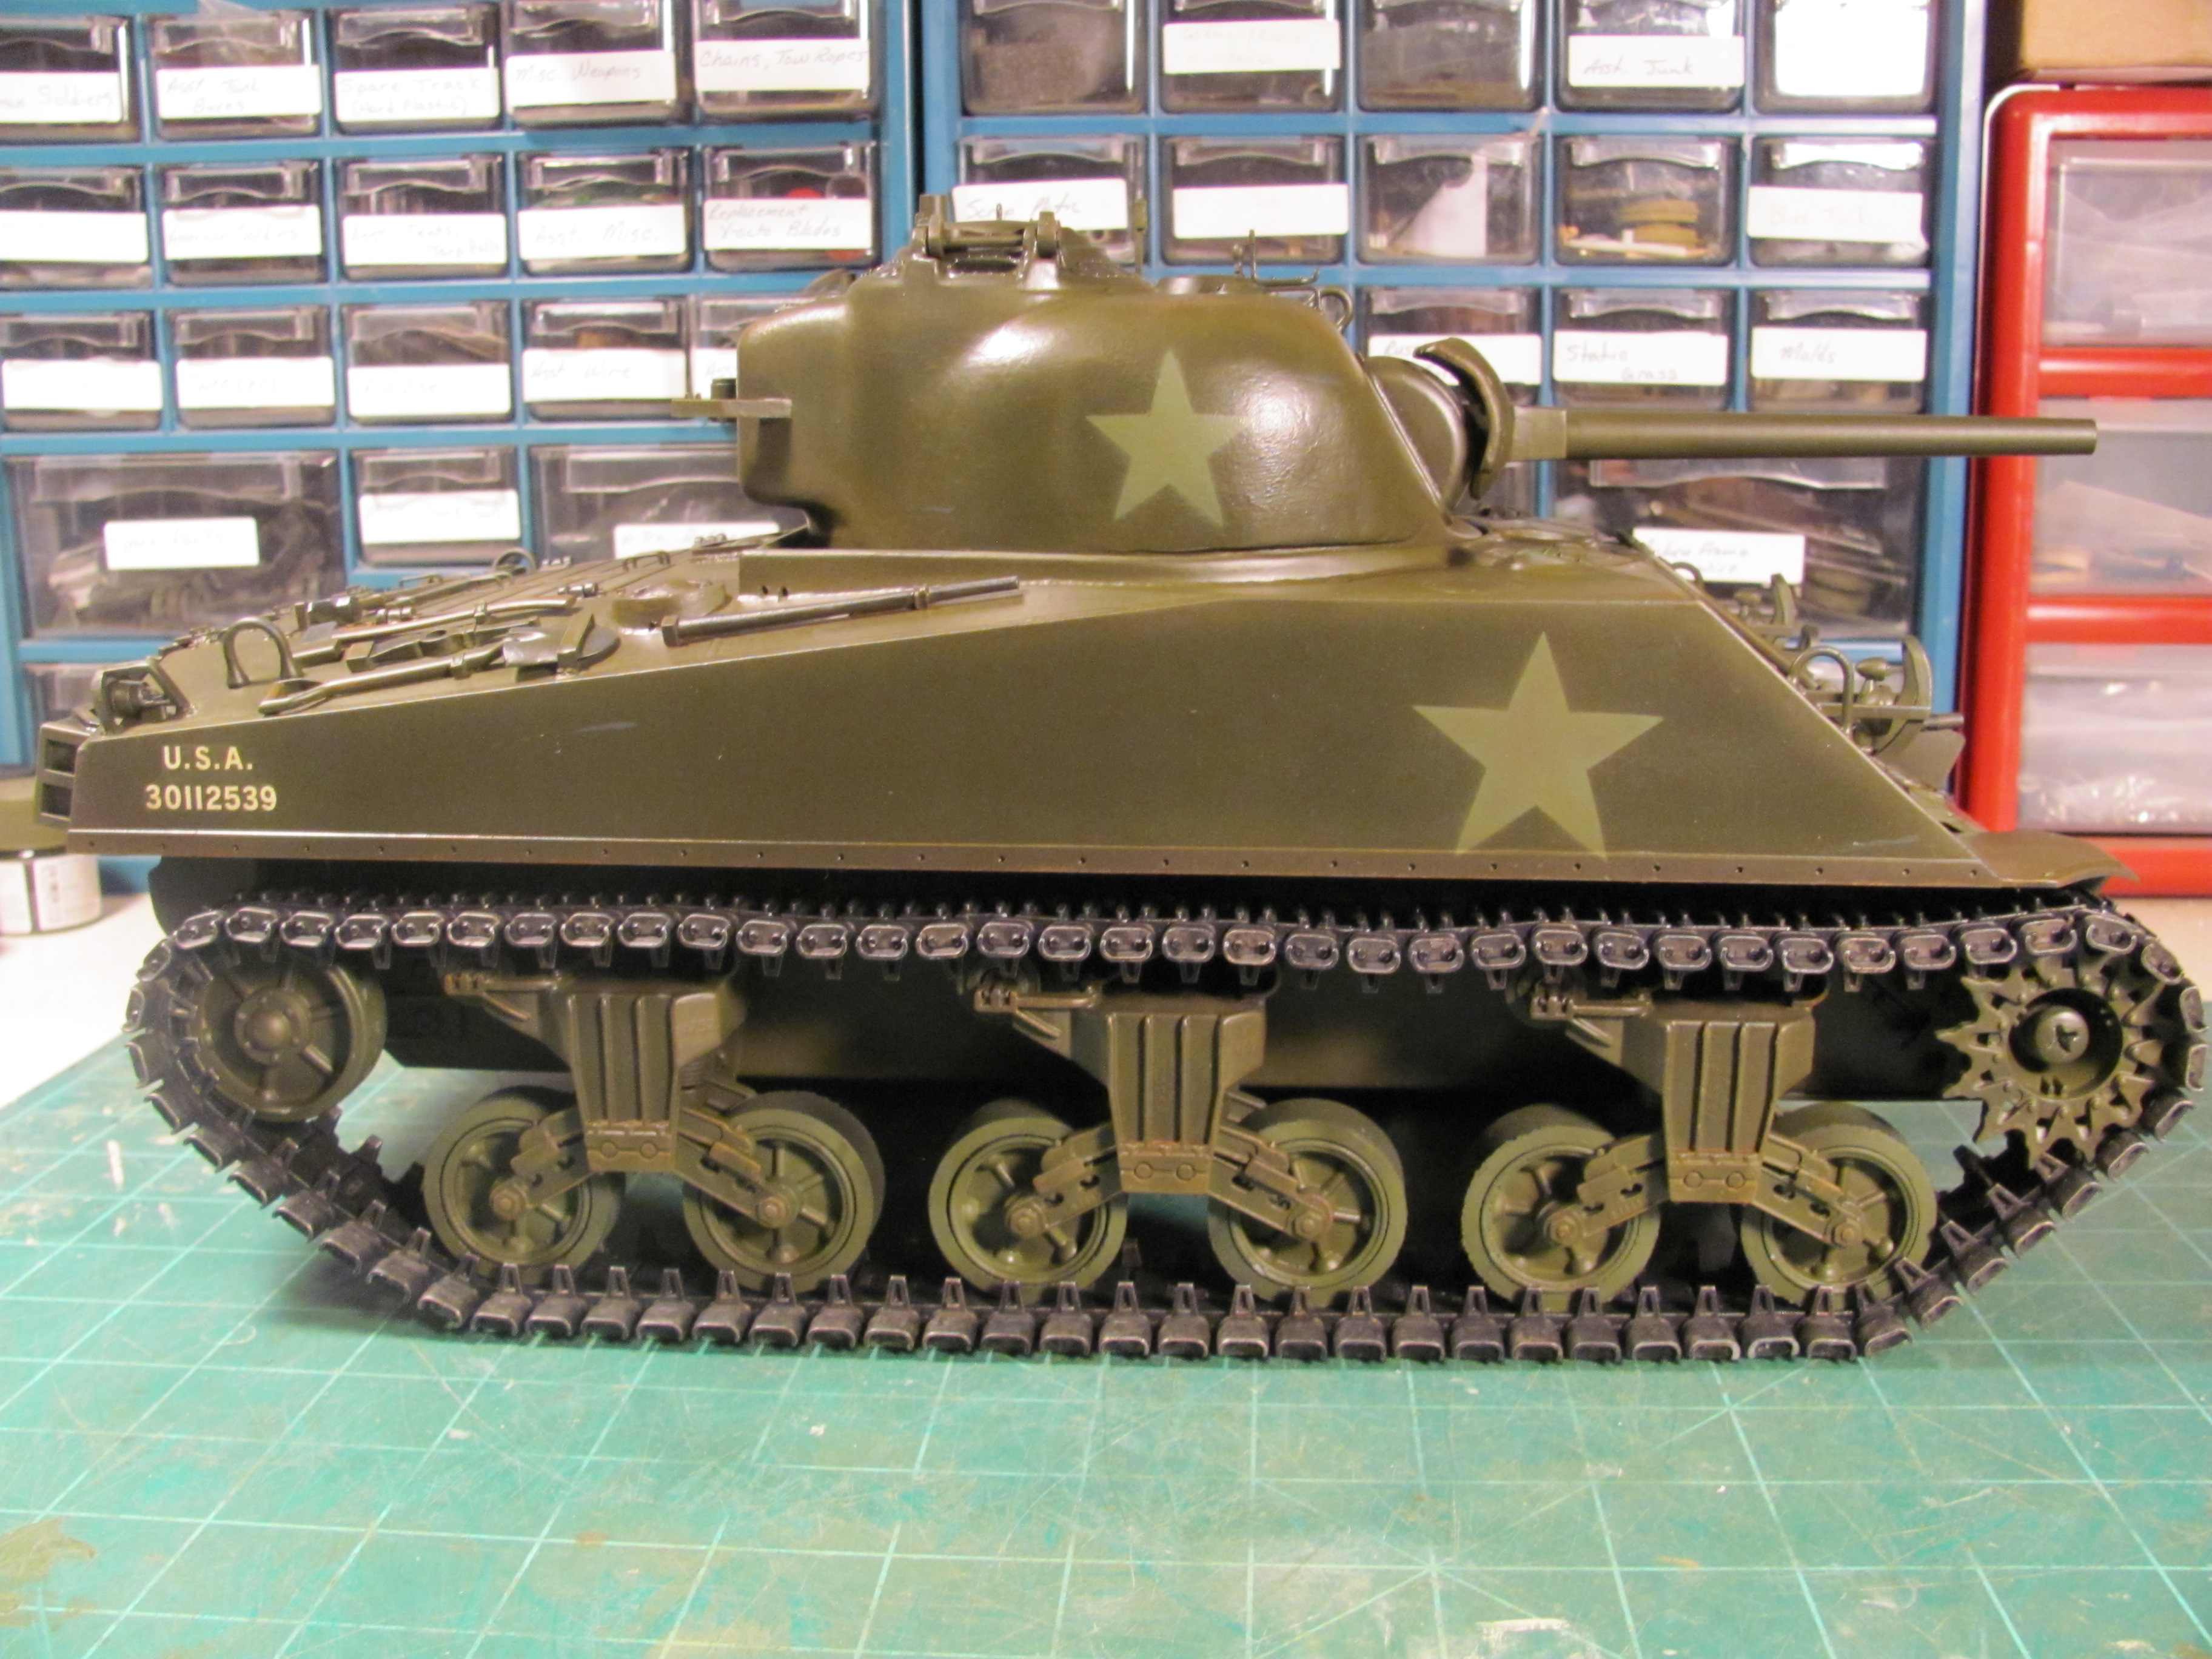
Finally! The Sherman has its first coat of paint!! the headlights are still masked as i will begin the weathering process tomorrow after this paint cures for a day.
I added weld beads around all the guards for the headlights, taillights, and rear stowage rack. The casting effects on the turret and tranny cover, i think are subtle but still evident. I do like how the added turret armor came out, i think that was well worth the effort. I can't wait to get this done on the field!!
10-27-2014, 05:12 AM
#32
Thread Starter
Here is a quick list of the parts I used for this conversion:
1. Tamiya Sherman Kit
2. MATO VVSS
3. MATO Drive sprockets
4. MATO T49 tracks with duckbills
5. Heng Long Idler wheel w/ball bearings
6. MATO or Heng Long metal gun mantlet and trunion, can't remember which
7. Nick's resin rear deck, exhaust defelctor, gun shield, and barrel
8. Impact Final drive cover with bearings
9. Schumo hull plate
10. Long can motors
11. Dean connectors
12. Herman's modified outshafts
13. blue gears in the turret rotation and gun elevation
14. metal gun elevation arm
15. asst. M2 and M3 bolts
I probalby should have done on the first thread!
Last edited by manchu9inf; 10-27-2014 at 09:51 AM. Reason: spelling
11-01-2014, 01:52 PM
#34
Thread Starter
well, i did the weathering this week, and i after the paint had dried, i coat it with Future and then airbrush with the basic color lighted and heavily thinned, here are some pics.
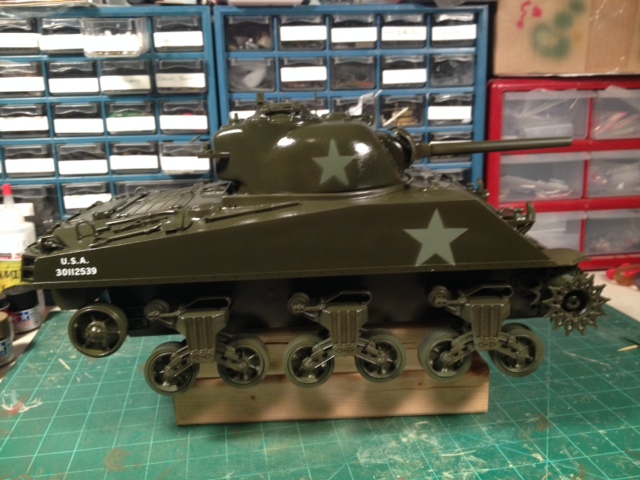
After that I will do the first oil wash.


Once that is complete, i do the 2nd oil wash on the suspension in a darker color and airbrush too.
once that is done, i will dry brush certain raised surfaces. once that is complete, i dullcote the tank.
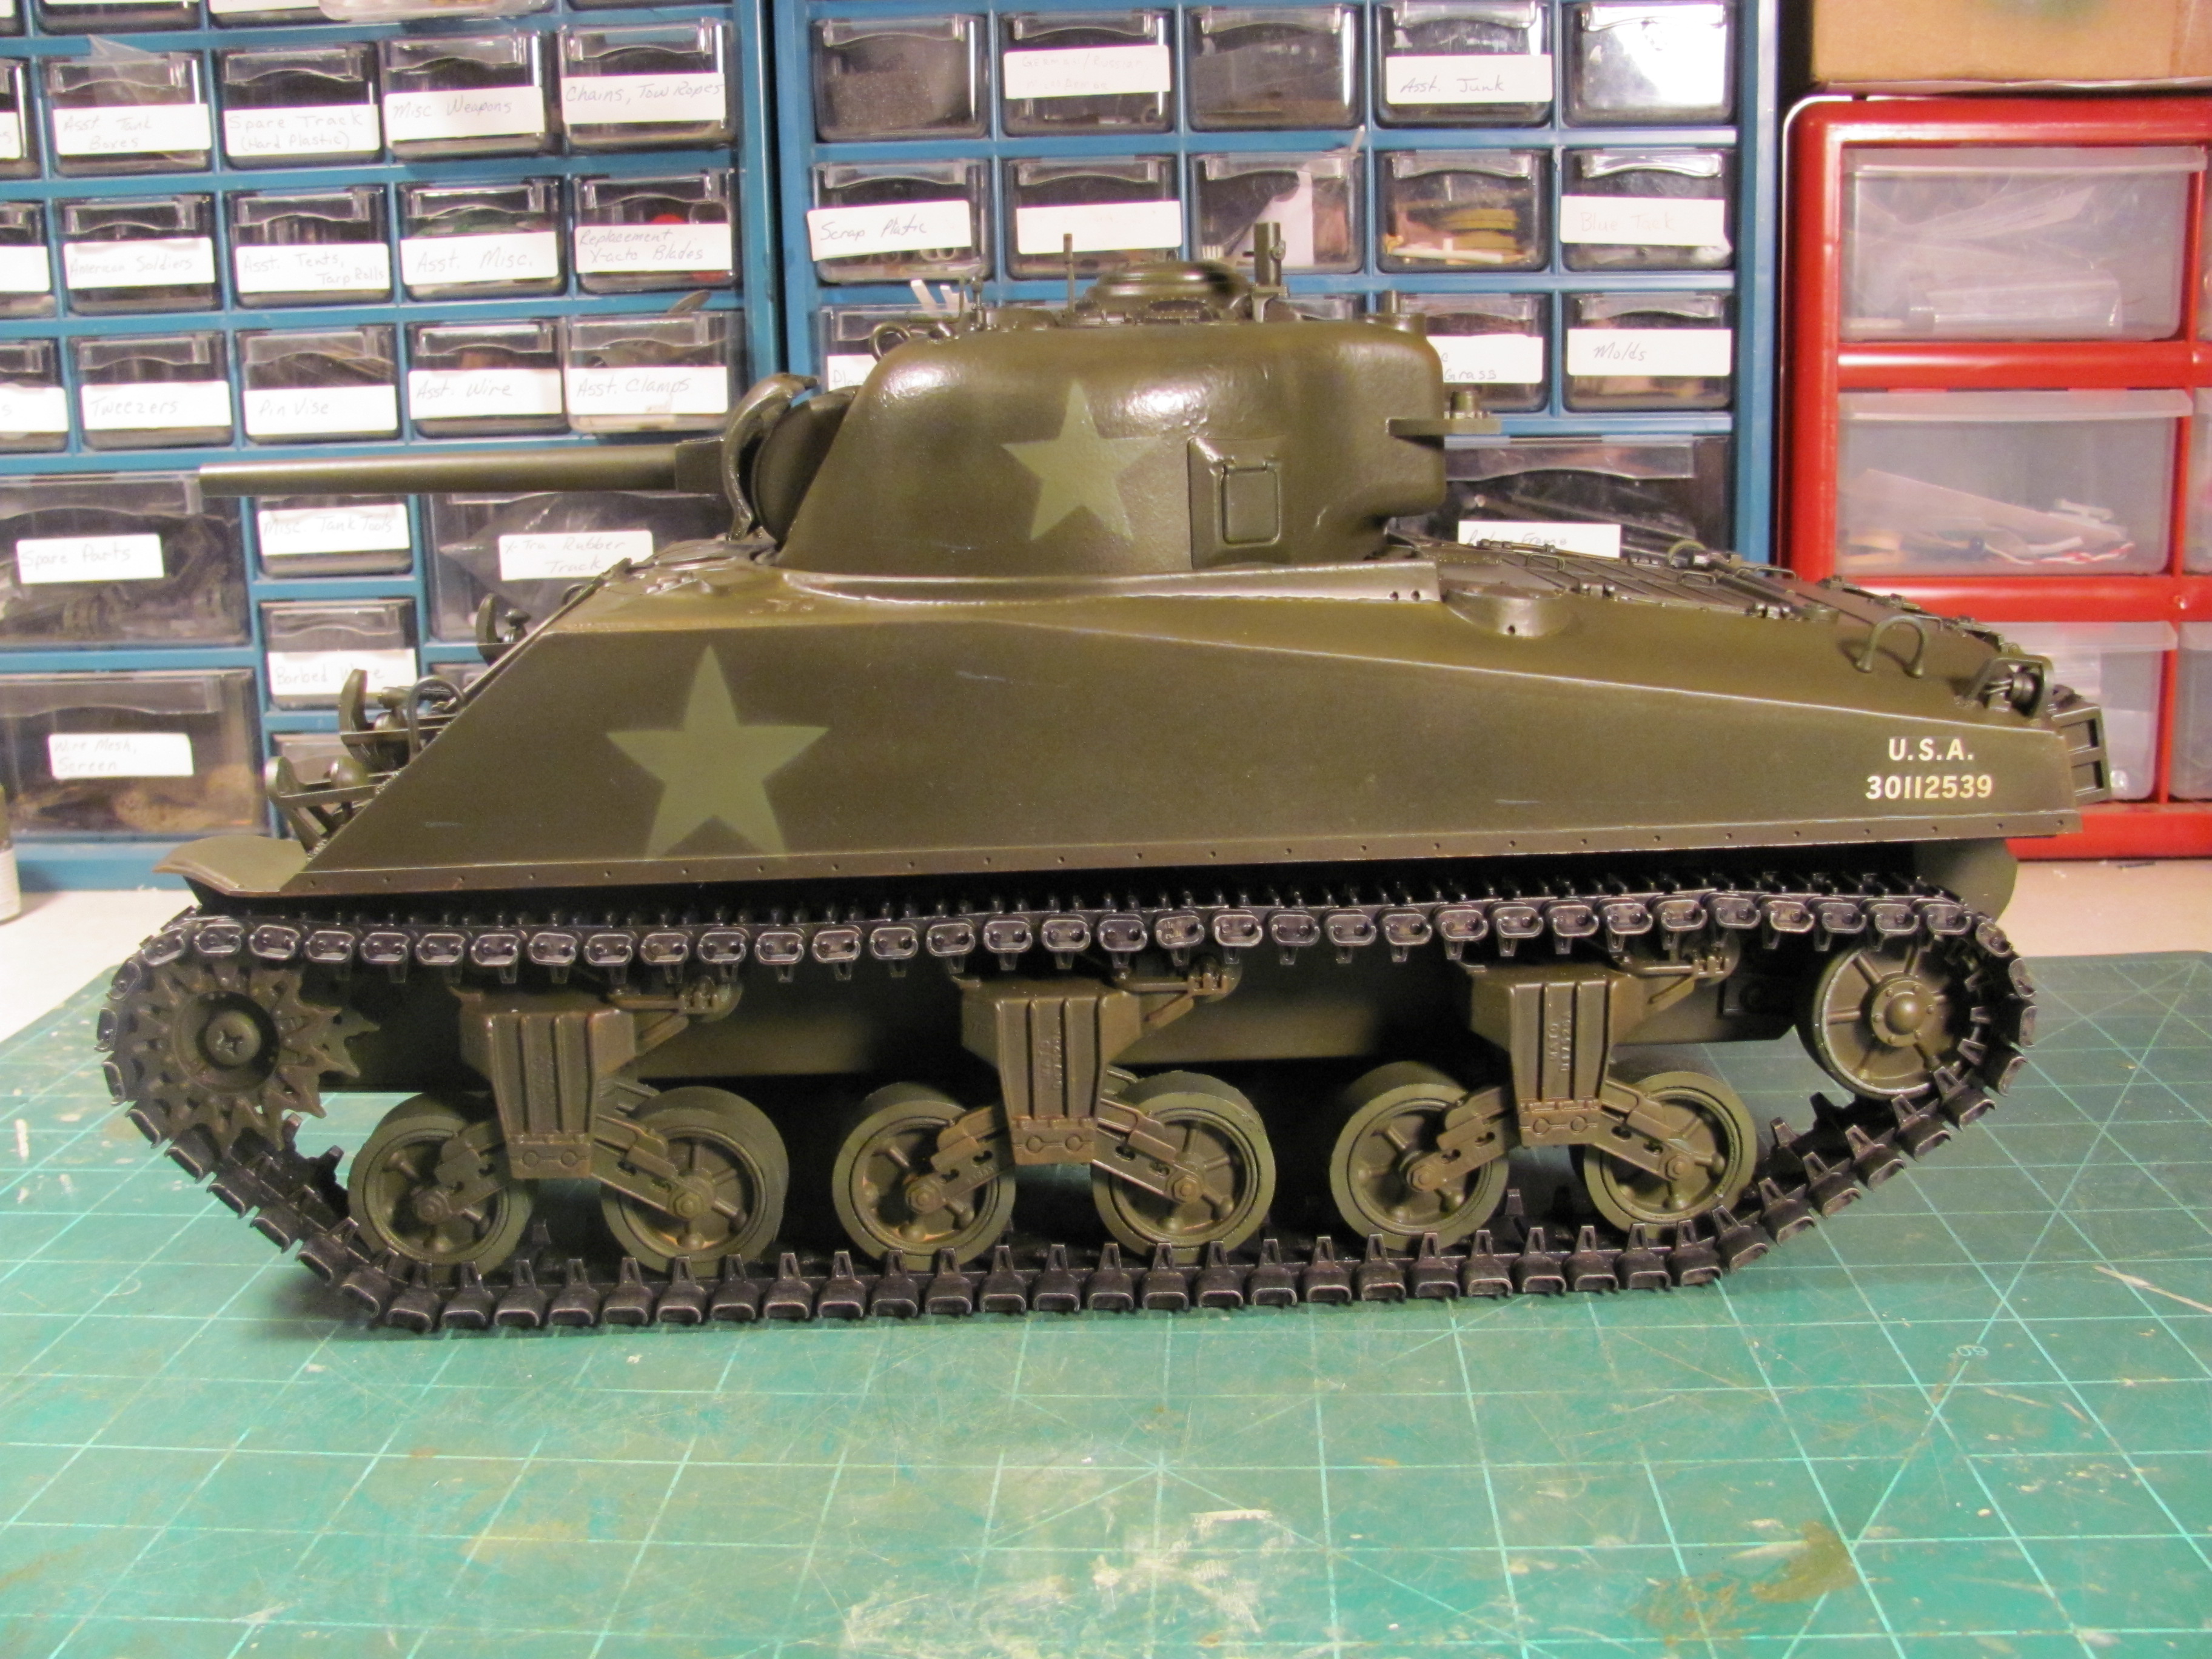
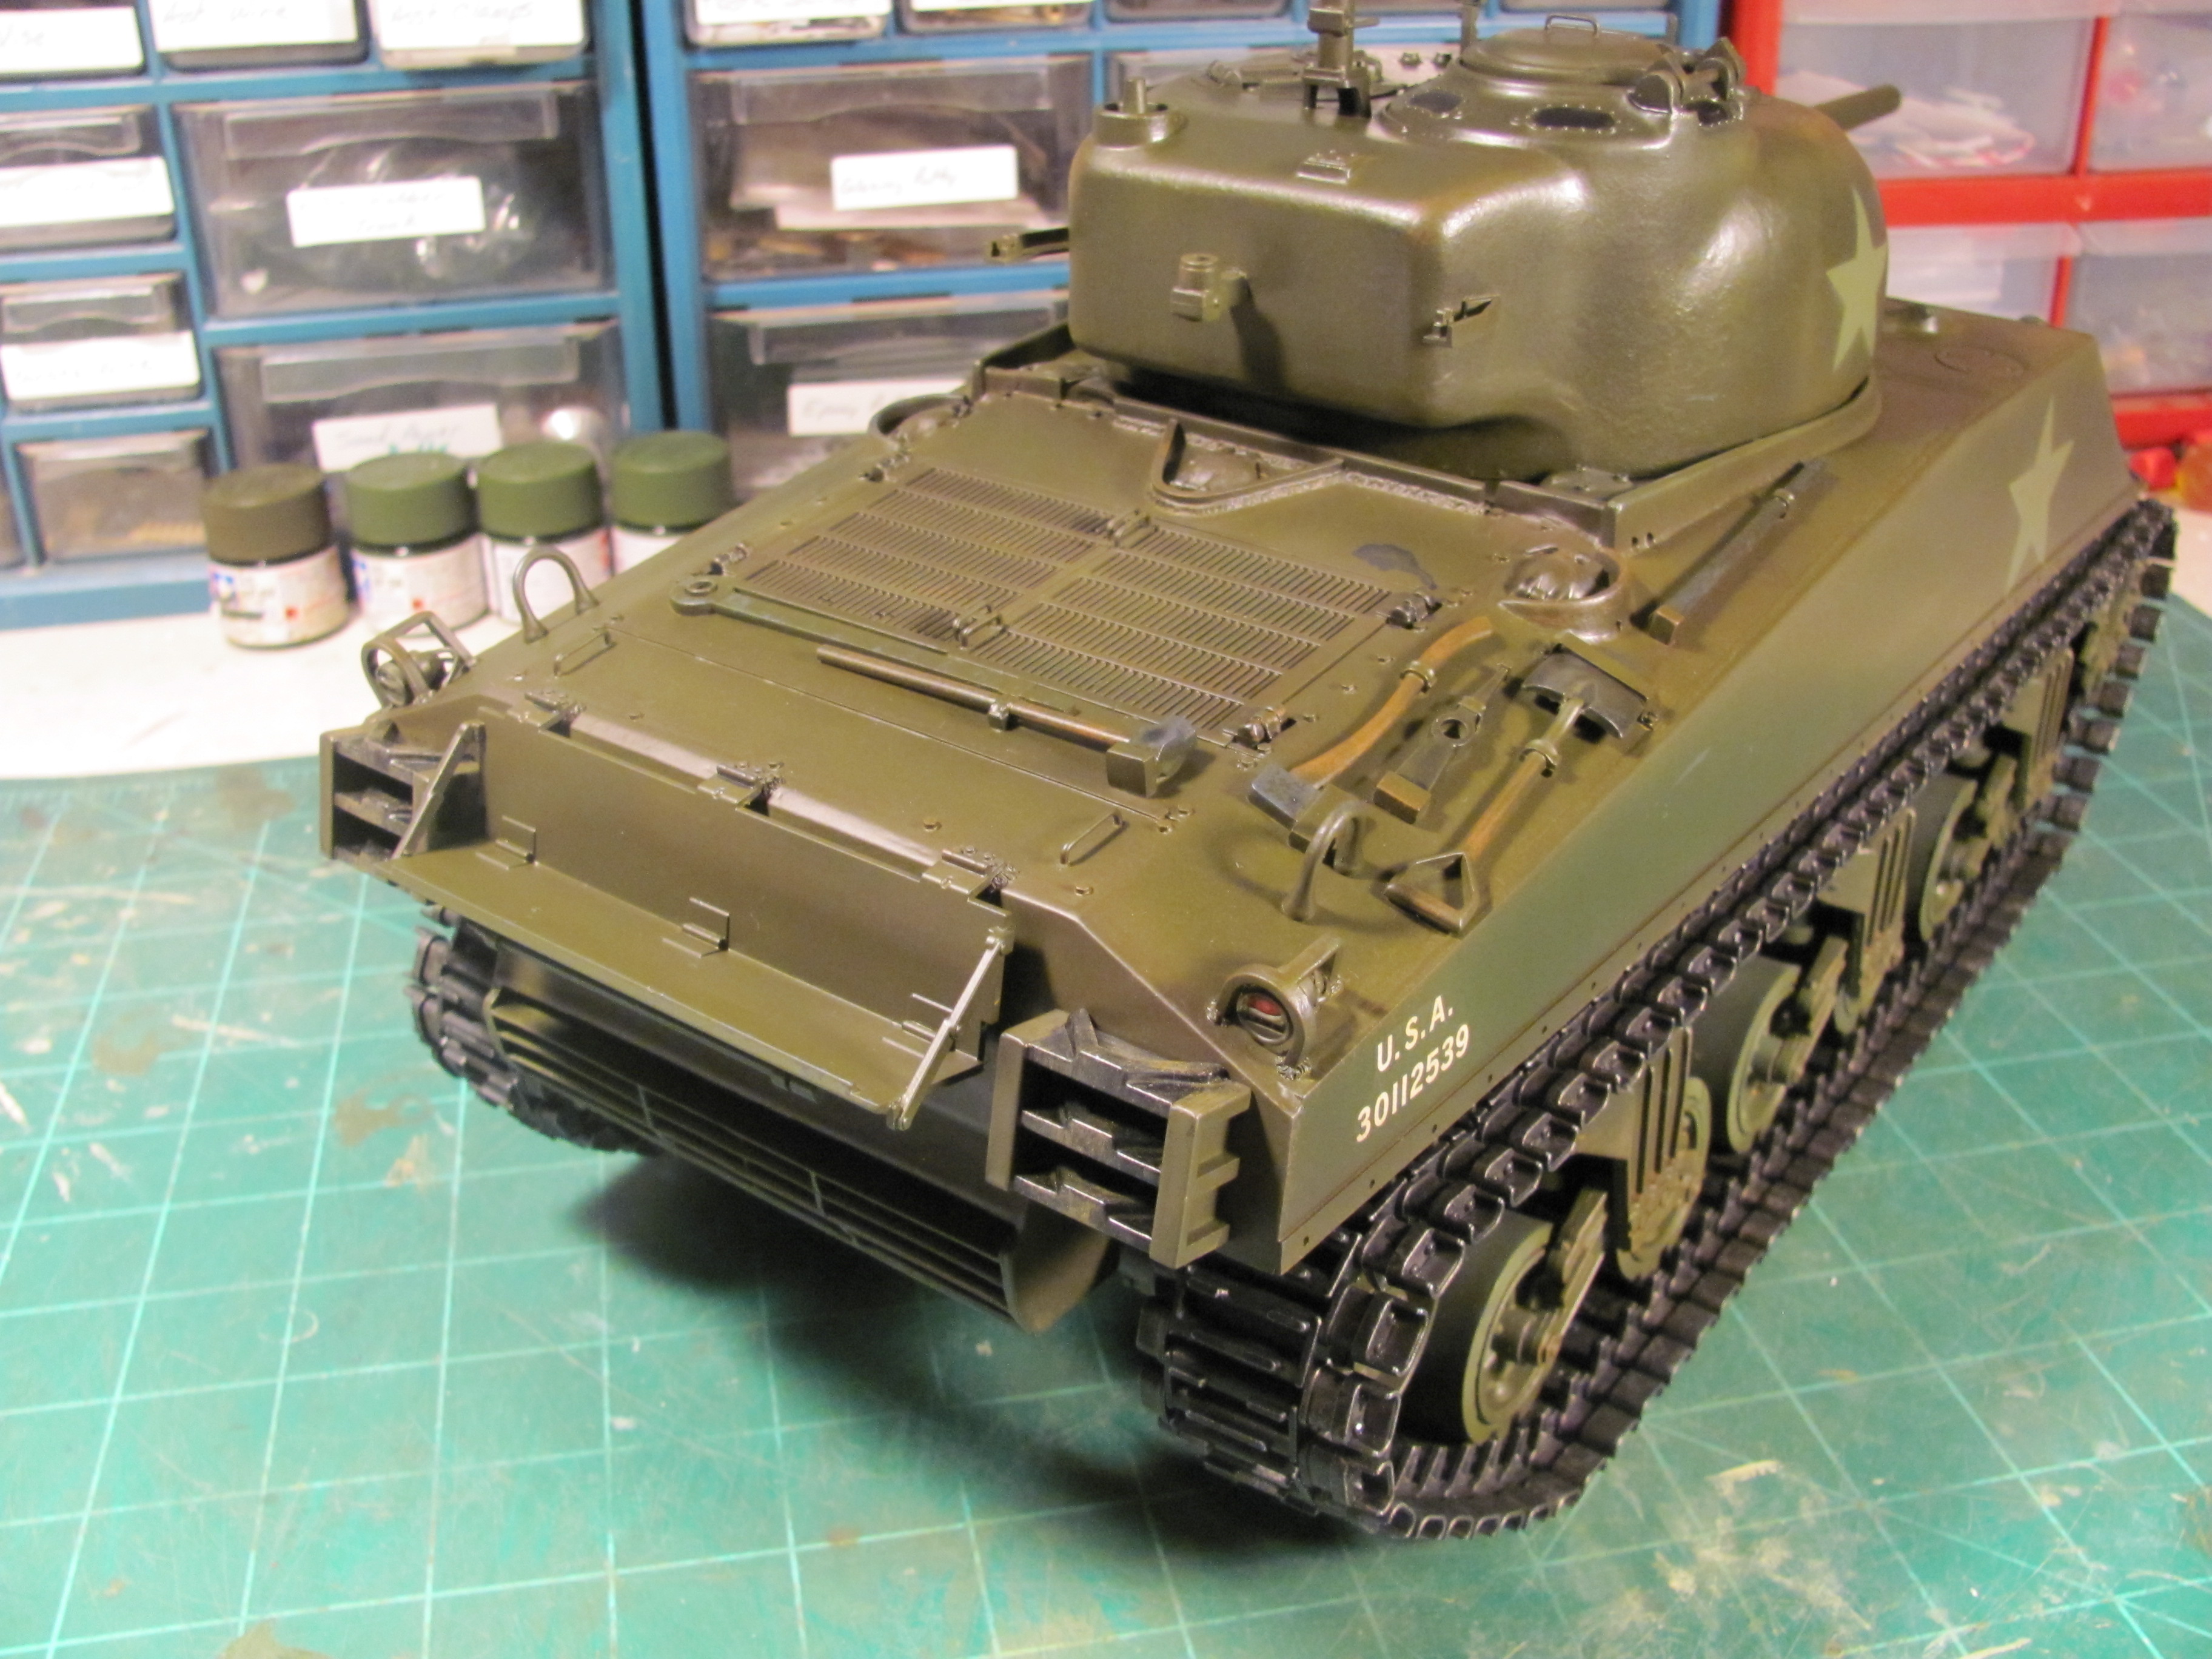
that is about as much weathering as i do, not too complicated, but i like the results. The stars were simply masked and painted on, i will add another light coat of dullcote and it will be pretty much finished, i have to still mount the emitter on the barrel and i plan to have that completed tomorrow. And she will be ready for this coming weekend. I will eventually get the .50 cal and stowage items done, but i figure i have all winter to get that done.
After that I will do the first oil wash.
Once that is complete, i do the 2nd oil wash on the suspension in a darker color and airbrush too.
once that is done, i will dry brush certain raised surfaces. once that is complete, i dullcote the tank.
that is about as much weathering as i do, not too complicated, but i like the results. The stars were simply masked and painted on, i will add another light coat of dullcote and it will be pretty much finished, i have to still mount the emitter on the barrel and i plan to have that completed tomorrow. And she will be ready for this coming weekend. I will eventually get the .50 cal and stowage items done, but i figure i have all winter to get that done.
11-05-2014, 06:23 PM
#38
Thread Starter
that turret is kinda small, i suppose it could be crammed in there though i can't wait to get it on the field. And a hull defense might be in the future!
11-06-2014, 02:47 AM
#39
I haven't done it but know it will fit!
Jeff
Jeff
11-06-2014, 04:29 AM
#40

Join Date: Sep 2007
Location: ChesapeakeVA - VIRGINIA
Posts: 160
Likes: 0
Received 0 Likes
on
0 Posts
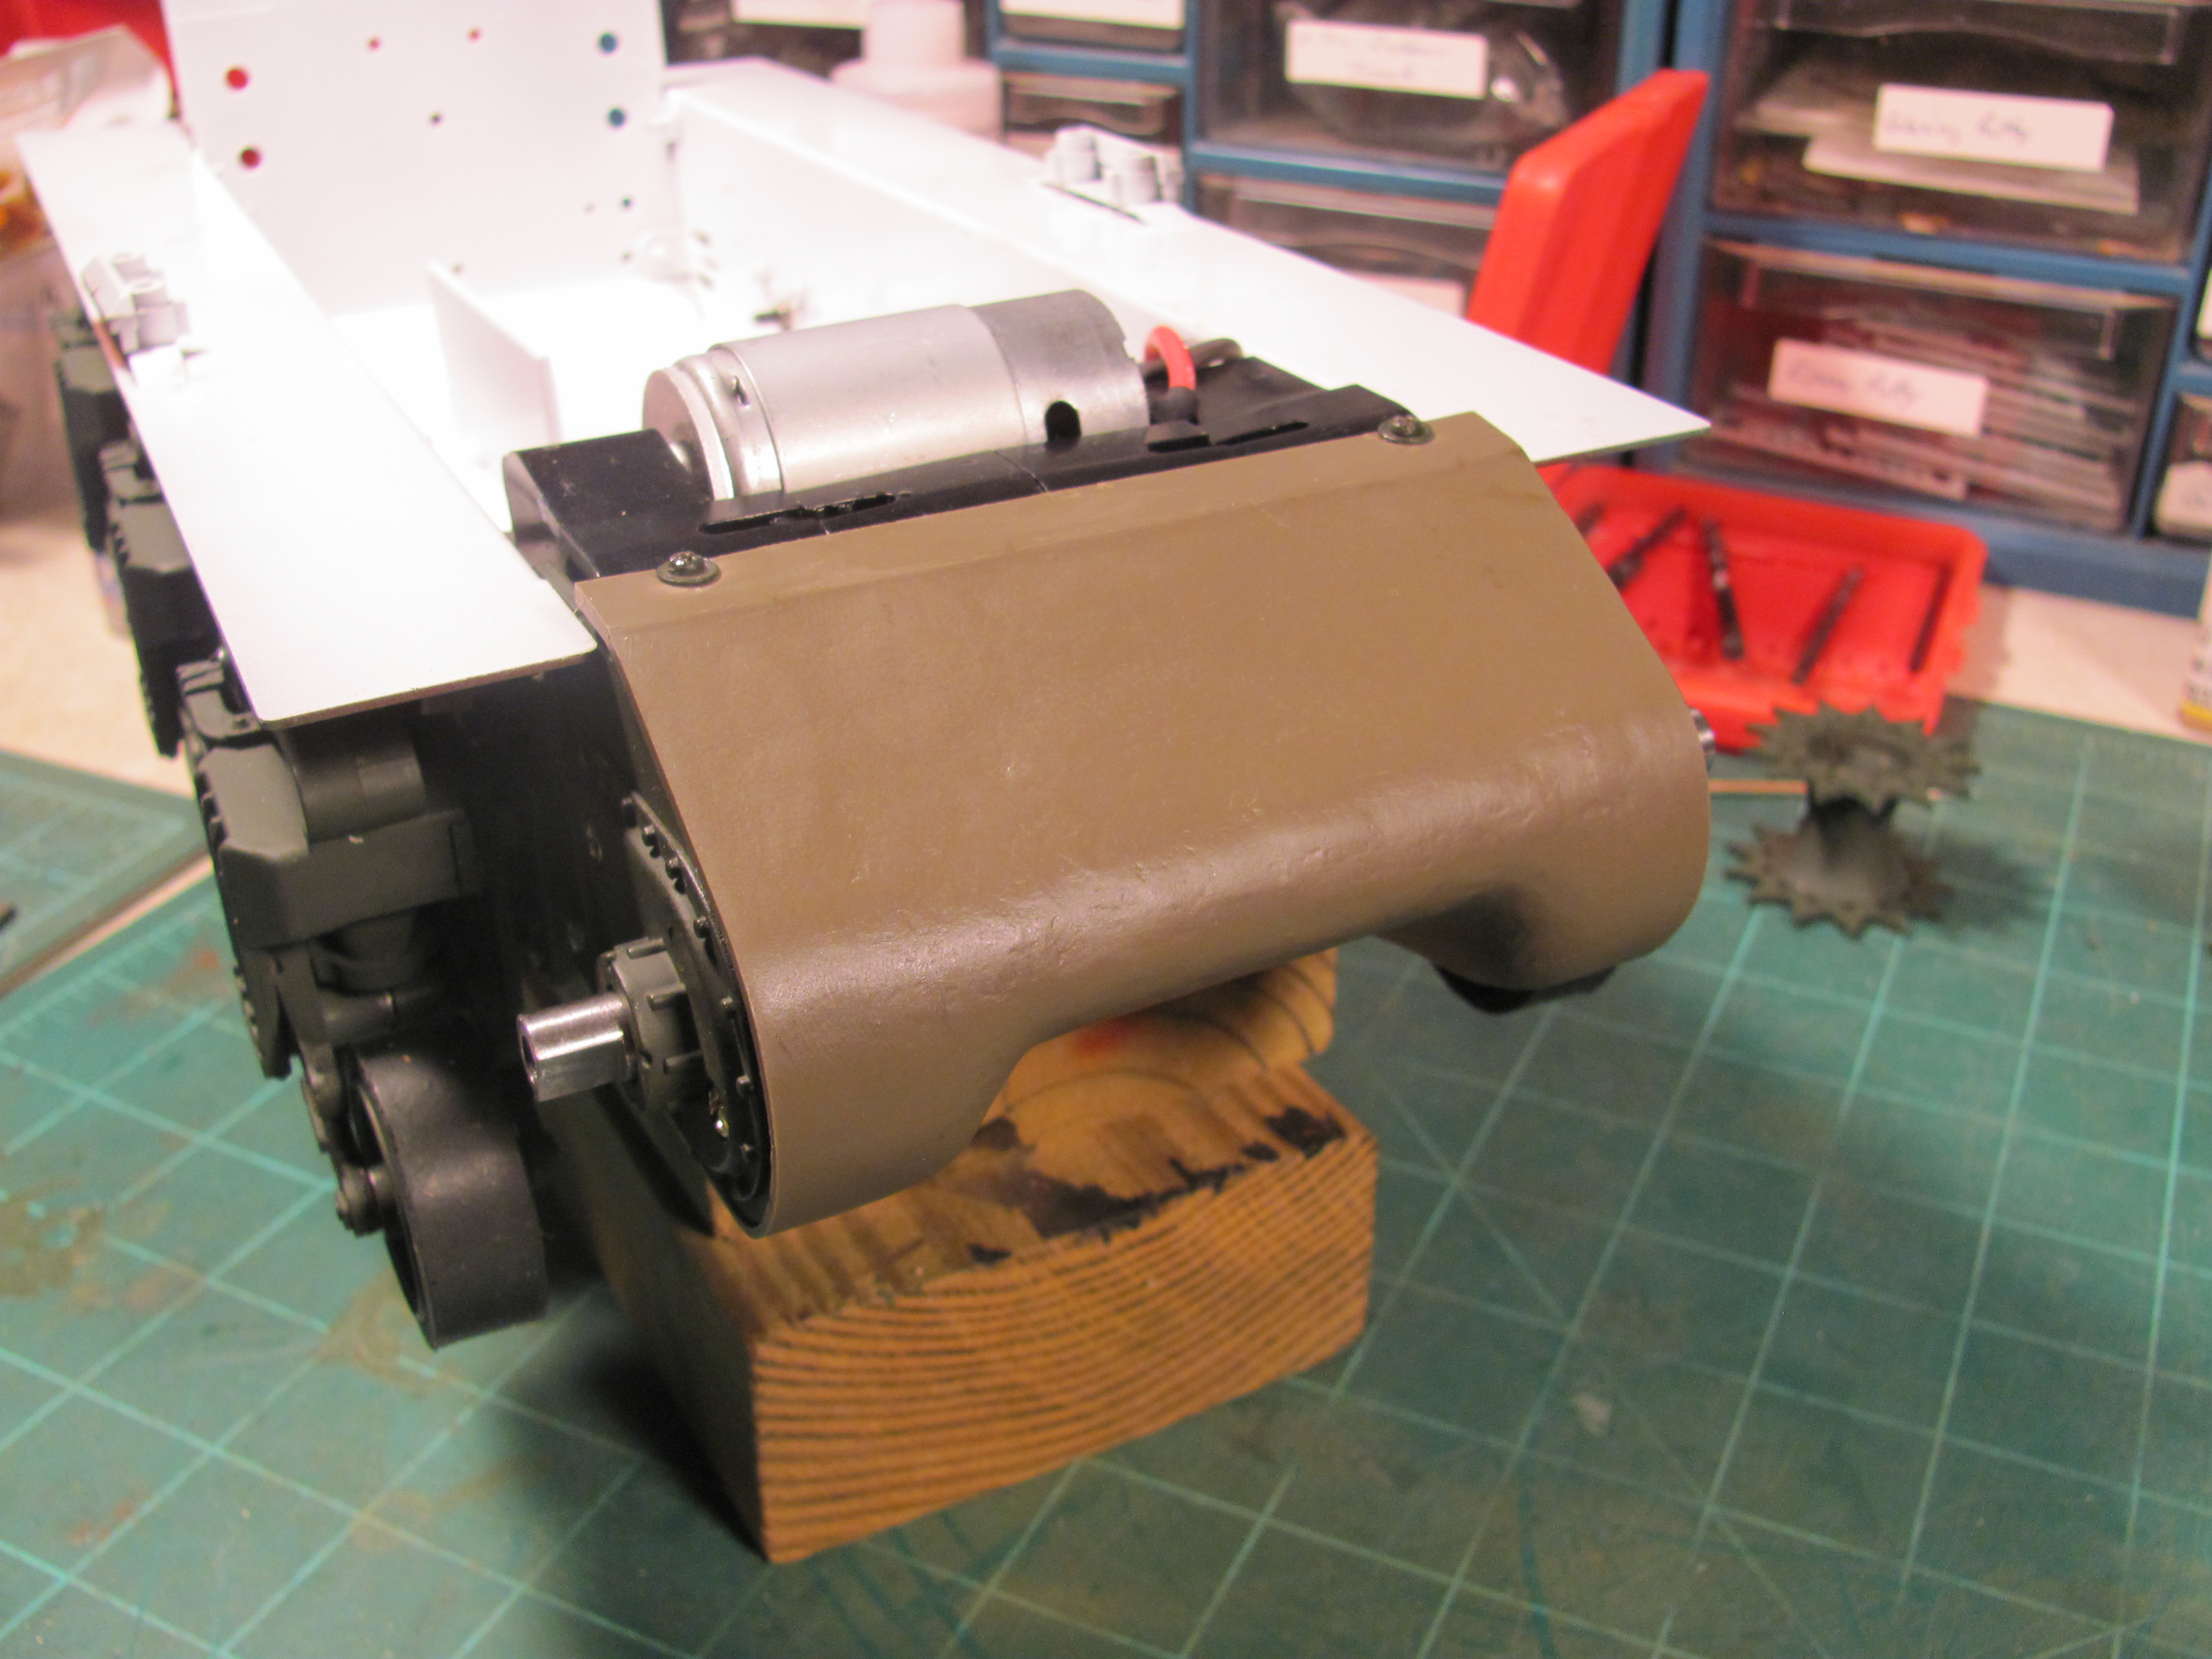
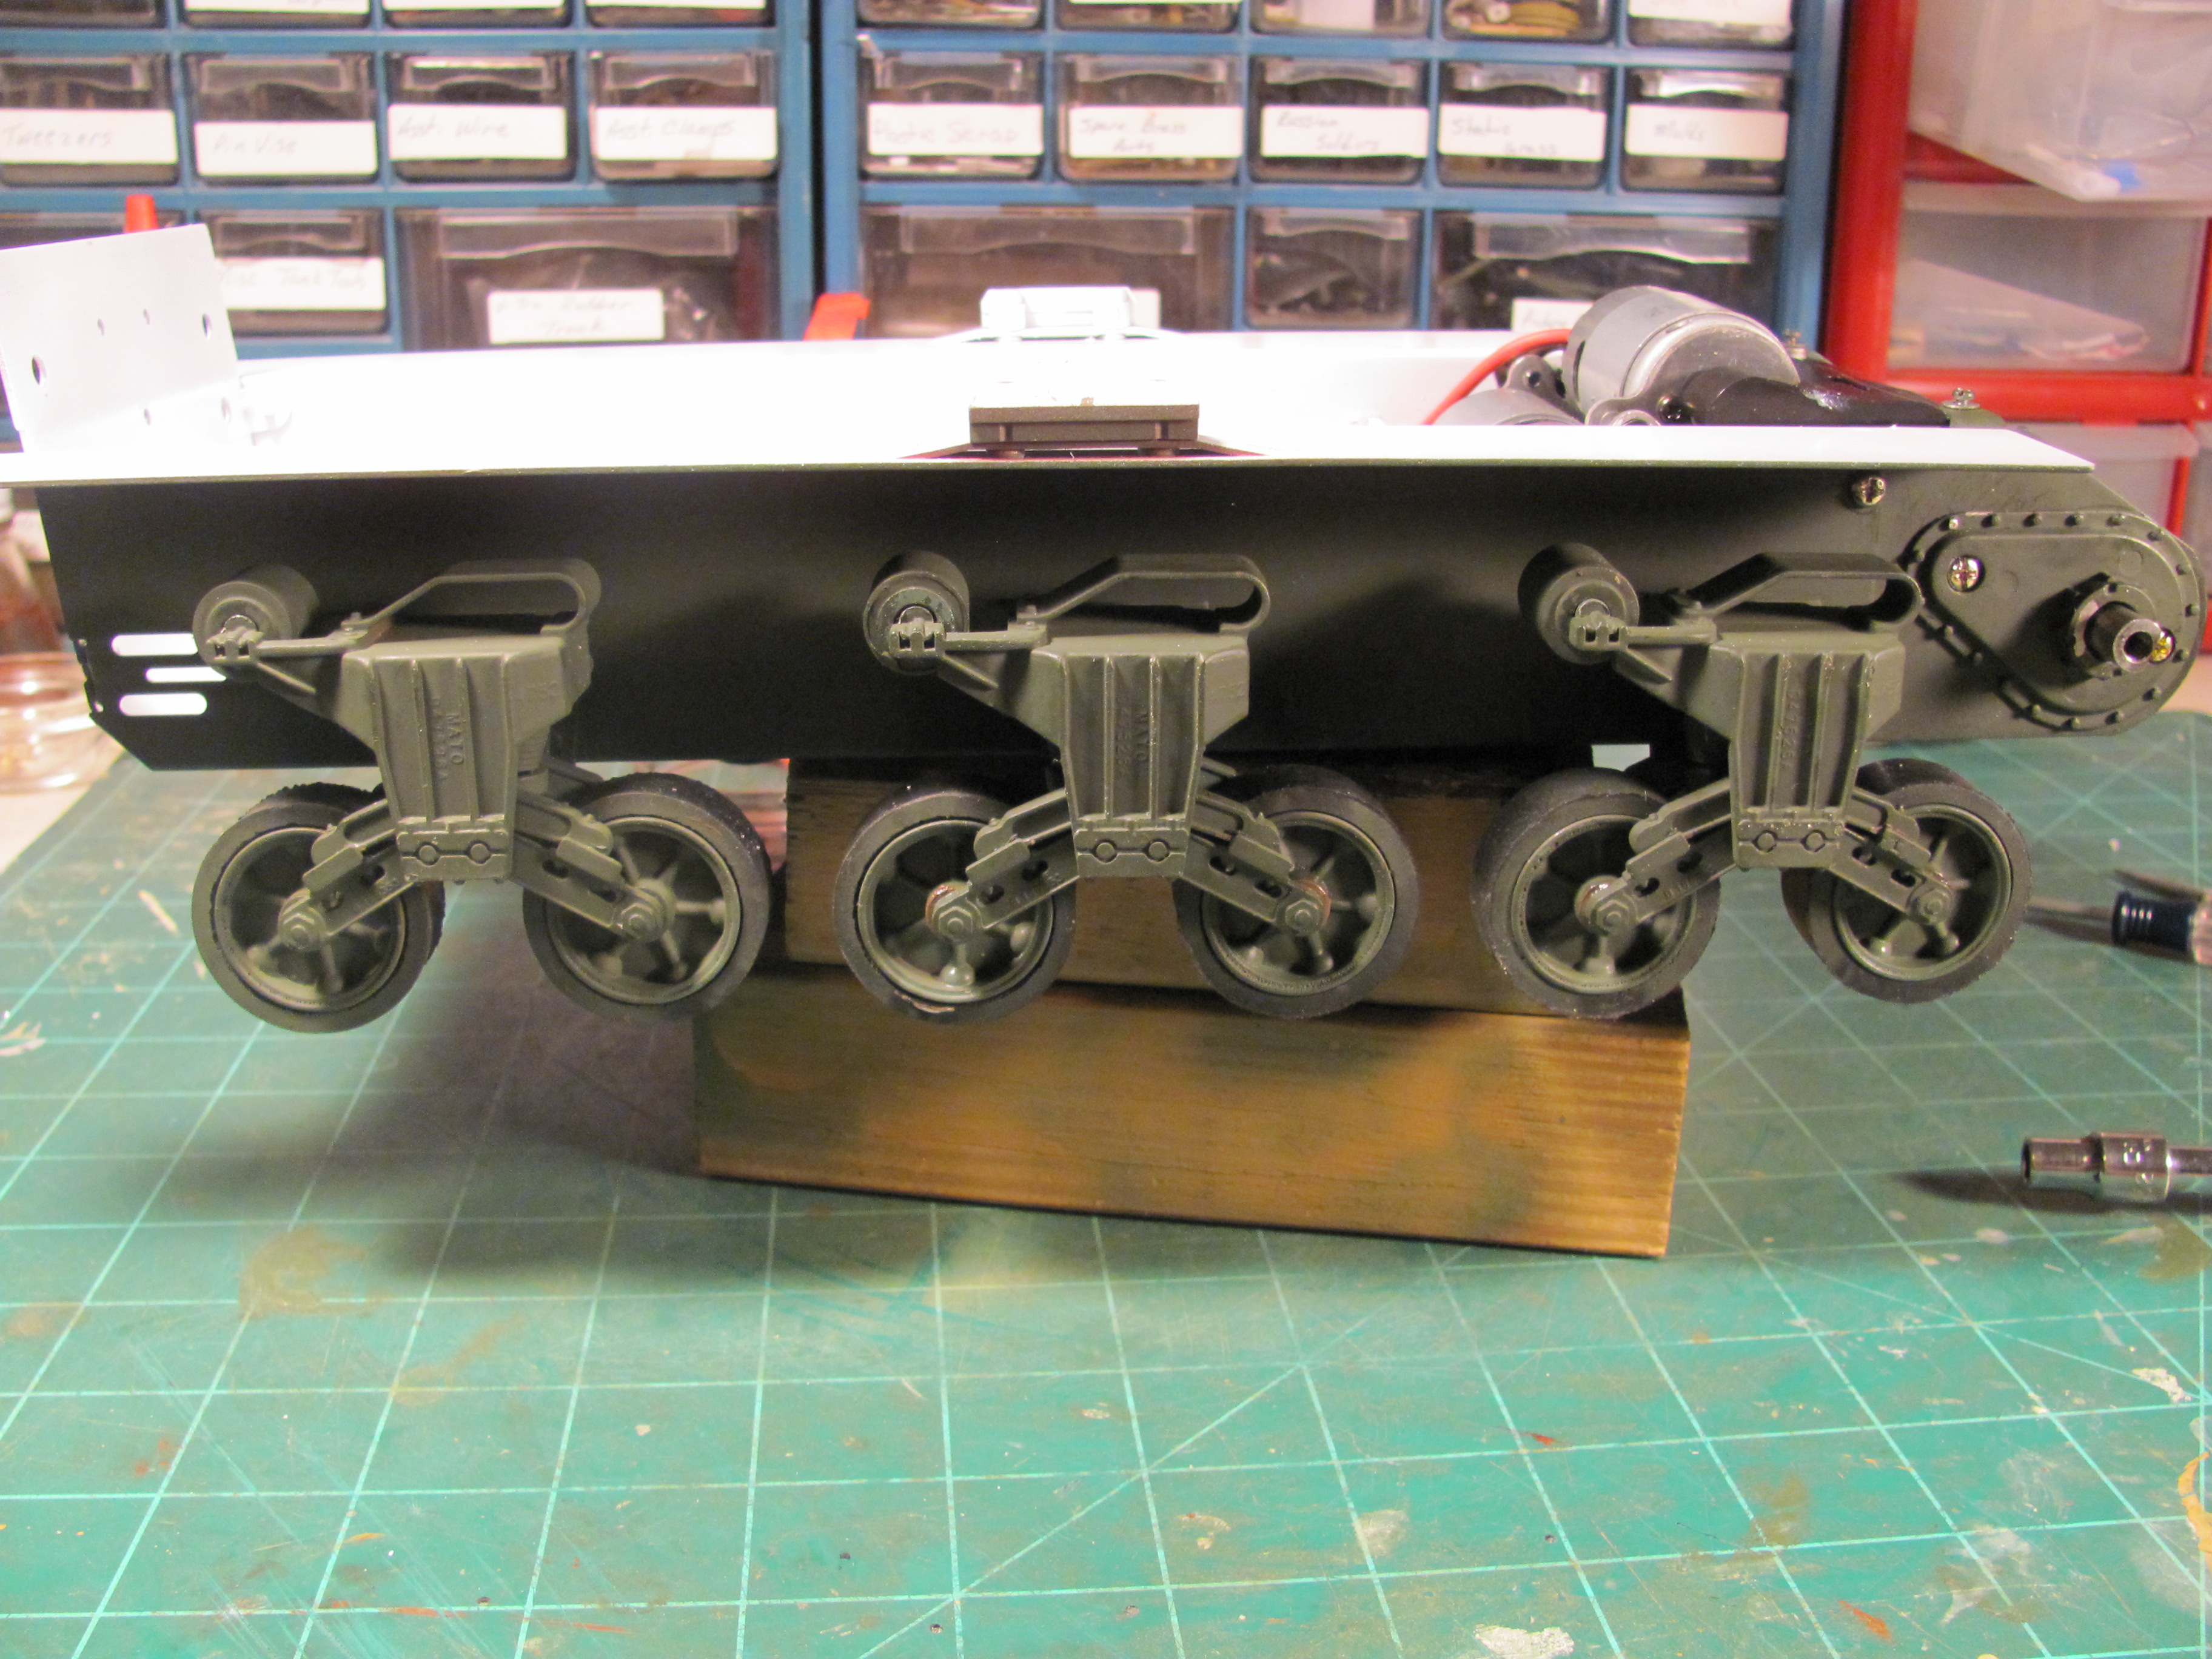
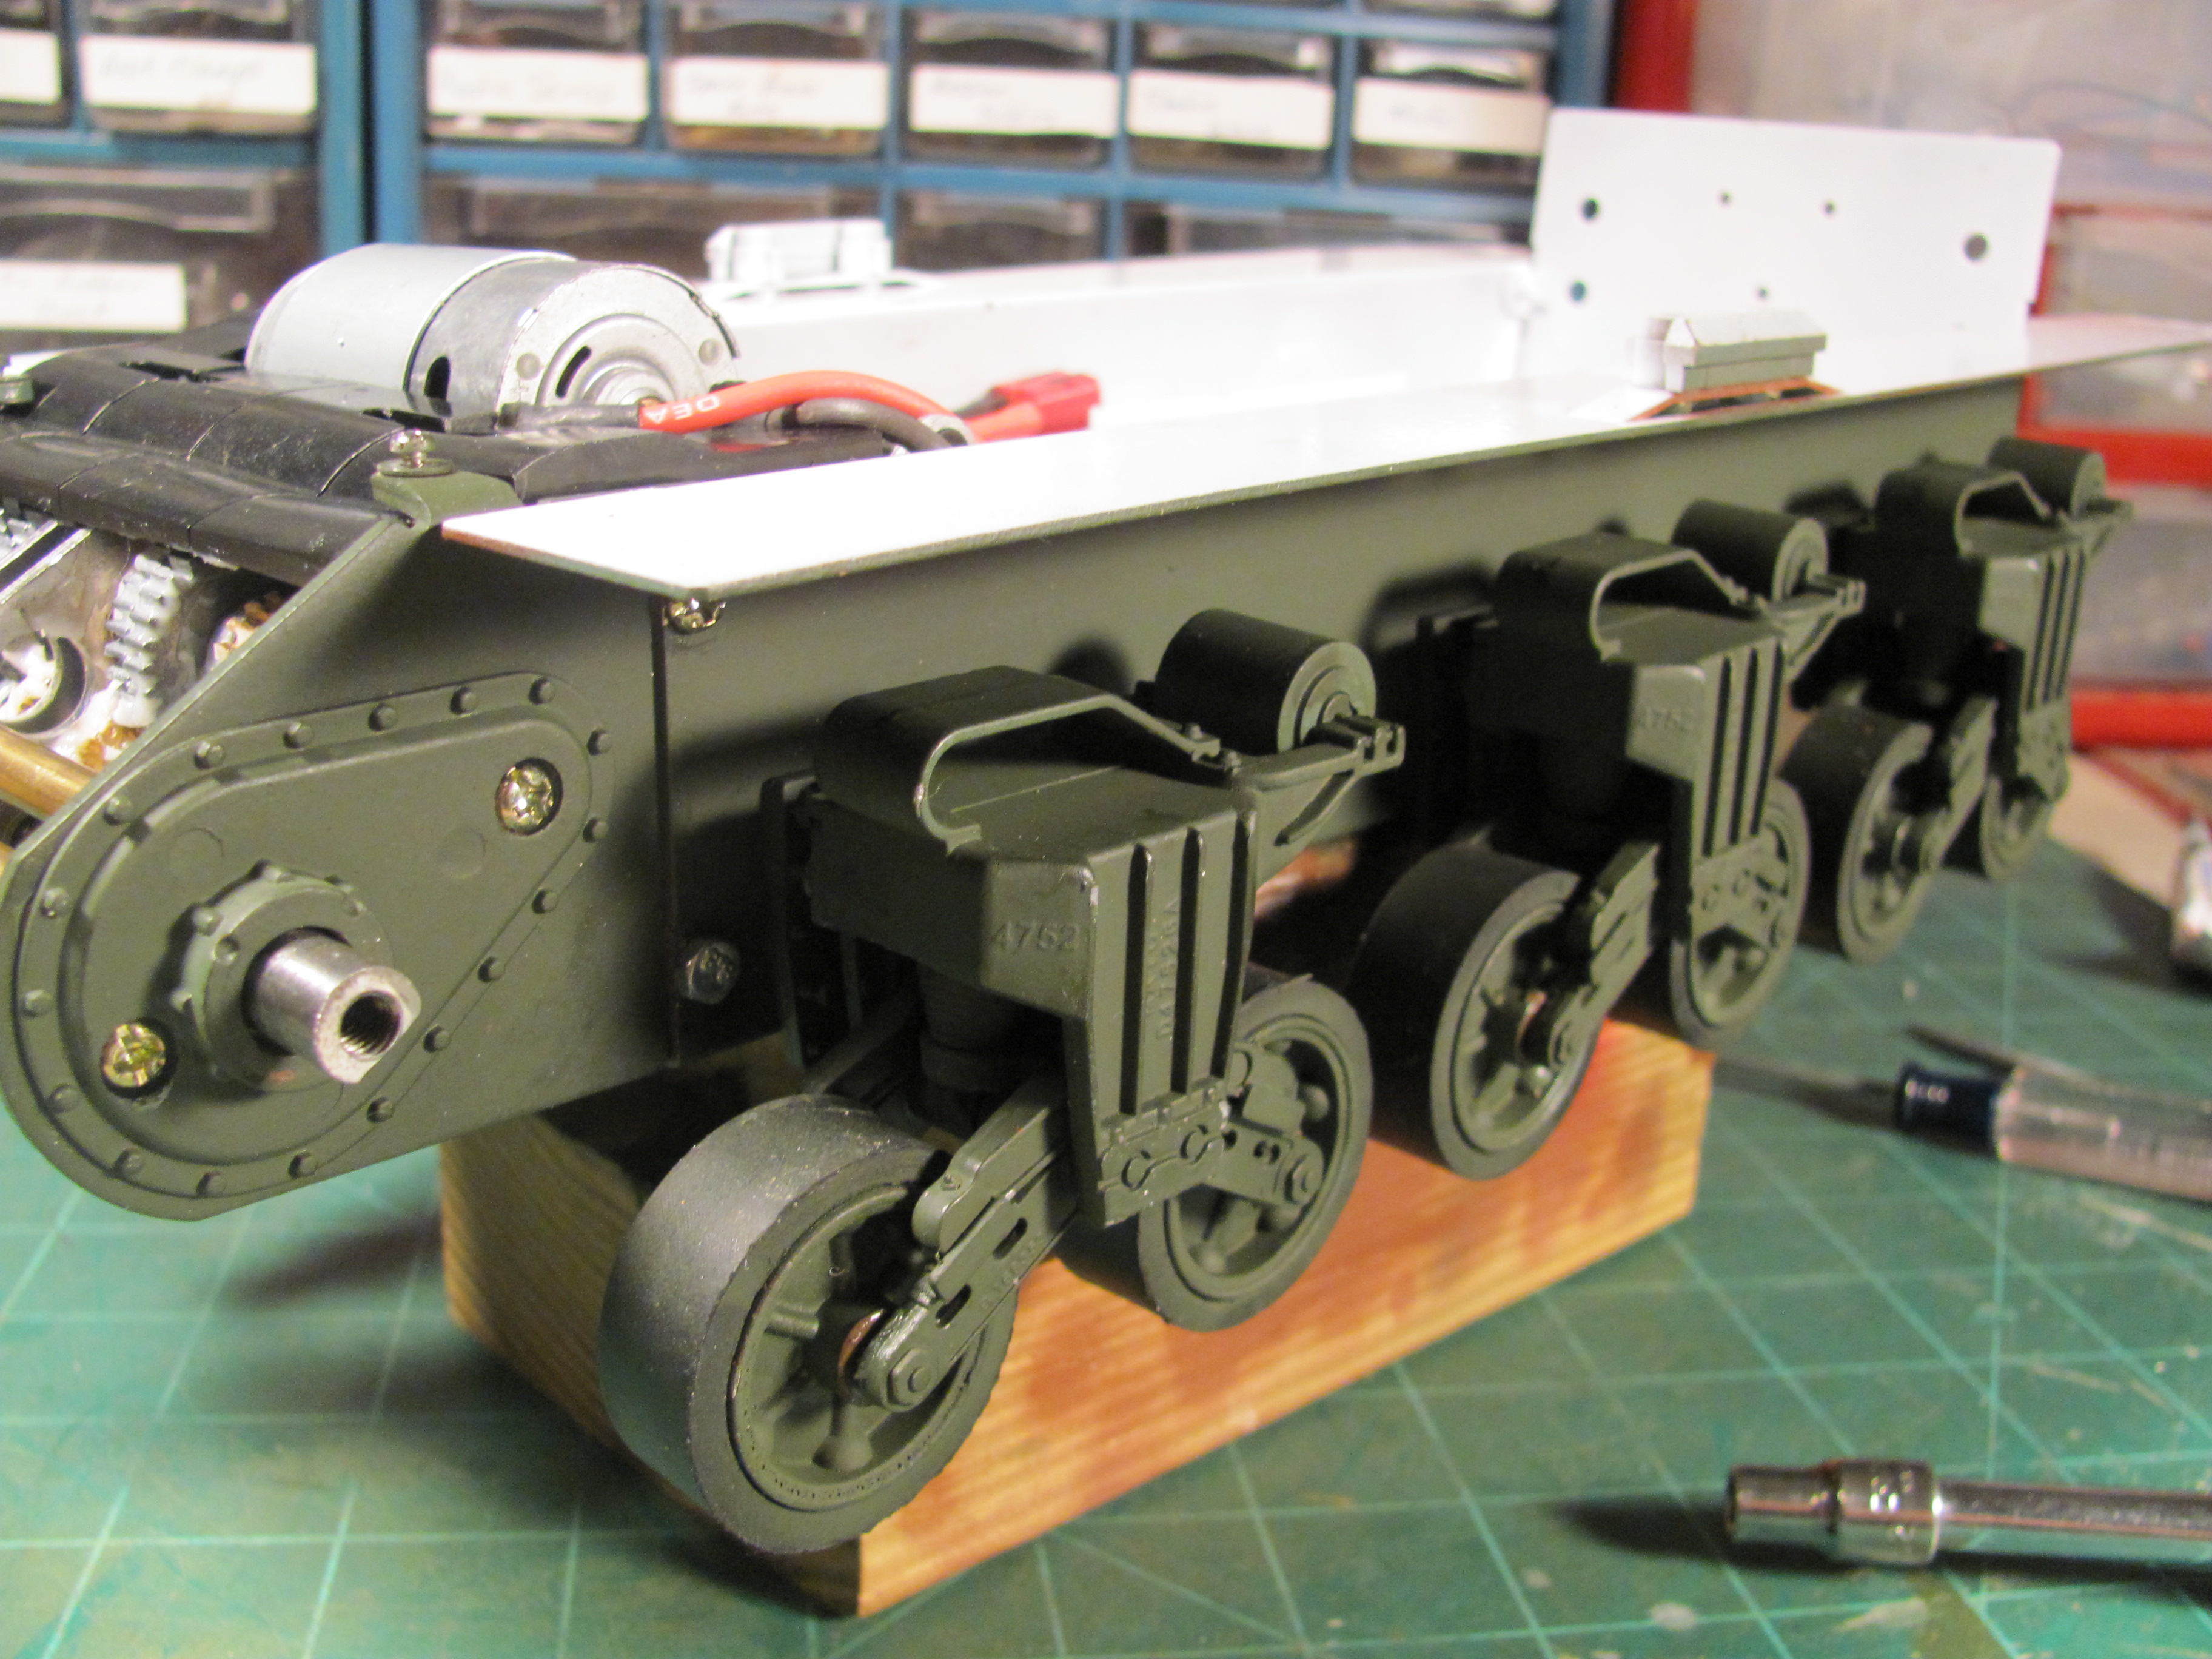
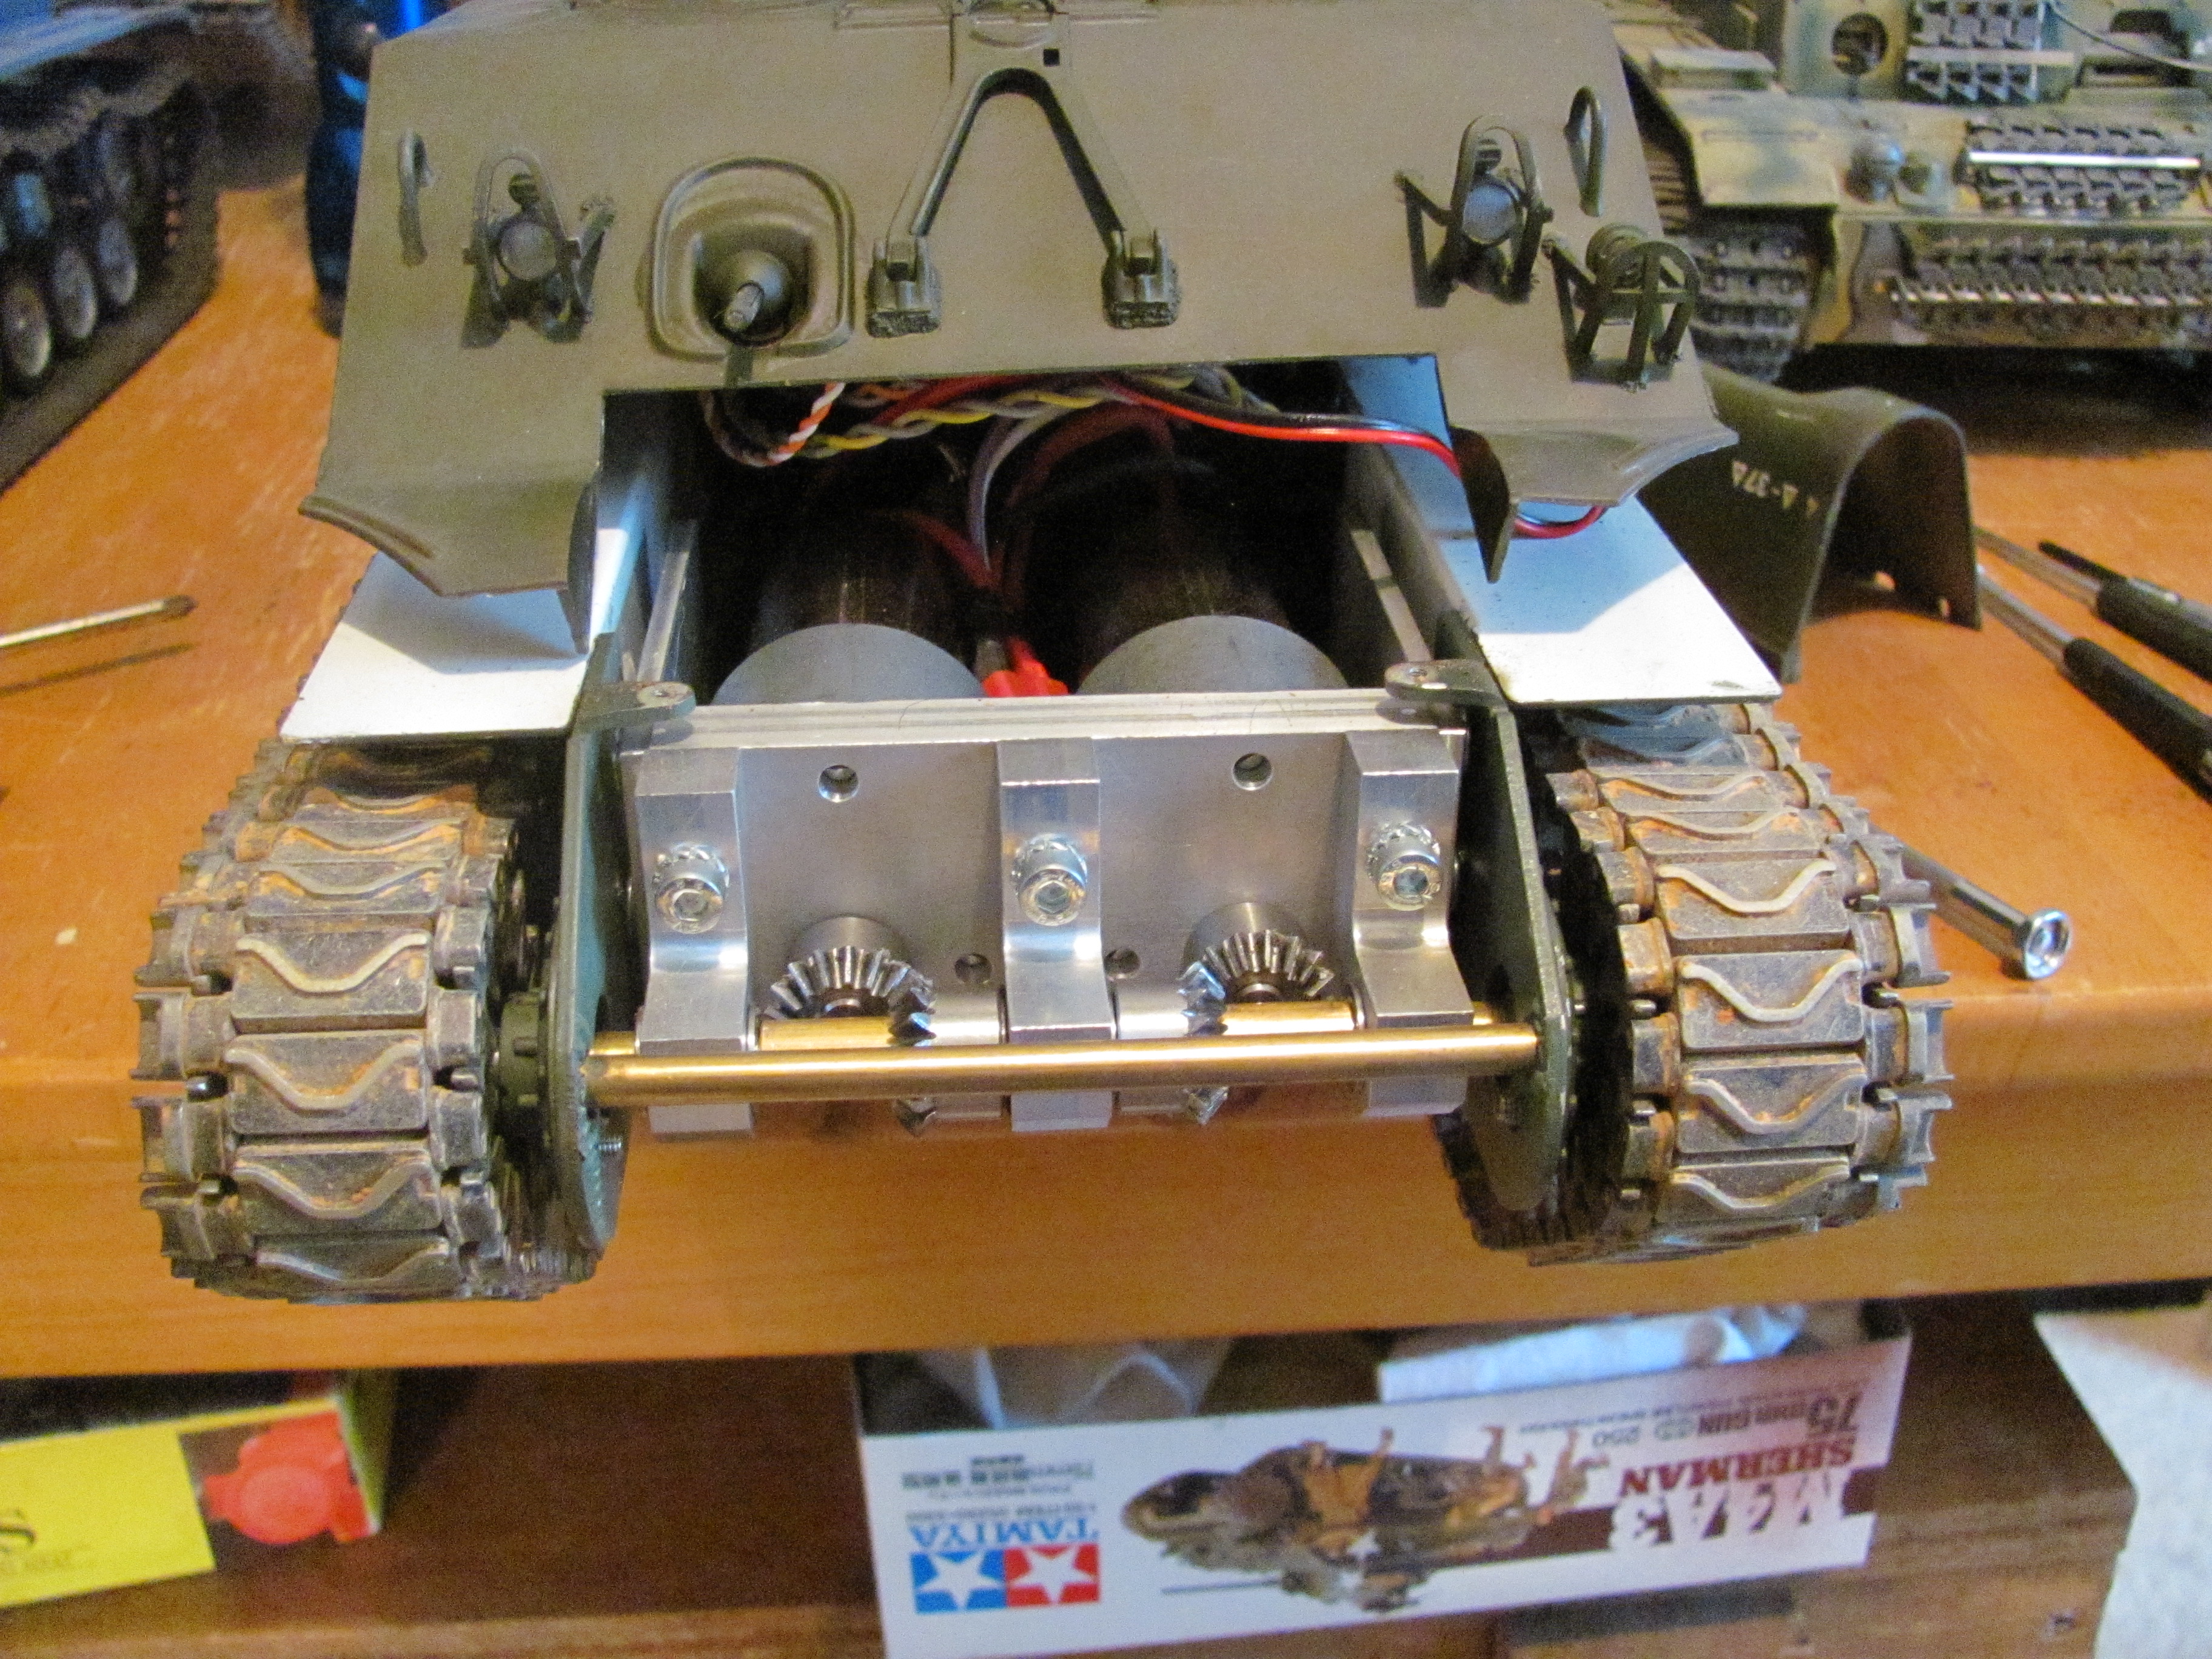
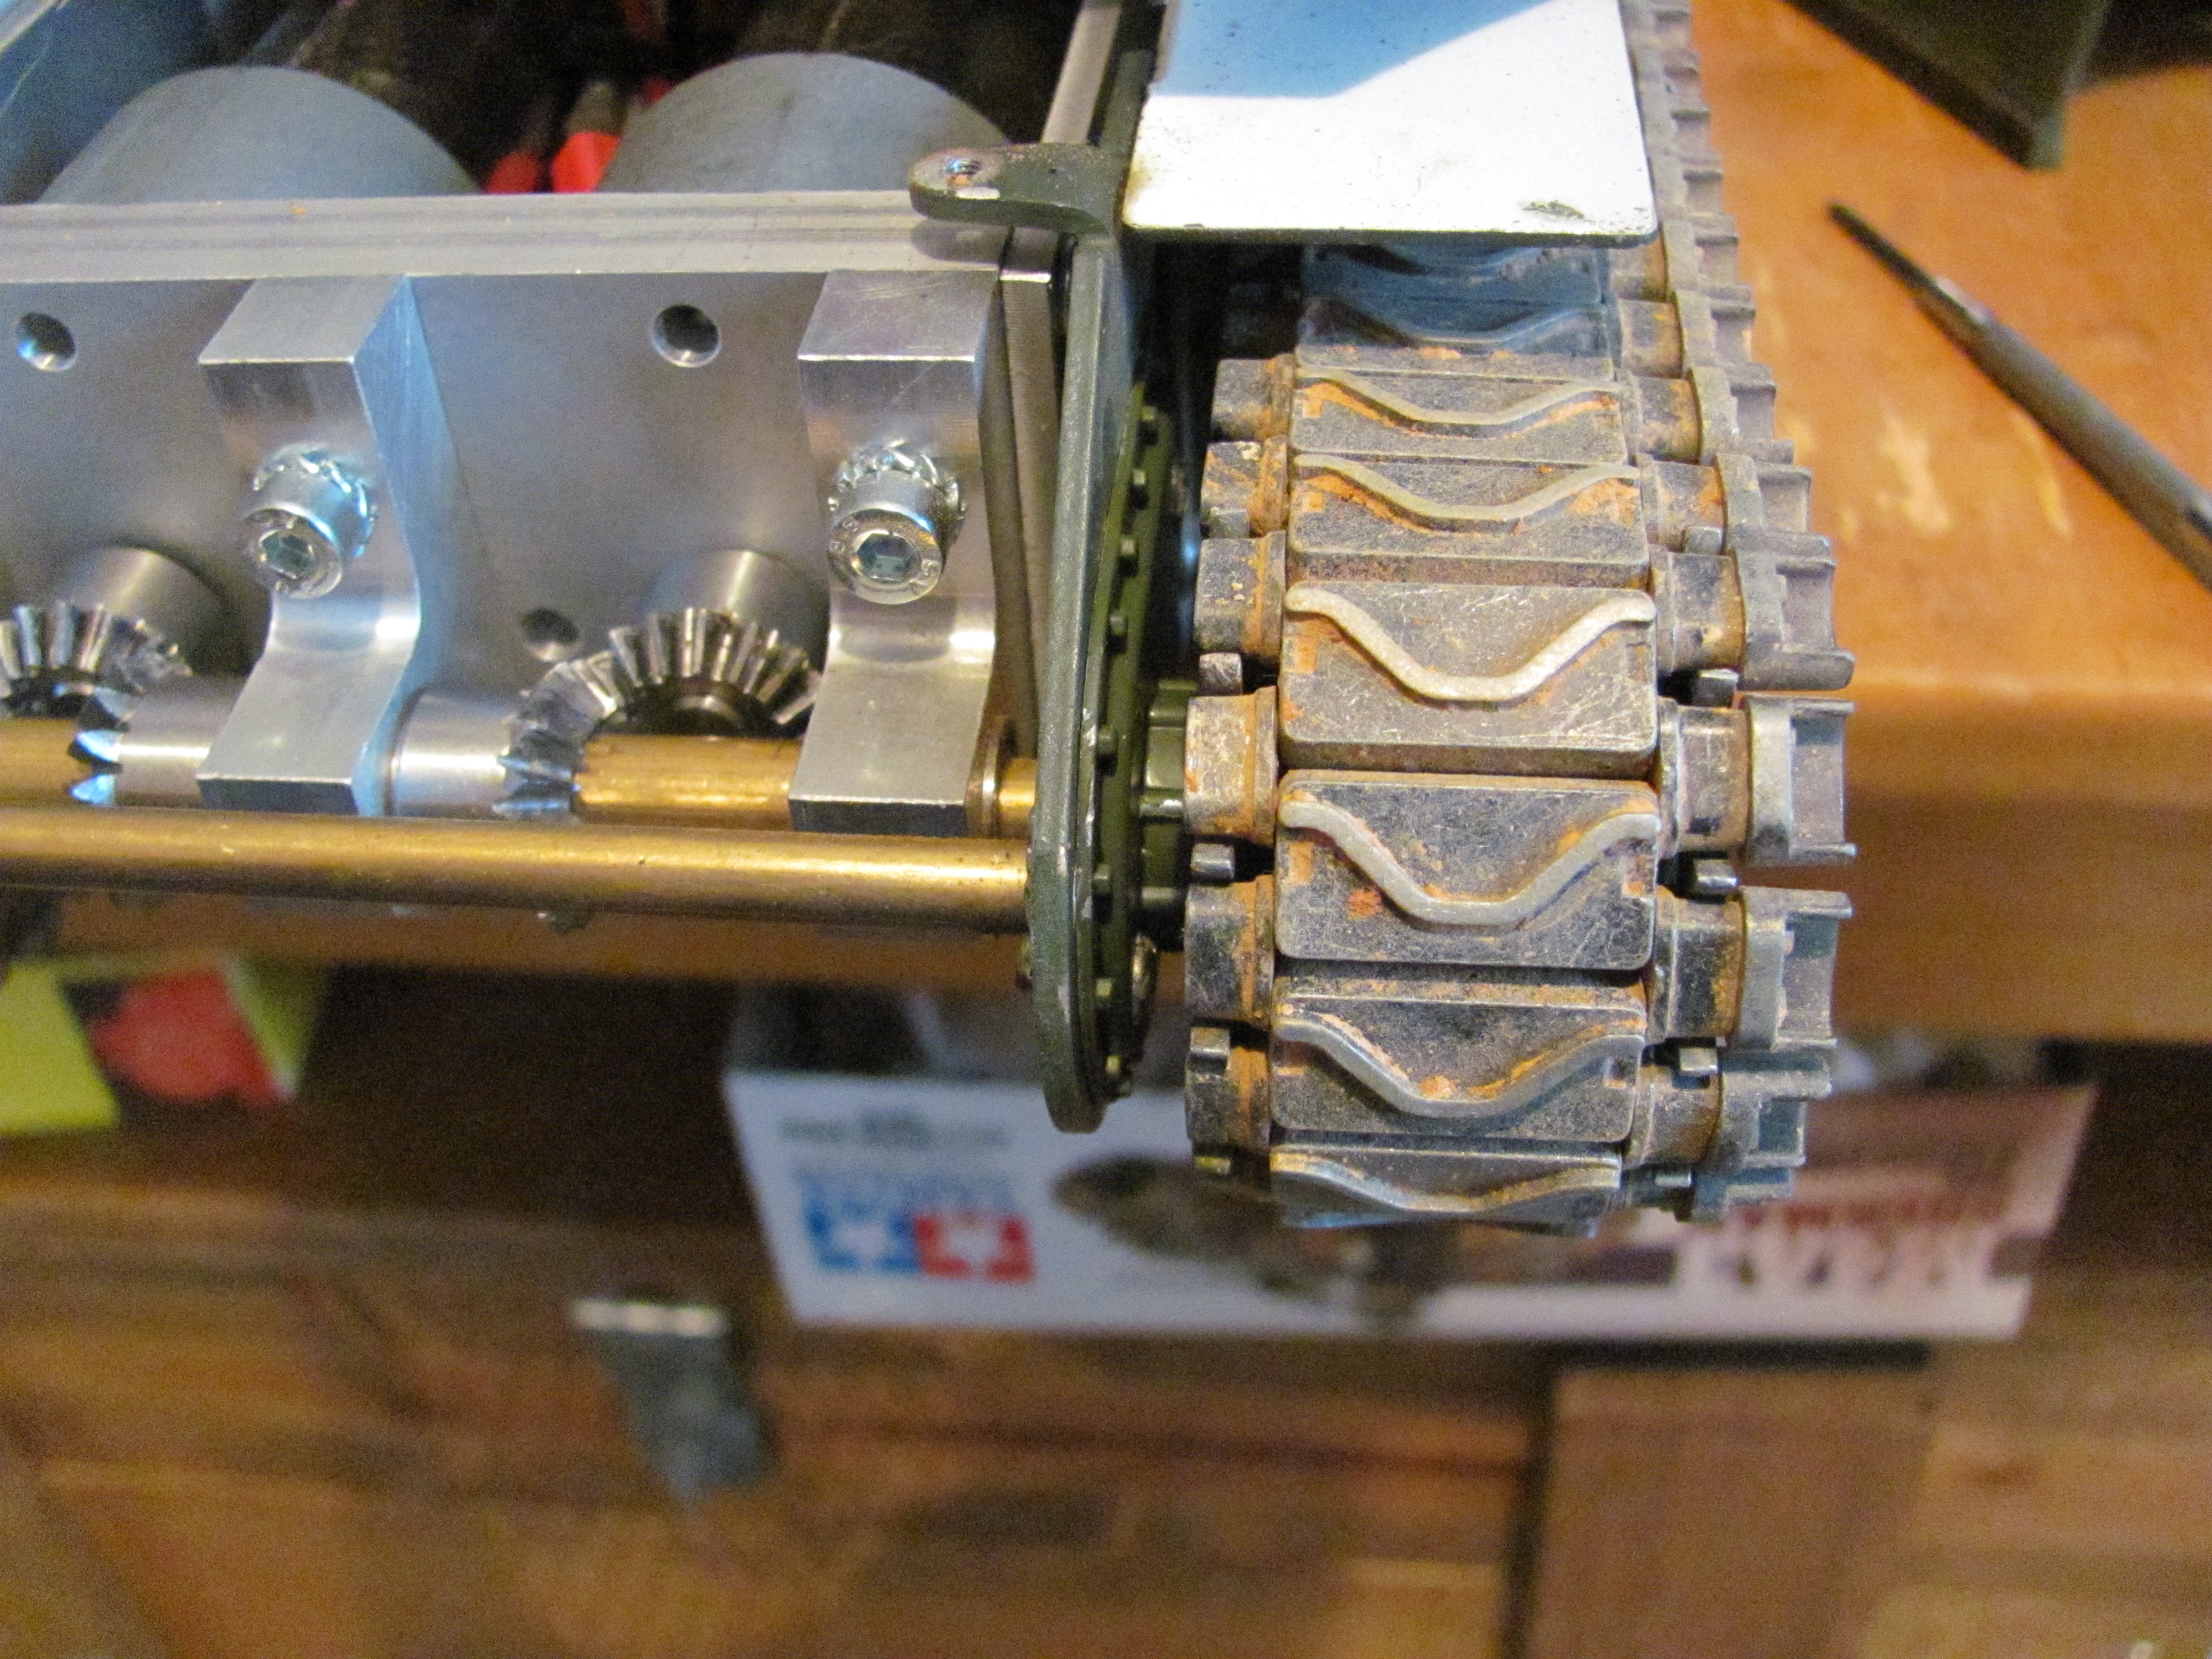
I was able to get some work done today, and mounted the bogies, gearboxes, differential covers and transmission cover, and the drive sprockets, The lower hull is now almost complete. I need to finish the rear hull and mount the idlers. The idlers are going to require a little bit of work and i may have to contract that work out! 
hopefully more will come tomorrow.
hopefully more will come tomorrow.
Now THAT, Is Impressive Work! You Know, I've got to STOP Enjoying Watching You Guys Build Your Tanks and Start Working on Own Tanks!
I've Got an Old Original Tamiya King Tiger That Is Just Begging for an Upgrade....,
 11-08-2014, 07:04 AM
#44
Will, that is a great build! Good construction, good paint, good mild weathering. It don't bet much better than this! Let me/us know how you do at Dville. Dang, I do wish it wasn't such a long drive, I really miss that place!


 11-10-2014, 04:35 PM
#47
Thread Starter
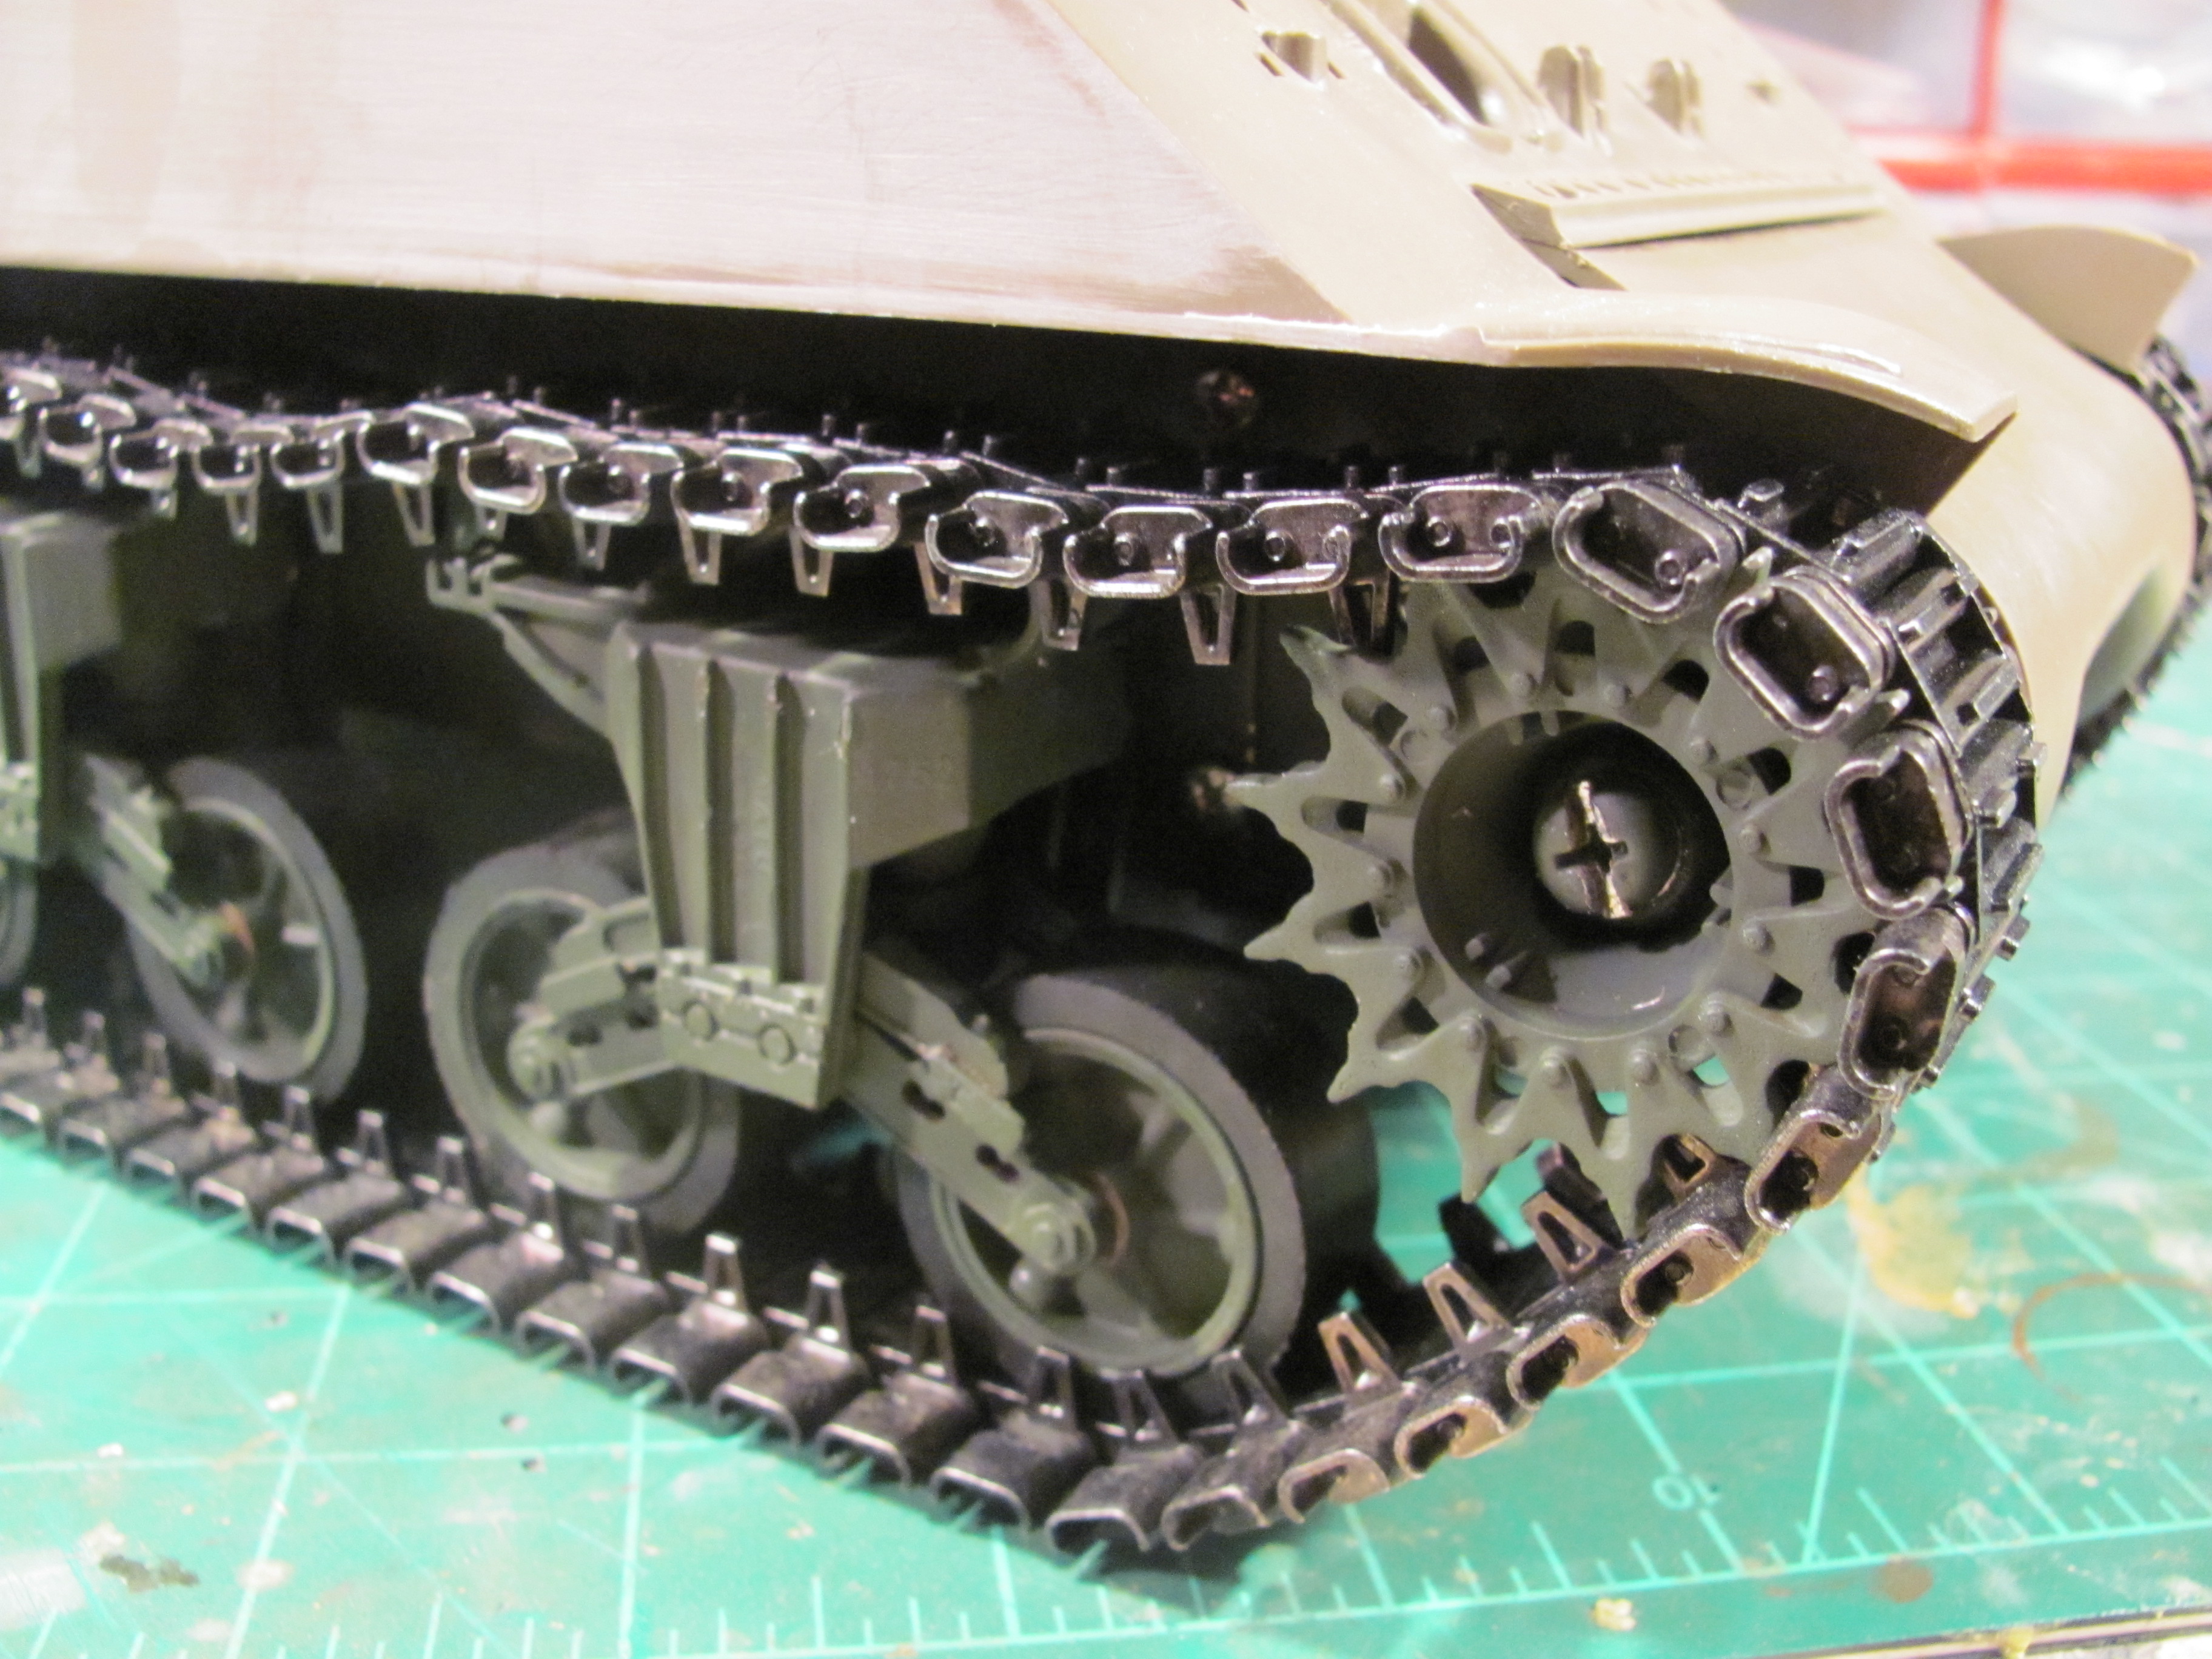
the tank ran well, i needed to work on the idlers and drive sprockets. the impact out drive covers needed modified to clear the MATO drive sprocket which is different from the tamiya. i had to file down the idler mounts to get the track aligned more properly. the corrections have been done and it is working a lot better. I also took out the stock gearboxes and added impact gear boxes with geardowns. everything is good to go now.
Last edited by manchu9inf; 11-10-2014 at 05:55 PM.


 06-14-2015, 07:01 PM
#50
Thread Starter
Well, i splurged on some new ETO gearboxes for the Sherman and I can't tell you how much a of a vast improvement they are over anything out there. If you get the chance to buy a set from ETO, i highly recommend them!
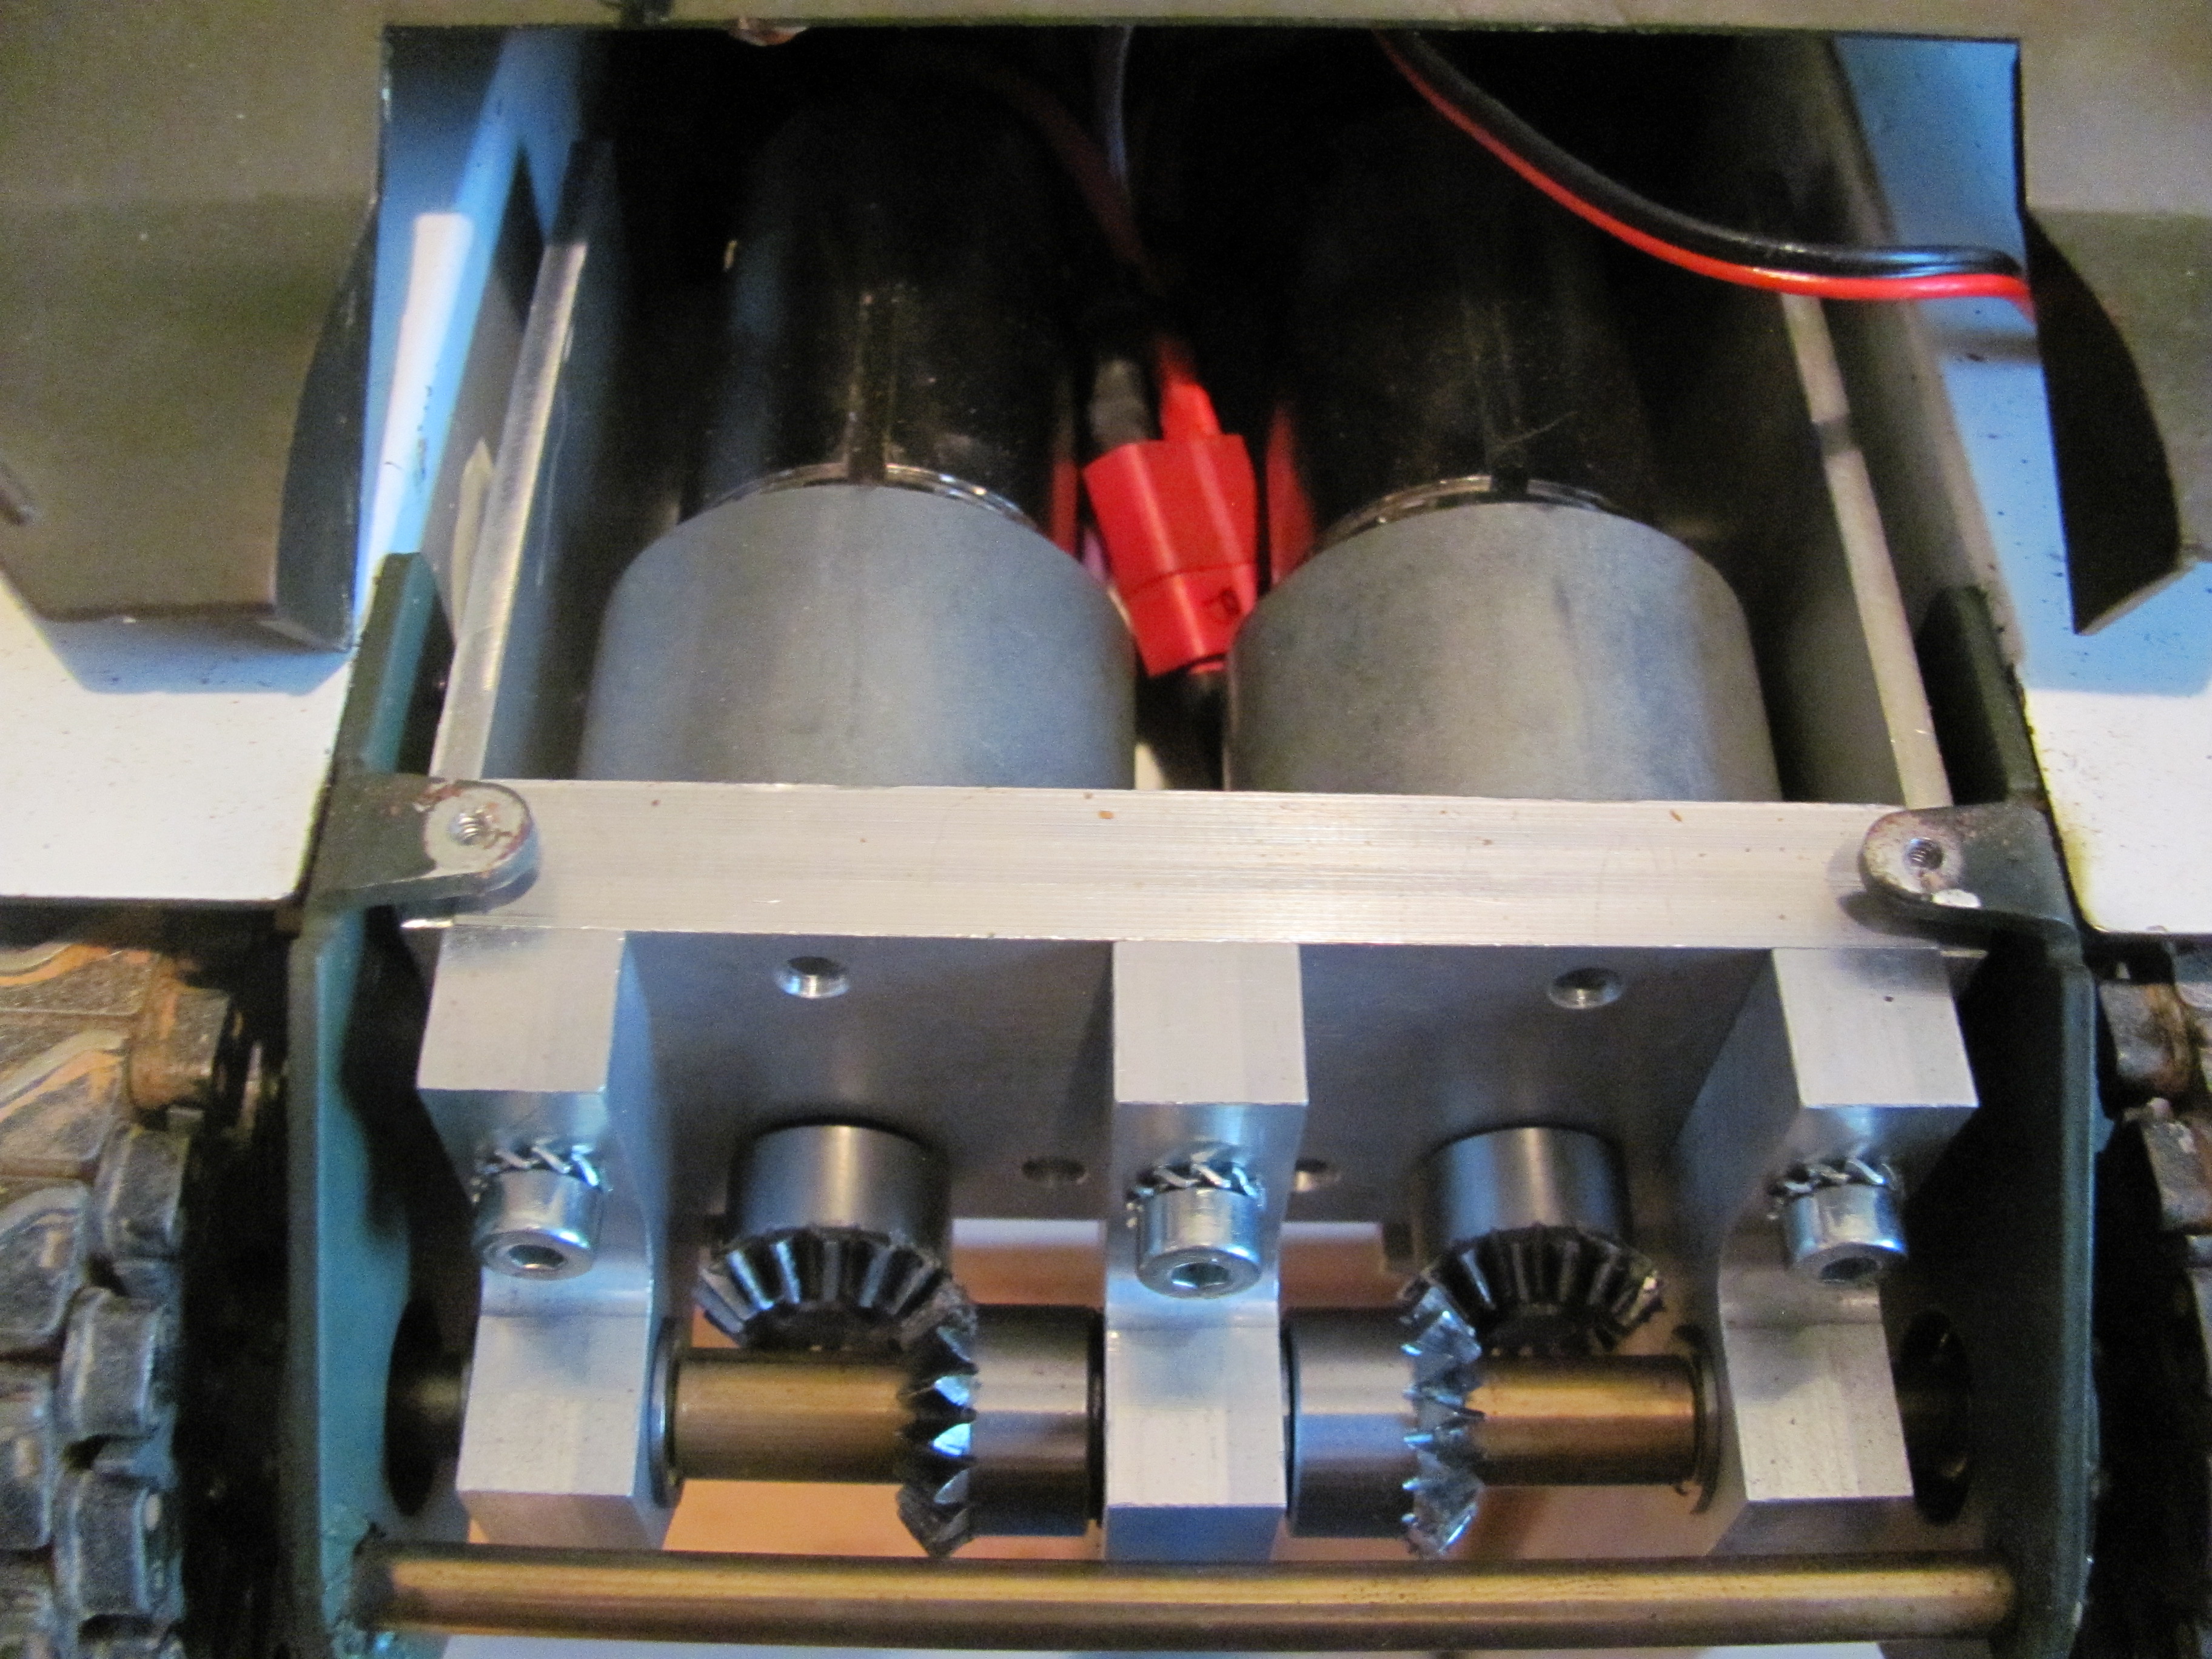
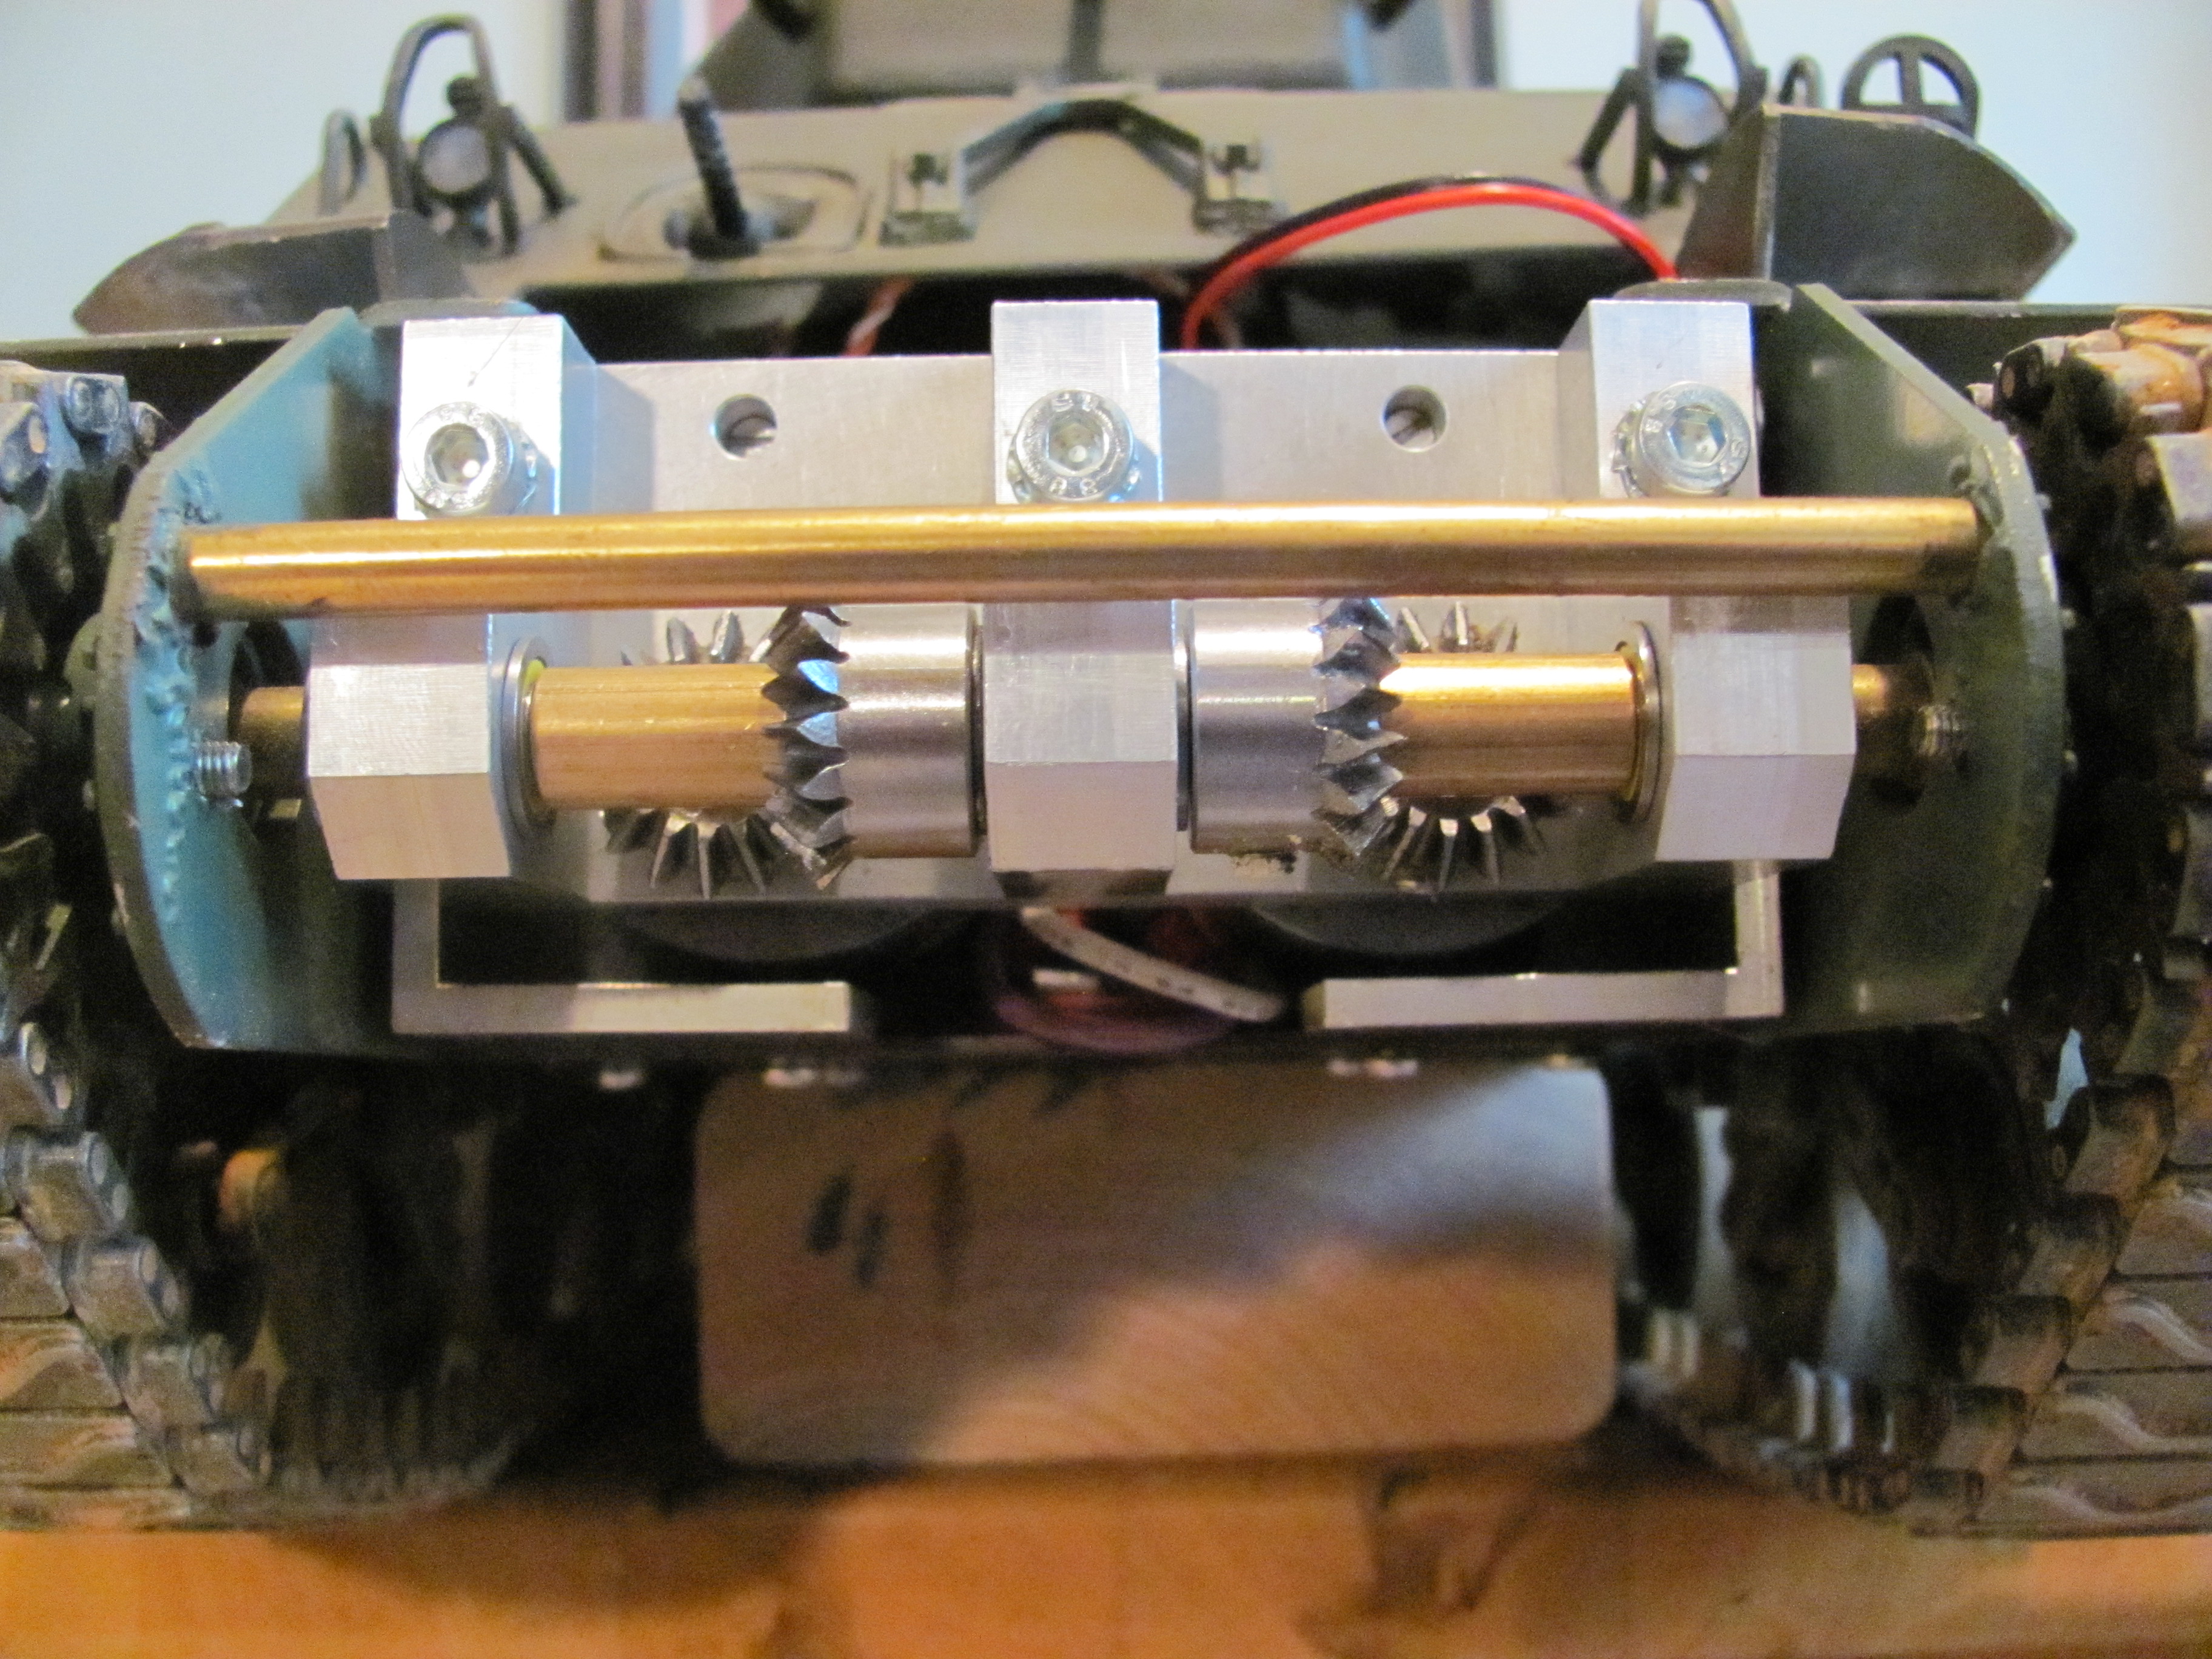
I ran these gearboxes at Danville during the May event and they performed flawlessly. they chewed up the terrain with the metal tracks, never faltered and I think they are indestructable. Because I am running Mato drive sprockets i had to have new out shafts made by Daryl Turner, they come set up for tamiya drive sprockets.
if you want some good gearboxes, you would not go wrong with these!