


M4a1
 03-13-2015, 08:18 PM
#26

Thread Starter

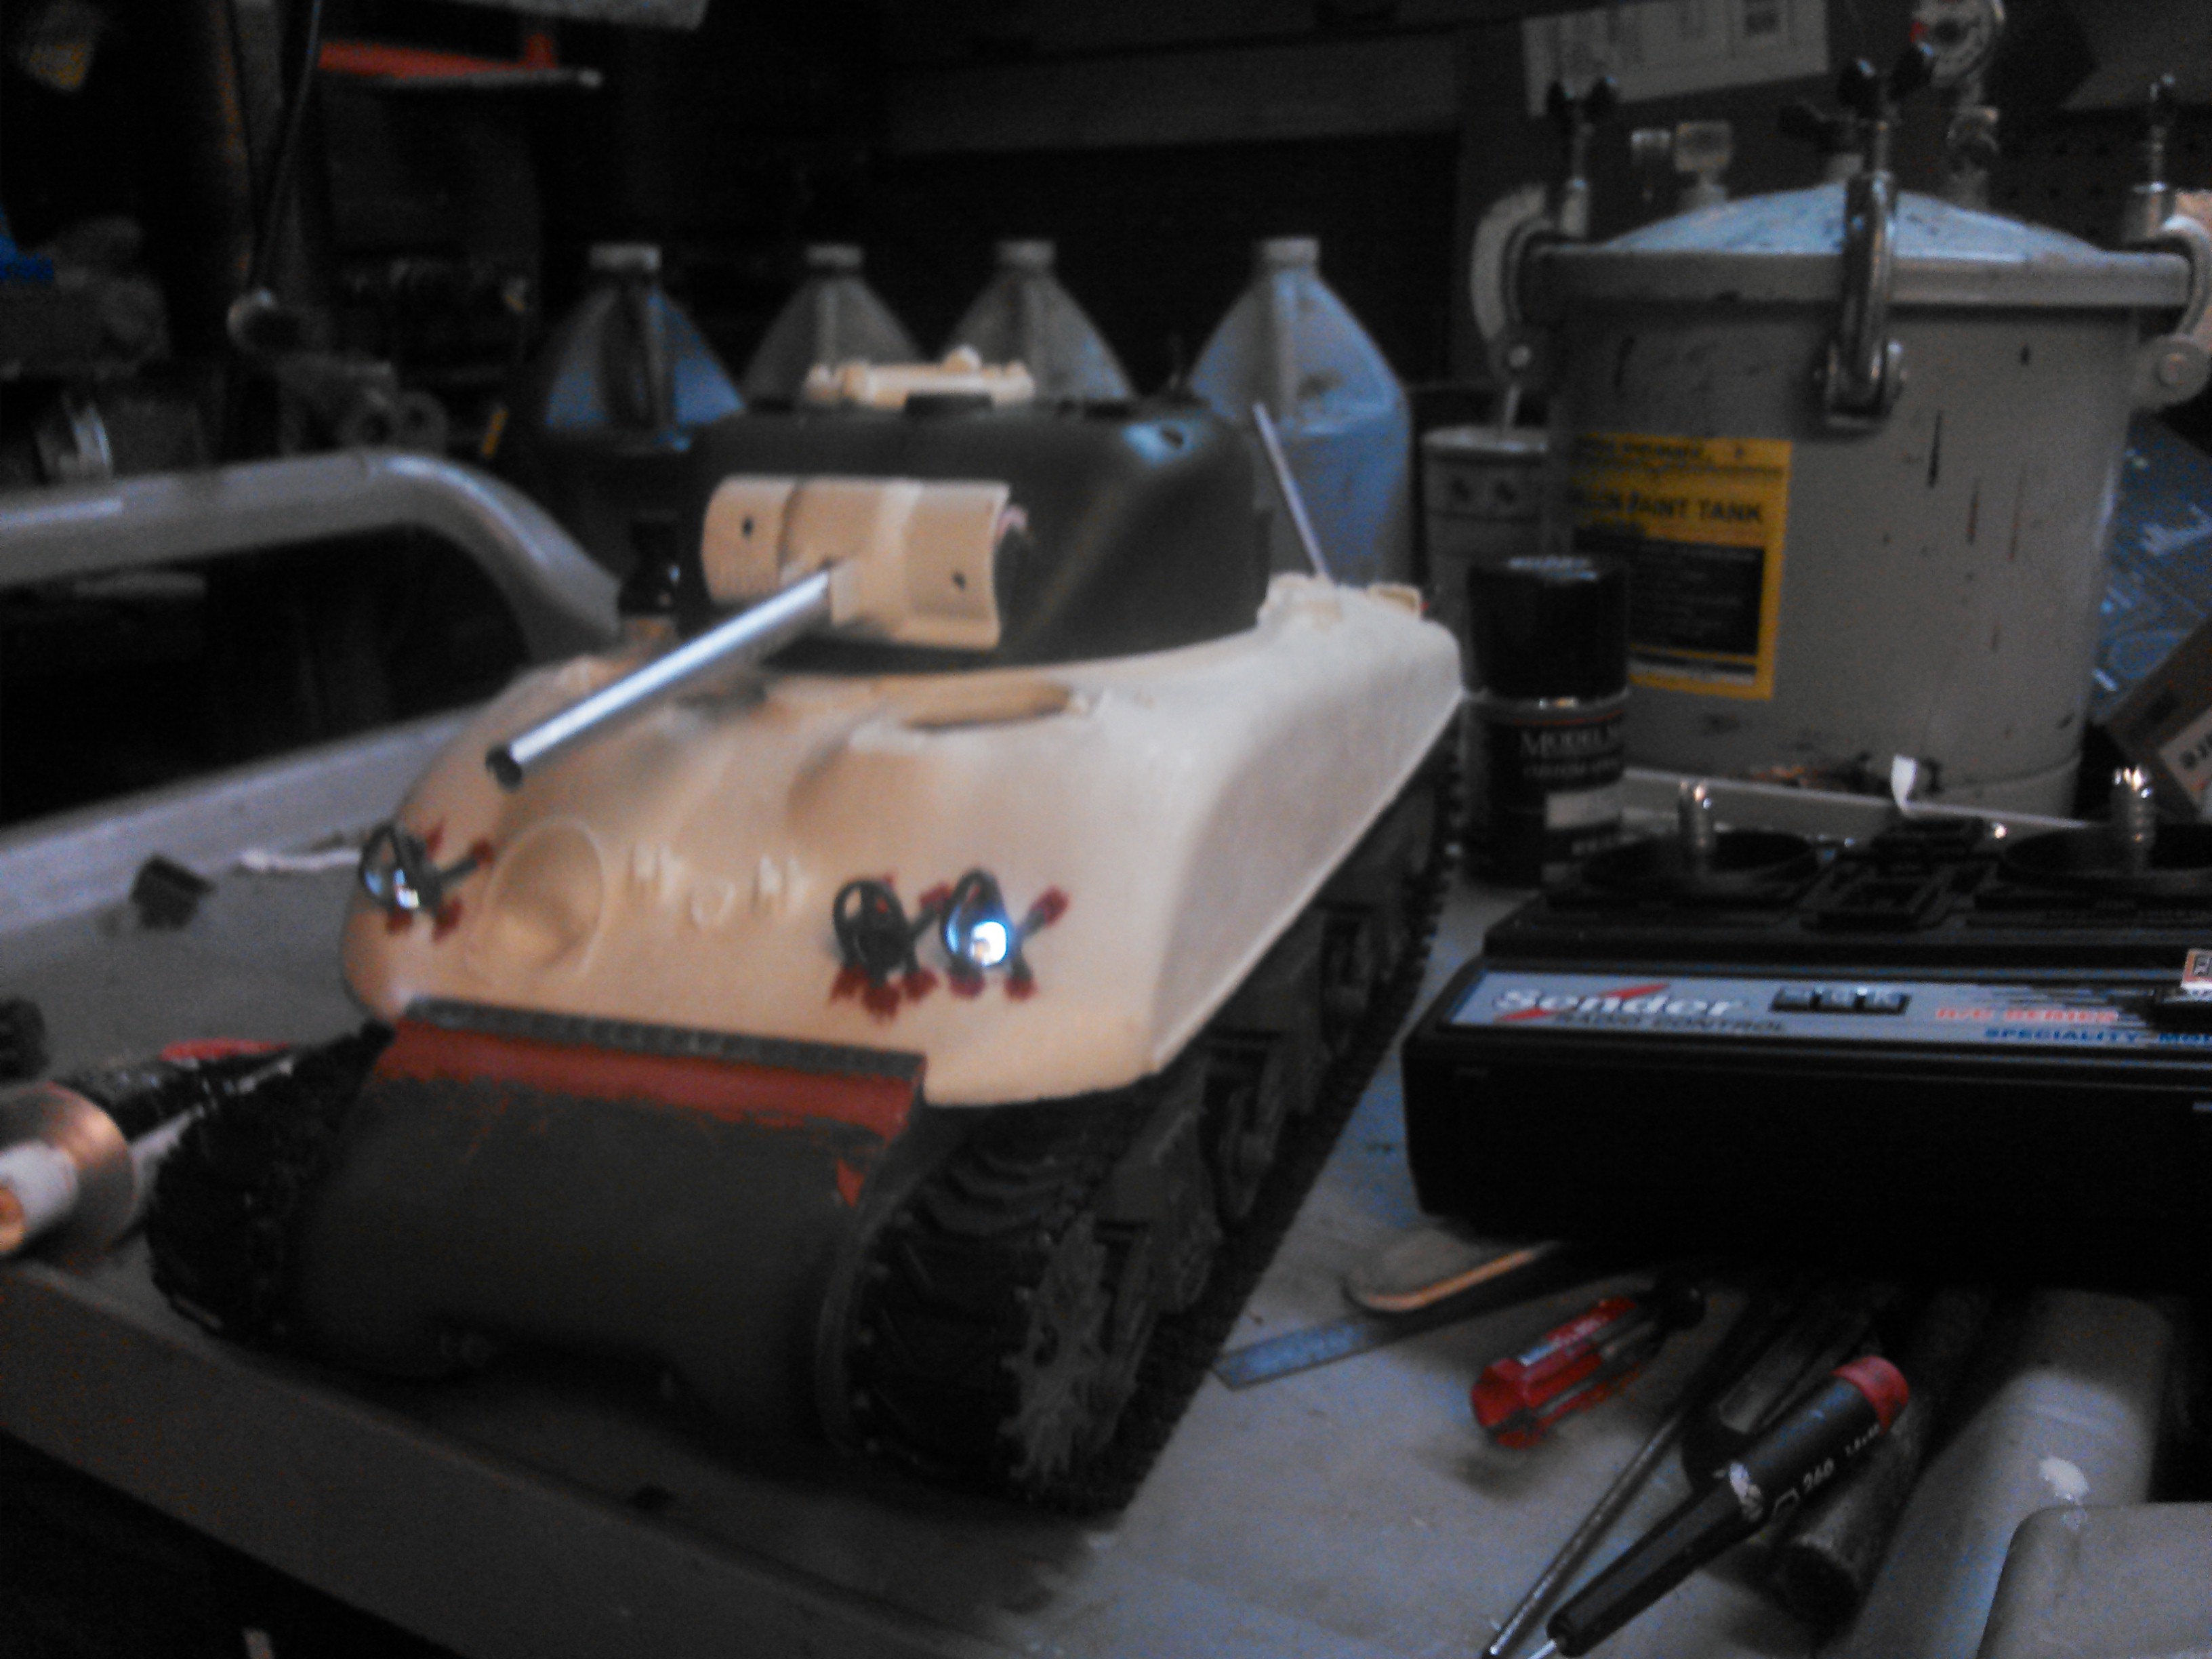
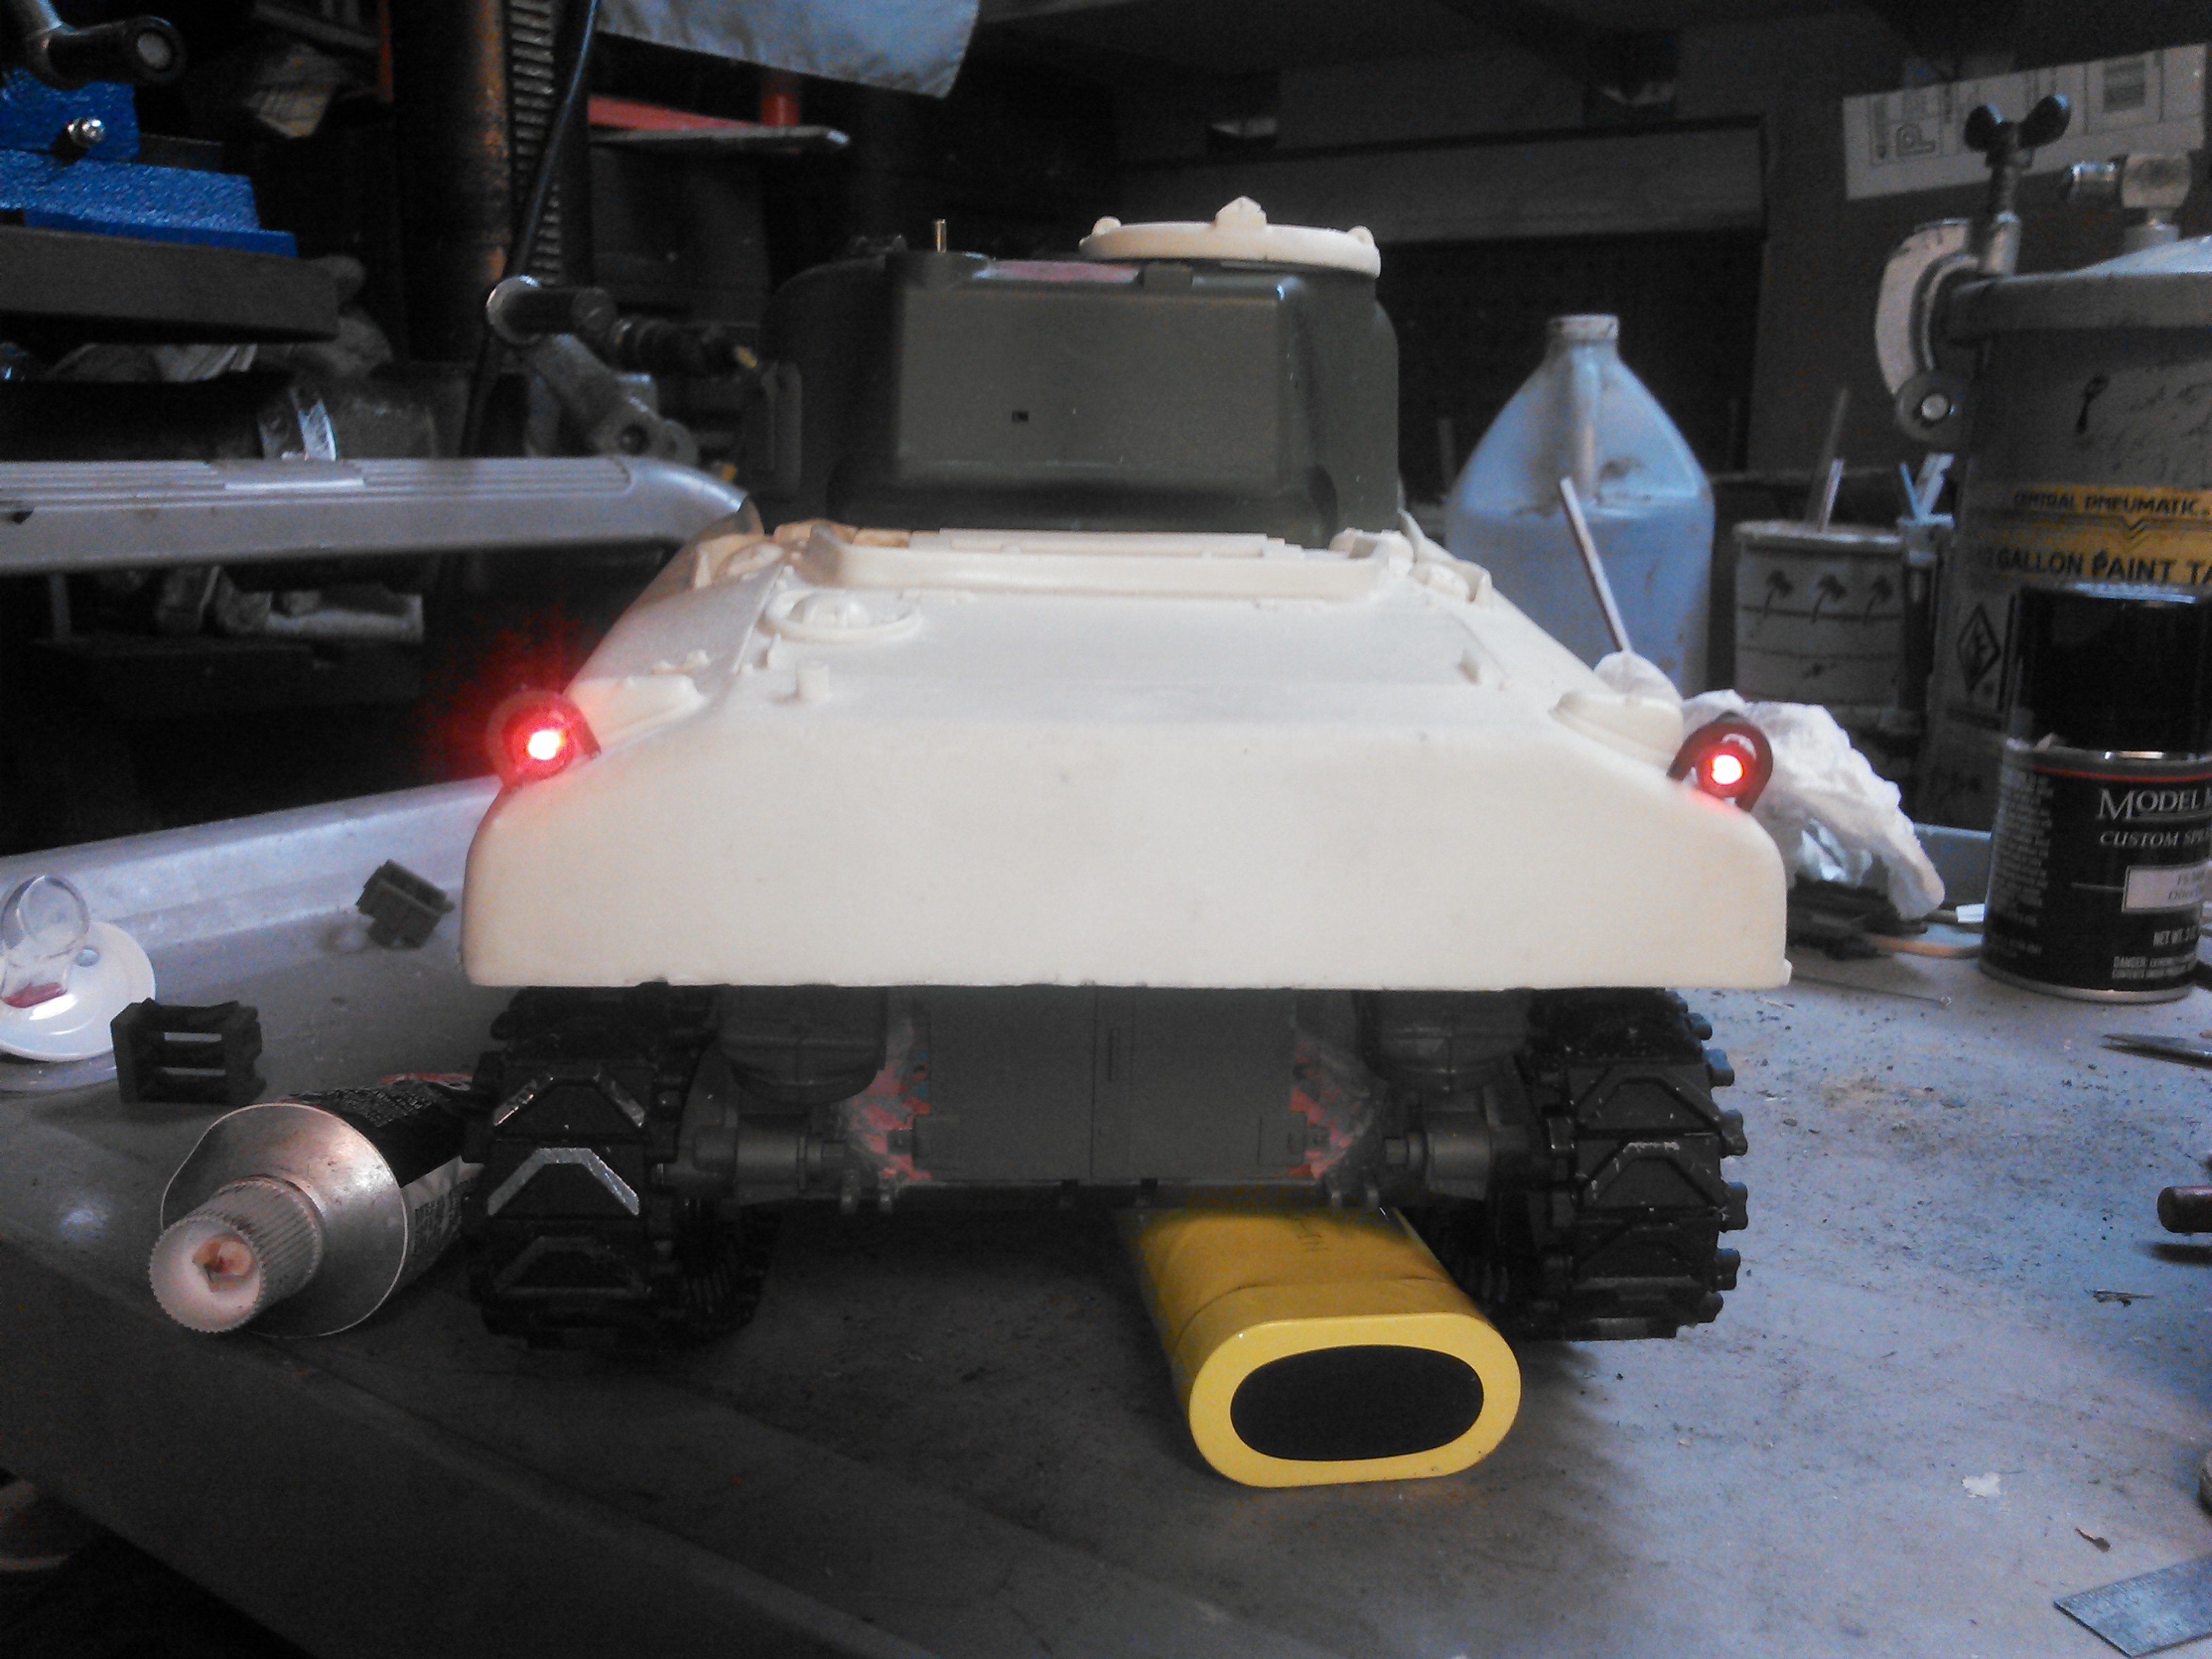
So I got the LEDs installed and soldered to the buss and then glued in the brush guards, accept for the rear, they don't fit right since they came off the flat rear of an A3 so I will make new brass ones this weekend.
I put it all together and fired it up. The lights all work and the turret rotates great.
Then I puttied some welds around the brush guards to fill in the holes they are mounted in.
I put it all together and fired it up. The lights all work and the turret rotates great.
Then I puttied some welds around the brush guards to fill in the holes they are mounted in.
 03-14-2015, 03:02 AM
#27
Another light you could add - a flat top 5mm LED fits perfectly into the turret spot light housing that comes with the HL Sherman (make sure its a 'warm white', otherwise it looks a bit funny)


 03-15-2015, 06:56 AM
#31
Thread Starter
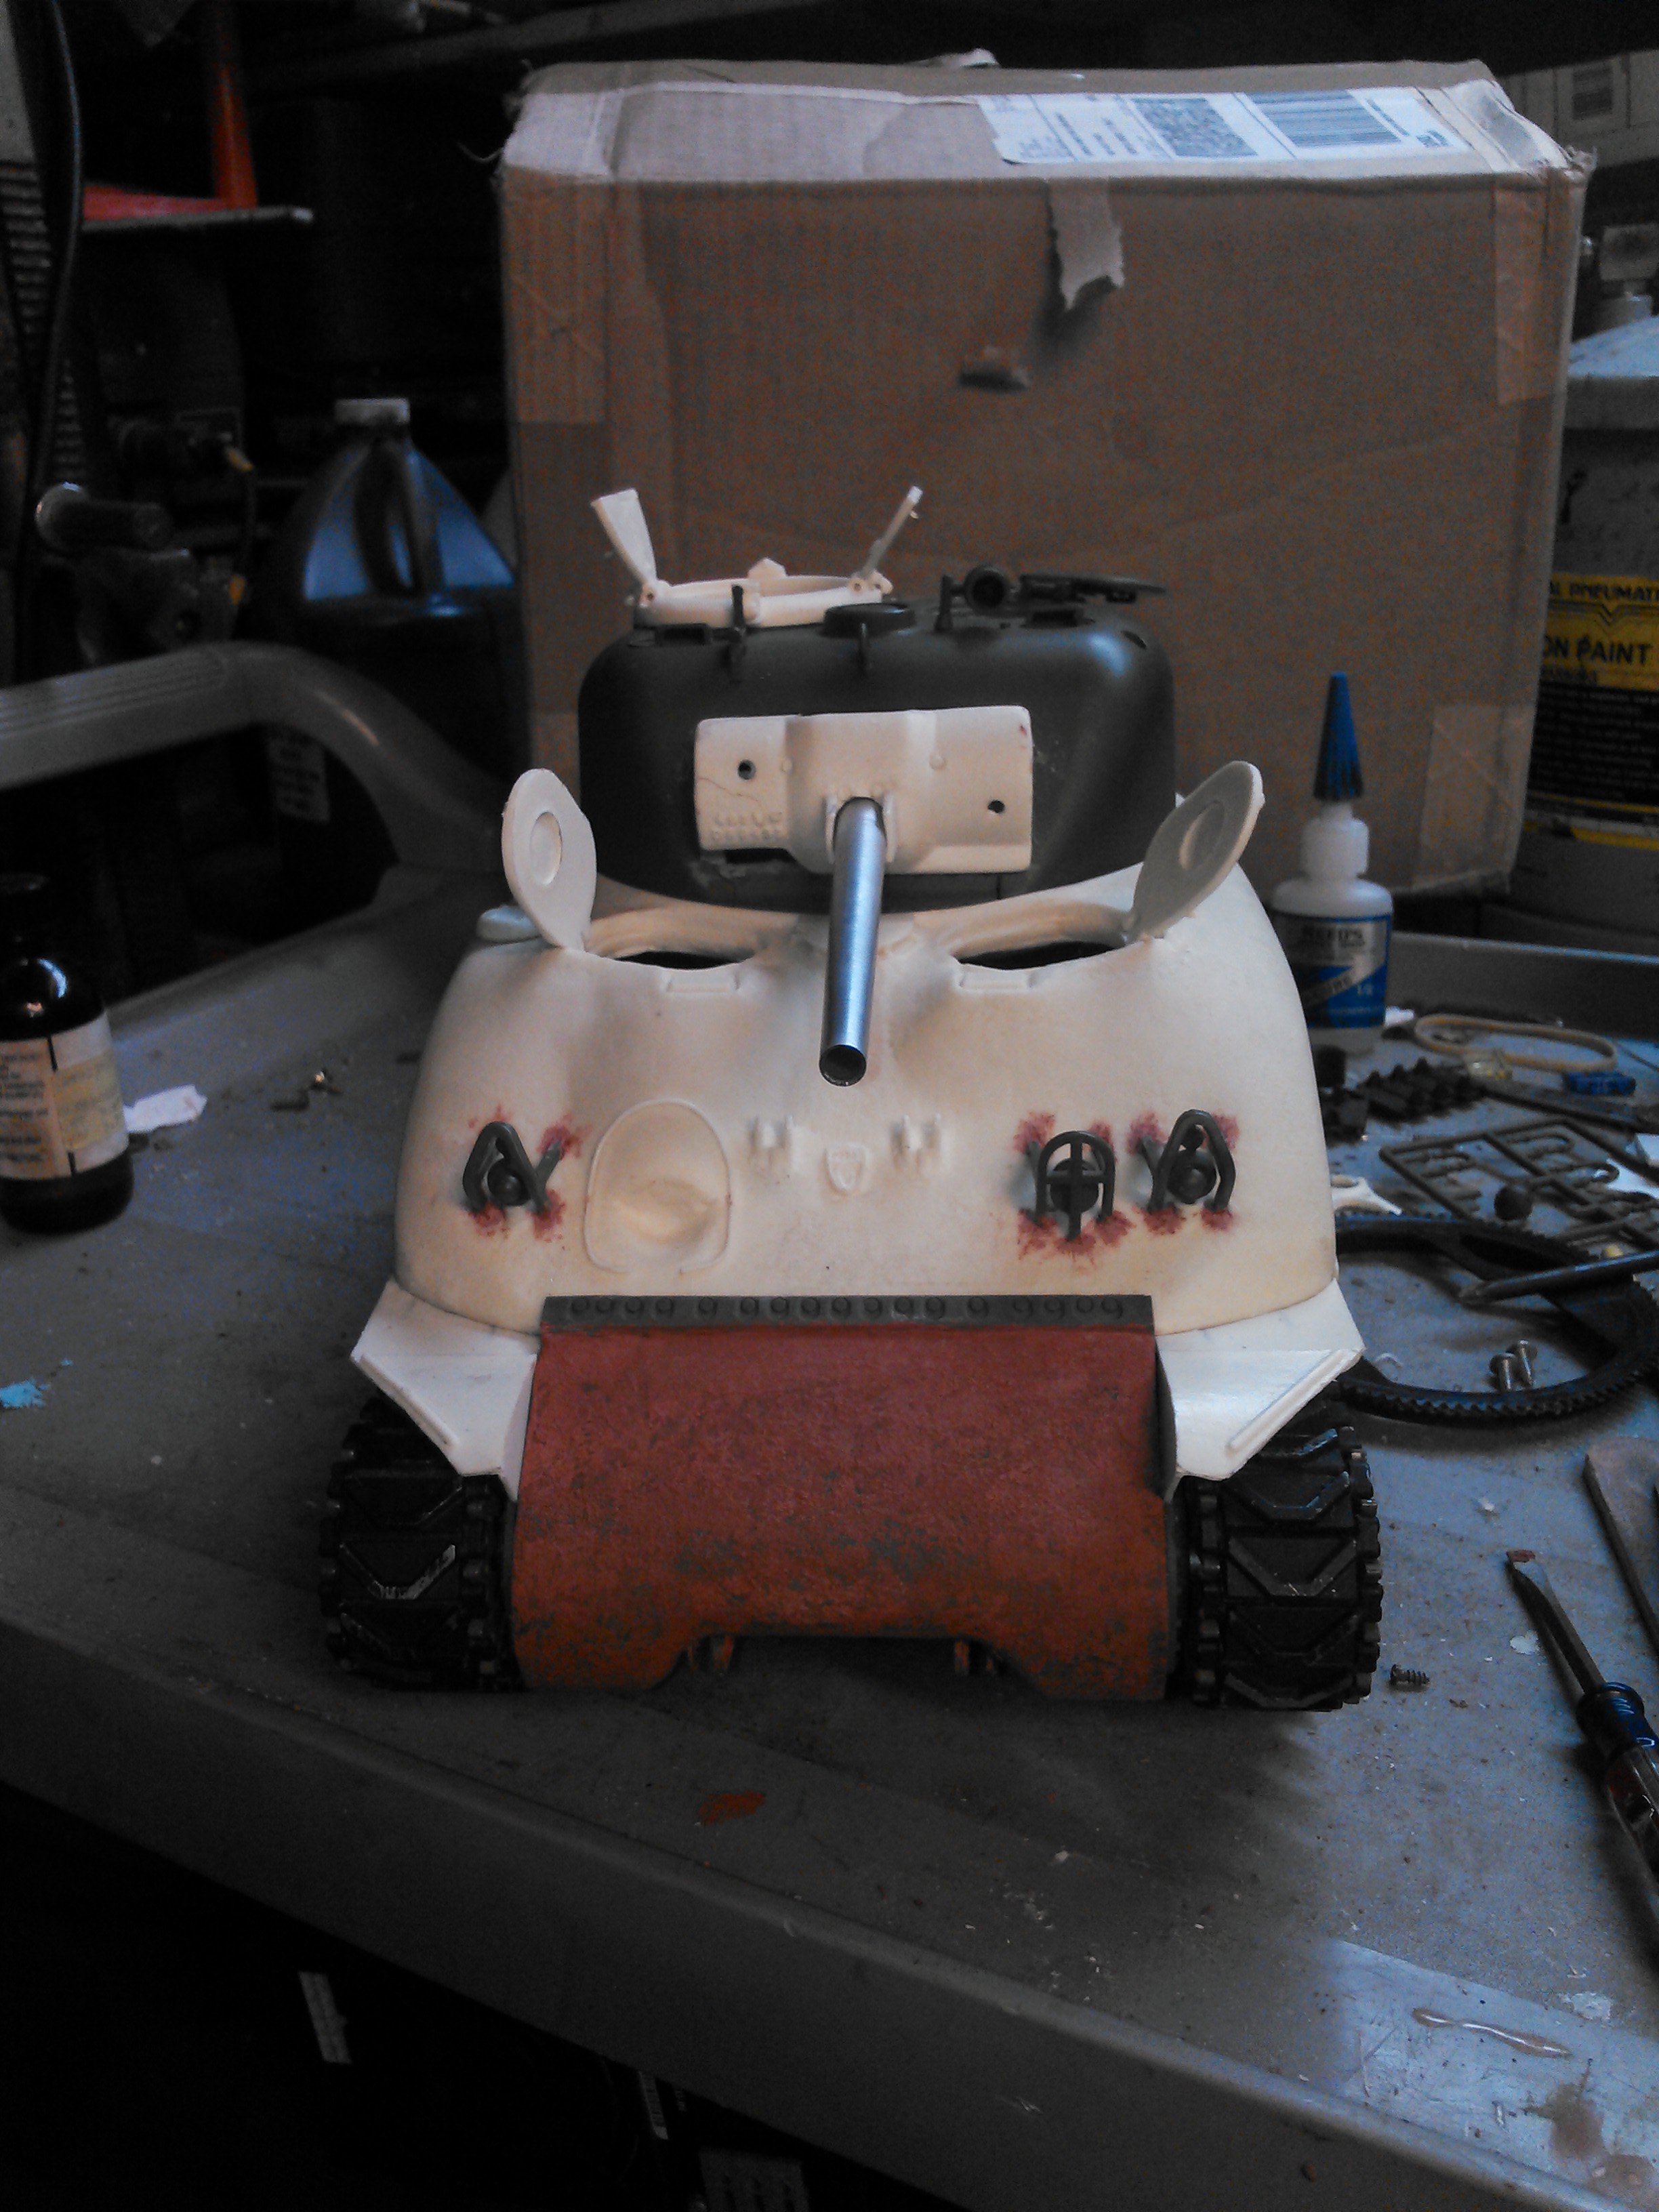
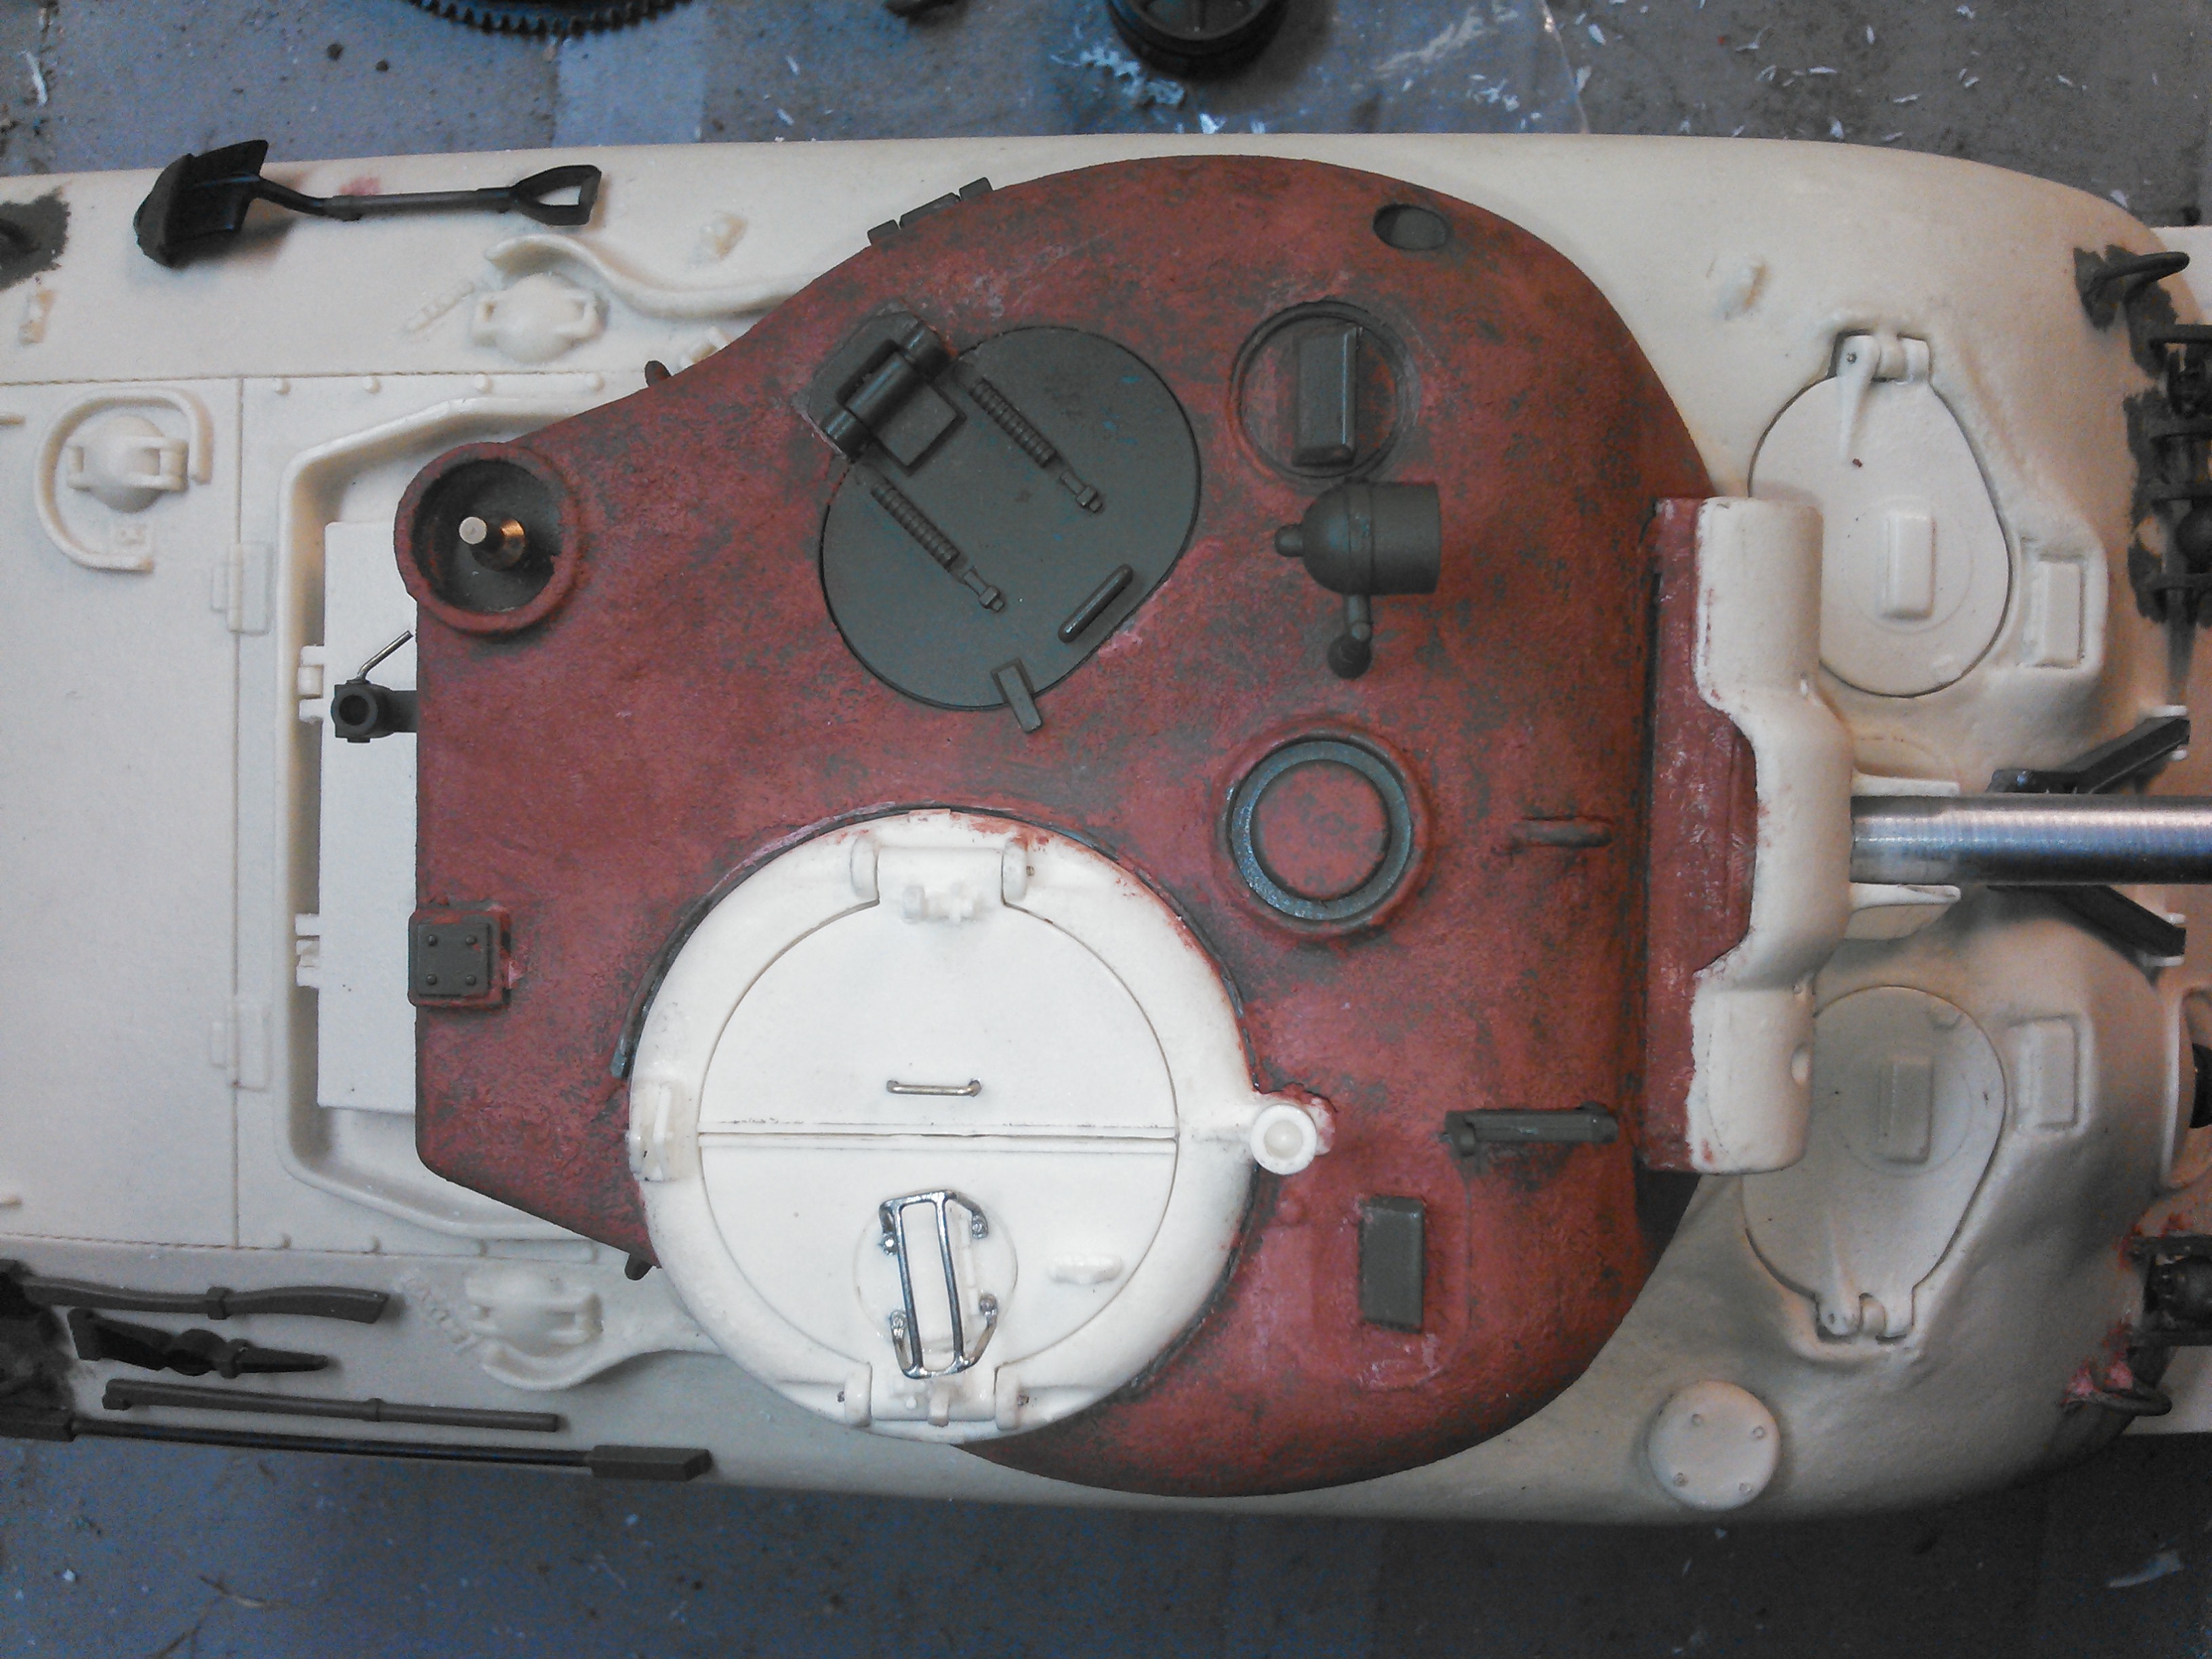
I got the hatches set up and hinged along with finishing the welding putty around the brush guards.
I also finished mounting the fenders. I cut grooves into them along with the hull and added dowels to help with strength and hopefully they wont break off.
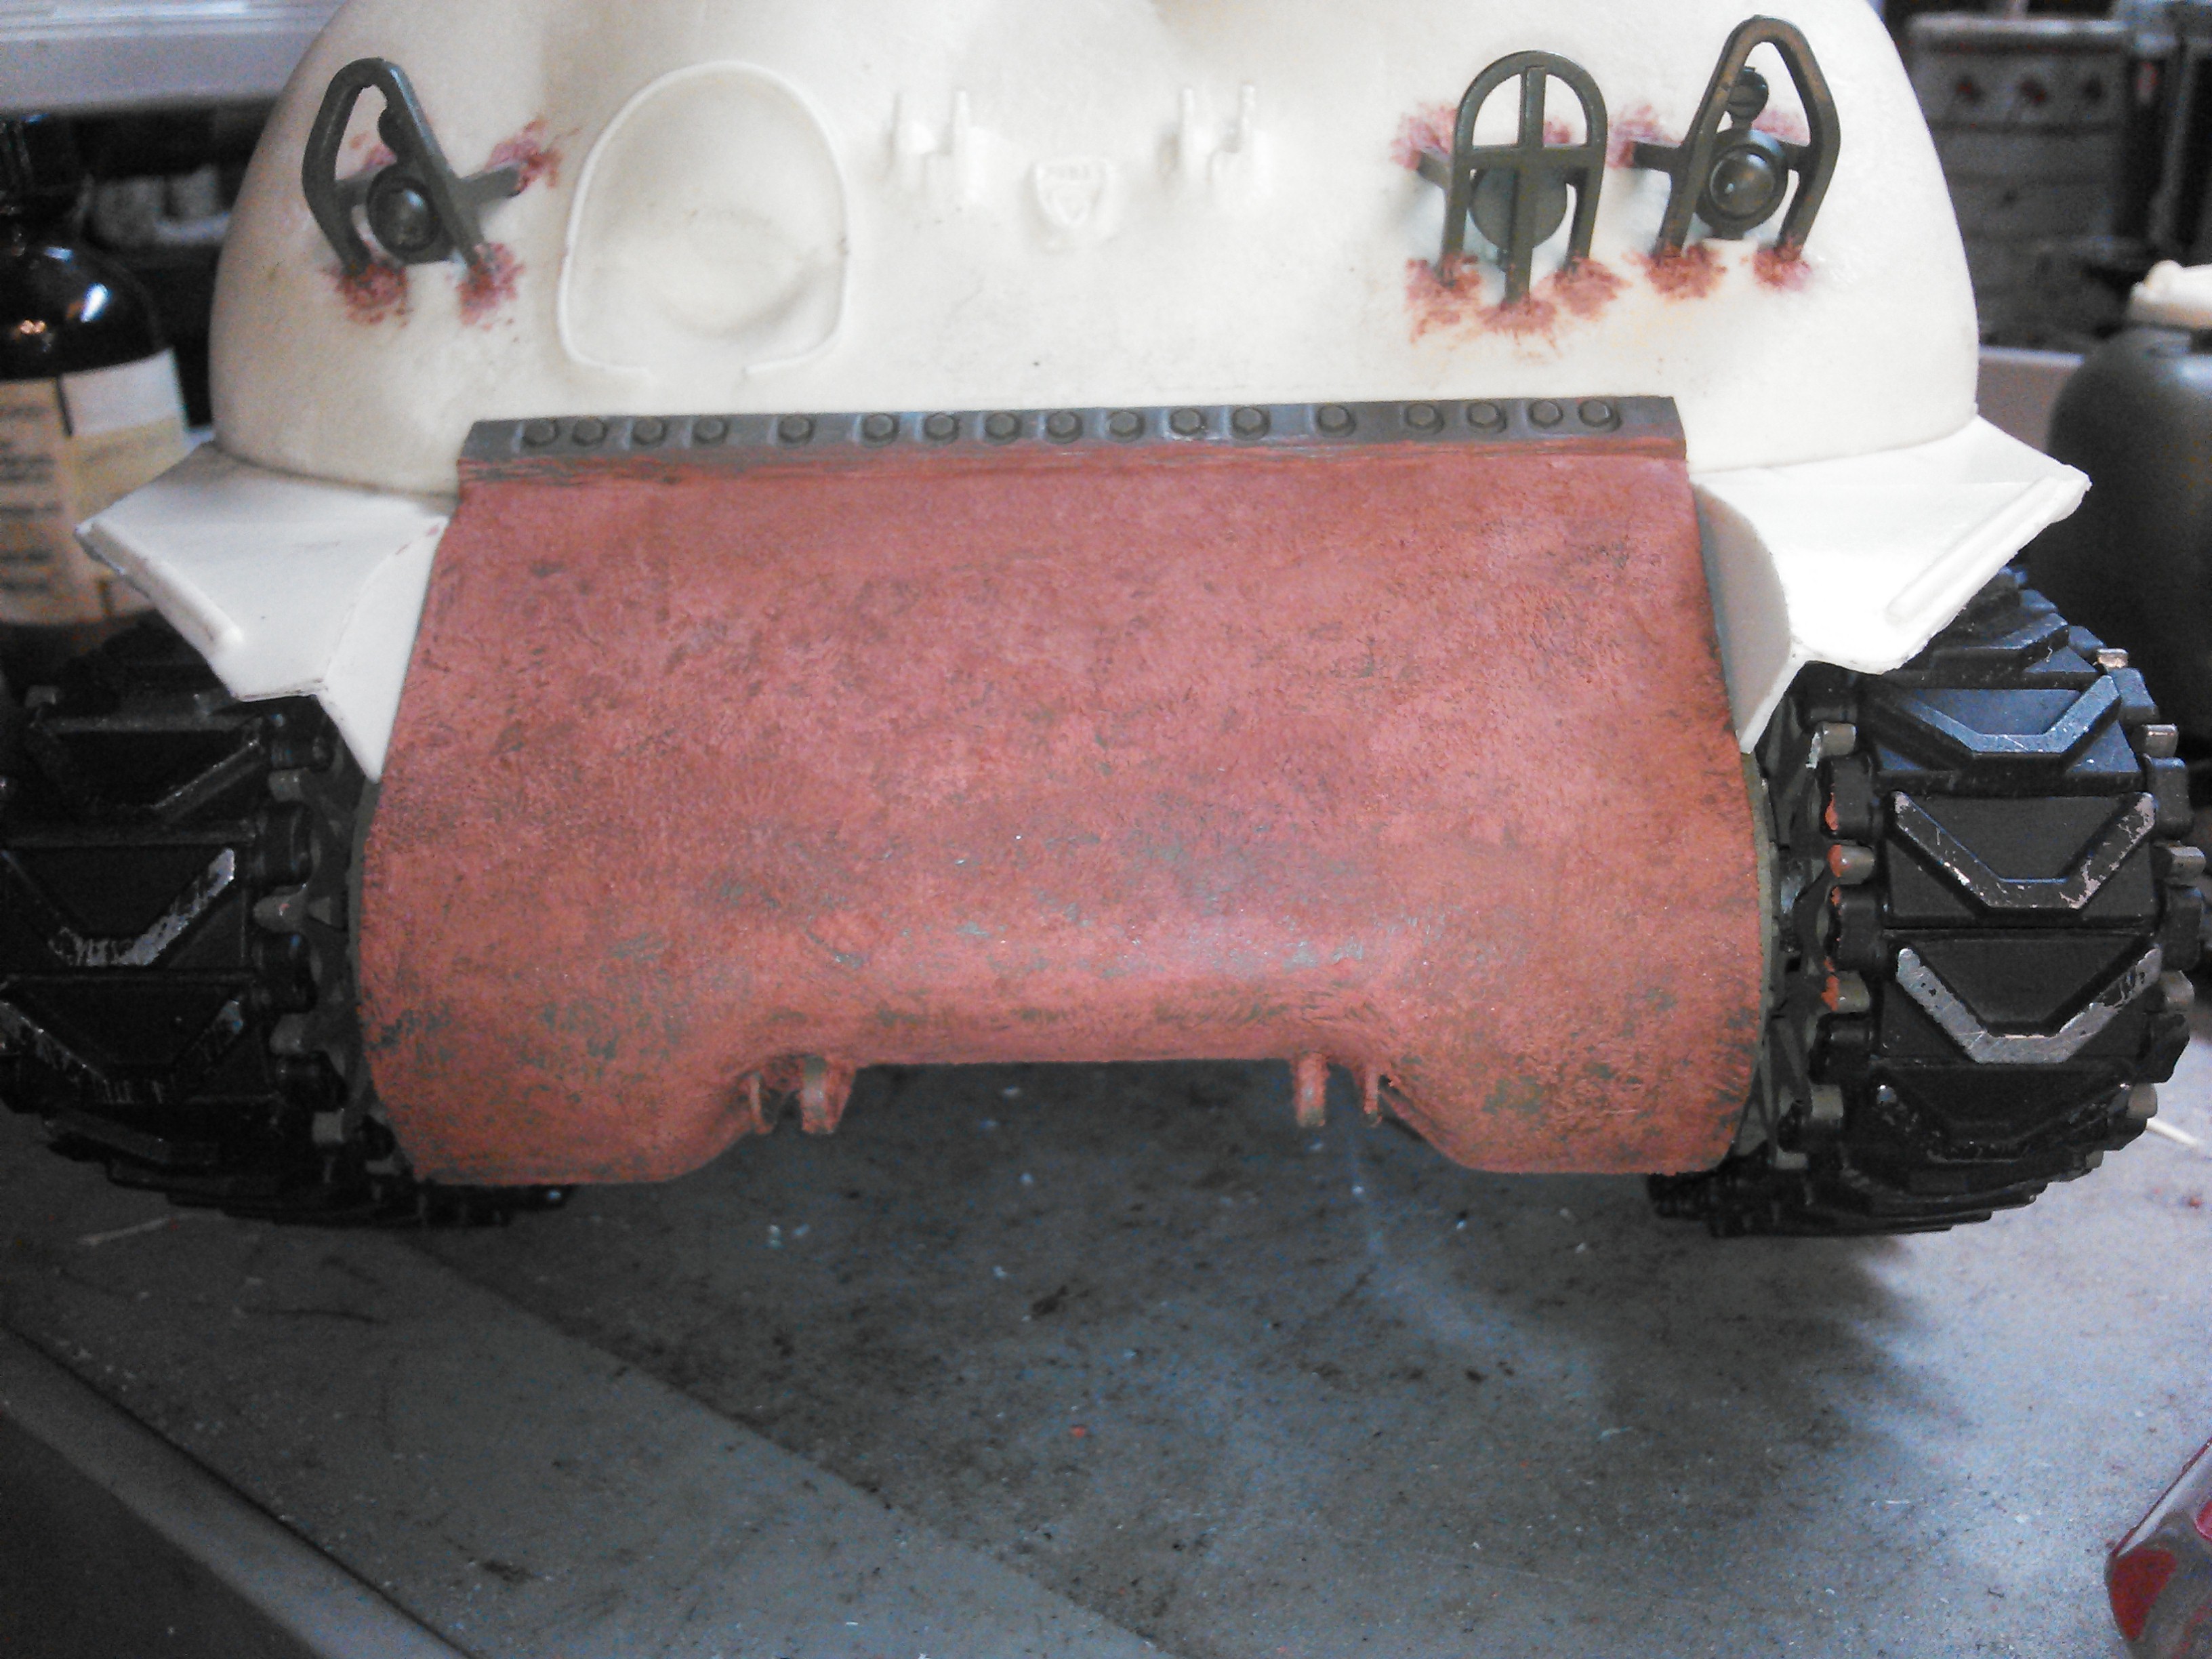
Then I got ambitious and decided to try texturizing the transmission cover. I used Bondo brand spot glazing putty and tried several brushes. I found that the shortest brush, about 3/16 long and extremely stiff worked best. Its an artist oil painting brush (left overs from grandmas hobby)
The process took me a little bit to get down and I had to clean my brush in some laquer thinner every few minutes because the putty does begin to dry and clog up. I also was able to smooth out some areas I got too thick, by dabbing with a drop of thinner and spread it back out. Overall, I am very happy with the results. Its very durable when dry, I have rubbed it with my finger and it does not rub off or flatten down. I cant wait to get to the turret and then spray some paint on it!
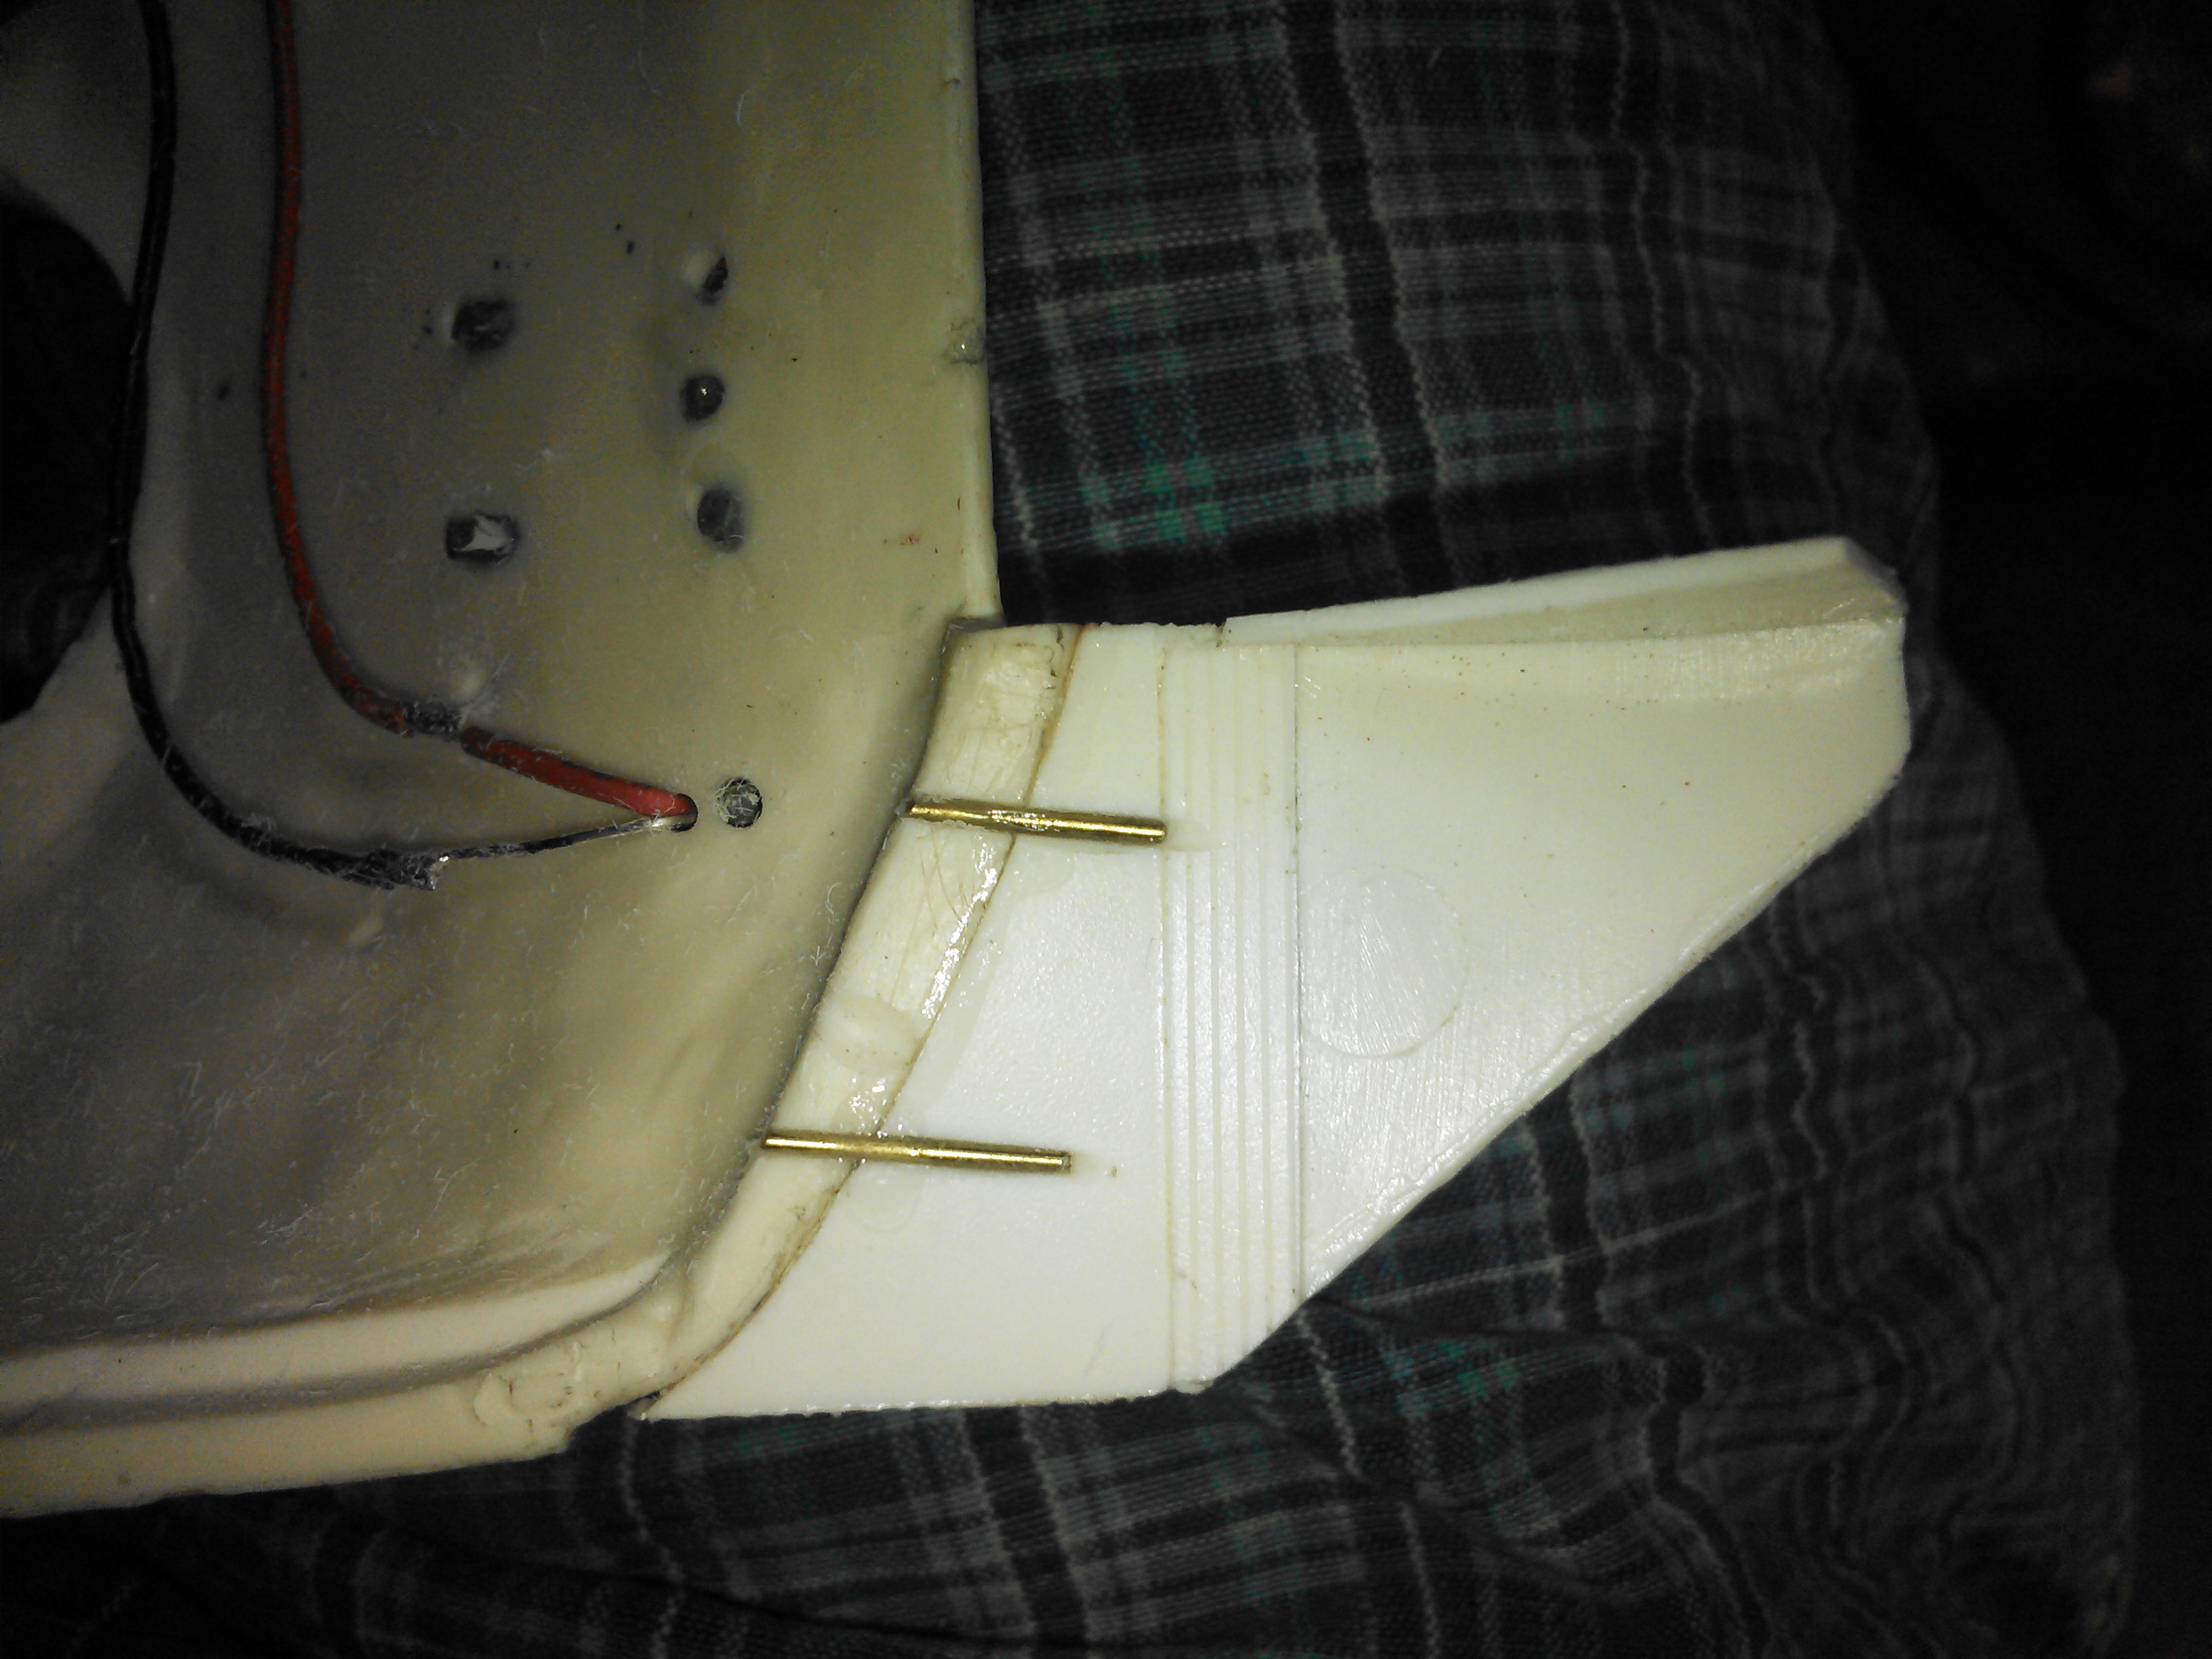
I also finished mounting the fenders. I cut grooves into them along with the hull and added dowels to help with strength and hopefully they wont break off.
Then I got ambitious and decided to try texturizing the transmission cover. I used Bondo brand spot glazing putty and tried several brushes. I found that the shortest brush, about 3/16 long and extremely stiff worked best. Its an artist oil painting brush (left overs from grandmas hobby)
The process took me a little bit to get down and I had to clean my brush in some laquer thinner every few minutes because the putty does begin to dry and clog up. I also was able to smooth out some areas I got too thick, by dabbing with a drop of thinner and spread it back out. Overall, I am very happy with the results. Its very durable when dry, I have rubbed it with my finger and it does not rub off or flatten down. I cant wait to get to the turret and then spray some paint on it!
03-17-2015, 09:44 PM
#32
Thread Starter
Ive been hard at work. Lots of things done.
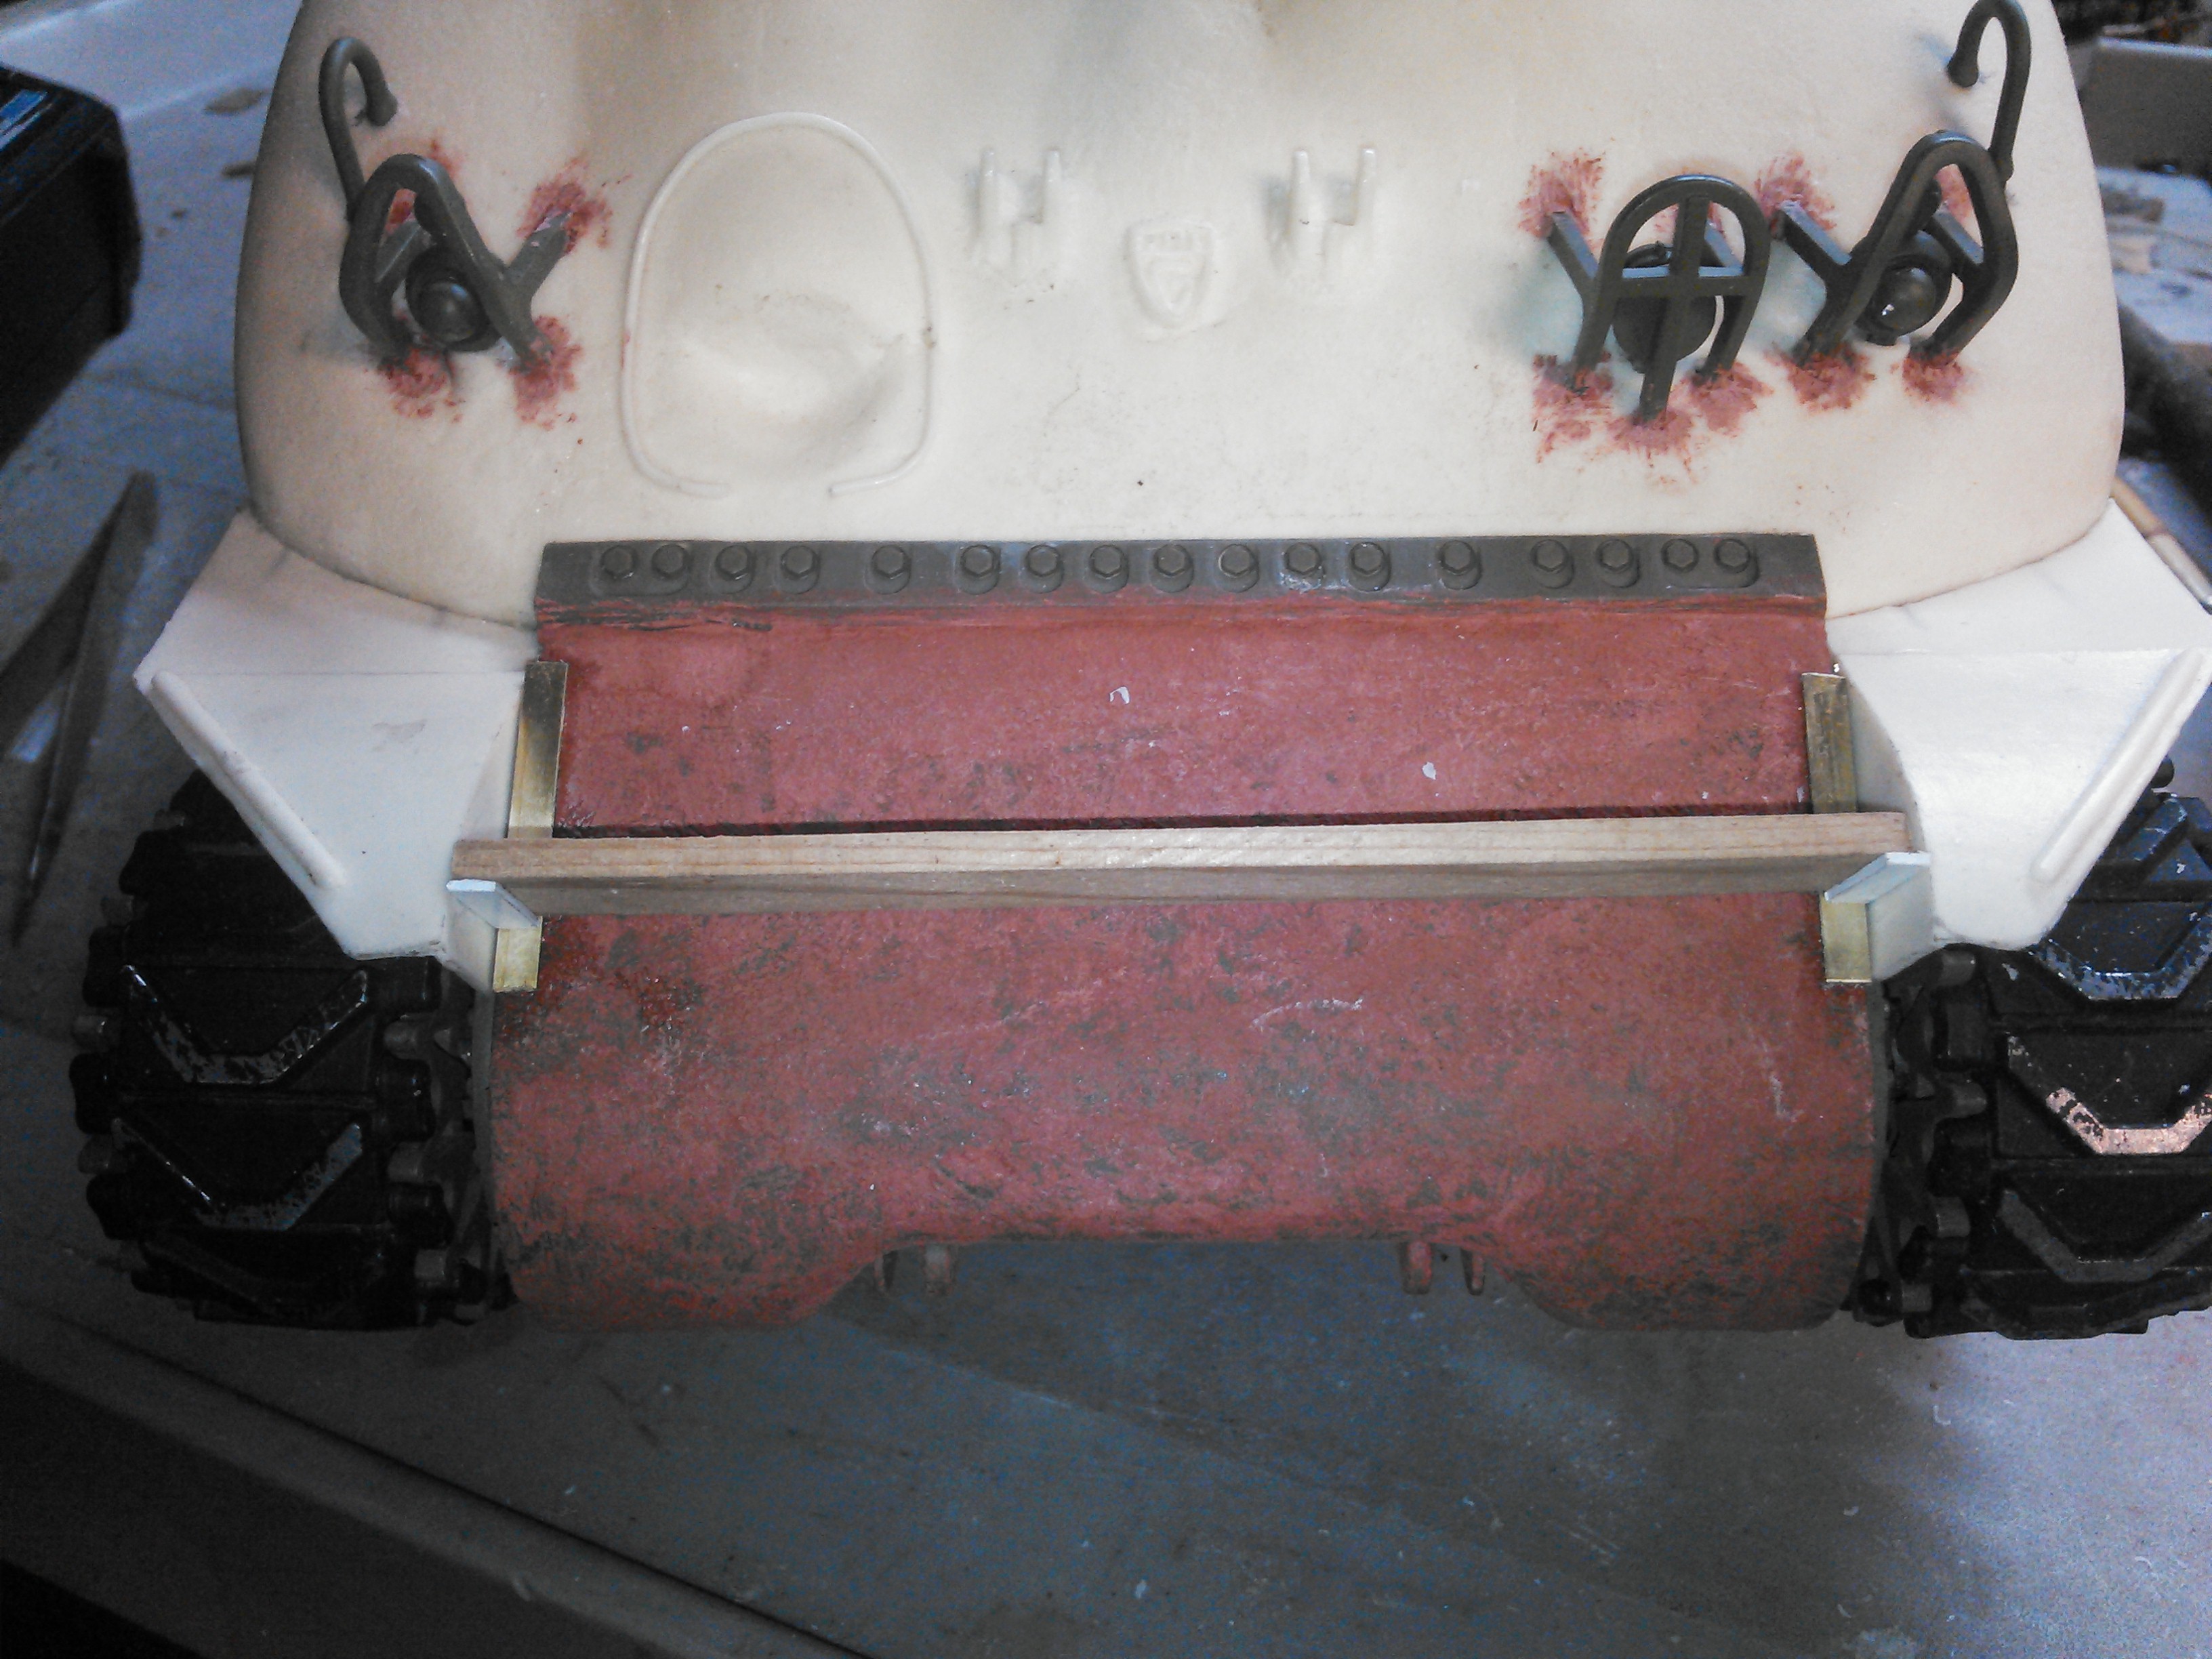
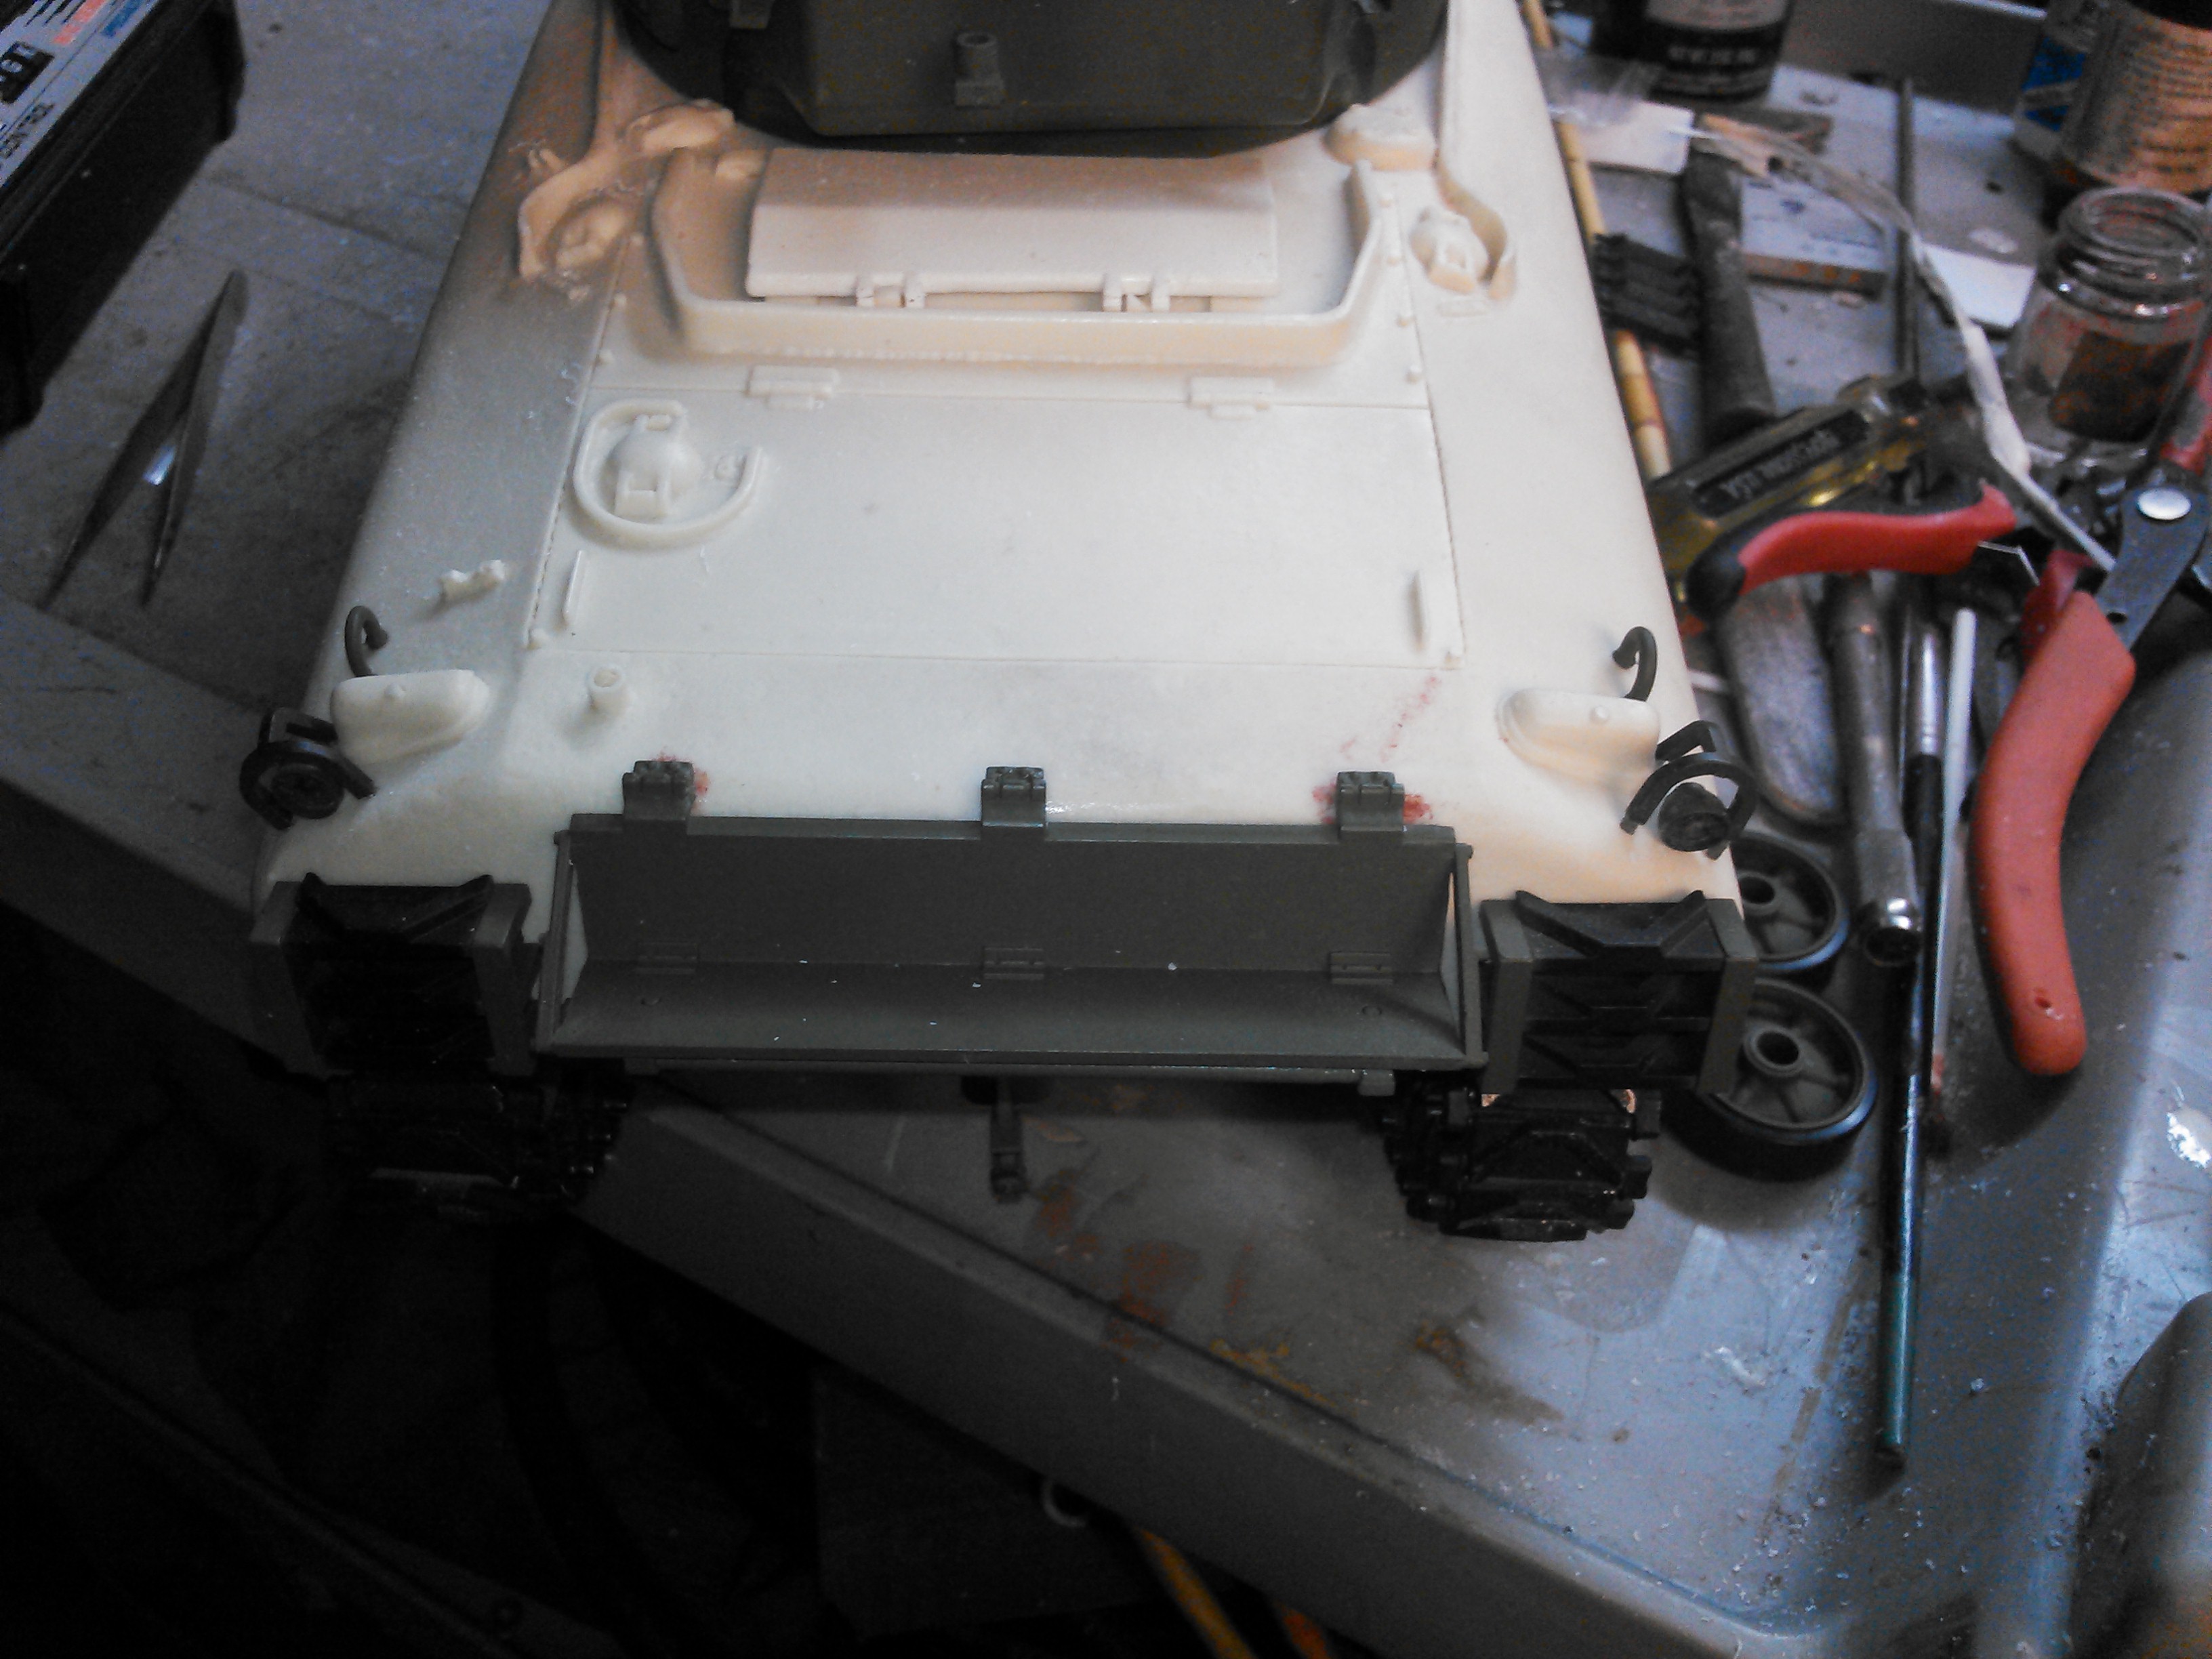
Stowage board installed across the transmission cover. The board comes off, it is just sitting in place right now.
Hull lift rings installed and "welded" in place.
Filler plates installed behind the gun mantle to cover the gaping holes top and bottom. What a pain in the butt that was. I still need to putty around the panels to blend them in. Next time I am going to try from the beginning to use Nick's turret mantle mount casting.
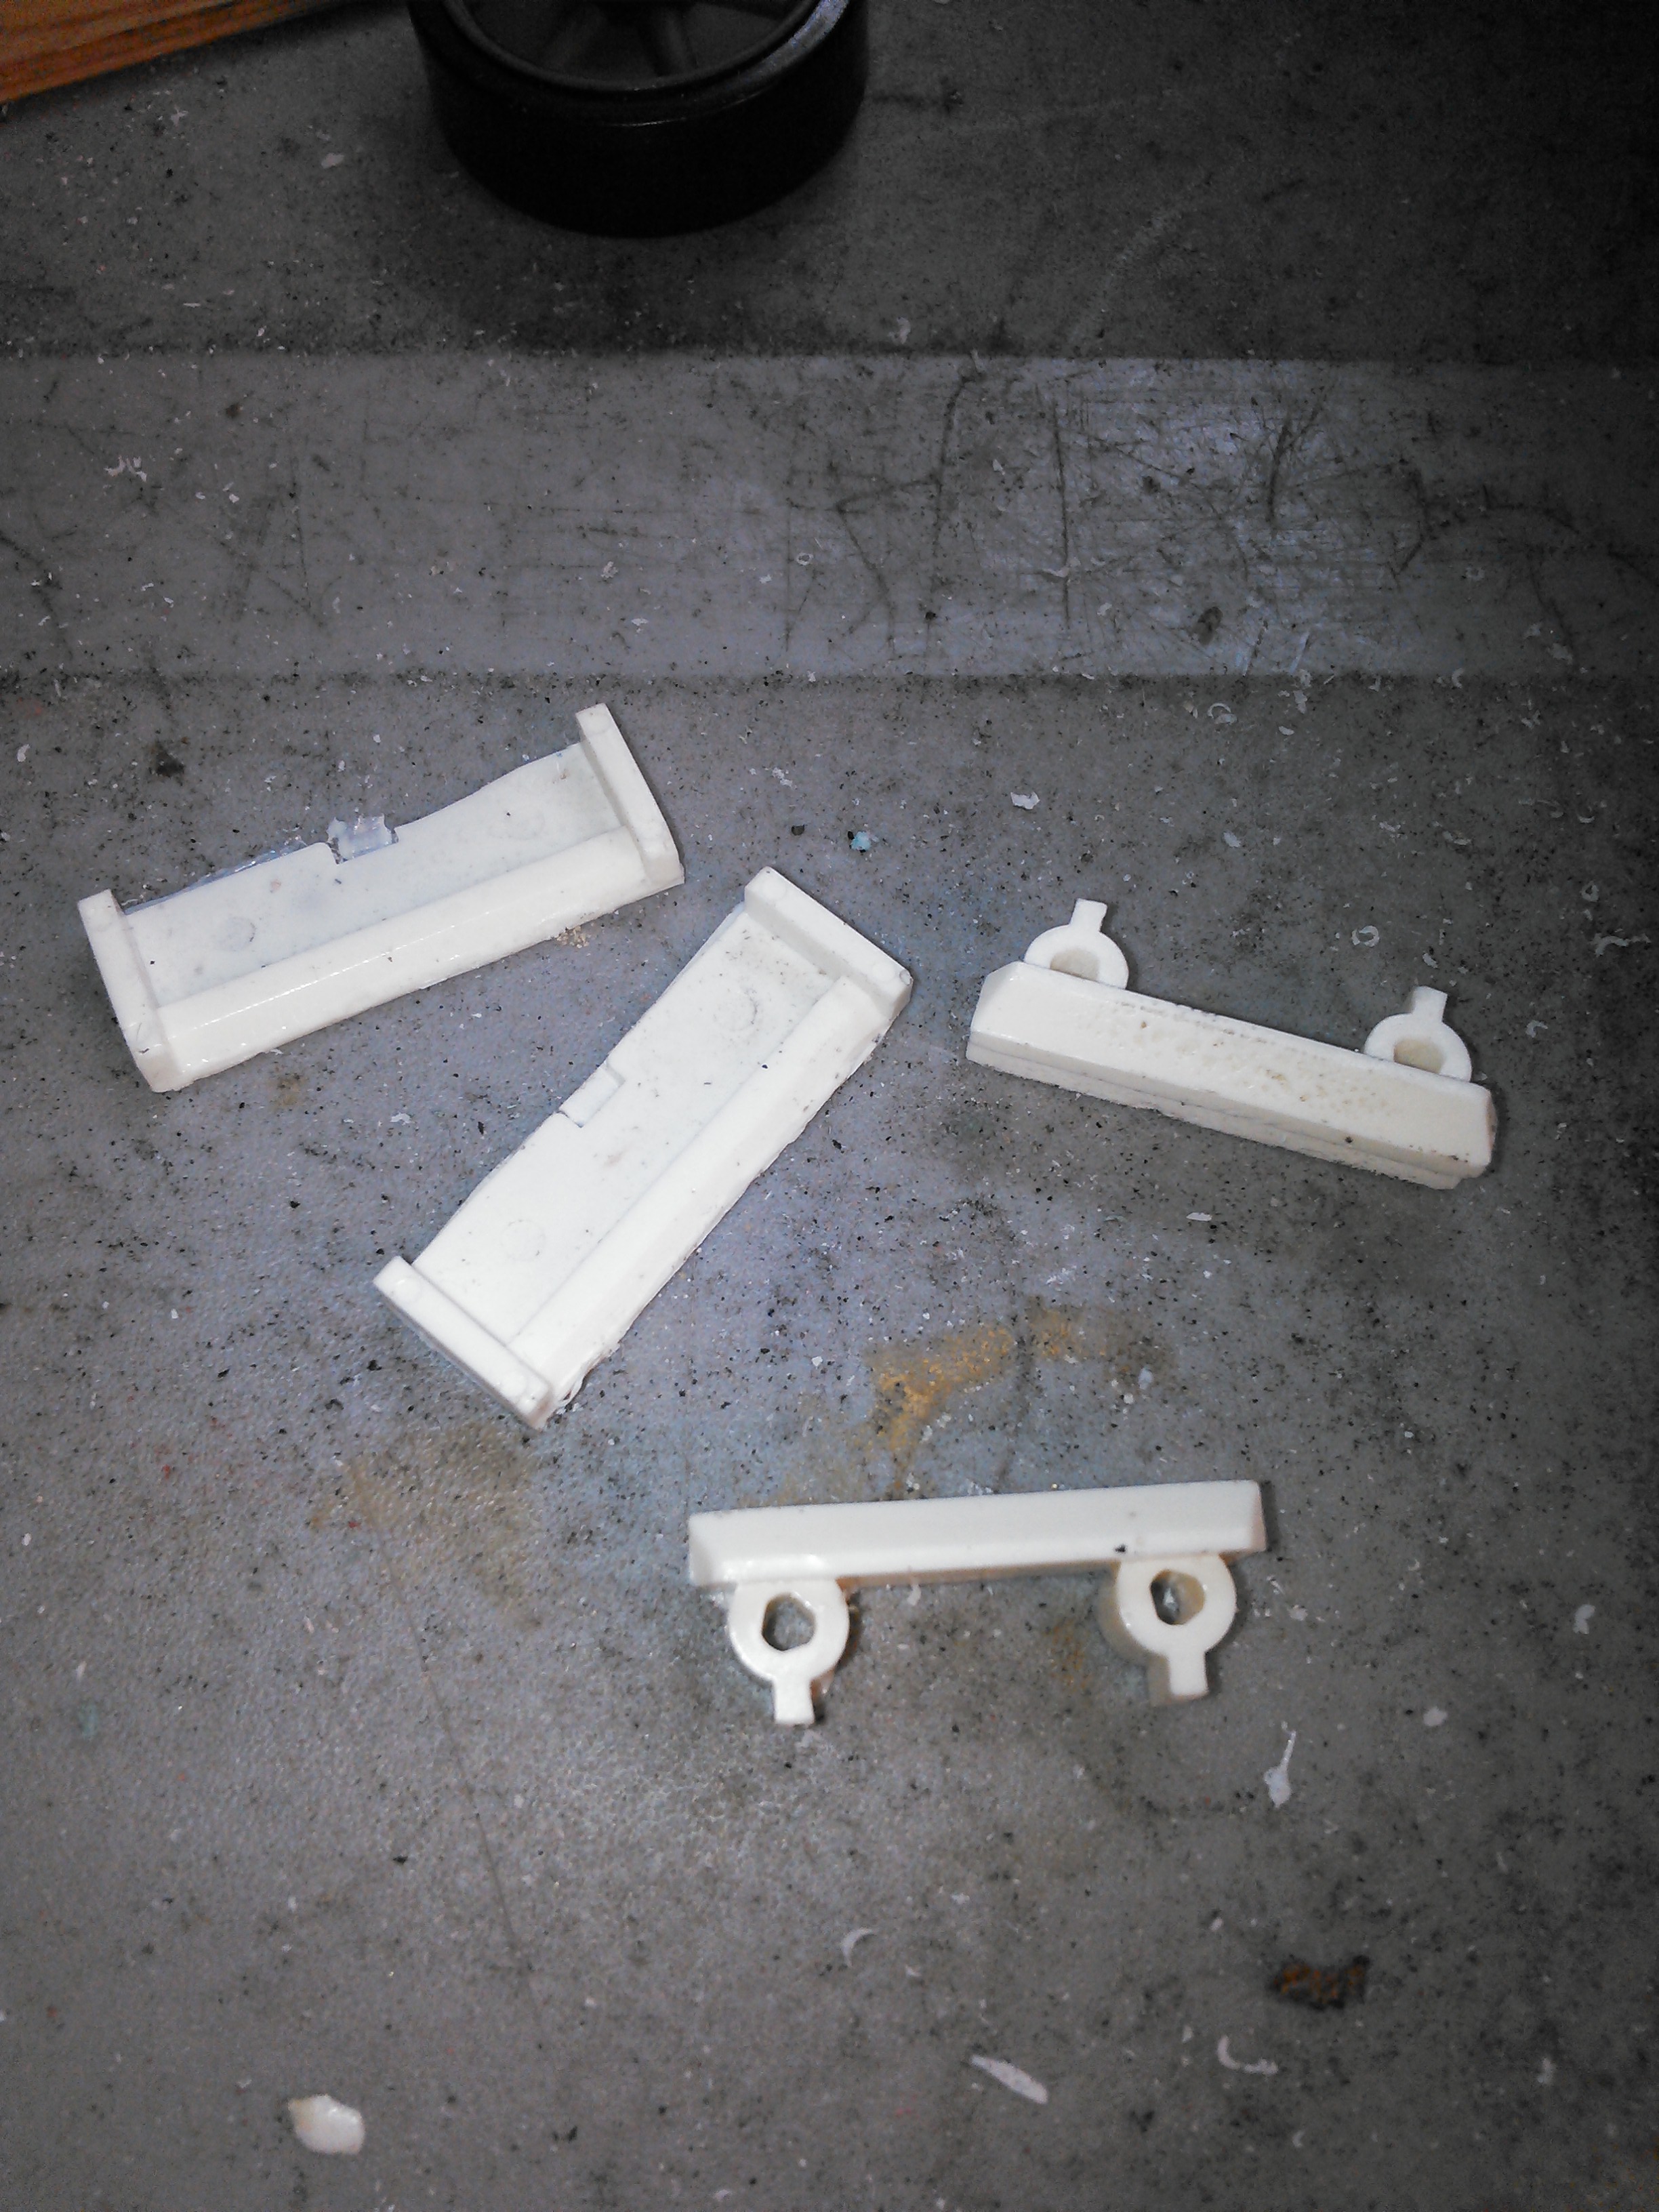
I also made some molds and castings of body clips and got one side installed tonight. Works well. Hull should fit tight, might wind up being too tight.
Stowage board installed across the transmission cover. The board comes off, it is just sitting in place right now.
Hull lift rings installed and "welded" in place.
Filler plates installed behind the gun mantle to cover the gaping holes top and bottom. What a pain in the butt that was. I still need to putty around the panels to blend them in. Next time I am going to try from the beginning to use Nick's turret mantle mount casting.
I also made some molds and castings of body clips and got one side installed tonight. Works well. Hull should fit tight, might wind up being too tight.
03-18-2015, 08:27 AM
#34
Thread Starter
Yes, Nick makes ones, but when I bought the gun and mantle from him, he didnt tell me he makes the turret gun mount behind the mantle. He sent me one in my recent order for another project last week, but I had already chopped up the brackets on the rear of the mantle that are needed to mount it through the turret gun mount he sent me. So it was basically too late unless i ordered a new mantle and pivot blocks. I just kept working on it as you see.
One more reason I keep after him to make a website or at least a catalog so you know what he makes. Had I known he made it, i would have bought it and saved myslef lots of work and headache.
One more reason I keep after him to make a website or at least a catalog so you know what he makes. Had I known he made it, i would have bought it and saved myslef lots of work and headache.
03-19-2015, 08:35 PM
#35
Thread Starter
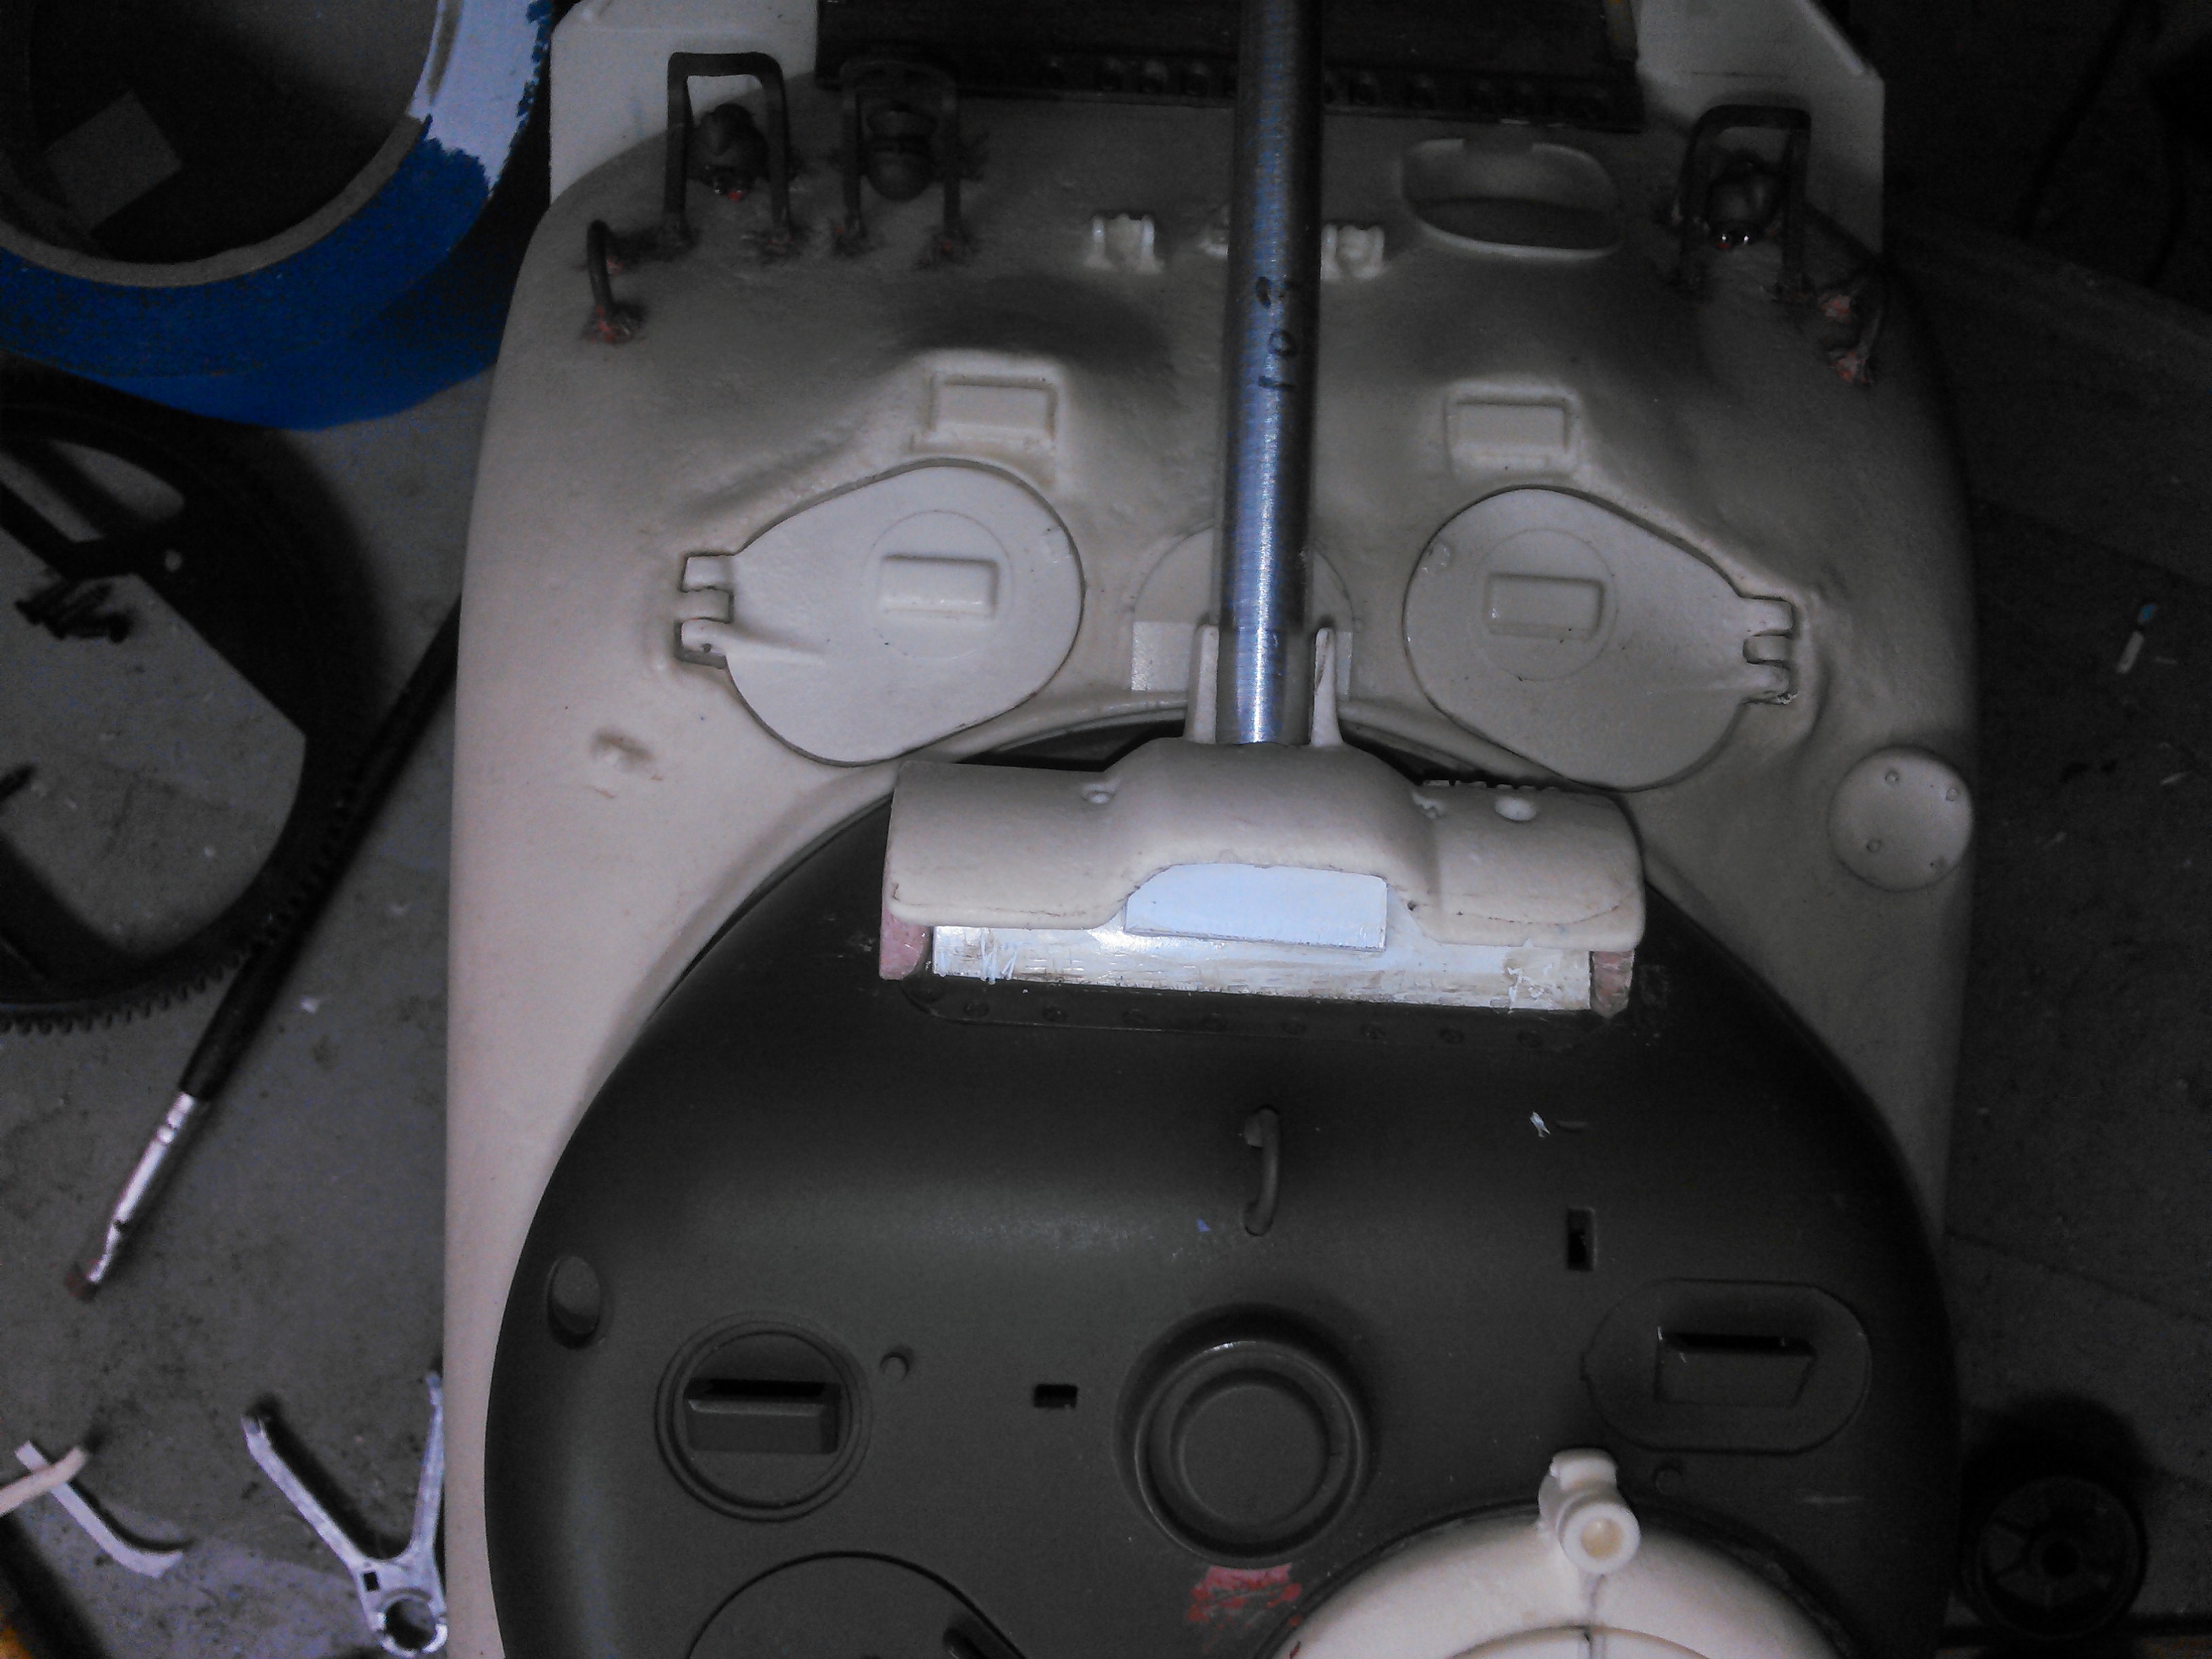
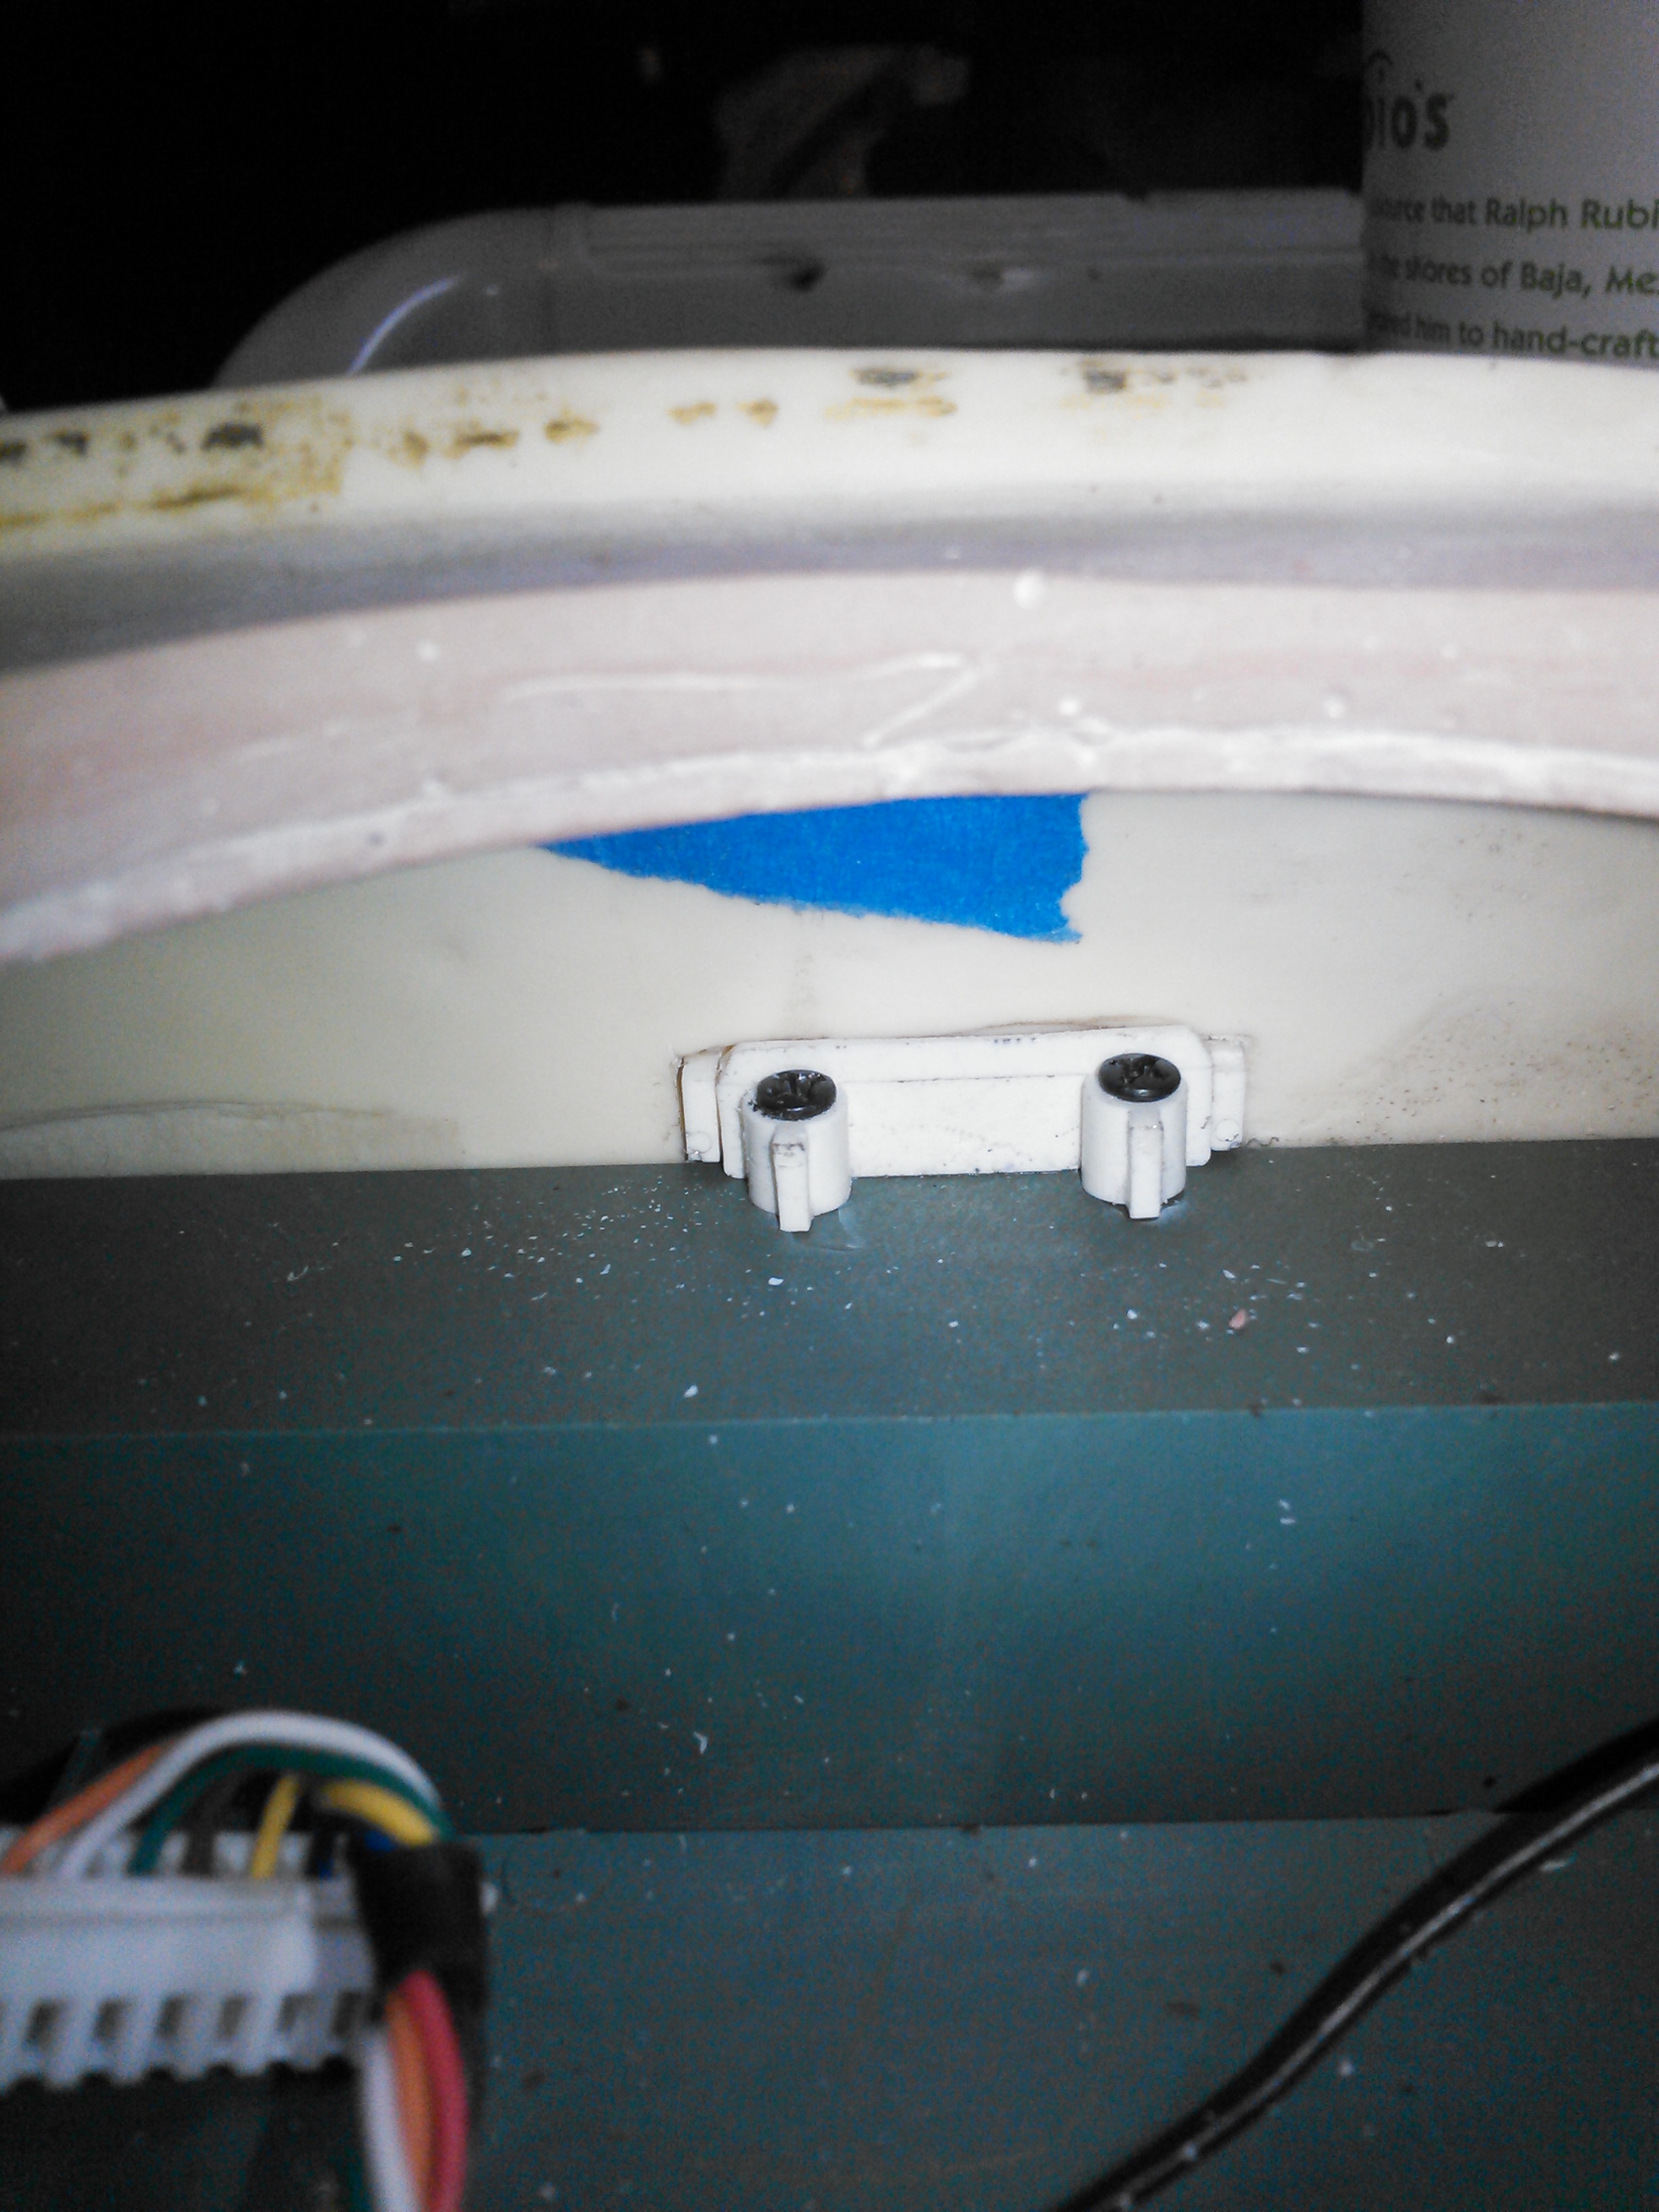
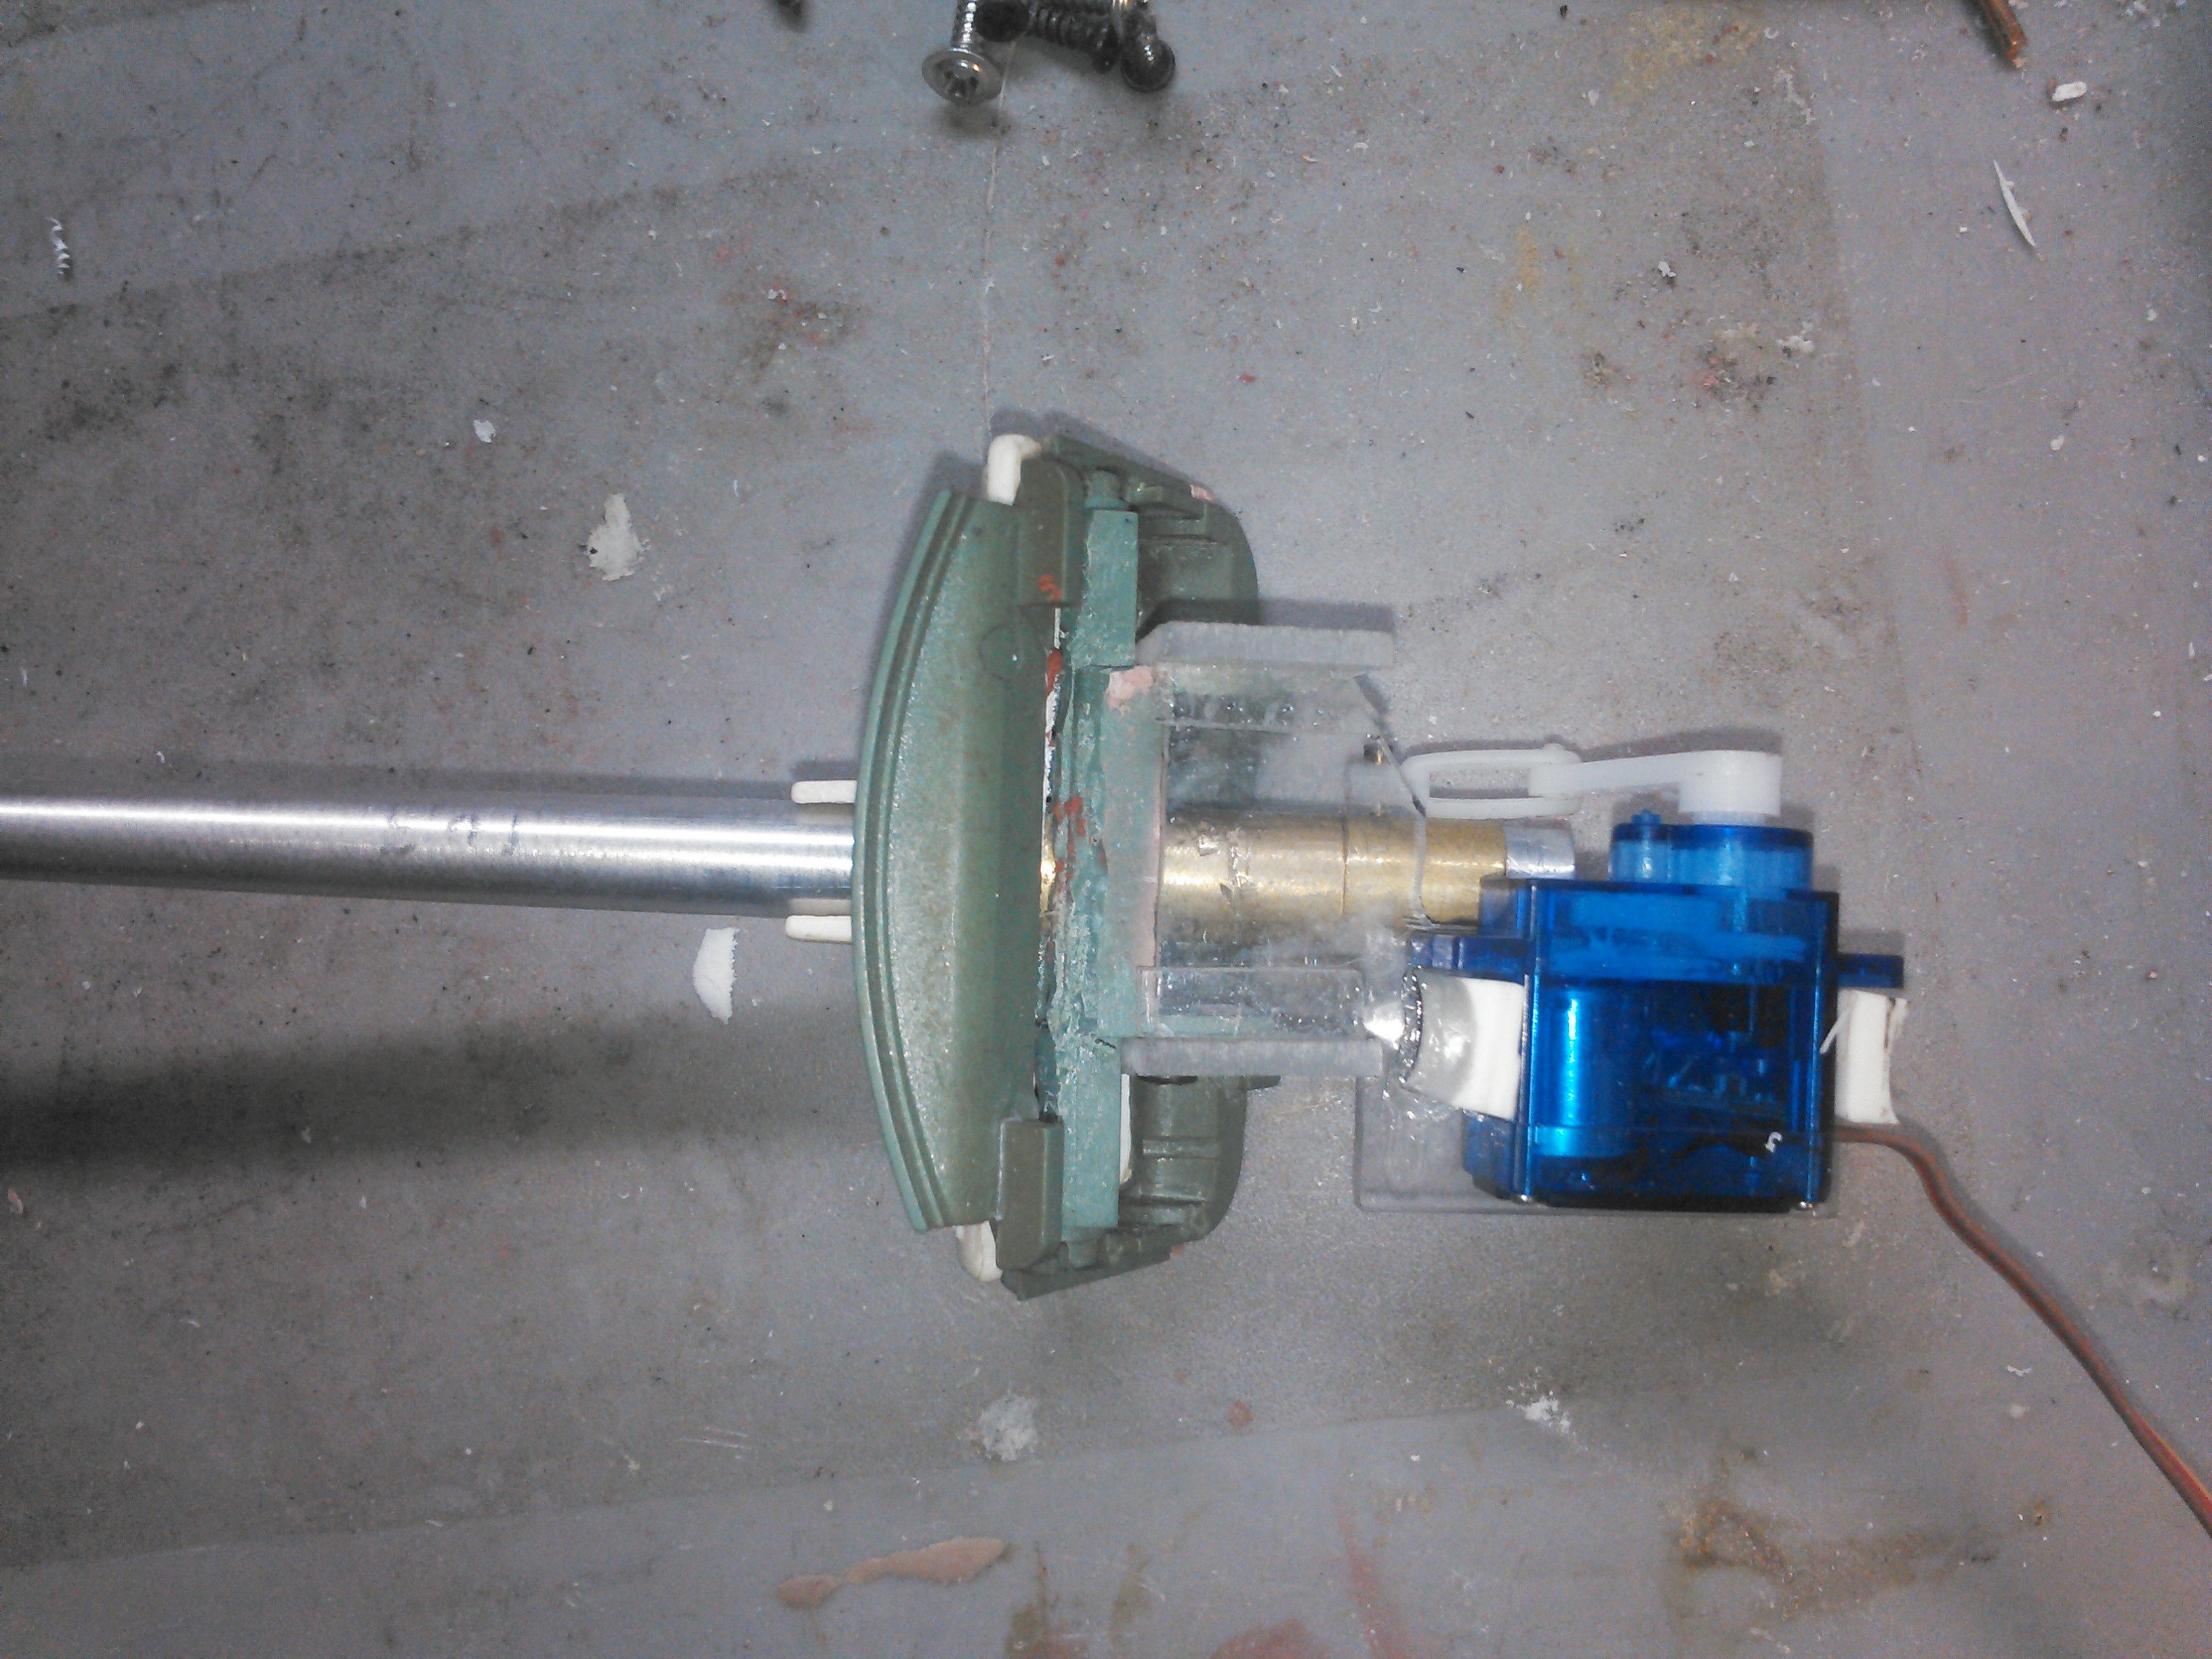
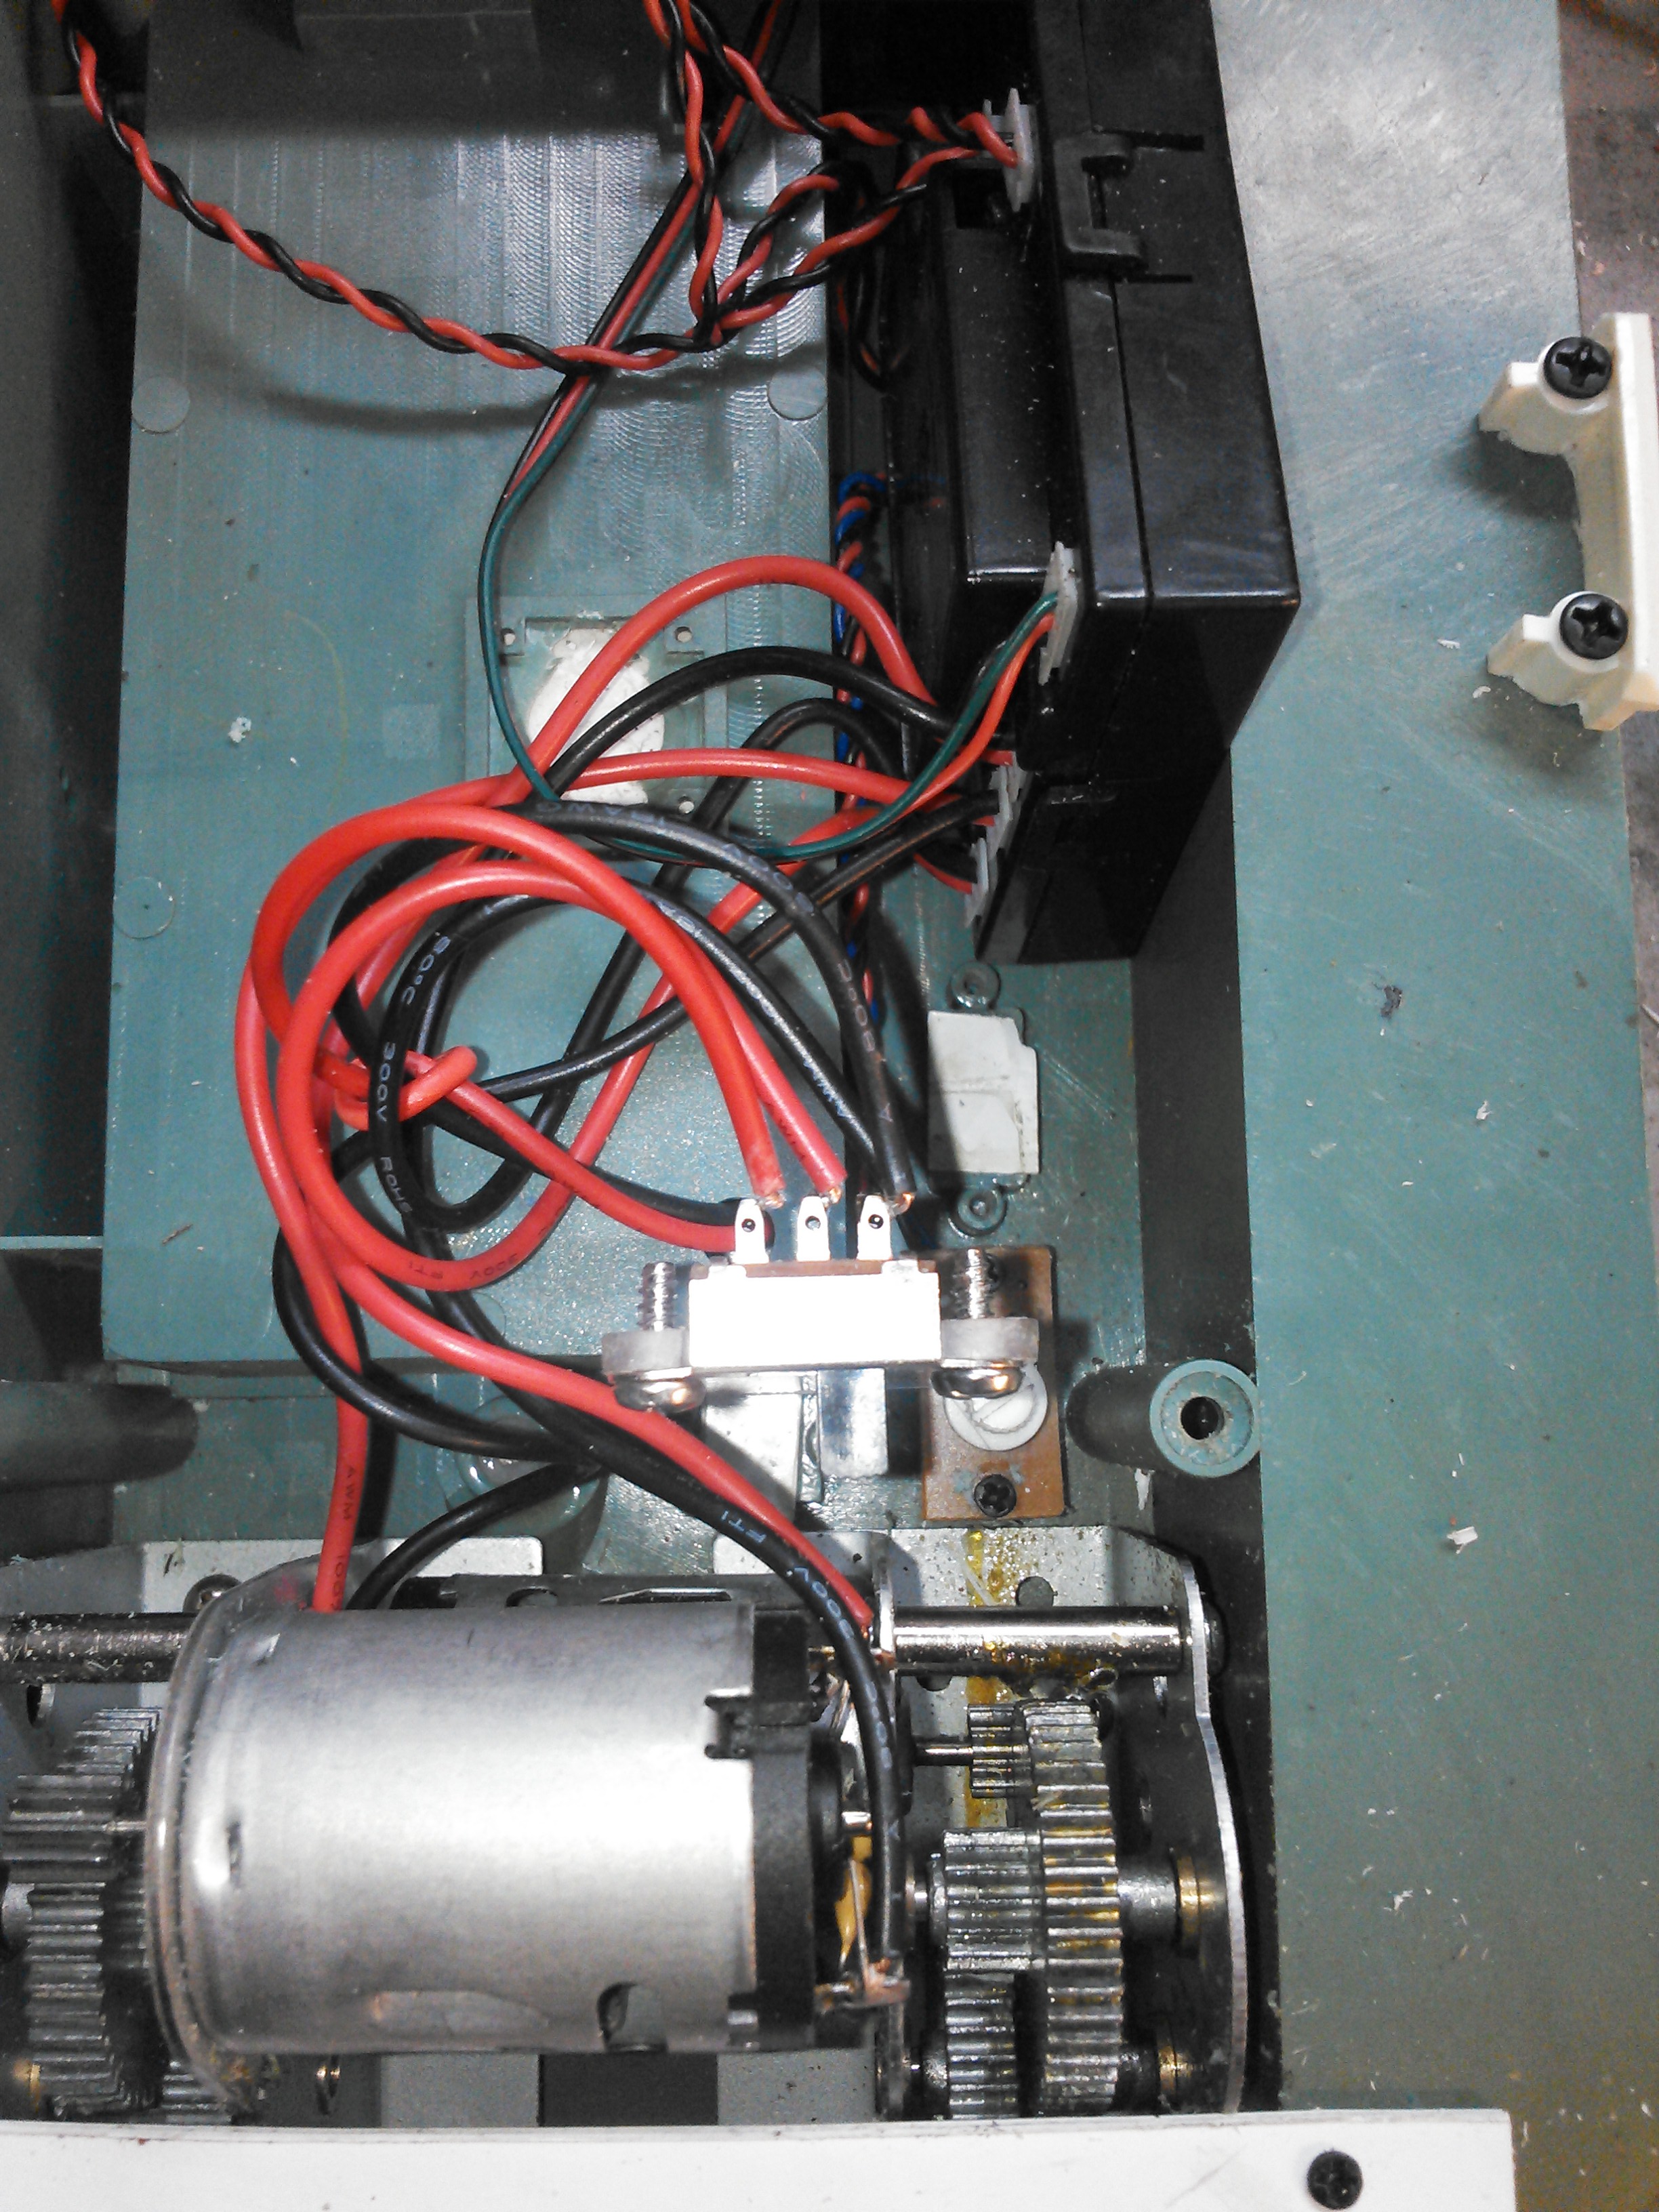
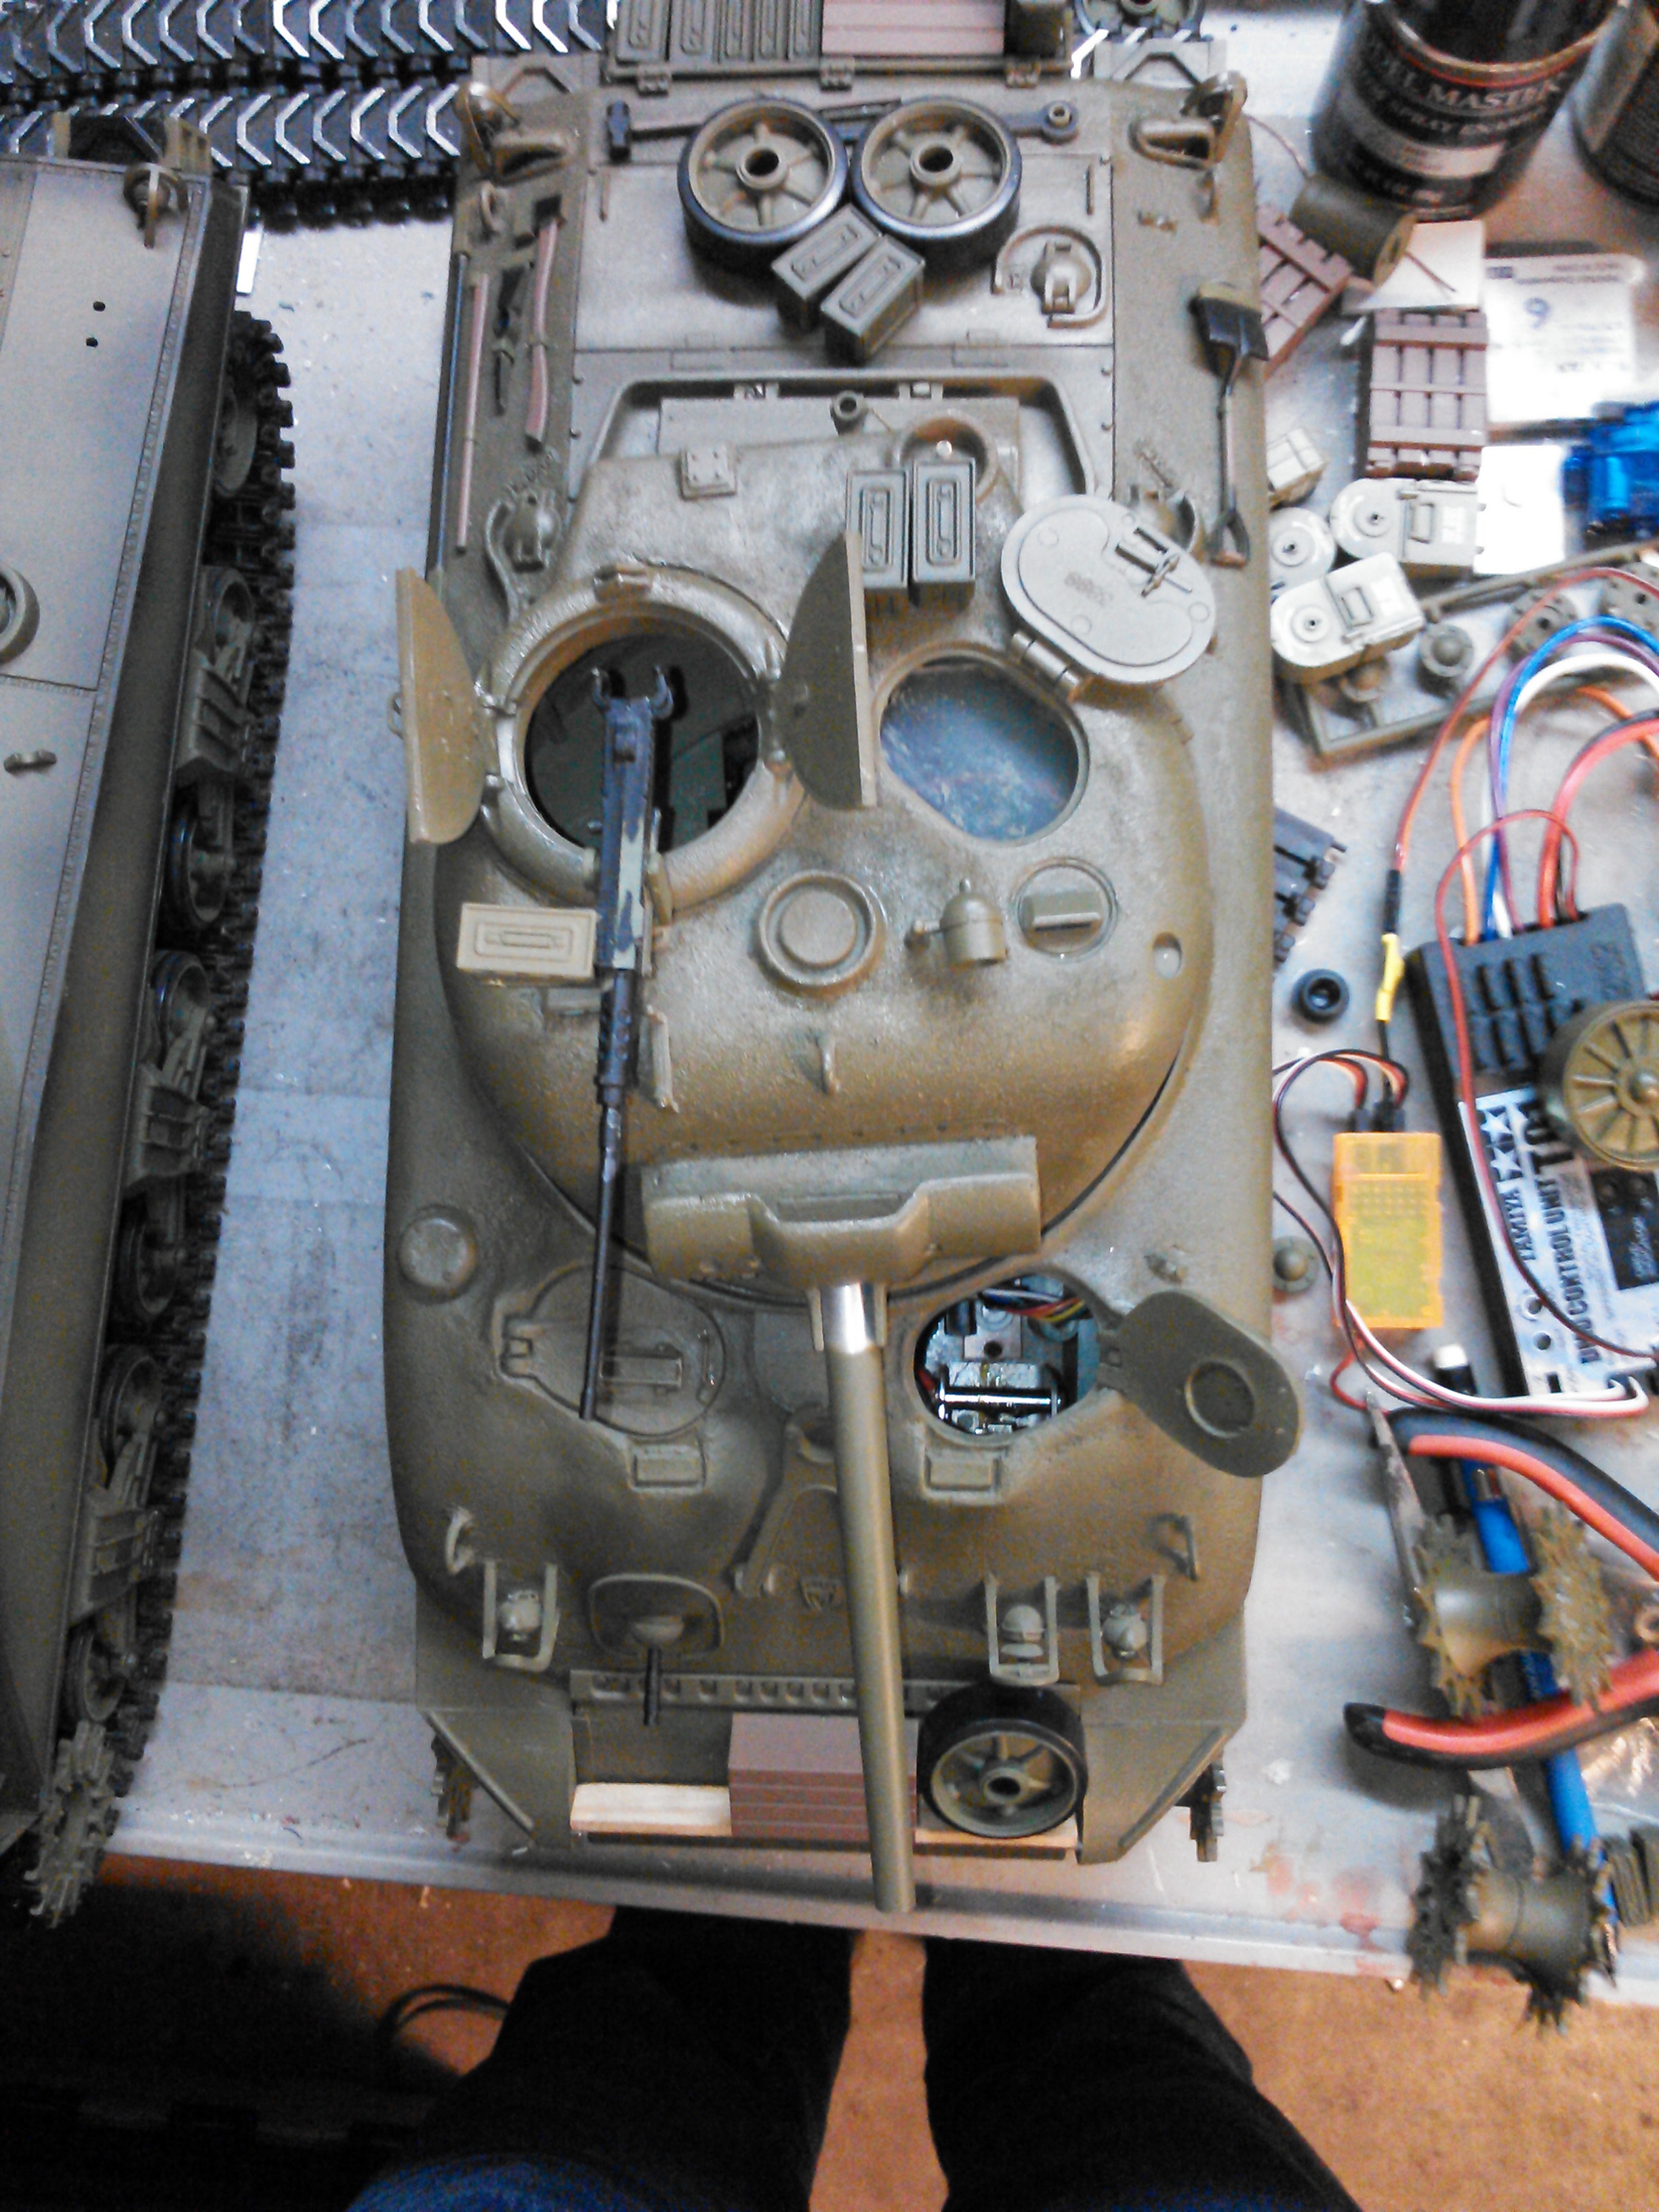
Servo Recoil BABY! Just have to wait for my BARC4 from Dan at Battle Armor to start hooking it all up.
Next I have to fabricate the elevation mount using a continuous rotation servo so that it will move with the stick, but stay in place when you let go of the stick and re-centers. Going to use a rate reducer on it as well so it goes slower. John turned me on to it, http://www.dionysusdesign.com/produc...roducts_id/192
I added screws to the servo blocks post photography tonight.
03-20-2015, 05:06 AM
#36
Senior Member

Join Date: Nov 2006
Location: Grande Prairie,
AB, CANADA
Posts: 8,976
Likes: 0
Received 4 Likes
on
4 Posts
Let me know how the elevation works out. IF you find away around the bbl always wanting to return to neutral, I would be most interested in the hardware you use. For my tanks I assign one of the proportional rotary knobs on my T6a to control the servo elevation, This allows me to dial it up or down and it stays put where ever I leave it.
Cheers
Cheers
03-20-2015, 07:41 AM
#37
Thread Starter
Dan, here is what I am going to use, its continuous rotation, so it stays where it is when you let go of the stick and it returns to center but the servo does not
http://www.robotshop.com/en/9g-conti...cro-servo.html
http://www.robotshop.com/en/9g-conti...cro-servo.html
03-20-2015, 10:58 AM
#38
Thread Starter
The more I think about this I think there is a flaw in my plan. To use the continous rotation servo, the elevation stick needs to operate up and down, but with the rx18 the only option is to have output to a motor that runs the barrel up and down continously with the stick pushed one directin,no independant up or down, just continous movement, moving the stick the other way fires the gun.
This will be a neat challange to see if I can manipulate the stuff to make it work on 4 channels. I know i can make it work easy on 5, using the landing gear ch5 on a momentary button connected to the barc main gun, and the elevation stick independant on its own servo not going through the barc or rx18.
This will be a neat challange to see if I can manipulate the stuff to make it work on 4 channels. I know i can make it work easy on 5, using the landing gear ch5 on a momentary button connected to the barc main gun, and the elevation stick independant on its own servo not going through the barc or rx18.
03-20-2015, 11:21 AM
#39
Senior Member
Join Date: Nov 2006
Location: Grande Prairie,
AB, CANADA
Posts: 8,976
Likes: 0
Received 4 Likes
on
4 Posts
The trouble with continous servos i have found is the neutral spot where they don't move is very small.
Just tie this into you receiver independent of the RX18 You can use a servo Y cable and hook it up in parallel to the BARC. This will allow up and down movment of the bbl as the reciever controls the servo not the RX18 or the BARC..
This is true for any system that uses standard RC. Tank people seem to forget that receivers are designed to move servos back and forth and if this is what you are looking to do you don't need to run it through a Tank control box. I think this comes about because of the proprietory radios on factory tanks. They don't use servos so people who are introduced to RC this way haven't been exposed to servos in use like they were desgned for.
So a regular reciever can easily control turret rotation and gun elevation. using continous servos
Just tie this into you receiver independent of the RX18 You can use a servo Y cable and hook it up in parallel to the BARC. This will allow up and down movment of the bbl as the reciever controls the servo not the RX18 or the BARC..
This is true for any system that uses standard RC. Tank people seem to forget that receivers are designed to move servos back and forth
and if this is what you are looking to do you don't need to run it through a Tank control box. I think this comes about because of the proprietory radios on factory tanks. They don't use servos so people who are introduced to RC this way haven't been exposed to servos in use like they were desgned for. So a regular reciever can easily control turret rotation and gun elevation. using continous servos
Last edited by YHR; 03-20-2015 at 11:29 AM.
03-20-2015, 01:24 PM
#40
Thread Starter
Yep, i have lots of operating functions on my ho scale battleship USS Indiana, my submarine USS Bonefish, which has a pressure hull and ballast tanks. Ive also made a tamiya Enterprise launch planes with a servo.
03-22-2015, 07:39 AM
#41
Thread Starter
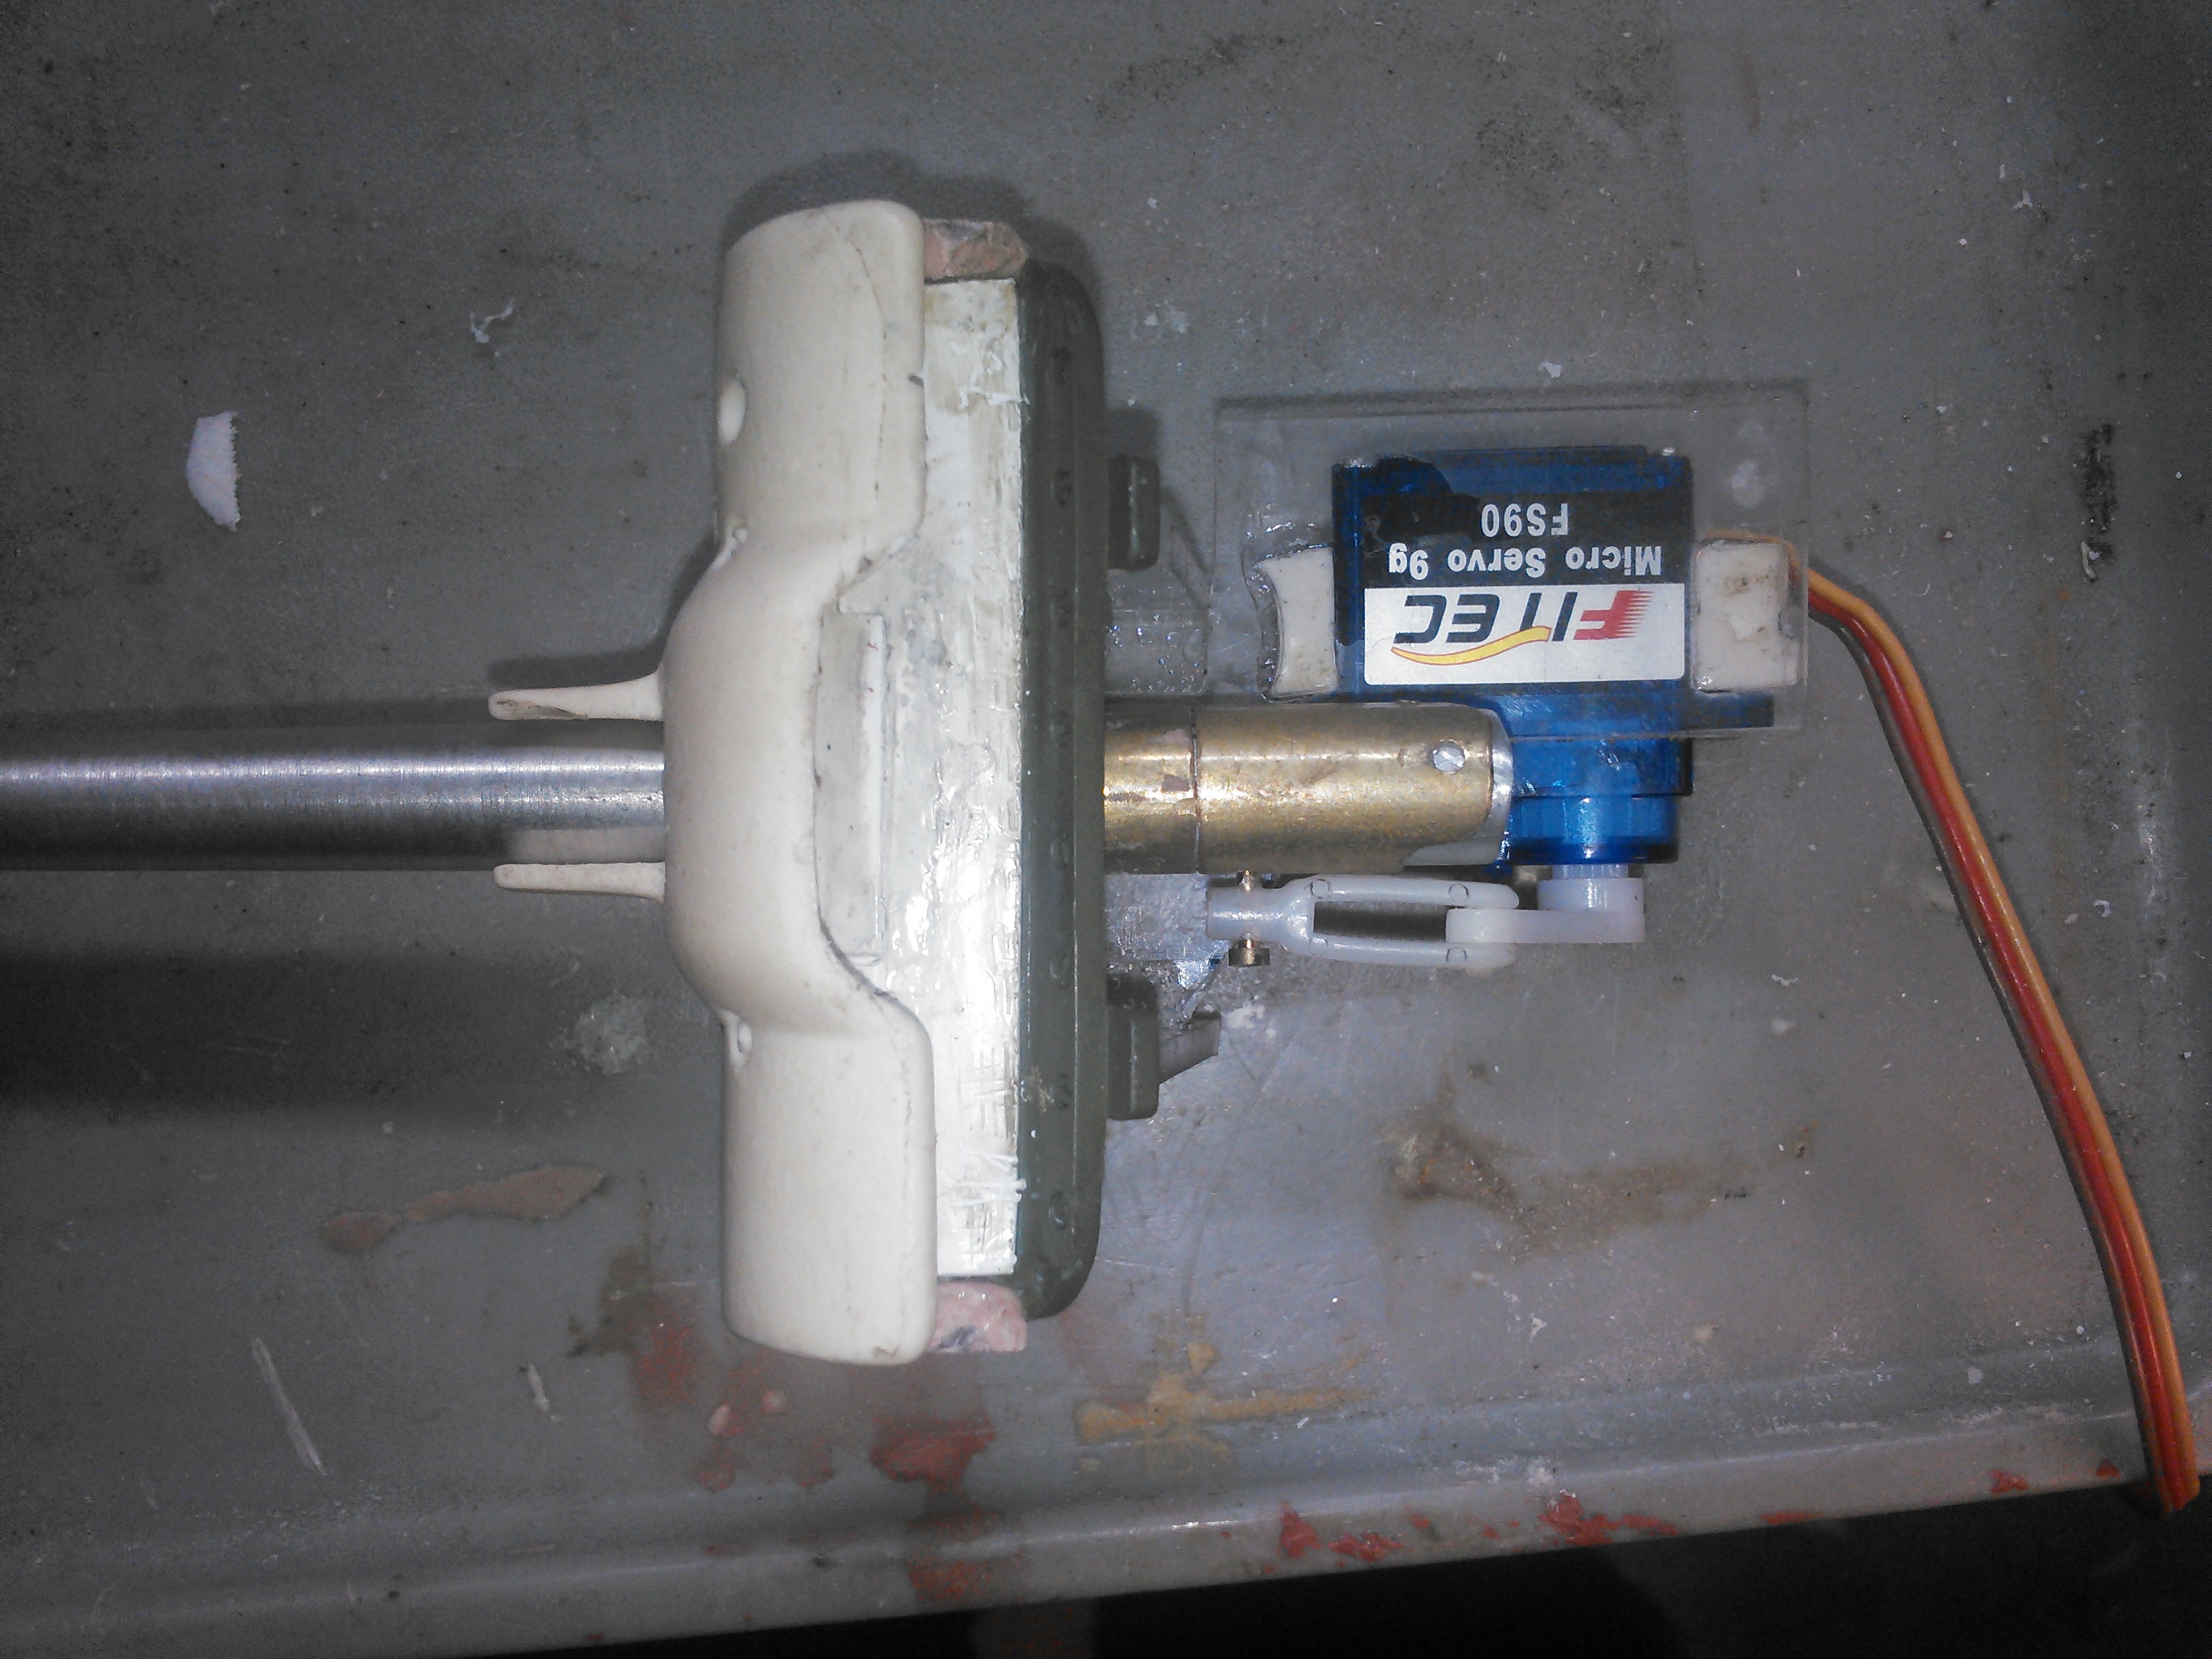
I finished installing the elevation servo system and did some tests. Here are some pictures and a quick video.
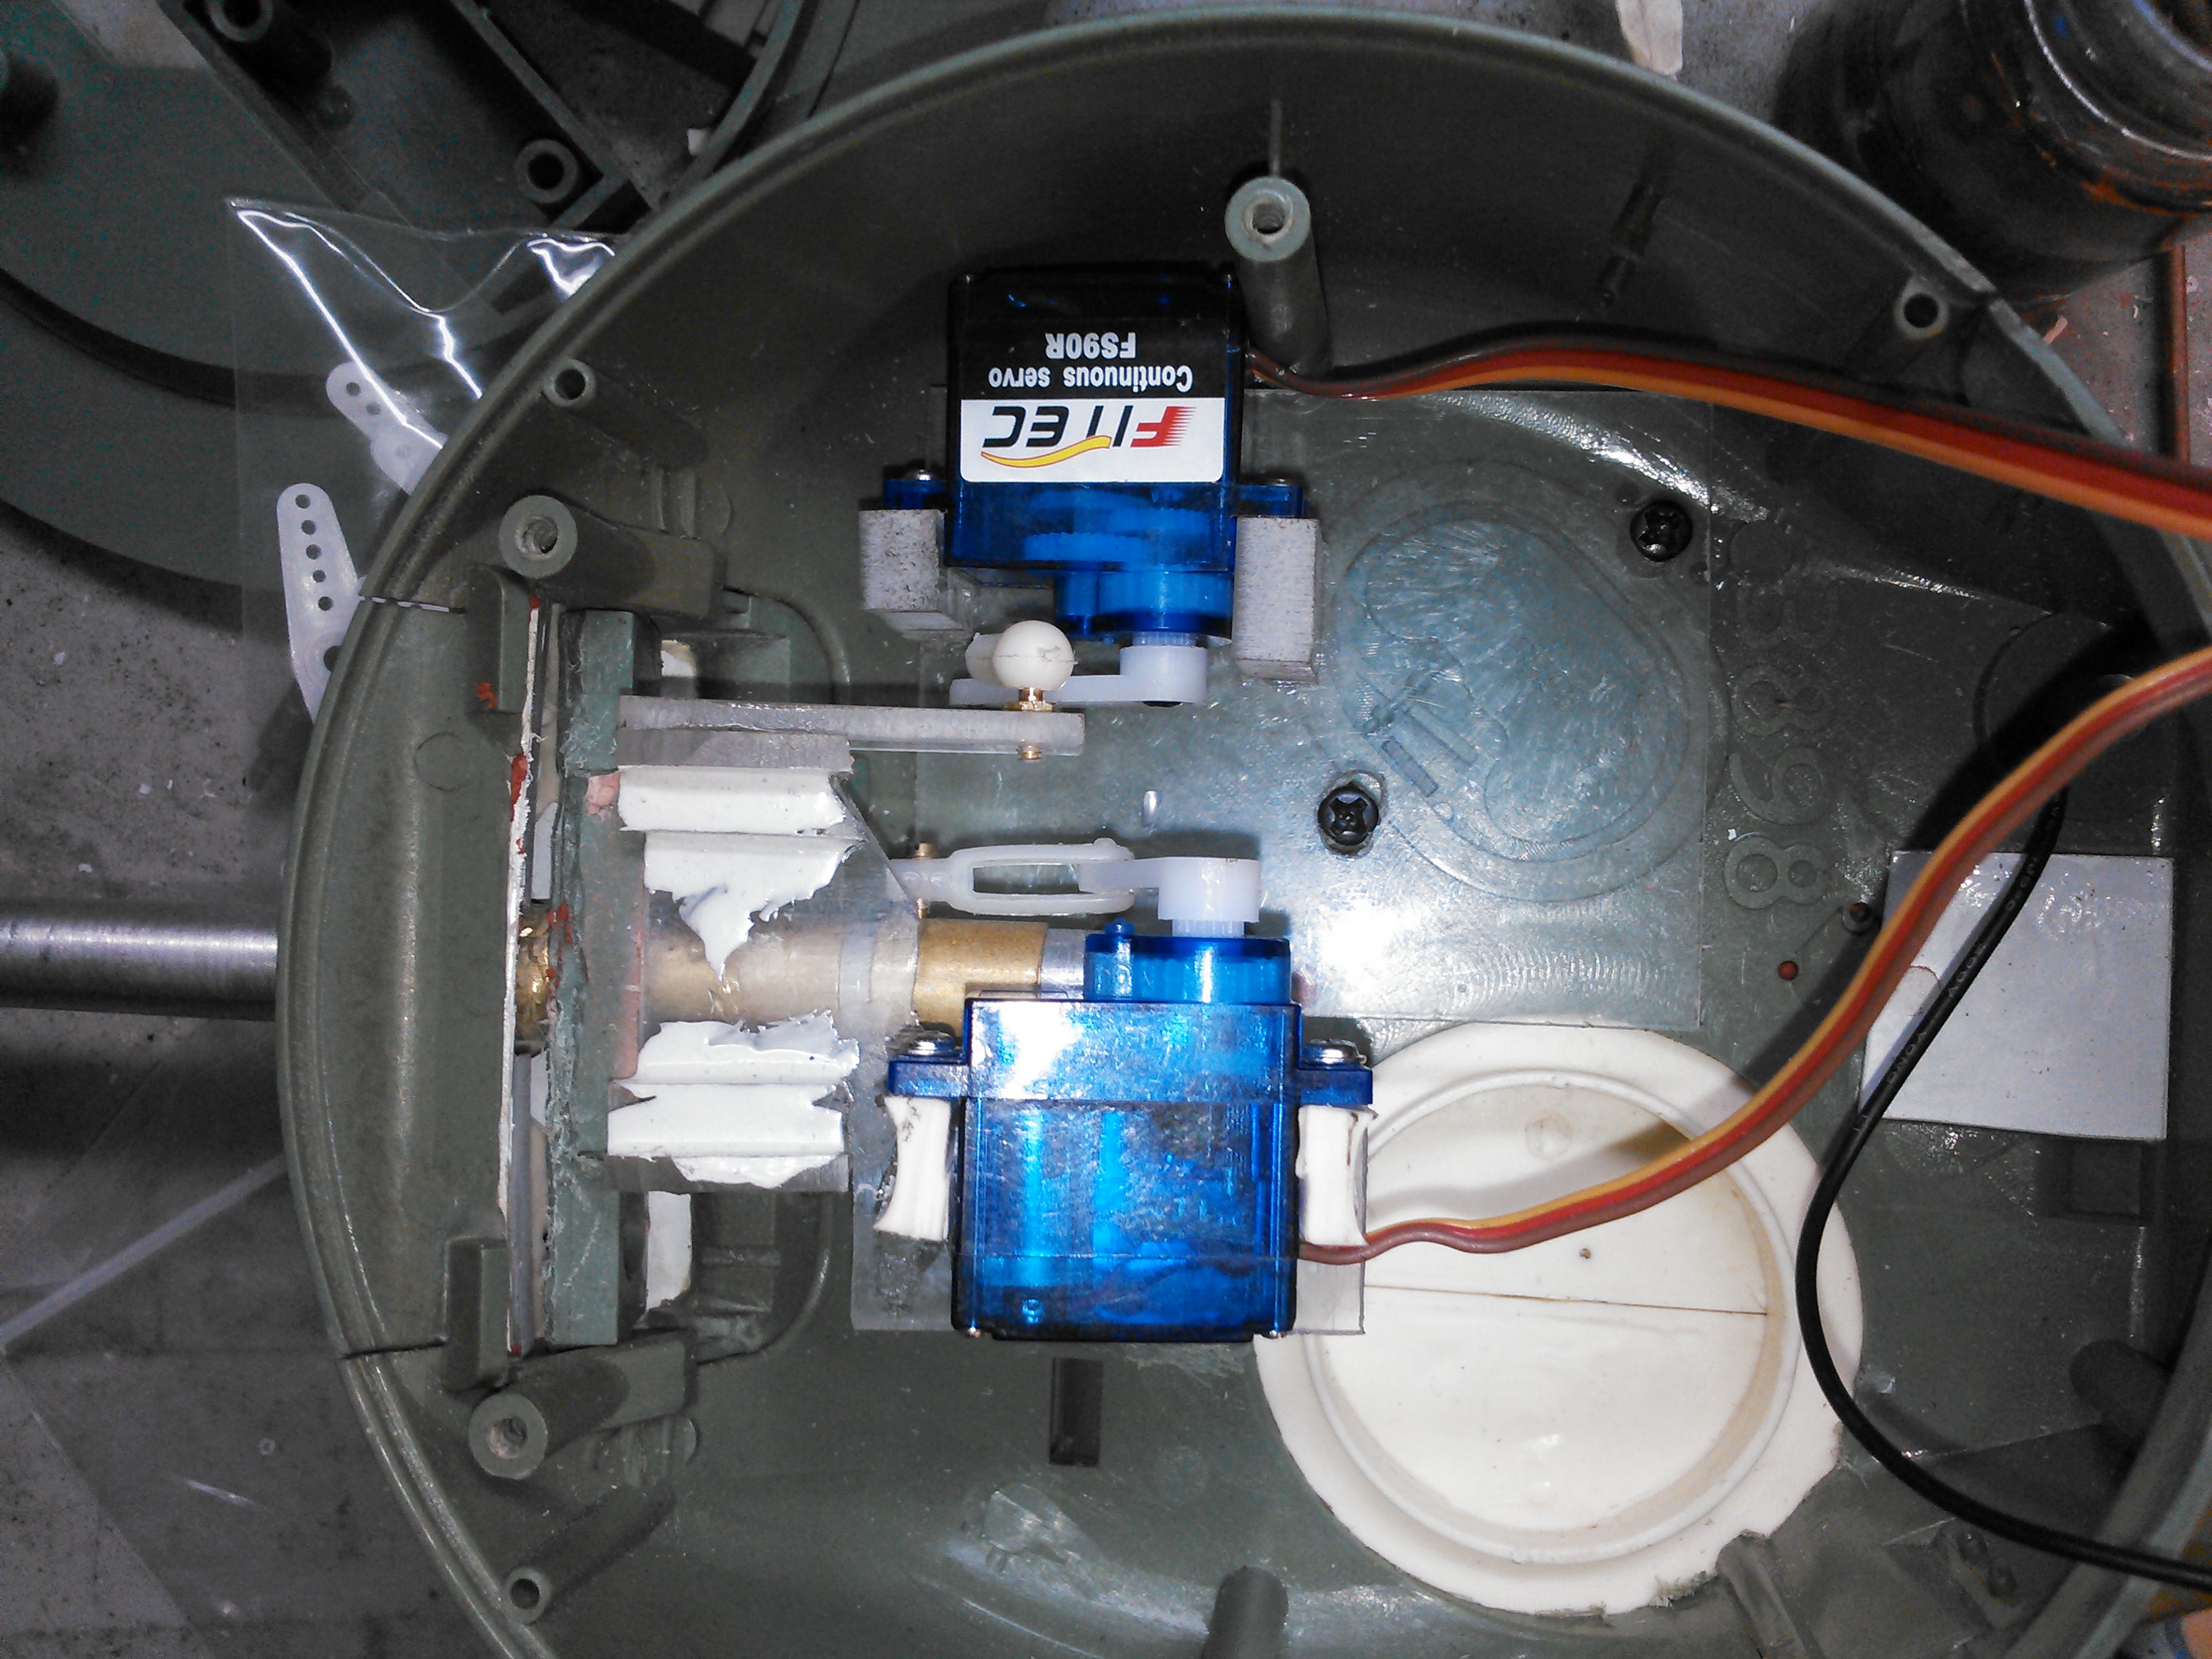
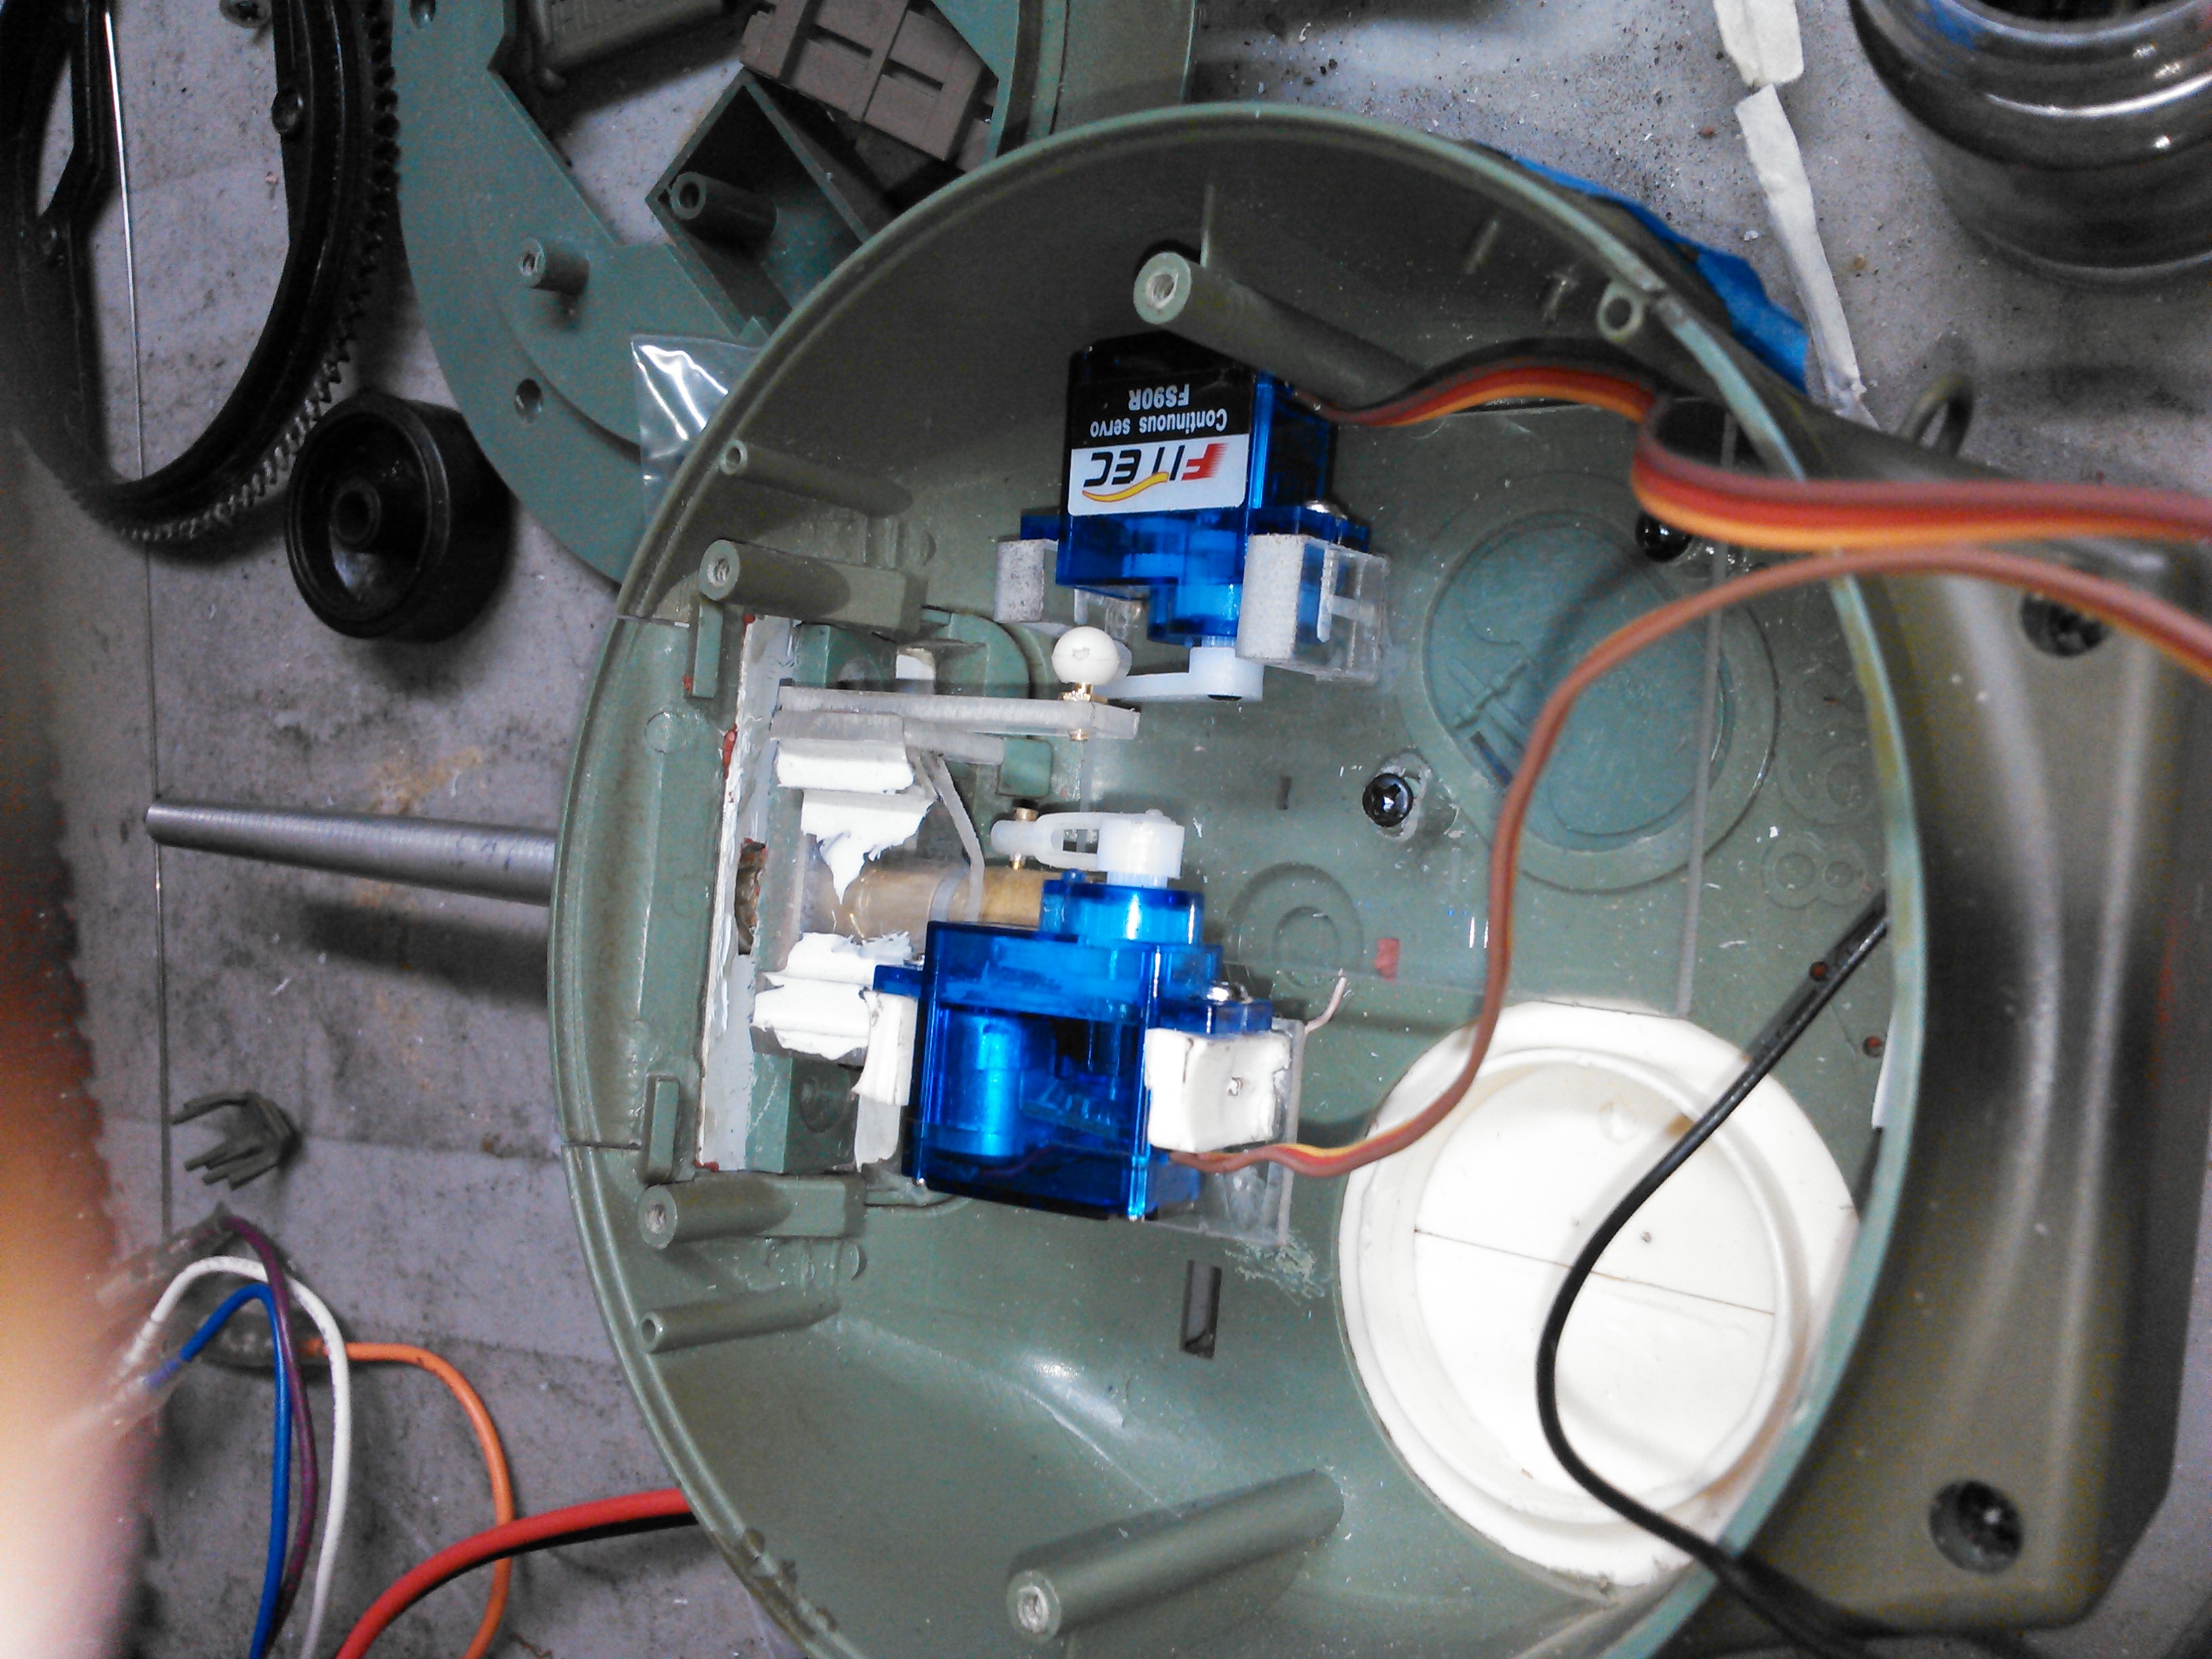
https://www.youtube.com/watch?v=WLhuKGxppmY
https://www.youtube.com/watch?v=WLhuKGxppmY
03-23-2015, 09:05 PM
#43
Thread Starter
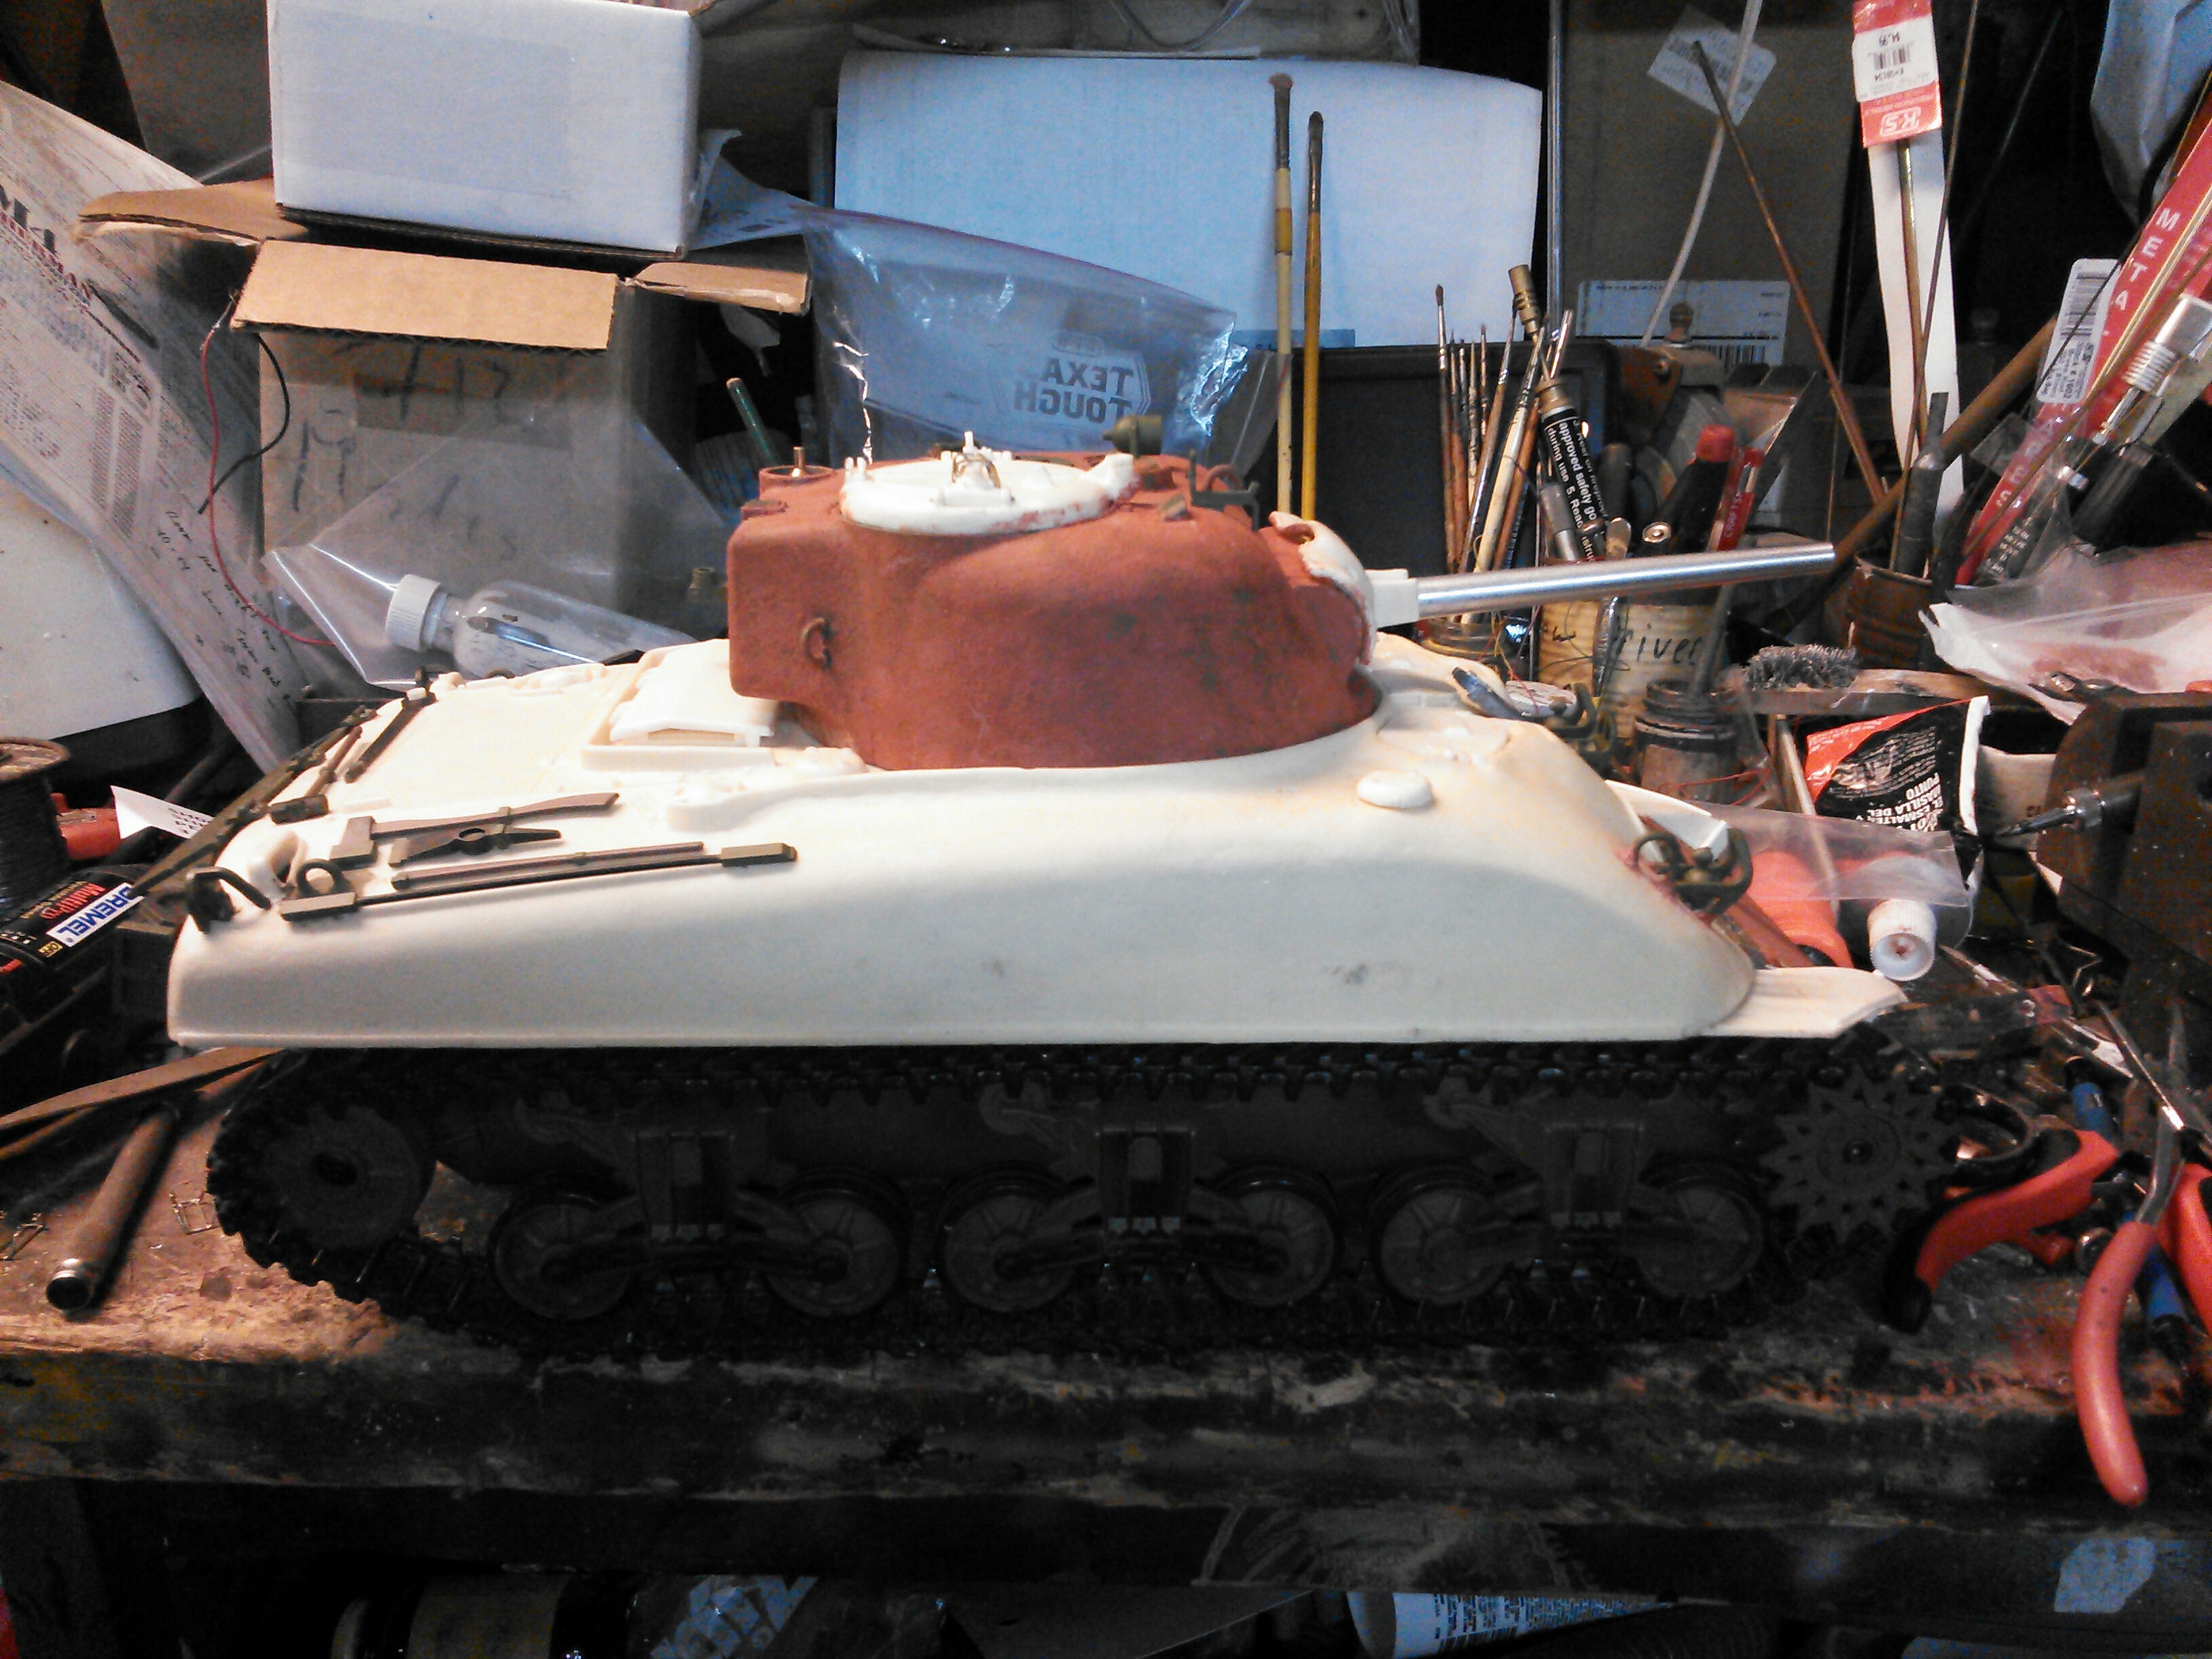
I am nearly done with the modeling aspect of this project. Left to do is mount the periscope guards on the hull hatches. I am also going to put mid war M2 .50 barrel stowage brackets on the top of the turret. I had some pictures but couldn't find them tonight.
I have finished the turret texture, modified a Mato metal barrel travel lock, got all the tools mount holes drilled and set in place. Not sure what more I can do or want to do, just call it done and wash the urethane parts tomorrow night and then I cant spray some paint in a few days. Then its just waiting on the BARC4 woohoo!
Oh the hull 30 cal isn't installed yet, I might get a nice Tamiya one with my next order, I just cant stand that HL pos.
03-24-2015, 09:01 PM
#44
Thread Starter
Got the hull washed up tonight for painting prep.
Also I decided to move the switches up into the hull and seal up the holes on the bottom as well as the holes on the side with the ABC switch hole left from the old RX14 system that HL never eliminated from the molds. I guess its hard to tell in the second picture, but I mounted the on off switch on a piece of plexi up above and behind the drivers hatch so that I can open the hatch and turn the tank on and off and if I want, adjust the volume because I just flipped the control pot over and screwed it back down.
I am debating whether or not I want to cut the battery box open and glue the bottom on and seal it up and just go through the top every time since I installed the body clips, it would be really easy to do it. Not sure yet.
That's it for now. Tomorrow comes the paint job. Working on decals still, Ksoc and I should have a proof sheet soon.
I have decided to name this tank California Girl.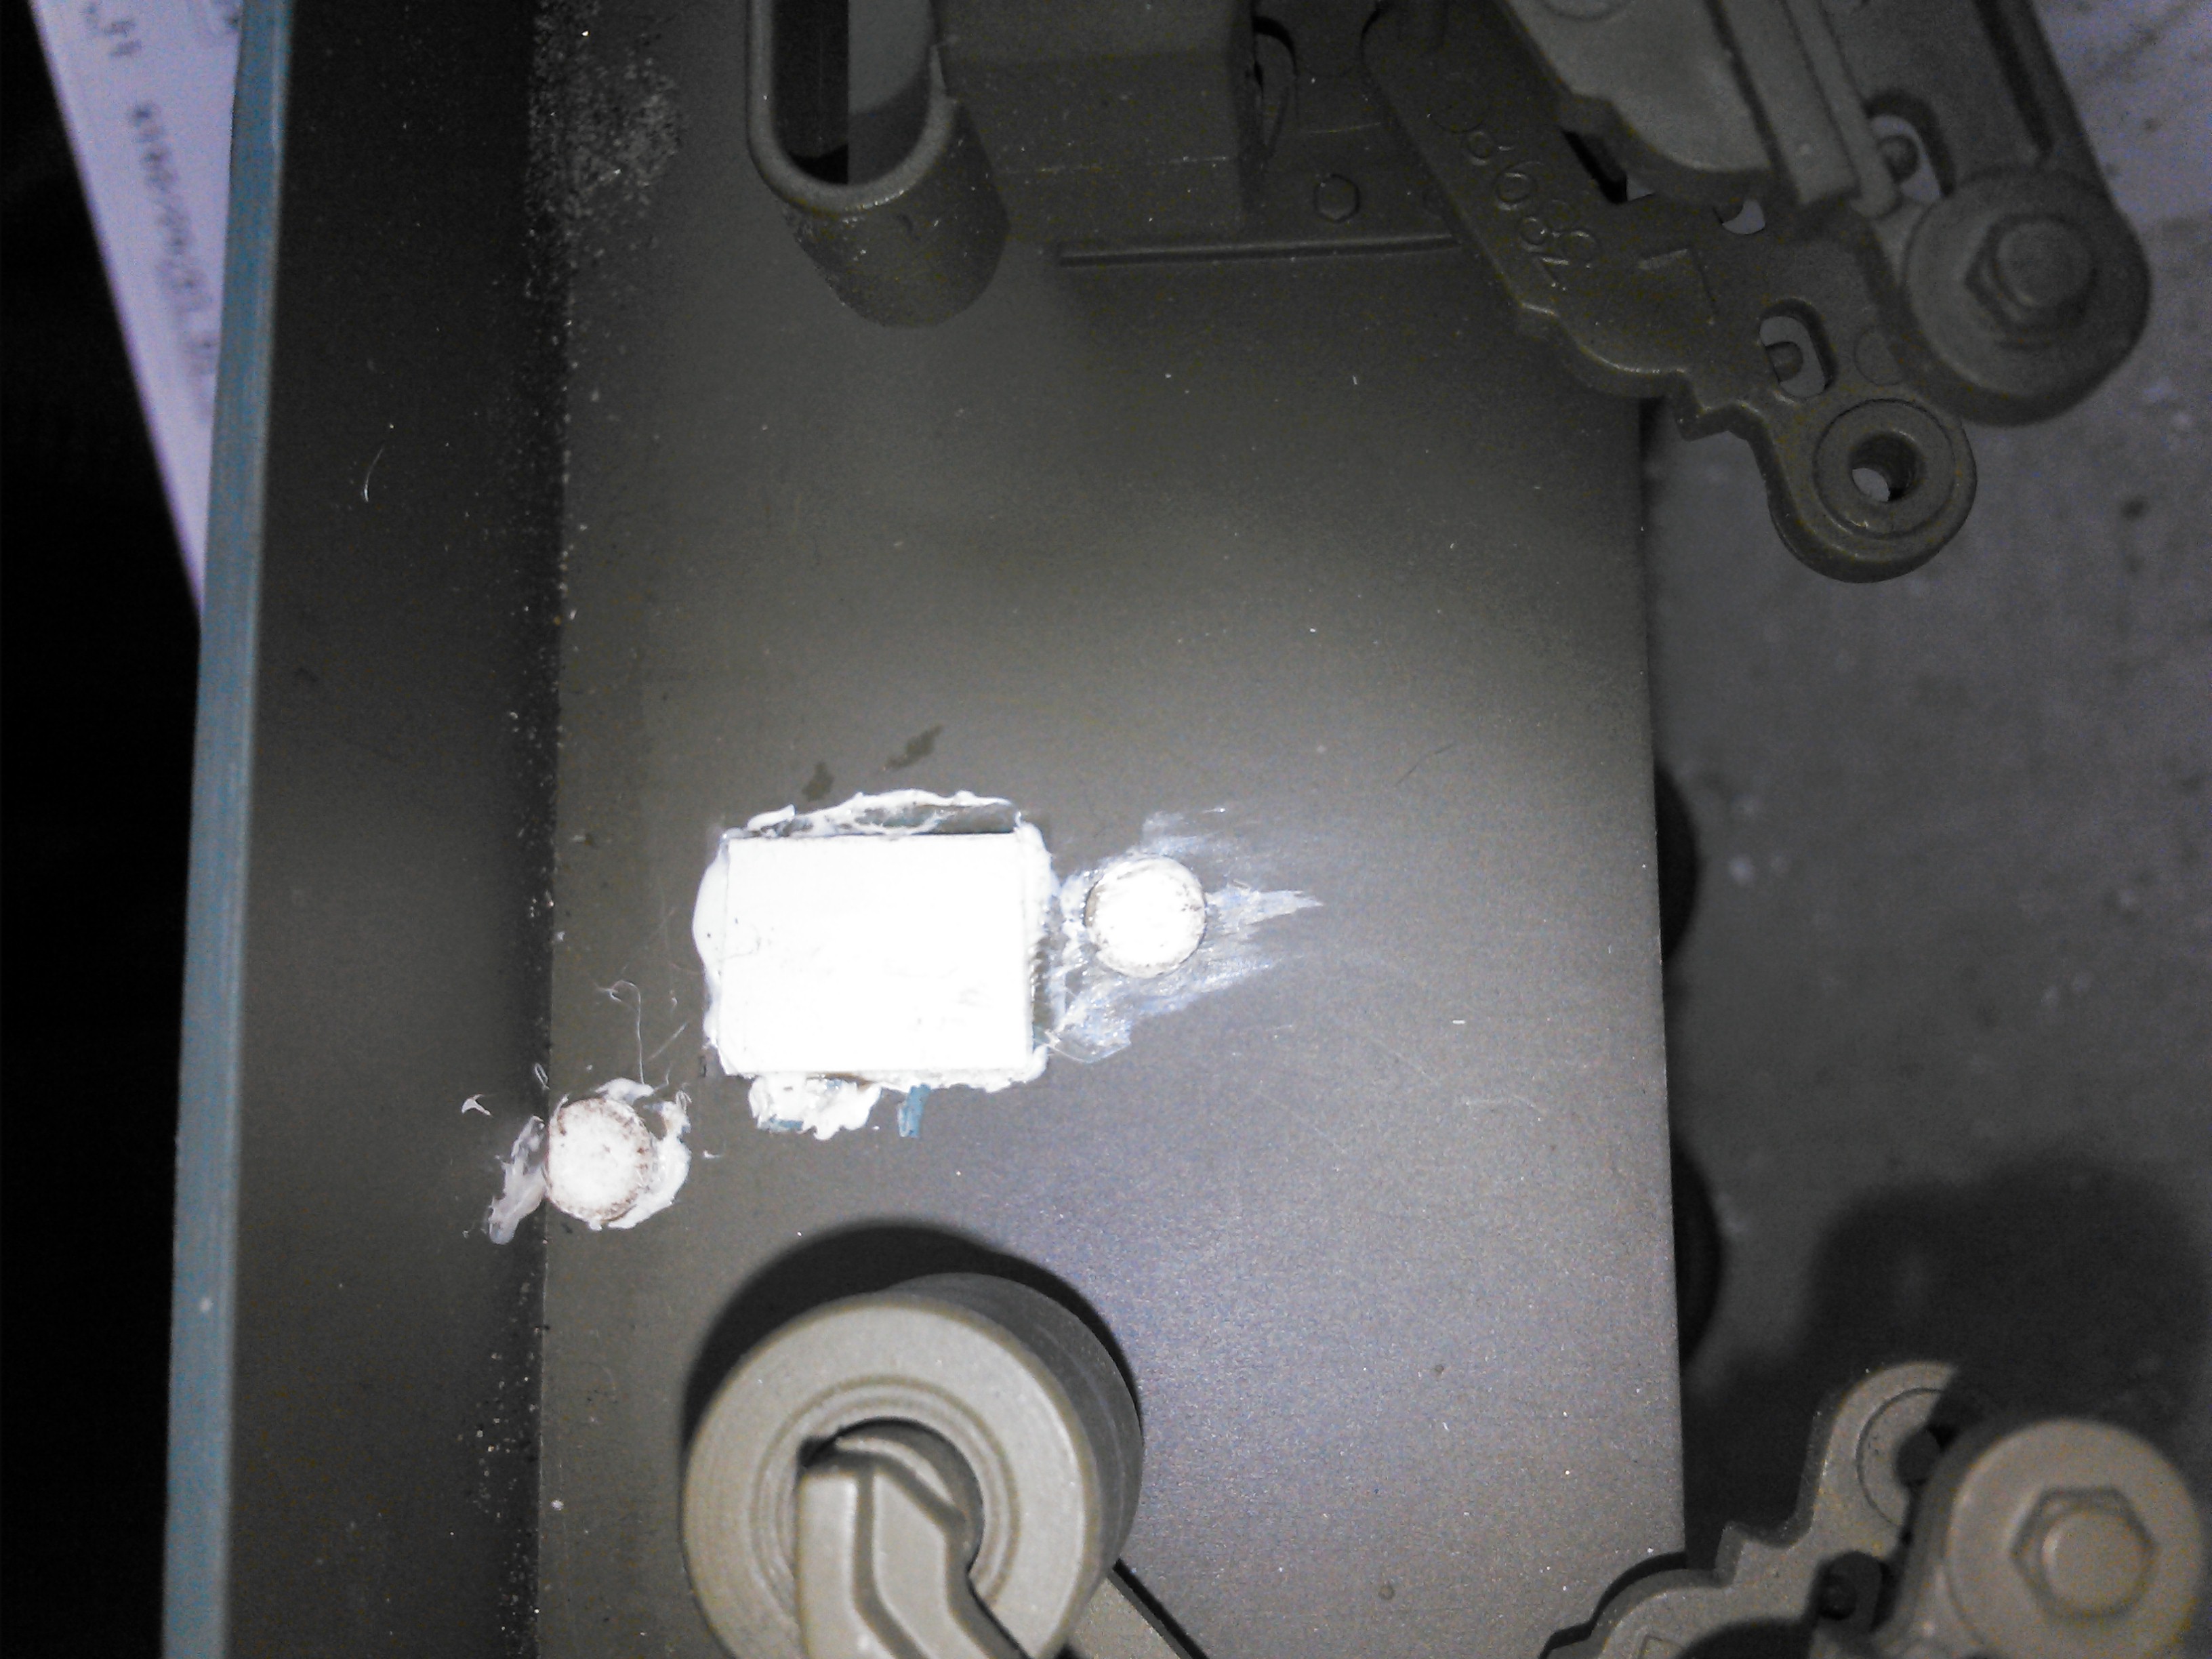
03-28-2015, 07:40 PM
#45
Thread Starter
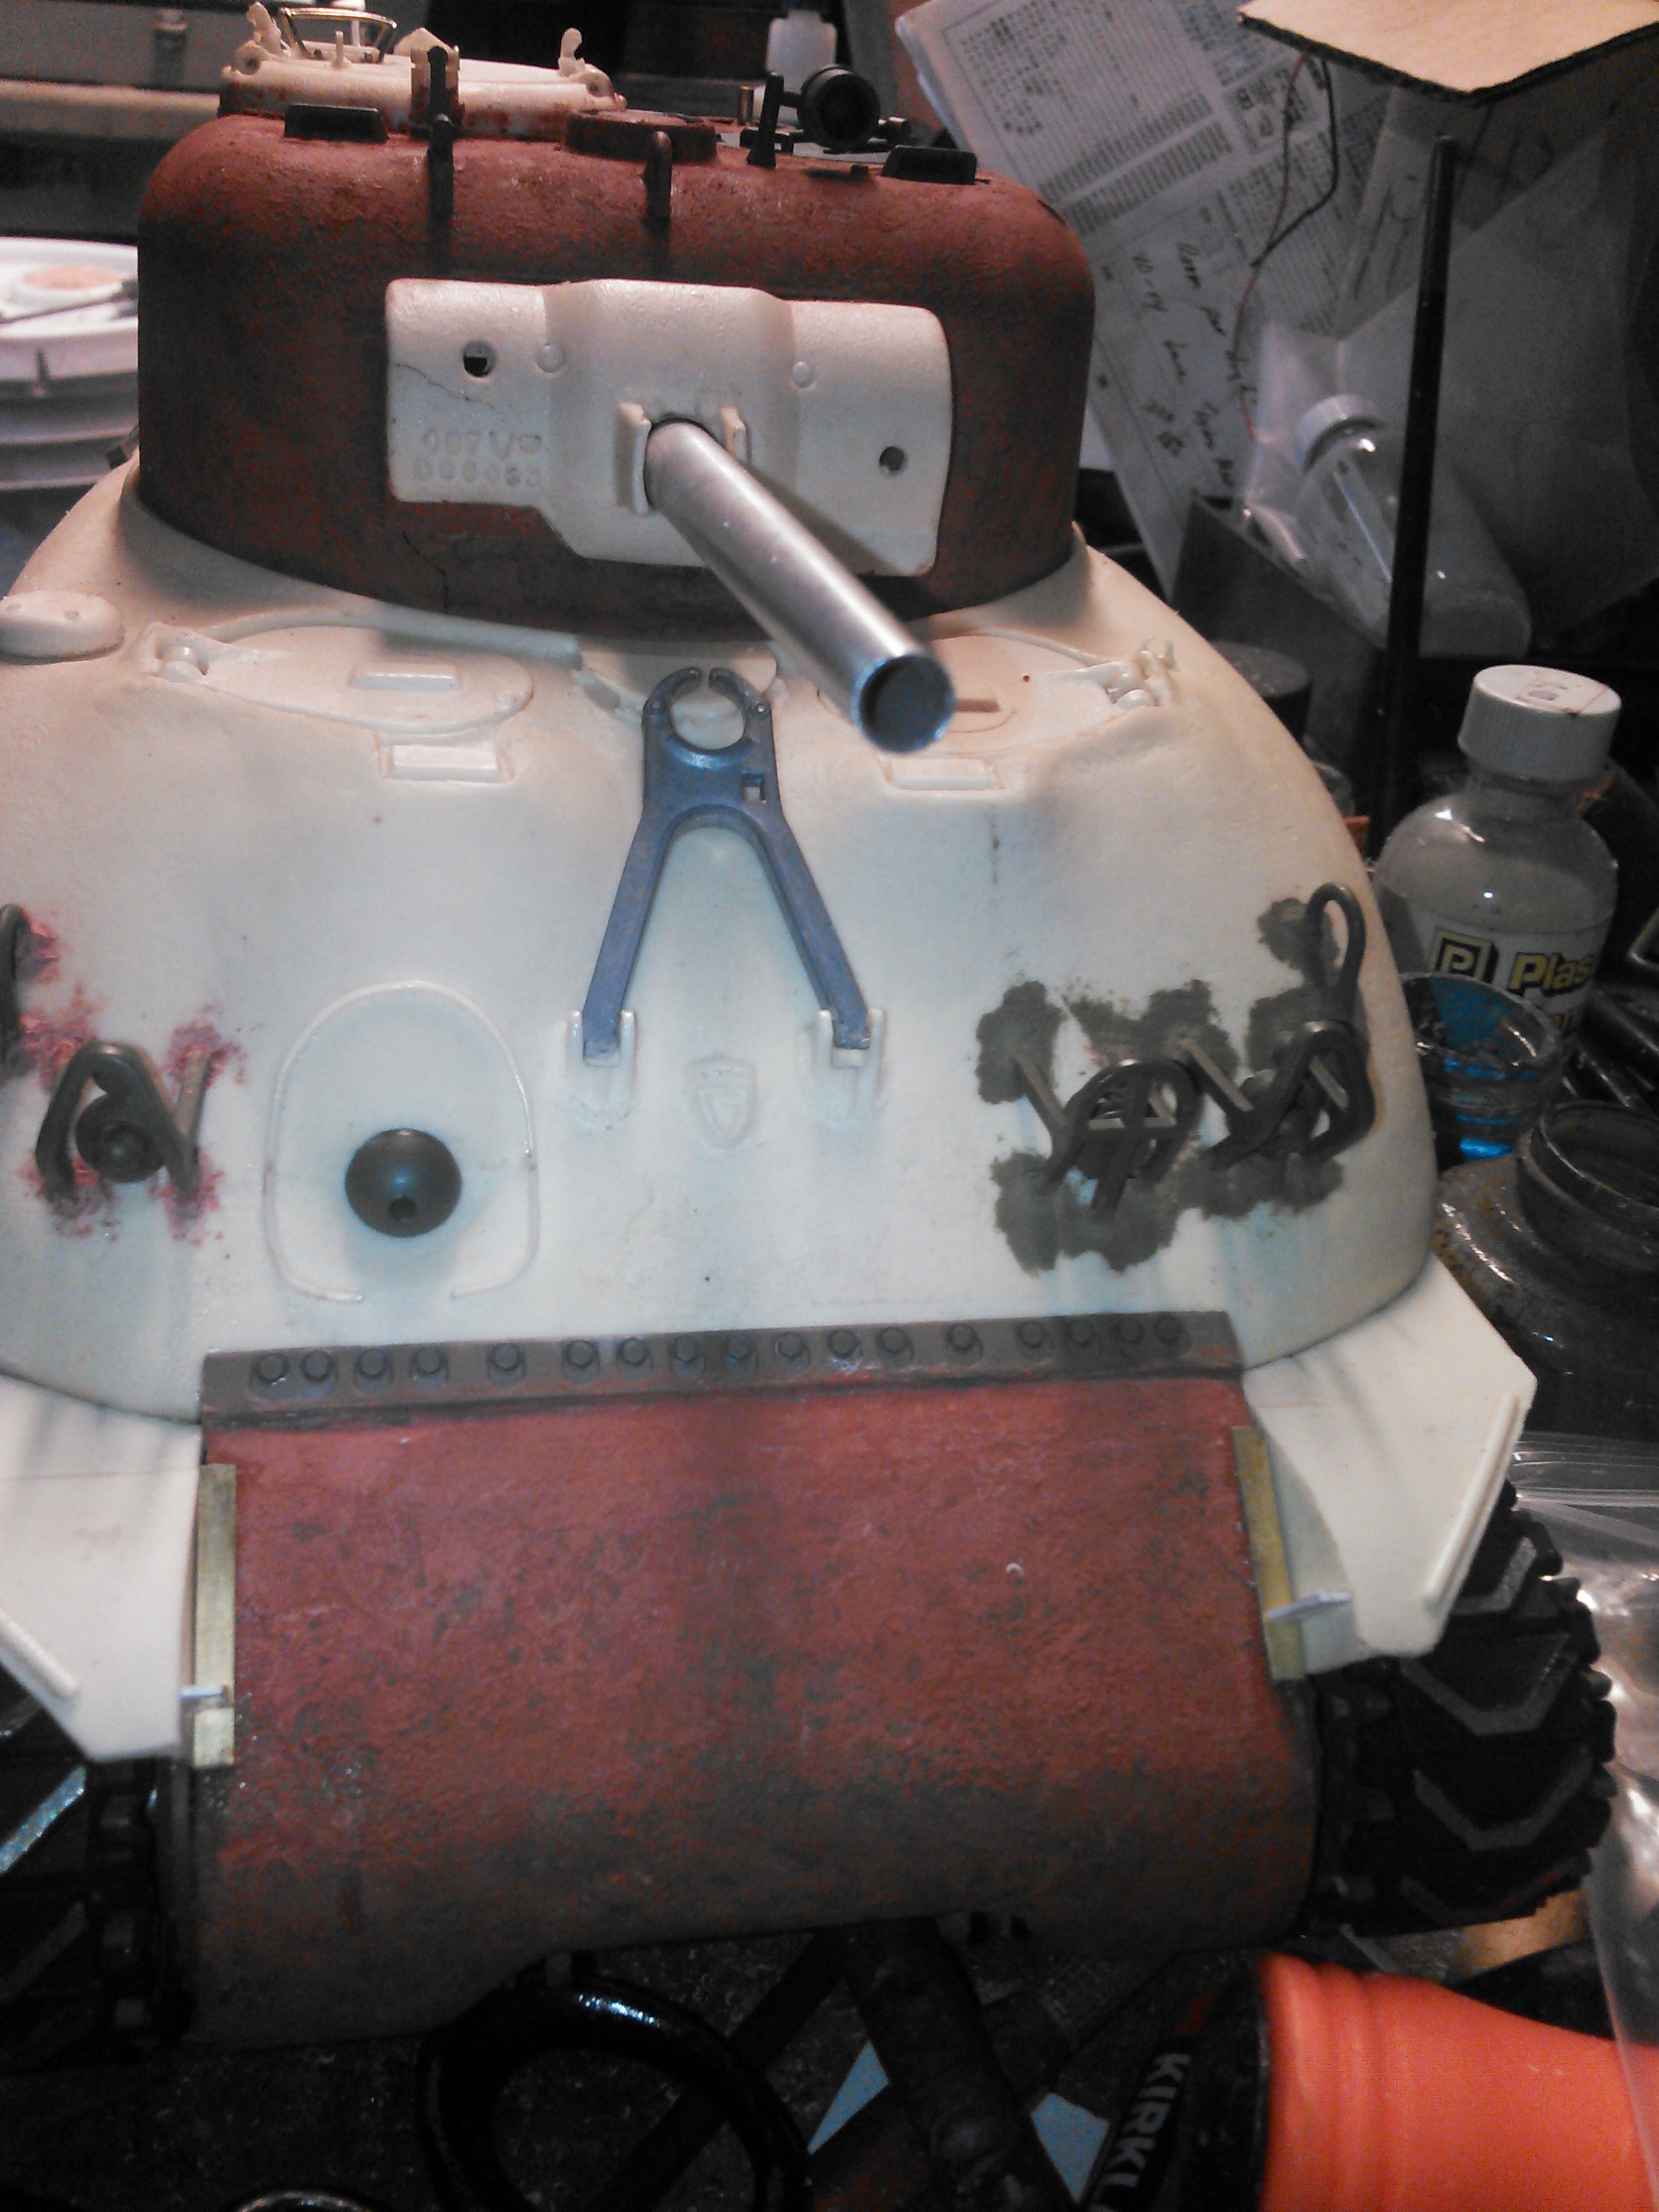
So here is where I am now. Paint and have the gloss coat applied. I think I am going to make and install the .50 cal barrel stowage mounts that go between the two hatches from front to back. These were on top of the turret until after D Day when those angle brackets were welded to the back of the turret like horns to hold the barrel.
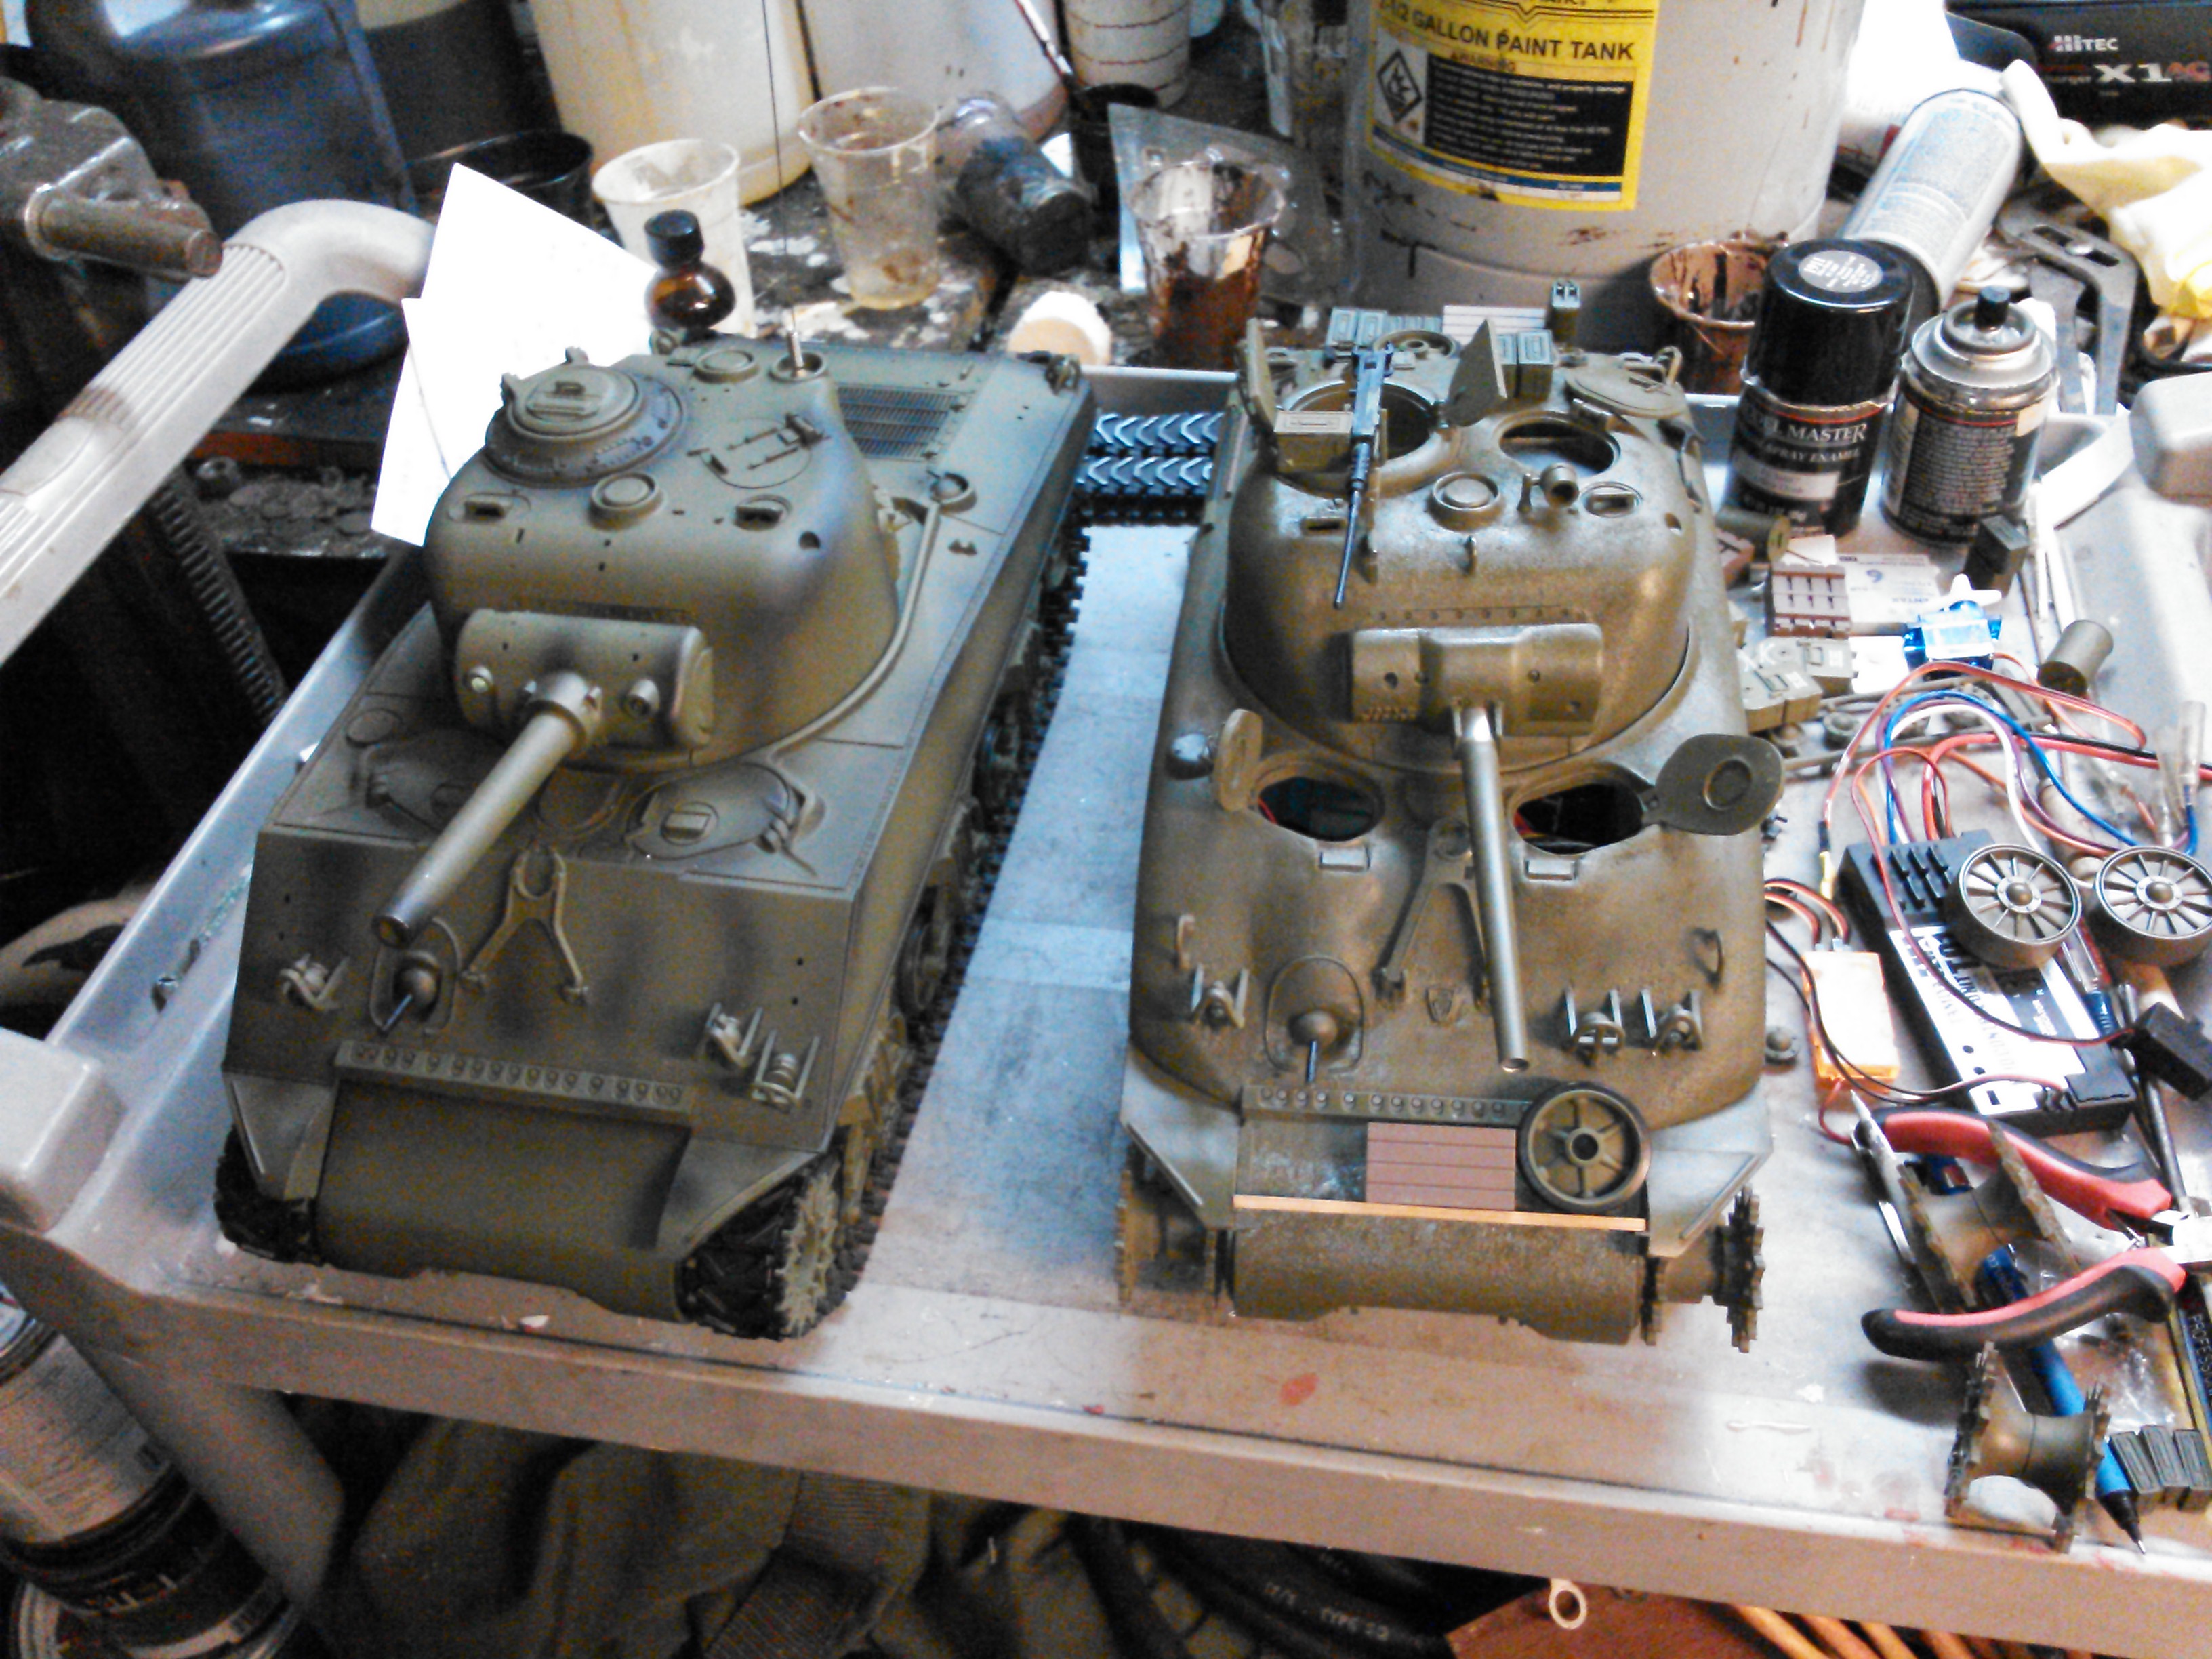
This was before I sprayed the gloss on.

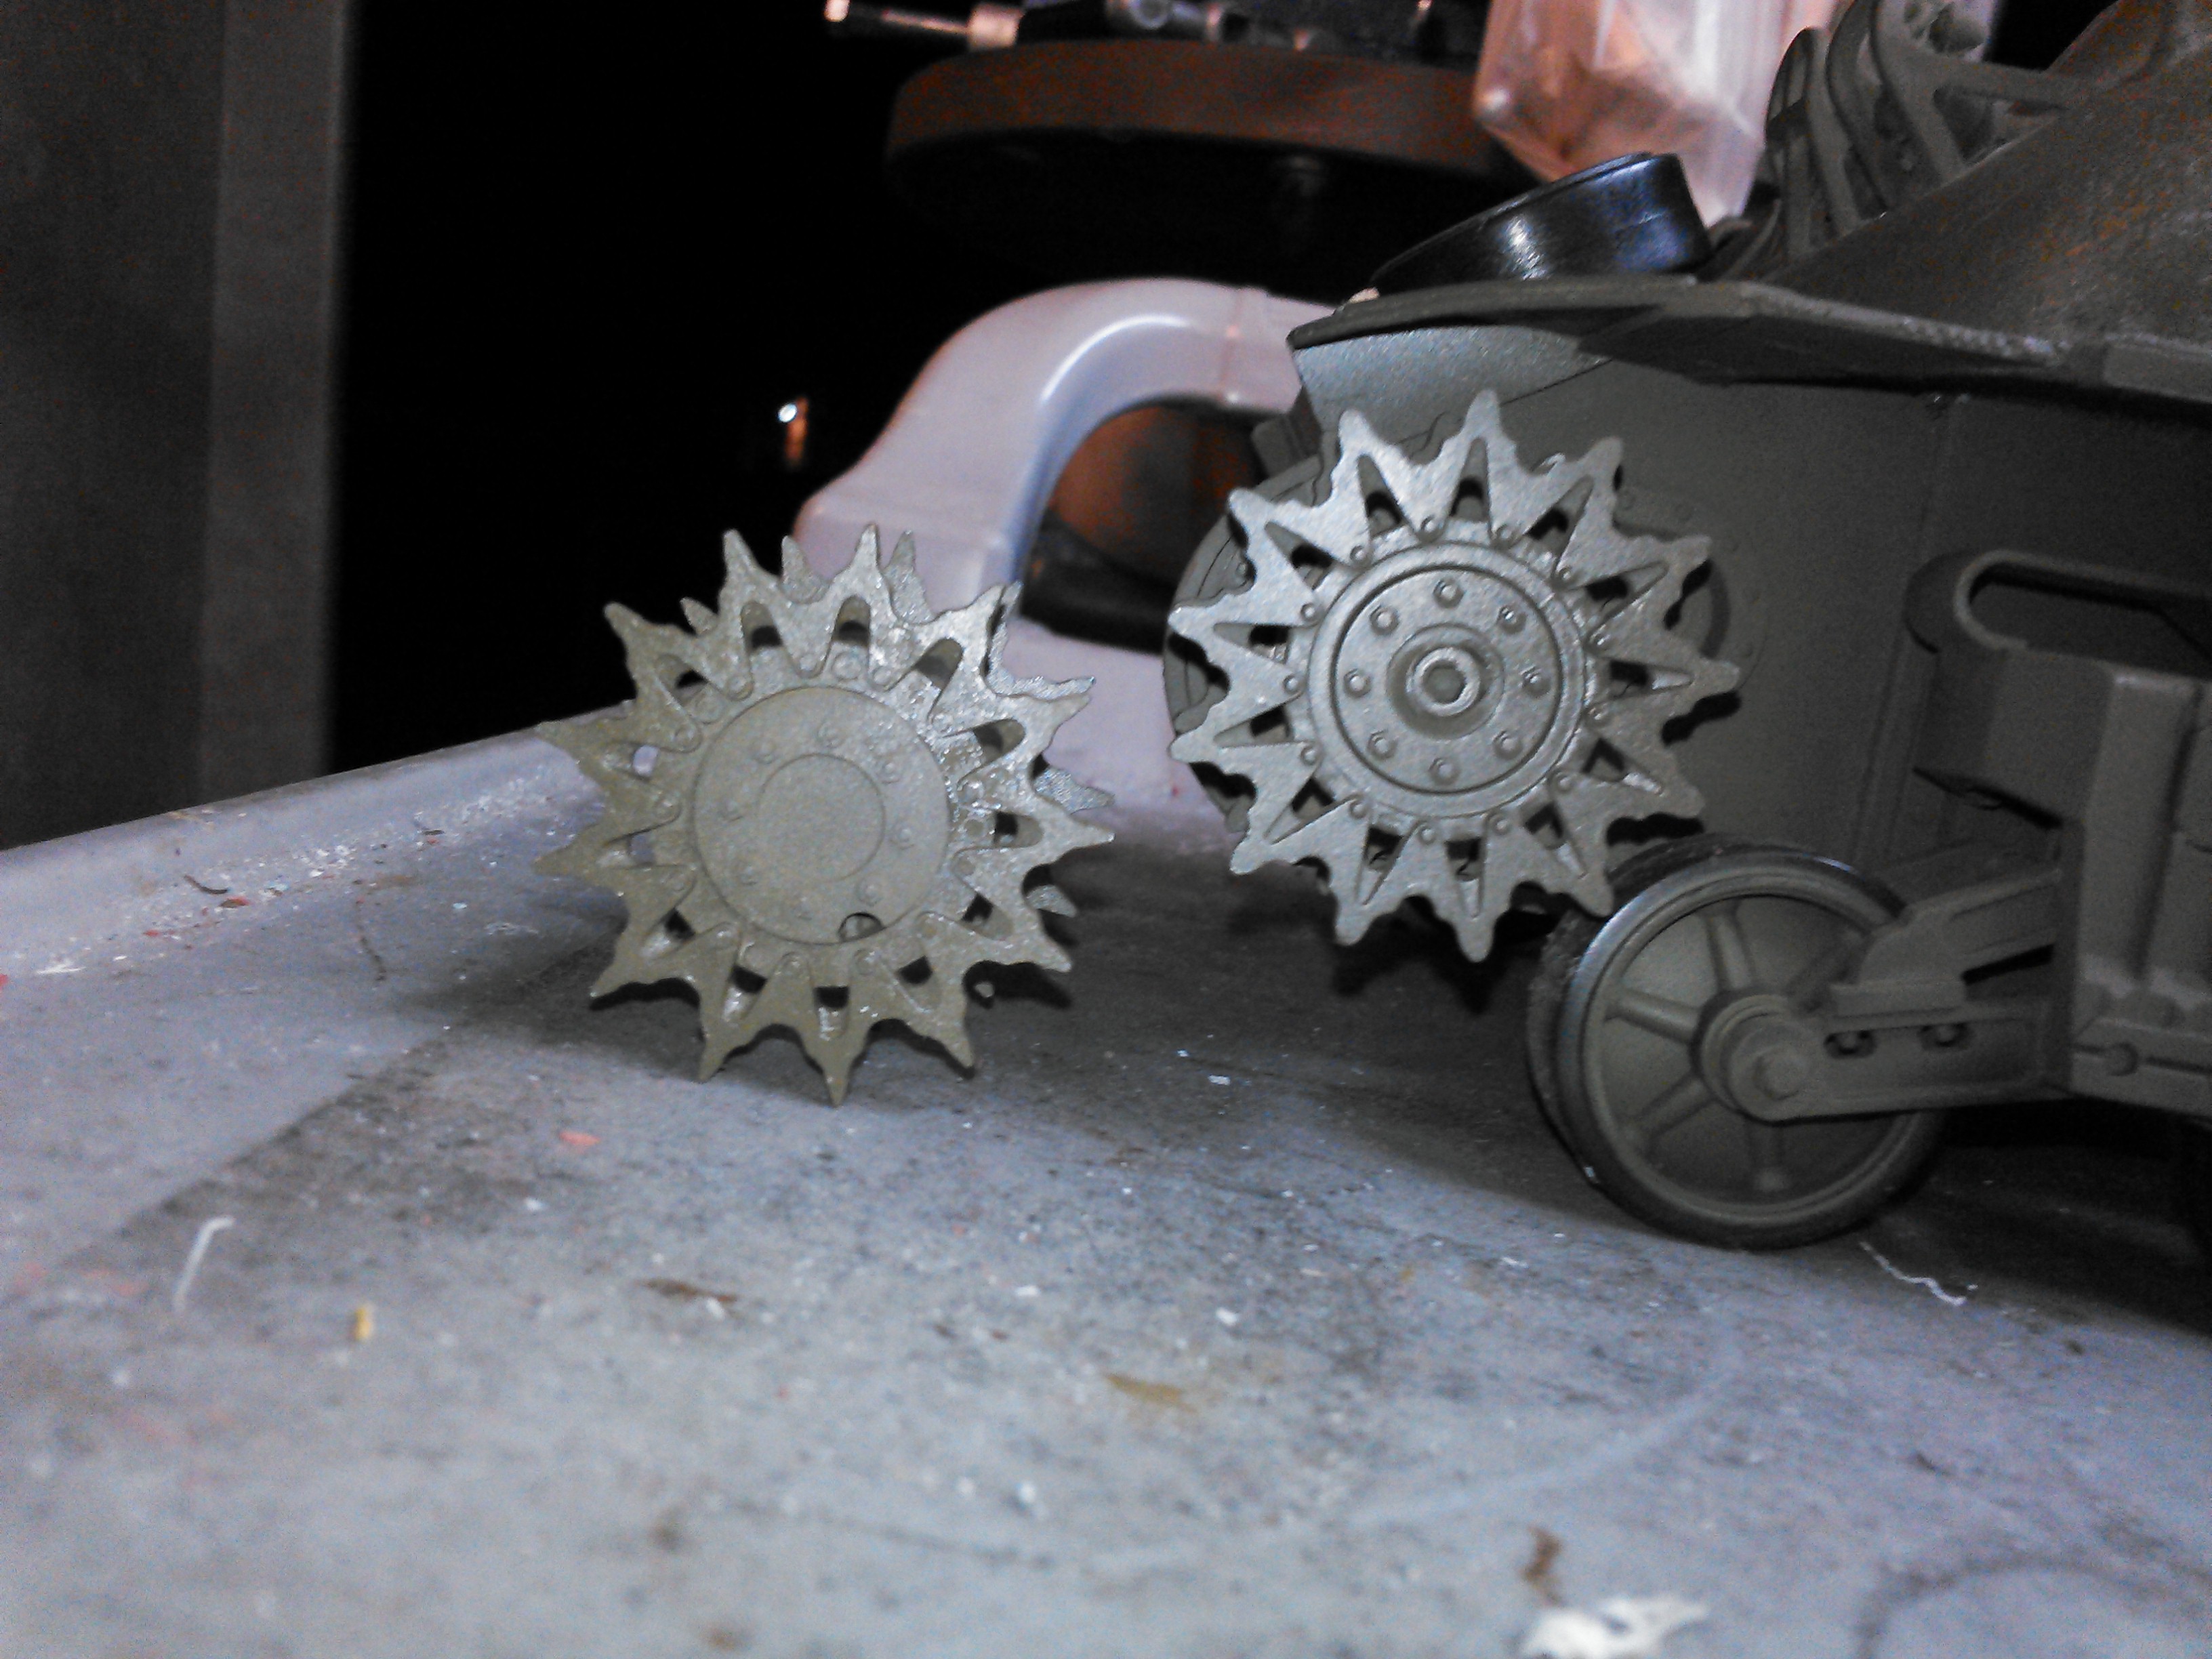
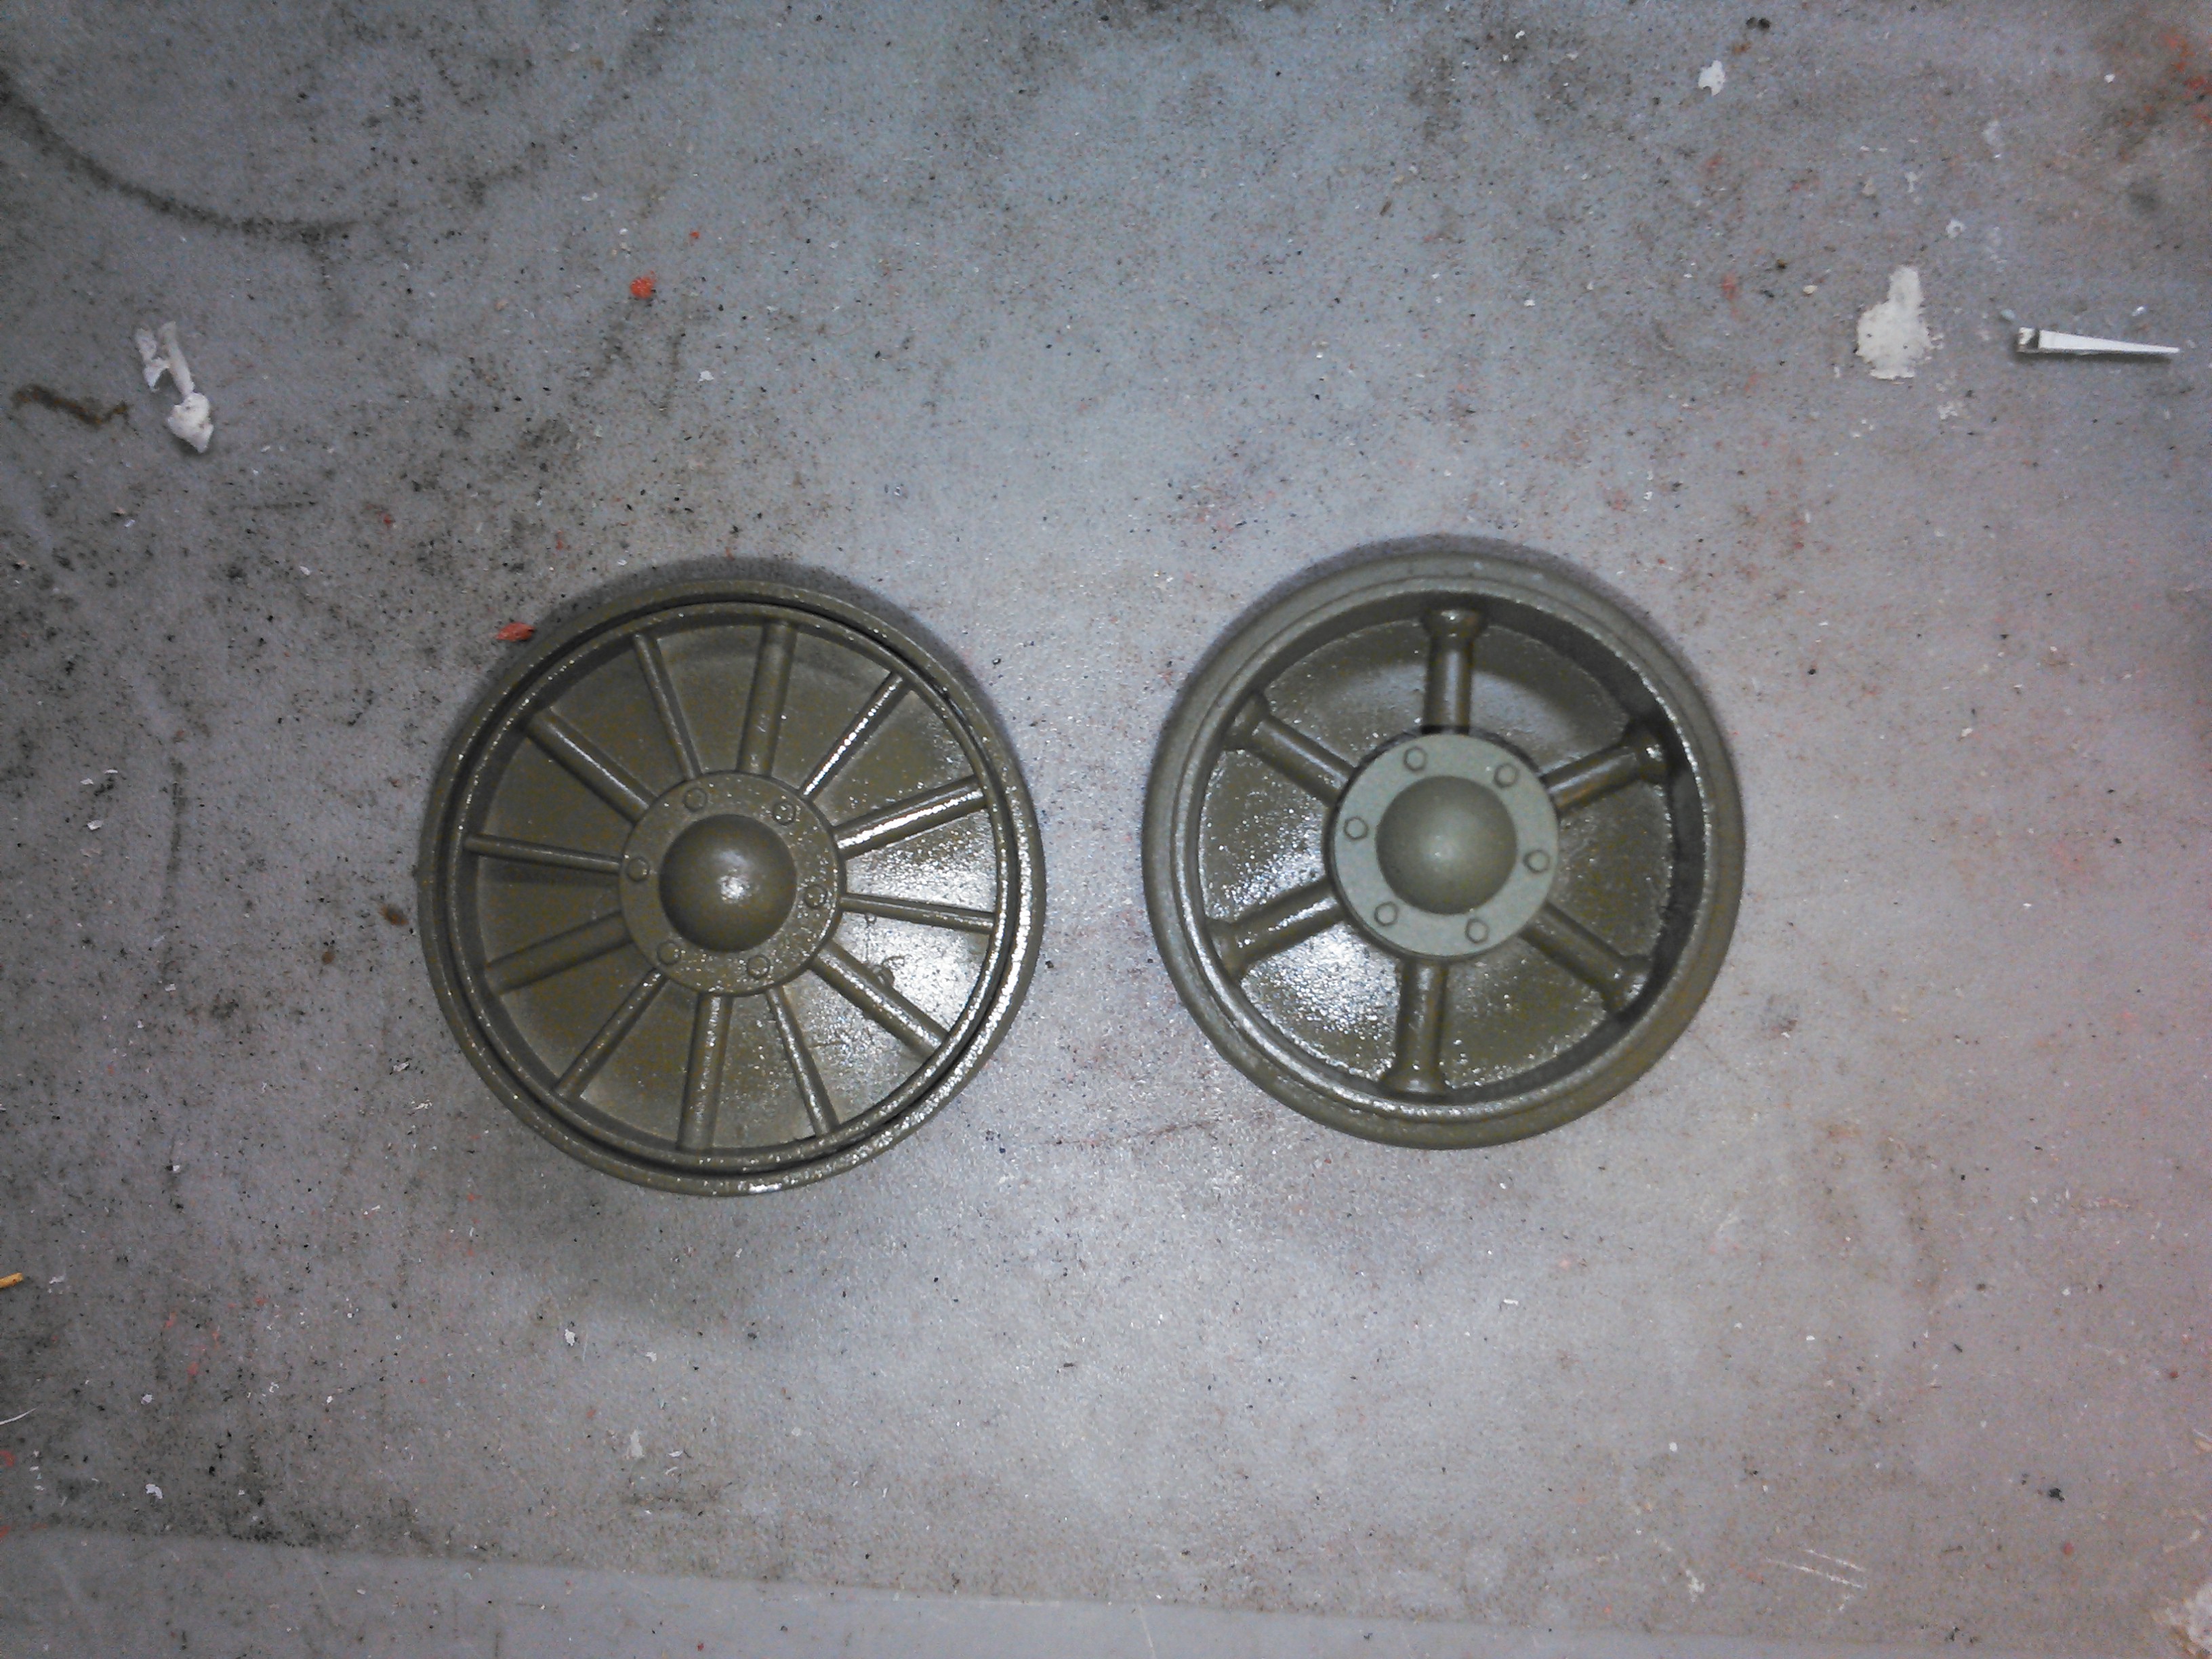
So this is something that surprised me and really pissed me off. This HL was a HengLong brand metal upgrade I got off ebay. Its not a Mato upgrade. Mato was out of stock for a few months so I went to evilbay. So it came with HL metal tracks and sprockets. I ordered set of Mato T74 tracks for my next project and was going to steal the sprockets and rear wheel out of it and order more because they look so much nicer than the HL sprocket and wheel. Especially the sprocket screw cover plate. On the HL its plastic, and it wont fit on with the screw in place. Go figure that, so you have to drill a hole in the cover so the screw fits through the middle of it just to push the pate into the sprocket.
So I went about changing them sprockets over, and guess what, look at the pictures, the Mato sprockets are wider than the HL ones, which means the MATO metal tracks are wider than the HL plastic or metal ones. Go figure that. So if you get a plastic track HL you cant buy the metal Mato sprockets and upgrade when the plastic ones break, you have to buy the whole track set.
I think that's a bummer, because the plastic tracks that come on the tank are nice to represent the rubber tracks. The ones on this model are metal, and the chevrons have already worn all the black paint off that I sprayed on so they don't look right. I am thinking of doing one of two things;
One, take the plastic tracks off the new HL I ran on the beach since its getting the Mato duckbill T74s for a Jumbo project,
Or use the black rubber tool handle paint and paint each chevron with one or two coats of the rubber so it will actually look like black rubber.
This was before I sprayed the gloss on.
So this is something that surprised me and really pissed me off. This HL was a HengLong brand metal upgrade I got off ebay. Its not a Mato upgrade. Mato was out of stock for a few months so I went to evilbay. So it came with HL metal tracks and sprockets. I ordered set of Mato T74 tracks for my next project and was going to steal the sprockets and rear wheel out of it and order more because they look so much nicer than the HL sprocket and wheel. Especially the sprocket screw cover plate. On the HL its plastic, and it wont fit on with the screw in place. Go figure that, so you have to drill a hole in the cover so the screw fits through the middle of it just to push the pate into the sprocket.
So I went about changing them sprockets over, and guess what, look at the pictures, the Mato sprockets are wider than the HL ones, which means the MATO metal tracks are wider than the HL plastic or metal ones. Go figure that. So if you get a plastic track HL you cant buy the metal Mato sprockets and upgrade when the plastic ones break, you have to buy the whole track set.
I think that's a bummer, because the plastic tracks that come on the tank are nice to represent the rubber tracks. The ones on this model are metal, and the chevrons have already worn all the black paint off that I sprayed on so they don't look right. I am thinking of doing one of two things;
One, take the plastic tracks off the new HL I ran on the beach since its getting the Mato duckbill T74s for a Jumbo project,
Or use the black rubber tool handle paint and paint each chevron with one or two coats of the rubber so it will actually look like black rubber.
03-31-2015, 05:52 AM
#46
Thread Starter
I got some plasti dip and painted it on the tread chevrons. What a pain in the butt that was. That goo doesn't paint.
Any way, Here is a pic of one side completed compared to the other side where the black paint wore off the chevrons. I don't know if this is going to work or not, it might peel off my first spin around the block. I hope I didn't waste a couple hours doing this. If so then I will just switch over to the plastic tracks from my other HL once I put the Mato duckbill T74 on it.
Im going to look into what Dan mentioned about getting Mato plastic tracks with metal links. That sounds interesting
.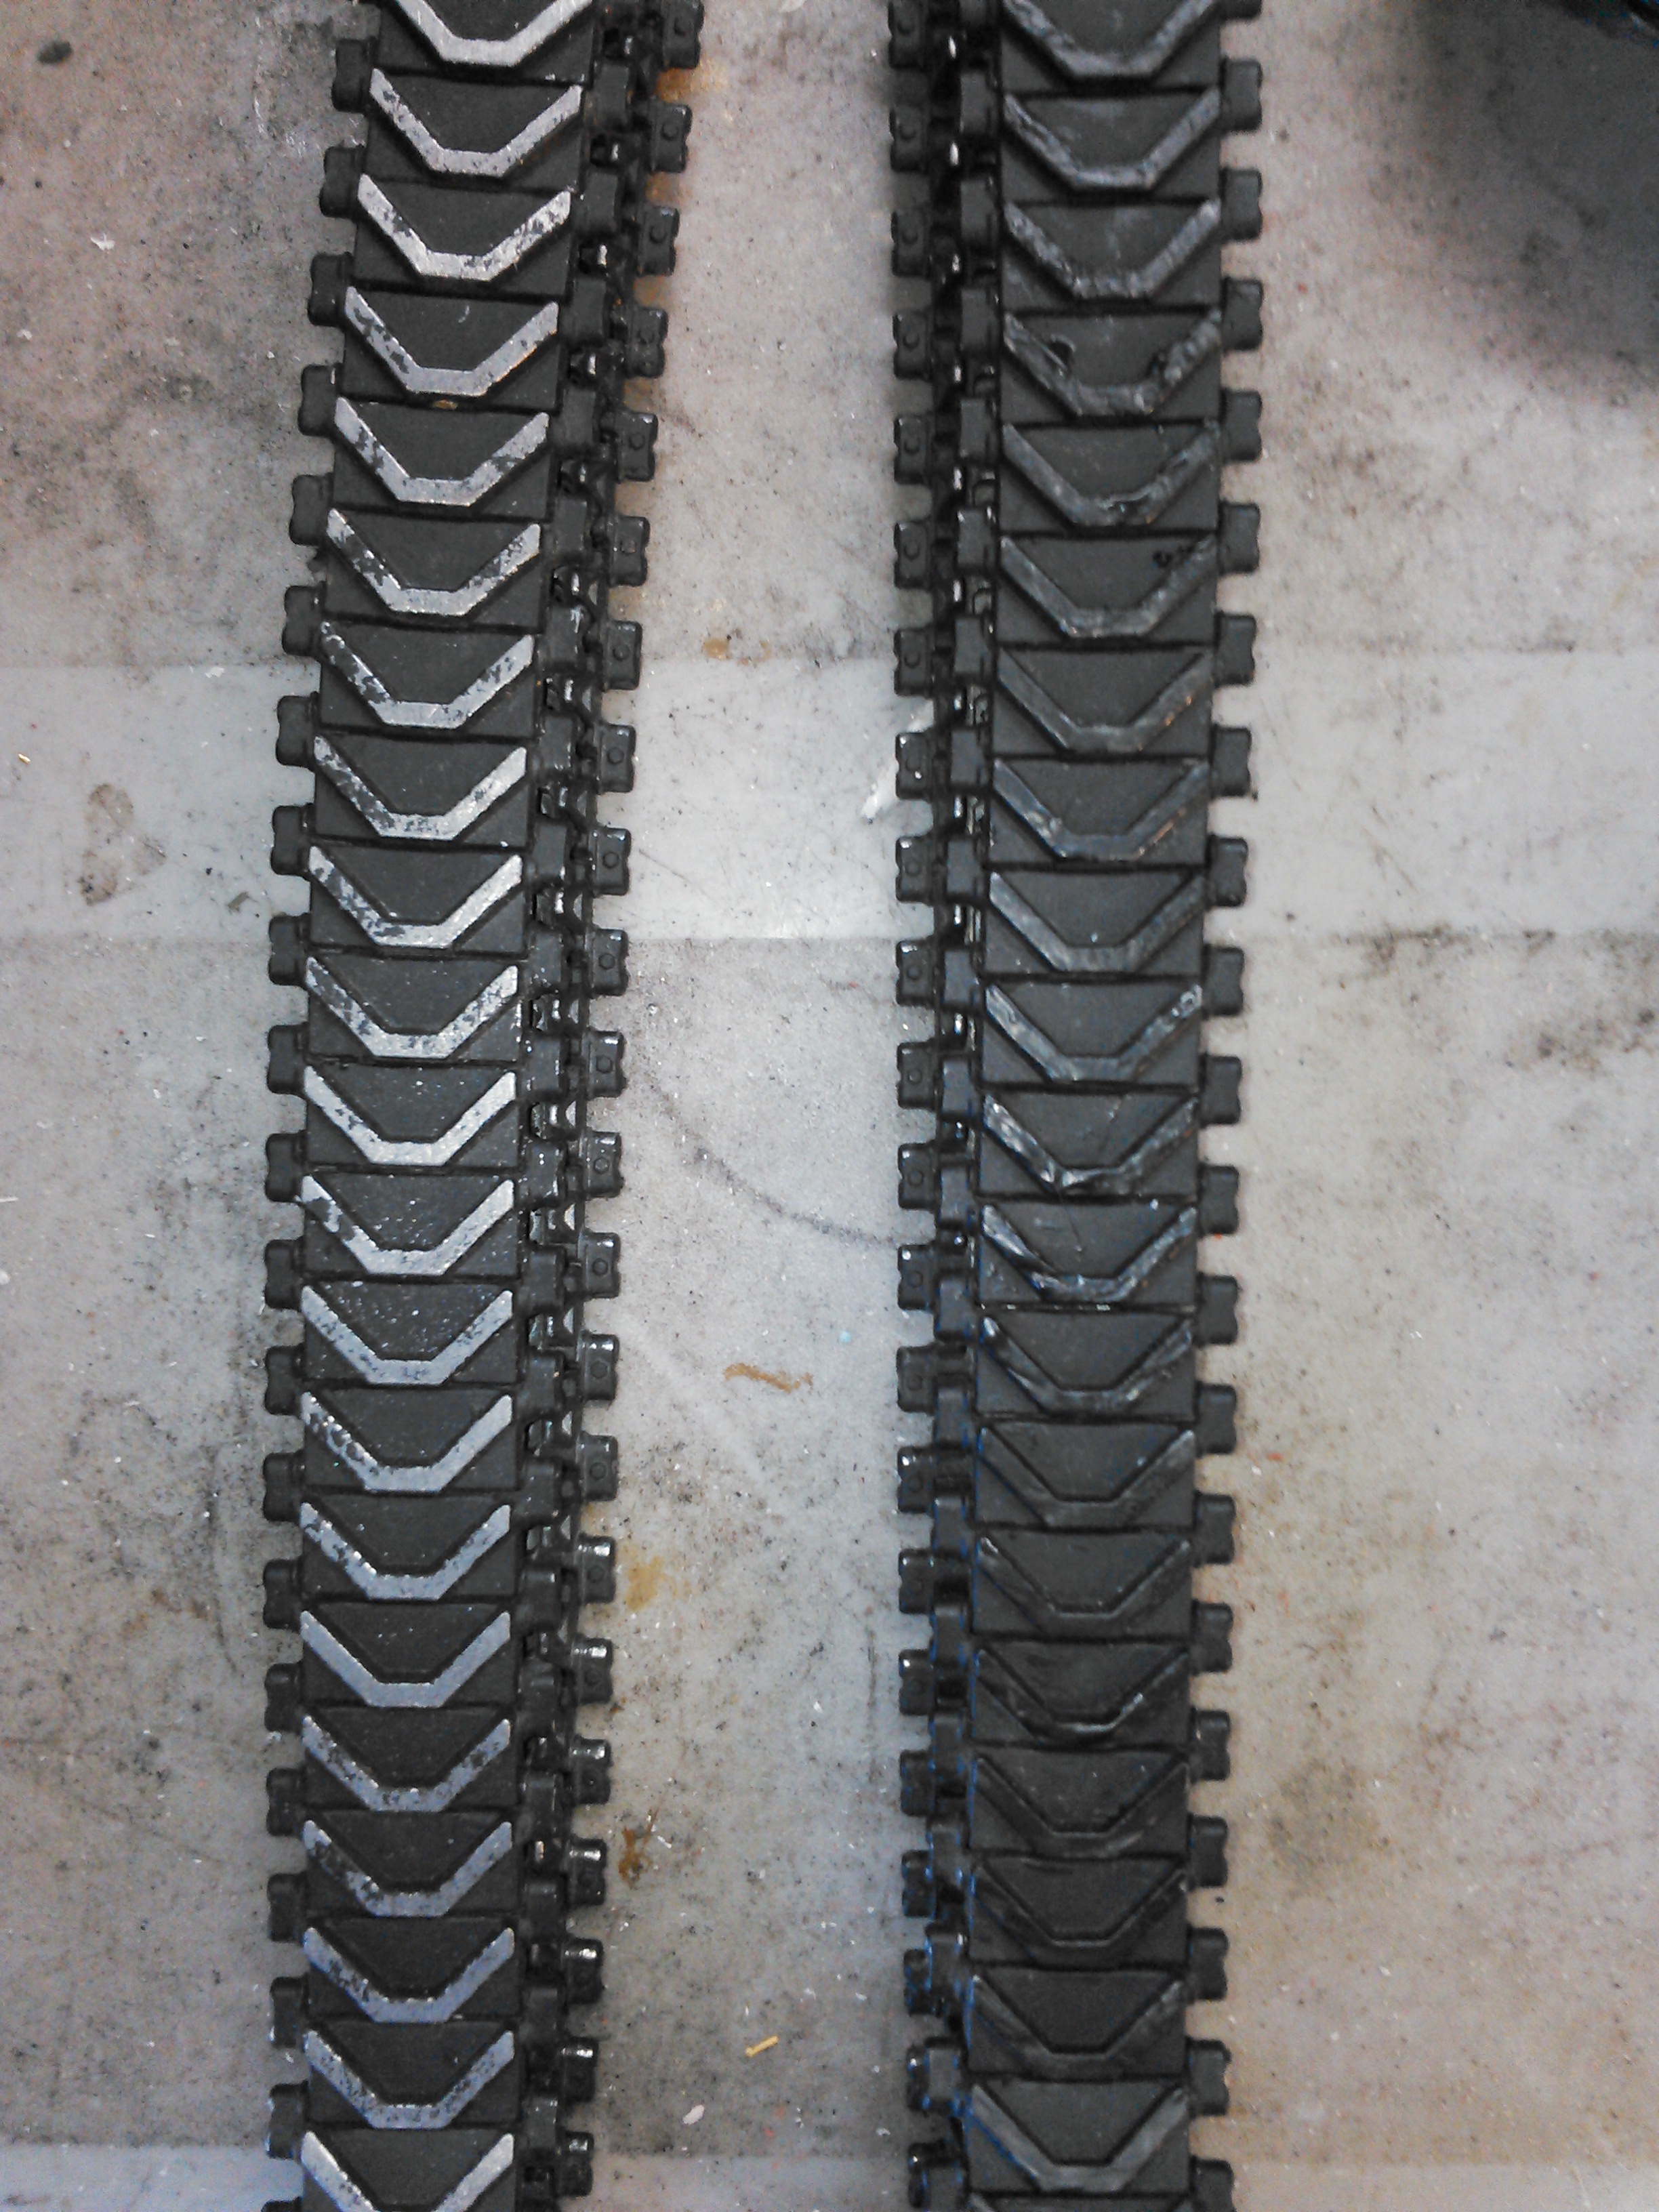
04-02-2015, 08:51 PM
#47
Thread Starter
So after running around a bit, the plastic dip is peeling off the tracks. Bummer, but expected. I am wondering if spraying the plastidip spray would adhere better. I would have to mask off the end connectors, ugh. I think I am just going with the plastic tracks.... Less drag anyway...
I installed the BARC4 and realized that the Tamiya Apple IR base I put in the turret, wont plug into the BARC, so luckily I had orderd a Battle Armor brand Tamiya apple mount that has the cable plug that fits the BARC, didn't realize they were different, so I had to remove the Tamiya brand mount and install the Battle Armor one. Take note of that everybody....
I hooked up the a servo Y cable from the elevation channel going to my elevation servo, and the BARC Gun input, and the gun servo to the BARC. I have a rate reducer from http://www.dionysusdesign.com/produc...roducts_id/192 on the elevation servo to slow it down, though it only does a little bit.
The BARC operates the recoil, the opposite direction of my servo recoil install, so it wants to push the barrel out of the tank. I had to get a servo reverser to fix this, and because of that, it moved the stop position or full forward, making my barrel pulled backward a bit from where I had it mounted. I had to remove my barrel and take the barrel recoil saddle off and rebuild it so that it was adjustable on the barrel so that the barrel length could be adjusted when the servo sits idle. I turned the screw on the link clip around and soldered it to the saddle and put a nut on the end. Then I drilled a new hole in the saddle and soldered a nut on so a set screw could be used to secure the barrel to the saddle.
Next I installed my flash LED and my IR LED. I was able to fit both of them in the Nick Aguilar 75mm barrel by filing off the flange of around the LEDs and fitting them in the barrel. I have the IR up front, and the Flash right behind it, painted orange. I filed notches into the sides of the flash LED so that the wires of the IR LED could pass through it as the LED bulbs are the exact outside diameter as the inside diameter of the barrel. This was tricky but worked. The flash was brighter before I painted the orange on it, but it was bright white and I felt orange was more appropriate. Its color and brightness is muffled a lot more in the 75 barrel than in the 105 barrel of my Tamiya. None the less, this worked fine and is quite visible.
Two bulbs in the barrel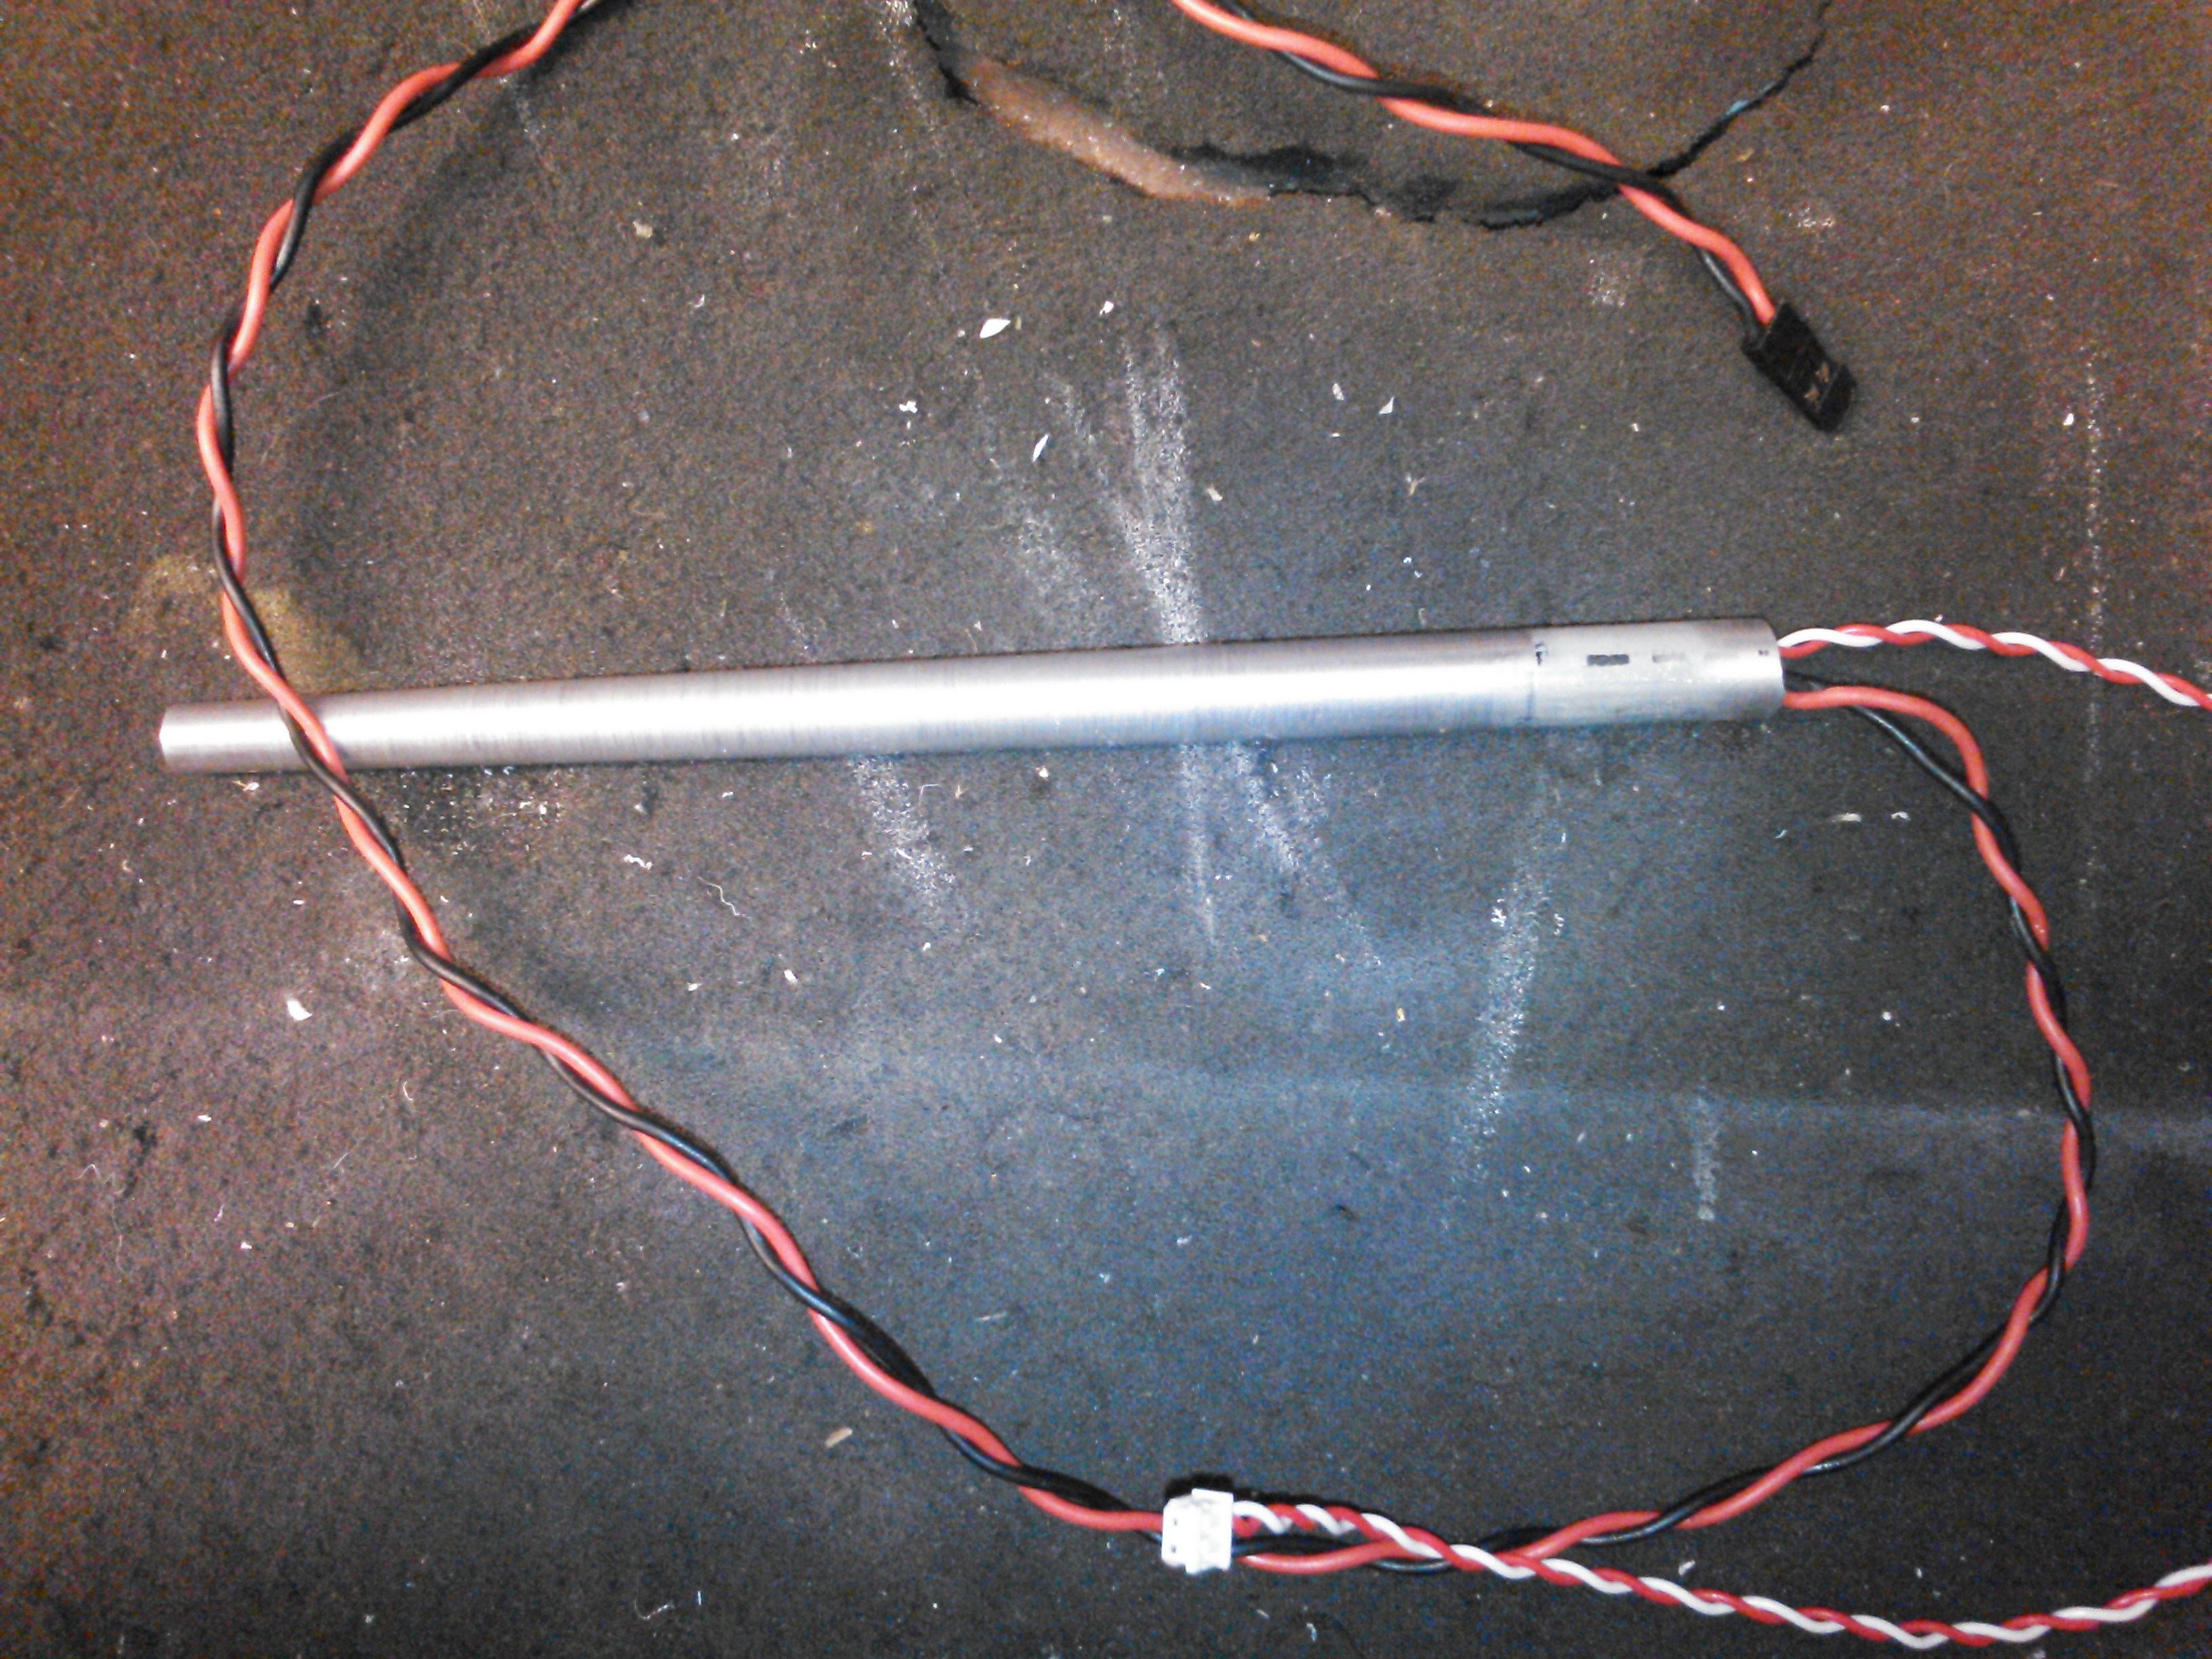
How the two LEDs fit together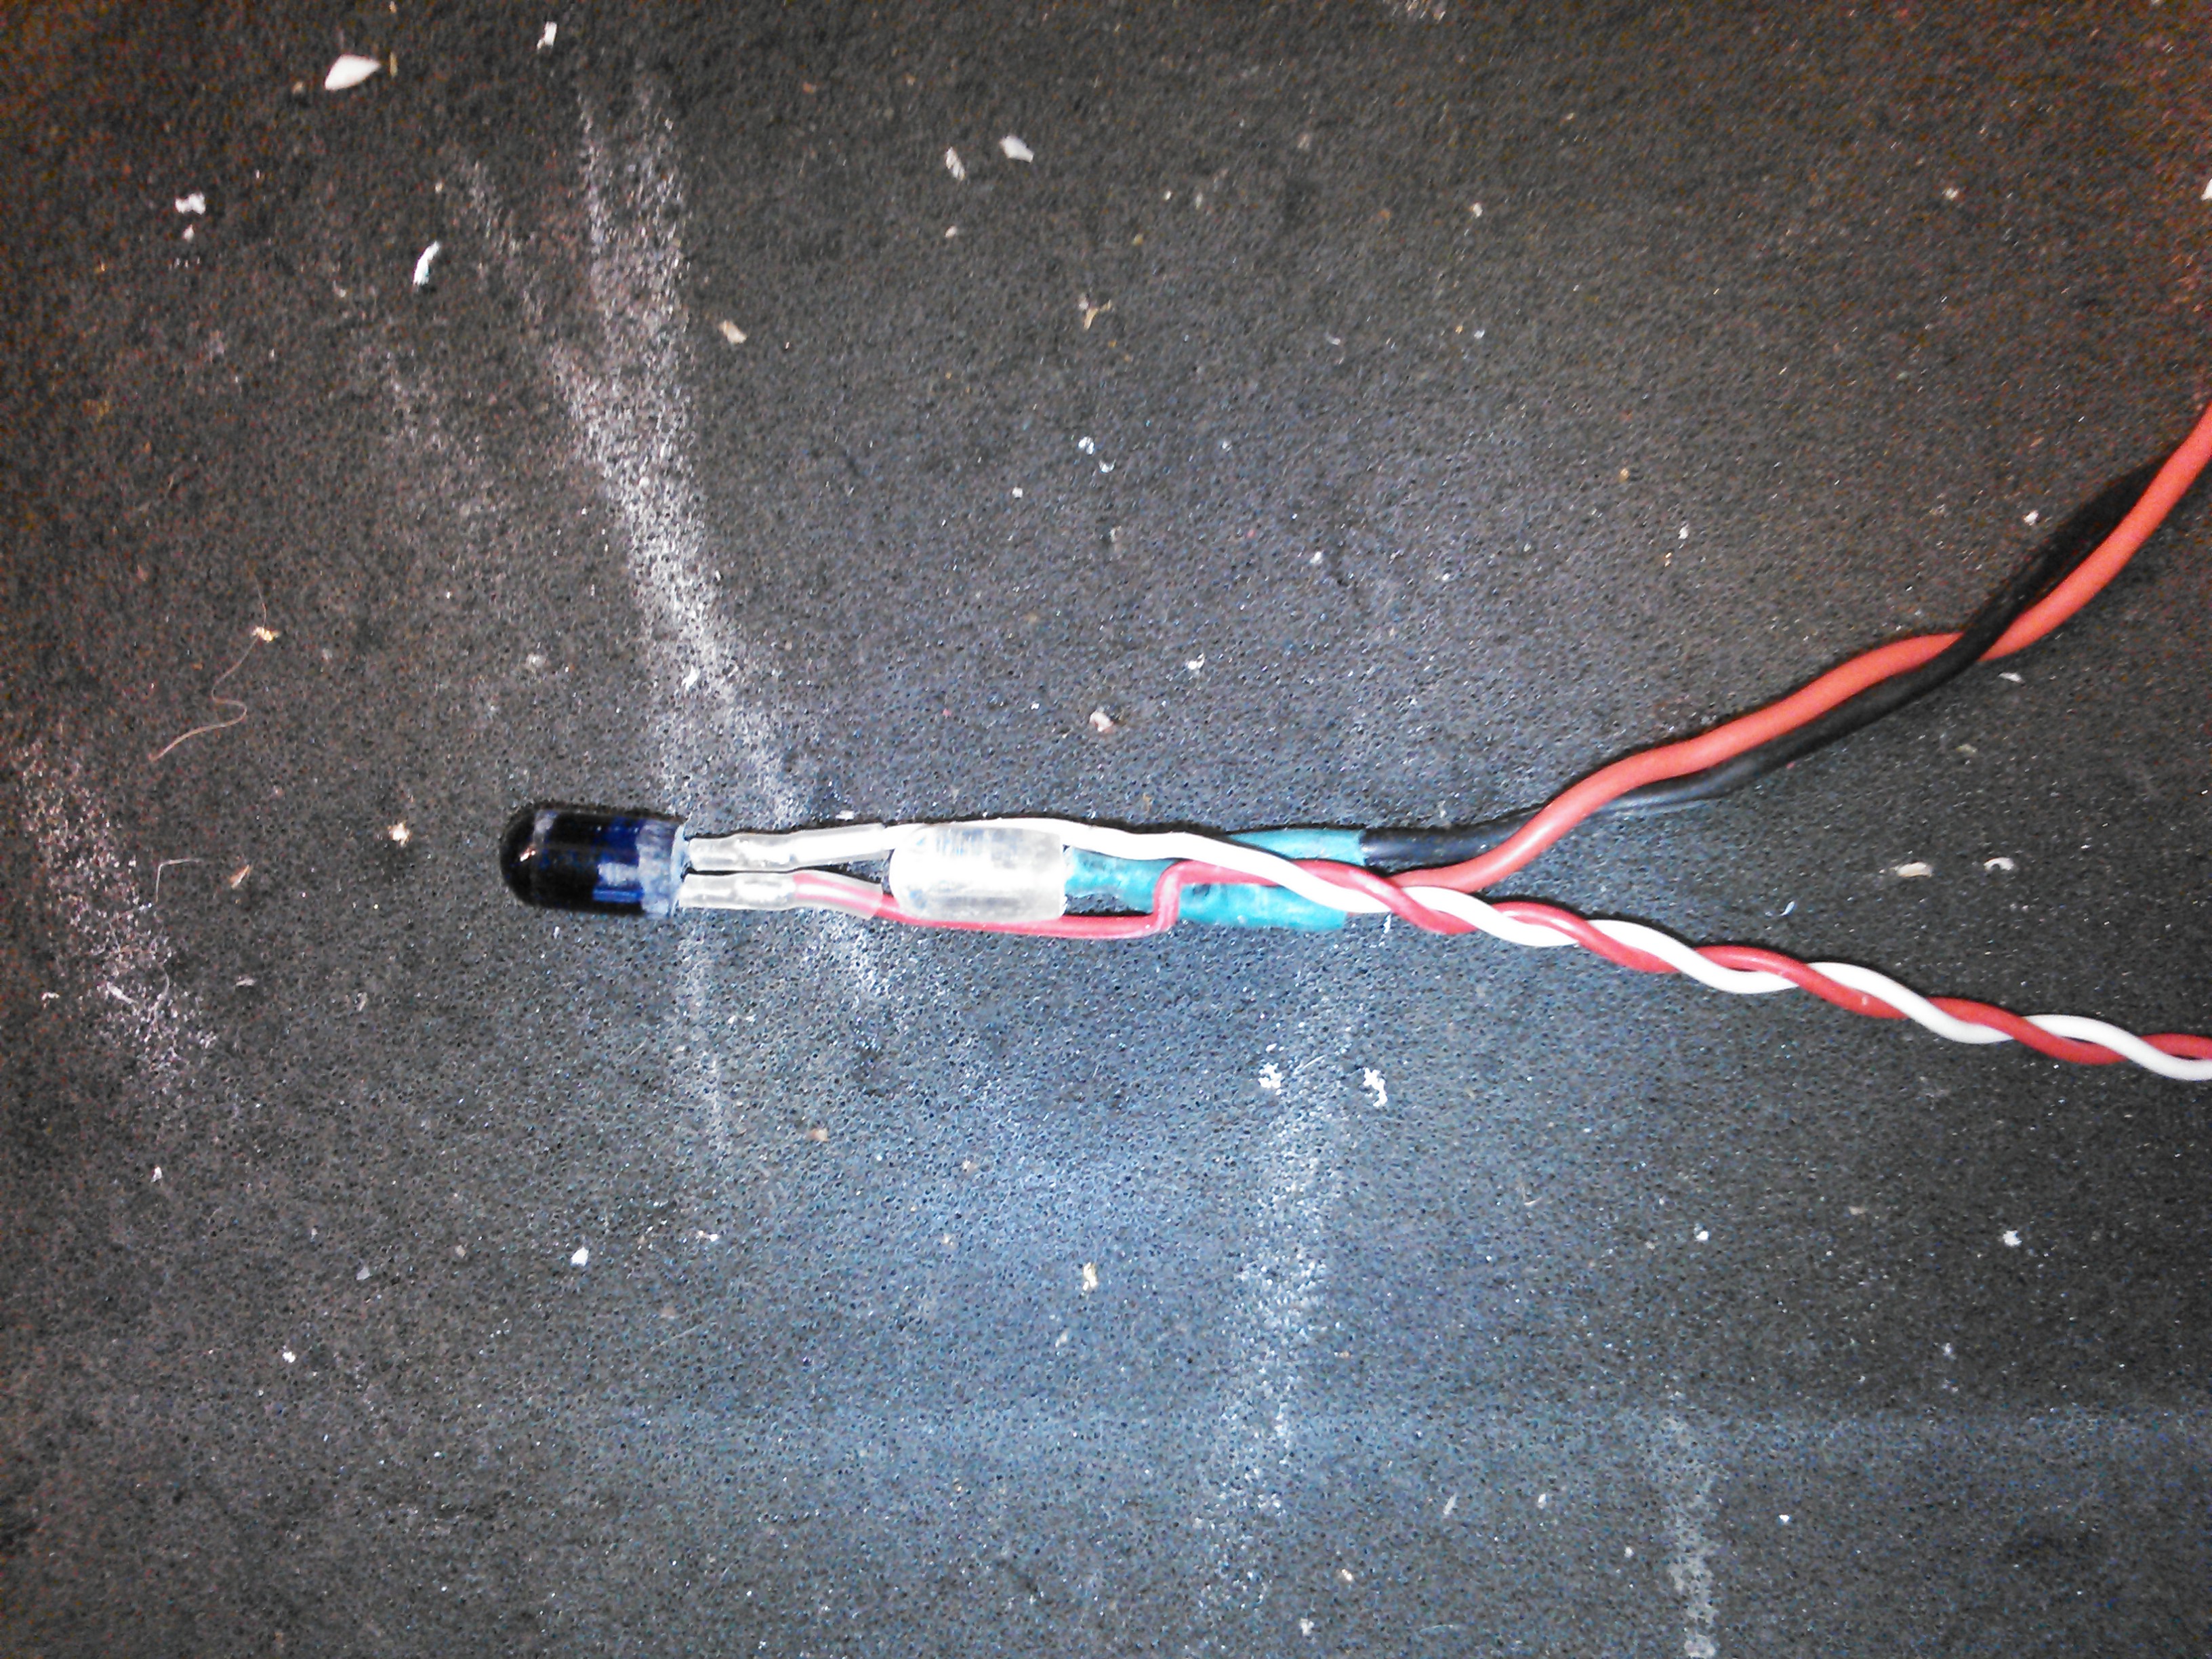
Look close and you can see the notches filed in the Flash LED to allow the IR wires past it
My new adjustable gun saddle for the recoil
I am not sure how well I like the barc4 yet. The servo recoil is nice and accurate, fast pull slow return. But to fire the gun, you tap stick up left in the corner. Up right is the machine gun. Its much easier to fire the machine gun than the main gun because I use left stick drive right stick turret so the machine gun is my thumb pulling rather than pushing for the main gun. None the less though, most of the time if I am quick enough, My elevation servo doesn't move, even though its on the same channel.
04-02-2015, 10:32 PM
#48
Senior Member
Join Date: Nov 2006
Location: Grande Prairie,
AB, CANADA
Posts: 8,976
Likes: 0
Received 4 Likes
on
4 Posts
The top left for cannon fire was used to allow straight up and down for elevation control on the bbl. I mulled this decision for a few days. Original programming had the cannon fired on full up.
You can wire up a button, to fire the MG and cannon, You need a push button double pole single throw , that actives full left and full up at the same time. This mimics the corner movements, and allows you to have firing buttons on your transmitter. I modded one of my HK radios with a cannon button , Mg Button, and a Start button. I bought a supply of parts and was going to special build radios for those that wanted them. I have been so busy with other things though, and I just haven't pushed this idea much.
You can wire up a button, to fire the MG and cannon, You need a push button double pole single throw , that actives full left and full up at the same time. This mimics the corner movements, and allows you to have firing buttons on your transmitter. I modded one of my HK radios with a cannon button , Mg Button, and a Start button. I bought a supply of parts and was going to special build radios for those that wanted them. I have been so busy with other things though, and I just haven't pushed this idea much.
04-03-2015, 08:27 AM
#49
Thread Starter
I was thinking about that double button Dan. I think you mentioned this to me in an email. I will have to make a dedicated radio for this tank.
My big question so far is , "Why are you guys still desinging systems for 4 channels."
Tamiya did it because any more channels was to expensive at the time.
Now, 5 channel radios ars dirt cheap. We need a good system that splits the commands all out to individual channels and enough of this splitting commands using the rx18.
I really want one total system that is made for a tank and does speed, steering, sound turret, servo recoil, and possbly servo elevation. Lighting control would be nice too.
I looked over komdo stuff last night and elmod, boy is elmod confusing but that looks like a total system depending on what you want.
also, i look forward to the new Clark system he posted this week.
04-03-2015, 09:45 AM
#50
Senior Member
Join Date: Nov 2006
Location: Grande Prairie,
AB, CANADA
Posts: 8,976
Likes: 0
Received 4 Likes
on
4 Posts
I would suggest anyone to get a 6 channel radio. The HK T6a is a perfect radio for tanking. The proportional servo control on channels 5 and 6 are great. The channel 5 can be used for independent servo control of the barrel and channel 6 is good for panning the horizon with an FPV camera or proportional turret rotation if you used a continuous servo.
THE BARC is designed to be plug and play with an RX18 to give you the same functionality of an HL tank with Tamiya battling added. Of course it blocks the Hull recoil, adds momentum to give you better esc control of your tank, but that is it's primary purpose. When you start going with independent barrel control, then what ever system you buy means you are advancing past plug and play.
Now with a T6A radio and a Benedini TBS the gloves come off and it can do a lot more, and for this you need the extra channels This radio combined with a BARC4 and Benedini will give you all the functionality you need in a tank. The BARC can be used with a 4 channel for Basic tank control. If you need more then that buy a 6, 9 or whatever you need. As I mentioned I wouldn't go with anything less then 6 channels, and I strongly suggest people opt for radios that have proportional control on channels 5 and 6. There is so much more you can do with them. The T6A is less then $30 from Hobby King. Less then some receivers for other brands.
Clark has built a powerful board for $100. It made no sense for me to develop a competing board at the Clark price point in this market. Chance are I couldn't do it for less, so why bother. Once I found away to hook up the Benedini to the Clark it really cemented the fact it was pointless to develop " Another" board. The TBS hooked up to a Clark is a powerful combo.
I am more then happy with the T6A/BARC/TBS/RX18, and have them in all my tanks. Having multiple brands of boards scattered throughout the fleet, can make it very confusing. The Clarks,El MOD and IBU2 I have purchased have been removed and thrown in a drawer. Not because there is anything wrong them, but only because I am happy with the BARC and the simplicity of the stick commands, and the great sound of the TBS. My tanks are set up exactly the same. Proportional control of the Barrel with a servo on channel 5, turret and throttle through the RX18, and all the auxiliary lighting through the BARC / TBS, and now the BARC control the servo recoil. If I cared about proportional control of the turret I would use the Proportional ch6 and a continuous servo. You do not need anything special for this other then a good radio.
Like you I am very interested in the New TK60. Programmable sound( Benedini like), and a USB connection to build battle tank configuation files will be a dynamite feature. The one knock people seem to have on the Clark board is the IR programming on a remote and the complexity involved. Without that channel guide, I am not sure how much success you would have. The option of selecting battle files off a computer and downloading them into your tank is really intriguing to me.