


Lets build a tank!!! The tamiya JS-2

 04-03-2015, 06:22 PM
#102
Senior Member
Thread Starter
Join Date: Feb 2015
Location: Quakertown PA
Posts: 421
Likes: 0
Received 0 Likes
on
0 Posts
A very wise idea. Let me know if I can help you out in any way. Ohh yeah last thing i promise. A pin vise would be helpful to have for putting the metal railings/steps on. Most of the holes for those are not drilled out. you can do it with just the bit. But the pin vise would have made it so much easier.
04-03-2015, 09:41 PM
#105

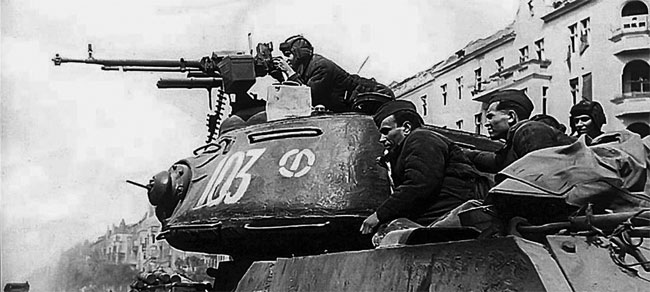
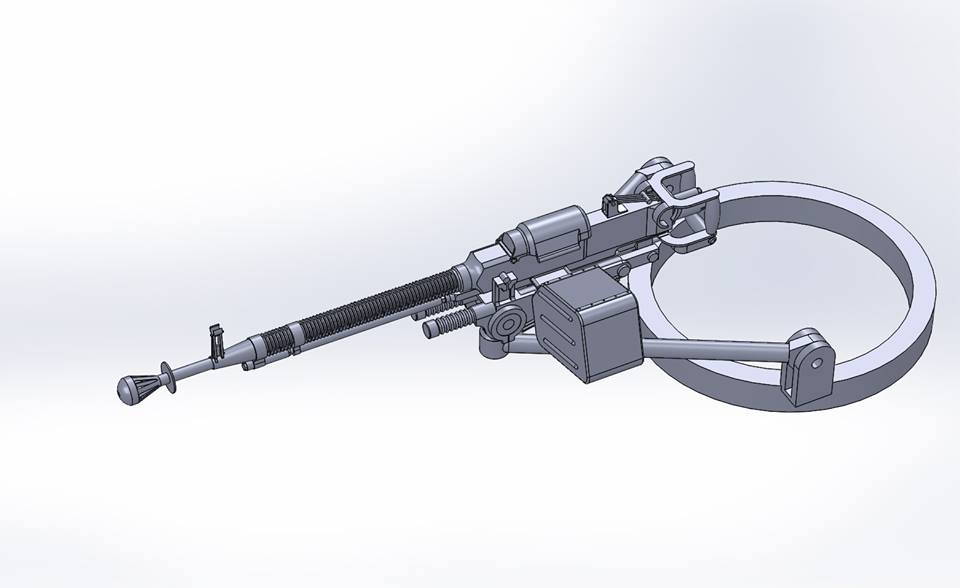
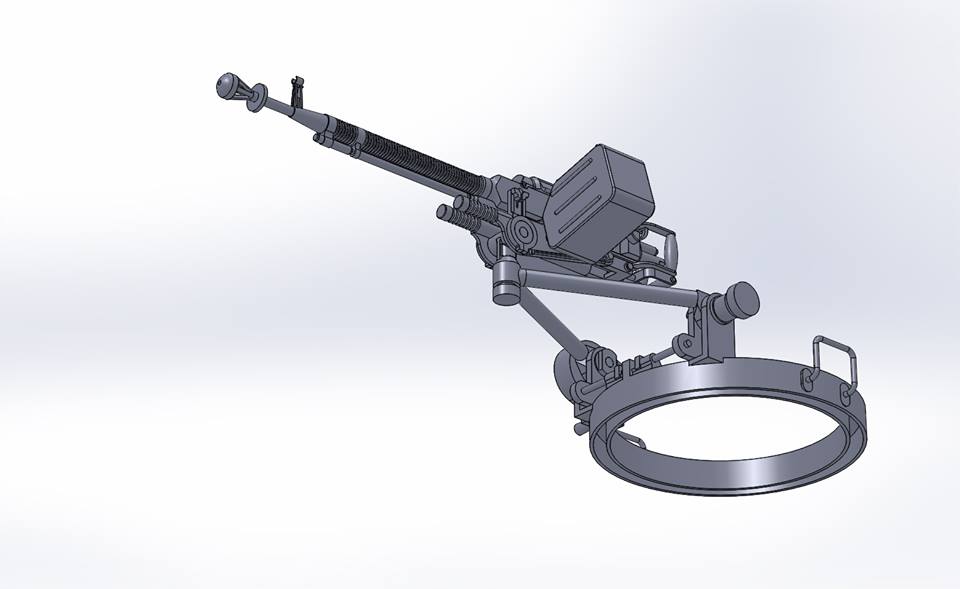
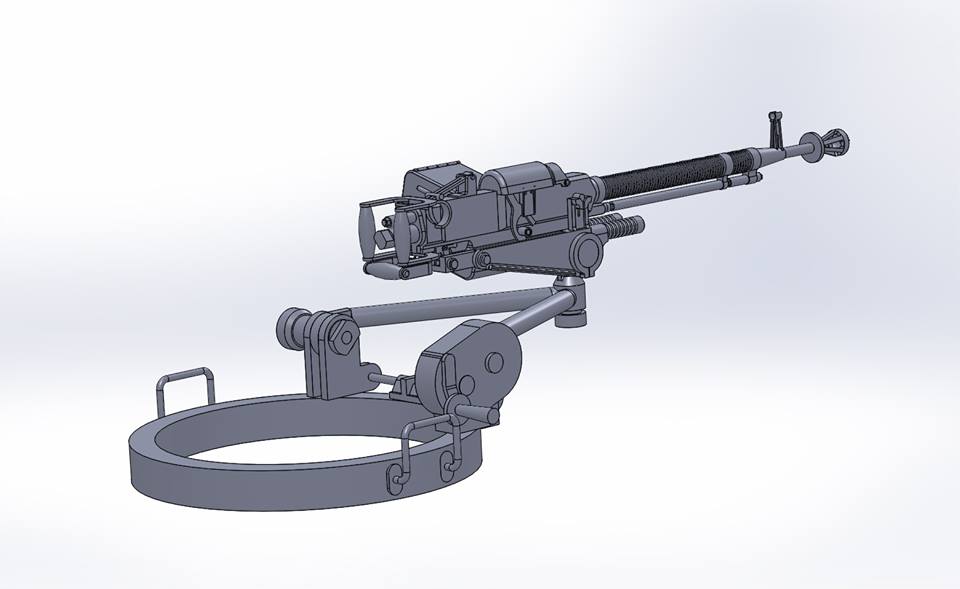
If you want AA for your JS-2, a buddy of mine is finishing up his 1:16 DShK & has it on Shapeways at a very reasonable price.
https://www.shapeways.com/product/7T...chine-gun-1-16
https://www.shapeways.com/product/7T...chine-gun-1-16
Last edited by herrmill; 04-03-2015 at 09:43 PM.
04-04-2015, 02:55 PM
#106


Join Date: Oct 2014
Location: Roseville, CA
Posts: 888
Likes: 0
Received 0 Likes
on
0 Posts
A very wise idea. Let me know if I can help you out in any way. Ohh yeah last thing i promise. A pin vise would be helpful to have for putting the metal railings/steps on. Most of the holes for those are not drilled out. you can do it with just the bit. But the pin vise would have made it so much easier.
04-04-2015, 03:37 PM
#108
Join Date: Oct 2014
Location: Roseville, CA
Posts: 888
Likes: 0
Received 0 Likes
on
0 Posts
04-04-2015, 04:01 PM
#110

Just to throw this out there, not assuming anything: The roadwheels are ABS, so regular plastic cement won't hold, you'll need PlastiWeld, Tenax or any other MEK based glue.
After building the first two Tamiyas years ago, when I got the IV, I glued all the roadwheels only to have them split because I missed the the ABS mark on the sprue (or in the instructions). Most of the kit sprues are polystyrene (marked PS), but a few are ABS.
Don't know why they switched in their newer kits, the PS Tiger I roadwheels are the tallest, thinnest of all their offerings and there's no issue with them, but they did and tricked me good the first time.
04-04-2015, 04:10 PM
#111
Join Date: Oct 2014
Location: Roseville, CA
Posts: 888
Likes: 0
Received 0 Likes
on
0 Posts
Just to throw this out there, not assuming anything: The roadwheels are ABS, so regular plastic cement won't hold, you'll need PlastiWeld, Tenax or any other MEK based glue.
After building the first two Tamiyas years ago, when I got the IV, I glued all the roadwheels only to have them split because I missed the the ABS mark on the sprue (or in the instructions). Most of the kit sprues are polystyrene (marked PS), but a few are ABS.
Don't know why they switched in their newer kits, the PS Tiger I roadwheels are the tallest, thinnest of all their offerings and there's no issue with them, but they did and tricked me good the first time.
After building the first two Tamiyas years ago, when I got the IV, I glued all the roadwheels only to have them split because I missed the the ABS mark on the sprue (or in the instructions). Most of the kit sprues are polystyrene (marked PS), but a few are ABS.
Don't know why they switched in their newer kits, the PS Tiger I roadwheels are the tallest, thinnest of all their offerings and there's no issue with them, but they did and tricked me good the first time.
Joe
04-04-2015, 05:40 PM
#112
Glad I saved you some trouble. It wouldn't have hurt anything, they just wouldn't have connected since the solvent in the normal styrene glue won't melt ABS. They recommend their Extra thin, which is MEK based, but not easy to find. PlastiWeld seems to be the easiest to grab from the LHS.
There's a difference in feel between the two plastics and if I was paying attention the first time I should have noticed, but I didn't.
There's a difference in feel between the two plastics and if I was paying attention the first time I should have noticed, but I didn't.
 04-05-2015, 02:38 AM
#115

That's not a slight to other retailers because that box takes a lot resources to handle/store. My US wholesale price on the Tamiya is higher than Banzai. It's actually higher than AAF too. I suspect the list price is set so high to allow for it. What's it on the JS-2, over 2Gs?
Based in the Home Islands coupled with the Futaba Tx/Rx (and battery/charger although those aren't anything special), nobody can compete.
04-05-2015, 05:12 PM
#119
Join Date: Oct 2014
Location: Roseville, CA
Posts: 888
Likes: 0
Received 0 Likes
on
0 Posts
04-05-2015, 05:29 PM
#120
Senior Member
Thread Starter
Join Date: Feb 2015
Location: Quakertown PA
Posts: 421
Likes: 0
Received 0 Likes
on
0 Posts
Your right about that lot smother than a stock HL for sure. The Nicad fits in as long as you lay it on it's side at an angle. I think i'll be using my lipo's in it more often than not though.
04-05-2015, 05:45 PM
#121
Join Date: Oct 2014
Location: Roseville, CA
Posts: 888
Likes: 0
Received 0 Likes
on
0 Posts
I also like the way it responds to stick input. You can make it creep and turn at the same time, no need to increase speed to get it to be responsive.
04-05-2015, 05:54 PM
#122
Senior Member
Thread Starter
Join Date: Feb 2015
Location: Quakertown PA
Posts: 421
Likes: 0
Received 0 Likes
on
0 Posts
you can also do a real slow pivot steer. just move the stick all the way to either left or right and give it a little gas. they really do a good job with the control and throttle response.
04-05-2015, 10:51 PM
#123

2 cent tip: From 2013 thru 2015 I have had some fun building the JS-2 for myself, a friend and an AAF Museum battle day acquaintance. Without getting to fancy, just adding ETO black motors (contact Bob) with Impact 8T pinion gears attached to the kit gearboxes allows for masterful driving on various outdoor terrain, including hilly grass-lawns and dirt.
No doubt larger motors are the single best, basic, performance upgrade for this or any of the larger Tamiya rc infrared fighting tanks. Metal tracks look great, but they are mostly a cosmetic or accuracy solution.
The tanks above run on the kit tracks using the Tamiya KV-1 wider kit tracks as often used on the Eastern Front or the kit JS-2 tracks. The model built for Danville fights has been running there off and on since late 2013.
Enjoy, John
Last edited by Pcomm1.v2; 04-05-2015 at 10:55 PM.
04-06-2015, 04:21 AM
#124
Join Date: Oct 2014
Location: Roseville, CA
Posts: 888
Likes: 0
Received 0 Likes
on
0 Posts
2 cent tip: From 2013 thru 2015 I have had some fun building the JS-2 for myself, a friend and an AAF Museum battle day acquaintance. Without getting to fancy, just adding ETO black motors (contact Bob) with Impact 8T pinion gears attached to the kit gearboxes allows for masterful driving on various outdoor terrain, including hilly grass-lawns and dirt.
No doubt larger motors are the single best, basic, performance upgrade for this or any of the larger Tamiya rc infrared fighting tanks. Metal tracks look great, but they are mostly a cosmetic or accuracy solution.
The tanks above run on the kit tracks using the Tamiya KV-1 wider kit tracks as often used on the Eastern Front or the kit JS-2 tracks. The model built for Danville fights has been running there off and on since late 2013.
Enjoy, John
Joe
04-06-2015, 05:59 AM
#125
Senior Member
Thread Starter
Join Date: Feb 2015
Location: Quakertown PA
Posts: 421
Likes: 0
Received 0 Likes
on
0 Posts
Since we happen to be talking about motors. If Install the larger motors and new pinio gear will the JS-2 still be in inline with the scale speed requiirements of Danville? For that matter is the stock config inline with Danville scale speed tests. I've heard that some of the Tamiya Tanks actually run a bit on the fast side out of the box. I do plan to take mine to Danville and I would rather have everything "dialed" in be given a warning that the speed is to fast for the battle's.
Thanks
Bill
Thanks
Bill