


Darn Craig's List --- M50 iSHERMAN PROJECT


 04-28-2015, 07:23 AM
#27

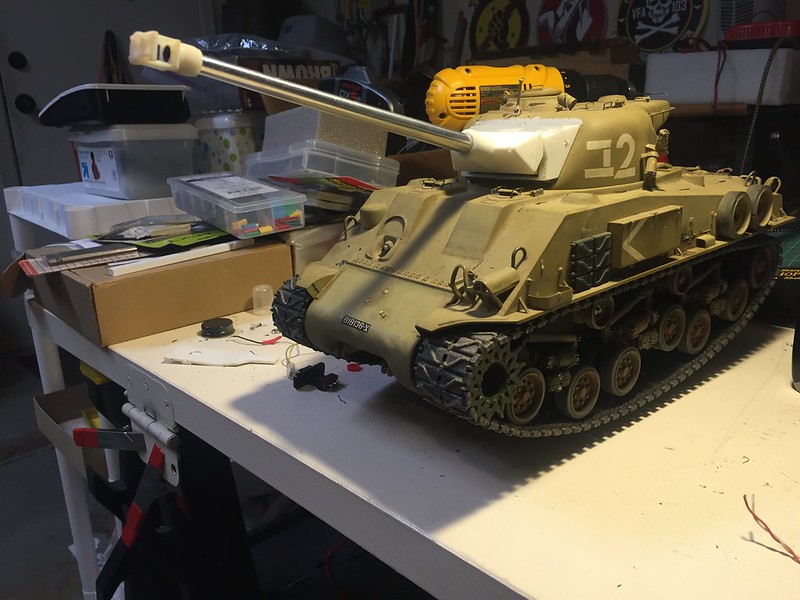
I got my Muzzle break from Shapeways, I stuck a piece of tube stock in for effect.
<iframe src="https://www.flickr.com/photos/68007800@N06/17113727118/player/" width="500" height="375" frameborder="0" allowfullscreen webkitallowfullscreen mozallowfullscreen oallowfullscreen msallowfullscreen></iframe>
<iframe src="https://www.flickr.com/photos/68007800@N06/17113727118/player/" width="500" height="375" frameborder="0" allowfullscreen webkitallowfullscreen mozallowfullscreen oallowfullscreen msallowfullscreen></iframe>
04-28-2015, 11:16 AM
#28
That one looks different then the one Tom used? Is it from WOZ?
12-07-2015, 06:33 AM
#30
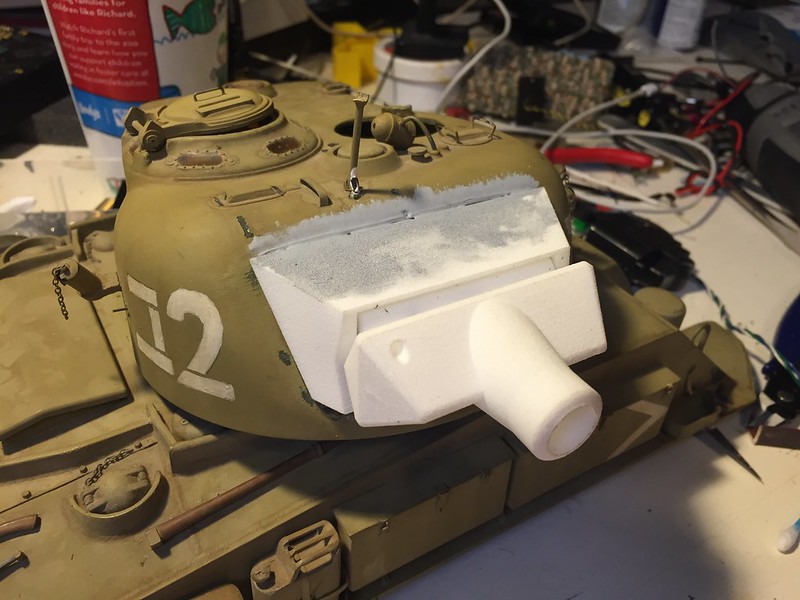
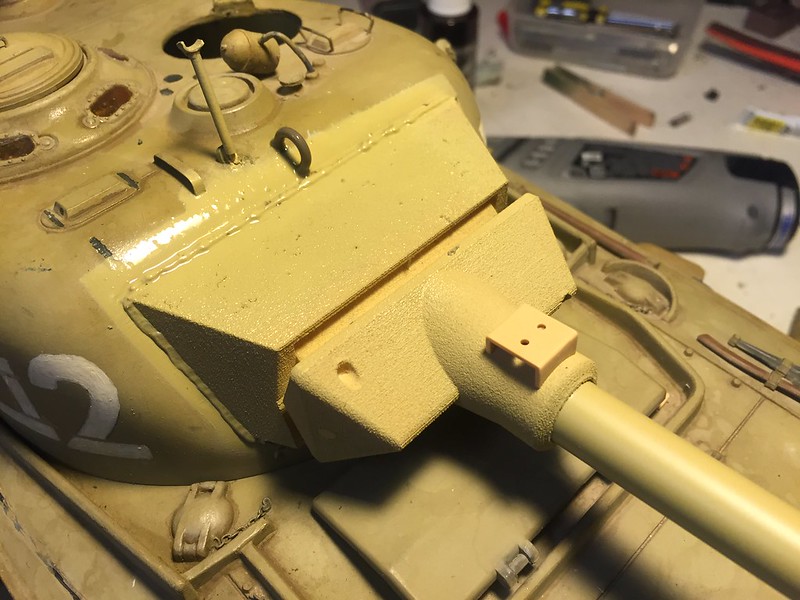
Well this project was definitely back burner for a while but I recently got a head of steam when a few 3D printed parts arrived and I managed to get them assembled. First was the mantlet and rotor shield. Fresh off shapeways and very well detailed, it even has the weld marks! I removed the previous effort and faired in the new parts.
 IMG_7090 by Ethan Dunsford, on Flickr
IMG_7090 by Ethan Dunsford, on Flickr
12-07-2015, 06:43 AM
#31
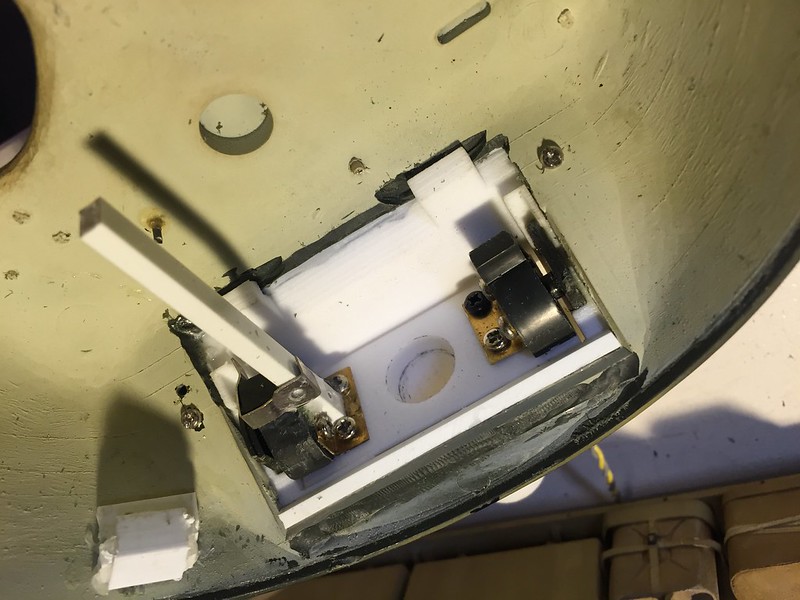
To add the moving trunnion for elevation, I scrounged some old Tamiya Sherman pivots and matched them to brass angle stock and screwed it all in place. A lever for the elevation was secured to the side of the mount. I didn't document everything but I added Tamiya elevation and Pershing recoil. I found a Tamiya Panther barrel and it fits the mount very well. Mato traverse inside and I wired everything up and made a longer Battle System emitter by cutting the Tamiya unit and lengthening it.
Once everything is rigged, depression in fantastic and elevation is adequate.
 IMG_7092 by Ethan Dunsford, on Flickr
 IMG_7103 by Ethan Dunsford, on Flickr
 IMG_7104 by Ethan Dunsford, on Flickr
 IMG_7105 by Ethan Dunsford, on Flickr
Once everything is rigged, depression in fantastic and elevation is adequate.
IMG_7092 by Ethan Dunsford, on FlickrIMG_7103 by Ethan Dunsford, on FlickrIMG_7104 by Ethan Dunsford, on FlickrIMG_7105 by Ethan Dunsford, on Flickr
12-07-2015, 06:46 AM
#32
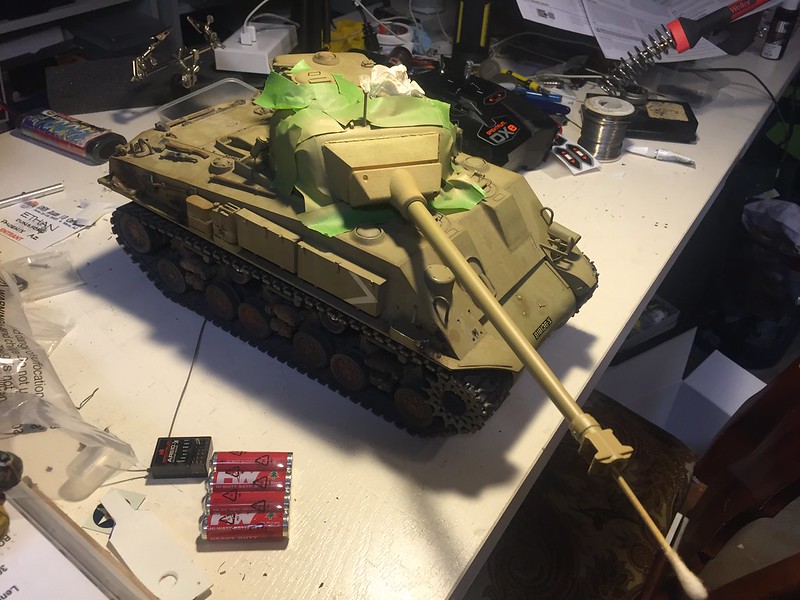
As this project is far from a super detail effort.... I masked off the new parts and painted them a base coat of the new Tamiya Light Sand Rattle Can and then another coat of Dark Yellow.
 IMG_7181 by Ethan Dunsford, on Flickr
IMG_7181 by Ethan Dunsford, on Flickr
12-07-2015, 10:24 AM
#34
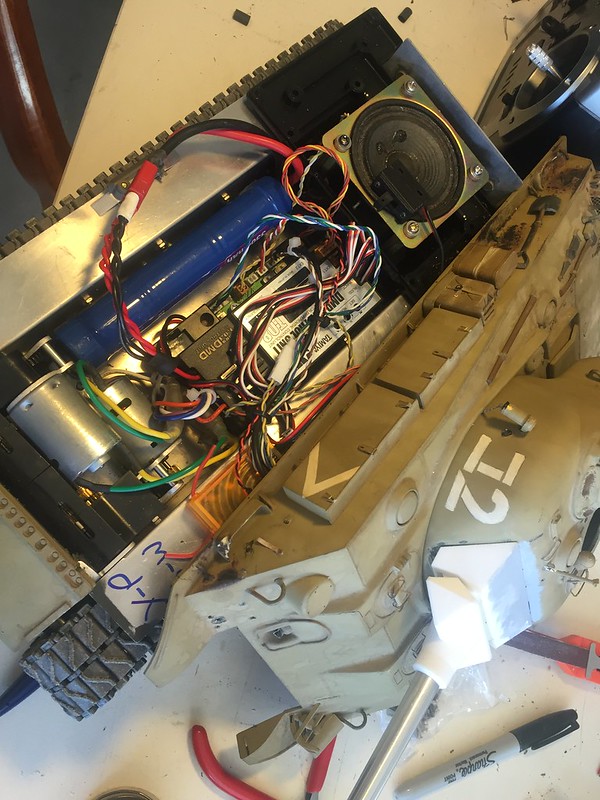
So I forgot the picture of the innards in place.... here you go. Double sided tape holds the boxes in place. Wires bundled and zip tied.
 IMG_7109 by Ethan Dunsford, on Flickr
IMG_7109 by Ethan Dunsford, on Flickr
12-08-2015, 06:50 AM
#36
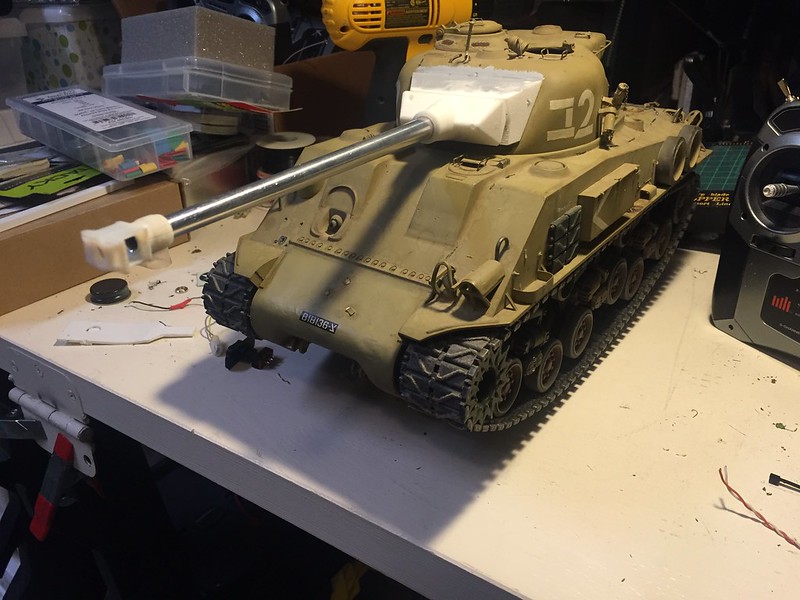
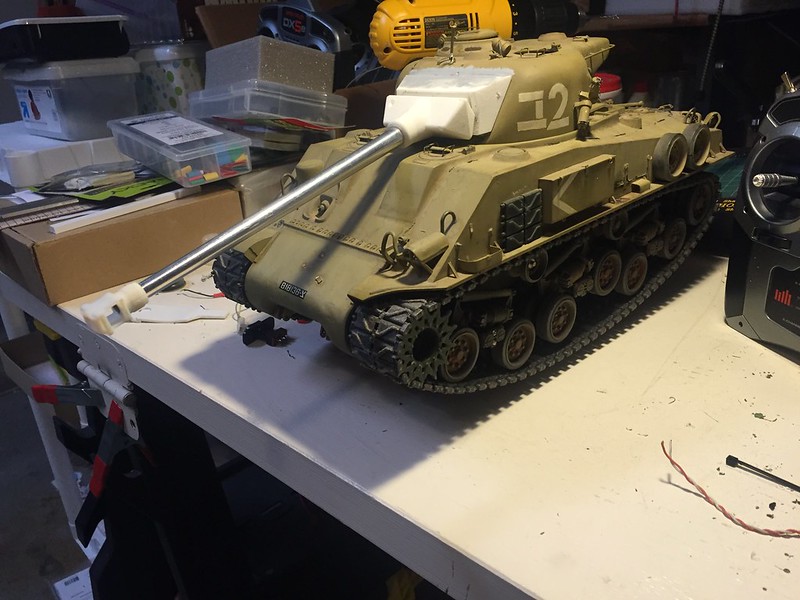
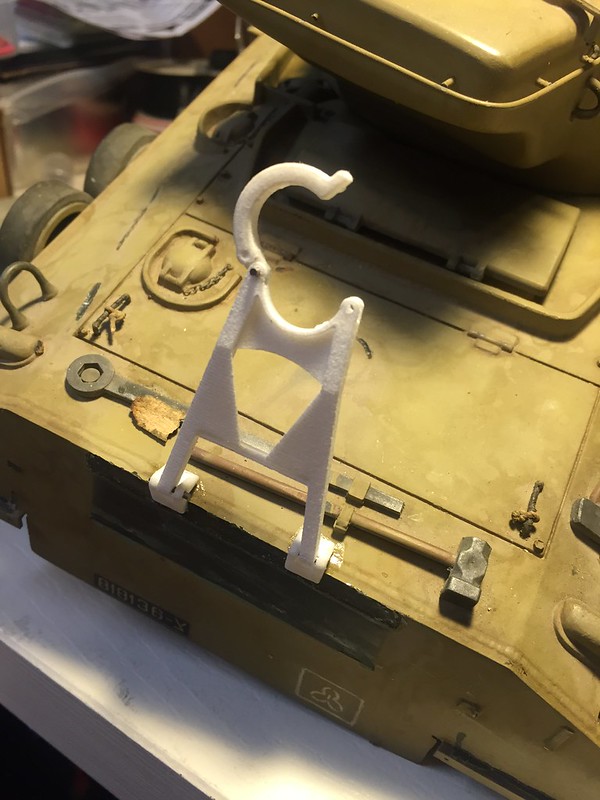
The 3D parts are giving me reason to surge ahead. I still like to scratch my own stuff but incorporating new products is one way to escalate growth in this hobby. As such...I am not leaving well enough alone and adding a correct travel lock for the '50. I drilled it out and pinned it with steel wire.
But before I even got that far I got a full dose of A.M.S. acute modeling syndrome. The stowage arrangement was not correct for an M50 so I decided to clean up and reorganize a bit.
 IMG_7182 by Ethan Dunsford, on Flickr
 IMG_7183 by Ethan Dunsford, on Flickr
 IMG_7184 by Ethan Dunsford, on Flickr
But before I even got that far I got a full dose of A.M.S. acute modeling syndrome. The stowage arrangement was not correct for an M50 so I decided to clean up and reorganize a bit.
IMG_7182 by Ethan Dunsford, on FlickrIMG_7183 by Ethan Dunsford, on FlickrIMG_7184 by Ethan Dunsford, on Flickr
12-08-2015, 08:15 AM
#37
Did you get the 3D stuff from Wozwaznt?
 12-09-2015, 06:17 PM
#40
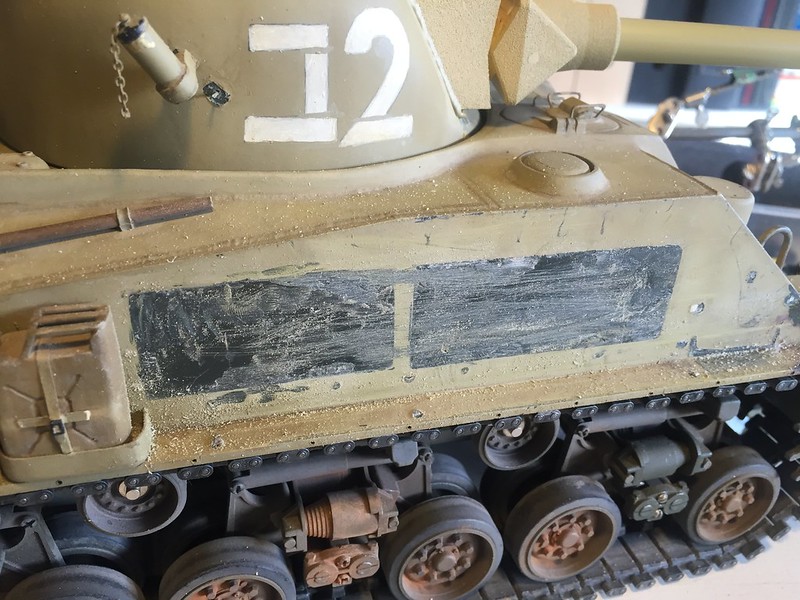
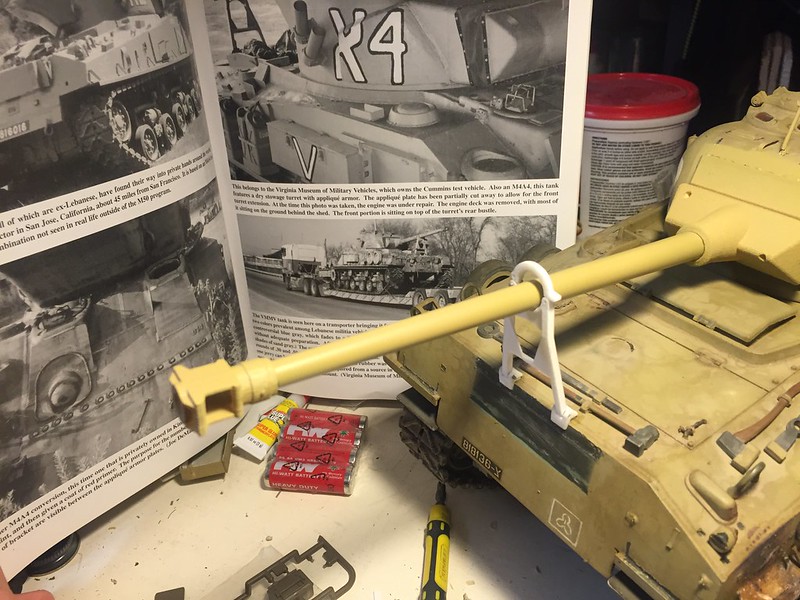
Gun travel lock installed and pinned.
 IMG_7204 by Ethan Dunsford, on Flickr
Matches references.
 [url=https://flic.kr/p/B4kERq]
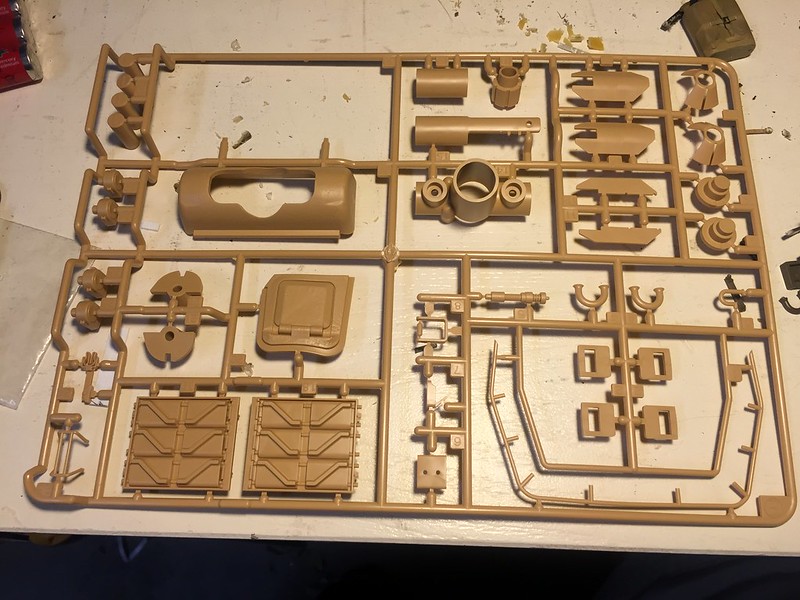
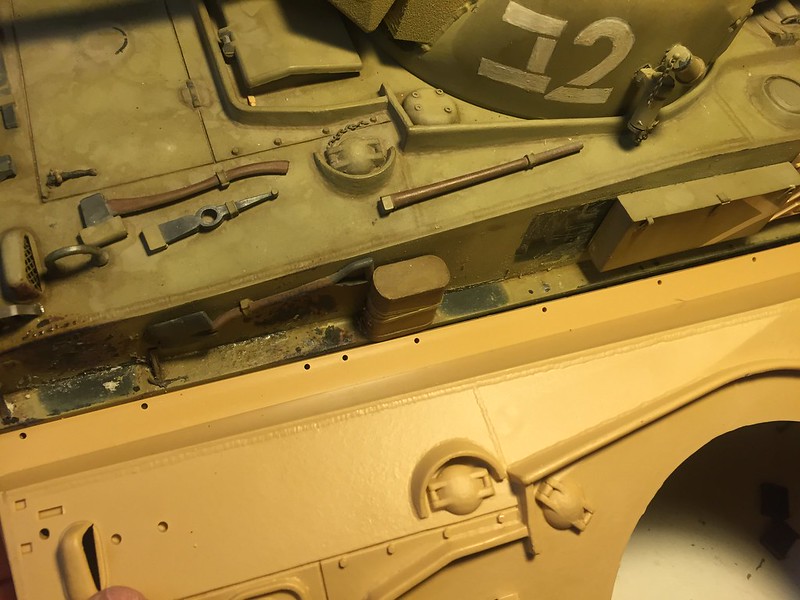
I chose to model the simple old school storage rack and I used that odd piece Tamiya includes for the Howitzer version. I will put some of my stash of resin stowage on there so I am not too worried on detail.
 [url=https://flic.kr/p/BTyNZx]
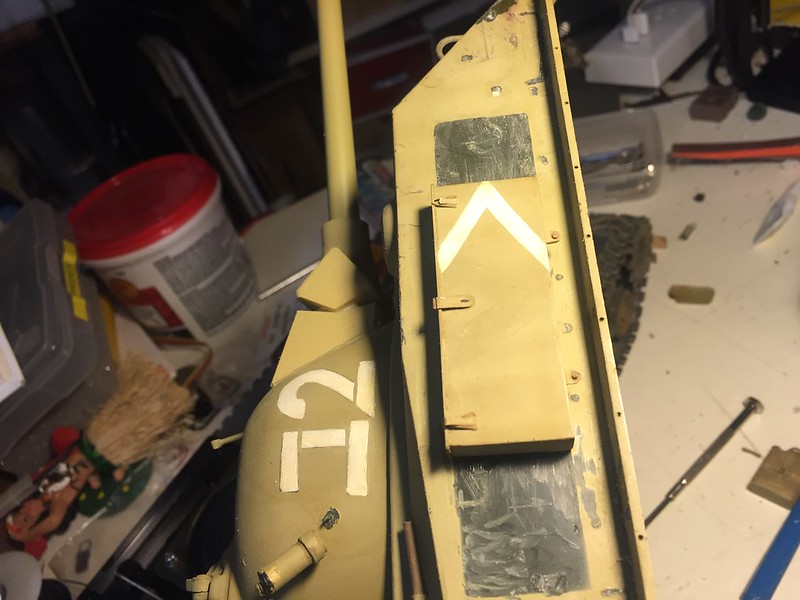
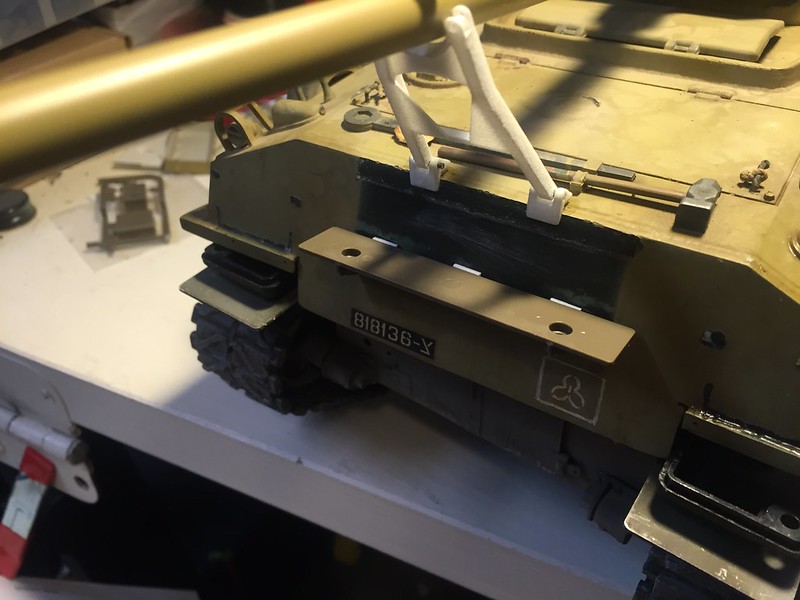
All the while I am cleaning up the stowage on the the side hull. I am adding the braces from the FULL OPTION kit to the old hull. Here I am marking the location based on a Super Sherman hull.
 [url=https://flic.kr/p/B4rjGK]
IMG_7204 by Ethan Dunsford, on FlickrMatches references.
[url=https://flic.kr/p/B4kERq]I chose to model the simple old school storage rack and I used that odd piece Tamiya includes for the Howitzer version. I will put some of my stash of resin stowage on there so I am not too worried on detail.
[url=https://flic.kr/p/BTyNZx]All the while I am cleaning up the stowage on the the side hull. I am adding the braces from the FULL OPTION kit to the old hull. Here I am marking the location based on a Super Sherman hull.
[url=https://flic.kr/p/B4rjGK]
Last edited by edoubleaz; 12-09-2015 at 06:19 PM.
12-09-2015, 06:24 PM
#41
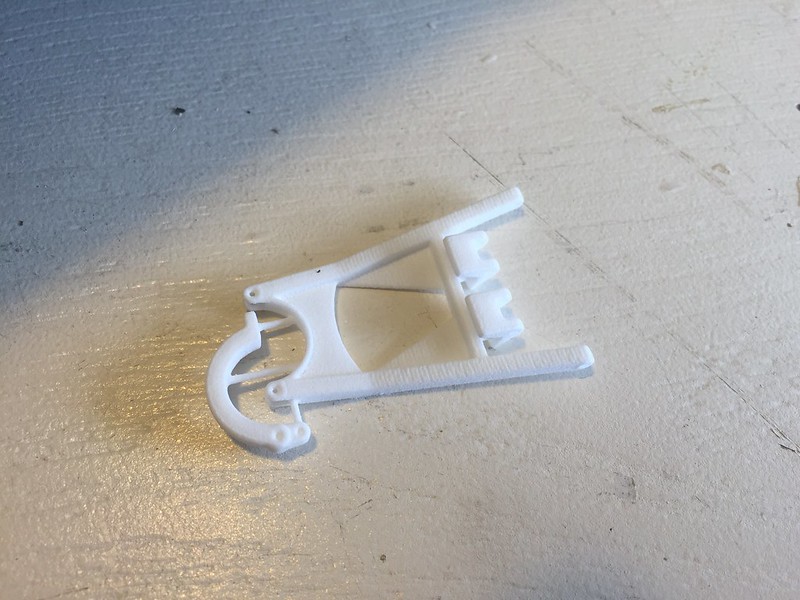
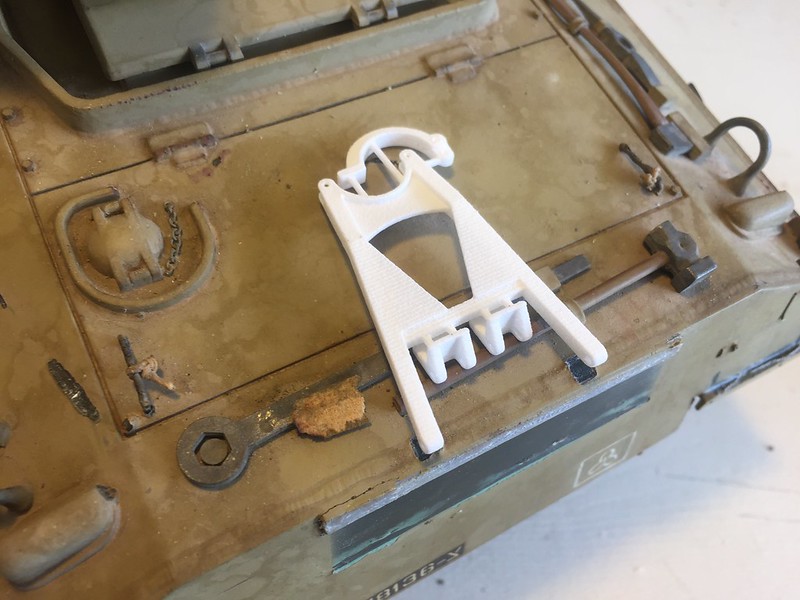
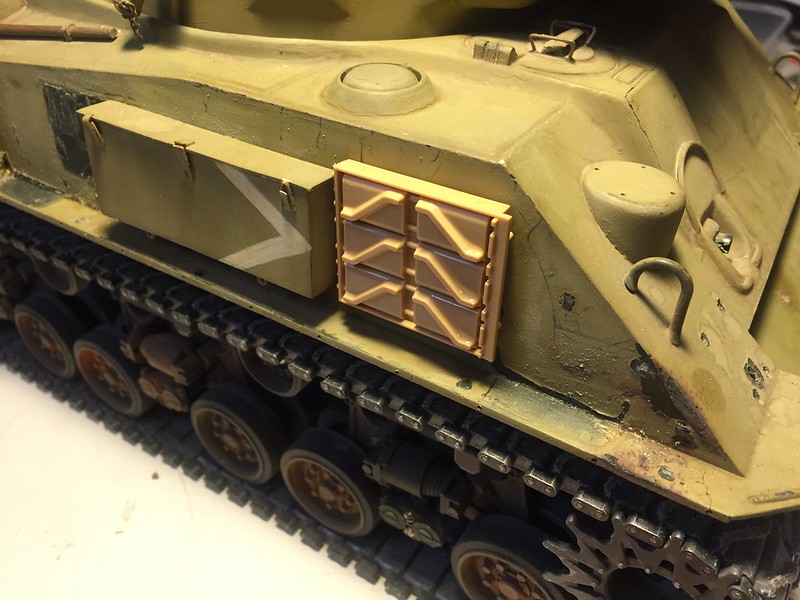
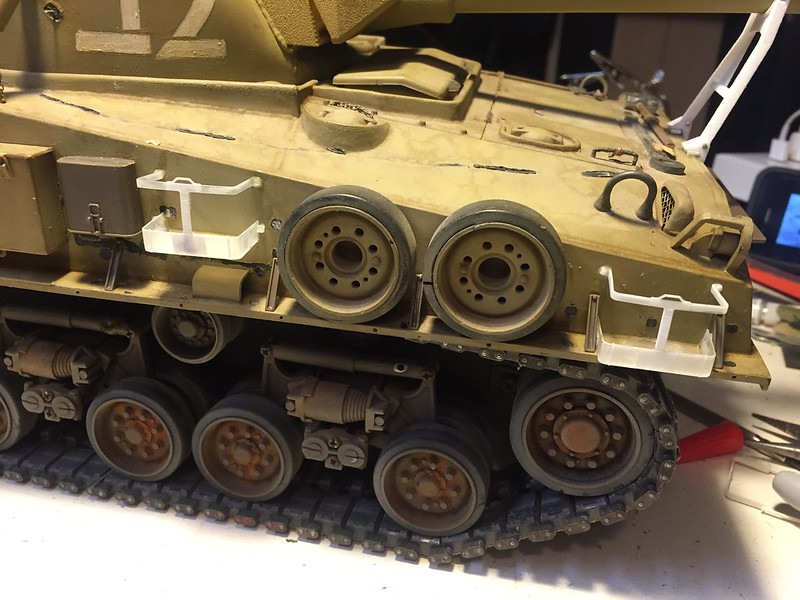
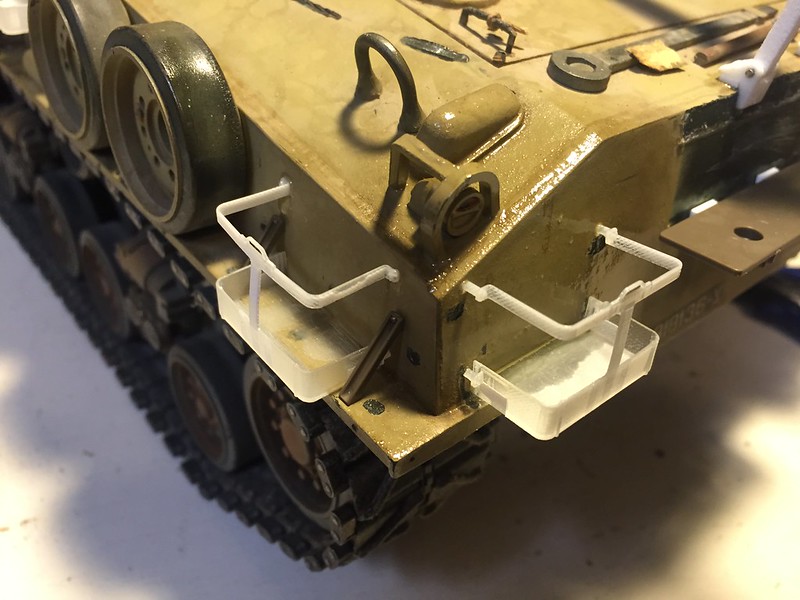
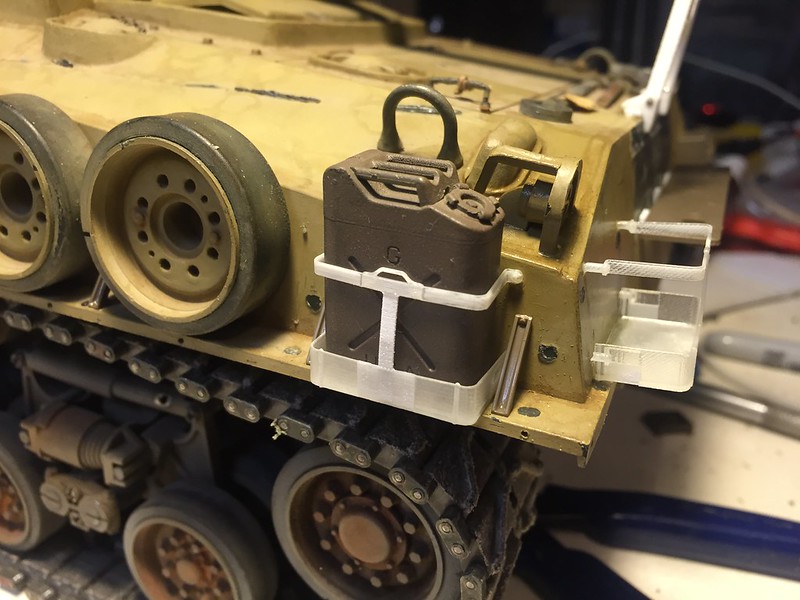
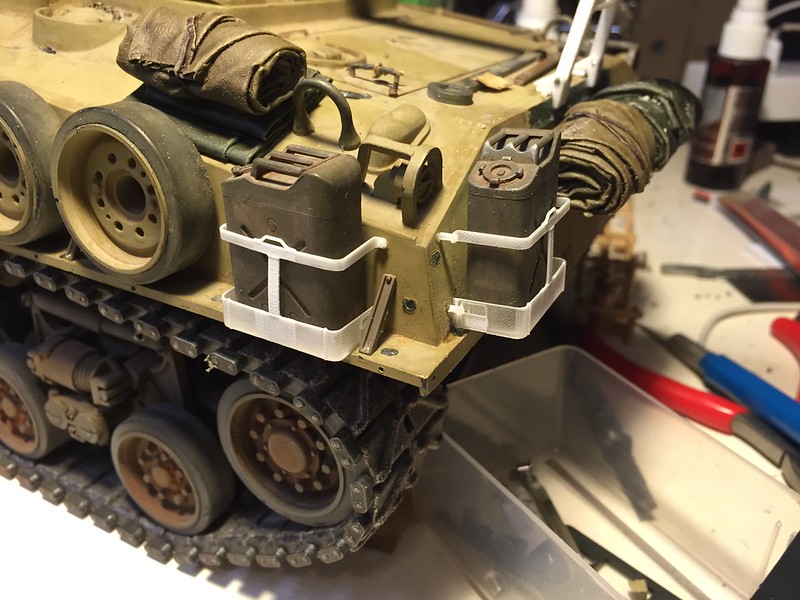
3D printing parts of the day. I got these brackets off of Shapeways a while back for a M51 update bit they will go just fine on the '50. they are very fragile but with a little bracing around a gas or water can they will work great.
 IMG_7221 by Ethan Dunsford, on Flickr
 IMG_7223 by Ethan Dunsford, on Flickr
 IMG_7224 by Ethan Dunsford, on Flickr
 IMG_7225 by Ethan Dunsford, on Flickr
IMG_7221 by Ethan Dunsford, on FlickrIMG_7223 by Ethan Dunsford, on FlickrIMG_7224 by Ethan Dunsford, on FlickrIMG_7225 by Ethan Dunsford, on Flickr
12-14-2015, 07:06 AM
#42
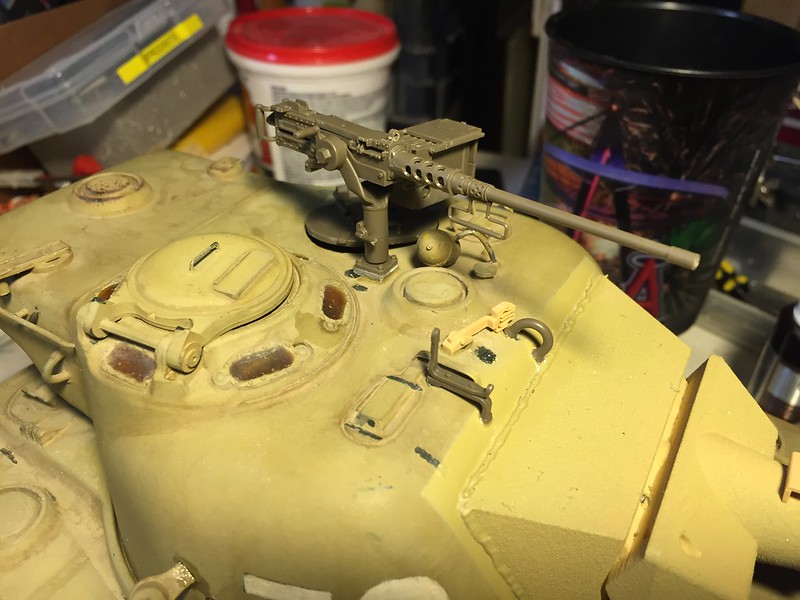
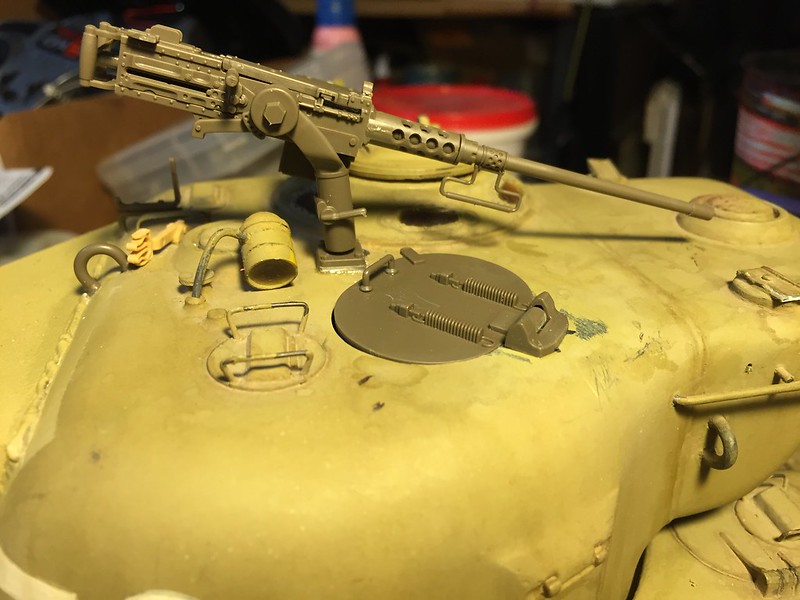
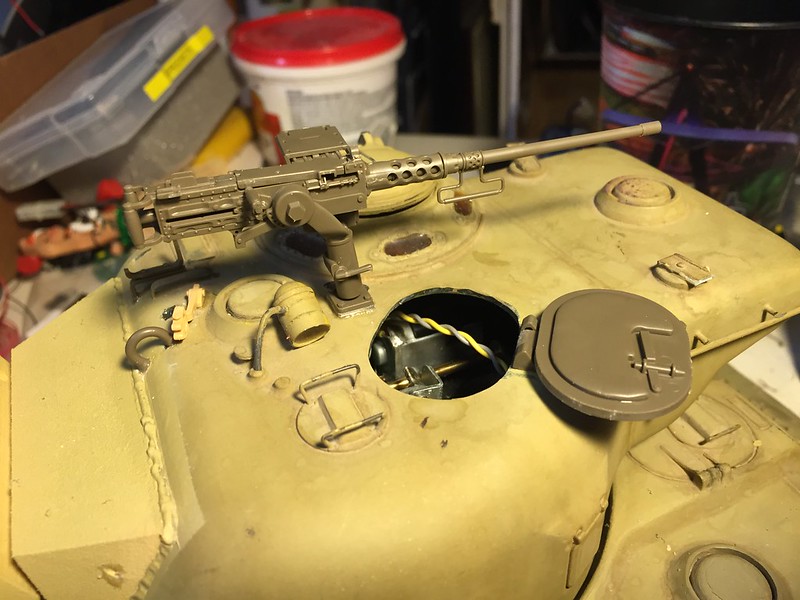
Restoring Shermans can be repetitive, as I am now down to the broken or missing details. Lifting lug on mantlet.... Replacement loaders hatch.... .50 cal and mount. Original owner had opened the old style turret and scratched a super detailed part. To bad it was all smashed to hell.
 IMG_7252 by Ethan Dunsford, on Flickr
 IMG_7254 by Ethan Dunsford, on Flickr
 IMG_7253 by Ethan Dunsford, on Flickr
IMG_7252 by Ethan Dunsford, on FlickrIMG_7254 by Ethan Dunsford, on FlickrIMG_7253 by Ethan Dunsford, on Flickr
12-14-2015, 07:18 AM
#43
More work on stowage... cans in racks and bags, tarps, and rolls attached. Once again, lets thank Steve Munsell at Value Gear Details for all his great stuff! Makes life a bit easier for us Hobbyists/Dads to get work done!
 IMG_7250 by Ethan Dunsford, on Flickr
IMG_7250 by Ethan Dunsford, on Flickr
12-15-2015, 06:33 AM
#46

When I first started tanking, I told myself "I'm not doing Tiger's or Sherman's, they've been done to death!" Then I kept seeing awesome Sherman's like this, and I couldn't not get one.
12-15-2015, 08:50 AM
#47
My favorite part of this site has always been the builds. I hope my efforts give other people ideas and help reduce the number of shelf queens. As a fully confessed Tamiya snob I admit to dabbling in other brands to continue the "family" of Shermans in my garage. You will see some Heng Long and Mato parts restoring my VVSS projects in the future as the parts brome more robust and mainstream. The gap is closing all around and the variety of material makes any OOB or RTR project seem boring!!!
12-15-2015, 10:06 AM
#48

I agree Ethan, every sherman i have has been a project, each getting more and more crazy involved. The only reason i havent bought a taign sherman yet is I dont have to modify it , just change the electronics, no fun there.
