


Panzergruppe Tarraco Battlegrounds: the Panzodrom
 09-03-2015, 06:06 AM
#51

Thread Starter

Join Date: May 2011
Location: Creixell, SPAIN
Posts: 191
Likes: 0
Received 0 Likes
on
0 Posts
...
now i will post pics from the second nebelwerfer that another member of our club is building


some parts had to be discarded and made from scratch, because this one it's being build to be towed (the wheels would be later made from rubber, so they could roll over every kind of terrain)


that's all, it's waiting for the paint works to be done
best regards!
now i will post pics from the second nebelwerfer that another member of our club is building
some parts had to be discarded and made from scratch, because this one it's being build to be towed (the wheels would be later made from rubber, so they could roll over every kind of terrain)
that's all, it's waiting for the paint works to be done
best regards!
 05-14-2016, 11:26 AM
#56
Thread Starter
Join Date: May 2011
Location: Creixell, SPAIN
Posts: 191
Likes: 0
Received 0 Likes
on
0 Posts
hi again
in these lasts weeks we have been very busy
Place de la ville Saint Michel
Hi again chaps
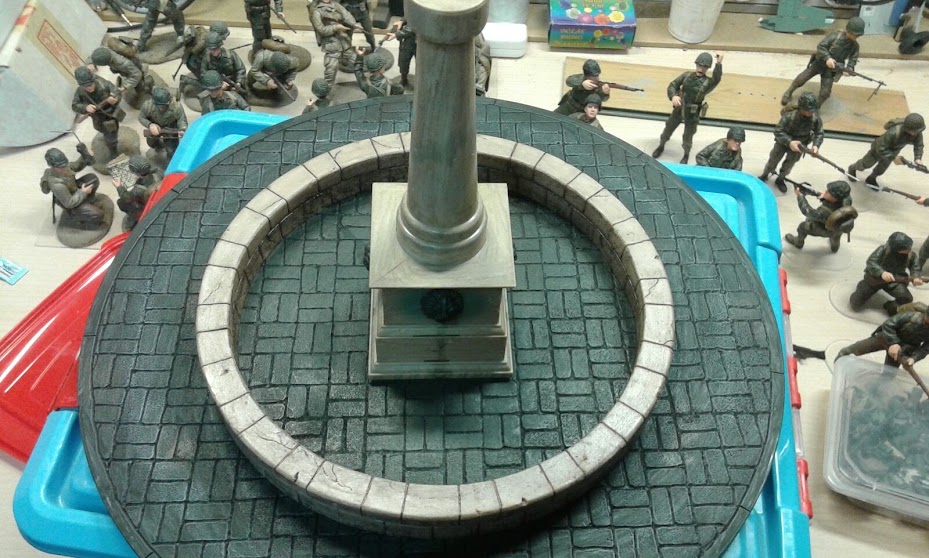
While another group member of the PzGr. Tarraco is finishing two super detailed 15cm sfF18 (i will post a complete report once they are finished), two of us have designed and build the main square of the future French town that will be built in the Panzodrom, with a working fountain and lamps.
So here you are a little step by step
The main square is 58x58cm.
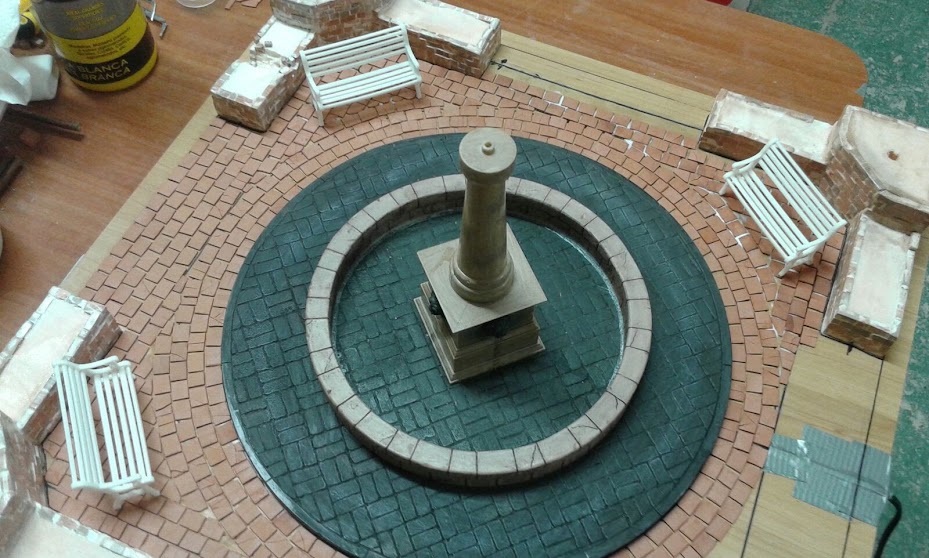
This is the fountain


the work to made her functional begins

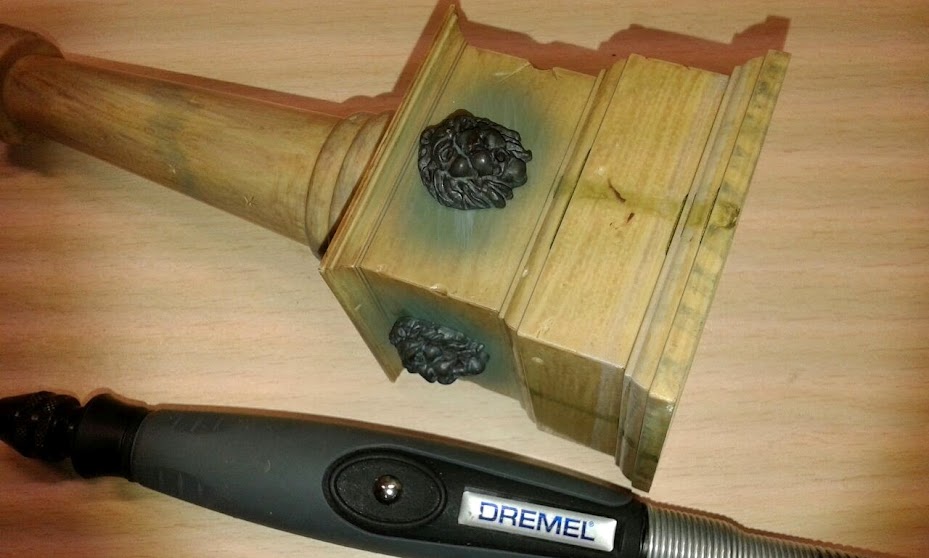
the water pump, with a piece of plastic that will glued inside to close the upper part of the statue base so there will be not losing of water pressure

the first test is a success

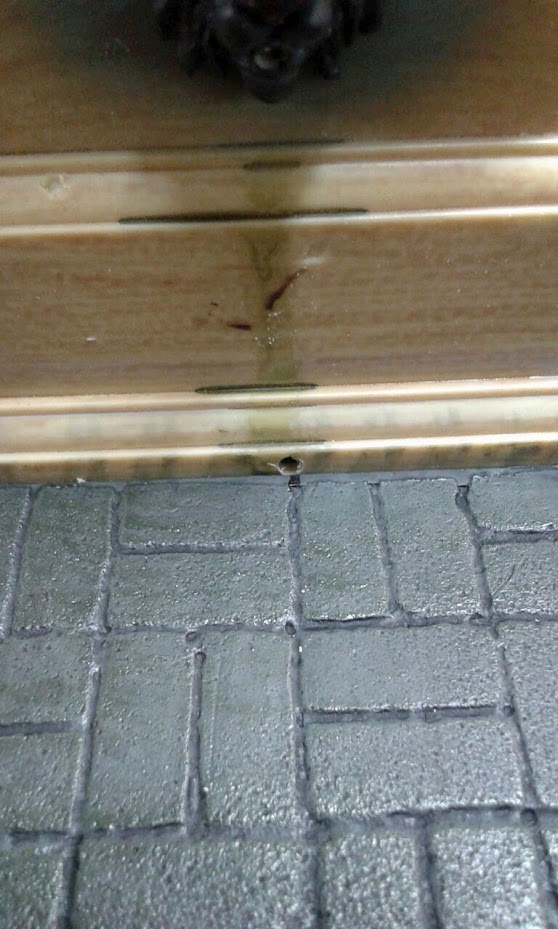
These little holes are there so the water can recirculate, they are invisible while under water
first test with the assembly done


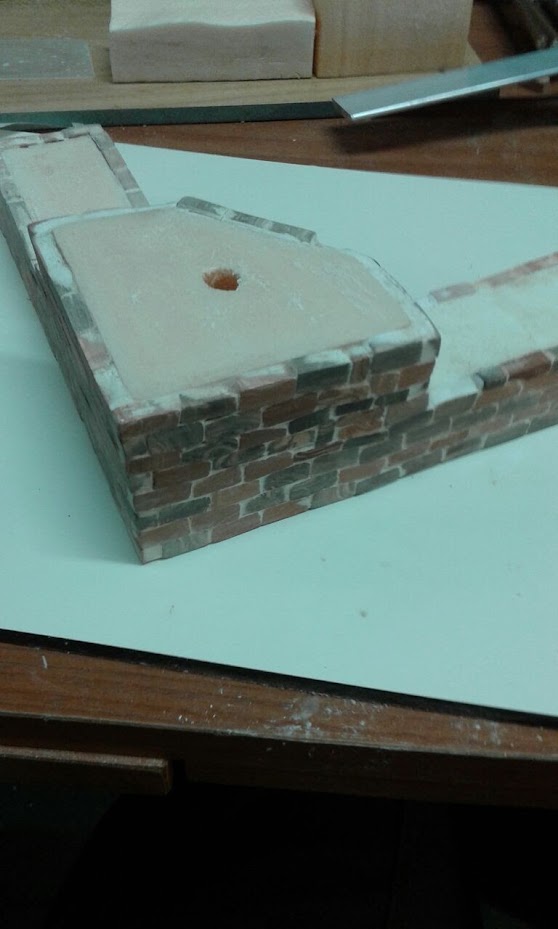
now the decorating components of the square. They are made with polystyrene and real bricks


...
in these lasts weeks we have been very busy
Place de la ville Saint Michel
Hi again chaps
While another group member of the PzGr. Tarraco is finishing two super detailed 15cm sfF18 (i will post a complete report once they are finished), two of us have designed and build the main square of the future French town that will be built in the Panzodrom, with a working fountain and lamps.
So here you are a little step by step
The main square is 58x58cm.
This is the fountain
the work to made her functional begins
the water pump, with a piece of plastic that will glued inside to close the upper part of the statue base so there will be not losing of water pressure
the first test is a success
These little holes are there so the water can recirculate, they are invisible while under water
first test with the assembly done
now the decorating components of the square. They are made with polystyrene and real bricks
...
Last edited by Jussek; 05-14-2016 at 11:28 AM.
05-14-2016, 11:42 AM
#57
Thread Starter
Join Date: May 2011
Location: Creixell, SPAIN
Posts: 191
Likes: 0
Received 0 Likes
on
0 Posts
...
the day that the other members of our club �meet� the square ;-)


the tiles are too from clay


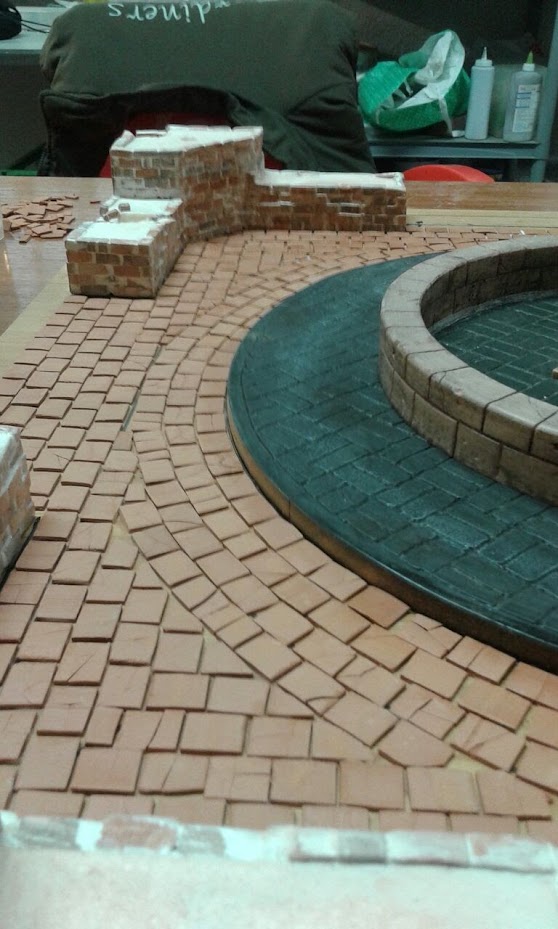
this was a really laborious work, to glue the tiles one by one�

the next decorative component, the public benches, made with a 3d printer and painted with acrylics and oils

already primed

the metal parts are painted with Tamiya gun metal and black, and then with black oils, and the wood parts are painted with Tamiya flesh and then with oils.


Meanwhile, the work on the square continues

The land for the gardens is made with pine bark, pulverized

First lights test


After the tiles are finished, we protected the work with varnish, so the weathering will no harm them too much
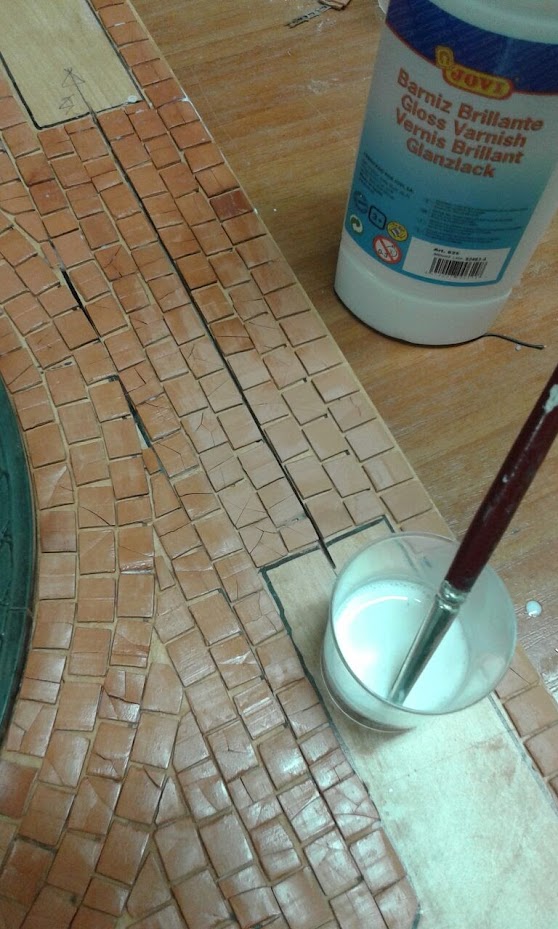

Applying the grout to the tiles
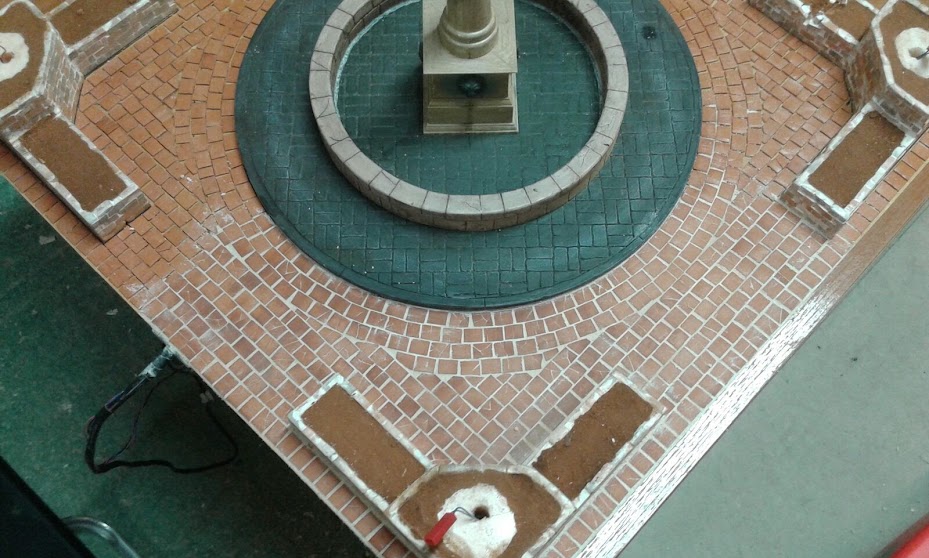


Weathering the square floor

some damage to one ot the gardens, some bullet holes and an AP impact

And the lampposts, here we are following the same technic used on the bridge, so they can be removed in case of necessity


A short video so you can see the water running
https://youtu.be/8hDctG2YnpA
best regards
the day that the other members of our club �meet� the square ;-)
the tiles are too from clay
this was a really laborious work, to glue the tiles one by one�
the next decorative component, the public benches, made with a 3d printer and painted with acrylics and oils
already primed
the metal parts are painted with Tamiya gun metal and black, and then with black oils, and the wood parts are painted with Tamiya flesh and then with oils.
Meanwhile, the work on the square continues
The land for the gardens is made with pine bark, pulverized
First lights test
After the tiles are finished, we protected the work with varnish, so the weathering will no harm them too much
Applying the grout to the tiles
Weathering the square floor
some damage to one ot the gardens, some bullet holes and an AP impact
And the lampposts, here we are following the same technic used on the bridge, so they can be removed in case of necessity
A short video so you can see the water running
https://youtu.be/8hDctG2YnpA
best regards
05-14-2016, 11:50 AM
#58
Thread Starter
Join Date: May 2011
Location: Creixell, SPAIN
Posts: 191
Likes: 0
Received 0 Likes
on
0 Posts
hi again chaps!
some new advances on the Pz.Gr. Tarraco scenery ;D
we are making several small 'scenes' with figures build up on them, so we will put them on the ground to achieve some sort of dynamism.
time for some US forces, as we have several M1919 Browing MG, we built two of them in these little scenes in order to quick put them on place when necessary. the first one, with the gunners in fire position, and the second one, with the gunners on the run in the moment they were about to 'plant' the tripod mount and the gun.
the scene composition


the building up with rocks, stones, tree trunks, and ground, all mixed and fixed with carpenter's glues and water (as always)

after the ground is dry and rock solid, we glue the figures in place


here the second scene


when all the ground will be dry and hard, we will put some green on these scenes, unfortunatelly, I thouthg too late to put the 'green' beforehand :/ , like in the next scene, using some strips of artificial grass...
in this new scene will be a 7,5cm PaK40 concealed behind a trunk and some broken wooden fences
the gun already painted

the scene composition


with the turfs and shrubbery, tree trunk, rocks and figure's bases glued in place (not the gun)

covering the shell with the everlasting compound mix of little stones, beach sand and real dirt and ground with diluted white glue

putting the gun and crew in place in order to get the marks on the ground, we will glue them next week, once the compound had dried.

stay tuned because we will use a lot of ammunition boxes for this gun and the 7 FlaK36 that will be really dazzling masterpieces! ;D 8) designed and built by a member of our club, made of real wood, they will be the most accurate and detailed models probably you have ever seen. I can�t post pics yet, he is building up the catalog and instruction sheets for the assembly of every model, because he has a shop and they will be on sale soon... :thumbup:
that's all for now!
best regards and thanks for watching!!
some new advances on the Pz.Gr. Tarraco scenery ;D
we are making several small 'scenes' with figures build up on them, so we will put them on the ground to achieve some sort of dynamism.
time for some US forces, as we have several M1919 Browing MG, we built two of them in these little scenes in order to quick put them on place when necessary. the first one, with the gunners in fire position, and the second one, with the gunners on the run in the moment they were about to 'plant' the tripod mount and the gun.
the scene composition
the building up with rocks, stones, tree trunks, and ground, all mixed and fixed with carpenter's glues and water (as always)
after the ground is dry and rock solid, we glue the figures in place
here the second scene
when all the ground will be dry and hard, we will put some green on these scenes, unfortunatelly, I thouthg too late to put the 'green' beforehand :/ , like in the next scene, using some strips of artificial grass...
in this new scene will be a 7,5cm PaK40 concealed behind a trunk and some broken wooden fences
the gun already painted
the scene composition
with the turfs and shrubbery, tree trunk, rocks and figure's bases glued in place (not the gun)
covering the shell with the everlasting compound mix of little stones, beach sand and real dirt and ground with diluted white glue
putting the gun and crew in place in order to get the marks on the ground, we will glue them next week, once the compound had dried.
stay tuned because we will use a lot of ammunition boxes for this gun and the 7 FlaK36 that will be really dazzling masterpieces! ;D 8) designed and built by a member of our club, made of real wood, they will be the most accurate and detailed models probably you have ever seen. I can�t post pics yet, he is building up the catalog and instruction sheets for the assembly of every model, because he has a shop and they will be on sale soon... :thumbup:
that's all for now!
best regards and thanks for watching!!
05-28-2016, 09:10 AM
#63
Thread Starter
Join Date: May 2011
Location: Creixell, SPAIN
Posts: 191
Likes: 0
Received 0 Likes
on
0 Posts
hi again chaps
while i'm waiting for my friend to build the ammo boxes so i can put them on the scene base, i call this item 'almost' finished
the old and broken wood fences:


some pictures with sunlight and some on the shadow


meanwhile... the dragon teeth production goes on

best regards
while i'm waiting for my friend to build the ammo boxes so i can put them on the scene base, i call this item 'almost' finished
the old and broken wood fences:
some pictures with sunlight and some on the shadow
meanwhile... the dragon teeth production goes on
best regards
05-28-2016, 11:47 AM
#64

Everything is just wonderful. The fact that building all the scenery is almost a hobby all in it's own. the time involved is incredible. In some cases more work and longer hours than building the vehicles them selves. Well worth the effort when you get results like you have. Well done.
05-29-2016, 09:55 AM
#66
Like what you guys have been doing for your battle field!!!!
08-09-2016, 02:36 AM
#68
Thread Starter
Join Date: May 2011
Location: Creixell, SPAIN
Posts: 191
Likes: 0
Received 0 Likes
on
0 Posts
Hello again gentelmen
We haven't been still in this hot summer time
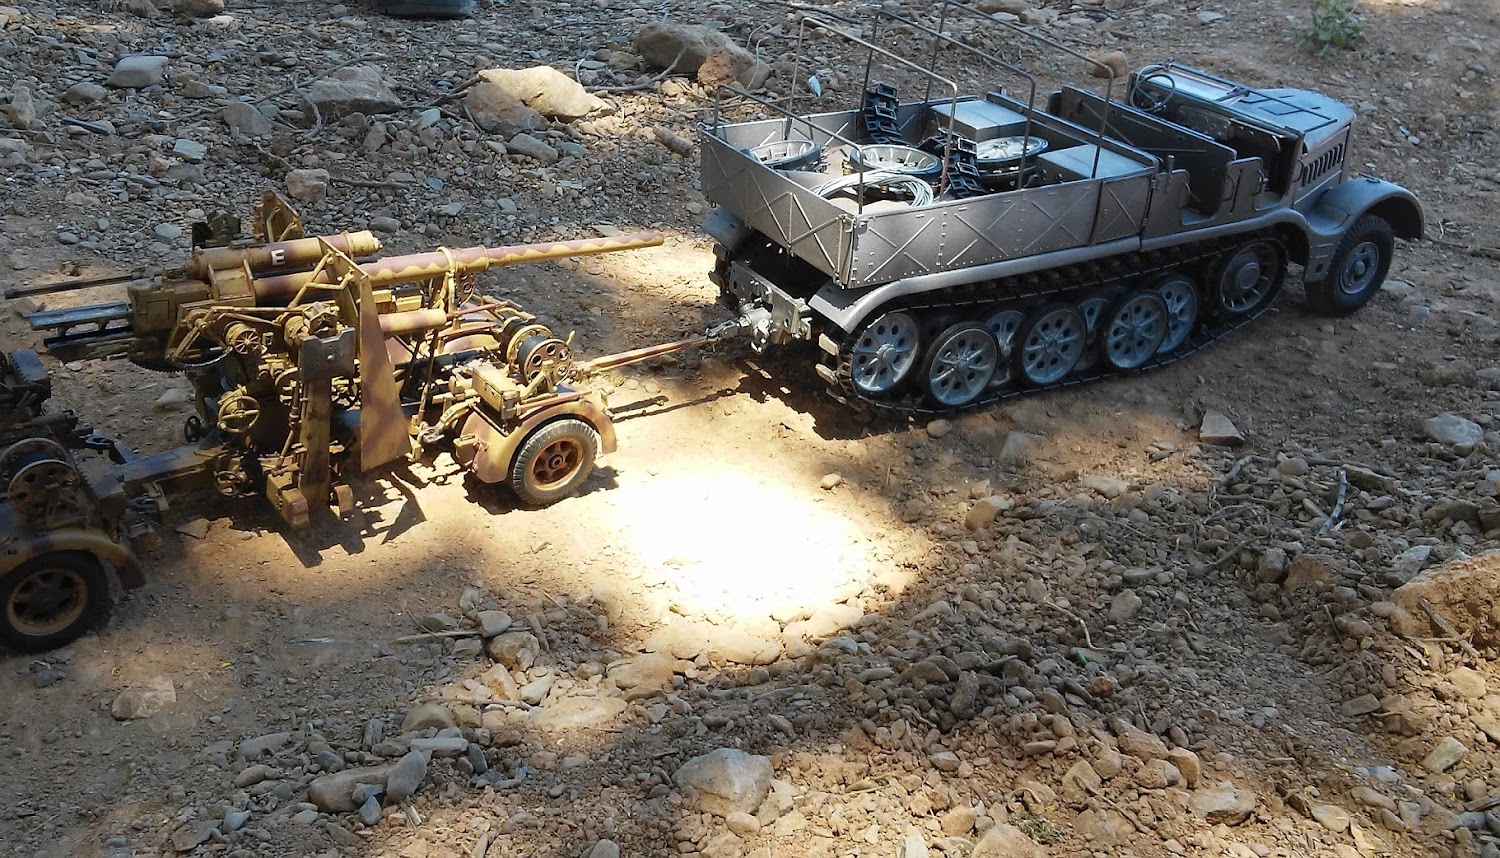
Some easy jobs have been done, one of the 8,8cm FlaK36 has been made a runner to be towed easely by the famo, and one of the SdKfz251 has been repainted. This will remain static, the two others we own will became RC
The 88's boggies have to be modified so the wheels can turn easely, also the towing bar pivot and the wheels pivots have to be modified so they can move freely
The boggies components disassembled

Some pins swaped by screws and it will have free movement, also the tween wheels axle has been changed.

Then the camo was applied


It works!
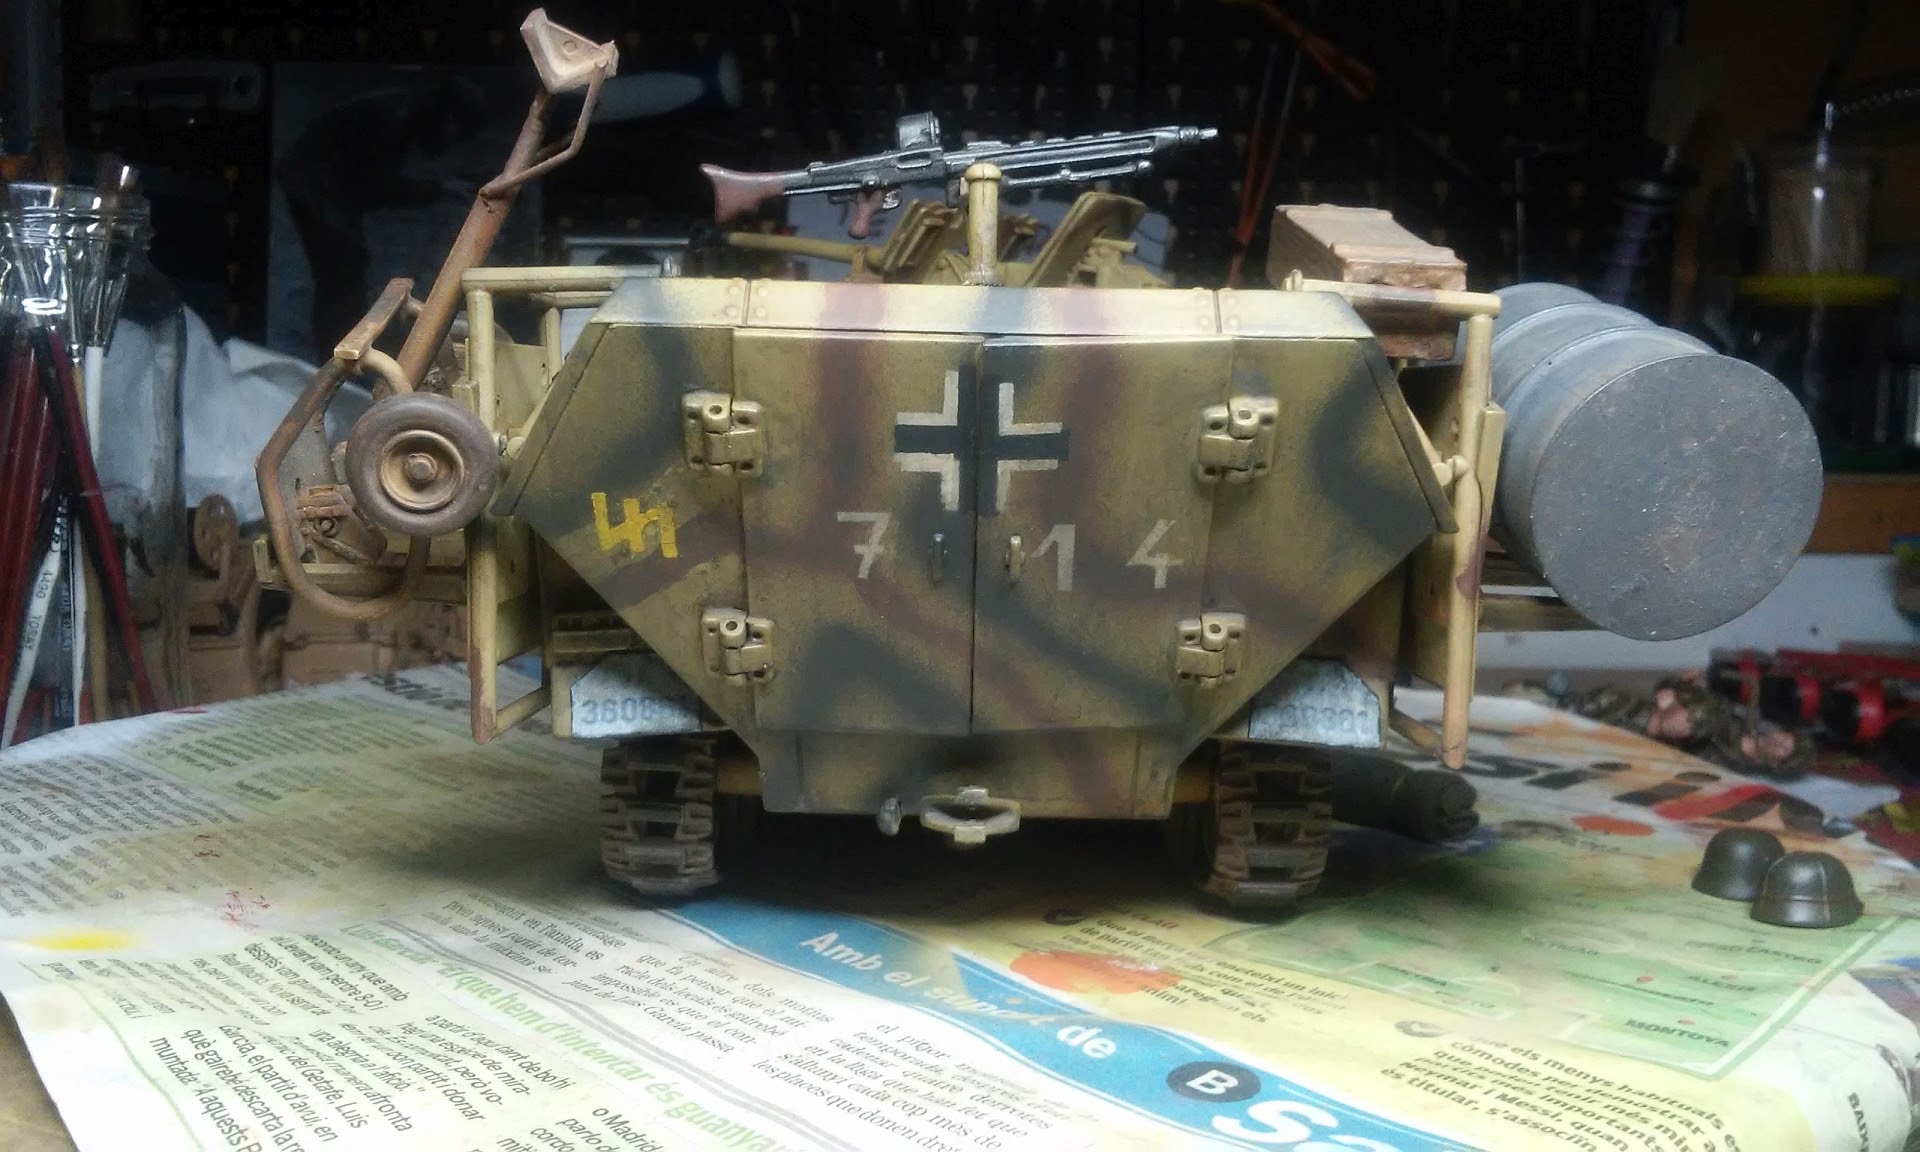
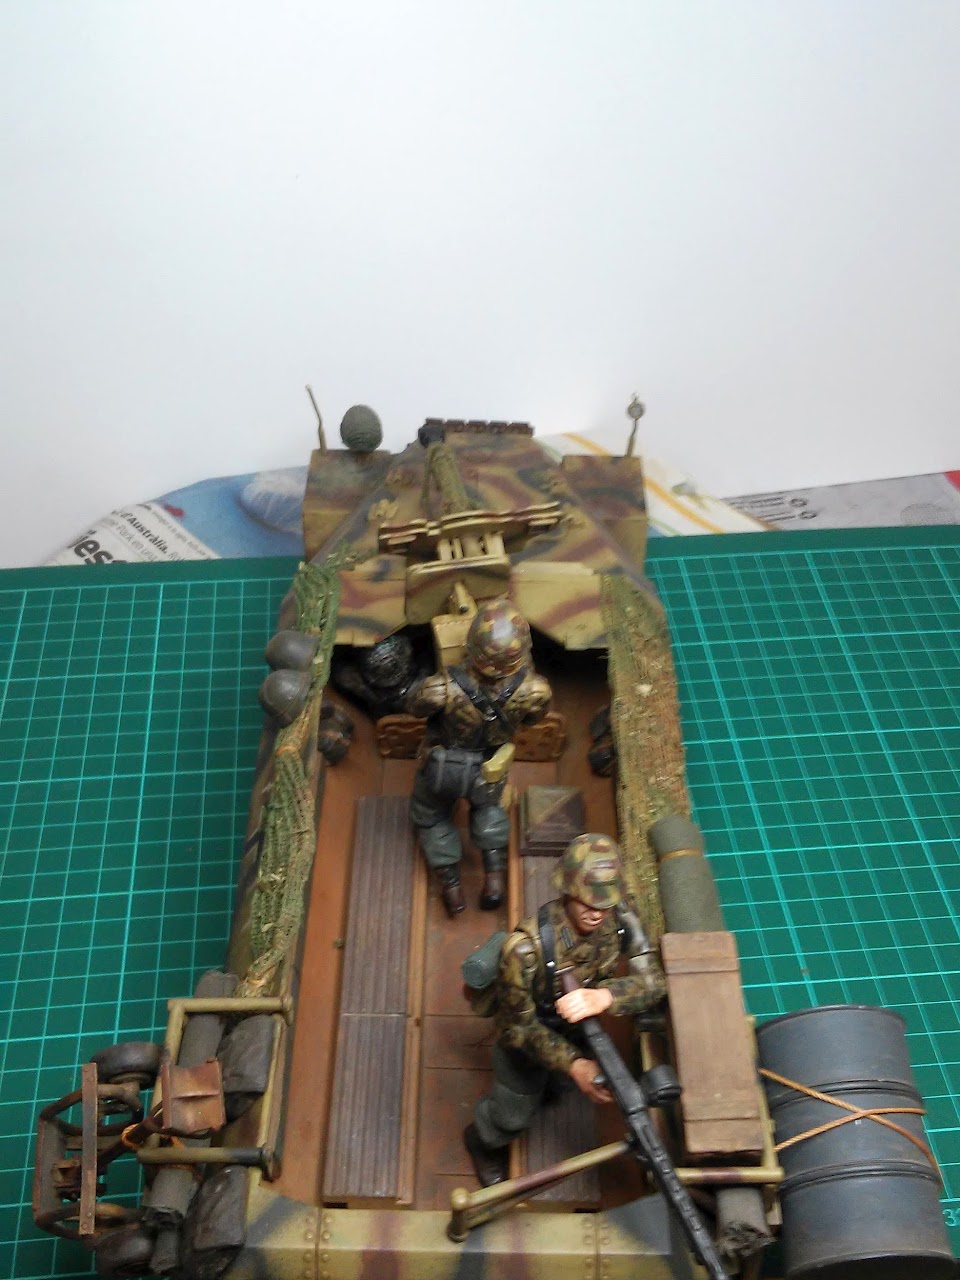
Now time for the new paint job for the SdKfz251


Here my first big mistake, i put the numerals inverted on the rigth side... so i will have then to plece there a convenient camo net...


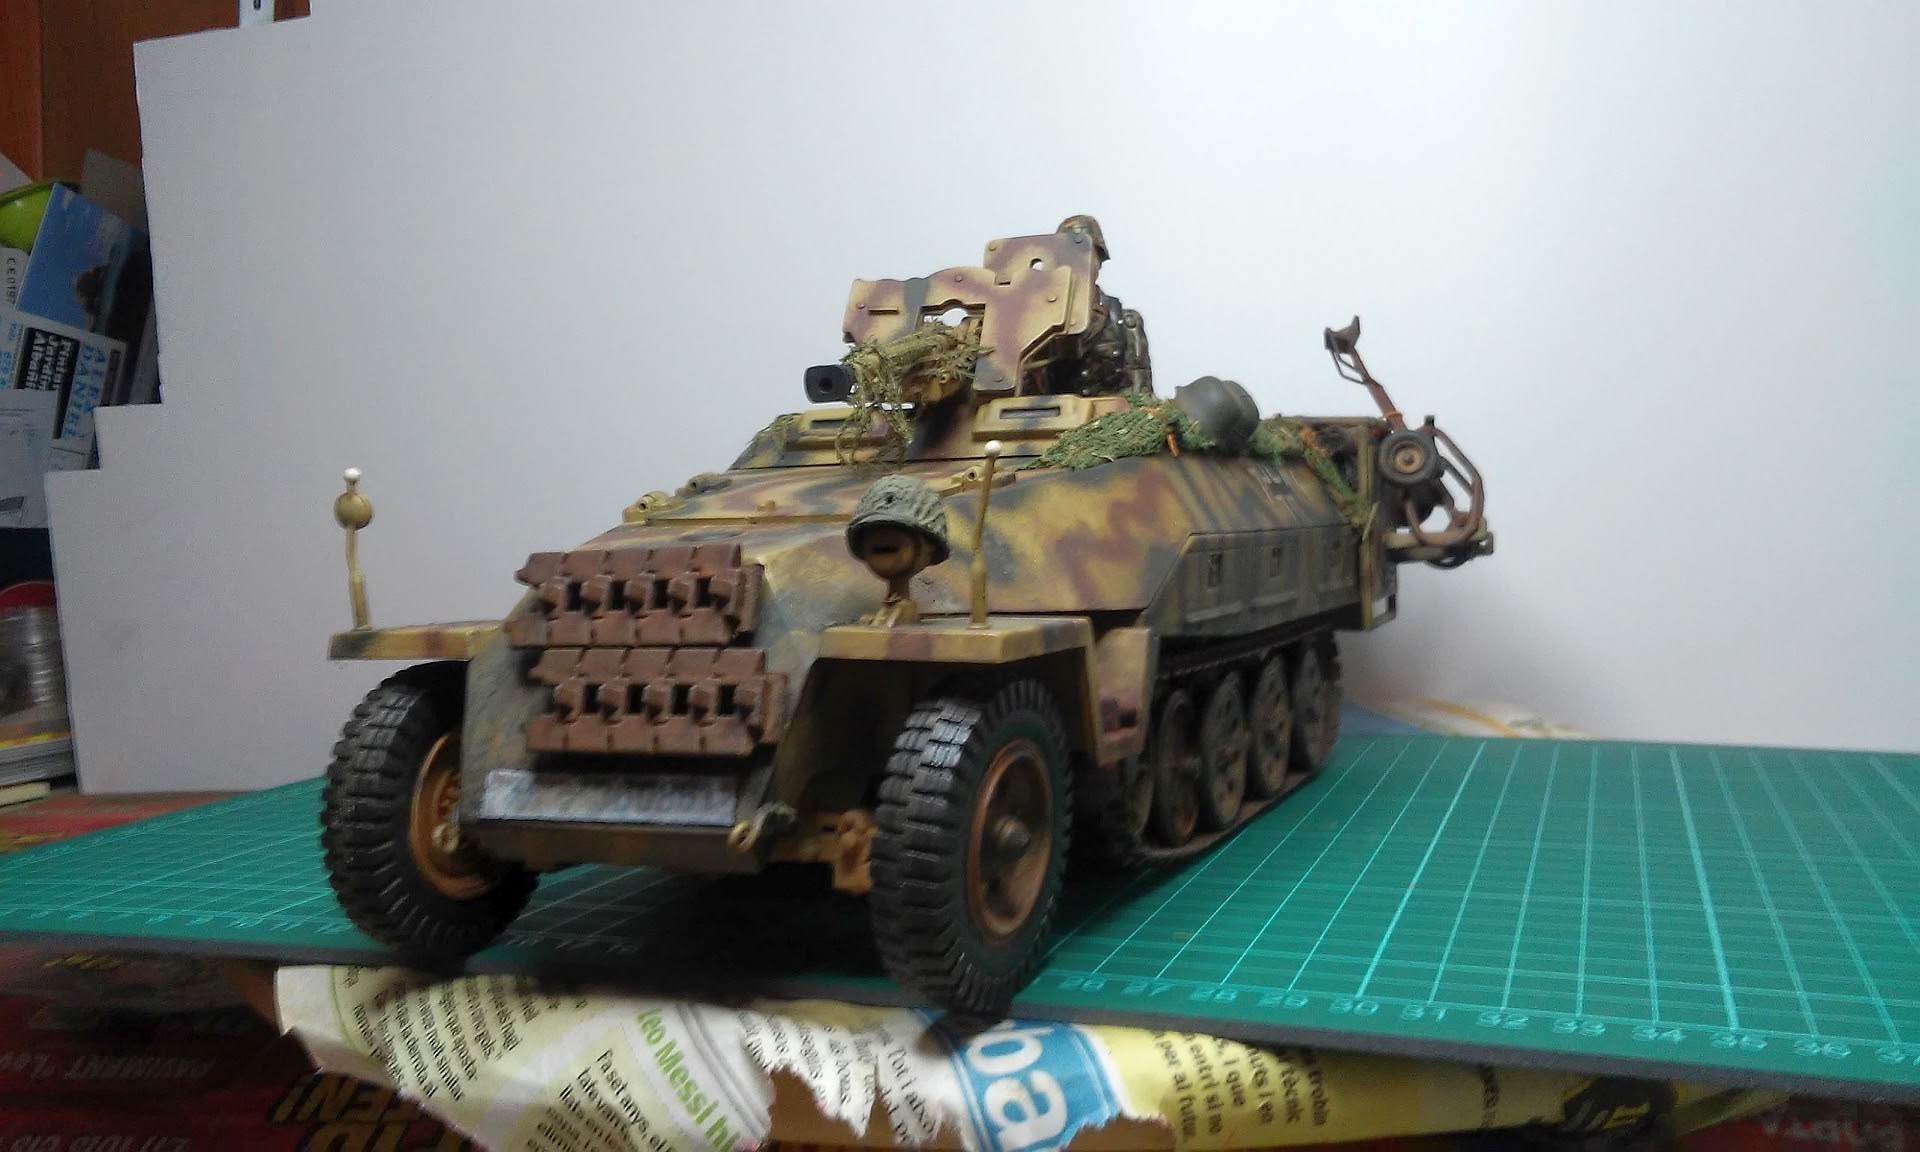
Finally it's 99%done, the last weatering i always do on our static models is the dust on the lower parts mainly, and i use real dust from the Panzodrom..., so this dusting is still pending...


Best regards
We haven't been still in this hot summer time
Some easy jobs have been done, one of the 8,8cm FlaK36 has been made a runner to be towed easely by the famo, and one of the SdKfz251 has been repainted. This will remain static, the two others we own will became RC
The 88's boggies have to be modified so the wheels can turn easely, also the towing bar pivot and the wheels pivots have to be modified so they can move freely
The boggies components disassembled
Some pins swaped by screws and it will have free movement, also the tween wheels axle has been changed.
Then the camo was applied
It works!
Now time for the new paint job for the SdKfz251
Here my first big mistake, i put the numerals inverted on the rigth side...
so i will have then to plece there a convenient camo net...Finally it's 99%done, the last weatering i always do on our static models is the dust on the lower parts mainly, and i use real dust from the Panzodrom...
, so this dusting is still pending...Best regards
 08-09-2016, 10:16 AM
#72
Wow, another nice build for the field!!!
08-09-2016, 11:58 PM
#73
Join Date: Jan 2016
Location: West Norriton, Pa.
Posts: 117
Likes: 0
Received 0 Likes
on
0 Posts
Wow!! Been reading this thread for the first for the last 3-4 hours (got stuck on the photos) and I am awe struck! I feel like I just returned from Disneyworld! If I had the cash, I'd probably be on a plane to Spain just to see this work in person. Mind blowing!
08-10-2016, 04:57 AM
#74
Thread Starter
Join Date: May 2011
Location: Creixell, SPAIN
Posts: 191
Likes: 0
Received 0 Likes
on
0 Posts
Wow! You overestimate our work 
I will never thank you enough for your so kind comments and this encourage me to follow the work!
LOL! We have time, but not all we want!
Be patient mate, the works are in progress and will be long time before we finish it!
Best regards
I will never thank you enough for your so kind comments and this encourage me to follow the work!
Best regards