


Strato50's M3 GRANT
 09-25-2015, 06:05 AM
#1

Thread Starter

Join Date: Jan 2006
Location: Hamilton,
ON, CANADA
Posts: 1,422
Likes: 0
Received 7 Likes
on
7 Posts
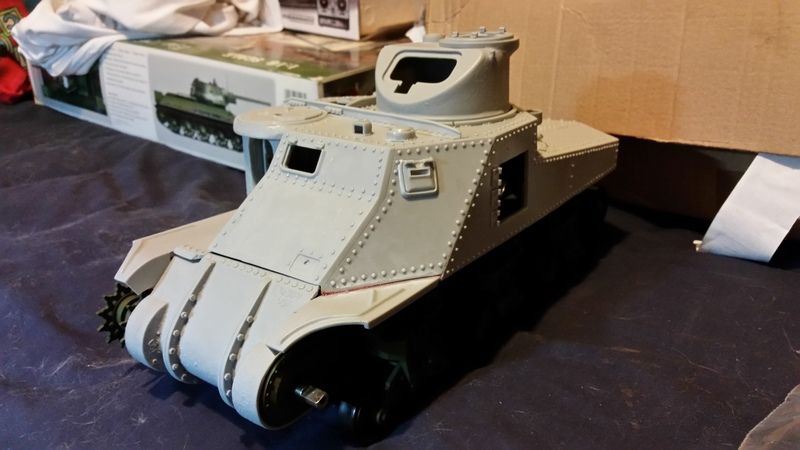
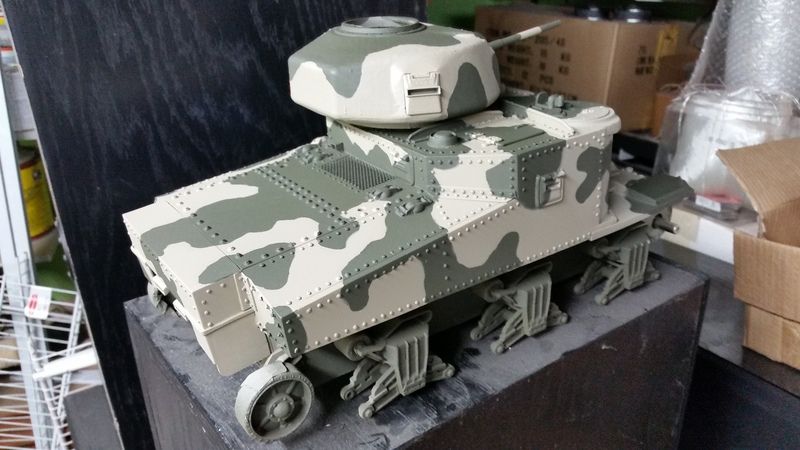
Well as some of you have known and possibly got a peek at I've been steadily grinding away at a Grant, and I've decided to begin the build thread 
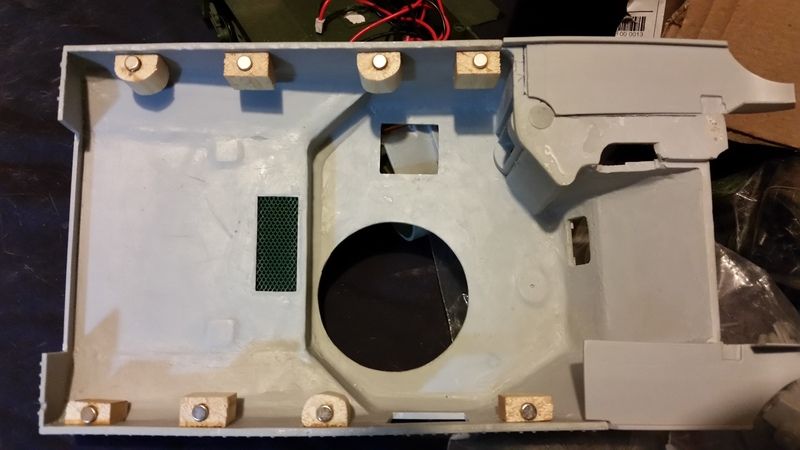
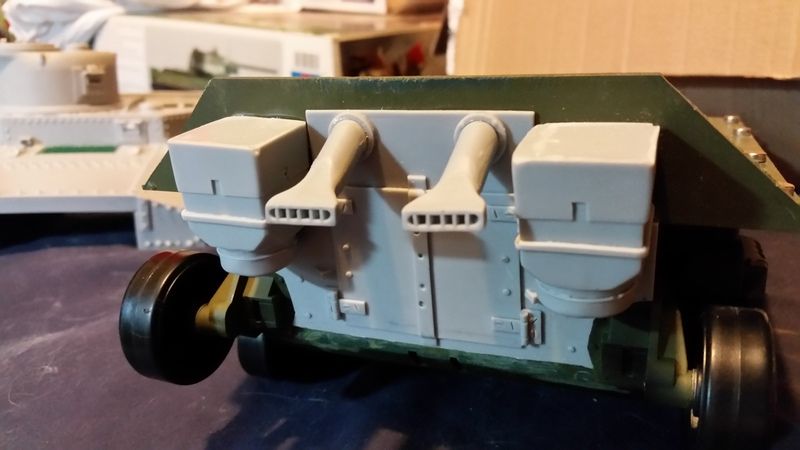
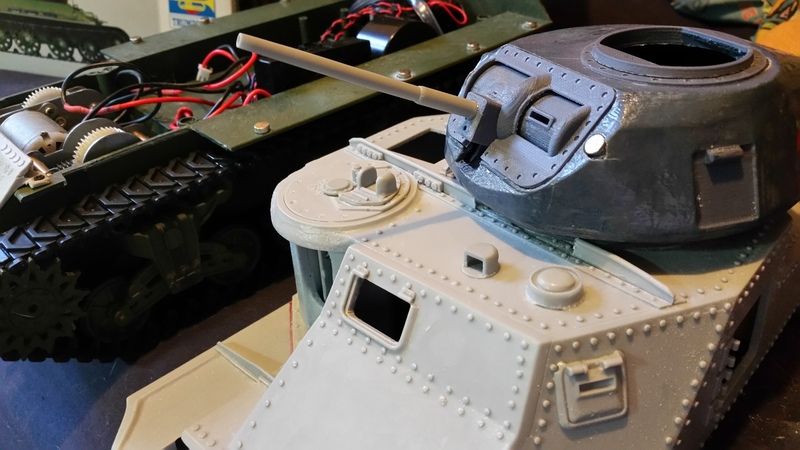
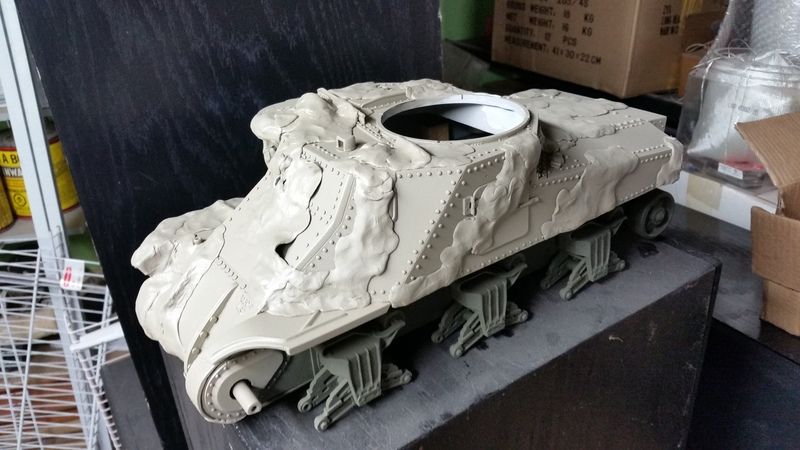
For starters, the kit is resin and included hatches, both guns and turret, rear panel and exhaust / air filters. Fit and finish is normal for a resin mold and I really had no major issues. There was a bit of hull warping but I have it secured nice and tight. The kit was ordered from a fellow in Hungary who was advertising on the Facebook group "World Rc Tank Community"
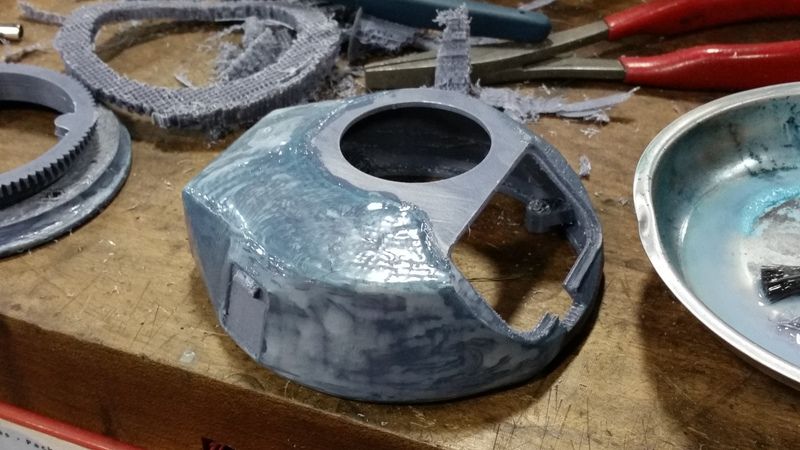
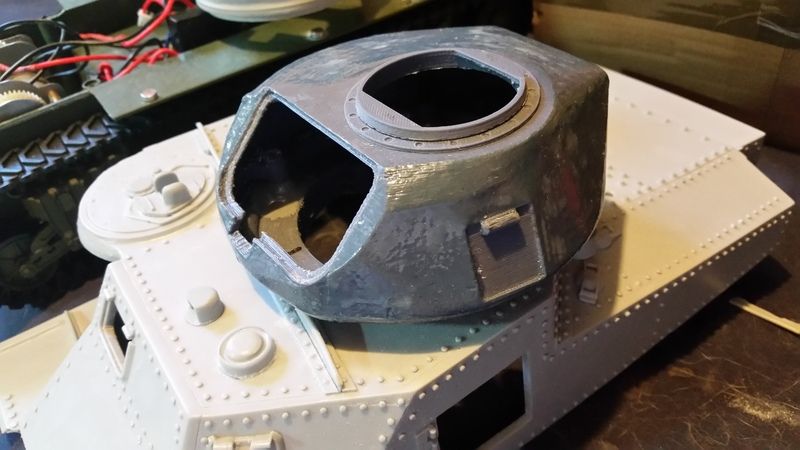
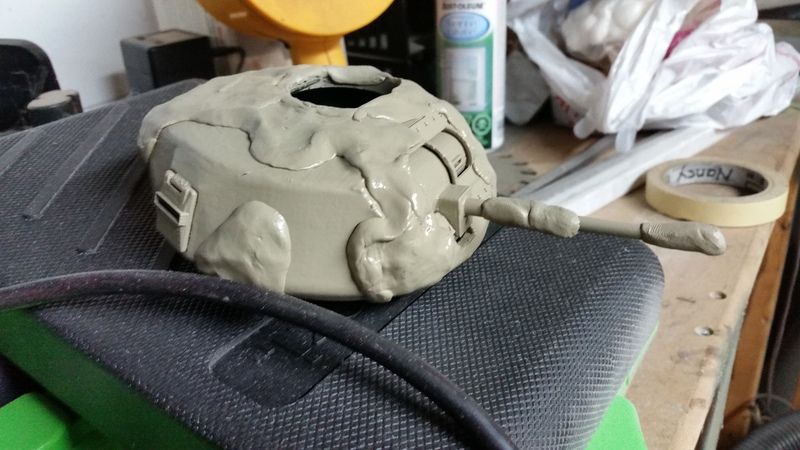
Now for the interesting bit.. The turret I had made for me by an RCU member who is into 3D printing (Woz). You may have seen a few links posted here regarding his builds, including a functional Panzer I. I'm really impressed with his work, which includes the mantlet, entire gun elevation assembly, two piece turret & a fully functional turret rotation gear. All 3D printed. I really couldn't imagine a better, stronger or cleaner way to do this.
Anyhoo, pictures!
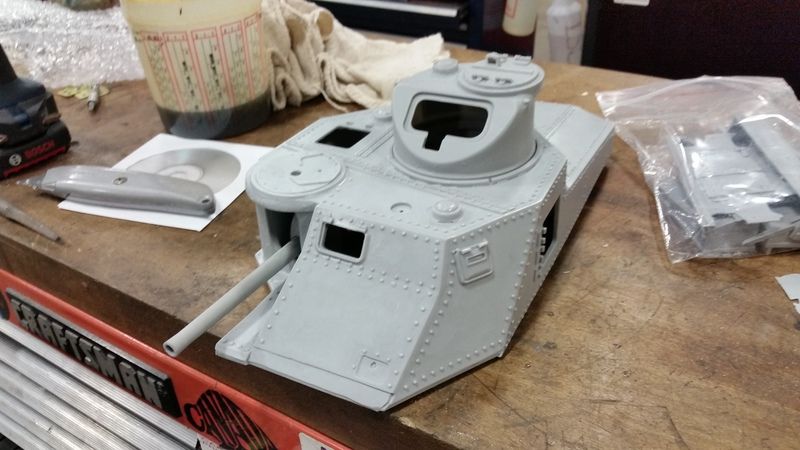

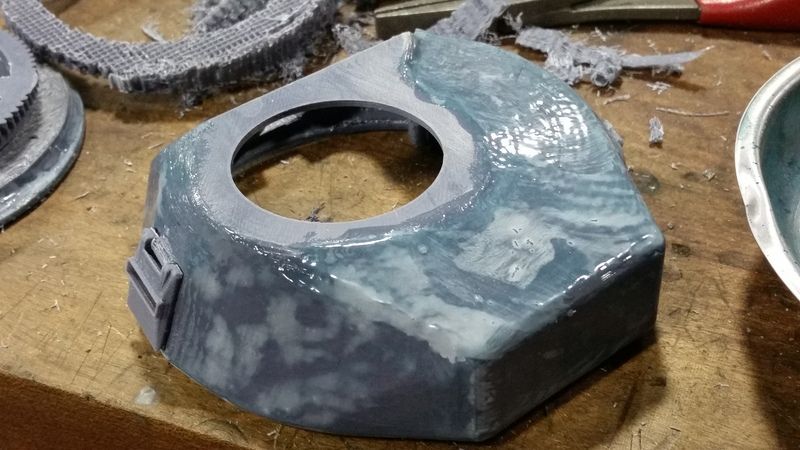


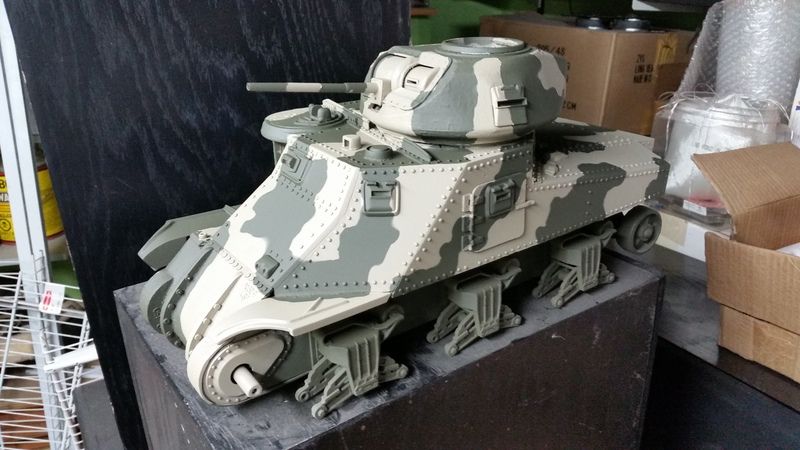
Turret rotation is planned to be on a continual rotation micro servo, modified to run on regular DC current powered by a HL / Clark board. No plans to put the 75mm gun on servos as I hope to have the 37mm fully functional in time. I'm not a grand master... yet
Extra points if anyone can identify the specific tank I'm attempting to represent!
For starters, the kit is resin and included hatches, both guns and turret, rear panel and exhaust / air filters. Fit and finish is normal for a resin mold and I really had no major issues. There was a bit of hull warping but I have it secured nice and tight. The kit was ordered from a fellow in Hungary who was advertising on the Facebook group "World Rc Tank Community"
Now for the interesting bit.. The turret I had made for me by an RCU member who is into 3D printing (Woz). You may have seen a few links posted here regarding his builds, including a functional Panzer I. I'm really impressed with his work, which includes the mantlet, entire gun elevation assembly, two piece turret & a fully functional turret rotation gear. All 3D printed. I really couldn't imagine a better, stronger or cleaner way to do this.
Anyhoo, pictures!
Turret rotation is planned to be on a continual rotation micro servo, modified to run on regular DC current powered by a HL / Clark board. No plans to put the 75mm gun on servos as I hope to have the 37mm fully functional in time. I'm not a grand master... yet
Extra points if anyone can identify the specific tank I'm attempting to represent!

 09-25-2015, 10:32 AM
#3

Kina still waiting to get back to my project. I fugured on using a continous servo as well but havent picked out how to match up gears, interested to hear which ones used?
09-25-2015, 10:54 AM
#4


You could also hack a turret rotation unit and take out the final drive gear. Then grind it down, center it and attach to a plastic servo holder like below:
Then add some glue or Plastimorph to finalize it in place. If you just glue it, it can act as a servo saver.
Also, what a SWEET Grant you got there.... wanna trade?

Last edited by Imex-Erik; 09-25-2015 at 10:59 AM.
09-25-2015, 05:14 PM
#5
Looks great!!!
09-25-2015, 09:24 PM
#8
Thread Starter
Join Date: Jan 2006
Location: Hamilton,
ON, CANADA
Posts: 1,422
Likes: 0
Received 7 Likes
on
7 Posts
I would check out Clark's site and look for the Taigen Tiger 1 conversion and look at part A10. That should fit on a servo and looks to have the same pitch as the turret gear ring. I haven't got mine yet so I can't say for sure
You could also hack a turret rotation unit and take out the final drive gear. Then grind it down, center it and attach to a plastic servo holder like below:

Then add some glue or Plastimorph to finalize it in place. If you just glue it, it can act as a servo saver.
Also, what a SWEET Grant you got there.... wanna trade?
You could also hack a turret rotation unit and take out the final drive gear. Then grind it down, center it and attach to a plastic servo holder like below:
Then add some glue or Plastimorph to finalize it in place. If you just glue it, it can act as a servo saver.
Also, what a SWEET Grant you got there.... wanna trade?
He also has a small matching gear that will go onto my continual rotation servo.
 I just hack things together and add glue until they stop falling apart.
09-26-2015, 06:08 AM
I just hack things together and add glue until they stop falling apart.
09-26-2015, 06:08 AM
#9
Senior Member

Join Date: Nov 2006
Location: Grande Prairie,
AB, CANADA
Posts: 8,976
Likes: 0
Received 4 Likes
on
4 Posts
Lucky guy. That is a nice tank you got going there. I really appreciate the modeling skills you have incorporated on that build. Nice to see a thread of some one actually building something again..
Also like your reference to continuous servos. I have started using these as well. Basically with a continuous servo you hardly need a tank control board as the Receiver and radio can do almost all you need,
WOZ and his 3 D printing are really showcasing what that technology means to us. Not only for detail parts but for the mechanical side of things as well. That is one thing I really want to focus my attention on as I enter this retirement.
Thanks for sharing. It is an inspiration to get back building something again.
Last edited by YHR; 09-26-2015 at 06:11 AM.
09-26-2015, 07:19 AM
#10
Join Date: Nov 2011
Location: Barboursville , VA
Posts: 268
Likes: 0
Received 0 Likes
on
0 Posts
GREAT! I am also grinding it out with an M3 Grant.... I'm slowed down due to M3 Suspension and Track issues... I have sanded down the HL Tracks to simple pads... and am now working on the British pads that will be affixed to each pad... this is more laborious than anything else (nearly 250 pads) as they all have to
be individually cut and prepped then slowly, with time to set properly affixed to the each track link.... and plastic to hard rubber gluing is difficult and very time consuming indeed...of-coarse then comes the M3 Suspension with the "over-head" return rollers. This has also become quite tricky and I will keep you posted..
At this time I must shout out a HUGE THANK YOU to Warren... for without his generous efforts and awsome abilities, not much of this would be happening! Thank You Warren!!!!
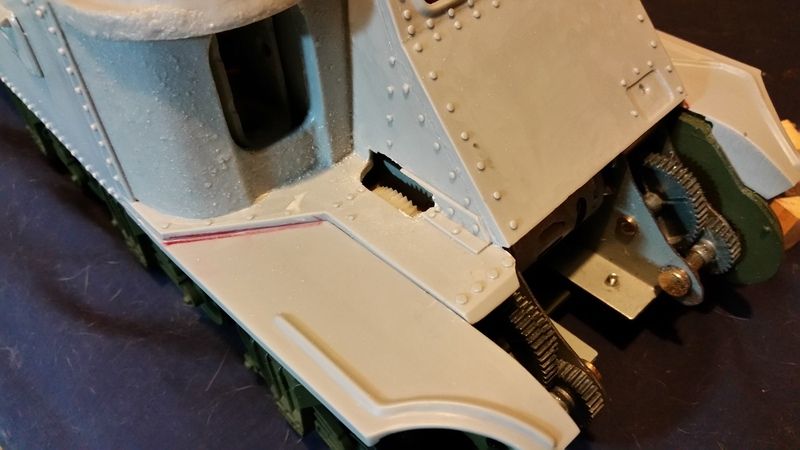
Back to your build... You have started an absolutely wonderful paint job.... I am quite far way from that at this time.... I see you had to grind away space in the kit's rigtht side of the main gun's armor to fit the left motor gear... Me too, but I have a plan for that... also I see you had to remove material from the top front
cross brace to make the turret fit and rotate properly.. Mann I have been thinking about how to that with out such a drastic removal of material... maybe shortening the height of the cross members?... who knows....
Finally, I am very interested in how you intend to make the turret function (rotation and Gun elevation) I have an idea of how to make it rotate, but elevation is more tricky... I would love to see your solution !!! ... the main 75mm is also a big hole as I haven't thought about it yet...
I will post images as soon as I have something to show... right now it's all just a lot of prep-work and blunt fitting etc...
P.S. I was wondering why you decided to do a late model Burma / India / Australian Grant and didn't go with the Early M3 Lee with the the commanders cupola and the shorter 75mm main gun maybe a barrel counter weight... I actually have a Lee Commanders Cupola and Turret...as well as an extra side hull hatch..
It's a slightly odd bird, but it grows on you...
be individually cut and prepped then slowly, with time to set properly affixed to the each track link.... and plastic to hard rubber gluing is difficult and very time consuming indeed...of-coarse then comes the M3 Suspension with the "over-head" return rollers. This has also become quite tricky and I will keep you posted..
At this time I must shout out a HUGE THANK YOU to Warren... for without his generous efforts and awsome abilities, not much of this would be happening! Thank You Warren!!!!
Back to your build... You have started an absolutely wonderful paint job.... I am quite far way from that at this time.... I see you had to grind away space in the kit's rigtht side of the main gun's armor to fit the left motor gear... Me too, but I have a plan for that... also I see you had to remove material from the top front
cross brace to make the turret fit and rotate properly.. Mann I have been thinking about how to that with out such a drastic removal of material... maybe shortening the height of the cross members?... who knows....
Finally, I am very interested in how you intend to make the turret function (rotation and Gun elevation) I have an idea of how to make it rotate, but elevation is more tricky... I would love to see your solution !!! ... the main 75mm is also a big hole as I haven't thought about it yet...
I will post images as soon as I have something to show... right now it's all just a lot of prep-work and blunt fitting etc...
P.S. I was wondering why you decided to do a late model Burma / India / Australian Grant and didn't go with the Early M3 Lee with the the commanders cupola and the shorter 75mm main gun maybe a barrel counter weight... I actually have a Lee Commanders Cupola and Turret...as well as an extra side hull hatch..
It's a slightly odd bird, but it grows on you...
Last edited by Jhdumas; 09-26-2015 at 07:47 AM.
 09-28-2015, 10:12 AM
#12
Thread Starter
Join Date: Jan 2006
Location: Hamilton,
ON, CANADA
Posts: 1,422
Likes: 0
Received 7 Likes
on
7 Posts
Hey Woz, thank you again for taking the time for the print!
I actually really like it. It's easy to drill and surprisingly strong too. It holds a CA glue bond REALLY well, I'm happy about that.
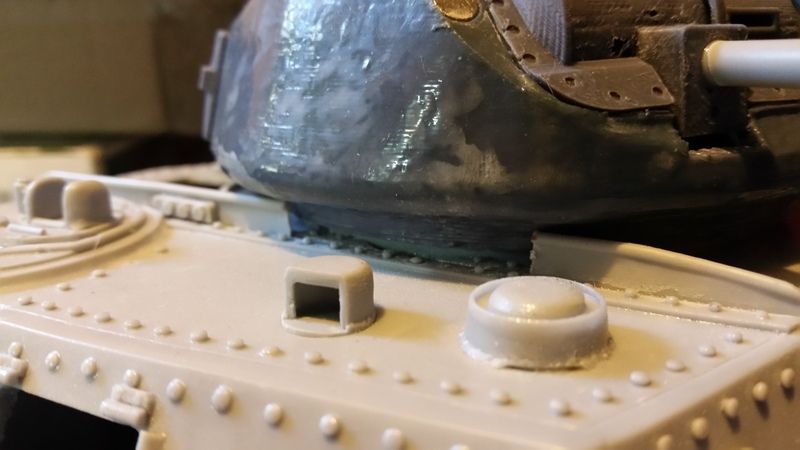
I've actually tapped several M3 holes for the turret base, and being only in plastic they've been doing very well.
I actually really like it. It's easy to drill and surprisingly strong too. It holds a CA glue bond REALLY well, I'm happy about that.
I've actually tapped several M3 holes for the turret base, and being only in plastic they've been doing very well.
09-28-2015, 12:48 PM
#13
I ordered black abs sheet and cut it to size to glue onto my tracks after dremmeling offf the chevrons.
To make them stick, i used an exacto to slice into the track and the pad to allow more adheasion for the CA. I have driven mine around a bit and no loose pads.
i have a video of it driving on my thread and also on my website on this page, http://richardsjohnson.net/id27.html
good luck with the track pads, it was very time consuming but worth the appearance they give.
09-28-2015, 07:31 PM
#14
Thread Starter
Join Date: Jan 2006
Location: Hamilton,
ON, CANADA
Posts: 1,422
Likes: 0
Received 7 Likes
on
7 Posts
I'm thinking about doing something similar, but with any kind of high density foam rubber if I can find some.
Not sure how that will behave on damp grass... but it'll make any hard surface a joy.
Not sure how that will behave on damp grass... but it'll make any hard surface a joy.
09-30-2015, 04:53 AM
#15
Senior Member
Join Date: Nov 2006
Location: Grande Prairie,
AB, CANADA
Posts: 8,976
Likes: 0
Received 4 Likes
on
4 Posts
Michaels has high density foam sheets, called scenic foam. I used these on my Leopard. I sanded the track face smooth( Pershing tracks) and then CA squares of this foam on the tracks. So far so good
10-01-2015, 07:08 PM
#16

hey Jordan if you want i can send you a piece of high density sign foam you can cut it to any shape you want it's sandable and then you could put Plasti Dip on it for grip


10-03-2015, 07:00 AM
#17
Thread Starter
Join Date: Jan 2006
Location: Hamilton,
ON, CANADA
Posts: 1,422
Likes: 0
Received 7 Likes
on
7 Posts
I'll take a look asap! Greg no need yet, if I find something for $3 I'll be fine.
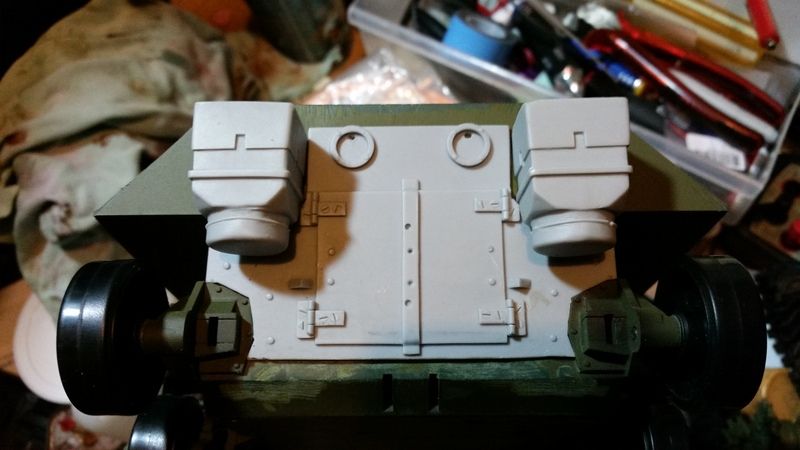
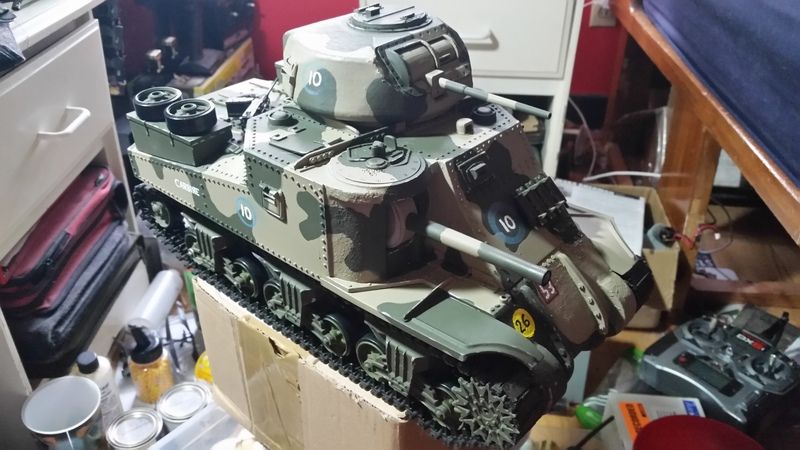
Here's a question for you historical types... would a large .30 or .50 machine gun ever have made it's way onto a Grant? I have not seen any in pictures, I doubt they were mounted, but I'm hoping to get some use out of all the accessories I have here.
Like so.

Here's a question for you historical types... would a large .30 or .50 machine gun ever have made it's way onto a Grant? I have not seen any in pictures, I doubt they were mounted, but I'm hoping to get some use out of all the accessories I have here.
Like so.
10-03-2015, 07:53 AM
#18
I believe that the British only mounted US .30 cal's on tanks. I think the decider may be that the standard British tank MG was the BESA 7.92mm, the standard rifle was .303, and there was a Vickers .50 in service already, so taking the US .30 Cal made it unique, while the US .50 was open to confusion for supply units?
10-03-2015, 08:19 AM
#19
Found a couple with 30. cals
https://c1.staticflickr.com/9/8263/8613173402_2f69e33055_b.jpg
http://farm6.static.flickr.com/5345/...23dea66b_m.jpg
https://c1.staticflickr.com/9/8263/8613173402_2f69e33055_b.jpg
http://farm6.static.flickr.com/5345/...23dea66b_m.jpg
10-05-2015, 05:52 AM
#21
Thread Starter
Join Date: Jan 2006
Location: Hamilton,
ON, CANADA
Posts: 1,422
Likes: 0
Received 7 Likes
on
7 Posts
Rex that looks like it completely belongs there I like it!
Did a bit more work.
Took a dremel sanding drum to my poor Sherman tracks.. actually turned out fairly well. Now to source some rubber

Tossed some FastWeld into a few nooks and crannies that I thought might cause problems down the road with rough play / driving.


Did a bit more work.
Took a dremel sanding drum to my poor Sherman tracks.. actually turned out fairly well. Now to source some rubber
Tossed some FastWeld into a few nooks and crannies that I thought might cause problems down the road with rough play / driving.
Last edited by Strato50; 10-06-2015 at 12:12 AM.
10-10-2015, 10:27 PM
#23
Thread Starter
Join Date: Jan 2006
Location: Hamilton,
ON, CANADA
Posts: 1,422
Likes: 0
Received 7 Likes
on
7 Posts
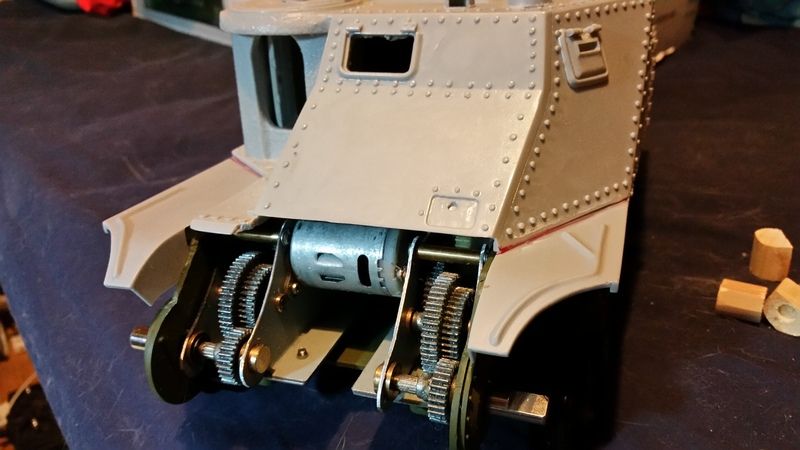
Bit more progess!
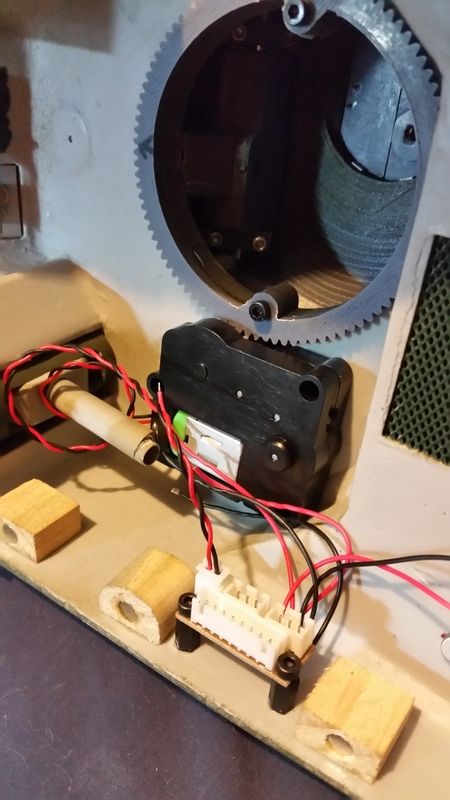
Mounted the original Sherman turret rotation gearbox directly to the turret roof. Used 3 drops of CA glue... so it's semi permanent but can be removed if need be. Now the gunners hatch on top of the tank opens up to reveal the silver can motor... oh well!
The gears actually mesh well; Woz supplied a matching gear with his printed turret ring but for now I won't really need it. I will if I decide to go with a larger servo rotation unit in the future.
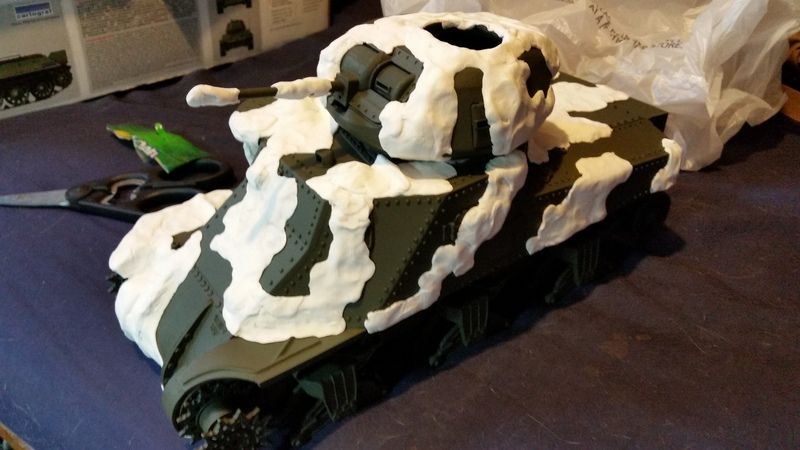
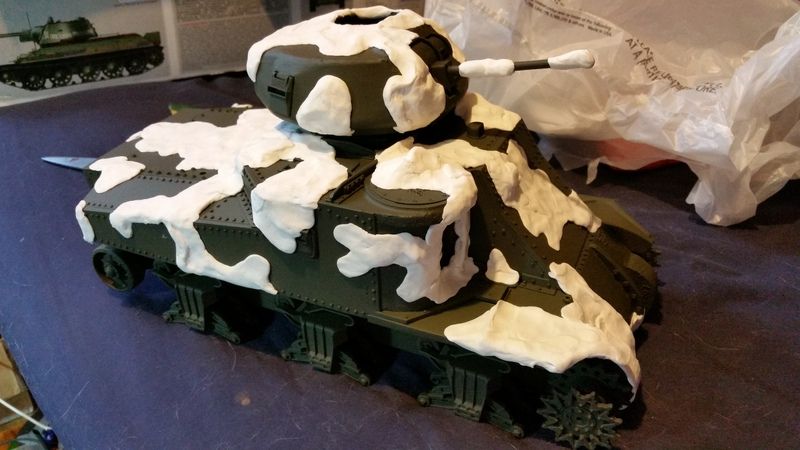
Also did some painting! I suck a this part but for a guy lacking any kind of stencil or airbrush I think I do ok...

Mounted the original Sherman turret rotation gearbox directly to the turret roof. Used 3 drops of CA glue... so it's semi permanent but can be removed if need be. Now the gunners hatch on top of the tank opens up to reveal the silver can motor... oh well!
The gears actually mesh well; Woz supplied a matching gear with his printed turret ring but for now I won't really need it. I will if I decide to go with a larger servo rotation unit in the future.
Also did some painting! I suck a this part but for a guy lacking any kind of stencil or airbrush I think I do ok...
Last edited by Strato50; 10-10-2015 at 10:30 PM.