Community
Search
Notices
RC Tanks Discuss all aspects of rc tank building and driving here!

Heng Long KV-1 repaint

Thread Tools
 
Search this Thread
 
Old 02-08-2016, 12:03 AM
  #26  
sollie
Thread Starter
 
sollie's Avatar
 
Join Date: Mar 2006
Location: DRAMMENBuskerud, NORWAY
Posts: 1,384
Received 37 Likes on 21 Posts
Default

Another weekend over .

Before and after Oils


Old 02-08-2016, 12:03 AM
  #27  
sollie
Thread Starter
 
sollie's Avatar
 
Join Date: Mar 2006
Location: DRAMMENBuskerud, NORWAY
Posts: 1,384
Received 37 Likes on 21 Posts
Default

Scuffs and what not. Before and after


Old 02-08-2016, 12:05 AM
  #28  
sollie
Thread Starter
 
sollie's Avatar
 
Join Date: Mar 2006
Location: DRAMMENBuskerud, NORWAY
Posts: 1,384
Received 37 Likes on 21 Posts
Default

And the rest of the weekends work


Old 02-08-2016, 02:29 AM
  #29  
vonmarshall
My Feedback: (1)
 
Join Date: Jan 2012
Location: London, UNITED KINGDOM
Posts: 116
Likes: 0
Received 0 Likes on 0 Posts
Default

Thanks for showing all of these steps. I am really enjoying your work.

When I built my Tamiya KT I went with a light weathering and really enjoyed doing it and was happy with the result. I have just piciked up a half-built Tamiya Leopard 2 for HL prices and think I am going to finish it in a muddy image so will be trying out a few of your methods.

Looking forward to your next installments.
Old 02-08-2016, 05:00 AM
  #30  
sollie
Thread Starter
 
sollie's Avatar
 
Join Date: Mar 2006
Location: DRAMMENBuskerud, NORWAY
Posts: 1,384
Received 37 Likes on 21 Posts
Default

Thanks for the kind Words, and good Luck With the leo .
Old 02-16-2016, 10:47 PM
  #31  
sollie
Thread Starter
 
sollie's Avatar
 
Join Date: Mar 2006
Location: DRAMMENBuskerud, NORWAY
Posts: 1,384
Received 37 Likes on 21 Posts
Default

Before and after Oils


Old 02-16-2016, 10:47 PM
  #32  
sollie
Thread Starter
 
sollie's Avatar
 
Join Date: Mar 2006
Location: DRAMMENBuskerud, NORWAY
Posts: 1,384
Received 37 Likes on 21 Posts
Default

Scuffs and what not. Before and after


Old 02-16-2016, 10:52 PM
  #33  
sollie
Thread Starter
 
sollie's Avatar
 
Join Date: Mar 2006
Location: DRAMMENBuskerud, NORWAY
Posts: 1,384
Received 37 Likes on 21 Posts
Default

And the rest of the weekends work


Old 02-17-2016, 12:50 PM
  #34  
MAUS45
 
MAUS45's Avatar
 
Join Date: Jul 2008
Location: Old Hickory, TN
Posts: 3,194
Received 38 Likes on 35 Posts
Default

Really nice work Sollie!!!
Old 02-17-2016, 05:06 PM
  #35  
philipat
 
Join Date: Dec 2007
Location: Okinawa, JAPAN
Posts: 2,898
Likes: 0
Received 4 Likes on 4 Posts
Default

really nice work! One small suggestion that will add a little would be to bore out the barrel of the turret machine gun.
Old 02-18-2016, 12:36 AM
  #36  
sollie
Thread Starter
 
sollie's Avatar
 
Join Date: Mar 2006
Location: DRAMMENBuskerud, NORWAY
Posts: 1,384
Received 37 Likes on 21 Posts
Default

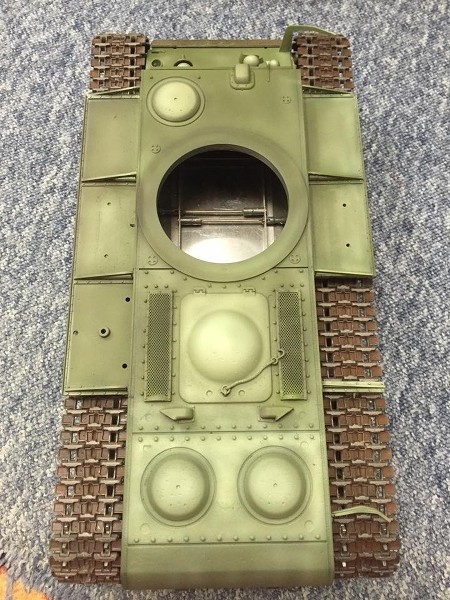
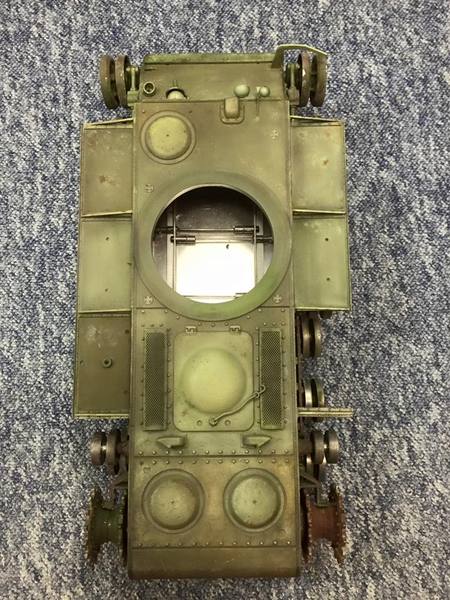
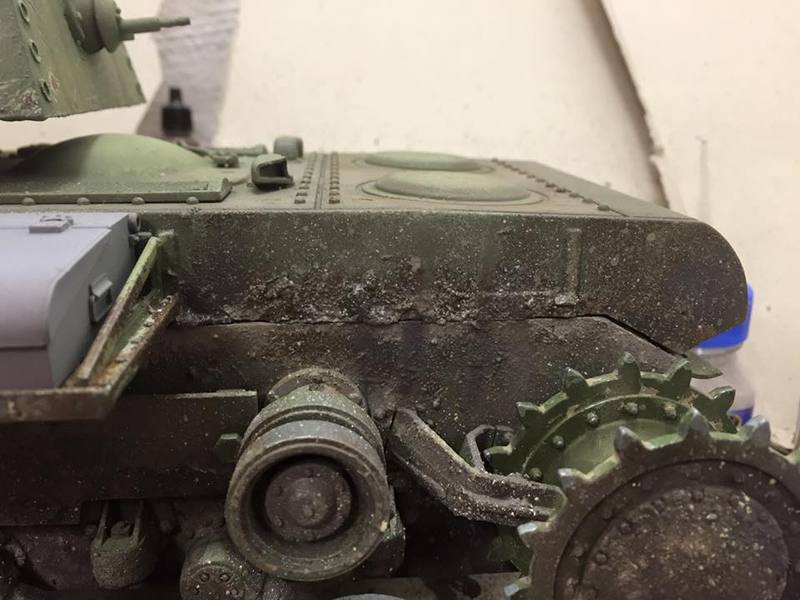
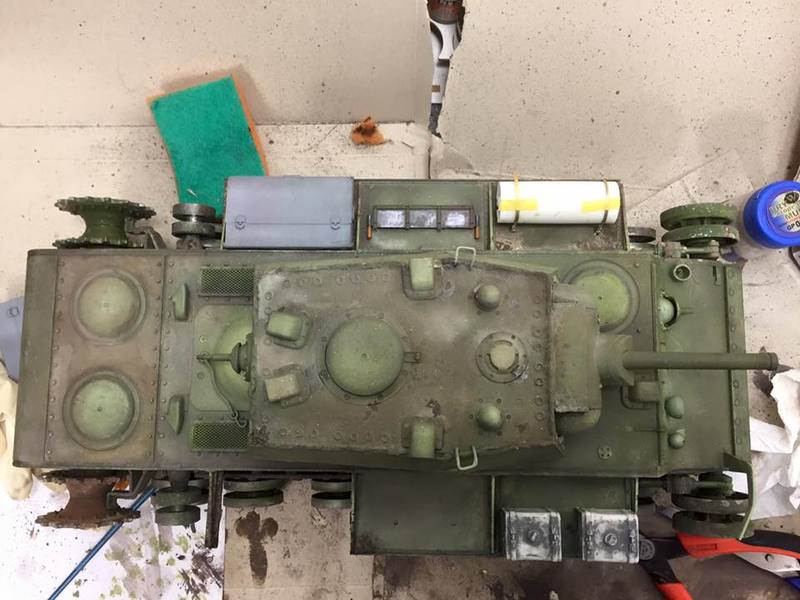
Short time atthe bench last night, but still managed to do something :-) Pushing towards a 'wrap' on this one


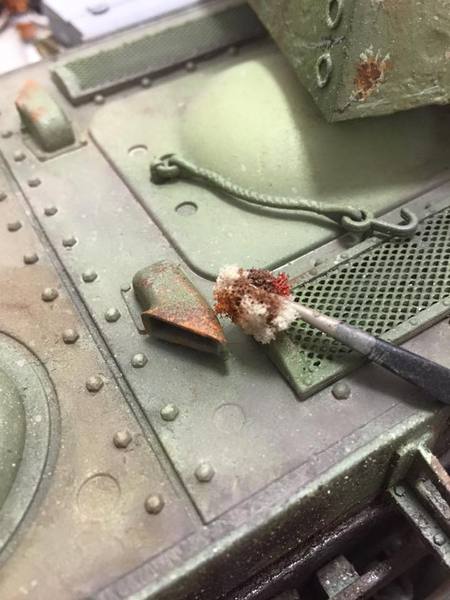
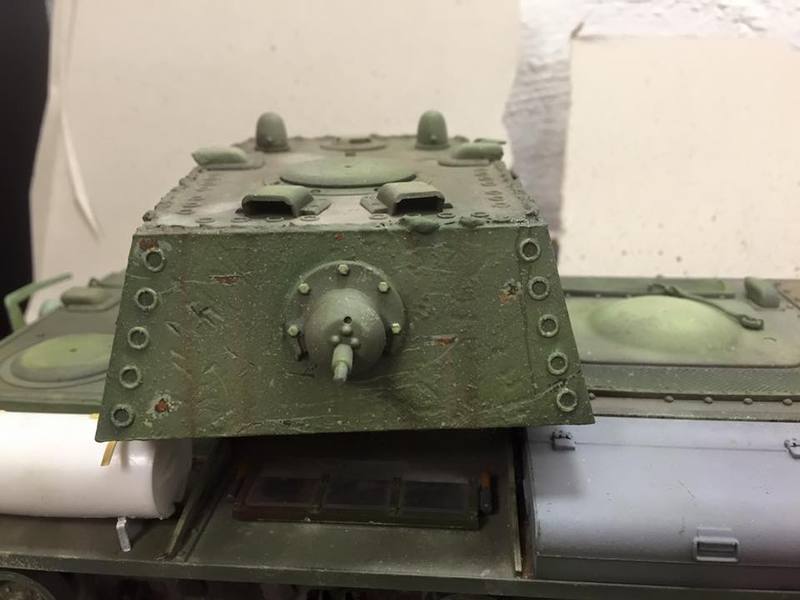
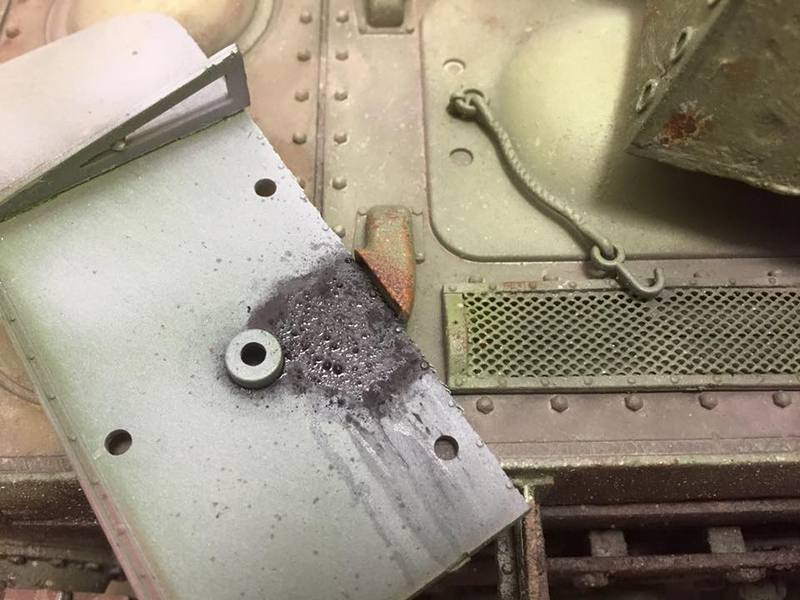
Did a test before going to work on the rear panel of the model
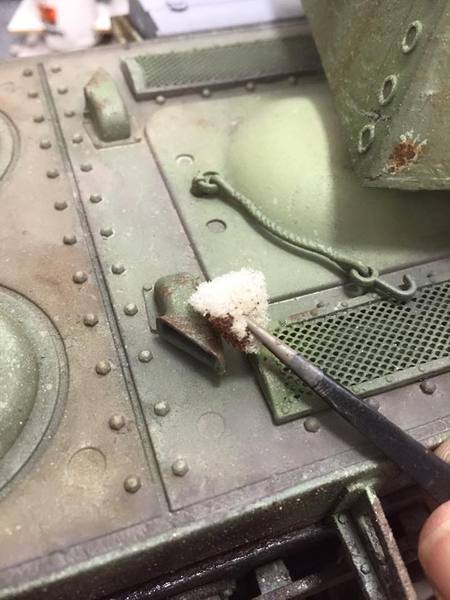
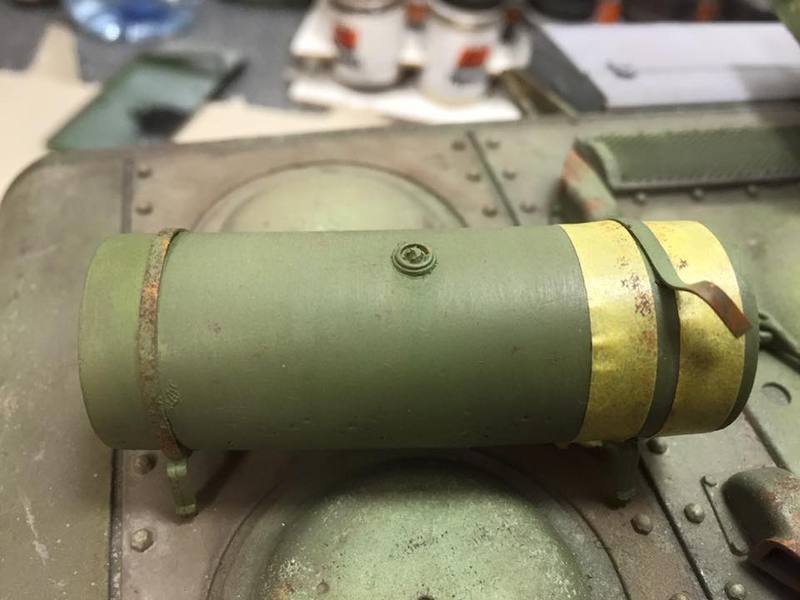
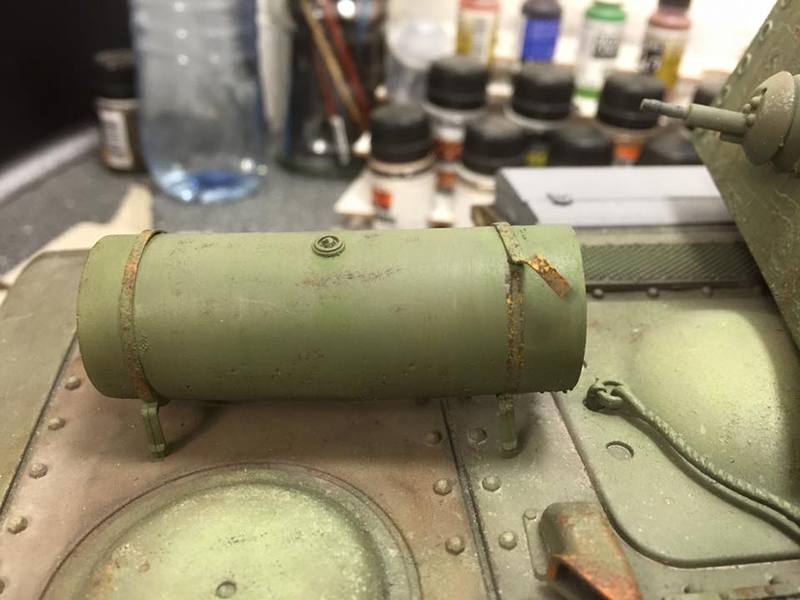


Drum chipping


Old 02-24-2016, 01:06 PM
  #37  
MAUS45
 
MAUS45's Avatar
 
Join Date: Jul 2008
Location: Old Hickory, TN
Posts: 3,194
Received 38 Likes on 35 Posts
Default

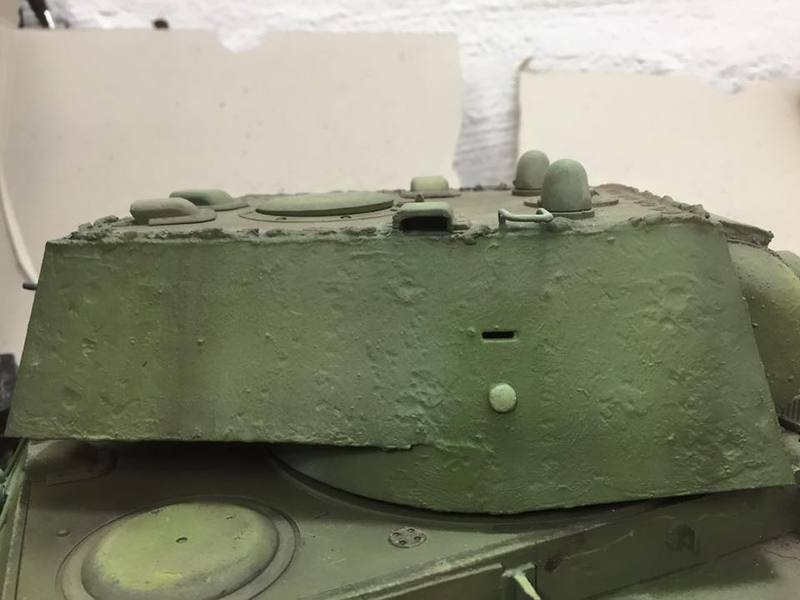
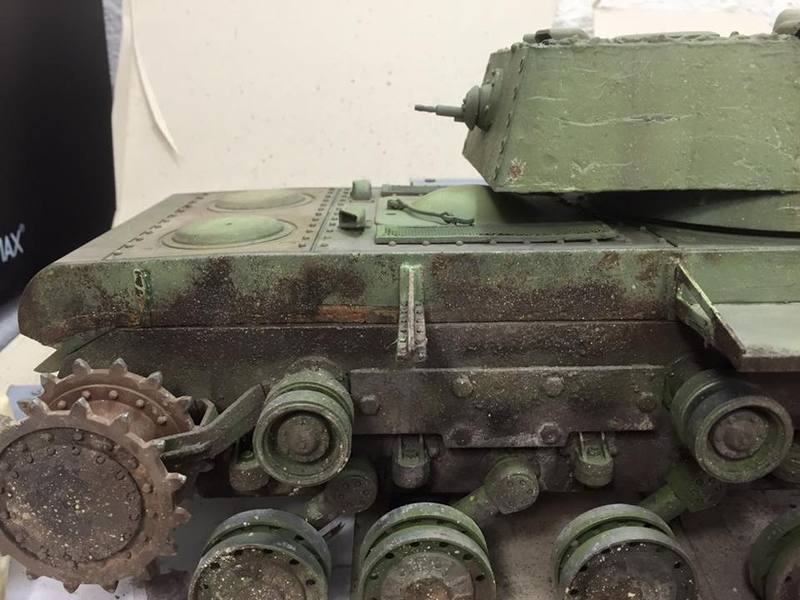
Great weathering Sollie.
Old 02-24-2016, 01:08 PM
  #38  
sollie
Thread Starter
 
sollie's Avatar
 
Join Date: Mar 2006
Location: DRAMMENBuskerud, NORWAY
Posts: 1,384
Received 37 Likes on 21 Posts
Default

thanks for having a look :-)

Posting Rules
You may not post new threads
You may not post replies
You may not post attachments
You may not edit your posts

BB code is On
Smilies are On
[IMG] code is On
HTML code is Off


Contact Us - Archive - Advertising - Cookie Policy - Privacy Statement - Terms of Service -

Copyright © 2024 MH Sub I, LLC dba Internet Brands. All rights reserved. Use of this site indicates your consent to the Terms of Use.