


SU-152 build
 01-19-2016, 05:58 AM
#1

Thread Starter
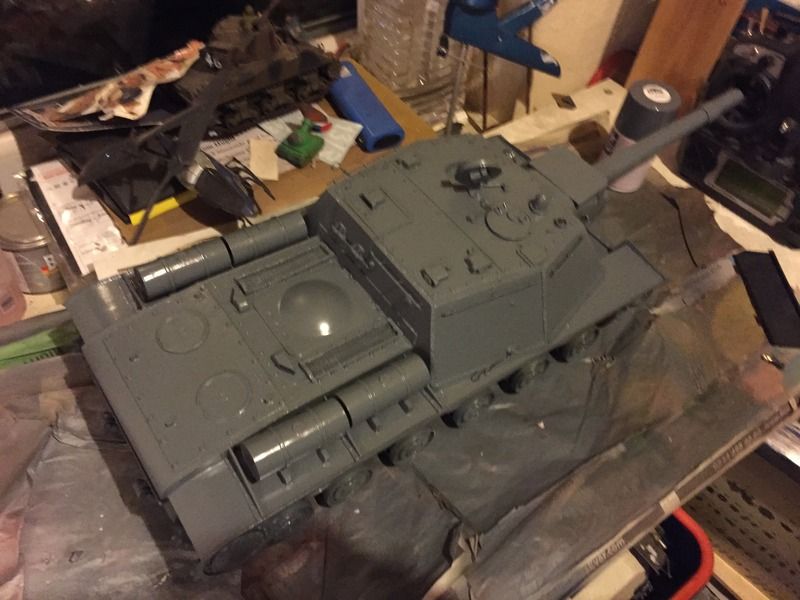
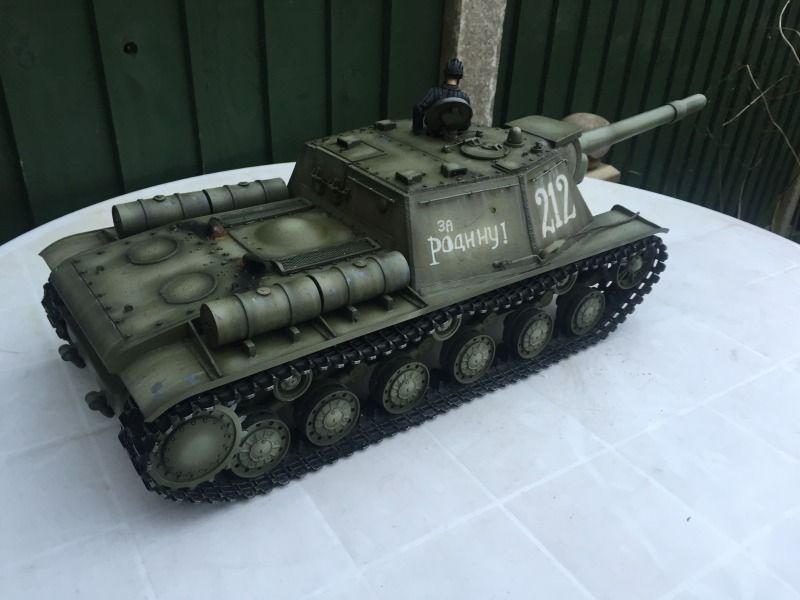
Hey folks, it's been a while since I posted a build up on here. Here's my latest, an su-152. The conversion kits from juckenburg and the rest is asiatam/taigen. Electronics are courtesy of Ian tank bear at rctankelectronics and comprise an ibu2 pro and vampire hidden battle unit.
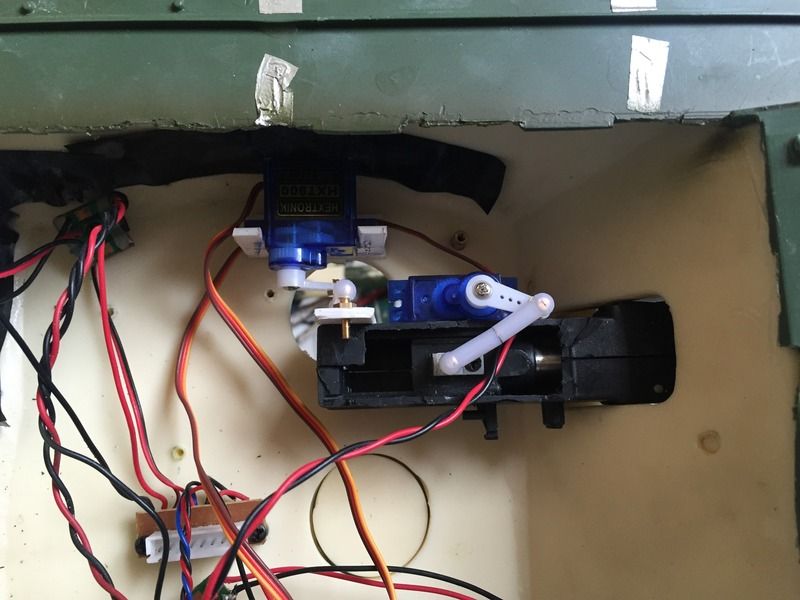
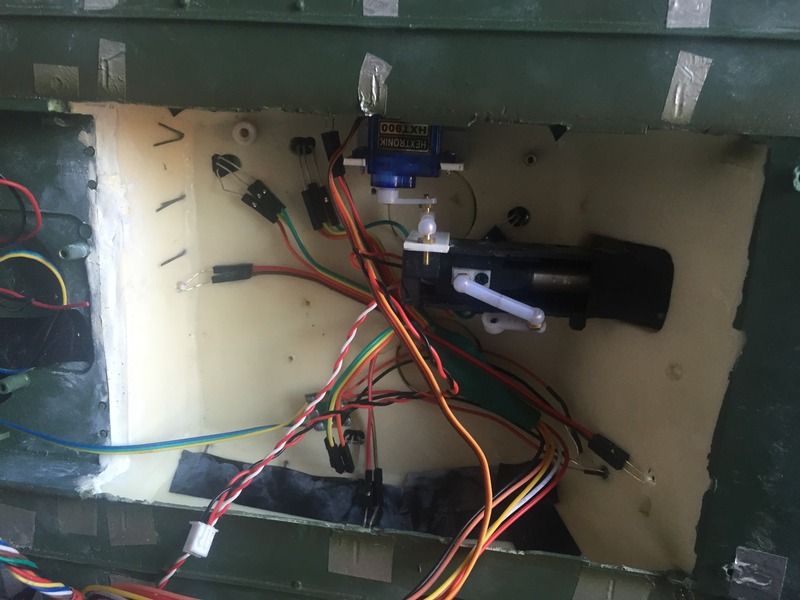
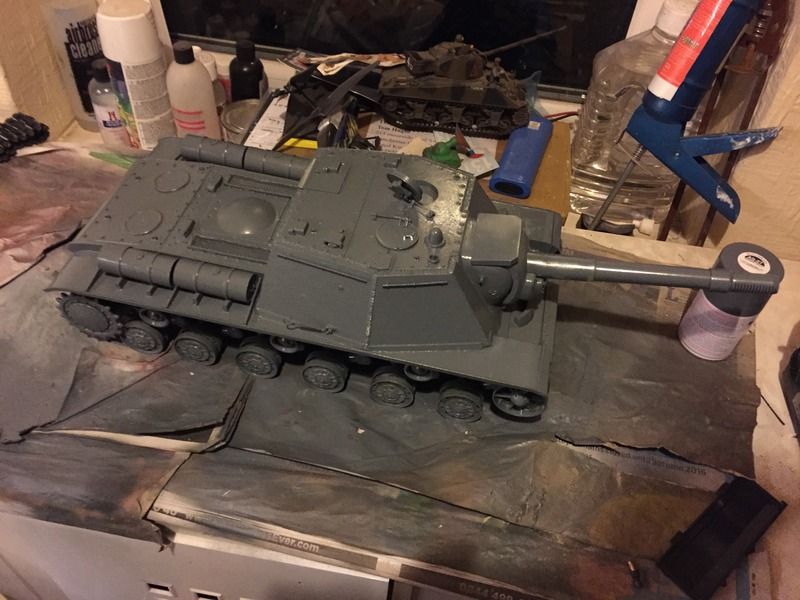
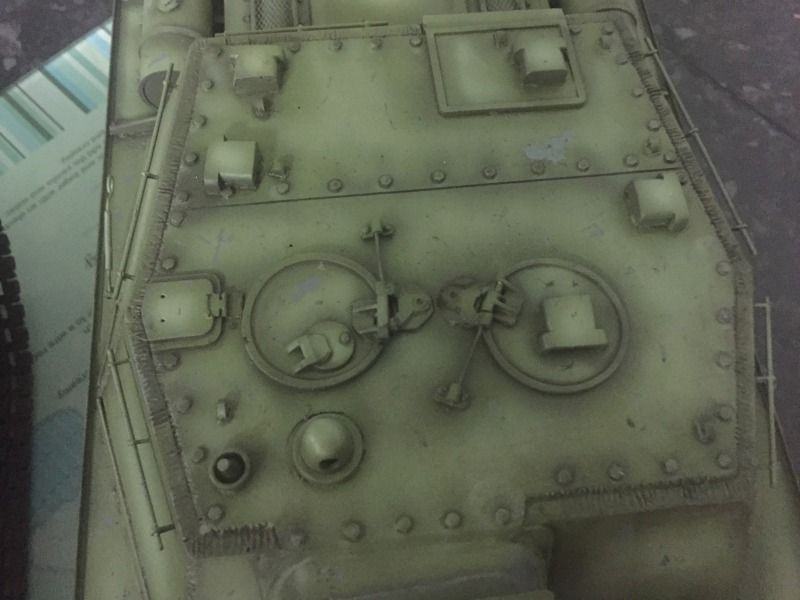
First job was to get rid of the henglong guts and replace with servo recoil and elevation
Removing the barrel and recoil unit
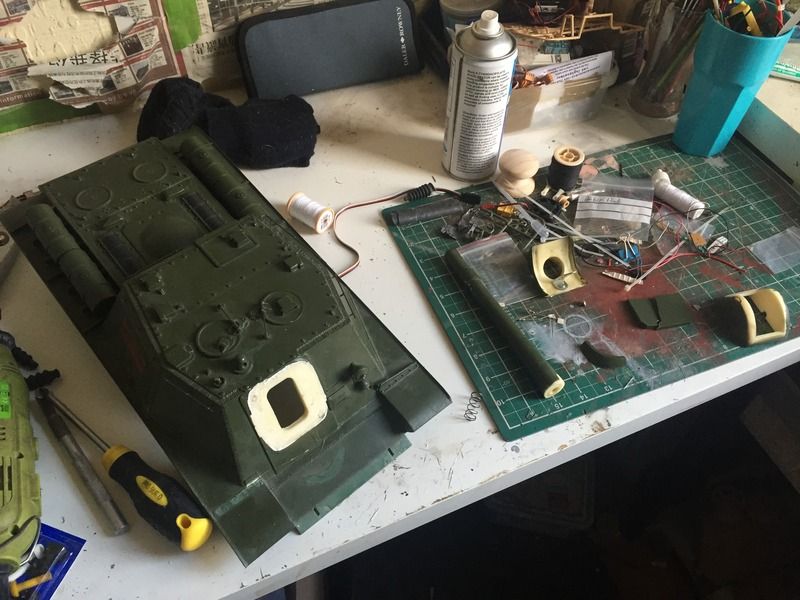
Recoil and elevation from styrene and a cut up henglong recoil
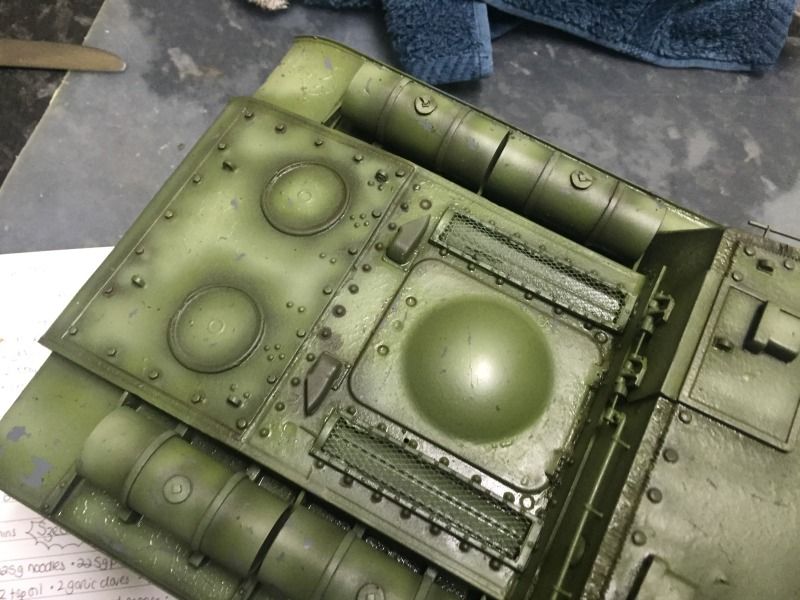
Next up was the battle system.
Emitter hidden in the barrel
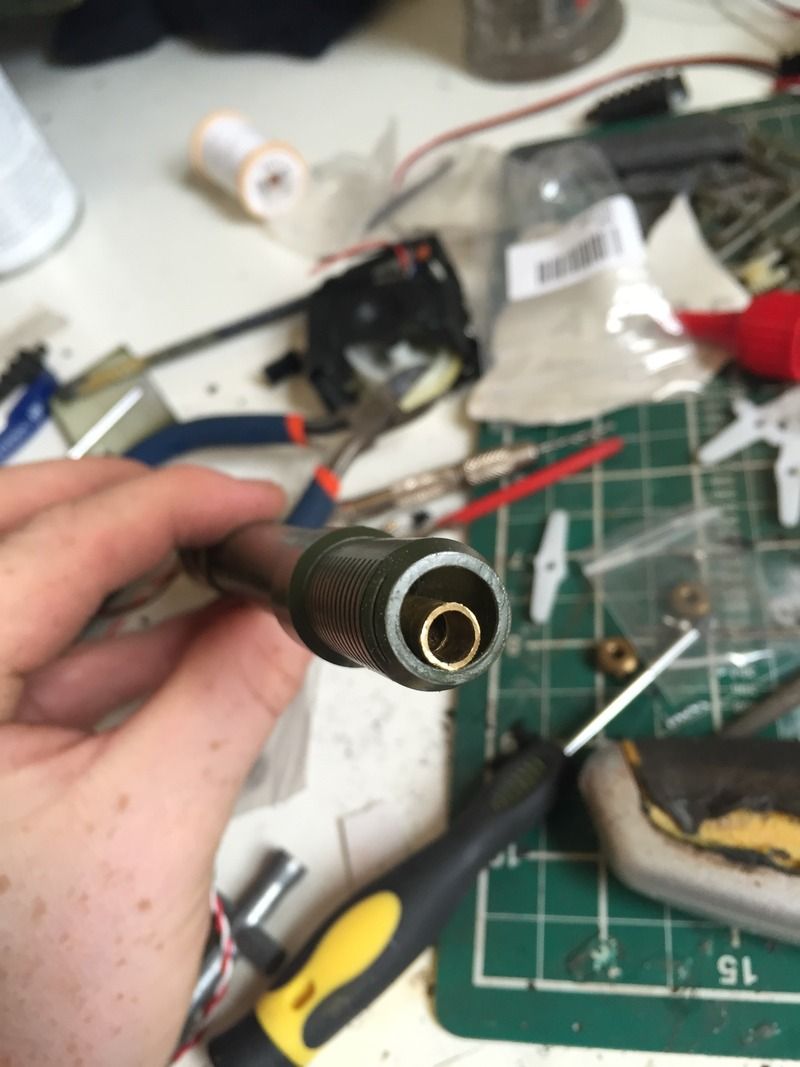
Sensors and LEDs from the inside
Externally
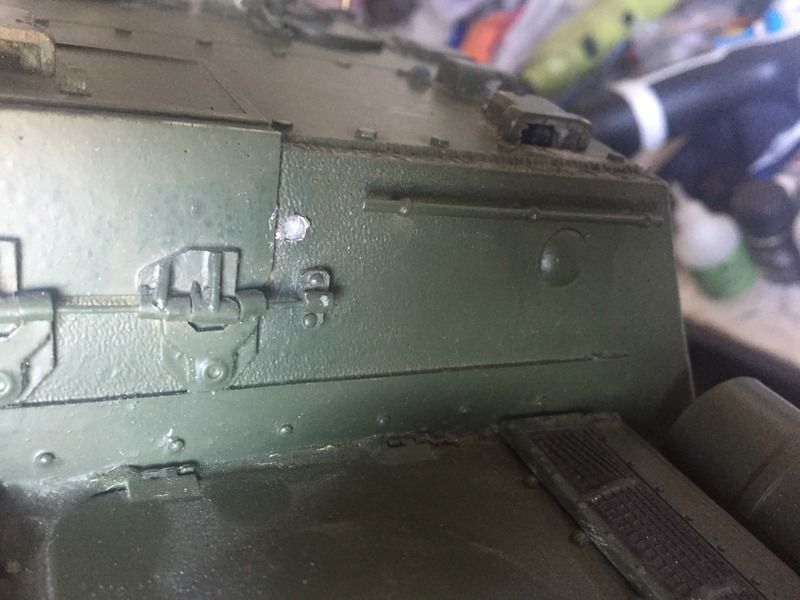
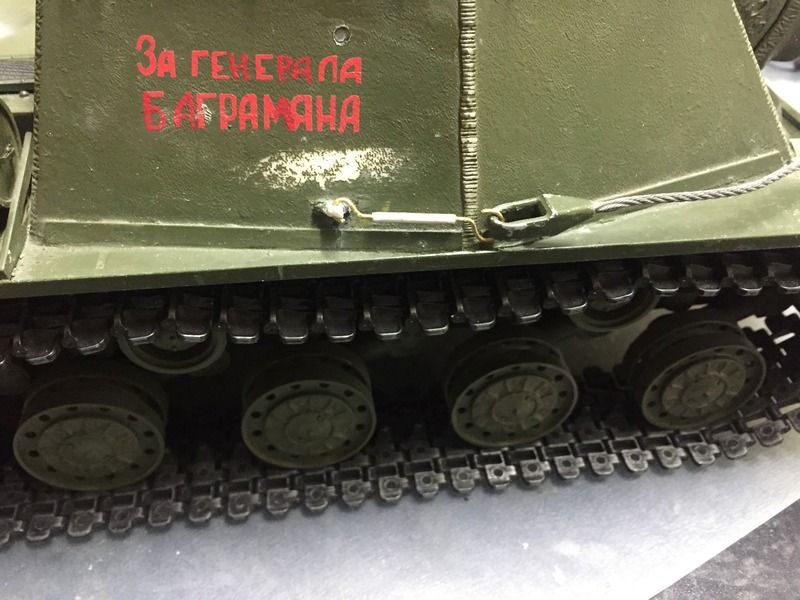
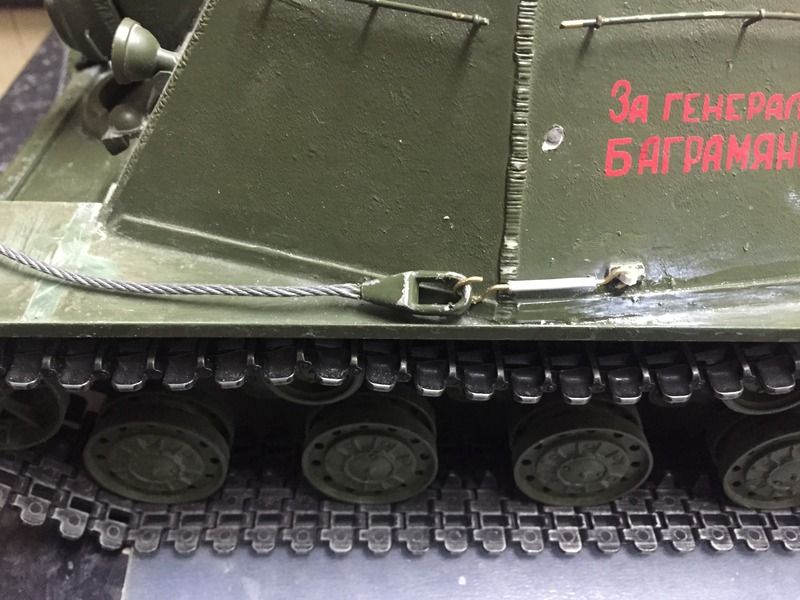
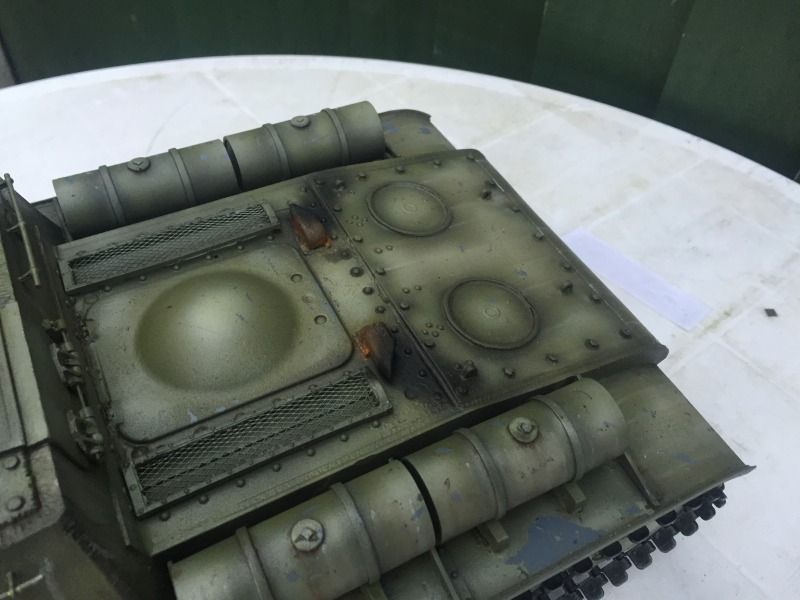
Next up adding detail,
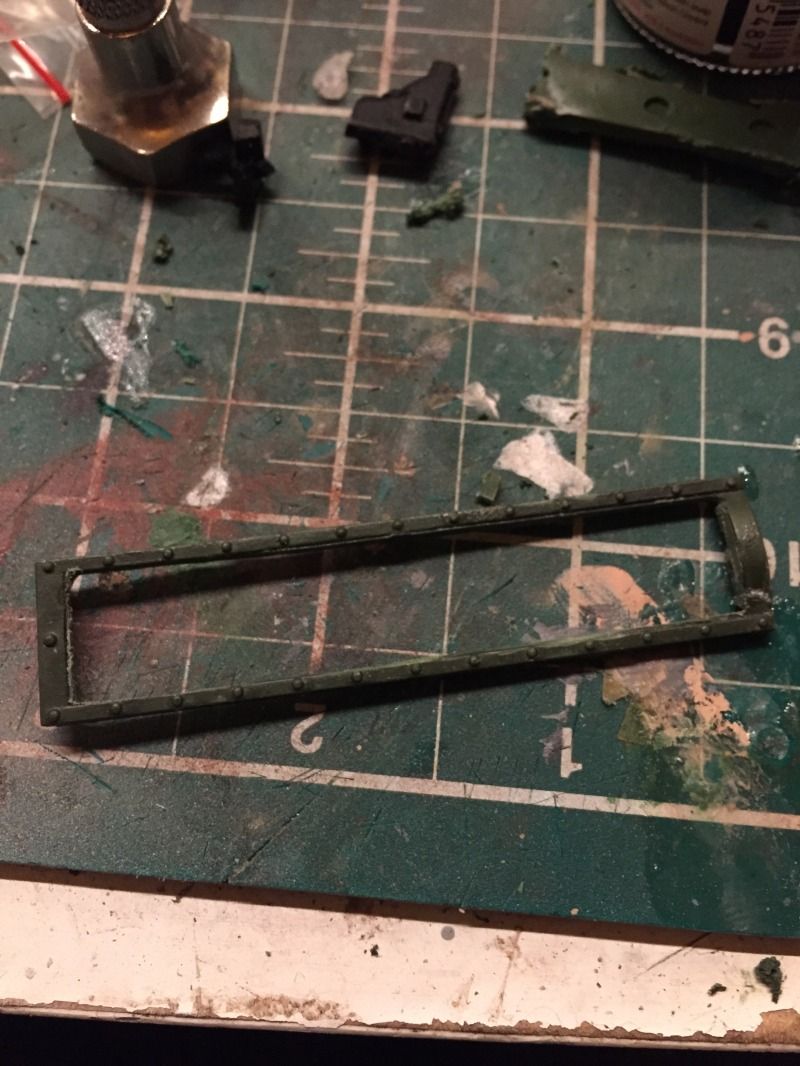
Scratch built hooks for the tow cables
Engine vents

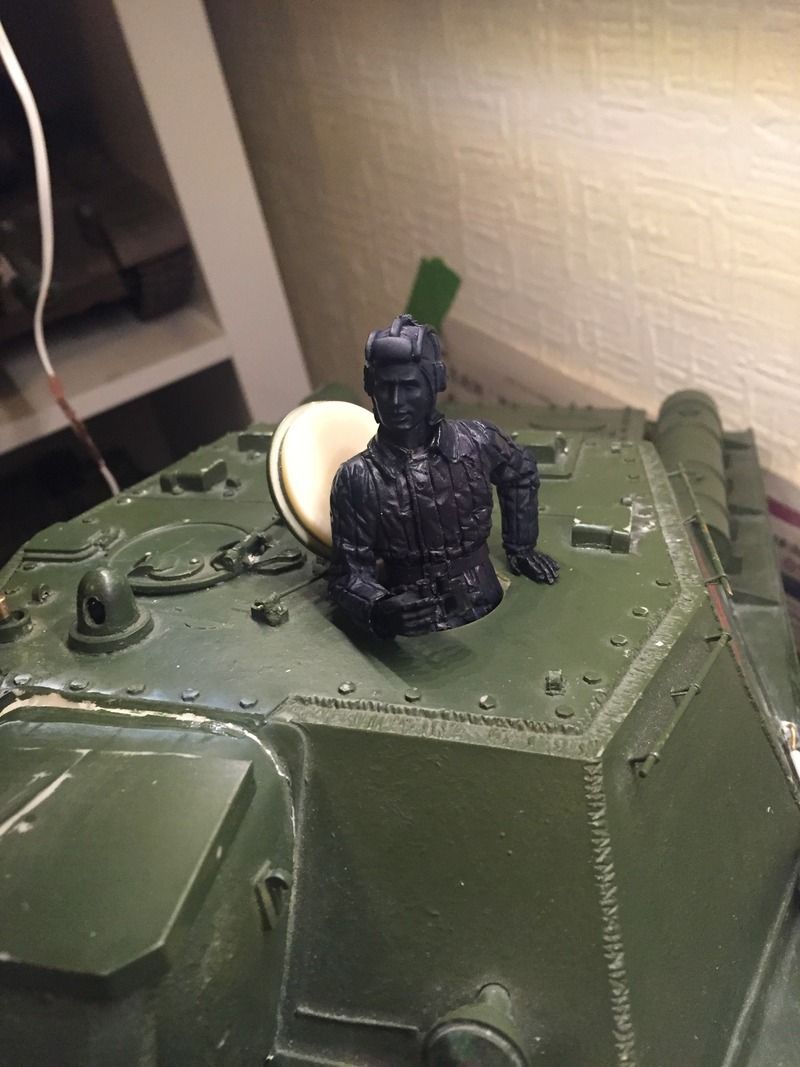
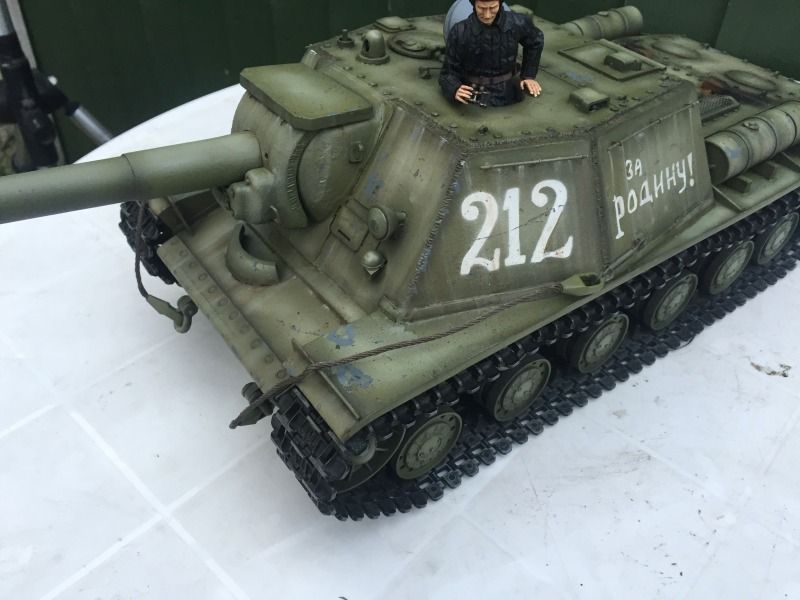
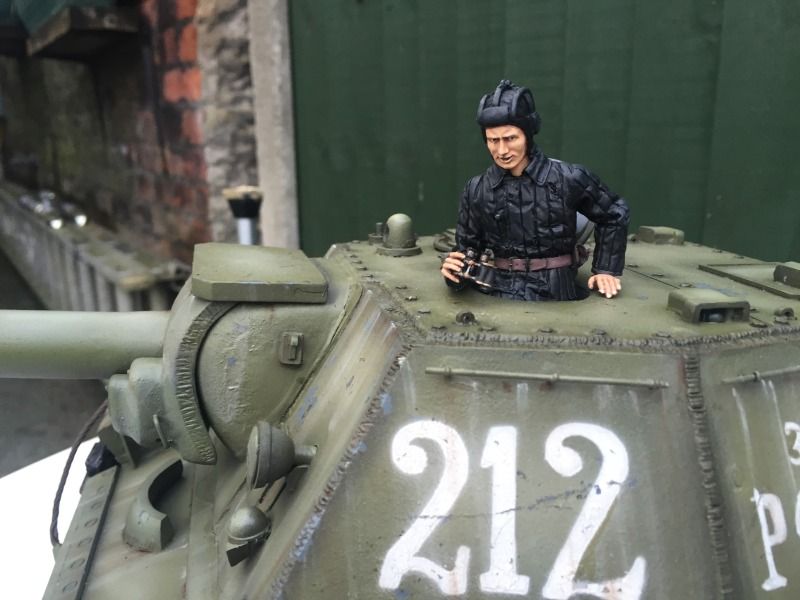
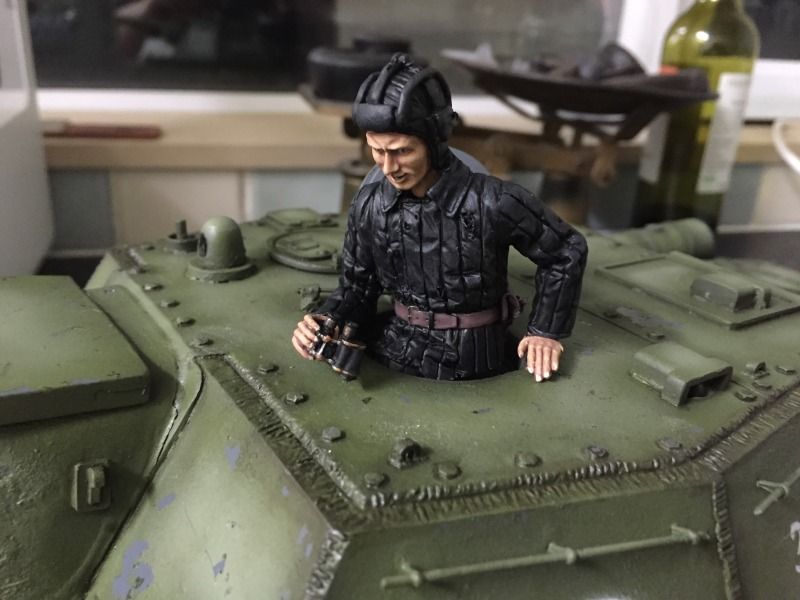
I had several crew members from heikkes modeulbau gasse, so one was used as a commander
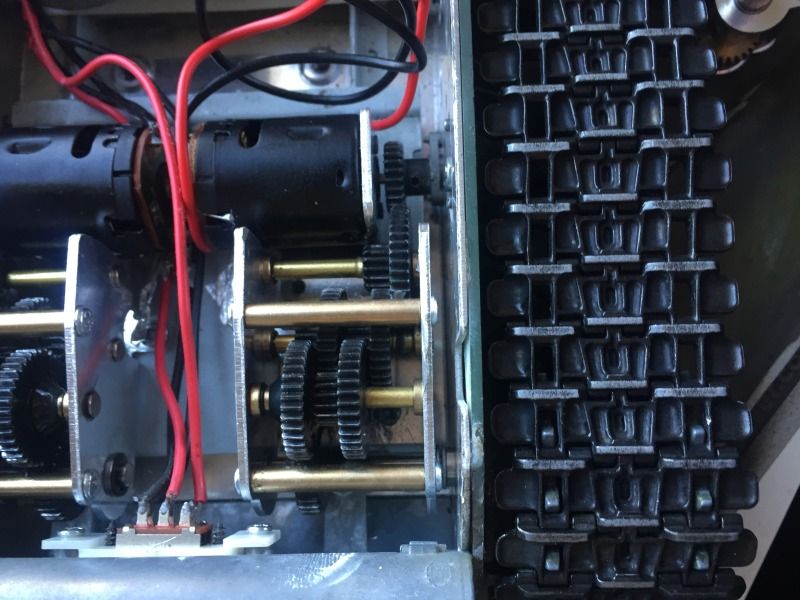
Originally brass gearboxes were installed however I replaced these with black steel ones
First job was to get rid of the henglong guts and replace with servo recoil and elevation
Removing the barrel and recoil unit

Recoil and elevation from styrene and a cut up henglong recoil

Next up was the battle system.
Emitter hidden in the barrel

Sensors and LEDs from the inside

Externally


Next up adding detail,
Scratch built hooks for the tow cables


Engine vents


I had several crew members from heikkes modeulbau gasse, so one was used as a commander

Originally brass gearboxes were installed however I replaced these with black steel ones

 01-19-2016, 05:59 AM
#2
Thread Starter
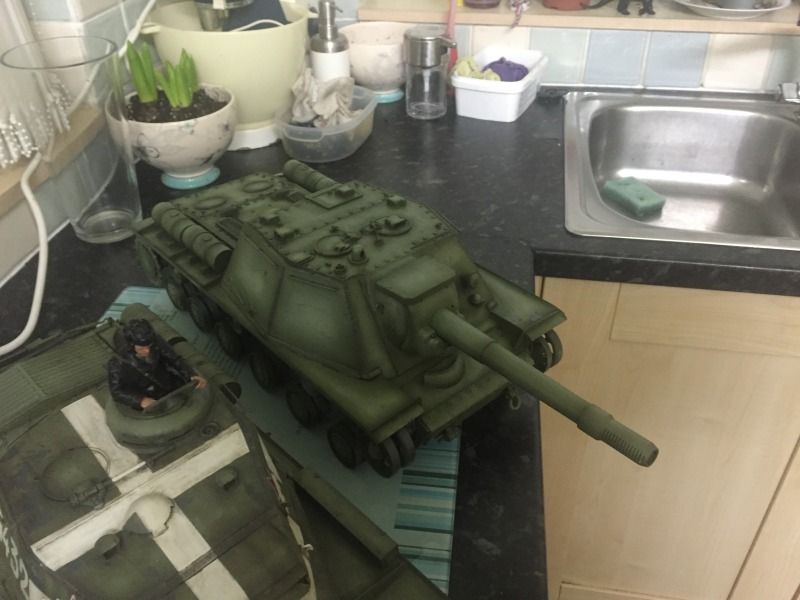
Next up paint. I use a base layer of Tamiya gunship grey as a steel colour for the chiping
Then hairspray and the mig ammo Russian green set modulated
Dark green and green base
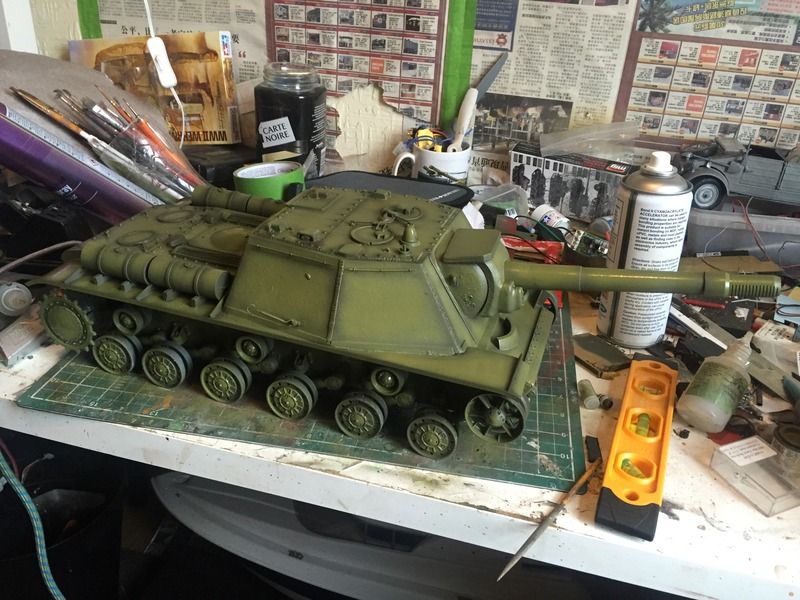
With light base and highlight

Then chipping and pin washes
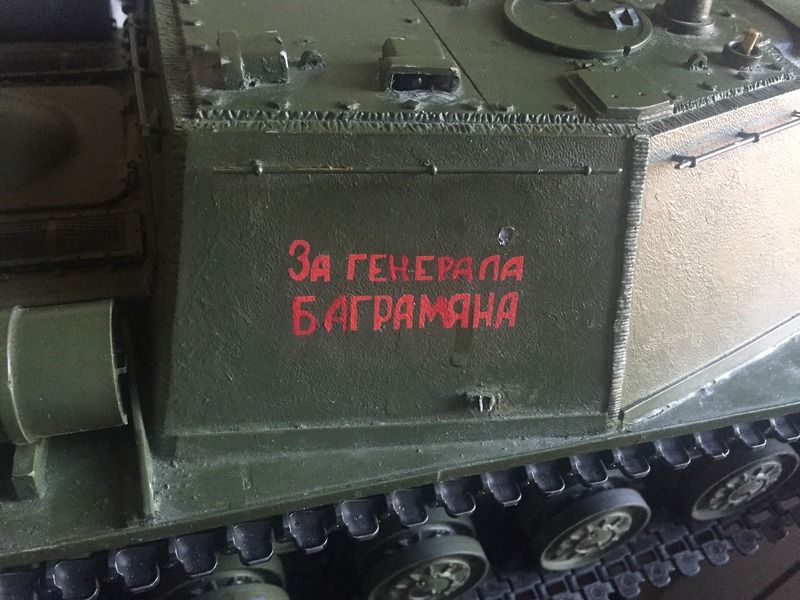
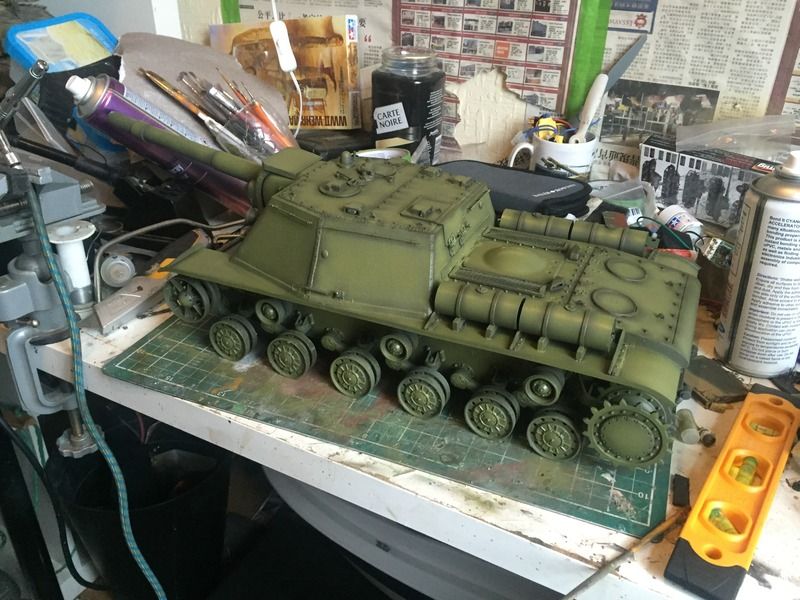
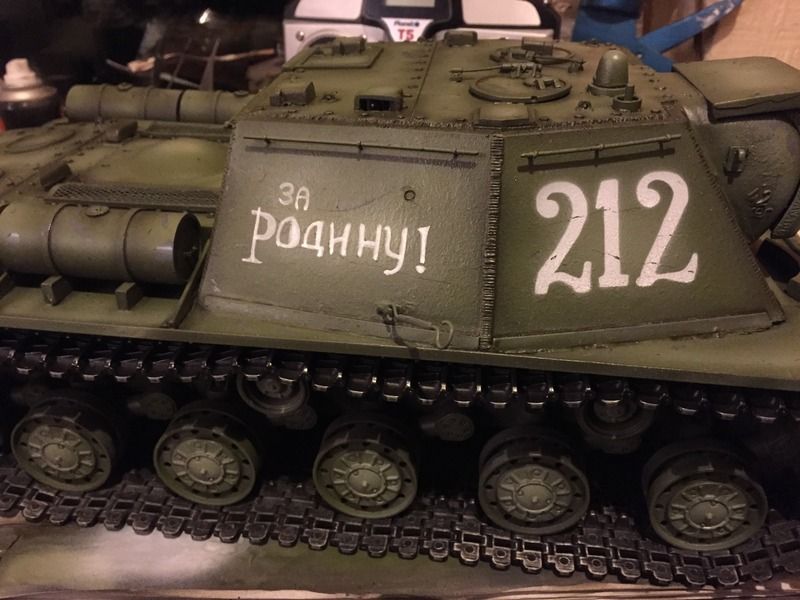
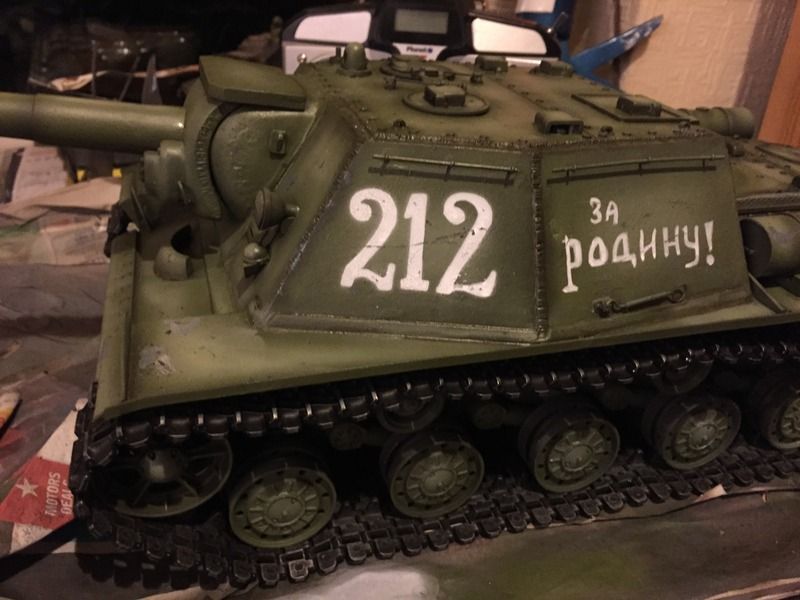
Next up was the markings. I've gone for big numbers and a slogan in this case, "for the homeland"
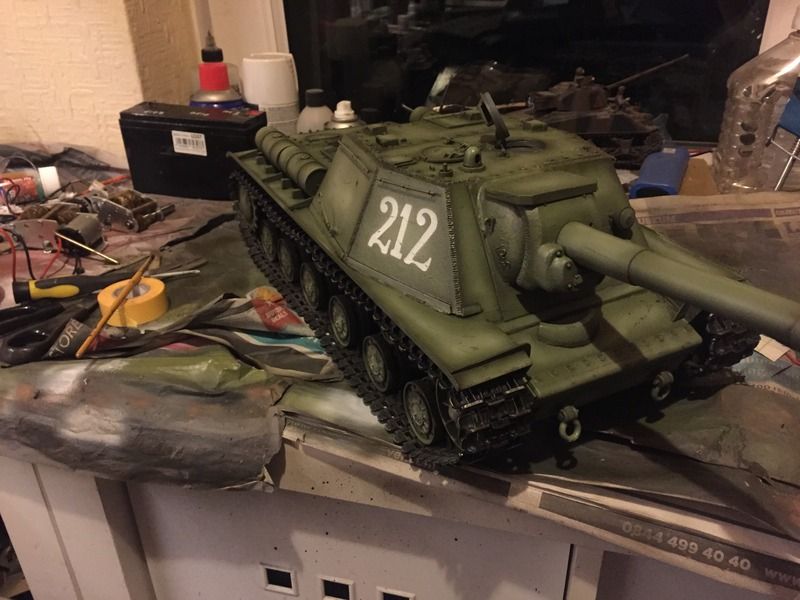
Next up the streaking and grime
Rusting the exhausts
And the commander

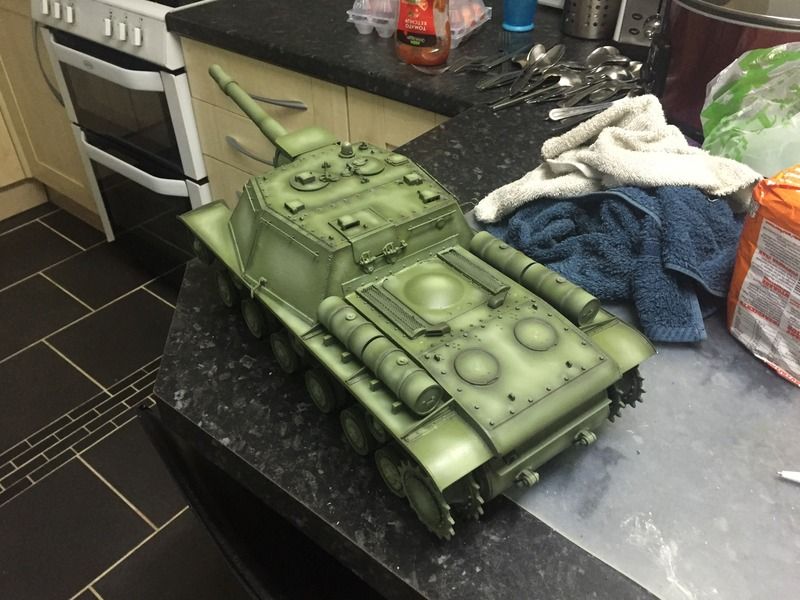
Last will be the mud, for which I'm waiting for materials to arrive


Then hairspray and the mig ammo Russian green set modulated
Dark green and green base


With light base and highlight


Then chipping and pin washes


Next up was the markings. I've gone for big numbers and a slogan in this case, "for the homeland"


Next up the streaking and grime


Rusting the exhausts

And the commander


Last will be the mud, for which I'm waiting for materials to arrive
01-19-2016, 06:09 AM
#3
Join Date: Feb 2015
Location: Alexandria, Minnesota, USA
Posts: 493
Received 0 Likes
on
0 Posts
looks great! You make it look so easy. Great job on the commander. I have a couple commanders that are unpainted, I would like to learn how to paint them like that. Im working on a barrel recoil elevation similar to yours, you gave me a couple more ideas.
 01-19-2016, 02:34 PM
#6
http://www.rctankregiment.com/rctank...nting&start=10
Got to admit the SU 152 is a nice peice of modeling all round, well up to Mr Hugills usual standard.
Last edited by tankman; 01-19-2016 at 02:40 PM.

 01-20-2016, 05:36 AM
#10
Thread Starter
Glad it could be of help to you, I've been meaning to do a figure painting tutorial for a while, I'll try and put something together as I've a ruck of verlinden figures need painting
01-20-2016, 05:38 AM
#11
Thread Starter
Cheers for the kind words gents, I've tried to strike a balance between detail and function. She's equipped to ir battle and experience has taught me photo etch doesn't always last so well in the heat of battle. It's been quite a challenge to make the green look interesting , I think the modulation helps, but I've some mud and stowage planned to add a bit more interest. Watch this space!

 01-20-2016, 06:45 AM
#13
Join Date: Jan 2014
Location: Kenosha,WI
Posts: 340
Likes: 0
Received 0 Likes
on
0 Posts
Cheers for the kind words gents, I've tried to strike a balance between detail and function. She's equipped to ir battle and experience has taught me photo etch doesn't always last so well in the heat of battle. It's been quite a challenge to make the green look interesting , I think the modulation helps, but I've some mud and stowage planned to add a bit more interest. Watch this space!
01-20-2016, 06:51 AM
#14
Join Date: Jan 2014
Location: Kenosha,WI
Posts: 340
Likes: 0
Received 0 Likes
on
0 Posts
01-20-2016, 07:17 AM
#15
01-20-2016, 07:43 AM
#16
Thread Starter
Well we now have the chassis to make most of the wwii Russian armour and between trumpeter and juckenburg there are the conversion kits out there! A 76mm t-34 would be nice though
 01-21-2016, 06:17 AM
#18
01-22-2016, 09:35 AM
#21
Have been interested in the vampire system for a bit but never wanted to get into it until I heard some after action reports. Let us know how it fares against tamiya apples and if their are any concerns or advantages with regard to the receivers being "hooded" or defense's such as the 45 or hull up/down. I'd imaginein a hull defense your invulerable since the receivers are completely covered on top/bottom? Great looking tank!!
01-22-2016, 12:49 PM
#22
Thread Starter
Have been interested in the vampire system for a bit but never wanted to get into it until I heard some after action reports. Let us know how it fares against tamiya apples and if their are any concerns or advantages with regard to the receivers being "hooded" or defense's such as the 45 or hull up/down. I'd imaginein a hull defense your invulerable since the receivers are completely covered on top/bottom? Great looking tank!!
01-22-2016, 01:17 PM
#23
Hey, the vampire doesn't give advantage over the TBU in any way, in fact you lose 45 degree defence and slope defence. The fins on the TBU and the fact the prism is quite right in the centre of the TBU means that even from a 45 degree angle you can still be hit. I love the hidden battle unit for an aesthetic point of view and for friendly battles they're great. However if battlings at the highly competitive end then the TBU does give some advantage.
01-22-2016, 02:05 PM
#24
Wow it looks fantastic. You know how to make the simple look interesting. Thanks for Sharing Tom!!!
01-23-2016, 10:52 AM
#25
Thread Starter
Pictures.


