


Armortek Leichter Panzersp‰hwagen Sd.Kfz.222 rebuild
 11-20-2016, 03:09 AM
#26

Thread Starter

The problem with the Schwimmi is to get the thing to move with suspension fitted there are a number of builds without suspension this is much simpler to build and also if you want to swim the vehicle much simpler to water proof, once you have managed to get it moving trying to make it swim requires a lot more work in terms of making the vehicle water proof, even though it is large in 1/6 you will quickly run out of space, I started a build thread a few years back of the K¸belwagen and Schwimmwagen alas these are still not completed and I can’t see when I’m going to get time to complete them before my next major project starts, I don’t intend converting my Schwimmwagen to swim it has been hard enough trying to make it drive.
Have a look on youtube there are a few builds, I remember seeing a 21[SUP]st[/SUP] Centaury Schwimmi converted and the builder shown pictures of how he waterproofed it, I will try and find time to look for this.
Have a look on youtube there are a few builds, I remember seeing a 21[SUP]st[/SUP] Centaury Schwimmi converted and the builder shown pictures of how he waterproofed it, I will try and find time to look for this.
 11-25-2016, 09:05 AM
#27
Thread Starter
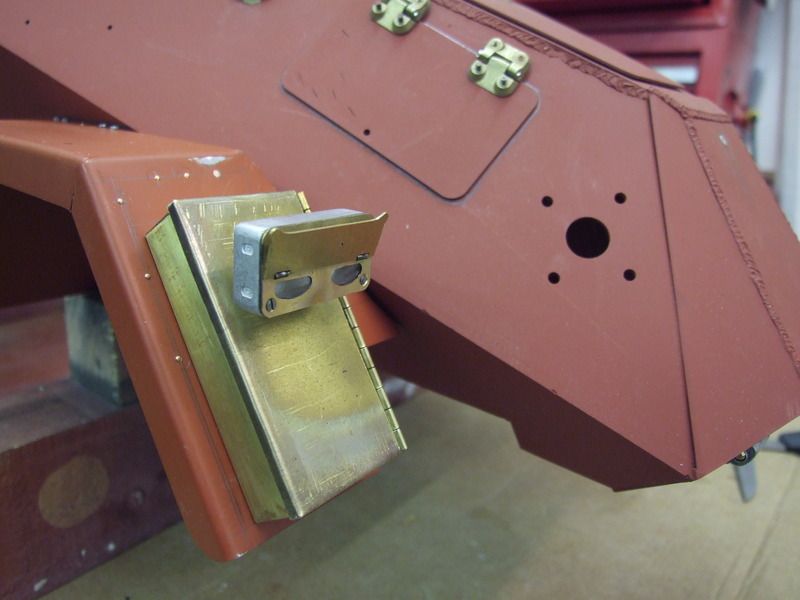
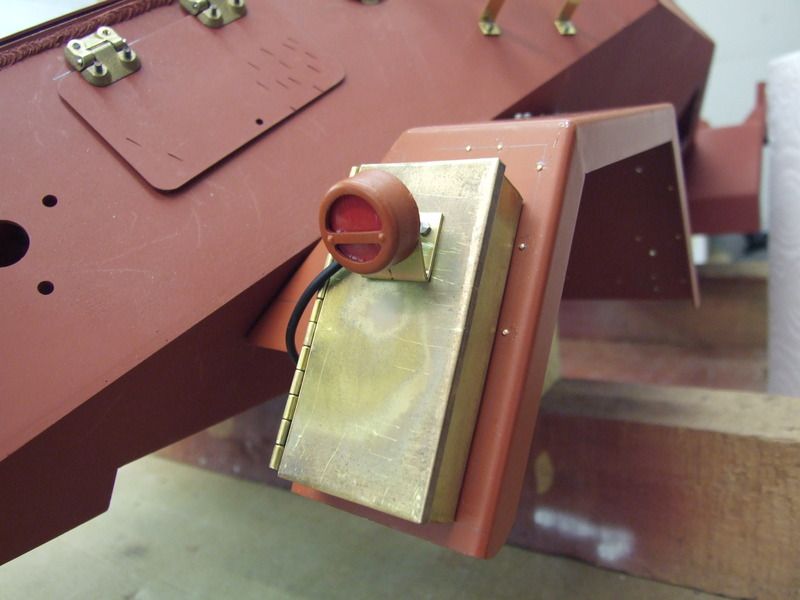
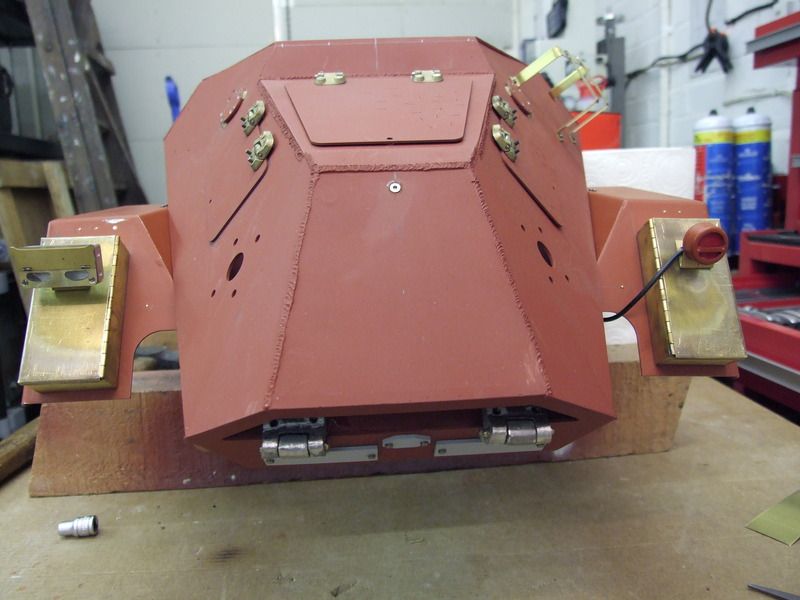
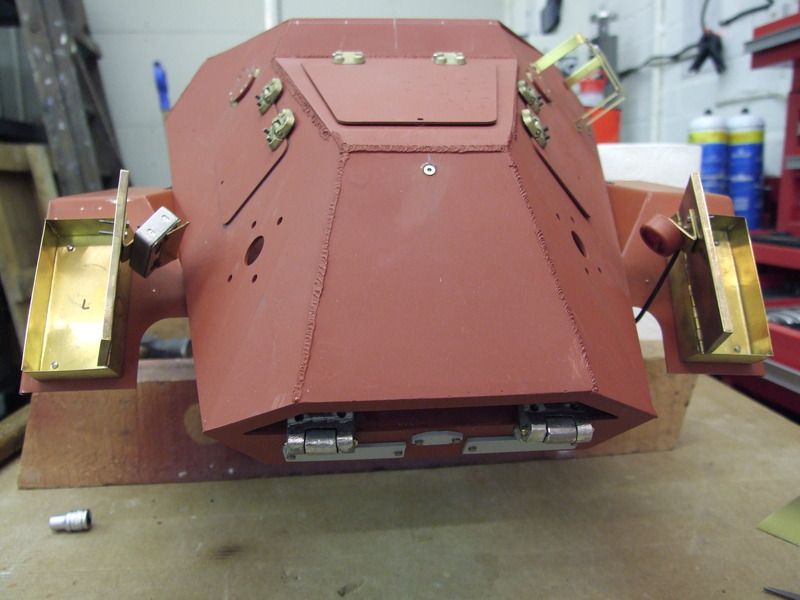
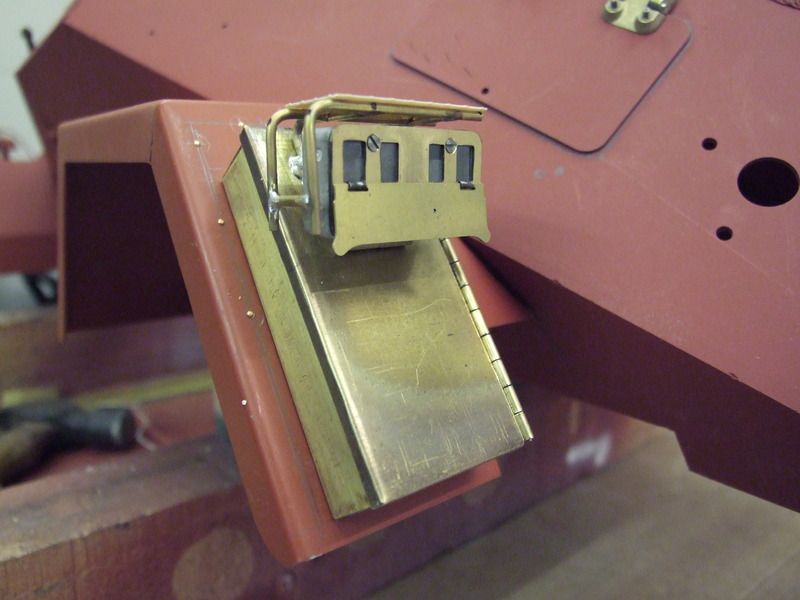
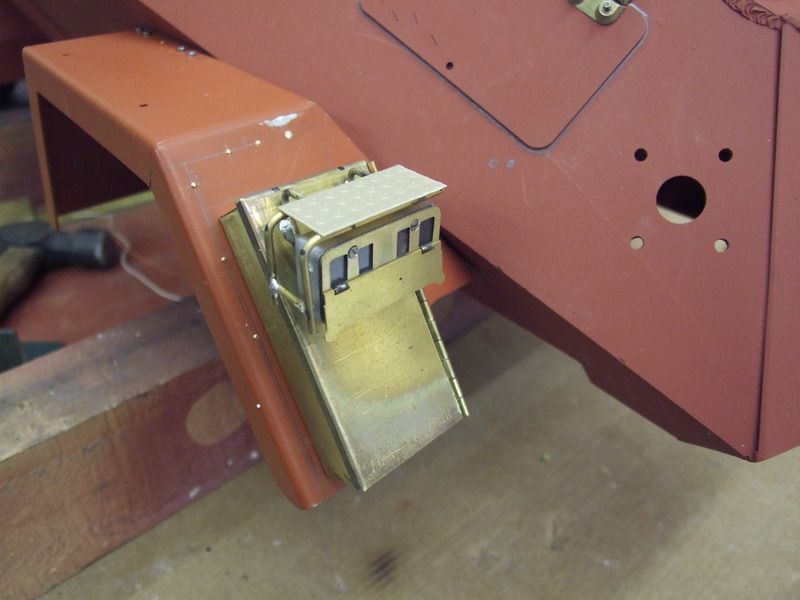
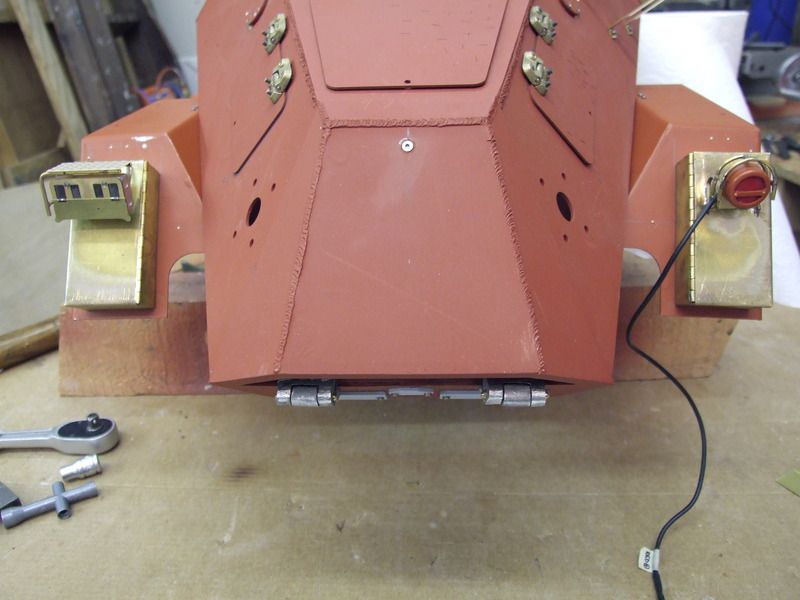
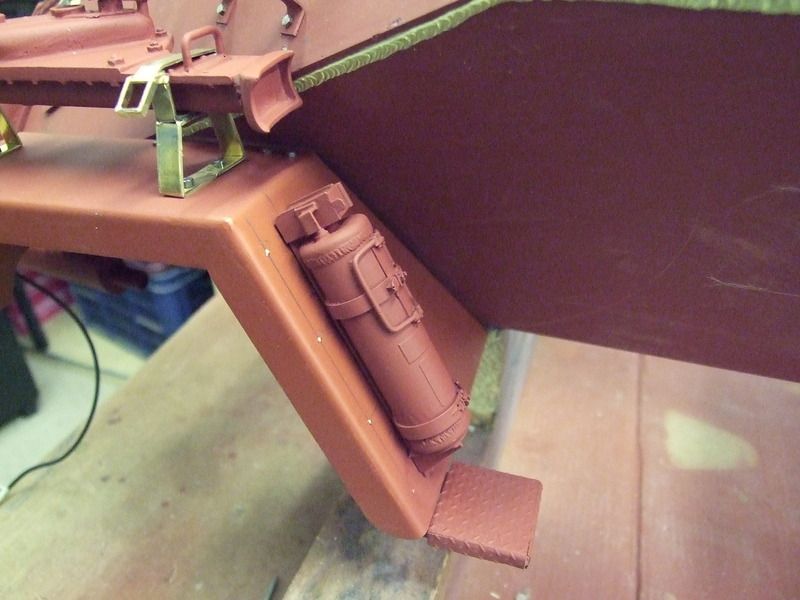
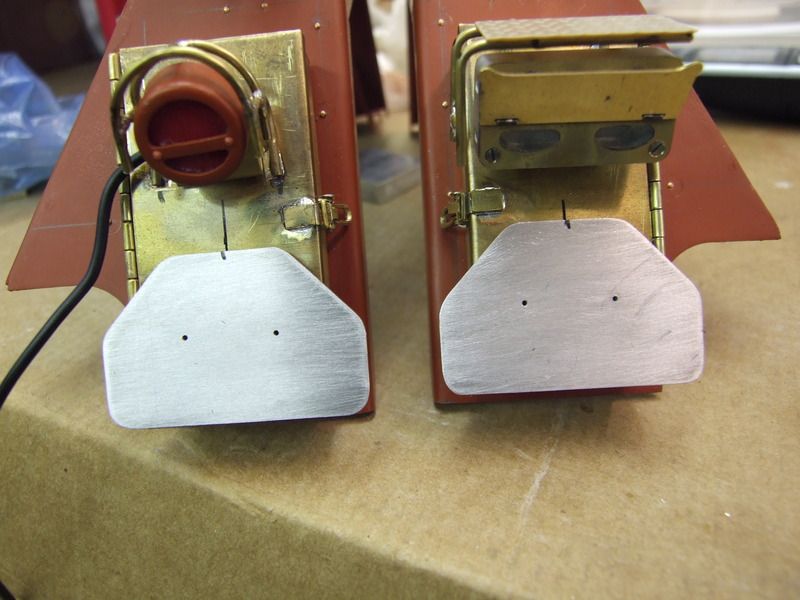
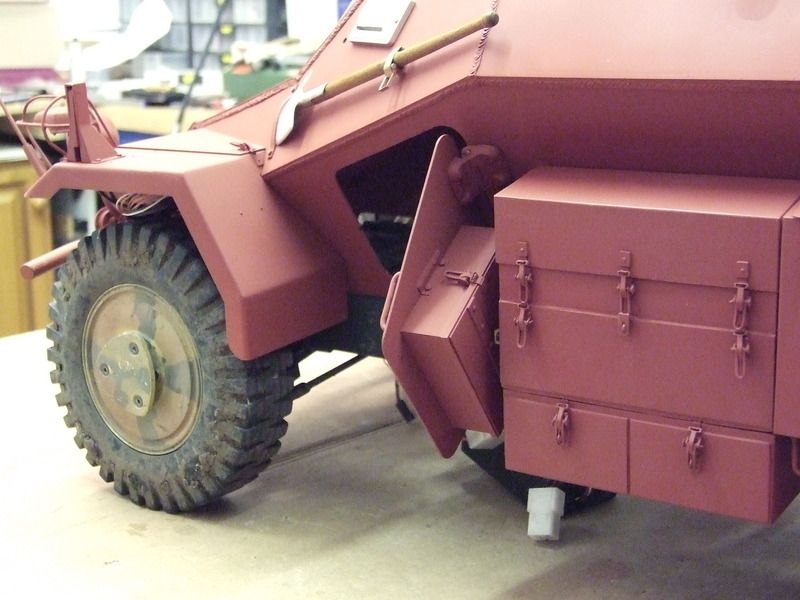
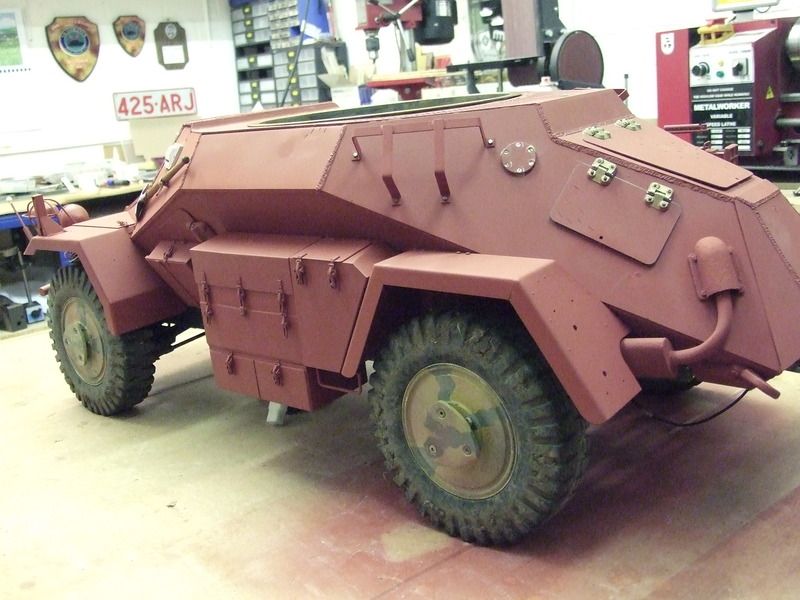
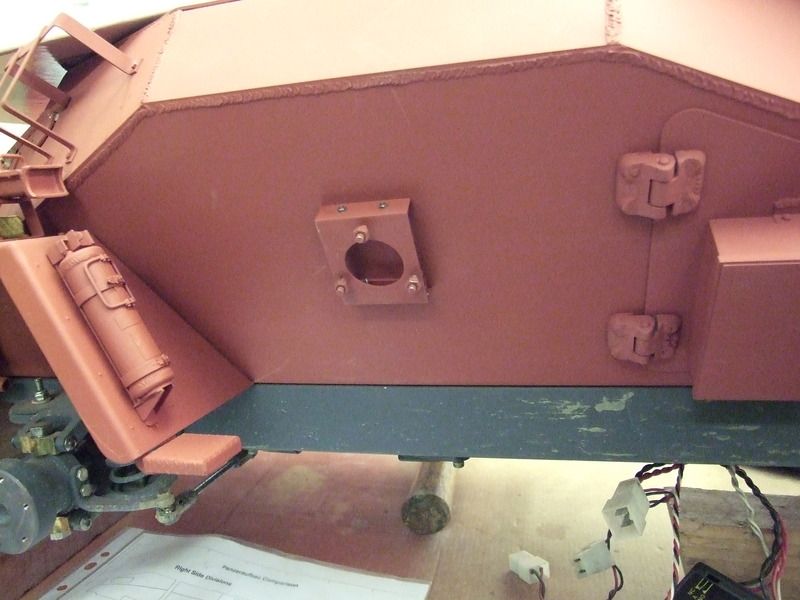
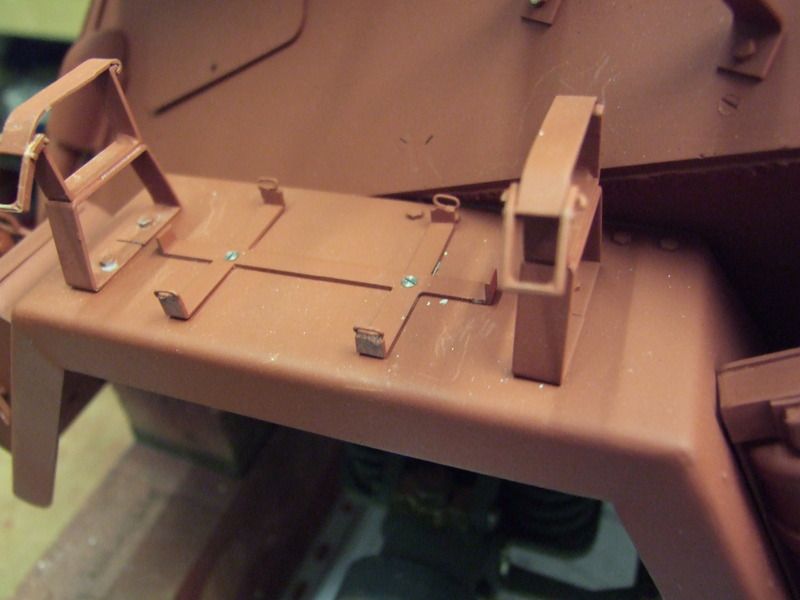
Moving along on my Panzersp‰hwagen Sd.Kfz.222 re-build, recently I have been working on the rear mudguards, rear stowage bins and lighting firstly the rear stowage bins were made from brass along with a mounting bracket for the rear Notek light this unit will have LED’s fitted when it’s completed I also made the rear light guard from round brass on the right rear mudguard there is also a round tail light this is from MM Panzer http://www.mmpanzer.estranky.sk/fotoalbum/sd-kfz-7-1/ I also had to make the mounting bracket and wire guard this guard is not as simple to make as one would think but after much trouble its complete, to scratch build these relatively simple parts took all the spare time I had over a week, whilst working on the rear mudguards I also added the bolt and rivet details along with a step for the right rear mudguard and added an Armorpax Tetra http://www.armorpax.net/wwii-german-parts next job will be making the registration plates and jack mounting brackets from scratch.
 12-02-2016, 03:42 AM
#29
Thread Starter
Crius, you paint a far better picture than my work requires there are far better builders out there than me but I thank you for your kind comments.
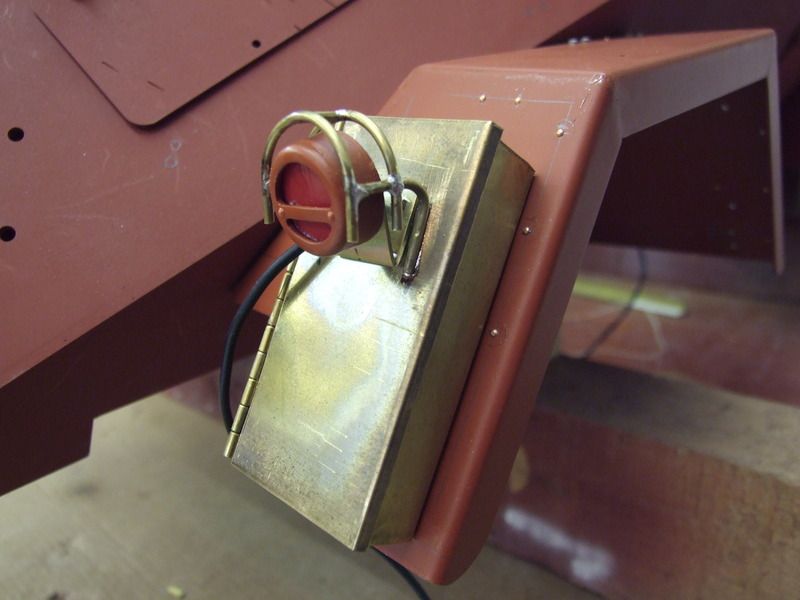
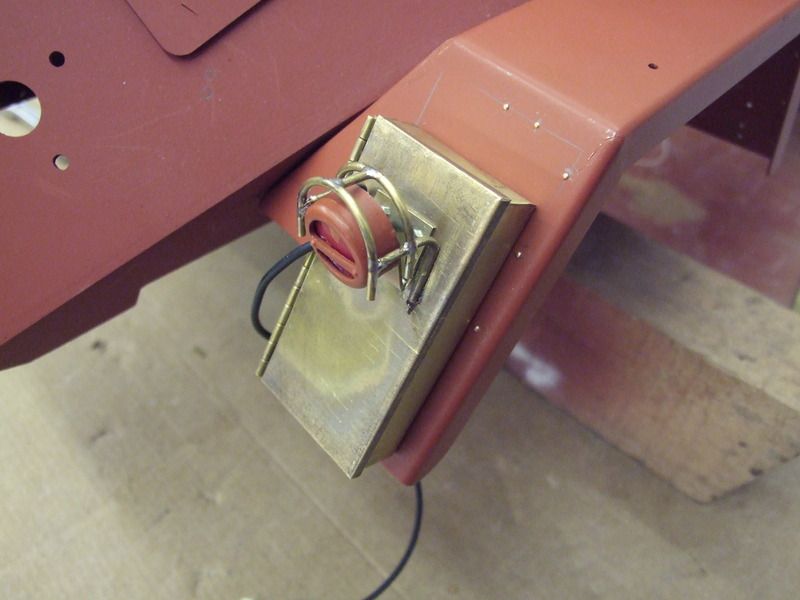
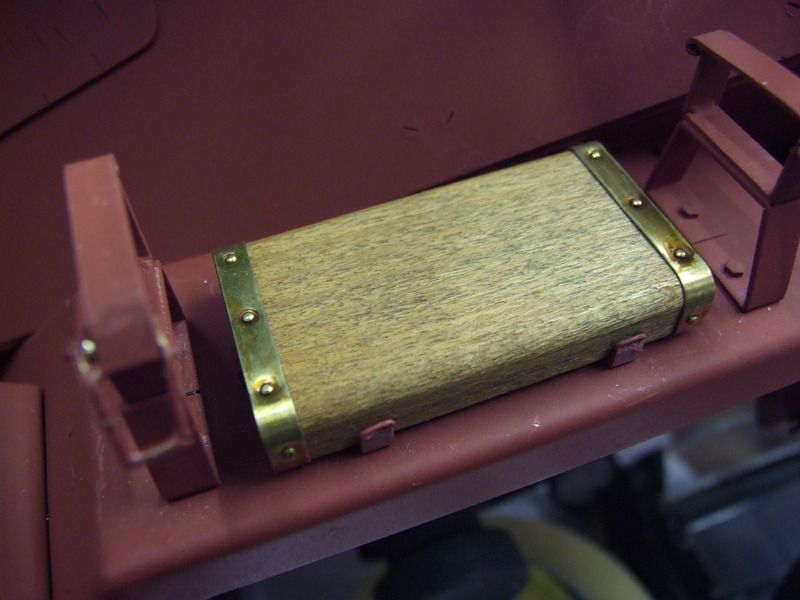
My latest up-date on the Panzersp‰hwagen Sd.Kfz.222 build, I have spent some time making the jack brackets and have also added the registration plates to the rear stowage boxes, the jack and Tetra come from Armorpax next job is installing bulbs into the Notek light then priming all the brass work.
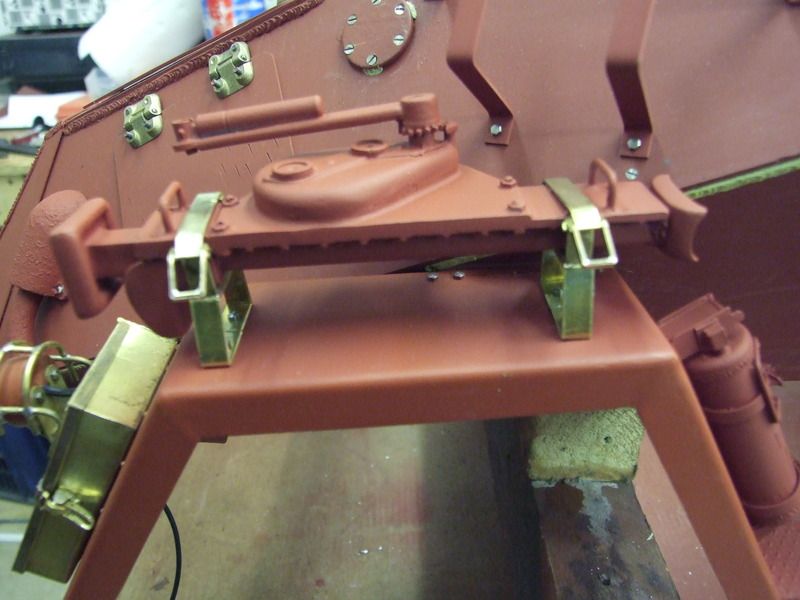
My latest up-date on the Panzersp‰hwagen Sd.Kfz.222 build, I have spent some time making the jack brackets and have also added the registration plates to the rear stowage boxes, the jack and Tetra come from Armorpax next job is installing bulbs into the Notek light then priming all the brass work.
12-02-2016, 08:09 PM
#30
Don't sell yourself short, Mark. I've seen pieces in museums that didn't look as good as this. I can't wait to see video of the finished product out in the field.
01-11-2017, 02:55 PM
#31
Thread Starter
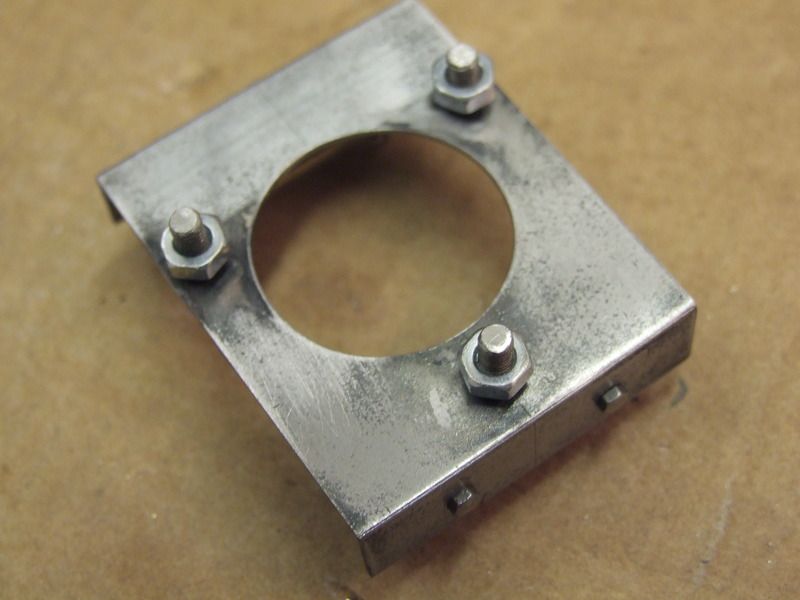
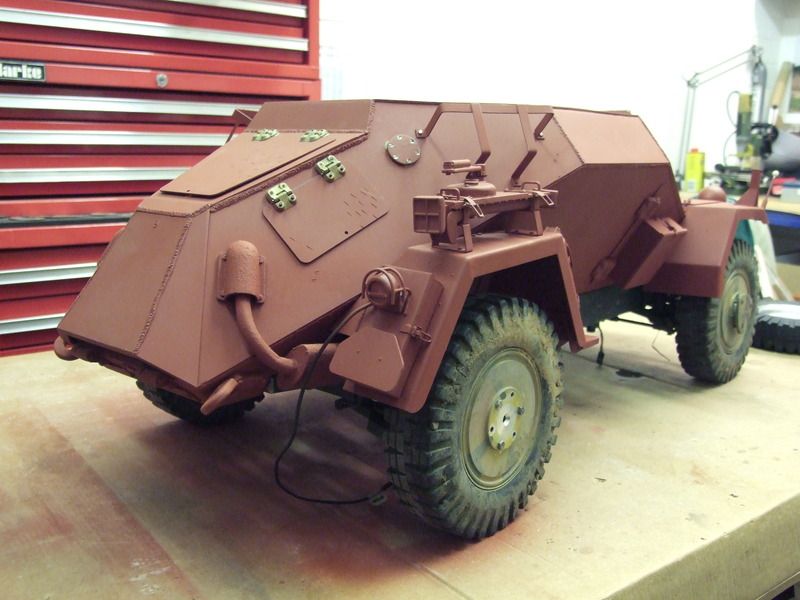
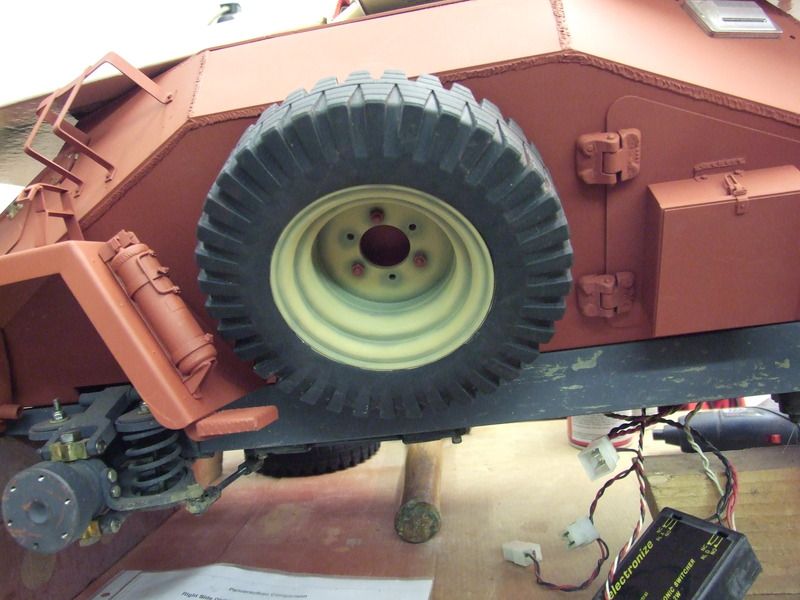
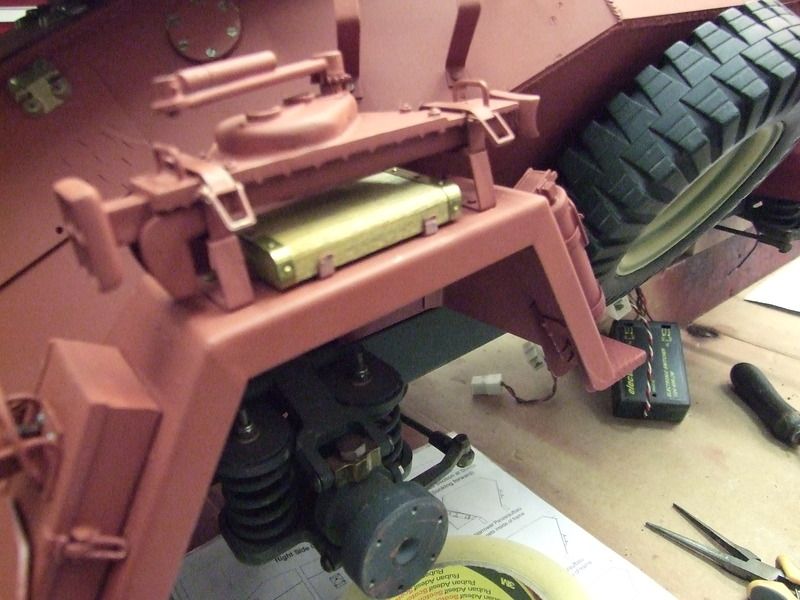
Recently I modified the spare wheel and also made the bracket that holds the wheel on the side of the Panzeraufbau this still needs to be primed and fitted

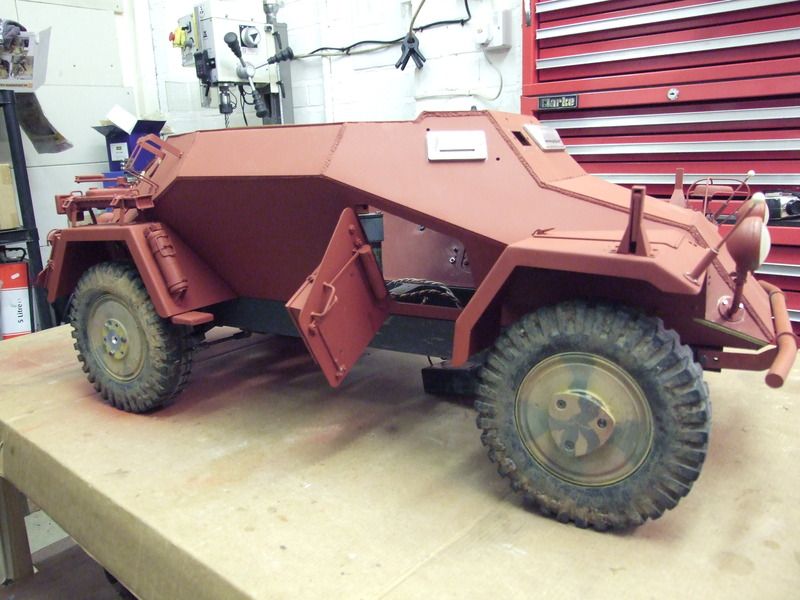
Here are a few pictures of the Panzeraufbau and Fahrgestell re-united just for a few pictures the rear Notek is not fitted while I work on the lighting.
Here are a few pictures of the Panzeraufbau and Fahrgestell re-united just for a few pictures the rear Notek is not fitted while I work on the lighting.
 01-19-2017, 12:16 PM
#33
Thread Starter
My latest update on the Sd.Kfz.222 build is of the spare wheel and mounting bracket used on the Ausf B, 5 series which is what the Armortek kit is, the wheel was profiled on the outside and inside removing the square edges and rounding them, the mounting bracket was crafted from steel and bolts as the real item onto brackets attached to the Panzeraufbau, when the spare wheel is in place this detail won’t be seen so one wonders why I bothered, the real vehicle stowed the tarpaulins for the vehicle in the centre of the wheel along with anything else the crew could stash this was then mostly covered with a canvas cover over the spare wheel.
More pictures can be found on my Facebook page Werkstatt - 5
More pictures can be found on my Facebook page Werkstatt - 5
01-20-2017, 02:39 PM
#34
Thread Starter
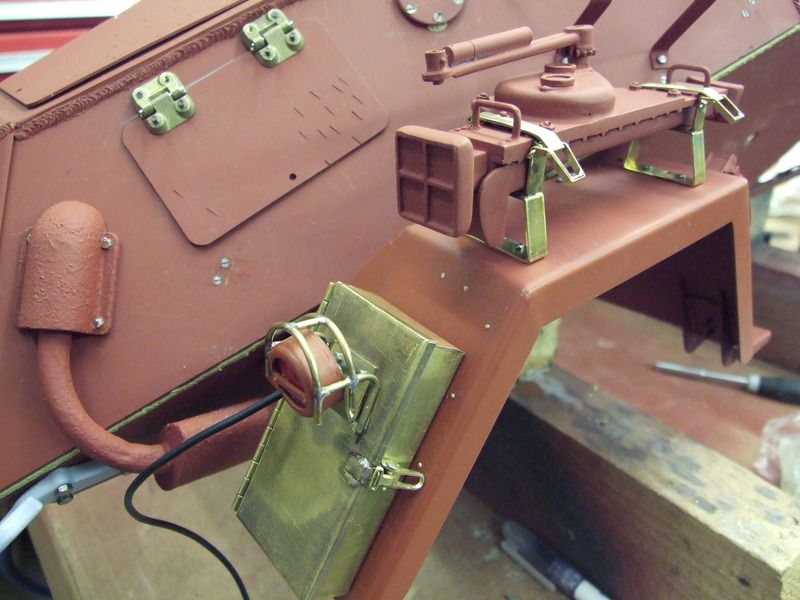
Tonight’s update on the Sd.Kfz.222 build, is the jack block and mounting brackets, on the Ausf B, 5 series the jack was mounted on the right rear mudguard and were held in place with leather straps which have not yet been fitted.
More pictures can be found on my Facebook page Werkstatt - 5
More pictures can be found on my Facebook page Werkstatt - 5
01-21-2017, 11:54 AM
#35
Sweet work on the straps for the block... all to be hidden by that jack!
Jeff
Jeff
01-22-2017, 04:07 PM
#36
Thread Starter
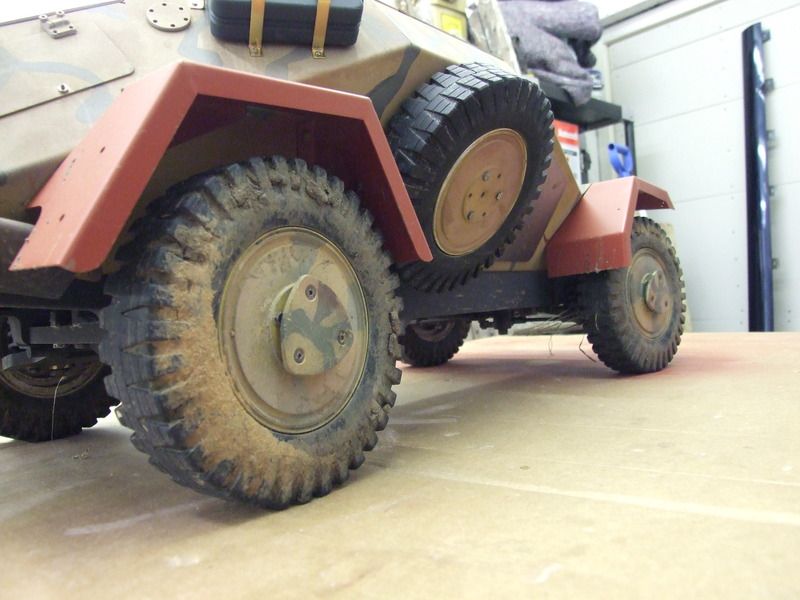
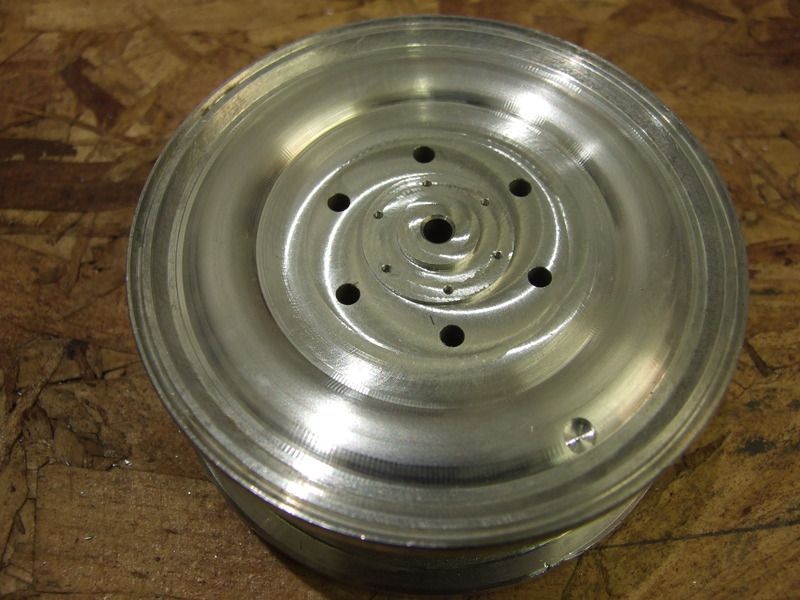
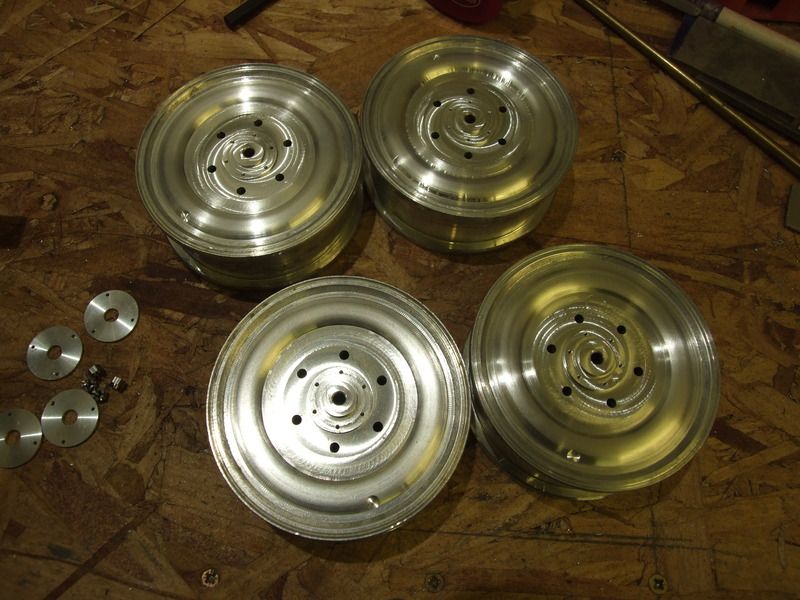
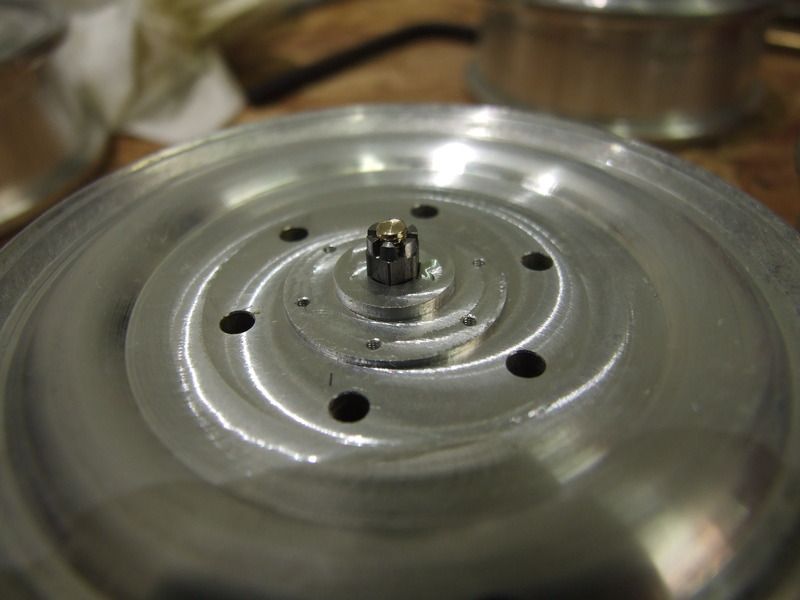
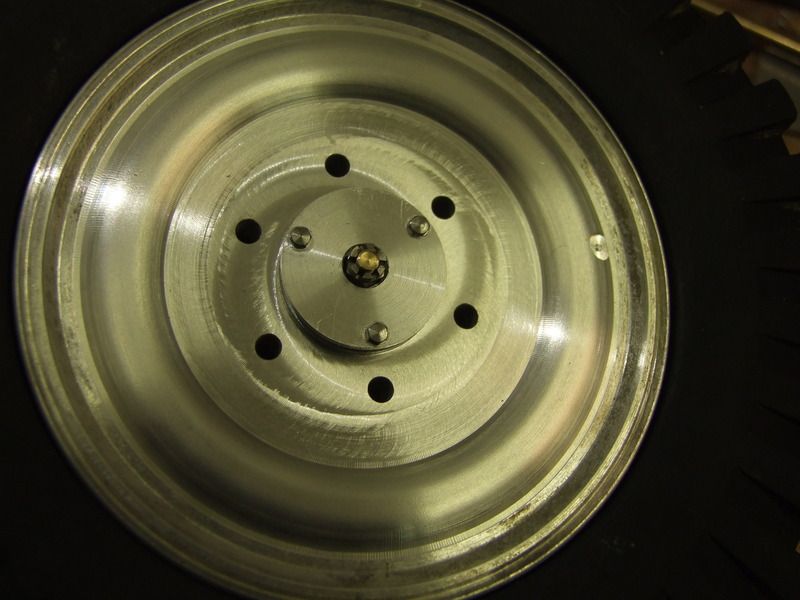
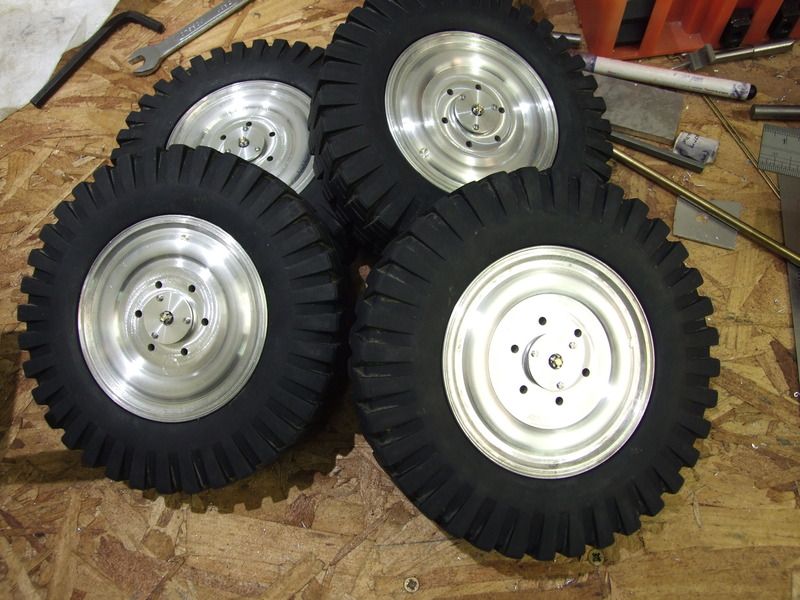
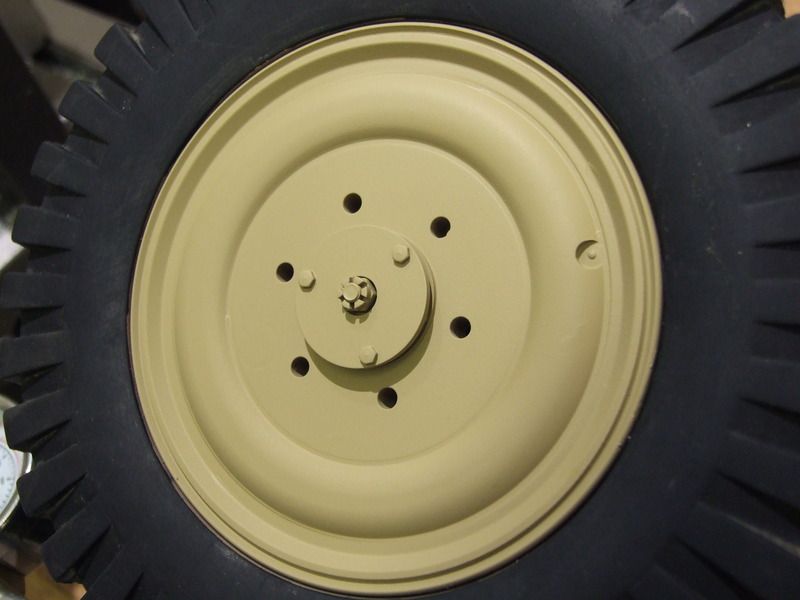
I wanted to add a little more detail to the Sd.Kfz.222 wheels as I felt they would benefit from more work, understanding which variant 222 you have is key to completing the model more accurately the Armortek Sd.Kfz.222 is the Ausf B, 5 series on this variant the wheels no longer had the triangular armour plate so this could be removed and the centre hub can then be machined into the wheel with the correct bolt detail, the centre nut is a castle nut I made I also made the outer plates for the centre hub which resembles a washer, the wheels have x6 bolts x3 sit on the inside of the outer cover and can only be seen from the side and x3 are visible on the outside later 5 series variants had x4 bolts showing on the outside and possible another x4 on the inside, the work to profile the wheels was done on 2 machines the radius was cut on a lathe, kind use from Lee Sellers of Newthorpe models the rest of the machining was done on my mill, the outer plates and castle nuts were done on my own lathe.
These are the wheels before modiforcation
First job was to simply remove the tyres from the wheels before the machining can be done.
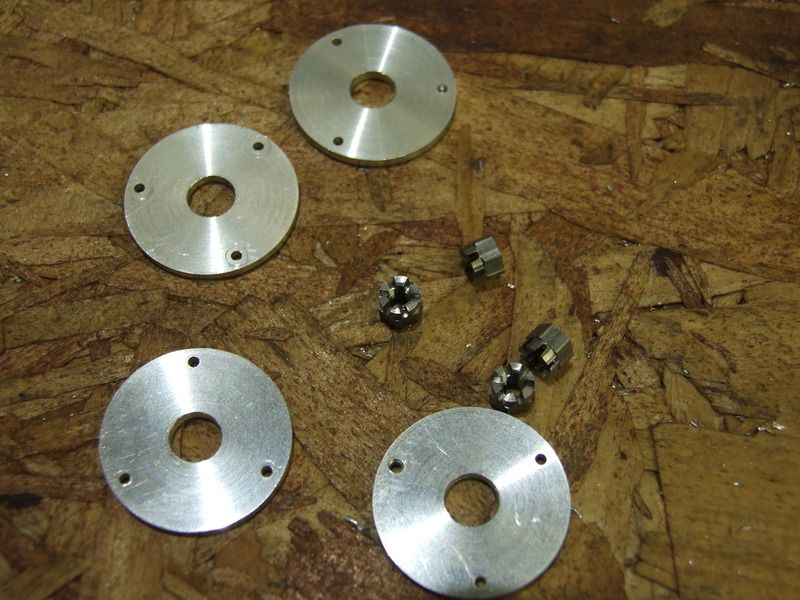
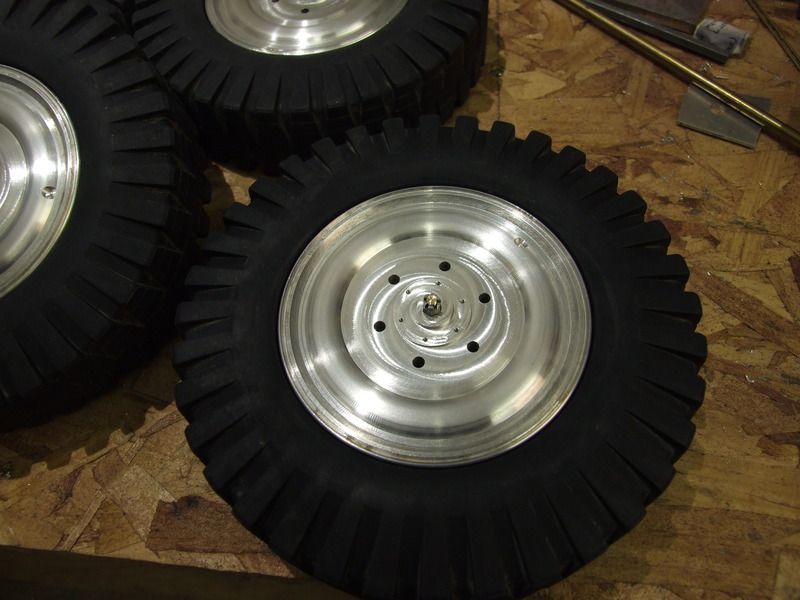
These are the wheels before modiforcation
First job was to simply remove the tyres from the wheels before the machining can be done.
05-24-2017, 01:14 PM
#37
Hey Rivetcounter! I know it's been a while since you posted updates on this restoration and your detailing is OUTSTANDING.
AND I was just BLOVERATING (that means BSing to those unedercated) about that 222 I found on the Armortek 222 build forum.
I'll start my own thread IF I could figure out how to post pictures. THANKS!
AND I was just BLOVERATING (that means BSing to those unedercated) about that 222 I found on the Armortek 222 build forum.
I'll start my own thread IF I could figure out how to post pictures. THANKS!
Last edited by Old MSgt; 05-26-2017 at 03:58 AM.
05-24-2017, 02:03 PM
#38
Thread Starter
Hi Mike, you are fast becoming the sole owner of all Armortek imports into the US, Iím not surprised you have gone for the 222 but where you find the time I donít know, unfortunately I havenít had the time recently to do any work on the 222 I also have the Panther kit thatís yet to be started once the 222 is completed.
I have sent you a PM
I have sent you a PM
05-25-2017, 02:10 AM
#39
Another one, Mike? Damn. --
"You can't have the whole world, Agamemnon. It's too big. Even for you."
All my life I've been saying that the man I'd most like to be adopted by is Hugh Hefner, but now it appears I may have to rethink that position. So how would you and Mrs. MSgt Mike feel about adopting a 56-year-old hippie problem-child?
05-25-2017, 03:59 AM
#40
Rivet, since I erased my 'high jacking' of your ABSOLUTELY BEAUTIFUL detail work on this 222, I look forward to when you can resume your thread (when you get time.) That's why, out of TOTAL RESPECT for you EXCELLENT WORK, I brought this forward again (from page 14).
THANKS MARK!
Mike
THANKS MARK!
Mike
Last edited by Old MSgt; 05-26-2017 at 02:35 AM.
05-25-2017, 12:23 PM
#41
Thread Starter
Mike, I have no problem with you hijacking my post and I don’t see it as hijacking I merely see it as interest please don’t remove your posts I’m happy they are there.
