


Jp 4


 08-06-2016, 11:36 AM
#27
Thanks for sharing. I am tempted to buy this Jagd!!!!
08-07-2016, 04:39 AM
#29
Nice.
I did that once when I used the recommended Tamiya rattle can, but on most I rarely have the patience to pre-assembly prime.
For me, opening that huge box is like being a kid on Christmas morning, so waiting for paint to dry goes against every fiber in my being.
I did that once when I used the recommended Tamiya rattle can, but on most I rarely have the patience to pre-assembly prime.
For me, opening that huge box is like being a kid on Christmas morning, so waiting for paint to dry goes against every fiber in my being.
08-07-2016, 12:33 PM
#30

Join Date: Jun 2011
Location: Charlotte, NC
Posts: 558
Likes: 0
Received 0 Likes
on
0 Posts
Lookin good Will.
Is it the same aluminum lower hull as the PIV, with just a different lower/front?
Also, I used the Taigen Metal idlers on my in progress IV H, and they were pretty much an exact fit.
Just the bearings that came with them were crap.
It's nice that Tamiya included the weld bead detail on the tubes, I added them myself.
08-07-2016, 02:26 PM
#31

Thread Starter
Dave, yea, its the same lower hull. i think the rear idler is going to look pretty decent, i had my doubts at first, but its growing on me.
Ausf, all i could do was prime the lower hull! before i got started into the build!!
Between the rain and the humidity not much painting or priming has been done. I hope to finish the front glacis with zimm tonight.
the Speed 400 motors came in and will start mounting them and then changing everything over to Dean's connectors. more pics to follow
08-07-2016, 05:57 PM
#33
Thread Starter
If you are interested in how i do zimmerit, here is the way that i have figured that works best for me:
I use Milliput, a hobby knife handle as a roller, a modified flat head screwdriver with the tip filed down at an angle to apply the pattern.
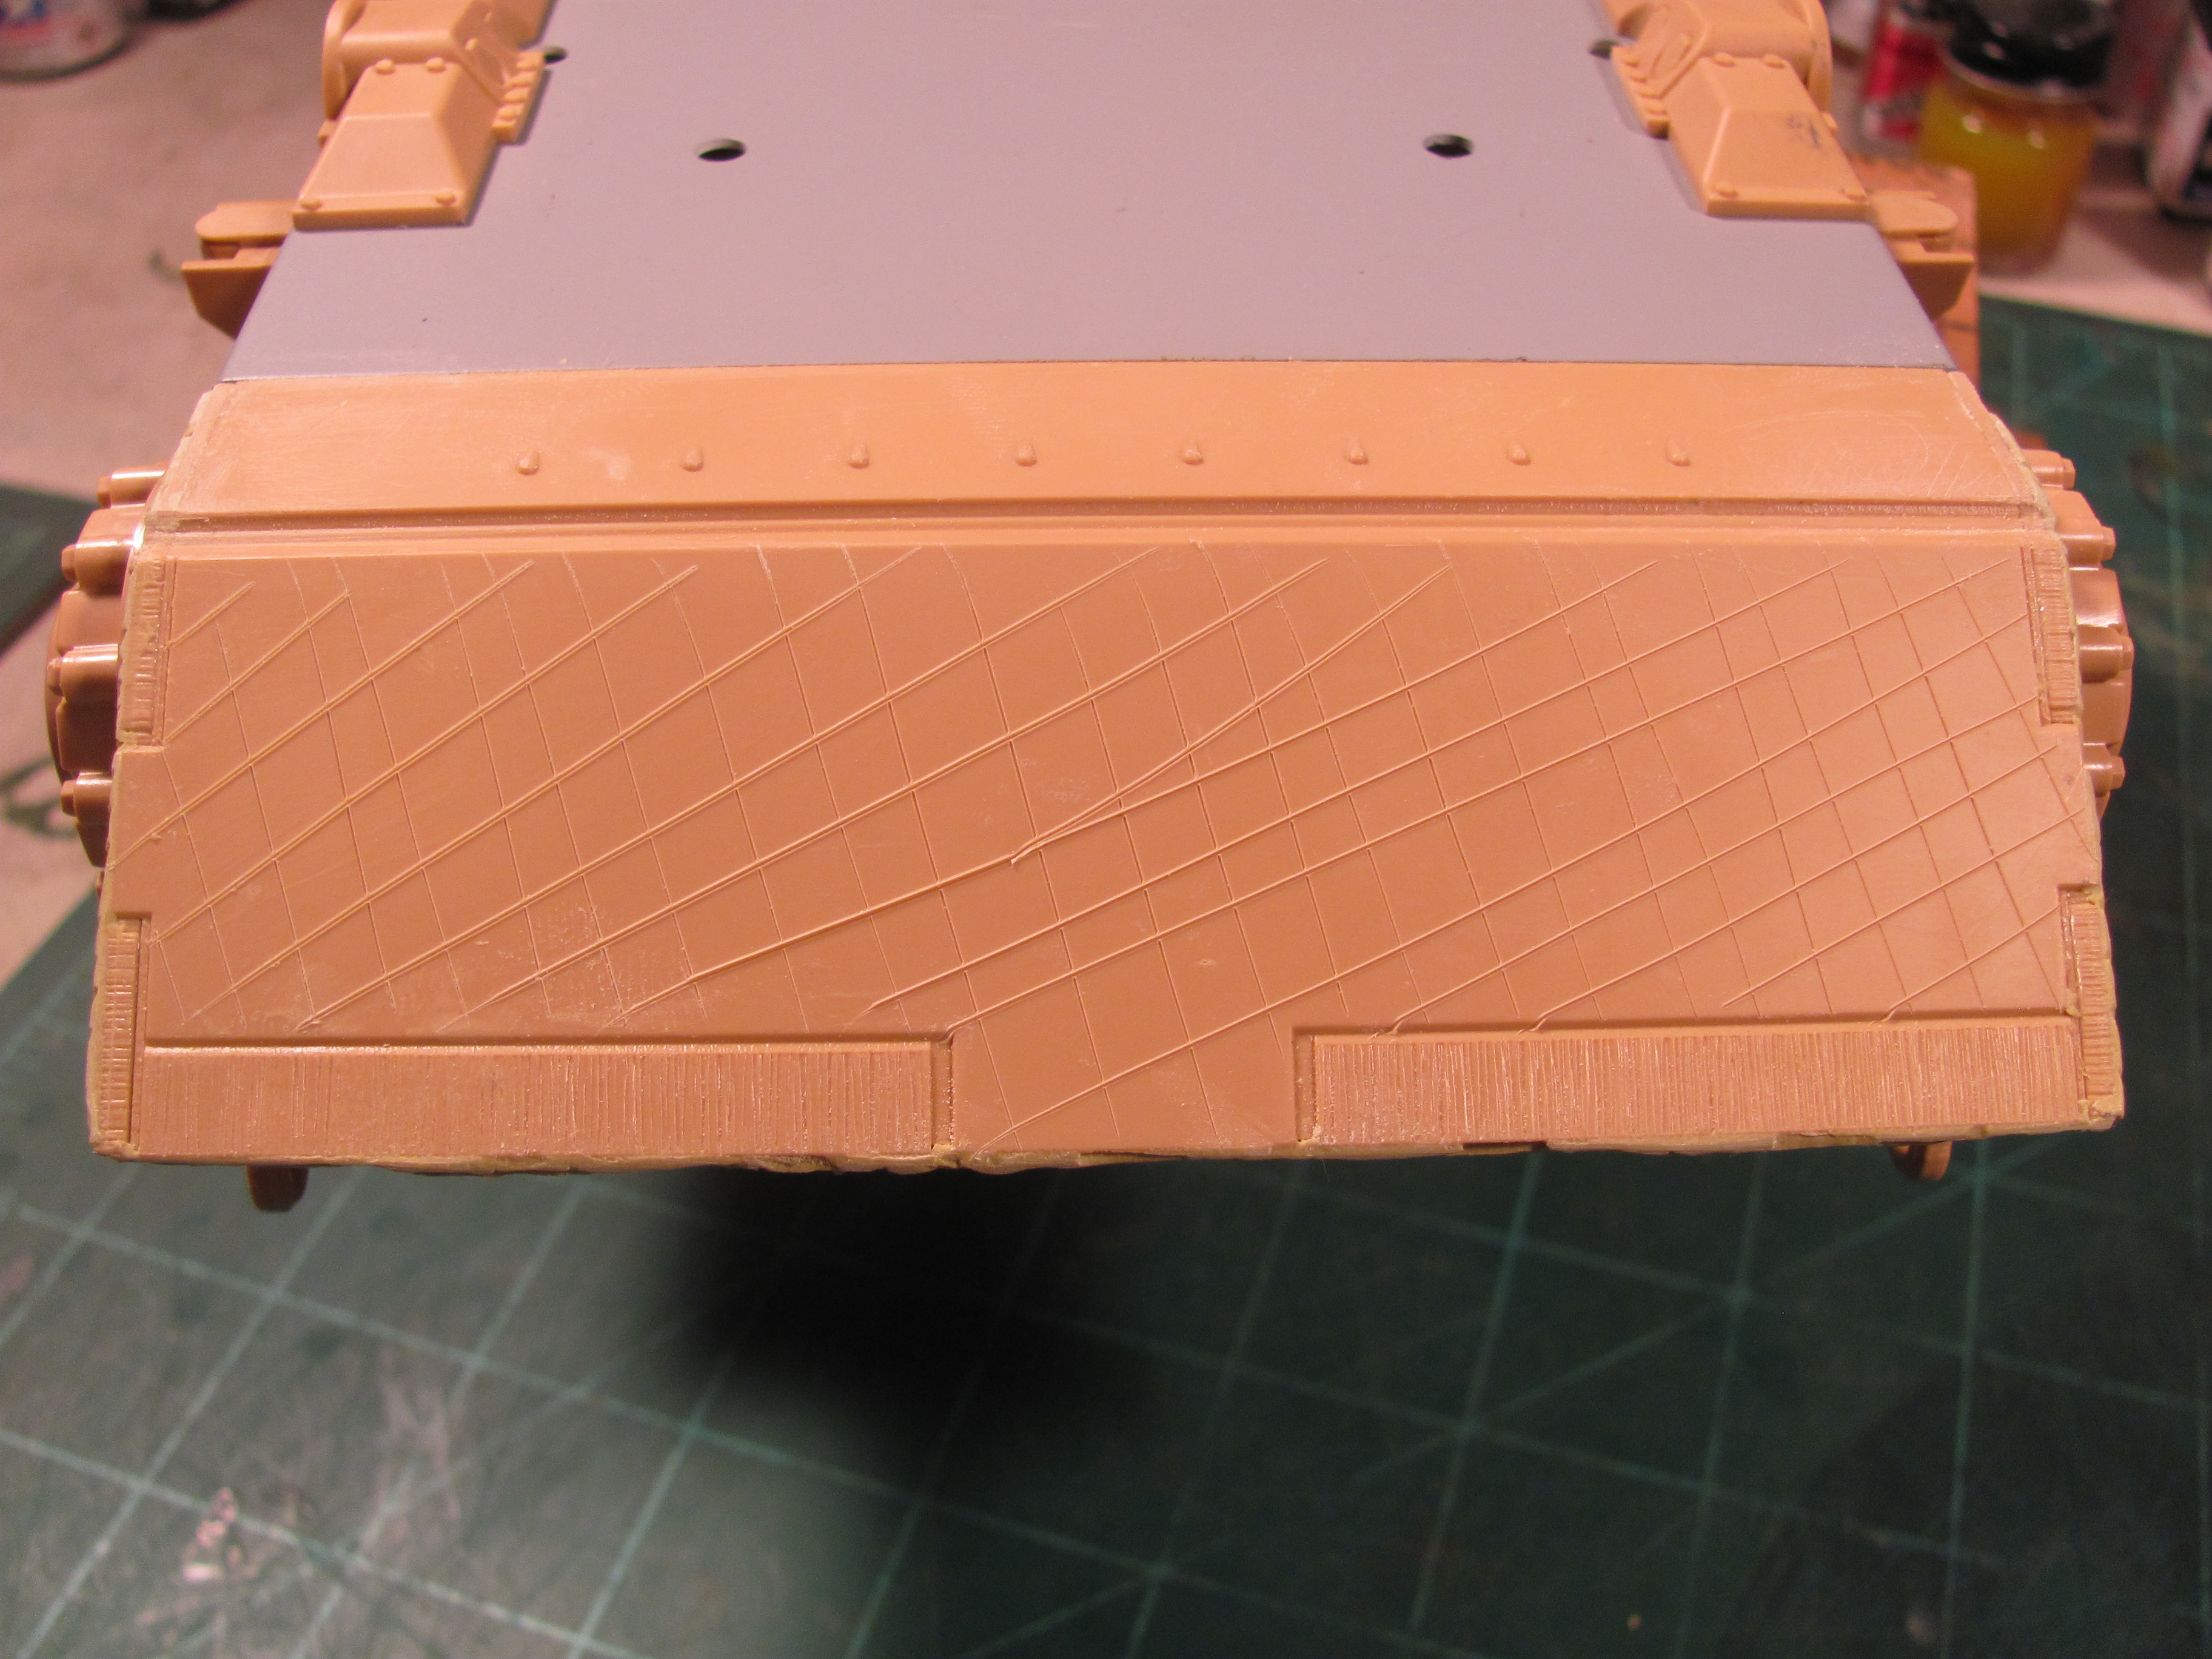
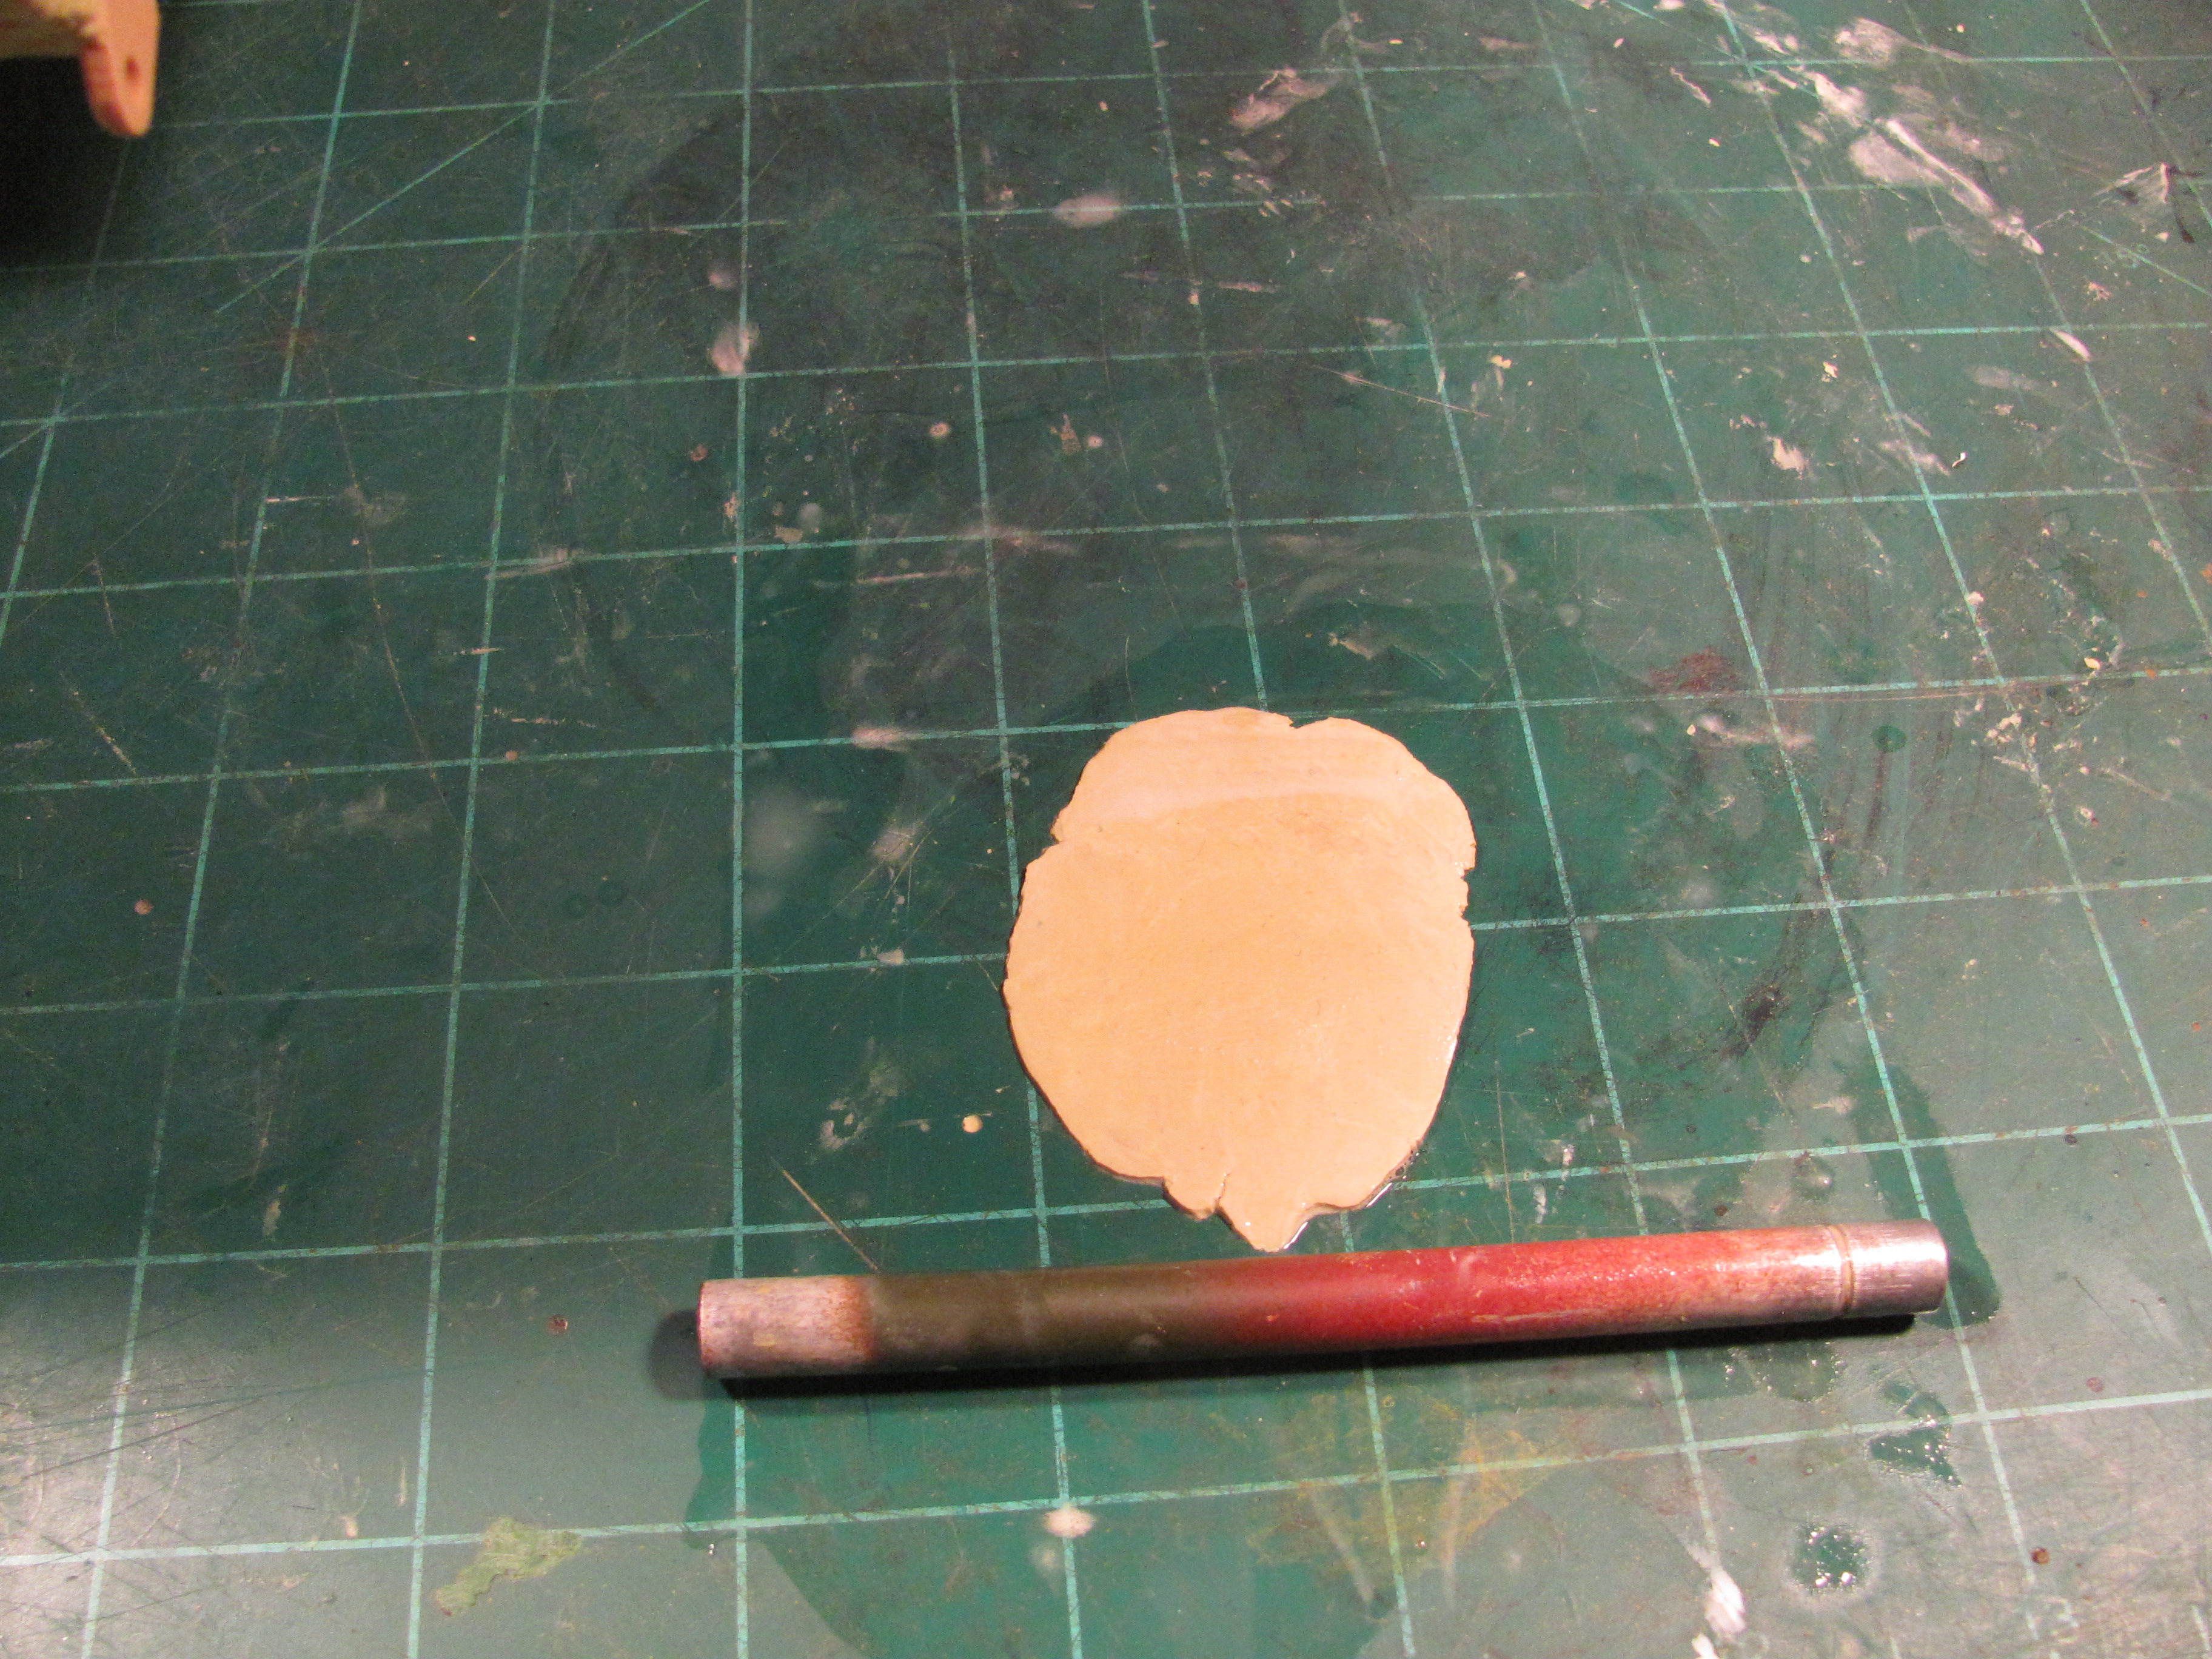
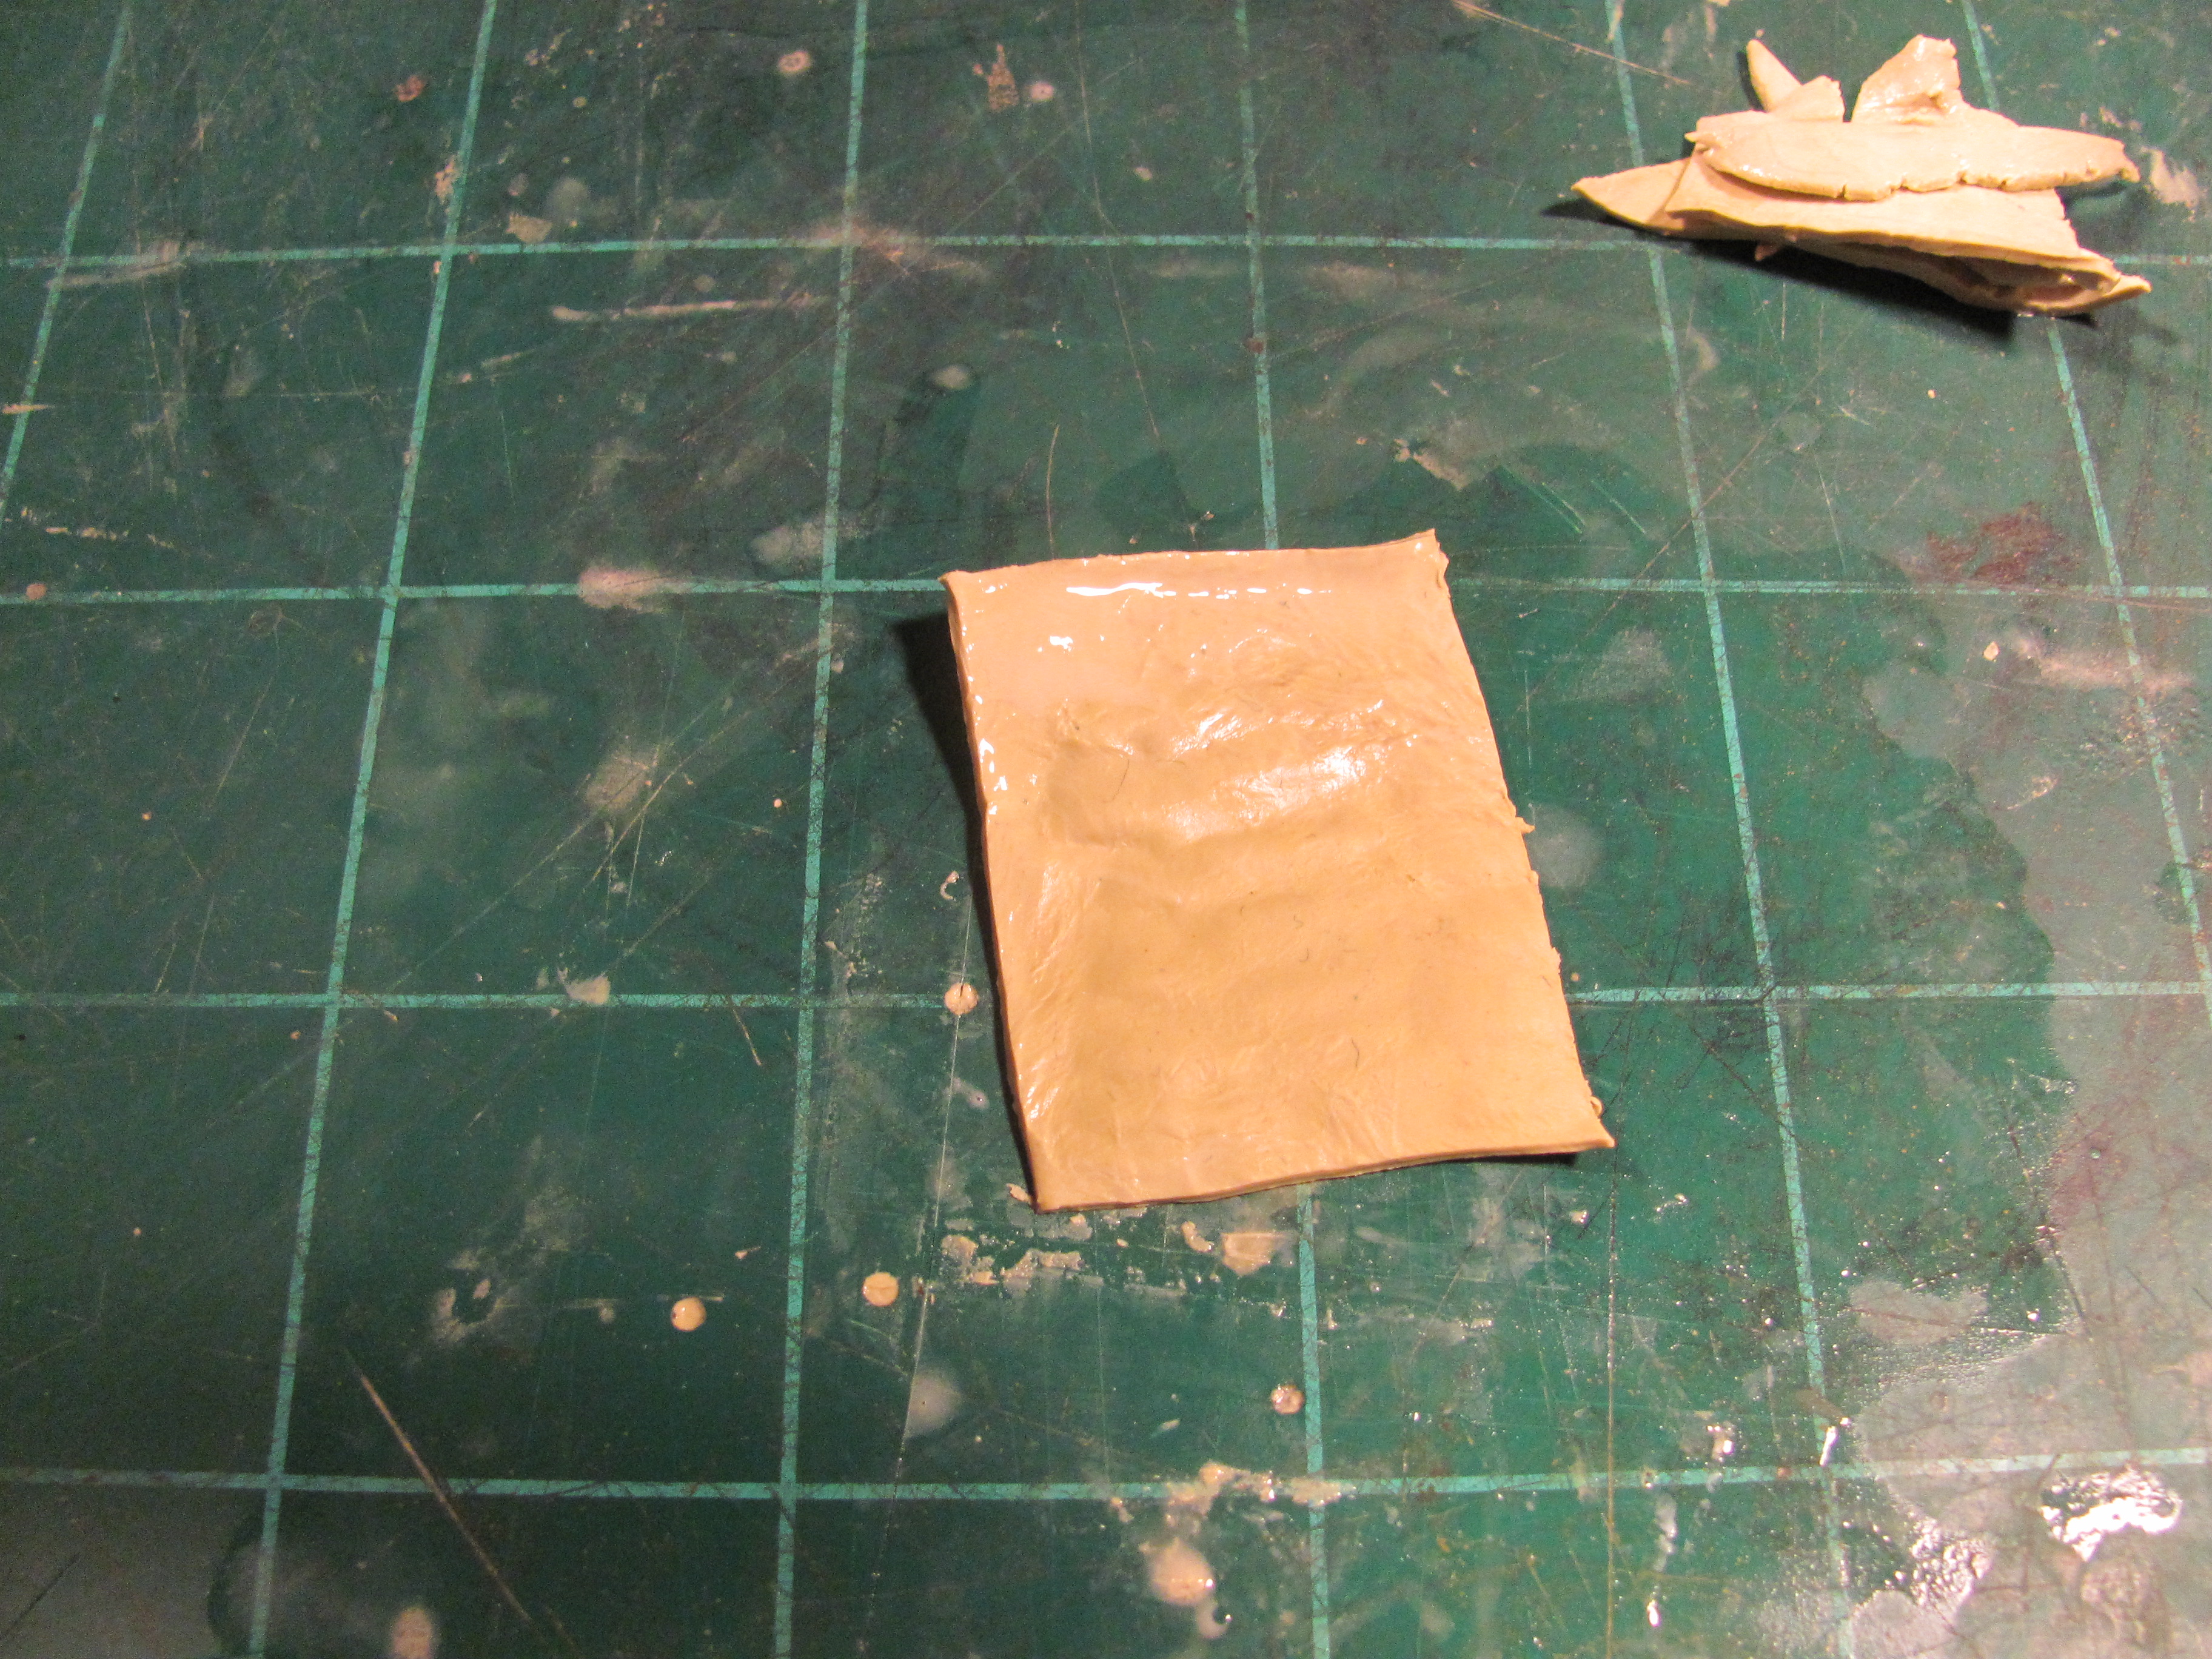
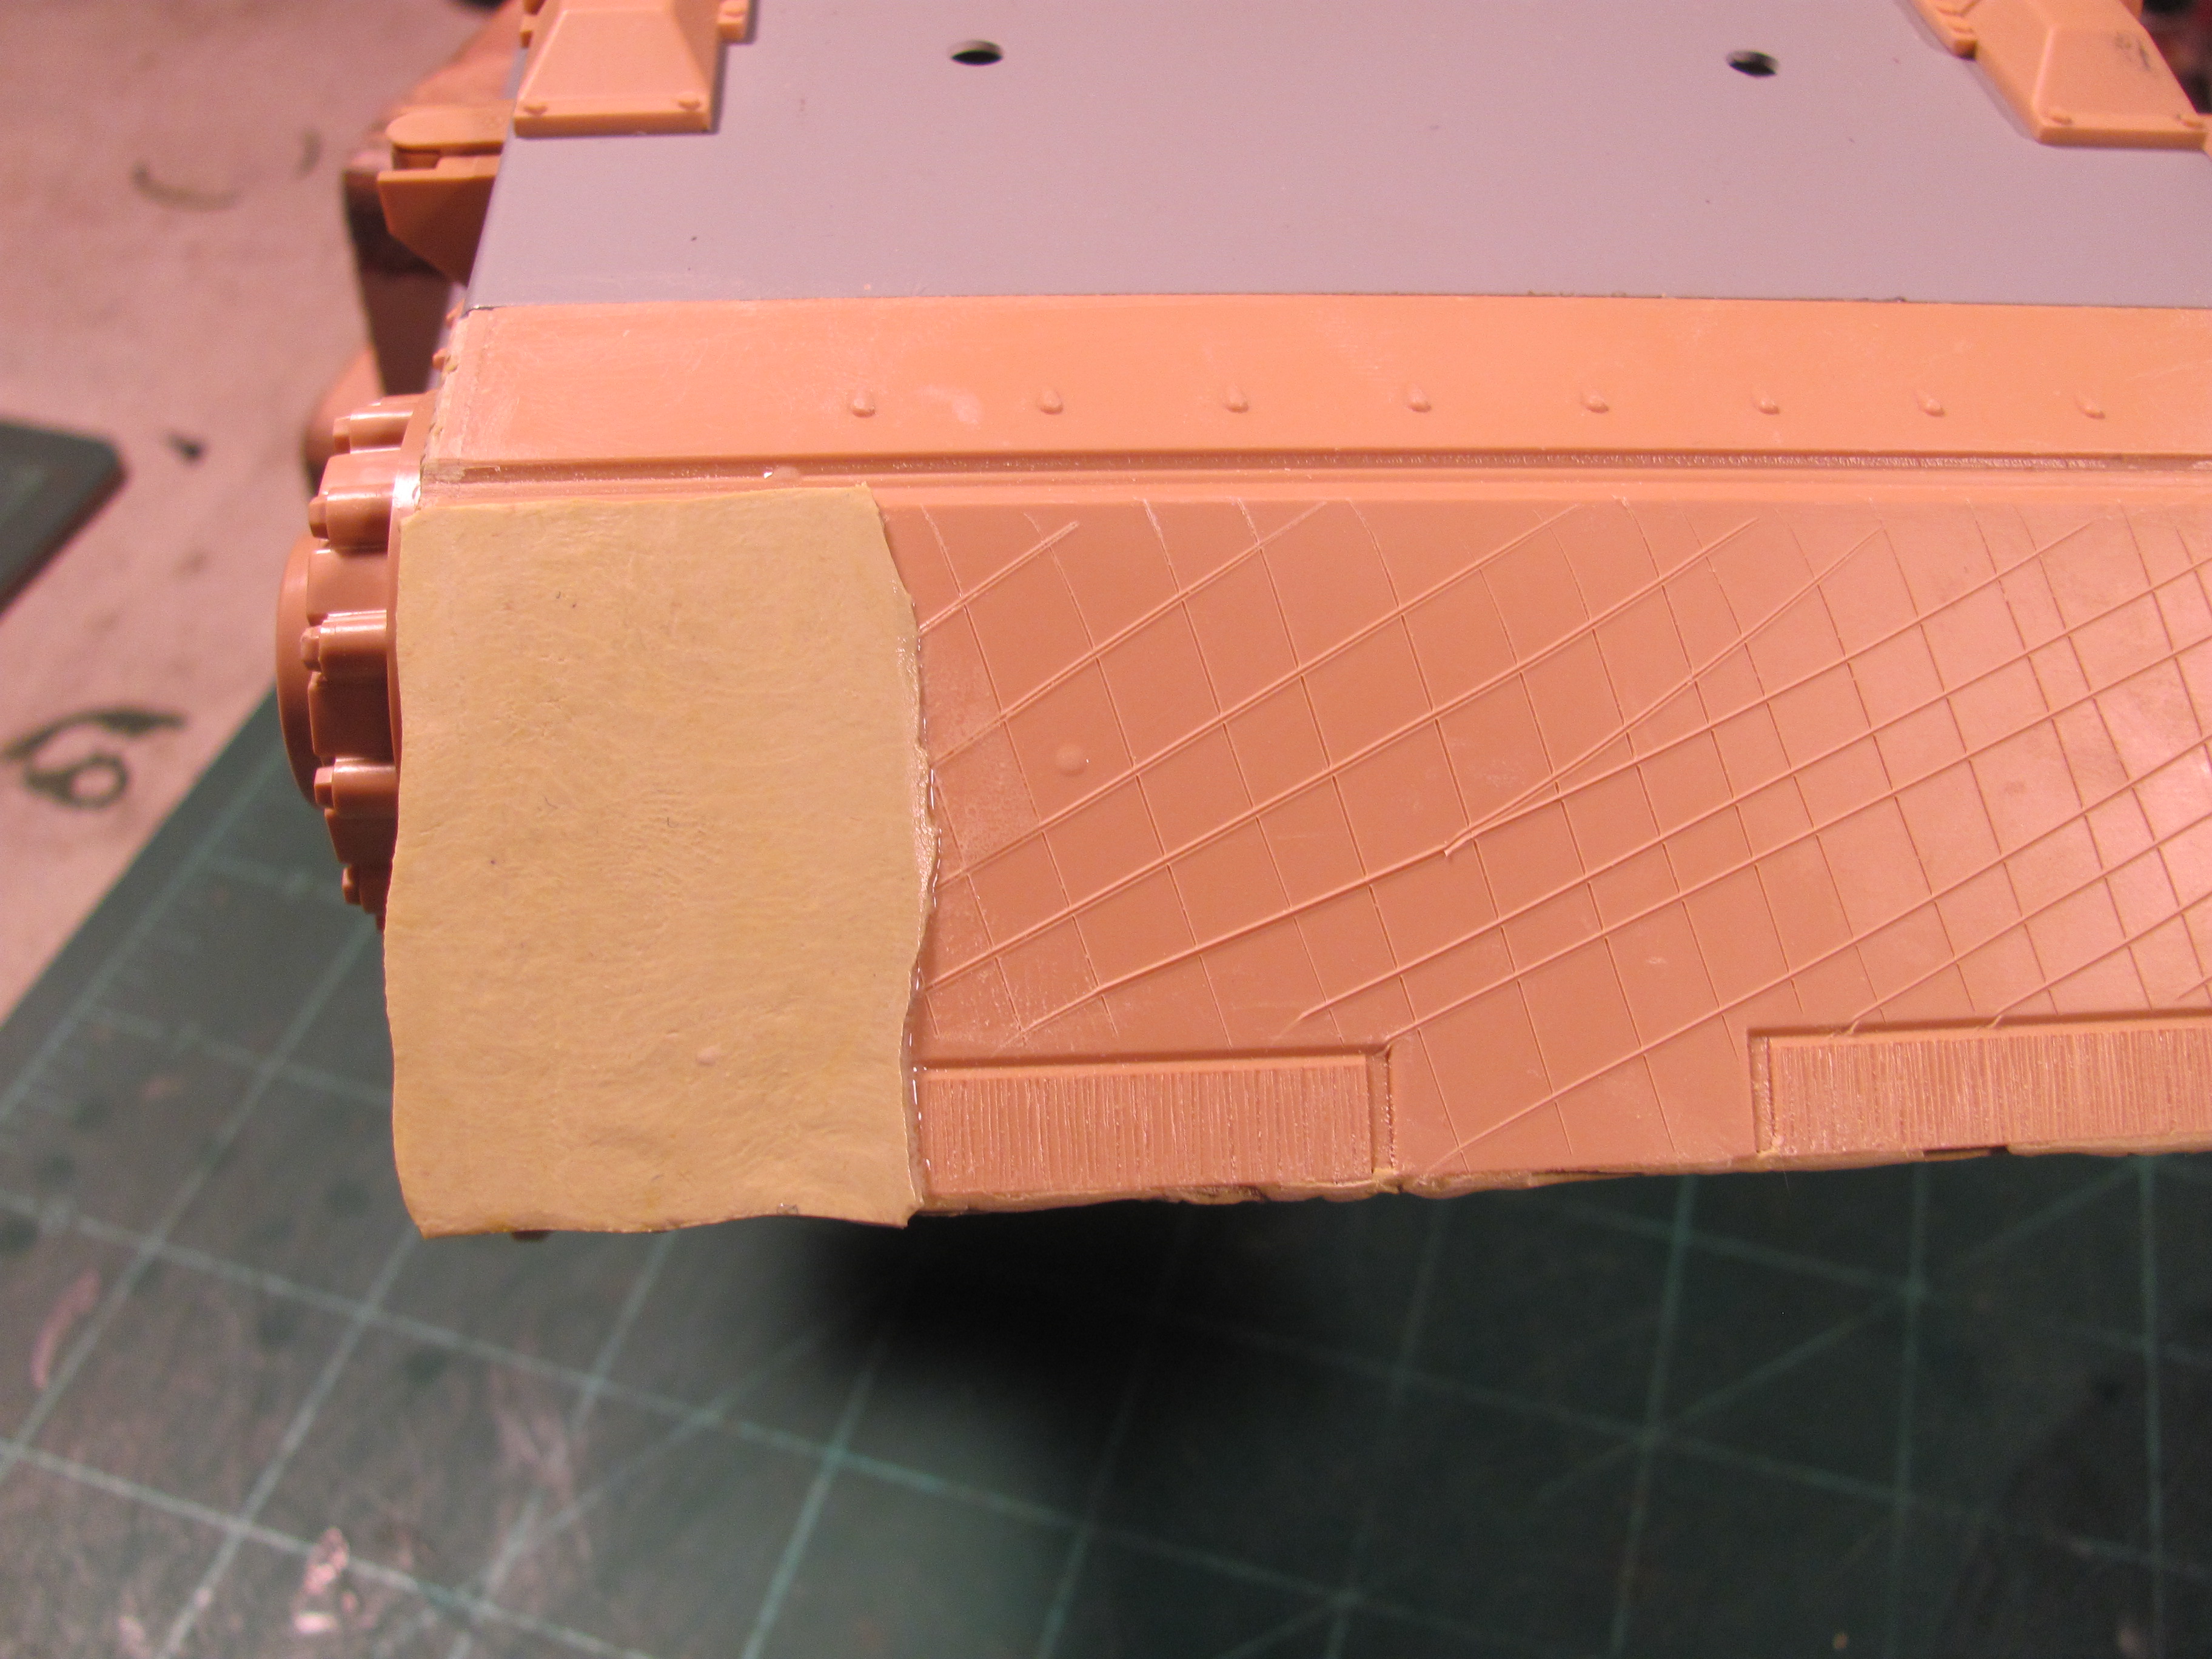
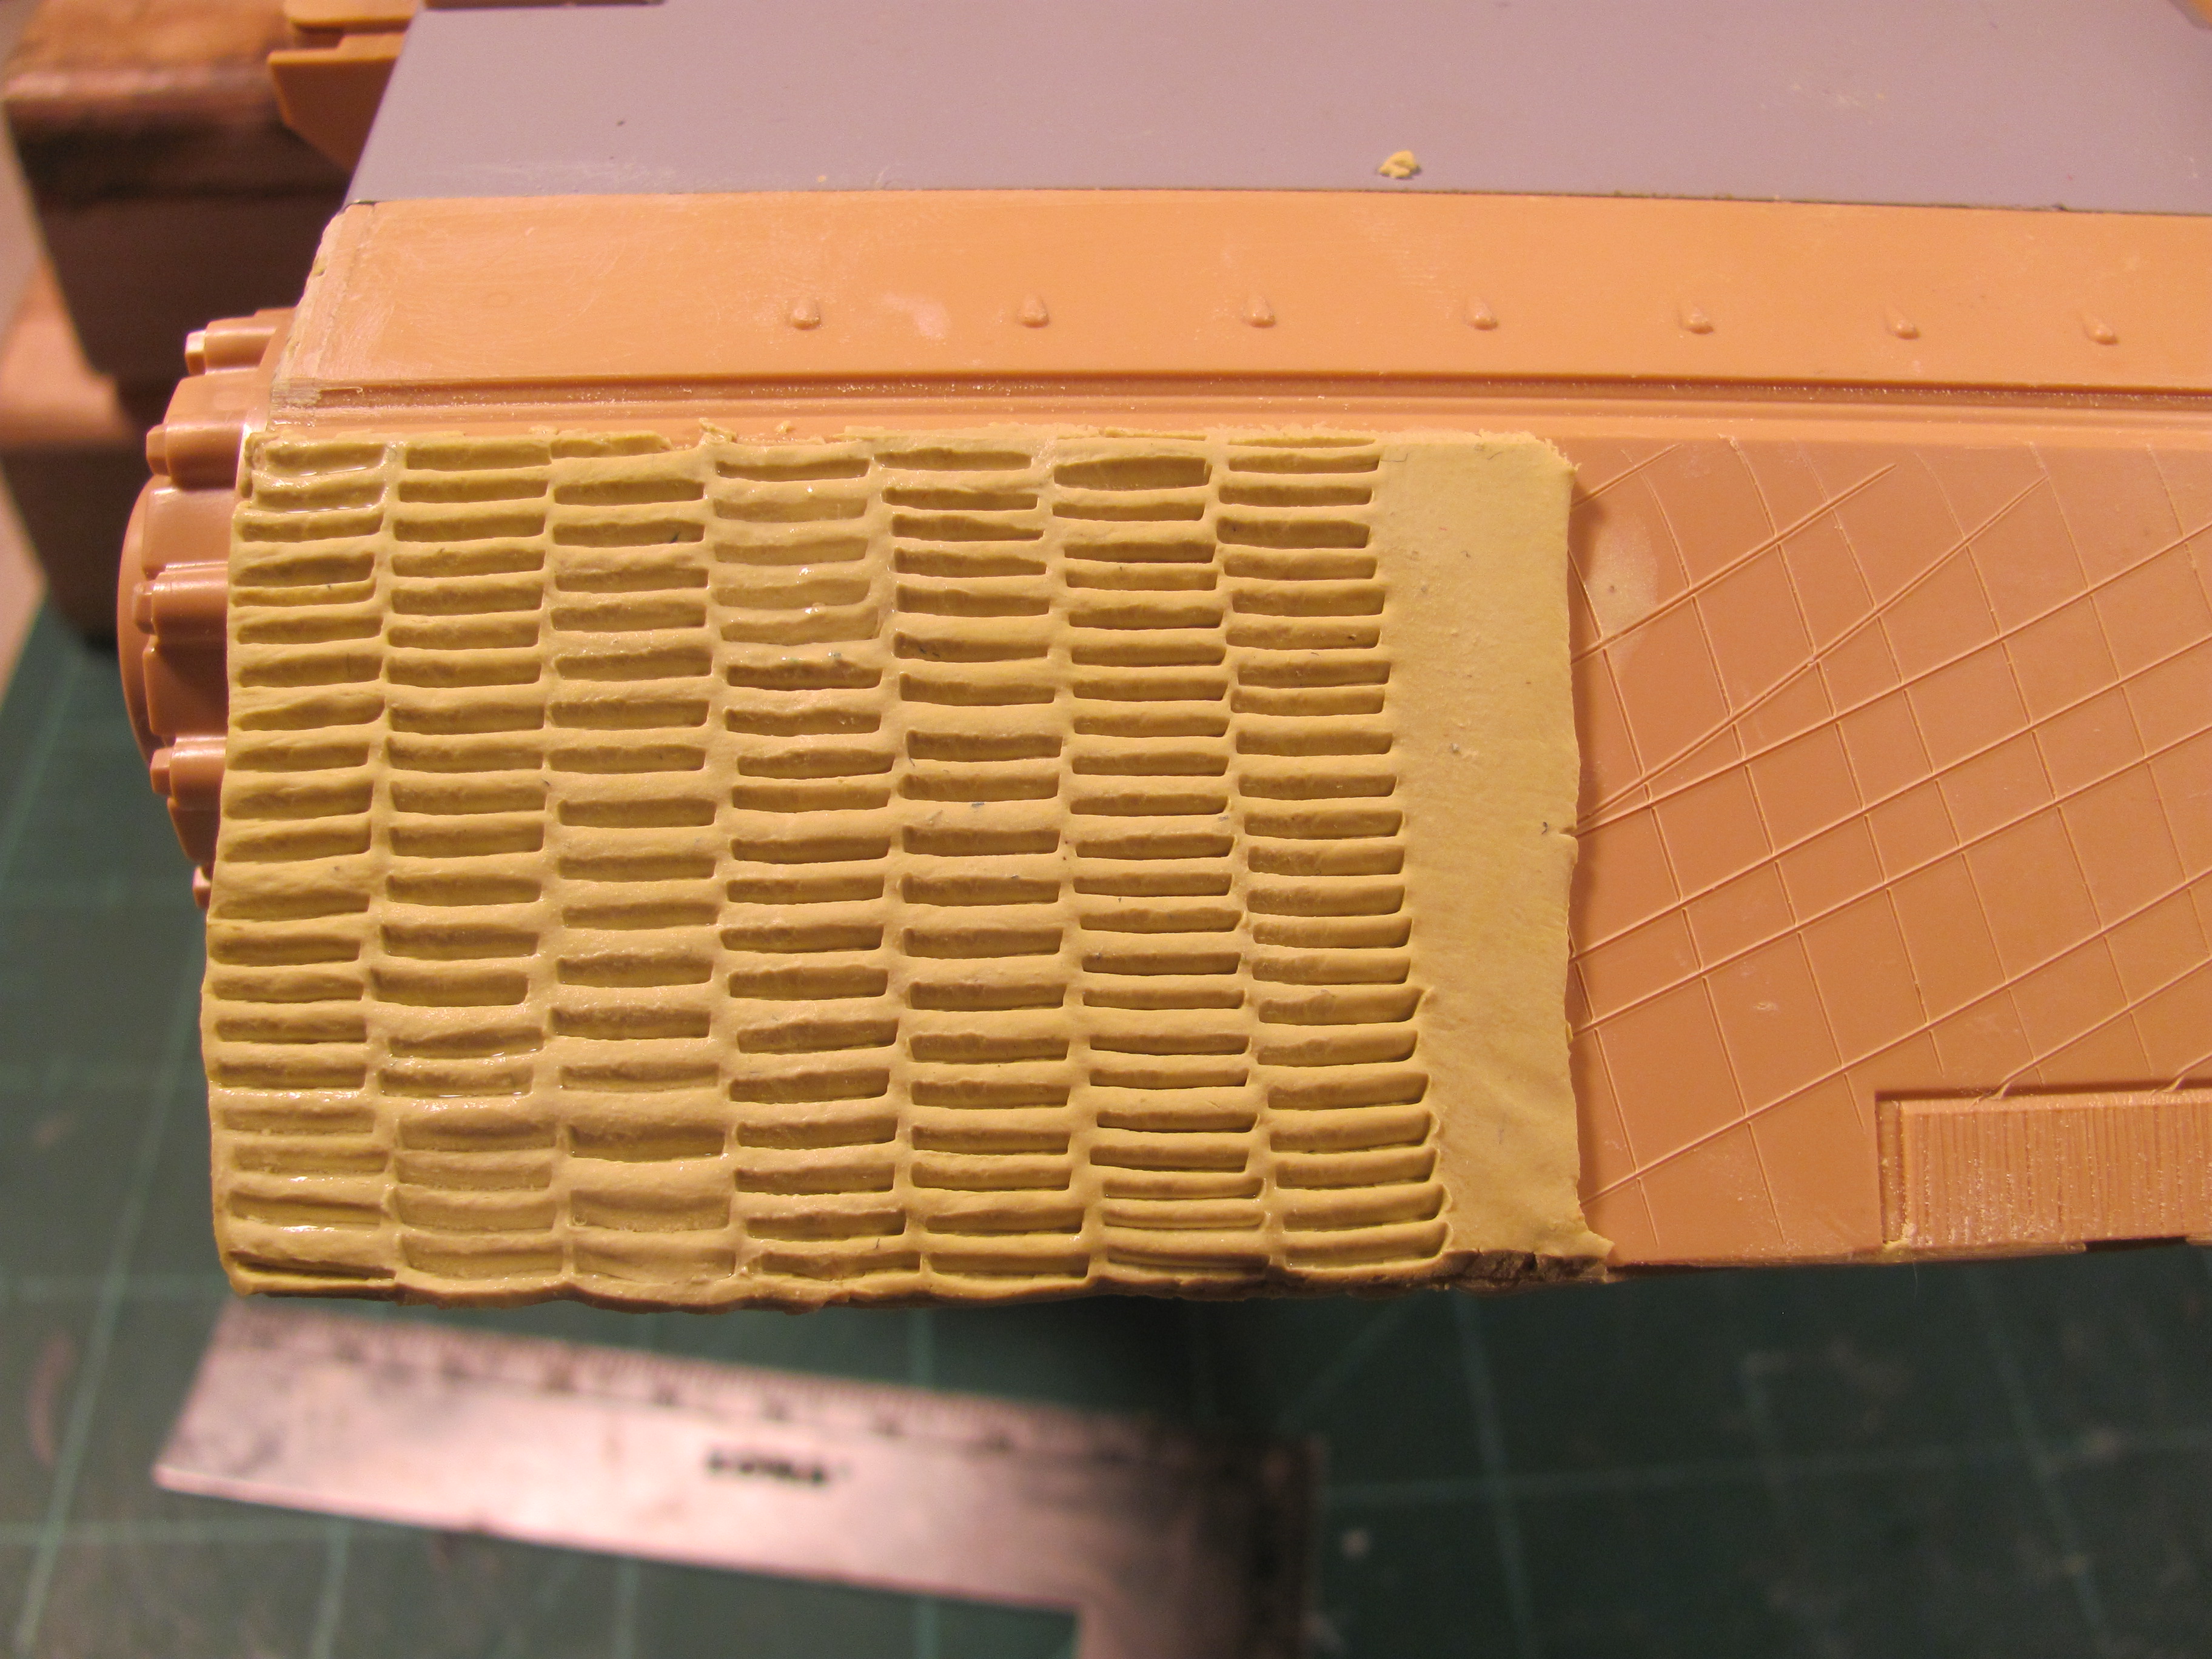
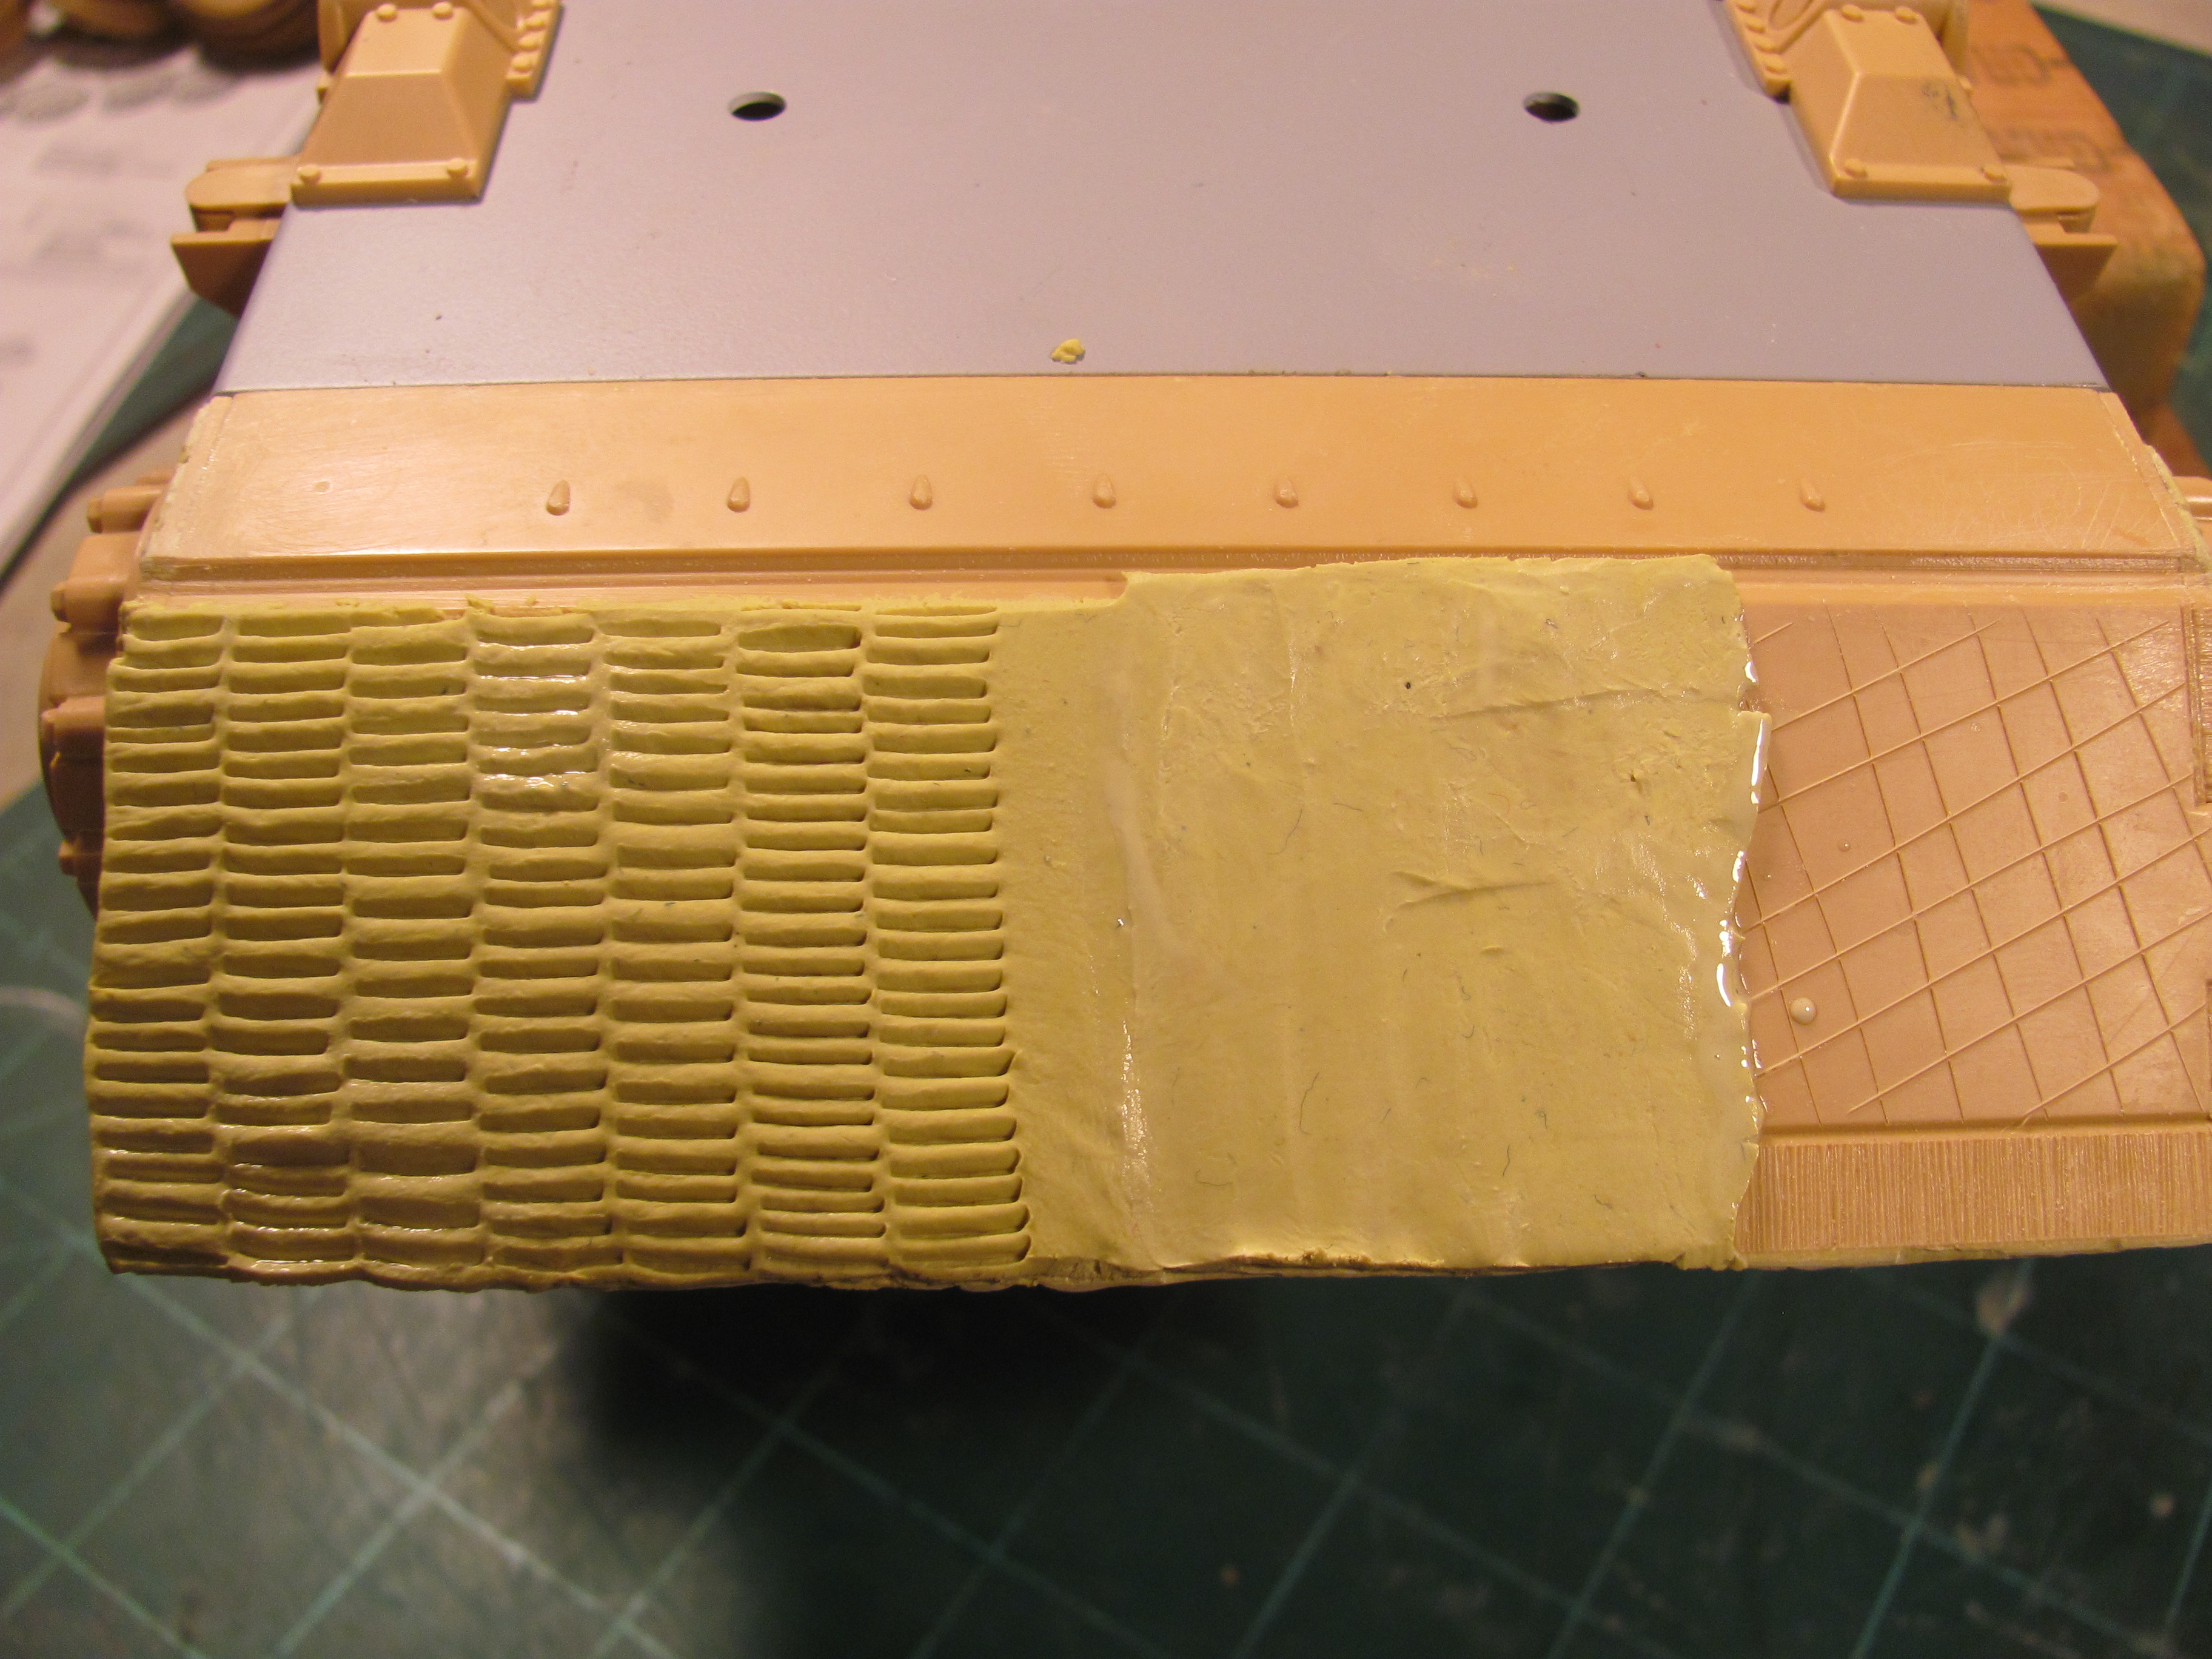
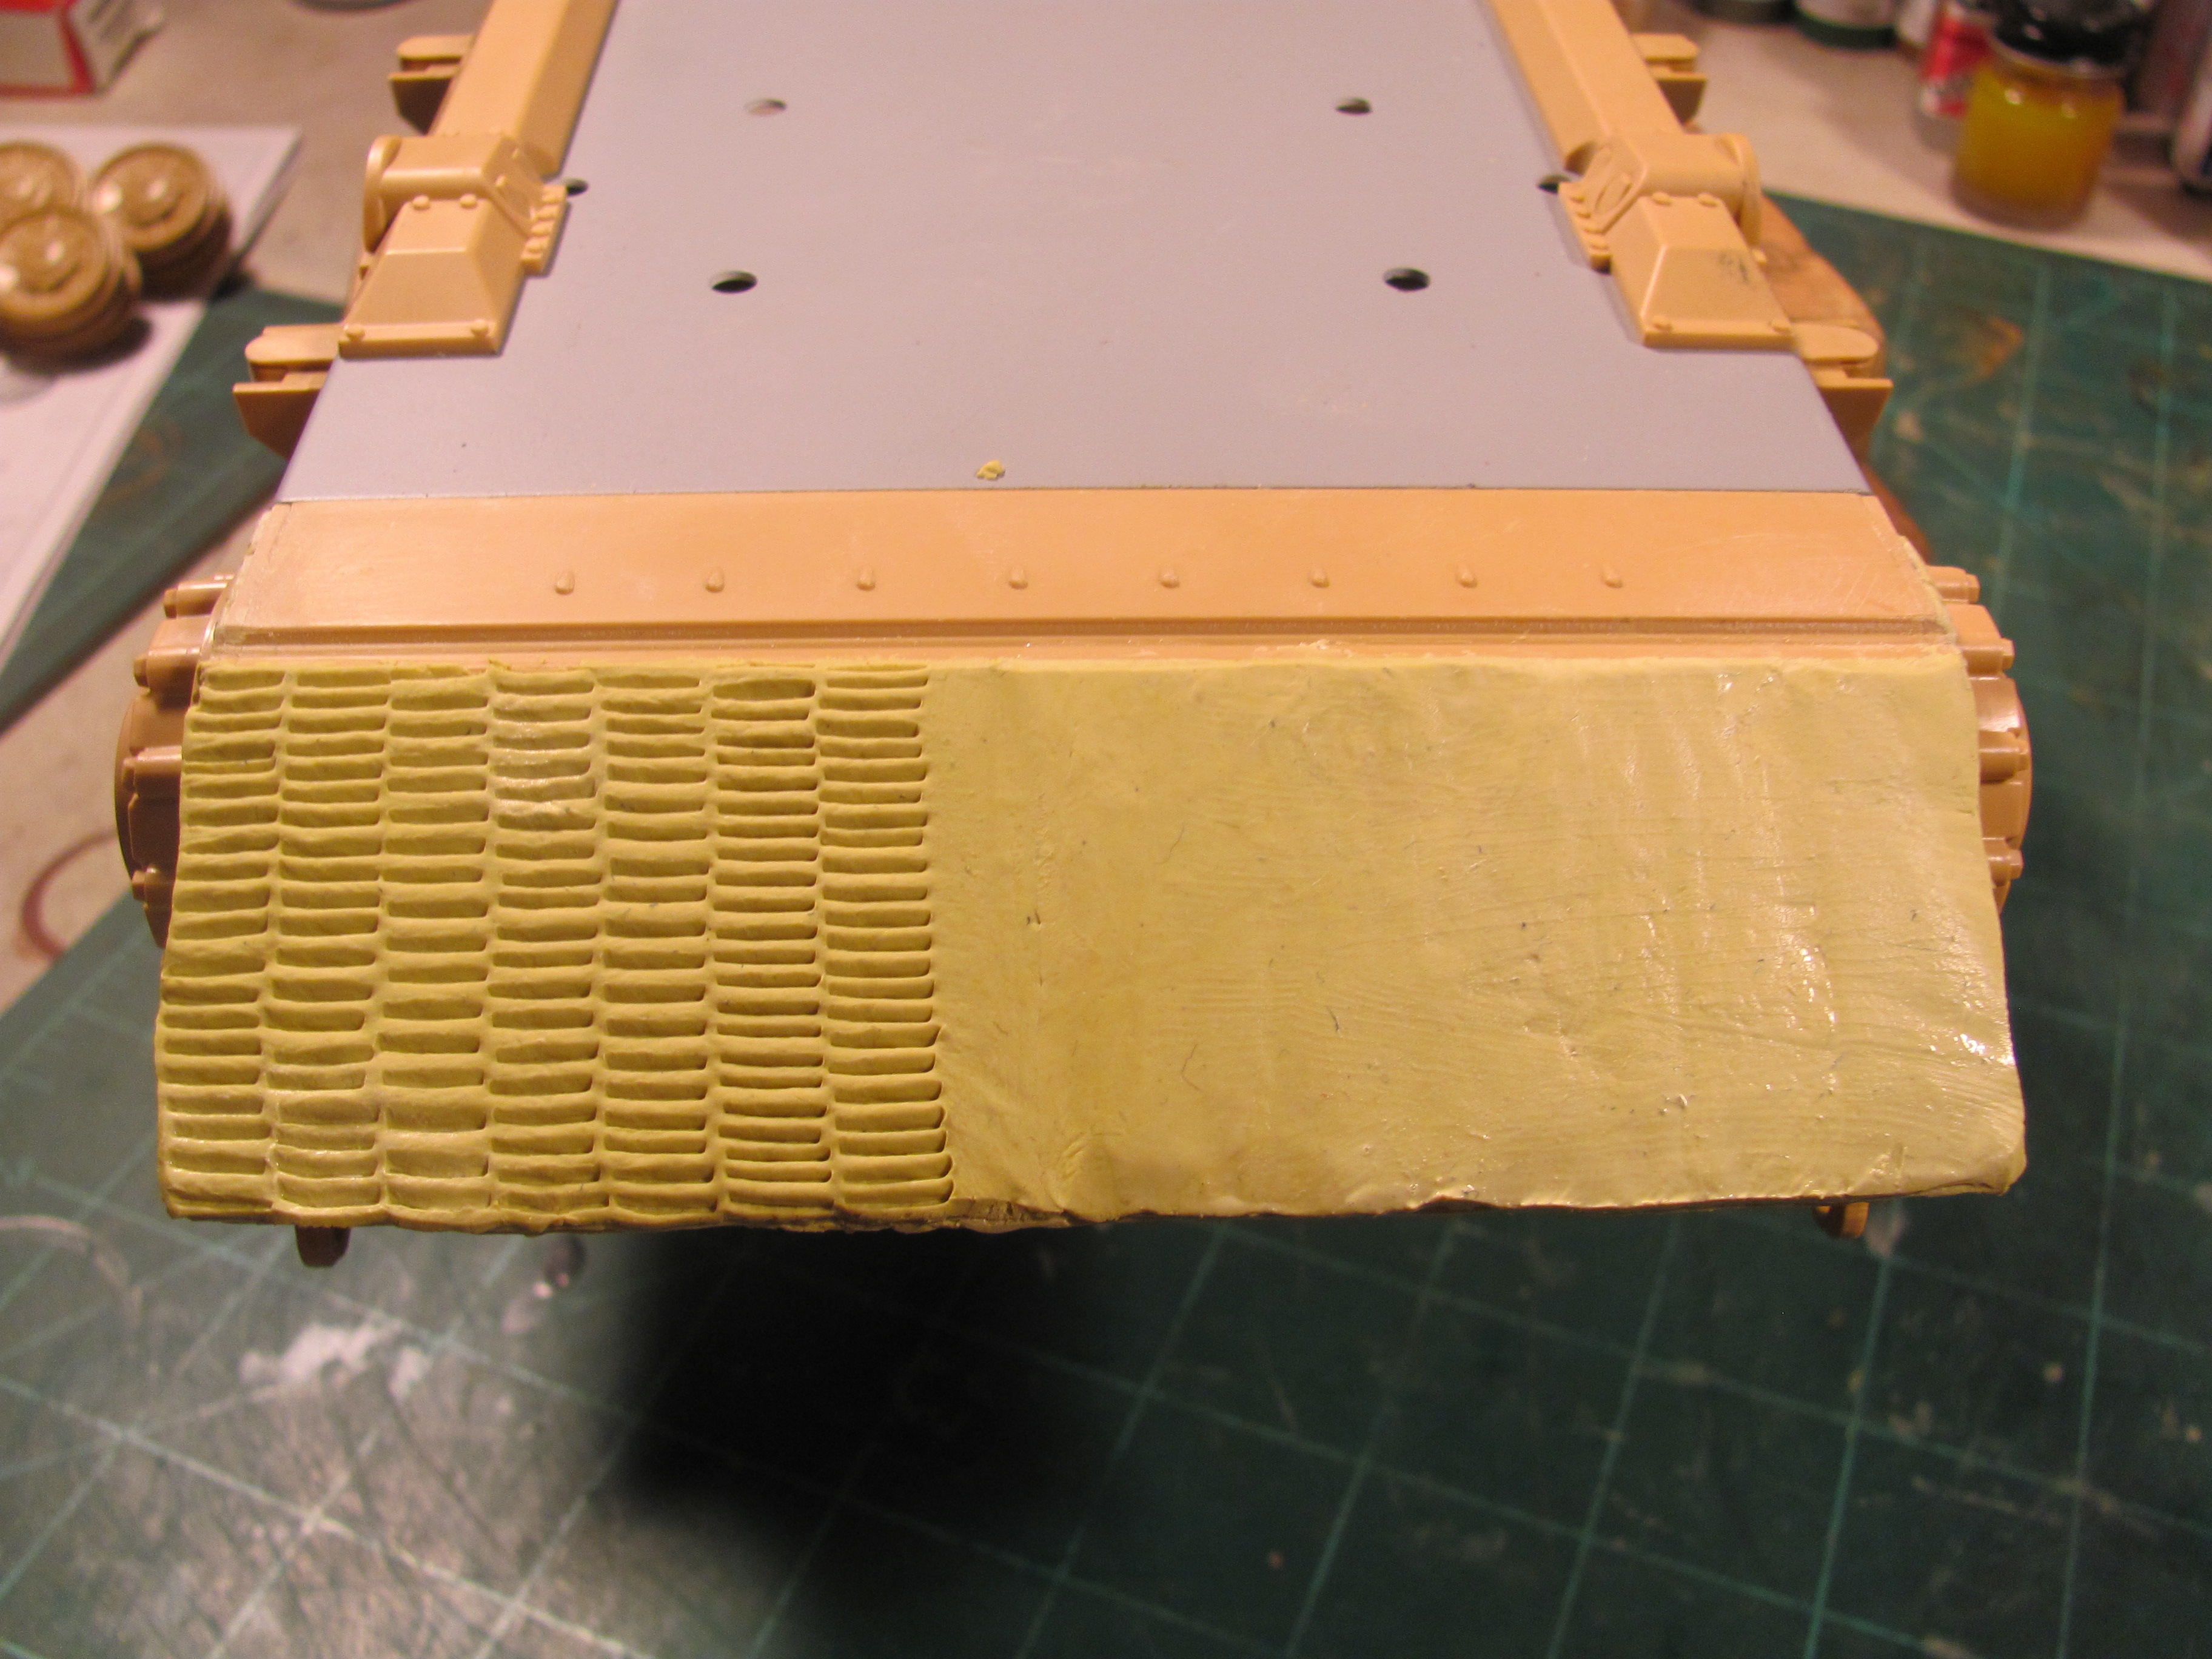
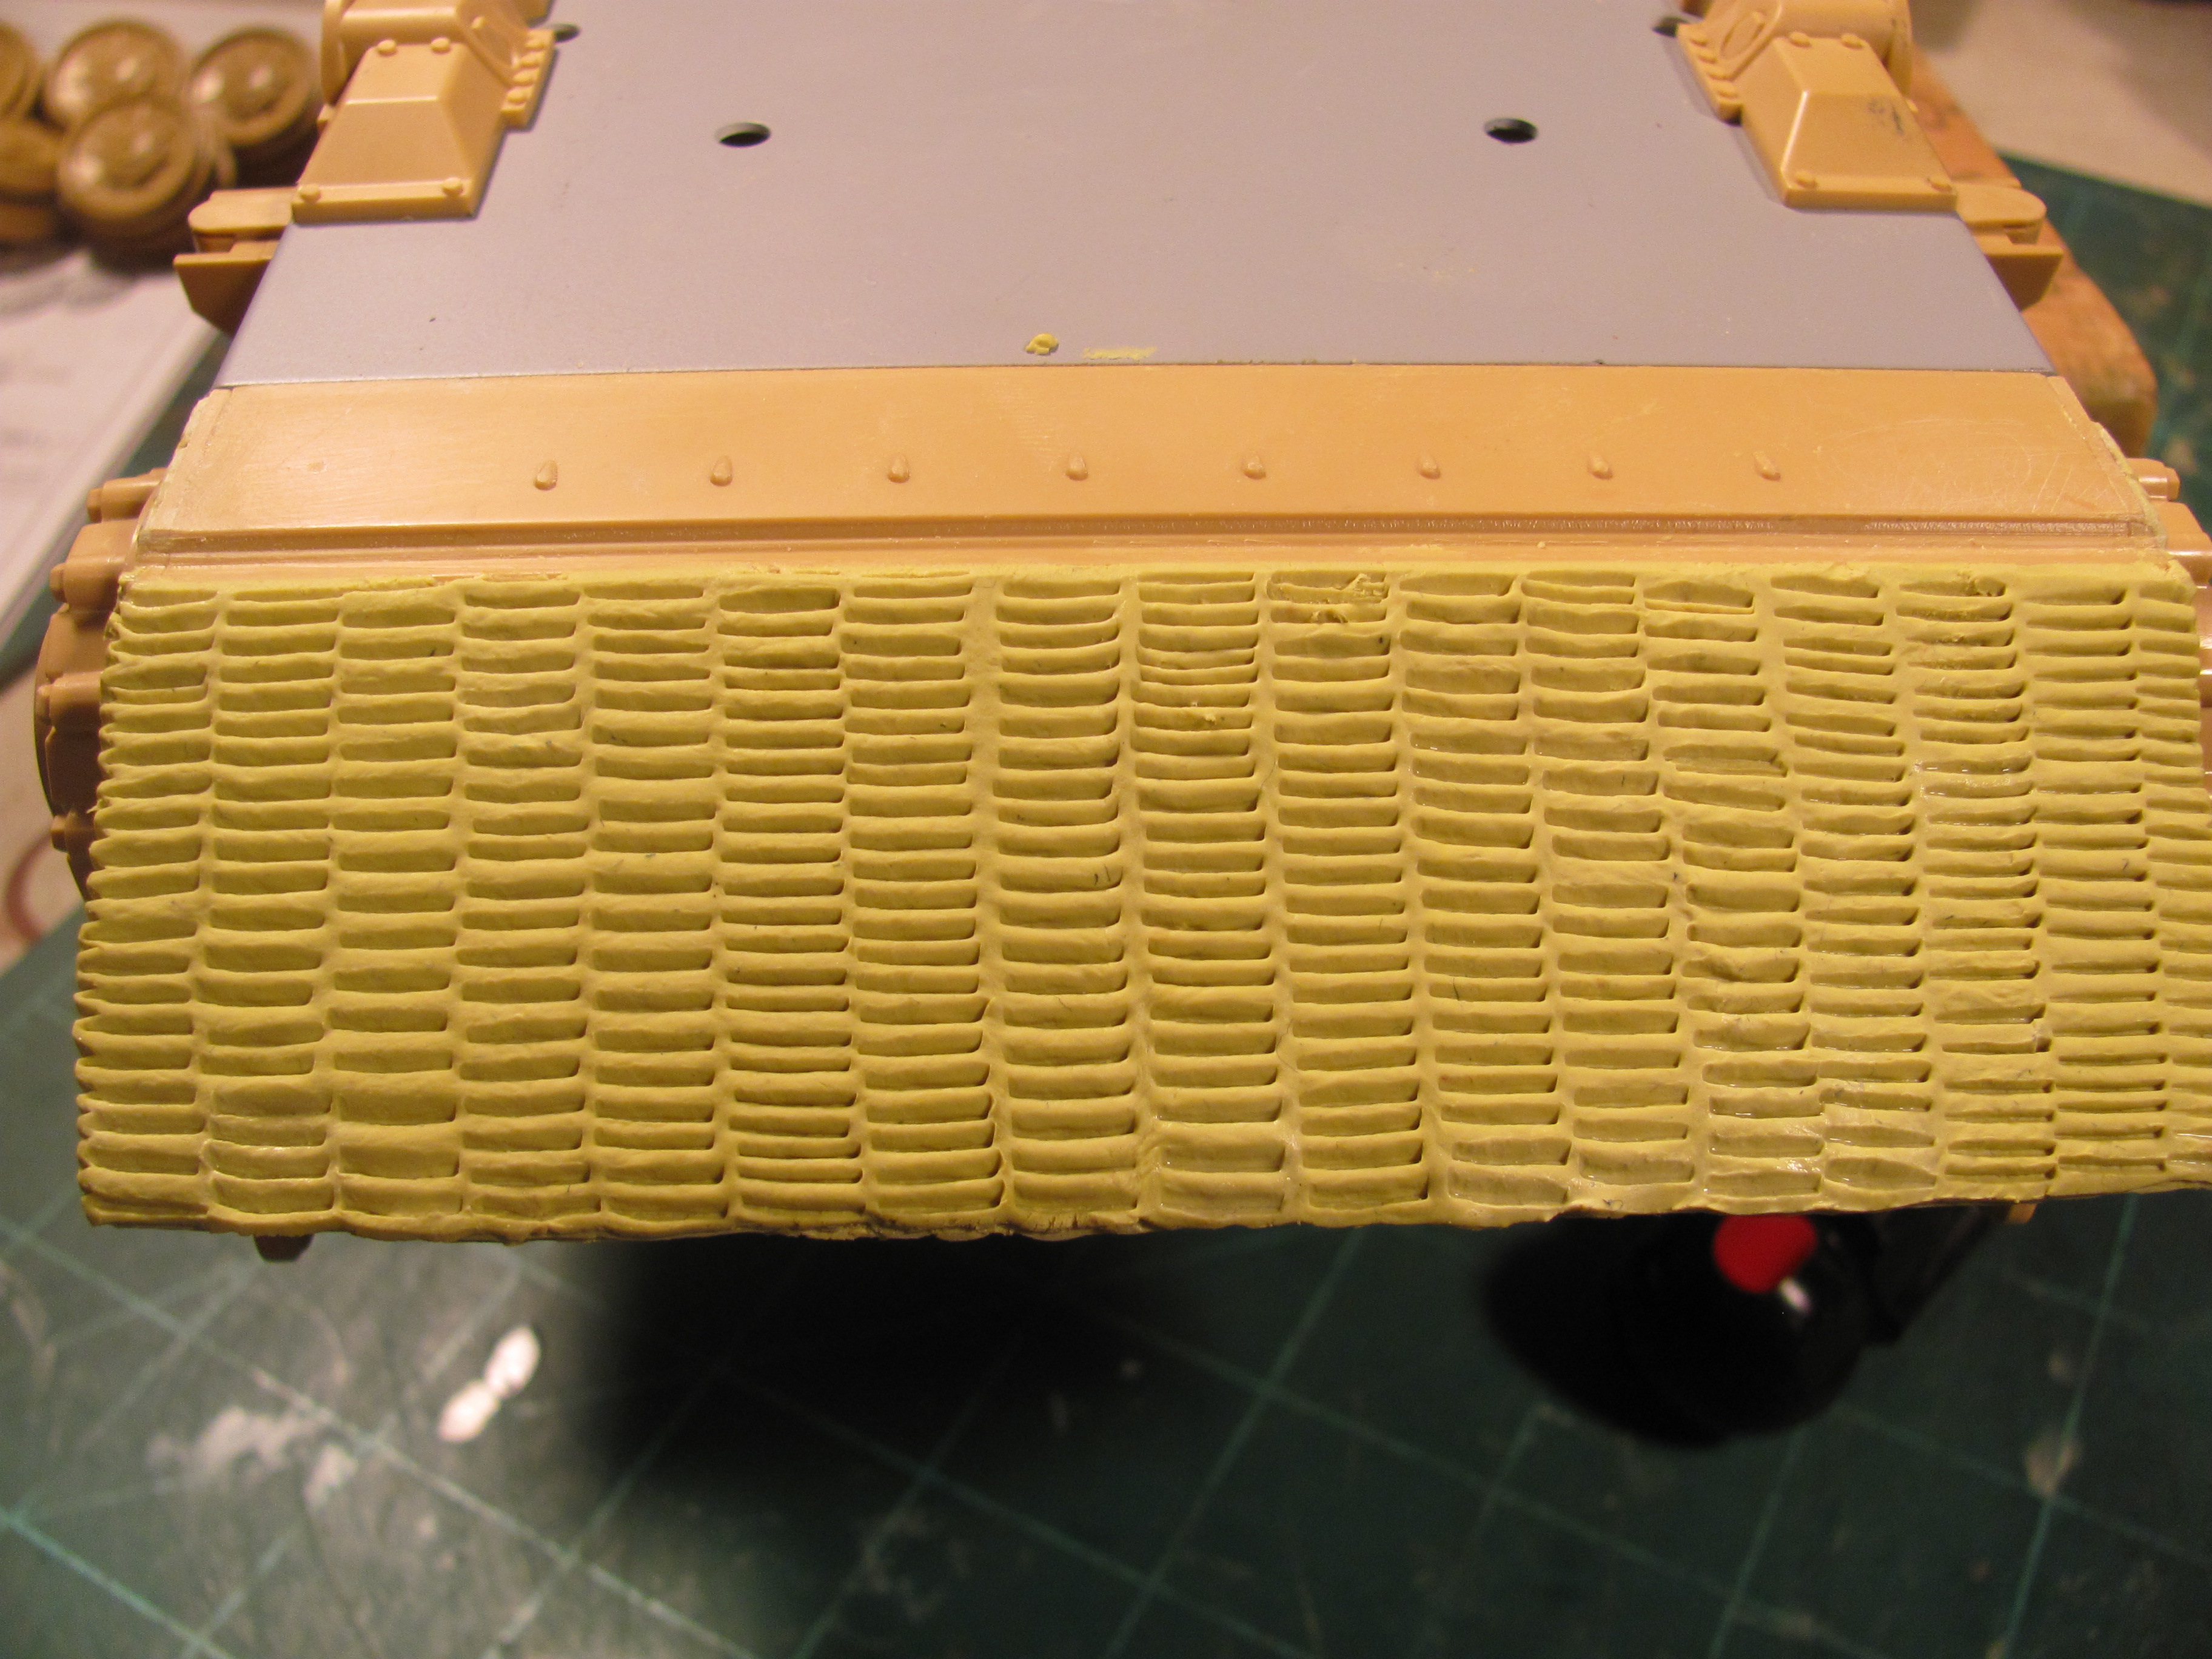
Step 1: scar the surface where you want the zimm, gives the milliput something to stick to
Step 2: roll the milliput flat
Step 3: Cut out the size you need
Step 4: place on model and roll it on using a roller
Step 5: Use a screwdriver to apply the pattern
Step 7: Continue until the surface you want zimmed it complete
I find this method ideal, the milliput has a long drying time to allow mistakes to be corrected, is easily sanded when fully dried, and is rock solid when completely dry and very durable. It is maybe a bit on the time consuming side, but the effects achieved i think are more than worth it.
I use Milliput, a hobby knife handle as a roller, a modified flat head screwdriver with the tip filed down at an angle to apply the pattern.
Step 1: scar the surface where you want the zimm, gives the milliput something to stick to
Step 2: roll the milliput flat
Step 3: Cut out the size you need
Step 4: place on model and roll it on using a roller
Step 5: Use a screwdriver to apply the pattern
Step 7: Continue until the surface you want zimmed it complete
I find this method ideal, the milliput has a long drying time to allow mistakes to be corrected, is easily sanded when fully dried, and is rock solid when completely dry and very durable. It is maybe a bit on the time consuming side, but the effects achieved i think are more than worth it.
08-08-2016, 03:41 AM
#35
Sweet work Will! I didn't know Milliput came in sheets? How thin is it... thinner than the ATAK premade stuff?
Jeff
Jeff
08-08-2016, 01:27 PM
#37
Thread Starter
Sorry for any confusion, the milliput does not come in sheets, you still have to mix the 2 different components and when that is done you roll it flat like a pie crust.
08-09-2016, 09:58 AM
#39
Sorry for the dumb question but I never know when something is available and out there without finding about it HERE first!
I am going to try using Elmers Wood Filler for my Jagdpanther zimm after practicing first of course!
Jeff
I am going to try using Elmers Wood Filler for my Jagdpanther zimm after practicing first of course!
Jeff
08-10-2016, 08:19 AM
#43
Thanks for sharing your progress!!!! Looks great!!!
 08-12-2016, 05:35 AM
#46
Wow, the texture on the gun housing is really nice. Your zimmerit is looking great. I know the resin zimmerit kits save time, but the work I have seen several of the do it your self guys looks more realistic.
08-12-2016, 06:04 AM
#47
Yep... doing it this way keeps it from looking like aluminum siding had been added to the tank. This is a very thinly applied coating!
I know the more complicated zimm work like on the Elefant and Panther might not (and would benefit from the sheets) but these two Jagds look better with THIS kind of work.
Jeff
I know the more complicated zimm work like on the Elefant and Panther might not (and would benefit from the sheets) but these two Jagds look better with THIS kind of work.
Jeff
08-12-2016, 07:53 AM
#48
Thread Starter
I stated I would do a list of mods and details added, here is what I have done or will do:
1. Impact metal Panzer IV Tracks
2. Add Zimmerit
3. Change L70 canon to L48 canon
4. Replace stock motors with Speed 400 motors
5. replace motor and battery connectors with Deans Connectors
6, Add bearings to rear idlers
7. Delete the gun travel lock
8. add the trailer hitch
9. Add Daryl's Hull brace
10. add armored cable to headlight
11. replace clutch gears in the gun elevation with the blue gear
Not a long list and all easily doable, if there is anything that I add to the list I will note in the build thread. I hope this helps for any future builds.
08-12-2016, 04:47 PM
#50
Thread Starter
i don't know, I haven't built the JP and by looking at the instructions, i think the Jpz 4 is probably different as there is very little room inside there. The JPz 4 does have 2 elevation set gear setup for rotation and elevation.

