Upgrading parts for M1A2 Abrams.

 12-18-2016, 02:22 PM
#27

OK, first, good work on the .50 cal. I'll save that for the end, since I can always change it out later. The other MG (7.62?) is a real lump of plastic that looks like a lump of plastic. Hopefully the AM guys will address both issues. I also have a couple Danbury mint .50s if I need them.
I have this material called Supplex that I might use for GL covers. That way they would be removable so I could run with one or the other, both or neither. Just started learning about the M250 grenade system.
For right now the thing I need most are camo schemes I can blow up for masks. In aircraft we start with the lightest color first and get darker as we go, and that's what I'll be doing here, the lighter of the greens, mask, the brown, mask, the dark green. So, any schemes you've run across, like from model kits in other scales, would be most helpful. I've found that sometimes it can be a lot easier just to buy a decent 1/35 scale kit of the tank I want to duplicate, and use the info from that instruction sheet. And if you see any good photos or drawings of any M1s from 1/37th in Katterbach, those are gold for me.
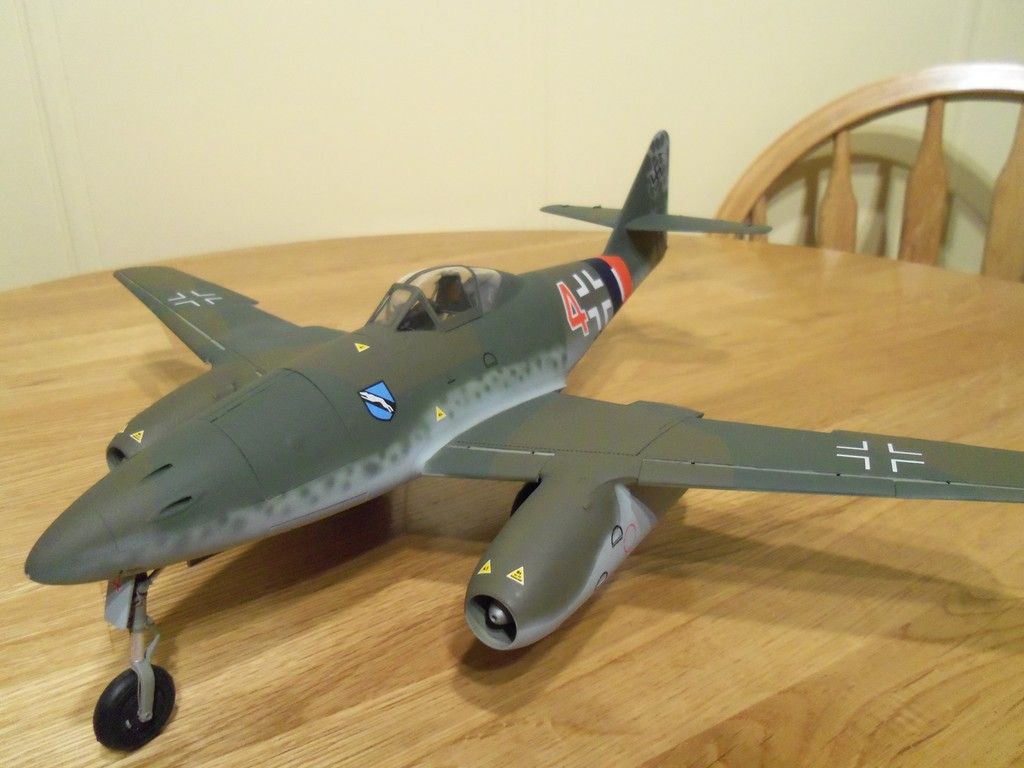
When I did the S33 I did it in 1/48 scale first, just a straight OOB build of the Tamiya kit.

And if this was an Me-262 I'd have plenty of color profiles to choose from. I have a couple more kits of the Schwalbe waiting to be built, too.
I have this material called Supplex that I might use for GL covers. That way they would be removable so I could run with one or the other, both or neither. Just started learning about the M250 grenade system.
For right now the thing I need most are camo schemes I can blow up for masks. In aircraft we start with the lightest color first and get darker as we go, and that's what I'll be doing here, the lighter of the greens, mask, the brown, mask, the dark green. So, any schemes you've run across, like from model kits in other scales, would be most helpful. I've found that sometimes it can be a lot easier just to buy a decent 1/35 scale kit of the tank I want to duplicate, and use the info from that instruction sheet. And if you see any good photos or drawings of any M1s from 1/37th in Katterbach, those are gold for me.
When I did the S33 I did it in 1/48 scale first, just a straight OOB build of the Tamiya kit.

And if this was an Me-262 I'd have plenty of color profiles to choose from. I have a couple more kits of the Schwalbe waiting to be built, too.

Last edited by Crius; 12-18-2016 at 02:25 PM.
12-18-2016, 04:38 PM
#28
Member
Thread Starter

Join Date: Oct 2016
Posts: 54
Likes: 0
Received 0 Likes
on
0 Posts
Nice models Crius! I like them both. Very crisp and neat job fore sure mate 
Yes the mg 242 was just a lump of poor plastic, they are some real great 3d printed upgrade for the m1a2s and not ot expensive.
Are you looking for reference pics or just camo scheme?
I'll give you two links for accuracy refs here:
For a M1A2 SEP
http://olivier.carneau.free.fr/photo...v2_1/index.htm
M1A2
http://www.primeportal.net/tanks/jef...dex.php?Page=1
For picture of m1s in the field I usualy use google and type something like: M1A2 in theatre of war (or operation or in combat) and use the image section....And the squinting game begins generaly for hours
Hopes it help.
12-18-2016, 06:10 PM
#29
If you don't have a sleeve like Gary uses in his method you could also cut down the shaft length with a dremel. If you go this method you can also turn the cutting wheel and grind a flat spot on the motor shaft if your going to a pinion that uses a grub screw.
12-19-2016, 05:29 AM
#31
Member
Thread Starter
Join Date: Oct 2016
Posts: 54
Likes: 0
Received 0 Likes
on
0 Posts
12-19-2016, 08:50 AM
#32
Member
Thread Starter
Join Date: Oct 2016
Posts: 54
Likes: 0
Received 0 Likes
on
0 Posts
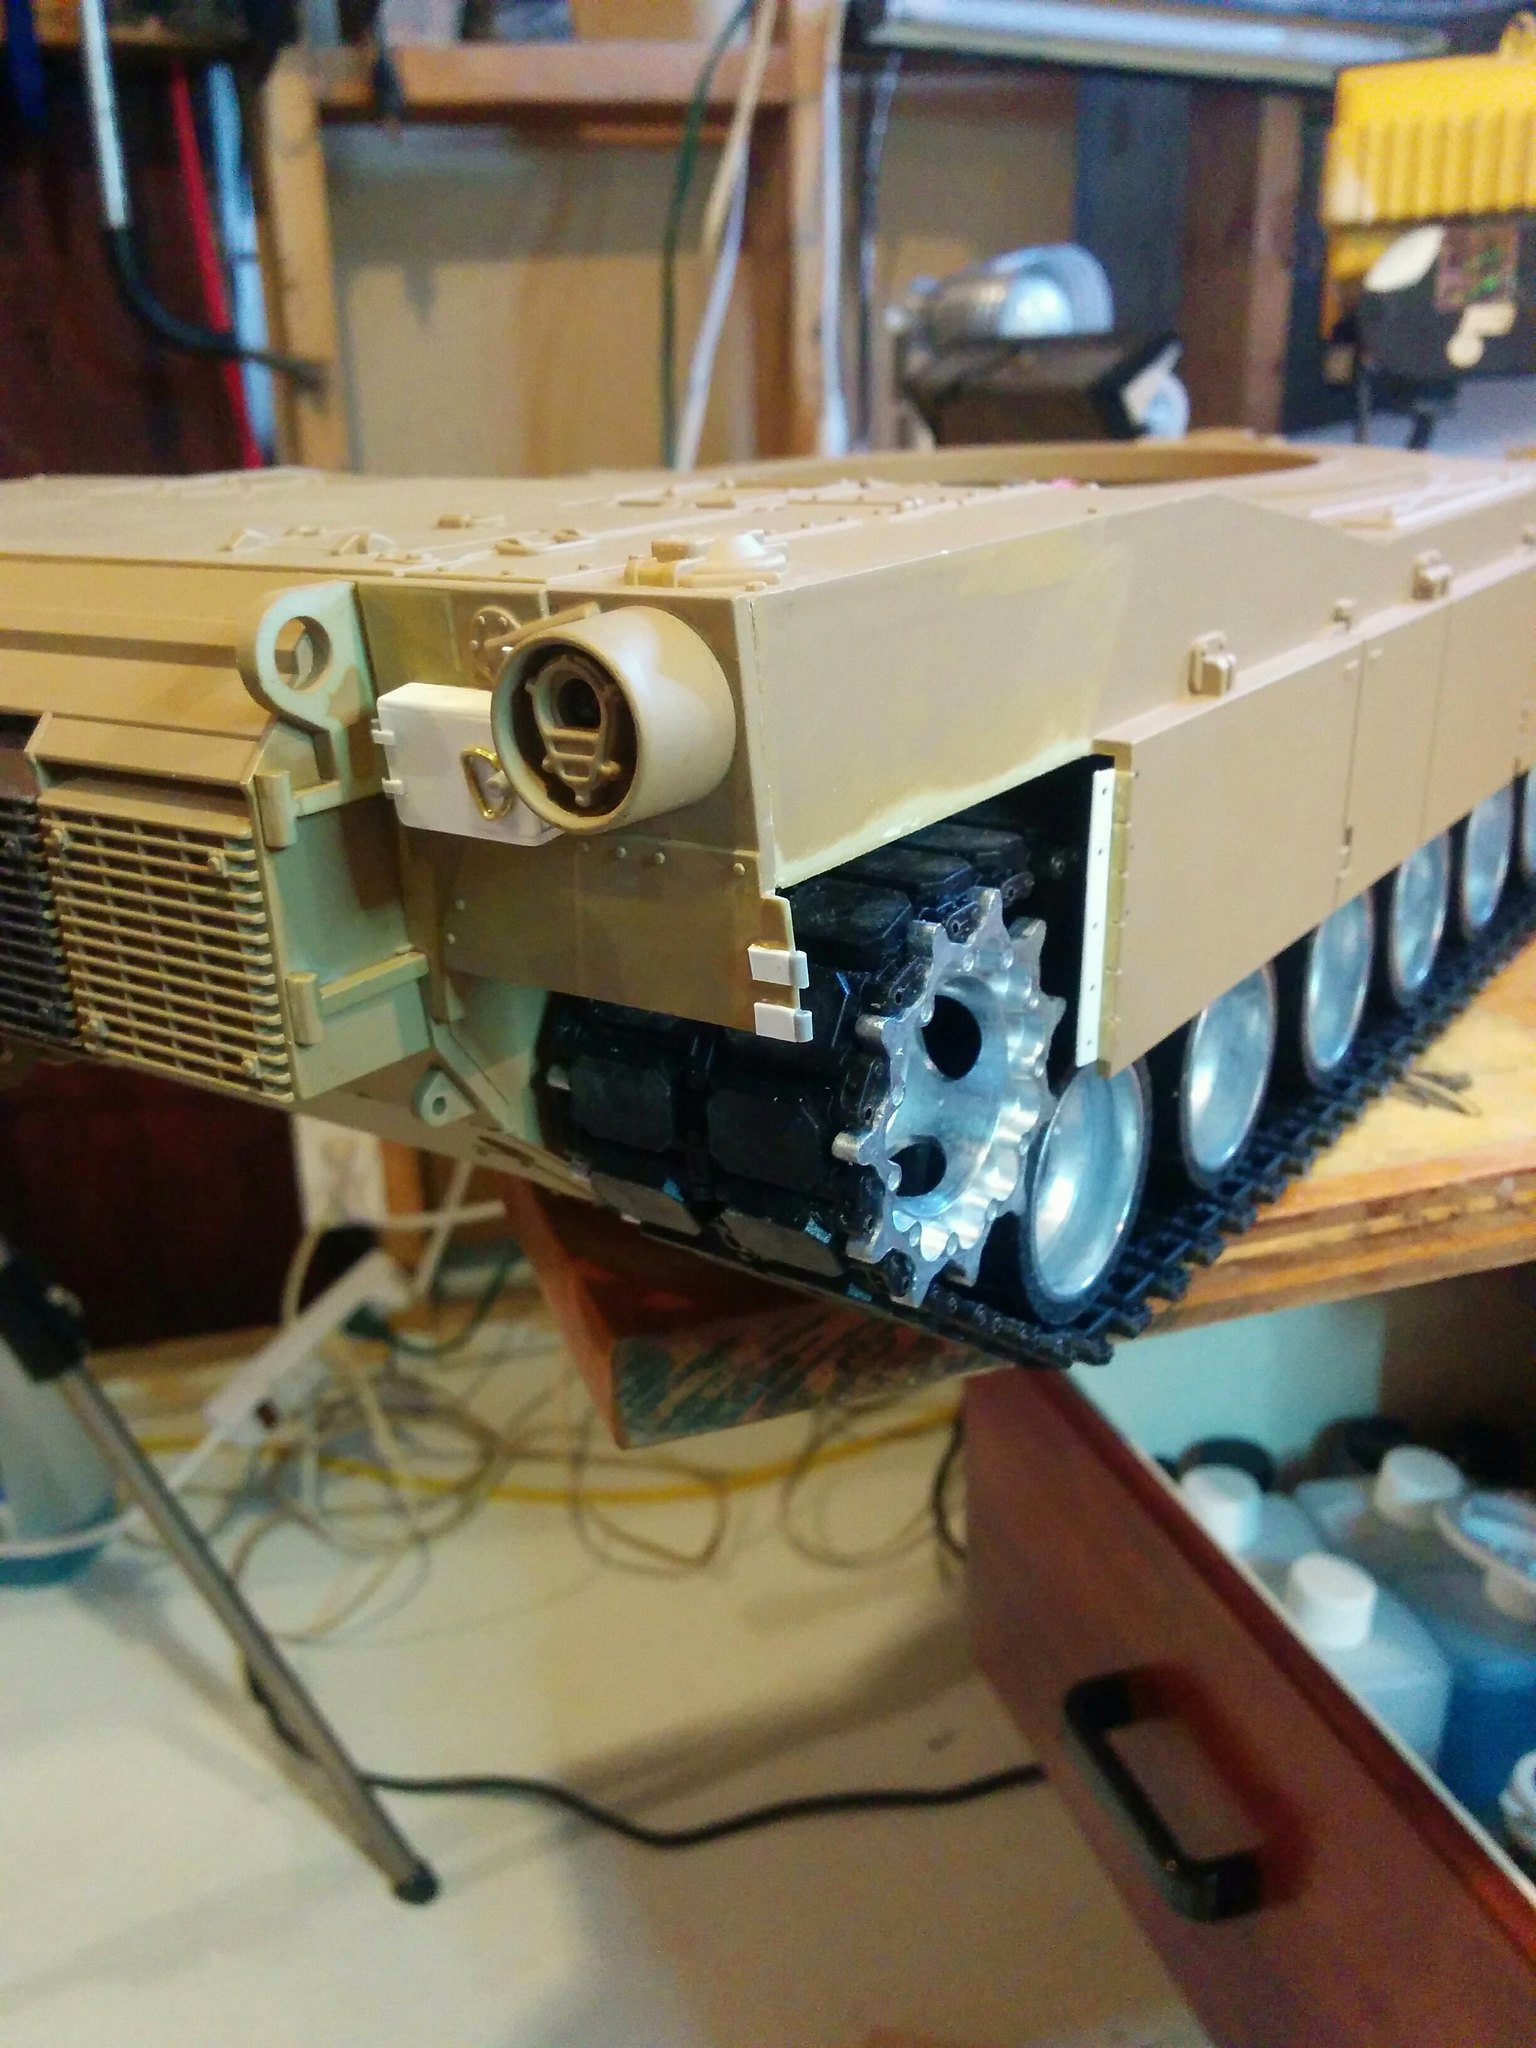
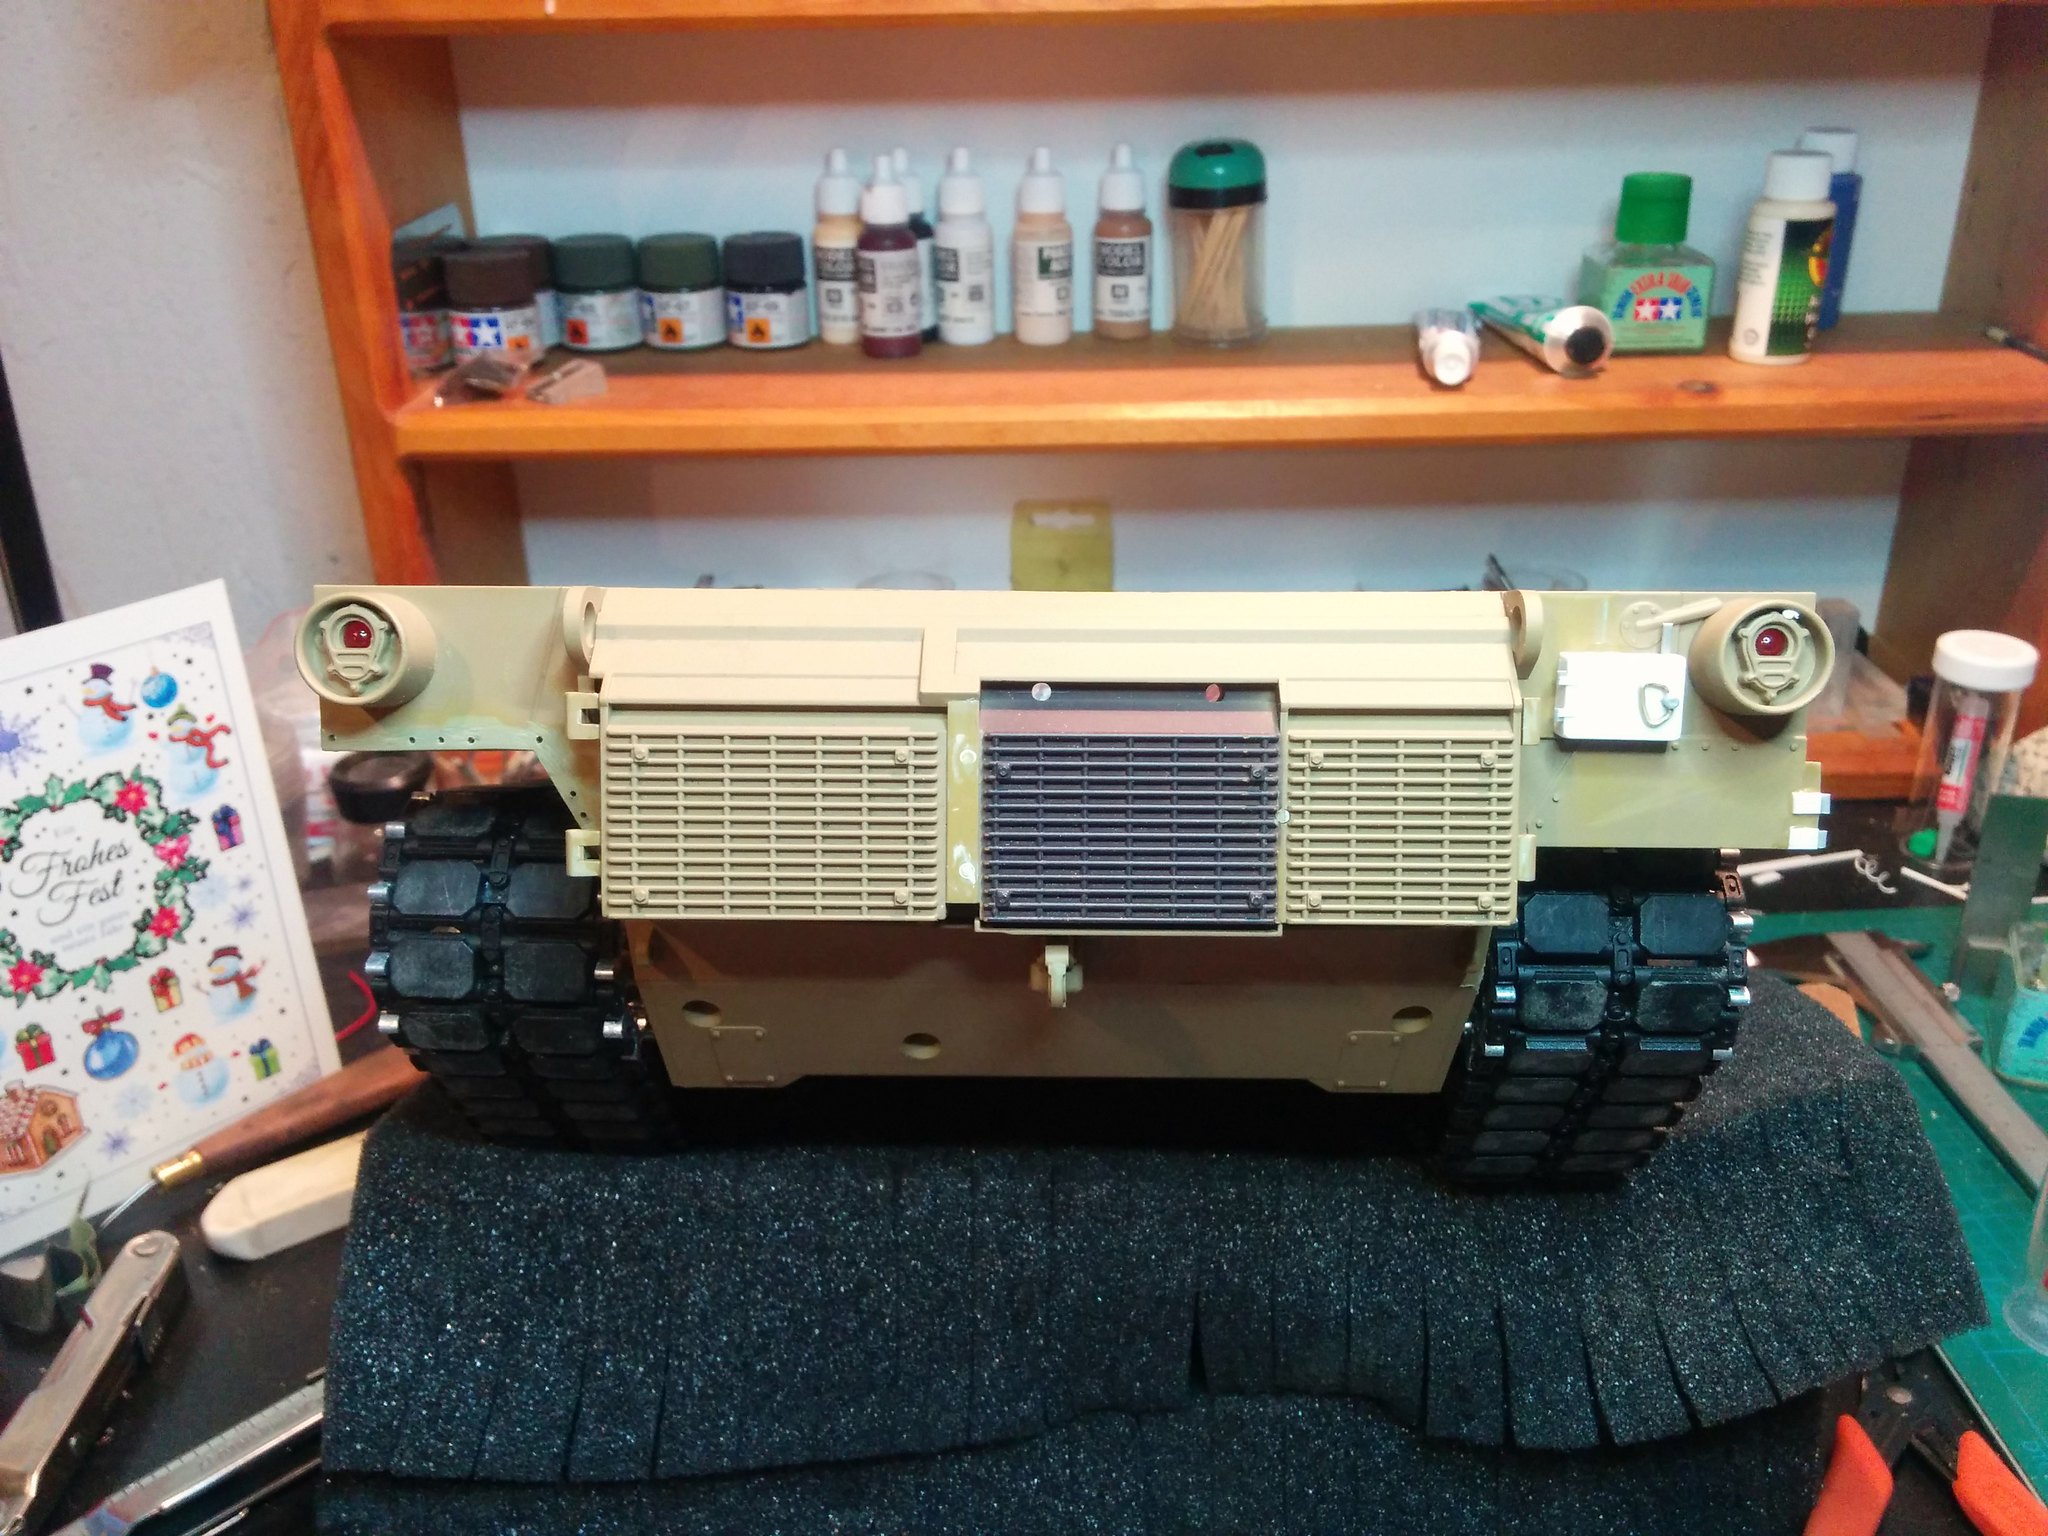
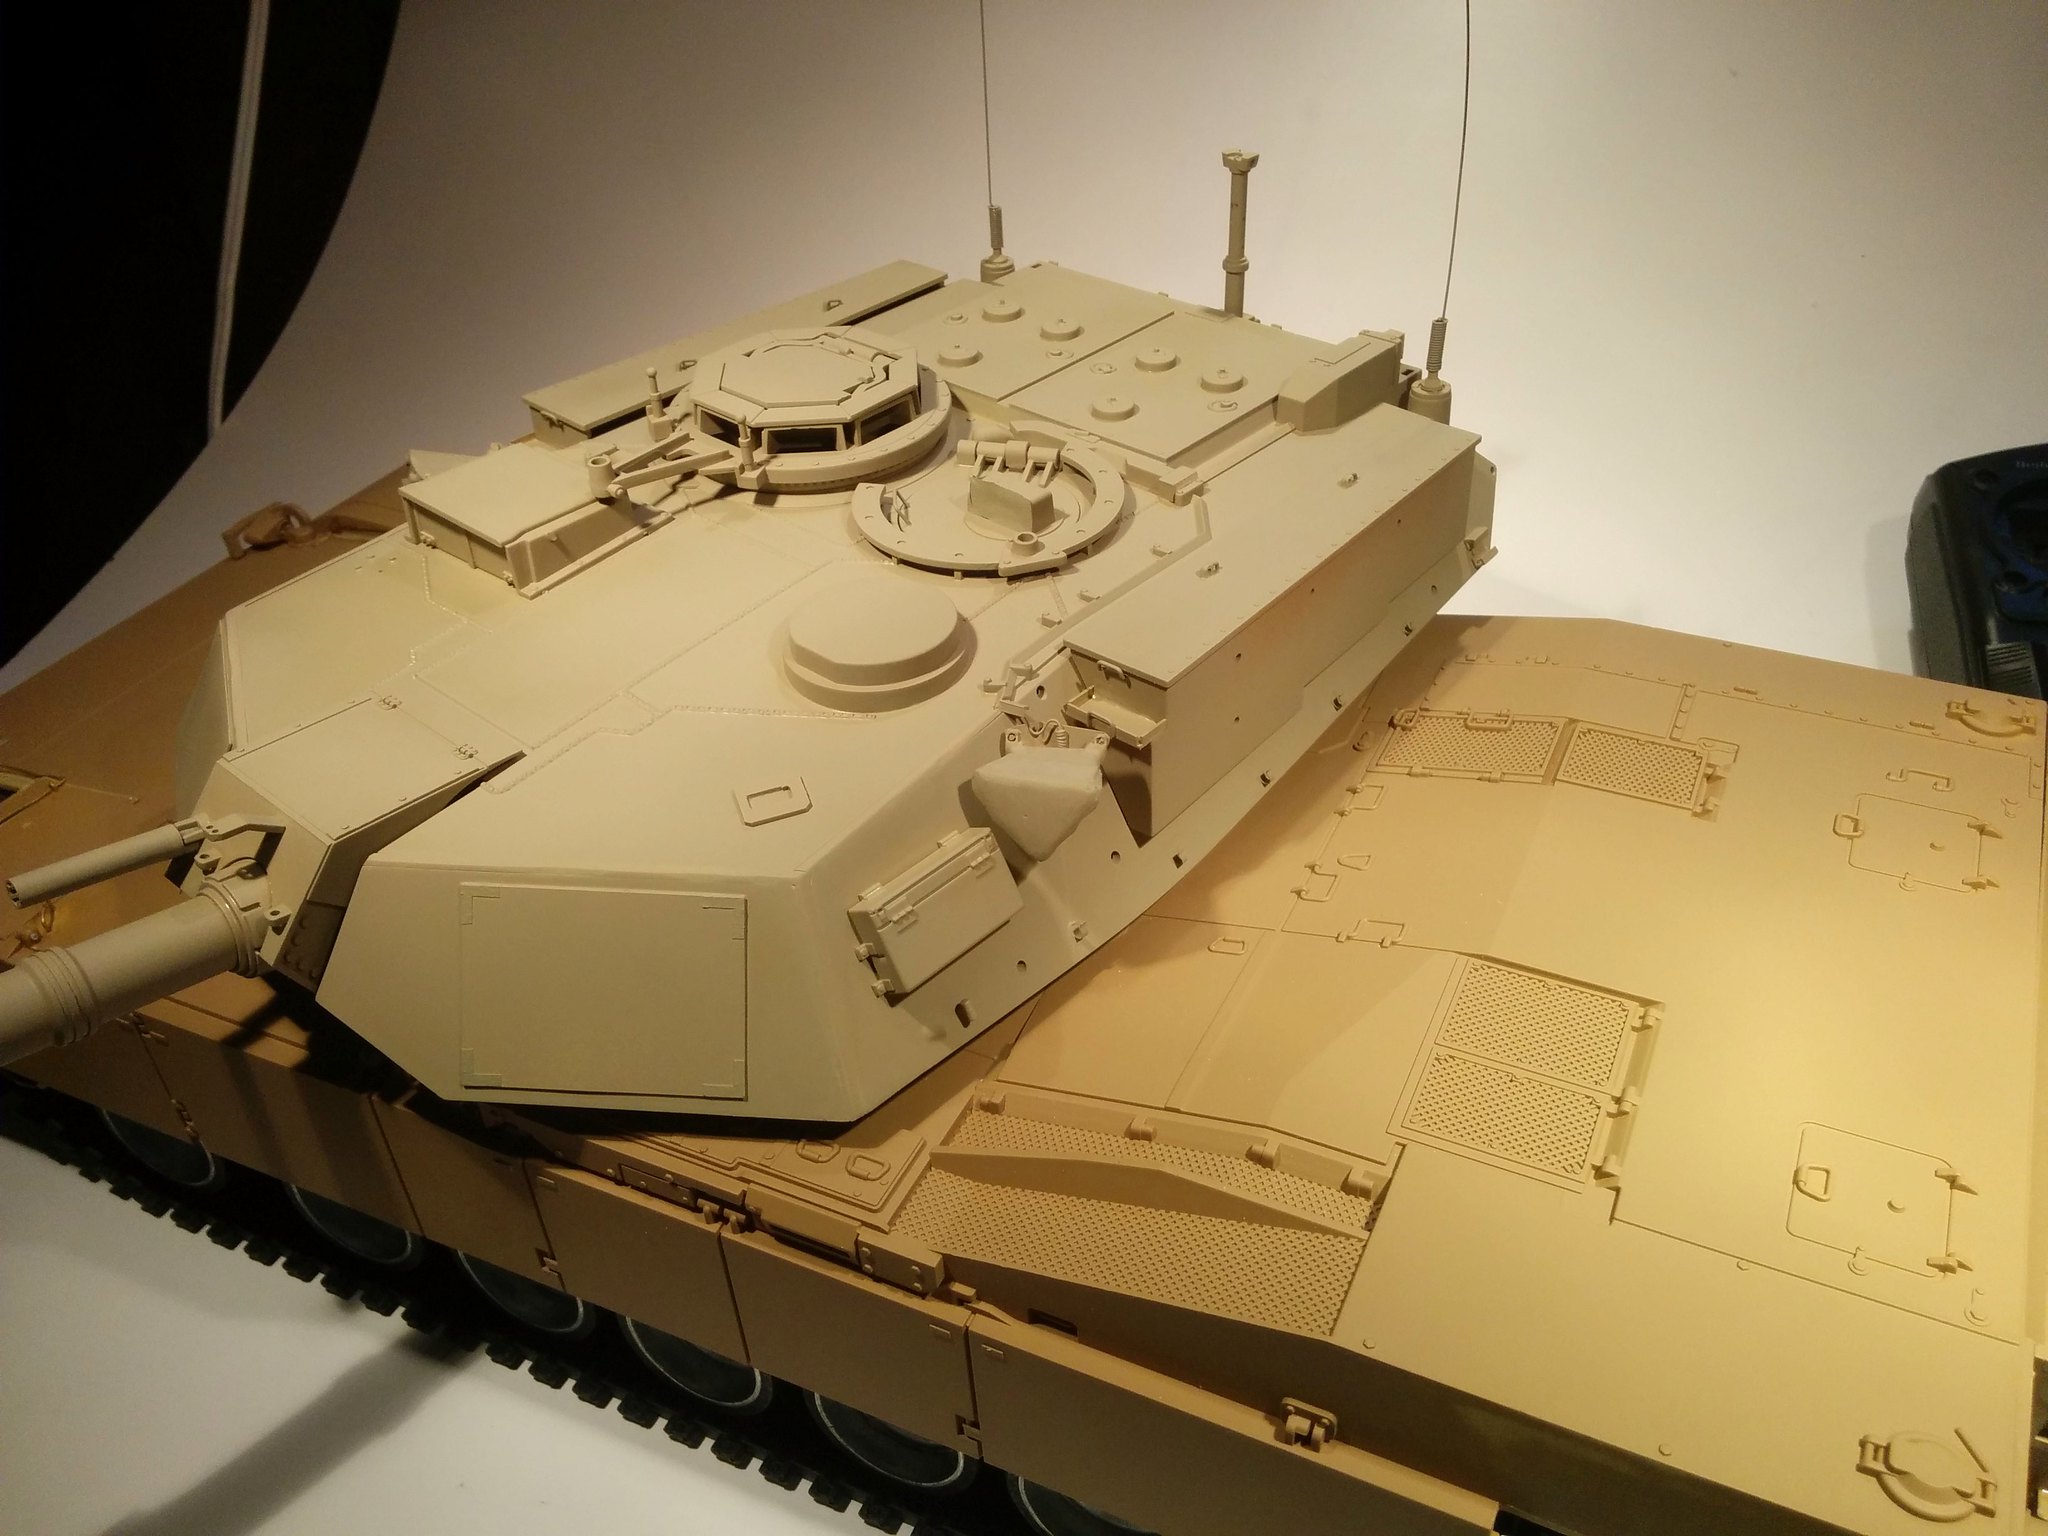
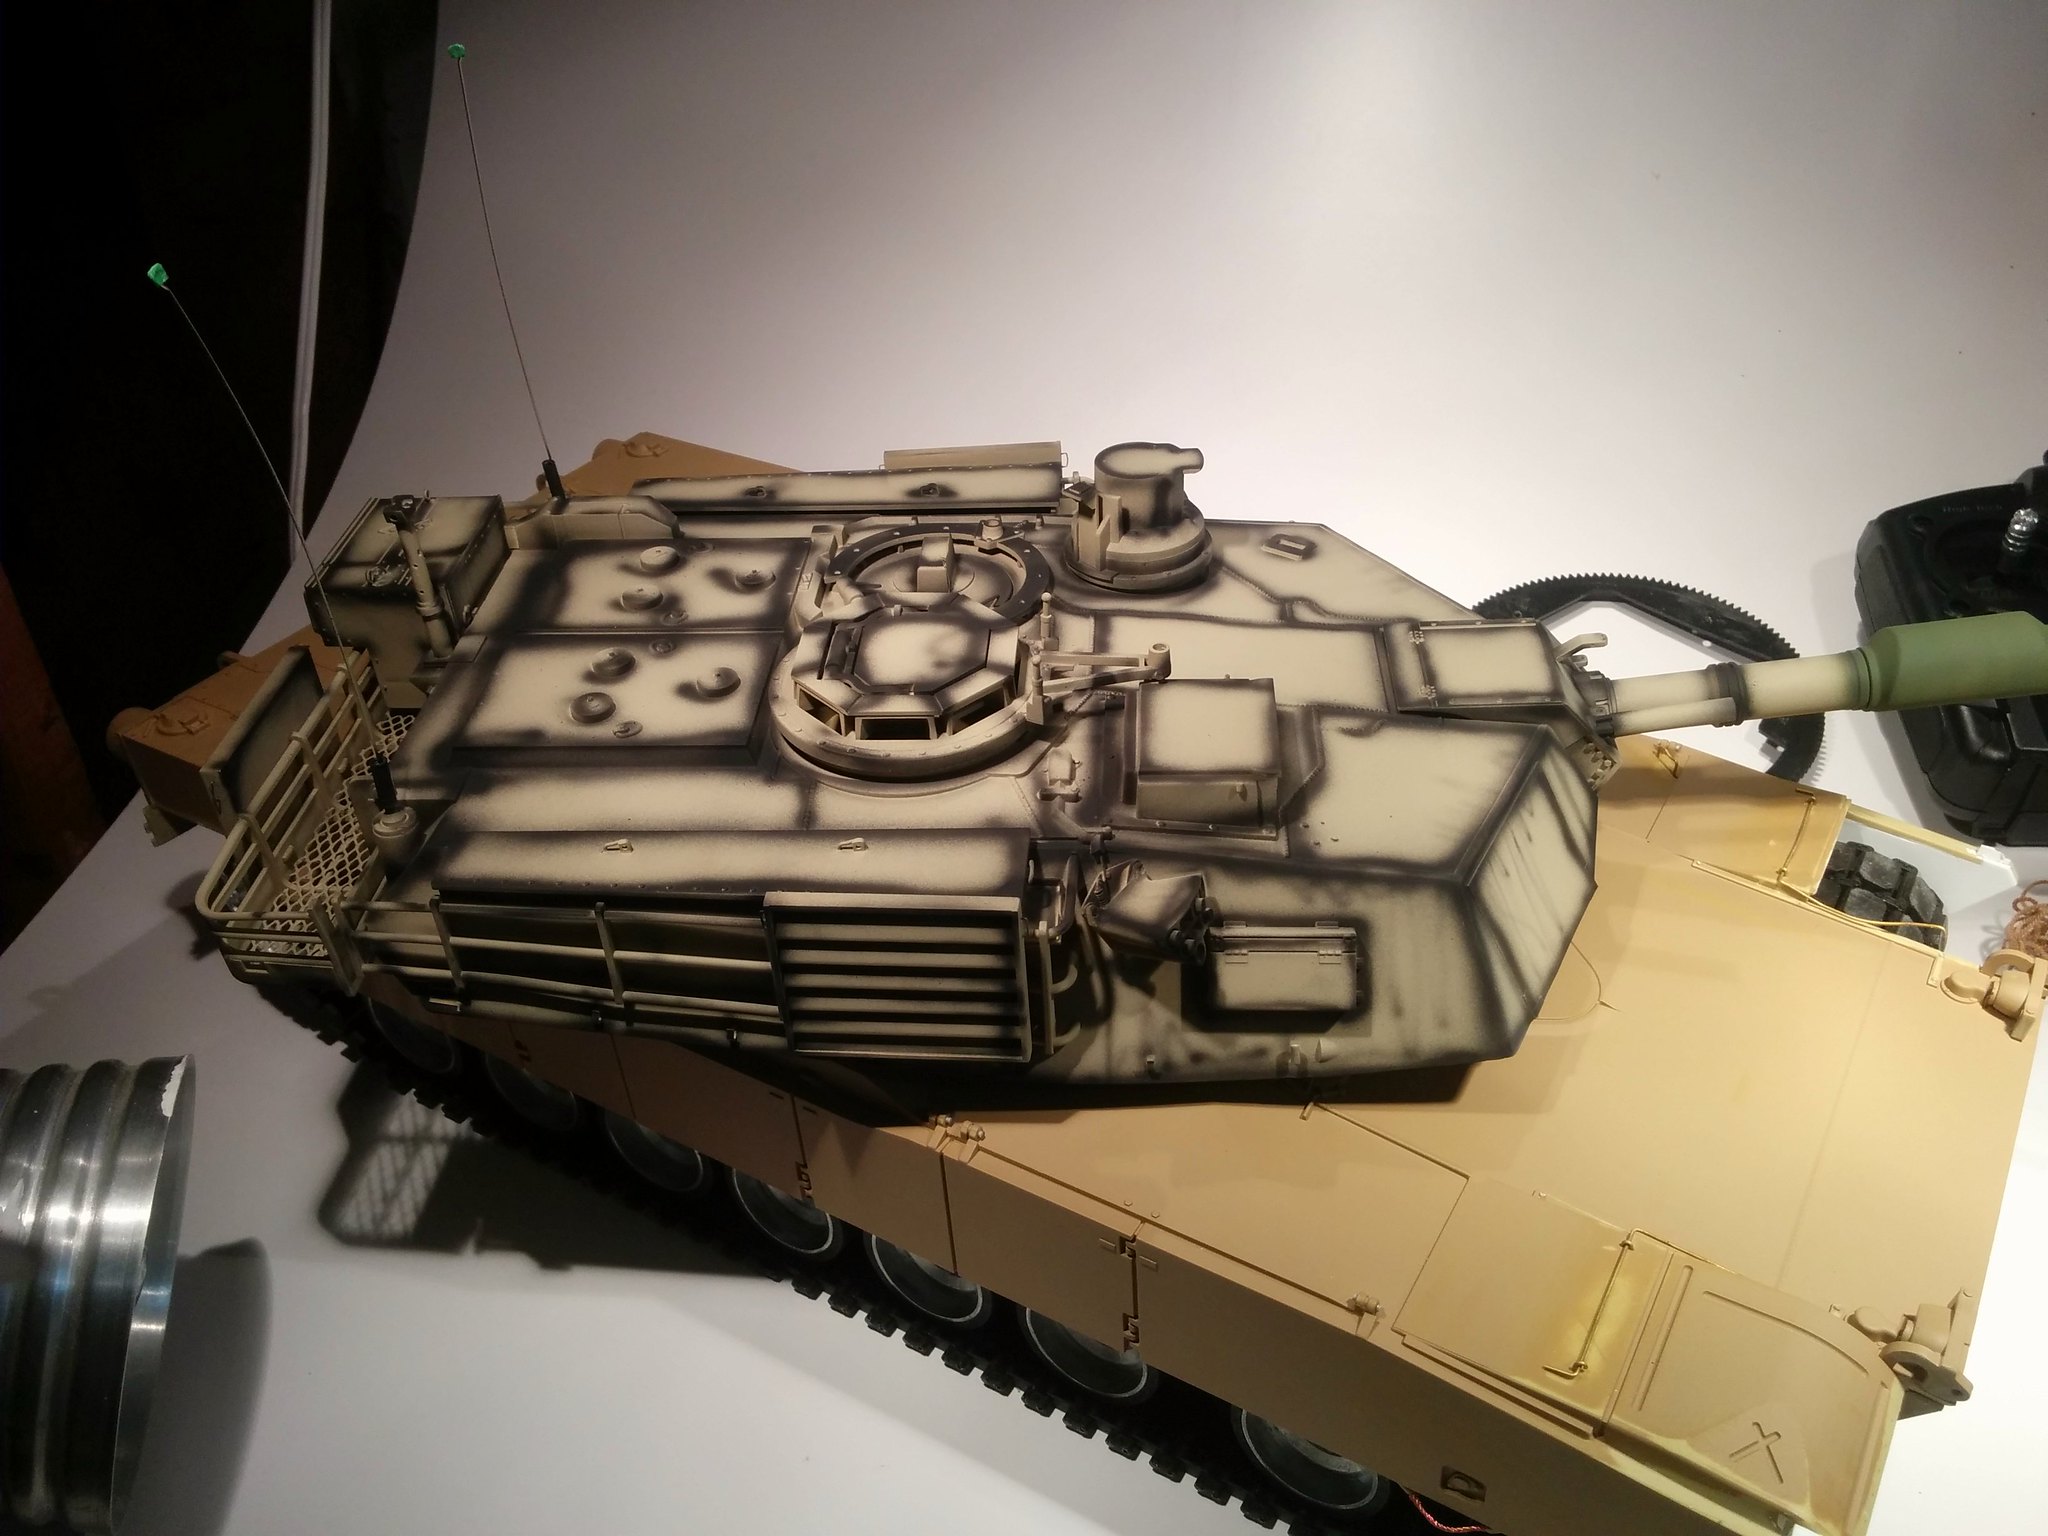
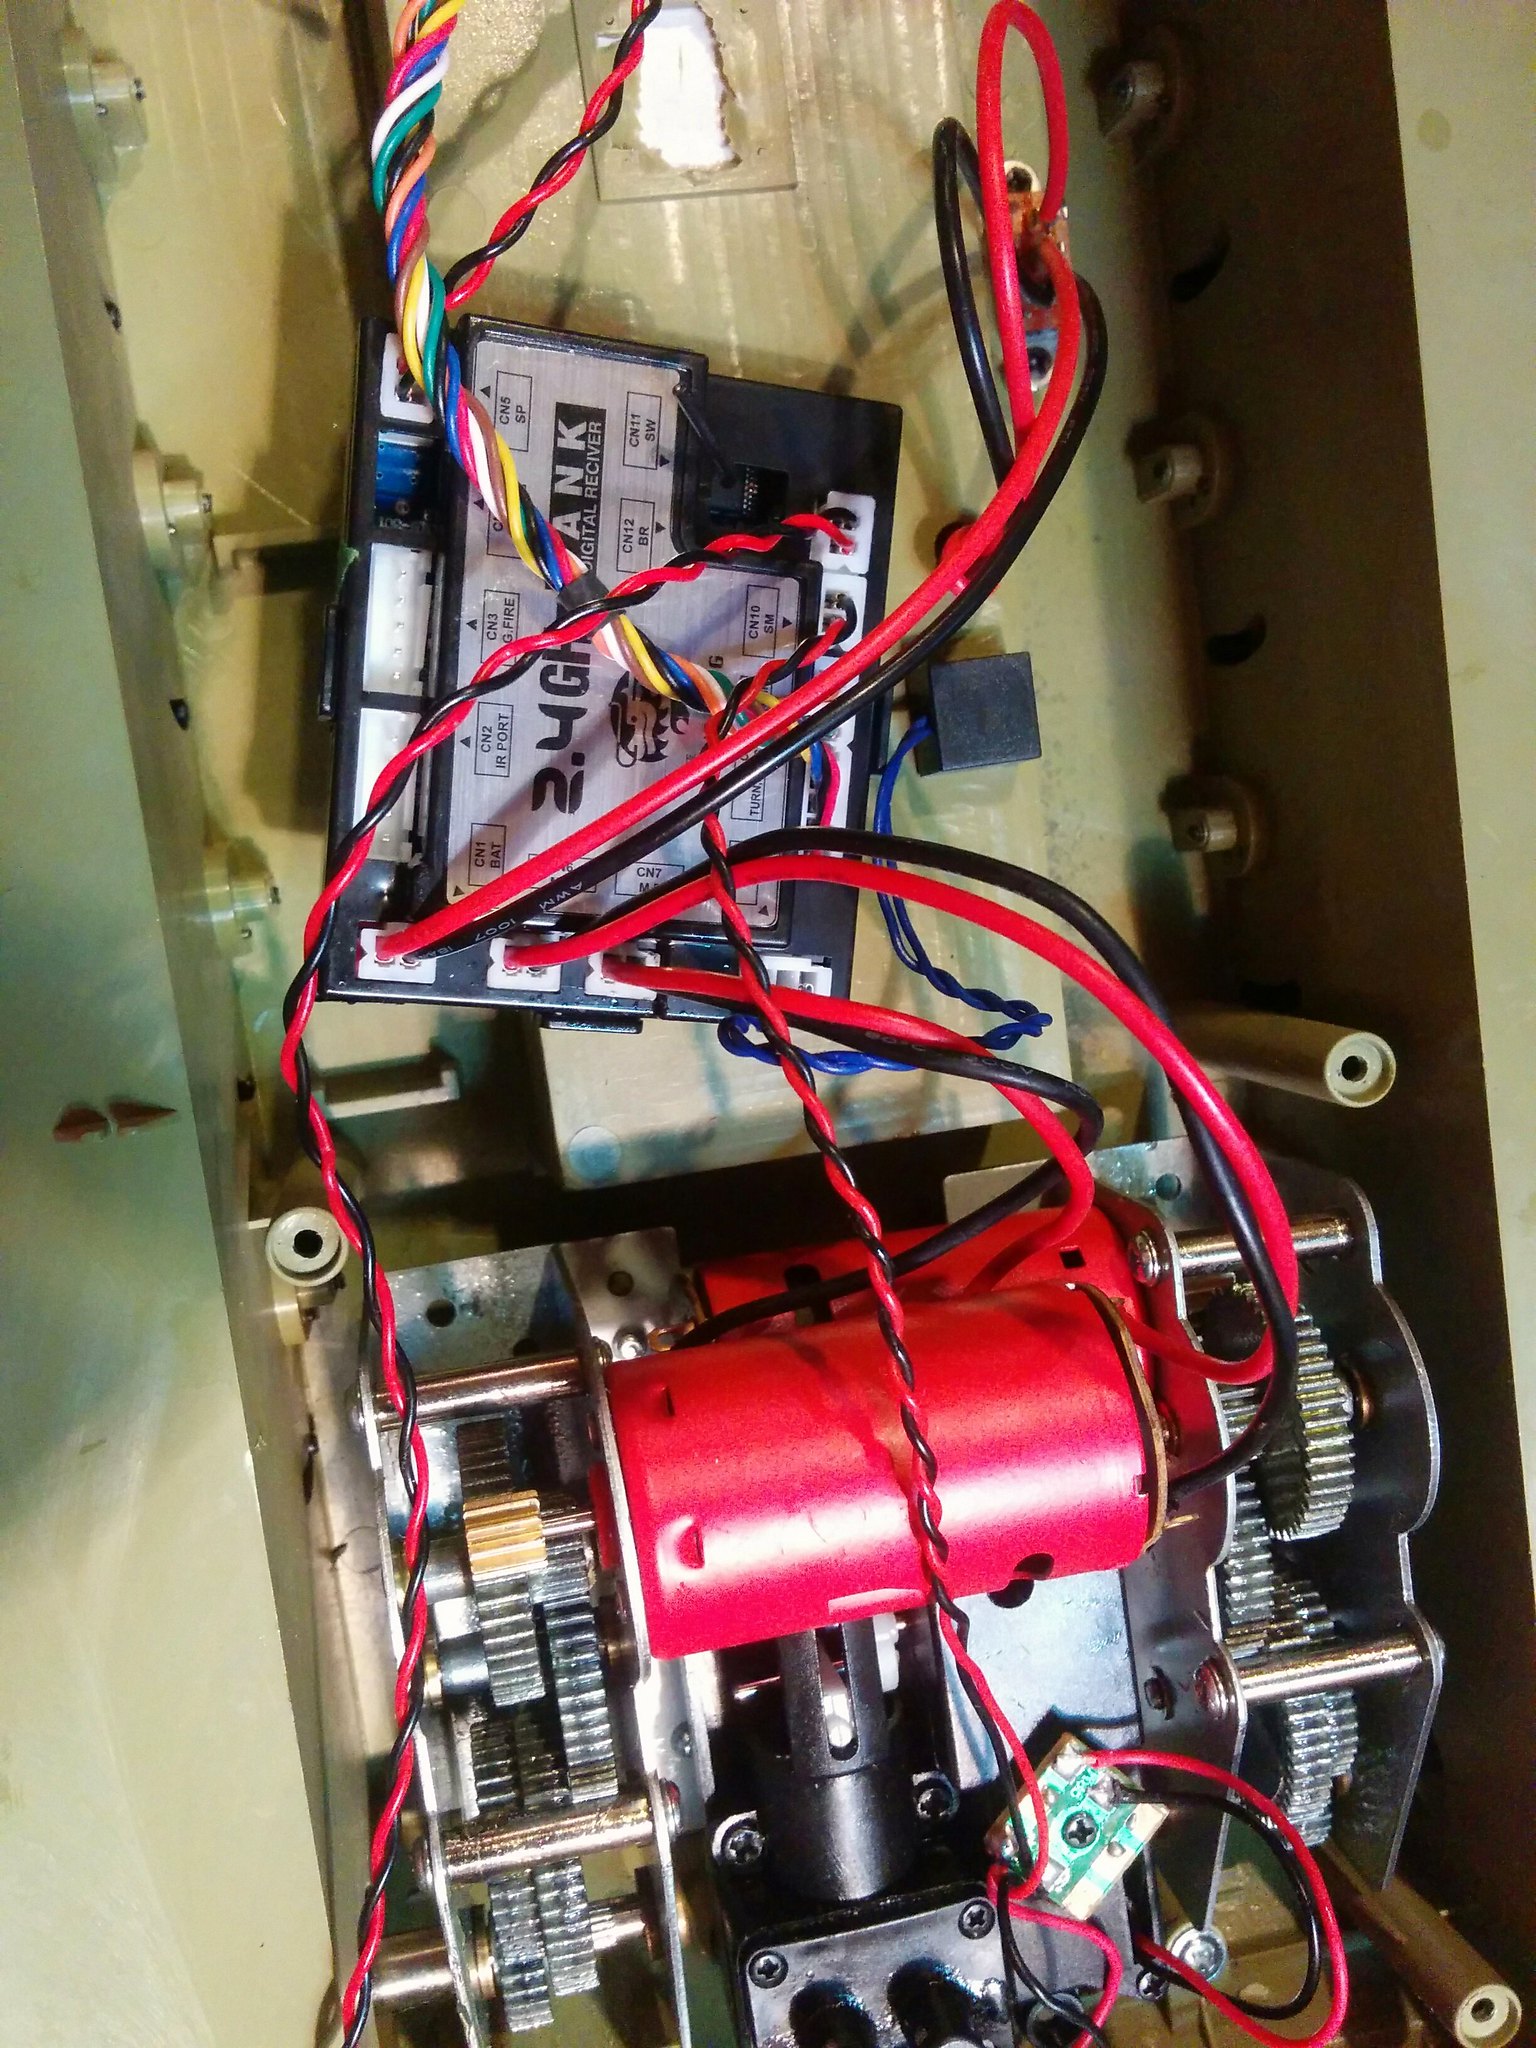
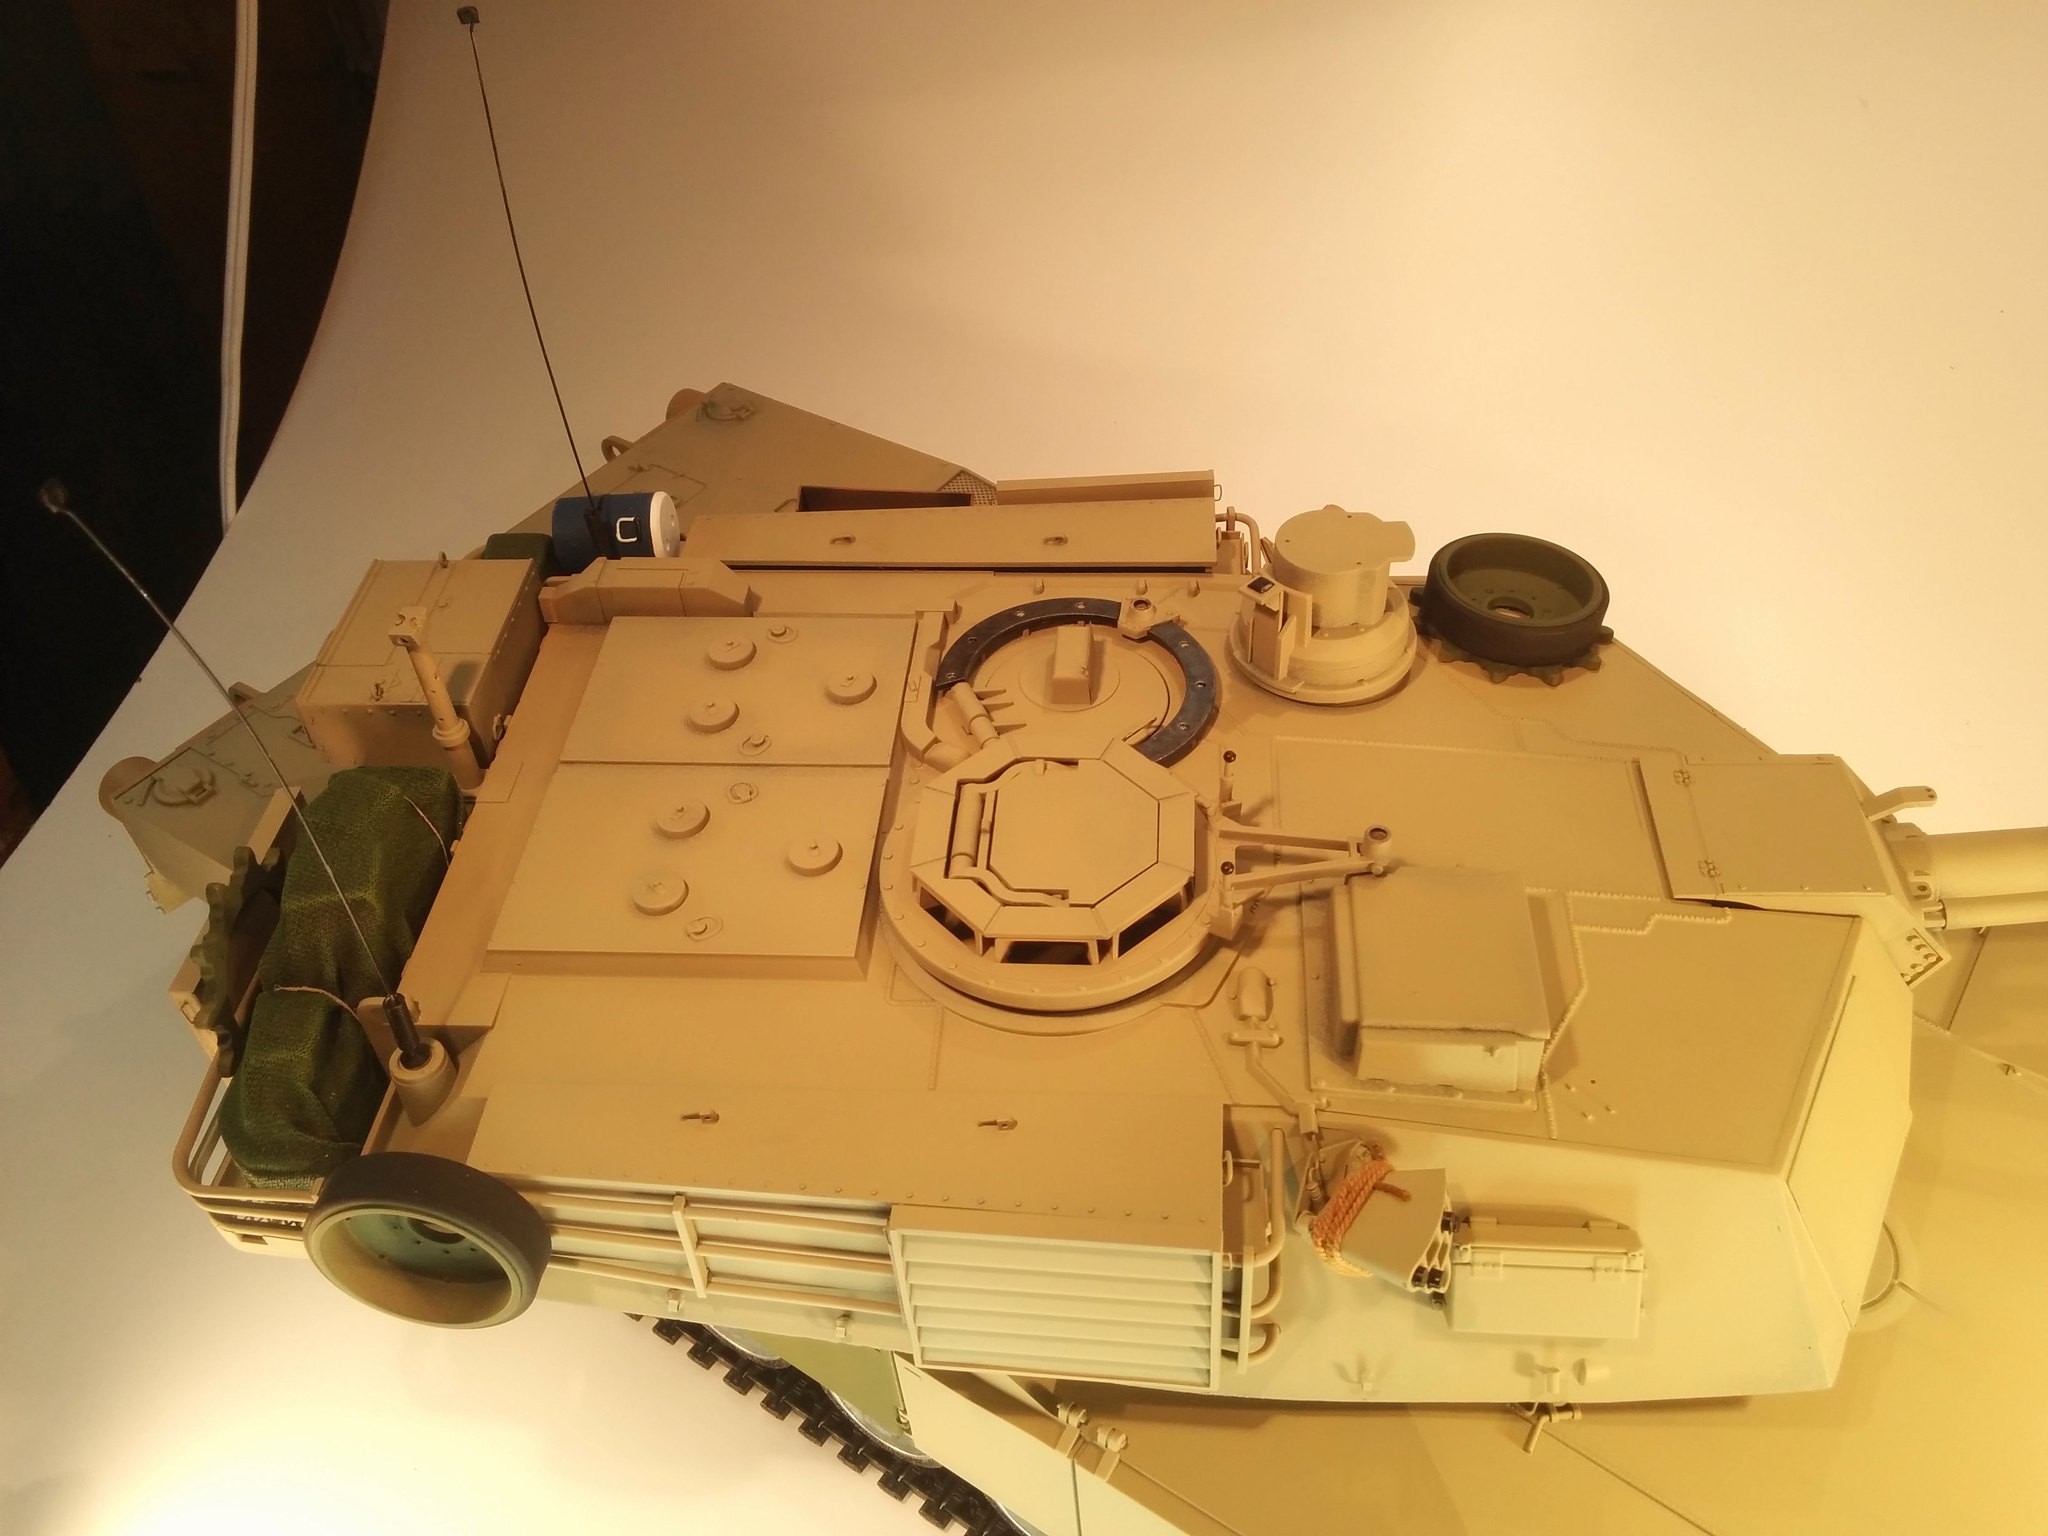
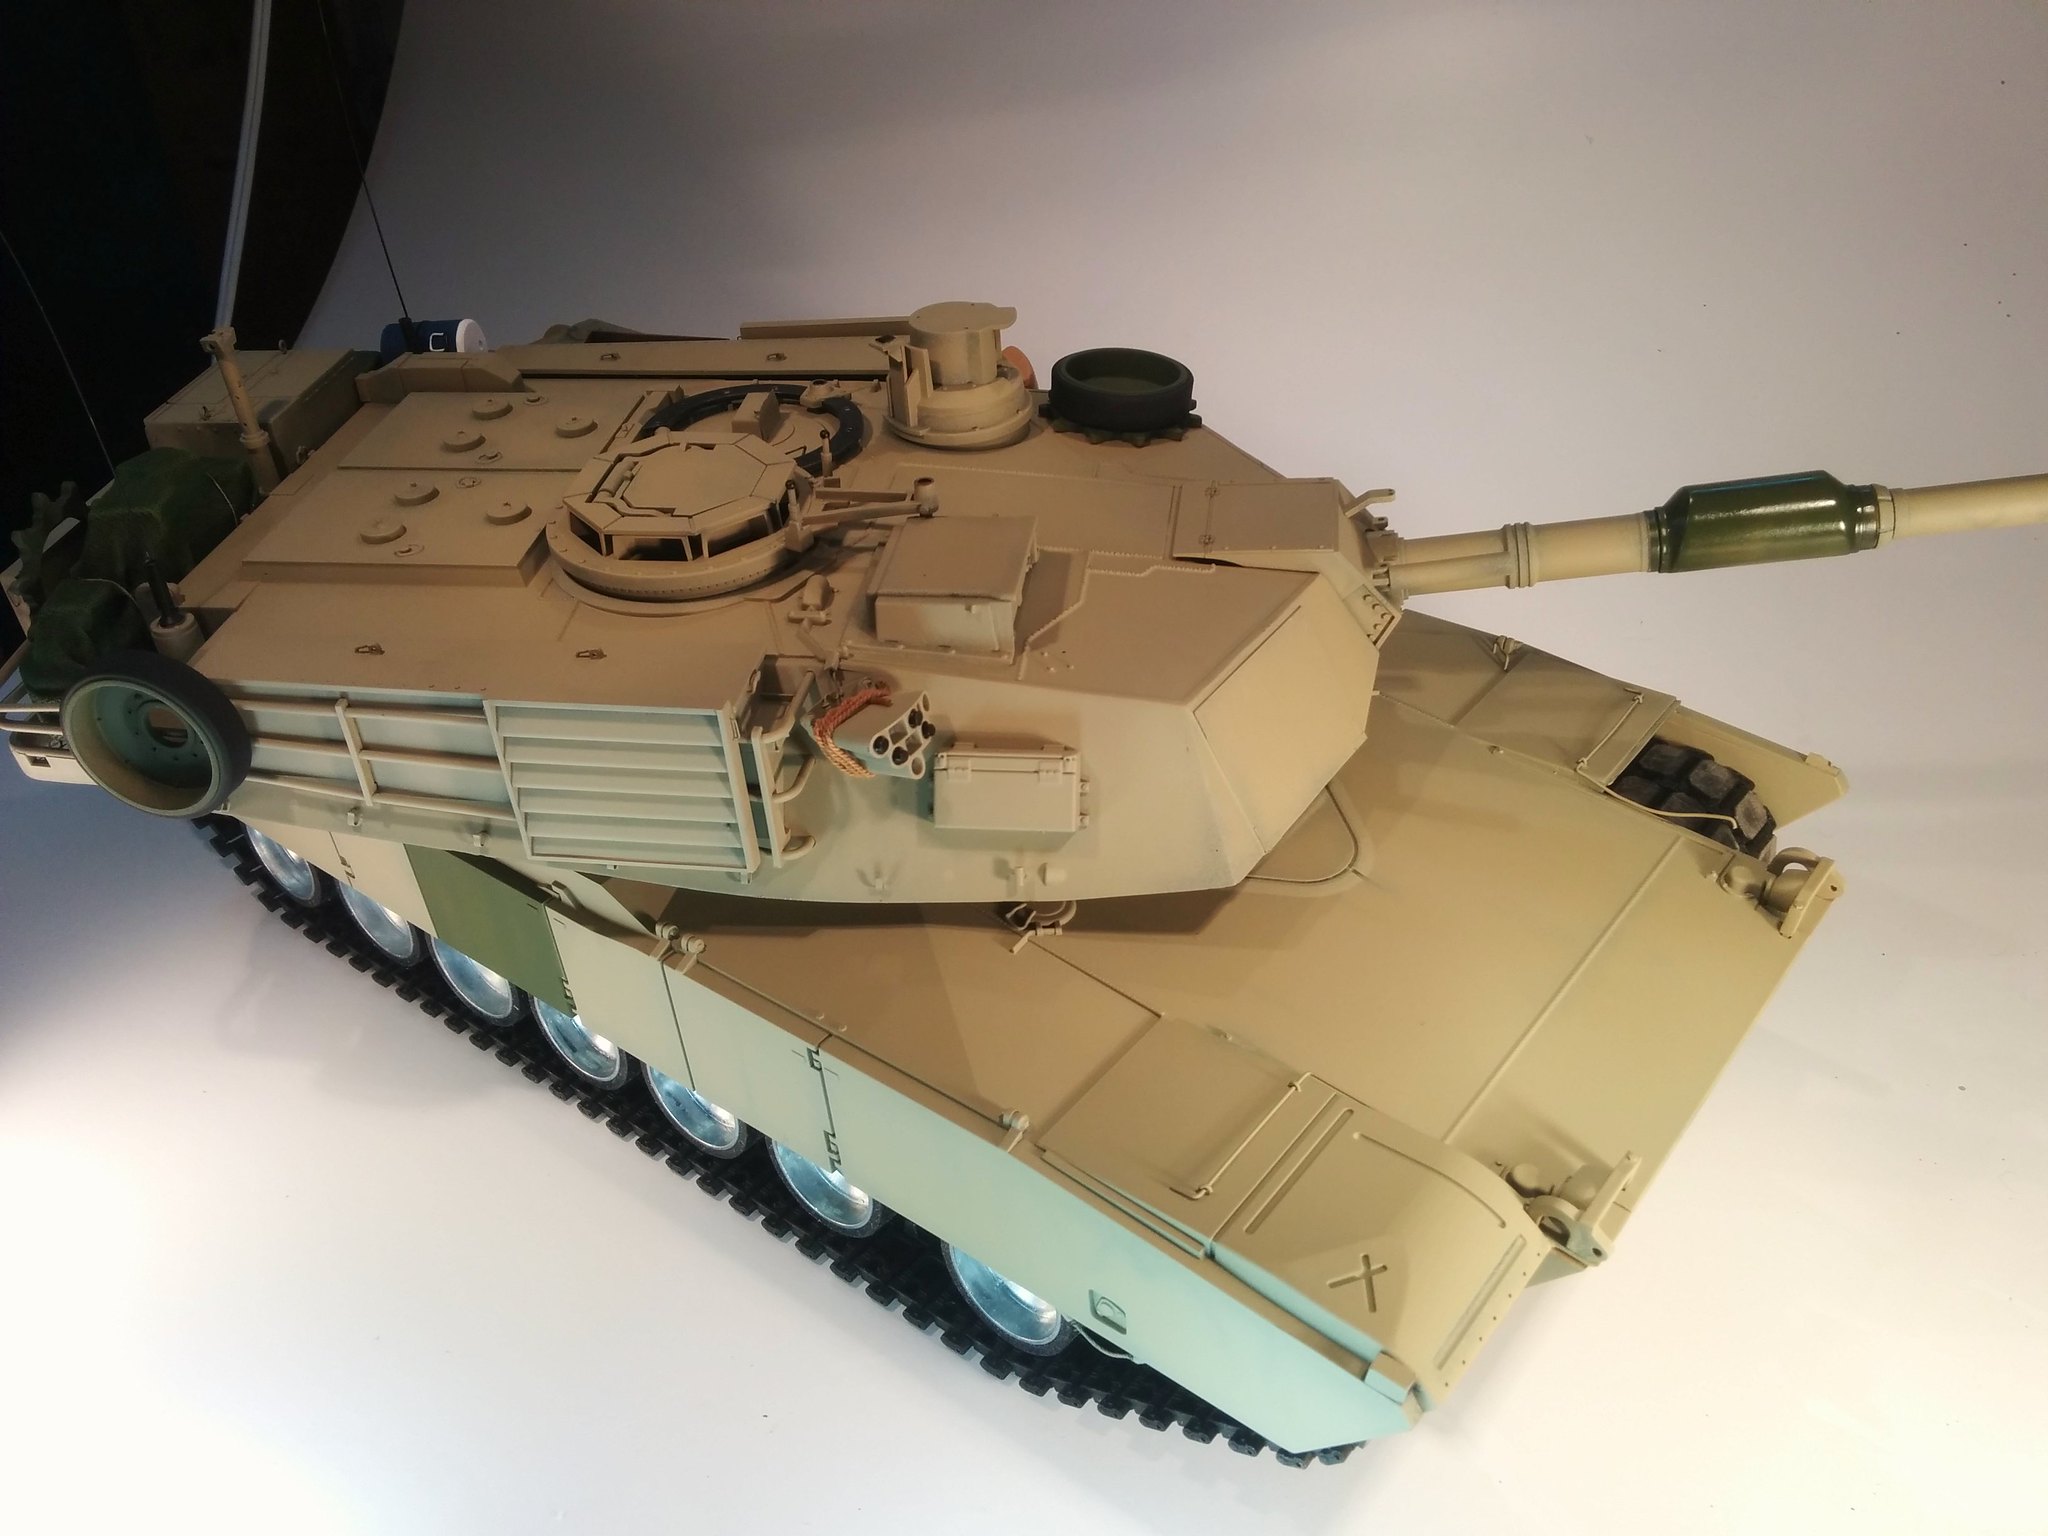
Progres of the day.
 2016-12-19_11-23-47 by asmodeuss, sur Flickr
 2016-12-19_11-23-32 by asmodeuss, sur Flickr
 2016-12-19_10-52-47 by asmodeuss, sur Flickr
Now, I have to wait for some bits and part to reach my door, I have bearings for the drive shaft I will be closing those big gaps between lower hull and the drive shafts.Tracks obviously, decals from precision scale and 4 motors( 2 360 hs and 2 of those red motors that are supposed to be 3 times stronger and 3 times faster...we'll see) Could not find the front axle...If someone has a link for those, I would be pleased
ACW
2016-12-19_11-23-47 by asmodeuss, sur Flickr2016-12-19_11-23-32 by asmodeuss, sur Flickr2016-12-19_10-52-47 by asmodeuss, sur FlickrNow, I have to wait for some bits and part to reach my door, I have bearings for the drive shaft I will be closing those big gaps between lower hull and the drive shafts.Tracks obviously, decals from precision scale and 4 motors( 2 360 hs and 2 of those red motors that are supposed to be 3 times stronger and 3 times faster...we'll see) Could not find the front axle...If someone has a link for those, I would be pleased
ACW
12-19-2016, 11:53 AM
#34
Member
Thread Starter
Join Date: Oct 2016
Posts: 54
Likes: 0
Received 0 Likes
on
0 Posts
Thanks a lot BennyB, I'll order it as soon as my wallet permits... I've already put way too much money on this for a month period I got to take care of other buisness first...Real life stuff
Thanks again mate.
I got to take care of other buisness first...Real life stuff Thanks again mate.
12-20-2016, 03:55 AM
#35

Wow... Are you going to drive this thing outside or is it a shelf queen? It's absolutely stunning what you are doing, but remember, sticks and stuff get sucked up into those tracks and exert stress on the skirts. I can't wait to see the finished product!
Last edited by pcsguy88; 12-21-2016 at 04:45 AM.
12-20-2016, 08:38 AM
#36
Member
Thread Starter
Join Date: Oct 2016
Posts: 54
Likes: 0
Received 0 Likes
on
0 Posts
PCS, I am definitly going to drive this thing around as much as I can, I know some details might get bumped around but thats no biggie, I can redo them or just leave them out as they fall, only adjusting the paint job where it broke off.
Thanks for the good word mate. I am actually starting the paint process which will tedeous for sure more updates later on.
Thanks for the good word mate. I am actually starting the paint process which will tedeous for sure
more updates later on.
12-20-2016, 09:49 AM
#37
Member
Thread Starter
Join Date: Oct 2016
Posts: 54
Likes: 0
Received 0 Likes
on
0 Posts
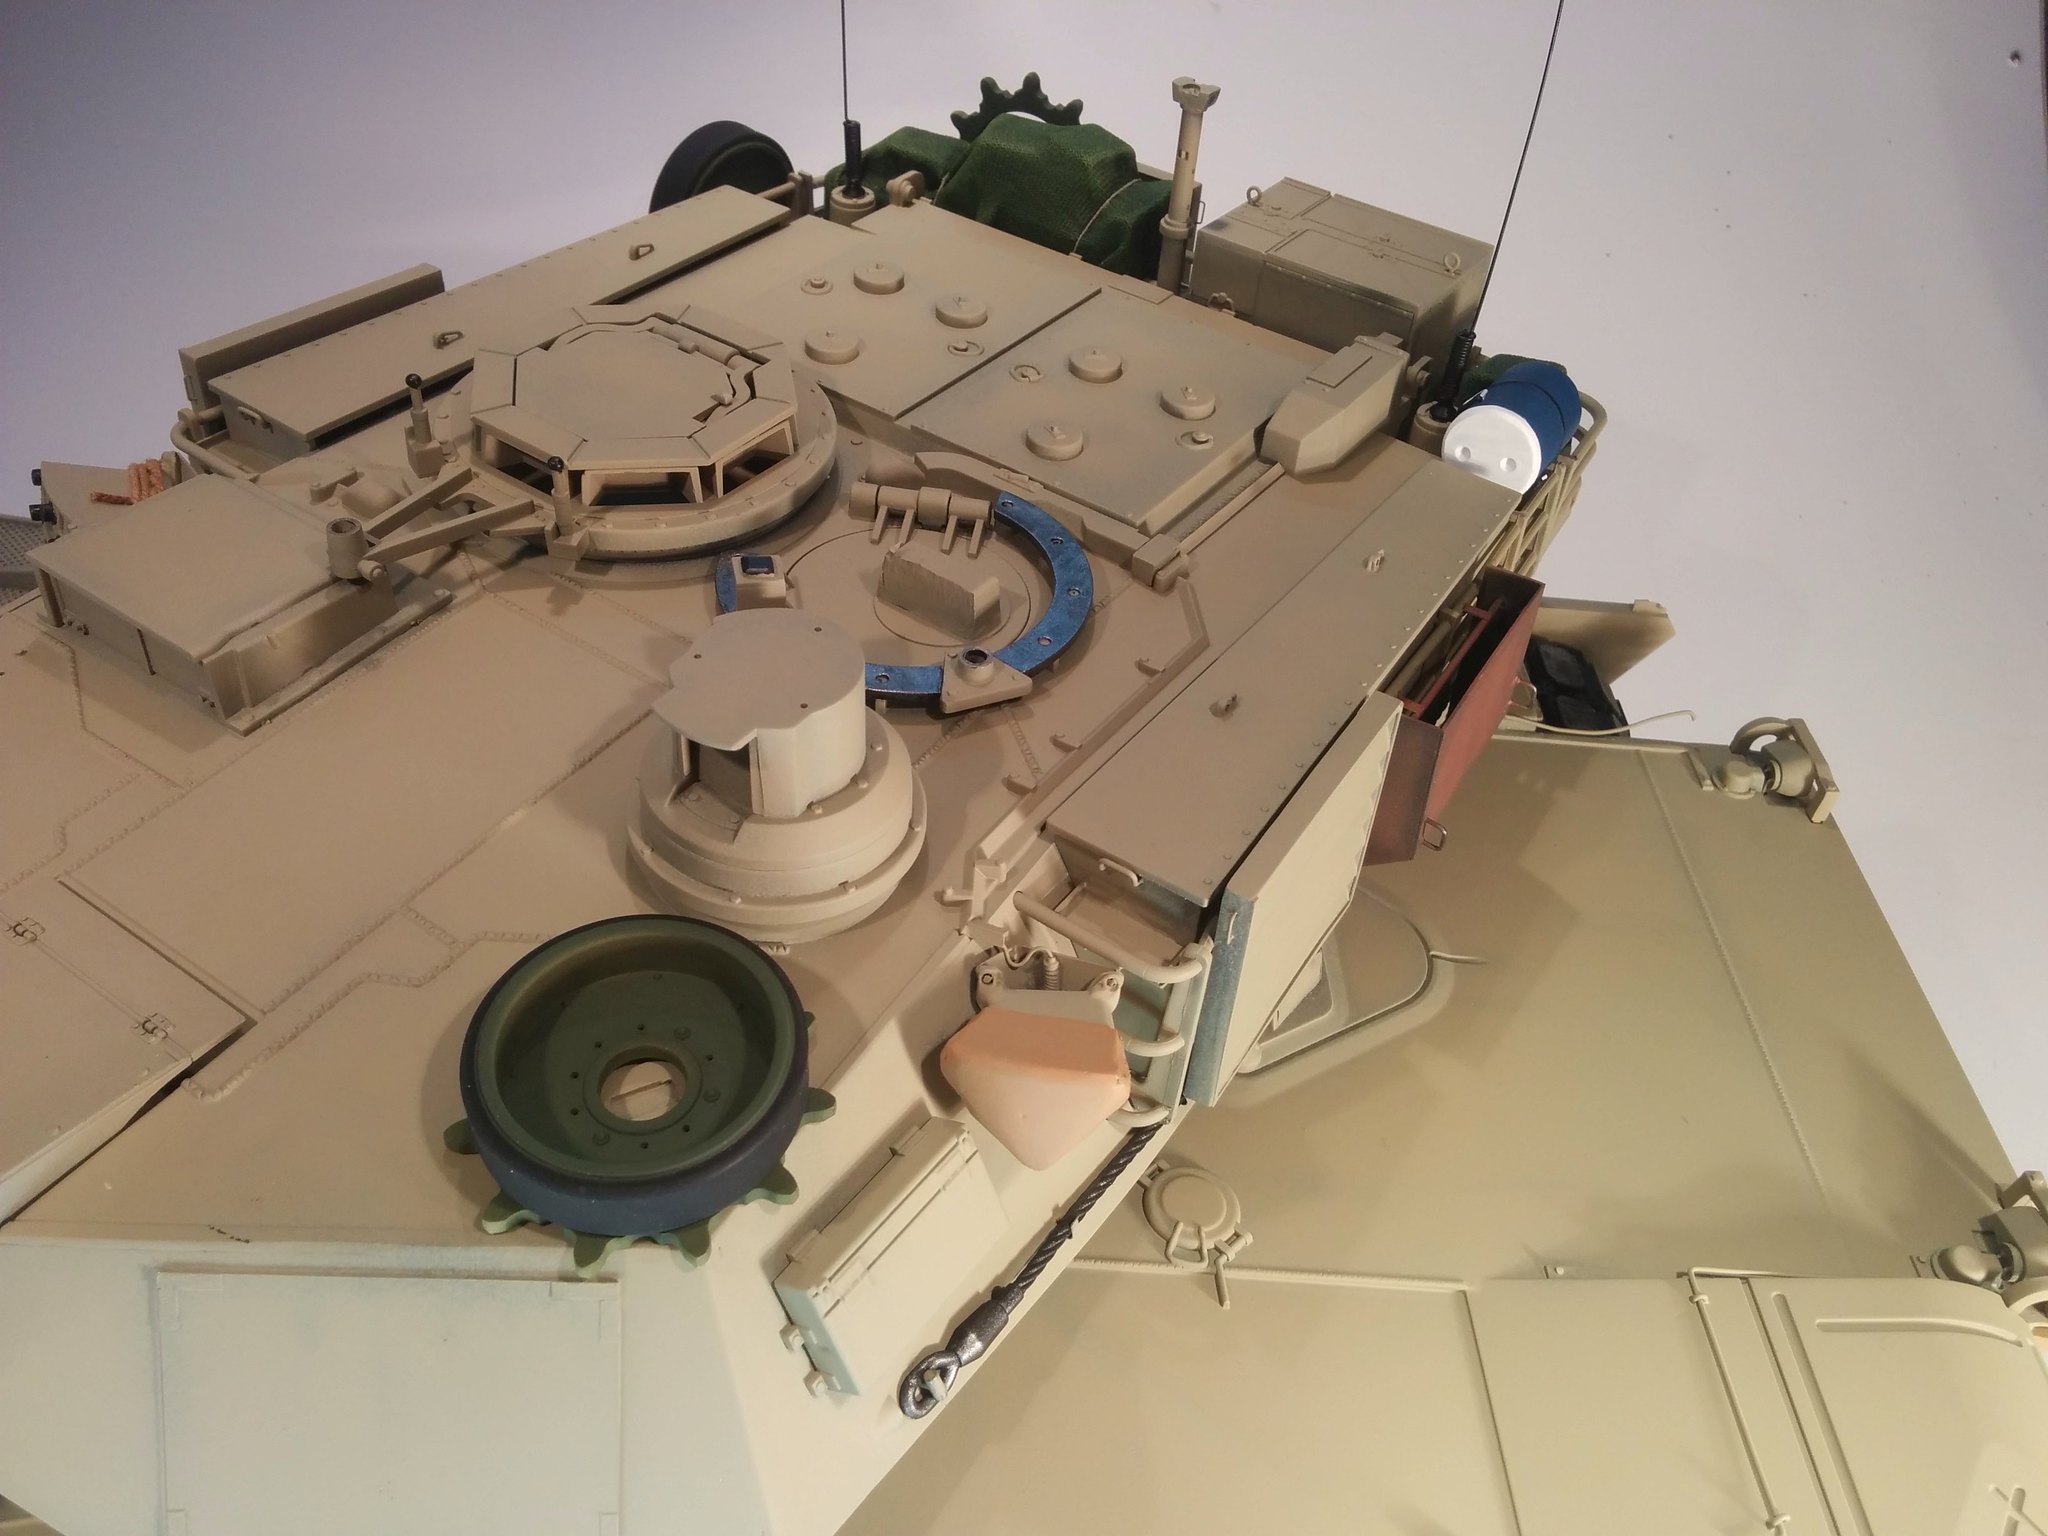
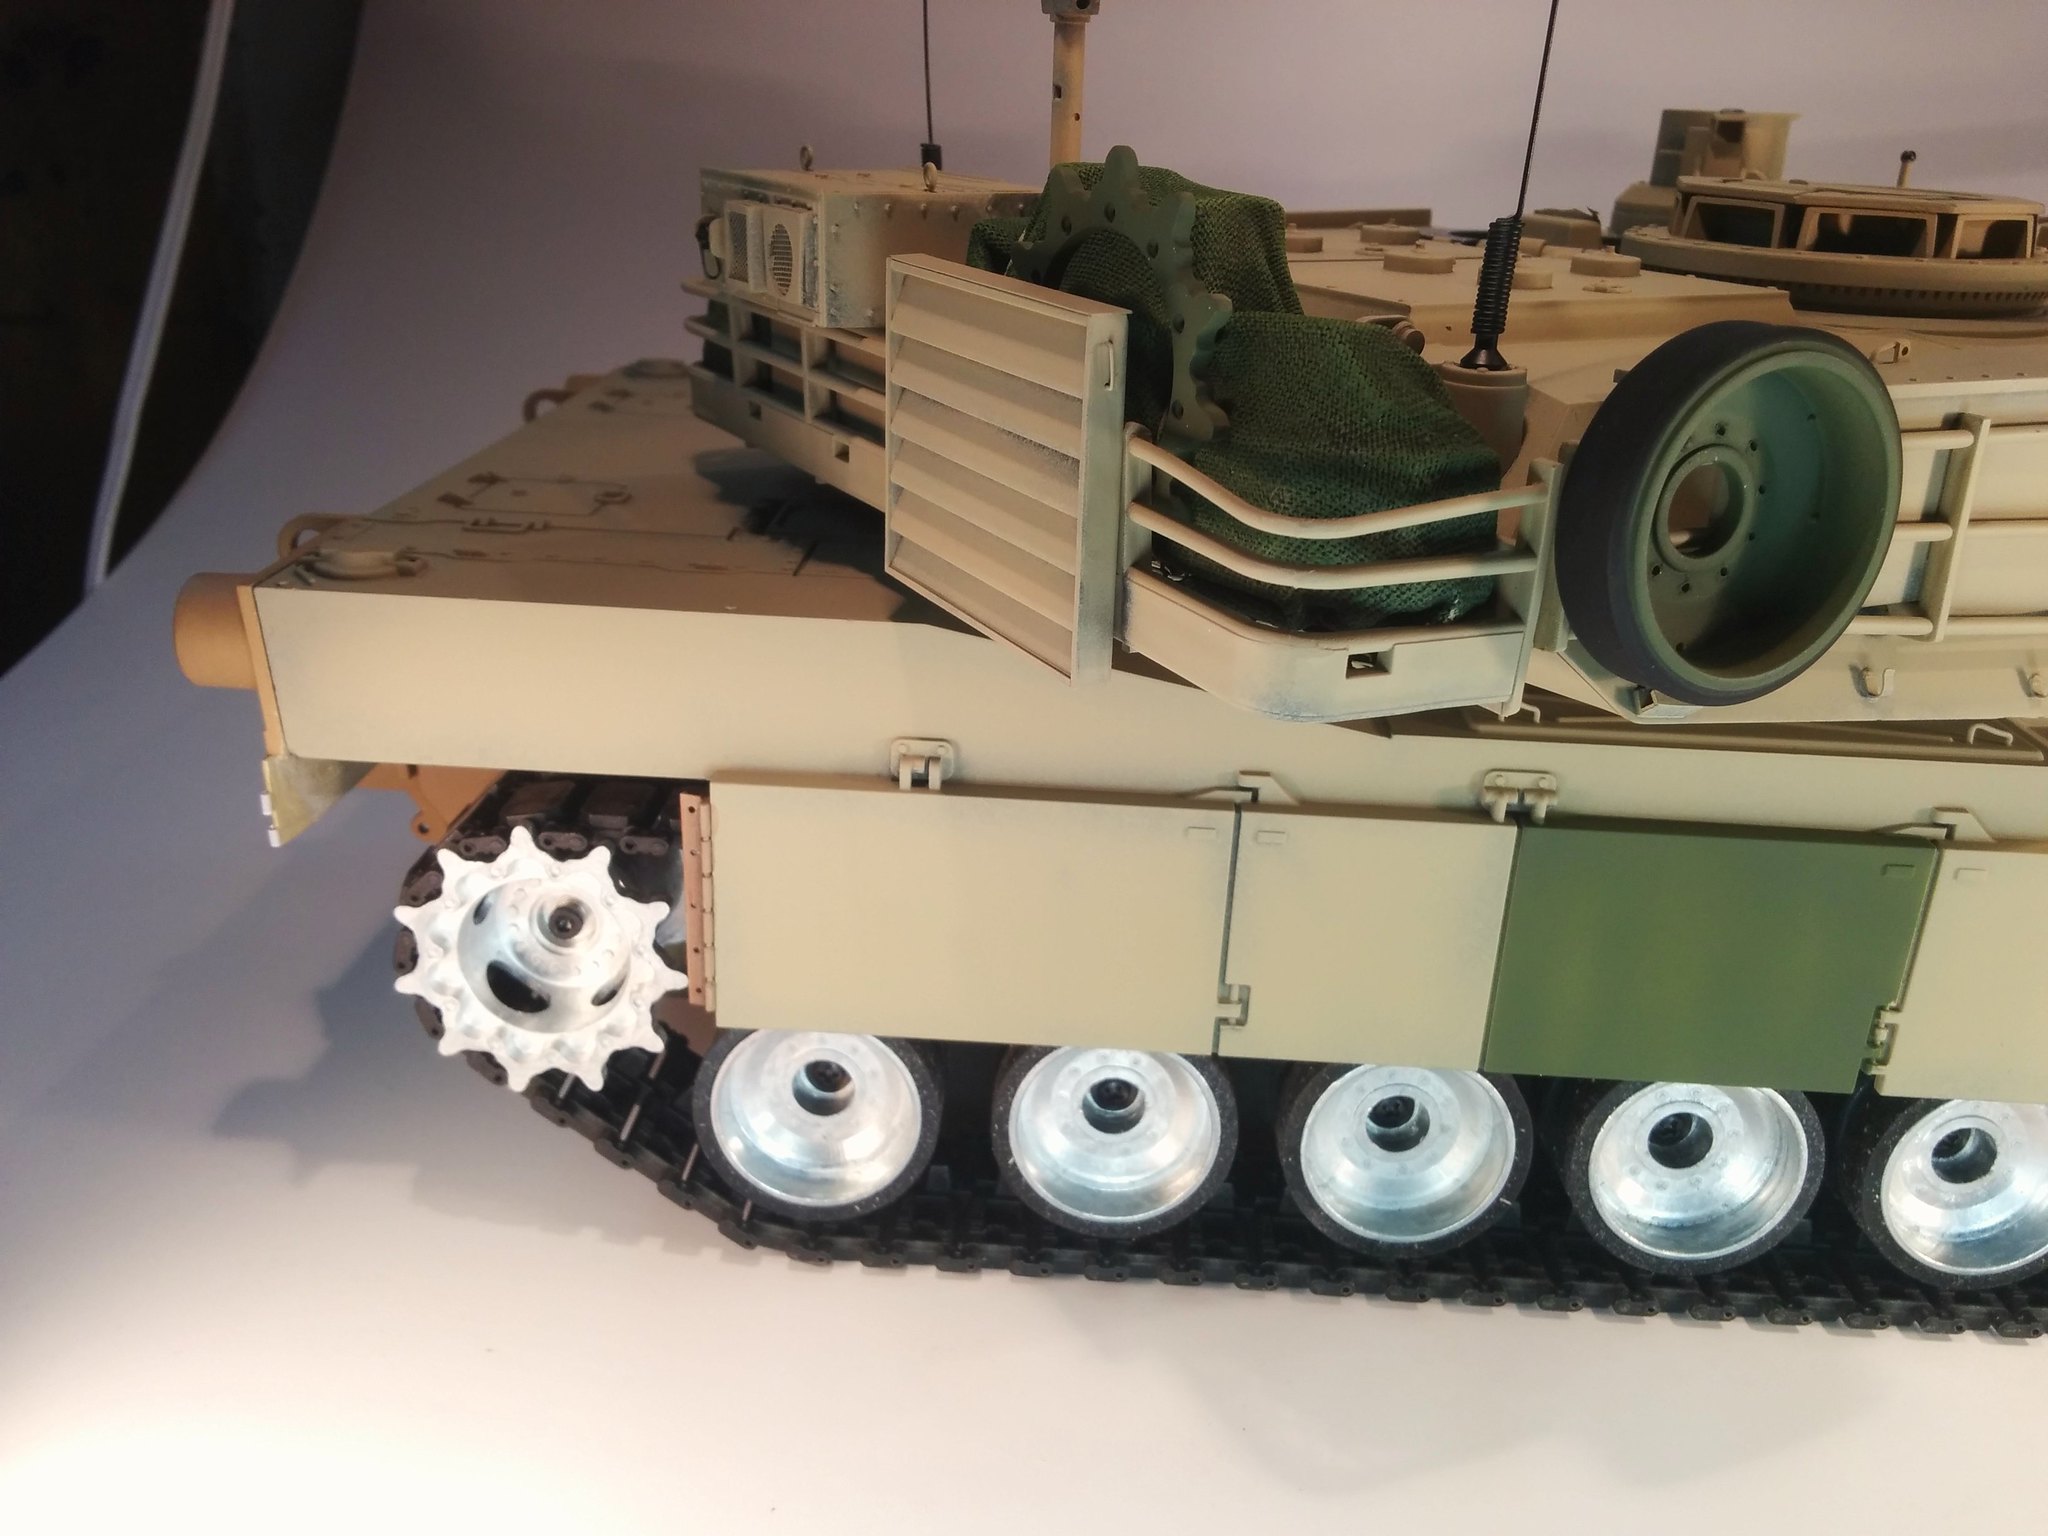
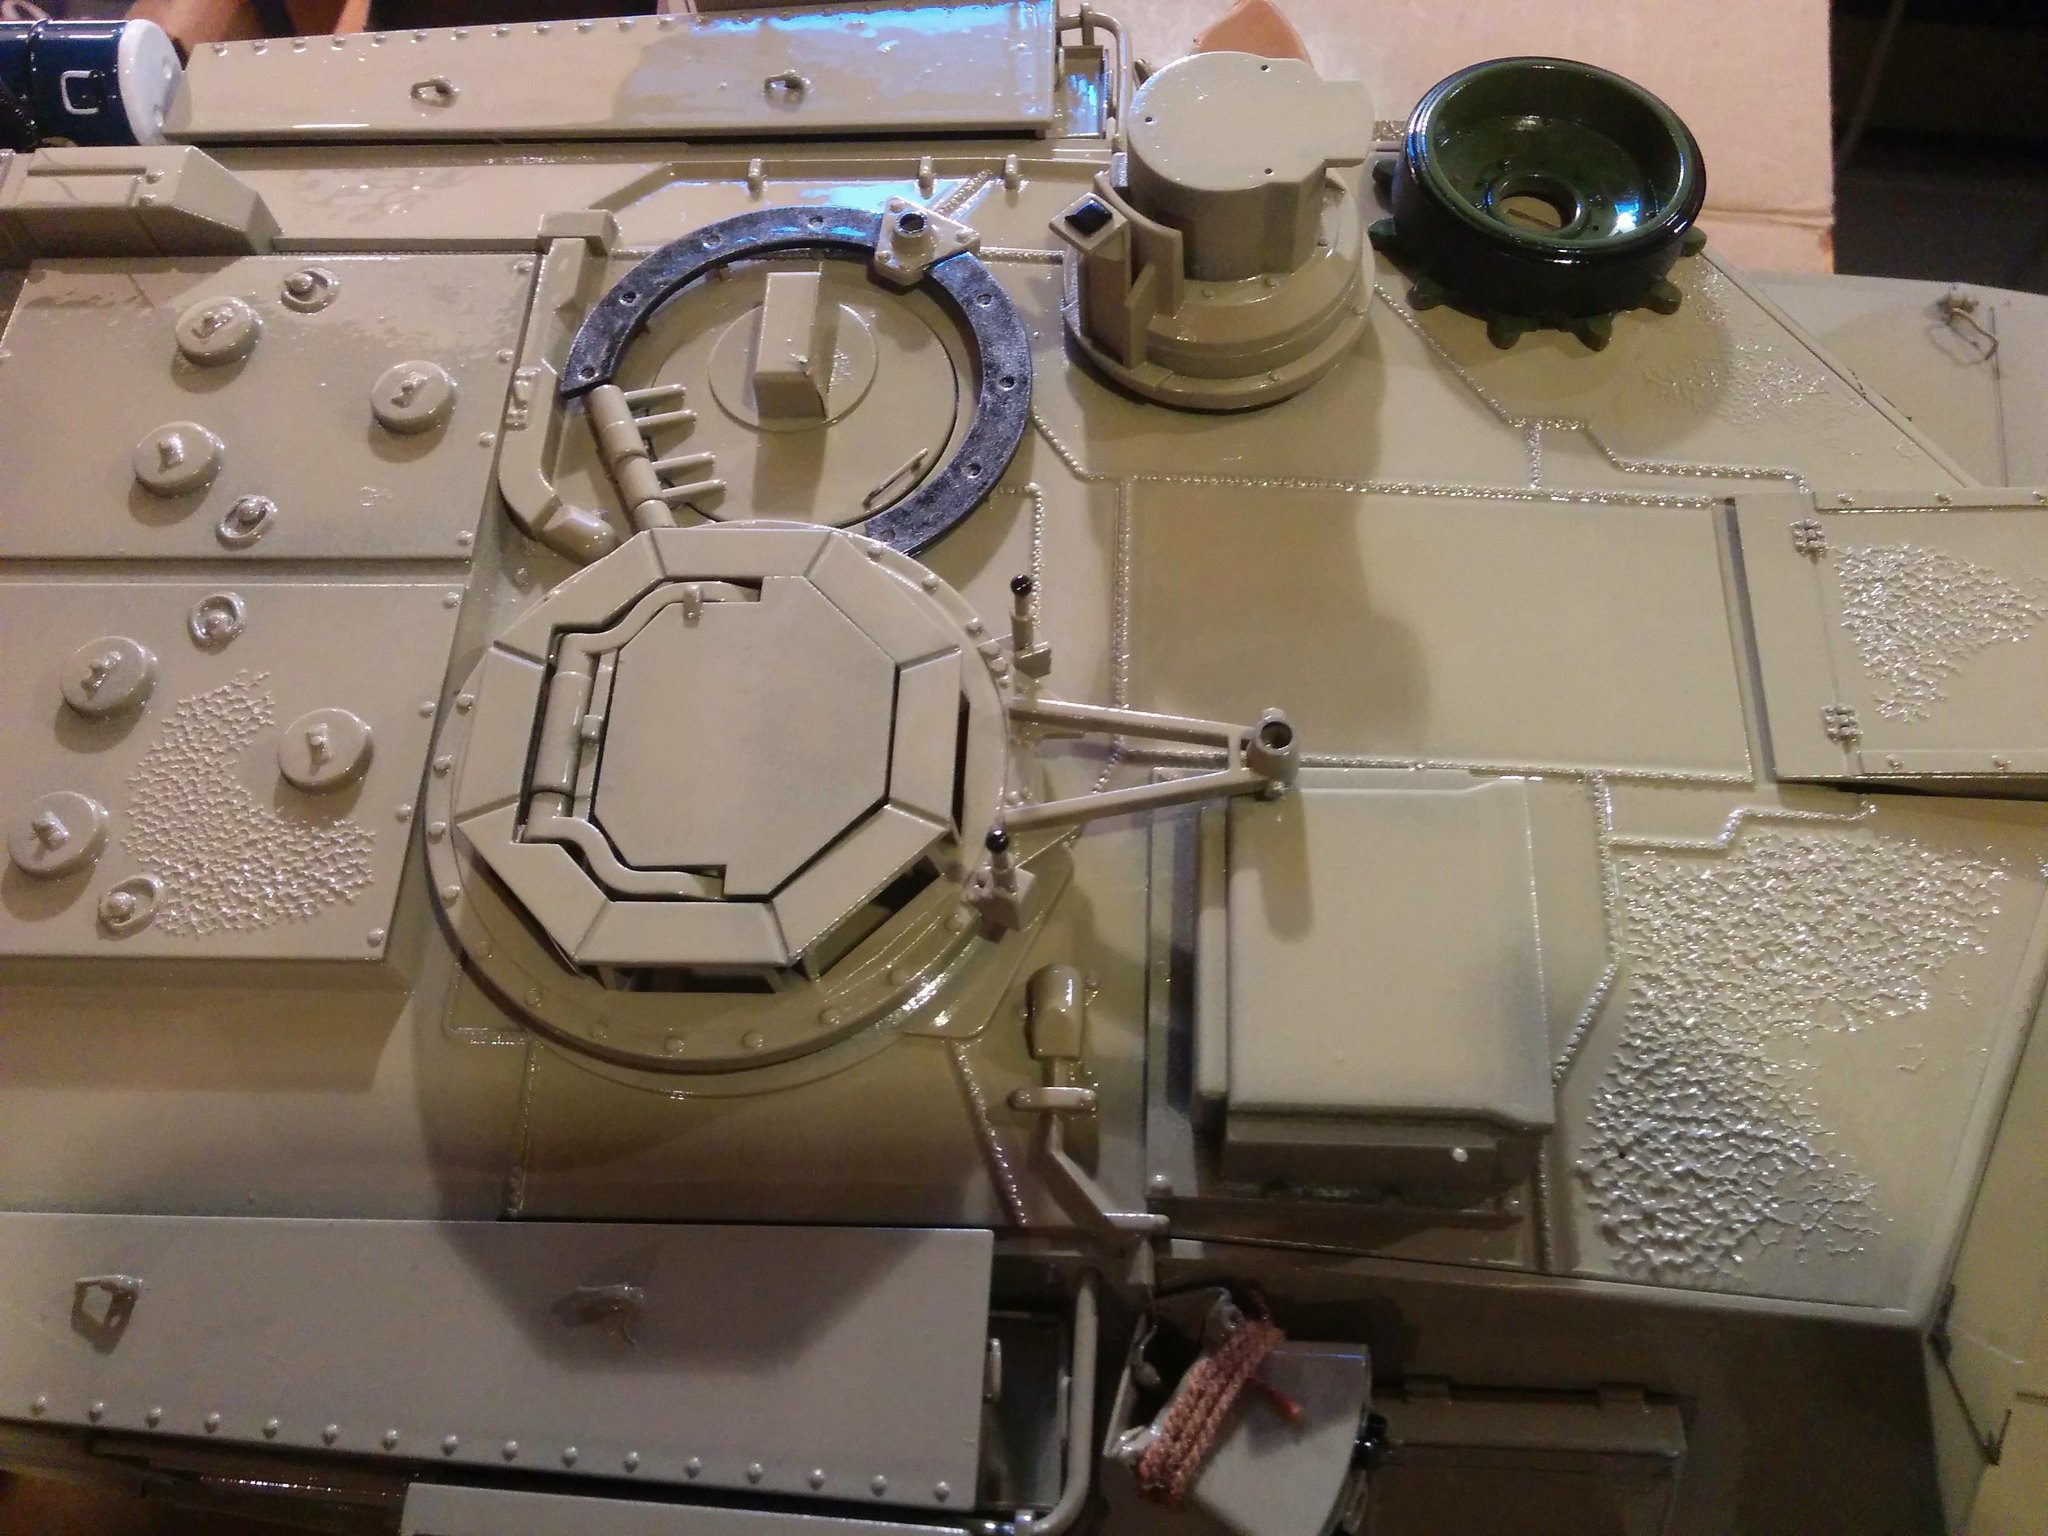
Some primer and stowage. Paint still wet
 2016-12-20_12-38-48 by asmodeuss, sur Flickr
You can see here the diff in paint color, lower hull is darker shade of tan. That said, following the pinwashes, oil fades, filters and general weathering the final color will be darker than the actual turret color.
 2016-12-20_11-39-28 by asmodeuss, sur Flickr
ACW.
2016-12-20_12-38-48 by asmodeuss, sur FlickrYou can see here the diff in paint color, lower hull is darker shade of tan. That said, following the pinwashes, oil fades, filters and general weathering the final color will be darker than the actual turret color.
2016-12-20_11-39-28 by asmodeuss, sur FlickrACW.
12-20-2016, 11:52 AM
#38
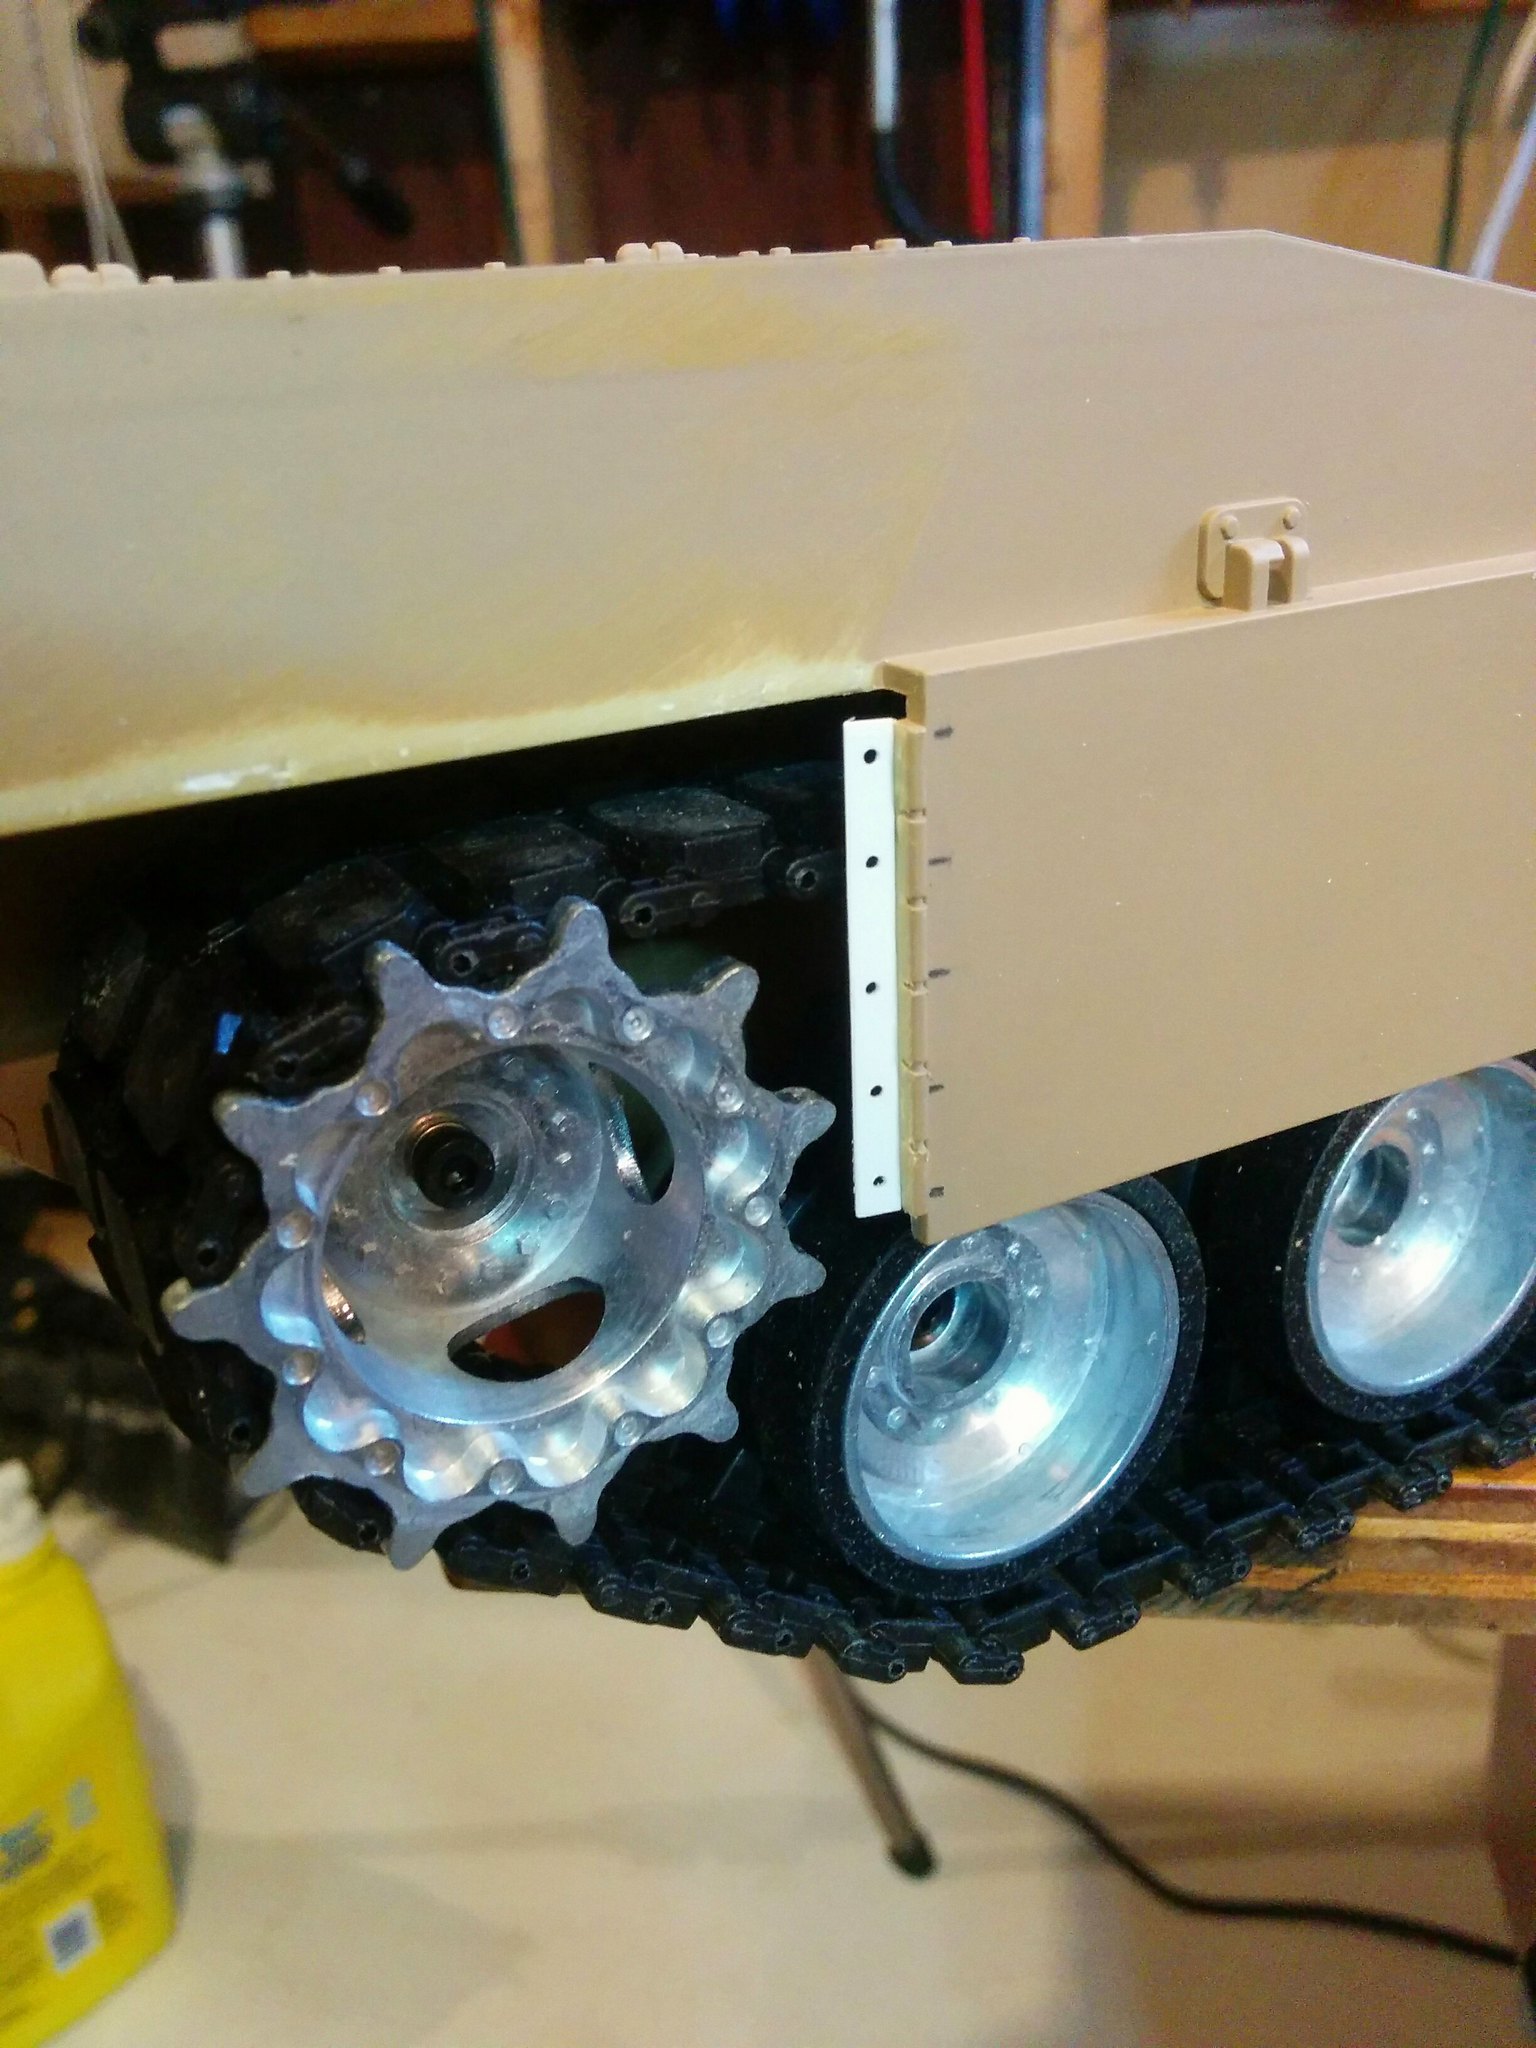
Just got the henntec. This is the second henntec I've purchased and the second time it's been unusable as delivered. The first one was for the Taigen King Tiger and I had to buy a whole new set of idler wheels because the henntec wouldn't work with the stock idlers. Now I get this one and it looks like it's designed to use the plastic idler and the shaft is too small for the metal idlers with bearings. Why would I spend over $50 for an idler adjust system and then use the cheap plastic idler that comes with the tank? Don't get me wrong, I'm really glad that guys take the time to make this kind of stuff, I just wish they'd get it right. The shaft on the henntec should be the same size as the stock shaft, that way you could use any idlers made to fit that size shaft and not have the problem I do now - a $50 item that I won't be able to use as desired without major modification.
Wait, let me clarify. They do get it right in a lot of ways, I just wish they'd provide more info about what may have to be modified and what specific parts it works with. I guess what I'm saying is - more info. I suppose I should have emailed first and explained exactly what parts I was using? Hmmm. I can make it work, though, I just have to turn a couple new posts at work.
As for the idler unit itself, it's a quality piece and it will definitely make the tank much better. Once I make it fit.
https://www.youtube.com/watch?v=hYEeCsfLCoo
Last edited by Crius; 12-20-2016 at 12:57 PM.
12-20-2016, 01:08 PM
#39
Member
Thread Starter
Join Date: Oct 2016
Posts: 54
Likes: 0
Received 0 Likes
on
0 Posts
Thanks for the heads up Gary!! I dont have the piece in front of me and I am posting this whitout having removed my AM iddlers but would the HL brass bushing which is in the stock iddler would fit?...or help to fit the thing?
12-20-2016, 01:15 PM
#40
Member
Thread Starter
Join Date: Oct 2016
Posts: 54
Likes: 0
Received 0 Likes
on
0 Posts
 12-20-2016, 01:42 PM
#41
I've already figured out a fix. I'll just turn a new post to fit the hentec unit on one end and the bearings in the metal idler on the other, then I'll tap it for a 3mm machine screw and make a brass washer to hold the idler on the post. I'll have them made by Friday.
12-20-2016, 03:52 PM
#43
If you know someone that can run a lathe I can draw a sketch that he'll be able to make the posts from, but I think they'll only work with these particular idlers. I think I could use one of the roadwheels with the Henntec, but that would leave me two roadwheels short, and I already sent the other set to Harley. I'll just make the posts, and I think instead of making a washer I'll use the flange bearing that comes with the henntec. Maybe. Further investigation required, but we're on top of it. I've already got a little bag of stuff to take to the shop tomorrow.
12-20-2016, 05:13 PM
#44
OK, I need to make two of these. The threaded hole just happens to be the same size as the socket head cap screw that holds on a stock heng long sprocket. Just happen to have a few of those. ")
And yes, that's what those stupid screws are really called.

The small end goes into the henntec, the bearing of the metal idler slips over the big end and a washer and cap screw go into the end to hold it all together, with loctite, of course. Should work well. The back of the bearing in the idler stands just a wee bit proud so it will mate to the flat surface of the henntec just dandy. Not sure yet if I should use 4140 preheat steel or this alloy stuff we have called H13. High nickel content in that stuff makes it very tough. If I use H13 I'll probably grind them. I won't be sure about the .195 ID until I can use inspection pins to check the hole size, but I'll be able to get a pretty much perfect fit. We'll make it deadnuts, if you habla.
12-21-2016, 07:01 AM
#46
Member
Thread Starter
Join Date: Oct 2016
Posts: 54
Likes: 0
Received 0 Likes
on
0 Posts
Crius, I do have a good friend which own a machine shop here in the woods, he builds huge forestry machines! I'll ask if he can do this for me. He always like when I come to ask for help creating intricate parts Lucky me Thanks for the drawing I've saved it on the cpu. But frankly I way build the whole thing from scratch....Well see.
PCS, NIce catch for sure mate! I would love to have some of those jerrycans for this build...Maybe when I am finish with all of the electronics mods I'll revisit the whole stowage, making it very busy.
Lucky me Thanks for the drawing I've saved it on the cpu. But frankly I way build the whole thing from scratch....Well see.PCS, NIce catch for sure mate! I would love to have some of those jerrycans for this build...Maybe when I am finish with all of the electronics mods I'll revisit the whole stowage, making it very busy.
12-21-2016, 01:22 PM
#47
Member
Thread Starter
Join Date: Oct 2016
Posts: 54
Likes: 0
Received 0 Likes
on
0 Posts
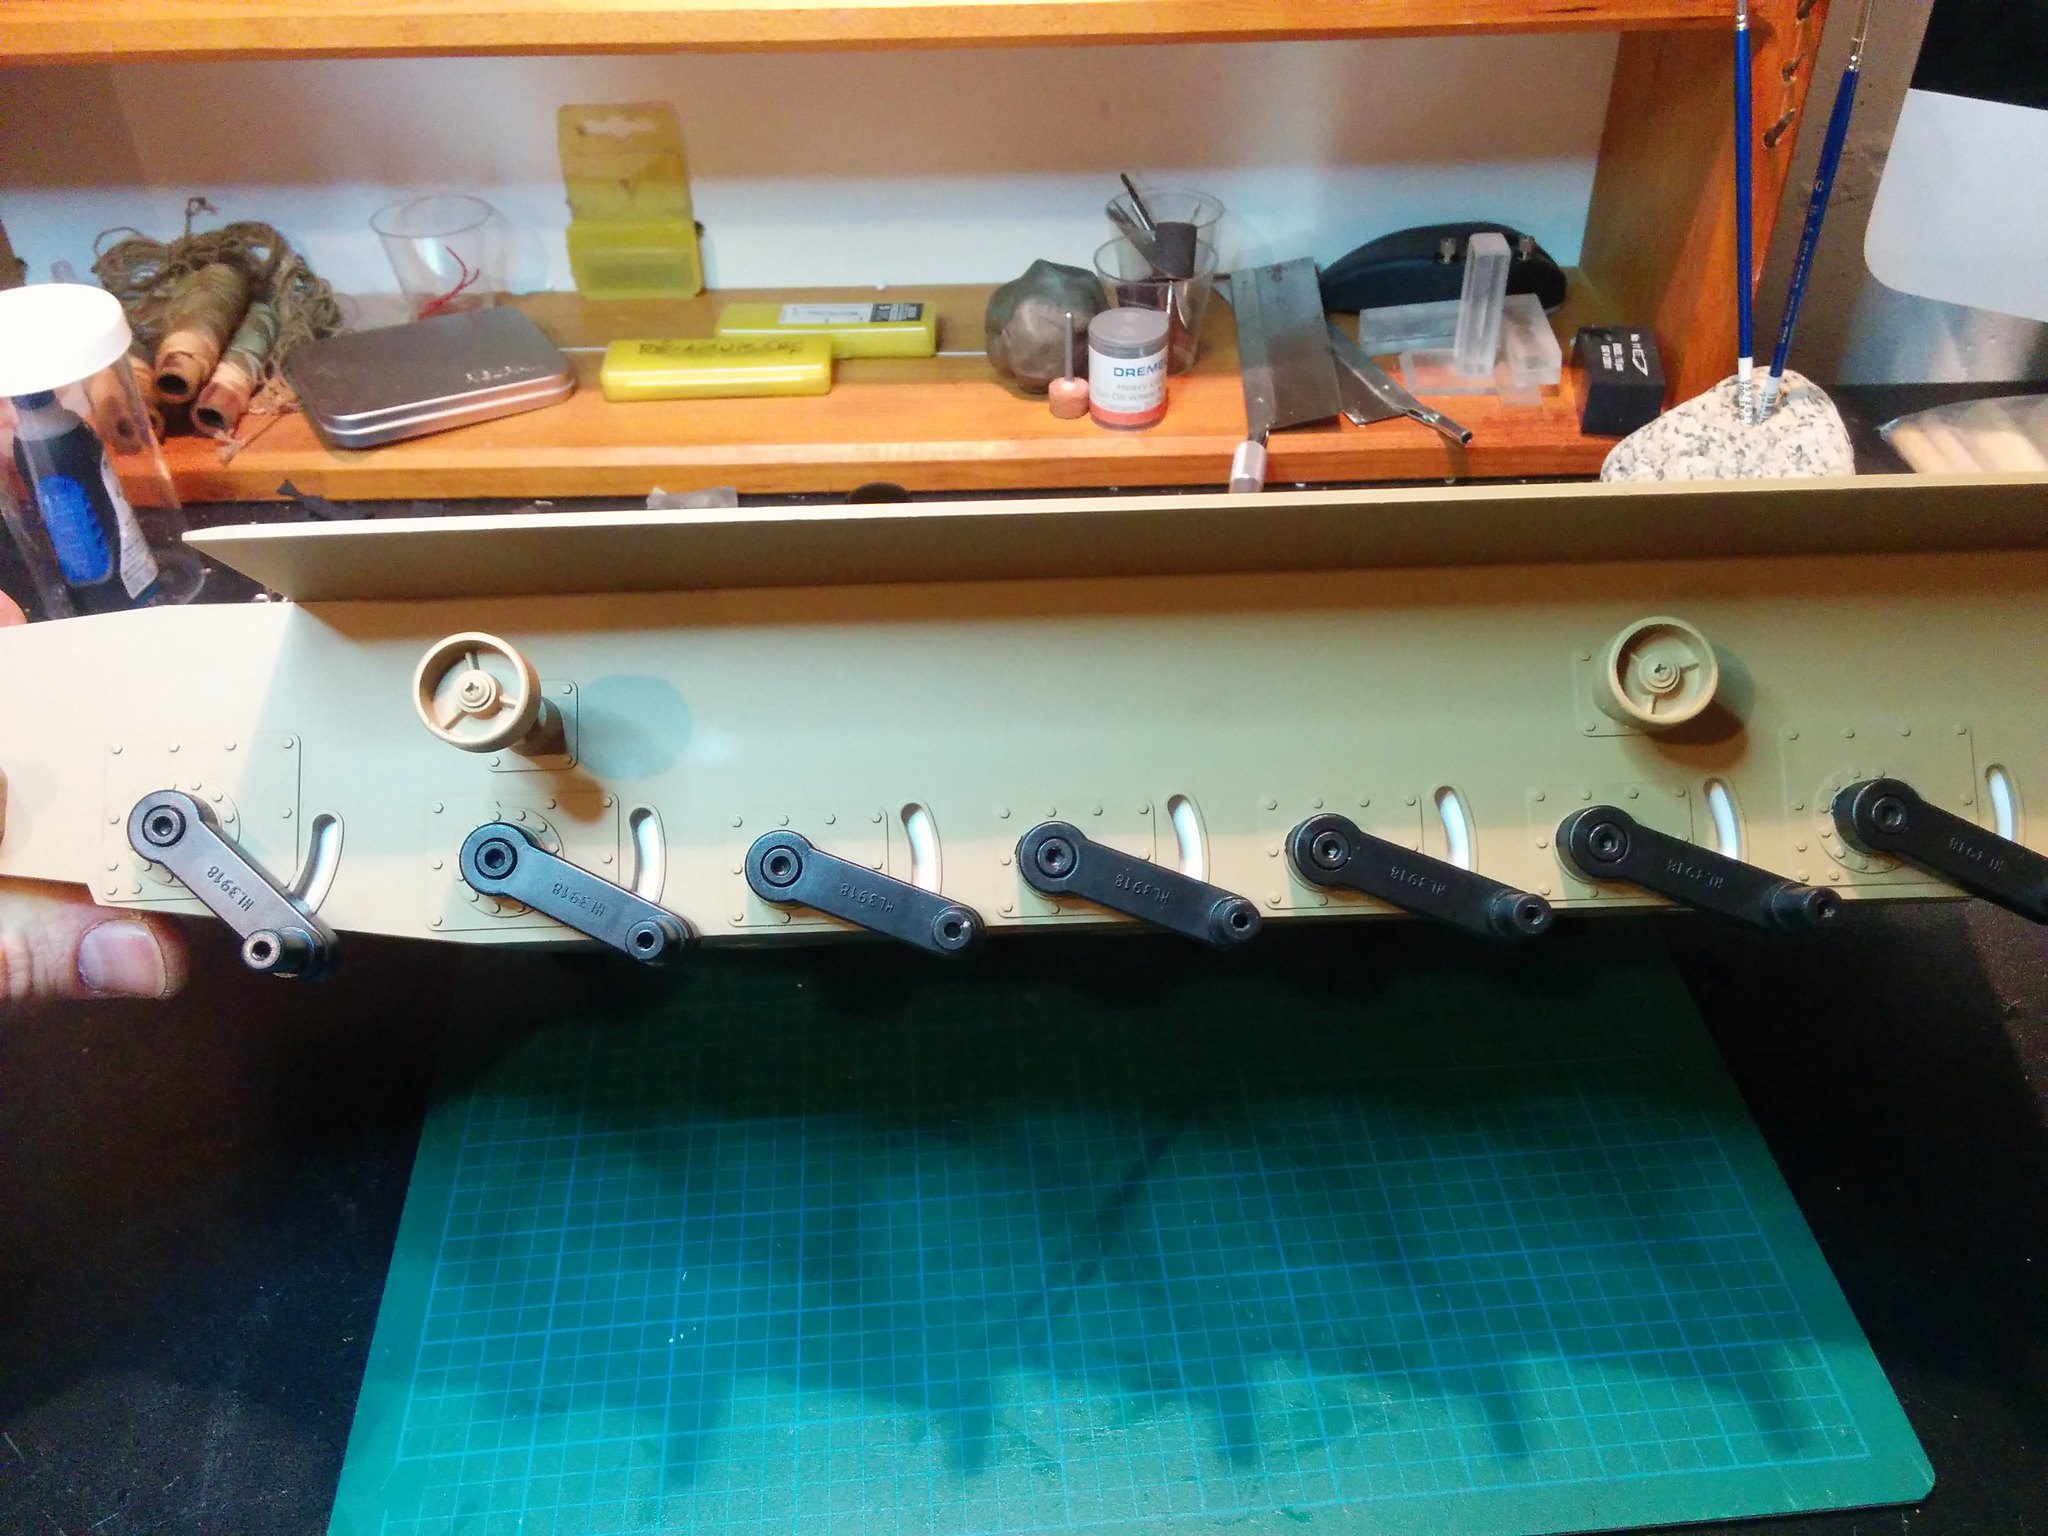
I've got these in the mail today! 390 motors they are faster indeed, but with a nicad battery it is hard to say if they will hold up the 3 times faster sales pitch...We'll see when I upgrade to lipo.
Here is the day progres
Motors they were suprizingly plug and play for the rx-18
 2016-12-21_03-11-39 by asmodeuss, sur Flickr
Basic colors are on
 2016-12-21_04-09-30 by asmodeuss, sur Flickr
I did not touch to the lower hull yet, I want to relocate the battery pack and make a tublike lower hull.
 2016-12-21_04-09-45 by asmodeuss, sur Flickr
 2016-12-21_04-10-02 by asmodeuss, sur Flickr
 2016-12-21_04-10-16 by asmodeuss, sur Flickr
ACW. More when I can.
Here is the day progres
Motors they were suprizingly plug and play for the rx-18
2016-12-21_03-11-39 by asmodeuss, sur FlickrBasic colors are on
2016-12-21_04-09-30 by asmodeuss, sur FlickrI did not touch to the lower hull yet, I want to relocate the battery pack and make a tublike lower hull.
2016-12-21_04-09-45 by asmodeuss, sur Flickr2016-12-21_04-10-02 by asmodeuss, sur Flickr2016-12-21_04-10-16 by asmodeuss, sur FlickrACW. More when I can.
12-21-2016, 01:42 PM
#48
Some video of the new motors in action would be cool. Hint, hint.
I got the hentec problem taken care of. If your friend works on large machinery he might find these challenging because they're so small. My shop isn't exactly set up for stuff this small, but i know a few tricks. So here's what happened with the hentec
https://www.youtube.com/watch?v=rTa_AePNwjk
I got the hentec problem taken care of. If your friend works on large machinery he might find these challenging because they're so small. My shop isn't exactly set up for stuff this small, but i know a few tricks. So here's what happened with the hentec
https://www.youtube.com/watch?v=rTa_AePNwjk
12-23-2016, 06:32 AM
#49
Member
Thread Starter
Join Date: Oct 2016
Posts: 54
Likes: 0
Received 0 Likes
on
0 Posts
Yes indeed it looks pretty darn handy being a machinist! very nice work mate.
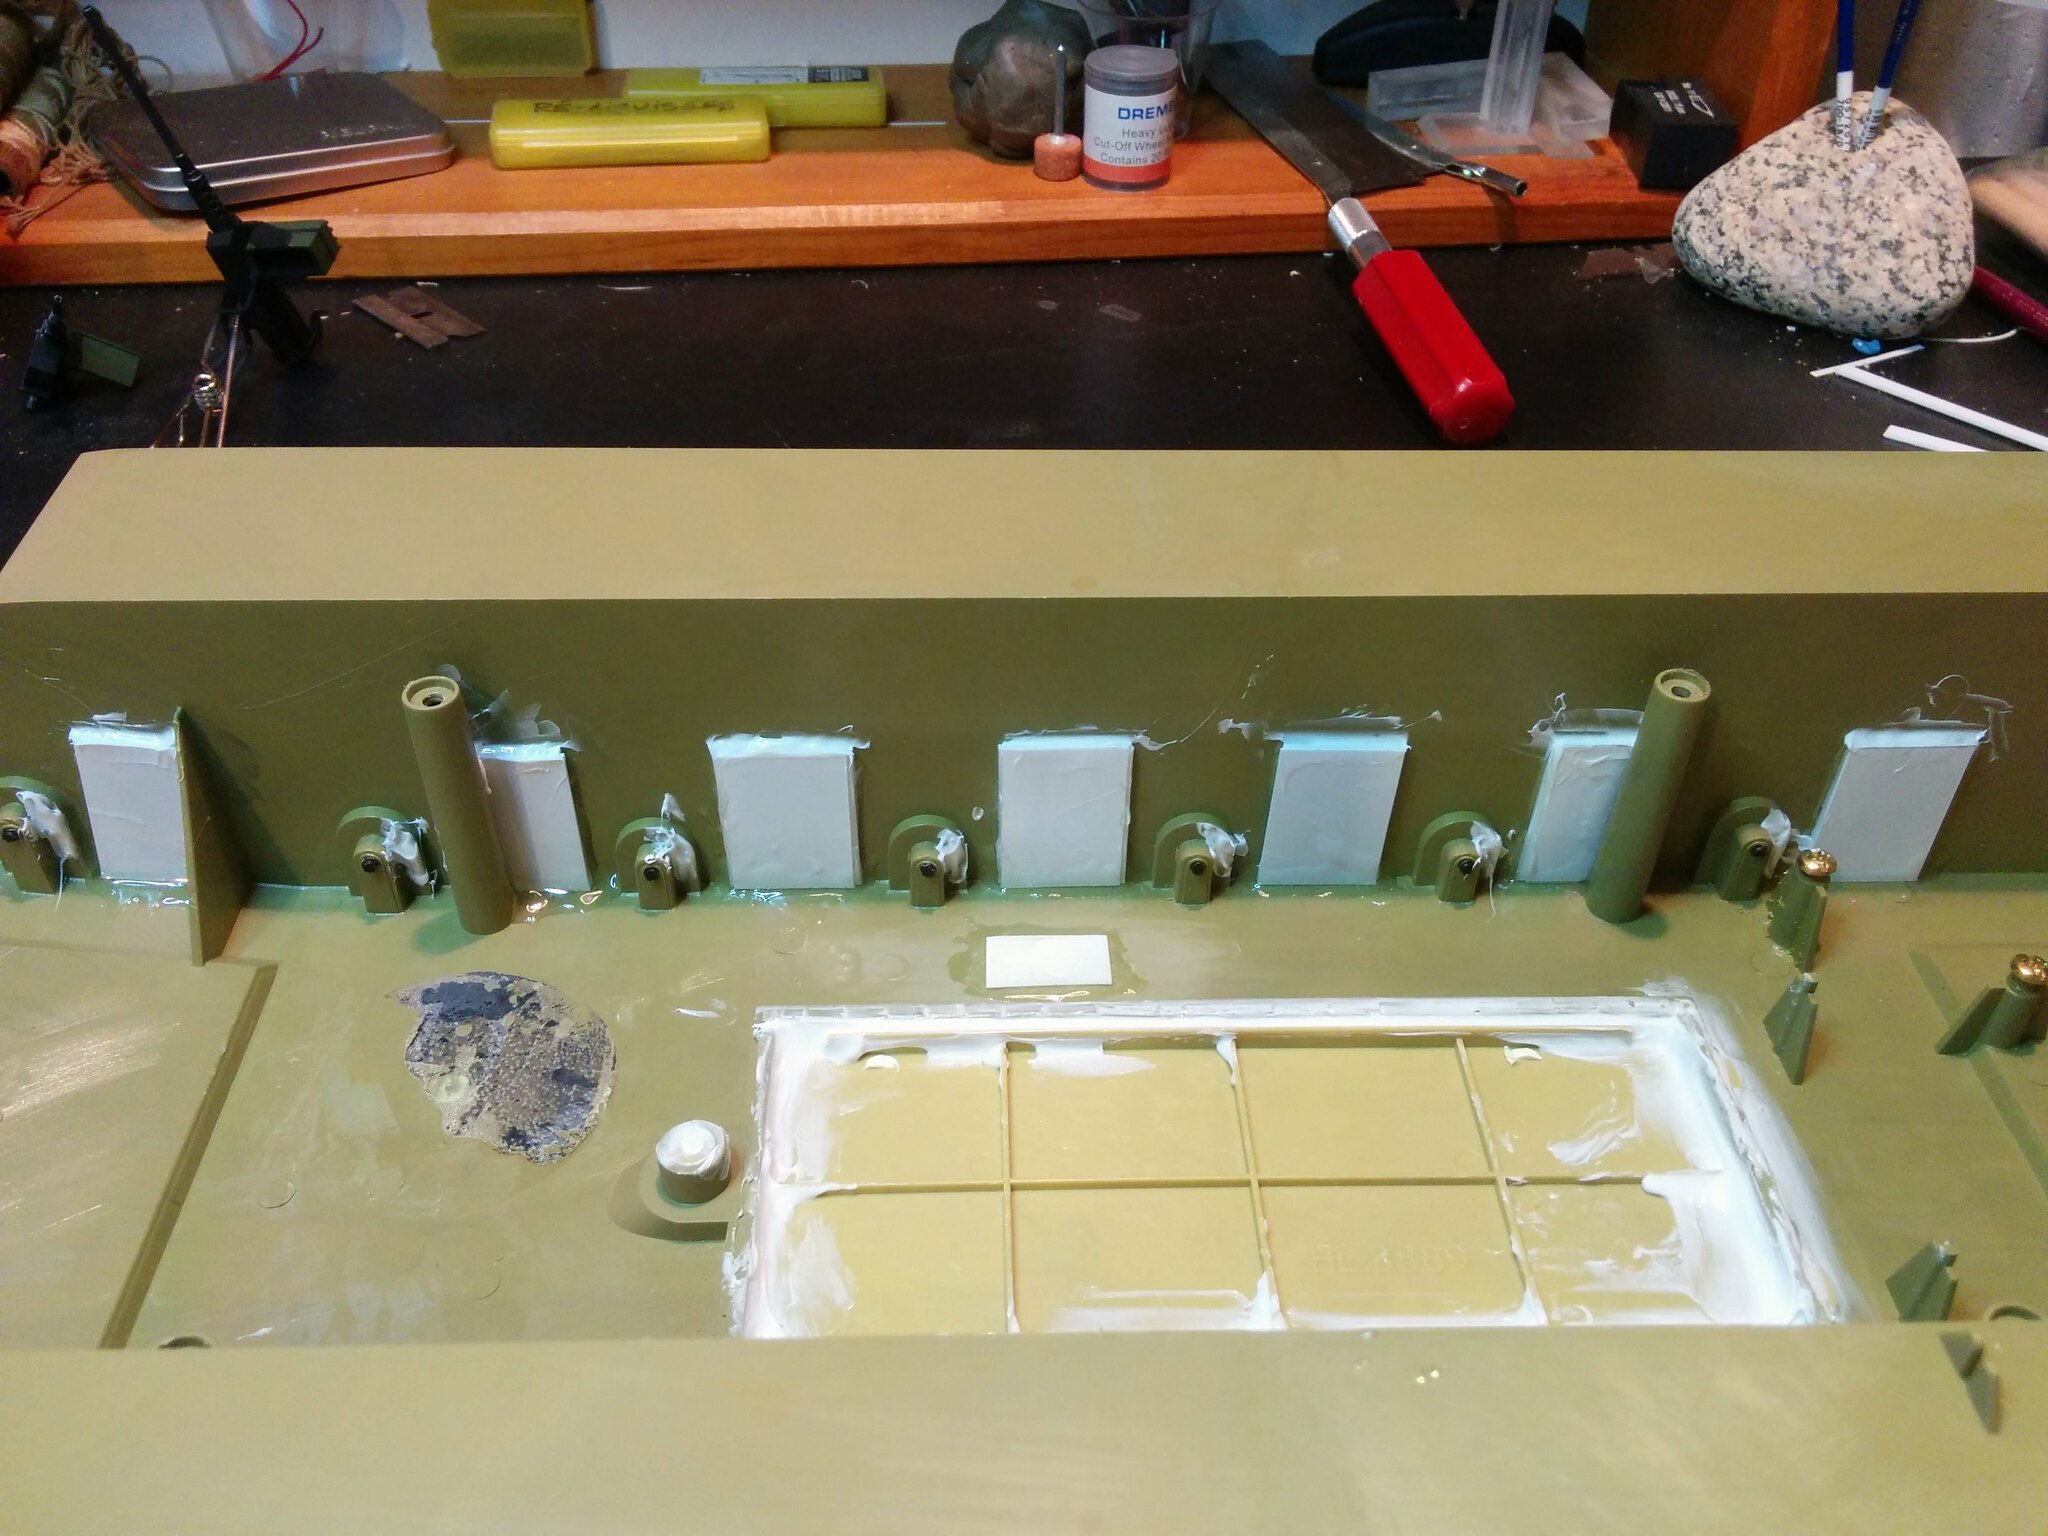
I had a bad reaction with the clear I bought... At least it localise in only tree area.
 2016-12-22_08-51-31 by asmodeuss, sur Flickr
Already got that repaired but the problem creeps on the edge so I'll be cheating with the weathering to tone it down.
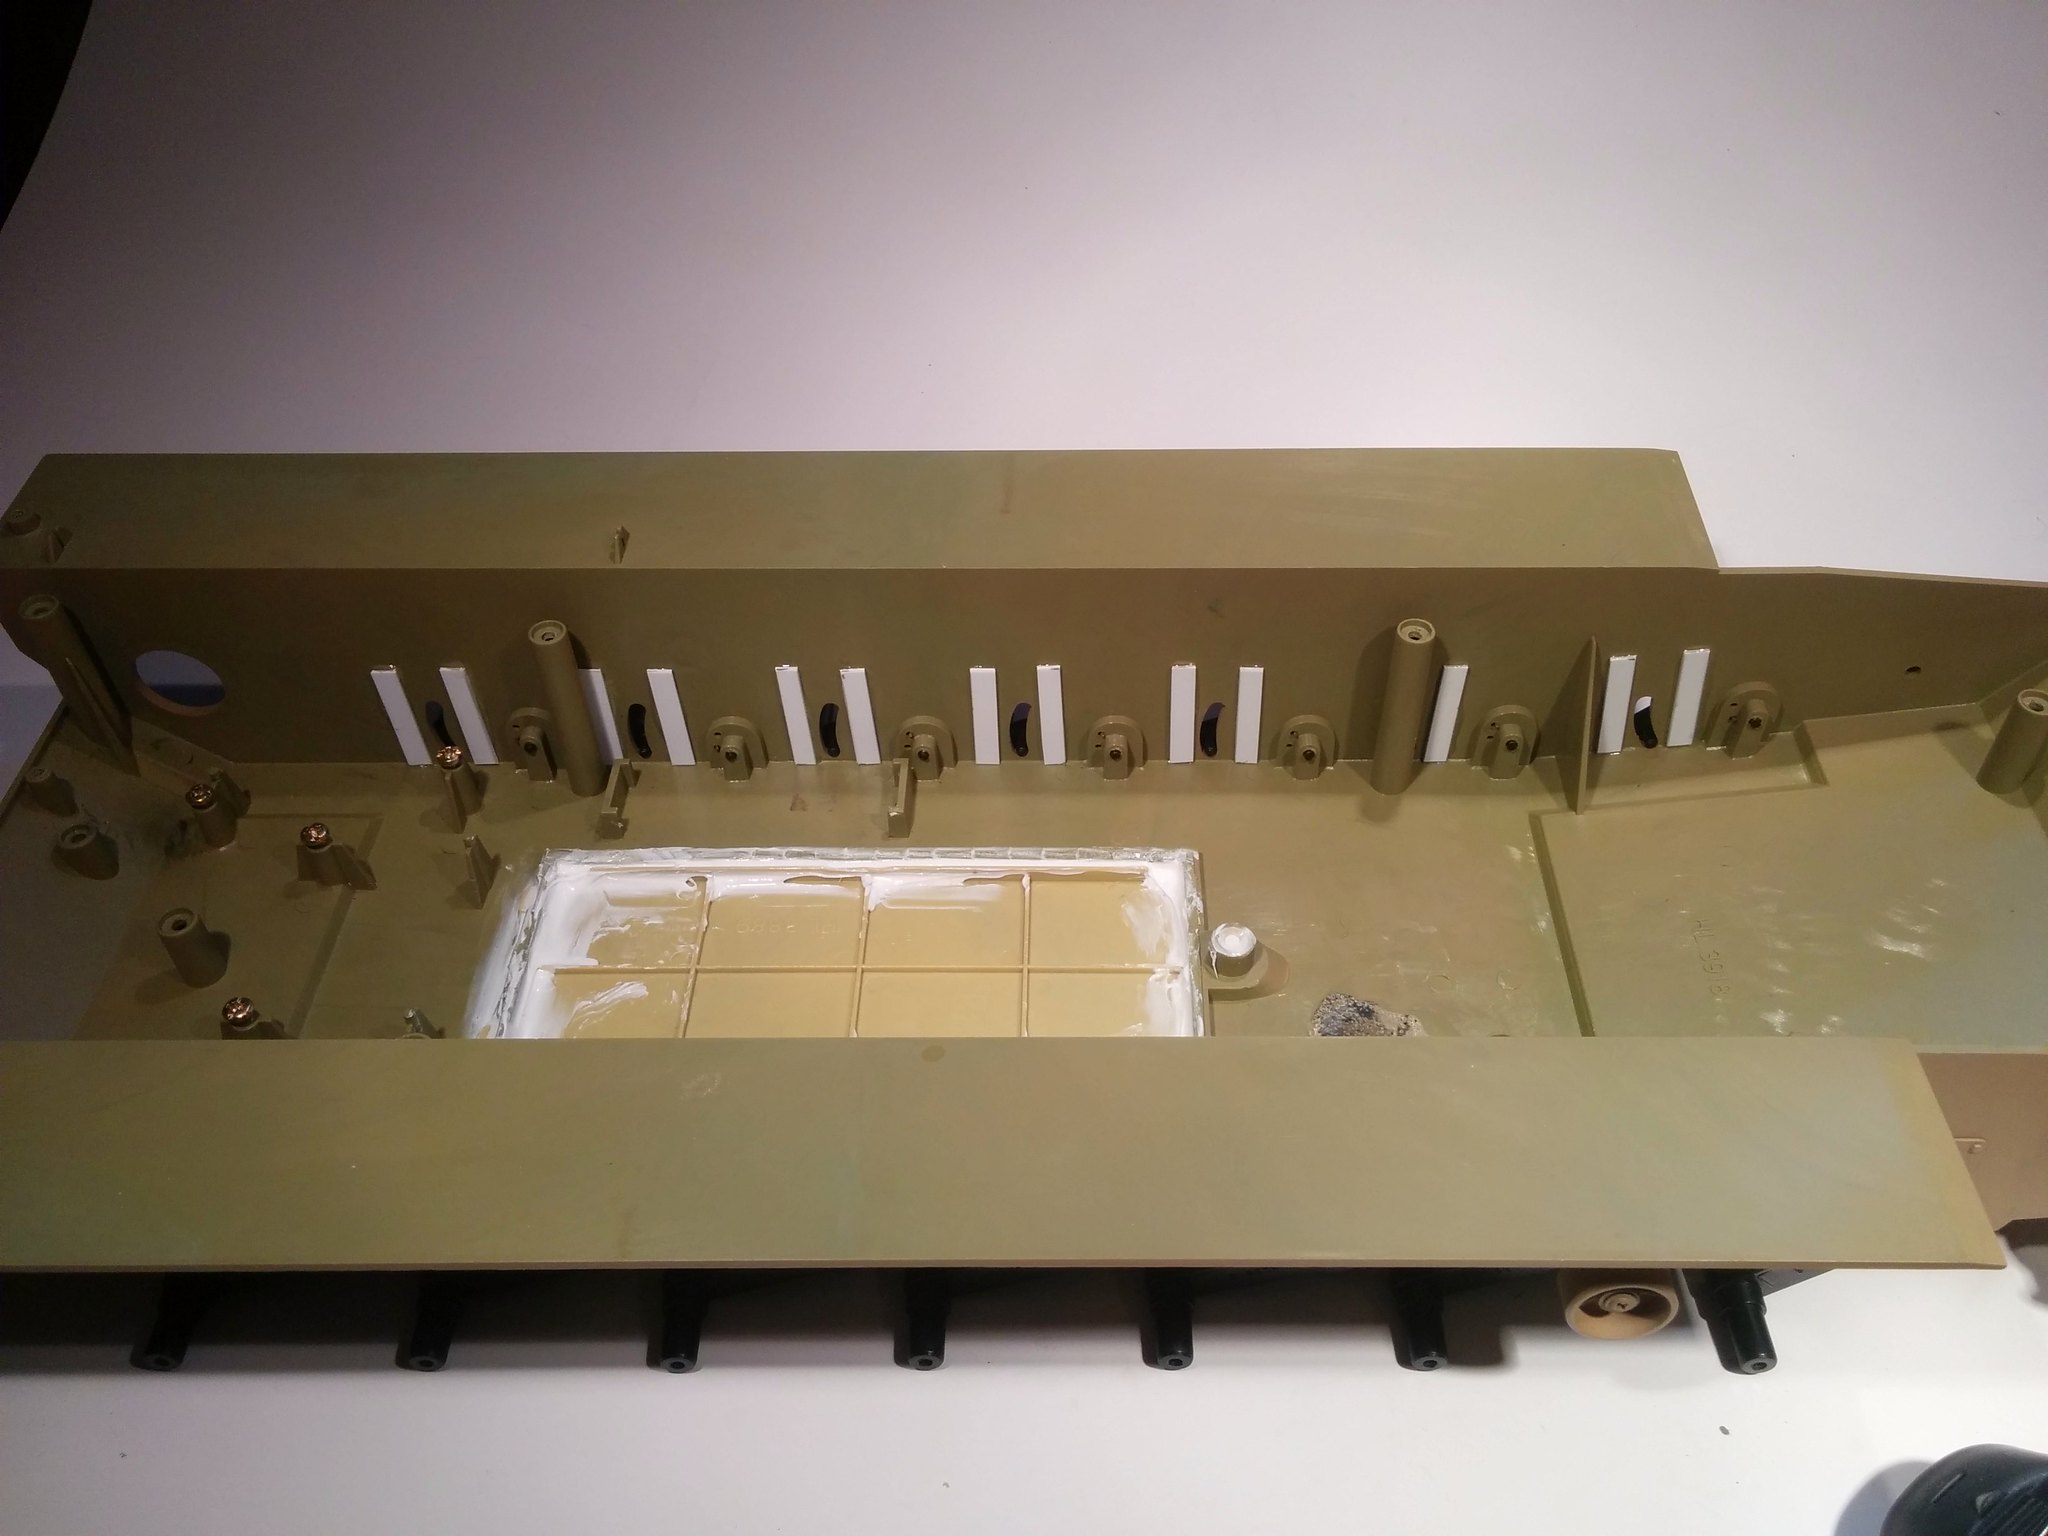
I started work on the lower hull to make it water resistant ( not full waterproof) I will surely buy a taigen lower if they build it
2016-12-22_08-51-31 by asmodeuss, sur Flickr
 2016-12-22_12-09-19 by asmodeuss, sur Flickr
more soon and merry christmas guys!
very nice work mate.I had a bad reaction with the clear I bought... At least it localise in only tree area.
2016-12-22_08-51-31 by asmodeuss, sur FlickrAlready got that repaired but the problem creeps on the edge so I'll be cheating with the weathering to tone it down.
I started work on the lower hull to make it water resistant ( not full waterproof) I will surely buy a taigen lower if they build it
2016-12-22_08-51-31 by asmodeuss, sur Flickr2016-12-22_12-09-19 by asmodeuss, sur Flickrmore soon and merry christmas guys!
12-23-2016, 10:36 AM
#50
Member
Thread Starter
Join Date: Oct 2016
Posts: 54
Likes: 0
Received 0 Likes
on
0 Posts