


Tamiya King Tiger Build
 04-07-2017, 05:08 PM
#1
Member
Thread Starter
Join Date: May 2003
Location: Arlington, VA
Posts: 37
Likes: 0
Received 0 Likes
on
0 Posts
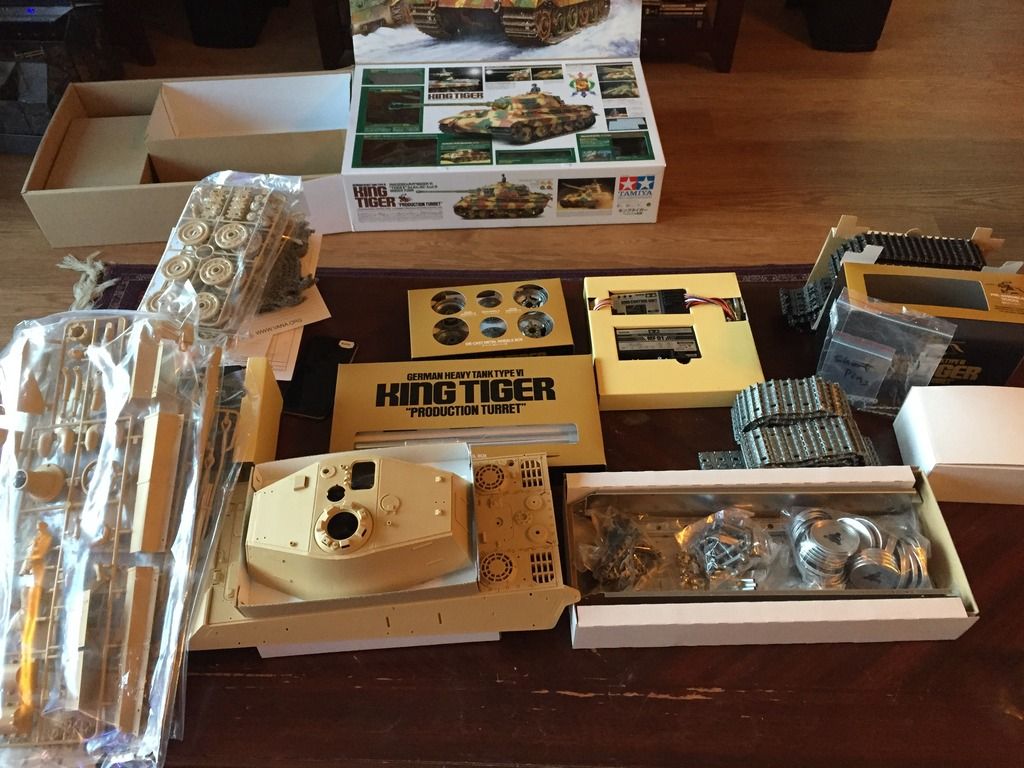
Hello all - here is my thread to document my Tamiya King Tiger build. I'm very, very new to RC tanks, but have experience with RC airplanes and model rockets, so please excuse my many newb questions as the plastic modeling side is new to me. I'll go ahead and post photos of the unboxing and build so far and look forward to learning from the expertise on these forums.
Cheers,
Tom
Cheers,
Tom

 04-08-2017, 07:56 AM
#6
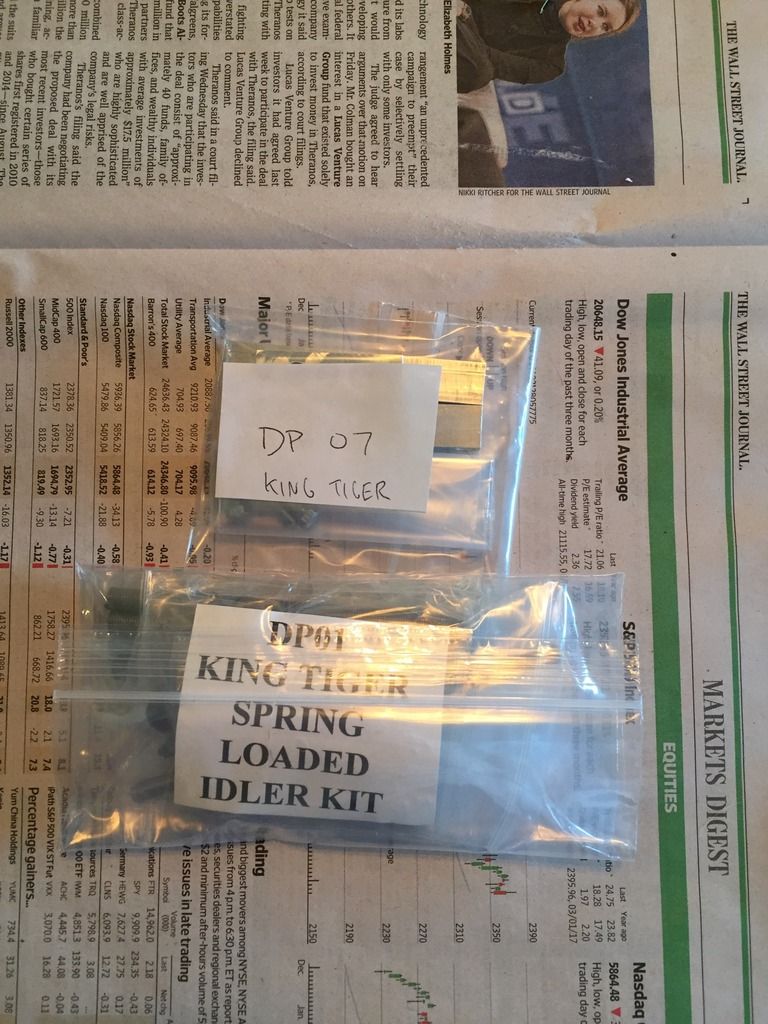
First off have fun with it Tom, if you have any questions we're here to help. If you have any extra $$ still in your budget I highly recommend Daryl Turners idler upgrade for this tank.
It's well documented that this tank tends to throw and bust track links and the idler upgrade eliminates this. NOT a must but will improve reliability greatly.
http://etoarmor.com/?product=idler-upgrade-set
It's well documented that this tank tends to throw and bust track links and the idler upgrade eliminates this. NOT a must but will improve reliability greatly.
http://etoarmor.com/?product=idler-upgrade-set
04-08-2017, 09:21 AM
#7
Member
Thread Starter
Join Date: May 2003
Location: Arlington, VA
Posts: 37
Likes: 0
Received 0 Likes
on
0 Posts
First off have fun with it Tom, if you have any questions we're here to help. If you have any extra $$ still in your budget I highly recommend Daryl Turners idler upgrade for this tank.
It's well documented that this tank tends to throw and bust track links and the idler upgrade eliminates this. NOT a must but will improve reliability greatly.
http://etoarmor.com/?product=idler-upgrade-set
It's well documented that this tank tends to throw and bust track links and the idler upgrade eliminates this. NOT a must but will improve reliability greatly.
http://etoarmor.com/?product=idler-upgrade-set
04-08-2017, 12:43 PM
#8
Member
Thread Starter
Join Date: May 2003
Location: Arlington, VA
Posts: 37
Likes: 0
Received 0 Likes
on
0 Posts
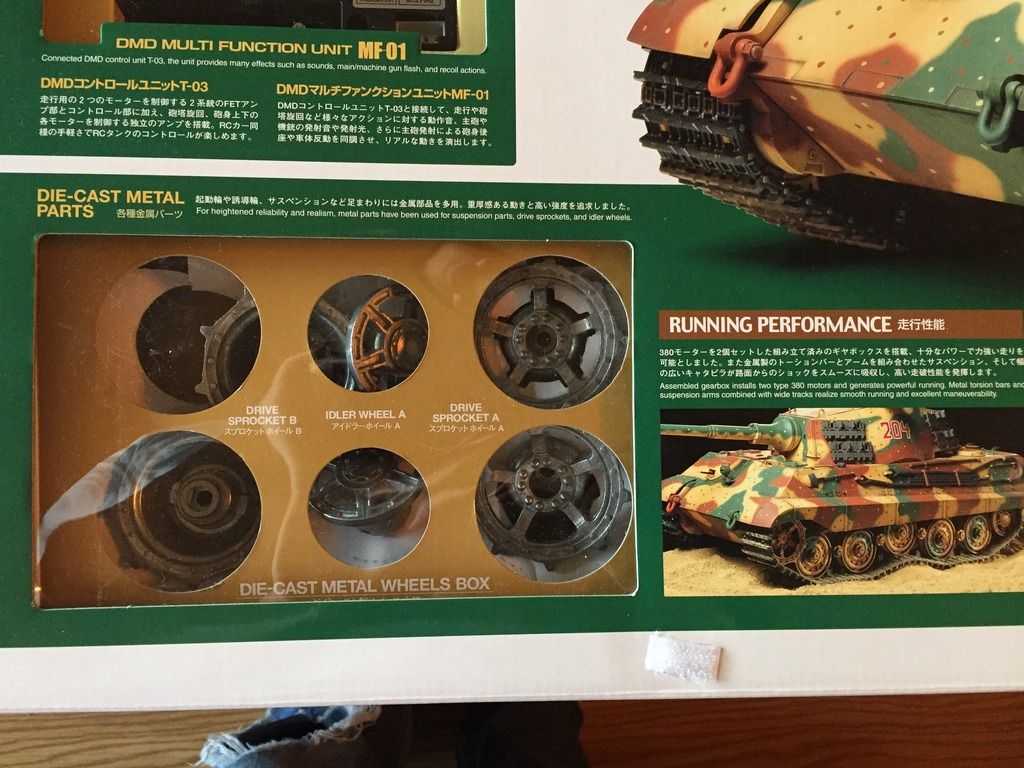
I've found this great site which gives an overview of assembly and gives hint and tips: http://www.artistichobbies.com/resou...akingtiger.php
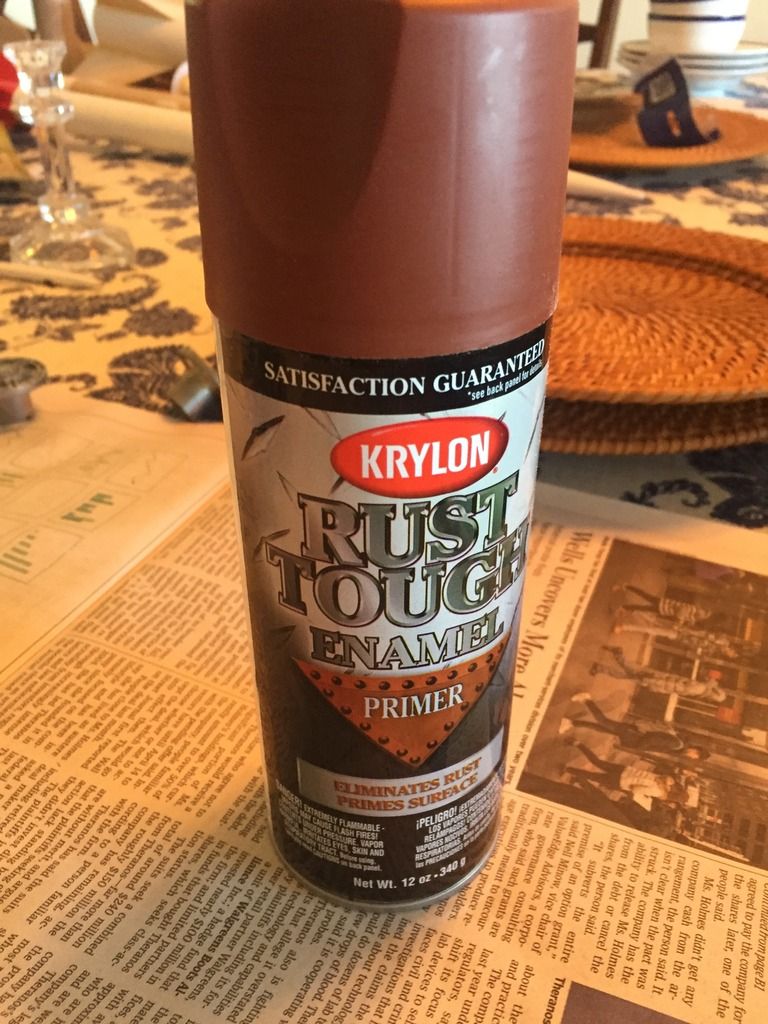
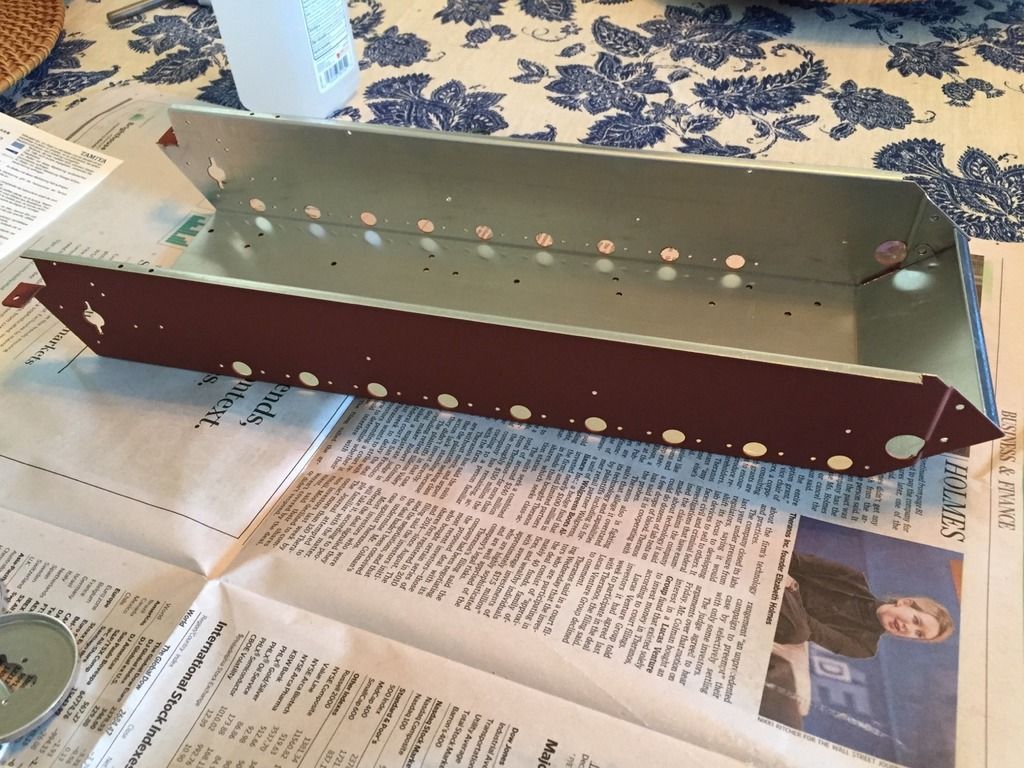
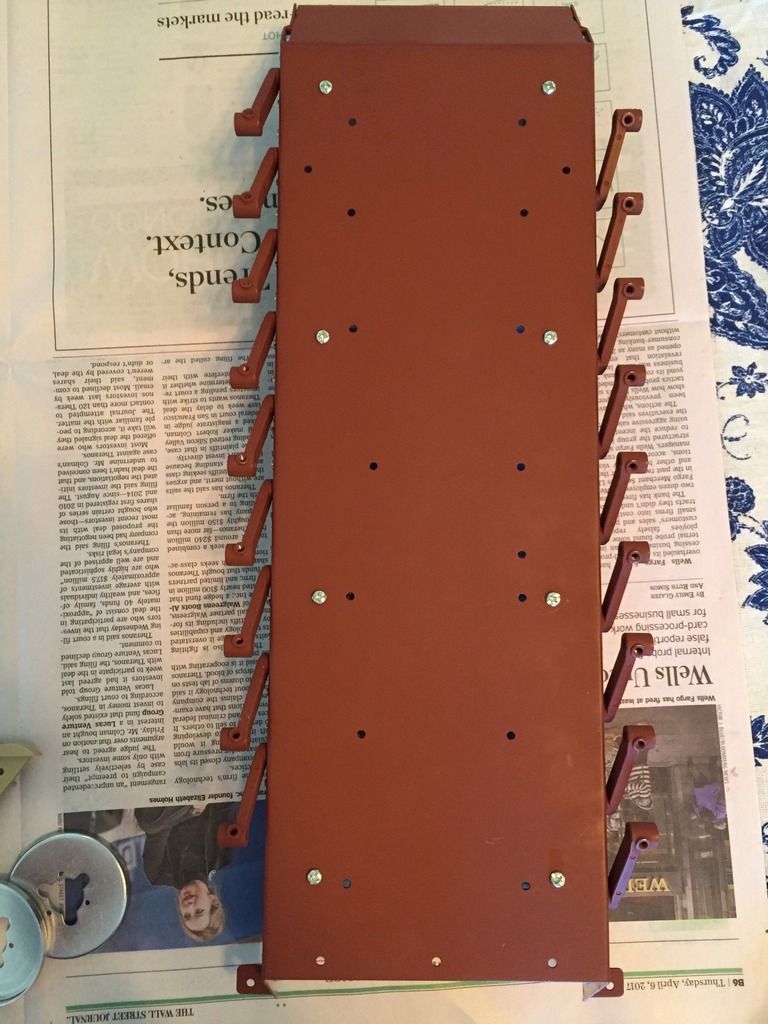
Started today with priming the metal components. Used Krylon ruddy brown:
Masking:
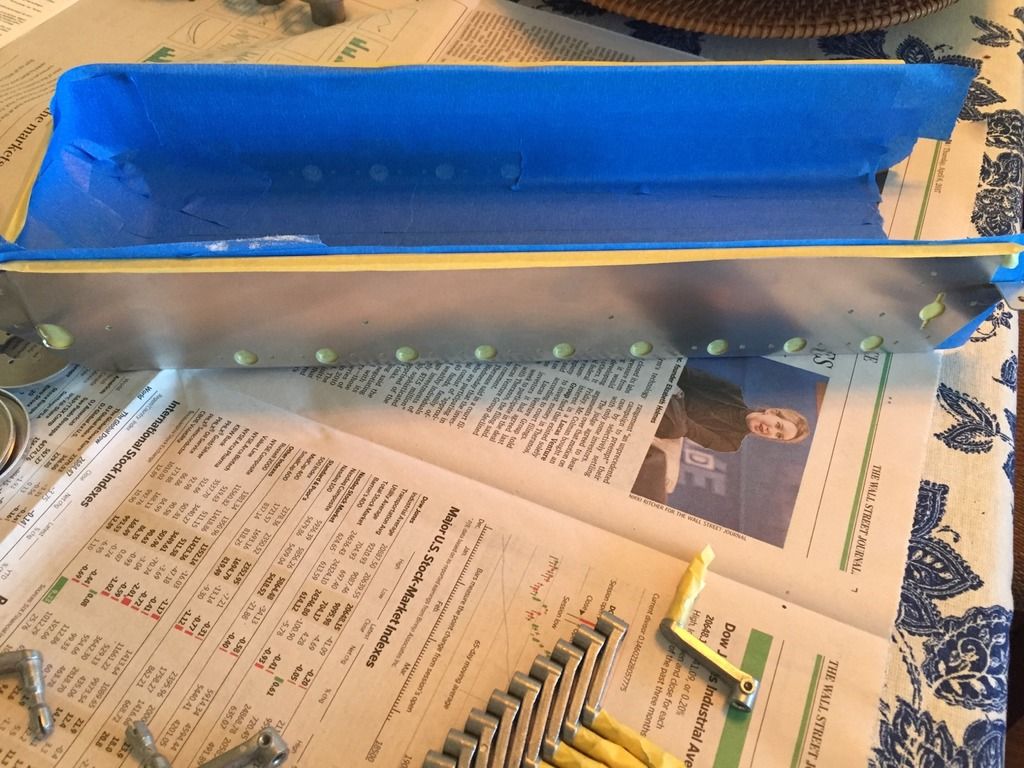
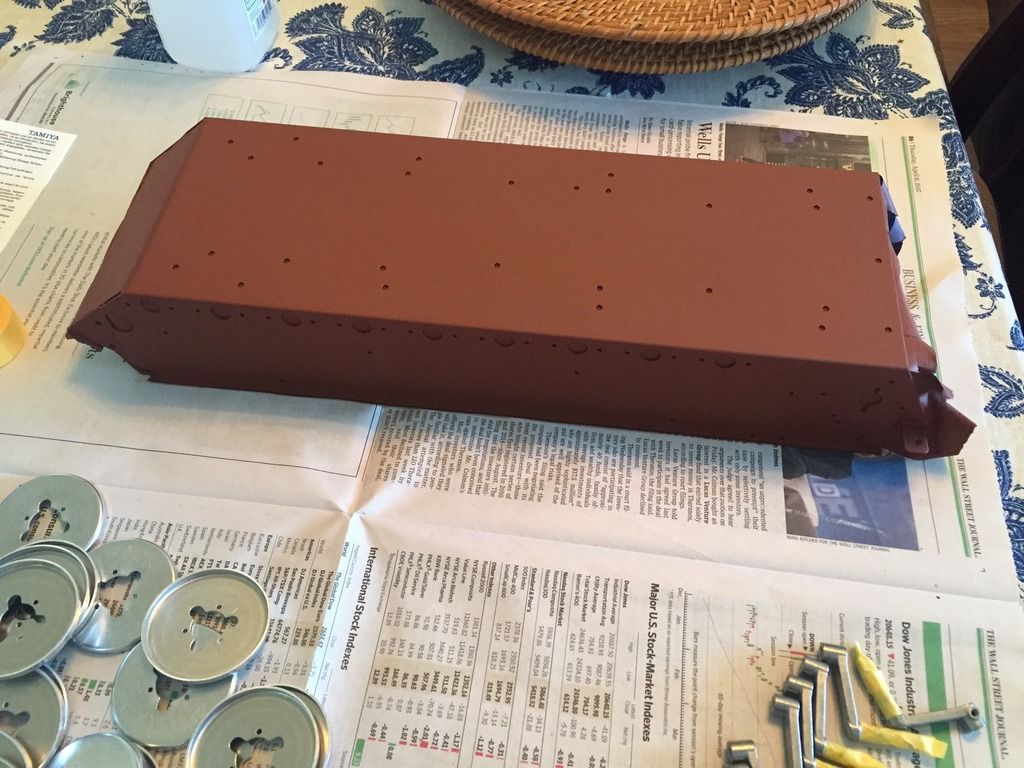
First coat on the hull came out a little rough, so sanded to prep for next coats:
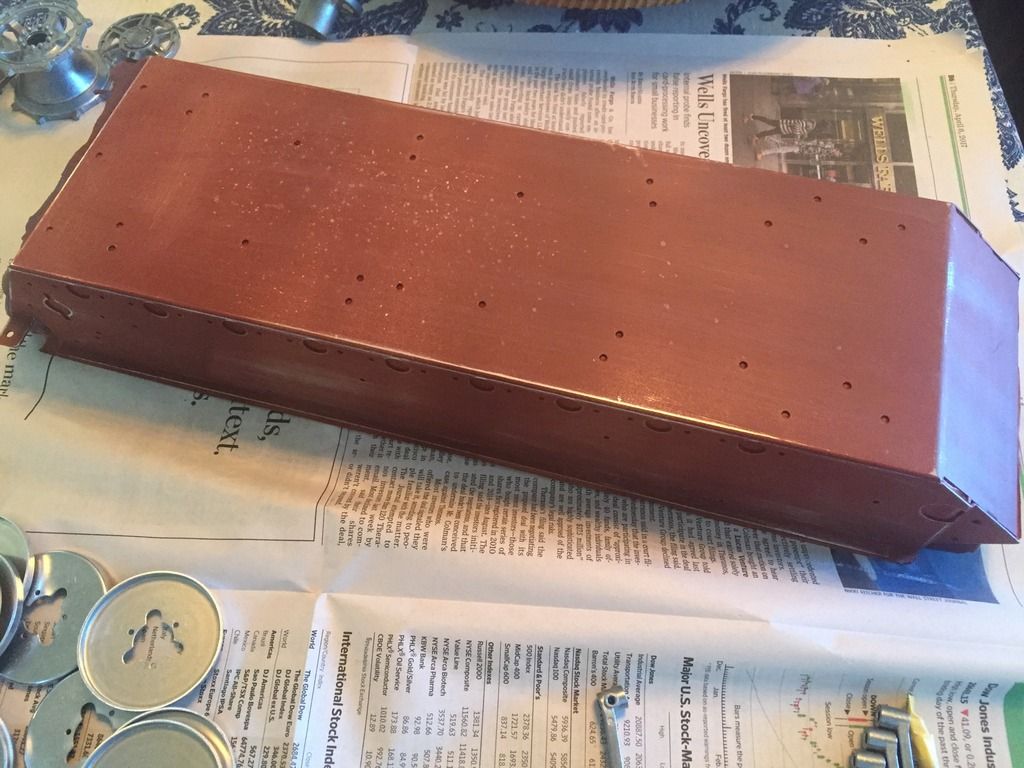
Couple more coats and I was pleased with the result:
Started today with priming the metal components. Used Krylon ruddy brown:
Masking:
First coat on the hull came out a little rough, so sanded to prep for next coats:
Couple more coats and I was pleased with the result:
04-08-2017, 12:50 PM
#9
Member
Thread Starter
Join Date: May 2003
Location: Arlington, VA
Posts: 37
Likes: 0
Received 0 Likes
on
0 Posts
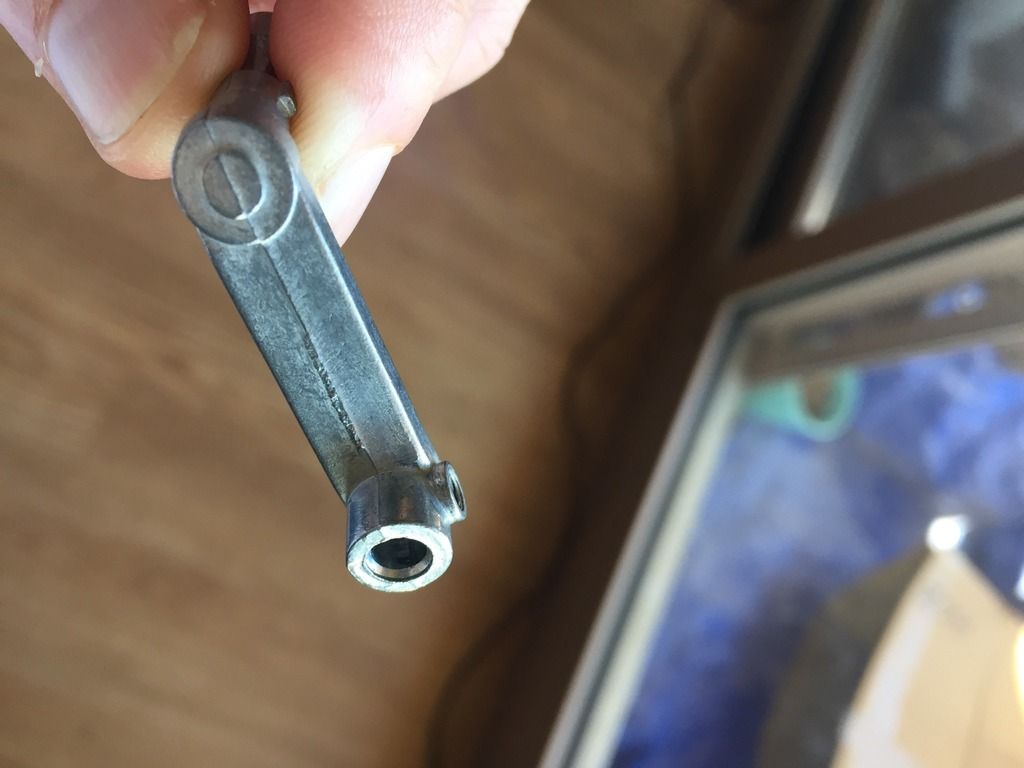
Question on the road arms - as I was prepping them for priming I noticed the mold lines. Should I clean these up before priming, and if so, how do I do that?
04-08-2017, 06:04 PM
#10
Senior Member

Join Date: Feb 2010
Location: benton, AR
Posts: 316
Likes: 0
Received 0 Likes
on
0 Posts
Congrats on doing a Tamiya build. I just did one on the leopard and learned a lot from everybody here. I will be starting a Tamiya Sherman build as soon as it comes in, should be around Tuesday. As for the swing arms, guess it really depends on how much you want to make it look realistic. the biggest part of the arm will be behind the road wheel.
04-08-2017, 06:56 PM
#11
Start with the plastic track first and see how she runs. Adding the weight of the metal track is cool and all (to get the track sag)but it add's stress to the gearboxes/.lower hull flex and running gear Wouldn't worry about the mold lines on the arms. They will be hidden by track and running gear. If it bothers you, than yea, clean that sh.t up, but won't hinder performance.
Last edited by TheBennyB; 04-08-2017 at 06:59 PM.
04-08-2017, 09:20 PM
#14
Understand the logistic impossibility, but man, the local university should send( Mech eng ) to check this stuff out. See how the watch works..pretty cool...see how torsion bar on a KT is installed.... YUP!
Last edited by TheBennyB; 04-08-2017 at 09:25 PM.
04-09-2017, 04:26 AM
#15


Join Date: Nov 2012
Location: USA
Posts: 903
Likes: 0
Received 0 Likes
on
0 Posts
04-11-2017, 03:15 PM
#16
Member
Thread Starter
Join Date: May 2003
Location: Arlington, VA
Posts: 37
Likes: 0
Received 0 Likes
on
0 Posts
Start with the plastic track first and see how she runs. Adding the weight of the metal track is cool and all (to get the track sag)but it add's stress to the gearboxes/.lower hull flex and running gear Wouldn't worry about the mold lines on the arms. They will be hidden by track and running gear. If it bothers you, than yea, clean that sh.t up, but won't hinder performance.
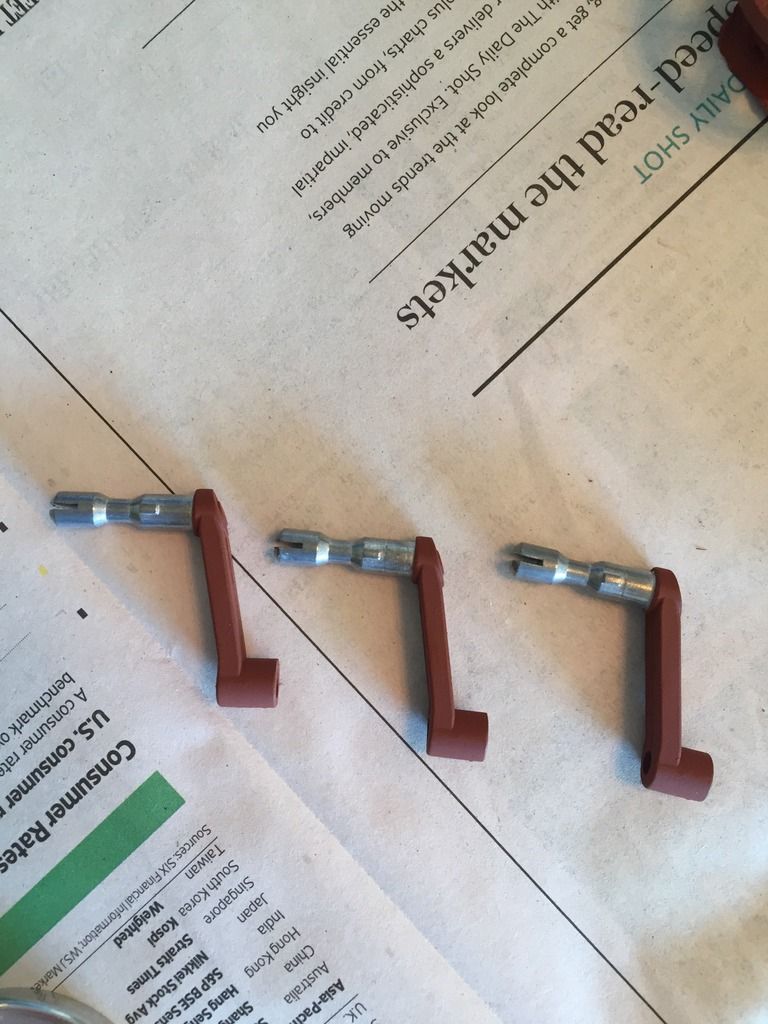
Prototype suspension arms has similar casting mold lines, just not quite so prominent. Link to Swiss resto work.
http://www.koenigstiger.ch/english/2...er-season.html
http://www.koenigstiger.ch/english/2...er-season.html
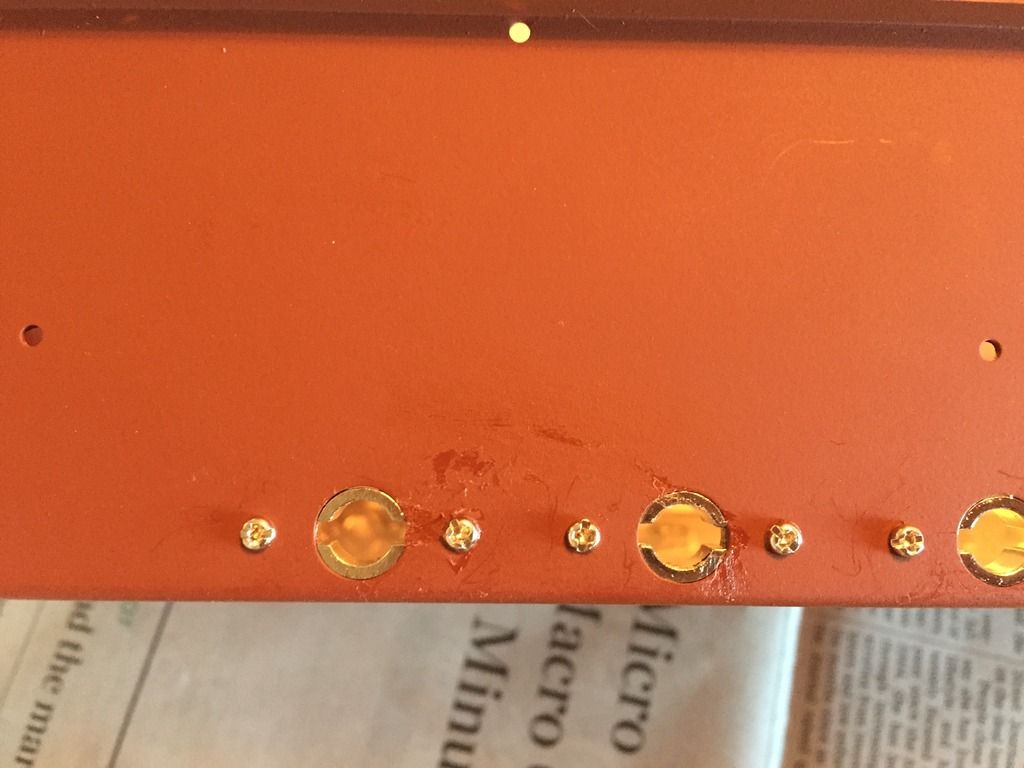
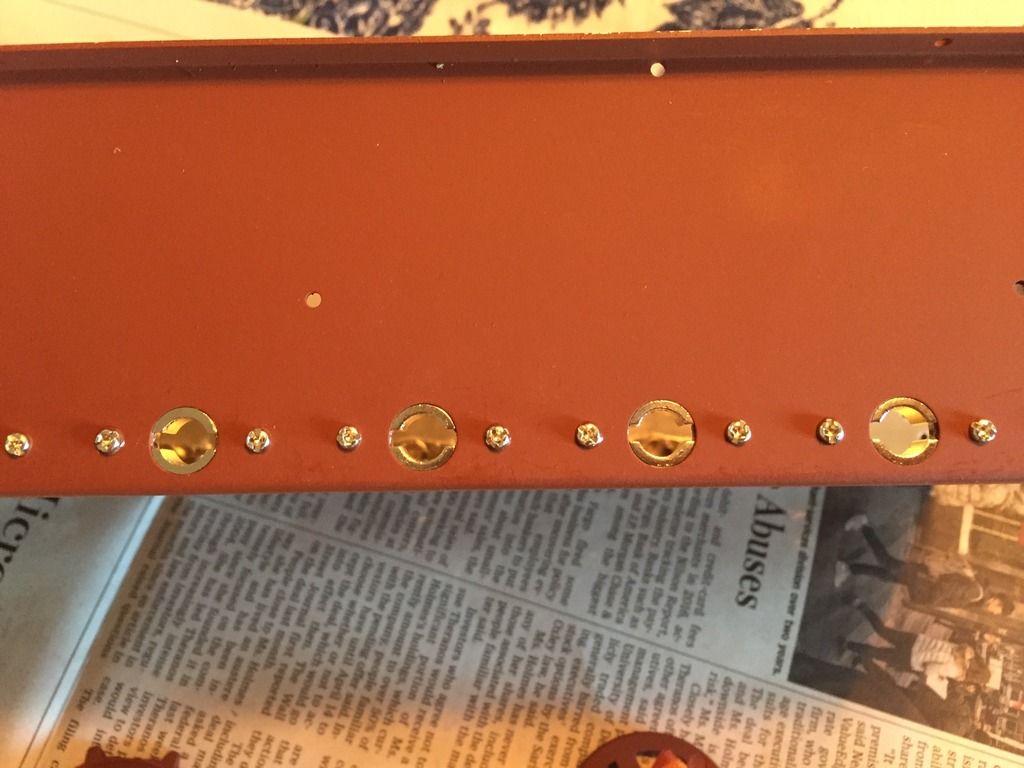
Here's an update on the latest progress:
First attempt at thread lock came out a little ugly:
But subsequent installations came out clean:

 04-11-2017, 04:00 PM
#17
Member
Thread Starter
Join Date: May 2003
Location: Arlington, VA
Posts: 37
Likes: 0
Received 0 Likes
on
0 Posts
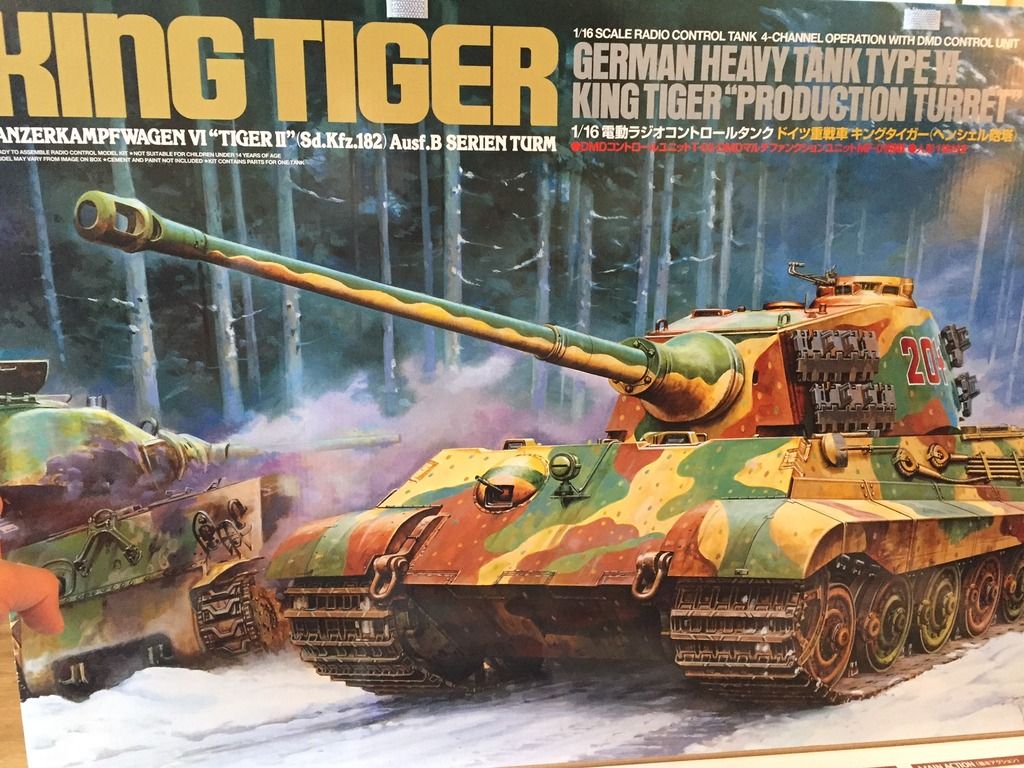
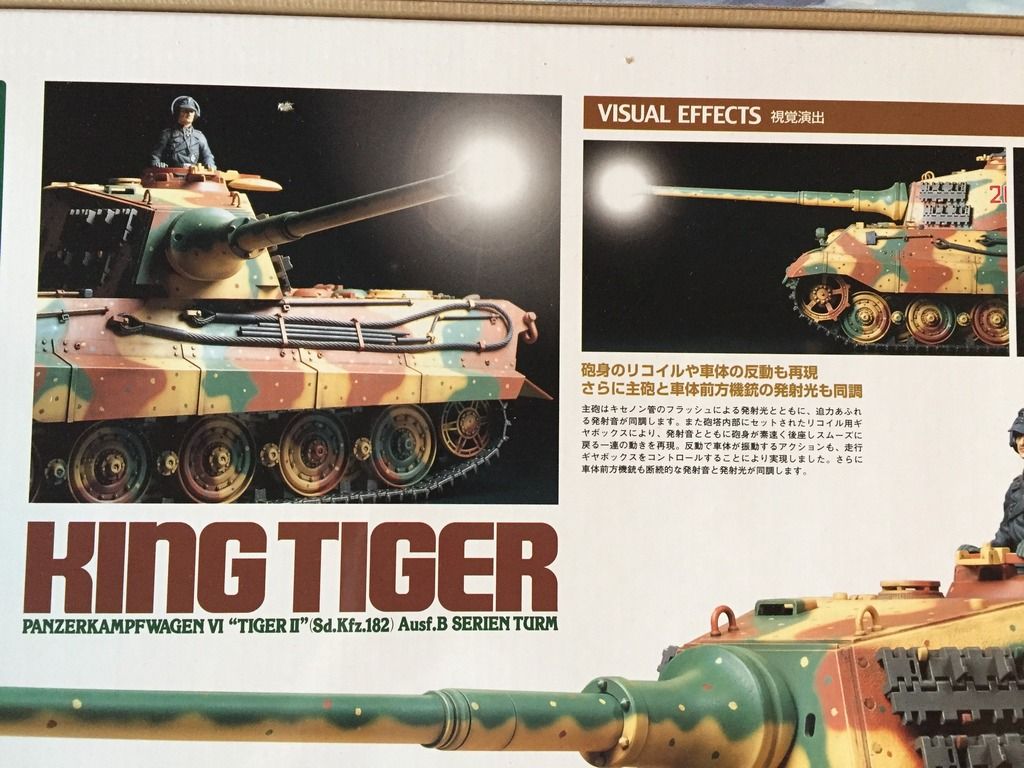
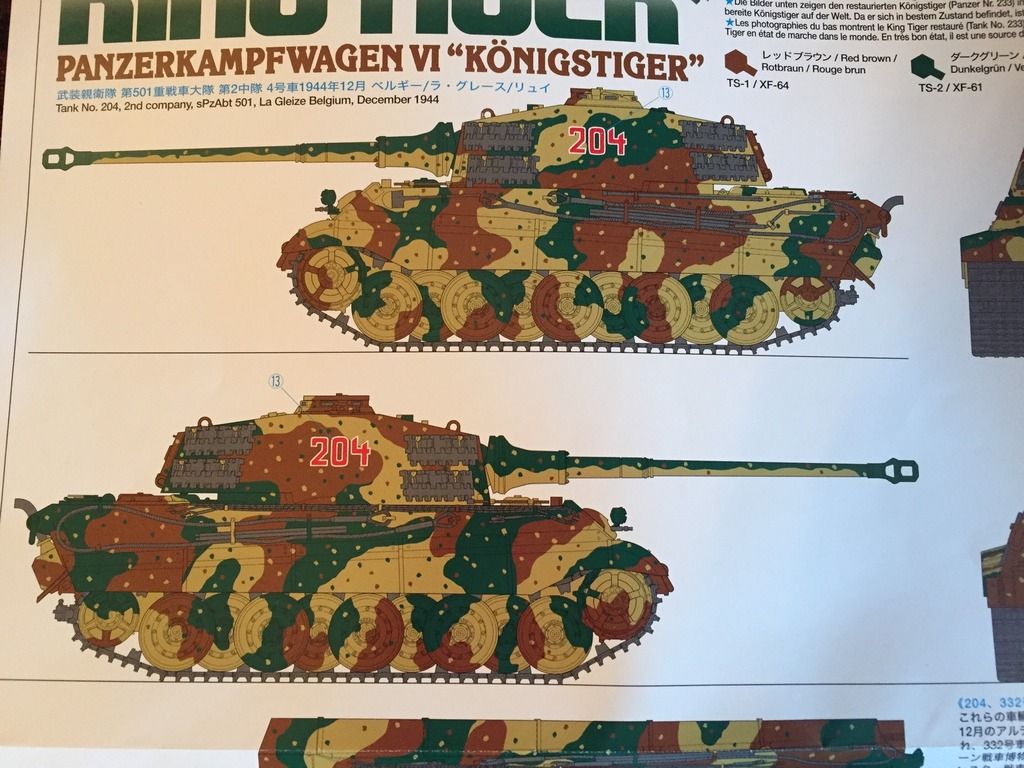
Question on painting - what's the best order to paint?? I've decided to go with the box art paint scheme of tank 204 from schwere Panzerabteilung 501, December 44:
This is my first time painting any sort of plastic model, not to mention a tank. The way I read the directions provided with the kit is that some basic pieces are primed, the entire model is assembled, the plastic primed, and then painted.
What I don't understand is:
- The road wheels, sprocket, hull, etc are primed - after assembly, do I need to de-assemble to paint? The paint scheme requires application of camo pattern on the sprocket/idler wheels/road arms, and I'm assuming dunkelgelb on the lower hull. Or do I paint them before installation?
- It would seem to make more sense to me to apply the camo to the main body and then add on pre-painted finishing pieces such as spare track, tow cables, tools, etc. Especially since this is my first time doing this sort of painting/detailing, and will be my first time working with an airbrush.
My last question is on the airbrushes themselves. Do I need an airbrush for larger surface areas to cover the dunkelgelb base, and then a finer airbrush to apply the camo pattern? Are there recommended airbrush models that are of high quality but also forgiving to the beginner?
Thanks!
Tom
 04-14-2017, 05:29 AM
#19
Member
Thread Starter
Join Date: May 2003
Location: Arlington, VA
Posts: 37
Likes: 0
Received 0 Likes
on
0 Posts
04-14-2017, 07:23 AM
#20
Member
Thread Starter
Join Date: May 2003
Location: Arlington, VA
Posts: 37
Likes: 0
Received 0 Likes
on
0 Posts
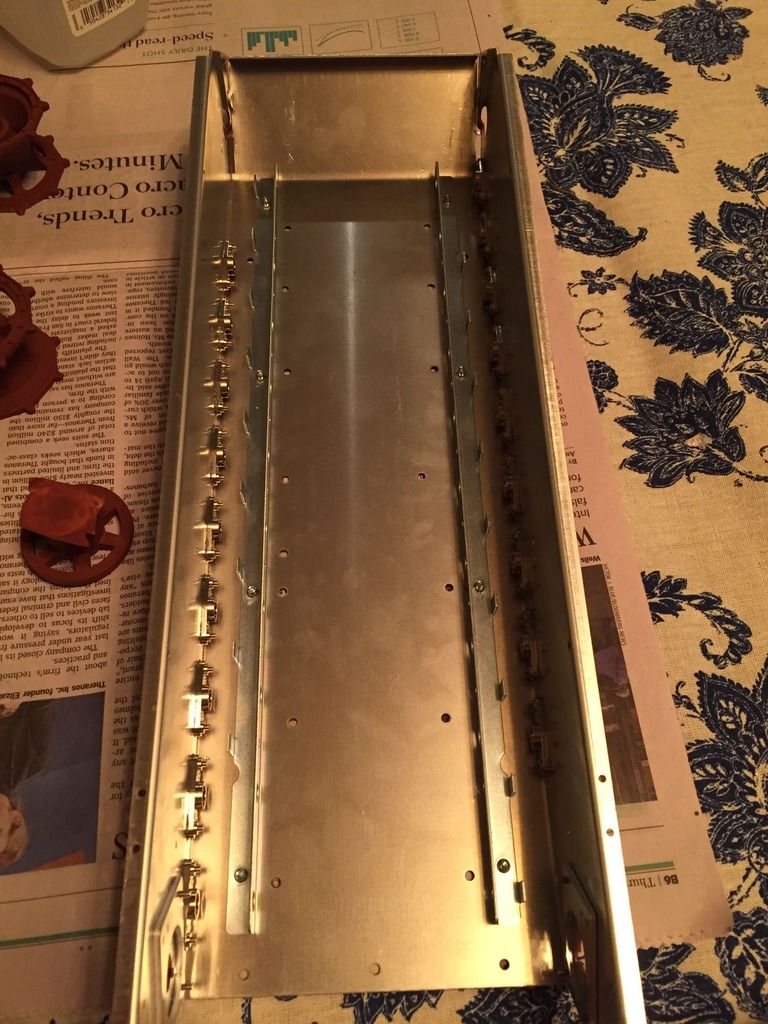
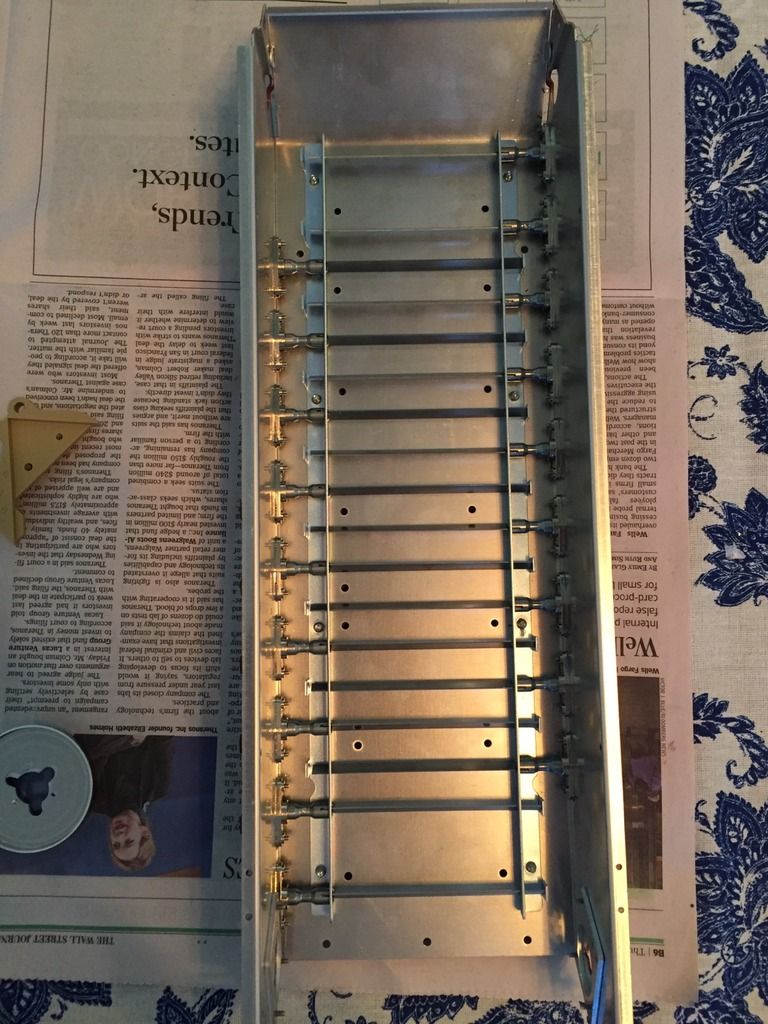
Latest progress - sprocket guides installed:

Installed the mechanical plate and fenders:
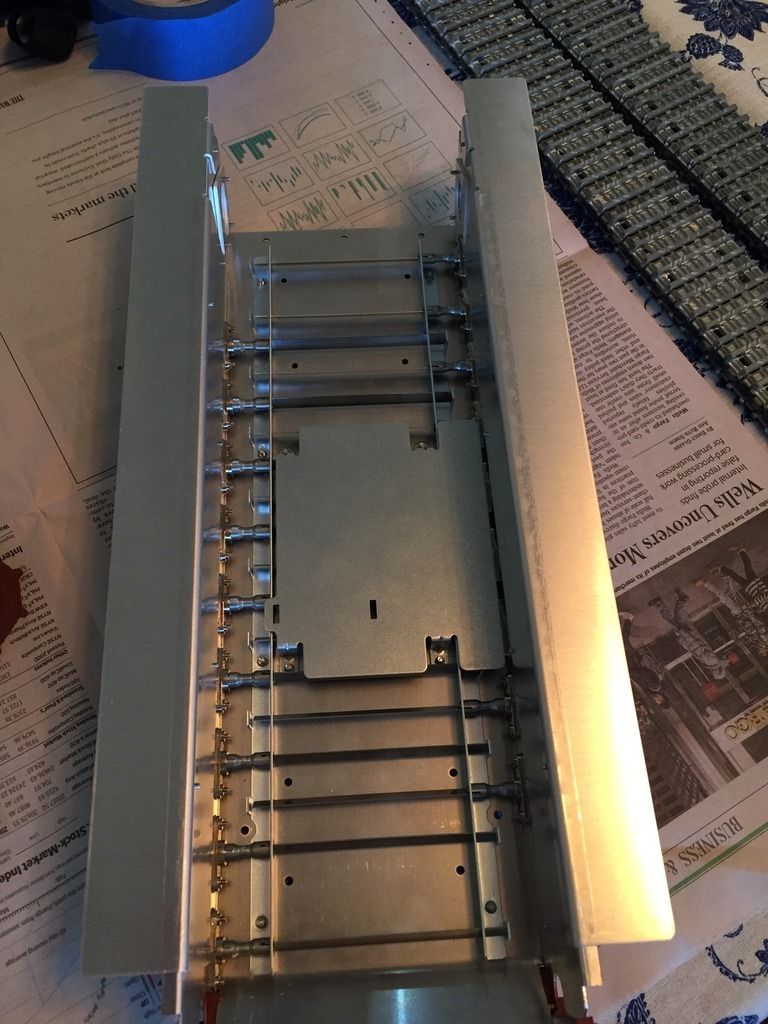
In the meantime I received a lower hull brace and idler upgrade set from ETO Armor - great customer service!!!
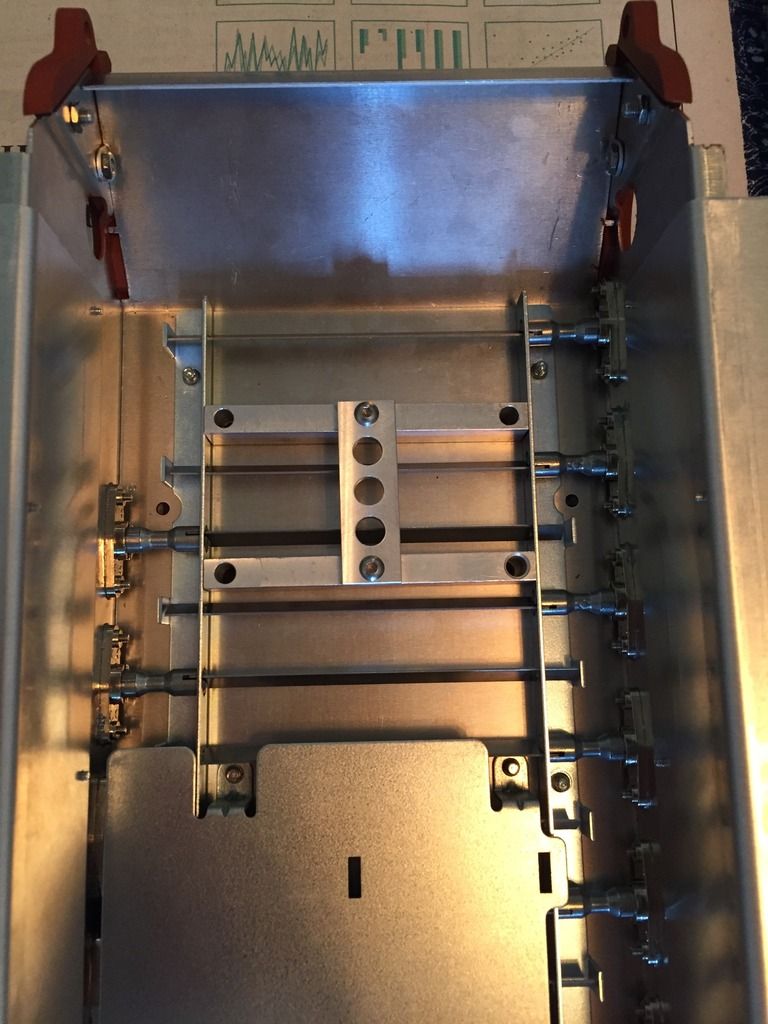
The hull brace looked a lot easier to do so I started with that. The brace itself assembles easily:
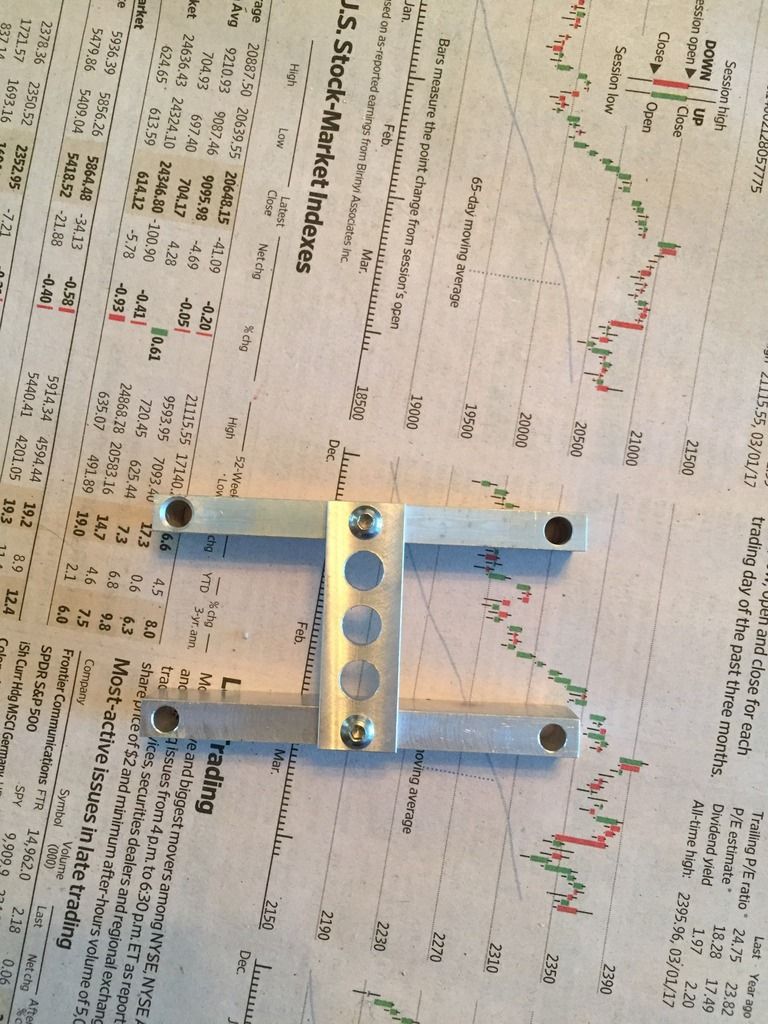
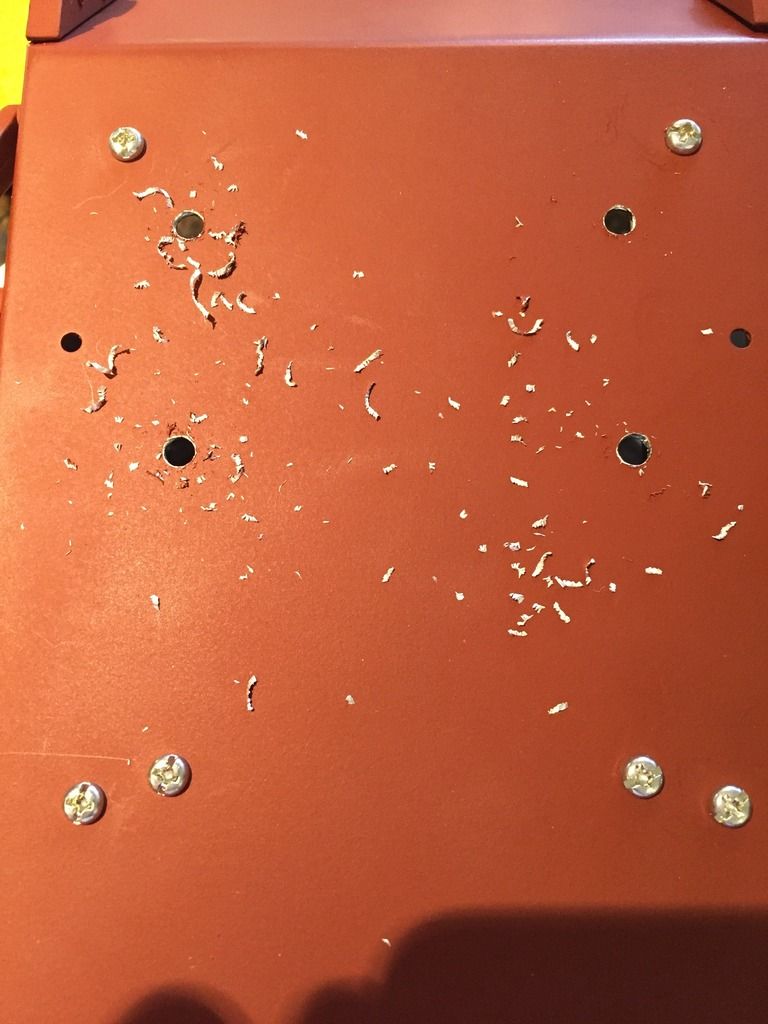
These 4 motor mounting holes are enlarged to 11/64":
The corresponding motor mounting pieces are removed from the motor, as seen on the right hand side:
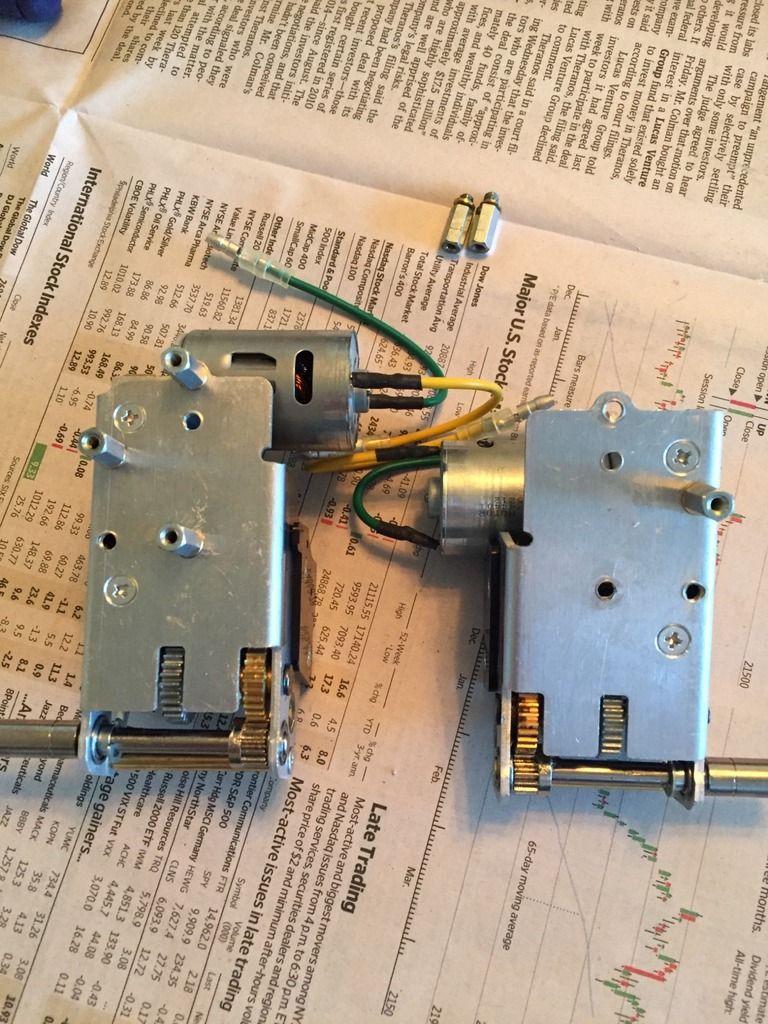
Brace is put into place:
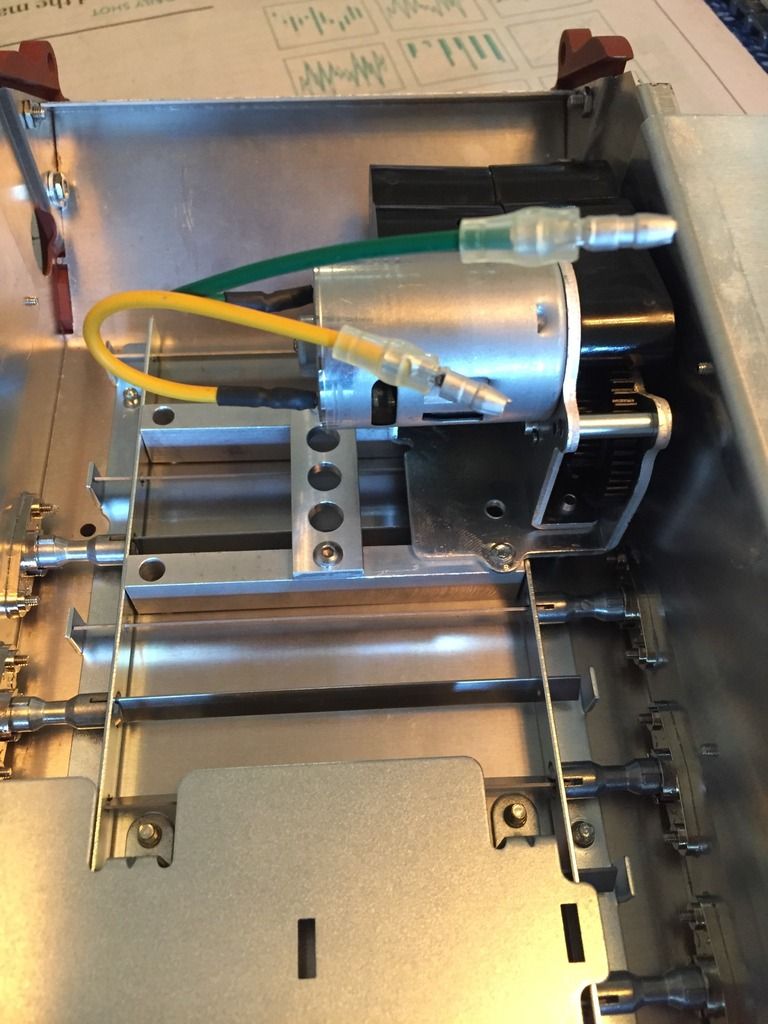
Right side motor assembly installed:
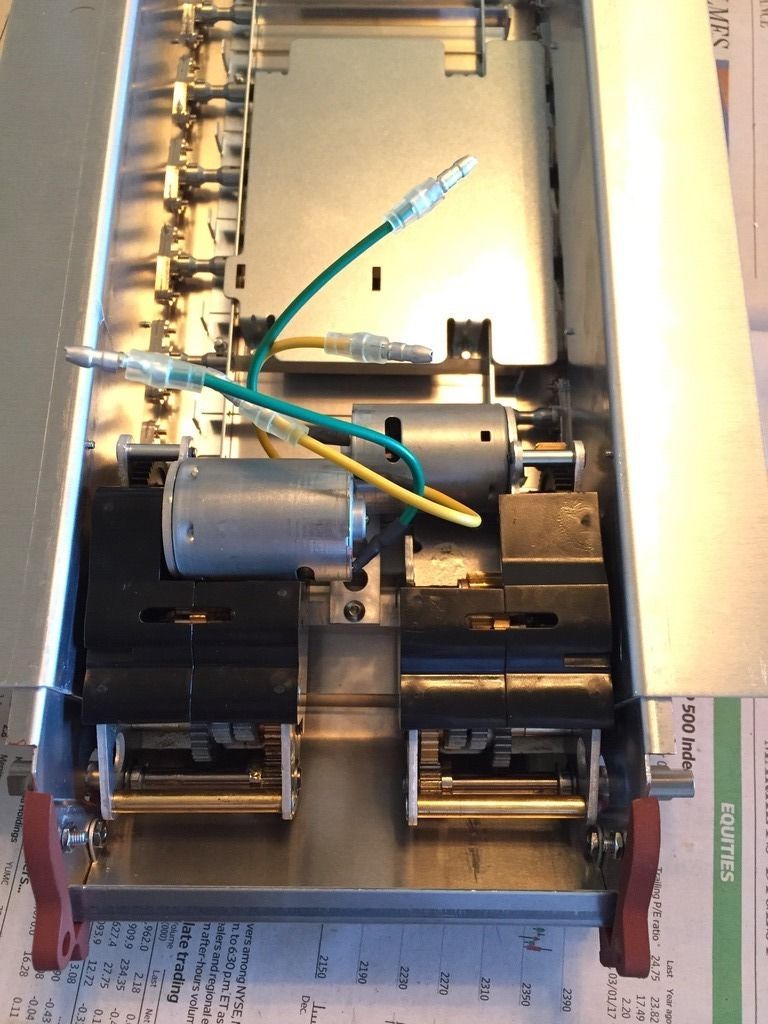
And installation complete:
Installed the mechanical plate and fenders:
In the meantime I received a lower hull brace and idler upgrade set from ETO Armor - great customer service!!!
The hull brace looked a lot easier to do so I started with that. The brace itself assembles easily:
These 4 motor mounting holes are enlarged to 11/64":
The corresponding motor mounting pieces are removed from the motor, as seen on the right hand side:
Brace is put into place:
Right side motor assembly installed:
And installation complete:
Last edited by tpallas; 04-14-2017 at 01:27 PM.
04-14-2017, 07:58 AM
#21

Following with interest.
I have a basically a small library's worth of ref material on Tigers and have most of the WWII Tamiya offerings, but never think to get a KT. It's weird, but I may have to fix that.
I have a basically a small library's worth of ref material on Tigers and have most of the WWII Tamiya offerings, but never think to get a KT. It's weird, but I may have to fix that.
04-14-2017, 09:58 PM
#23
I want to install a gearbox brace too, but Im a bit scared of drilling the holes wrong and having misalignement. Hope somebody makes a gearbox brace that does not need to enlarge the holes.
I want to replace the idler tensioner too (No idea which one to install) and replace the tracks with a metal ones. Does anybody know if the mato tracks are compatible with the tamiya sprochets? I have heard mixed opinions.
I want to replace the idler tensioner too (No idea which one to install) and replace the tracks with a metal ones. Does anybody know if the mato tracks are compatible with the tamiya sprochets? I have heard mixed opinions.
 04-14-2017, 10:27 PM
#24
For the brace, you are not drilling new holes, you are making four existing holes larger. The instructions with the brace are extensive with illustrations and it's pretty hard to not get it correct.
For your idler, use the HennTec system. There are two systems, one for outside adjustment of the idler, one 'scale' for inside adjustment. The 'scale' system is adjusted through the prototype idler adjustment covers on the hull rear plate. The available covers to replace the glued on Tamiya covers are metal and held on with rare earth magnets. You can also use the stock covers by installing miniature rare earth magnets in them on the inside of the cover and installing metal rod in the hull rear plate. Both systems work very well and I use HennTec systems personally. Installation of the HennTec is simple and usually involves drilling one small hole per side using the idler system as the template. All needed bolts, nuts and washers come with the kit.
http://etoarmor.com/?product=henntec...iya-king-tiger
http://etoarmor.com/?product=henntec...a-king-tiger-2
http://etoarmor.com/?product=henntec...t-cover-plates
I can not answer your question on the Mato tracks working with Tamiya drive sprockets and idlers.