Community
Search
Notices
RC Tanks Discuss all aspects of rc tank building and driving here!

Screen accurate Fury

Thread Tools
 
Search this Thread
 
Old 03-04-2018, 01:09 PM
  #51  
Ad Lav
 
Join Date: Dec 2015
Posts: 130
Likes: 0
Received 0 Likes on 0 Posts
Default

Tamiya based with schumo turret.
Old 03-05-2018, 04:18 PM
  #52  
Maccrage
Thread Starter
 
Maccrage's Avatar
 
Join Date: Aug 2017
Location: Clackamas, Oregon
Posts: 496
Received 9 Likes on 9 Posts
Default

Just got Nick's kit in the mail. Man, this turret is a thing of beauty.
Old 03-05-2018, 08:46 PM
  #53  
yellowshaker
My Feedback: (1)
 
yellowshaker's Avatar
 
Join Date: Oct 2009
Location: bayonne, NJ
Posts: 4,453
Received 2 Likes on 2 Posts
Default

Nick's stuff is always top notch!
Old 03-06-2018, 11:51 AM
  #54  
Eddyk
 
Join Date: Jun 2015
Posts: 230
Likes: 0
Received 13 Likes on 7 Posts
Default

My Fury with the Schumo turret

Click image for larger version

Name:	1463162718_1280.jpg
Views:	122
Size:	143.2 KB
ID:	2257870

Click image for larger version

Name:	1463162722_2545.jpg
Views:	98
Size:	211.3 KB
ID:	2257871

Click image for larger version

Name:	1463162725_3169.jpg
Views:	87
Size:	182.4 KB
ID:	2257873

Click image for larger version

Name:	1463162729_4801.jpg
Views:	85
Size:	194.6 KB
ID:	2257875

Click image for larger version

Name:	1463162732_5447.jpg
Views:	83
Size:	185.5 KB
ID:	2257877

Click image for larger version

Name:	1463162735_6043.jpg
Views:	86
Size:	192.1 KB
ID:	2257879

Click image for larger version

Name:	1463162739_7254.jpg
Views:	82
Size:	221.3 KB
ID:	2257881

Click image for larger version

Name:	1463162742_8131.jpg
Views:	79
Size:	216.6 KB
ID:	2257883

Click image for larger version

Name:	1463162745_9748.jpg
Views:	74
Size:	237.9 KB
ID:	2257885

Click image for larger version

Name:	1463162749_10826.jpg
Views:	72
Size:	230.7 KB
ID:	2257887

Click image for larger version

Name:	1463162752_11317.jpg
Views:	79
Size:	221.2 KB
ID:	2257889
Old 03-06-2018, 11:51 AM
  #55  
Eddyk
 
Join Date: Jun 2015
Posts: 230
Likes: 0
Received 13 Likes on 7 Posts
Default

..

Last edited by Eddyk; 03-06-2018 at 11:58 AM.
Old 03-06-2018, 12:58 PM
  #56  
RichJohnson
 
RichJohnson's Avatar
 
Join Date: Nov 2014
Location: San Diego
Posts: 2,814
Received 374 Likes on 238 Posts
Default

I saw when you built that with the schumo turret, i looked at the website you said you got it from but it wasnt listed. Must be a real low key distributtion network on it.
Old 03-06-2018, 01:05 PM
  #57  
Eddyk
 
Join Date: Jun 2015
Posts: 230
Likes: 0
Received 13 Likes on 7 Posts
Default

Originally Posted by RichJohnson
I saw when you built that with the schumo turret, i looked at the website you said you got it from but it wasnt listed. Must be a real low key distributtion network on it.
These turrets are out of production...
Old 03-07-2018, 07:05 AM
  #58  
yellowshaker
My Feedback: (1)
 
yellowshaker's Avatar
 
Join Date: Oct 2009
Location: bayonne, NJ
Posts: 4,453
Received 2 Likes on 2 Posts
Default

Nick's is the closest you will get now to this turret.... sadly, Schumo no longer produces this or the other turret for the Sherman.
Old 03-12-2018, 07:08 PM
  #59  
Maccrage
Thread Starter
 
Maccrage's Avatar
 
Join Date: Aug 2017
Location: Clackamas, Oregon
Posts: 496
Received 9 Likes on 9 Posts
Default

Well, my T84 tracks arrived today. And, inspired by Ad Lav, I'm about to start tearing them down, along with the Tamiya track, to change the guides. I'm going to start on this while I wait on the rest of my parts to arrive.

The build has begun!
Old 03-12-2018, 10:21 PM
  #60  
Maccrage
Thread Starter
 
Maccrage's Avatar
 
Join Date: Aug 2017
Location: Clackamas, Oregon
Posts: 496
Received 9 Likes on 9 Posts
Default

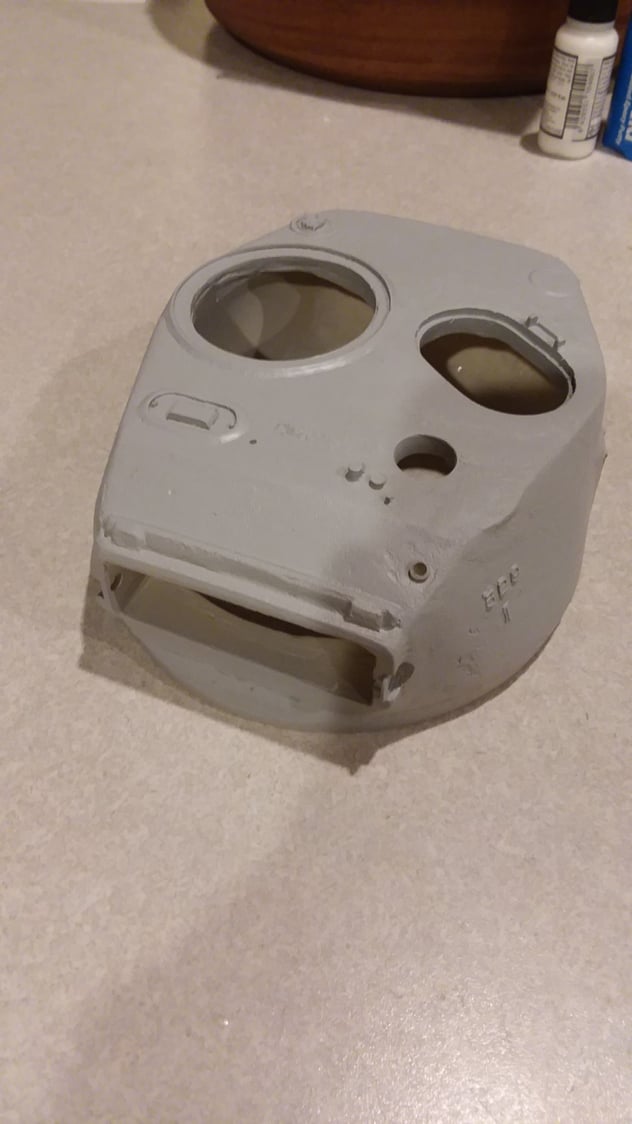
I've also started on Old Phyllis. The base was purchased from Rich.

So far, I've begun work on the muzzle, and begun adding details. I gutted the electronics. Don't know what board to use yet.

I'm going to add a cast effect to the hull and turret, and fix the air scoops, as the base should be inset in the hull, and not on top, unlike the M4.
Attached Thumbnails Click image for larger version

Name:	20180312_005834.jpg
Views:	85
Size:	671.1 KB
ID:	2259024  
Old 03-12-2018, 11:29 PM
  #61  
Maccrage
Thread Starter
 
Maccrage's Avatar
 
Join Date: Aug 2017
Location: Clackamas, Oregon
Posts: 496
Received 9 Likes on 9 Posts
Default

20 minutes, and this is the result. The only part of the Impact tracks getting used are the track shoes. I'm going to have to clean flash off each one too. I'm switching the end connectors to the Tamiya as well, since the Impact connecters bind on the sprocket.
Attached Thumbnails Click image for larger version

Name:	20180313_002512.jpg
Views:	81
Size:	615.4 KB
ID:	2259031   Click image for larger version

Name:	20180313_002531.jpg
Views:	84
Size:	643.7 KB
ID:	2259032  
Old 03-13-2018, 12:34 AM
  #62  
Maccrage
Thread Starter
 
Maccrage's Avatar
 
Join Date: Aug 2017
Location: Clackamas, Oregon
Posts: 496
Received 9 Likes on 9 Posts
Default

One hamburgered hand later, and one of the Impact tracks is disassembled. And since my hand hates me, I think I'm done for the night.
Attached Thumbnails Click image for larger version

Name:	20180313_013106.jpg
Views:	82
Size:	521.5 KB
ID:	2259033   Click image for larger version

Name:	20180313_013112.jpg
Views:	89
Size:	906.4 KB
ID:	2259034  
Old 03-13-2018, 08:04 AM
  #63  
RichJohnson
 
RichJohnson's Avatar
 
Join Date: Nov 2014
Location: San Diego
Posts: 2,814
Received 374 Likes on 238 Posts
Default

Ha ha, i remeber how much my fingers hurt 20 years ago assembling the metal sherman tracks on my dmd non option sherman.
Your going to texture the a1 hull? Om my, well refer to my taigen mongrel build on how i did it. Thougn that tank is so nice i would reccomend not doing it, just becase at two feet away you cant tell. To do it right you need to remove all the brush guards and tools. If you do, soak the brush guards with liquid cement from the inside amd they will become loose and you can pull them out and then replace them. I still have the ones from my other mato hull of you wamt them as backups incase you break one.
Old 03-13-2018, 12:15 PM
  #64  
Maccrage
Thread Starter
 
Maccrage's Avatar
 
Join Date: Aug 2017
Location: Clackamas, Oregon
Posts: 496
Received 9 Likes on 9 Posts
Default

One down, one to go.

Click image for larger version

Name:	hq2okIj.jpg
Views:	77
Size:	243.2 KB
ID:	2259110

Click image for larger version

Name:	XoCD2rU.jpg
Views:	71
Size:	259.5 KB
ID:	2259111
Old 03-13-2018, 12:36 PM
  #65  
yellowshaker
My Feedback: (1)
 
yellowshaker's Avatar
 
Join Date: Oct 2009
Location: bayonne, NJ
Posts: 4,453
Received 2 Likes on 2 Posts
Default

You are determined LOL
Old 03-13-2018, 02:58 PM
  #66  
Maccrage
Thread Starter
 
Maccrage's Avatar
 
Join Date: Aug 2017
Location: Clackamas, Oregon
Posts: 496
Received 9 Likes on 9 Posts
Default

Tracks are done.

Click image for larger version

Name:	8eUn0zv.jpg
Views:	74
Size:	206.6 KB
ID:	2259134
Old 03-13-2018, 07:16 PM
  #67  
Maccrage
Thread Starter
 
Maccrage's Avatar
 
Join Date: Aug 2017
Location: Clackamas, Oregon
Posts: 496
Received 9 Likes on 9 Posts
Default

One down, one to go.

Click image for larger version

Name:	Ti7PasV.jpg
Views:	76
Size:	183.5 KB
ID:	2259149
Old 09-30-2018, 01:11 PM
  #68  
Maccrage
Thread Starter
 
Maccrage's Avatar
 
Join Date: Aug 2017
Location: Clackamas, Oregon
Posts: 496
Received 9 Likes on 9 Posts
Default

Been a while. Started the turret today.


Still need to delete the antenna mount and add the loader's periscope.
Old 09-30-2018, 01:44 PM
  #69  
RichJohnson
 
RichJohnson's Avatar
 
Join Date: Nov 2014
Location: San Diego
Posts: 2,814
Received 374 Likes on 238 Posts
Default

Did nick make that fill in piece?
you got a lot of body work to fit that thing nicely.
Old 09-30-2018, 02:05 PM
  #70  
Maccrage
Thread Starter
 
Maccrage's Avatar
 
Join Date: Aug 2017
Location: Clackamas, Oregon
Posts: 496
Received 9 Likes on 9 Posts
Default

No. Cut it out of a SOL Models turret.
Old 10-01-2018, 09:19 AM
  #71  
RichJohnson
 
RichJohnson's Avatar
 
Join Date: Nov 2014
Location: San Diego
Posts: 2,814
Received 374 Likes on 238 Posts
Default

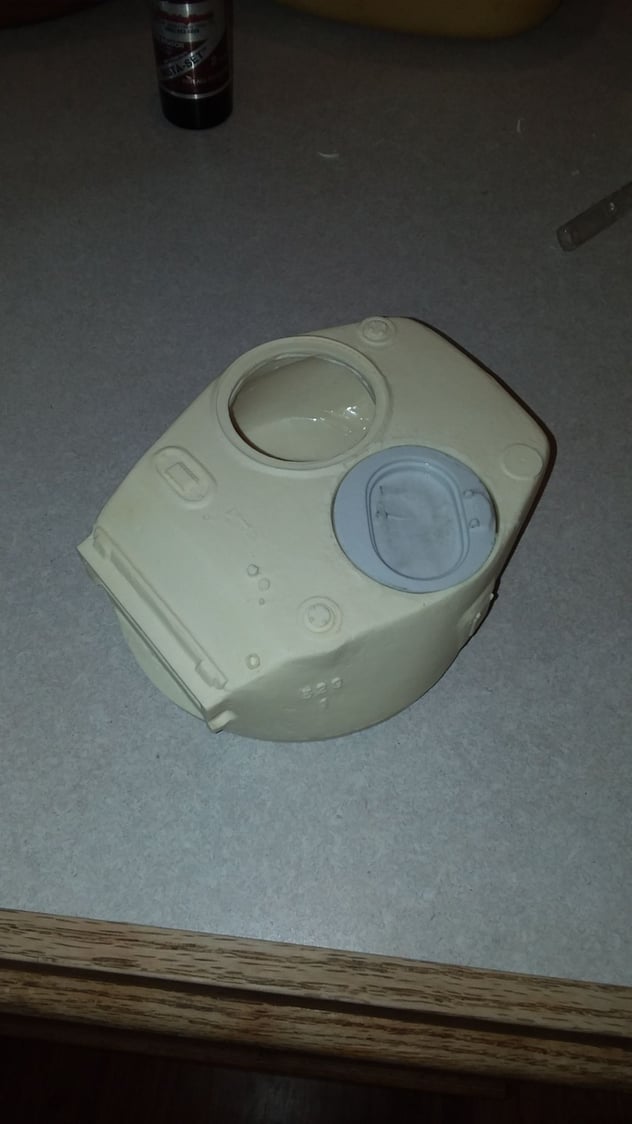
Another way wouls be to glue a plate across the inside of the roof and then glue a circular plate in the hole. Then trim and fill it all then cut the oval hatch in to the new roof.
im planning to do this on my coming A1E8.
Old 10-01-2018, 09:43 AM
  #72  
Ad Lav
 
Join Date: Dec 2015
Posts: 130
Likes: 0
Received 0 Likes on 0 Posts
Default

You could always cut a perfect sized circle from a HL turret roof/hatch as it’s only about £10 to buy.
Old 10-01-2018, 09:47 AM
  #73  
RichJohnson
 
RichJohnson's Avatar
 
Join Date: Nov 2014
Location: San Diego
Posts: 2,814
Received 374 Likes on 238 Posts
Default

The round turret loaders hatch is smaller than the 76mm loader hatch. That would not be accurate.
Old 10-01-2018, 09:54 AM
  #74  
Maccrage
Thread Starter
 
Maccrage's Avatar
 
Join Date: Aug 2017
Location: Clackamas, Oregon
Posts: 496
Received 9 Likes on 9 Posts
Default

Originally Posted by RichJohnson
The round turret loaders hatch is smaller than the 76mm loader hatch. That would not be accurate.
Yep. 76mm oval loader's hatch is about the same size as the driver's and BOG's hatches.
Old 10-05-2018, 07:30 PM
  #75  
Maccrage
Thread Starter
 
Maccrage's Avatar
 
Join Date: Aug 2017
Location: Clackamas, Oregon
Posts: 496
Received 9 Likes on 9 Posts
Default

Shot of grey, looks pretty good.


Removed the side bulge of the former antenna and remade it to match Fury.


Contact Us - Archive - Advertising - Cookie Policy - Privacy Statement - Terms of Service -

Copyright © 2024 MH Sub I, LLC dba Internet Brands. All rights reserved. Use of this site indicates your consent to the Terms of Use.