


My Finished Tamiya KT
 03-20-2018, 05:16 AM
#1

Thread Starter
Join Date: Feb 2017
Location: State College, PA
Posts: 89
Likes: 0
Received 0 Likes
on
0 Posts
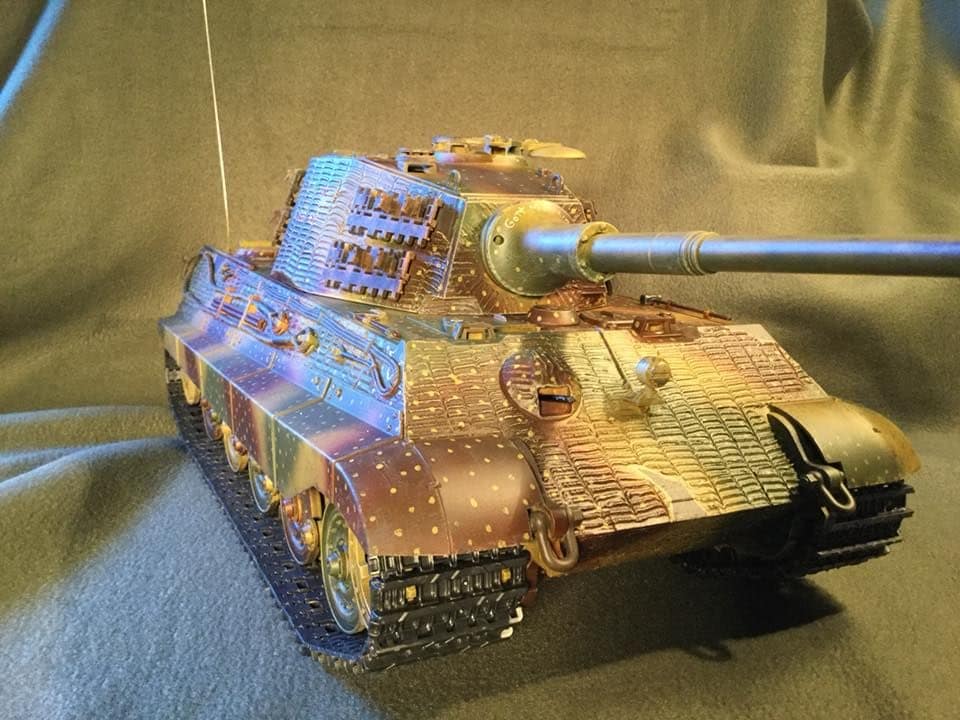
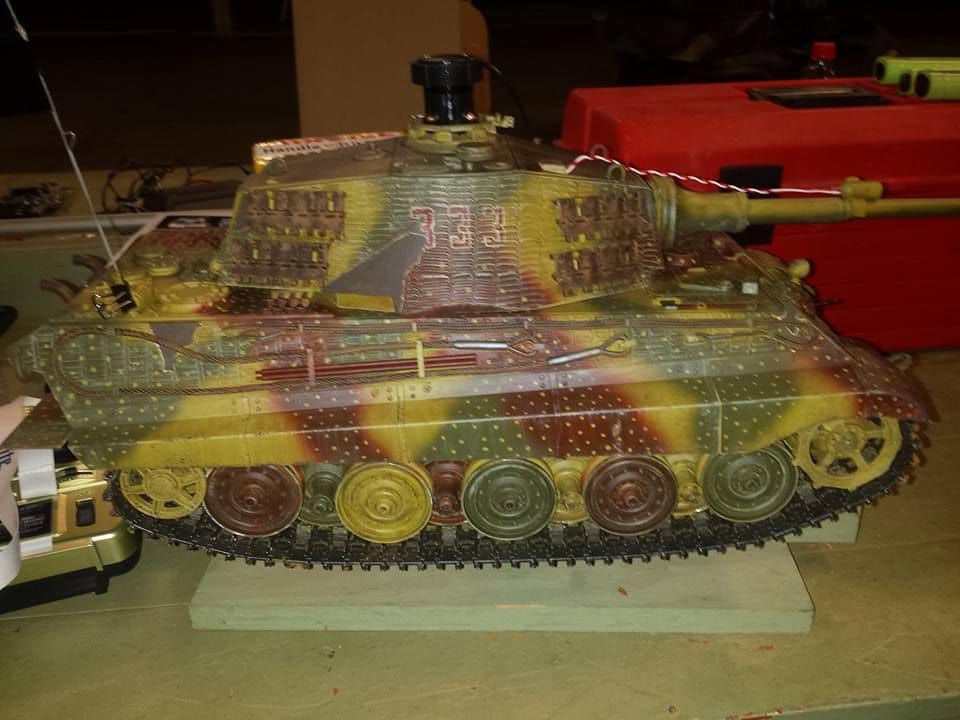
Some pictures of my finished Tamiya King Tiger. It has Daryl's Idler system, metal elevation arm and final drive bushing kit. To slow it down it has a set of 480's with gear reduction units on them. It is running a little slow but I can change pinions and get a little more out of it. It may be slow but she has torque and keeps going after five or six hits.
The build was fun for my first one. It was pretty simple and straight forward. I screwed up the rear idler wheel axels (put them in backwards) but some technical help from forum members allowed me to make some repairs on the bench at Danville to fix the issue. I learned that you have to put zip (wire) ties on the KT turret rotation unit to make the turret turn and with the addition of the rear reduction units I have a hard time putting my battery in. I am going to pull out the speaker box, remove a section and reseal it. I will also replace the mounting screws with bolts to make the speaker box a rigid support for the chassis.
The tank held up well in battle. I lost a rear fender but was expecting more damage than that.
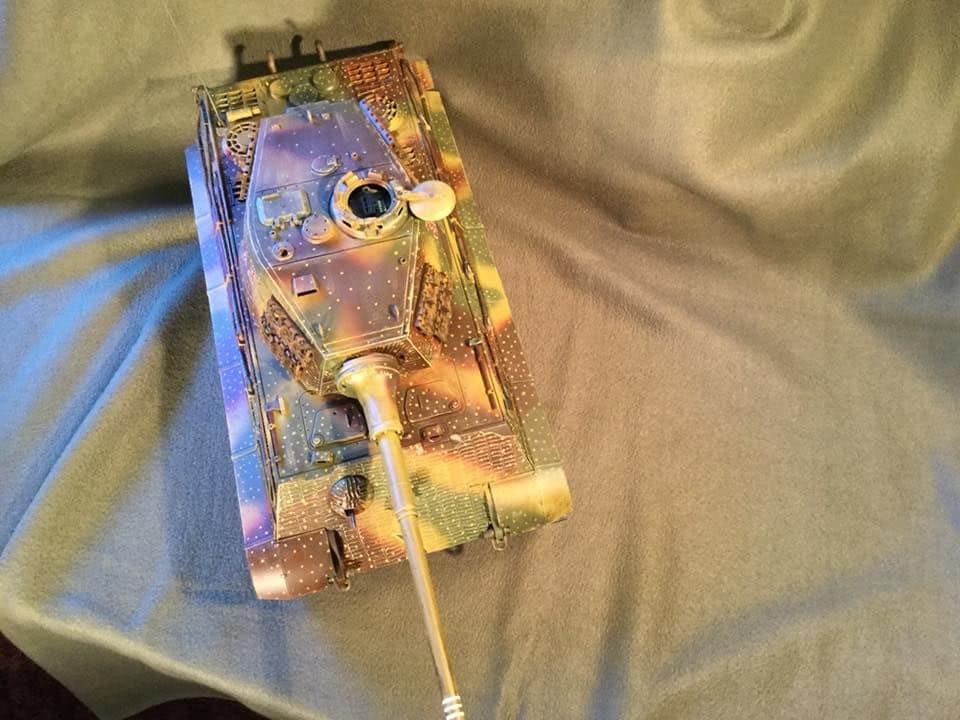
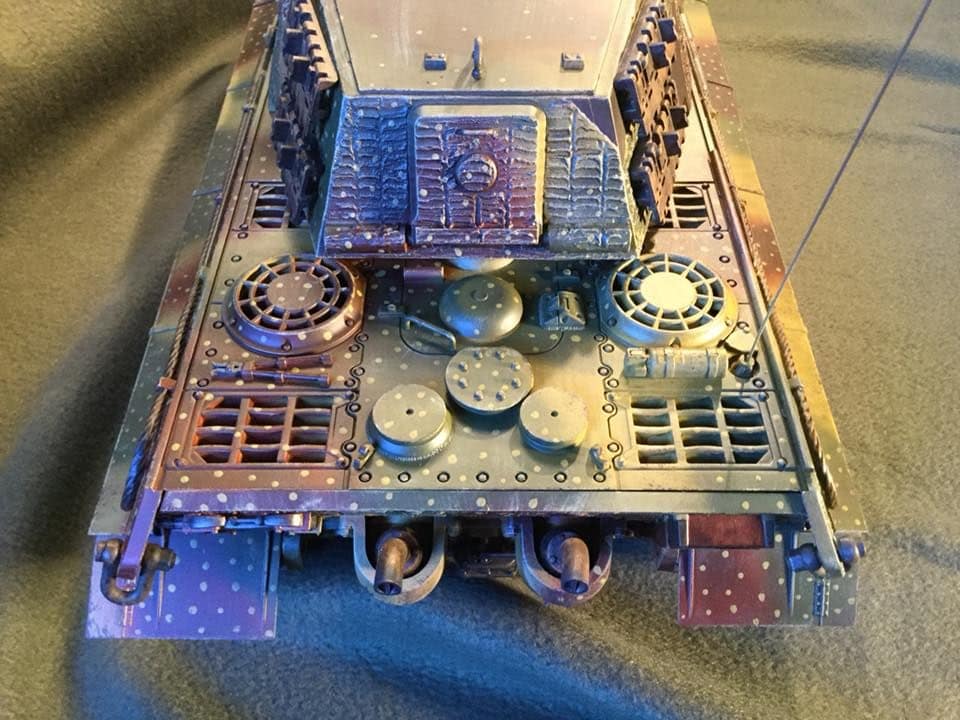
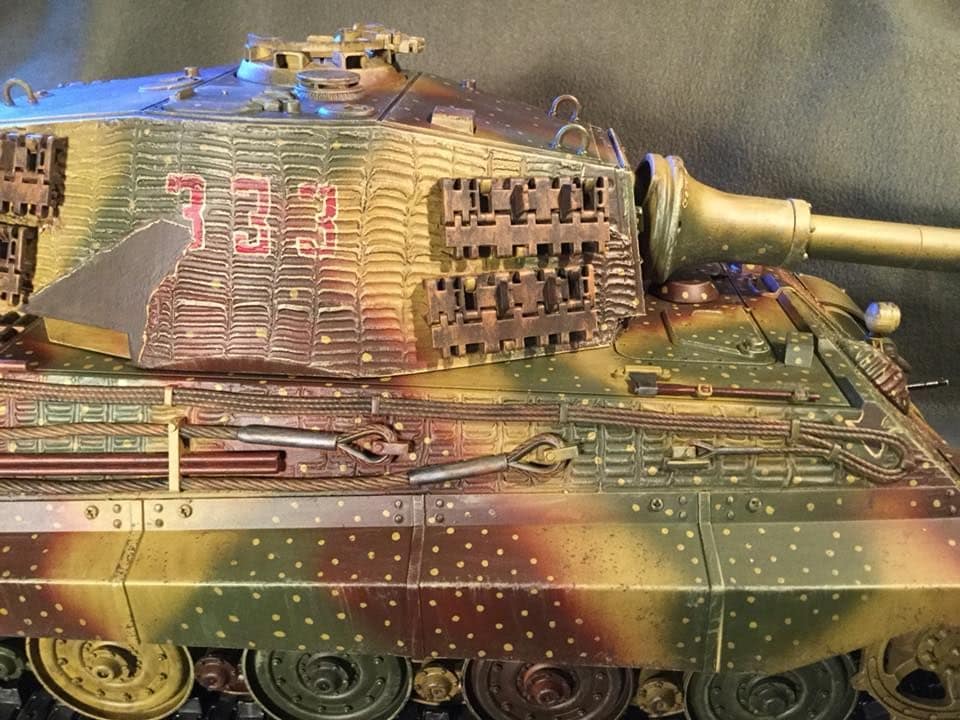
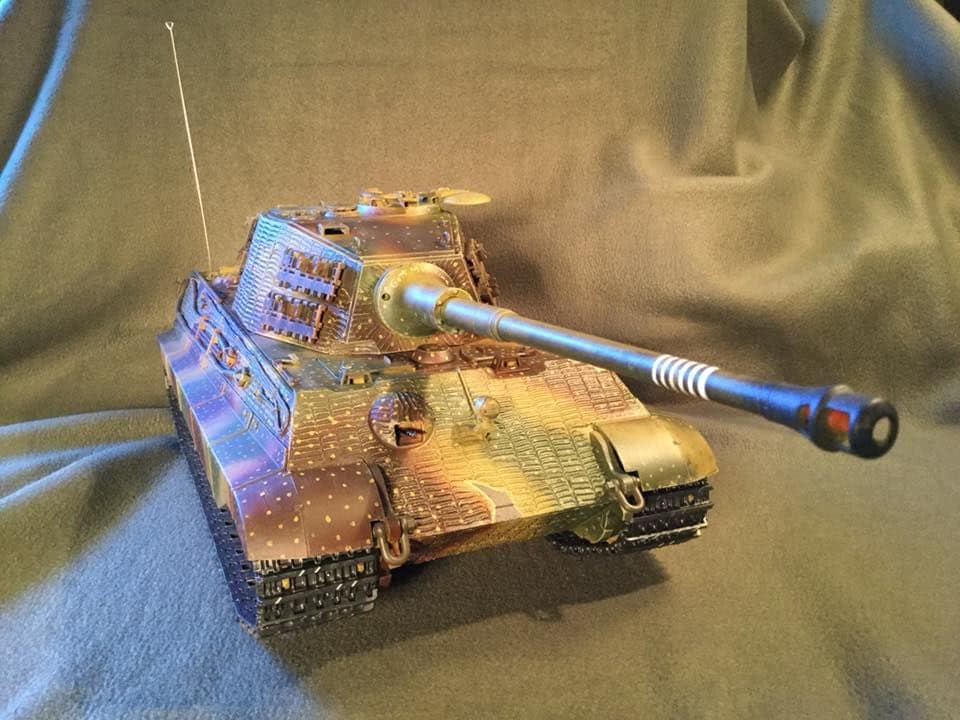
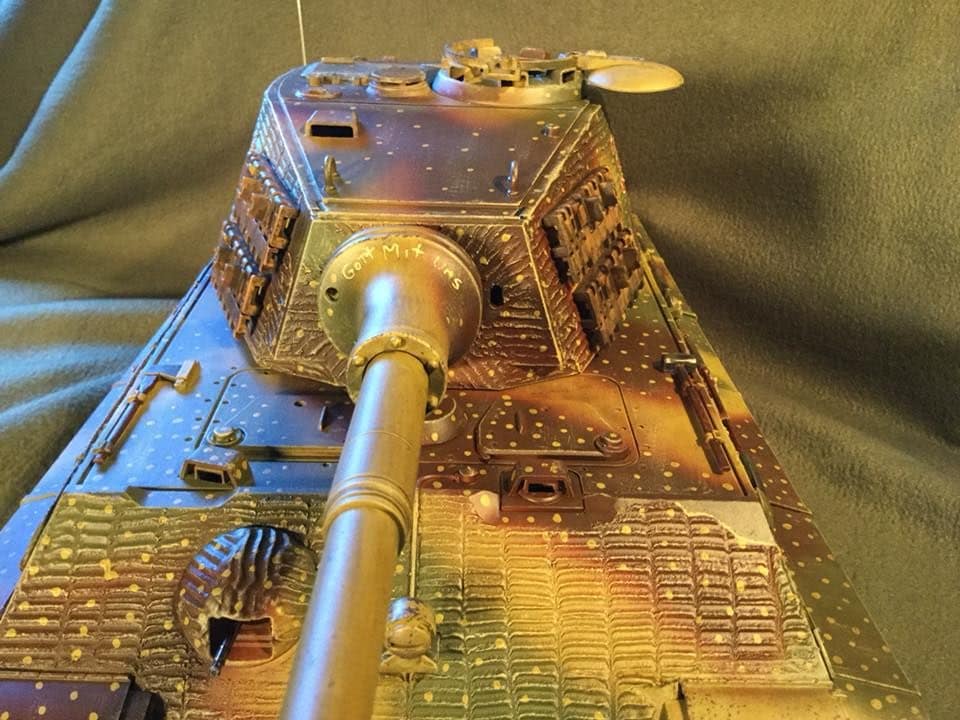
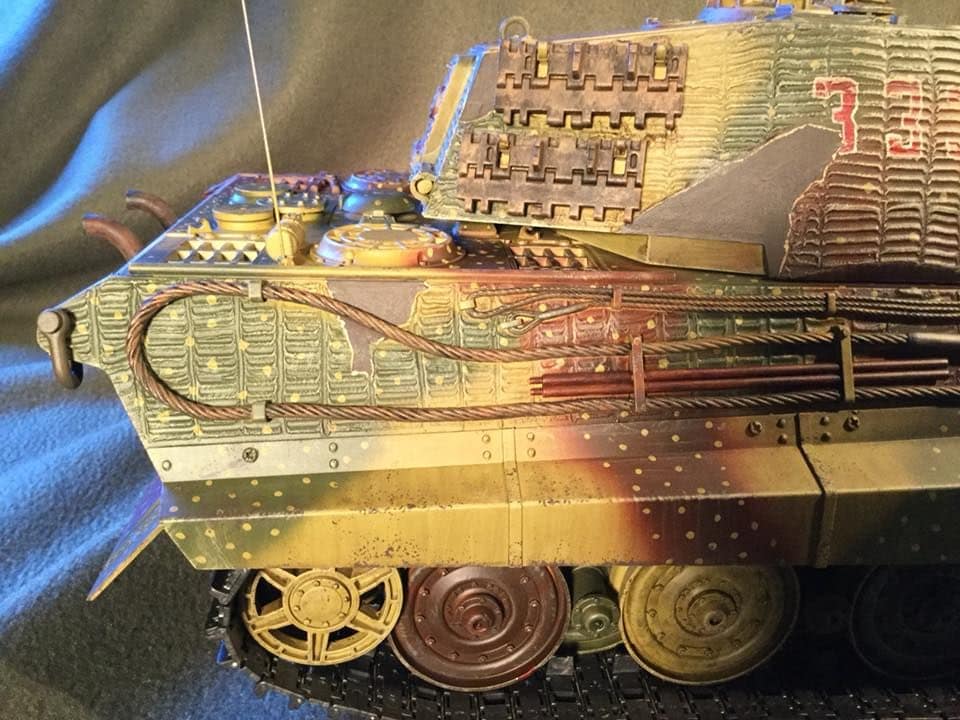
I used Rusto-leum etching primer on the metal parts, followed that with Army Painter Desert yellow. All edges and high spots were dry-brushed with Vallejo Middlestone and Stone Grey (50/50 mix). I used all Vallejo paints and my Badger Patriot airbrush. I tried AK products for the rust and also their Yellow Enamel filter and wash. I used Citadel Nullin Oil as a fine line wash and also around all grease fittings on the road wheels and any of the moving parts (hinges, covers . . . . .). The whole tank was then sprayed with Army Painter Anti-Shine Matt Varnish. The numbers were hand painted due to the depth of the zimmerite; the Tamiya decals would not work even with decal softener. I used Elmer's Carpenters Wood Filler for the zimmerite coating; the Tamiya decal sheets were not textured enough to be worth the effort. I tried to make the zimmerite a rough and unsymmetrical as I could. I looked at what seemed like hundreds of pictures of KT's and none of the zimmerite patterns were perfect like a lot of the "model grade" tanks that people make. I used a plastic clay molding tool from Michael's to make the patterns. The vertical lines were by hand as were the hatch, mantle and mg port.
Hope you like the pictures.
Skip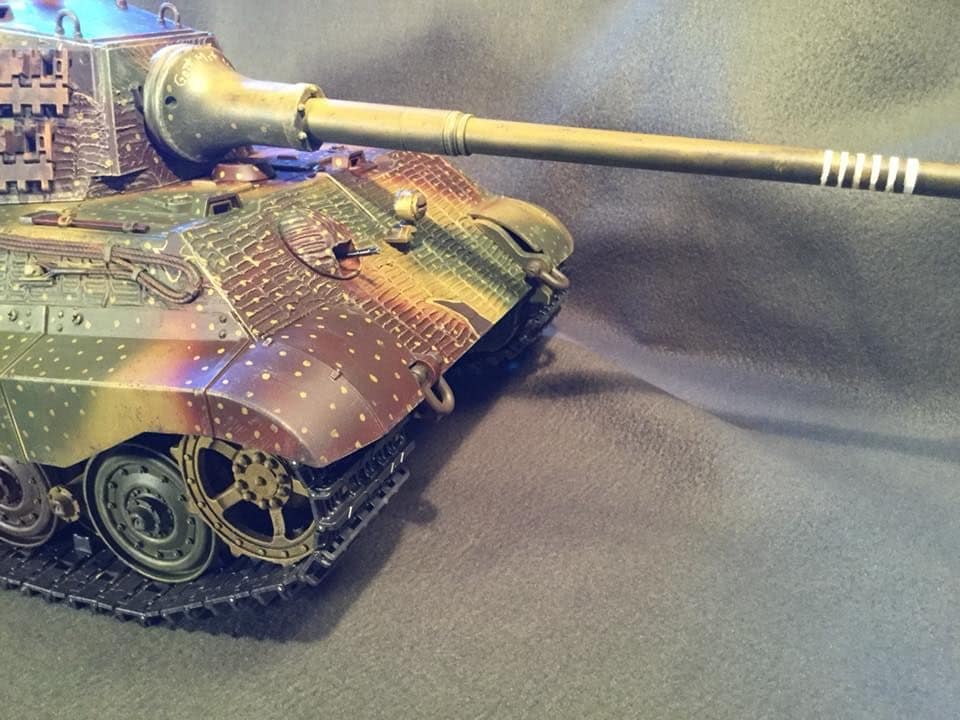


On the bench at AAF
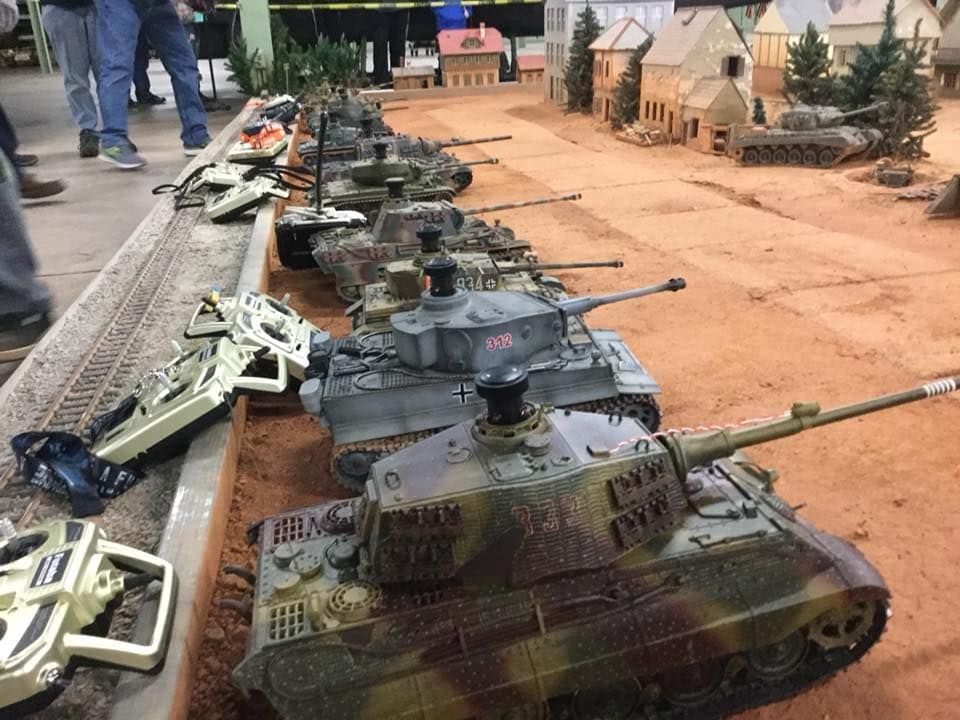
Ready for battle. My sons Tiagen Tiger is next to it.
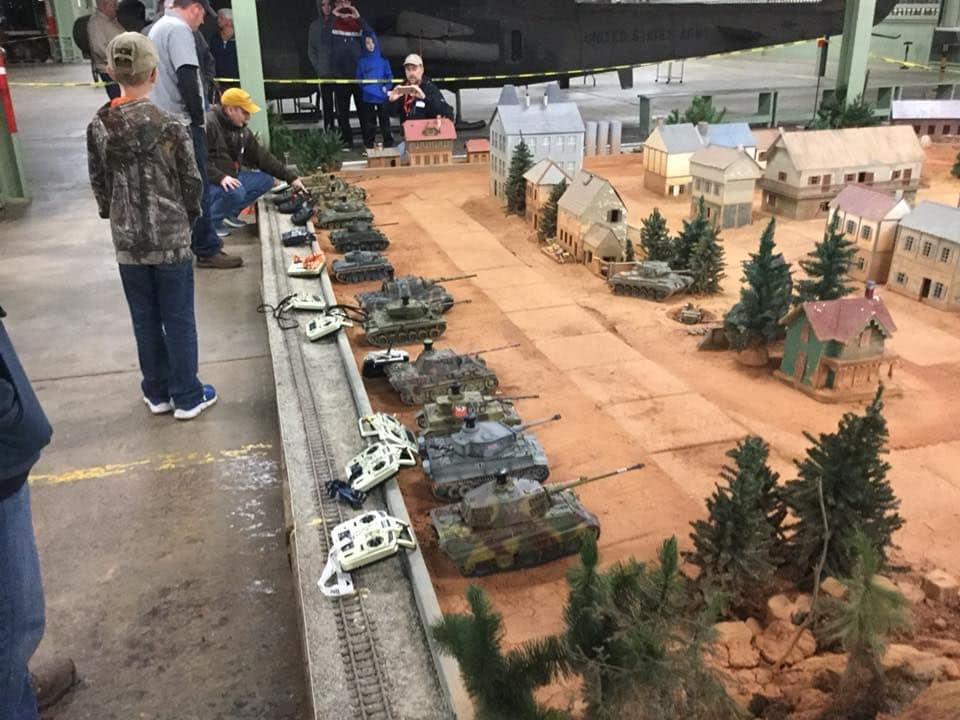

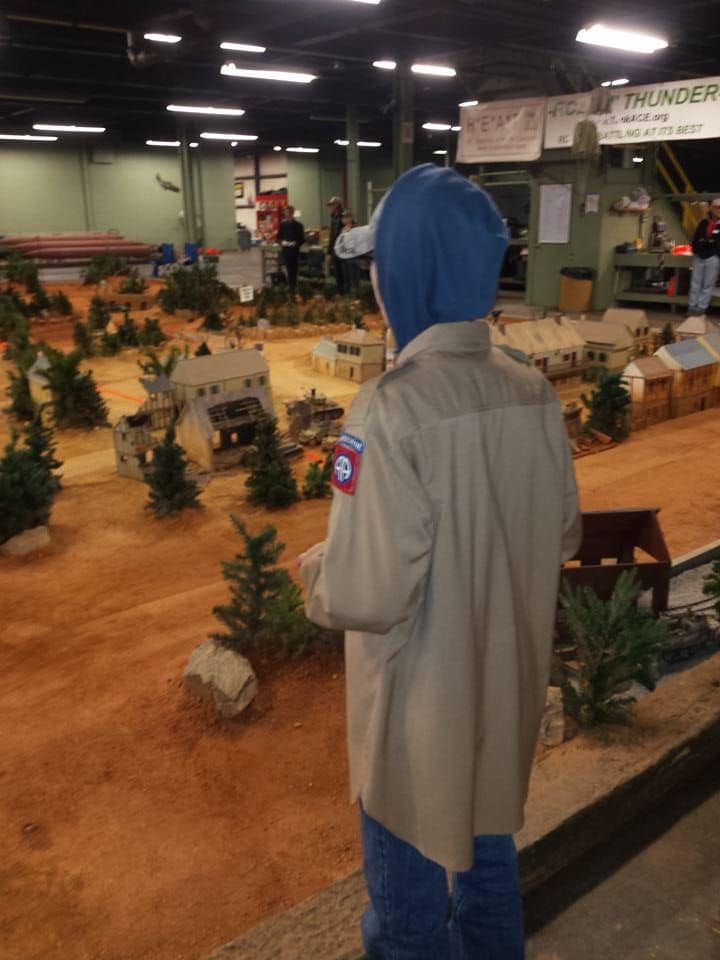
My boy running my KT. I didn't get to run it at all on Saturday.
Another bench view.
The build was fun for my first one. It was pretty simple and straight forward. I screwed up the rear idler wheel axels (put them in backwards) but some technical help from forum members allowed me to make some repairs on the bench at Danville to fix the issue. I learned that you have to put zip (wire) ties on the KT turret rotation unit to make the turret turn and with the addition of the rear reduction units I have a hard time putting my battery in. I am going to pull out the speaker box, remove a section and reseal it. I will also replace the mounting screws with bolts to make the speaker box a rigid support for the chassis.
The tank held up well in battle. I lost a rear fender but was expecting more damage than that.
I used Rusto-leum etching primer on the metal parts, followed that with Army Painter Desert yellow. All edges and high spots were dry-brushed with Vallejo Middlestone and Stone Grey (50/50 mix). I used all Vallejo paints and my Badger Patriot airbrush. I tried AK products for the rust and also their Yellow Enamel filter and wash. I used Citadel Nullin Oil as a fine line wash and also around all grease fittings on the road wheels and any of the moving parts (hinges, covers . . . . .). The whole tank was then sprayed with Army Painter Anti-Shine Matt Varnish. The numbers were hand painted due to the depth of the zimmerite; the Tamiya decals would not work even with decal softener. I used Elmer's Carpenters Wood Filler for the zimmerite coating; the Tamiya decal sheets were not textured enough to be worth the effort. I tried to make the zimmerite a rough and unsymmetrical as I could. I looked at what seemed like hundreds of pictures of KT's and none of the zimmerite patterns were perfect like a lot of the "model grade" tanks that people make. I used a plastic clay molding tool from Michael's to make the patterns. The vertical lines were by hand as were the hatch, mantle and mg port.
Hope you like the pictures.
Skip
On the bench at AAF
Ready for battle. My sons Tiagen Tiger is next to it.
My boy running my KT. I didn't get to run it at all on Saturday.
Another bench view.

 03-20-2018, 06:08 AM
#3
Yep, I really like it. You can build my kit!
03-20-2018, 01:43 PM
#5
Very nice King Tiger, I really like the chipped up zimmerite that you have done, and the airbrush camouflage turned out great. How did the kit go together? My wife & I built the Tamiya Sherman last year and I was thinking of building either the Tiger or King Tiger for a next model.
I have been told the King Tiger is a much newer kit than the little Sherman which makes me think it would have a bit more working detail like hatches that open.
I would like to hear your opinion of the kit,
Larry
I have been told the King Tiger is a much newer kit than the little Sherman which makes me think it would have a bit more working detail like hatches that open.
I would like to hear your opinion of the kit,
Larry
03-21-2018, 04:56 AM
#7
Thread Starter
Join Date: Feb 2017
Location: State College, PA
Posts: 89
Likes: 0
Received 0 Likes
on
0 Posts
Thanks for the comments folks!
Larry: The kit was fun to build. I had one issue because I misunderstood the directions and put the rear idler axels in backwards. It worked but the idlers moved out from the chassis about 1". It was an easy fix; the idlers are screwed together and not glued. The KT has some issues that need addressed if you want to run it at an organized event. The transmissions won't last unless you replace the final gear bushing, the idler/track tension set up from Tamiya is not very good so you will need to replace it if you want to battle. Also due to the weight of the barrel it is advisable to replace the elevation arm with a machined metal one. All of those items have aftermarket kits for them ( I had about $120 in those parts, including shipping; Daryl can get them ordered for you). The KT is way too fast stock out of the box. I put 480 motors on and it was still running faster than the medium tanks so I had to put a set of gear reducers on it (that was another $100 in parts). The gear reducers push the motors up and back so now I have to modify my speaker box to allow room for my battery. Also the turret rotation unit needs attention to make it work right; this is a simple fix with a zip tie. All of these are easy fixes but you really should do them in order to have a reliable runner.
I bought Colin a Panther kit at the museum this weekend. Everyone had very good comments on the build and the two initial problems with the kit (barrel and drive wheel spacing) seem to have been fixed. It appears to be ready to go out of the box.
Thanks for the comments on the paint. I wanted something that looked like it had seen its share of time in the field. The zimmerite was fun to do as was the painting. I think I had about 20 hours in the painting (including primers and base coats). I did more than I needed to but I wanted to have some fun with that scale. I think Colin is going to finish the Panther in a similar fashion.
BennyB:
Thanks man! You and Daryl kept me on the right track and answered all of the noob questions that I had during the planning and build. Your help with the transmissions and the turret motor got me on the field and fighting. It feels great to have my own tank on the field that I built instead of one that I bought or borrowed. Colin and I have learned a lot from you and the ACE guys in just a year.
See ya,
Skip
03-21-2018, 05:29 AM
#8
Thank you for the "kit review" Skip2A, that gives me lots of food for thought. Maybe a Panther kit for a next project, who knows
BennyB and the guys at Danville are a super helpful group, he bailed me out of trouble when I was doing the initial set-up with our little Sherman. I could not get the silly thing to fire either the main gun or the machine gun and Benny said it had to do with the trim on the TX, sure enough it worked perfectly! Me being an airplane guy I had all the trims centered, now I know
Thanks again for the run down, Larry

