


Okmo m60

 08-18-2018, 07:19 PM
#54

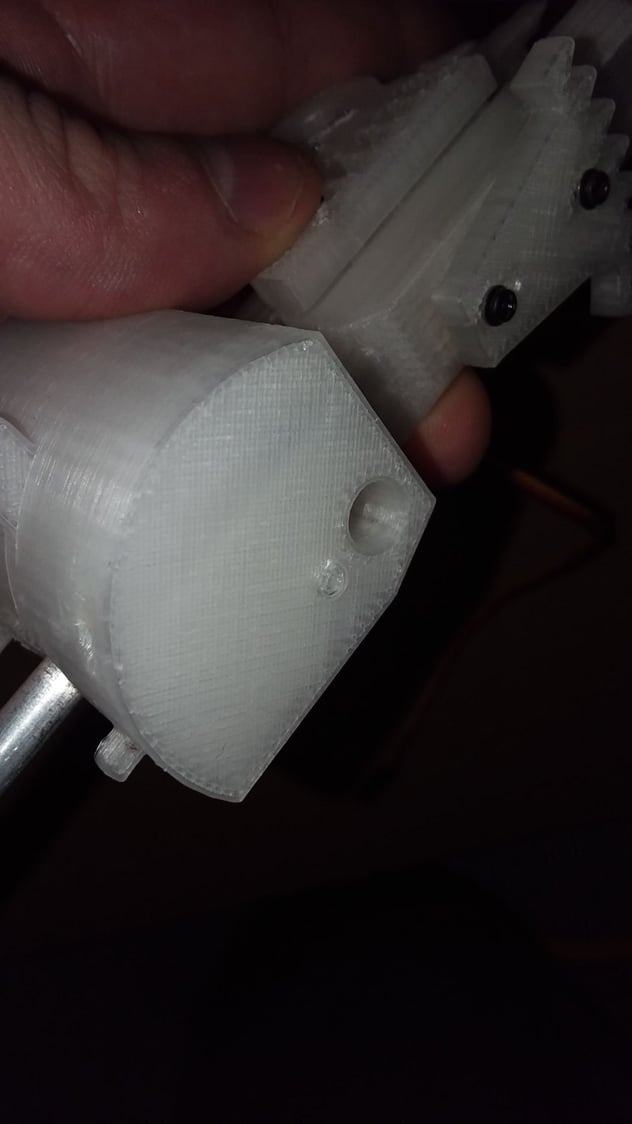
A friend and I were reviewing my kit today and I was wondering if the short screws were supposed to hold the brass torsion bar stop in the hull from the bottom since there is a hole in the bottom of the tank at each spot. See my picture. My kit came with two sets of long screws like the ones to hold the wheels to the bogie arms. I was wondering if those long ones were for tightening the torsion bars.
Also, I got 9 brass pieces just like the torsion bar end stops that do not have a hole drilled in them for the torsion bar. Any idea what those are for?
Also, the aluminum tubes I asked about are not for the suspension bogie arms, all of them have aluminum tubes already. So are they spares or for something else? like stand offs maybe fore the coupola rotation?
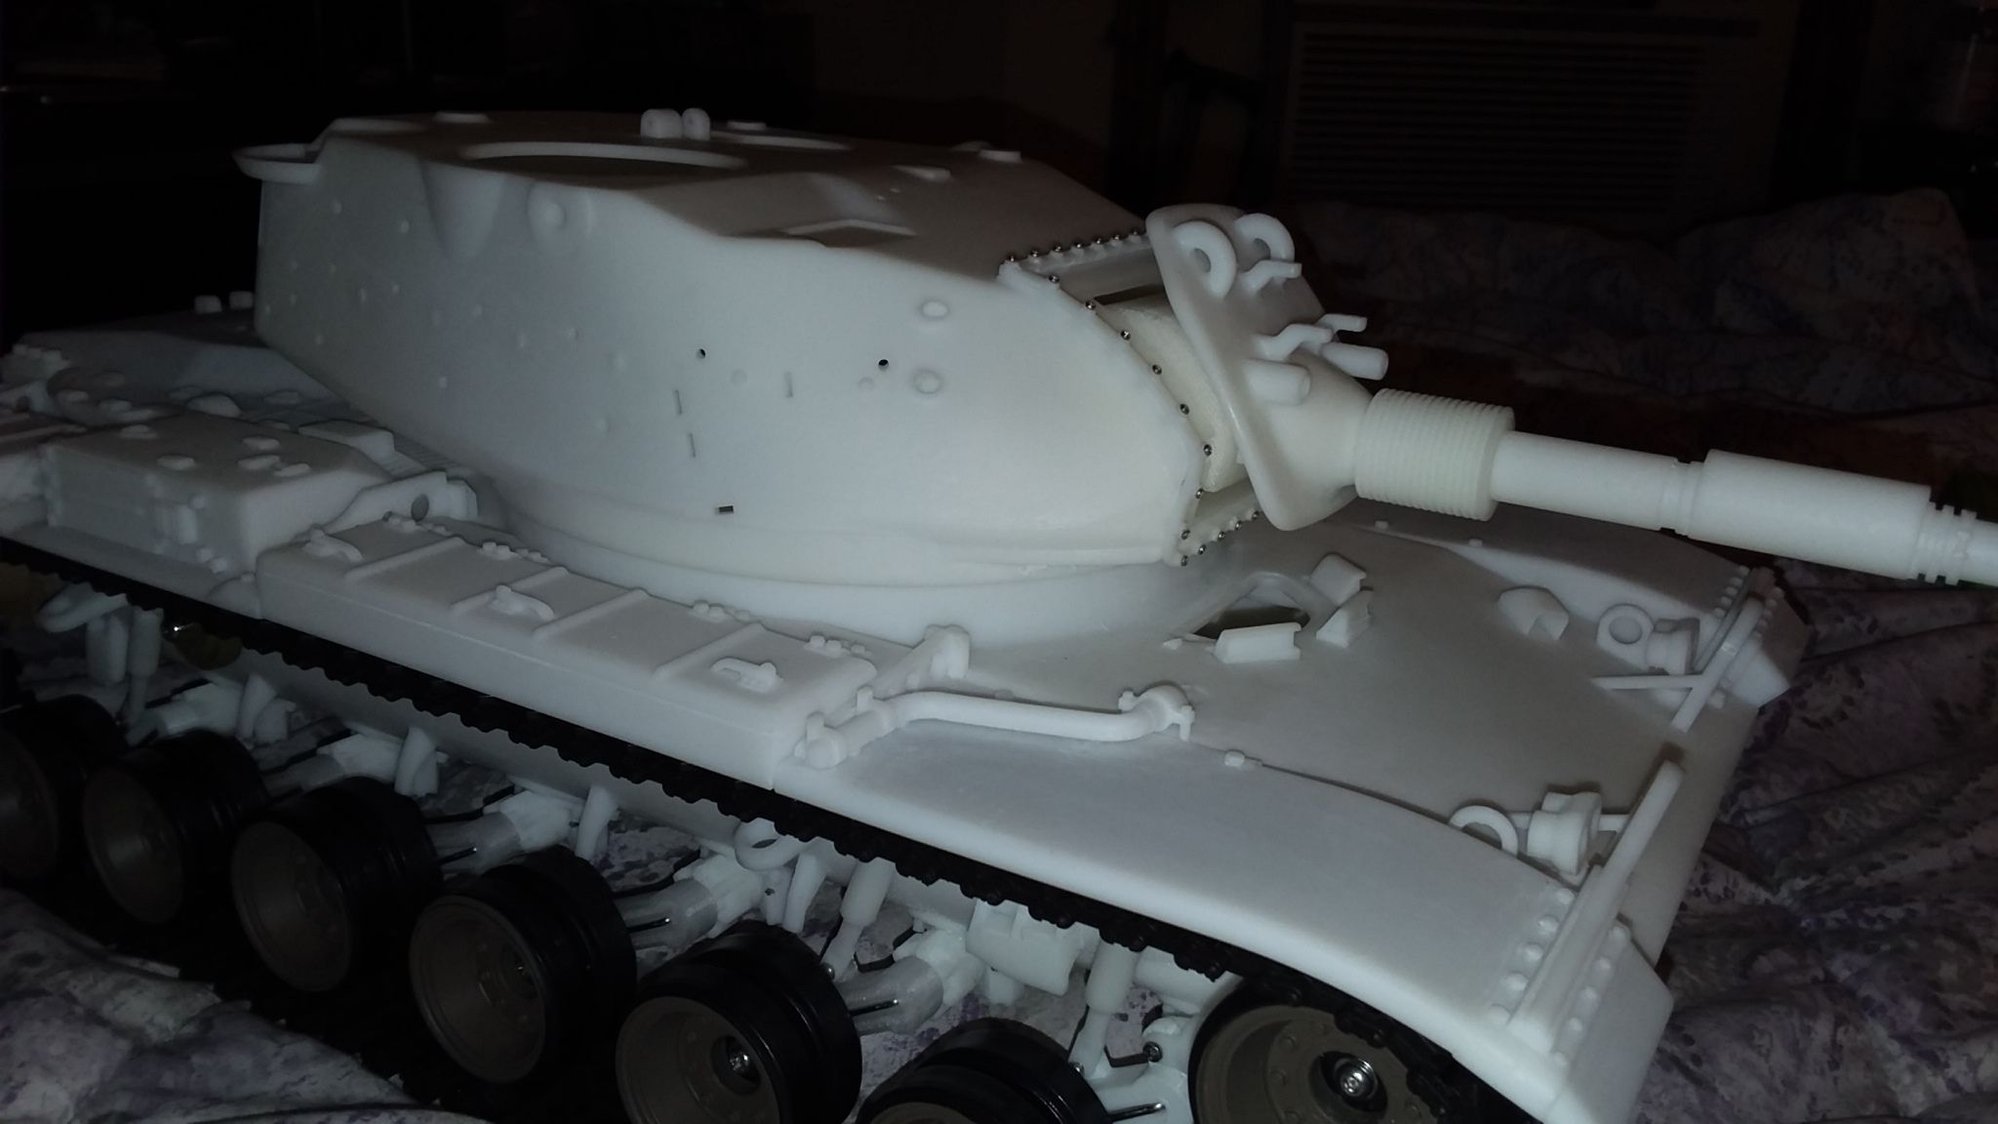
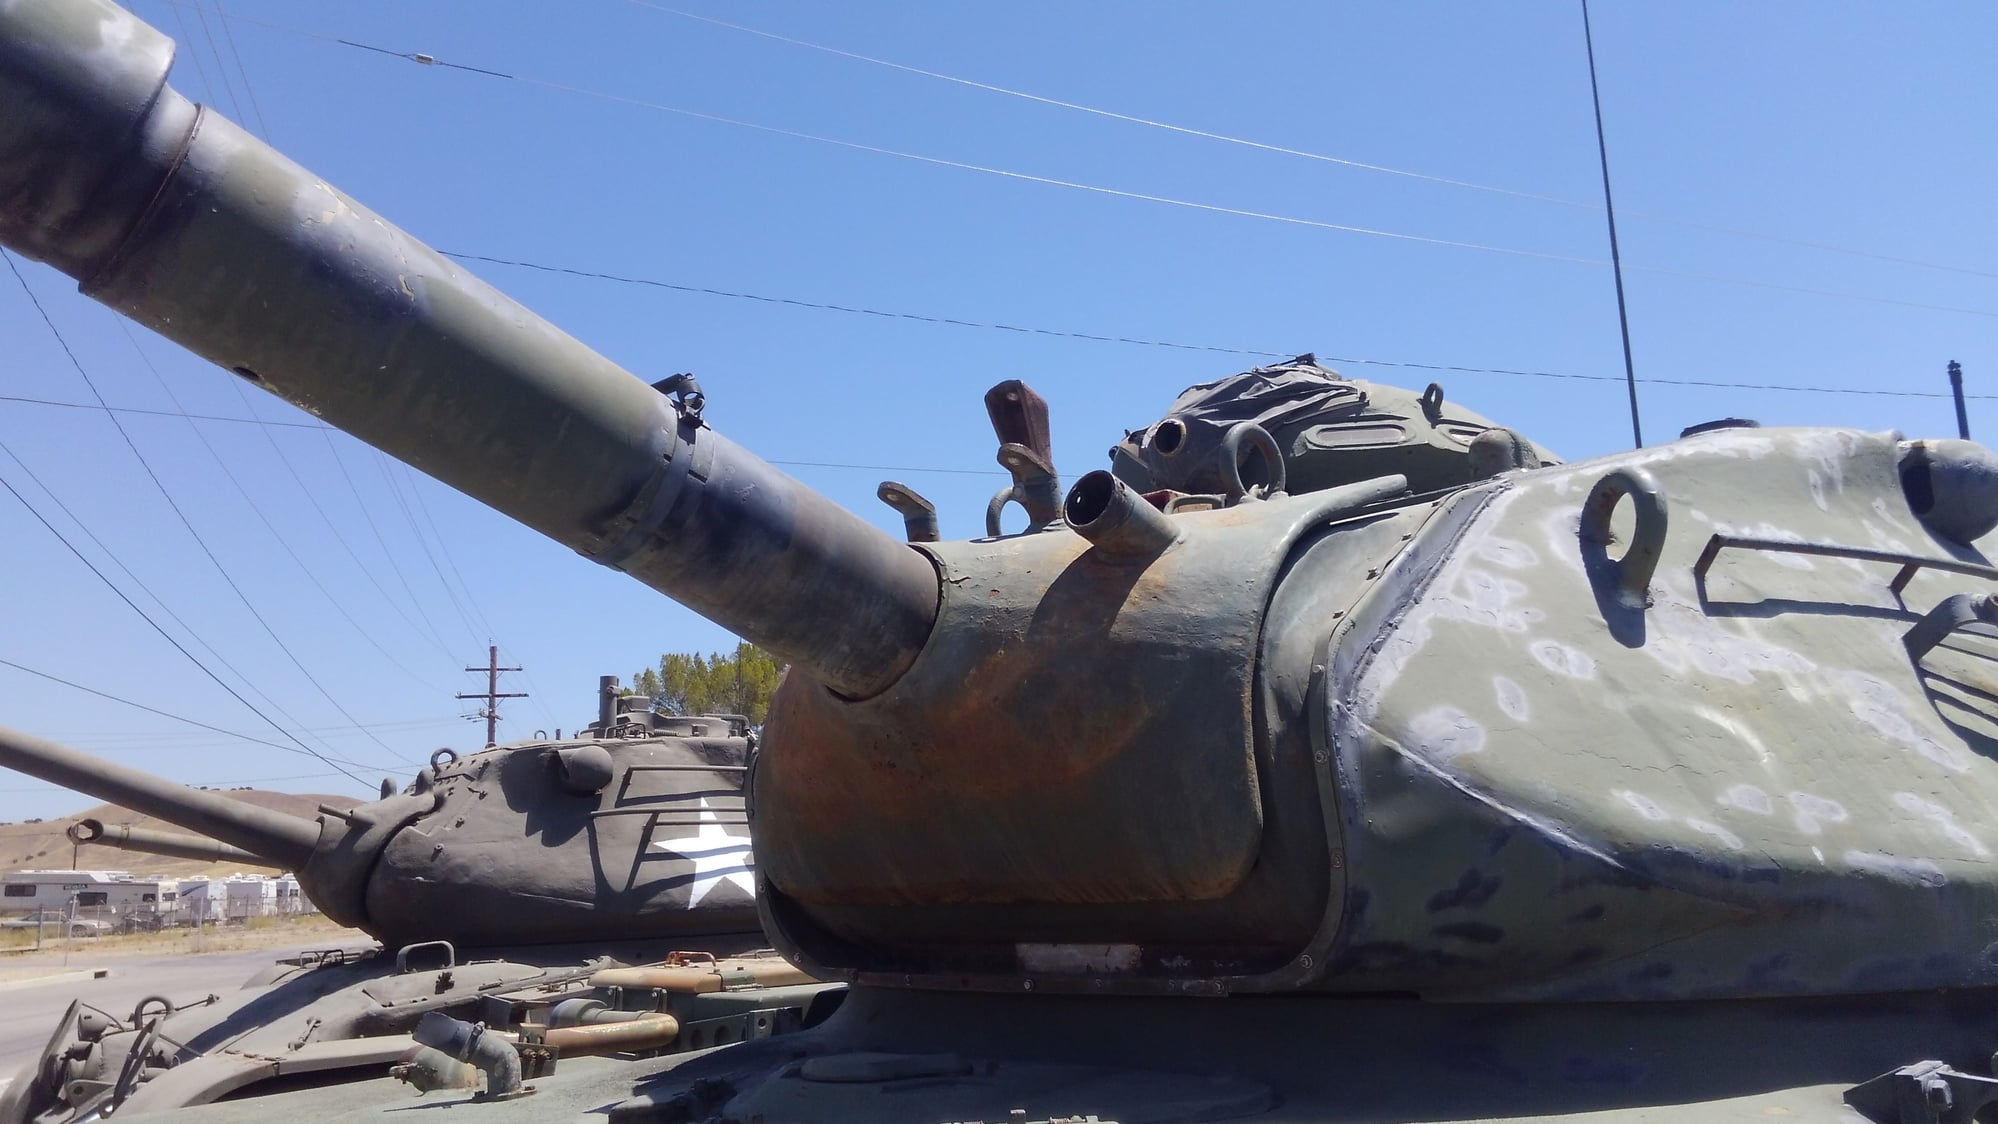
So here is another thing we realized looking the turret over. The mantlet provided is very vertical unlike the real tank. The real mantly is very concave shaped with the barrel forward and the top and bottom sweeping back in a sideways U shape. I included a picture of the real thing below. I think this can be accomplished by removing the top tab from the back of the mantlet and the top tab from the rotor shield and then heating and sweeping back the top plate to give it a correct shape. Then cut off the sheld below the barrel taper and glue on more material sweeping it back and then blending it in with bondo or putty.
Or possibly cut off all the tabs behind the mantlet and on the rotor shield and heat the mantlet and make it conform to the rotor shield or a block carved to the correct pointed shape.
Not too difficult but its still a pain to have to do this.

Also, I got 9 brass pieces just like the torsion bar end stops that do not have a hole drilled in them for the torsion bar. Any idea what those are for?
Also, the aluminum tubes I asked about are not for the suspension bogie arms, all of them have aluminum tubes already. So are they spares or for something else? like stand offs maybe fore the coupola rotation?
So here is another thing we realized looking the turret over. The mantlet provided is very vertical unlike the real tank. The real mantly is very concave shaped with the barrel forward and the top and bottom sweeping back in a sideways U shape. I included a picture of the real thing below. I think this can be accomplished by removing the top tab from the back of the mantlet and the top tab from the rotor shield and then heating and sweeping back the top plate to give it a correct shape. Then cut off the sheld below the barrel taper and glue on more material sweeping it back and then blending it in with bondo or putty.
Or possibly cut off all the tabs behind the mantlet and on the rotor shield and heat the mantlet and make it conform to the rotor shield or a block carved to the correct pointed shape.
Not too difficult but its still a pain to have to do this.
08-18-2018, 08:06 PM
#55

Thread Starter

I tried the screws from the bottom, but the thickness of the hull makes them way too short, and the flats for the screw to engage is on the top of the torsion bars.
08-18-2018, 08:08 PM
#56
Ok, but the screw I show in the bottom is the short screw and it does hold the brass piece in place. I suppose its really not needed once the torsion bar is inserted and tightened down but just wondering.
08-18-2018, 08:10 PM
#57
Thread Starter
I believe they forgot to give me the long screws they sent you.
08-18-2018, 09:00 PM
#58
I think they are a second set of wheel screws. They are the same length and they have an equal amount of washers too. I think they are going to be way too long and stick up tall on the torsion bar locks. I figured out that in my kit, half of the brass hex torsion bar locks did not have holes for the torsion bars in them, the package they sent me this week had more brass hexes with half with holes and half with out. Im so confused..... but I do now have enough with holes for every torsion bar and 9 without holes.....
I tested the metal wheels with bearings I bought from tank army. Man they are nice and roll so much better than the plastic ones that came in the kit. I also got metal return rollers but my friend told me they tended to eventually bind up on his abrams so he went back to the plastic ones. I will start with the plastic return rollers and possibly upgrade to the metal if the plastic ones don't roll well.
I tested the metal wheels with bearings I bought from tank army. Man they are nice and roll so much better than the plastic ones that came in the kit. I also got metal return rollers but my friend told me they tended to eventually bind up on his abrams so he went back to the plastic ones. I will start with the plastic return rollers and possibly upgrade to the metal if the plastic ones don't roll well.
08-22-2018, 02:50 PM
#59
Thread Starter
A friend and I were reviewing my kit today and I was wondering if the short screws were supposed to hold the brass torsion bar stop in the hull from the bottom since there is a hole in the bottom of the tank at each spot. See my picture. My kit came with two sets of long screws like the ones to hold the wheels to the bogie arms. I was wondering if those long ones were for tightening the torsion bars.
Also, I got 9 brass pieces just like the torsion bar end stops that do not have a hole drilled in them for the torsion bar. Any idea what those are for?
Also, the aluminum tubes I asked about are not for the suspension bogie arms, all of them have aluminum tubes already. So are they spares or for something else? like stand offs maybe fore the coupola rotation?
So here is another thing we realized looking the turret over. The mantlet provided is very vertical unlike the real tank. The real mantly is very concave shaped with the barrel forward and the top and bottom sweeping back in a sideways U shape. I included a picture of the real thing below. I think this can be accomplished by removing the top tab from the back of the mantlet and the top tab from the rotor shield and then heating and sweeping back the top plate to give it a correct shape. Then cut off the sheld below the barrel taper and glue on more material sweeping it back and then blending it in with bondo or putty.
Or possibly cut off all the tabs behind the mantlet and on the rotor shield and heat the mantlet and make it conform to the rotor shield or a block carved to the correct pointed shape.
Not too difficult but its still a pain to have to do this.
08-22-2018, 05:00 PM
#60
Yeah. I figured that. I was looking at some good close ups of M60s with the weather cover on and I think, if we make the weather cover real delicate and accurate, it will look right and we wont have to bother redesigning the mantlet underneath because it wont matter as long as it looks right with the cover on. Making that cover right, that's going to be the hard part.
The reason it sticks up so high is because there is a wire frame in the cover that gives it that tall square shape. I have some photos of the tank in front of the SRP center at Roberts where the material is rotted away and the wire frame is left.
The reason it sticks up so high is because there is a wire frame in the cover that gives it that tall square shape. I have some photos of the tank in front of the SRP center at Roberts where the material is rotted away and the wire frame is left.

