


M60a3 DKLM kit build
 11-29-2018, 01:25 PM
#76

Join Date: Nov 2010
Location: HamiltonWaikato, NEW ZEALAND
Posts: 937
Likes: 0
Received 78 Likes
on
55 Posts
Hi Rich
It's looking good overall. What material is that? For the bellows section, putting a piece of material through a tube wringer is an option I'm exploring for my M41 mantlet - creases the length quite nicely, though it means the bellows area would have to be glued - or sewn - to the front cover. Tube wringer - https://www.bing.com/images/search?v...x=2&ajaxhist=0 -
Mal
 11-29-2018, 02:54 PM
#77
Thread Starter

Its some type of cloth material they provide.
There is a material that would work that is used for model train passenger car diaphrams between the cars, but i dont know what its made out of. Some type of thin flexible rubber bellows materail.
There is a material that would work that is used for model train passenger car diaphrams between the cars, but i dont know what its made out of. Some type of thin flexible rubber bellows materail.
 12-02-2018, 02:35 PM
#80
Junior Member
Join Date: Dec 2018
Posts: 1
Likes: 0
Received 0 Likes
on
0 Posts
Hi that�s an amazing looking tank, I noticed that u only have a radio control chip in there. I�m new to RC tank building and working on my hooben t55, do I need some sort of CPU to get the tank running? Or I just hook up motors with the radio controller and good to go?
thanks
thanks
12-09-2018, 07:57 PM
#81
Thread Starter
For a tank it I recommended to use a full option type Tank Control Board. You can get a taigen system if you do not intend to participate in Infra Red battles or desire to build a servo recoil.
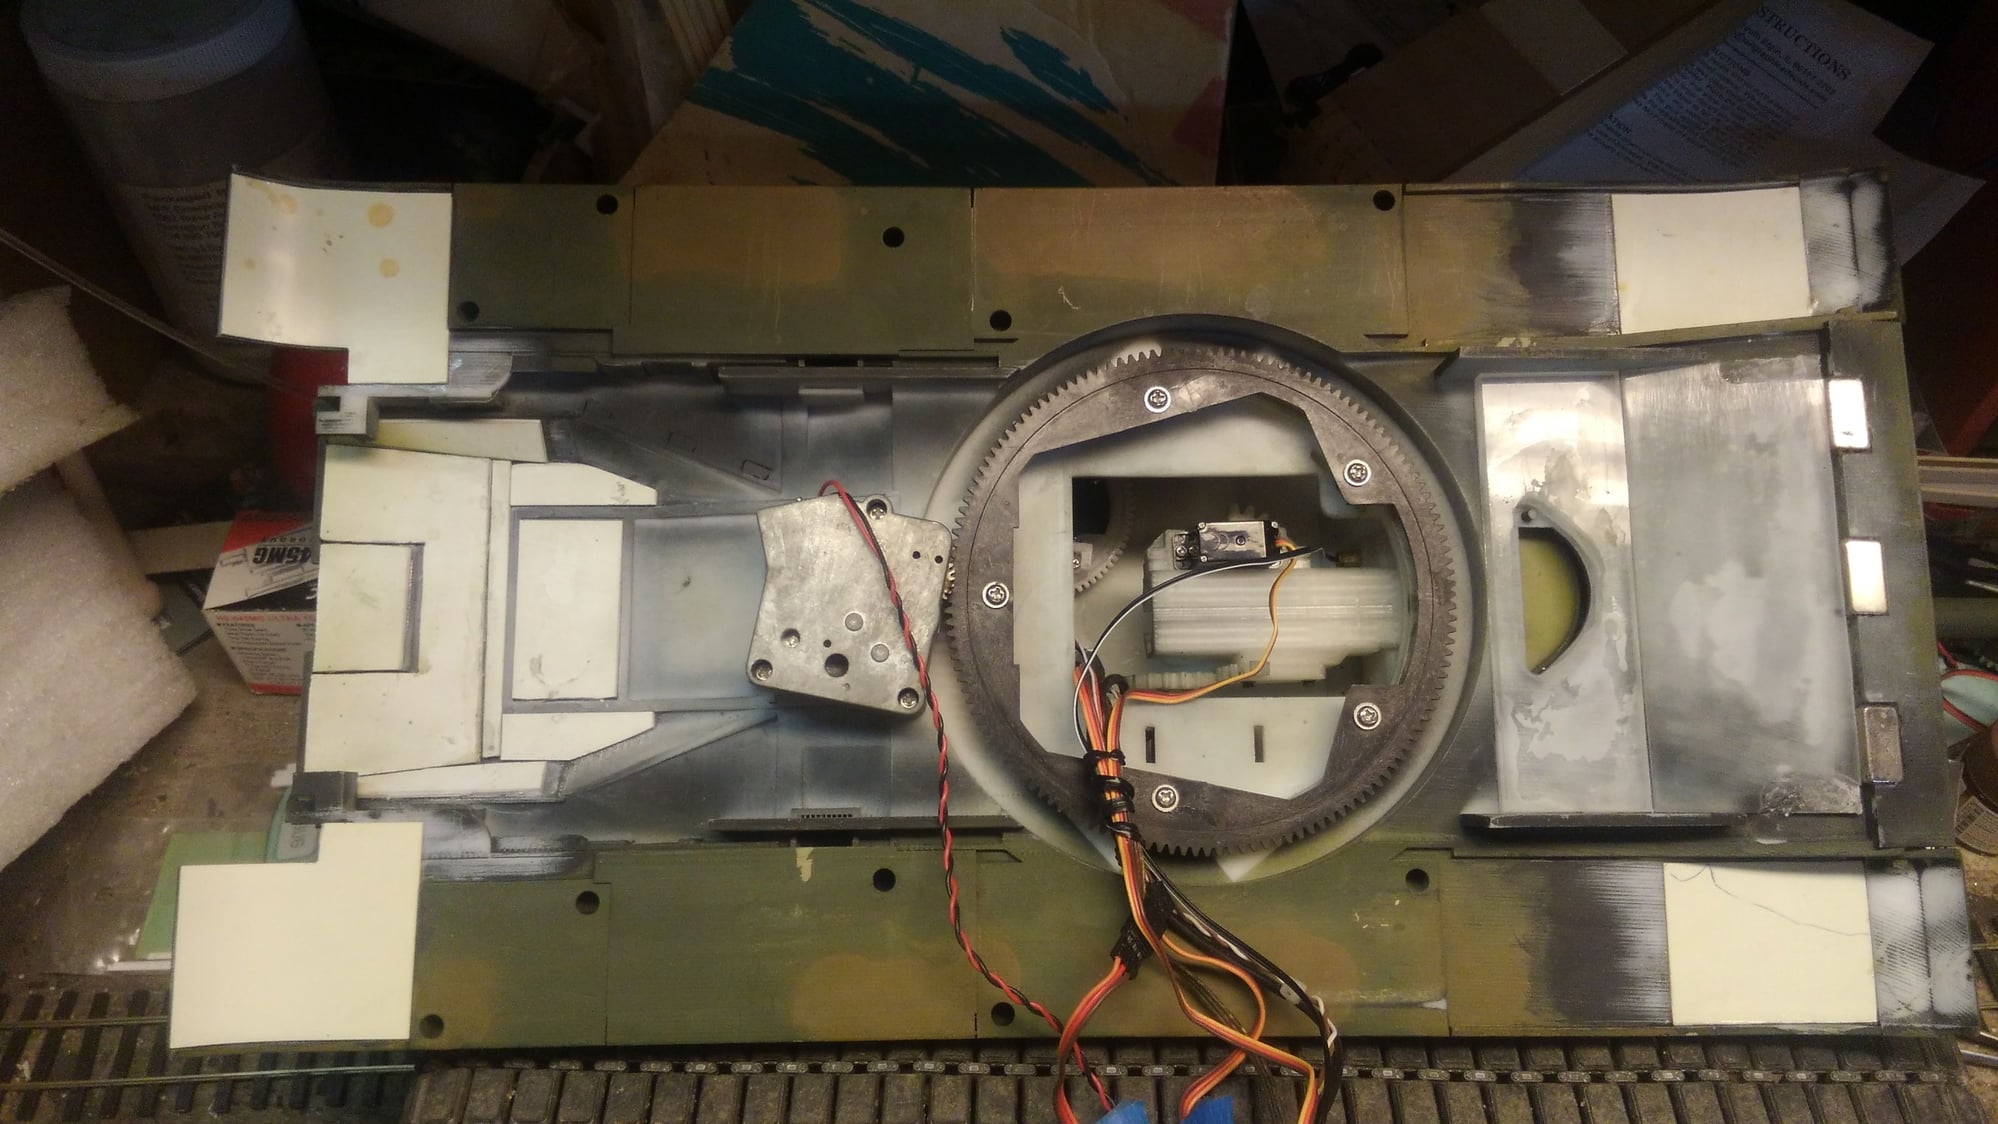
The other two main options are Clark boards available from DKLM and IBU2 which is what I have in this tank, but its an older board no longer available and the new version has a momentum or inertia delay that you cannot turn off so until they solve that I will not recommend a new board from IBU.
The board controls the motors with a dual motor mixed ESC that also recoils the motors when the main gun is fired making the tank jerk back slightly to simulate the recoil shock wave flowing through the hull. The board controls the front lights and tail lights separately as weill as the macine gun LED and the main gun barrel flash LED. The board controls the turret rotation left and right, barrel elevation with the continuous motor on a cam like henglong and taigen use (I put my gun elevations on a servo on a separate knob channel on my transmitter not running through the TCB) and then the board controls a servo to recoil the main gun when it is fired. IF you desire to do the laser tag IR combat with other tanks, the Tamiya system plugs right into it.
12-09-2018, 08:19 PM
#82
Thread Starter
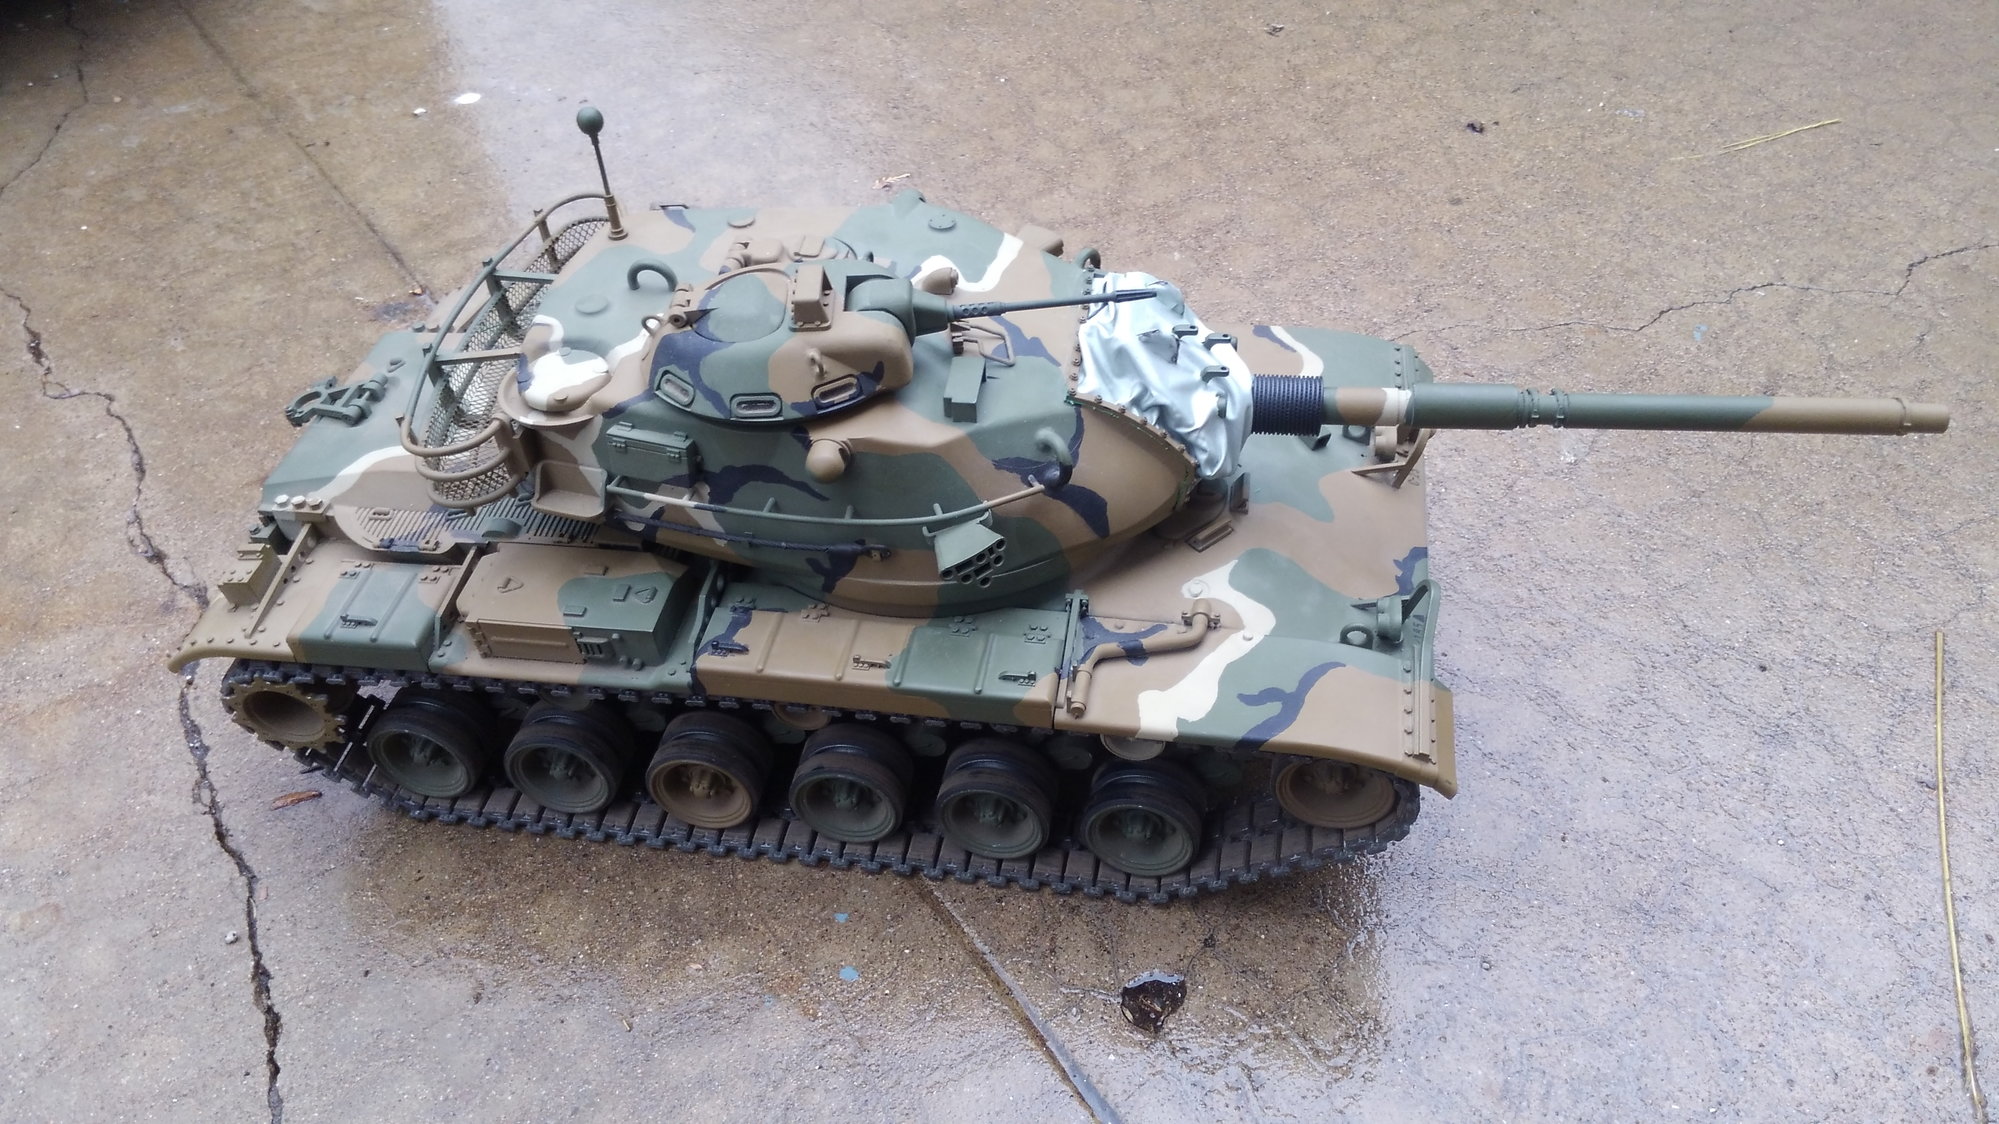
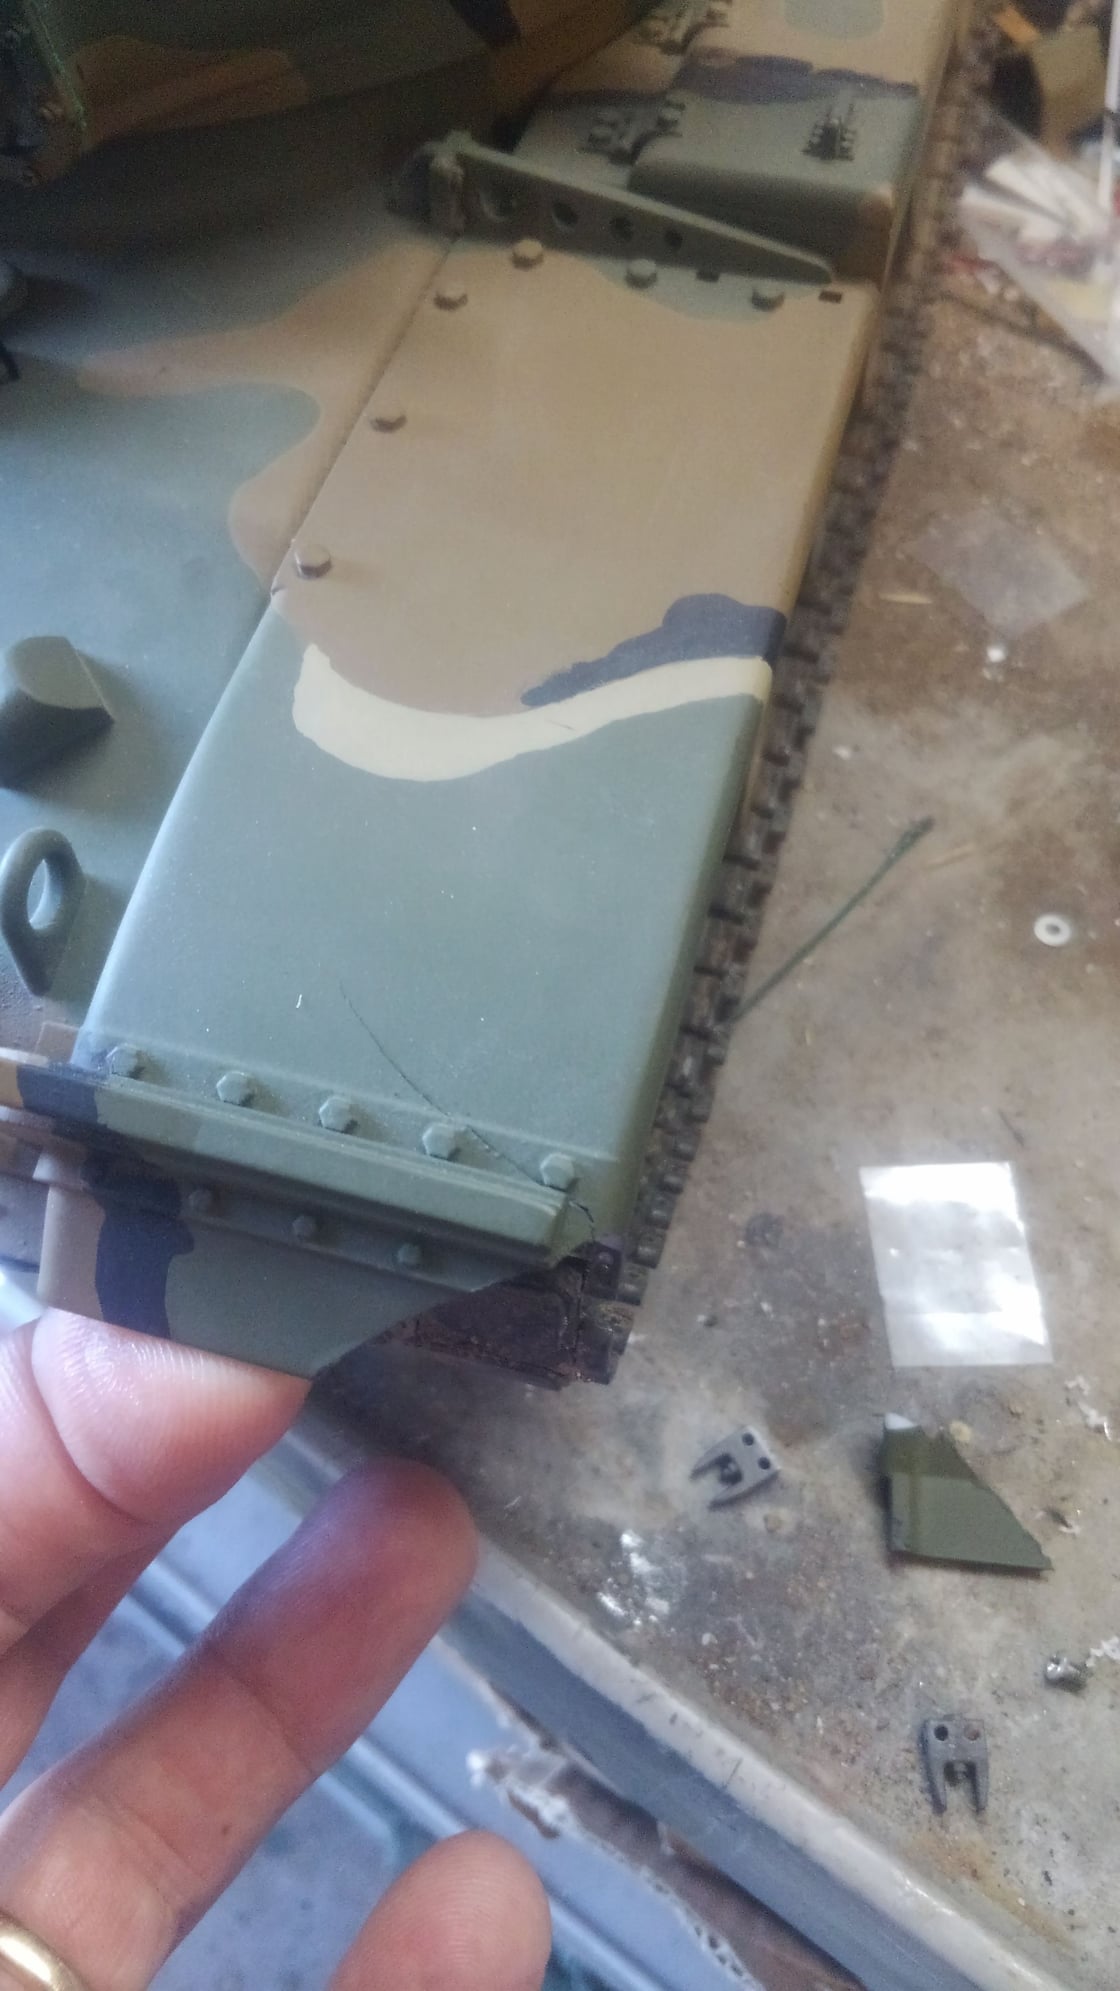
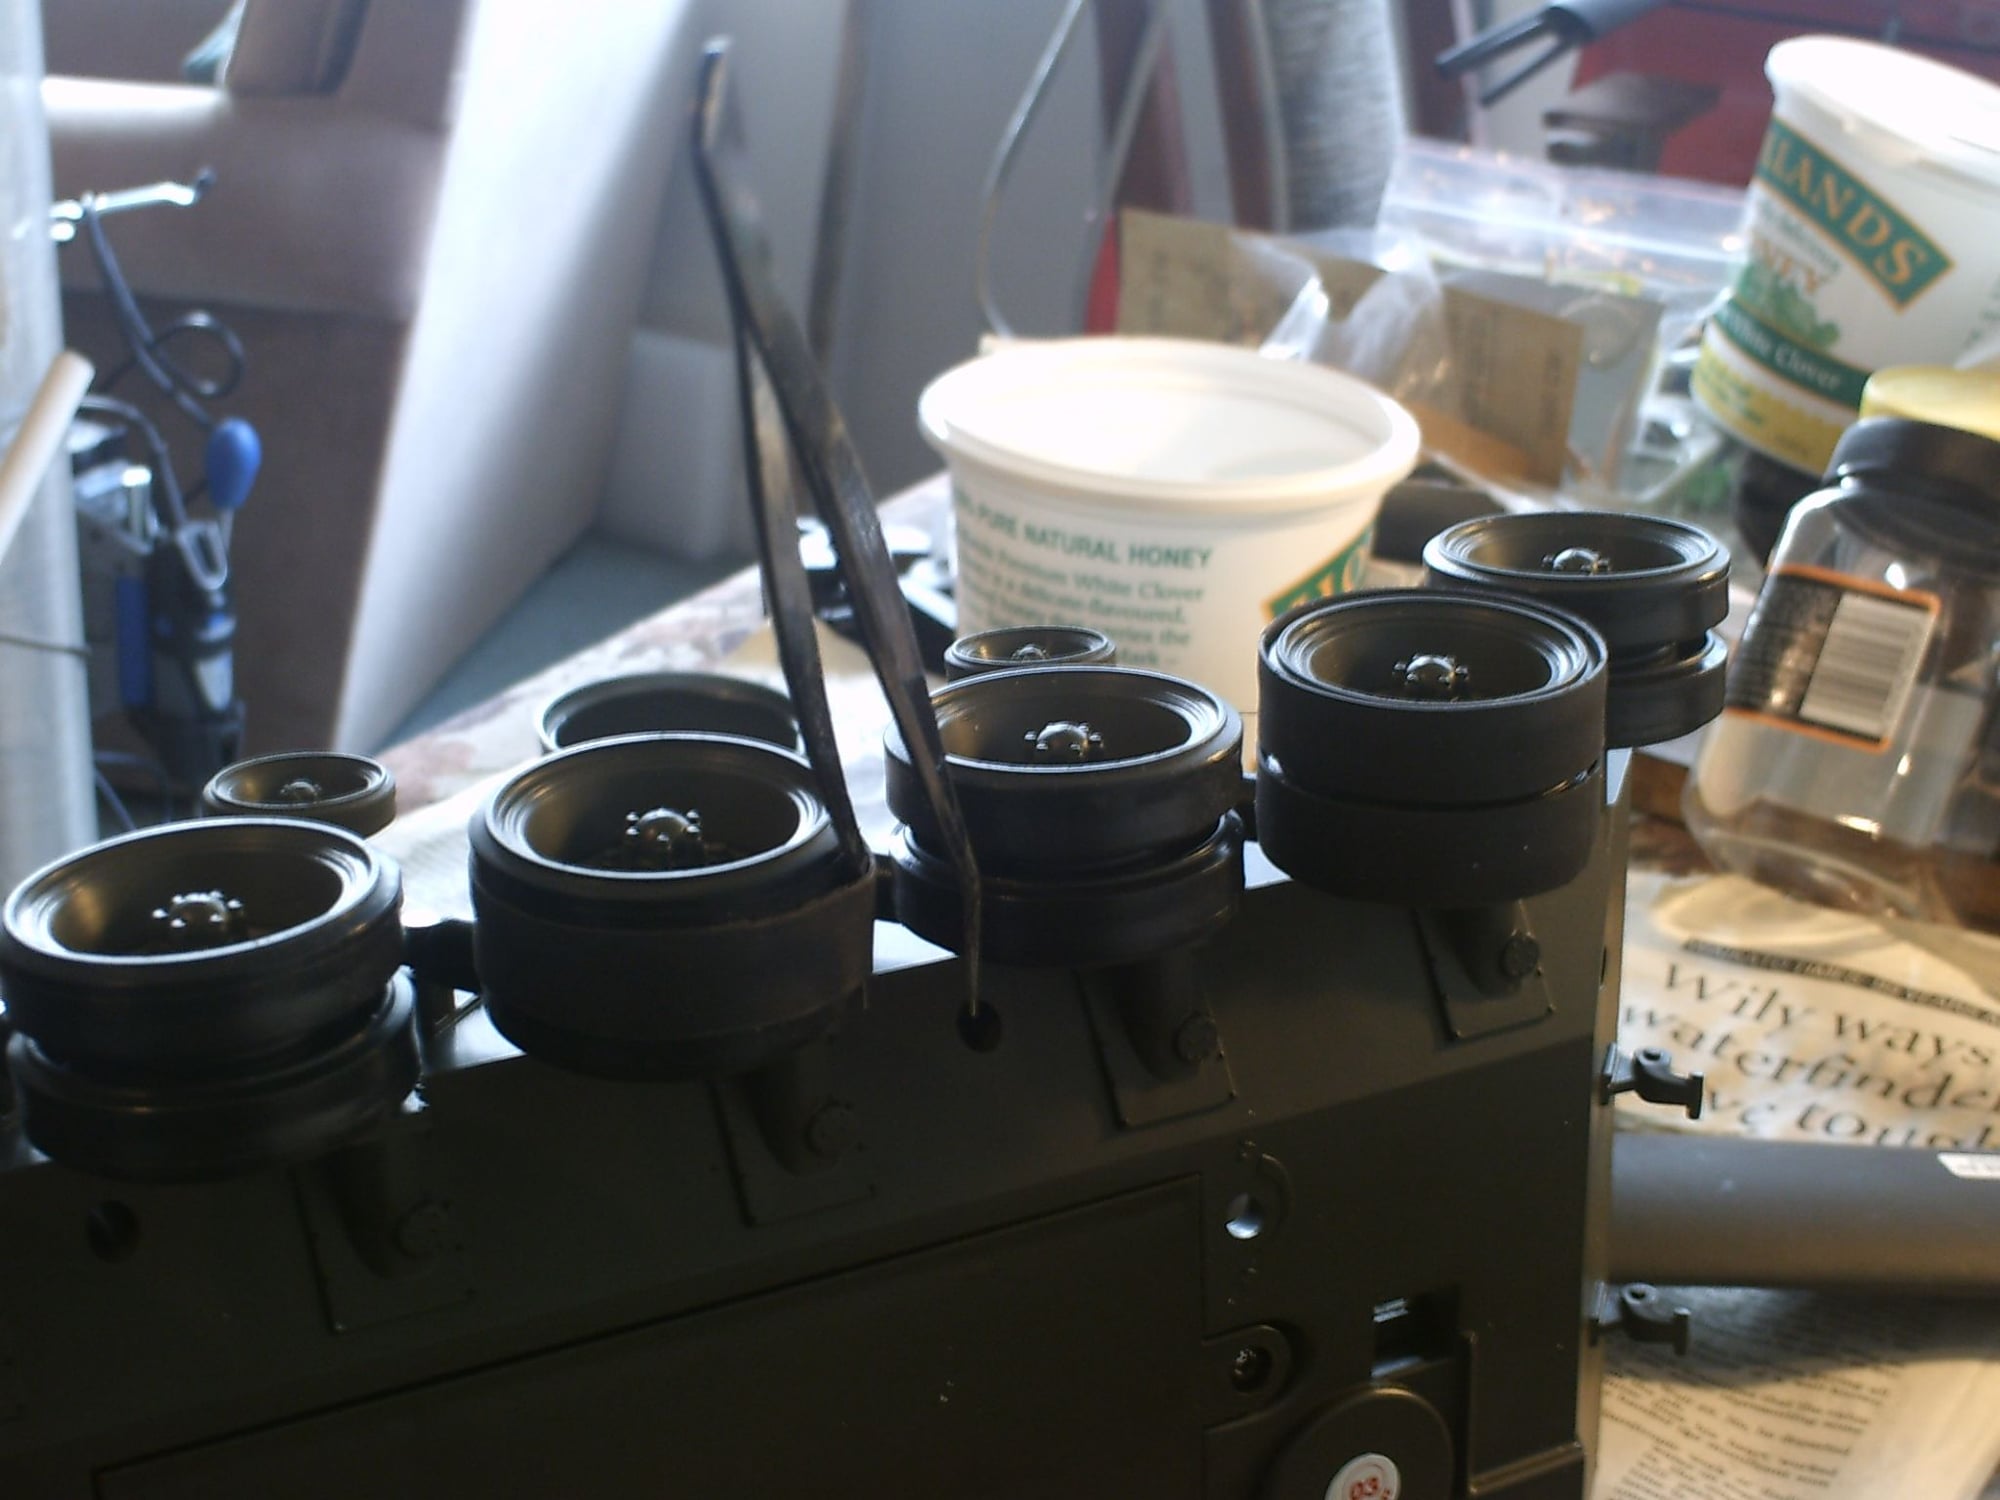
Well, I have been busy, so I haven't gotten to much of an update but now this one isn't good.
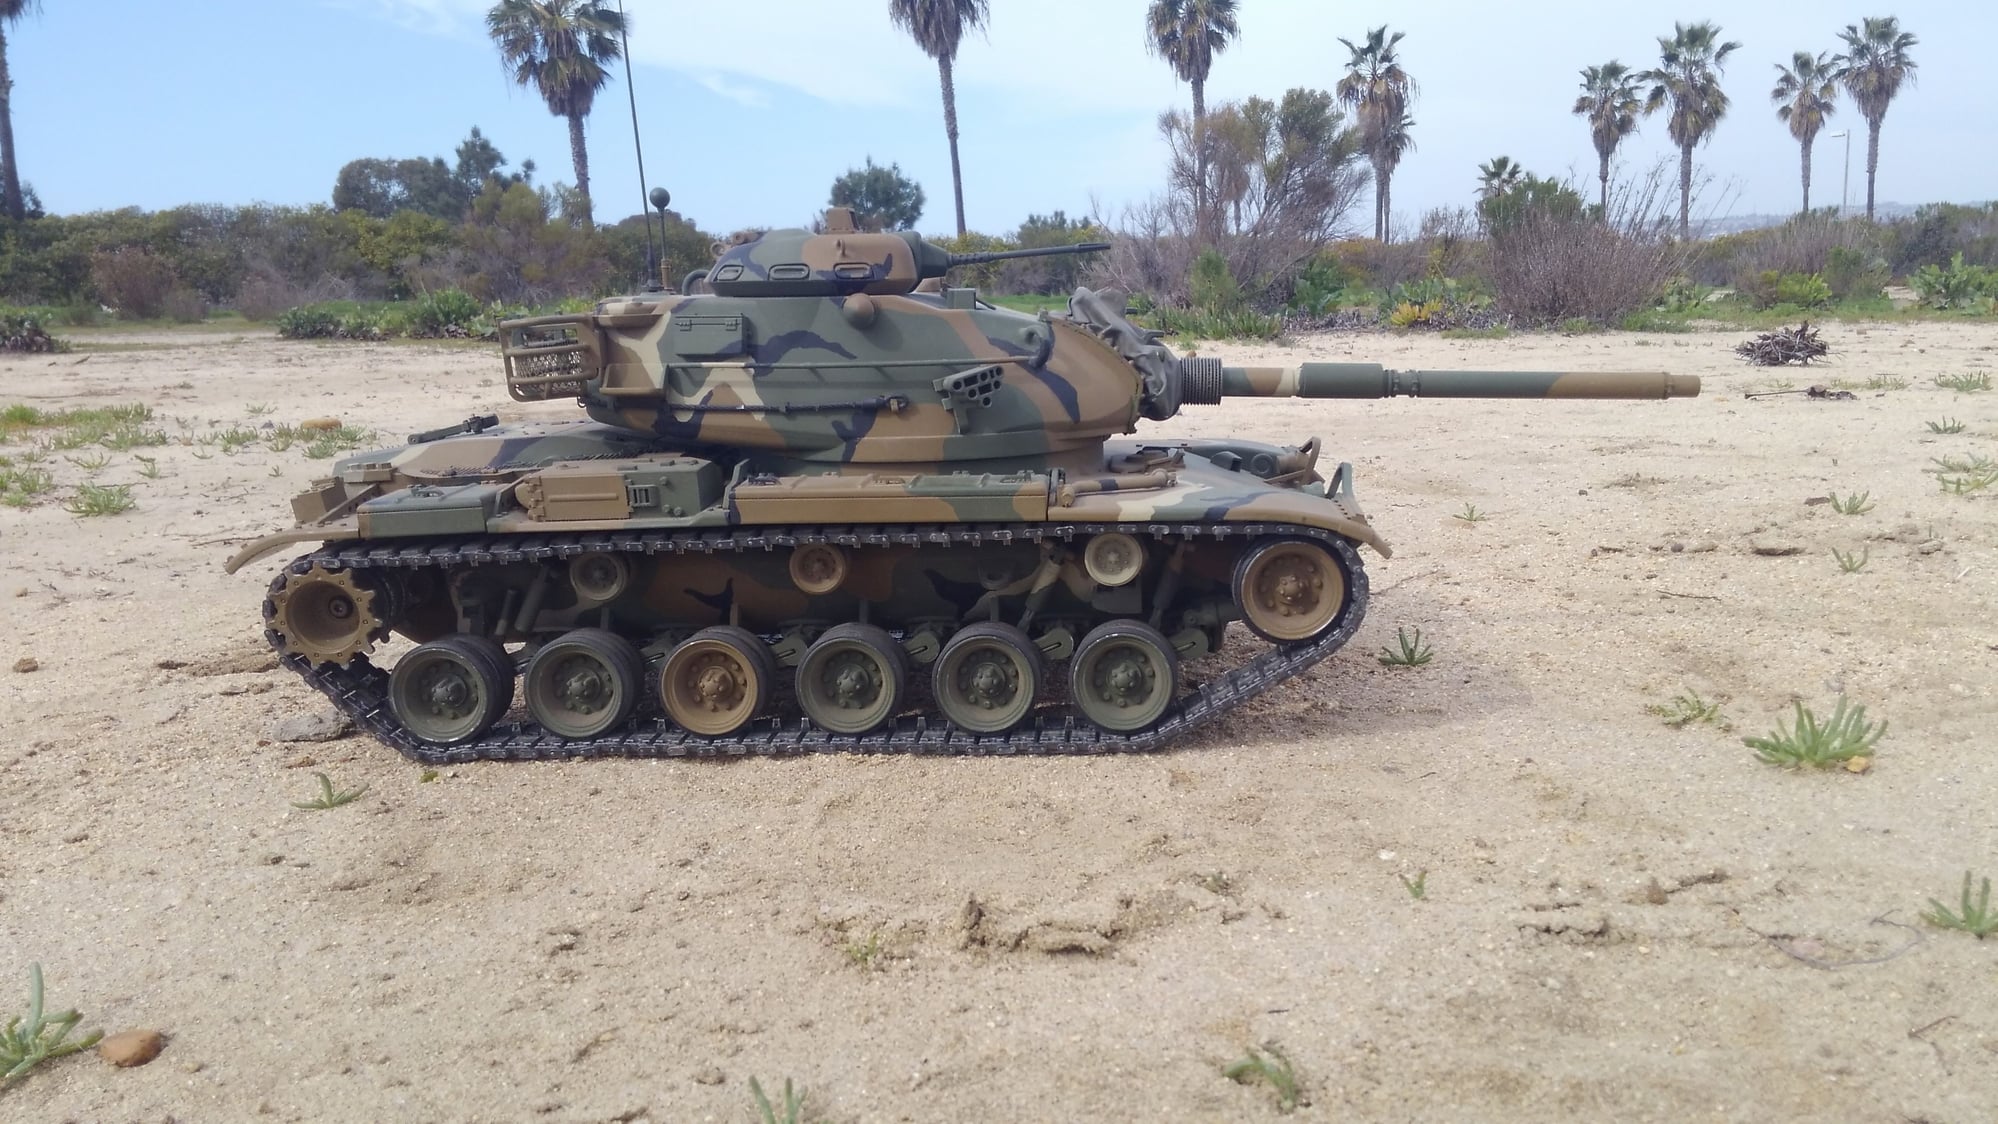
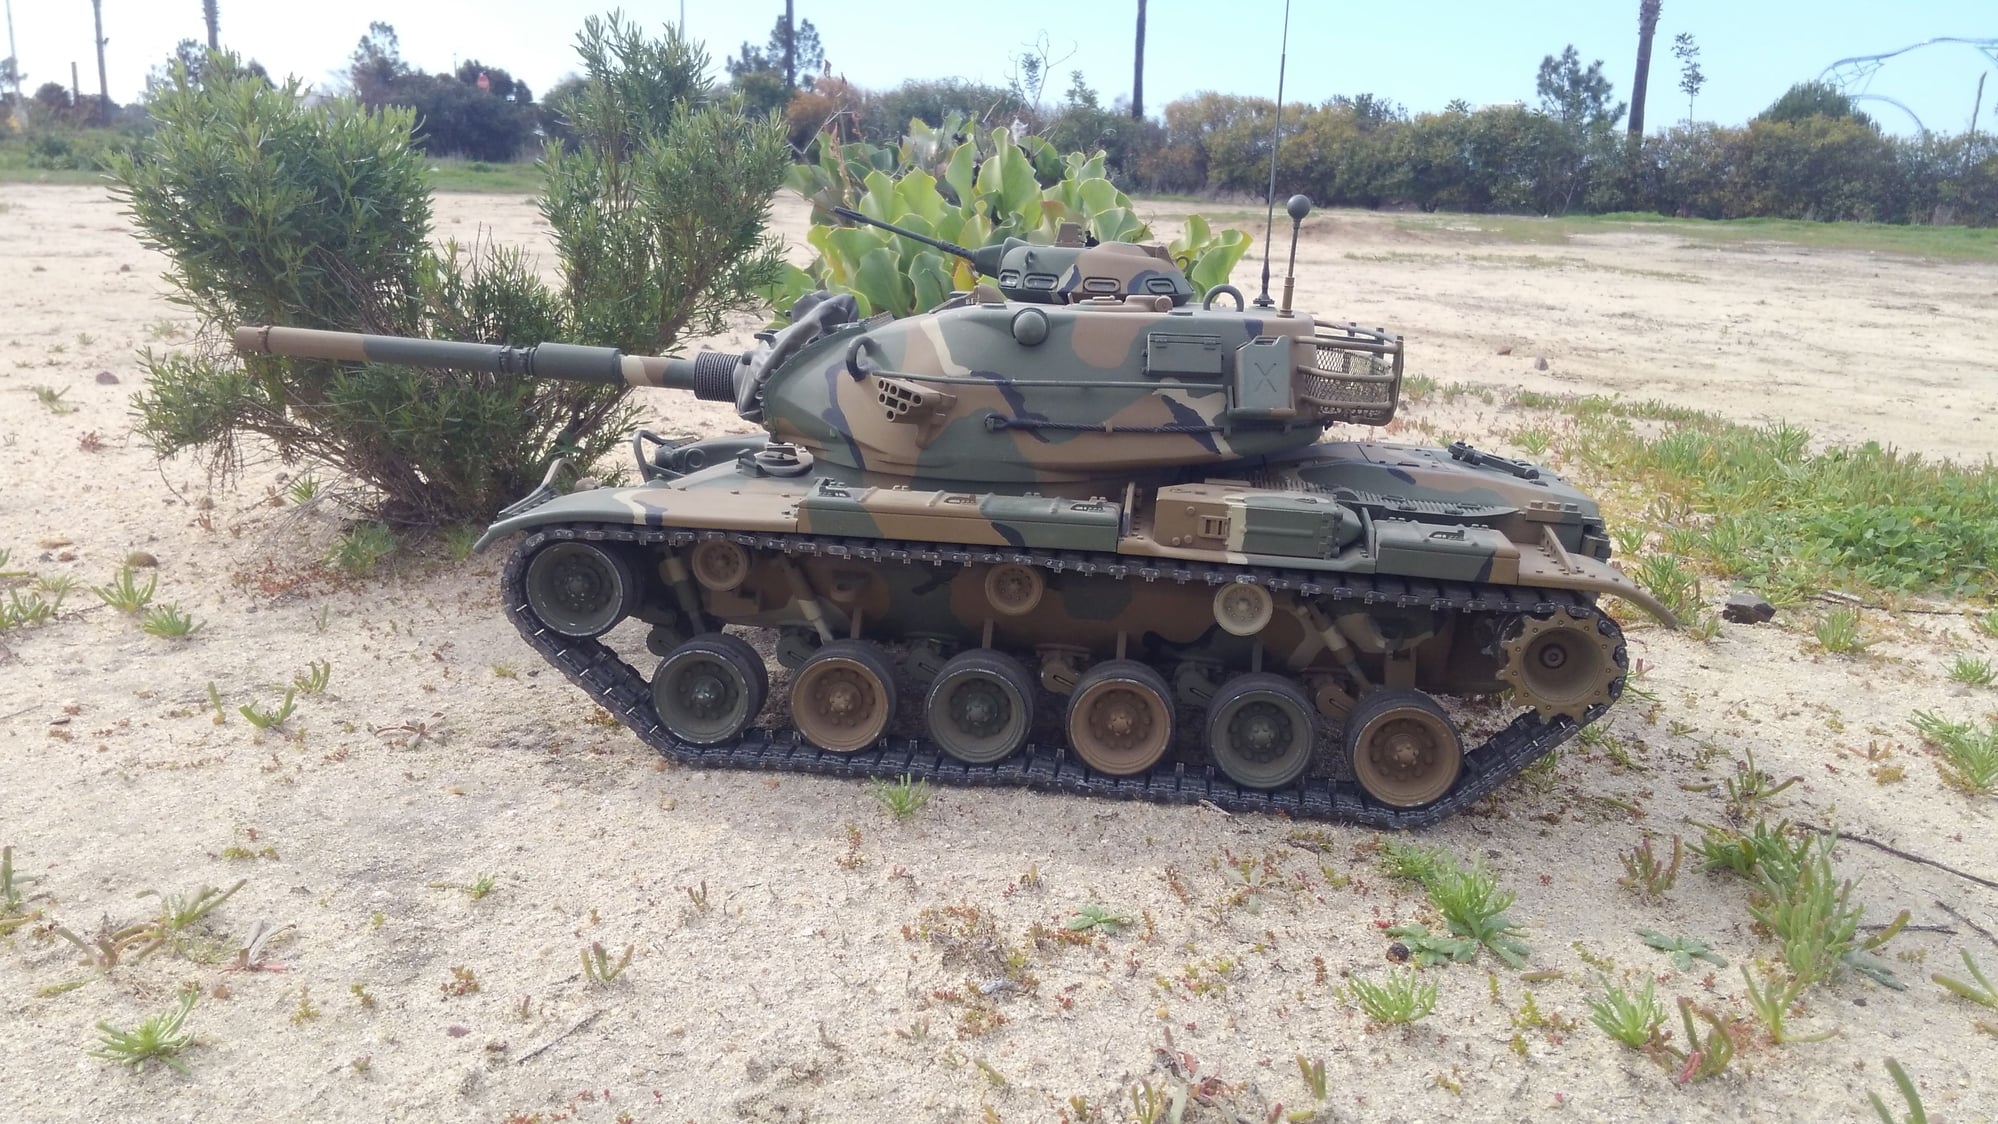
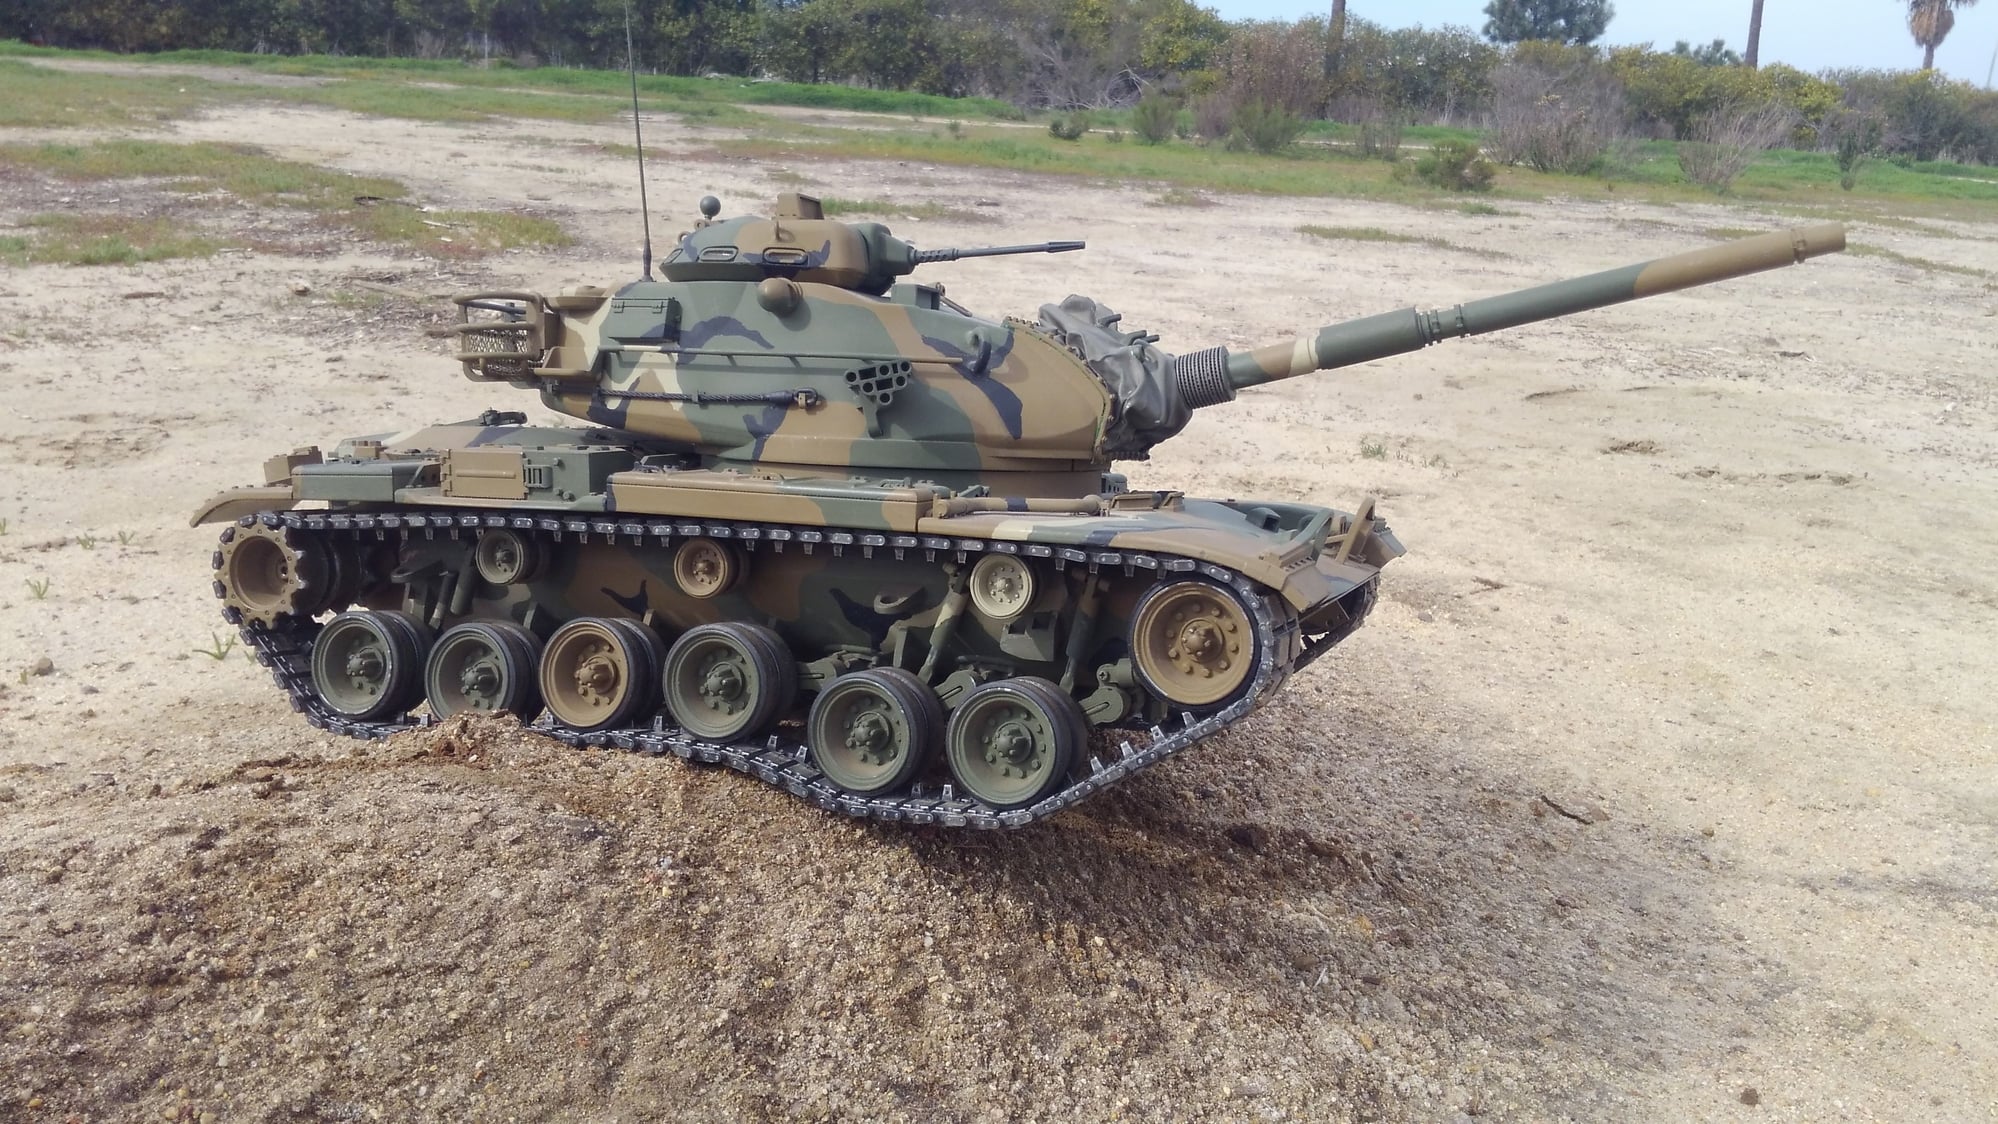
I finally settled on a color I thought matched the new color of the vinyl mantlet cover and got it painted. That is a big relief because I really like how it came out.
The bad news is this 3D printed plastic is just as susceptible to warping and brittle breaking as urethane is if you are familiar with that stuff.
I was driving around at an RC ship meet and ran into a folding table leg, not even at full speed and the front fender made a loud snap and my heart sank as I saw what I did.
The fender snapped off back beyond the angle bracing and a big crack followed back into the fender. Luckliy the broken off part was lying there.
I glued it back on with CA and decided to strip off the paint underneath on both front fenders and lay in some sheet styrene to help reinforce where the long crack was. I also opted to do the rear fenders since they kinda hang out in space and if somebody hits me or I inadvertently back up into something in the heat of battle I don't want them to snap off.
I intend to lay up another sheet of styrene going forward over the one I already laid in, and carry it over the printed material, but I have decided to cut off the printed on rubber mud guards, and make new ones out of army truck tire innertube rubber. This will reduce the hard plastic forward projection beyond the tracks and bow, and create some rubber cushion incase I hit something again, and the real ones are rubber any way so why not dot it.
The other drag, every time I back in a turn the left track comes off the front idler. In disscussions with John, FASTTANKS here on the forum, we suspect this is because the right side idler has the trailing wheel closer than on the left, due to the design of the staggering in the torsion bars. We also have a theory that the track guide horn may be gripping the side of the rubber wheel on the idler and then riding up onto the wheel, or possibly ridding on the metal lip edge of the inside of the outside idler wheel. Going to take some time to do some modding on it but its still not ready to be driven in battle yet if I cant keep the tracks on. I have thrown the rear a few times but nothing really consistent or major to note.
12-11-2018, 06:05 AM
#84
Hey Rich, Your M60 looks super cool in that paint job. You have done an amazing job finishing it.
I broke the fender on my HL Abrams like like that. It did not crack as far back, but the part that is supposed to be rubber broke totally off. I re glued it, but it did not last very long. I ended up replacing both sides with bicycle iner tube rubber. Now when I crash into stuff, I still do that from time to time, it hits on the rubber and doesn't break off. It also looks better than painted plastic, and is naturally weathering just like the real thing.
I broke the fender on my HL Abrams like like that. It did not crack as far back, but the part that is supposed to be rubber broke totally off. I re glued it, but it did not last very long. I ended up replacing both sides with bicycle iner tube rubber. Now when I crash into stuff, I still do that from time to time, it hits on the rubber and doesn't break off. It also looks better than painted plastic, and is naturally weathering just like the real thing.
12-11-2018, 10:26 AM
#85

Join Date: Jul 2013
Location: Palm, PA
Posts: 70
Likes: 0
Received 0 Likes
on
0 Posts
It's a beautiful tank, I was hoping that it disprove my own doubts of 3d printed plastic strength. I have only used 3d printed items for details that are not structural a few times. In your case I would worry that as you strengthen one piece or area of the tank, it would then show the weakness of another, causing you to chase problems constantly. I really hope that is not the case though, especially due to your financial investment into this thing already.
01-04-2019, 04:29 PM
#86
Thread Starter
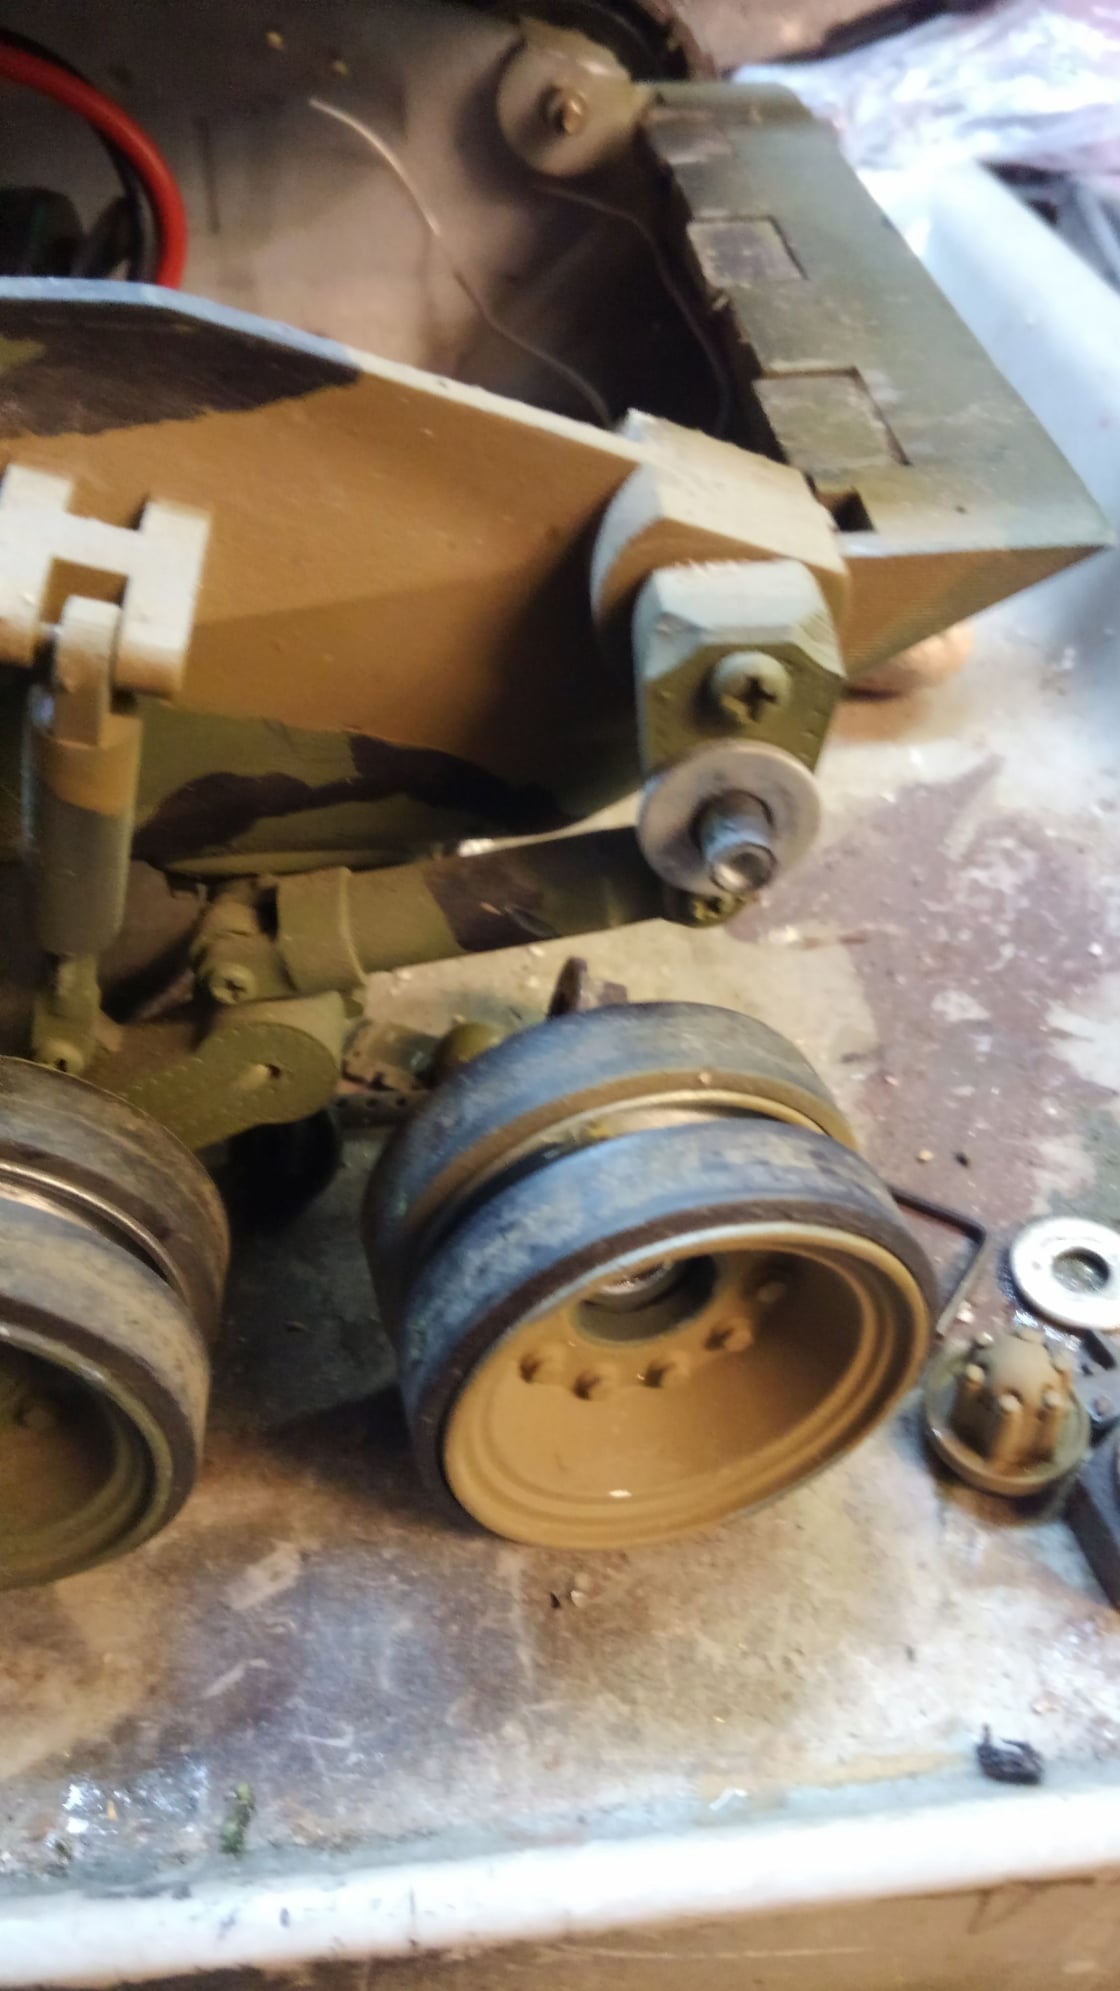
Still fighting track throwing issues. When I back and turn the first torsion arm wheel comes up over the guide teeth and then the track goes off its normal path and rides up the idler and comes off. I cannot back up and turn even slightly.
I believe the rubber metal dklm track has too much grip to the ground for our scale so that the track will not slide at all on the dirt during the turn. The tank is either not heavy enough to put enough ground pressure on the wheels to keep the track on in place during a backing turn or the guide teeth are too short, which I do suspect is a problem.
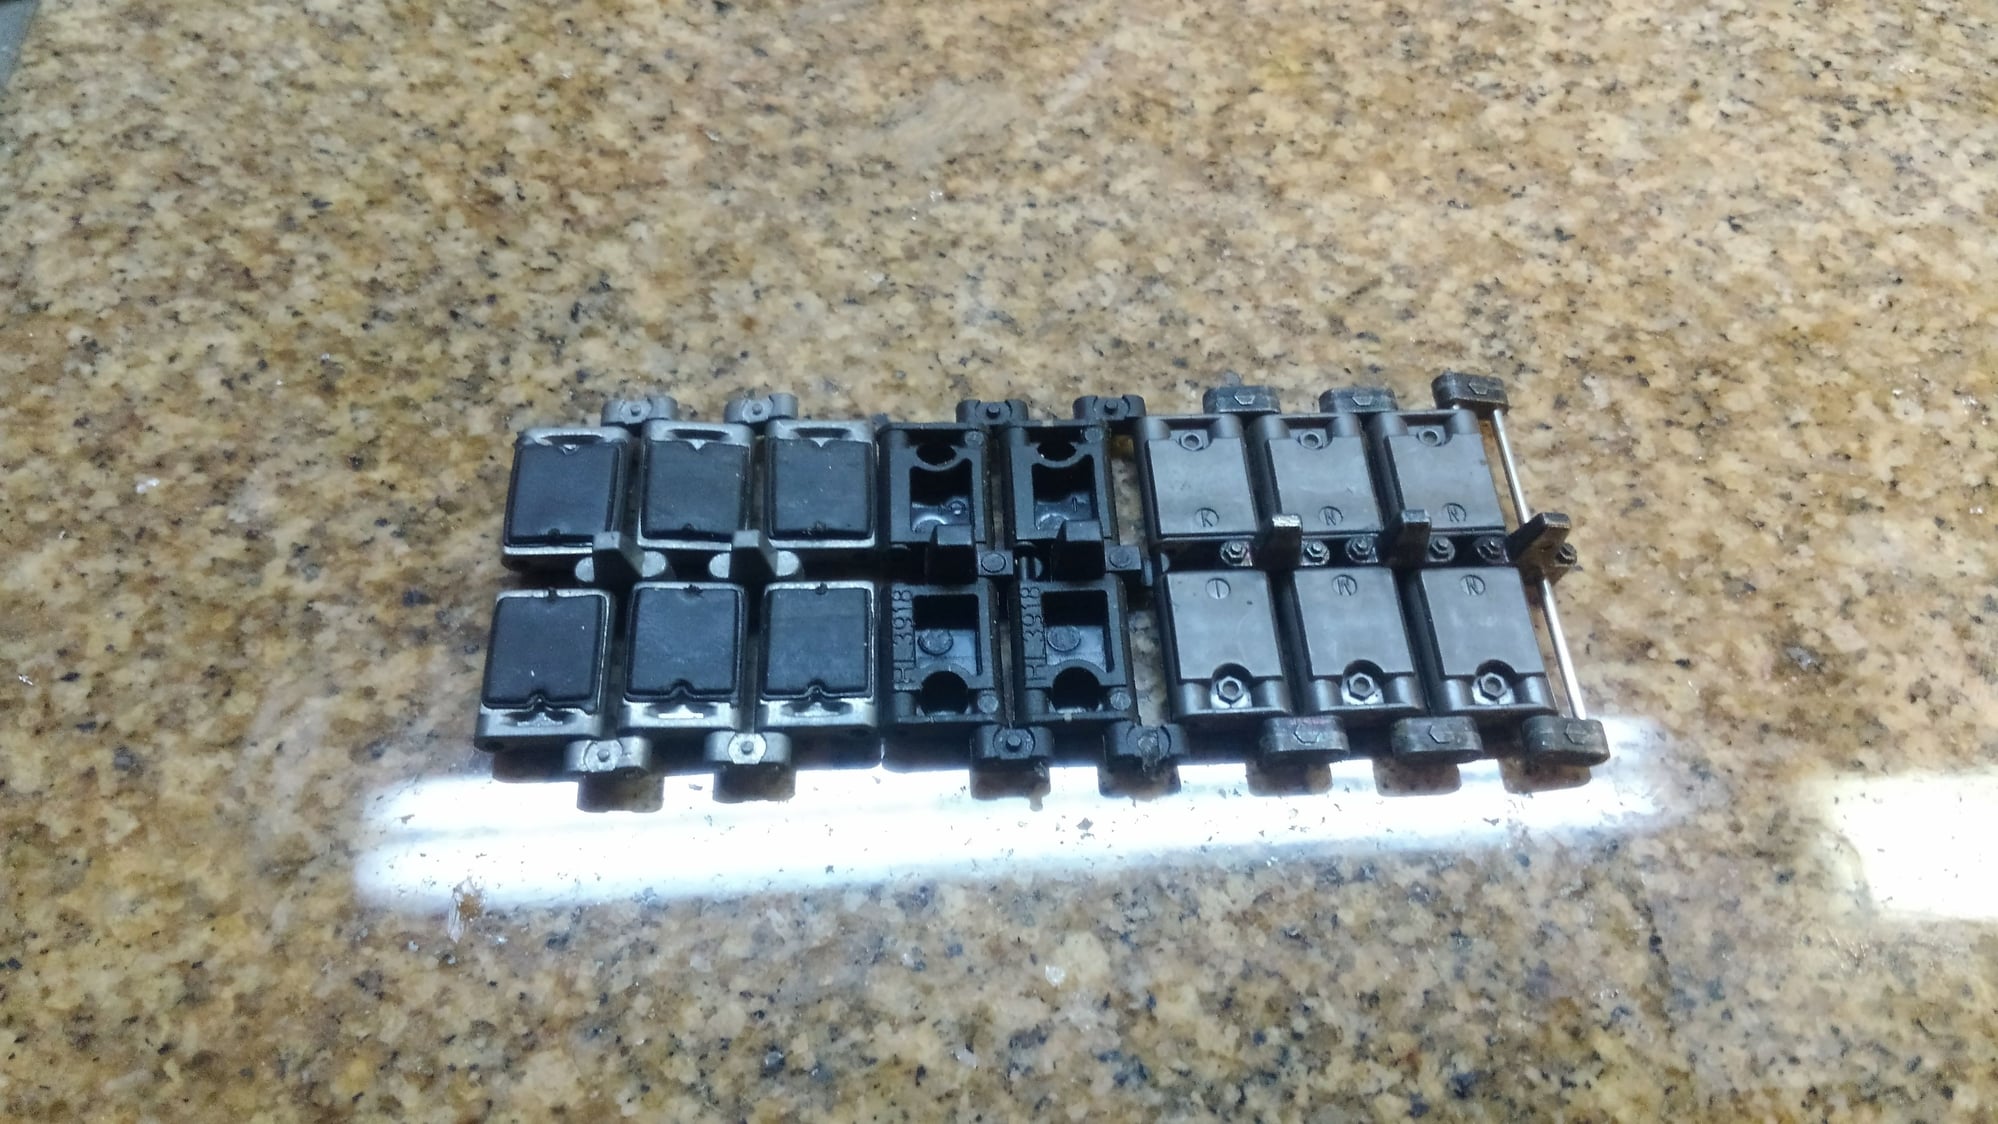
I am going to try the plastic track next and see what happens.
On John Fasttanks suggestion, I checked the depth of the idler wheel and found it was too far inboard. It needed to be moved outward the thickness of a washer for thrust.
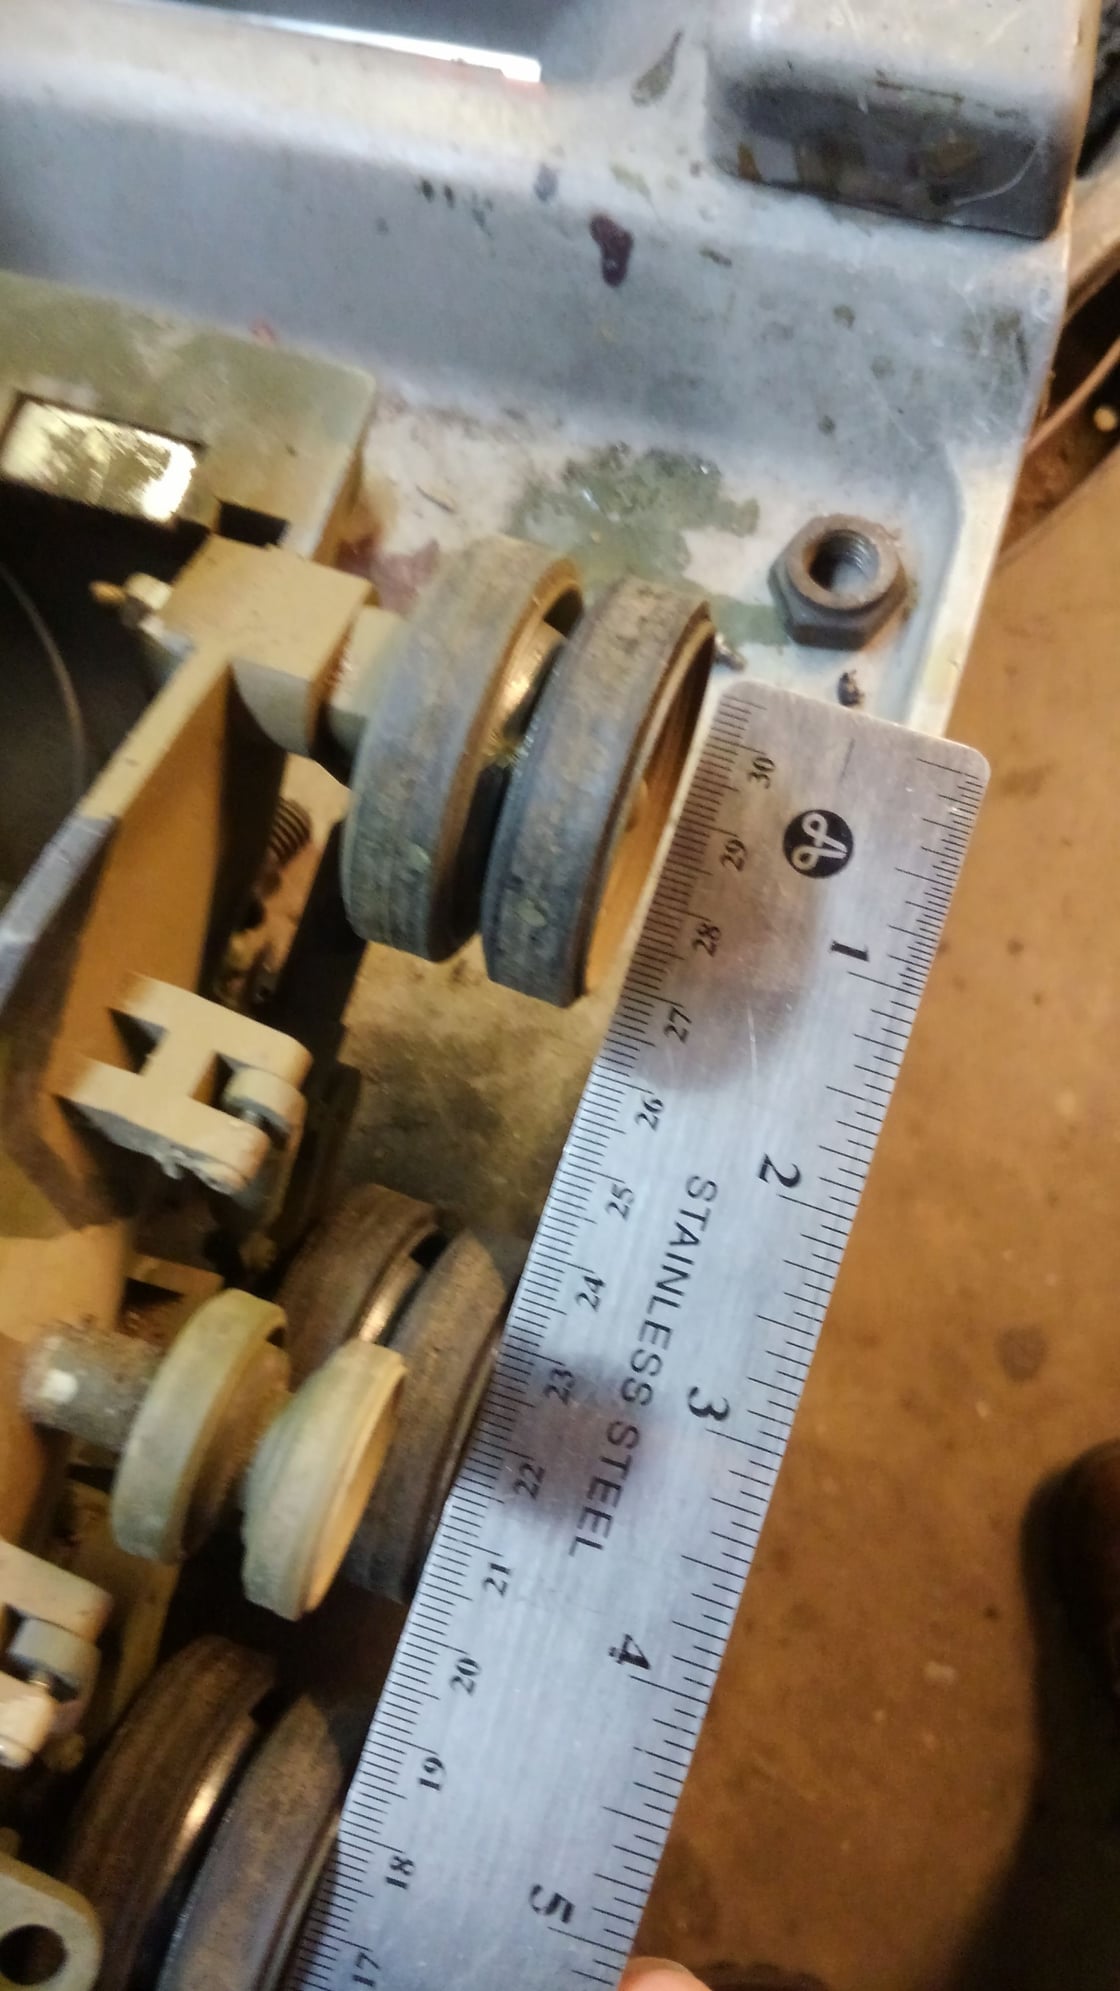
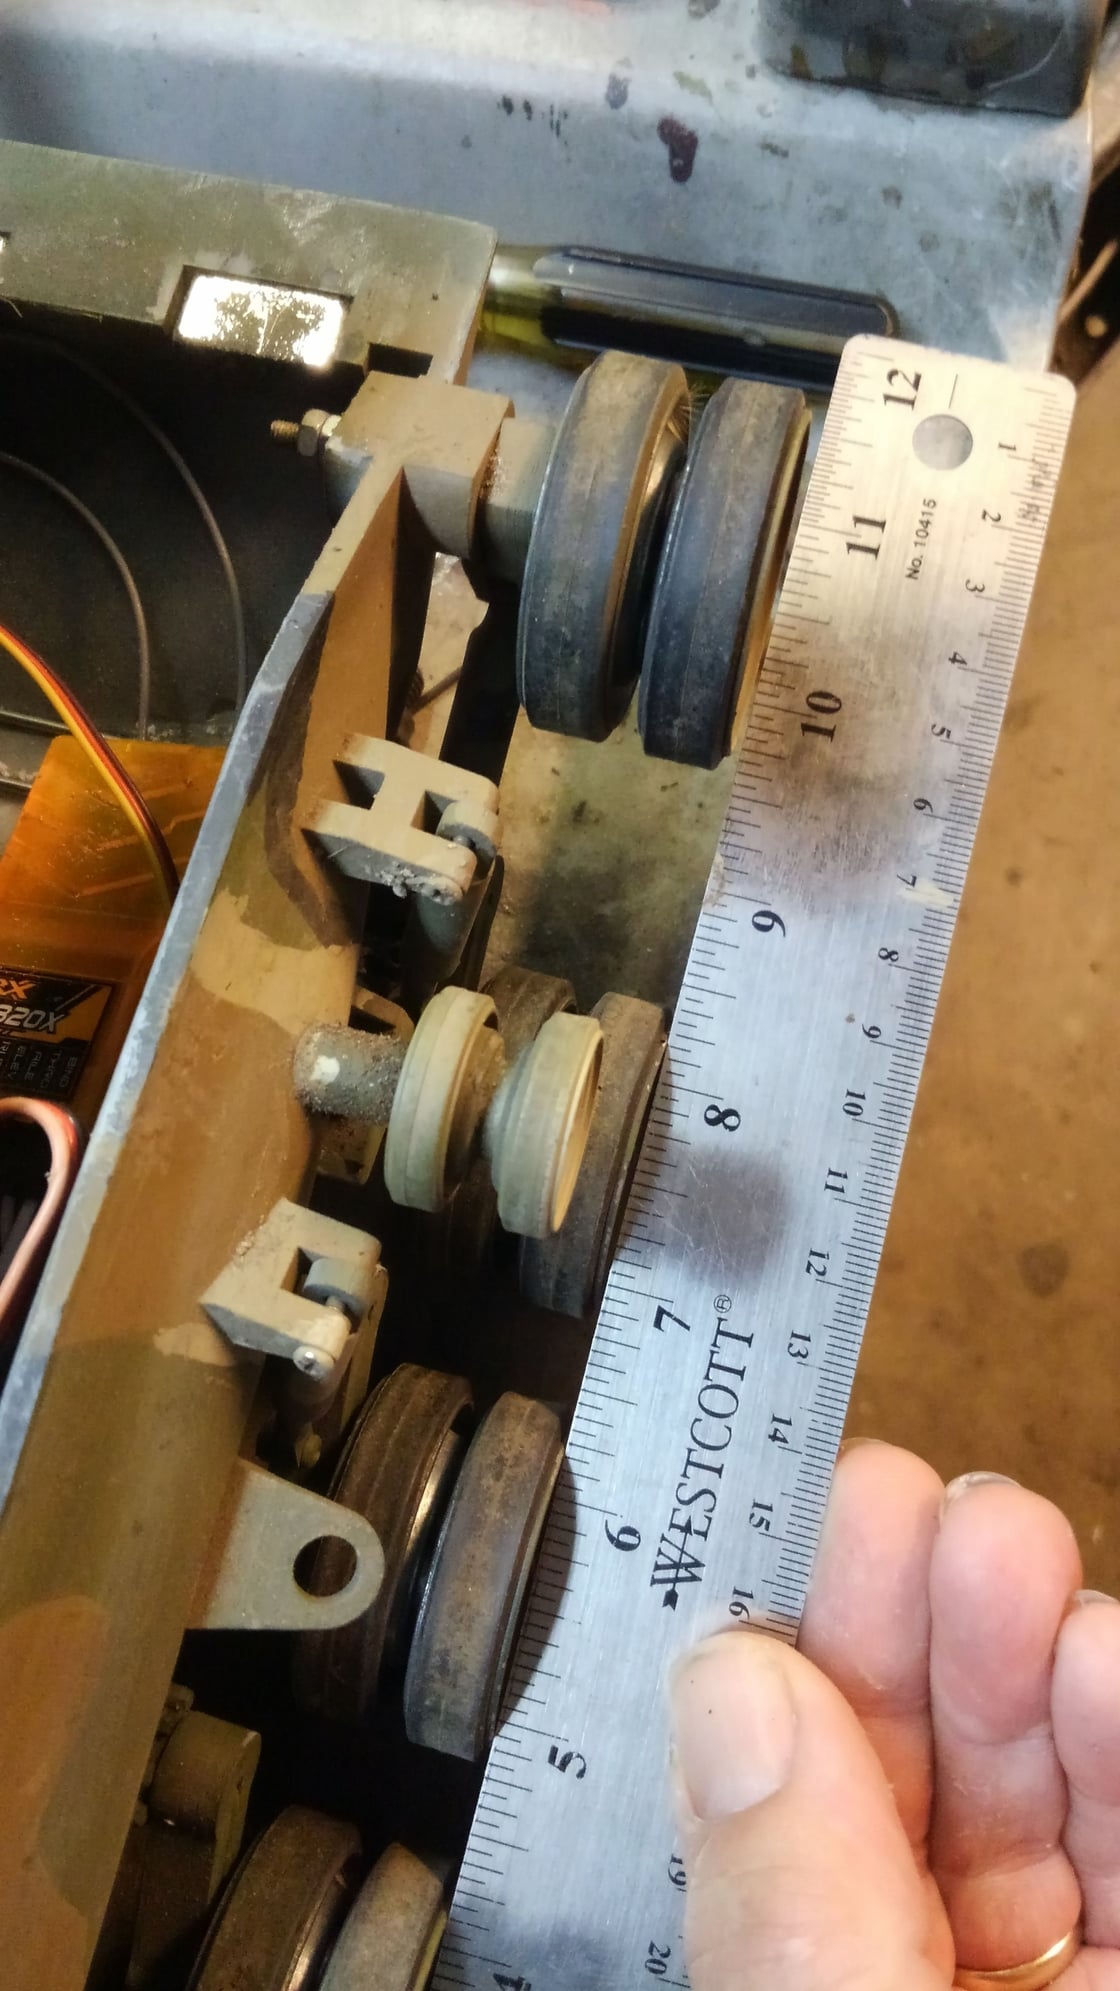
I believe the rubber metal dklm track has too much grip to the ground for our scale so that the track will not slide at all on the dirt during the turn. The tank is either not heavy enough to put enough ground pressure on the wheels to keep the track on in place during a backing turn or the guide teeth are too short, which I do suspect is a problem.
I am going to try the plastic track next and see what happens.
On John Fasttanks suggestion, I checked the depth of the idler wheel and found it was too far inboard. It needed to be moved outward the thickness of a washer for thrust.
01-30-2019, 07:31 PM
#87
Thread Starter
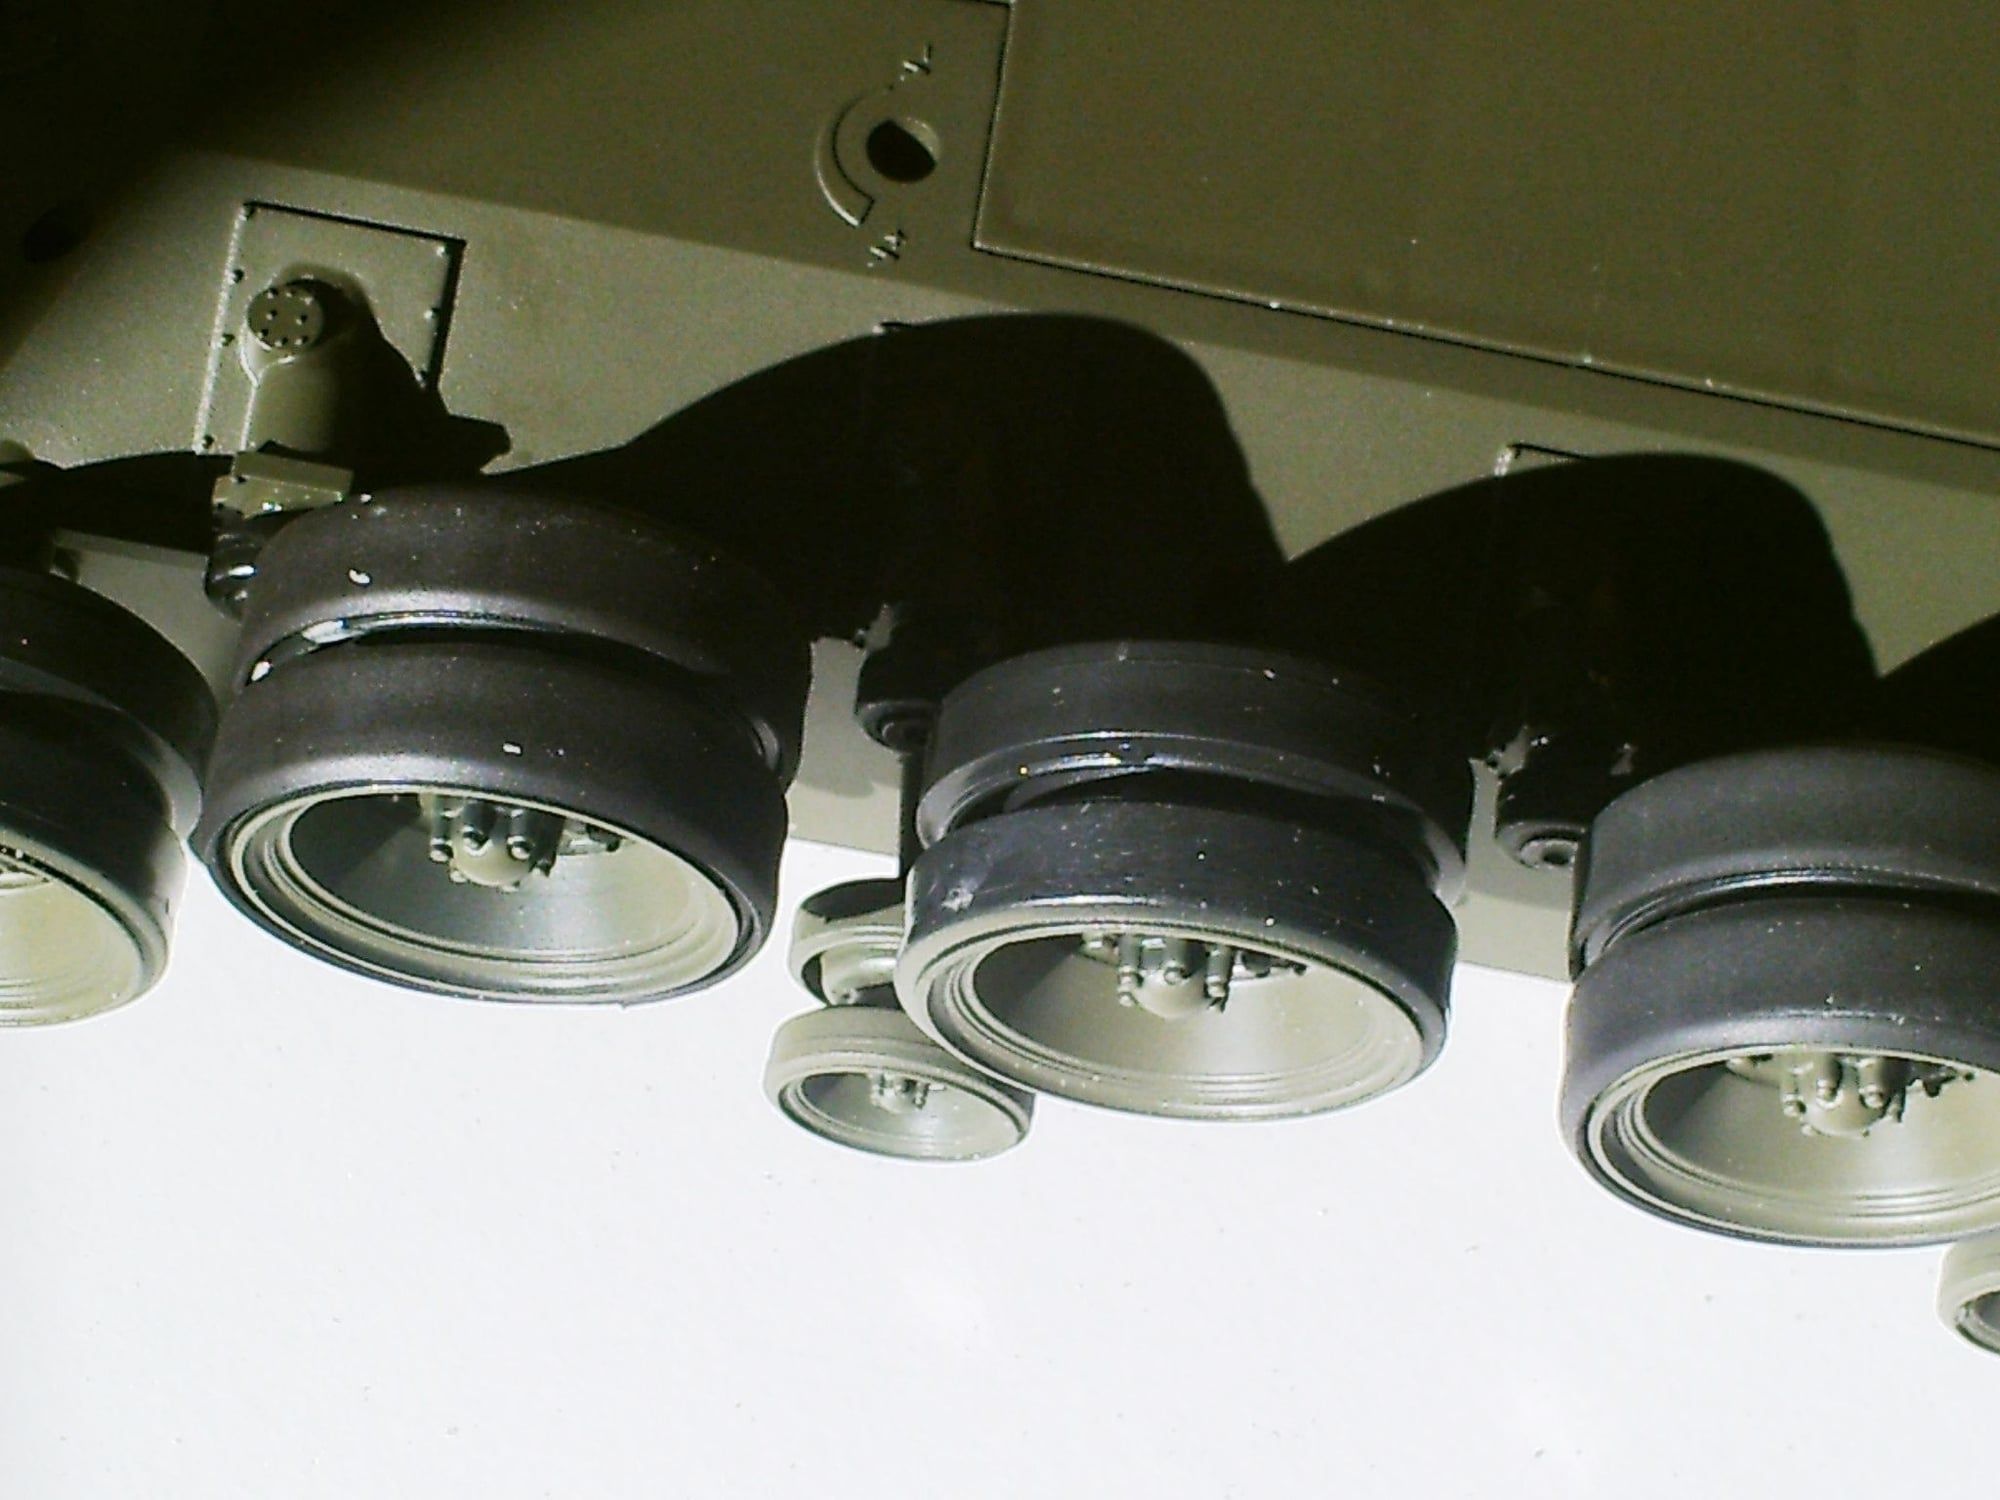
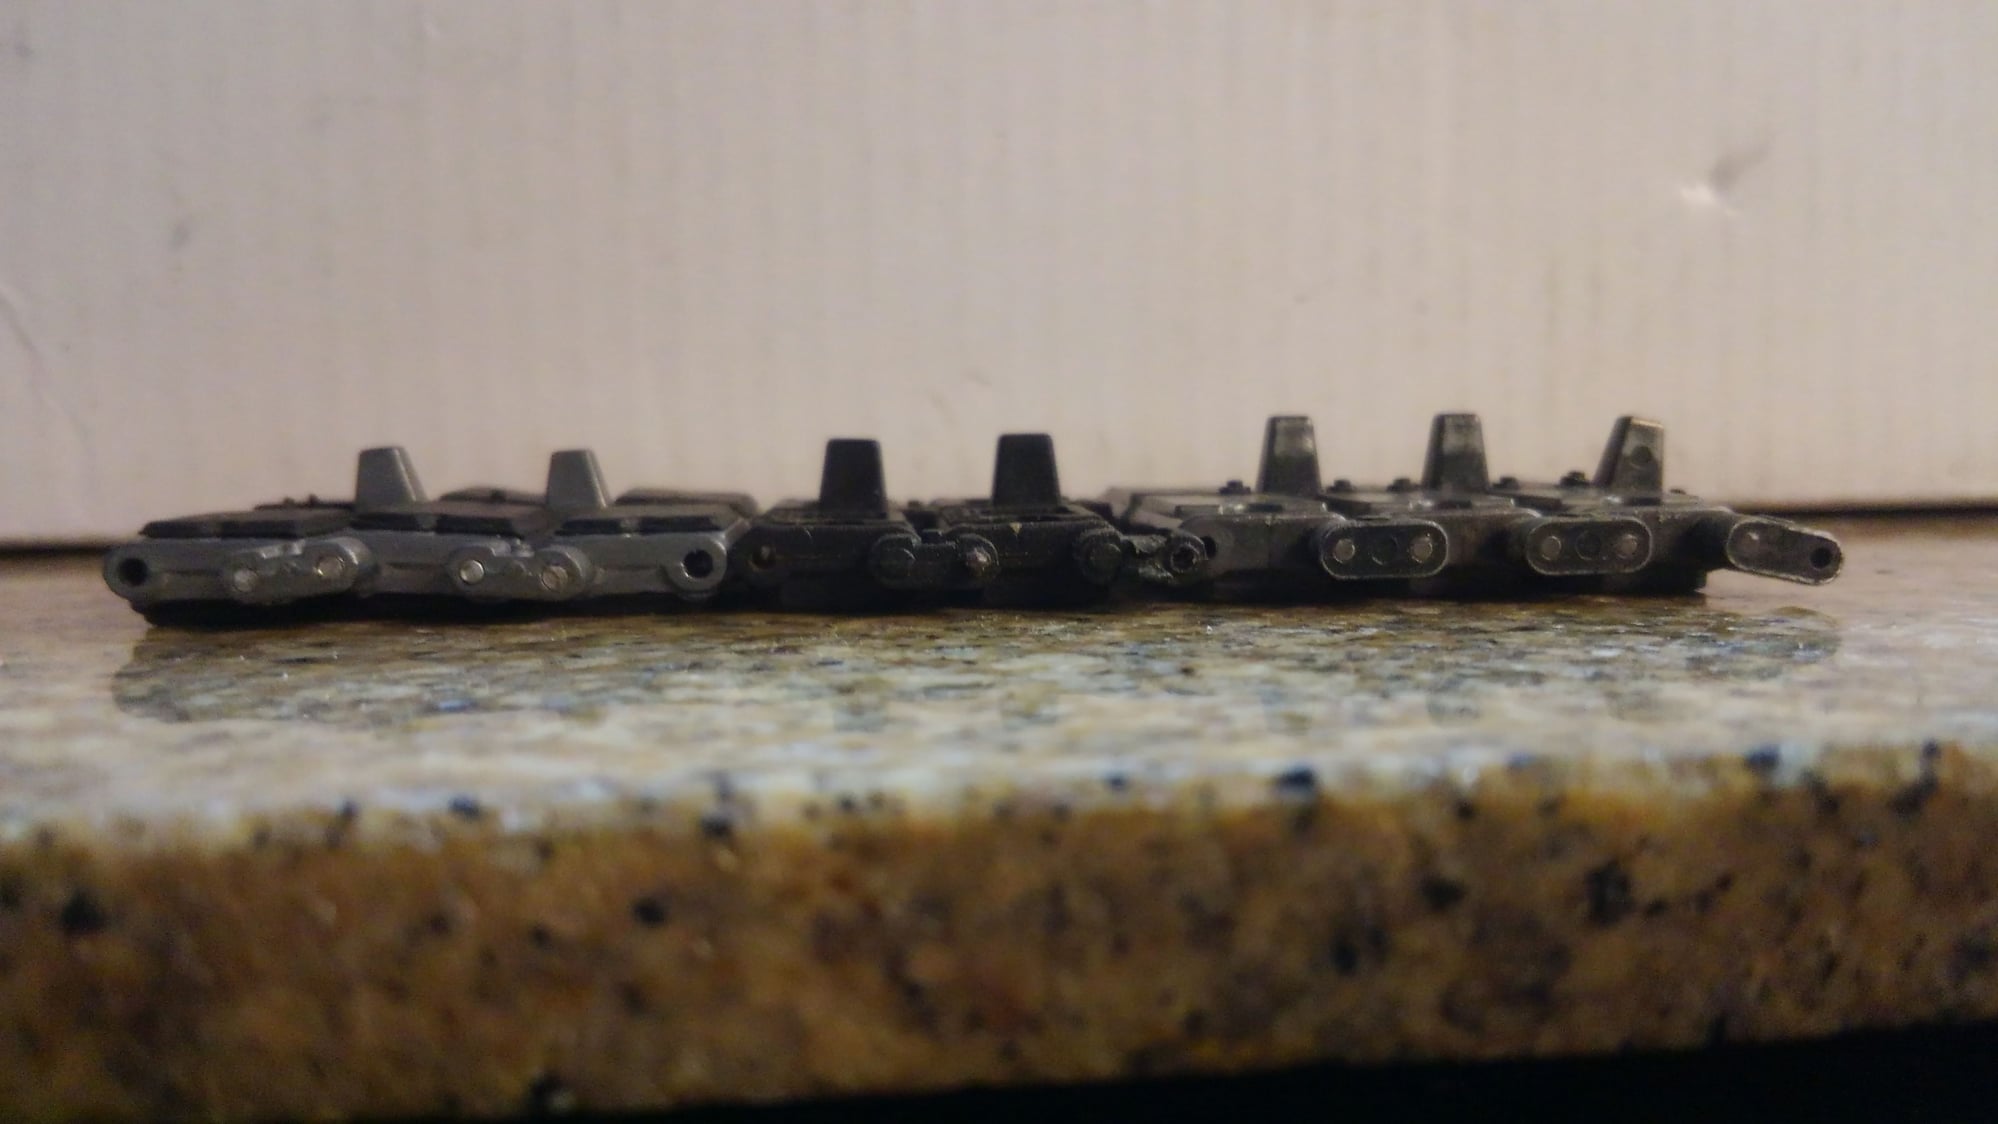
Its about time for an update to where I am with the tracks. In short I have the problem solved. The whole key is tall enough guide teeth, which the Henglong plastic tracks have but the dklm metal/rubber tracks do not.
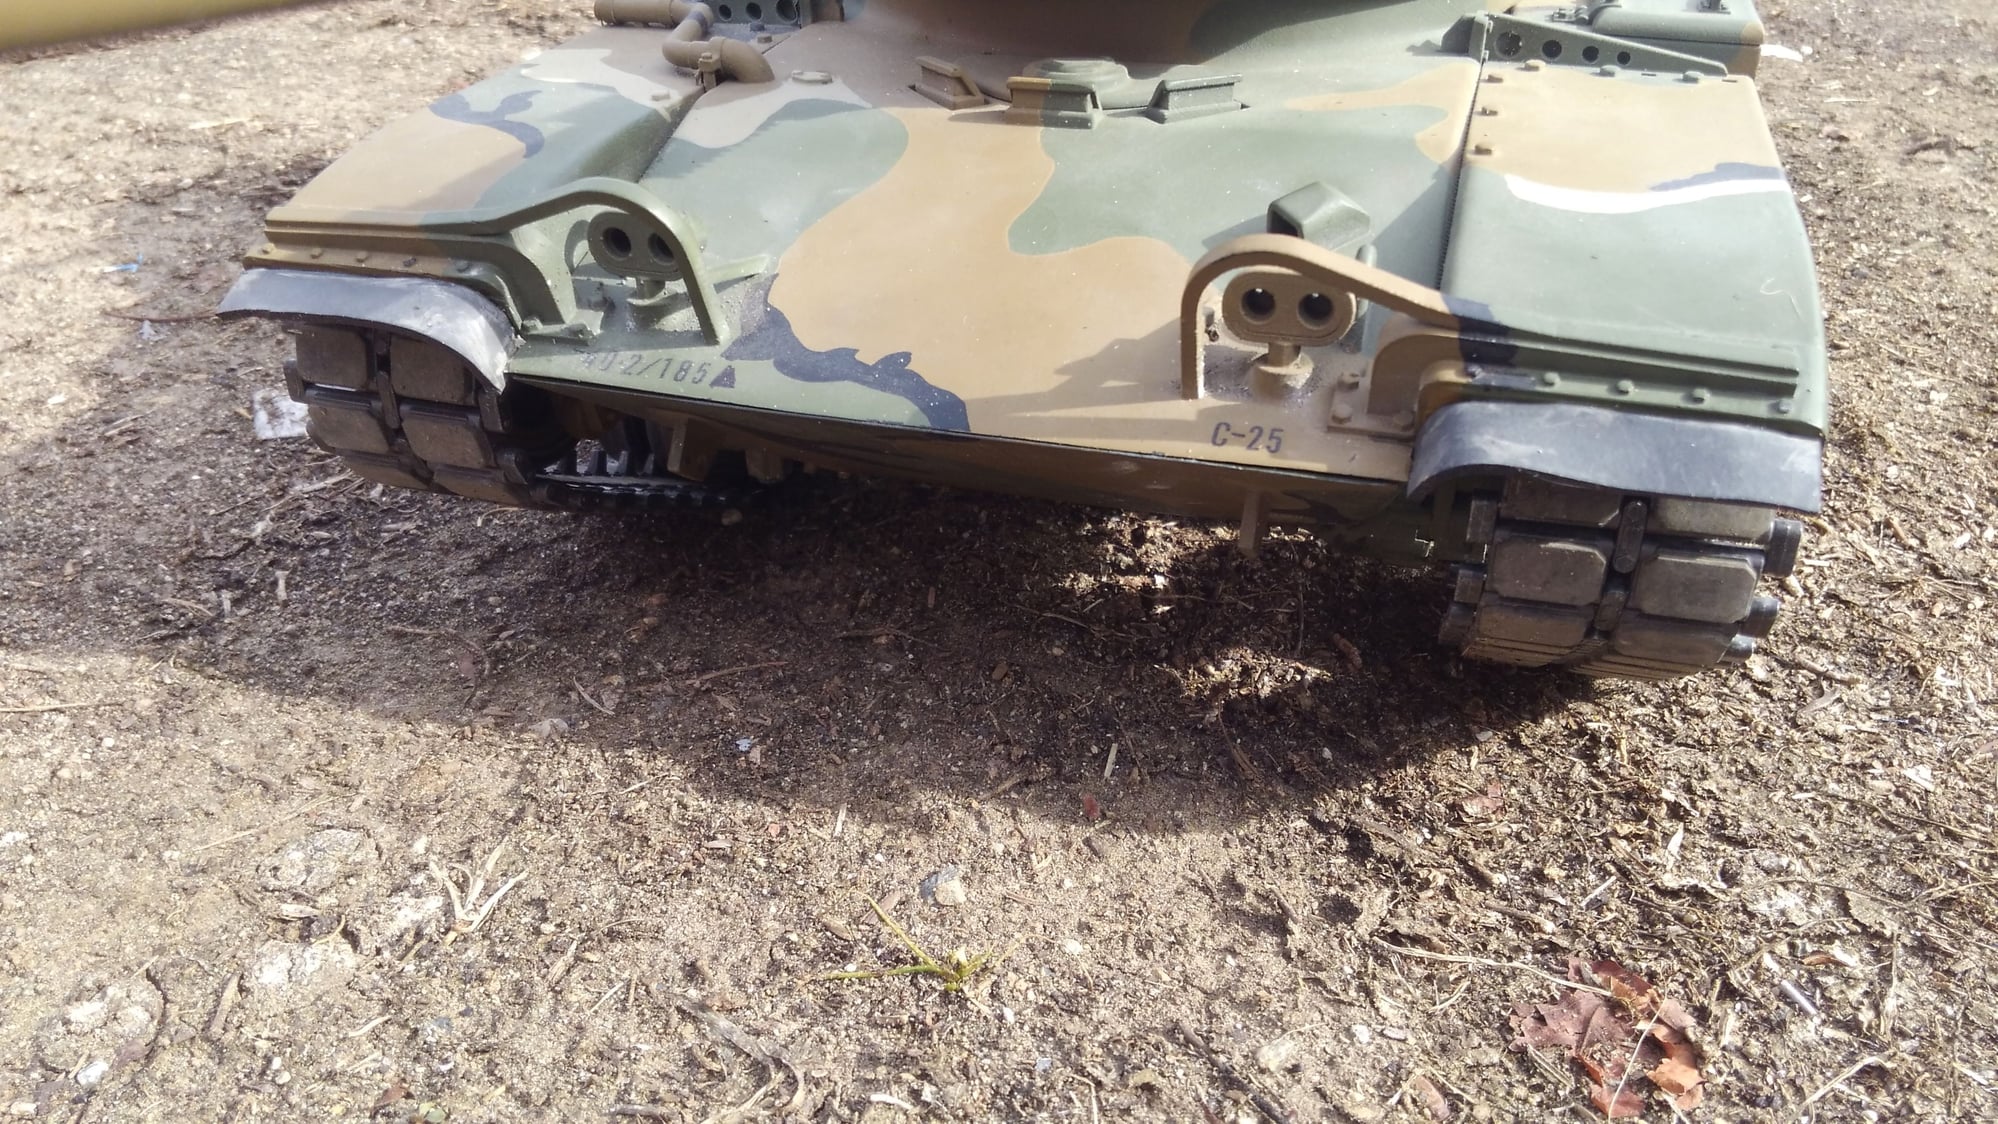
I borrowed a set of Tamiya Abrams tracks and put them on my tank. The left side fits fine, but the right side was too long, probably by half more or more of a track pad length. Taking one more out, the track would not fit safely on the suspension, so I had to put the one back. Long story short, the idler either needs to adjust tighter or be bigger. The solution came to wrapping the rubber tires of the idler wheel with 7 wraps of black electrical tape. Problem solved. You cannot tell.
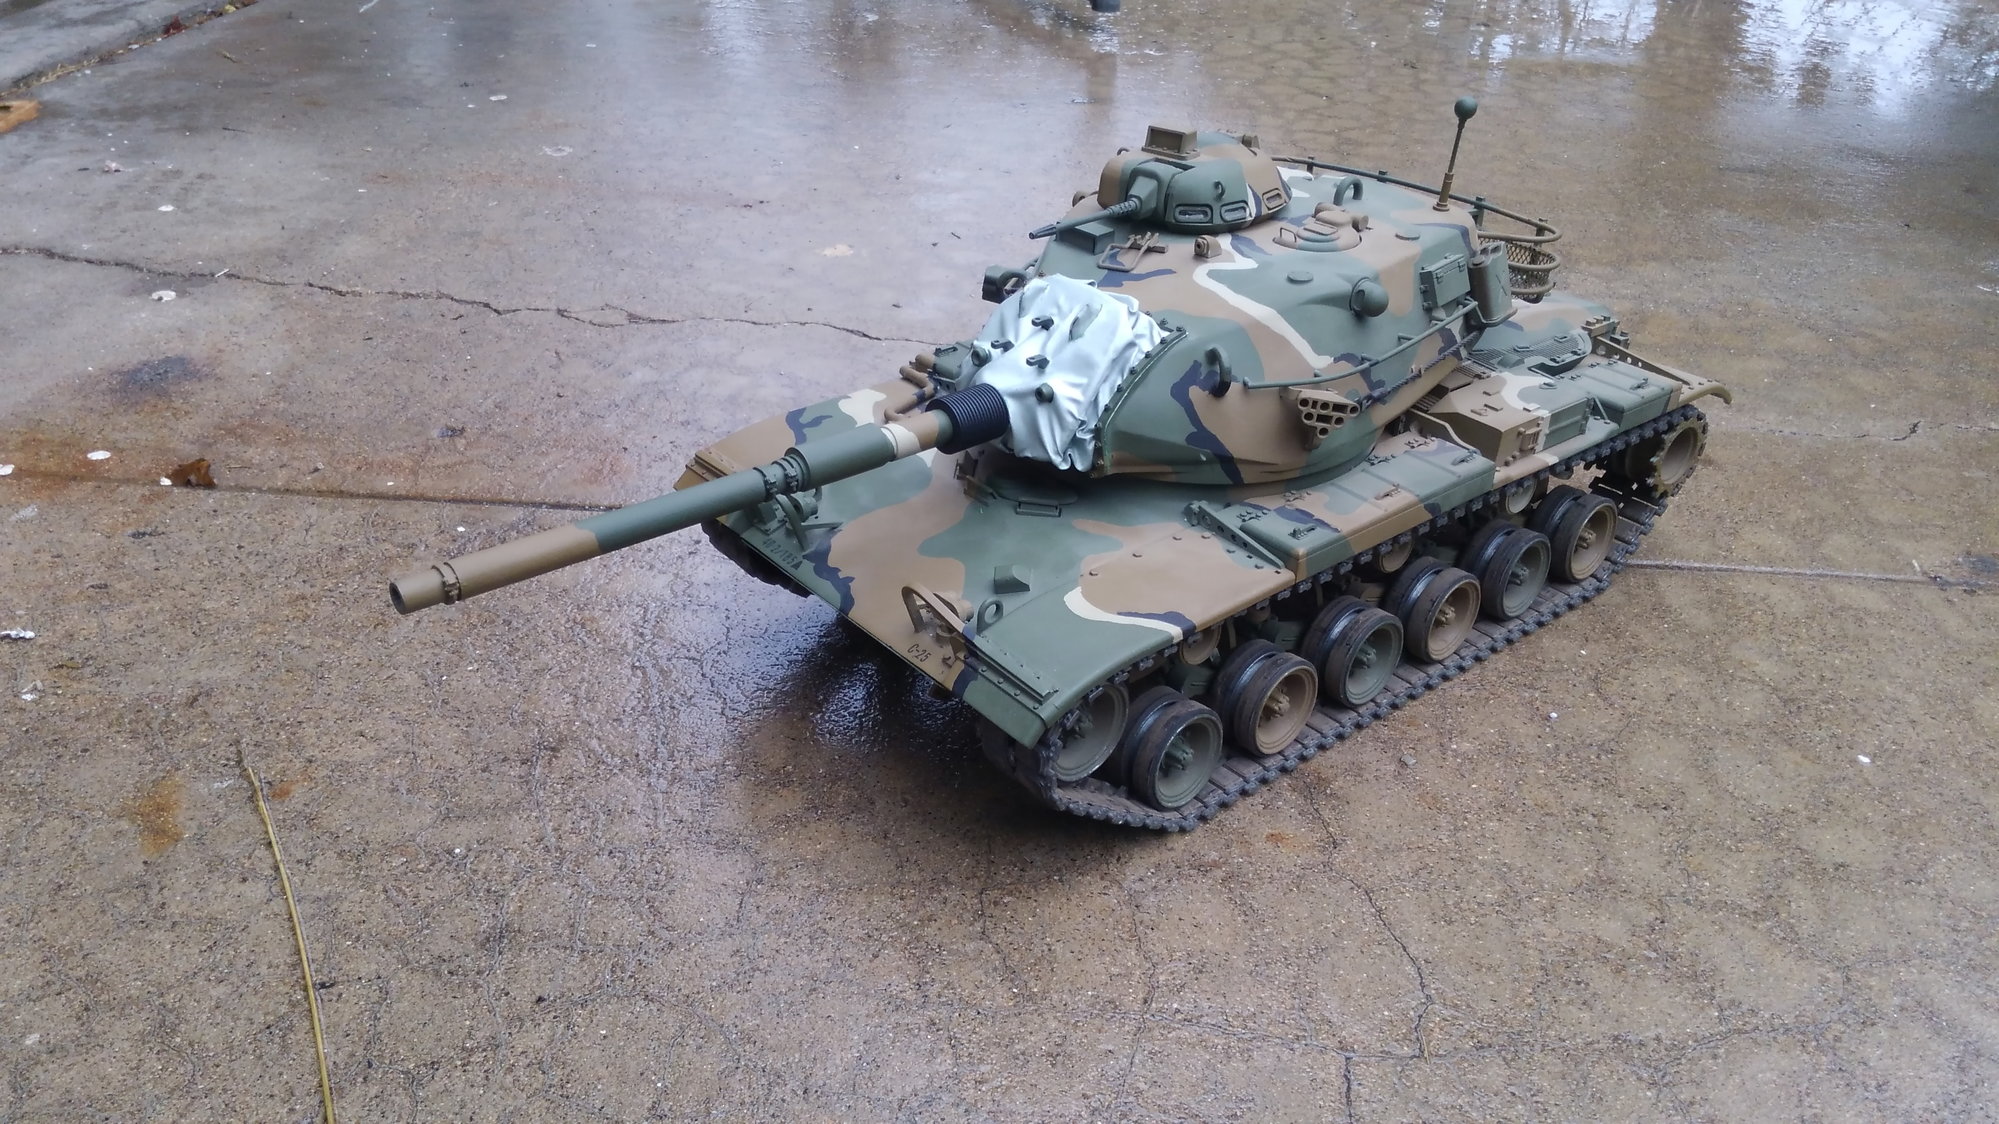
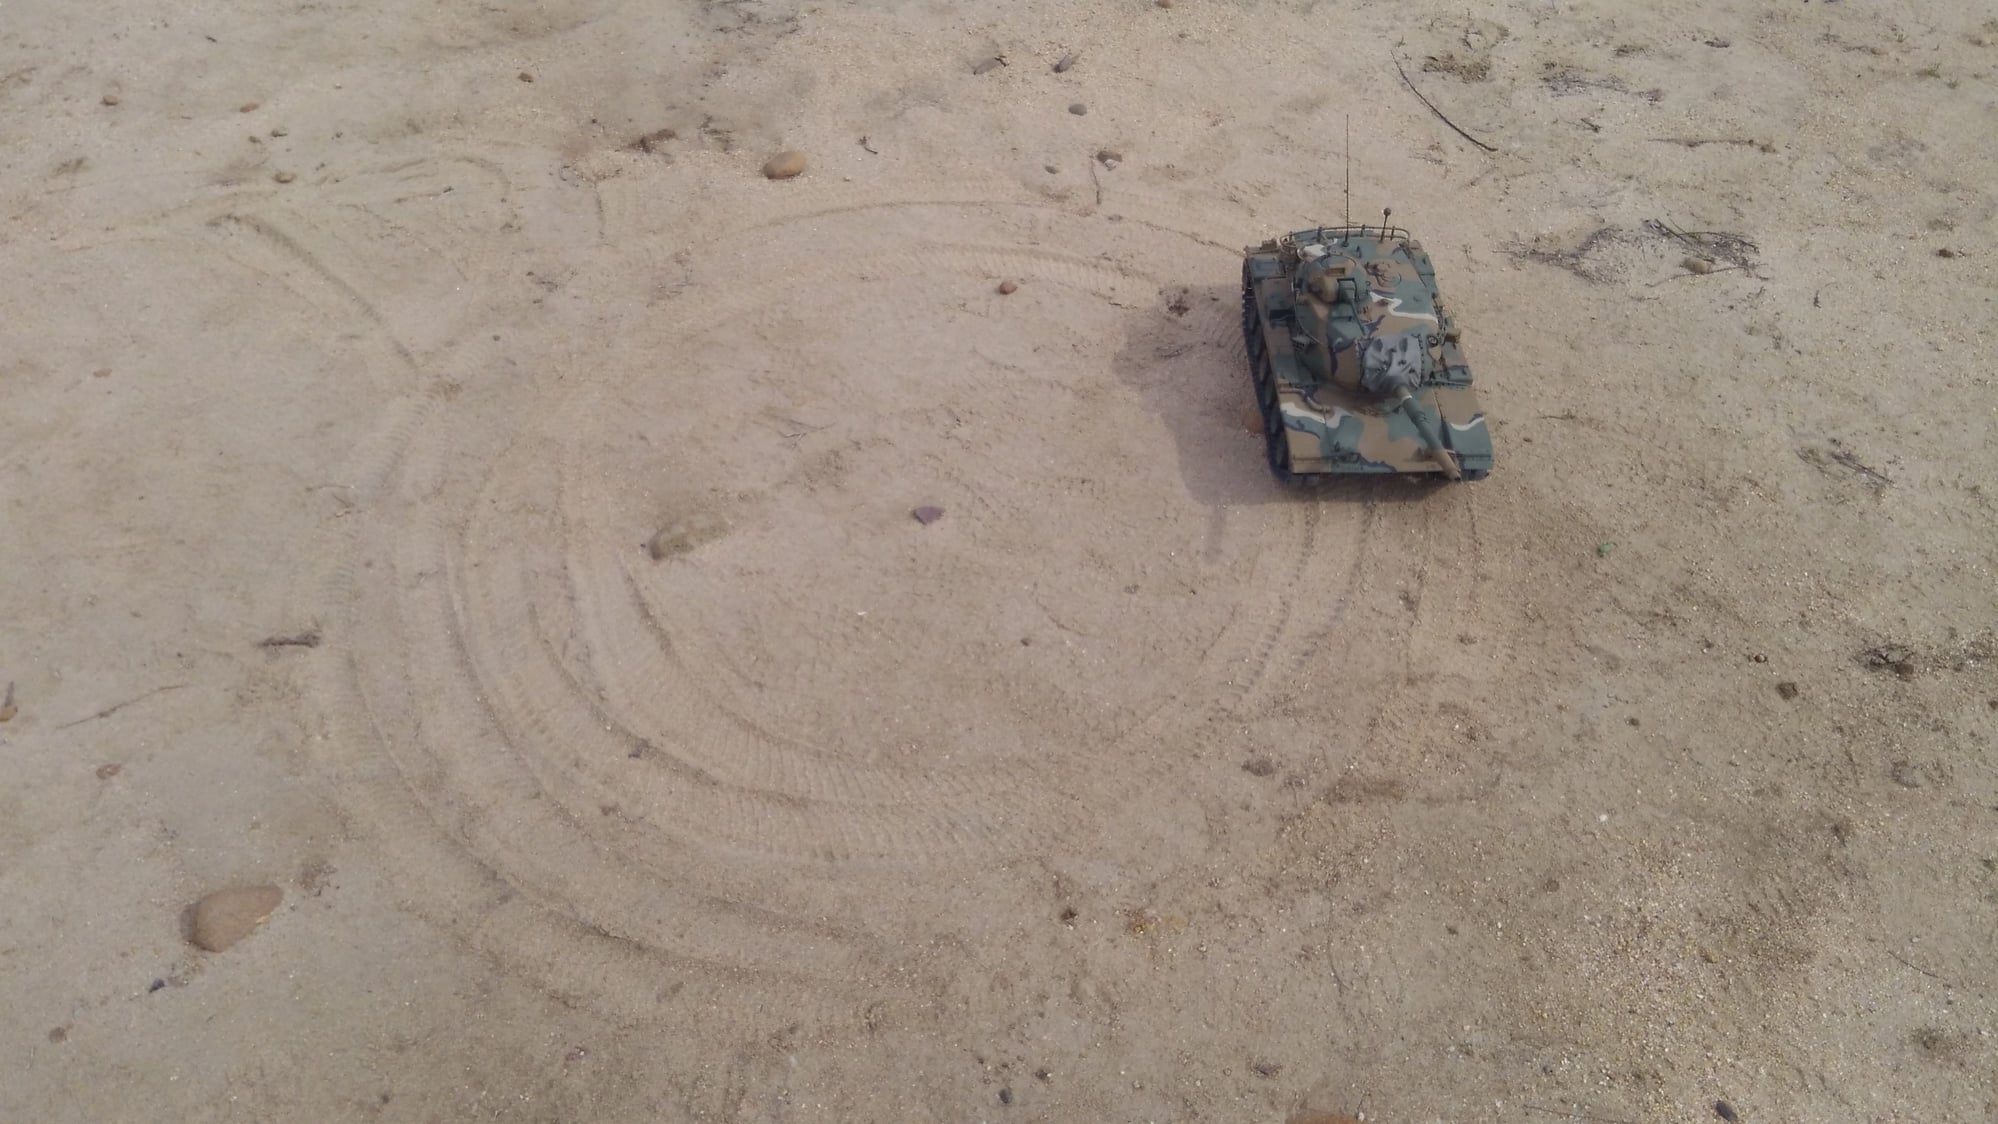
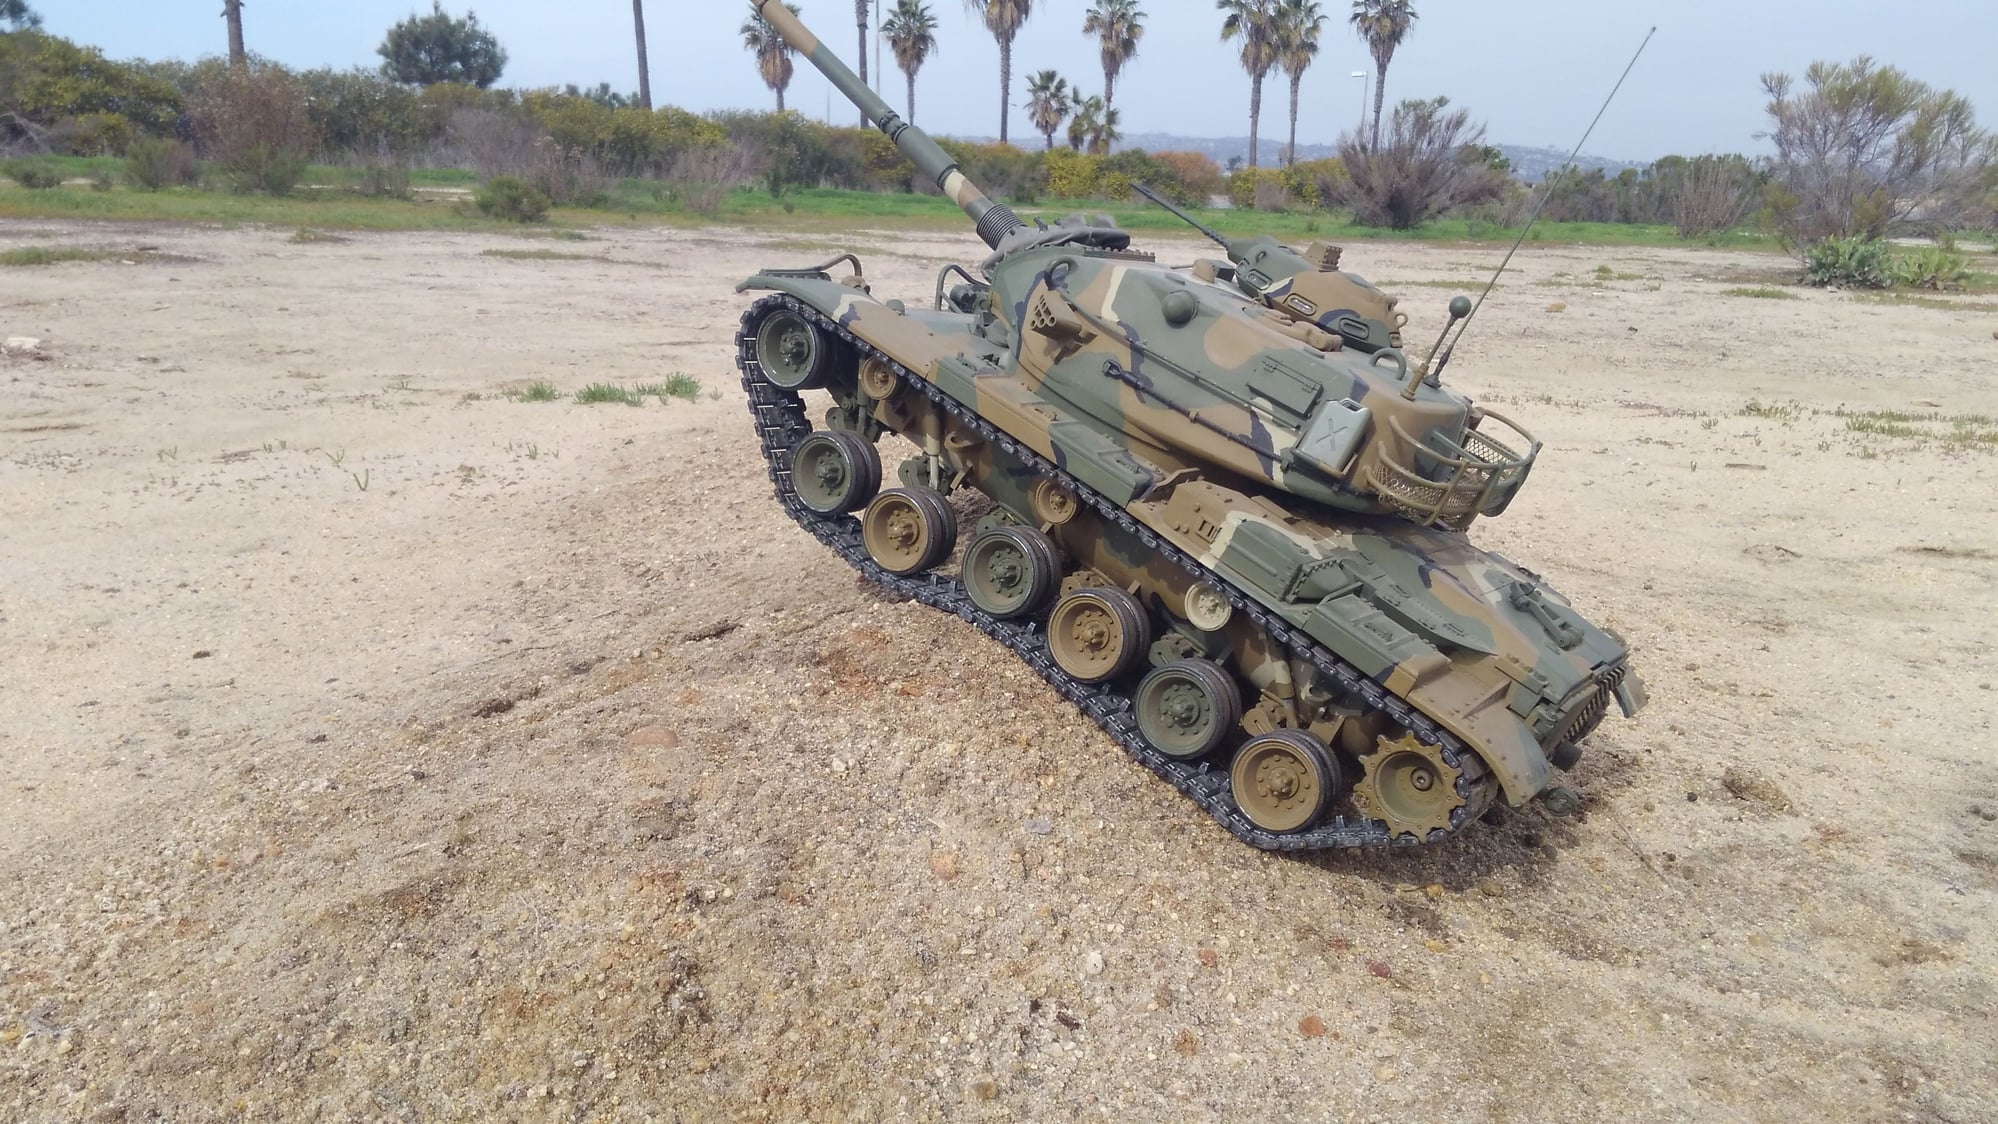
The tank drives awesome now. The track will not come off while driving. In one photo you can see the circle of dirt track that I backed up all the way around and the track stays on. I tried on concrete and asphalt and the track stays put.
Ready for battle.

I borrowed a set of Tamiya Abrams tracks and put them on my tank. The left side fits fine, but the right side was too long, probably by half more or more of a track pad length. Taking one more out, the track would not fit safely on the suspension, so I had to put the one back. Long story short, the idler either needs to adjust tighter or be bigger. The solution came to wrapping the rubber tires of the idler wheel with 7 wraps of black electrical tape. Problem solved. You cannot tell.
The tank drives awesome now. The track will not come off while driving. In one photo you can see the circle of dirt track that I backed up all the way around and the track stays on. I tried on concrete and asphalt and the track stays put.
Ready for battle.
 01-30-2019, 08:19 PM
#89
Its about time for an update to where I am with the tracks. In short I have the problem solved. The whole key is tall enough guide teeth, which the Henglong plastic tracks have but the dklm metal/rubber tracks do not.
I borrowed a set of Tamiya Abrams tracks and put them on my tank. The left side fits fine, but the right side was too long, probably by half more or more of a track pad length. Taking one more out, the track would not fit safely on the suspension, so I had to put the one back. Long story short, the idler either needs to adjust tighter or be bigger. The solution came to wrapping the rubber tires of the idler wheel with 7 wraps of black electrical tape. Problem solved. You cannot tell.
The tank drives awesome now. The track will not come off while driving. In one photo you can see the circle of dirt track that I backed up all the way around and the track stays on. I tried on concrete and asphalt and the track stays put.
Ready for battle.

 01-31-2019, 03:02 PM
#93
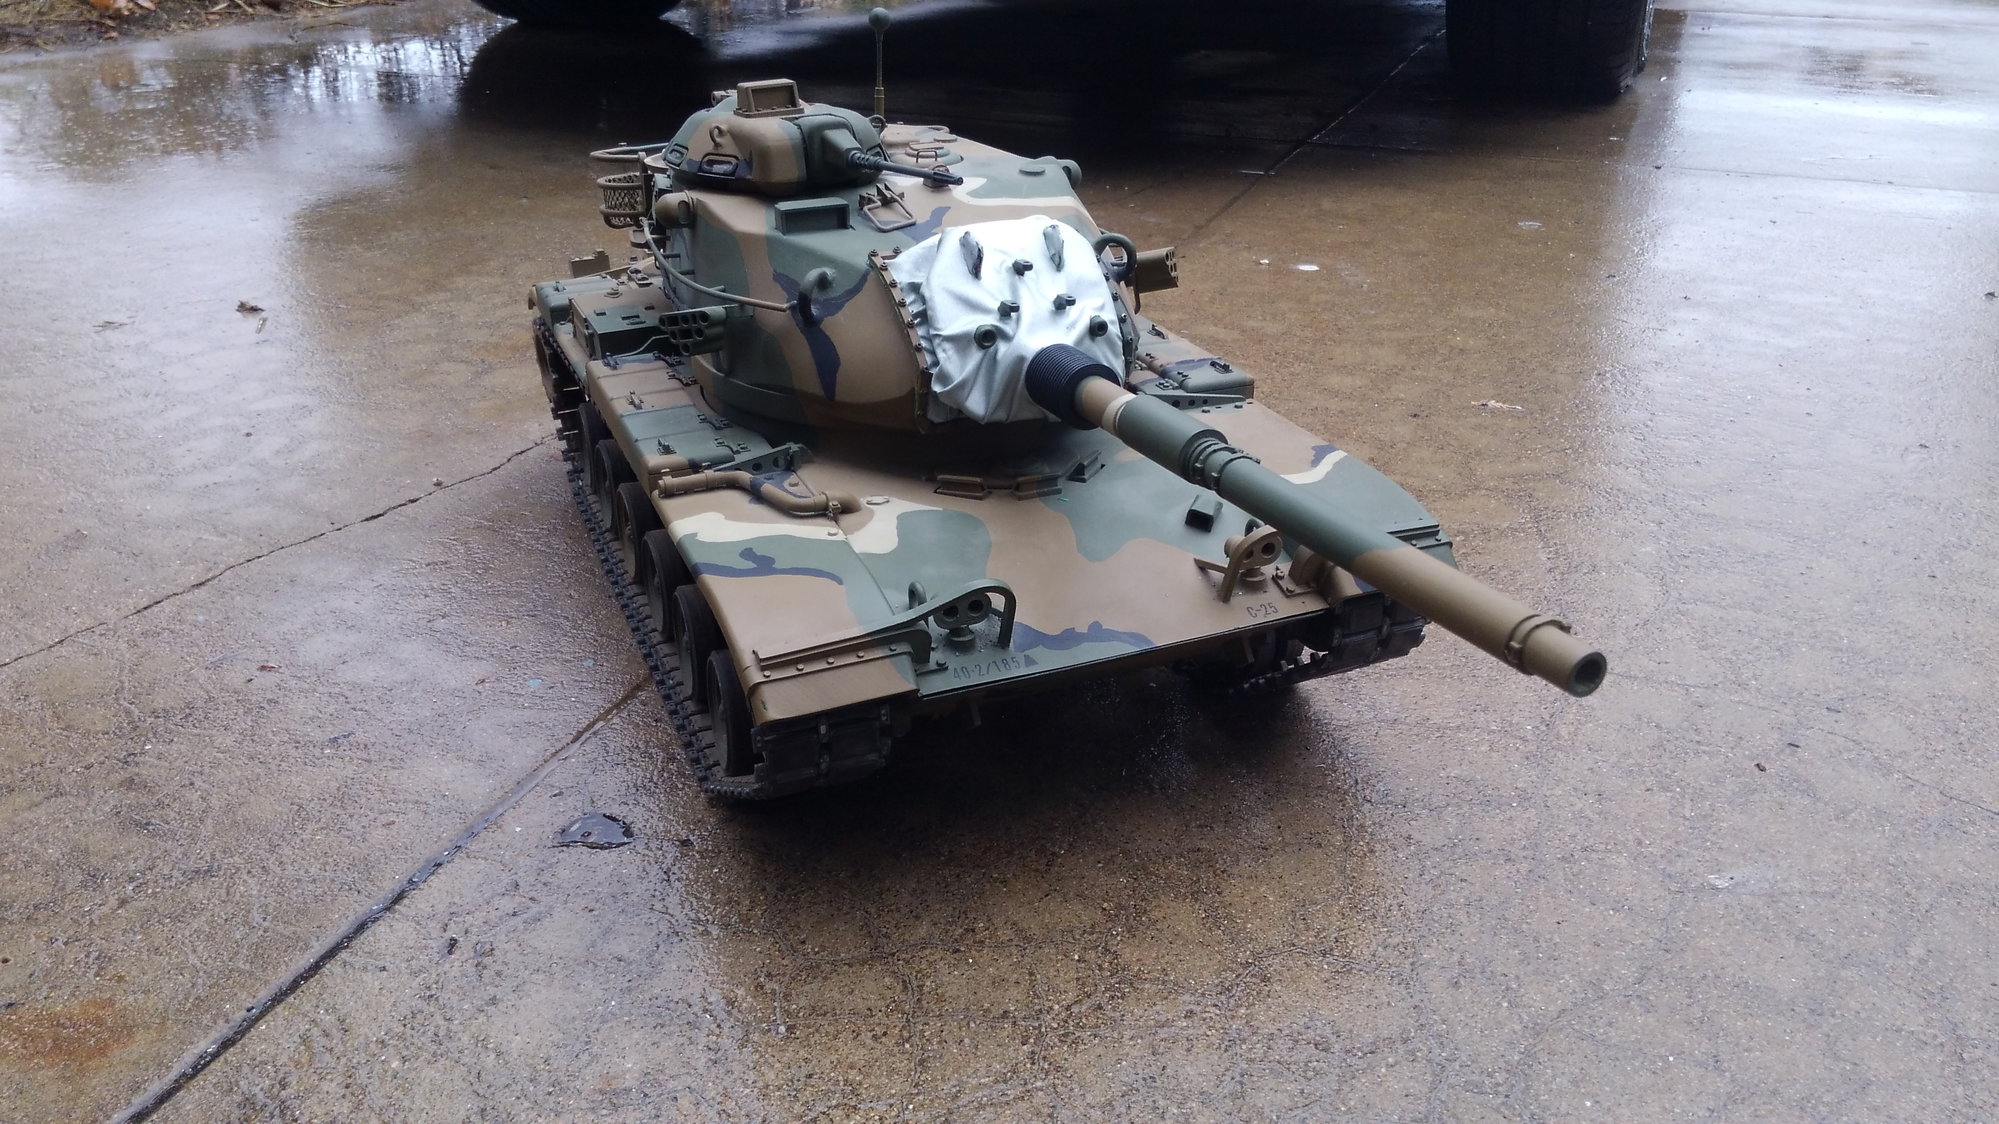
That looks great Rich. Glad you solved the track throwing problem. That camo came out really well.
02-01-2019, 01:53 PM
#94
Great looking M60. The camo looks great with desert background. Glad you got the track issue sorted out. Would hate for that model to be a shelf queen.
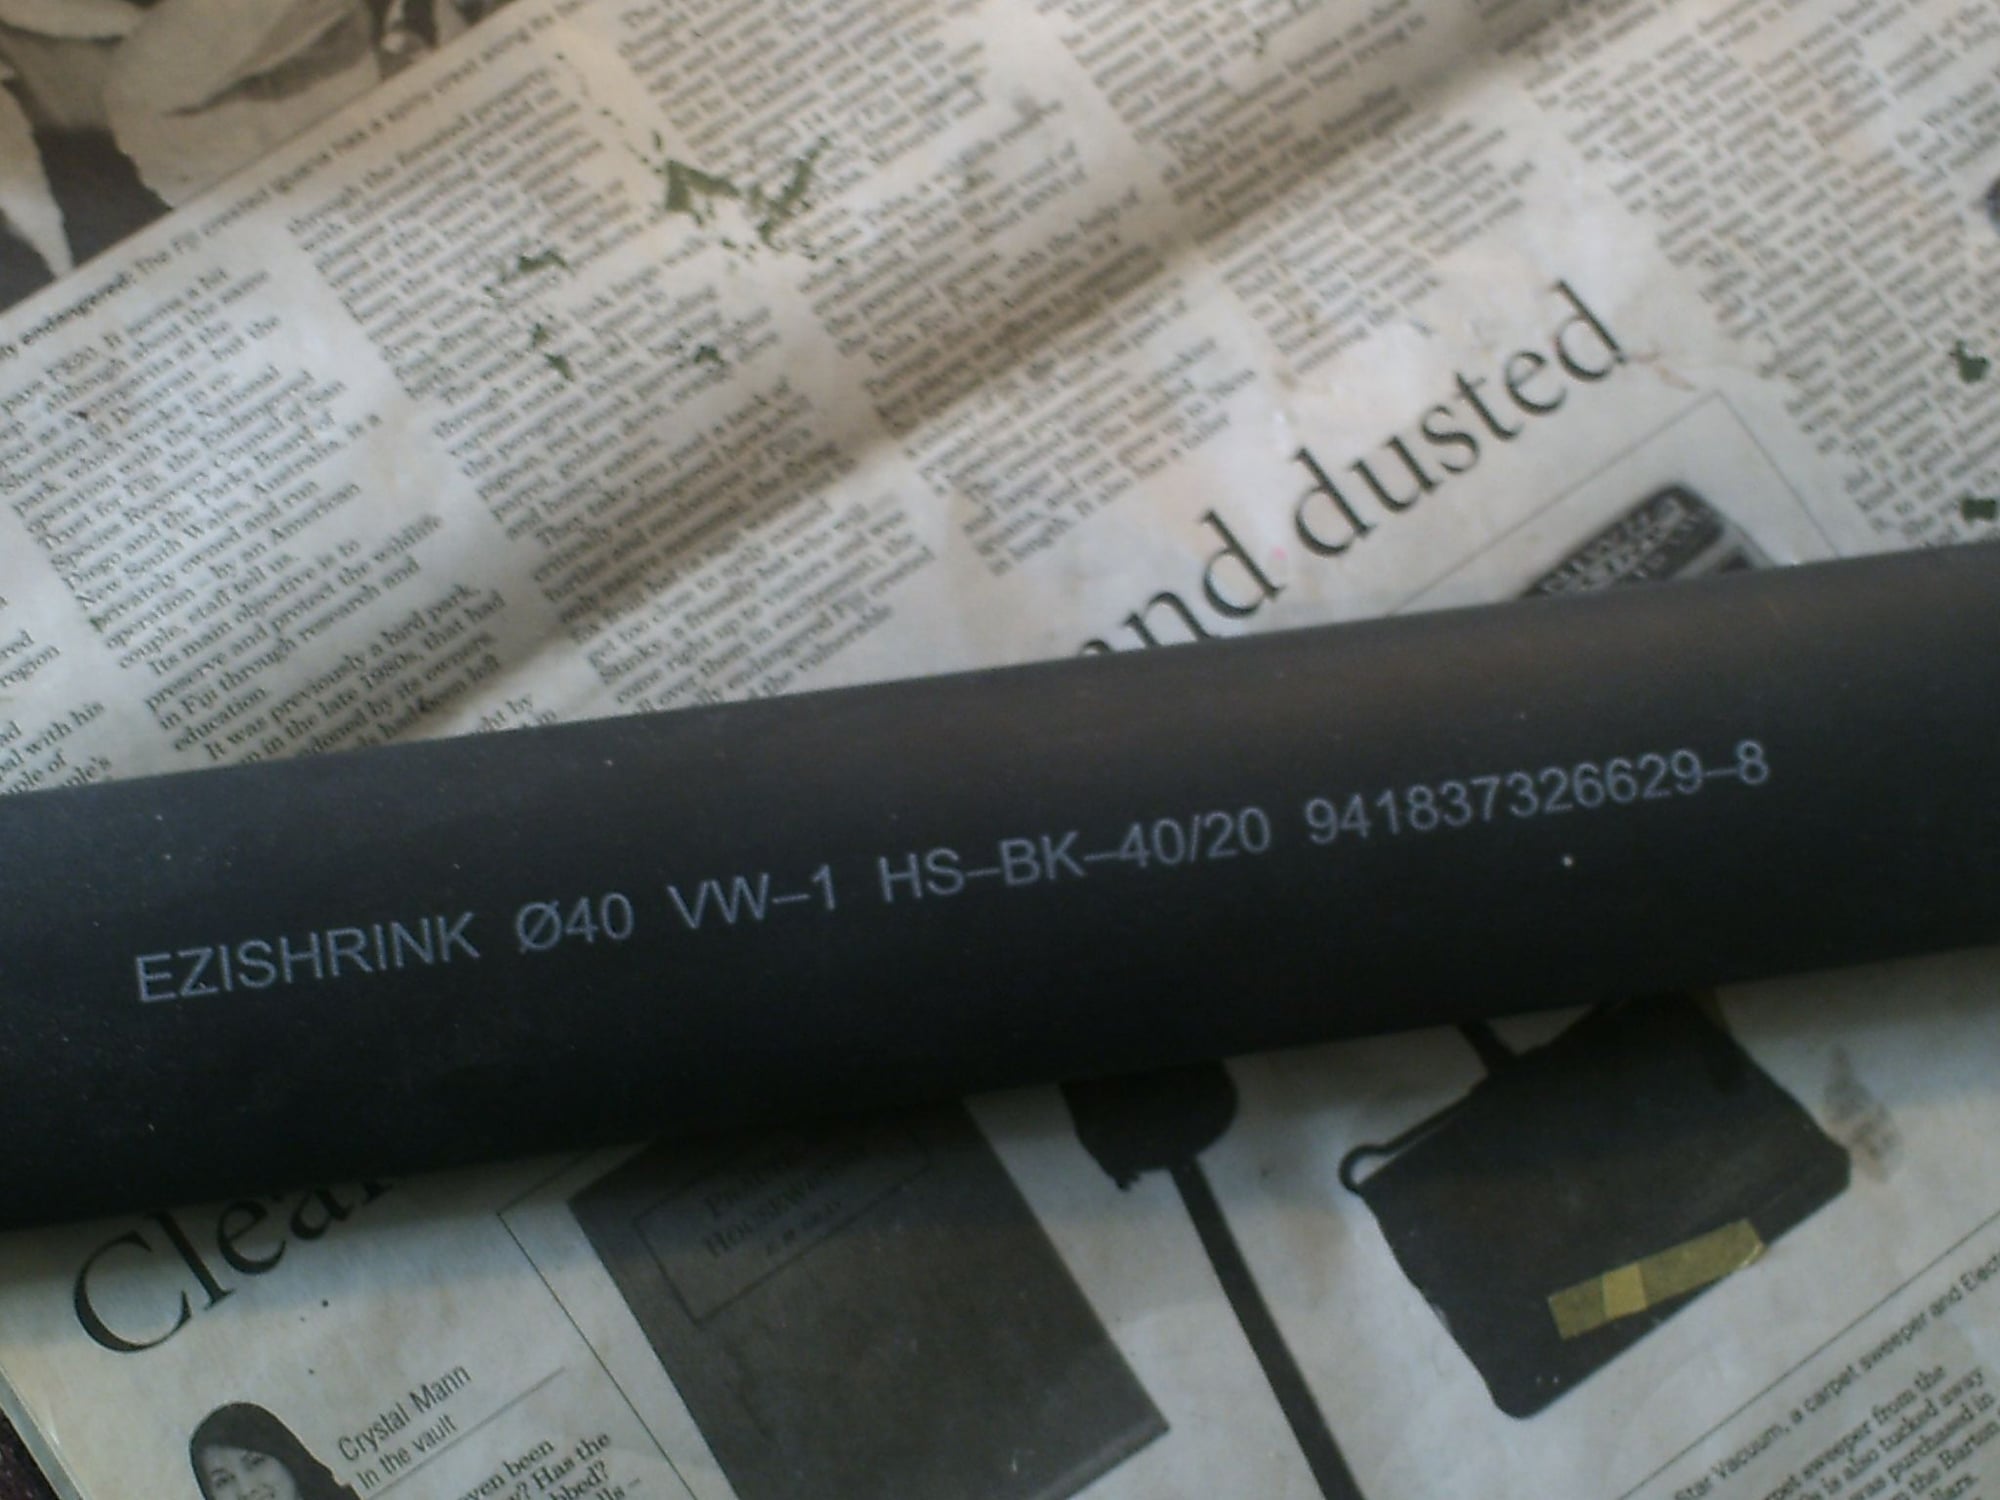
Great idea on the heat shrink for rubber tires.
B
Great idea on the heat shrink for rubber tires.
B
 02-12-2019, 02:32 PM
#96
Thread Starter
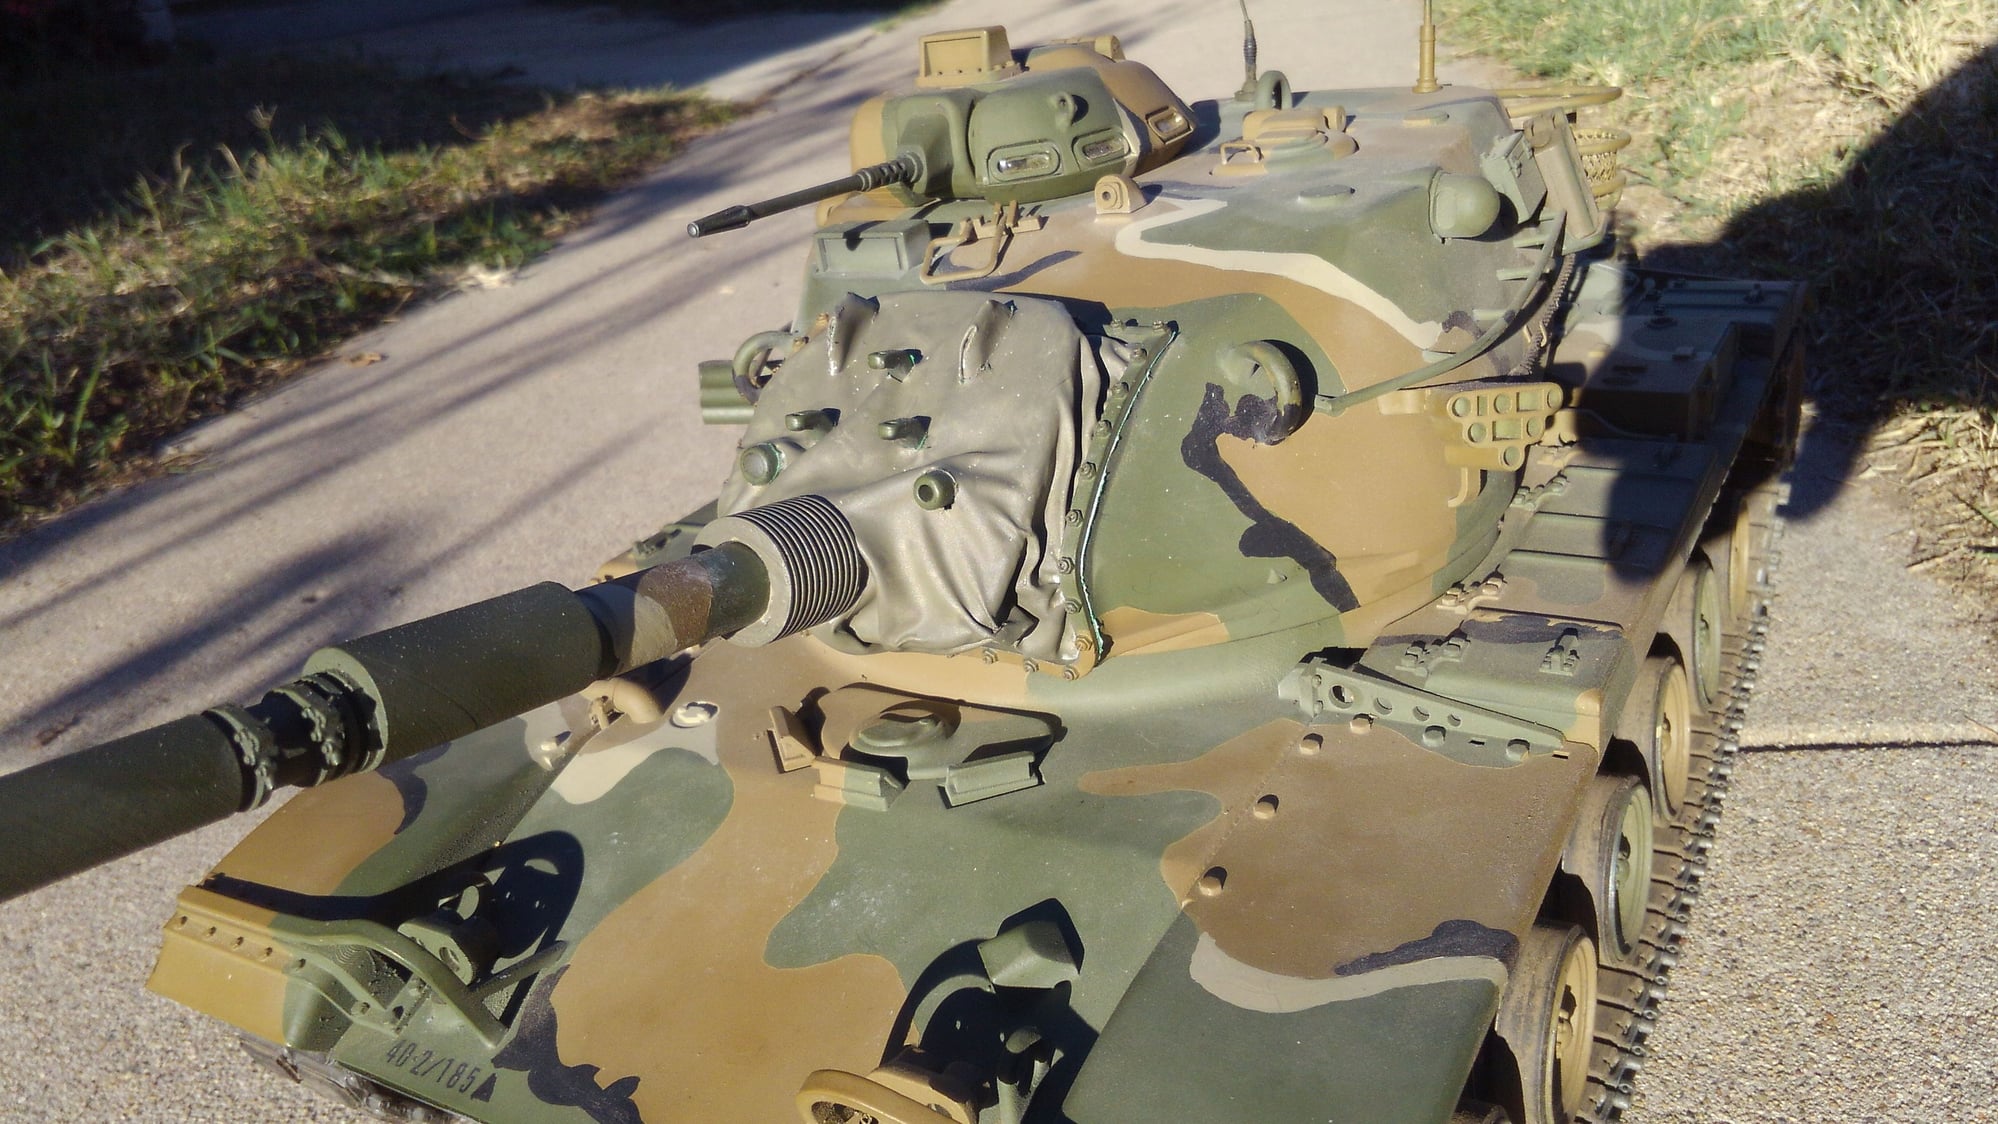
I finally got around to cutting the molded on fender flaps off and adding another styrene sheet under the fender and let it stick out forward a little for lip to glue the truck inner tube rubber flap to. While it did not come out as nice looking as I had hoped it would, it did turn out better than I expected it would since this was the first time I did this. They are quite secure on the fenders and look decent.
Aside from maybe some day adding the head and tail lights which I usually don't do, I am calling this tank done. Now on to some Alice rucks and bedroll gear for the basket eventually.


Aside from maybe some day adding the head and tail lights which I usually don't do, I am calling this tank done. Now on to some Alice rucks and bedroll gear for the basket eventually.
02-12-2019, 03:04 PM
#97
Call it well done.
I did rubber mud flaps like that for my Abrams out of old bicycle inner tube material.
I did rubber mud flaps like that for my Abrams out of old bicycle inner tube material.
02-14-2019, 02:42 PM
#98
Looks great!!!
05-07-2019, 06:32 PM
#99
Thread Starter
Finally got my new taigen 65mm shafts made with a henglong flat spot on them, thanks to my good friend and machineist Jerry. Cant wait to get these installed and remove my homemmade extended ones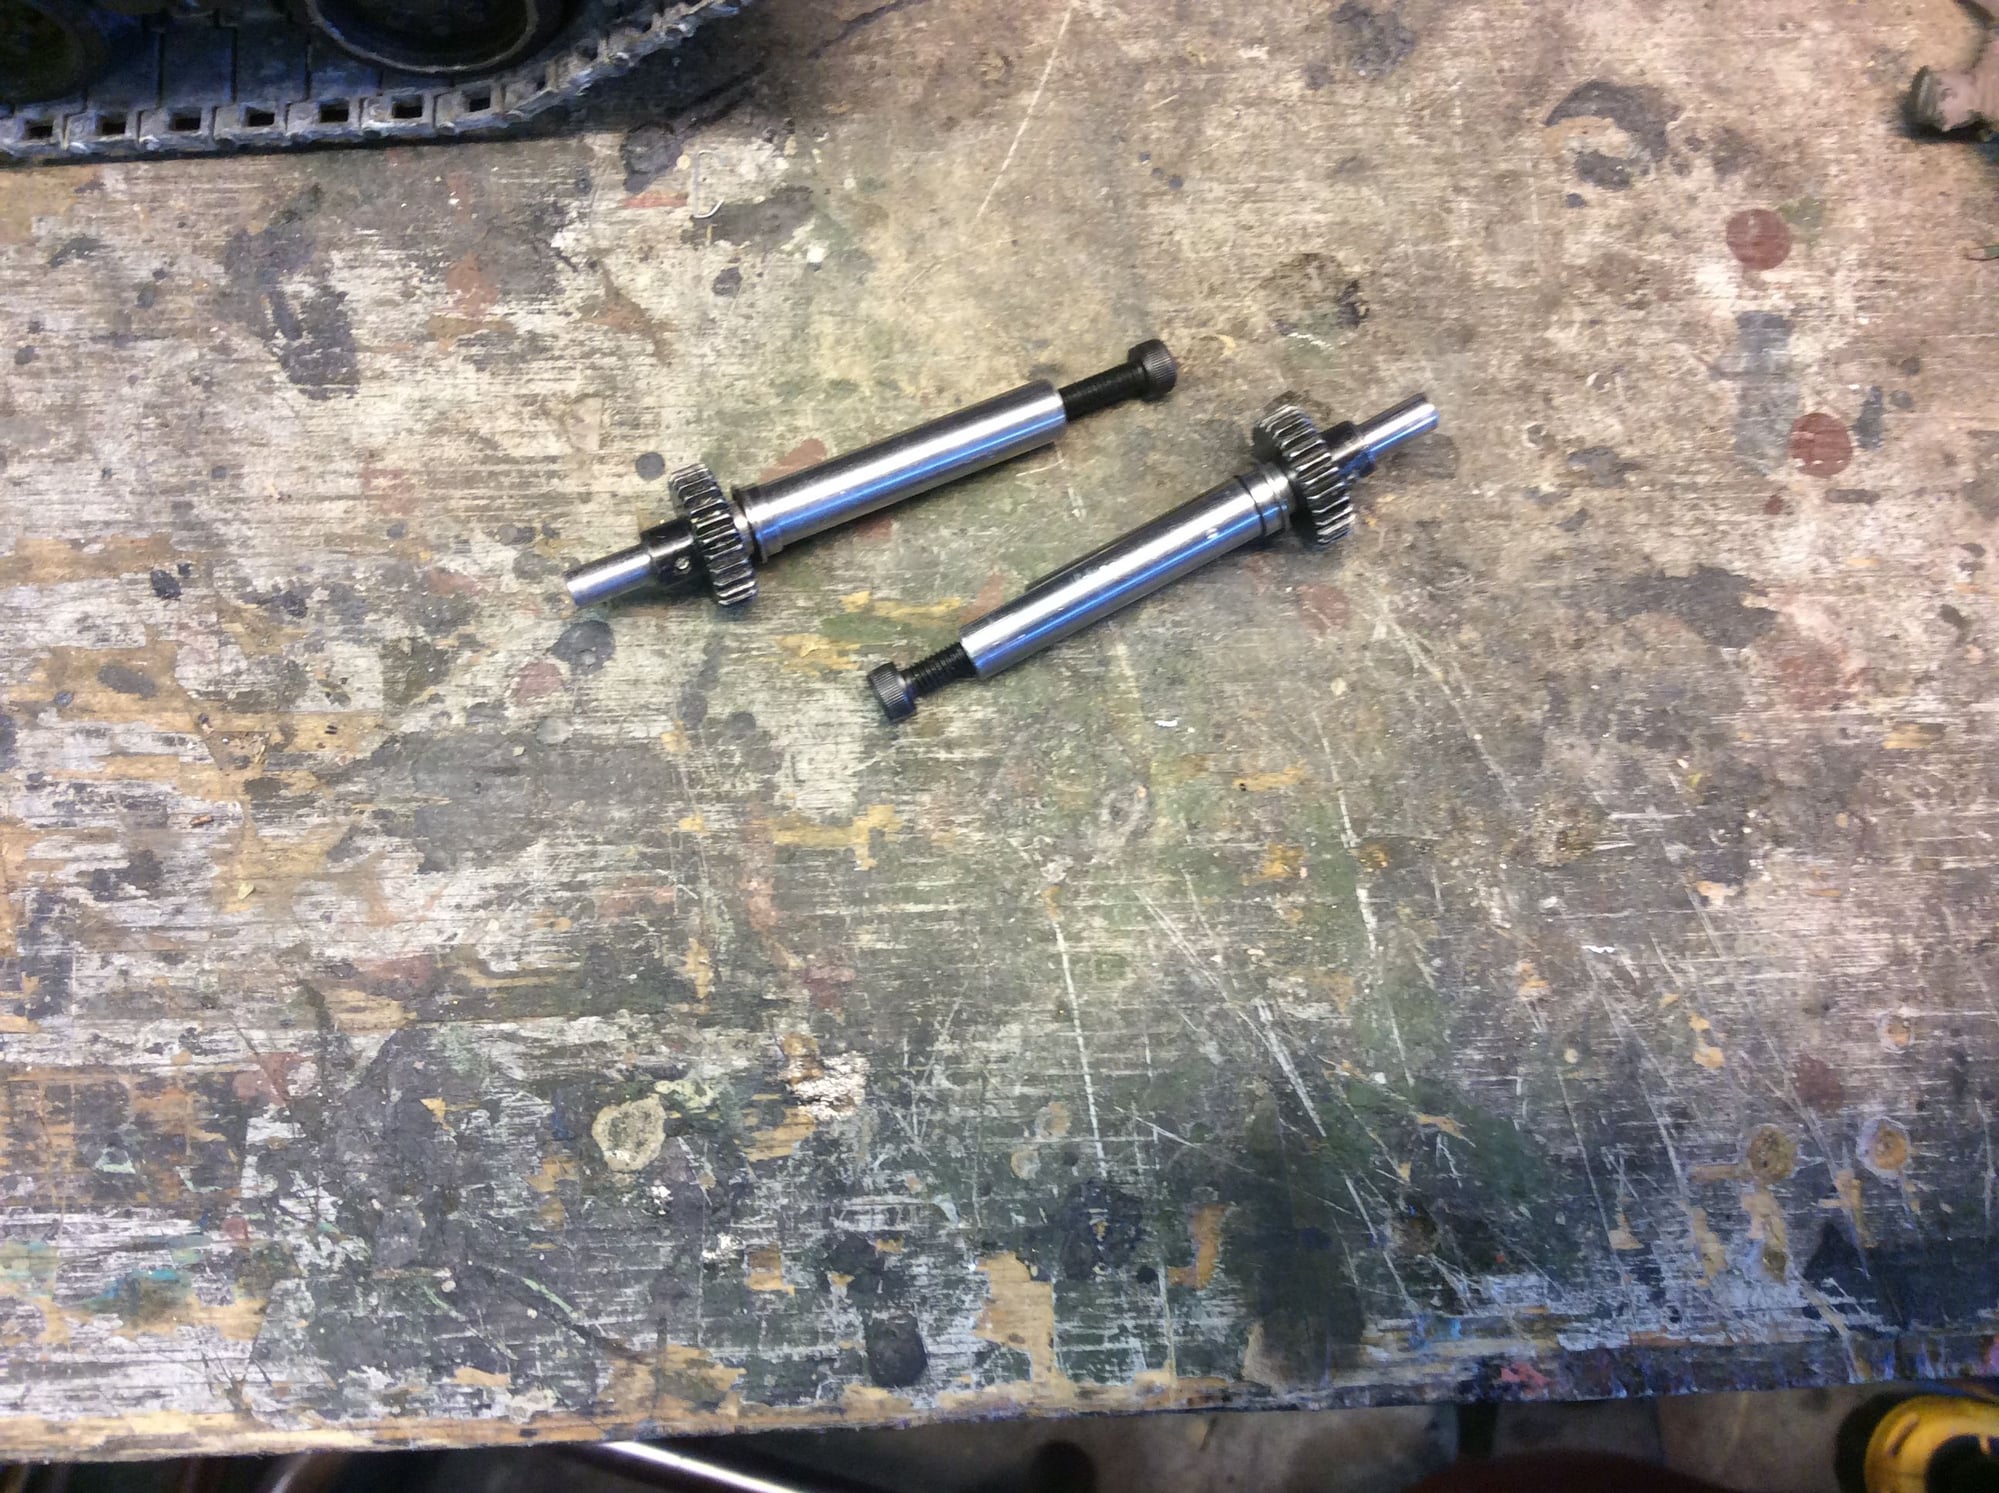
05-20-2019, 10:54 AM
#100
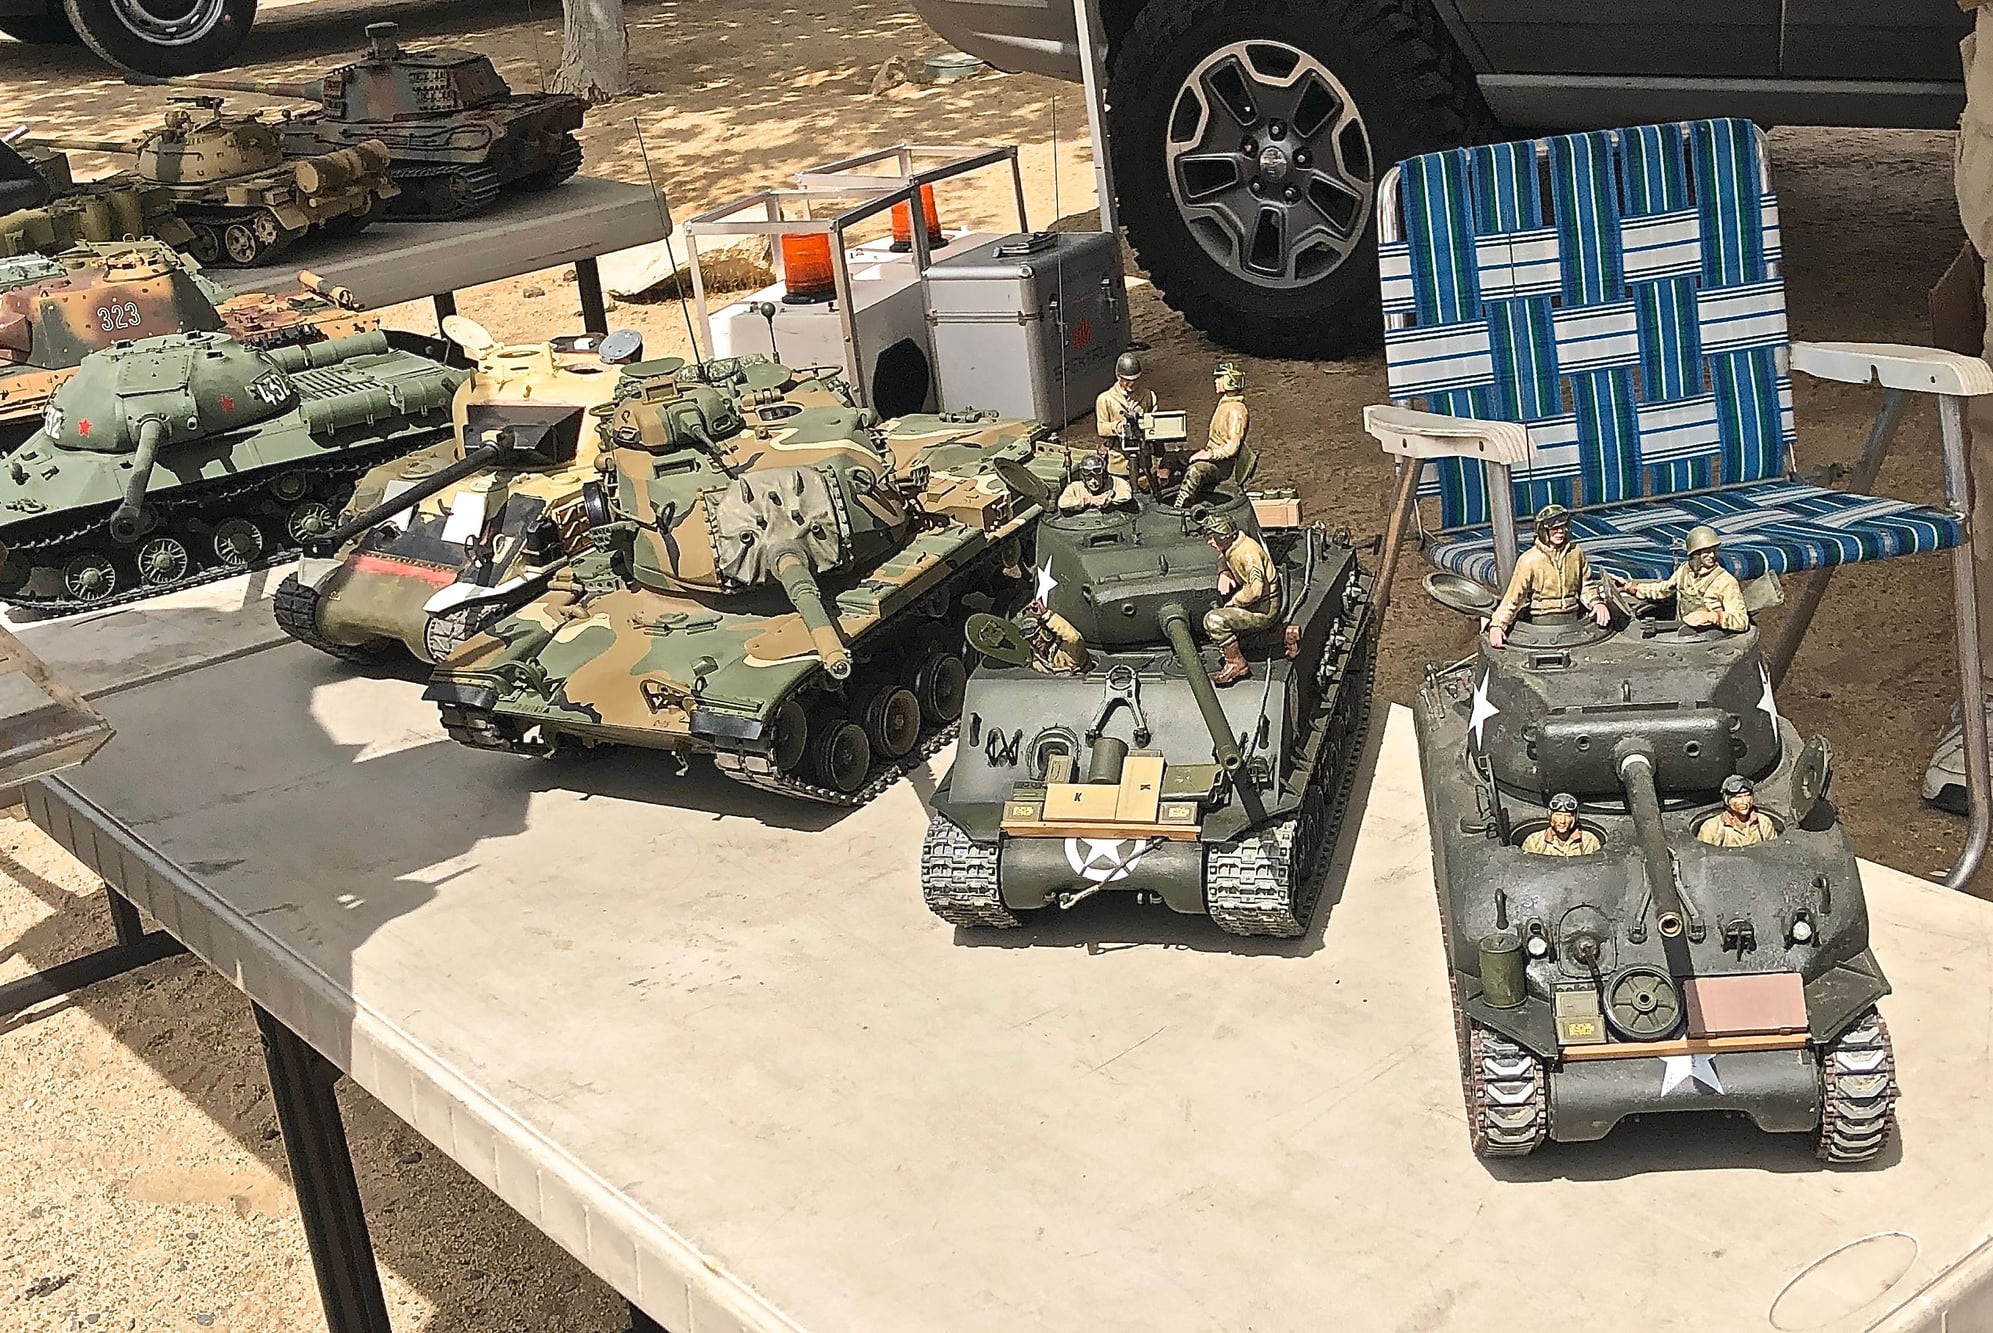
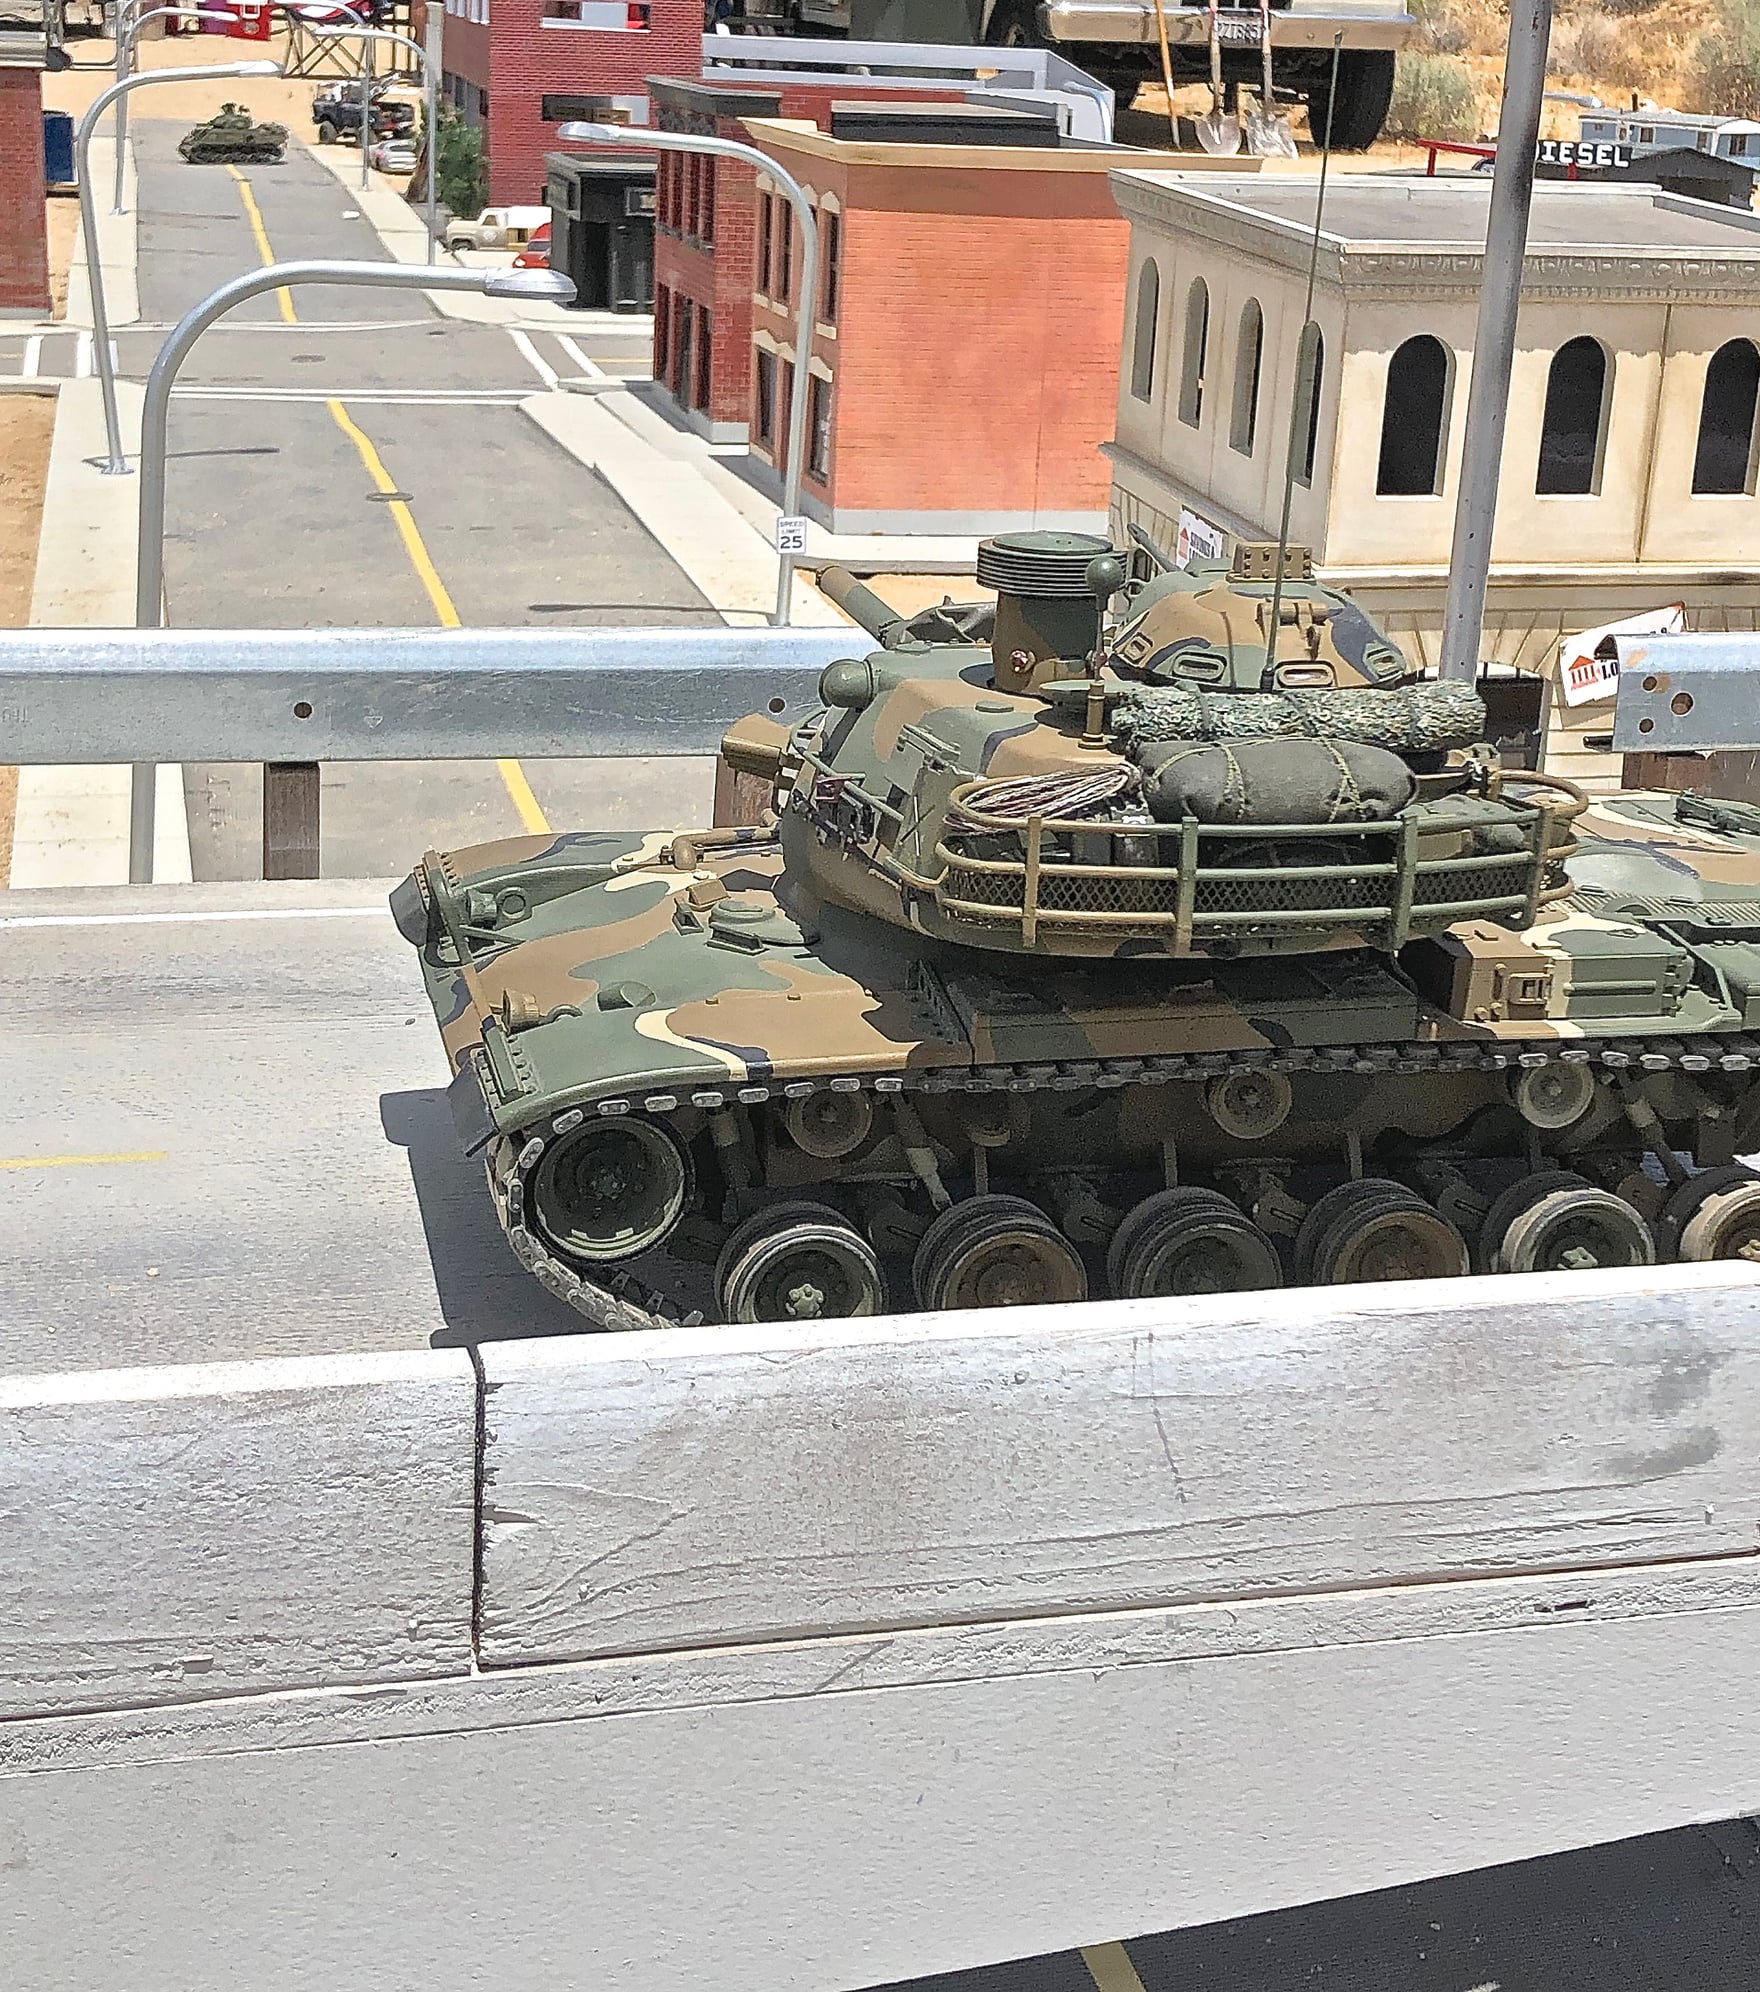
Wow! What an awesome tank to see in action. Had another opportunity to fight with and against this tank in an IR battle at the ProLine "By the Fire" R/C rock crawler event held on May 18th. Not only is this M60 a stunningly built model but it runs and fights as good as it looks. The group of tankers at the battle started calling it the "Predator" because it fought so well and just had a "presence" that no other tank could match.
Here are a few photos I took during the day.


Here are a few photos I took during the day.
Last edited by Fsttanks; 05-20-2019 at 10:59 AM.