


Hooben T-55A (first run production)
 04-07-2019, 12:21 AM
#1

Thread Starter
Its been a l-o-n-g time since I posted anything new on these forums, there's a heap of really nice builds so its quite a lot to live up to. This build is/was pretty straightforward, but was a long time in coming, so despite being quite simple, I'm really glad its been completed - even more so because I like the T-55A's proportions in the first place; so when Hooben first announced the T-55A a decade ago, I was ready to flash the cash, till the first horror stories started floating out. I held back and moved on to other tanks, acquiring the Leopard 2A6 and Panther G in the meantime. After a while, it went out of production due to "worn out molds" so even if I could deal with mold flashing and incomplete parts, there wasn't one to be bought.
Fast forward 5 years later and a friend had a partially-built T-55A that he wanted to offload, some cash changed hands and I was owner of build number 493:

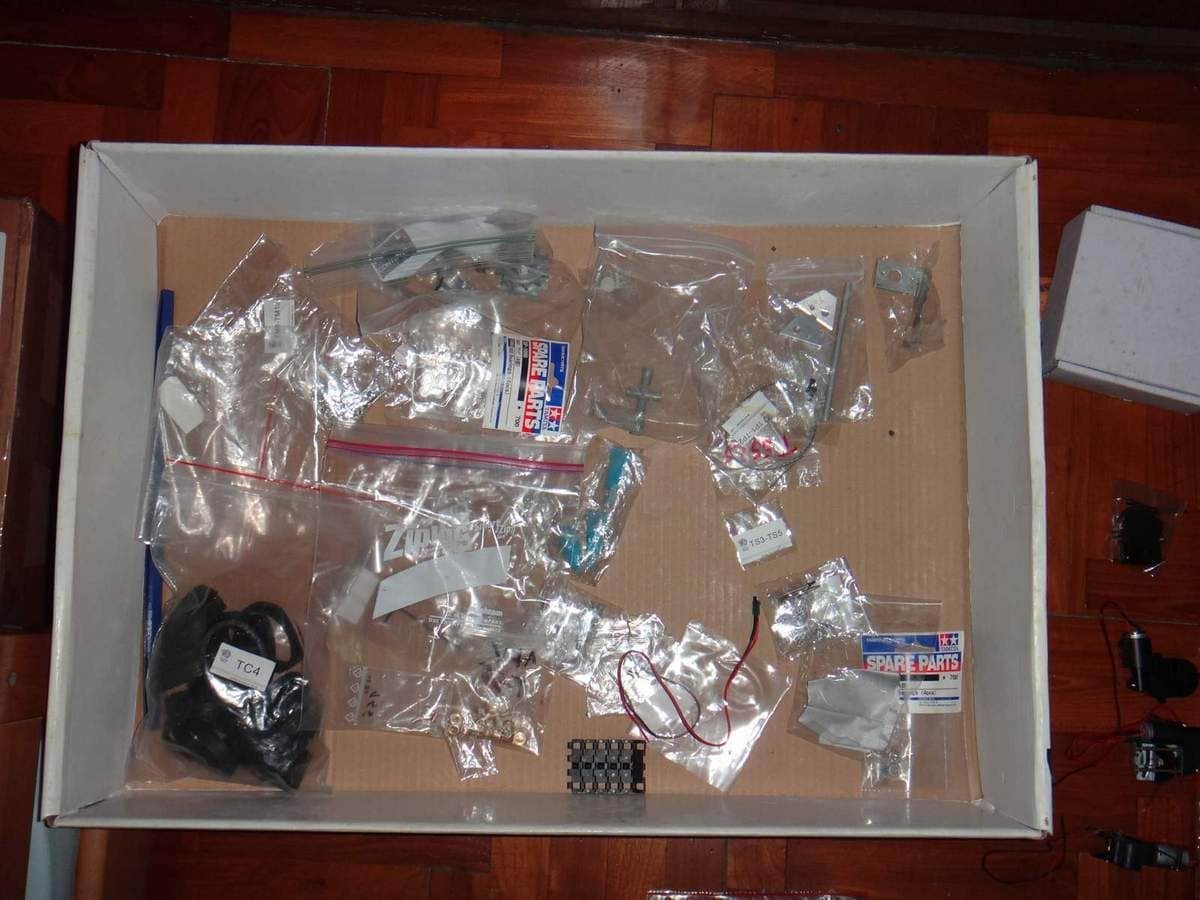
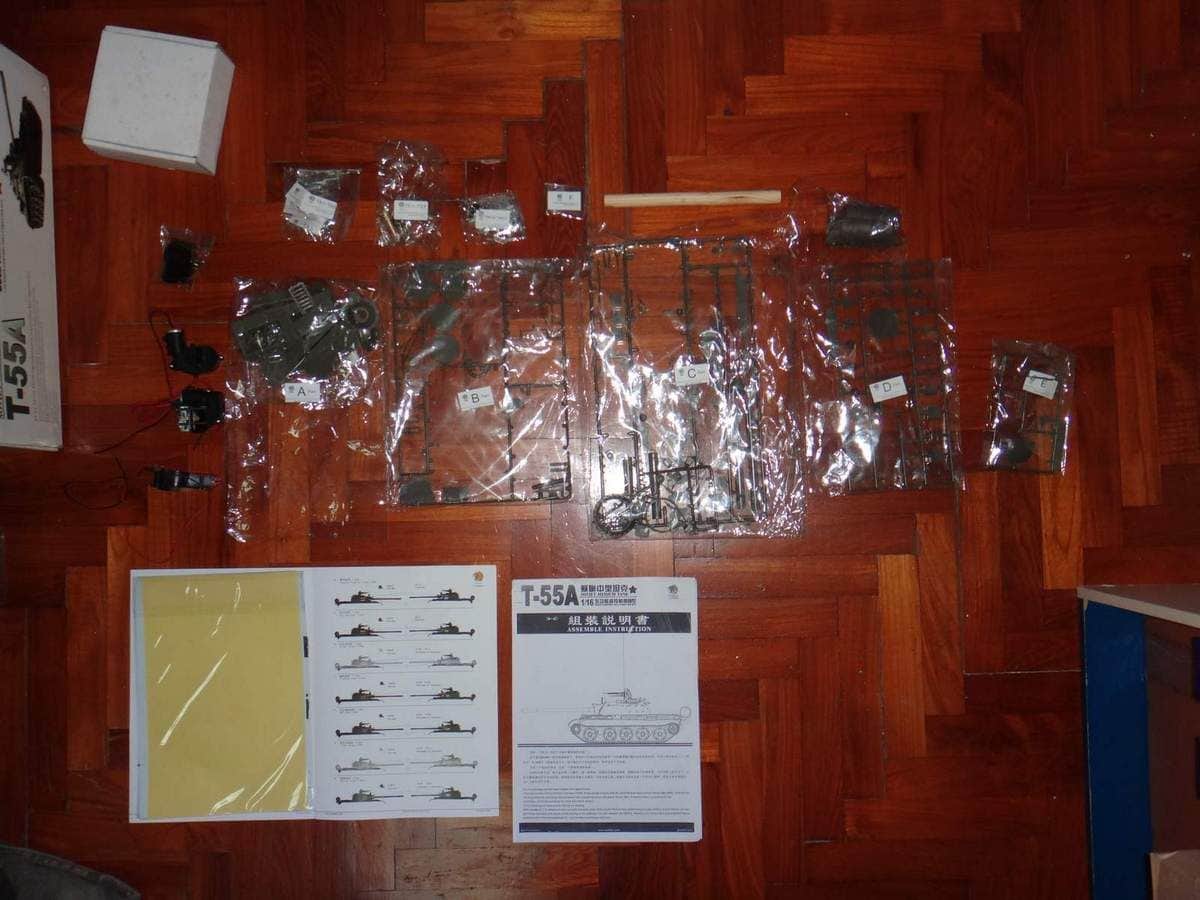
Being partially built, it also came partially upgraded, with chassis stiffening plates, upgraded idler wheels as well as copper grab handles about the turret and faux fuel piping. I set about assembling the rest of the parts: Given how fragile the stock 12.7 mm DShK heavy machine gun looked, I purchased an additional machine gun off from the Heng Long ZTZ-99 kit as a spare.
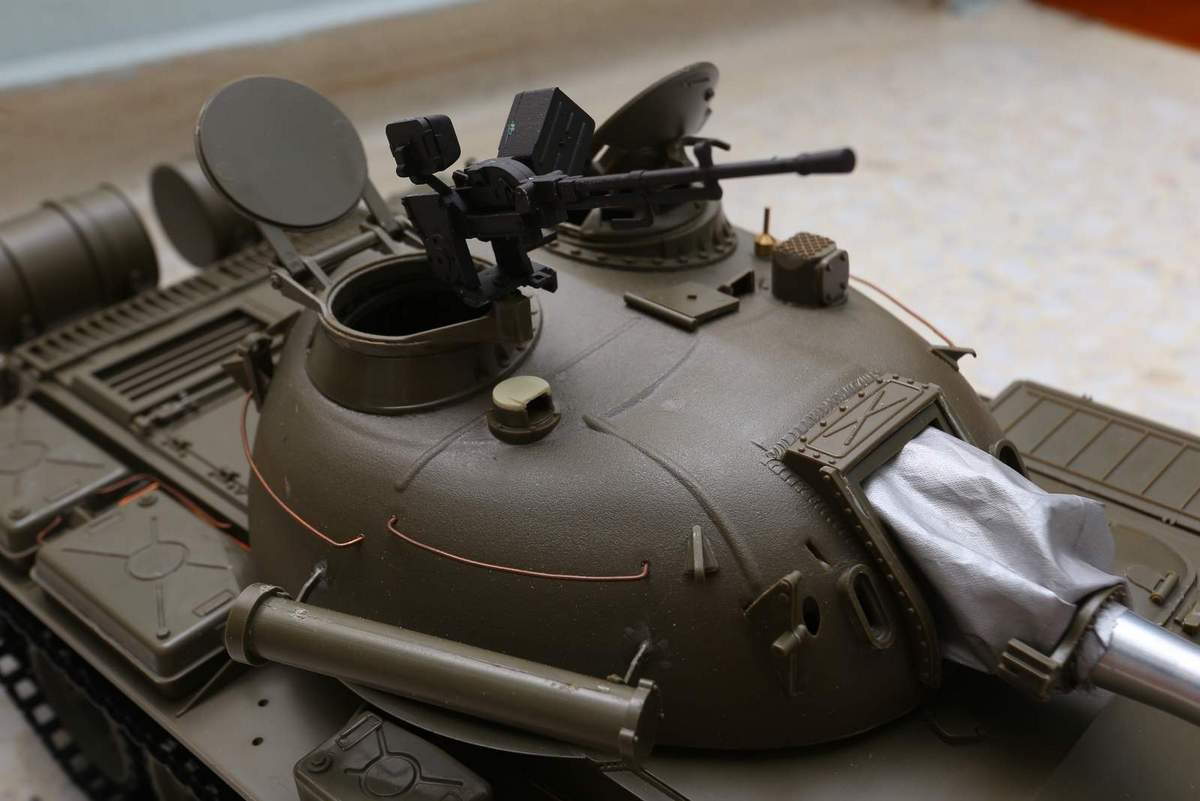

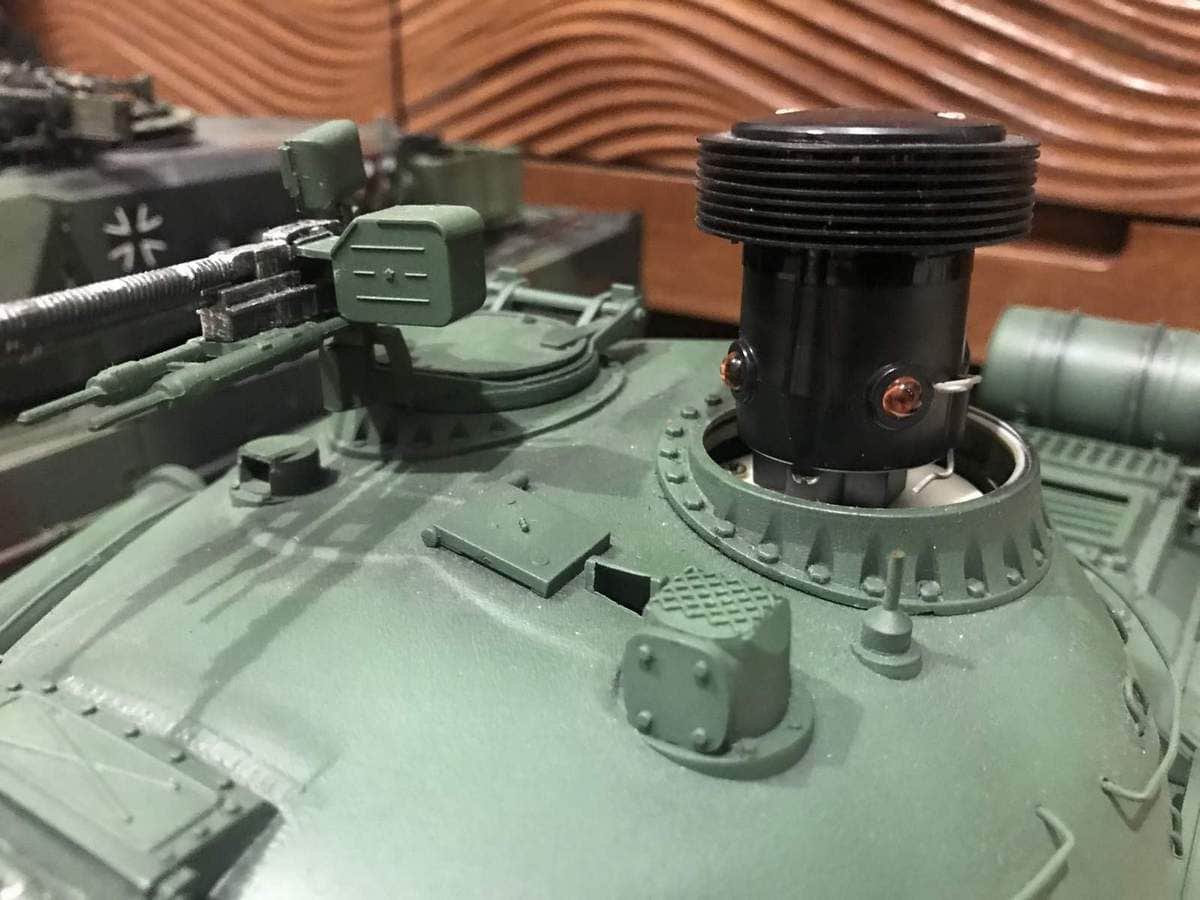
The next major milestone was to select electronics for the tank and I decided to give Clark a try. I got OKMO design's founder to 3DP me a Tamiya-esque setup, and I intended to make the front running lights of the tank functional, both for the running lamps and the IR lamps. Given how tight the tank was, it was going to be a tough ask, but the slaved gun barrel IR searchlight was too large to resist!
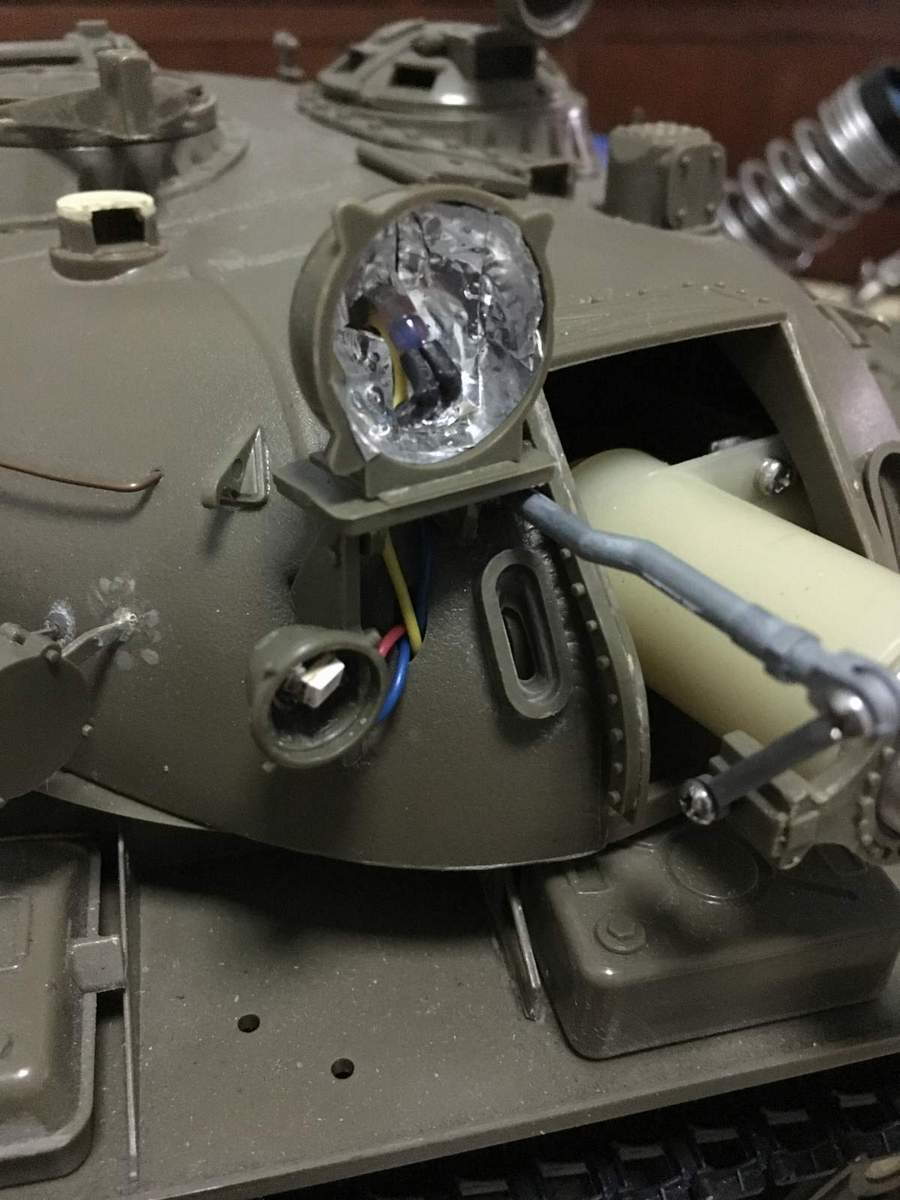
The original solution were Maglite halogen bulbs; however they drew a lot of current and caused problems for the Clark board's switchable lighting system. It looked good and authentic though. In this photo, I have the SMT LED and Maglite bulb reversed, as I placed them in the wrong positions.
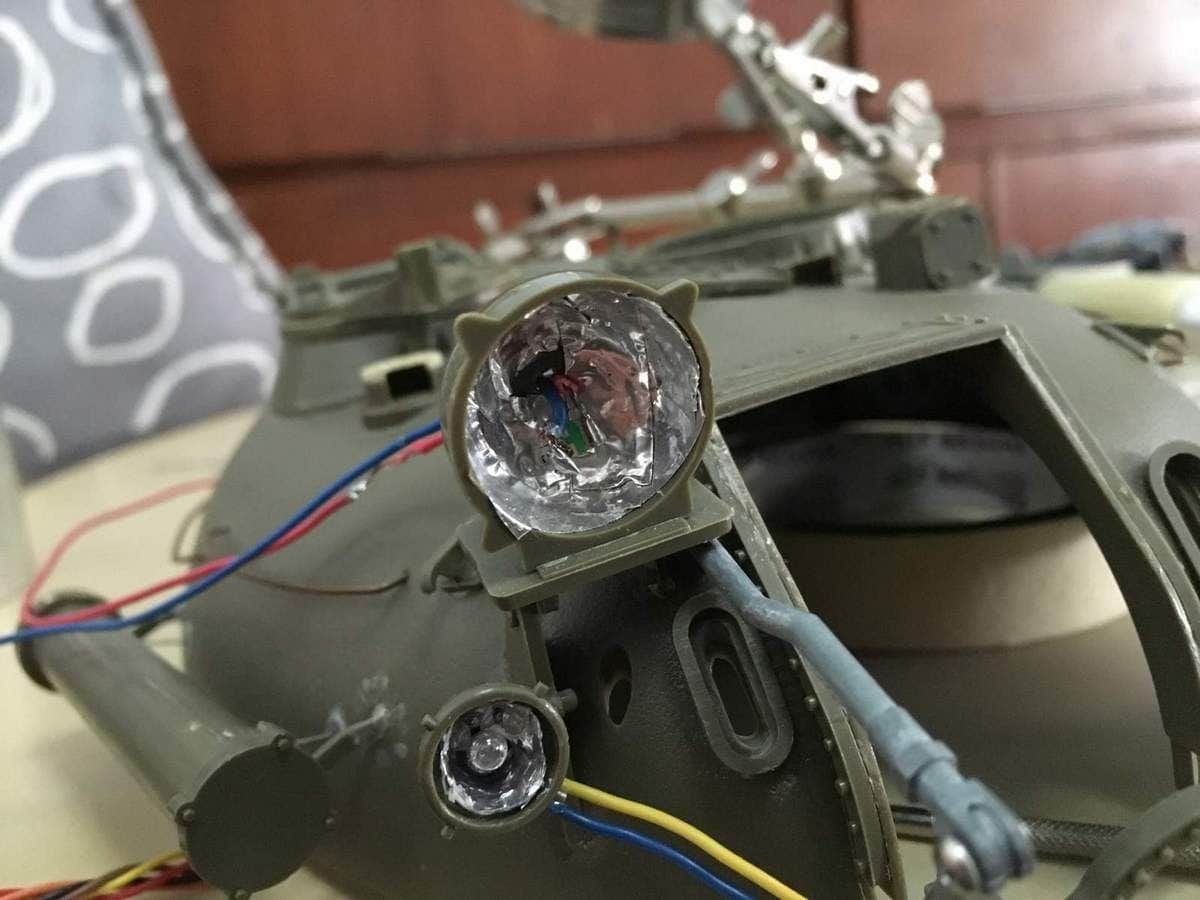
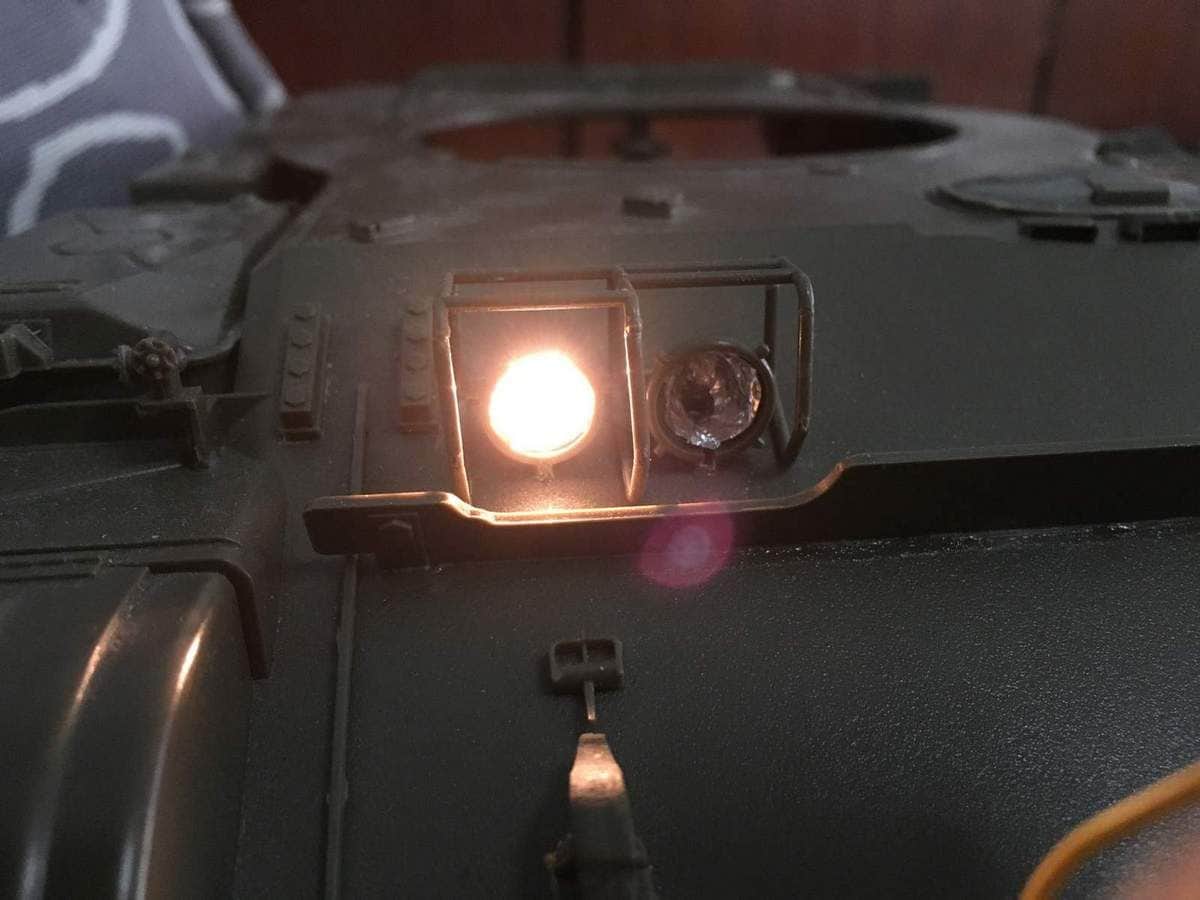
Fixed
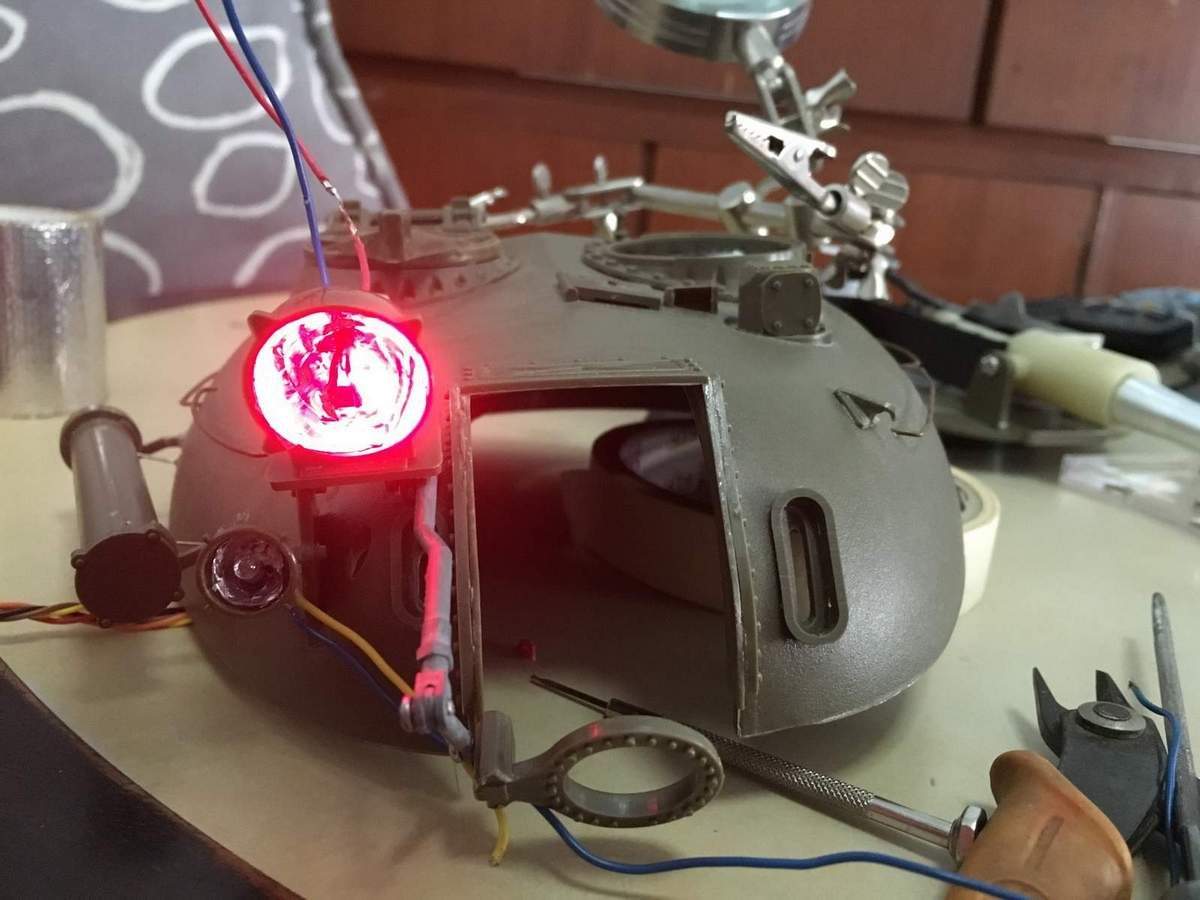
An SMT red LED was used for the IR searchlamp. For all the lamps, I had the buckets lined with adhesive aluminum tape to give the reflector effect.
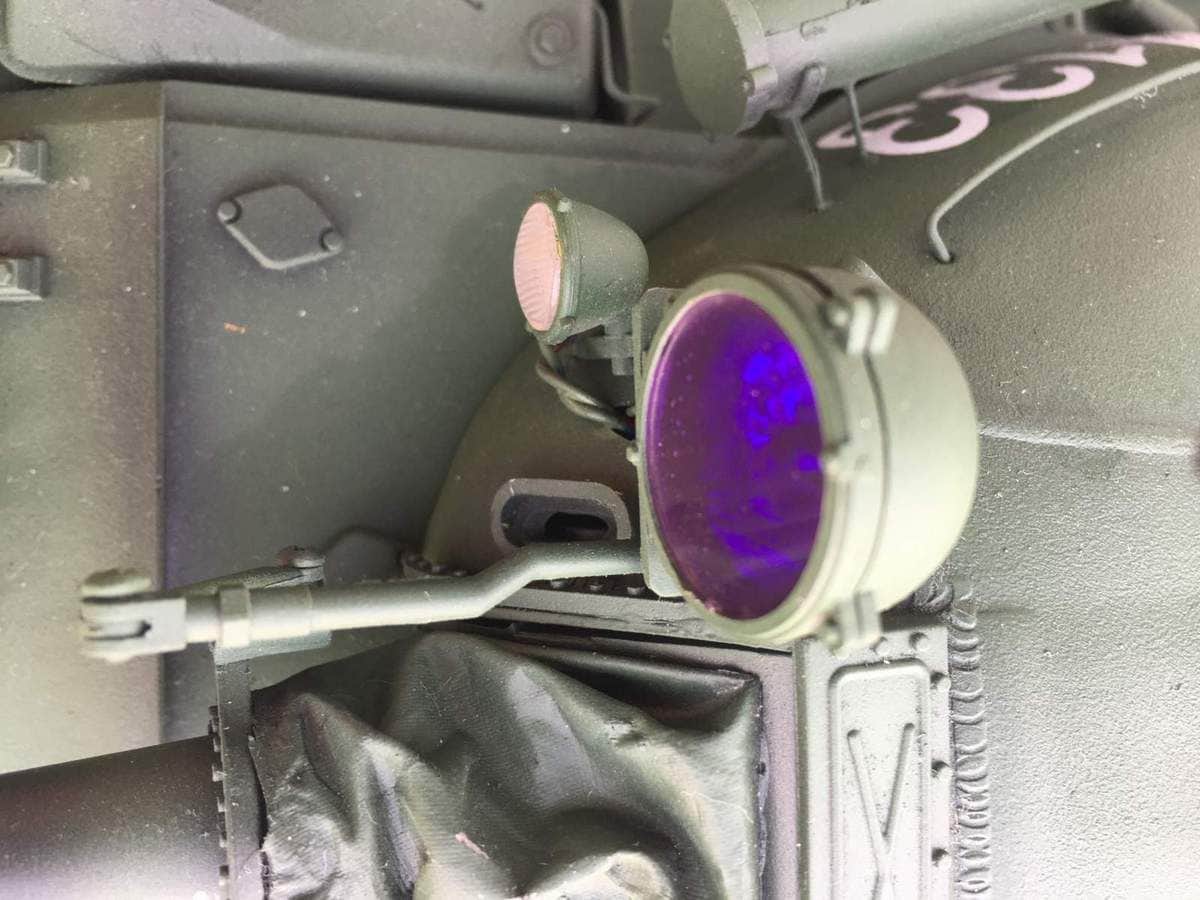
I approximated the black glass look of the IR search lamp with enamel purple paint.

The full system ablaze. The spot lights and the IR search lights are individually switchable. The current draw continued to be a problem, and the Maglite bulbs eventually got swapped to LEDs as well.
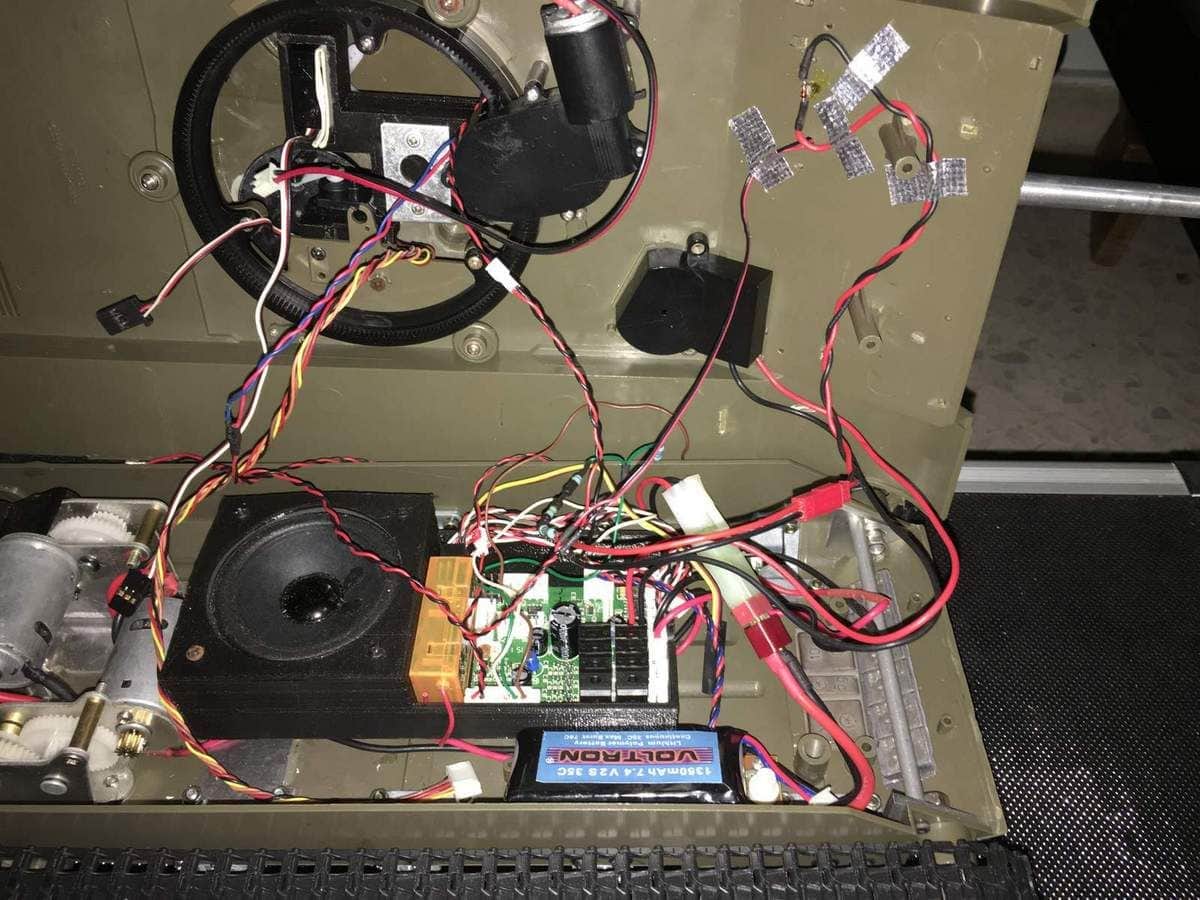
A look at the 3DP speaker box cum electronics holder. Space was a premium so I used small-capacity LiPos at this stage for testing. Okmo also printed me a servo recoil cum elevation box that would bolt into the kit-supplied recoil cradle.
The next major problem was also one of the Soviet tanks' key identification features, the large fuel tanks hung off the back of the hull. Like the turret fording kit, they were destined to fail/break the first time out if they weren't reinforced. However as it was necessary to remove them in the process of removing the hull top, I sketched out a proposed solution, asking OKMO to print me two small parts:

The solution makes use of rare-earth magnets with the fuel drum mounts epoxied to the base. I wanted it to be strong enough to resist breaking, yet detach itself from the hull given a hard enough hit.
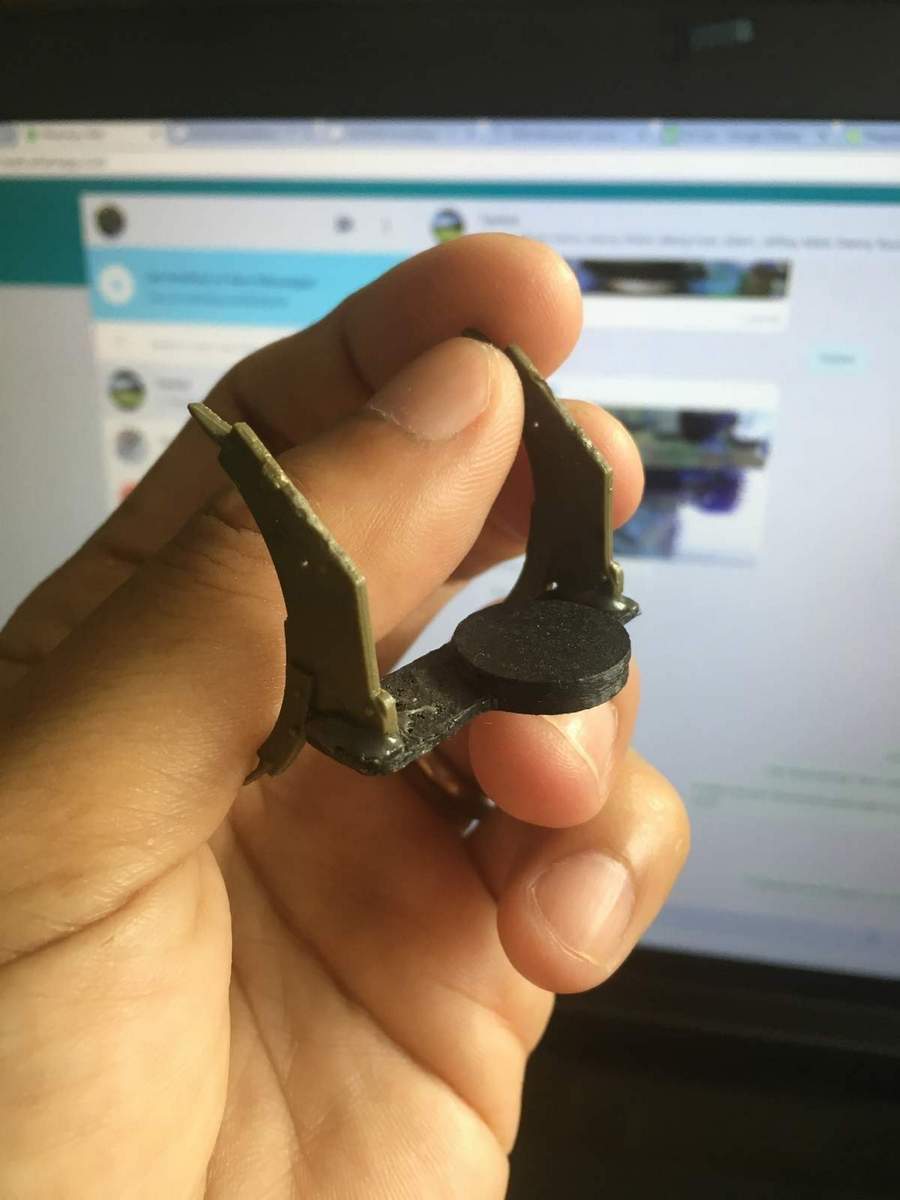
Each piece is constructed to key into the fuel drum holders and incorporate a rare earth magnet glued into a recess
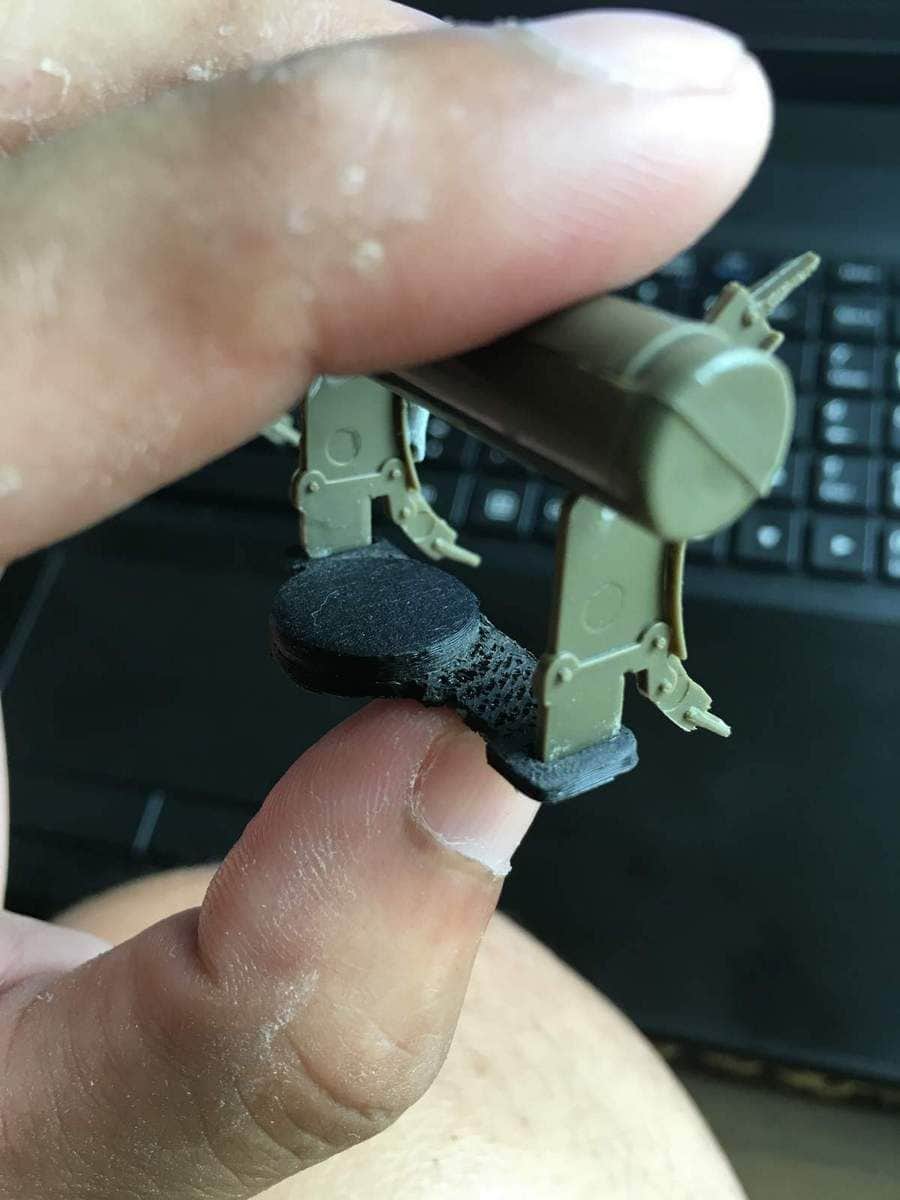
Posts are attached with epoxy for strength and rigidity
The holders are temporarily fixed onto the hull to locate positions for the corresponding hull magnets

The hull magnets are also secured with glue
Fuel drum mounts removed
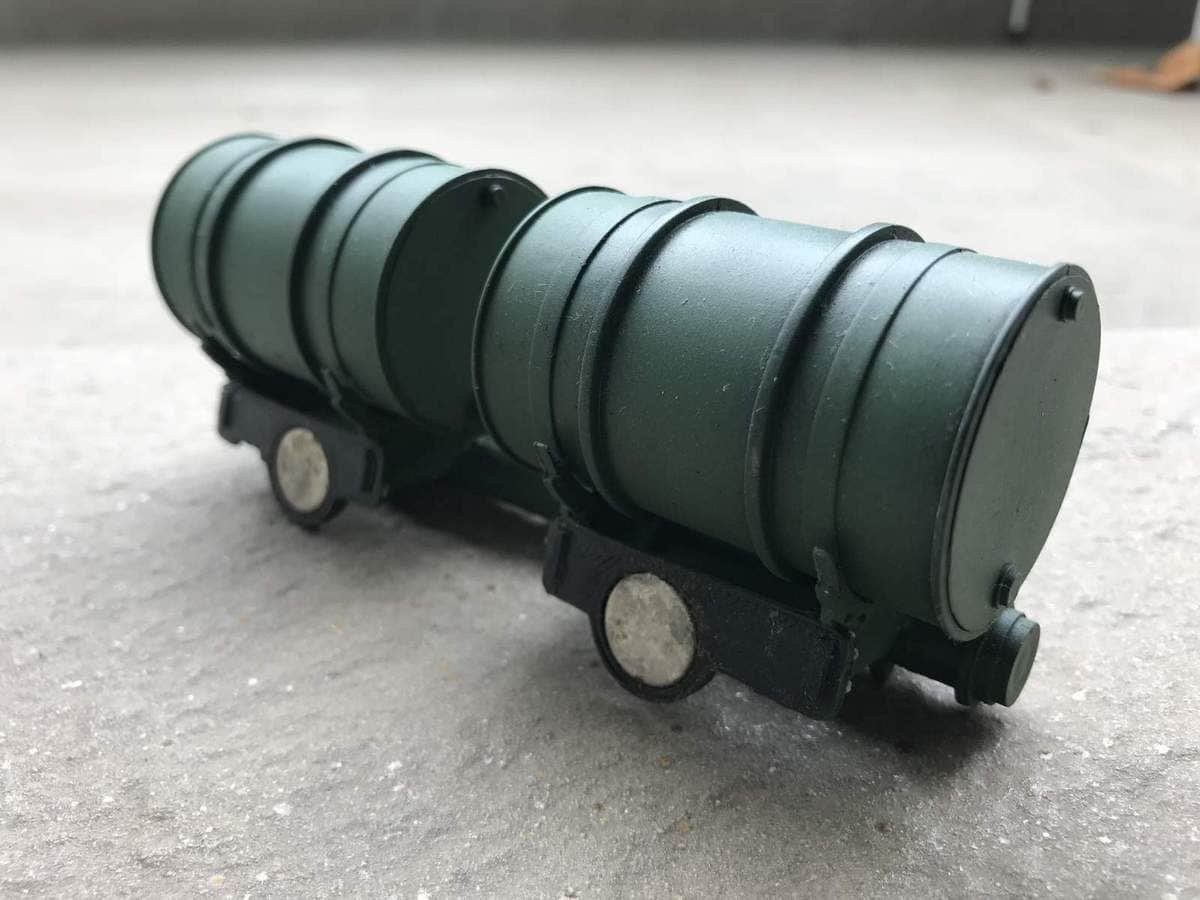
Fuel drum mounts as one single unit
You can see the steel rod that I had inserted through from the turret into the fording kit cylinder. As I handled the kit during its construction, I broke the slender plastic mounts several times. I doubted it would last 5 minutes in use, thus I had them strengthened
The final custom part was a 3D printed TBU base.
Fast forward 5 years later and a friend had a partially-built T-55A that he wanted to offload, some cash changed hands and I was owner of build number 493:
Being partially built, it also came partially upgraded, with chassis stiffening plates, upgraded idler wheels as well as copper grab handles about the turret and faux fuel piping. I set about assembling the rest of the parts: Given how fragile the stock 12.7 mm DShK heavy machine gun looked, I purchased an additional machine gun off from the Heng Long ZTZ-99 kit as a spare.
The next major milestone was to select electronics for the tank and I decided to give Clark a try. I got OKMO design's founder to 3DP me a Tamiya-esque setup, and I intended to make the front running lights of the tank functional, both for the running lamps and the IR lamps. Given how tight the tank was, it was going to be a tough ask, but the slaved gun barrel IR searchlight was too large to resist!
The original solution were Maglite halogen bulbs; however they drew a lot of current and caused problems for the Clark board's switchable lighting system. It looked good and authentic though. In this photo, I have the SMT LED and Maglite bulb reversed, as I placed them in the wrong positions.
Fixed
An SMT red LED was used for the IR searchlamp. For all the lamps, I had the buckets lined with adhesive aluminum tape to give the reflector effect.
I approximated the black glass look of the IR search lamp with enamel purple paint.
The full system ablaze. The spot lights and the IR search lights are individually switchable. The current draw continued to be a problem, and the Maglite bulbs eventually got swapped to LEDs as well.
A look at the 3DP speaker box cum electronics holder. Space was a premium so I used small-capacity LiPos at this stage for testing. Okmo also printed me a servo recoil cum elevation box that would bolt into the kit-supplied recoil cradle.
The next major problem was also one of the Soviet tanks' key identification features, the large fuel tanks hung off the back of the hull. Like the turret fording kit, they were destined to fail/break the first time out if they weren't reinforced. However as it was necessary to remove them in the process of removing the hull top, I sketched out a proposed solution, asking OKMO to print me two small parts:
The solution makes use of rare-earth magnets with the fuel drum mounts epoxied to the base. I wanted it to be strong enough to resist breaking, yet detach itself from the hull given a hard enough hit.
Each piece is constructed to key into the fuel drum holders and incorporate a rare earth magnet glued into a recess
Posts are attached with epoxy for strength and rigidity
The holders are temporarily fixed onto the hull to locate positions for the corresponding hull magnets
The hull magnets are also secured with glue
Fuel drum mounts removed
Fuel drum mounts as one single unit
You can see the steel rod that I had inserted through from the turret into the fording kit cylinder. As I handled the kit during its construction, I broke the slender plastic mounts several times. I doubted it would last 5 minutes in use, thus I had them strengthened
The final custom part was a 3D printed TBU base.
Last edited by cleong; 04-07-2019 at 12:47 AM.
 04-07-2019, 01:28 AM
#2
Thread Starter
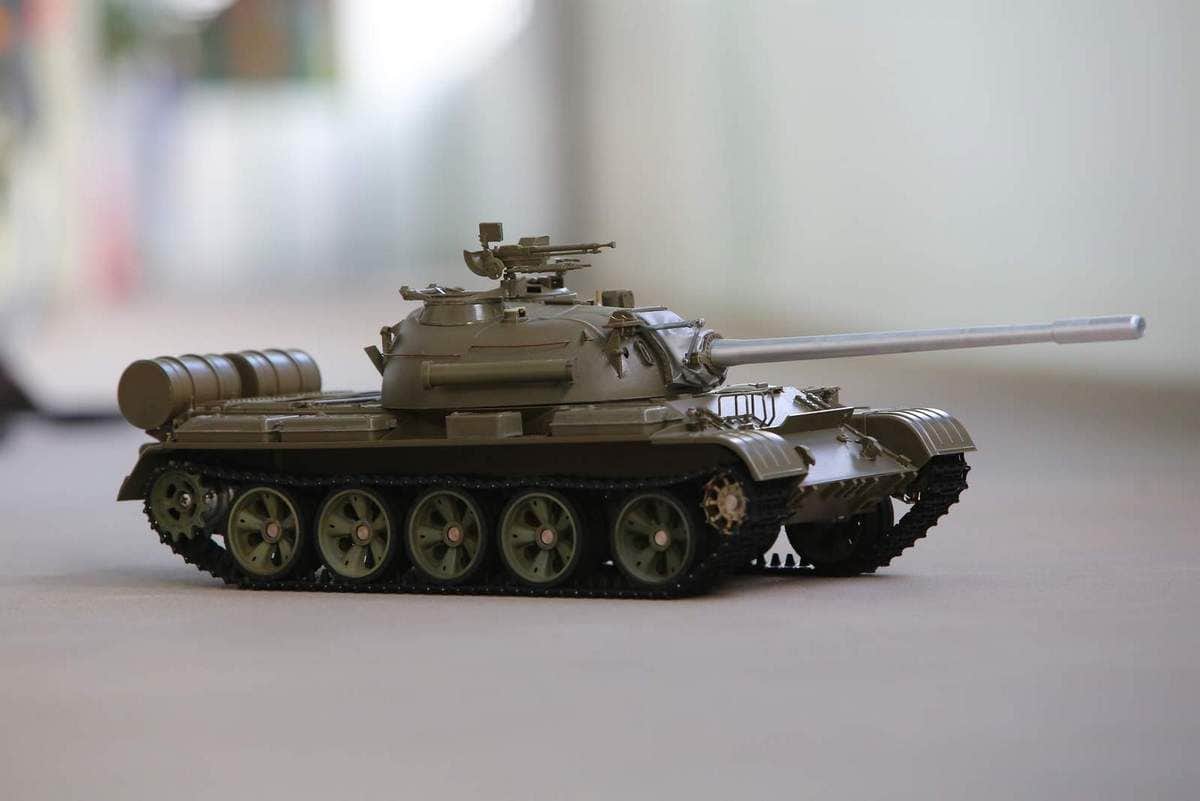
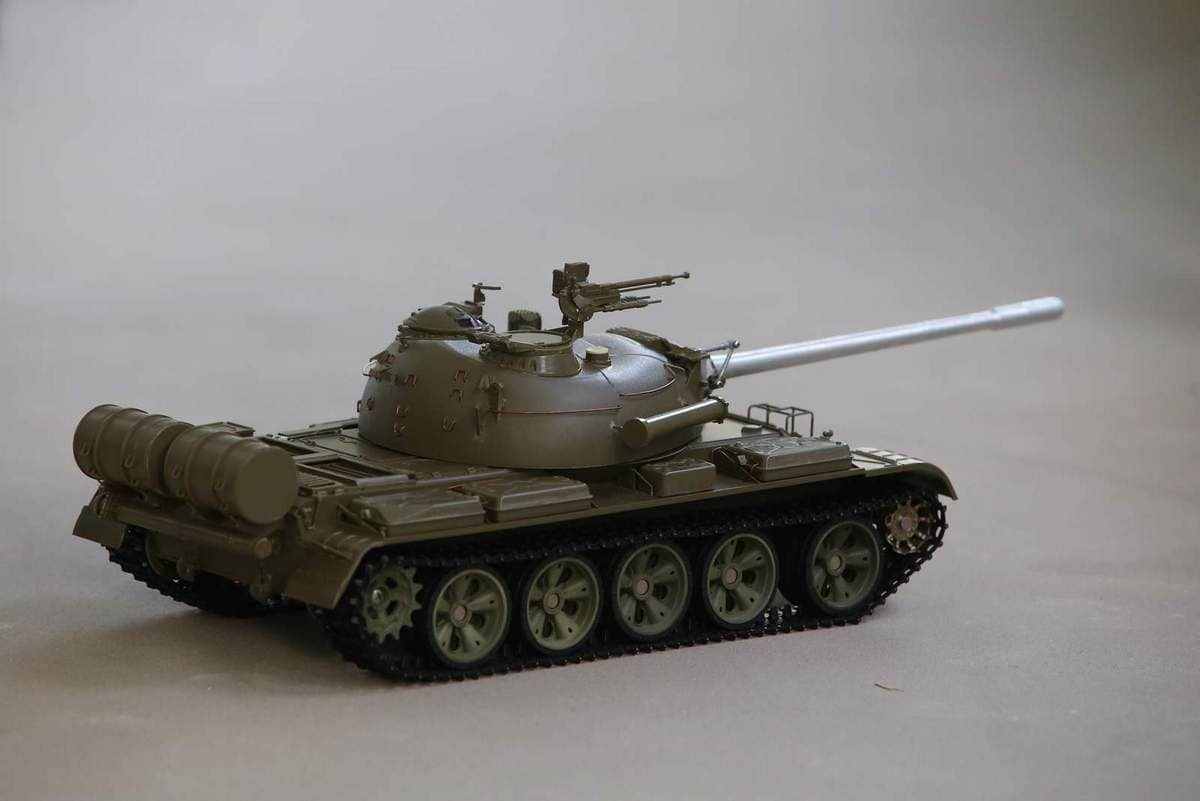
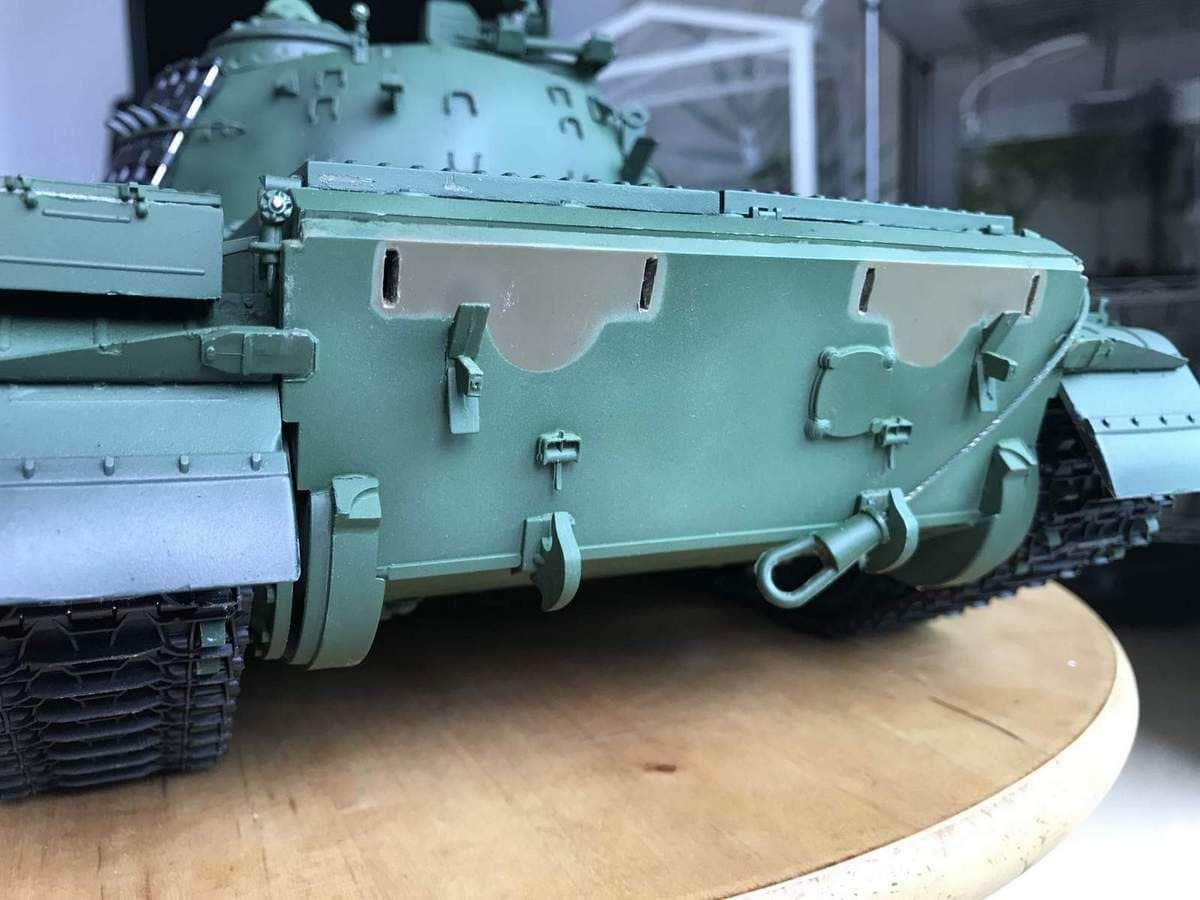
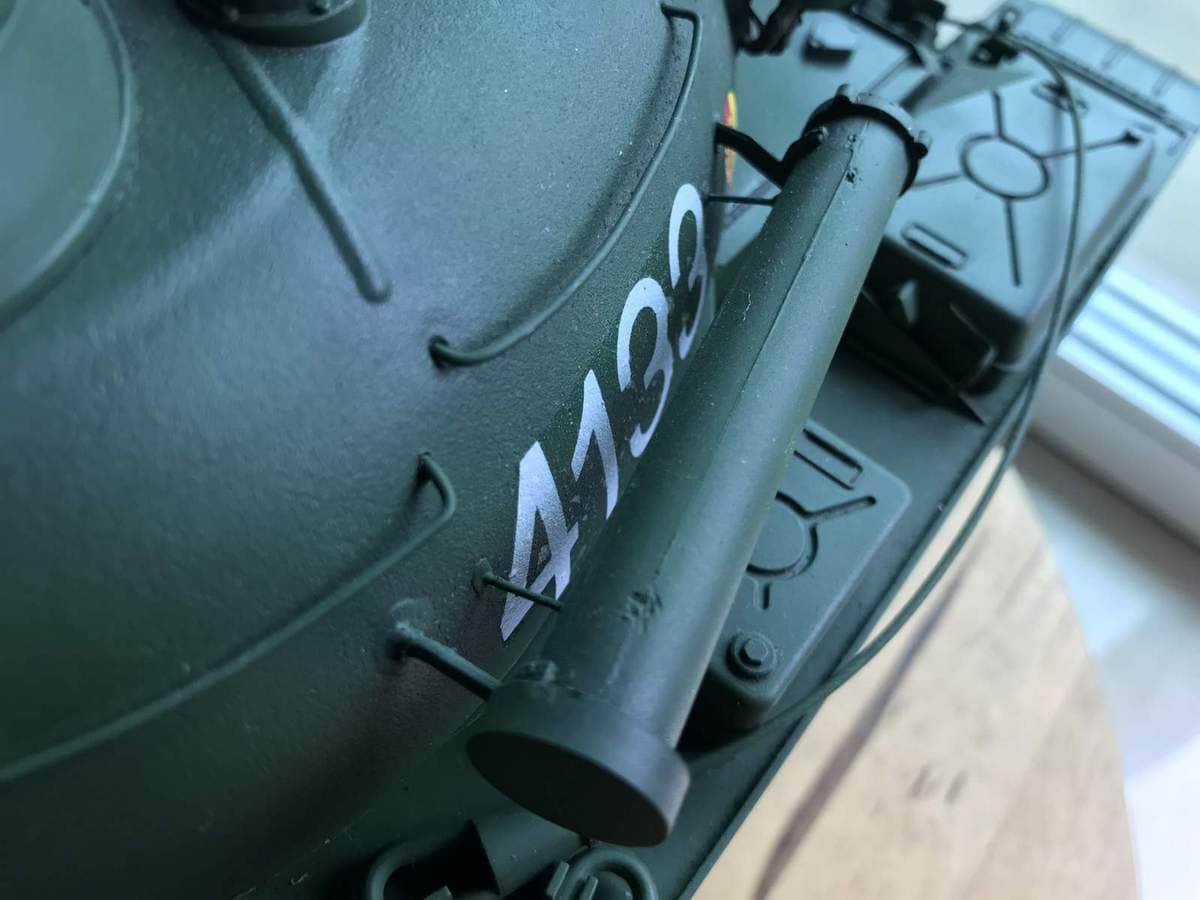
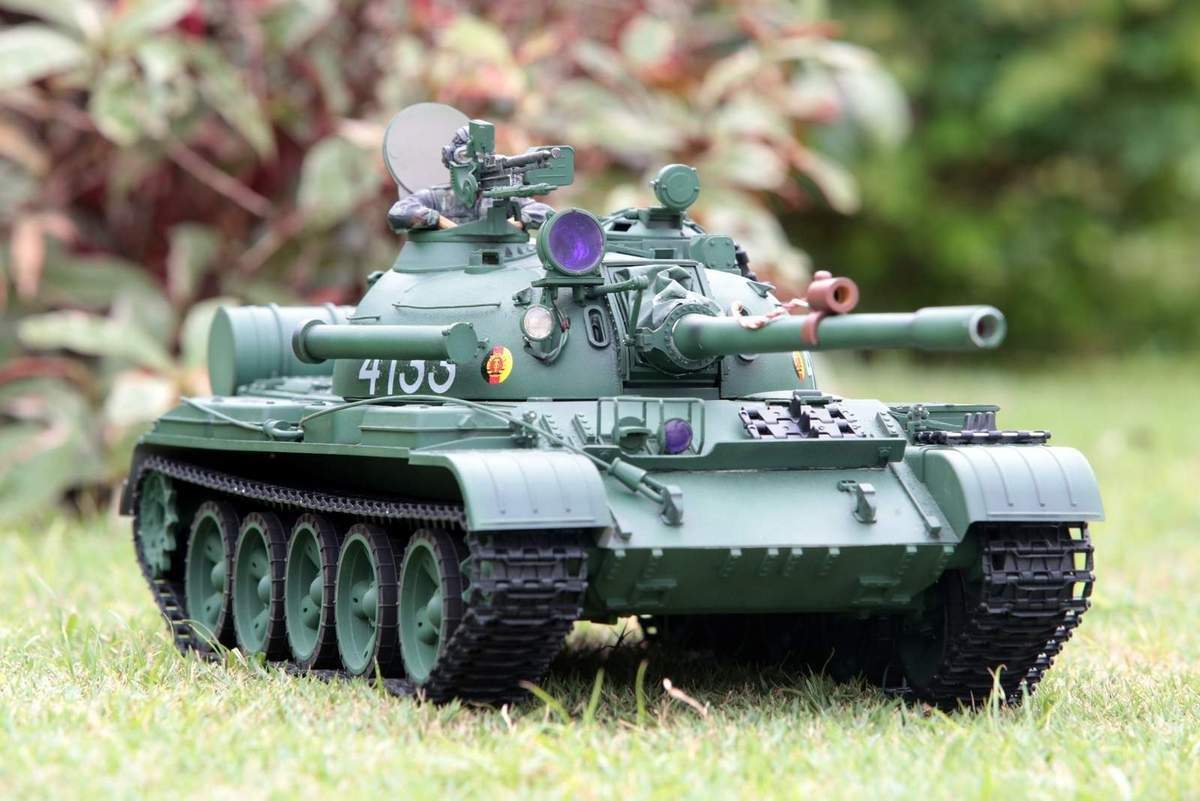
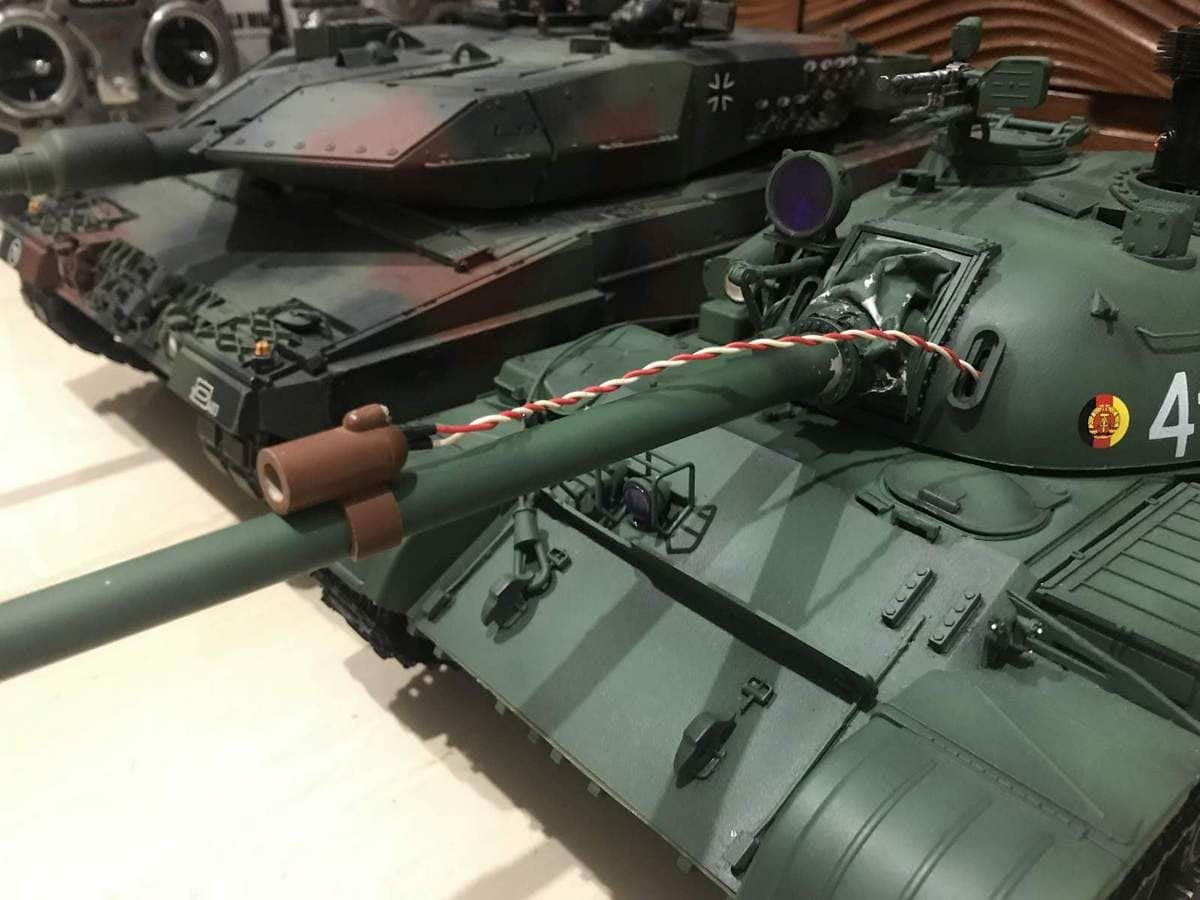
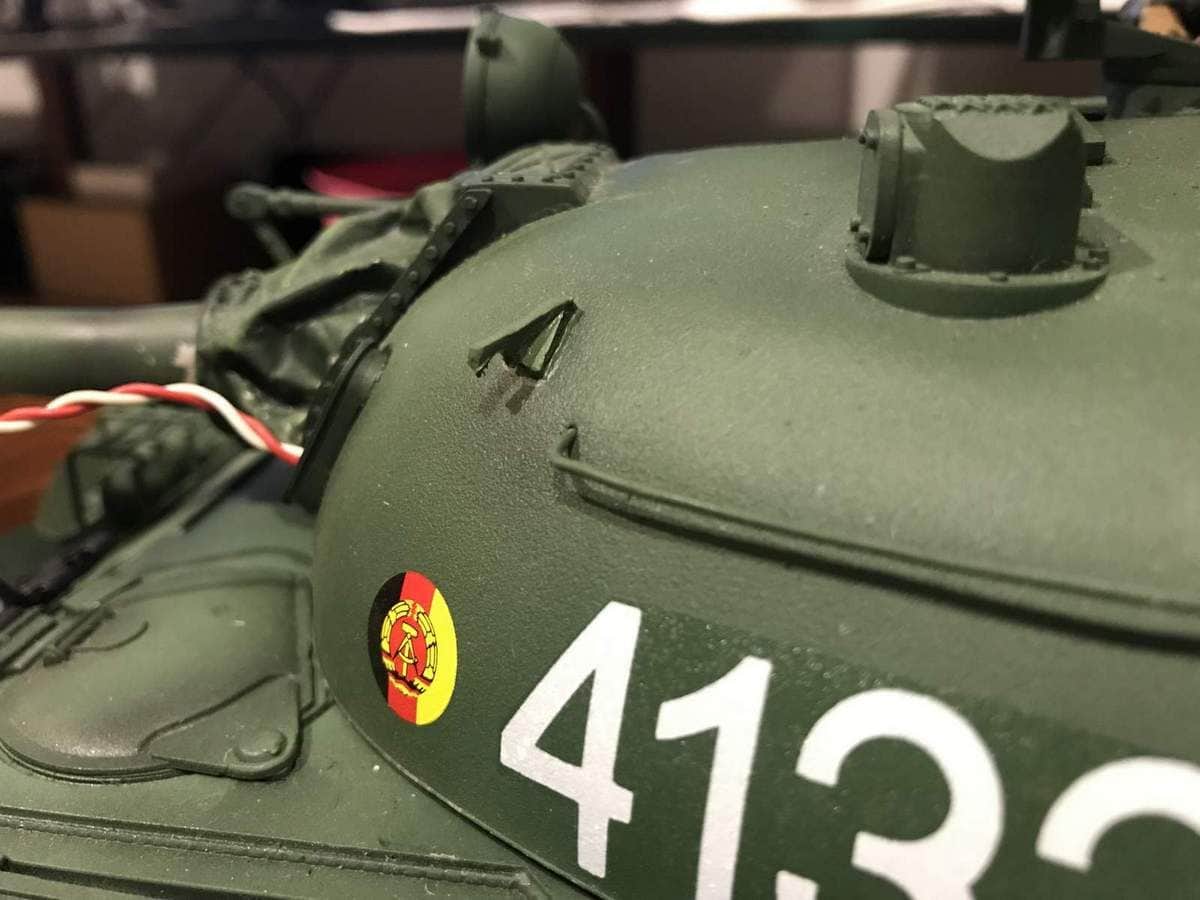
The paint job and installation of the Clark electronics were done by OKMO's people and it was finished in German Democratic Republic colours of tank 4133 amongst the choices available in the kit-supplied decals. It was returned to me with preshading of panel lines done, and awaiting my choice of decals.
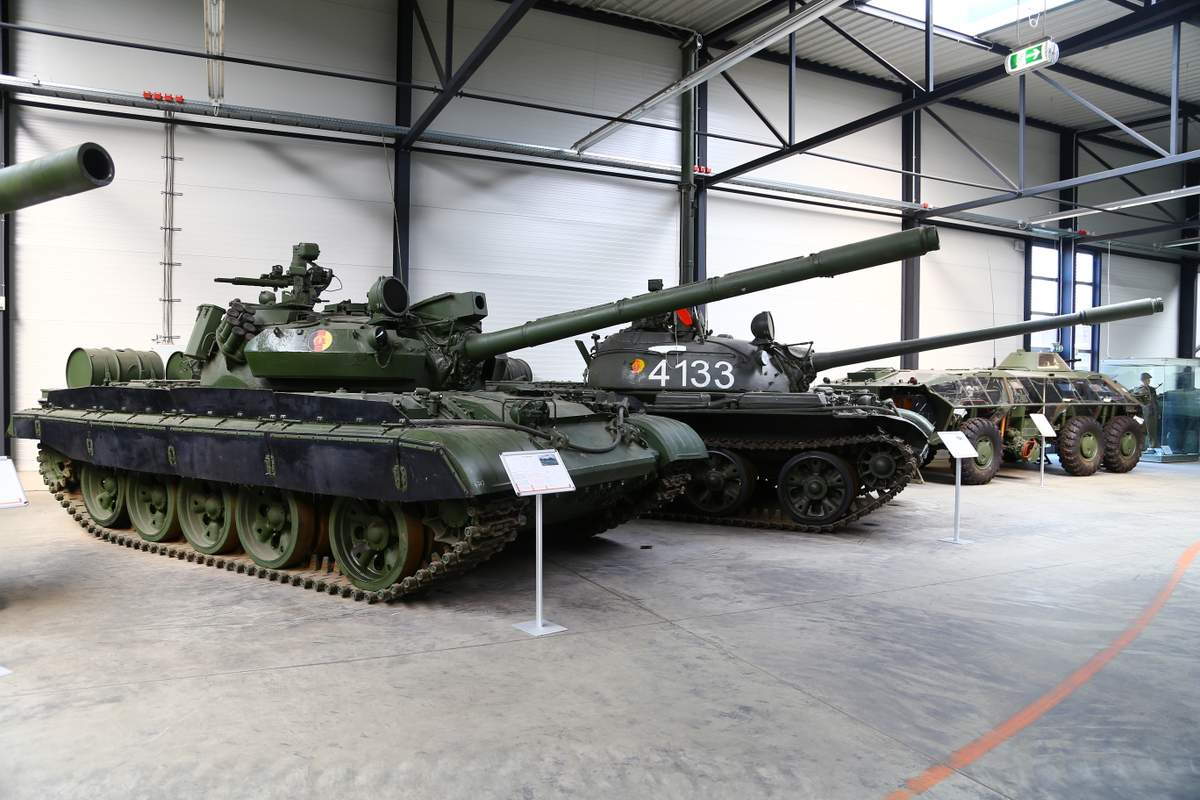
During a later visit to the Deutsches Panzermuseum Munster, I realized that one of the T-55A in their exhibits were also 4133. Even though it had quite a few differences, it was pretty cool to see the actual tank!
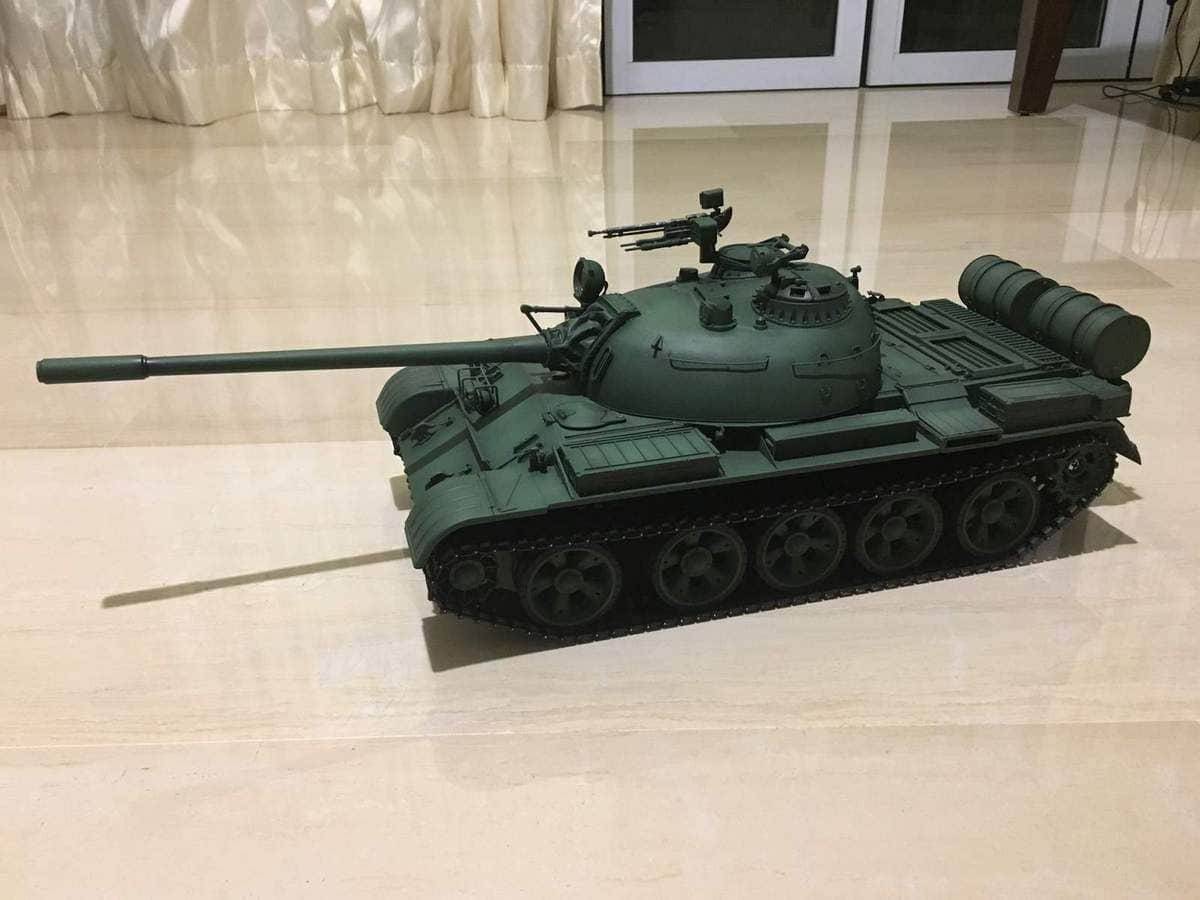
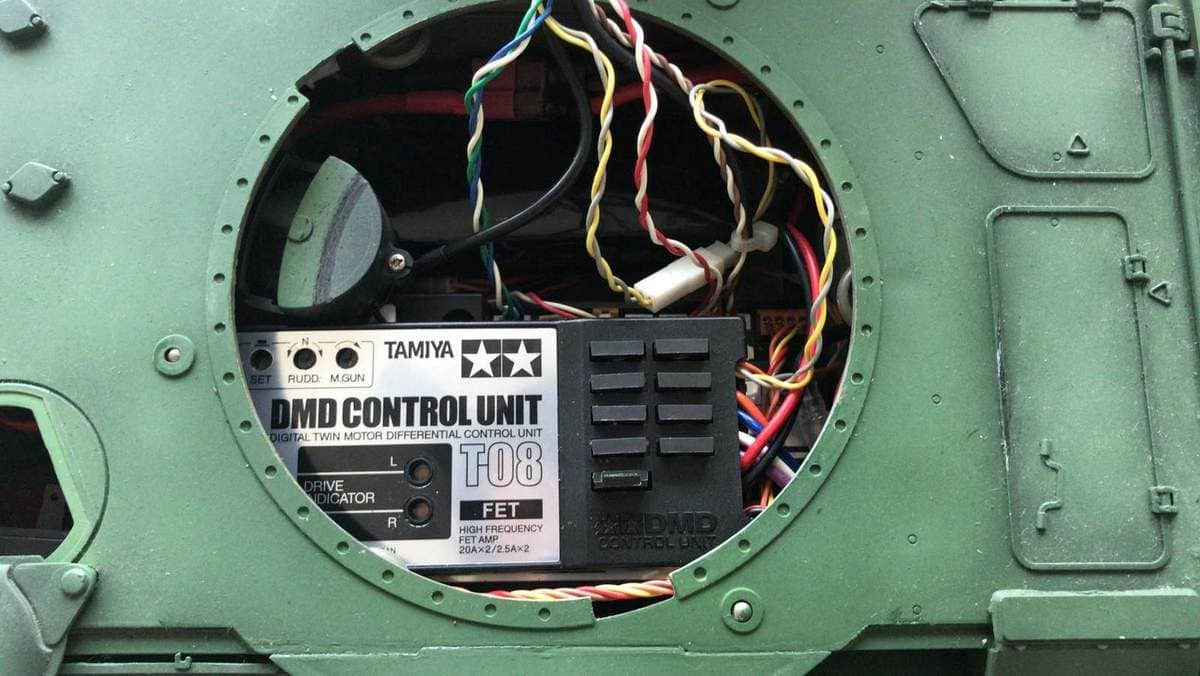
Being completed to this stage in 2016 however, it languished and never saw IR action, as I could not get to grips with the Clark control setup. I finally bit the bullet last month when I visited the AAF Tank Museum and bought a set of Tamiya KV-1/2 electronics along with a gun flash with the intention to convert the tank over. The recoil and gun barrel elevation gearboxes were salvaged from my decommissioned Tamiya Panther G, which worked better with the cabling set up for the Tamiya electronics. It appeared that Hooben referenced Tamiya's equipment a fair bit, as I only needed to drill one extra hole in the Tamiya recoil gearbox, and the elevation gearbox bolted in perfectly.
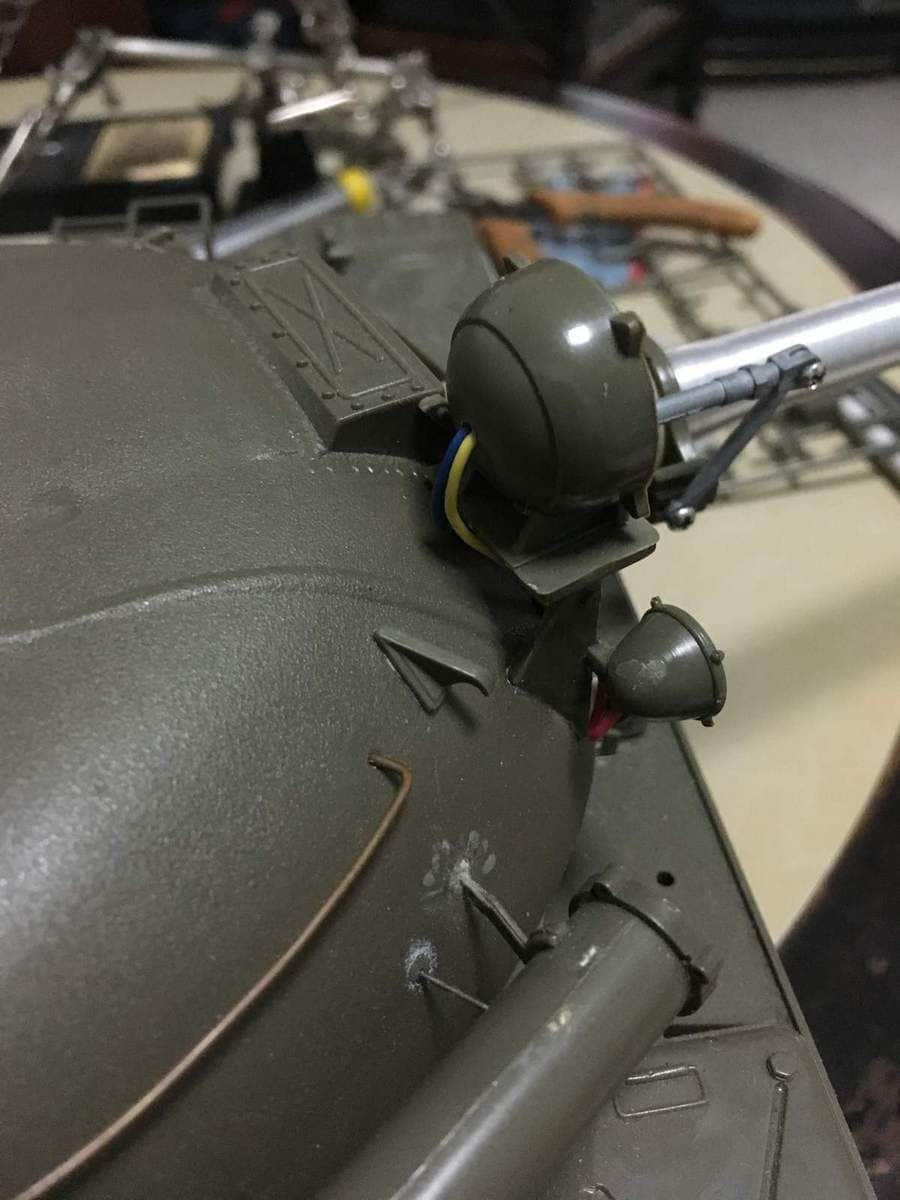
At this point of time, frustration with just getting the tank moving meant that I left the machine gun LED unplugged, as well as the lighting system that dogged the whole tank's completion in the past. But whatever, it was functional for the field and it turned out to be a really good battler with low ground pressure and great ground clearance offering it great mobility despite a lack of IR range. The Panther's clip on emitter found its way over as well:
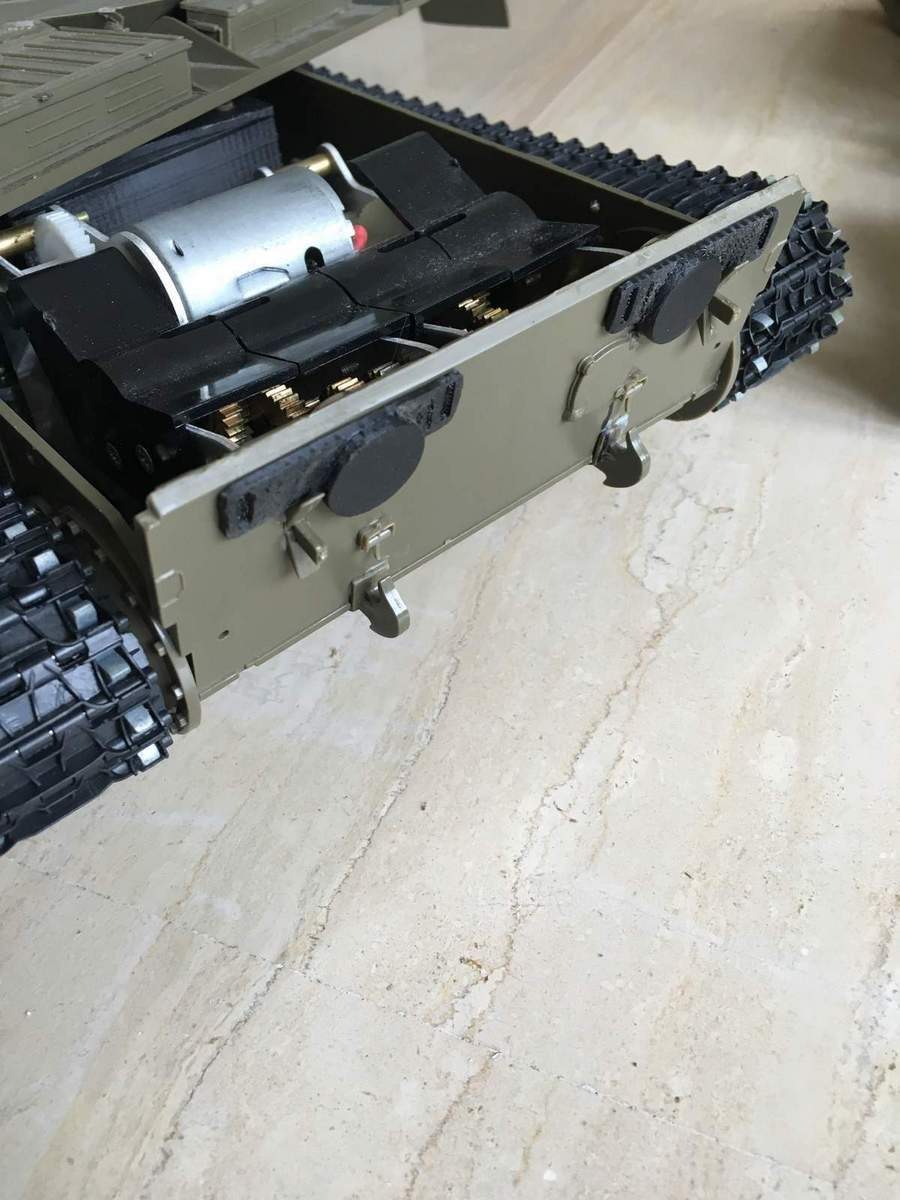
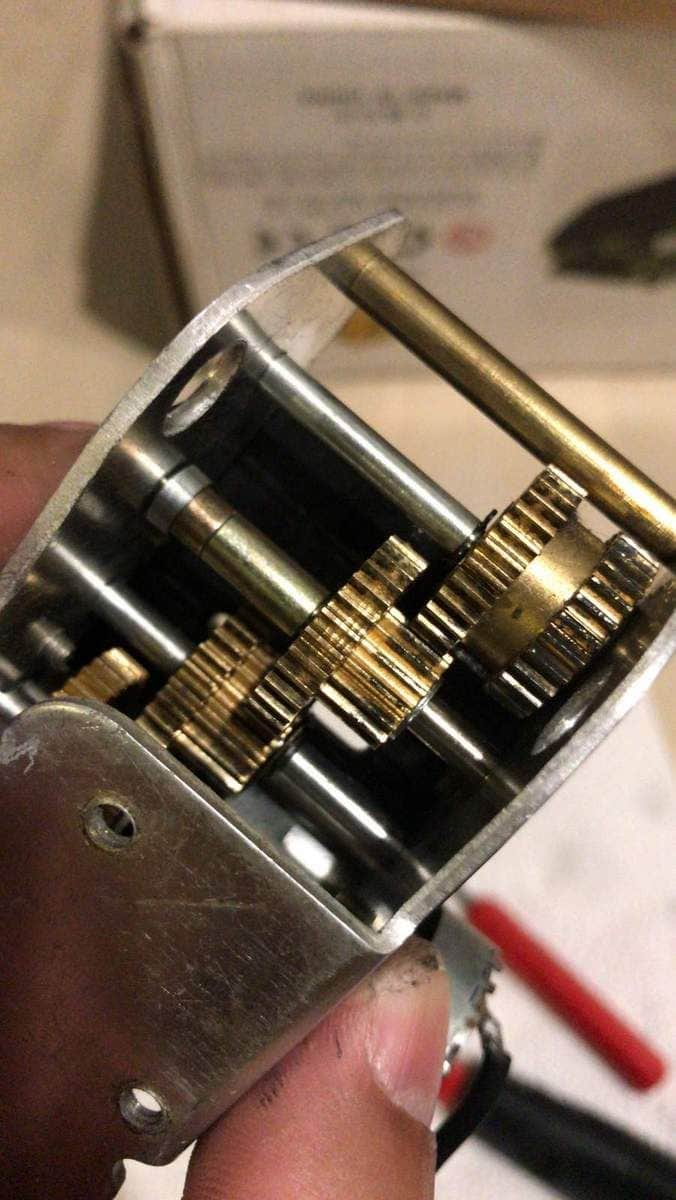
The great performance of the tank was then abruptly ended when I lost drive in the right side gearbox and opening her up revealed why:
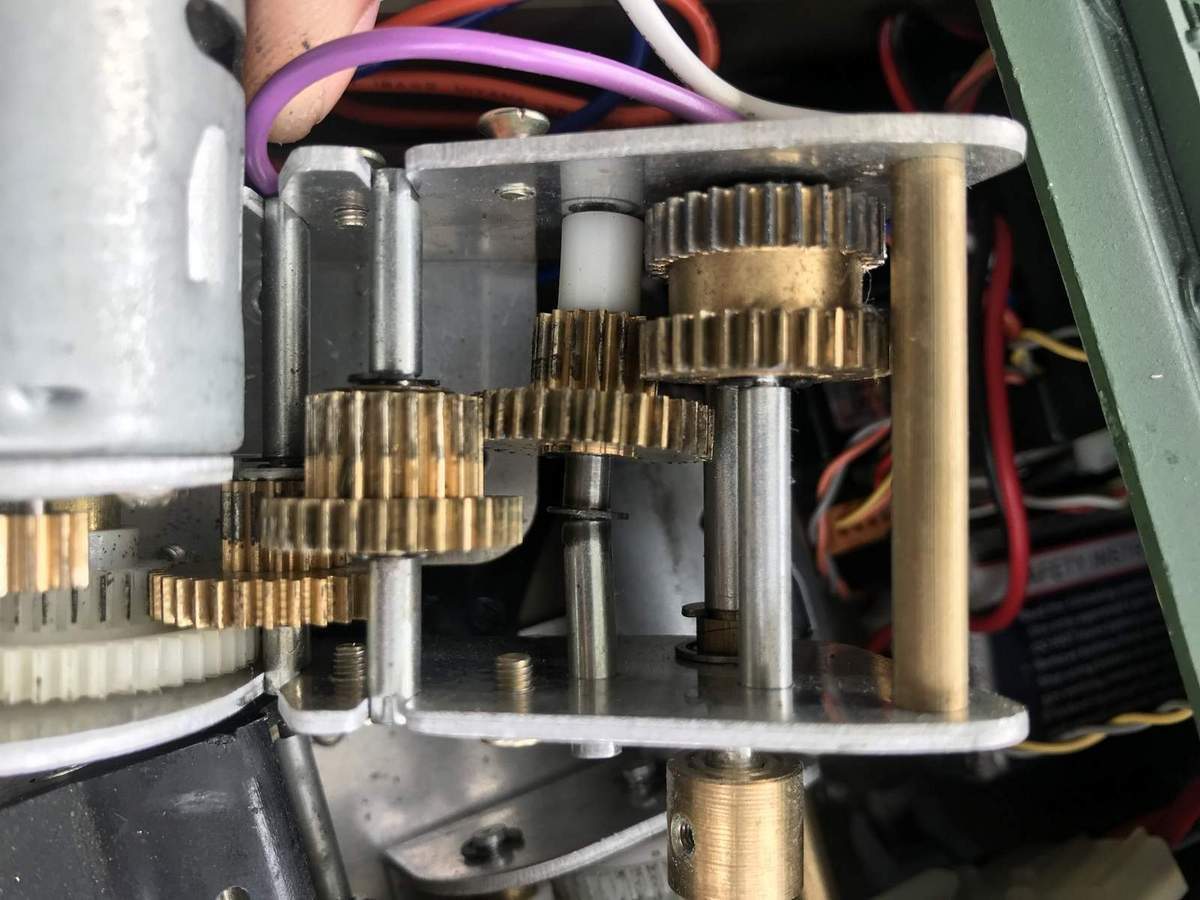
I'm pretty sure that shaft's not meant to be crooked
Chinese "quality" or poor design? The shaft didn't need two slots ground into it as it used only one E clip. The other became a weak point when subjected to stress
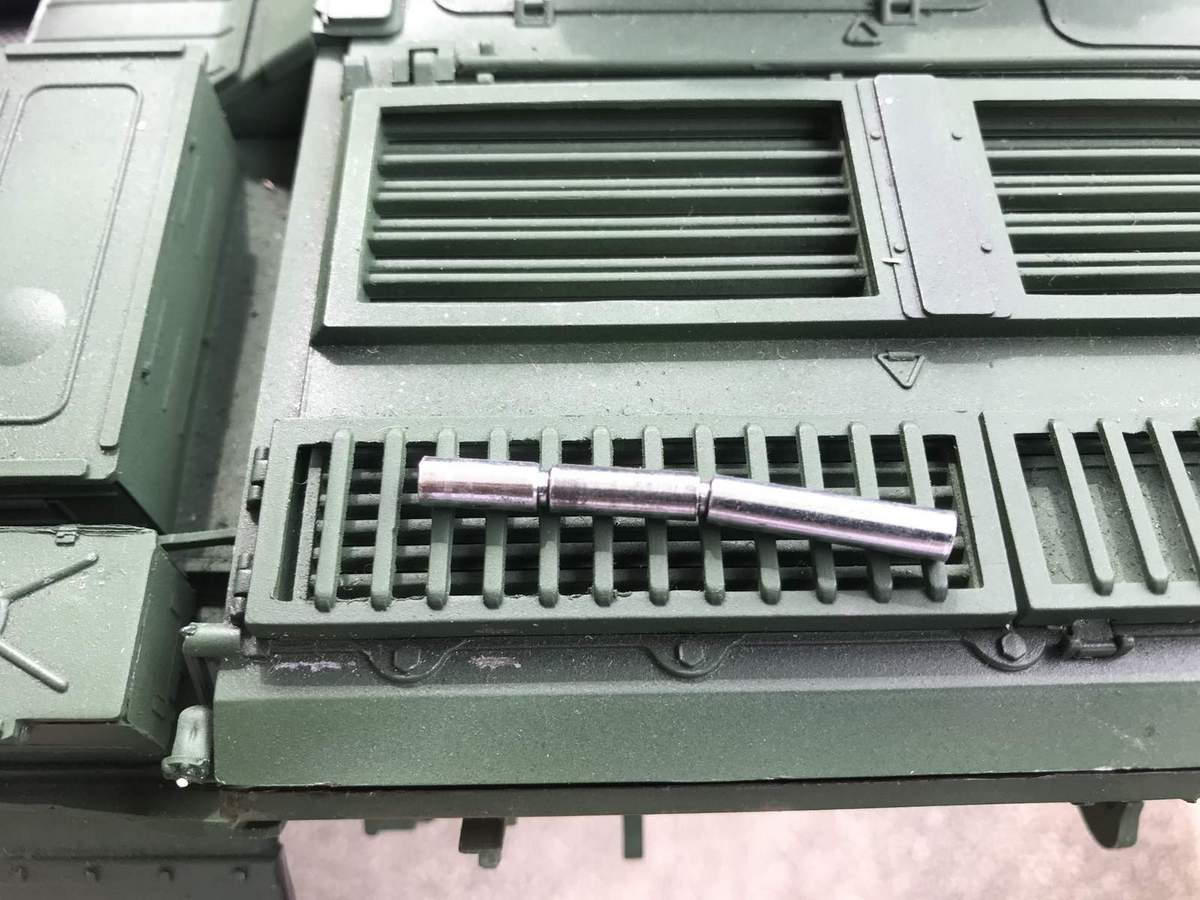
I scrounged around in my gearbox spares for a Tamiya gear shaft which I spaced out to the correct alignment with shaft sleeves.
I also lost a turret lifting hook while operating the tank and unlike Tamiya, you're not going to be able to get onto AAF's website to order spare parts and so I fabricated one from scrap styrene off my Ludwig Leopard 2A4 project (more on that later)
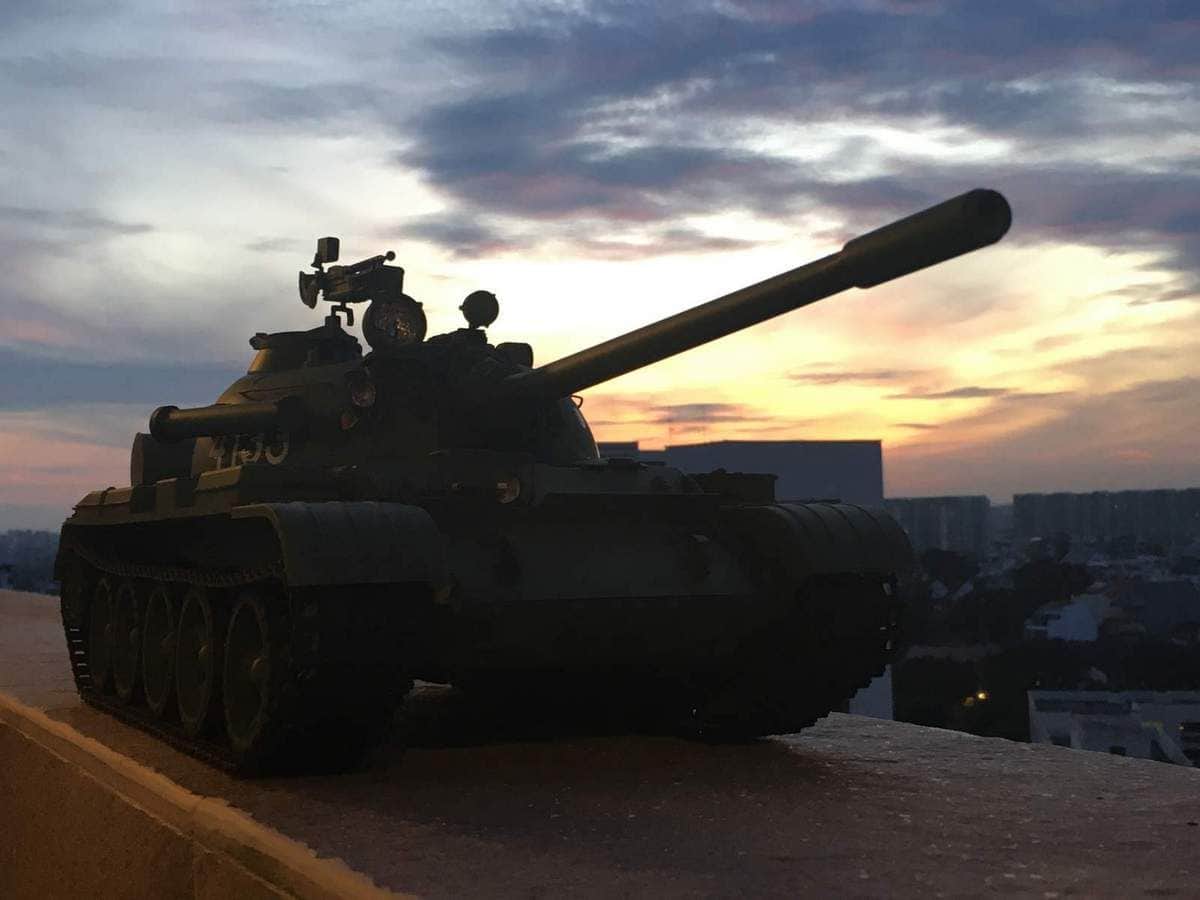
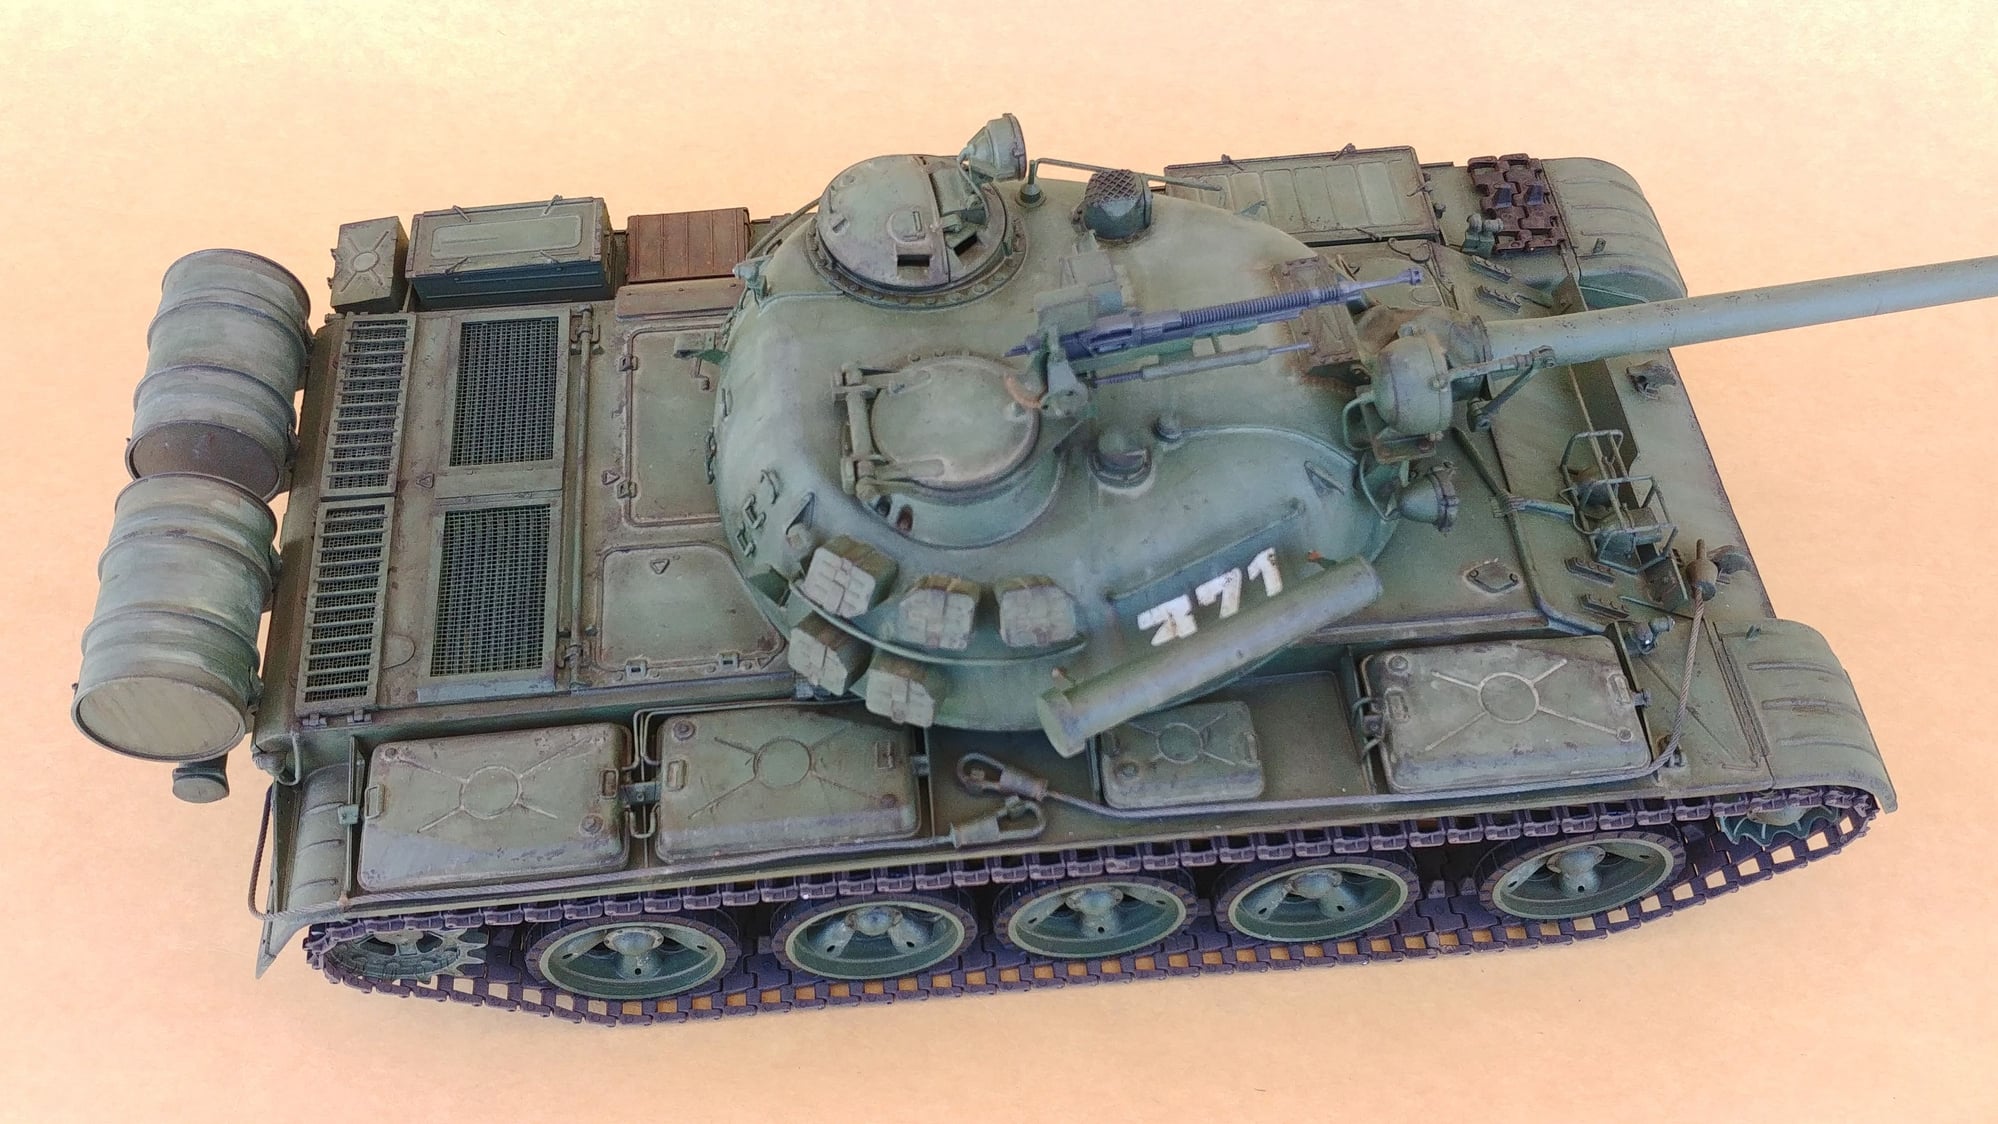
All in all, it is fulfilling to finally get the Hooben T-55A running. It ended up costing me more than a Tamiya tank but its something I always liked - Eastern Bloc tanks always had a rather purposeful look, being low and broad with long main guns. However, true to its Chinese origins, the tank has quality issues and I expect it to continue. I am already looking into solutions to fit Tamiya gearboxes into the T-55A and it shares a woeful gun barrel depression just like the full scale tank does. In the meantime, enjoy the video, and tanks for reading.

During a later visit to the Deutsches Panzermuseum Munster, I realized that one of the T-55A in their exhibits were also 4133. Even though it had quite a few differences, it was pretty cool to see the actual tank!
Being completed to this stage in 2016 however, it languished and never saw IR action, as I could not get to grips with the Clark control setup. I finally bit the bullet last month when I visited the AAF Tank Museum and bought a set of Tamiya KV-1/2 electronics along with a gun flash with the intention to convert the tank over. The recoil and gun barrel elevation gearboxes were salvaged from my decommissioned Tamiya Panther G, which worked better with the cabling set up for the Tamiya electronics. It appeared that Hooben referenced Tamiya's equipment a fair bit, as I only needed to drill one extra hole in the Tamiya recoil gearbox, and the elevation gearbox bolted in perfectly.
At this point of time, frustration with just getting the tank moving meant that I left the machine gun LED unplugged, as well as the lighting system that dogged the whole tank's completion in the past. But whatever, it was functional for the field and it turned out to be a really good battler with low ground pressure and great ground clearance offering it great mobility despite a lack of IR range. The Panther's clip on emitter found its way over as well:
The great performance of the tank was then abruptly ended when I lost drive in the right side gearbox and opening her up revealed why:
I'm pretty sure that shaft's not meant to be crooked
Chinese "quality" or poor design? The shaft didn't need two slots ground into it as it used only one E clip. The other became a weak point when subjected to stress
I scrounged around in my gearbox spares for a Tamiya gear shaft which I spaced out to the correct alignment with shaft sleeves.
I also lost a turret lifting hook while operating the tank and unlike Tamiya, you're not going to be able to get onto AAF's website to order spare parts and so I fabricated one from scrap styrene off my Ludwig Leopard 2A4 project (more on that later)
All in all, it is fulfilling to finally get the Hooben T-55A running. It ended up costing me more than a Tamiya tank but its something I always liked - Eastern Bloc tanks always had a rather purposeful look, being low and broad with long main guns. However, true to its Chinese origins, the tank has quality issues and I expect it to continue. I am already looking into solutions to fit Tamiya gearboxes into the T-55A and it shares a woeful gun barrel depression just like the full scale tank does. In the meantime, enjoy the video, and tanks for reading.
Last edited by cleong; 04-07-2019 at 05:35 AM.
04-07-2019, 04:28 AM
#3
Looks great. I bought a Hooben T-55A second hand and it has a lot of issues. It came with an IBU2 which I've never used. I was expecting to have it up and running quickly, but with all of the issues it has taken a back burner to the Abrams. This thread gives me hope that I can get it up and running one day...

 04-08-2019, 07:04 AM
#6

Join Date: Nov 2012
Location: USA
Posts: 903
Likes: 0
Received 0 Likes
on
0 Posts
The first run kits were pretty bad. The gearboxes are junk and the electronics were a joke. I ended up using the stock gearbox housings but replaced everything else with Tamiya parts. Today it is much easier to just order replacement gearboxes from DKLM with the steel gears. Like you, I also replaced all the electronics with Tamiya DMD/MF units. Excellent job on a difficult build.
04-10-2019, 07:49 PM
#7
 04-13-2019, 12:26 PM
#8
The nature of weathering is not dirtying with dirt and mud. Is to give the model an aspect of real wear and rust.
When I was young I had a moment of genius placing my Sand Scorcher in mud, I though I was a weather master. After 30 years of learning I'm more humble now. :-)
When I was young I had a moment of genius placing my Sand Scorcher in mud, I though I was a weather master. After 30 years of learning I'm more humble now. :-)
04-13-2019, 06:23 PM
#9
Thread Starter
I think you misunderstand, I�m in no way claiming my weathering is great (or even any was done, aside from preshading), it�s merely fit for my purpose which is RC tanking, and not scale model competition award winning.
Any additional mud or scratches I get along while operating the tank which all my tanks eventually get, I regard as natural RC weathering.
Any additional mud or scratches I get along while operating the tank which all my tanks eventually get, I regard as natural RC weathering.
04-14-2019, 05:59 AM
#10
Join Date: May 2009
Location: Perth, ON, CANADA
Posts: 278
Likes: 0
Received 0 Likes
on
0 Posts
Any chance of a separate thread on this tank outlining your techniques? I'd put it right beside Streetsquid's tutorial from years back in my archives.
Mike.
Last edited by Spitvalve; 04-14-2019 at 08:46 AM.
04-14-2019, 08:04 AM
#11
I'm with ya, Leong. Mother Nature will do plenty of damage to our tanks all by herself, so it's not like she needs any help. I also like to go back after a couple years and see the weathering progress through the photos. When new she was shiny, now, two years later, she's gettin' a bit dusty. Can ya dig it? 
04-18-2019, 08:20 PM
#12
ARRGGHH, still have a V1 partial build too Leong! Just got tired of the crap pot metal trailing arms breaking on the idlers. Hooben was nice enough to send me newer plastic's tree's and lower so I can actually use them.
04-30-2019, 09:52 PM
#13
Thread Starter
Funny enough, both Ludwig and Schumo/AFV have recast suspension parts for the T-55. I bought a few small parts some time back, but maybe I should be buying more now.
