


StuG IIIG build thread
 08-24-2008, 05:06 AM
#51

Thread Starter

The clamp bar is made from 1/8" x 1/8" channel. It's too tall and needs to be thinned. I used double side tape to attach the channel to a strip of wood (big enough to use as a handle) and used a coarse file to rip off the excess. It takes a while but the end result looks right. The ends of the channel were filed to an angle, and holes drilled at each end to match the swivel screw positions.
I've loosely assembled it to check that it looks right - I used pictures to position the swivel brackets in the right place, and once again I've come across the only dimensional problem with the HL Panzer III - the engine cover is about 2mm too high. I've made the superstructure to be the correct height overall, so the rear panel is a bit short.[ ] To get the spare track to sit correctly I had to file off the bosses on the bottom of the track. I don't think it will show when it's finished though![>:]
Jo
I've loosely assembled it to check that it looks right - I used pictures to position the swivel brackets in the right place, and once again I've come across the only dimensional problem with the HL Panzer III - the engine cover is about 2mm too high. I've made the superstructure to be the correct height overall, so the rear panel is a bit short.[
] To get the spare track to sit correctly I had to file off the bosses on the bottom of the track. I don't think it will show when it's finished though![>:]Jo
 08-24-2008, 12:44 PM
#53
Banned
Join Date: Jan 2007
Location: swindon, UNITED KINGDOM
Posts: 1,707
Likes: 0
Received 0 Likes
on
0 Posts
that is some nice detail work Jom [X(][X(][X(]
I would have to borrow some one elses eyes for that job[sm=spinnyeyes.gif]
Kind regards Rob
I would have to borrow some one elses eyes for that job[sm=spinnyeyes.gif]
Kind regards Rob
10-07-2008, 04:27 AM
#54
Thread Starter
I've finished the hinges for the gunner's hatch, and also made the machine gun shield. The shield is the later pattern with the rectangular hole for the MG42.
Hinges are made by soldering tube to a piece of flat brass bar - I've silver soldered it (Yes I know I said that soldering brass was ugly - I must have improved my technique!).
For convenience in marking and cutting I soldered two tubes to the bar - that way the two sides of the hinge theoretically match. See the pictures, the last step will be to cut the bar in half to make a pair of hinges, and then shape the ends. The hinges were CA'd to the hatches and superstructure.
One great thing about the tubing that K&S sell is that all the tubes fit inside each other - so to get the right outside diameter I used a fairly large diameter tube. The hinge pin size is a matter of choice - if necessary a smaller piece of tube can be inserted to "thicken up" the hinge.
Jo
10-07-2008, 04:41 AM
#55
Thread Starter
Flushed with success after the brass hinges I decided to make the whole shield from brass....
I don't have drawings for it so it took a bit of time to work out the dimensions on a "it must fit to here and do this" basis.
The basic shield is rectangular with folded corners. I've used 0.8mm sheet (which would be 1/2 inch plate, full size) as it looks about right. Detail parts were silver soldered on as I went along, and hinges made from tube and sheet as before. The bolts attaching the hinges are 00-90 - a bit big but it's not going to show when the paints on. I've replicated the way the shield stays up - there's a crude plate welded to the forward hatch which fits onto a pin welded to the inside of the shield.
Jo
10-27-2008, 01:23 AM
#56
Thread Starter
Starting on the Cupola. Making round shapes is always difficult so I've trepanned them on a lathe. I screwed a block of wood to the faceplate, skimmed it off flat and then used double sided tape to mount the styrene sheet - see the pictures.
The hole in the plumbing pipe I used for the cupola turret is too big so I've added a filler - this is the piece that the hatch shuts down onto.
Now starting on the cupola build to add the periscope mounts from styrene T section. Once dry, I'll mount this back onto the wood block and use the lathe to skim it down to the correct height.
I've also added the lock detail inside the loader's hatch. The lever is made from flattened copper wire, the guide plate from brass channel that's been annealed - so it's bendable.
the lock actually works, which is a problem as if it locks by itself I can't get inside the hull to unlock it [&:]
I guess I'll have to glue it in the open position...
Jo
10-27-2008, 02:53 AM
#57
Senior Member

Join Date: Mar 2008
Location: Auckland, NEW ZEALAND
Posts: 180
Likes: 0
Received 0 Likes
on
0 Posts
ORIGINAL: jom
the lock actually works, which is a problem as if it locks by itself I can't get inside the hull to unlock it [&:]
I guess I'll have to glue it in the open position...
the lock actually works, which is a problem as if it locks by itself I can't get inside the hull to unlock it [&:]
I guess I'll have to glue it in the open position...
 Brilliant workmanship jom
look forward to the next installment with pic's
[8D]
10-29-2008, 01:07 AM
#60
Thread Starter
ORIGINAL: philipat
Wow...I just saw this thread. That track retention bar is awesome! Ever consider building several and selling them? 
Wow...I just saw this thread. That track retention bar is awesome!
Ever consider building several and selling them?
As far as making more retention bars - I thought that I was mad making that one, and without machinery it took a long time. Don't think I'll be making any more! Besides, I haven't worked out how to make the wing nuts yet.....
Jo
10-29-2008, 11:42 AM
#62
Senior Member
Join Date: May 2006
Location: Wallasey, Cheshire, UNITED KINGDOM
Posts: 463
Likes: 0
Received 0 Likes
on
0 Posts
Brilliant work Jo [sm=thumbup.gif][sm=thumbup.gif] I will have to save these pictures for when I get my Stug, truly inspirational
Cheers Ian
Cheers Ian
10-29-2008, 12:49 PM
#63
Senior Member

Join Date: Jan 2007
Location: Santa Rosa,
CA
Posts: 1,332
Likes: 0
Received 0 Likes
on
0 Posts
Hi jom
Look here for well made wing nuts. http://www.wecohe.de/shop/index.php?...ort=20a&page=3
Gary
Look here for well made wing nuts. http://www.wecohe.de/shop/index.php?...ort=20a&page=3
Gary
07-16-2014, 08:11 PM
#65
Thread Starter
Well it's been a while, but the Stug has come out of hibernation, hopefully to get finished. I had a few problems with it - the recoil system is too big, and in particular wouldn't allow the gun to traverse: one of the track adjuster pivot screws stripped, allowing one track to come off; and I had 3 goes at making a brass muzzle brake (don't forget none of this was available in 2008!), so it got put away. Someone asked me a couple of months ago what happened to it; I pulled it out of storage and realised just how much work I'd put into it.
Pictures coming....
Pictures coming....
07-16-2014, 09:31 PM
#66
Thread Starter
Here's where I've got to so far

The muzzle brake: finished one on the left of the pictures


Cupola hatch, still using the hinges I made 5 years ago


The gun mount. This took a lot of head scratching and only just fits in the chassis. It will use the HL recoil drive (reversed), the HL Stug elevation unit (still to be fitted somewhere....) and the original turret drive for traverse. I need to extend the frame to fit this on. There isn't much room left inside the tank so the packaging of the boards, smoker, speaker and battery is going to be tight! I've already removed the false floor to get more room.


Finally a murky pic of the track adjuster pivot fix. I drilled out the entire pivot to 10mm and turned up an insert to replace the original. Of course it blocks the fixing screw tube, so I've drilled through it. Lots of epoxy to make sure it stays there. I made 2 for when the other side fails....

The muzzle brake: finished one on the left of the pictures
Cupola hatch, still using the hinges I made 5 years ago
The gun mount. This took a lot of head scratching and only just fits in the chassis. It will use the HL recoil drive (reversed), the HL Stug elevation unit (still to be fitted somewhere....) and the original turret drive for traverse. I need to extend the frame to fit this on. There isn't much room left inside the tank so the packaging of the boards, smoker, speaker and battery is going to be tight! I've already removed the false floor to get more room.
Finally a murky pic of the track adjuster pivot fix. I drilled out the entire pivot to 10mm and turned up an insert to replace the original. Of course it blocks the fixing screw tube, so I've drilled through it. Lots of epoxy to make sure it stays there. I made 2 for when the other side fails....
Last edited by jom; 08-06-2014 at 04:11 AM.


 04-25-2020, 07:04 PM
#69
Thread Starter
Well, after sitting on the shelf of doom for 6 years, the lockdown got me thinking that I should finish it. I know I can now buy a ready made StuG, even a full metal chassis, but I have all the parts I need and it's going to work.
First step was to incorporate the Asiatam recoil system into the crew compartment. I'm not sure if the HL StuG has gun azimuth, but mine will! Lots of 3mm styrene used to make the new mount. I've also cut out one of the engine hatches, there will be a switch panel underneath it.
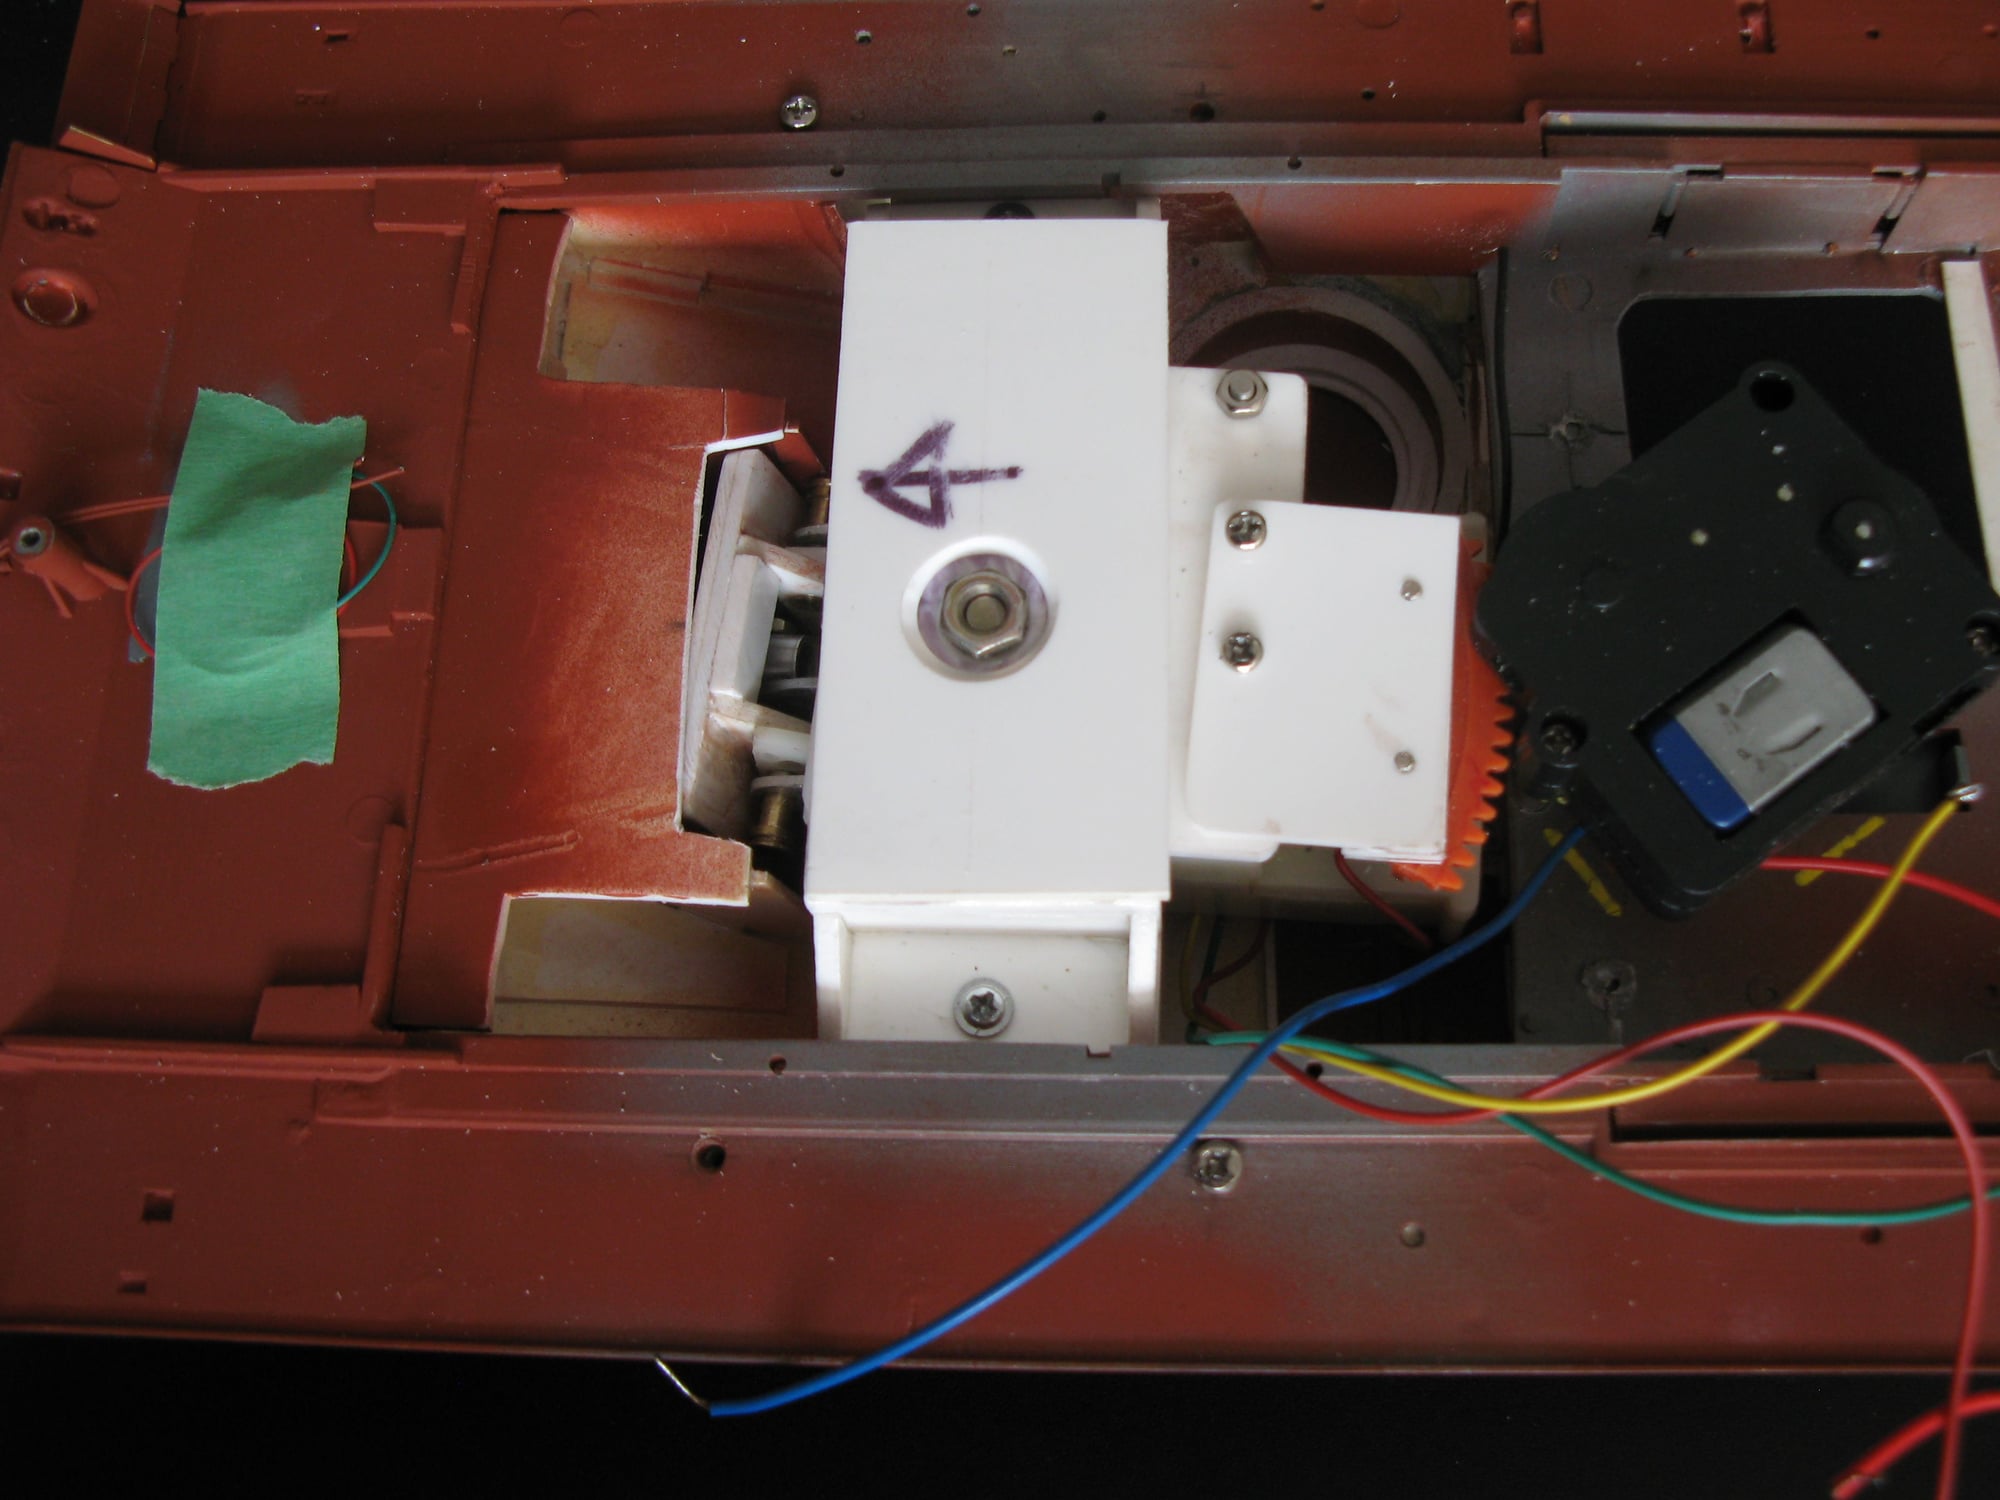

First step was to incorporate the Asiatam recoil system into the crew compartment. I'm not sure if the HL StuG has gun azimuth, but mine will! Lots of 3mm styrene used to make the new mount. I've also cut out one of the engine hatches, there will be a switch panel underneath it.
04-25-2020, 07:09 PM
#70
Thread Starter
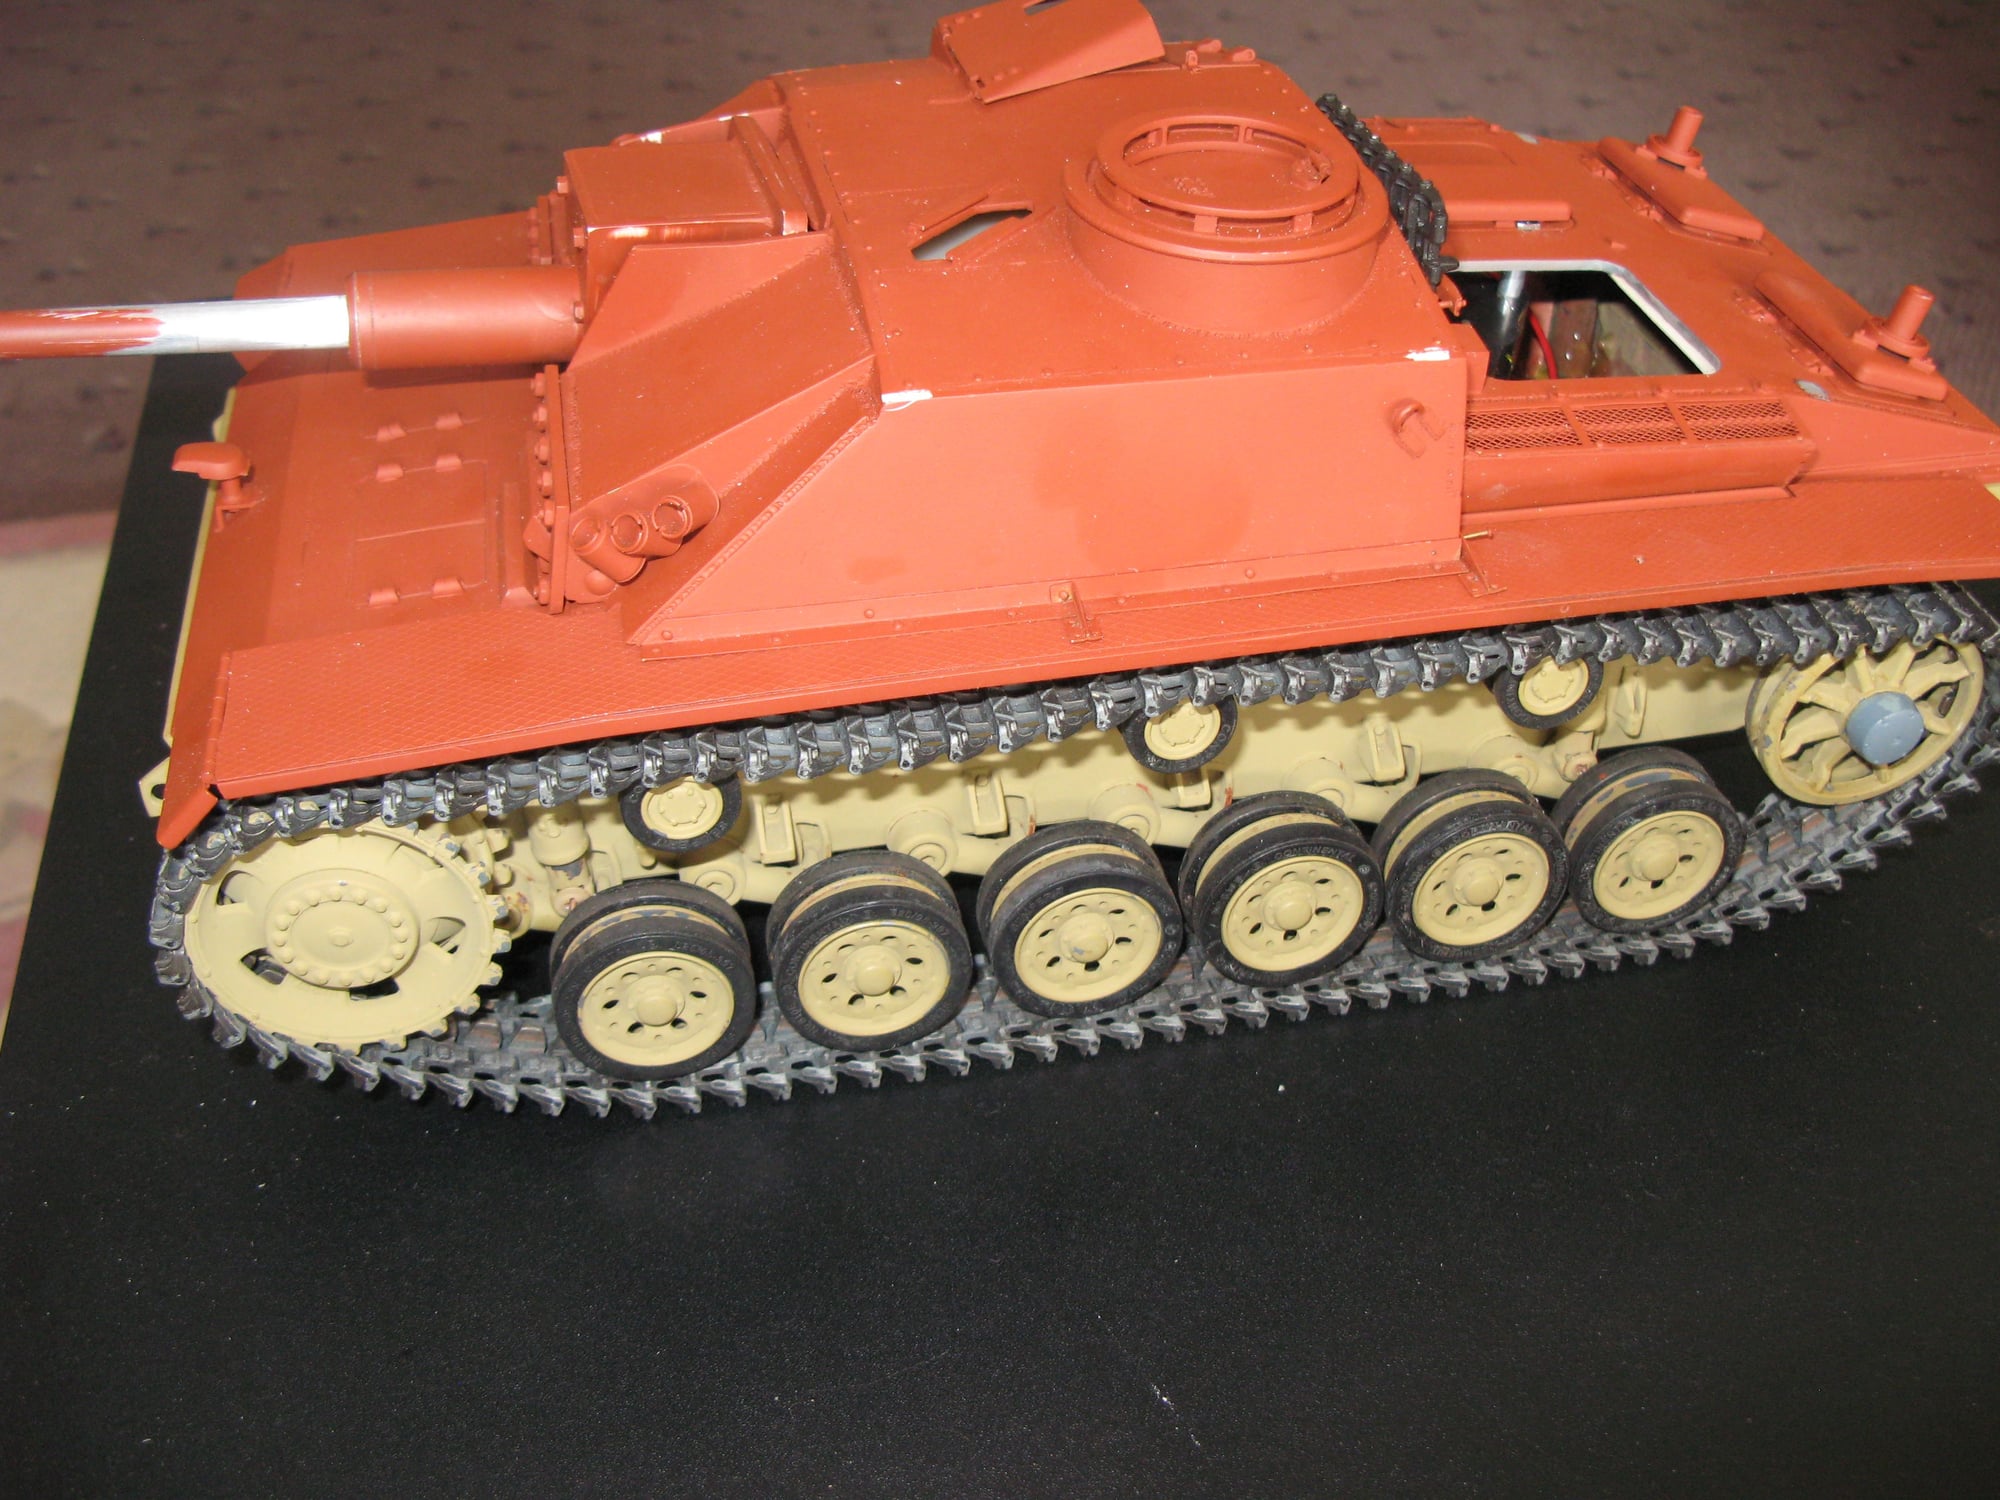
Here's what it looks like from the outside...
PS does anyone have a wiring diagram for the Asiatam recoil unit? I want to rewire the top of the tank completely, without all the odd connections, and on top of that half the wires have fallen off...
PS does anyone have a wiring diagram for the Asiatam recoil unit? I want to rewire the top of the tank completely, without all the odd connections, and on top of that half the wires have fallen off...
 04-26-2020, 07:15 PM
#72
Thread Starter
Cheers
Jo
Last edited by jom; 04-26-2020 at 07:54 PM.
04-27-2020, 04:08 PM
#74
Wow, nice way to get the traverse setup. I am still working that ouot on my Stug III I may use this instead of the way I was headed with mine.
04-27-2020, 07:40 PM
#75
Thread Starter
With the traverse I'm thinking of limiting it by removing teeth on the turret gear, and then adding a tension spring each side so that the gears re-engage when it gets to the end of the travel (10� each way). I don't like the clutch in the drive unit, it's much too coarse!
Incidentally, I'm using an RX14 board. Not going to change it as I have 3 of them (from bad experiences with the previous HL boards). I think these were the first iteration to be almost reliable.
Incidentally, I'm using an RX14 board. Not going to change it as I have 3 of them (from bad experiences with the previous HL boards). I think these were the first iteration to be almost reliable.
Last edited by jom; 04-27-2020 at 08:51 PM.