


JUMBO Build


 04-06-2012, 02:41 PM
#28
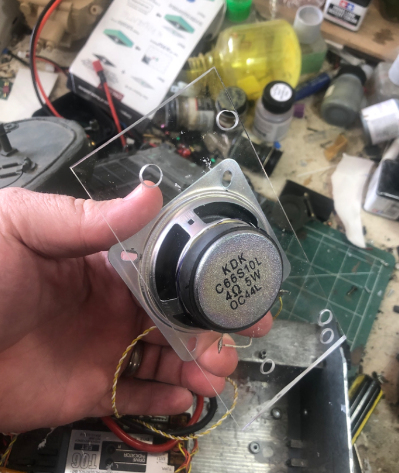
Bogies near completion. I am priming everything in Black and OD this time round. Hull tub and trucks done, reattached, and gearboxes reinstalled. One custom mod I have adapted, I use the long speaker box posts to mount the speaker sans box...
04-06-2012, 04:22 PM
#29
Work now moves to the charging system and wiring. I add an "m" connector from Radio Shack and give my vehicles the option of charging internally. I mount the double pull/double throw Tamiya On/Off switch from the DMD in a hatch and cut the wire. I solder the wire together on the DMD to close the circuit. My power will be switched directly off the batteries. I usually install the M connector near the power for this process but you could mount it in another hatch.
I color code the tabs to keep the positive and negative sides together.
I color code the tabs to keep the positive and negative sides together.
04-08-2012, 04:06 PM
#30
All my tanks have the power switch throw forward so I connect the rear post on the on/off to the positive post of the "m connector" (red marked part). The middle switch post and a wire from the negative (black) go to the battery so I connect them to a Male deans plug.
The front switch post and a wire to the negative post are soldered to a female deans plug to power the MFU DMD. I build it this way so you can swap them or preform maintenance as needed.
I soldered the red black cables from the MFU/DMD together and ended them in a male deans to finish the wiring plan.
04-13-2012, 12:20 PM
#31
Tank almost back together. Adding standard Sherman details like tools and stowage. This tank will resemble its real life example and lack the rear luggage rack and have minimal stowage items. Latest additions, hatches, mg stowage, welds, and chains to fuel filler caps.
04-13-2012, 01:06 PM
#32

Looks good - I'm using this as a bench mark for my build [8D]
Busy bulking up the turret:


and the trans cover:

Still a ways to go before I'm happy tho [&o]
Busy bulking up the turret:
and the trans cover:
Still a ways to go before I'm happy tho [&o]
04-16-2012, 04:24 PM
#33
I guess you can say I am committed to what I have..... It went into paint this morning....
Black base coat, Olive Drab color coat. I know I usually go into intricate detail on paint techniques, but this time I am using Krylon camo Black and Olive. Why? The real vehicle that I have the privilege of playing with is touched up with those paints. I know, I helped!!!
Black base coat, Olive Drab color coat. I know I usually go into intricate detail on paint techniques, but this time I am using Krylon camo Black and Olive. Why? The real vehicle that I have the privilege of playing with is touched up with those paints. I know, I helped!!!
04-16-2012, 04:42 PM
#34
Looks gooOood, DAMN that looks good! 
~ Jeff
~ Jeff
04-17-2012, 05:14 AM
#36
ORIGINAL: Rex Ross
The grillwork on the engine deck leaves me speechless. [X(]
The grillwork on the engine deck leaves me speechless. [X(]
 That's the correct way it's done.
 ~ Jeff
04-23-2012, 05:16 PM
#37
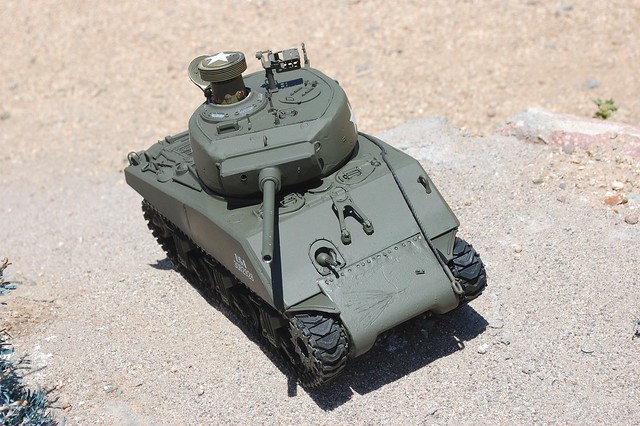
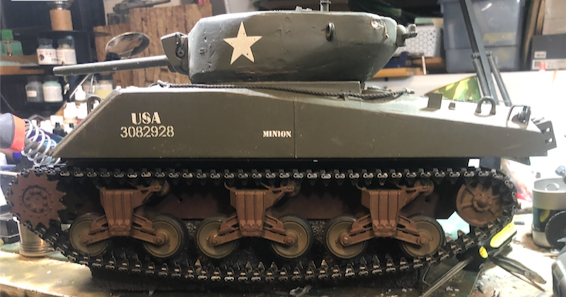
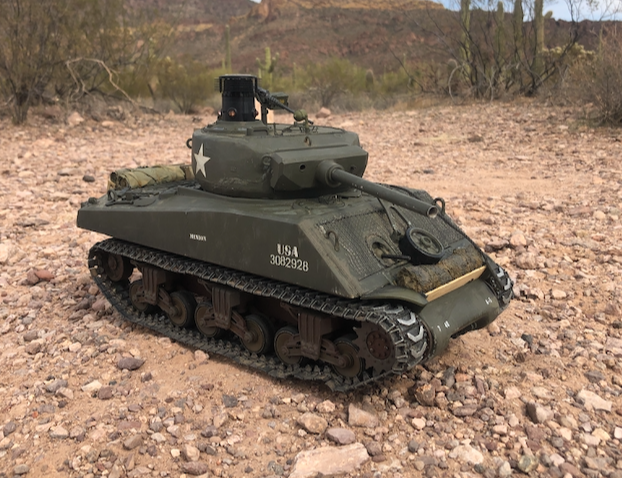
Well, I have a coat of paint and the markings on. It is marked to match the museum example completely. My paint is a little dark.... time to add some weathering!
Battle debut was disappointing, I have a motor wiring issue to work out.... GRRRRR. Still a crowd favorite and bound to do some damage in the future!
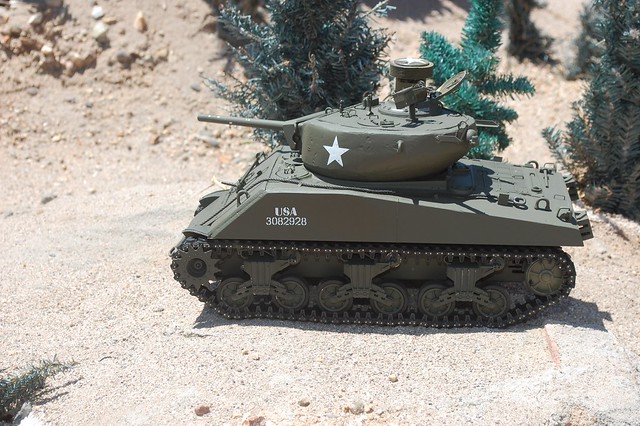
Untitled by edoubleaz, on Flickr
Untitled by edoubleaz, on Flickr
Battle debut was disappointing, I have a motor wiring issue to work out.... GRRRRR. Still a crowd favorite and bound to do some damage in the future!
Untitled by edoubleaz, on Flickr
Untitled by edoubleaz, on Flickr
11-05-2012, 04:59 PM
#39
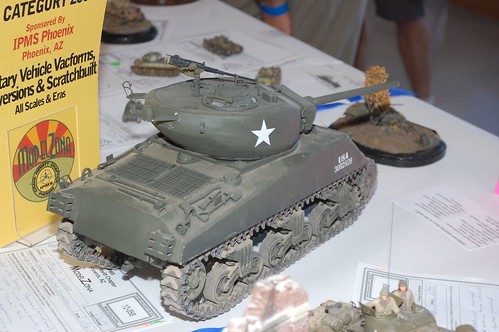
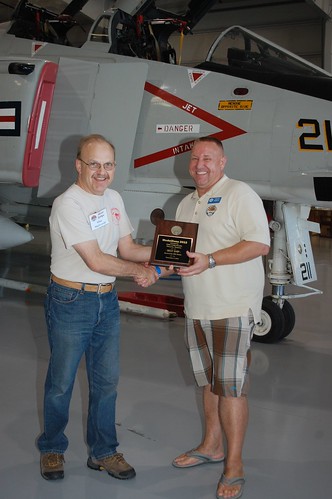
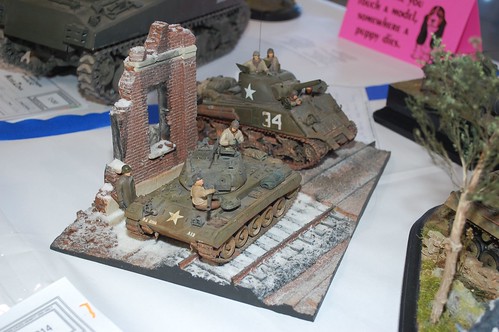
My usual coupe de grace, the IPMS Modelzona event in Phoenix. The Jumbo earned a Silver in the armor conversion category, losing out to a pint sized Sherman ironically.

DAK XO Craig Pierce threw out some knowledge with a 1/350 scale LCAC and won best ship!

Member Joseph Garcia placed with an ME-163

Other DAK entries Below.

DAK XO Craig Pierce threw out some knowledge with a 1/350 scale LCAC and won best ship!
Member Joseph Garcia placed with an ME-163
Other DAK entries Below.
11-06-2012, 11:53 AM
#40
Join Date: Sep 2010
Location: nelson, UNITED KINGDOM
Posts: 391
Received 0 Likes
on
0 Posts
Hi It always amazes me how one guy with a knife and a bit of glue plus other hand tools can build a better model than Tamiya
Great work Tamiya please take note This Is How you do it
regards pete
Great work Tamiya please take note This Is How you do it
regards pete
03-04-2021, 10:37 AM
#41
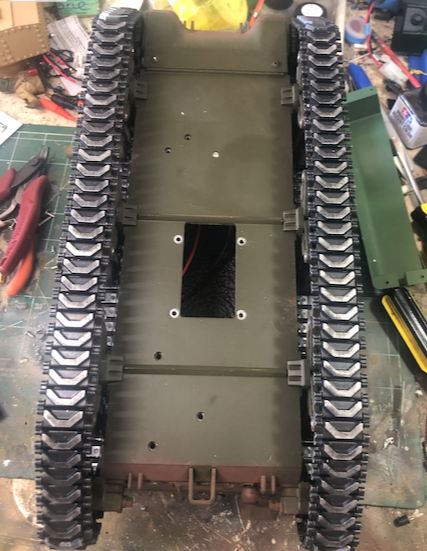
Well it is time for some Zombie action. This tank has served me well but I confess it throws tracks too often and my best efforts have not kept it running. At the last DAK event I acquired a second hand Taigen Sherman and I have begin a suspension transplant to get it back on the field. The older suspension needs a gearbox replacement to keep the tracks on so it may be recycled down the line!
Simple enough process, I removed the Tamiya innards and upper hull from the legacy Jumbo and cleaned out the Taigen brains, speaker, smoker, and battery box. Only wiring change was to change Taigen connectors to Deans. To make the hull fit I removed 1/8 inch from each side of the Taigen metal and removed the attachment plates and transmission cover. I swapped my old Jumbo trans plate by making some new location holes on the bottom and a few sanding efforts up top. A Motor tool and good file made quick work.
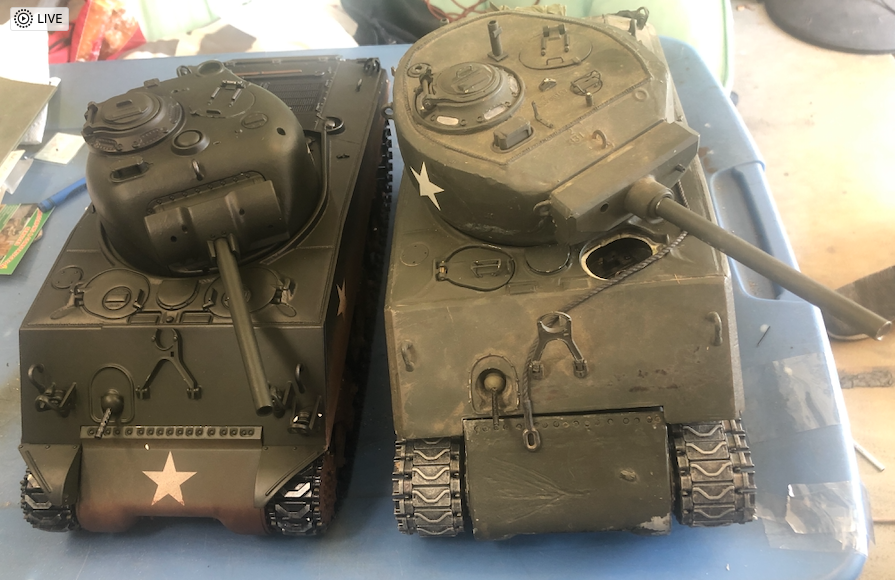
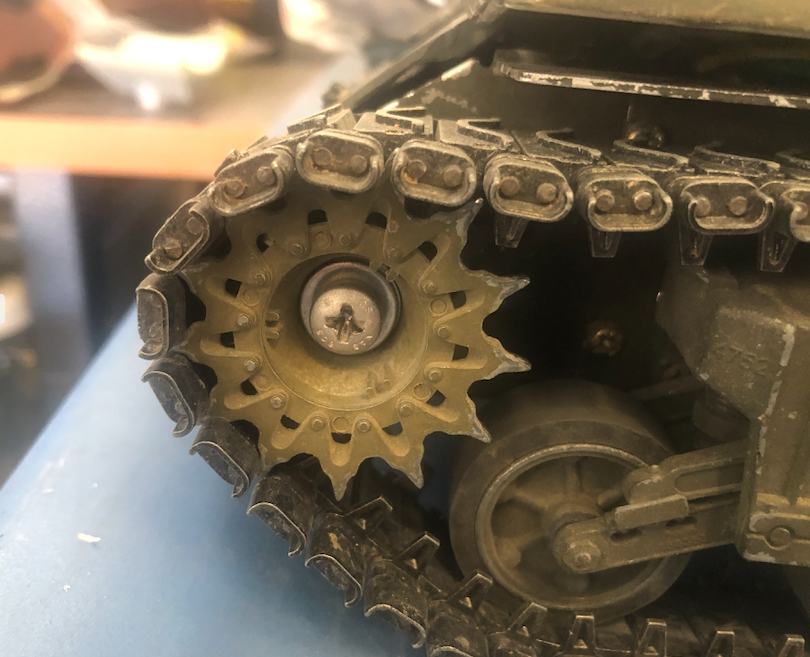
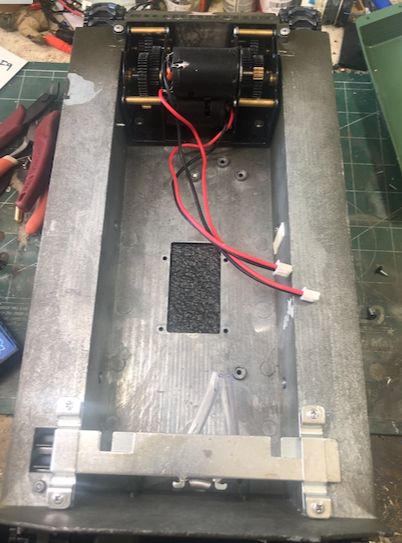
Simple enough process, I removed the Tamiya innards and upper hull from the legacy Jumbo and cleaned out the Taigen brains, speaker, smoker, and battery box. Only wiring change was to change Taigen connectors to Deans. To make the hull fit I removed 1/8 inch from each side of the Taigen metal and removed the attachment plates and transmission cover. I swapped my old Jumbo trans plate by making some new location holes on the bottom and a few sanding efforts up top. A Motor tool and good file made quick work.
 03-05-2021, 11:27 AM
#43

Nice work bringing it back. Taigen chassis really are the best. As I mentioned my metal mato based Jumbo is also in process of moving to a taigen as the mato bogies gave out. Nice you were able to save the jumbo differential housing you made. Mine was tailored to fit the mato chassis and would not transpose to the taigen. My overhaul is just waiting for me to complete my differential housing conversion now.
hope maybe we can have them side by side on the field soon.
hope maybe we can have them side by side on the field soon.
03-07-2021, 06:45 PM
#44
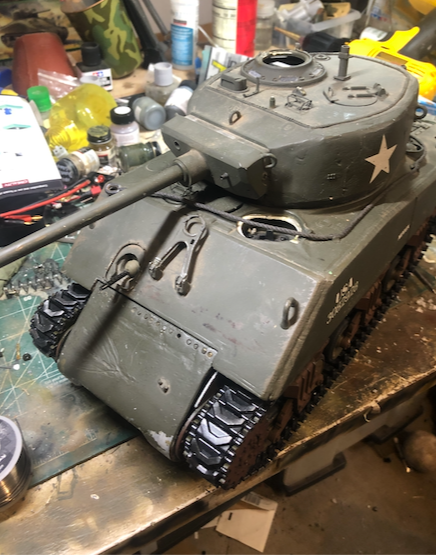
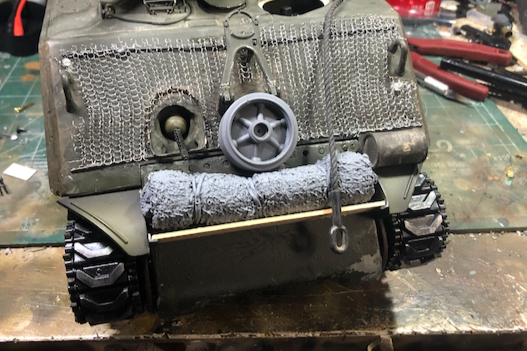
As the original was for the Museum style look, my refurb will now go tactical... I have decided to add Sommerfield matting, stowage, and weathering. The bars for the Martin came from used sparklers I had in my garage and the matting is some mesh I had from the hardware store. Super glue and paint......
Additional gear came from Value gear. My buddy Steve Munsel hooking me up as usual!
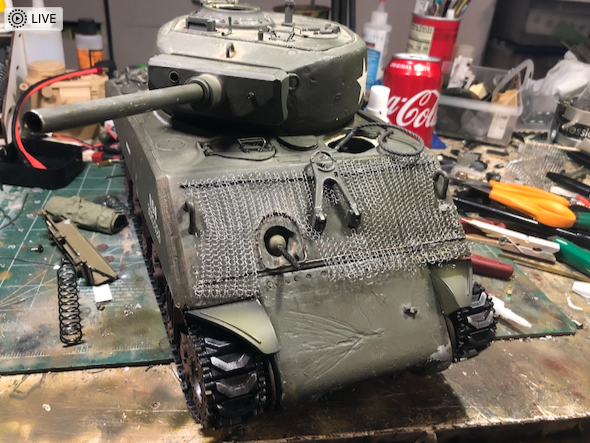
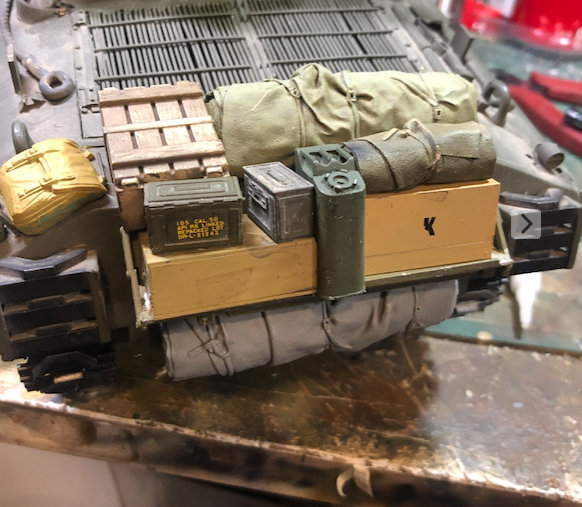
Additional gear came from Value gear. My buddy Steve Munsel hooking me up as usual!
The following users liked this post:
Pnzjgr (03-07-2021)
The following 2 users liked this post by edoubleaz:
Pah co chu puk (03-13-2021),
Panther F (03-22-2021)

The following users liked this post:
ksoc (03-26-2021)
03-22-2021, 02:01 AM
#47
MAN, that is HAWT!!!
Thanks... a great way to start a Monday.
Thanks... a great way to start a Monday.
03-24-2021, 05:38 PM
#49
Actually both of these are old, Ethans here is quite old. Both were just rebuilds and upgrades with better products that were not available when we built our Jumbos originally. Just funny that both of us were rebuilding the same tanks at the same time both with Taigen sherman chassis.
03-24-2021, 10:07 PM
#50
I wonder why it was changed from Mato? I have only HL and Taigen chassis in my builds but as far I know, Mato is only one with track tensioner. Maybe they will meet someday, you are only 400 miles apart 
Last edited by Michal_Kaczorowski; 03-24-2021 at 10:11 PM.