


My Hooben T-55 Build
 08-01-2010, 08:59 PM
#1
Junior Member
Thread Starter
My Feedback: (1)
Join Date: Dec 2009
Location: Epsom, NH
Posts: 19
Likes: 0
Received 0 Likes
on
0 Posts
I have just finished by Hooben T-55 build. It started as a "static kit". As most of the T-55 kits, some of the parts were missing. No complete D-parts tree, just a few loose parts from the D-parts tree. There were supposed to be right & left hand suspension springs, and I received a package labed right & a package labed left, but both packages had the same springs. Also some of the A, B, & C parts had molding problems, some of the parts not being completely molded. A the screw bags didn't have some of the needed screws. So, no problem.... I replaced the springs, made some of the parts from styrene & resin, repaired the mis-molded parts, and purchased some screws. I made a .80 styrene sheet radio tray, installed mato 3:1 gearboxes, HL RX18, built a speaker box, and installed HL gear, turret rotation & elevation motors. Painted and lightly weathered, I used hand cut stencils for the numbers. Here are some photos.
Vic
Epsom, New Hampshire
Vic
Epsom, New Hampshire


 08-02-2010, 12:13 AM
#7
Senior Member

Glad you got it going...too bad you have to build it yourself after paying someone to build it. I have heard nothing but negative about ordering that tank ...too bad it's the only one on the market. YOU ON LINE, HL AND TAMIYA???
Tank does look really good and hope it runs as good as it looks. Thanks for posting.
Tank does look really good and hope it runs as good as it looks. Thanks for posting.
08-02-2010, 07:31 AM
#8
Hello Vic
Is the electronics unit a CLARK unit? I would like to see a close-up pic of the electronics unit.
What functions are included with the electronics unit? Sound, elevation, IR battle etc?
Is the electronics unit a CLARK unit? I would like to see a close-up pic of the electronics unit.
What functions are included with the electronics unit? Sound, elevation, IR battle etc?
08-02-2010, 08:06 AM
#10
Man, what a sweet looking tank. The end results were worth the extra pain for sure!
- Jeff
- Jeff
 08-02-2010, 01:12 PM
#15
Junior Member
Thread Starter
My Feedback: (1)
Join Date: Dec 2009
Location: Epsom, NH
Posts: 19
Likes: 0
Received 0 Likes
on
0 Posts
Yes, the tracks came with the kit. The tracks are similar in quality to Heng Long, definately below Tamiya Quality.
Vic
Vic
08-02-2010, 01:16 PM
#16
Junior Member
Thread Starter
My Feedback: (1)
Join Date: Dec 2009
Location: Epsom, NH
Posts: 19
Likes: 0
Received 0 Likes
on
0 Posts
The weathering a a mix of airbrushing and dry charcoal chalk/pastels fixed with flat finish.
Thanks for all the nice comments. I will post more of my tanks in the future.
Vic
Thanks for all the nice comments. I will post more of my tanks in the future.
Vic
 04-03-2020, 12:11 AM
#18

Join Date: Mar 2014
Posts: 146
Likes: 0
Received 0 Likes
on
0 Posts
You can use Clark, about half the builds I've seen others do use them, but I have no experience with those so I have nothing to add if you want to use their radio gear. One the first Hooben I used the gearbox that comes with it. I got it via ebay from "Thor robotics". But they call themselves "Twin Horse" on Ali express and I bought my second and third one from them too. My second one I got at a huge discount during one of their occasional sitewide sales, regular price $449 I got it for $381 including shipping. For that price I got the Hooben R/C gear along with the model: Rx and Tx (receiver and transmitter), metal gearbox and wiring set, just about everything except the battery (you can use any old Nimh 7.2 volt battery but you have to get it separately for about $25). I decided to not try to use a Clark since I figured because the sellers offer the Hooben R/C electronics as an add on, it was designed to work with those electrics and would be a lot easier to get the model running and, so it has, the Hooben electrics are perfectly functional and work ok. Hooben R/C stuff is very similar, if not identical to Heng Long 2.4 electrics... but since there's little or no difference in price or function I saw no point in wasting any money or effort finding out and just installed the Hooben electronics.
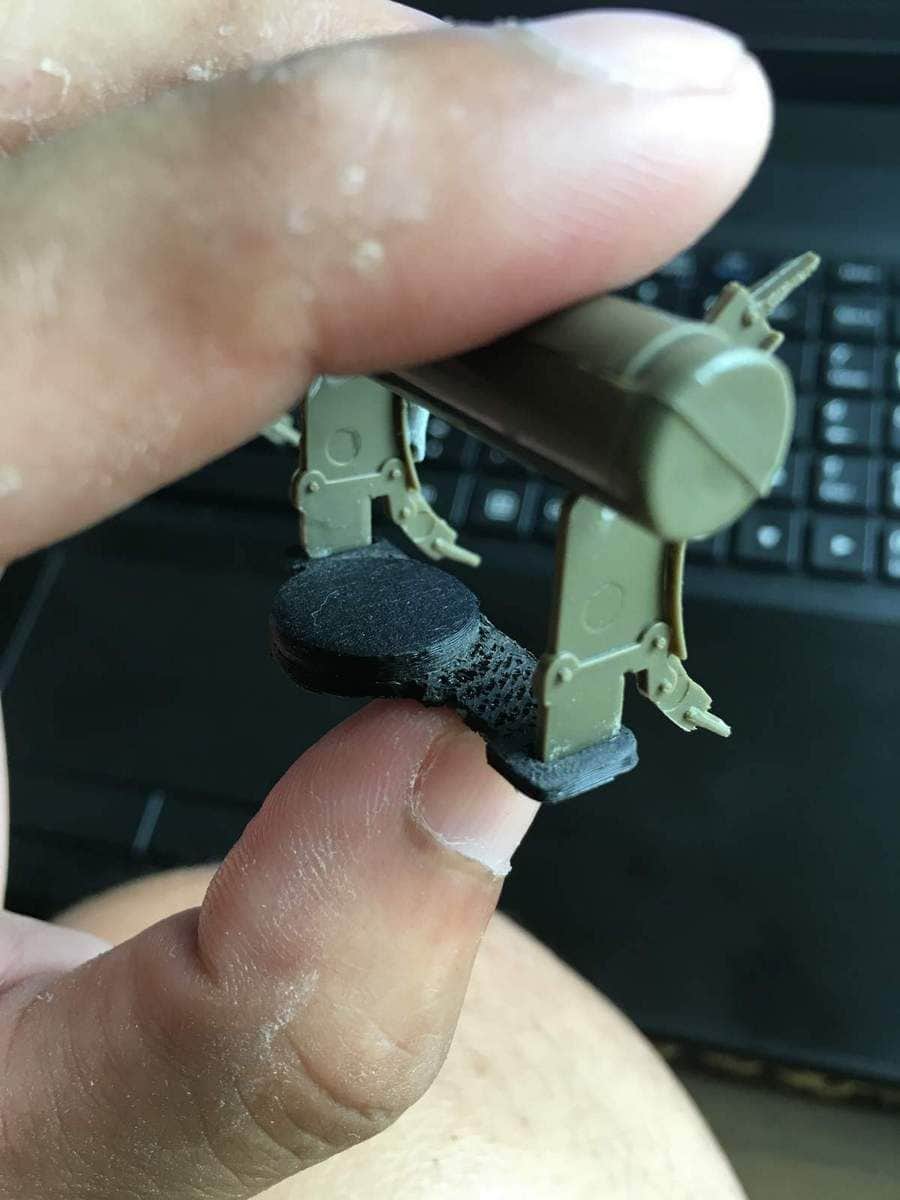
If you get the Hooben "full option" kit, the functions you get are: sound, speaker is included; drive motors function; turret traverse and gun elevation; and a recoil function. After the first one I was not satisfied with the recoil function so I bought the add-on gun recoil unit from DKLMRC. This is was able to make work by modifying the turret motor mounts and fabricating a few parts from sheet styrene plastic, glued together in a laminate to increase thickness of the part as needed. If you have a dremel tool, making plastic motor mounts is not difficult and I needed to make them for both the recoil function motor and the main gun elevation motor. It took about an hour of work cutting, gluing the plastic laminate, then grinding the parts into shape, for both motors.
You can add IR sensor function if you participate in tank battles and the full option kit does include the IR sensor to put on your turret. But I didn't install the IR unit myself so I don't know anything about that part. The Hooben electronics did not come with the binding cable you can use to bind the receiver to the transmitter (I.e. "Rx" to the "Tx" as the diagrams say) but you don't need one to bind them anyway. All you need is a metal screwdriver to short the pins together in the receiver and I am going to tell you how. "Binding" is really simple and no big deal at all.
To bind the Rx to the Tx (receiver to the transmitter, remember)
1. i first connected my 7.2 v battery to the battery connector,
2. Then plugged that in to the receiver just where the diagram said to (a diagram of the receiver wiring comes with the electronics - yet another reason I went with Hooben R/C system, since it eliminated a lot of guess-work)
Now find your speaker and plug that into its port where the diagram says it goes. You'll need the speaker connected to tell you the binding procedure has finally worked as it'll roar to life when this happens.
3. Then i powered on the Rx with the on off switch.
4. Then i turned on the Tx (i.e. transmitter), when i saw the light glow in front I knew it was ready.
5. Now find the part on the diagram of the Rx connections and find the one that goes to the binding cable, or is supposed to. Since the little cavity is empty and has no connector in it, just look for the two tiny pins there. Take the screwdriver and place the blade so that it's touching both those pins there.
6. Now, find the button on the Tx that turns the whole system on and off (there's a diagram for the transmitter functions too, if you didn't see it before this just find that piece of paper now).
7. On my Tx and yours too, on-off (of the radio system) is controlled by a button, the "On-off" function is the button approximately on the front of the Tx, lower right about in the middle of all the buttons that area. Hold that button down with your thumb, meanwhile make sure your screwdriver touching both those little pins in the Rx. Keep holding down the on button and keep the screwdriver shorting the little pins and you ought to hear the speaker roar into life after just a few seconds!
8. If the speaker doesn't tell you that you've finally binded Rx to Tx, recheck what went wrong: maybe the speaker is not plugged in the right place? Maybe the battery isn't connected right either, recheck that... also, make sure the pins you're shorting with the screwdriver are really the ones in the little port in the Rx that controls binding.
9. Once it roars to life you can shut off the on off on the tank and shut down the Tx. STILL no joy? Make sure that your battery's charged, and that the on-off switch from the battery to the receiver, is connected right.. Make sure your R/C Tx was on the whole time and the Rx (receiver) was ready to accept a signal.
04-13-2020, 05:20 AM
#19
excellent work!
I have a Hooben Ferdinand. Got it from Amazon RTR. Three things I found annoying about the tank.
First, it came with an M4A3E8 manual...
Second, some of the screws inside the superstructure are loosed. Had to replace them.
Third, rear suspension springs are not strong enough, I will have to replace them later on.
The tank comes with a Henglong 5.3 MFU, I replaced it with Henglong 6.1s instead. It works pretty well.
04-13-2020, 06:35 AM
#20
 05-06-2020, 04:31 AM
#21
Join Date: Mar 2014
Posts: 146
Likes: 0
Received 0 Likes
on
0 Posts
Certainly I know I am replying to an old question, and now you somehow made me think of some guy lecturing to a dusty empty lecture hall that hasn't had a student in it for 10 years... but no, like I said in the comment - I made it for a reason as there is little information about how to assemble the Hooben T-55, even the "assembly guide" is bare-bones basic and mostly only has line drawings of how most of the parts go together. There are two problems with this assembly guide:
1) Some of it is in English, but most of the text is chinese. I don't know chinese; and
2) A lot of the assembly guide is wrong because
a. If you assemble the parts how they say to do it, they won't work.
b. The parts shown in the guide are not in the kit. Obviously Hooben made a design change and didn't bother to update the assembly guide.
c. You have different parts then are shown in the ass'y guide.
d. You have extra parts that aren't shown in the ass'y guide (although often you can figure out where they are supposed to go anyway)
Like I said, I already built one T-55 that functions - but I wasn't happy with how that one turned out and wanted to make another one that looks and works better. And rather than go back and try to fix tank #1 I decided to start all over with another tank and hopefully avoid the mistakes I made on the first one.
And the reason i wrote the long reply above was mainly just to provide helpful tips to other people who are putting together their own T-55's and who might be scouring the internet for anything they can find. That is exactly what I did, even before I bought tank #1, since I wanted to get some idea of exactly what I was getting into before putting down the money. And it turns out I found just as much info on Hooben T-55 building from other people's blogs and posts than the half-baked assembly instructions that come with the tank.
Also I wanted to write down how-to tips while the steps were still fresh in my mind, in case I wanted to refer to it later. And if I was doing all that typing anyway just for my own reference, why not post what I've written about it so others can refer to it! Because of the half-finished state that Hooben ships their T-55 to you, it's impossible to have TOO much information, especially if your goal is to build a running T-55!
So the only source of information (aside from the so-called assembly guide) is to search out forum posts like this one, along with r/c tank modelling blogs, and internet sites written by people who have already done it.... since there's really not gonna be many answers coming from the Hooben site (for any number of reasons, my non-existent Mandarin speaking skills being most prominent)!
05-09-2020, 09:36 PM
#22
Join Date: Mar 2014
Posts: 146
Likes: 0
Received 0 Likes
on
0 Posts
I already built one T-55 and was not totally satisfied with the results; so I wanted to make another one, to try to perfect at least one... here are some images on tank #2.
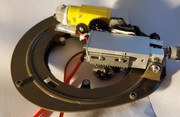
Recoil unit from DKLMRC
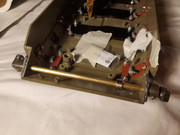
henntec unit.
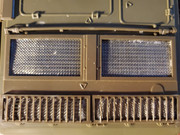
Screen from DKLMRC.
Recoil unit from DKLMRC
henntec unit.
Screen from DKLMRC.
05-09-2020, 09:54 PM
#23
Join Date: Mar 2014
Posts: 146
Likes: 0
Received 0 Likes
on
0 Posts
I used stone texture paint from the hardware store to simulate the dirt on the hull.
I made this magnetic fuel rack that will fall off rather then break off.
The turret searchlight is real ship in a bottle type construction
Base coat of Mig oil ochre - works well for middle east camo patterns like 6-day war or Yom Kippur War patterns.
Last edited by Marc780; 05-09-2020 at 10:06 PM.
05-09-2020, 10:21 PM
#24
I did a similar mod to my rear fuel tank drum holders except I added a circular magnet.
My kit didn't come with electronics and I started off with Clark TK22 but eventually migrated to a set of Tamiya KV-1 DMD/MFU.
Hooben T-55A (first run production)
My kit didn't come with electronics and I started off with Clark TK22 but eventually migrated to a set of Tamiya KV-1 DMD/MFU.
Hooben T-55A (first run production)