


ESM 50cc Spitfire rework
 01-24-2012, 04:25 PM
#76
Senior Member
Thread Starter

Join Date: Feb 2004
Location: Barrowhill, Staffordshire, UNITED KINGDOM
Posts: 586
Likes: 0
Received 0 Likes
on
0 Posts
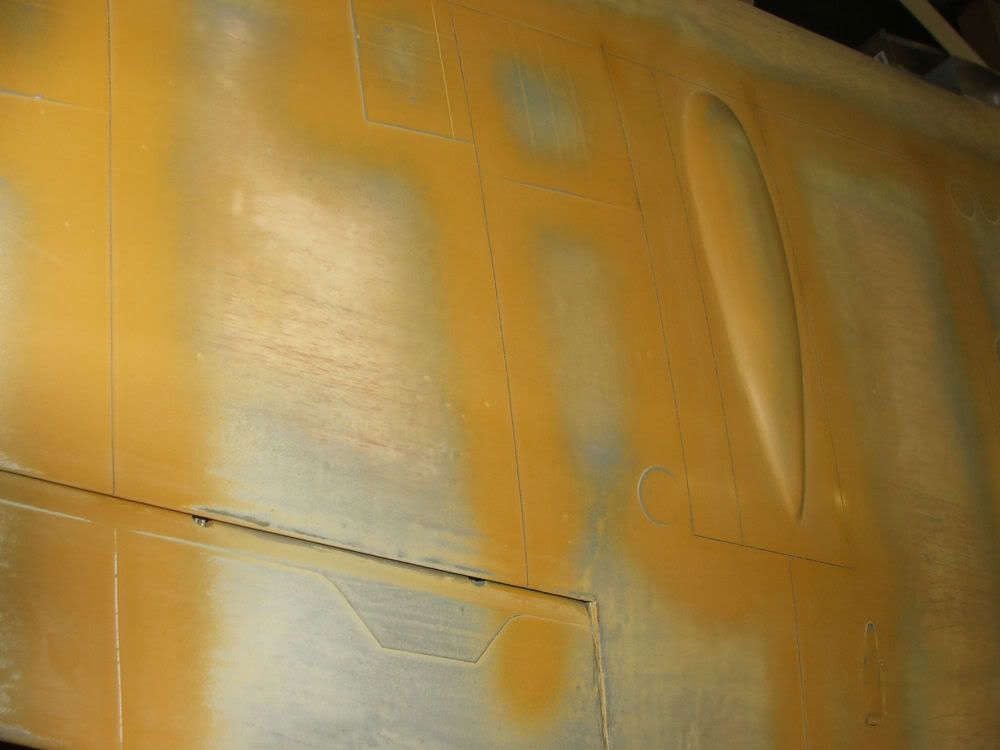
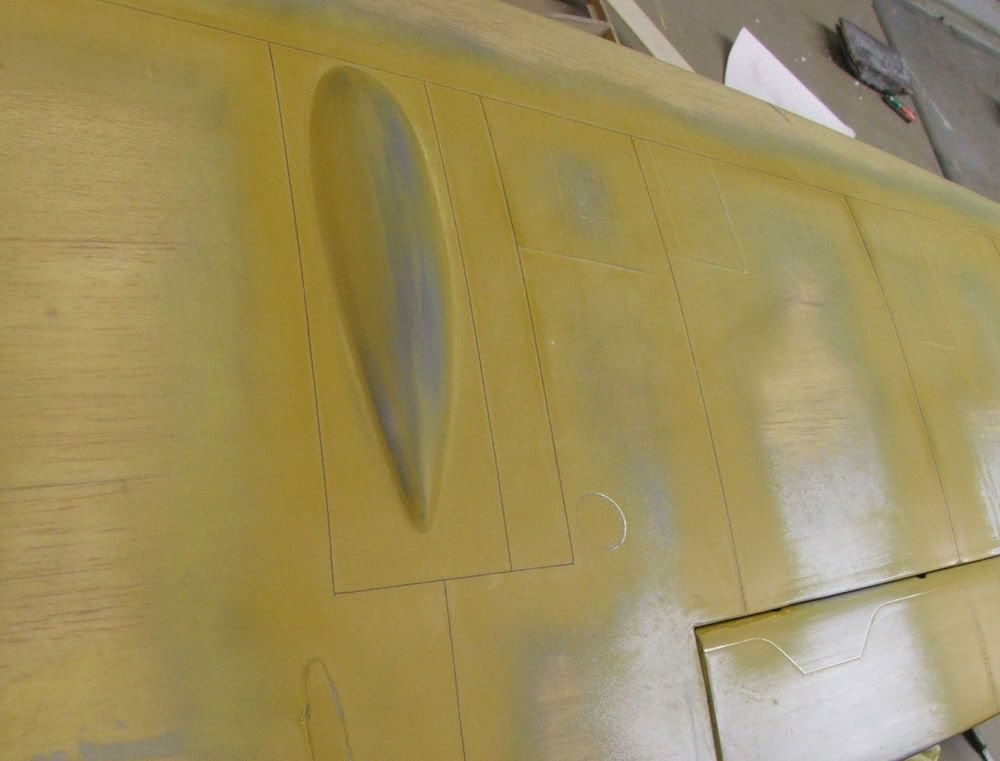
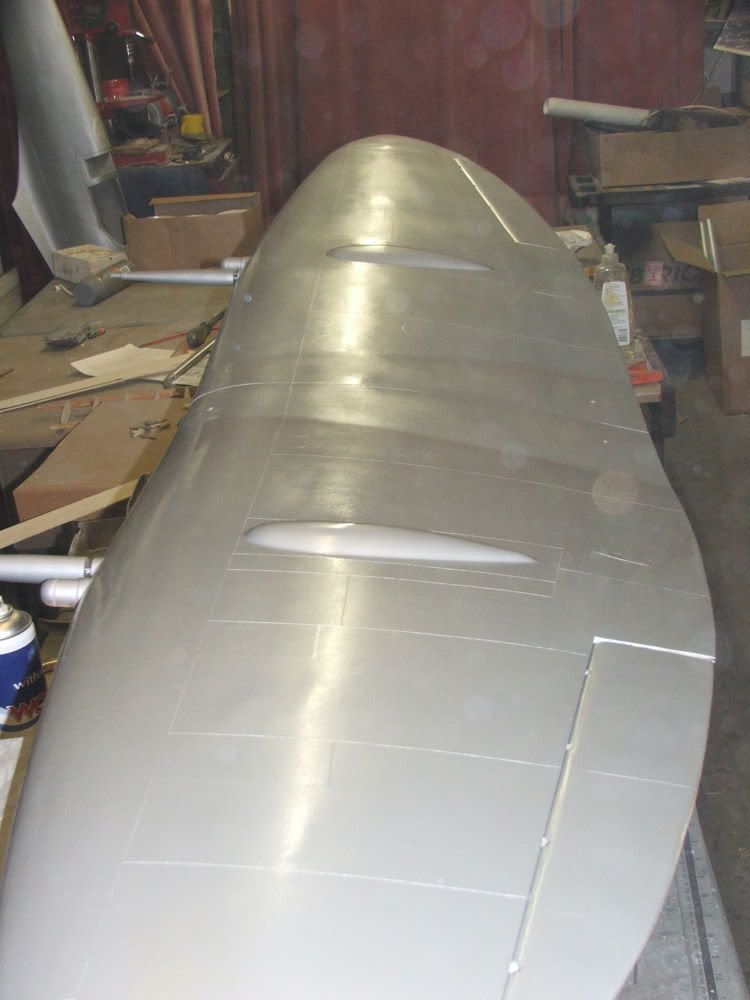
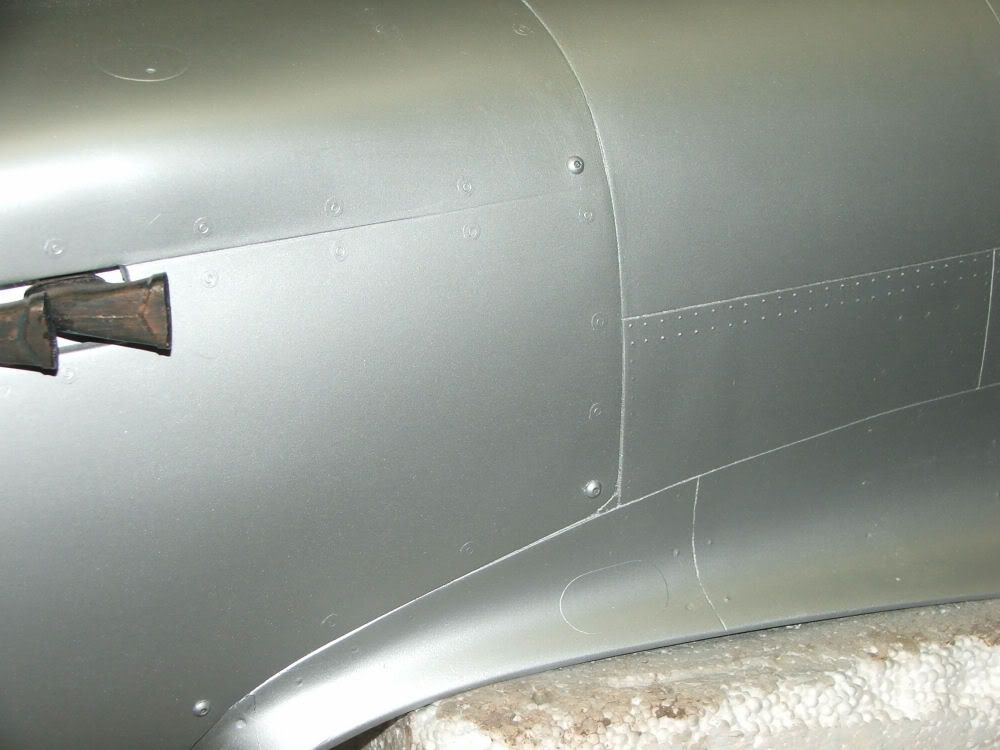
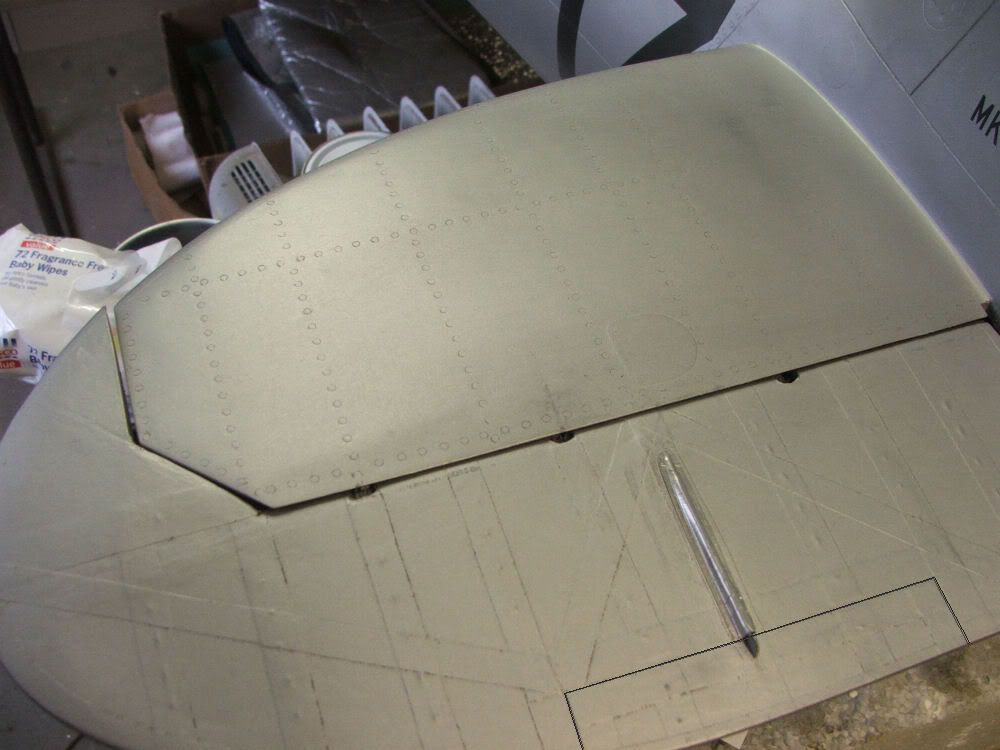
Got my paint delivery today ;D so the panel lines were applied to the wing and tailplane. These are a mixture of ali foil tape and chartpak lining tape. Once lined, the tape was sprayed over with hi build primer, three thin coats. Once dry, the wing was wet flatted to reveal the tapes, then the tapes peeled off.
Ian.

Ian.
 01-25-2012, 01:39 AM
#77

Join Date: Dec 2010
Location: Birmingham, UNITED KINGDOM
Posts: 203
Likes: 0
Received 0 Likes
on
0 Posts
Hi ian,
I cannot wait for this to be at the Warbirds meets, it looks stunning now so god knows what its going to look like when its done.
I very happy Spitfire owner.
Cheers
DB
I cannot wait for this to be at the Warbirds meets, it looks stunning now so god knows what its going to look like when its done.
I very happy Spitfire owner.
Cheers
DB
01-25-2012, 11:13 AM
#78
Senior Member
Thread Starter
Join Date: Feb 2004
Location: Barrowhill, Staffordshire, UNITED KINGDOM
Posts: 586
Likes: 0
Received 0 Likes
on
0 Posts
Cheers DB 
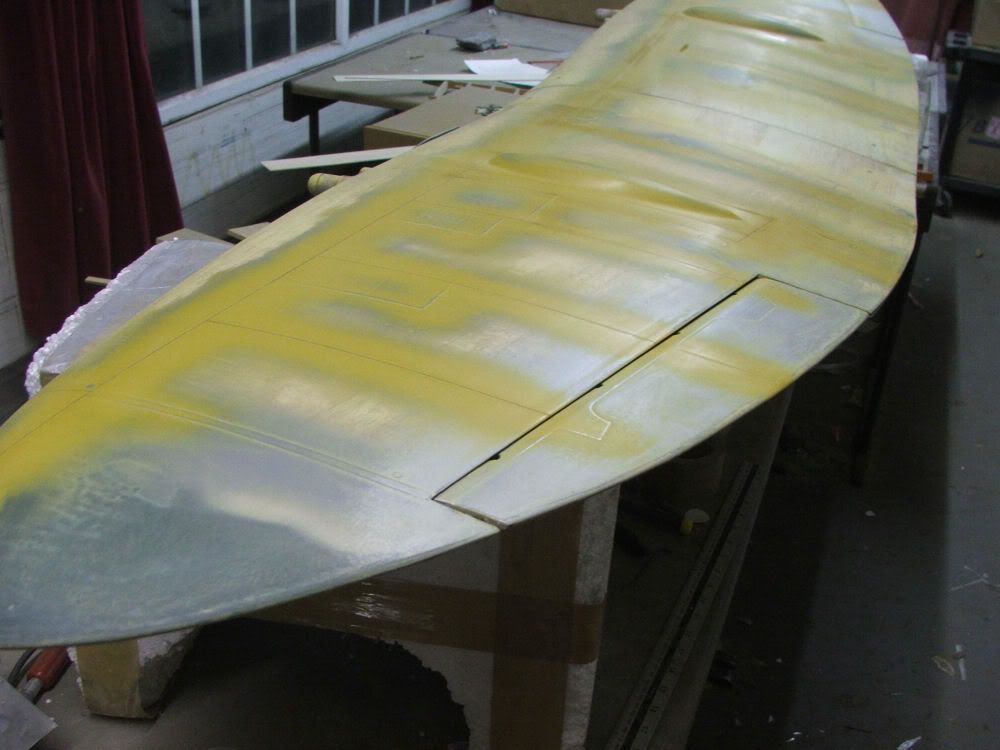
Got a coat of silver on the topsides outside in the glorious British sunshine, this will be wet flatted and another coat applied. This silver paint has lots of pigment in it and I use it as a final primer on silver models, or any model that needs weathering back to reveal metalwork.
Ian.
Got a coat of silver on the topsides outside in the glorious British sunshine, this will be wet flatted and another coat applied. This silver paint has lots of pigment in it and I use it as a final primer on silver models, or any model that needs weathering back to reveal metalwork.
Ian.
01-25-2012, 01:16 PM
#79
Senior Member
Thread Starter
Join Date: Feb 2004
Location: Barrowhill, Staffordshire, UNITED KINGDOM
Posts: 586
Likes: 0
Received 0 Likes
on
0 Posts
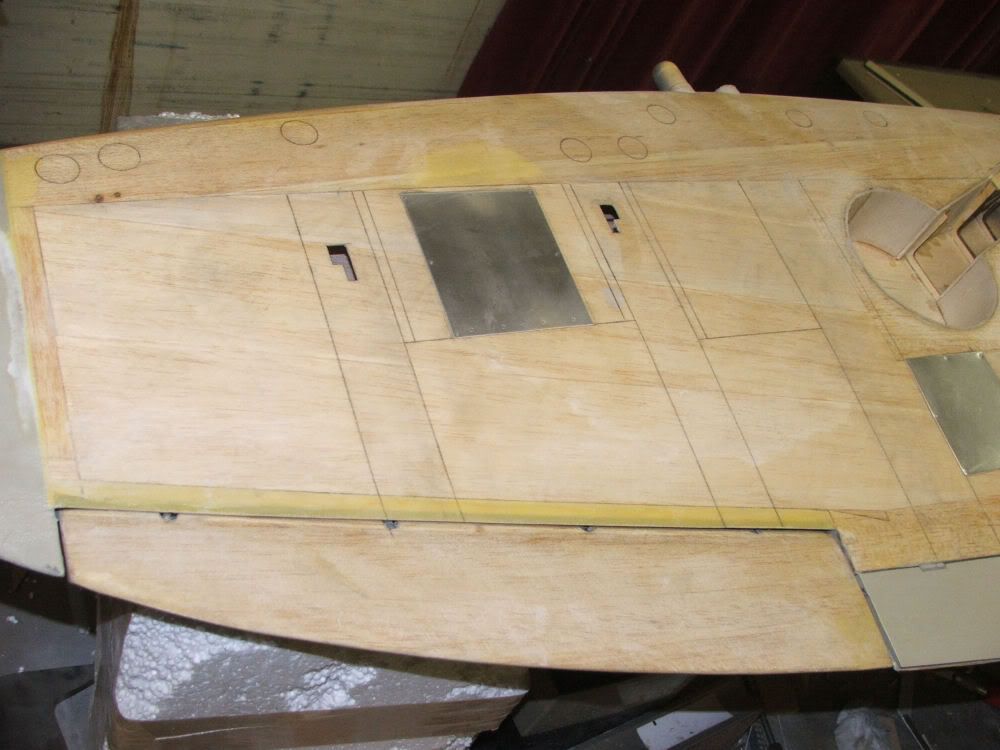
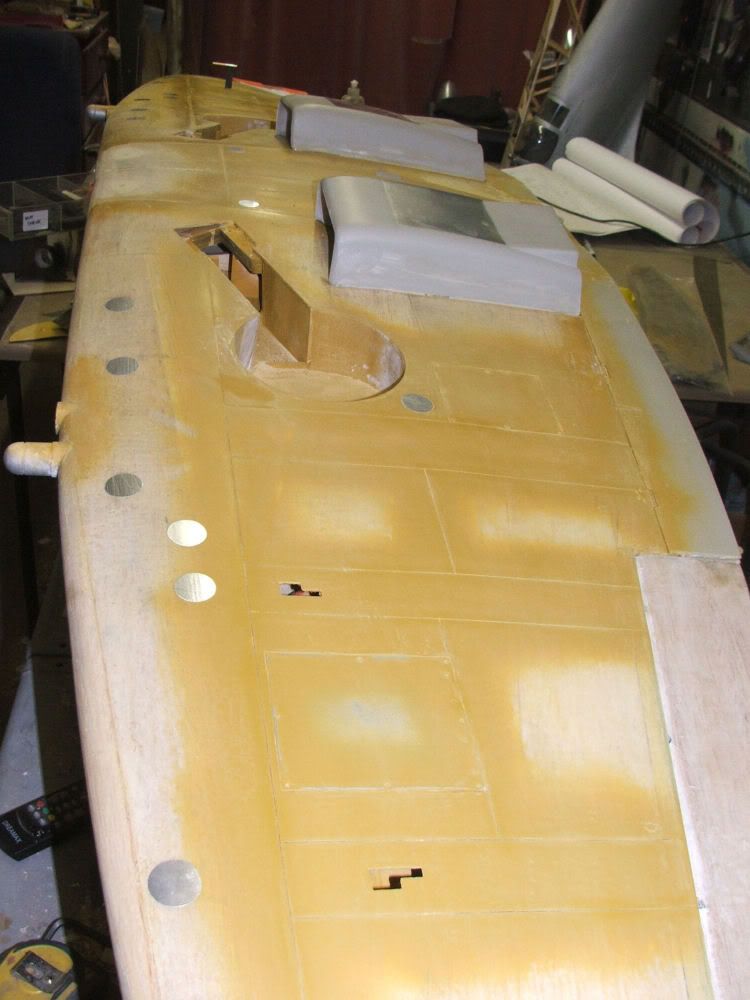
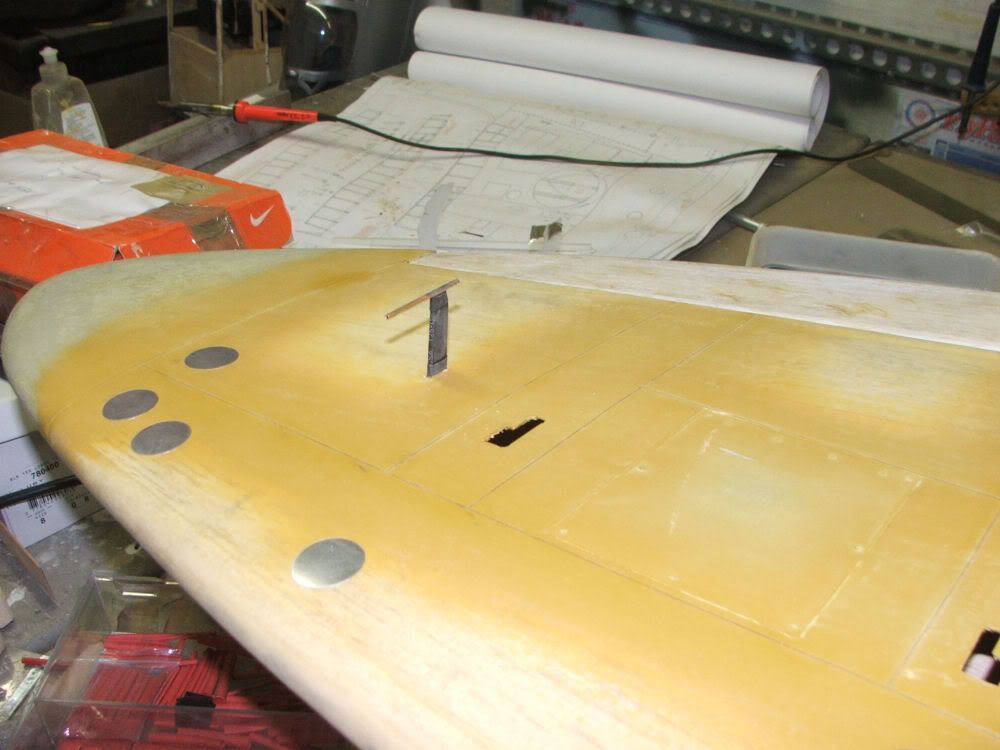
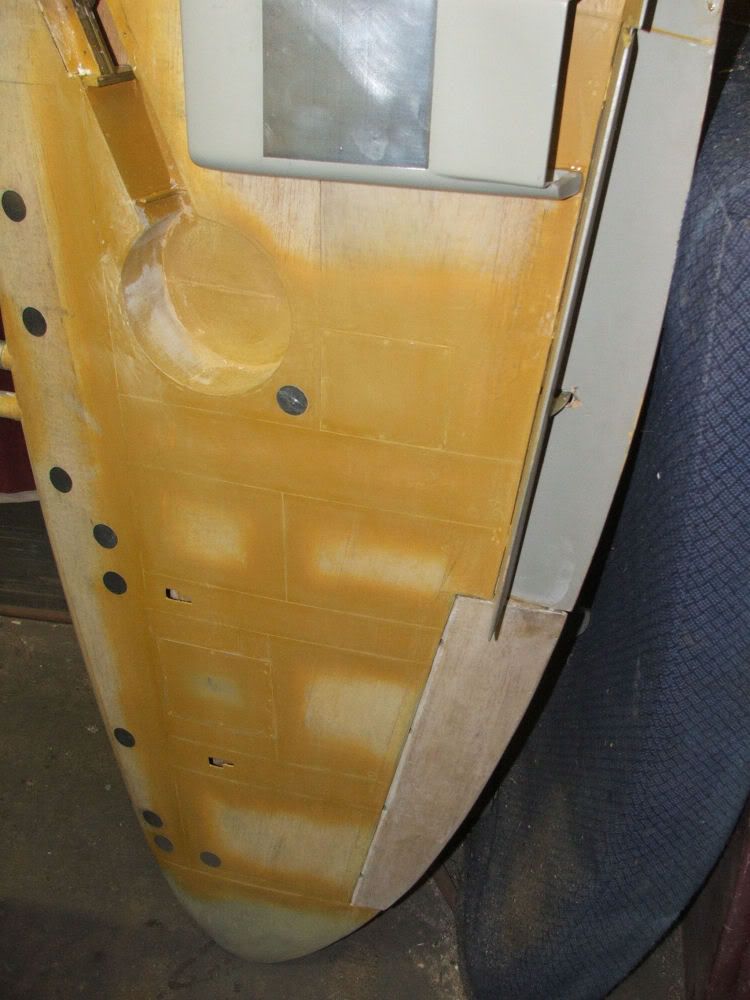
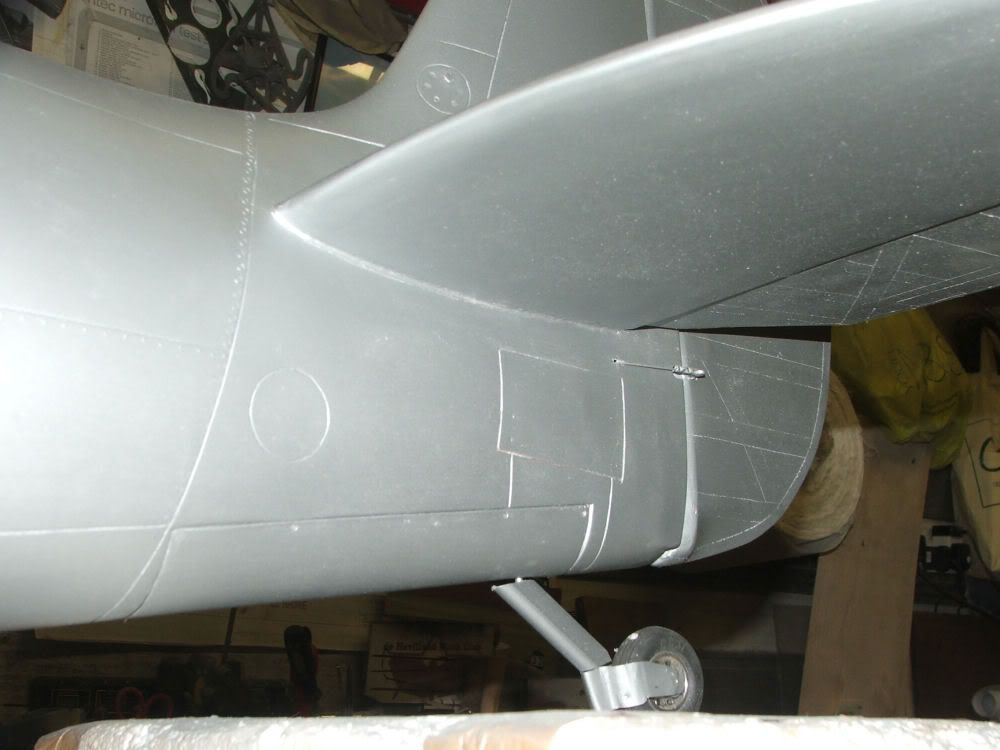
Now the underside. Made up the servo covers and have drawn out the panels etc. The shell ejection chutes were drawn out then cut out. The sheeting around the hole was then chamfered off internally to leave a thin edge like the skins of the full size.
The servo hatches are in the approximate position of panels of the full size, though they have all been jiggled about a bit since the U/C isn't really in the scale position etc. But the idea with this model is to end up with a practical model that looks scale enough, flies right and remains completely usable.
Ian.

 01-31-2012, 09:41 AM
#82
Senior Member
Thread Starter
Join Date: Feb 2004
Location: Barrowhill, Staffordshire, UNITED KINGDOM
Posts: 586
Likes: 0
Received 0 Likes
on
0 Posts
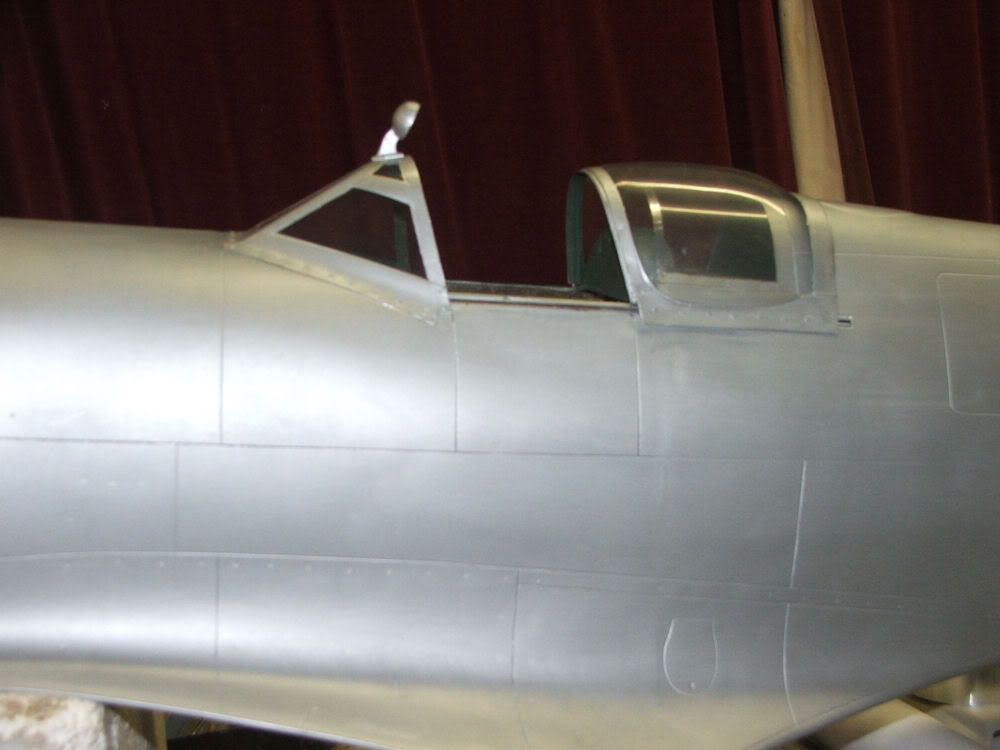
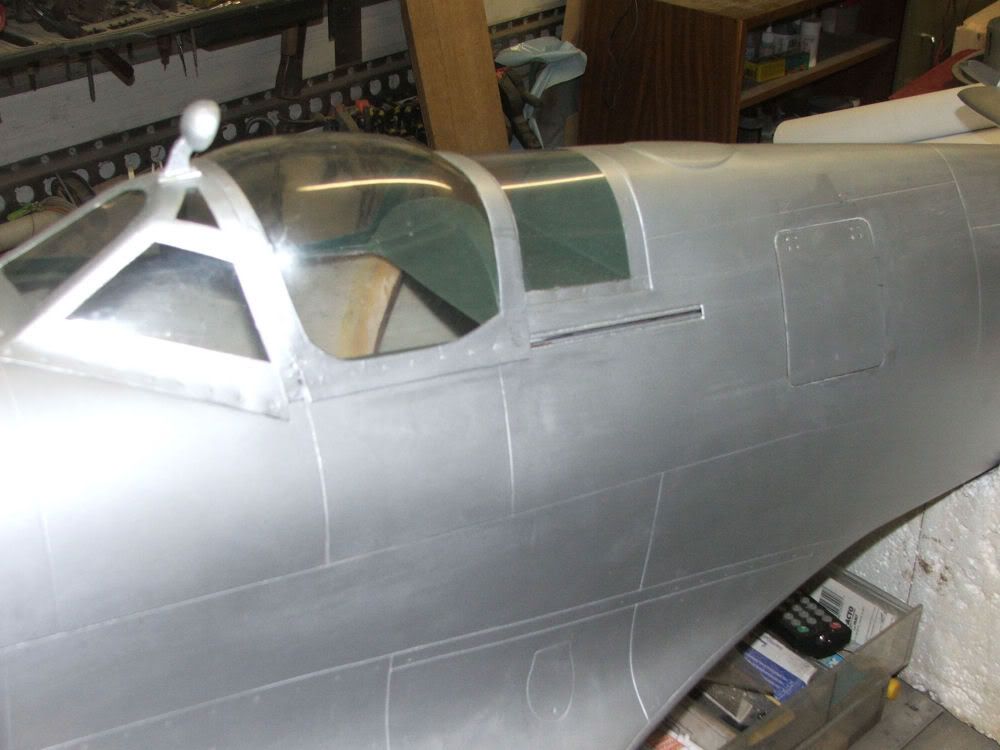
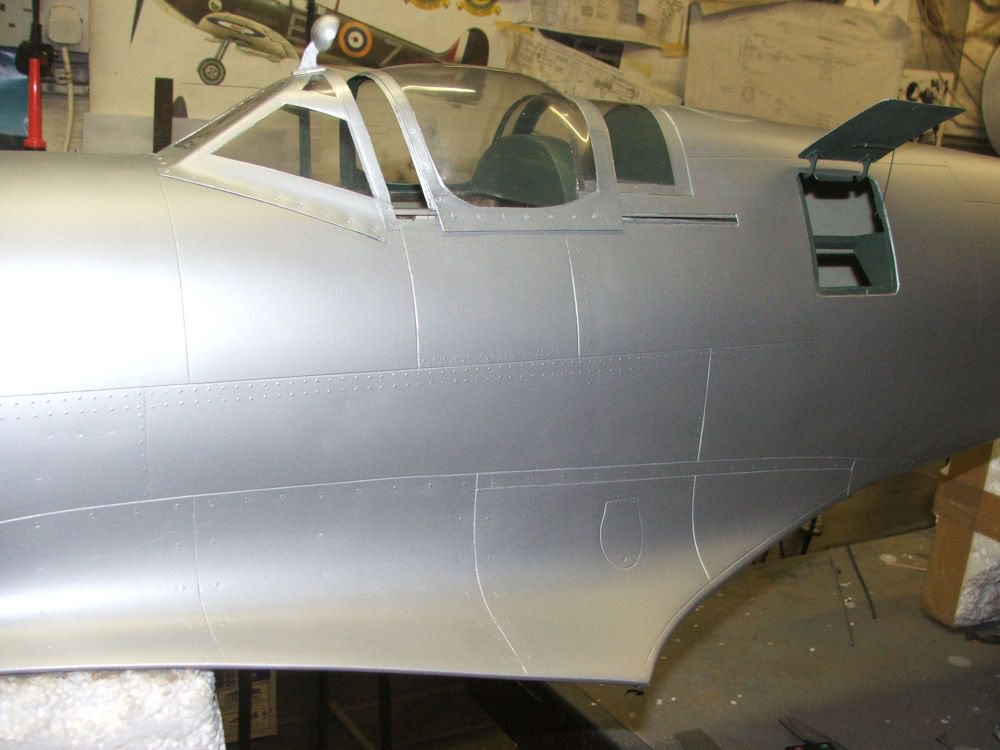
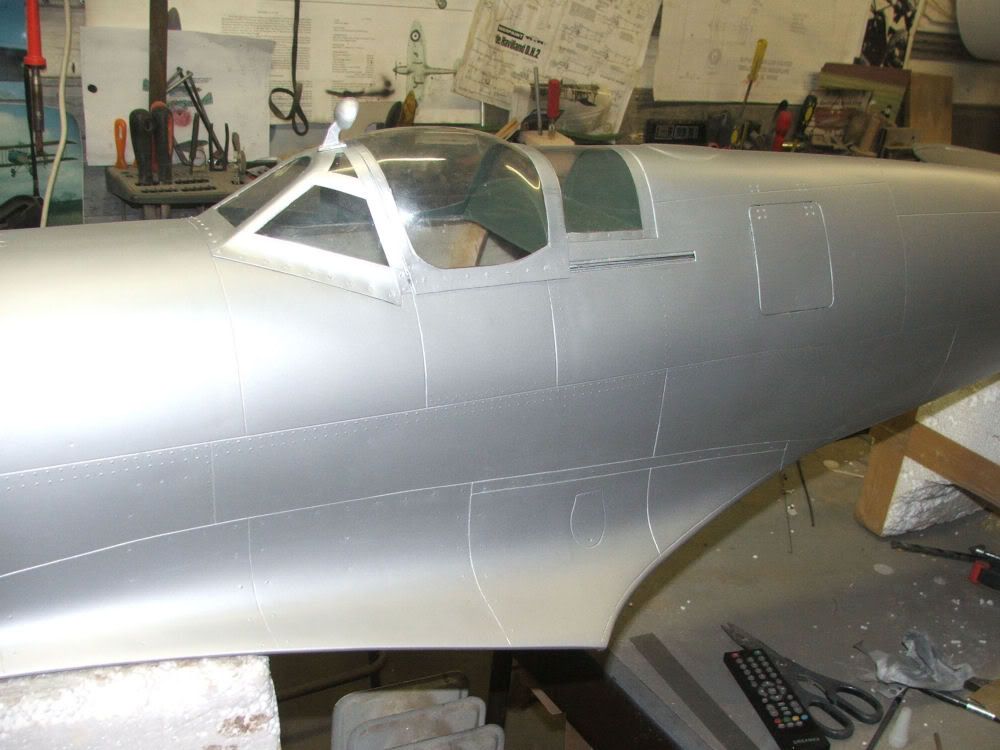
Prekin, the spinner is the one available for the kit, nt 100%scale, but good enough for this. Got the cockpit framing and stiffening sorted, pleased with the fit and the reversing mirror, polished ali for the mirror itself. Got the other side of the exhausts too, so one side is glassed in, flip it over tonight and glass 'tuther side in.
Ian.


Ian.
 02-22-2012, 11:21 AM
#85
Senior Member
Thread Starter
Join Date: Feb 2004
Location: Barrowhill, Staffordshire, UNITED KINGDOM
Posts: 586
Likes: 0
Received 0 Likes
on
0 Posts
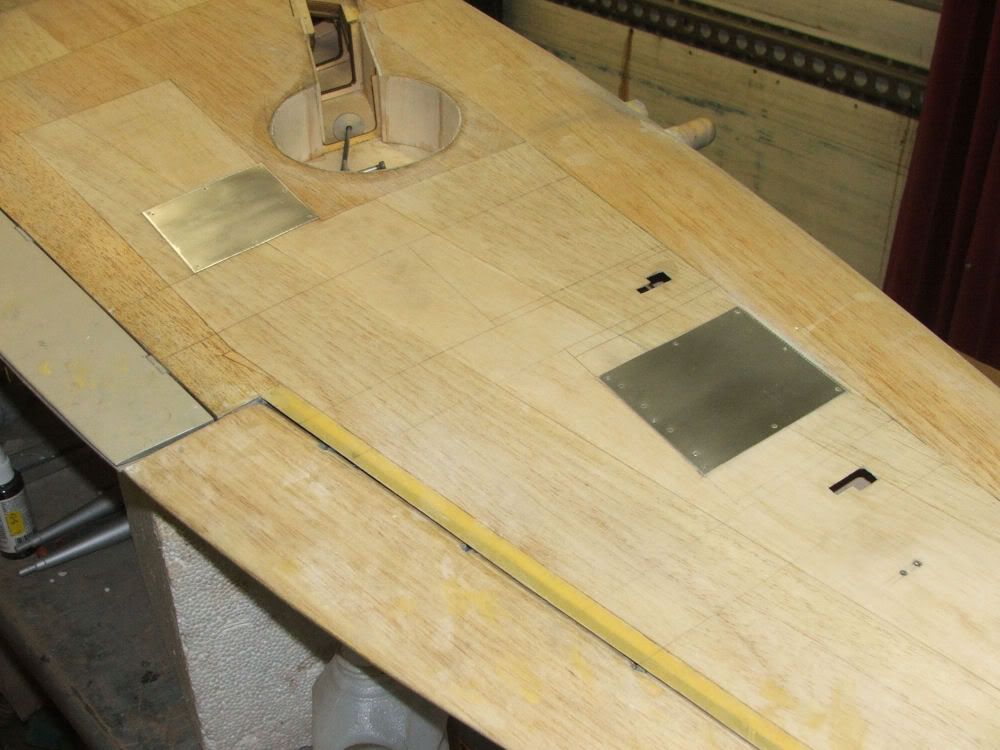
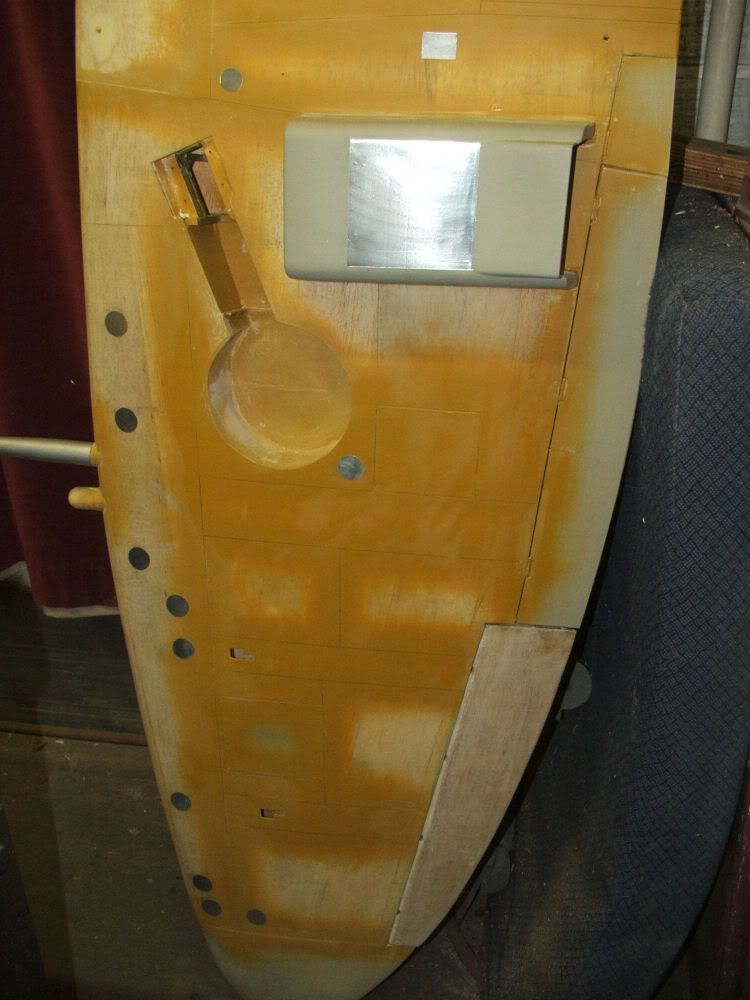
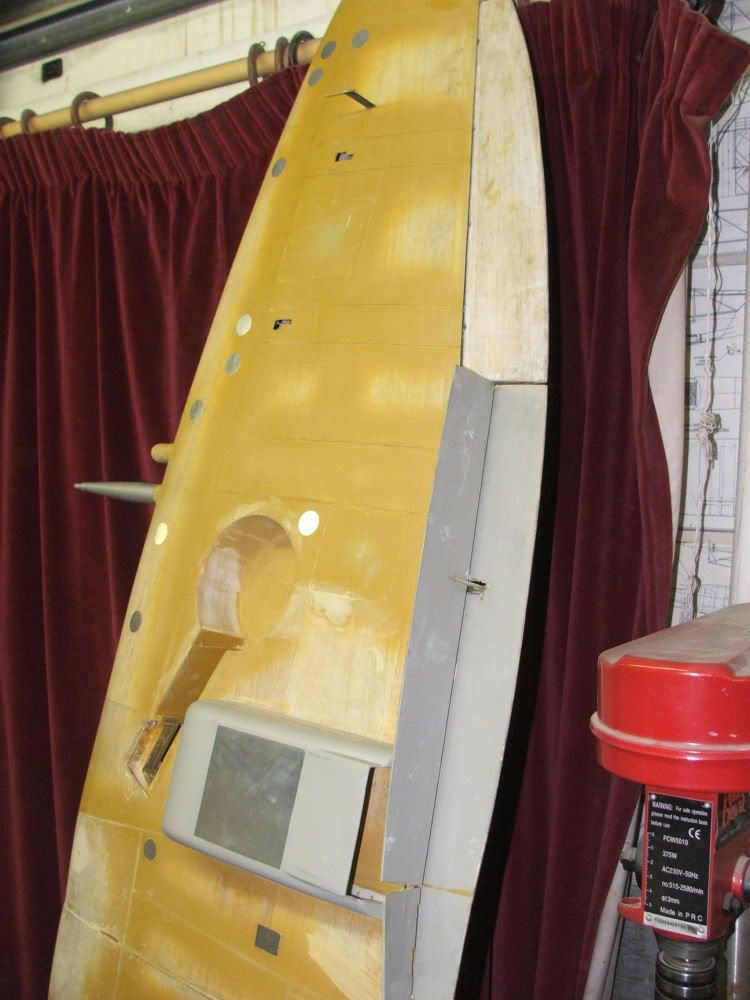
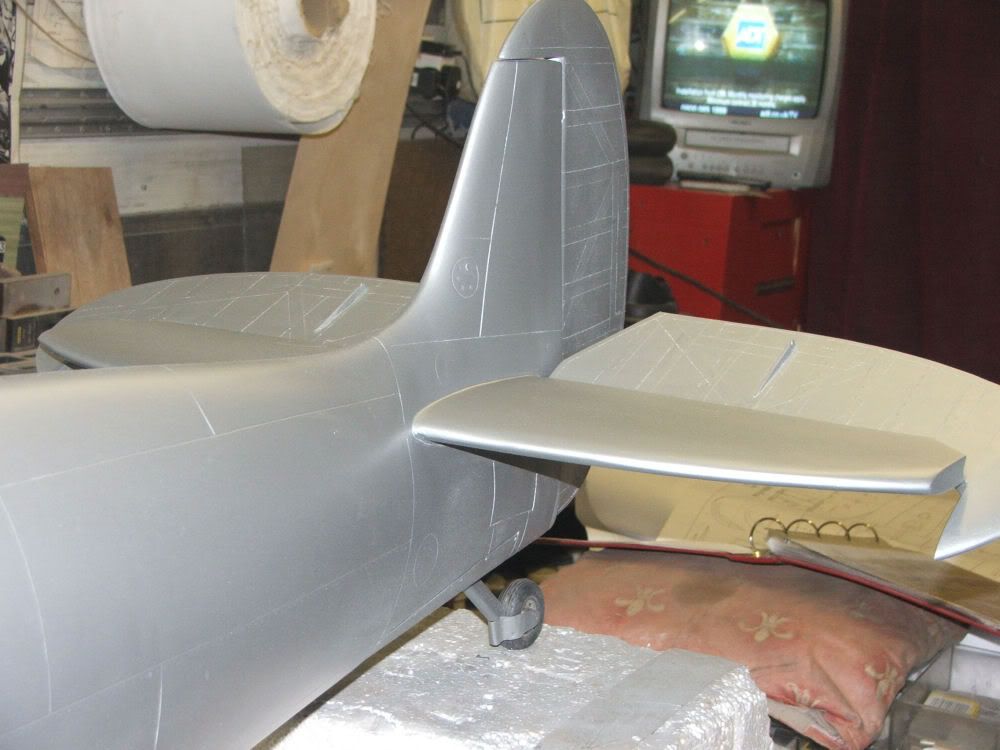
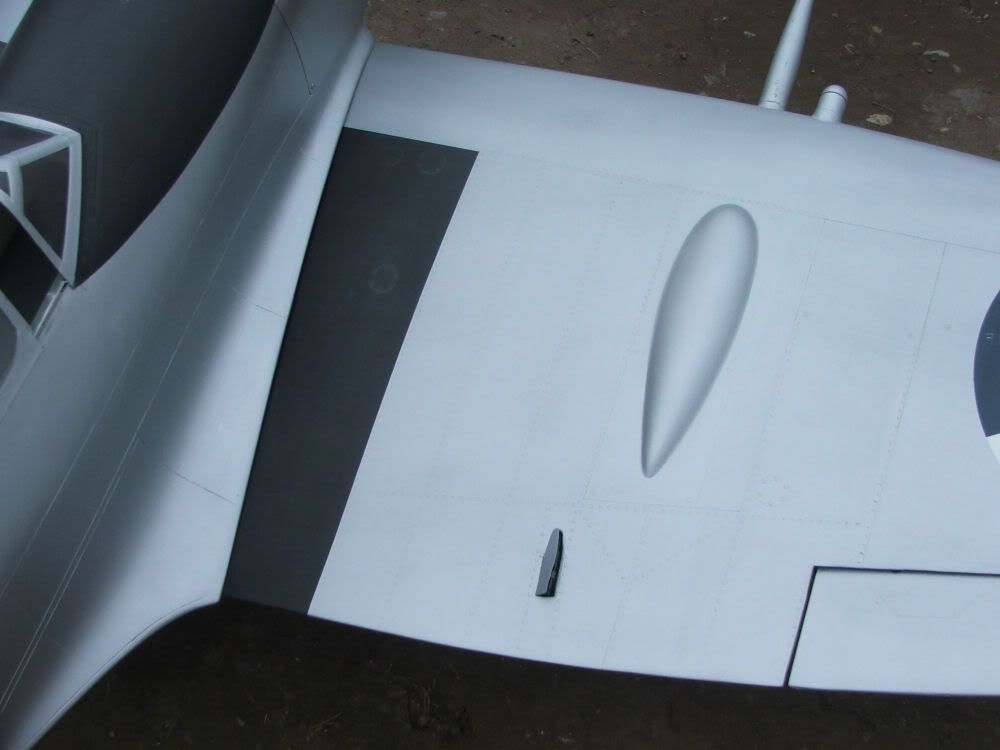
Found a bit more time for this. All panel lines and hatches are on the undersides, radiators on and dressed up a bit, pitot tube made, it removable and pushes into two plastic tubes built into the wing much earlier on. Hopefully get some top coats on soon. Pleased with the look of the undersides, no horns and hatches visible. The radiators have been blanked off inside with some ali mesh, they look a bit odd when you can simply see through them.
Ian.
Ian.
 02-29-2012, 02:06 PM
#88
Senior Member
Thread Starter
Join Date: Feb 2004
Location: Barrowhill, Staffordshire, UNITED KINGDOM
Posts: 586
Likes: 0
Received 0 Likes
on
0 Posts
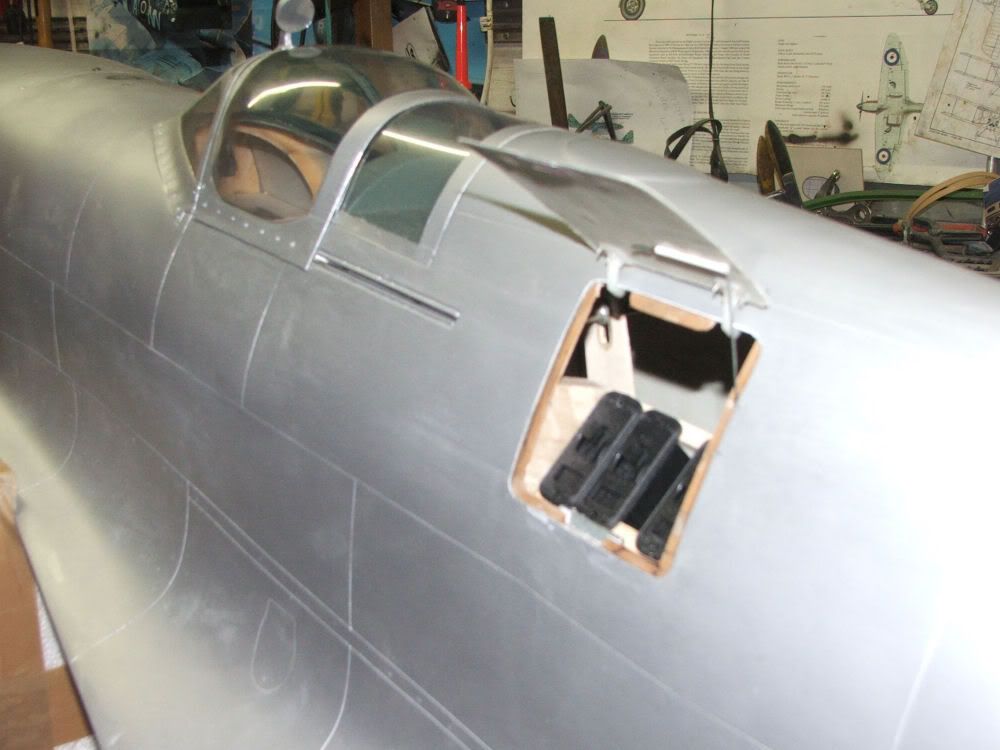
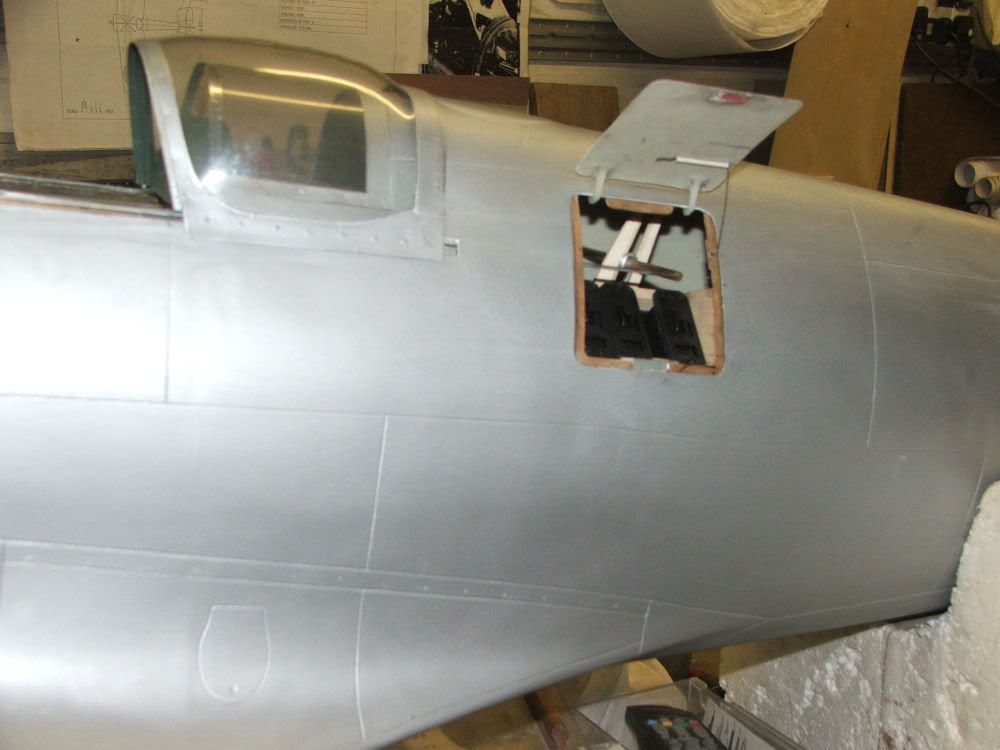
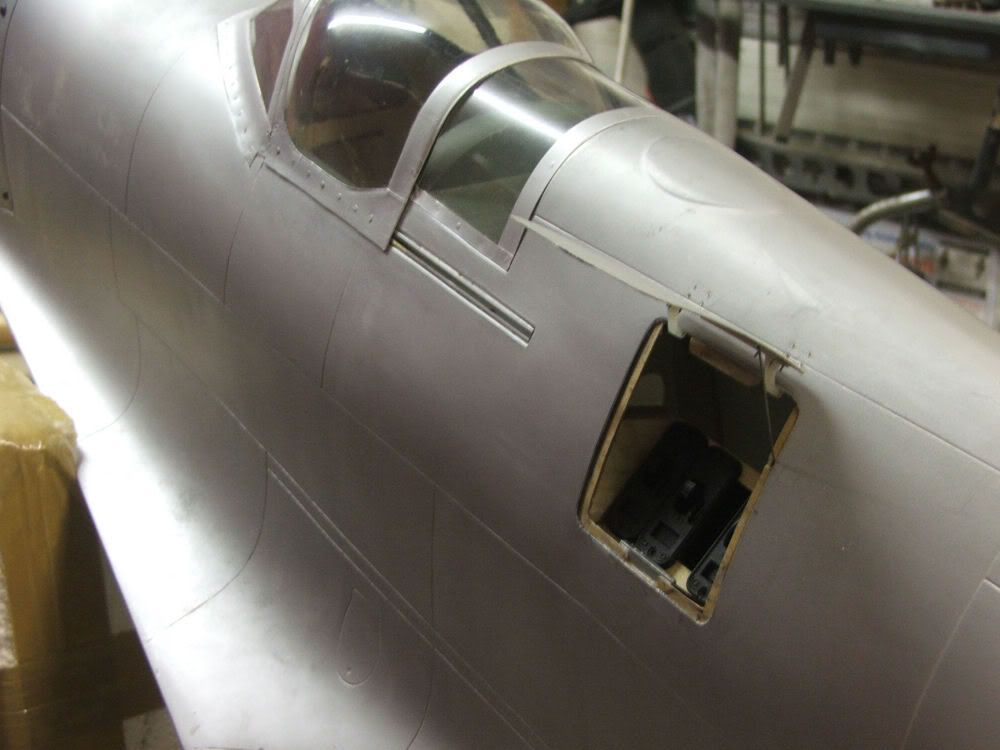
Had a decision to make regarding the mounting of the switches etc. I really didn't want them external, but the only panel to fit them was behind the CofG. Went for this panel and will have to compensate with a bit more ballast. Be worth it though. The hatch is top hinged and held shut with a strong magnet, pretty standard stuff. There is a stay fitted oo, o hold the door up when leads are plugged in etc. This stay is simply hinged through a tube on the door, and runs in a hole in the hatch surround on the fuselage. Since the bend angle in the wire at the door is 85 degrees instead of the 90 degrees, the wire runs in the hole and a kink in the wire then acts as the stop for the stay. To close, simply squeeze the wire and shut the door. To open, since the door itself is quite flimsy, a very slight push in the middle of the door allows a fingernail to get under a bottom corner to pull the door off the magnet. Seems to work a treat. The switches can only use the lower half of the space available though, hence they are on an angle (and conveniently easier to see and get at) since the canopy actuator runs in the middle. I've been very careful with the weight and it feels quite solid and practical.
Ian.

Ian.
03-02-2012, 10:12 AM
#90
Senior Member
Thread Starter
Join Date: Feb 2004
Location: Barrowhill, Staffordshire, UNITED KINGDOM
Posts: 586
Likes: 0
Received 0 Likes
on
0 Posts
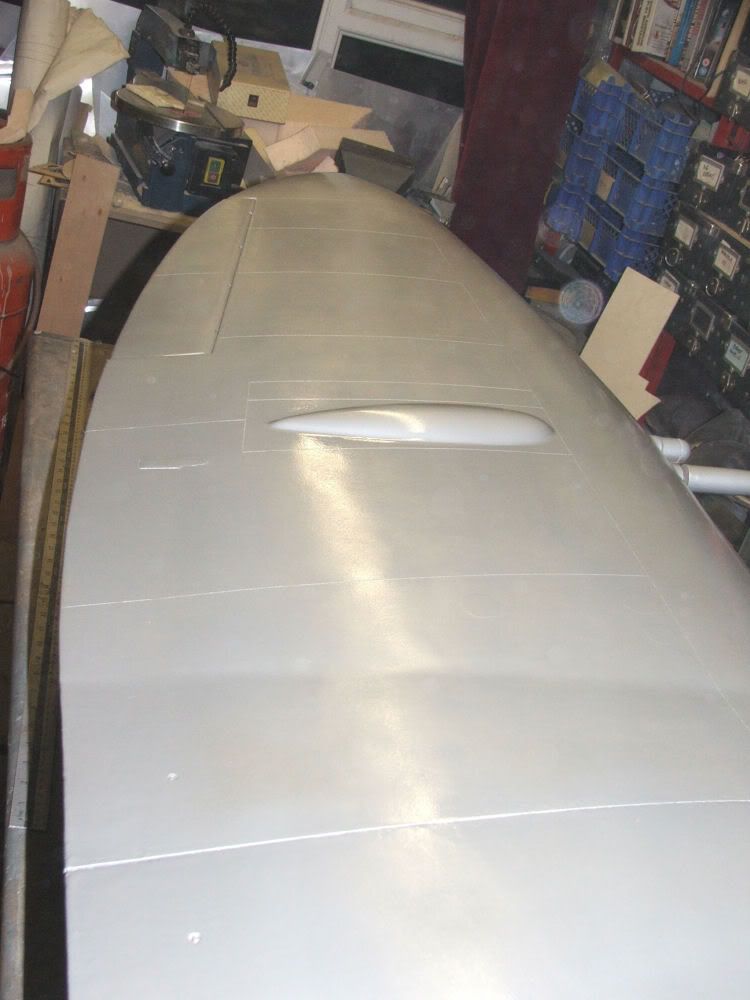
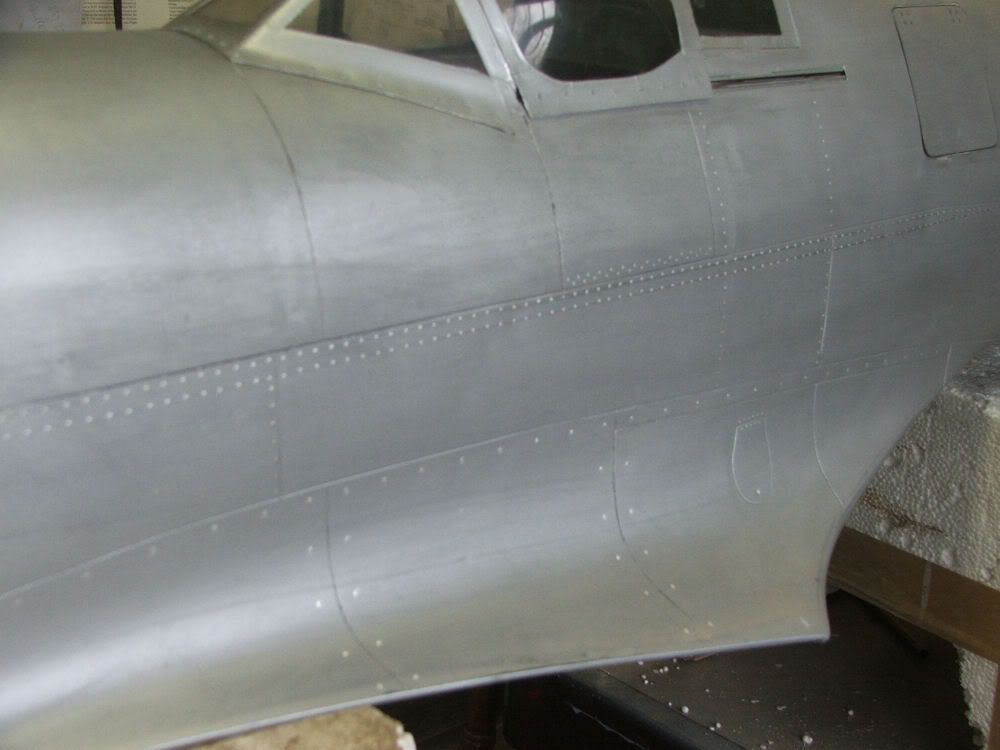
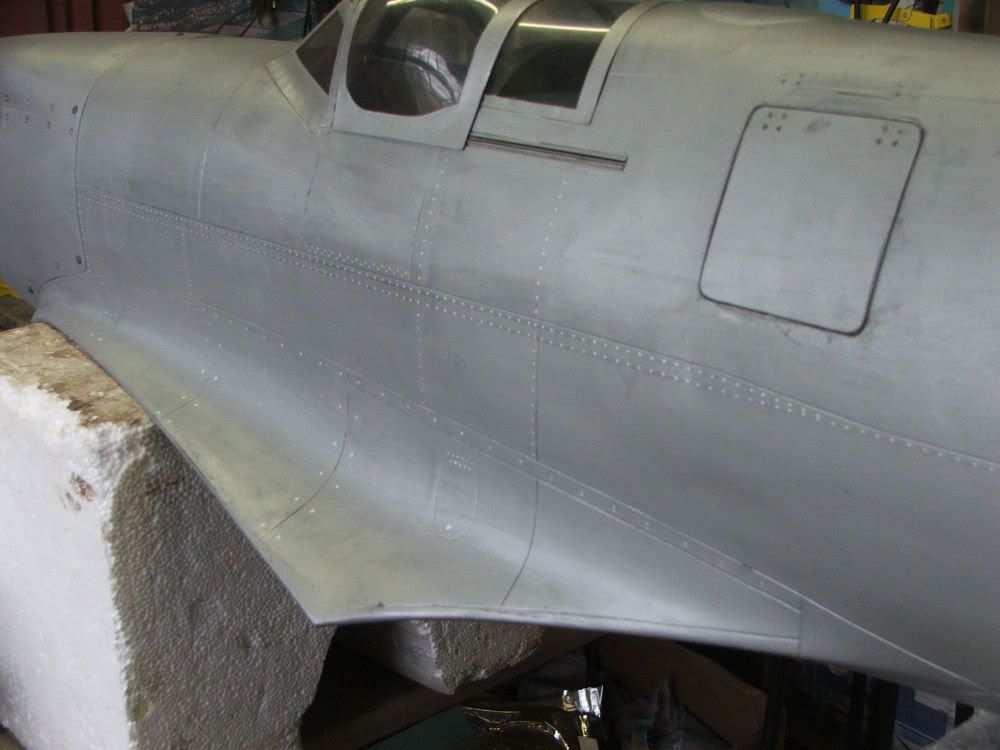
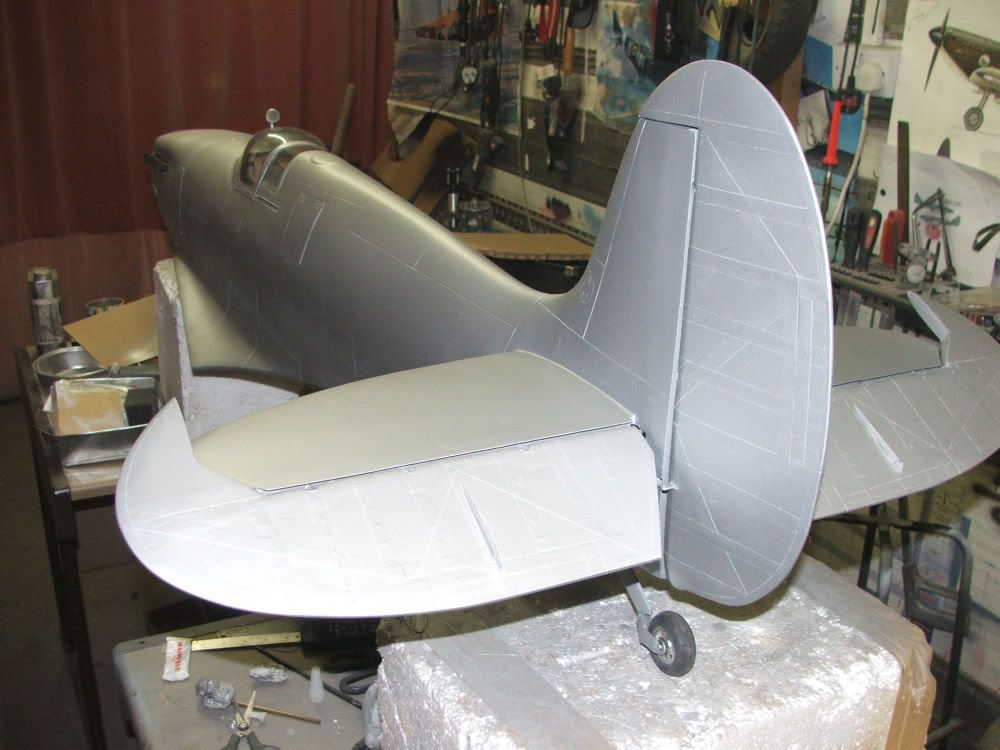
Got the final top coats on the wings, plus I've wet flatted and raised rivetted the fuselage ready for its topcoats. Started to flush rivet the wings too. I also dressed up the insides of the flaps, just to make the boring flat internals look better when they're down.
Ian.

Ian.
03-02-2012, 02:48 PM
#91
Senior Member
Thread Starter
Join Date: Feb 2004
Location: Barrowhill, Staffordshire, UNITED KINGDOM
Posts: 586
Likes: 0
Received 0 Likes
on
0 Posts
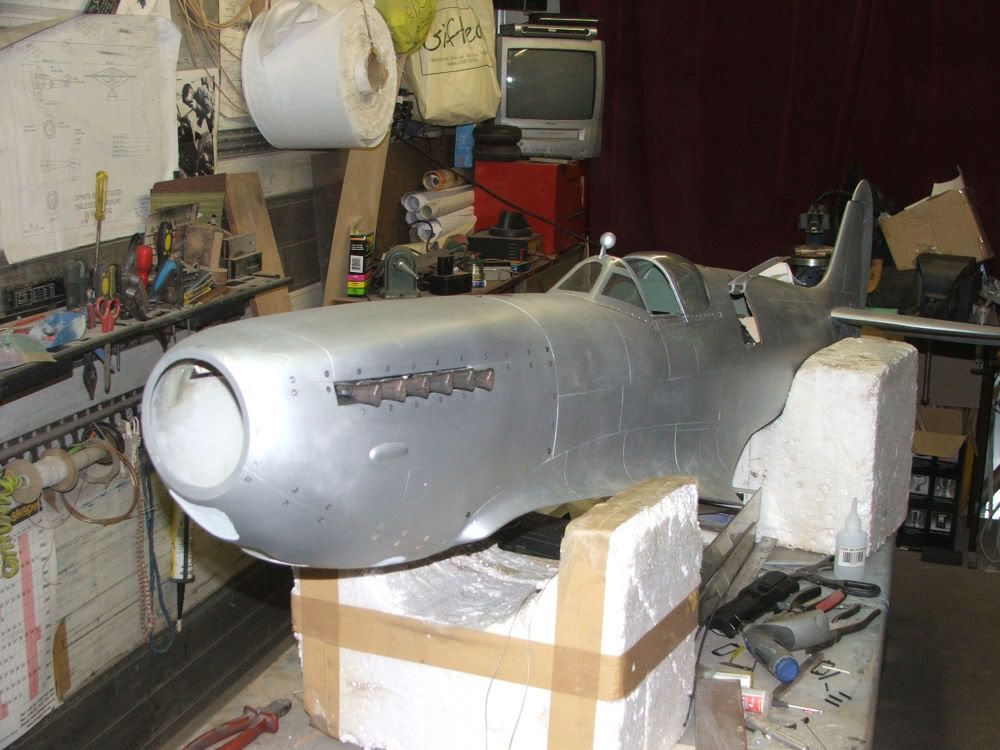
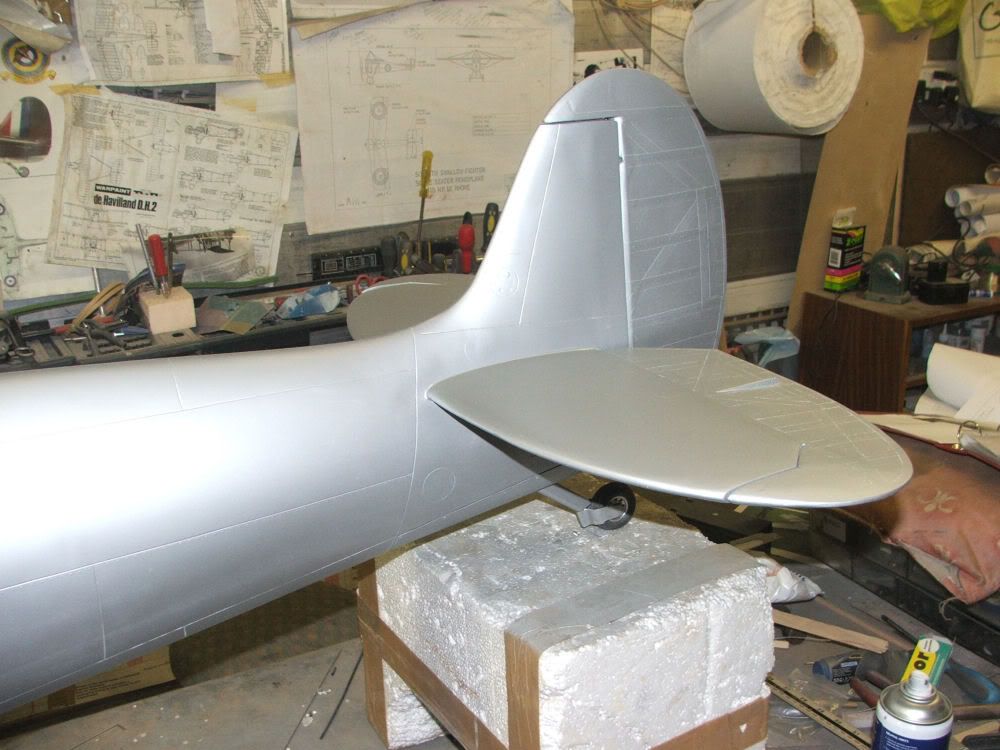
Got the fuselage top coats on, so thats all the main components painted. Just the U/C doors to do, but got to make them yet so it'd be hard to paint them! Also got the sliding canopy servo installed and set up, pleased it works smoothly. Thats all the servos in now apart from the throttle and choke.
All surfaces are glued on now too and I'm very pleased with all of the linkages and the way all the bits wiggle. The elevator is closed loop internally, the rudder closed loop too. I was going to do a pushrod on the left side for the rudder as per full size, but decided against it on weight grounds. So one side of the rudder horn is scale, the other not so!
All surfaces are glued on now too and I'm very pleased with all of the linkages and the way all the bits wiggle. The elevator is closed loop internally, the rudder closed loop too. I was going to do a pushrod on the left side for the rudder as per full size, but decided against it on weight grounds. So one side of the rudder horn is scale, the other not so!

 03-04-2012, 04:25 AM
#94
Senior Member
Thread Starter
Join Date: Feb 2004
Location: Barrowhill, Staffordshire, UNITED KINGDOM
Posts: 586
Likes: 0
Received 0 Likes
on
0 Posts
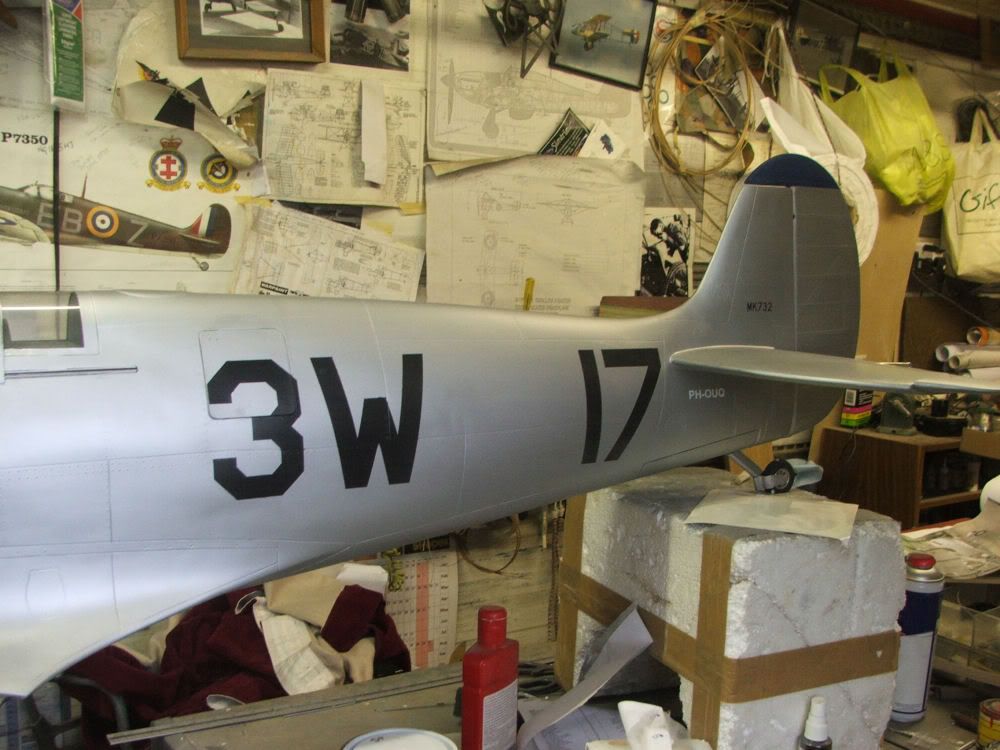
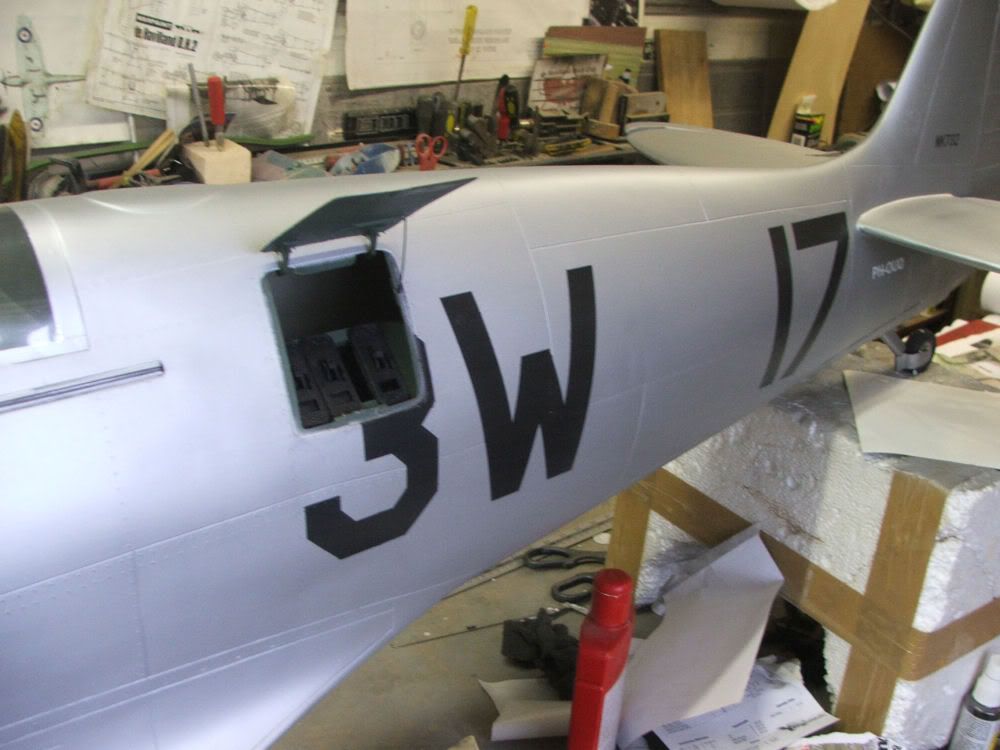
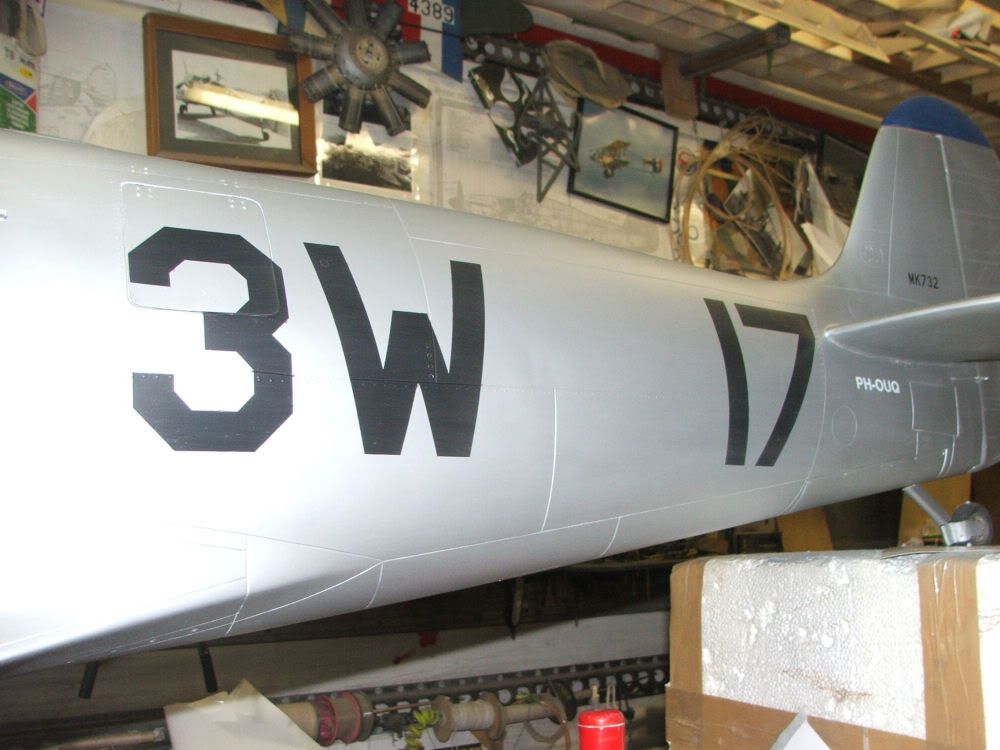
Stole some shed time over the weekend and got some stickers on to please DB, Flightline Graphics did a lovely job of the paint masks as ever, plus some time for more of the flush rivetting, marvellous fun ;D ;D
Ian.
Ian.
03-15-2012, 04:02 PM
#97
Senior Member
Thread Starter
Join Date: Feb 2004
Location: Barrowhill, Staffordshire, UNITED KINGDOM
Posts: 586
Likes: 0
Received 0 Likes
on
0 Posts
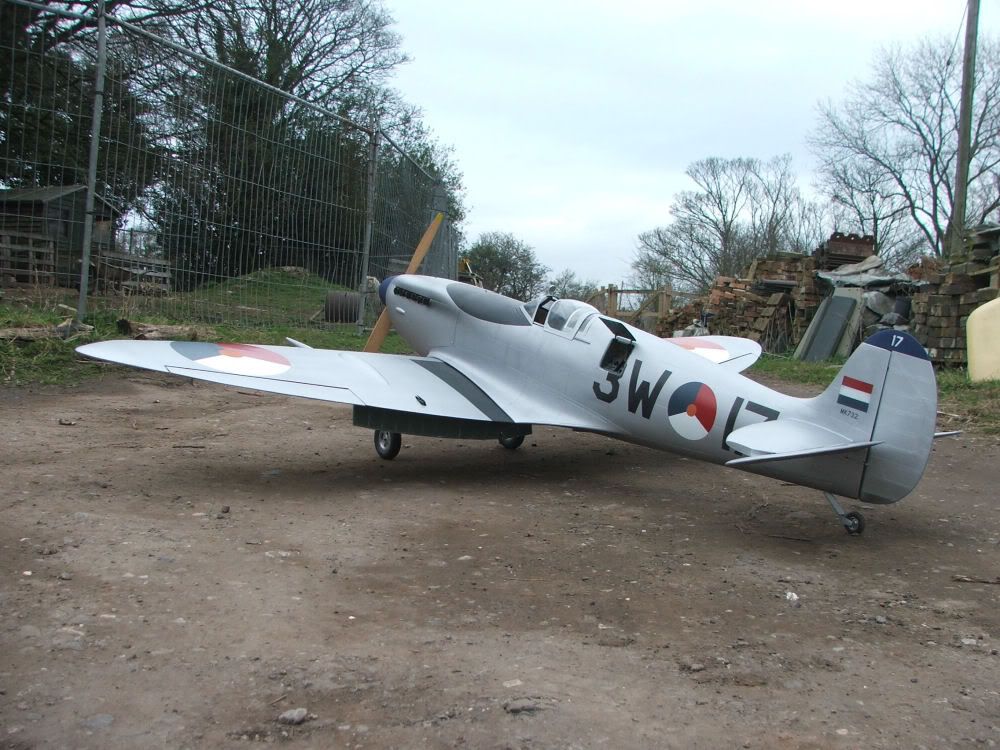
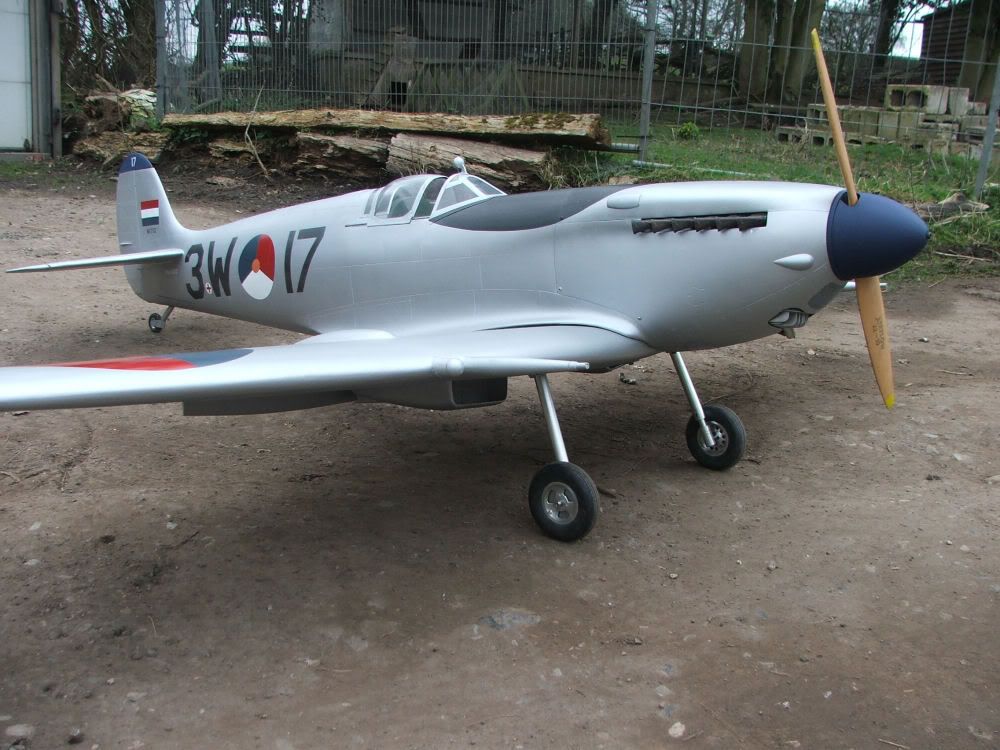
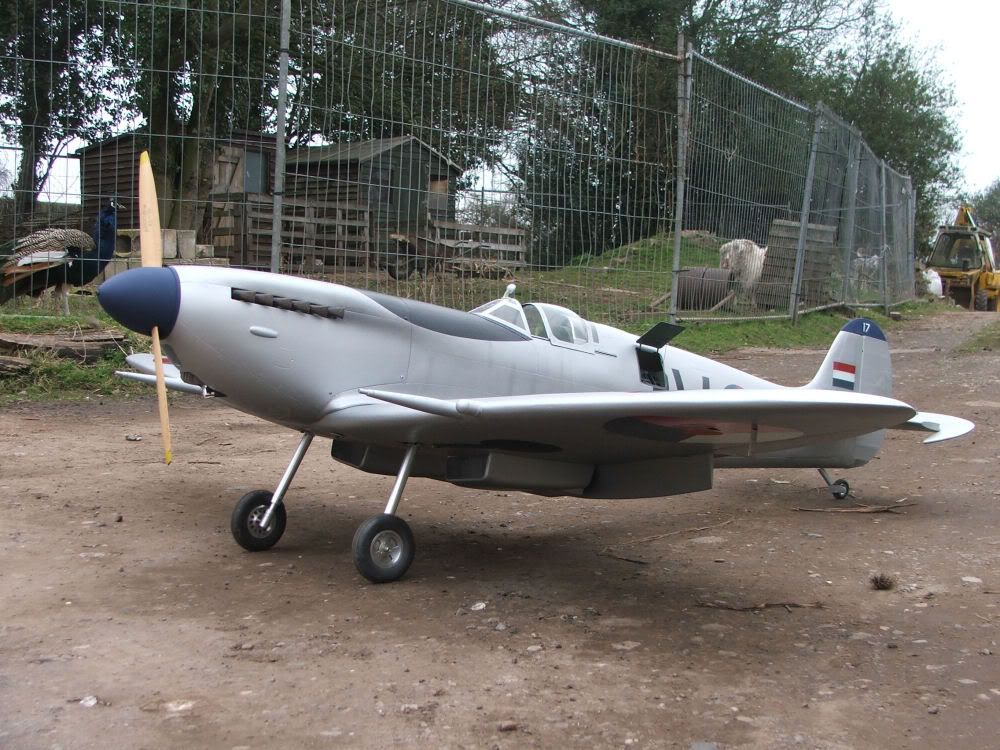
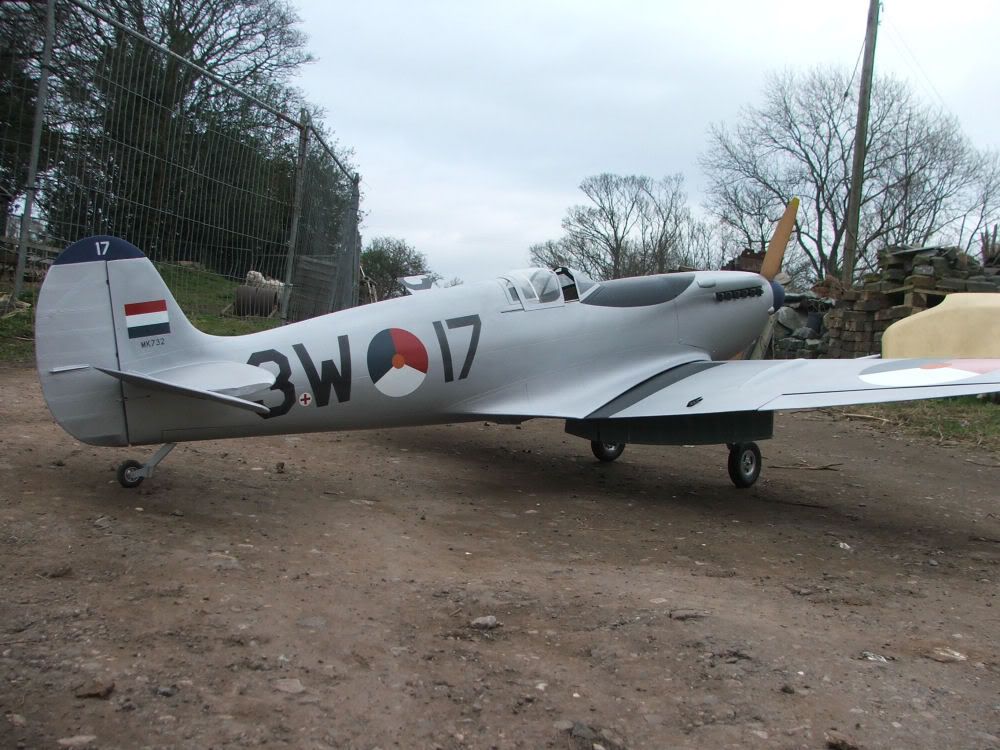
All markings now on. Must say the masks for the complicated roundels worked superbly. I was picky with them since I didn't want any overlapped colours on the roundels, so the masks had to be perfect, and perfect they were, very simple to use with good results. Flightline Graphics really know their stuff. Just got to refit the motor and retracts, fit the tank, throttle and choke servos and finally mount the Rx, then the dreaded balancing act!! Not too worried really, what it needs it needs.
Ian.
Ian.
03-16-2012, 08:54 AM
#98
Senior Member
Thread Starter
Join Date: Feb 2004
Location: Barrowhill, Staffordshire, UNITED KINGDOM
Posts: 586
Likes: 0
Received 0 Likes
on
0 Posts
Heres a couple of pics assembled, just gear doors and some internals to sort. Certainly is a scheme that stands out from the green / grey, brown / green examples. Keep having to look back to make sure all the roundels are on the right way round, its an ocd thing! Quite pleased with how the white painted mesh blends in from certain angles. I'll work the CofG out tonight, shouldn't be too far away from the factory measurement bt I guess it'll need a drop or two of lead.
Ian.

Ian.
03-16-2012, 09:26 AM
#99
Senior Member
Thread Starter
Join Date: Feb 2004
Location: Barrowhill, Staffordshire, UNITED KINGDOM
Posts: 586
Likes: 0
Received 0 Likes
on
0 Posts
The balance point at the minute, without batteries, tank, throttle and choke servo's and Rx is about 30mm behind the 153mm stated in the storybook. When I've balanced ESM models in the past, I've always found my ideal position is a tad further back, meaning less ballast, but we'll see.
Ian.
Ian.
