


ESM Mitsubishi J2M3 Raiden build


 02-26-2013, 05:44 PM
#228

Thread Starter

Here are some better shots from the show. The Raiden didn't win anything, but it felt good to enter a plane and hear people say nice things about it.
As I mentioned the gun blisters were made from CyA bottles. The inner barrels are aluminum tube with cut down cake icing tips courtesy of the wife.
I had also added more cockpit details like the armored glass panel behind the gun site.
Now all I have to do is wait for some warm weather!
As I mentioned the gun blisters were made from CyA bottles. The inner barrels are aluminum tube with cut down cake icing tips courtesy of the wife.
I had also added more cockpit details like the armored glass panel behind the gun site.
Now all I have to do is wait for some warm weather!
 12-25-2014, 11:38 AM
#230
Join Date: Oct 2006
Location: Newnan,
GA
Posts: 196
Likes: 0
Received 0 Likes
on
0 Posts
")
Last edited by Corsair 29; 12-25-2014 at 11:41 AM.
12-26-2014, 05:22 AM
#231
If you get the Sierra Retracts with this plane, plan on making some major modifications to the wing, and fuselage. The Sierra Retracts I received are 95 degrees!, plus the already crazy dihedral that comes with this plane. Guess what I'm doing during this Christmas break.
12-26-2014, 04:41 PM
#232
Join Date: Oct 2006
Location: Newnan,
GA
Posts: 196
Likes: 0
Received 0 Likes
on
0 Posts
Phil,
Cant show you step by step since I already started, but when I first got the retracts I didn't think about reducing the dihedral. Then I placed the retracts just to see how they would look, and I had one of those Oh, Oh, moments I also heard voices in the back of my head saying "should've gone with Robarts". I knew then that I had to reduce the dihedral to get these retracts to look halfway decent because they looked like a foul ball hit on both directions at the same time. Then things got worst, I wanted to see how they looked like with the gear retracted, and I saw that the strut was making contact with the bottom of the top wing sheeting.
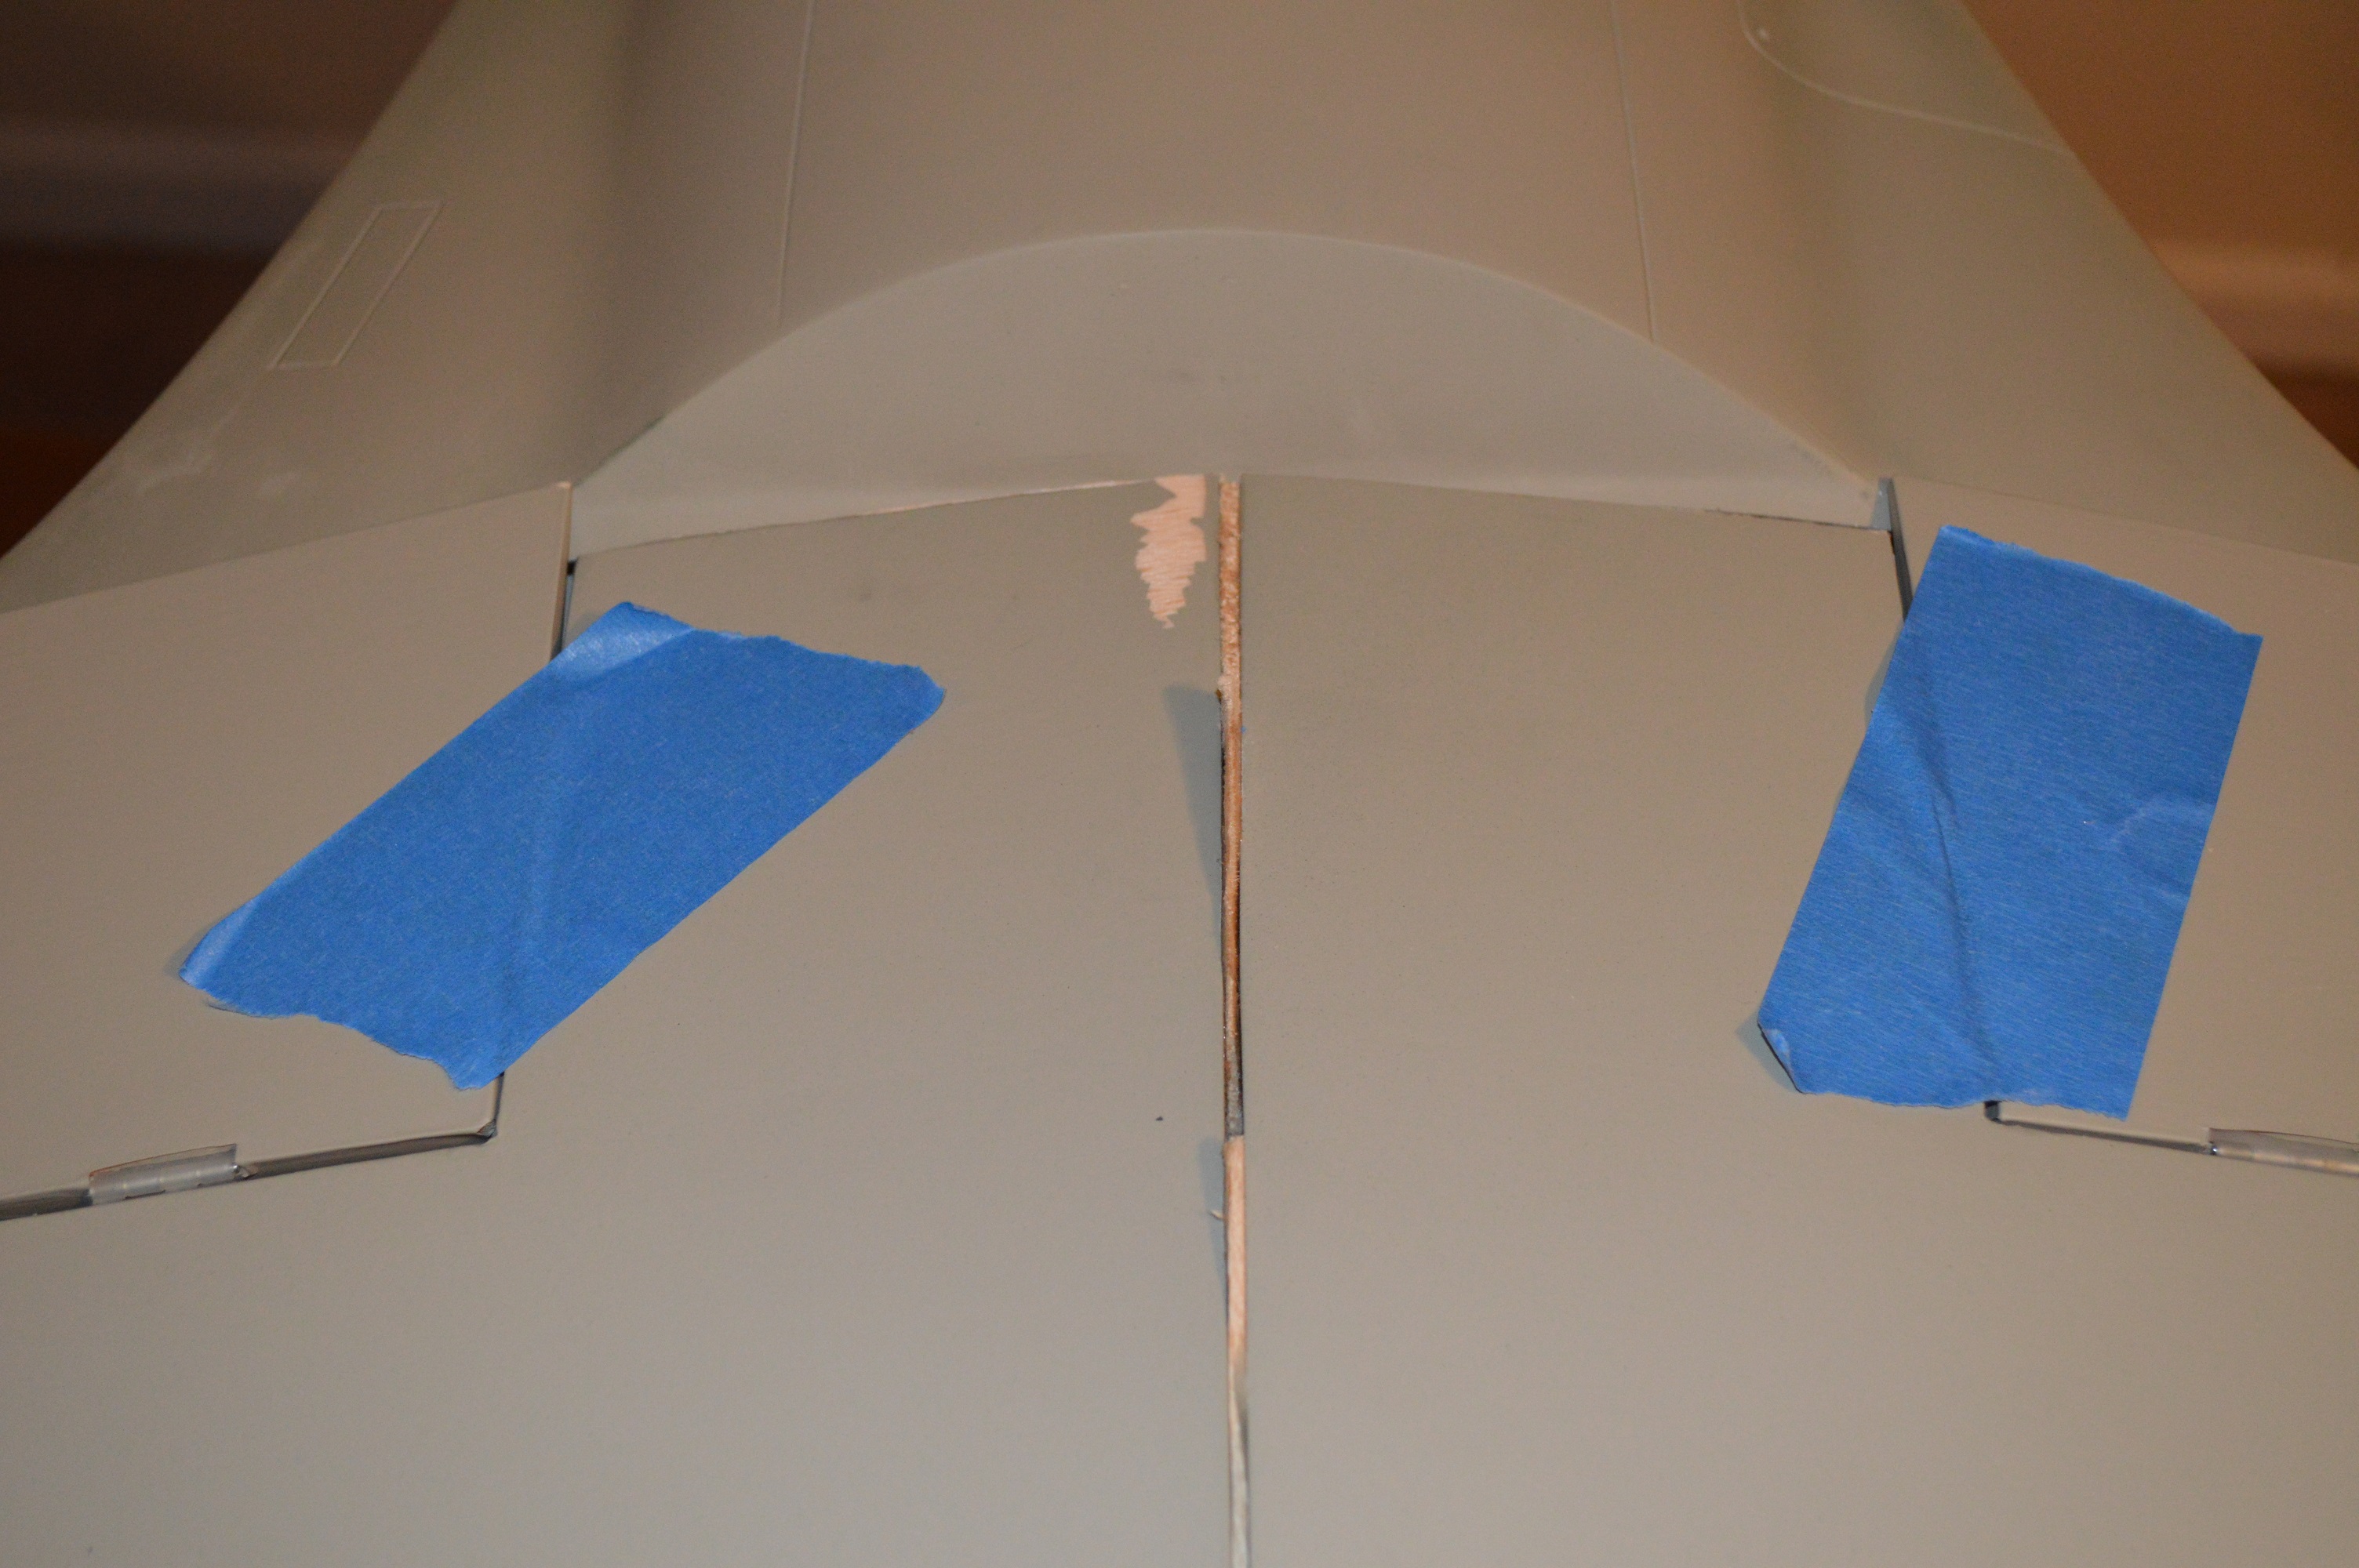
So, I started with the dihedral, This meant that I had to make a new plywood joiner with less angle. Please don't ask me how I got the angle, I just used the : "It looks good" divided by the "it appears fine" plus the "just go for it" formula, and glued the halves together. Obviously this left a gap on the top wing, and a small gap on the bottom, so, I just filled these with balsa, and glued it in place.

Cant show you step by step since I already started, but when I first got the retracts I didn't think about reducing the dihedral. Then I placed the retracts just to see how they would look, and I had one of those Oh, Oh, moments I also heard voices in the back of my head saying "should've gone with Robarts". I knew then that I had to reduce the dihedral to get these retracts to look halfway decent because they looked like a foul ball hit on both directions at the same time. Then things got worst, I wanted to see how they looked like with the gear retracted, and I saw that the strut was making contact with the bottom of the top wing sheeting.
So, I started with the dihedral, This meant that I had to make a new plywood joiner with less angle. Please don't ask me how I got the angle, I just used the : "It looks good" divided by the "it appears fine" plus the "just go for it" formula, and glued the halves together. Obviously this left a gap on the top wing, and a small gap on the bottom, so, I just filled these with balsa, and glued it in place.
12-26-2014, 04:50 PM
#233
Join Date: Oct 2006
Location: Newnan,
GA
Posts: 196
Likes: 0
Received 0 Likes
on
0 Posts
Next, I wanted to see how the change of dihedral affected the wing to fuselage placement, and I found out that I had another challenge. The wing was not sitting correctly on the fuselage saddles.
More formulas, thinking, and calculating, led me to figure that the solution was to trim the trailing edge of the wing where the fuselage made contact, and remove the existing wing support blocks on the fuselage. Once I did this the wing fitted perfectly to the fuselage. Of course I have to rebuild another wing bolt support plywood, but this will be pie for me. Pictures show the aftermath.


More formulas, thinking, and calculating, led me to figure that the solution was to trim the trailing edge of the wing where the fuselage made contact, and remove the existing wing support blocks on the fuselage. Once I did this the wing fitted perfectly to the fuselage. Of course I have to rebuild another wing bolt support plywood, but this will be pie for me. Pictures show the aftermath.
12-26-2014, 04:59 PM
#234
Join Date: Oct 2006
Location: Newnan,
GA
Posts: 196
Likes: 0
Received 0 Likes
on
0 Posts
Lastly the retracts. Remember this is not final, I'm still tweaking, especially the left wing strut, its a hair off, but its getting there, maybe a washer or two might do the trick.
Again, the challenge was the strut contacting the bottom of the top wing sheeting, where I had visions of cracks, and holes. I looked at this, and the only solution was to gap the retracts, to create separation. Using 3/32 basswood I was able to accomplish this, and now there is a gap between the strut, and top sheeting that I might be able to use that retract liner supplied, Will see.
Like I said before still tweaking.
12-26-2014, 06:45 PM
#235
C29, Thank you SO much for the info, I'm very glad I found this thread!
I finally got all of mine out of the box and mocked up.... Not a bad looking plane. I got my two ailerons hinged with Robart hinge points. I would never use CA hinges on a plane this big. Robart doesn't list the Raiden in it's gear finder list....
I finally got all of mine out of the box and mocked up.... Not a bad looking plane. I got my two ailerons hinged with Robart hinge points. I would never use CA hinges on a plane this big. Robart doesn't list the Raiden in it's gear finder list....
Last edited by Fili; 12-26-2014 at 07:00 PM.
12-26-2014, 08:06 PM
#236
My Feedback: (48)
Finished one for my friend last year. Stock wing flies great. Very solid flyer, quick but stable and solid. Used a CRRC55 twin and Robart gear. Changed to robert hinges also and larger wheels.
Very popular at the fly ins as it is different. Has a lot of presence for a 80" wing due to large fuselage. Looked right at home with larger aircraft.
The plugs stick thru cowl a bit was not a problem. My friend insisted on this engine as they runs so sweet. We have several and they all have run perfect out of the box. Very smooth and great throttle response. No shaking the plane apart with this twin, plenty of power. Most flights were at half throttle.
Last edited by dmyers0403; 12-26-2014 at 08:11 PM.
12-28-2014, 07:59 PM
#238
My Feedback: (48)
QUOTE=Fili;11949231]If I may ask, Which Robart gear did you use?[/QUOTE]
If memory is good I used a set of #631RS-85 with the 1/2" offset struts #673 that I had laying around.
FYI: I reinforced the inside of engine mount tube with heavy glass cloth. We balanced finished plane by placing 16oz and smaller fish weights as needed placed over cowl at engjne tube location. We took the selected wieghts and placed the plane nose down, Inserted weights into tube against back of firewall then foamed inside of tube with expandable foam. Sealed in wieght perfect. All lines and wires were outside of engine tube.
Last edited by dmyers0403; 12-28-2014 at 08:08 PM.
12-29-2014, 01:14 PM
#239
If memory is good I used a set of #631RS-85 with the 1/2" offset struts #673 that I had laying around.
FYI: I reinforced the inside of engine mount tube with heavy glass cloth. We balanced finished plane by placing 16oz and smaller fish weights as needed placed over cowl at engjne tube location. We took the selected wieghts and placed the plane nose down, Inserted weights into tube against back of firewall then foamed inside of tube with expandable foam. Sealed in wieght perfect. All lines and wires were outside of engine tube.[/QUOTE]
Thank You Sir!
12-30-2014, 06:23 PM
#240
I'm going to try to do the nav lights, thanks to all here for all their expertise and info...
I also chose to run 440 pushrods to each of the ele's instead of the pull pull provided, just don't have a warm and fuzzy with the pull pull set up.
I also chose to run 440 pushrods to each of the ele's instead of the pull pull provided, just don't have a warm and fuzzy with the pull pull set up.
12-30-2014, 09:32 PM
#241
My Feedback: (48)
Forgot to mention in my last post that I did the same. Used a carbon fiber rod with 440 end rods for elevator control with HD swivle links at each end. Worked very well but had to cut out mid brace on fuselage former behind wing and add new brace, no biggy to redo. Used std. Pull pull on rudder. Be sure and check elevater joiner/control link as mine was twisted and had to be corrected after it was glued in place. Tuff wire, would have been much easier before glueing to stab. Otherwise elevators will not line up even.
12-31-2014, 04:13 AM
#242
Forgot to mention in my last post that I did the same. Used a carbon fiber rod with 440 end rods for elevator control with HD swivle links at each end. Worked very well but had to cut out mid brace on fuselage former behind wing and add new brace, no biggy to redo. Used std. Pull pull on rudder. Be sure and check elevater joiner/control link as mine was twisted and had to be corrected after it was glued in place. Tuff wire, would have been much easier before glueing to stab. Otherwise elevators will not line up even.
01-01-2015, 10:05 AM
#243
Alrighty then... Anyone else have an issue with the engine mount tube not being aligned with the inner former? I'm not sure the pics do justice, and I can trim the former to accept the tube, but jeez.For me to fight and get her remotely close, the tube is quite distorted... anyhoo, how did you guys securely attach that tube? I dont feel good with just epoxy..any tips?
01-01-2015, 10:21 AM
#244
My Feedback: (48)
The engine offest was in the former alignment. I did have to use my dremel sanding drum to get fit for tube to slide into former. I scuffed paint off of tube where it was to be glued, then used hysol to get good glue contact and create fillits at former and outside of firewall at tube. I also made a flat 1/4 inch ply plate over top of tube for batteries and ignition. I never made any penetrations thru tube as it is thin and I did not want to weaken it. Mine worked great.
01-05-2015, 04:59 PM
#245
The engine offest was in the former alignment. I did have to use my dremel sanding drum to get fit for tube to slide into former. I scuffed paint off of tube where it was to be glued, then used hysol to get good glue contact and create fillits at former and outside of firewall at tube. I also made a flat 1/4 inch ply plate over top of tube for batteries and ignition. I never made any penetrations thru tube as it is thin and I did not want to weaken it. Mine worked great.
01-26-2015, 05:04 PM
#249
Engine, cowl mounted. Wheel wells sealed and ready for paint. The plastic wells were yunk...
And no, the cowl paint doesn't match the fuse.. All the more reason the "modify" the finish...Hee hee!
And no, the cowl paint doesn't match the fuse.. All the more reason the "modify" the finish...Hee hee!
Last edited by Fili; 01-26-2015 at 05:06 PM.
03-17-2015, 01:03 PM
#250

My Feedback: (2)

Join Date: May 2002
Location: Honolulu,
HI
Posts: 924
Likes: 0
Received 0 Likes
on
0 Posts
Hi Everyone
Thanks to all for posting al the great information, it was a huge help in getting my Raiden built and flying.
Radio: Futaba 14MZ
Engine: Zenoah G62 converted to electronic, 3" prop extension from Sierra.
Guardian: I run a aft CG and the plane is a bit touchy on landing.
Prop: 20 X 15 APC T6 racing prop.
Retracts: Robart, Wheels Robart
Last edited by Aero65; 03-17-2015 at 01:21 PM.