


ESM Spitfire 72.5


 03-20-2016, 08:36 AM
#203

Join Date: Dec 2008
Location: New Delhi, INDIA
Posts: 241
Likes: 0
Received 0 Likes
on
0 Posts
Thanx Oldtimer..... I have not reached this stage...but when I do I shall come back here!!
Doing the tail now.... The pull pull Elevator is a *****...but am going along with it!!! never seen anythng like this before...but the idea of no horn sticking out appeals to me...
Doing the tail now.... The pull pull Elevator is a *****...but am going along with it!!! never seen anythng like this before...but the idea of no horn sticking out appeals to me...
03-20-2016, 06:38 PM
#206
Join Date: Dec 2008
Location: New Delhi, INDIA
Posts: 241
Likes: 0
Received 0 Likes
on
0 Posts
Nice Prekin..... how do you make them and what do they cost for a 2 blade, n yellow color, for a DLE35RA. I also need to cover the gap between the cowl and the spinner backplate... its about 7mm.
03-20-2016, 06:52 PM
#207
Join Date: Apr 2007
Location: Qld, AUSTRALIA
Posts: 309
Likes: 0
Received 0 Likes
on
0 Posts
Hello Sandy, I didnt use the pull, pull on the elevator, I did on the Rudder, my elevators each have their own servo, with a carbon fibre push rod, internal, I used a modified version of the bit that comes for the elevator P/P, but I made the arms longer, to give more leverage, my Spit only has small throws on the elevators. If you are going with the P/P system, can I suggest heavier wire and double check the weld and the holes on the elevator joiner.
Oldtimer
Oldtimer
03-21-2016, 02:51 AM
#208
Thank you for your intereset Sandy, but the spinners will be only in white colour. It�s a fibreglass spinner with aluminium backplate. The price is 40 USD+ shipping. If you have gap between the cowl and spinner, you can move the cowel or make shorter distance pillars.
03-27-2016, 06:47 AM
#209
Join Date: Dec 2008
Location: New Delhi, INDIA
Posts: 241
Likes: 0
Received 0 Likes
on
0 Posts
Guys any ideas for placing the switches and air fill valve ? I will need 2 switches - Rx & CDI + pressure gage + air fill. Its such a beautiful model that I dont want to hack away at the fuse and have thingys sticking out.....
03-27-2016, 06:54 AM
#210
Join Date: Dec 2008
Location: New Delhi, INDIA
Posts: 241
Likes: 0
Received 0 Likes
on
0 Posts
Thanx Prekin..... at the moment I am going in with an AL spinner - 4.5"...got it cheap at Hobbyking for 18$. Need the weight in the nose anyway. It has 4 slots for a 4 Blade prop... just in case I ever decide to go for a very scale" looking prop.....
03-27-2016, 07:38 AM
#211
At the first time I try to put the switches into cockpit in case, I have sliding canopy, or some place for them.
But sometime I have them near the scale exhaust and hind the in the black paint. The fill valve I have as a free tube under the cowl.
My ESM Dauntless and Lavochkin in the shots. In the bottom part of cowls you see two yellow tubes.
But sometime I have them near the scale exhaust and hind the in the black paint. The fill valve I have as a free tube under the cowl.
My ESM Dauntless and Lavochkin in the shots. In the bottom part of cowls you see two yellow tubes.
03-27-2016, 11:49 PM
#215
Senior Member
My Feedback: (4)

Join Date: Aug 2008
Location: EllinikoAthens, GREECE
Posts: 1,079
Likes: 0
Received 5 Likes
on
5 Posts
Sandy, here's the recommended procedure:
- Put the engine & CDI on the plane first, empty tank, all servos & retracts on (assemble the wings on the fuse).
- Then choose which batteries you will use (in terms of size and weight)
- Then do a CG test - this will determine where the batteries should be placed. As you balance the plane upside down, aim for 25% of the root chord and put the batteries on the wing belly / cowl bottom.
There is plenty of room around the tank area to fit them
- The switches should then be placed close the batteries, find an inconspicuous place as suggested by Prekin
See if you can spot the switch on my "other" Spit (it is visible, but you have to know where to look!)

 03-28-2016, 05:42 AM
#218
Join Date: Dec 2008
Location: New Delhi, INDIA
Posts: 241
Likes: 0
Received 0 Likes
on
0 Posts
Thank you Oldtimer and windsurfa..... you guys rock.... I now have many more ideas than I was fixated on.... I was also fixated on using fancy toggle switches with big bezels..rather than the simple futaba style switches with just the metal wire sticking out of the fuse!!! haven't used them for a while though....
and having the pneumatic set up on the wings is gr8 idea too.....just 1 servo cable to the Rx....
and having the pneumatic set up on the wings is gr8 idea too.....just 1 servo cable to the Rx....
03-28-2016, 03:56 PM
#219
Join Date: Apr 2007
Location: Qld, AUSTRALIA
Posts: 309
Likes: 0
Received 0 Likes
on
0 Posts
hello Sandy,
have a look where my fuel tank is, by moving it back closer to the CofG it helps when doing the taxi bit, you dont have fuel weight up front, but you will need all the other bits up front on this model, I even mounted batteries on a bracket I made on top of the engine, you are using air retracts, which brand are they, ???
Oldtimer
04-17-2016, 04:17 AM
#220
Join Date: Dec 2008
Location: New Delhi, INDIA
Posts: 241
Likes: 0
Received 0 Likes
on
0 Posts
Hi Guys.... my build is getting along slowly..... The surfaces are all done - elevator, rudder flaps and ailerons....
Anyone tried keeping the wings separate ? Not gluing them ? any ideas ?
Sorry for the late reply oldtimer.... I got the stock ESM air retracts at the moment...waiting to receive -retracts from hobbyking.... dont know what I will finally decide upon using....the ESM air ones are quite good....
Anyone tried keeping the wings separate ? Not gluing them ? any ideas ?
Sorry for the late reply oldtimer.... I got the stock ESM air retracts at the moment...waiting to receive -retracts from hobbyking.... dont know what I will finally decide upon using....the ESM air ones are quite good....
04-17-2016, 03:08 PM
#221
Join Date: Apr 2007
Location: Qld, AUSTRALIA
Posts: 309
Likes: 0
Received 0 Likes
on
0 Posts
Hello Sandy,
I always join the wings, think it would be a lot stronger.
stick with the ESM air retracts, I have 5 models I am flying with retracts, 4 are the ESM, air. the other set are Century Jet, in my Spitfire, the ESM sets need checking over, put larger axles in them, check every nut and bolt on them, there will be loose ones, I only have problems with 1 set of retracts, they are sloppy, need work every time I take the Spitfire out.
you will need to put a spacer under the back edge to tilt the wheels forward a bit more, move your fuel tank back a bit so it is over the C of G. beef up the firewall, back to the former in front of the wing, you will need it, batteries and stuff right up front, even in the engine bay, I have the 35ra in mine, it will need to be baffled.
cheers, Oldtimer.
04-27-2016, 06:03 AM
#222
Join Date: Dec 2008
Location: New Delhi, INDIA
Posts: 241
Likes: 0
Received 0 Likes
on
0 Posts
Wings are joined. Retract system mounted on the wings as suggested by so many of you and I just loved the idea. Iam using a Jettronics Retract valve as on many of my jets and I am very happy using them.
Now what remains is mounting the engine and the electronics....
Those of you who have mounted the DLE35RA - please advise how to manage the choke linkage ? I have no place in the front to push pull the choke linkage. as the spinner fully covers the opening.I have 2 options:
Bell crank it and have a rod dropping down OR have it servo controlled.....
04-28-2016, 03:40 PM
#223
Join Date: Apr 2007
Location: Qld, AUSTRALIA
Posts: 309
Likes: 0
Received 0 Likes
on
0 Posts
Hello Sandy,
I have the push rod for the choke just poking out through a small hole in the front of the front exhaust, so it goes forward, towards the prop, works for me. if you live in a warm climate and use a starter you can probably get away without using a choke.
Oldtimer.
I have the push rod for the choke just poking out through a small hole in the front of the front exhaust, so it goes forward, towards the prop, works for me. if you live in a warm climate and use a starter you can probably get away without using a choke.
Oldtimer.
04-28-2016, 10:14 PM
#224
Join Date: Dec 2008
Location: New Delhi, INDIA
Posts: 241
Likes: 0
Received 0 Likes
on
0 Posts
Hello Sandy,
I have the push rod for the choke just poking out through a small hole in the front of the front exhaust, so it goes forward, towards the prop, works for me. if you live in a warm climate and use a starter you can probably get away without using a choke.
Oldtimer.
I have the push rod for the choke just poking out through a small hole in the front of the front exhaust, so it goes forward, towards the prop, works for me. if you live in a warm climate and use a starter you can probably get away without using a choke.
Oldtimer.
04-29-2016, 01:49 AM
#225
Join Date: Apr 2007
Location: Qld, AUSTRALIA
Posts: 309
Likes: 0
Received 0 Likes
on
0 Posts
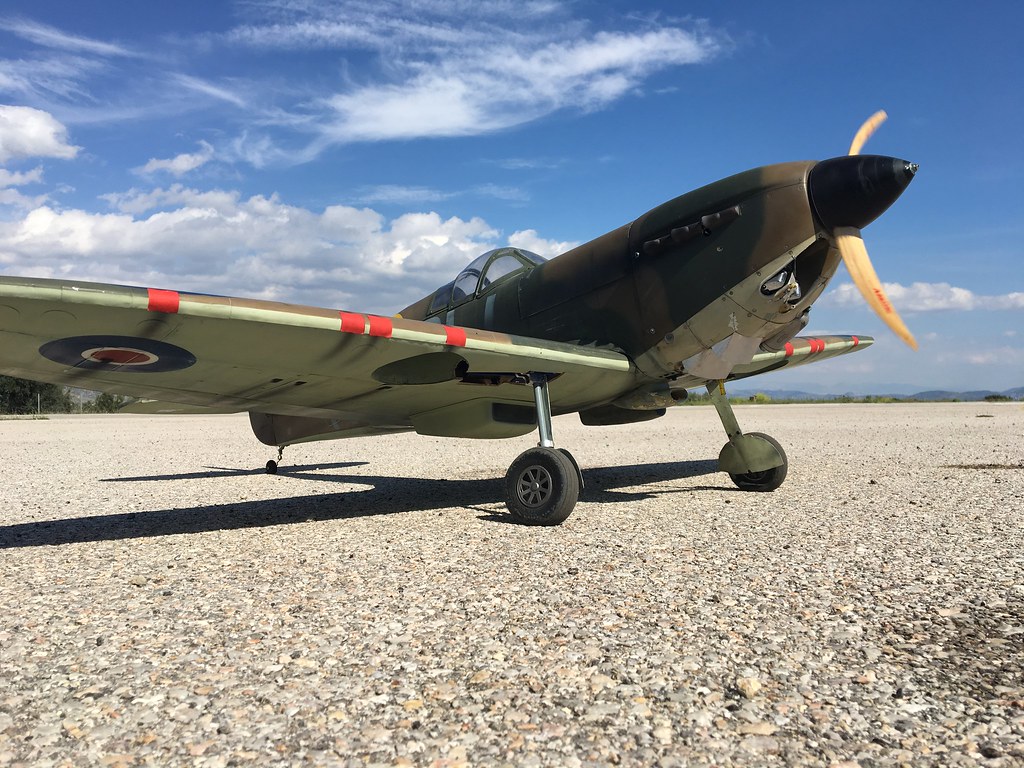
hello Sandy,
not a very good photo, but if you use a bit of imagination you can see what I mean. just a small hole in the front edge of the dummy exhaust.
just a wire poking out 10mm, bit of a pain to line it all up.
Oldtimer
not a very good photo, but if you use a bit of imagination you can see what I mean. just a small hole in the front edge of the dummy exhaust.
just a wire poking out 10mm, bit of a pain to line it all up.
Oldtimer