


Meister Scale Zero - step by step
 02-15-2013, 04:41 PM
#76

Thread Starter
Never mind about my thread... All this is for modelers...
As you told, one technique is with solder iron and burning rivets in surface.
Same tool you put in solder iron, that small brass tube, you can put in Dremel, Proxon or similar machine and with rotation of that tube you can made holes on surface.
For me, most important tool is something on what you can lean that tube. When I made those kind of rivets (with solder iron) I use saw with small teeth. on every second tooth, when I lean my bras tube I get right distance for rivets.
When I try to made rivets without saw, line is bad and ugly...
http://www.nsmodelers.rs/warbirds/th...lja-i-vedering
Sure, many modelers have different techniques...
Best rivets, most easy for applying are from Mirce Finish Set...
Regards
Mirce
 02-15-2013, 05:59 PM
#77

Join Date: Apr 2006
Location: Carrollton
Posts: 1,698
Likes: 0
Received 0 Likes
on
0 Posts
Hello Mirce,
I'm glad you're taking some time to show us some progress on your Zero. I always enjoy watching a true craftsman at his work.
Please take care and stay warm,
David
I'm glad you're taking some time to show us some progress on your Zero. I always enjoy watching a true craftsman at his work.
Please take care and stay warm,
David
02-26-2013, 02:24 AM
#78
Thread Starter
Thank you David...
Here is little update...
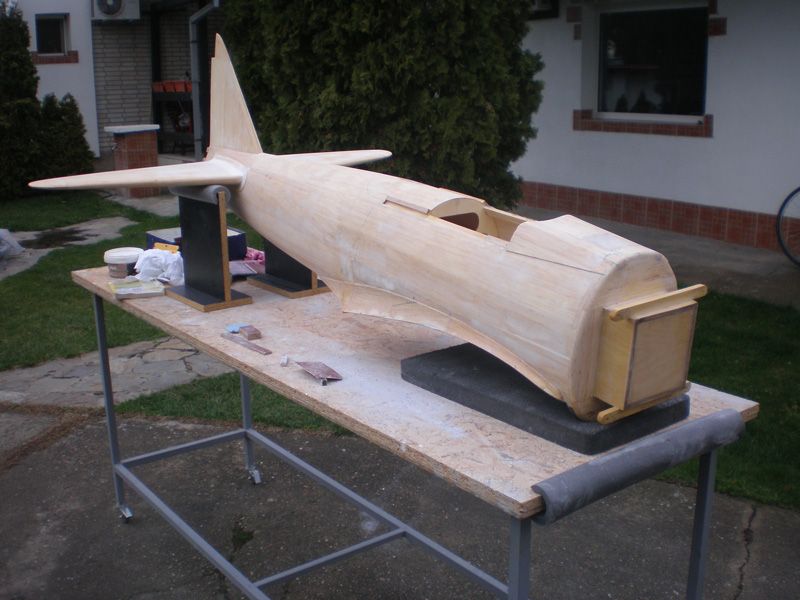
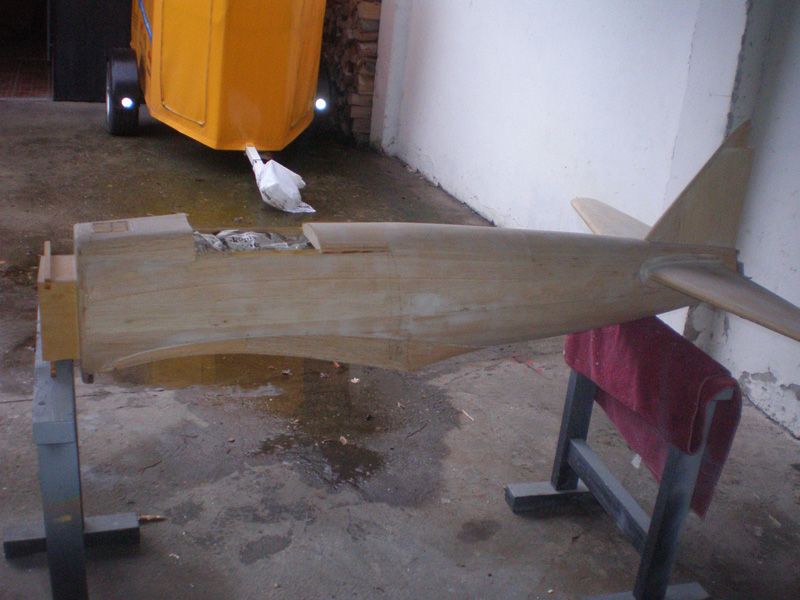
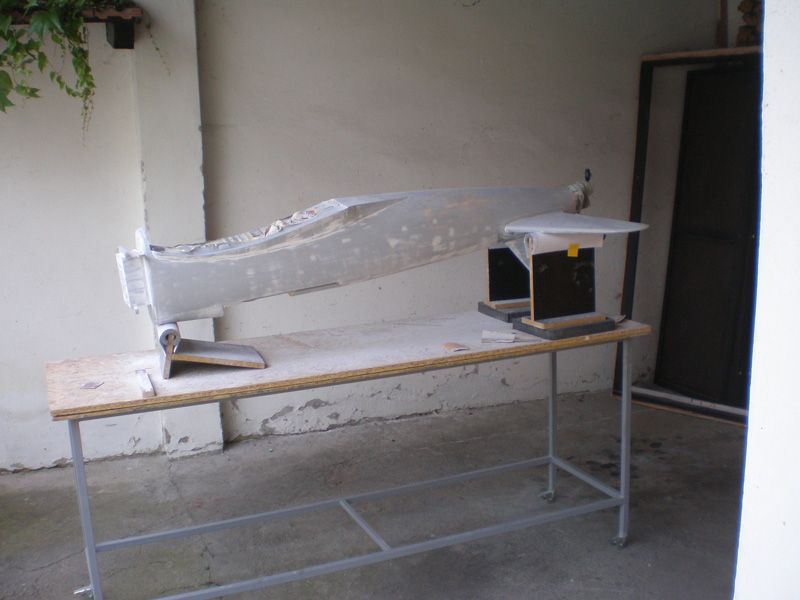
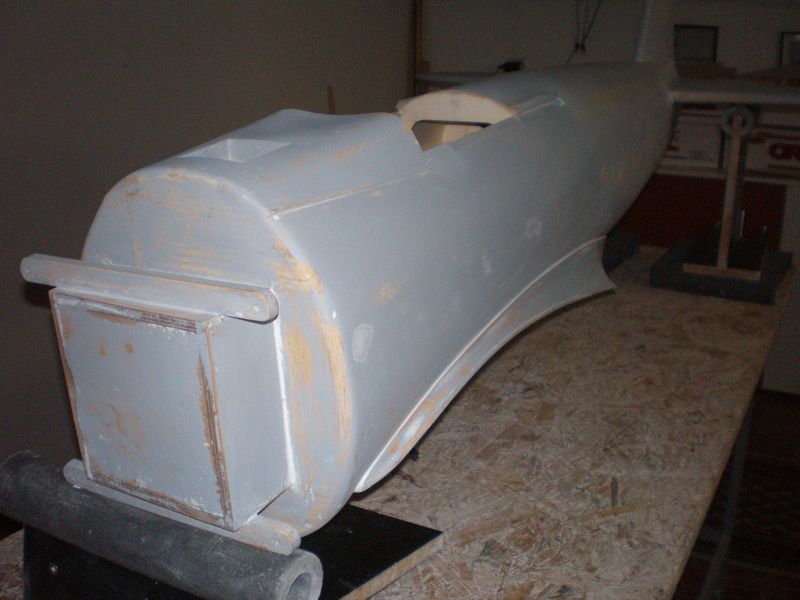
This February is not so cold, so I used one nice day to add acrylic filler on fuselage and sand it...
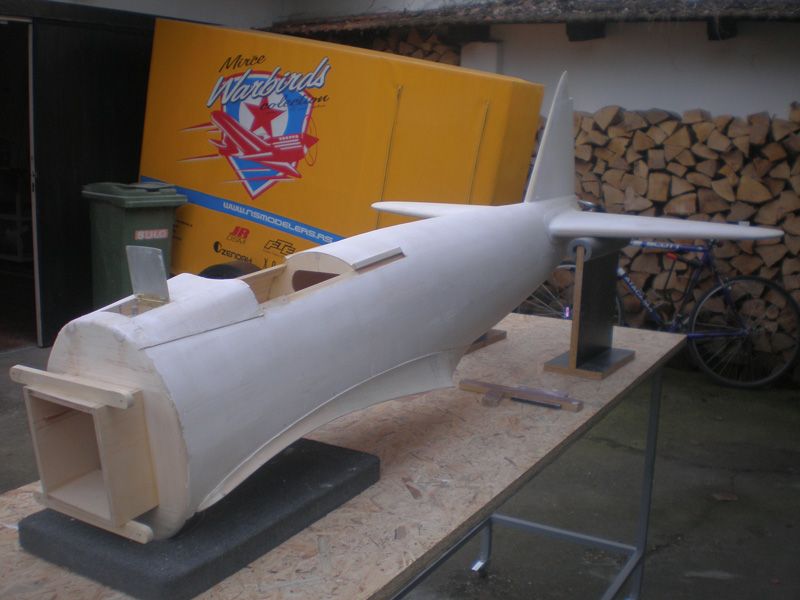
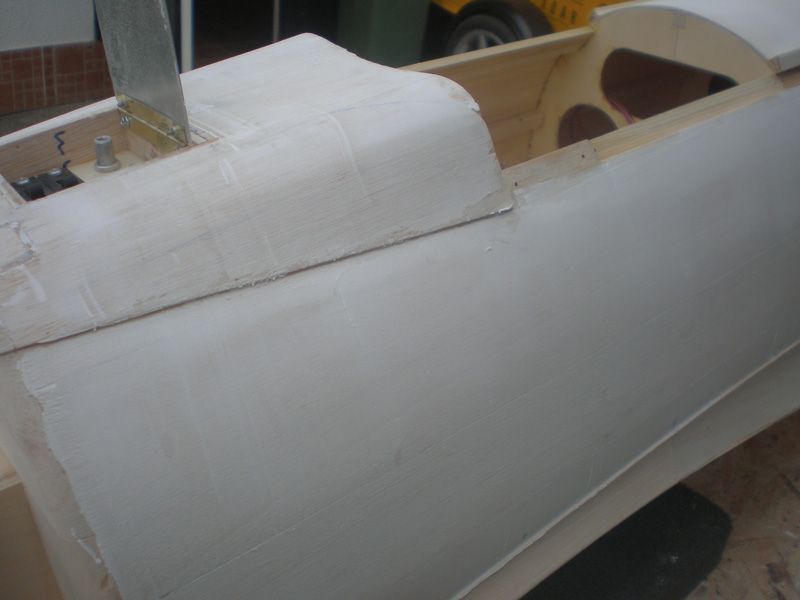
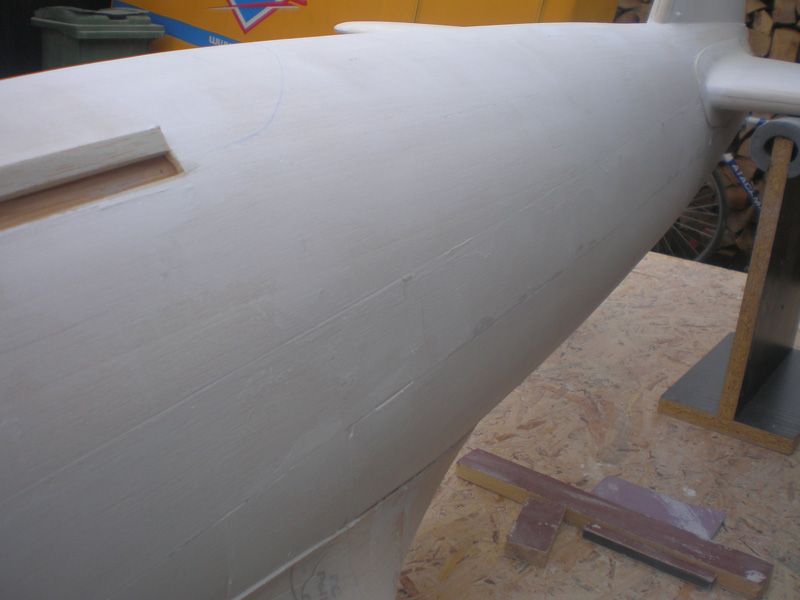
Meister Zero is big model, and for sanding it I must go outside of my work shop... It's very dusty job...


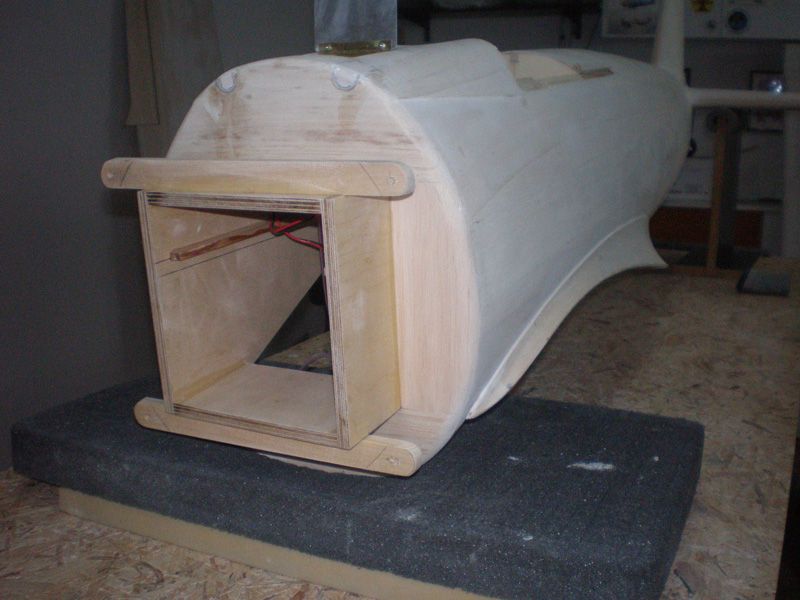
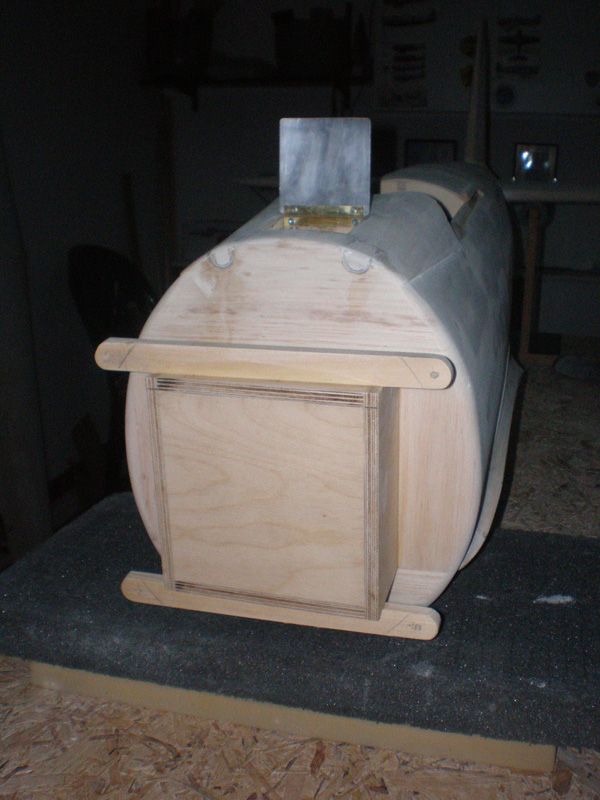
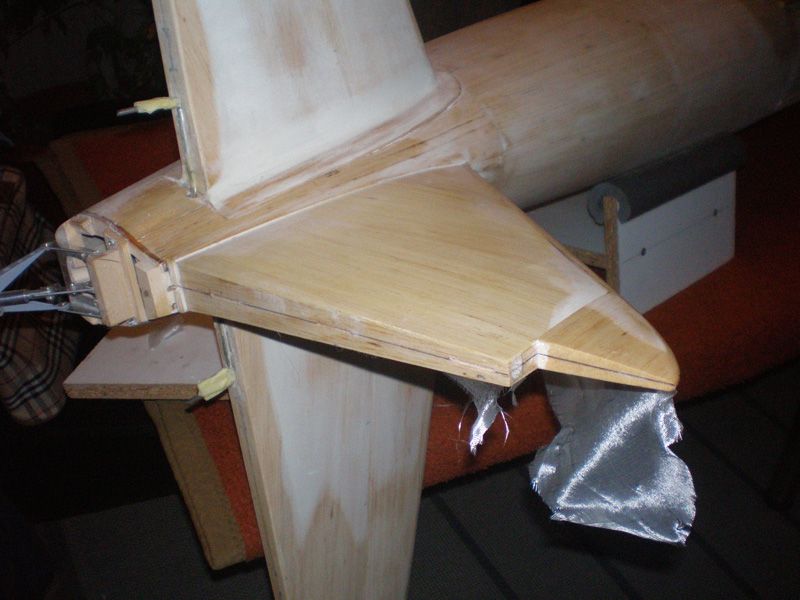
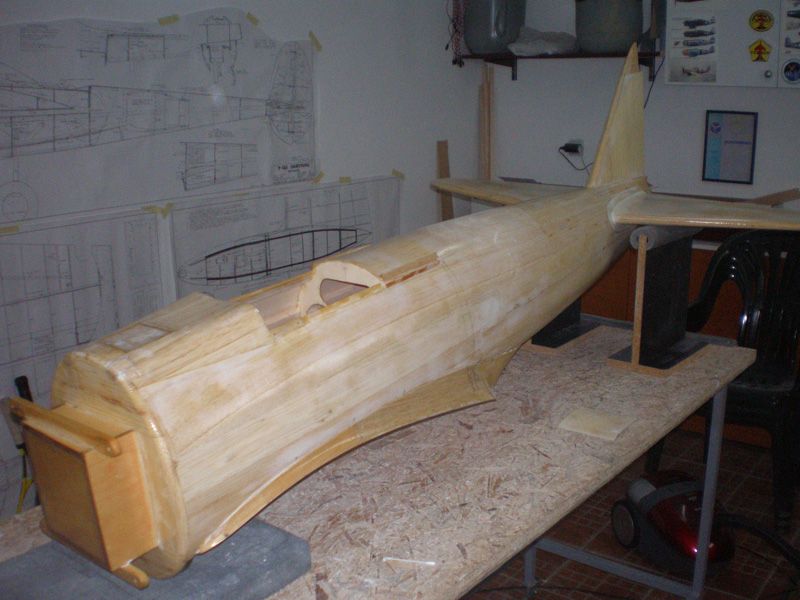
Now I just have to made and glue plate on front of the engine box and fuselage is ready for glassing...
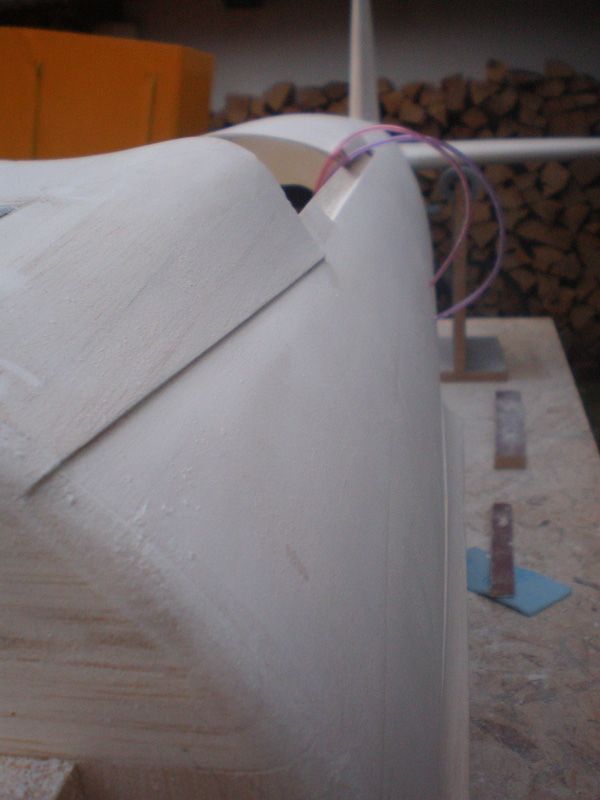
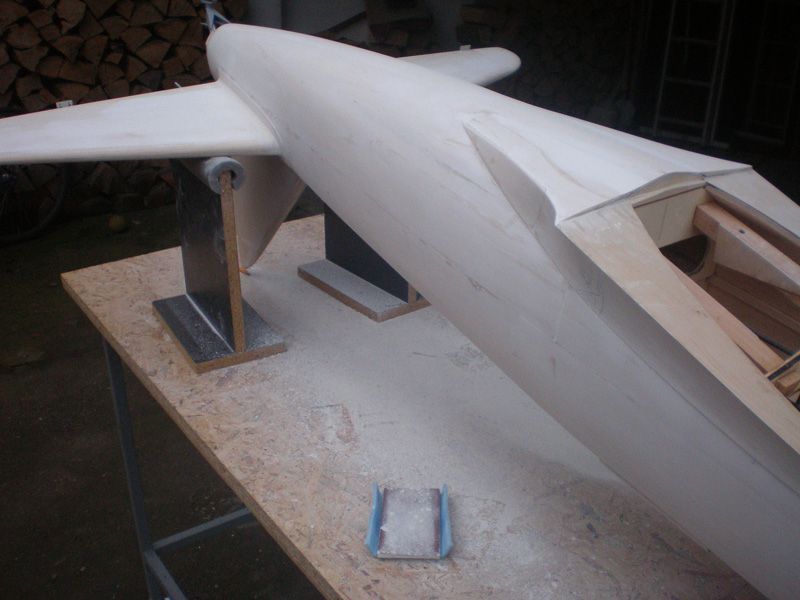
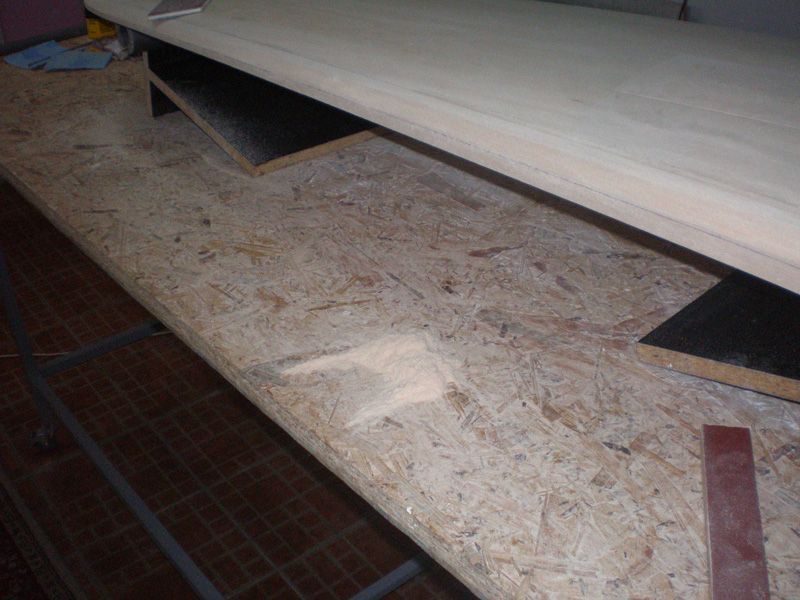
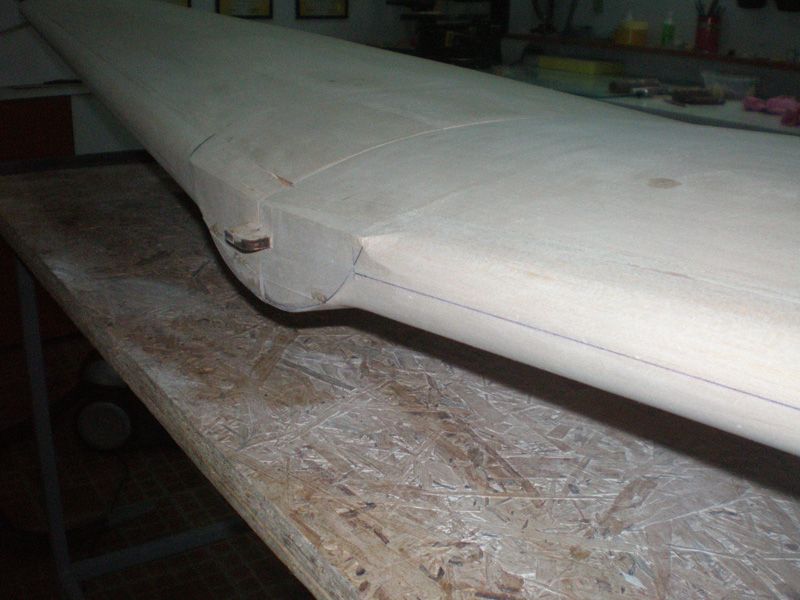
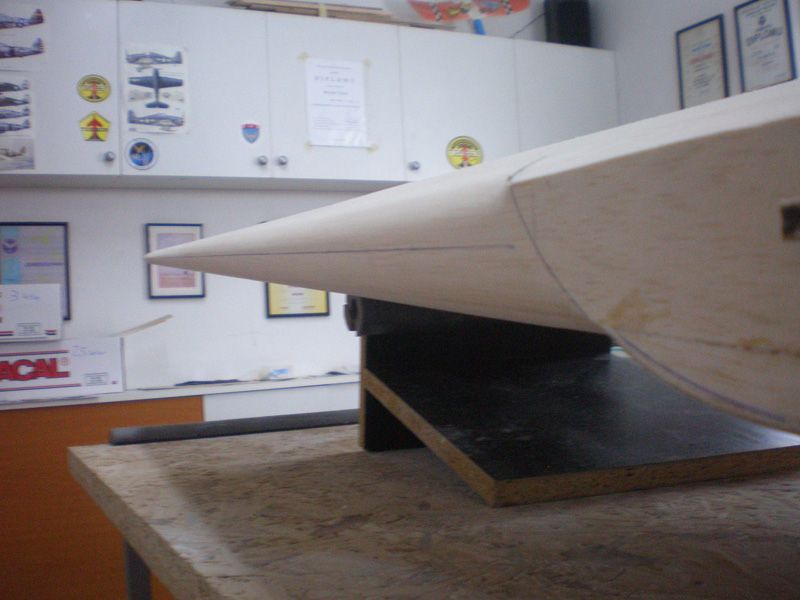
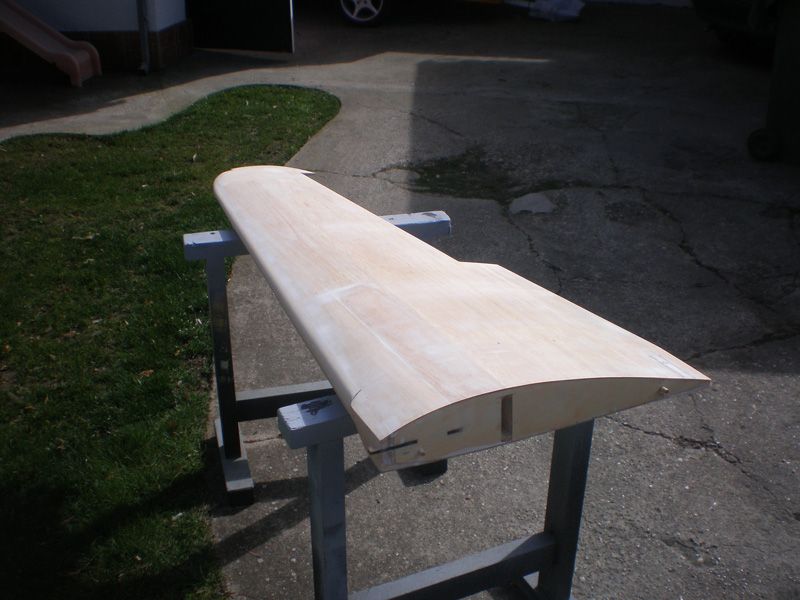
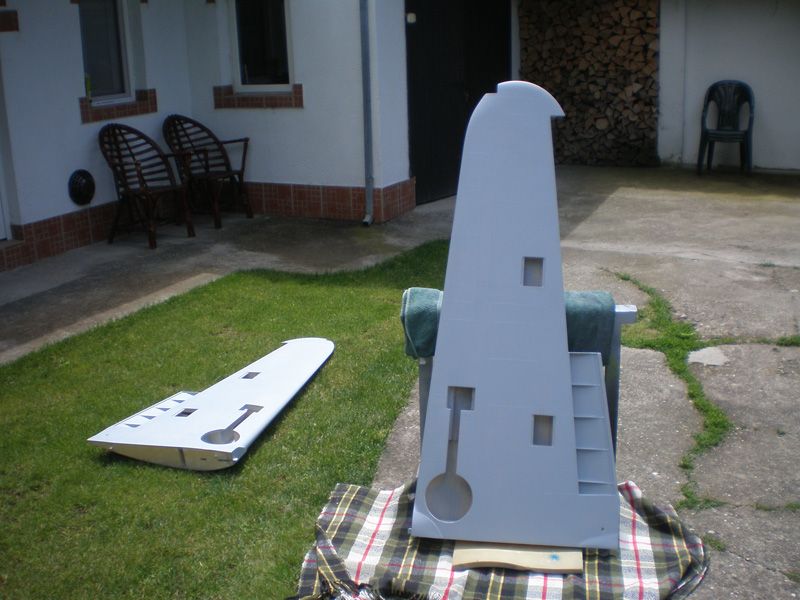
I made leading edges on the wings also...
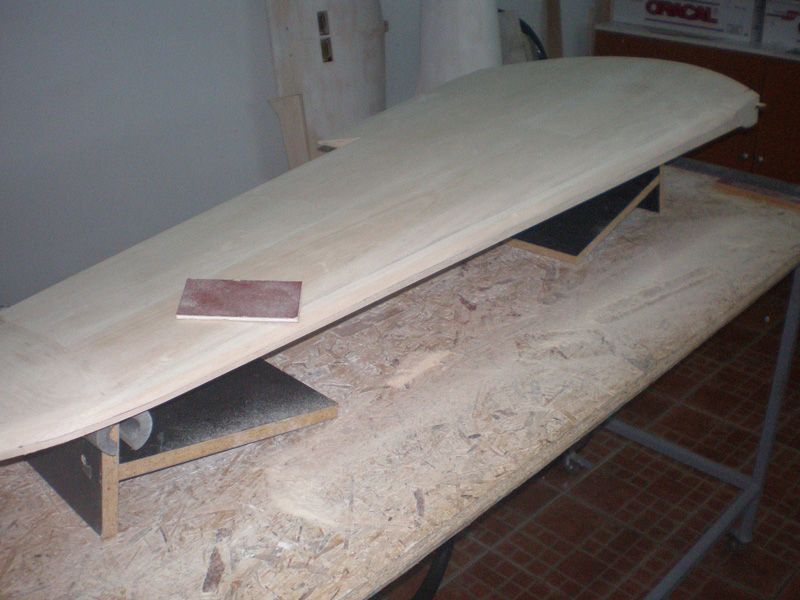
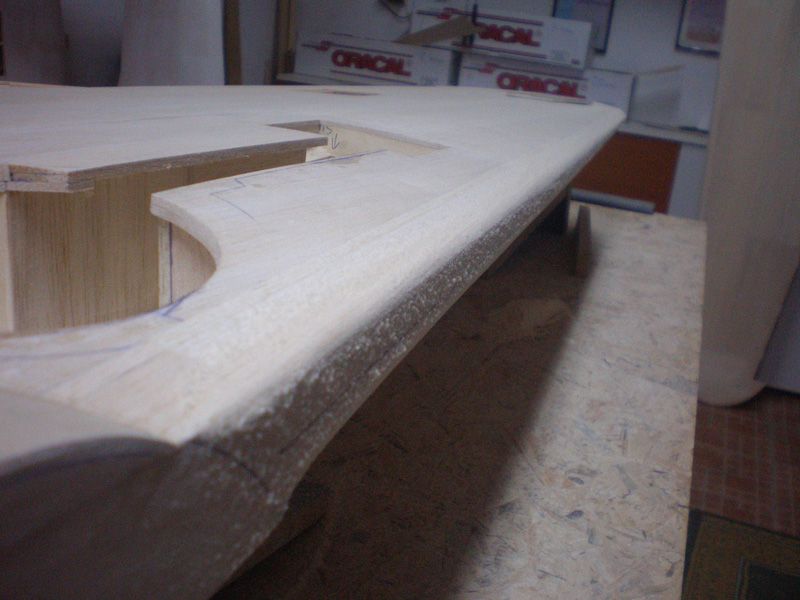
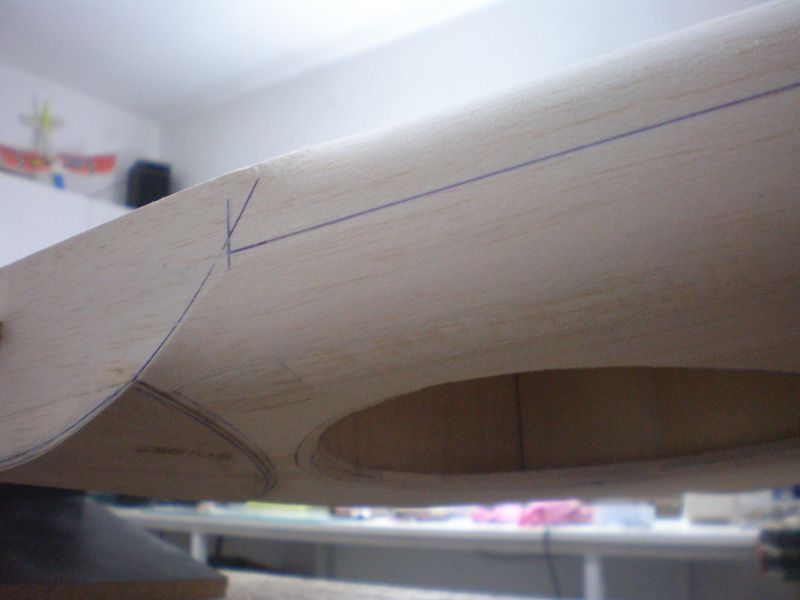
Two ply blocks are added in front and behind of the bolt for fixing wing on fuselage. This ply are glued on plate for bolt and strengthen it.
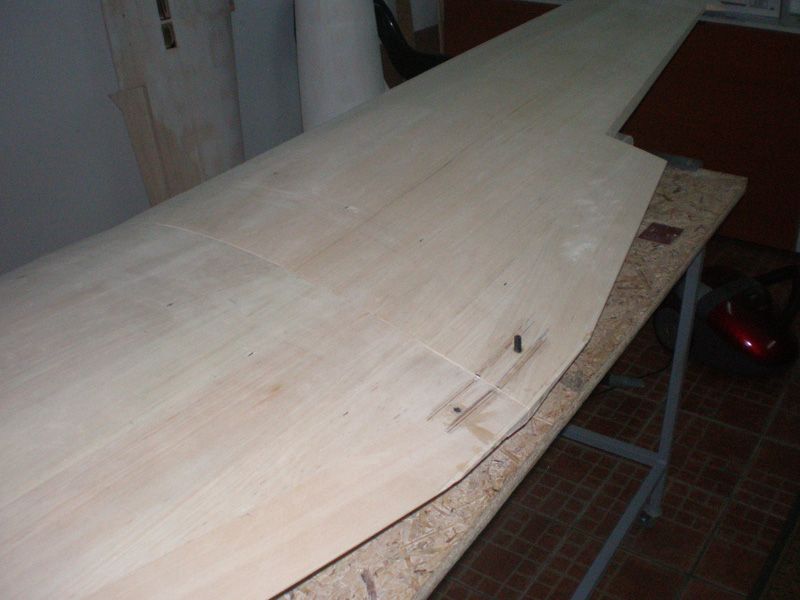
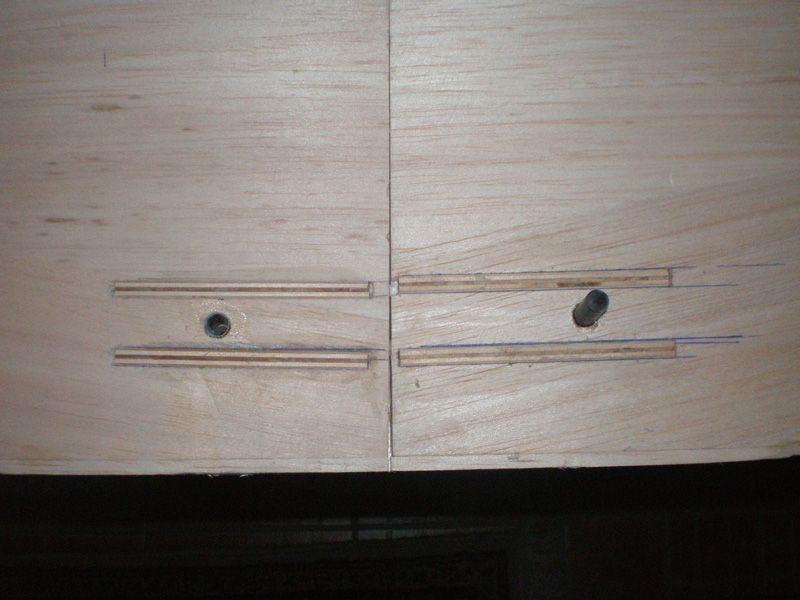

There are carbon tubes - guide for wing screws...
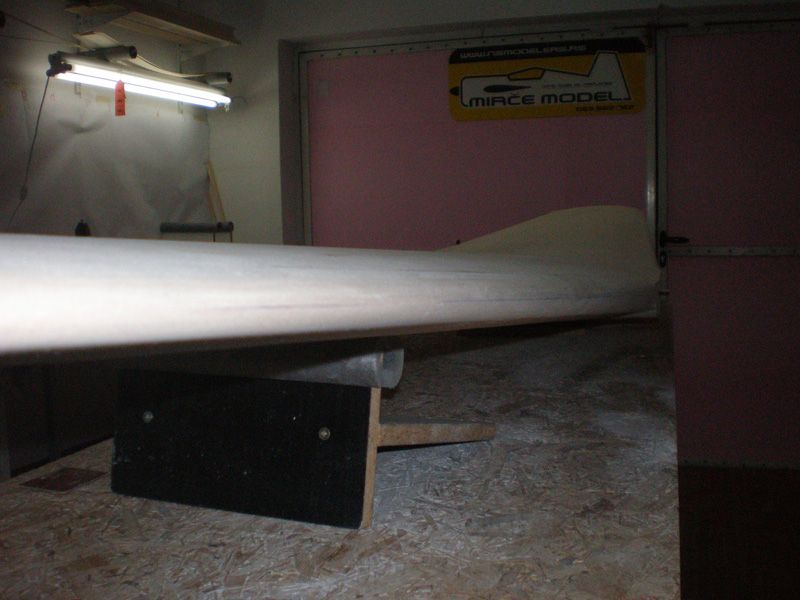
Wings are ready now for applying acrylic filler. Sanding that filler will be last big job before glassing...
Regards
Mirce
Here is little update...
This February is not so cold, so I used one nice day to add acrylic filler on fuselage and sand it...
Meister Zero is big model, and for sanding it I must go outside of my work shop... It's very dusty job...
Now I just have to made and glue plate on front of the engine box and fuselage is ready for glassing...
I made leading edges on the wings also...
Two ply blocks are added in front and behind of the bolt for fixing wing on fuselage. This ply are glued on plate for bolt and strengthen it.
There are carbon tubes - guide for wing screws...
Wings are ready now for applying acrylic filler. Sanding that filler will be last big job before glassing...
Regards
Mirce
03-02-2013, 04:07 PM
#79
Thread Starter
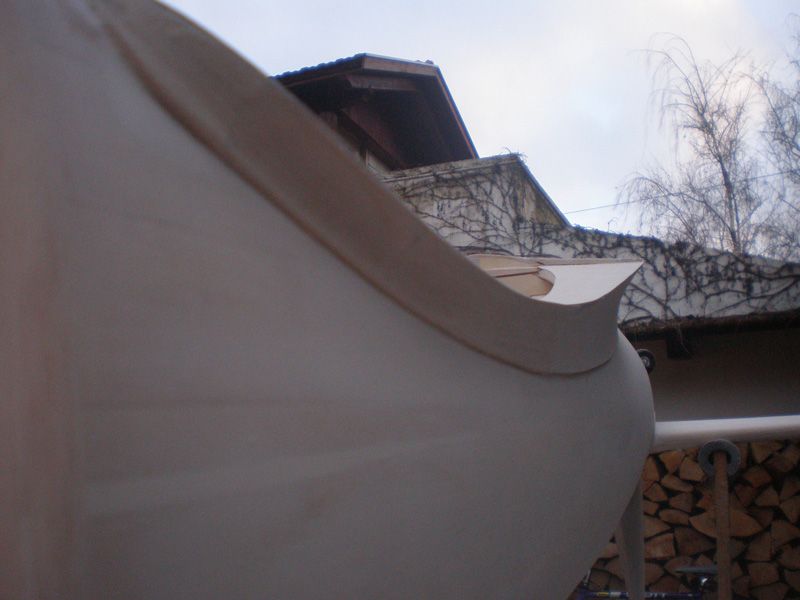
As I told in last topic, adding acrylic filler on wing was next...


After sanding I put 18 gr glass cloth on the upper wing side...

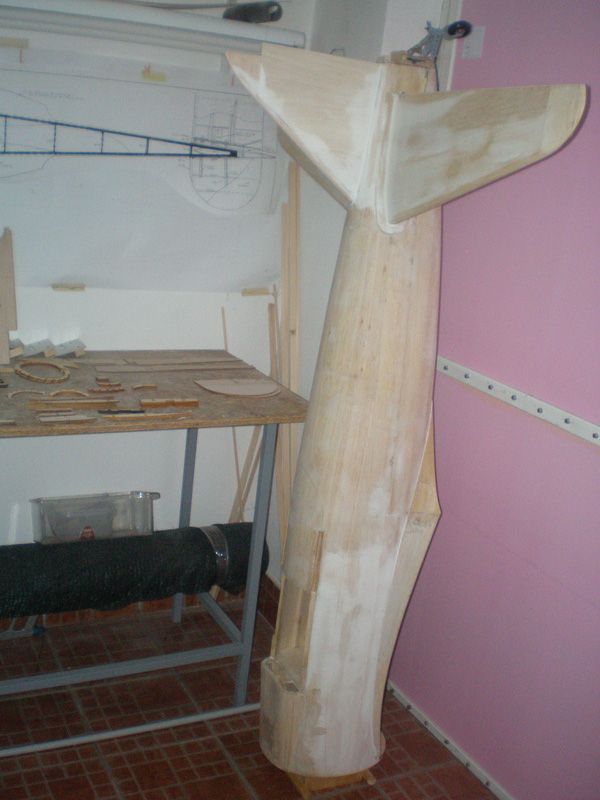
On fuselage was glued fire wall. That was be last job before adding glass on this model part...


To be continued...
Regards
Mirce
After sanding I put 18 gr glass cloth on the upper wing side...
On fuselage was glued fire wall. That was be last job before adding glass on this model part...
To be continued...
Regards
Mirce
03-09-2013, 01:24 PM
#80
Thread Starter
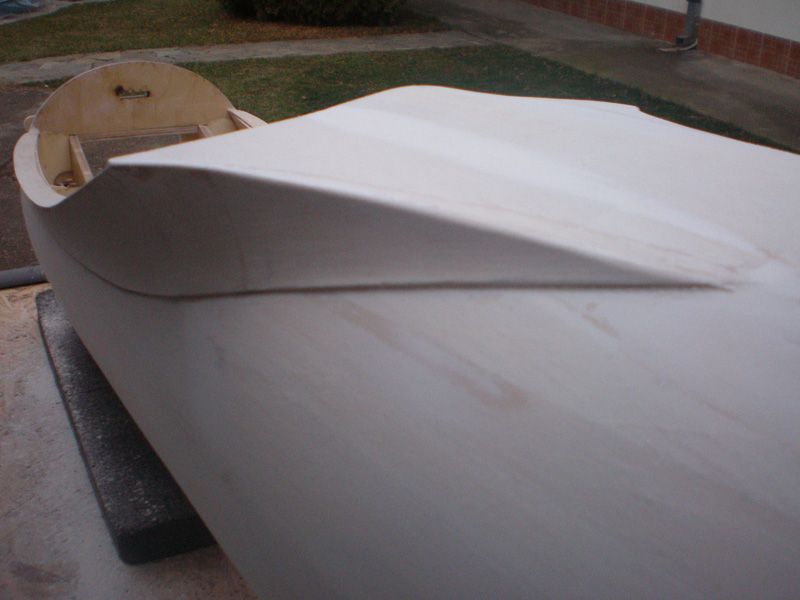
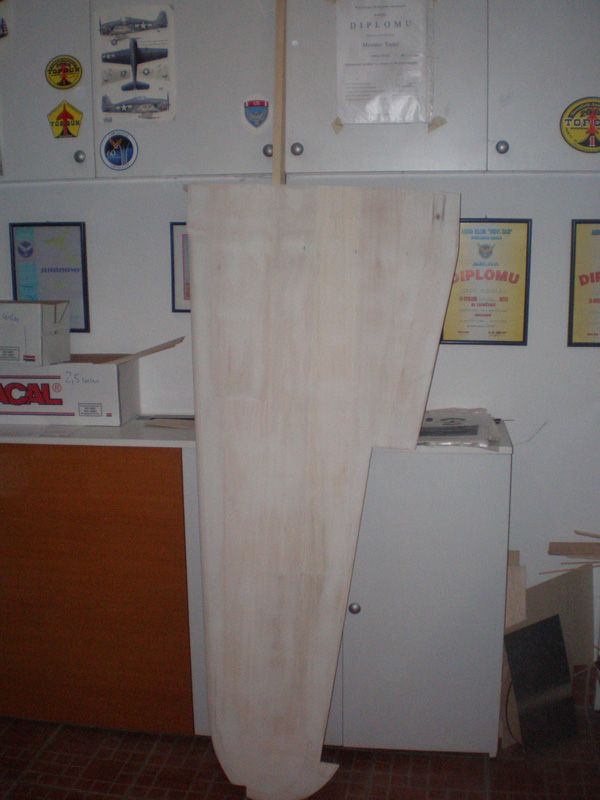
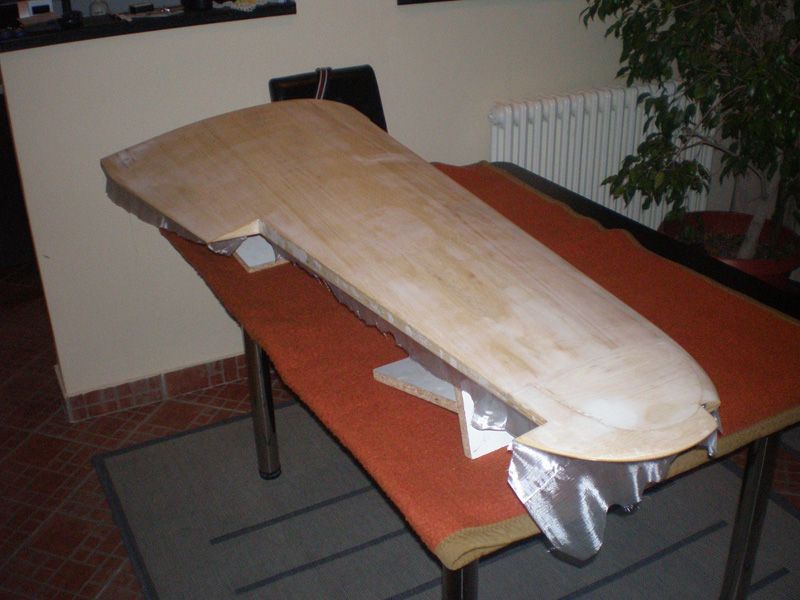
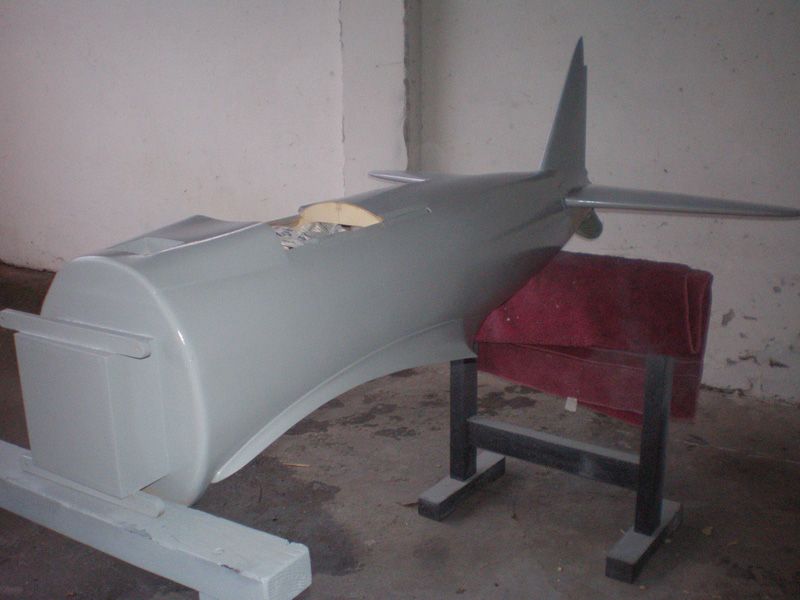
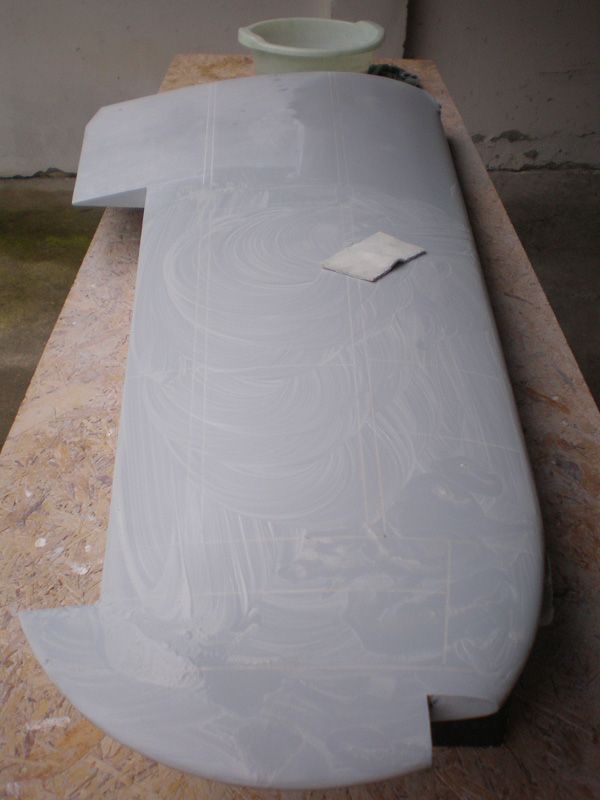
In last few days I almost finished all glassing on my Zero.
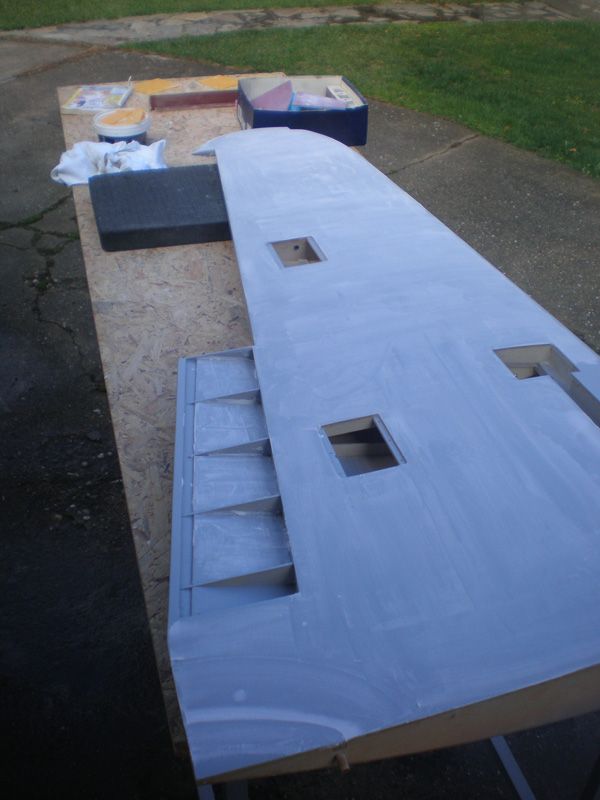
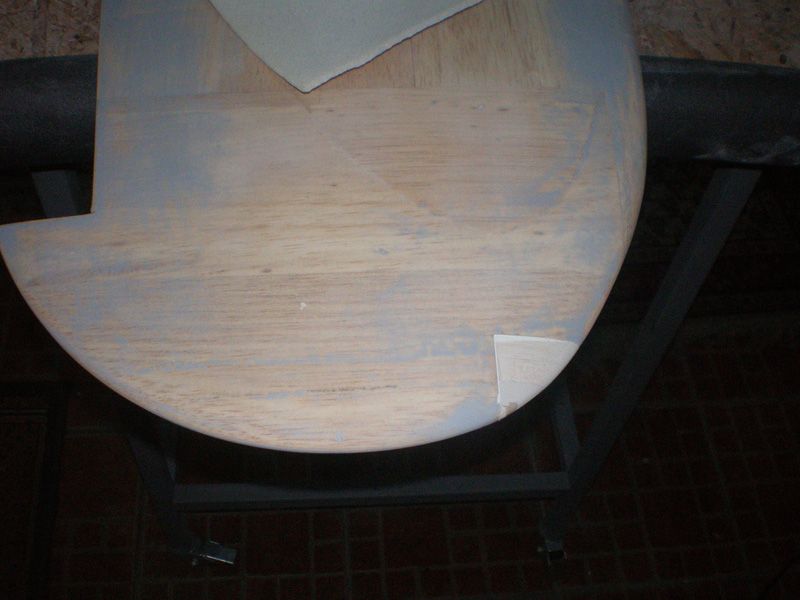
Wings are complete finished...
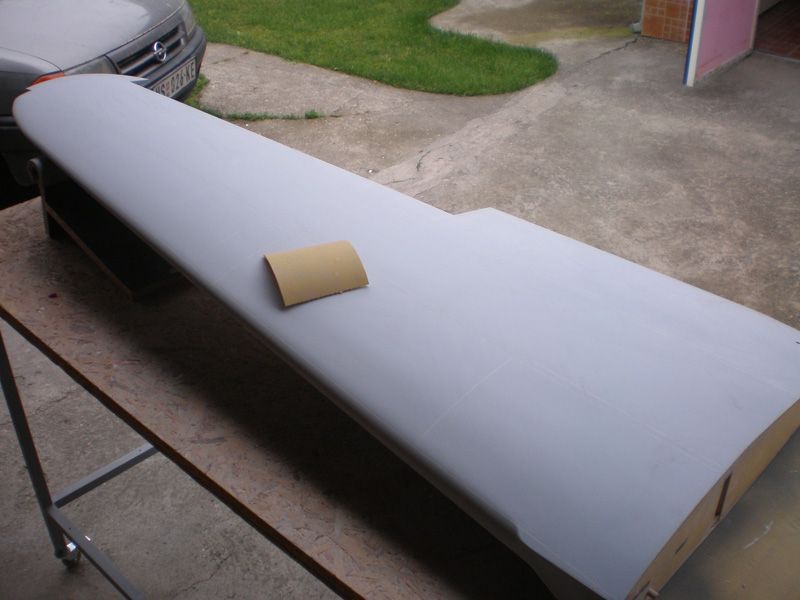
For glassing wing I need four days of work. First day I add glass cloth on one side of the wing, second day I sand edges and put glass cloth on other side. Third day I sand (light) both sides of the wing and add add second layer of epoxy resin on first wing side. At forth day second layer of resin is on the other surface. After this process wing, or some other part, is read for final sanding.

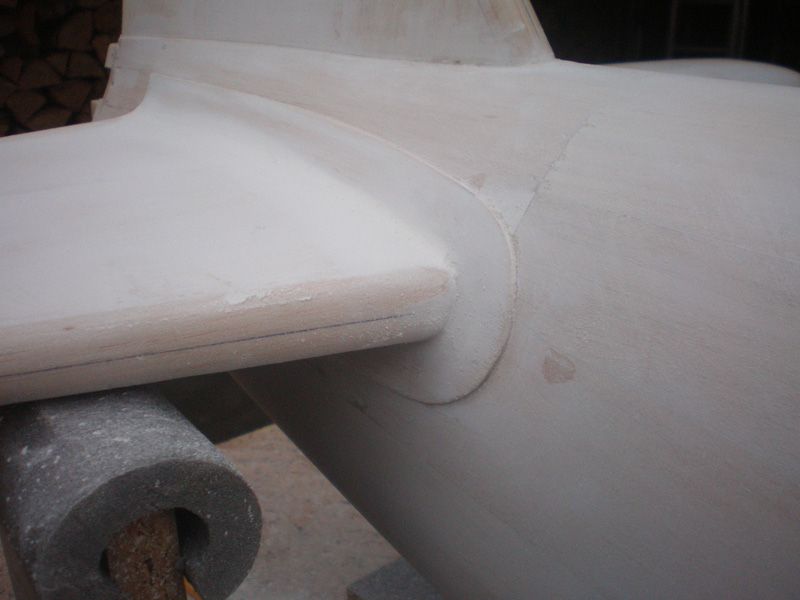
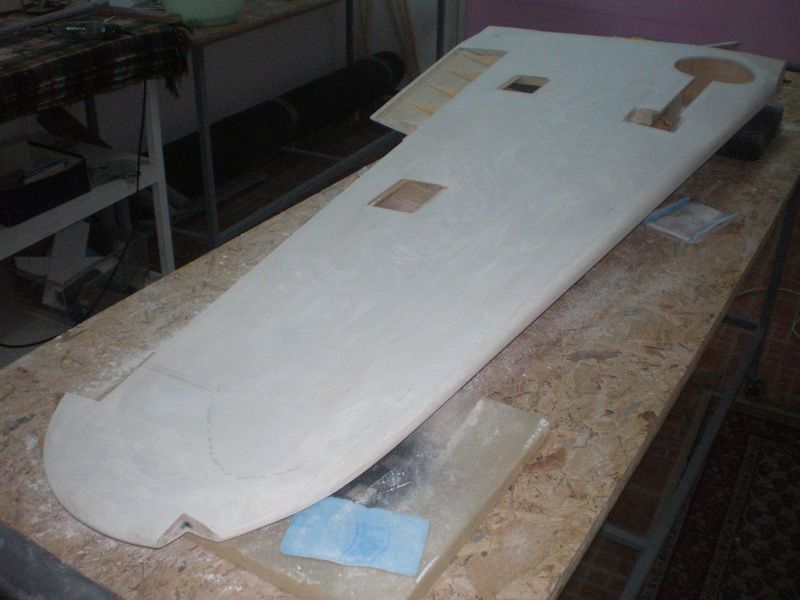
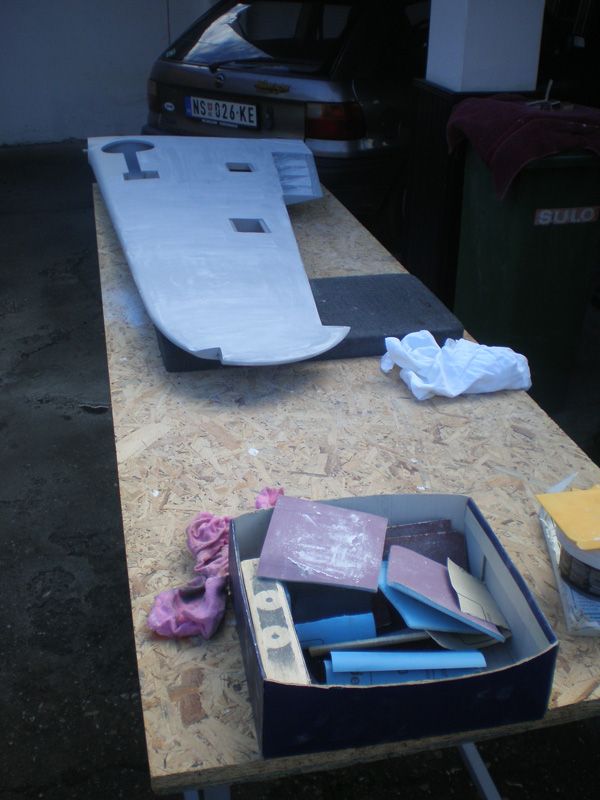
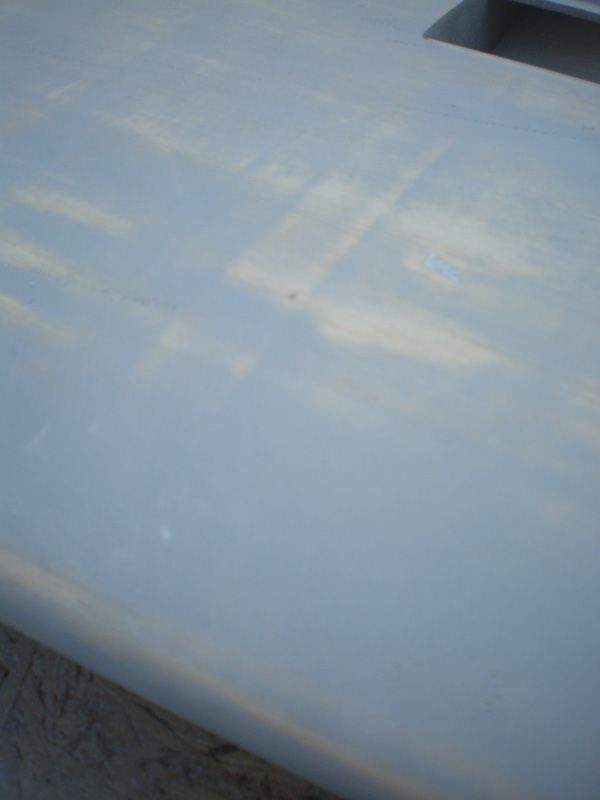
Next step is adding filler...

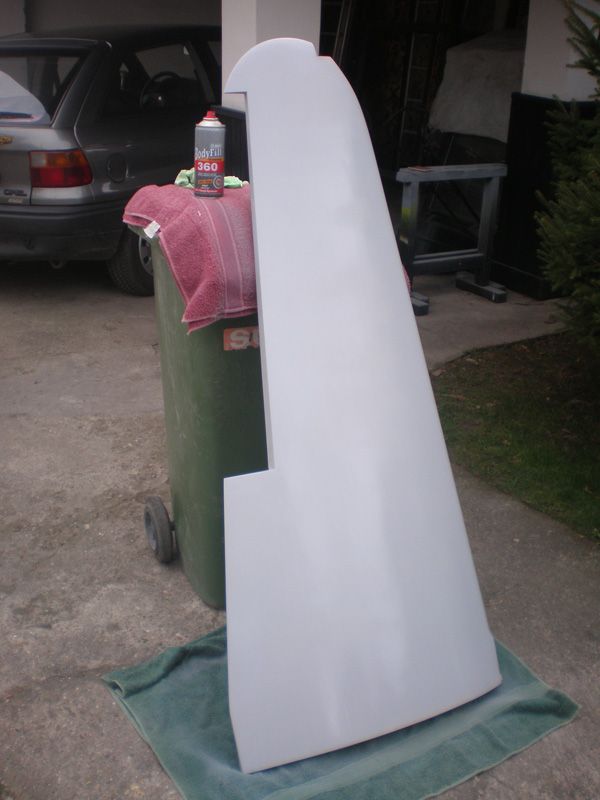

When wing get this grey color you can see all places, small holes, small scratches and so on, you need to fix with acrylic filler. After that come final sanding and after that, wing is ready for panel lines...
This step, with acrylic filler and sending is next for the wing...
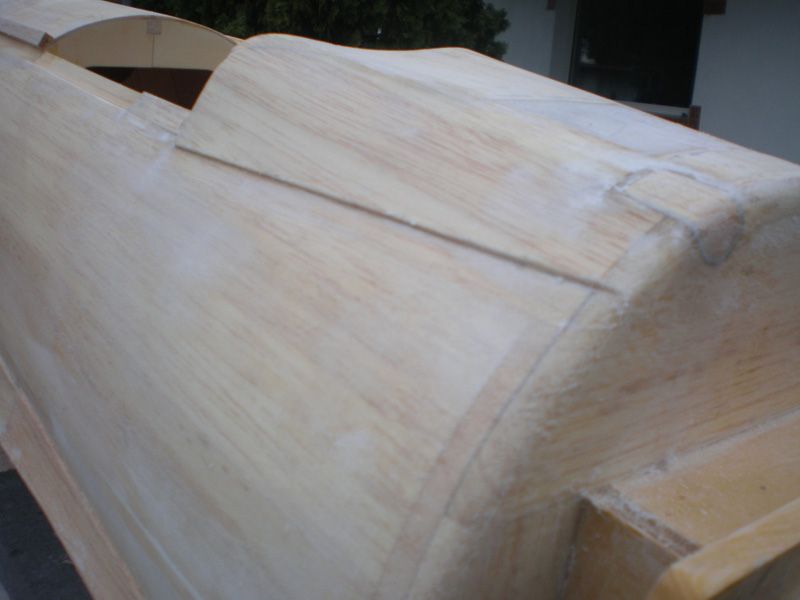
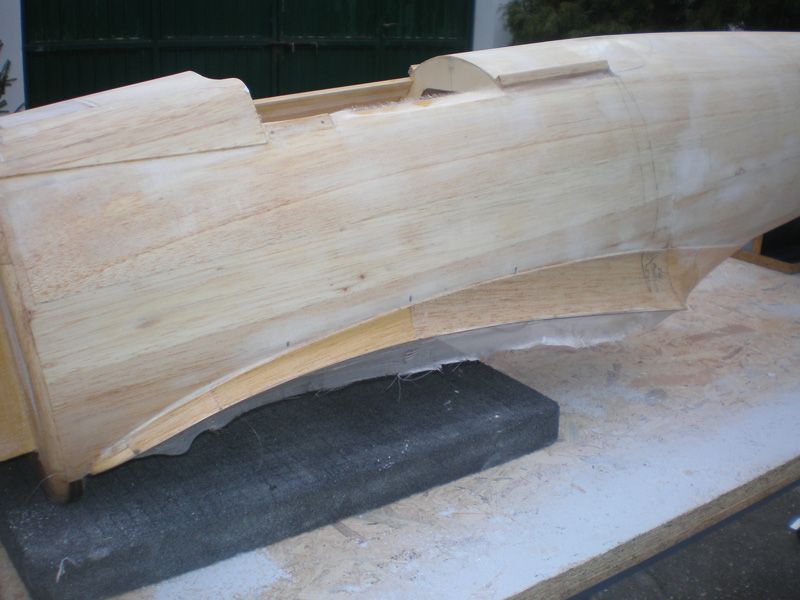
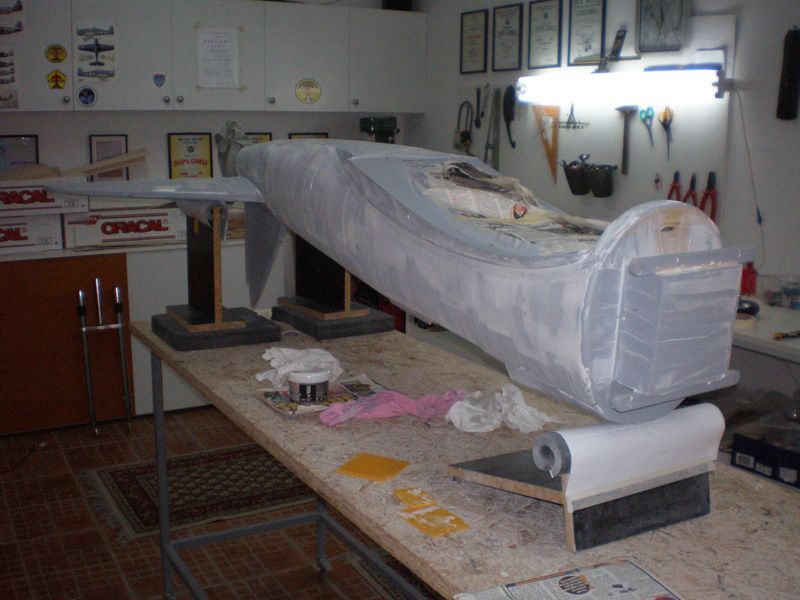
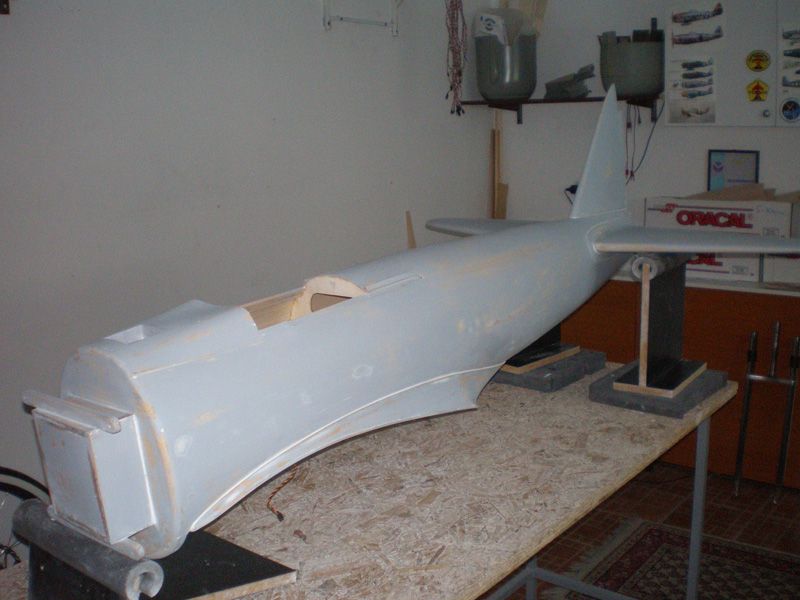
I was working on the fuselage too. You can see on which surface are applying glass - it's darker... I need few more days of work to come in position to apply grey filler...
Regards
Mirce
Wings are complete finished...
For glassing wing I need four days of work. First day I add glass cloth on one side of the wing, second day I sand edges and put glass cloth on other side. Third day I sand (light) both sides of the wing and add add second layer of epoxy resin on first wing side. At forth day second layer of resin is on the other surface. After this process wing, or some other part, is read for final sanding.
Next step is adding filler...
When wing get this grey color you can see all places, small holes, small scratches and so on, you need to fix with acrylic filler. After that come final sanding and after that, wing is ready for panel lines...
This step, with acrylic filler and sending is next for the wing...
I was working on the fuselage too. You can see on which surface are applying glass - it's darker... I need few more days of work to come in position to apply grey filler...
Regards
Mirce
03-09-2013, 02:52 PM
#82
Thread Starter
I use Acrylic filler from spray... Name is Body 360, but I'm sure that you will not find it in USA.
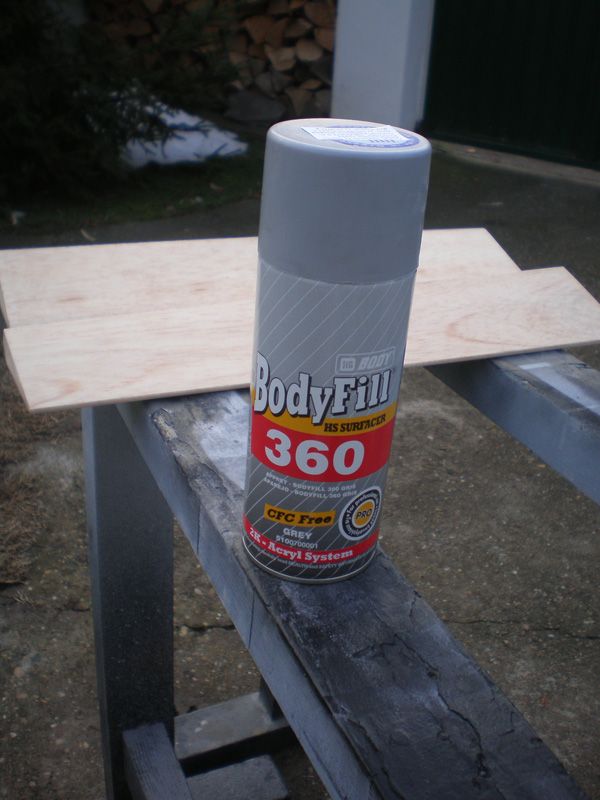
I think, every acrylic spray will be good. I like filler from canister because you use it and leave it until you need it again. It's easy for manipulation...
Regards
Mirce
I think, every acrylic spray will be good. I like filler from canister because you use it and leave it until you need it again. It's easy for manipulation...
Regards
Mirce
03-10-2013, 12:33 AM
#84
Thread Starter
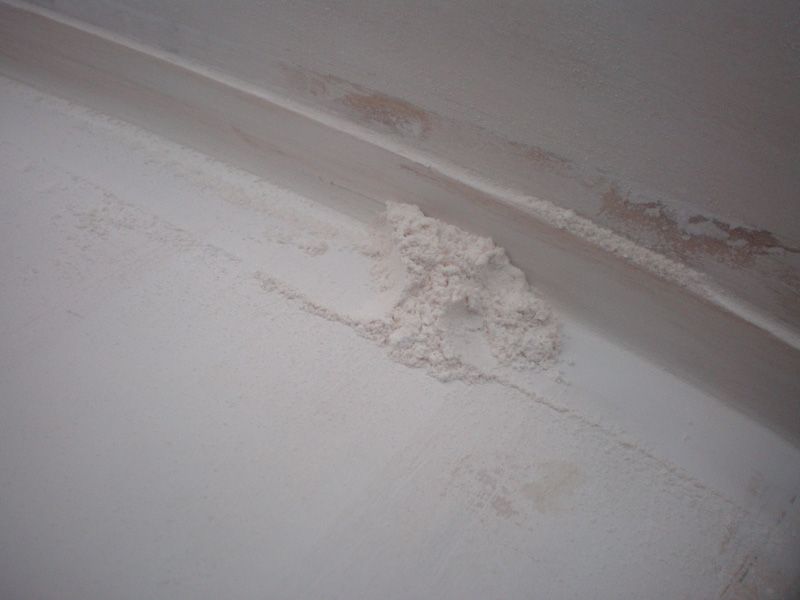
That white filler is one component acrylic filler that is applied with a plastic spatula. That filler fill gaps very good and it's easy for sanding. When you sand it filler look like chalk.
That filler is good even for bigger holes, but in that case you must add it in more thinner apply. If you put it thick filler will have cracks on the surface.
This filler is good for preparation surface before glassing. You can use it after glassing also, but just to fix some scratch or holes here and there. Main filler work must be done before glassing.
I use earlier two components filler, from car industry, but it's very tough and hard for sanding. This one component acrylic filler is great...
I don't know name or brand for this type of filler in USA, but I'm sure you can find it in every paint shop...
Hope this will help.
Regards
Mirce
 03-14-2013, 03:54 AM
#87
Thread Starter
In last few days some more job was done on Zero...
I add all glass cloth on fuselage. Here is one quick course how I do that...
First thing is prepare all cloth you need for that day for covering...
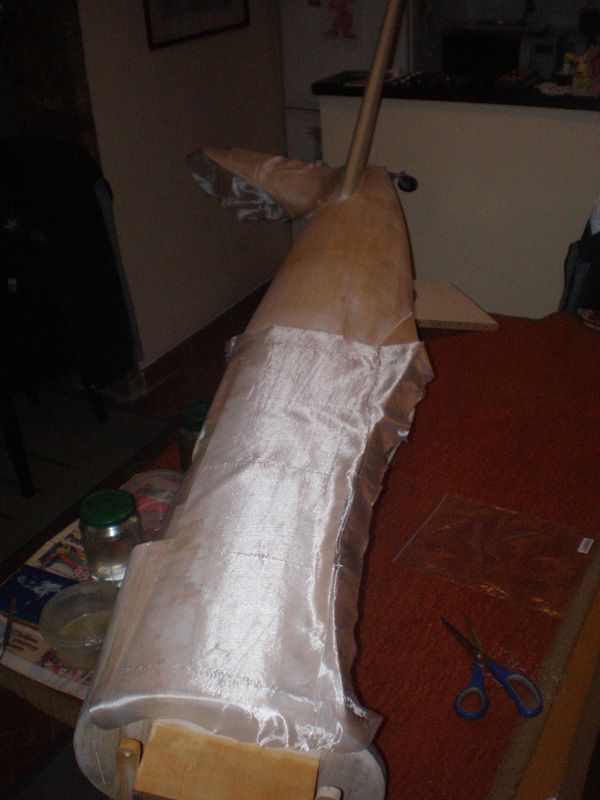
I keep both components of epoxy resin in glass jars. Jar have big hole and it is easy to take resin with syringe. Syringe is good for precise measure, because always must be same and precise ratio of both resin parts...
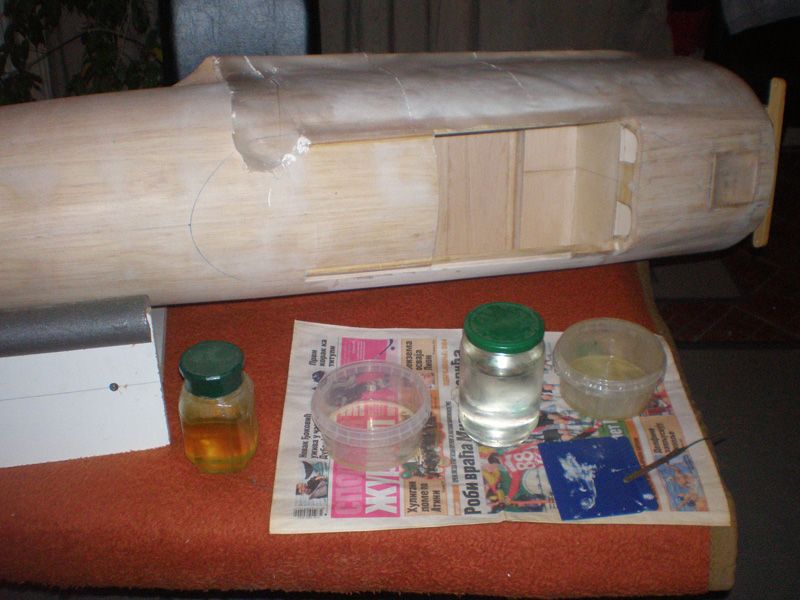
Other important thing is always wipe your tools. If the resin hardens the scissors, you can throw them...
When I mix both components i apply it on glass cloth like this...

For large flat surface I use plastic spatula...
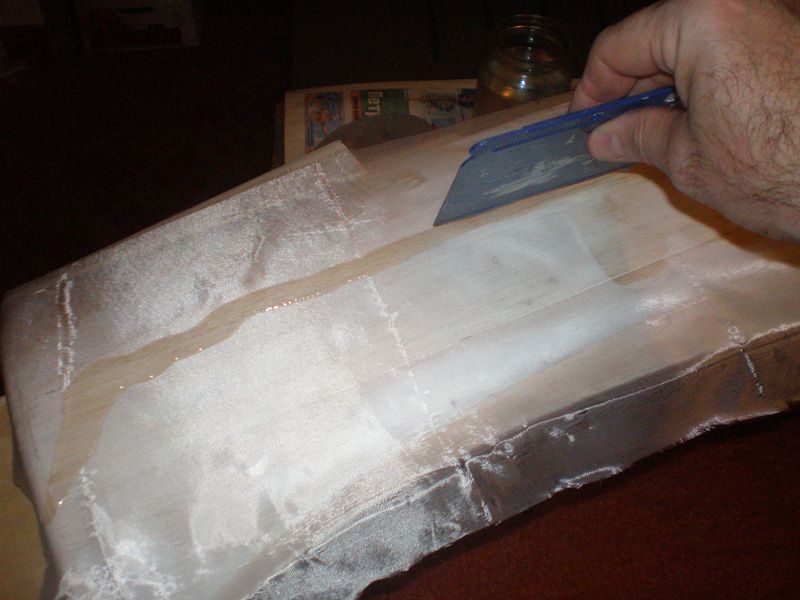
... and gently drag it from middle to the edges of the cloth...
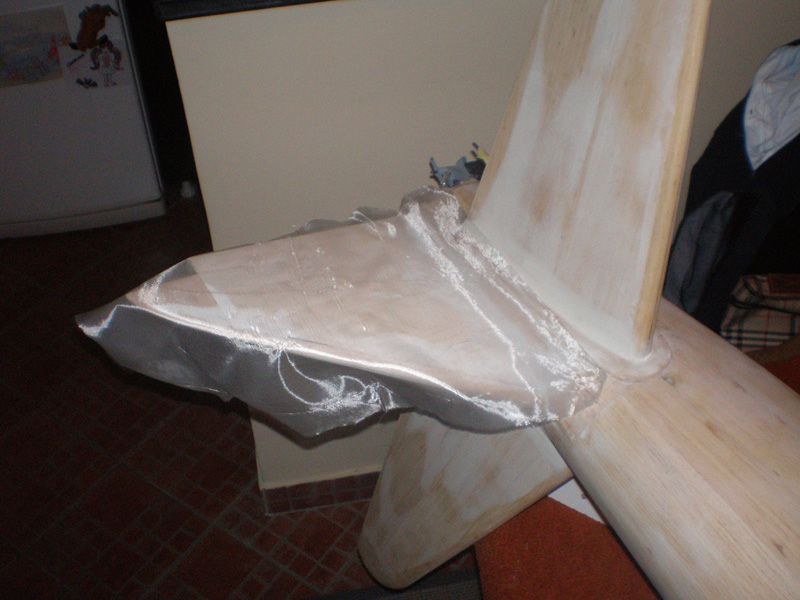
For curves and edges I use sponge and push it many time on surface. I don't pull it...
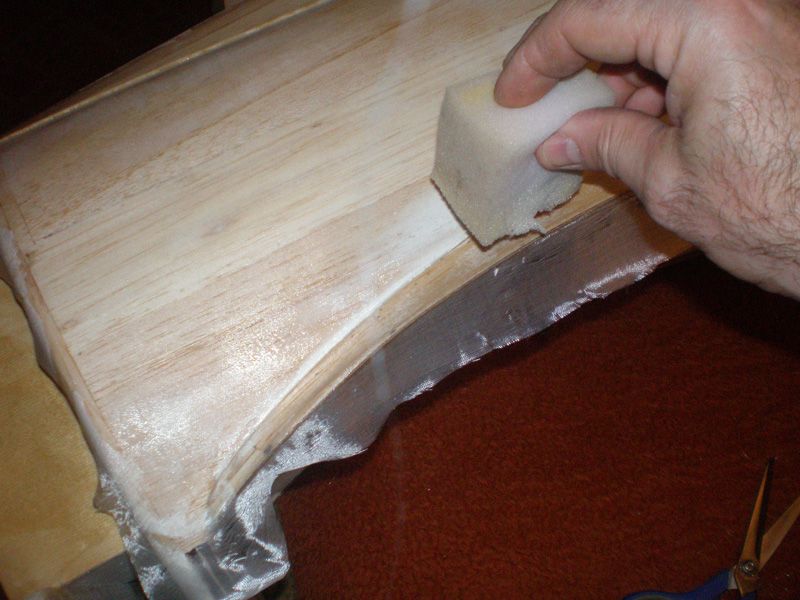
This is result...
Same technique is for rudder...
Excess resin take down with plastic spatula and wipe from spatula in the box where is mix of the epoxy resin. And one more thing, when you mix epoxy resin, don't mix to much, because after some time resin will start to cake...
It's easier to mix little by little, and adding from time to time new mix...
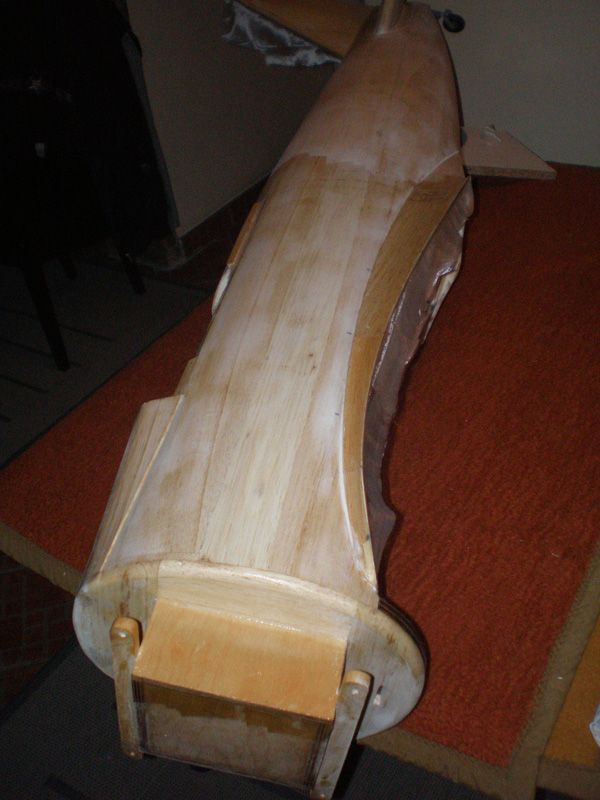
Next day, when resin get dry, with scalpel or sand paper take down surplus of cloth... After that same procedure on other side of the rudder and in front of the fuselage...
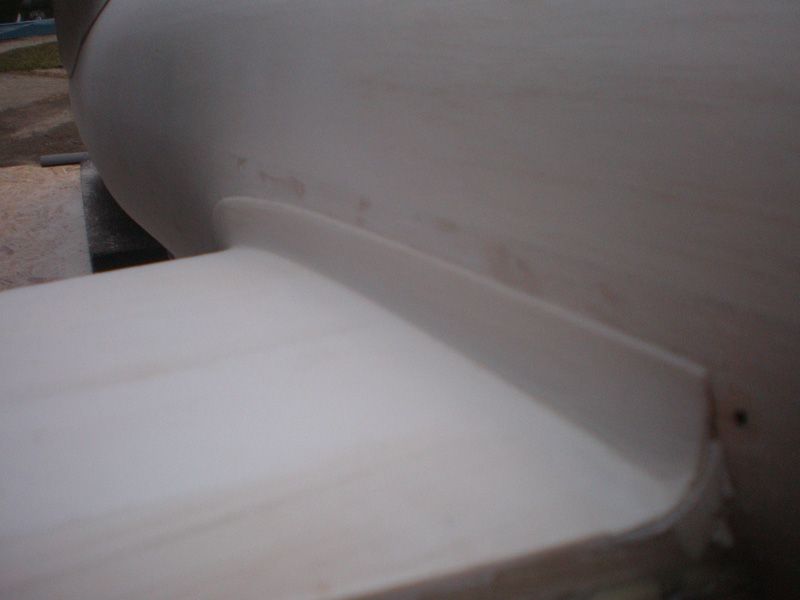
Finally fuselage was ready for sanding before second layer of epoxy resin...
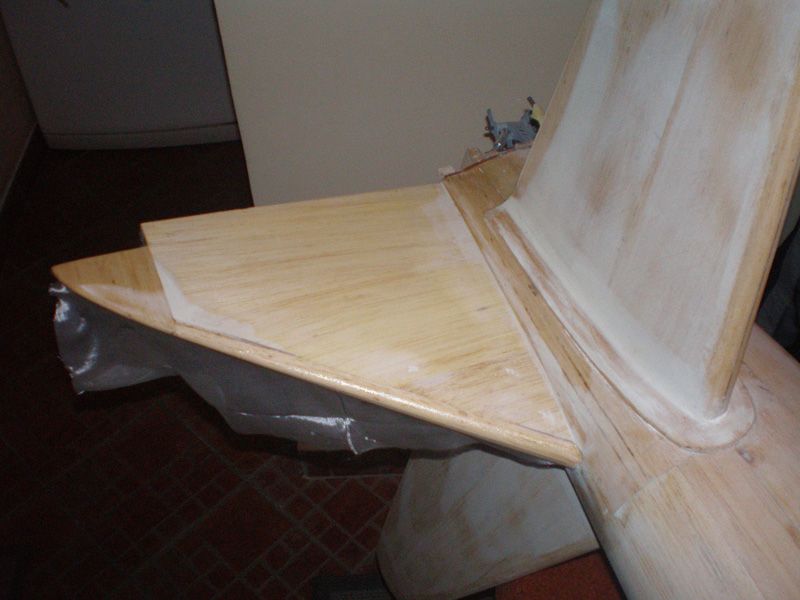
On the wing all those stages are done before. On layer of gray filler I add new, thin layer of acrylic filler. Gray surface show where you need to fix small holes and scratches.But, I add filler on all surface one more time, because in that case get much better, smoother surface...

After sanding and sanding, surface will be like this...
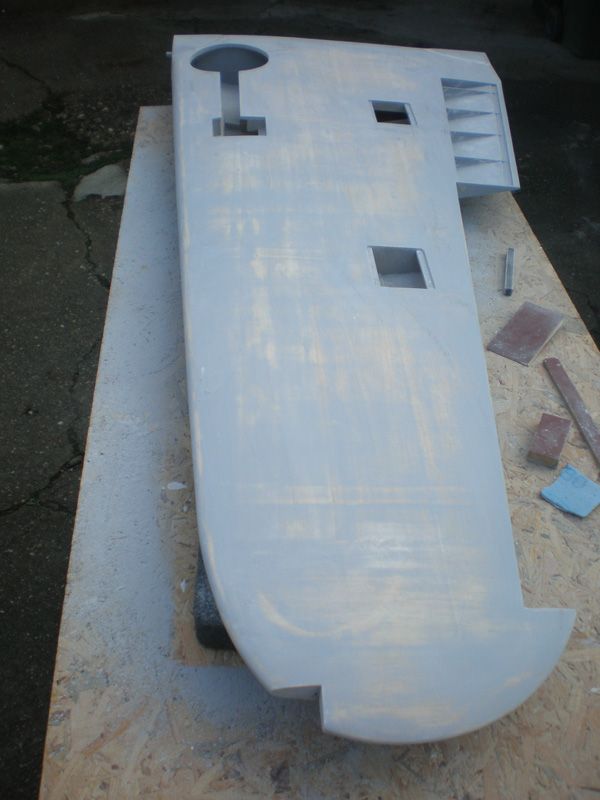
Now you can clear see where was surface little higher or lower. Last photo show glass lap...
When sand all surface, it's ready for panel lines, and finally part of building which I like most...
Regards
Mirce
I add all glass cloth on fuselage. Here is one quick course how I do that...
First thing is prepare all cloth you need for that day for covering...
I keep both components of epoxy resin in glass jars. Jar have big hole and it is easy to take resin with syringe. Syringe is good for precise measure, because always must be same and precise ratio of both resin parts...
Other important thing is always wipe your tools. If the resin hardens the scissors, you can throw them...
When I mix both components i apply it on glass cloth like this...
For large flat surface I use plastic spatula...
... and gently drag it from middle to the edges of the cloth...
For curves and edges I use sponge and push it many time on surface. I don't pull it...
This is result...
Same technique is for rudder...
Excess resin take down with plastic spatula and wipe from spatula in the box where is mix of the epoxy resin. And one more thing, when you mix epoxy resin, don't mix to much, because after some time resin will start to cake...
It's easier to mix little by little, and adding from time to time new mix...
Next day, when resin get dry, with scalpel or sand paper take down surplus of cloth... After that same procedure on other side of the rudder and in front of the fuselage...
Finally fuselage was ready for sanding before second layer of epoxy resin...
On the wing all those stages are done before. On layer of gray filler I add new, thin layer of acrylic filler. Gray surface show where you need to fix small holes and scratches.But, I add filler on all surface one more time, because in that case get much better, smoother surface...
After sanding and sanding, surface will be like this...
Now you can clear see where was surface little higher or lower. Last photo show glass lap...
When sand all surface, it's ready for panel lines, and finally part of building which I like most...
Regards
Mirce
03-20-2013, 12:08 AM
#88
Thread Starter
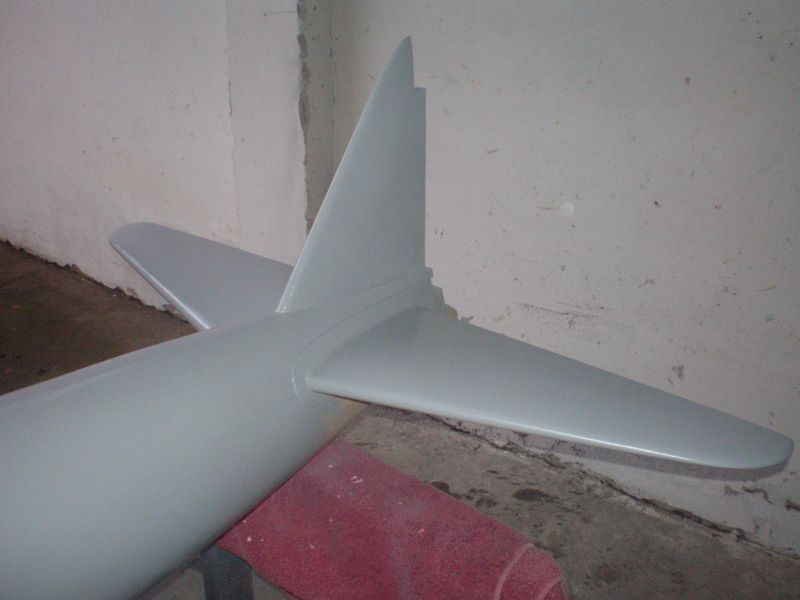
Before start putting panel lines on surface, I made last piece, template for tip lights...

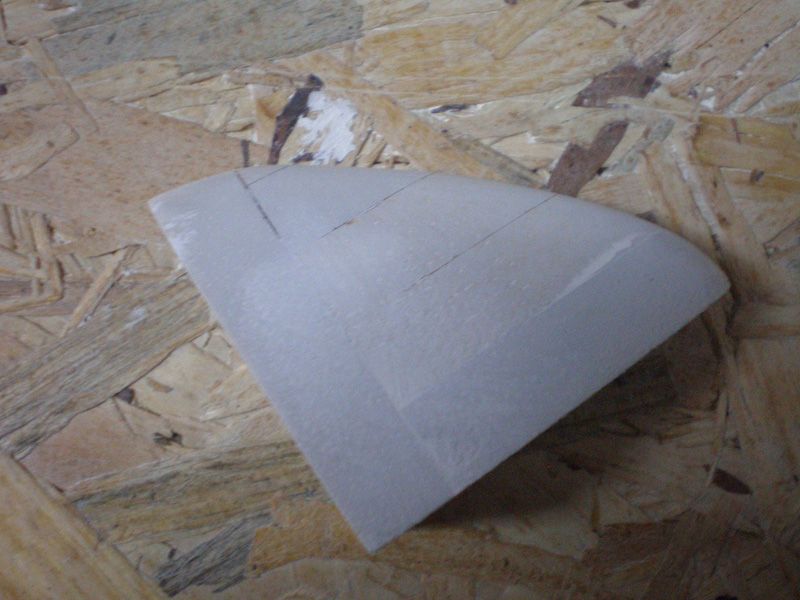

Wing is now moved in other workshop, where I made all details on my models. This Meister Scale Zero is opportunity for me to create my new product, Detail set and Paint mascs for Zero
For Panel lines, rivets and screws, I will use again Mirce Finish Set. Surface will be with all details, with every rivet row, like details on surface on my Meister P 47...
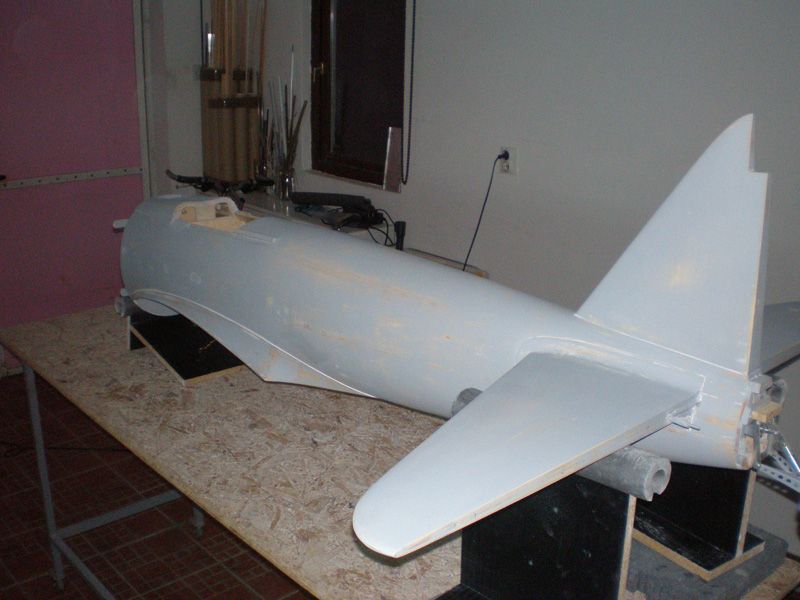
In meantime I prepare and made second layer of resin on fuselage. After that I sand fuselage, so surface was ready for first filler coat...
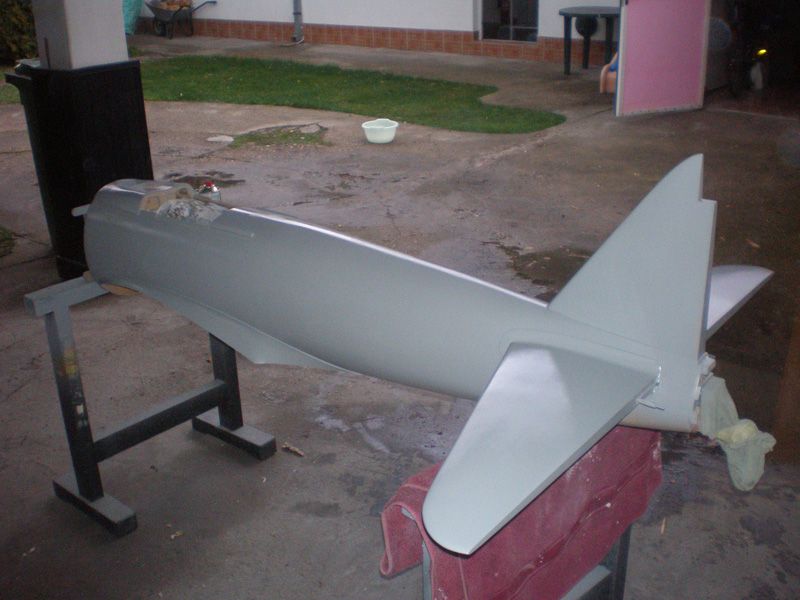
This gray layer show all places where I need to fix some small holes or scratches. That will be done in next few days, than sanding again, and than, fuselage will go in work shop for details too...

Regards
Mirce
Wing is now moved in other workshop, where I made all details on my models. This Meister Scale Zero is opportunity for me to create my new product, Detail set and Paint mascs for Zero
For Panel lines, rivets and screws, I will use again Mirce Finish Set. Surface will be with all details, with every rivet row, like details on surface on my Meister P 47...
In meantime I prepare and made second layer of resin on fuselage. After that I sand fuselage, so surface was ready for first filler coat...
This gray layer show all places where I need to fix some small holes or scratches. That will be done in next few days, than sanding again, and than, fuselage will go in work shop for details too...
Regards
Mirce
05-28-2013, 03:42 PM
#90
Join Date: Apr 2006
Location: Carrollton
Posts: 1,698
Likes: 0
Received 0 Likes
on
0 Posts
Hello Mirce,
I had to go back to page 10 to find this thread. I hope everything's going OK for you. Are you still busy working on your jets to work on your Zero or you just having too much fun flying your awesome Jug?..............
Take care,
David
I had to go back to page 10 to find this thread. I hope everything's going OK for you. Are you still busy working on your jets to work on your Zero or you just having too much fun flying your awesome Jug?..............
Take care,
David
06-01-2013, 05:19 PM
#91
Thread Starter
Hello my friends... What to tell first, thank you for kind words, or sorry for so big pause on this project...
Sorry Trevor because I wasn't give you answer, I can't see it until now. Carbon tubes are 5 mm outer diameter and 3 mm inner...
David, thank you for care about me... I'm OK, but in last, little more than two months I was working on my Galeb G2 jet project, which is right now most important for me, because I want to offer it like kit.
I'm not sure that you read about it in jet section of RC Universe, but in case that haven't opportunity to see it here is a link: http://www.rcuniverse.com/forum/m_10...mpage_6/tm.htm
Zero was on shelf for few months, but few day ago, when I take Galeb to my friend in paint shop, I start working again on it. Here is little up date...
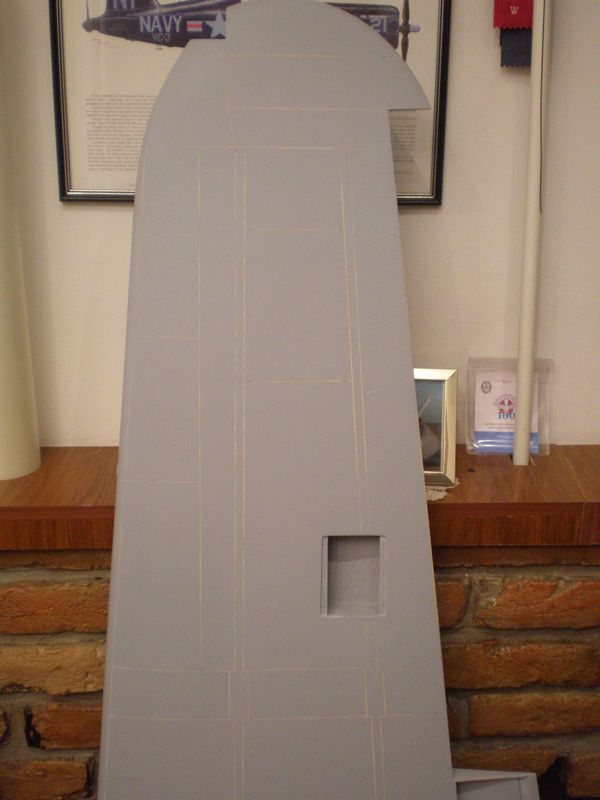
Zero wings was ready for panel lines in March this year. But, as I told, working on jet model was reason I don't do panel lines until now.
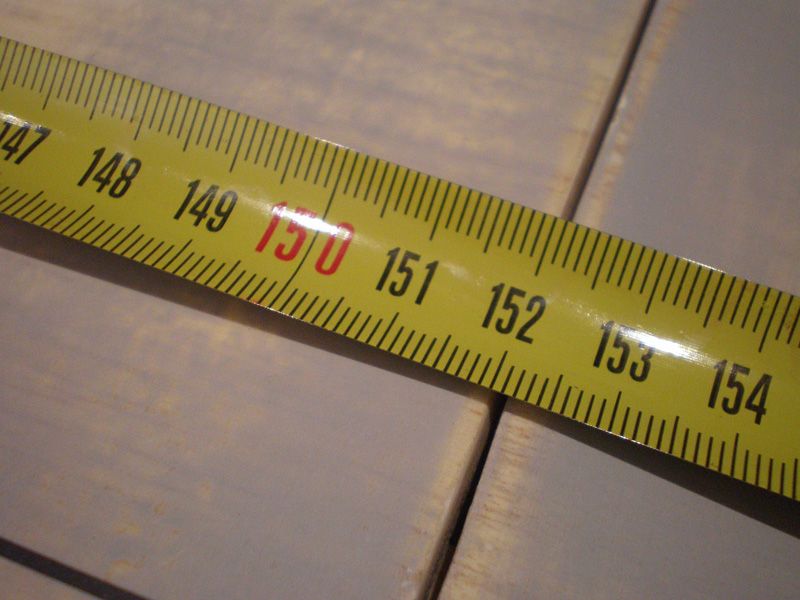
For panel lines I used my Mirce Finish Set, which include 1,2 mm wide lines made from Oracal foil.
Details how to apply lines I find in book: Aero Detail 7 - Mitsubishi Zero.
I have that book in PDF...
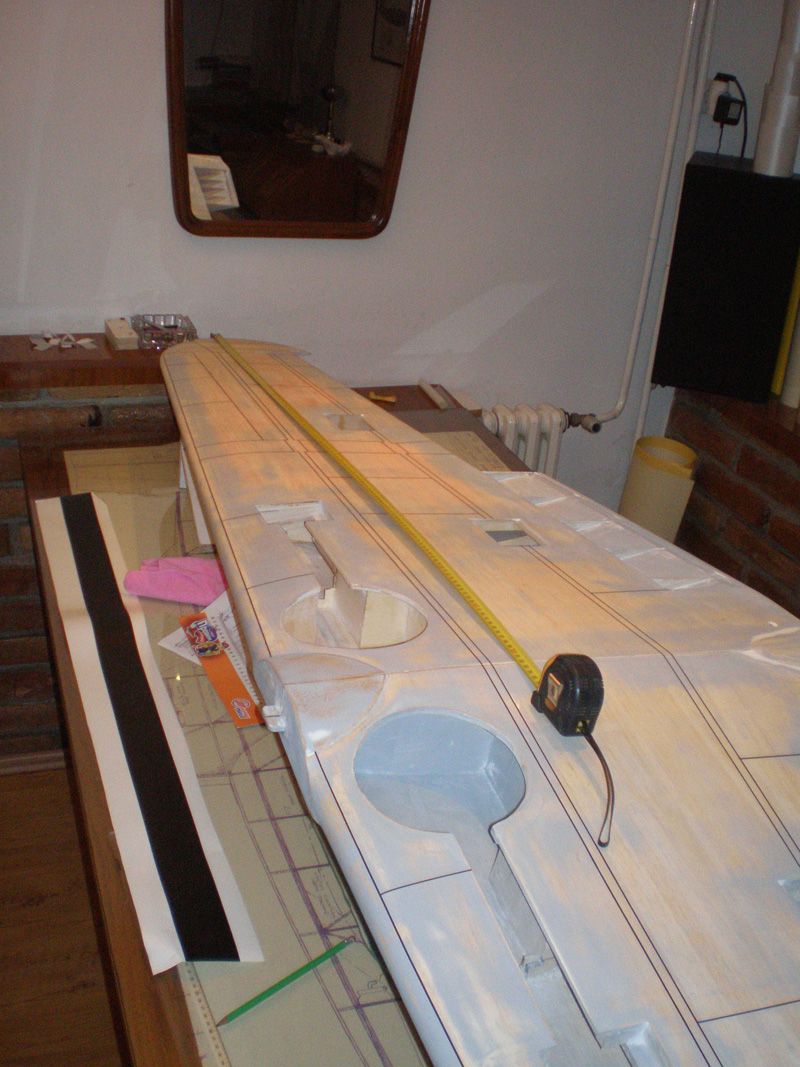
As always I import drawing in my Corel program, scale it on size of model, in this case 3 meter of wingspan, and have all measure, distance, detail size...
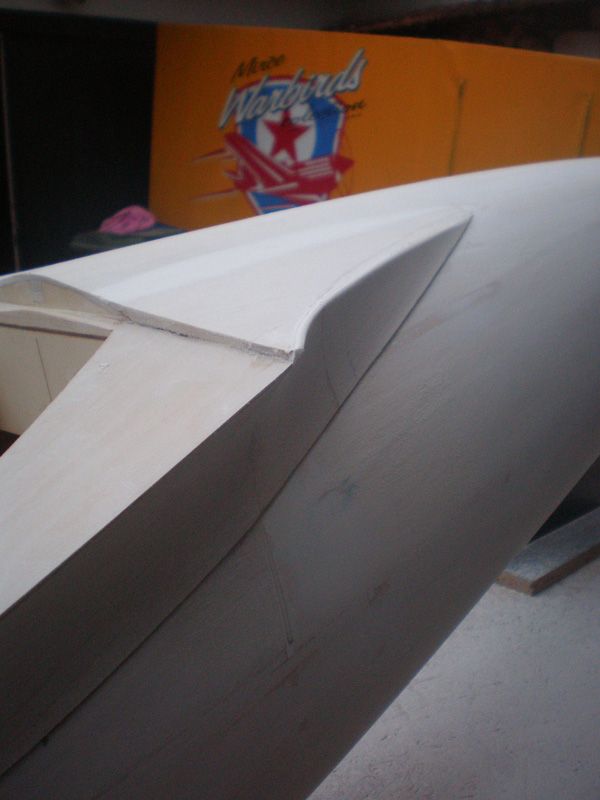
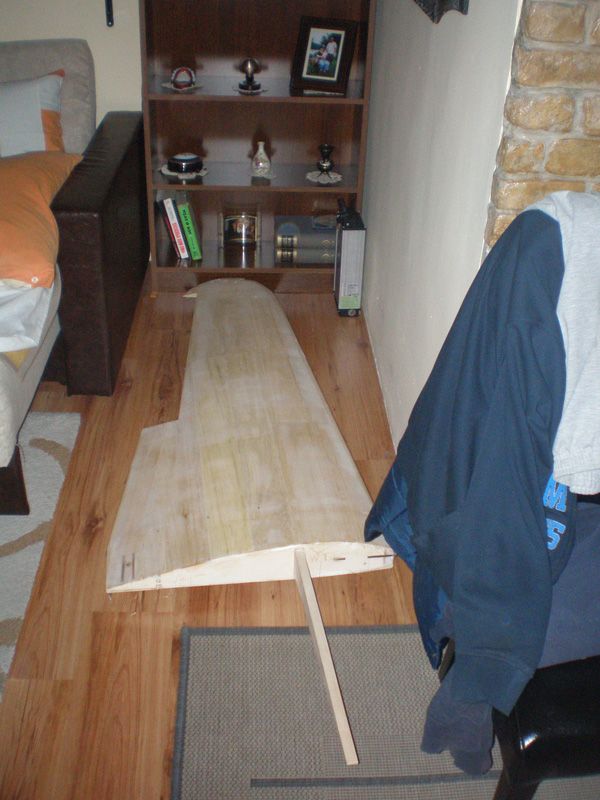
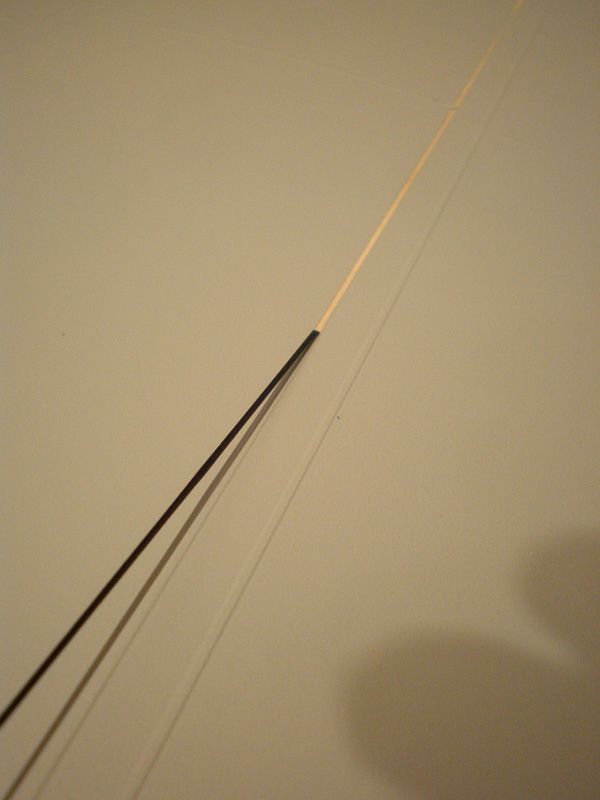
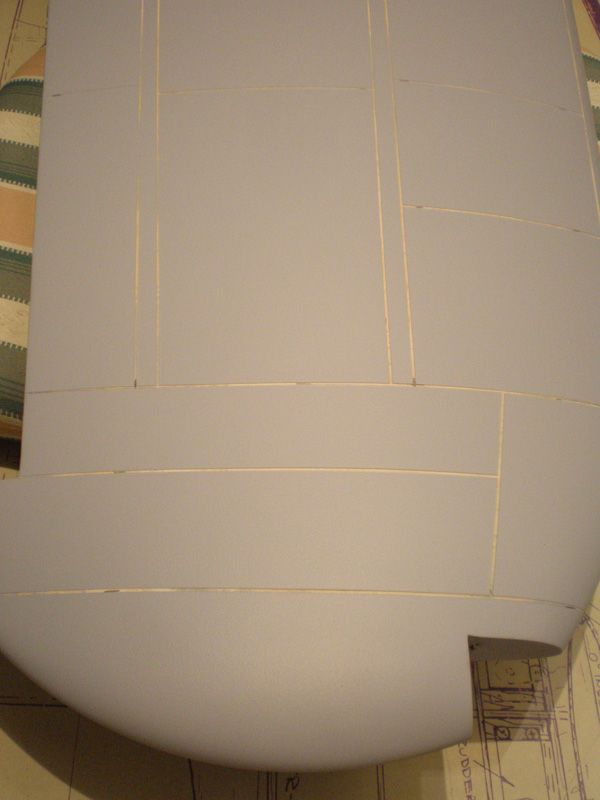
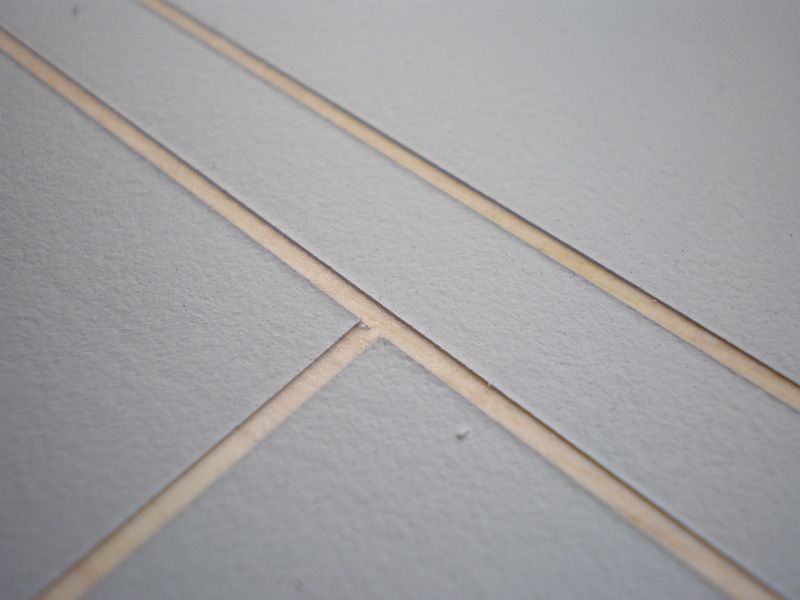
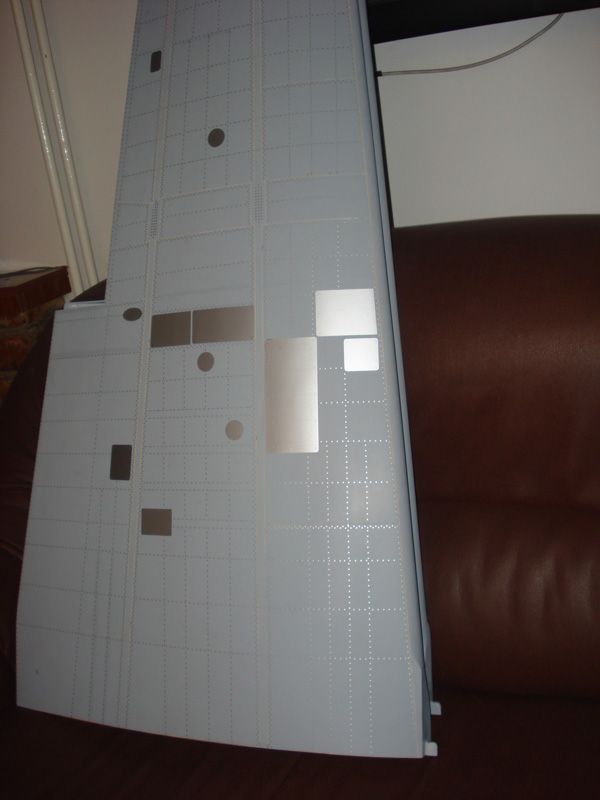
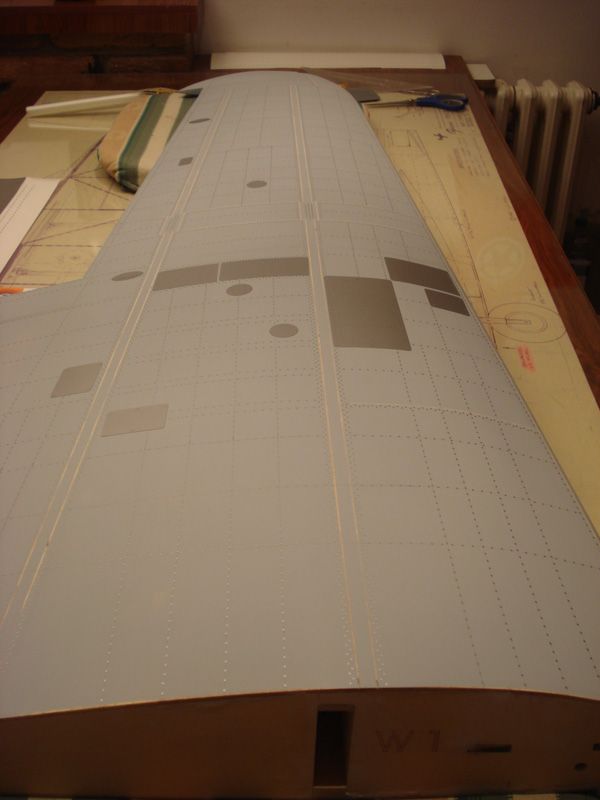
First step was to apply panel lines...


As you can see, I used high tech toll for straight line - thread...
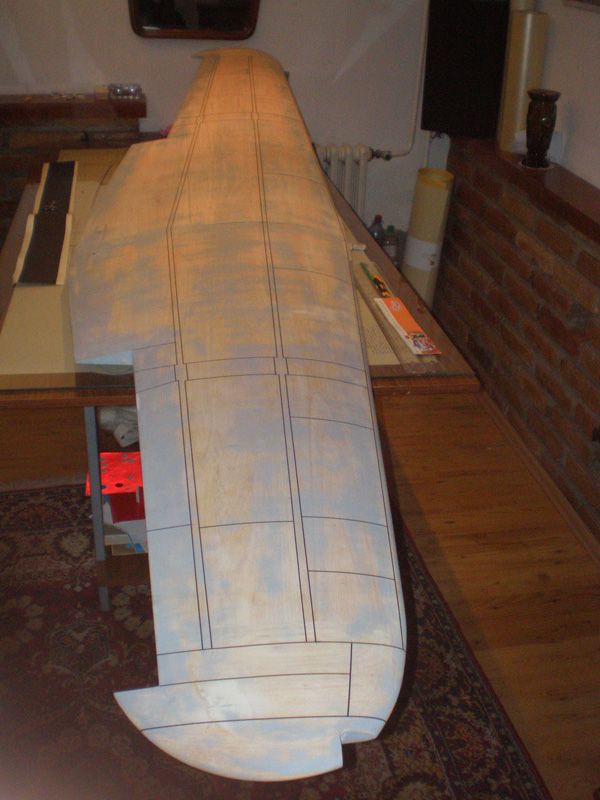

Wings are huge..

Next step was to apply filler. I used again Body 360 - gray filler. I used it every time and have, as always, great result with it...
On surface was added 5 layers of filler, first and last was on all surface, and middle three was just over panel lines. So much layers give thick filler layer... Bad part of story is that you need 4 - 5 canisters for huge wing like this...
In meantime I waited until the filler is dry, I add acrylic filler on fuselage. I always add filler on all surface and sand it down. That is good way to made perfect smooth surface...
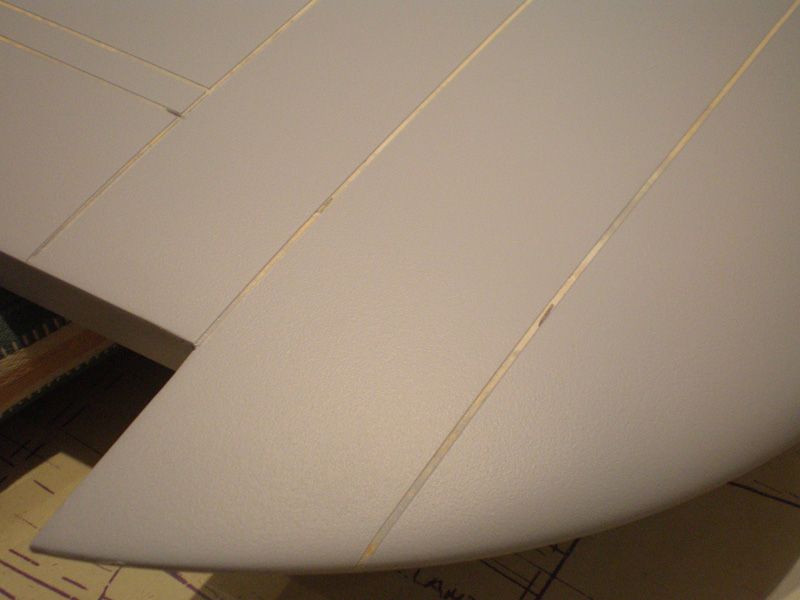
Next day, filler on wing was dry, so I start remove panel lines...


Edges are sharp and thick...

Fuselage are sand and ready for panel lines...
Wing is now ready for final sanding, before rivets and other small details. I made sanding in two stages, first just smooth sanding with 180 grade sand paper, just to remove "orange peel" from filler...

Before...
And after...
Than water sand paper grade 600 - 800. You can use it immediately but in that case you will need to sand much more...
Important thing is to wash paper and clean surface with wet rag... Also change water and sand paper from time to time...
For this wing I need 3 -4 hours to made that final sanding.
After that, I wipe all surface with cotton rag and alcohol to clean all dust and maybe some grease stains...
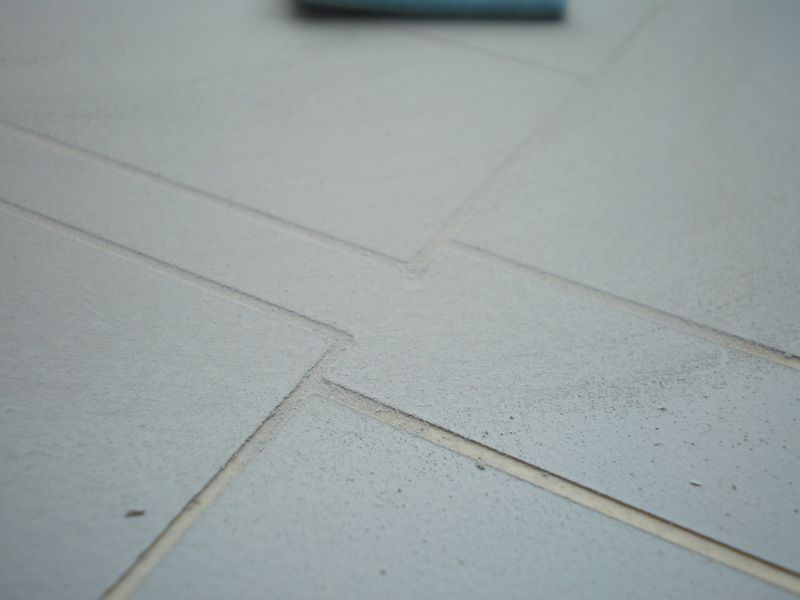
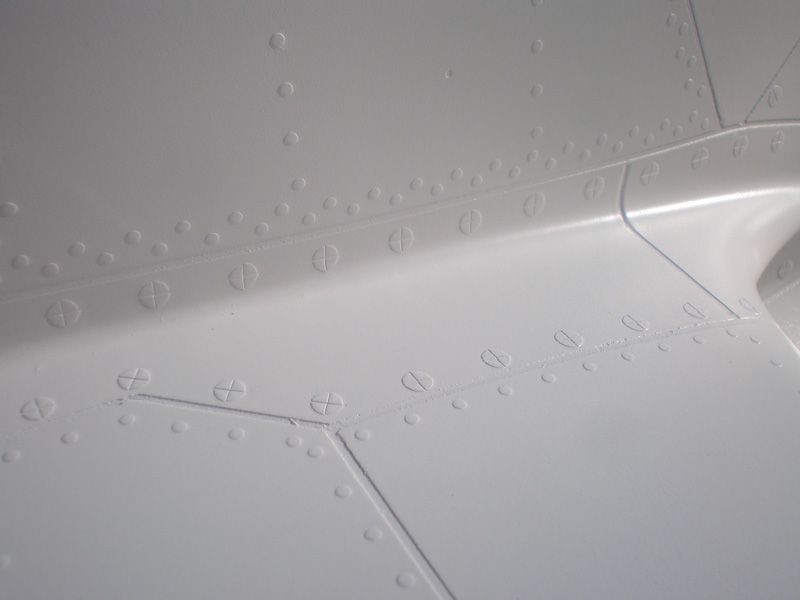
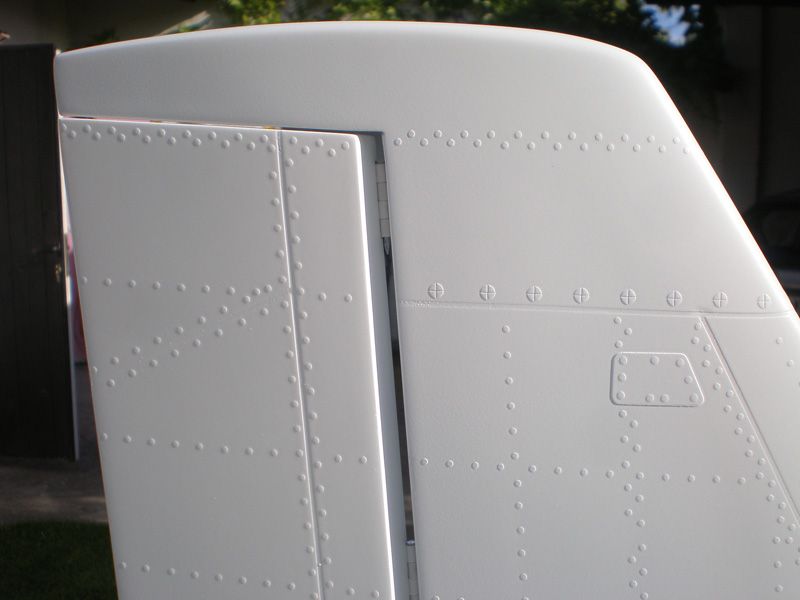
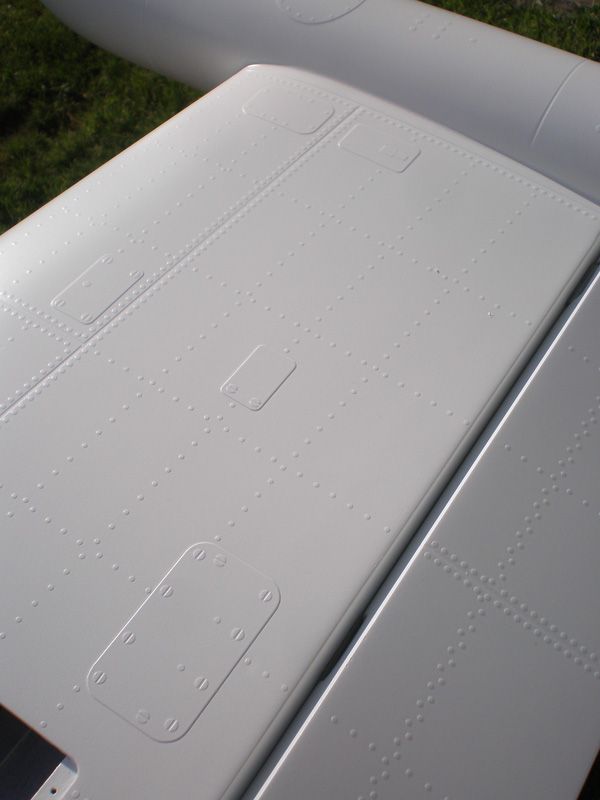
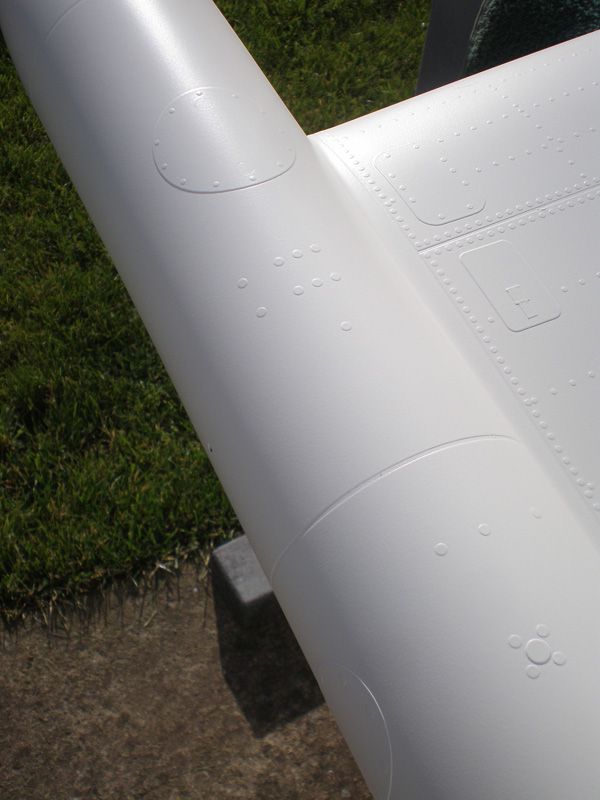
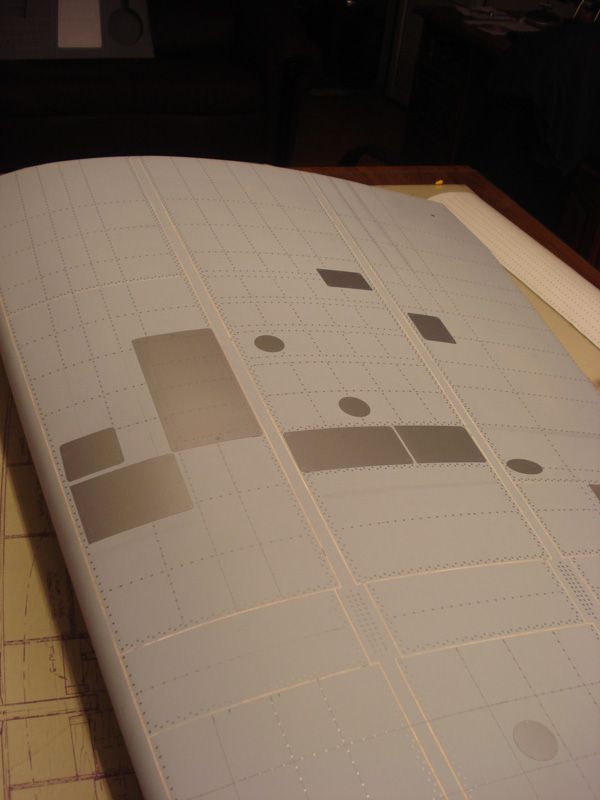
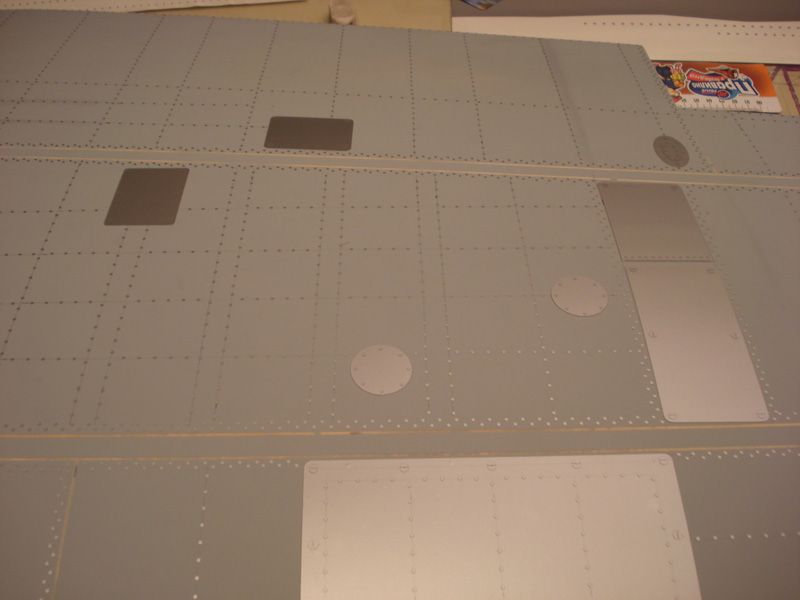
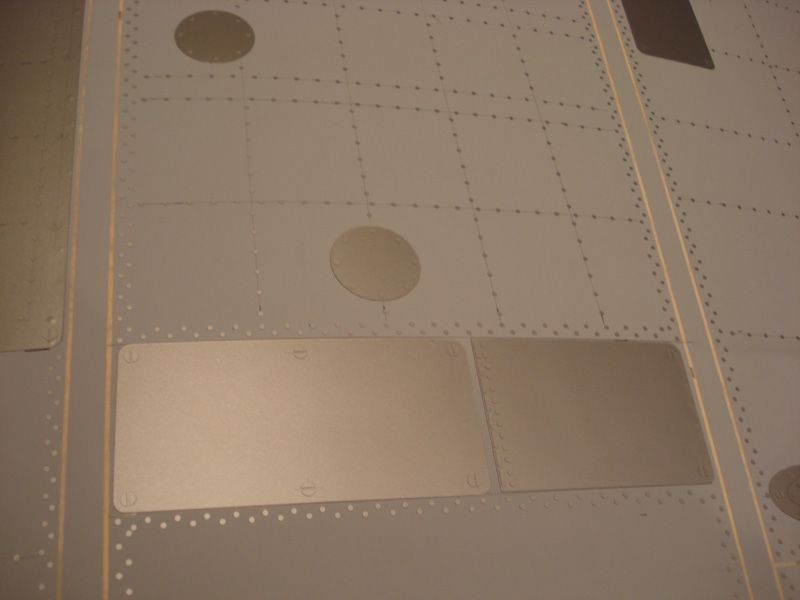
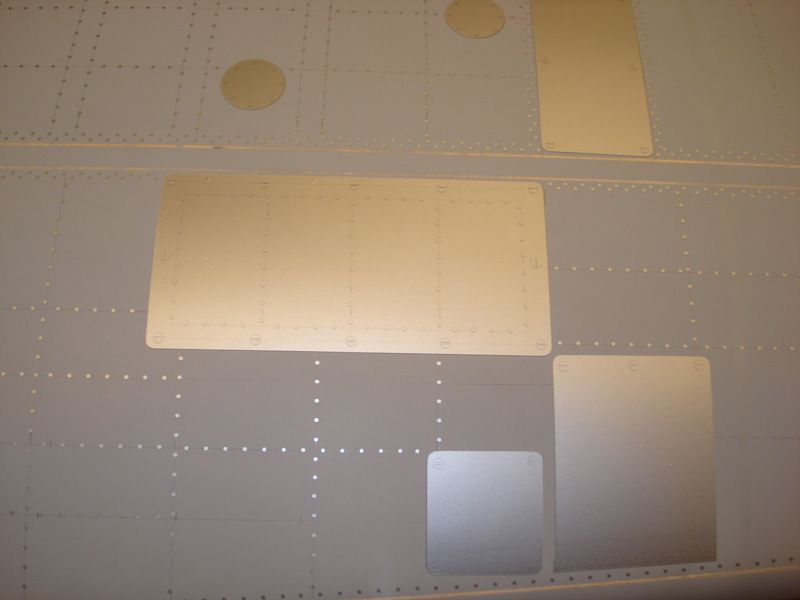
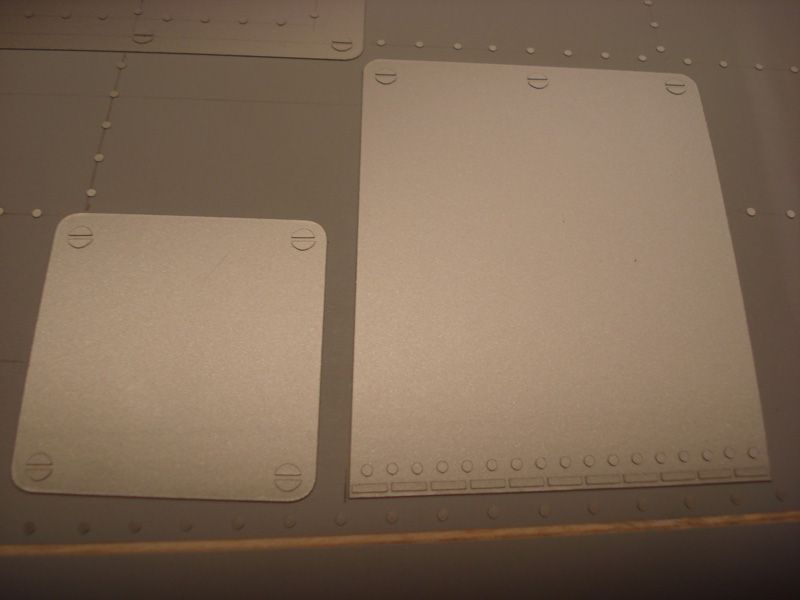
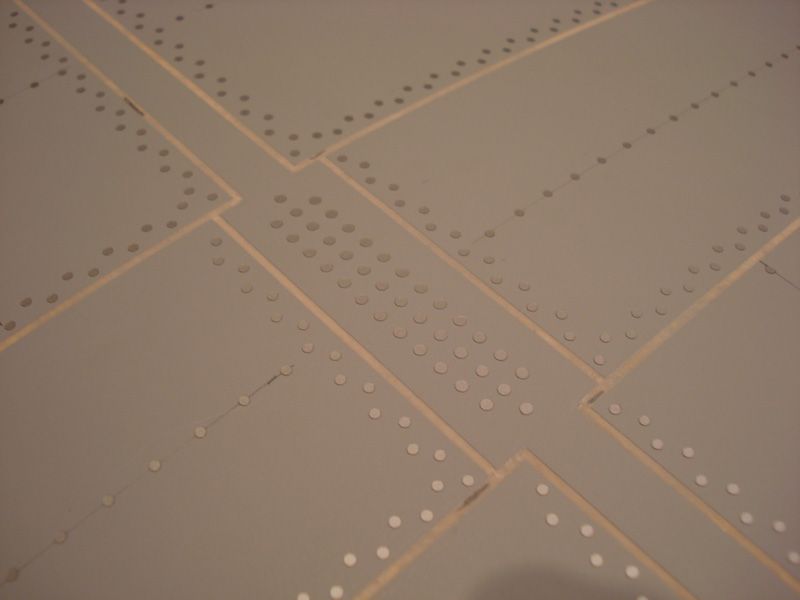
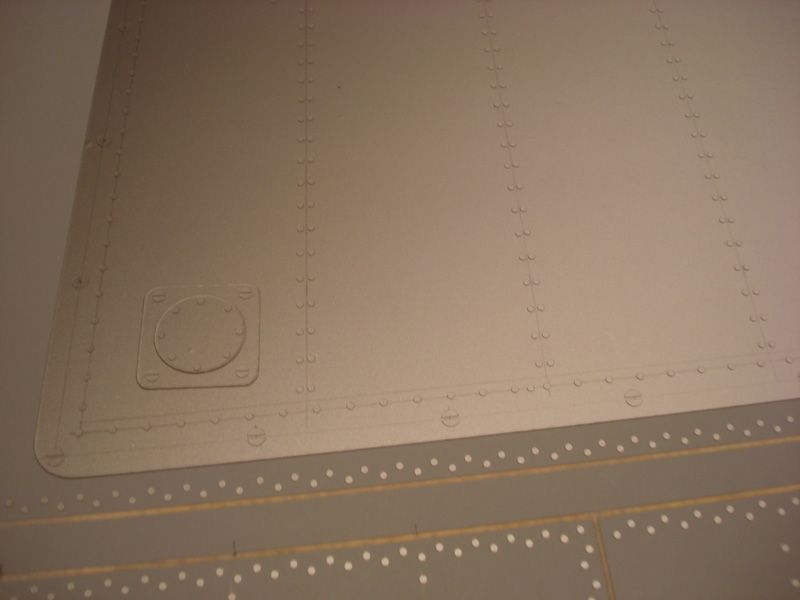
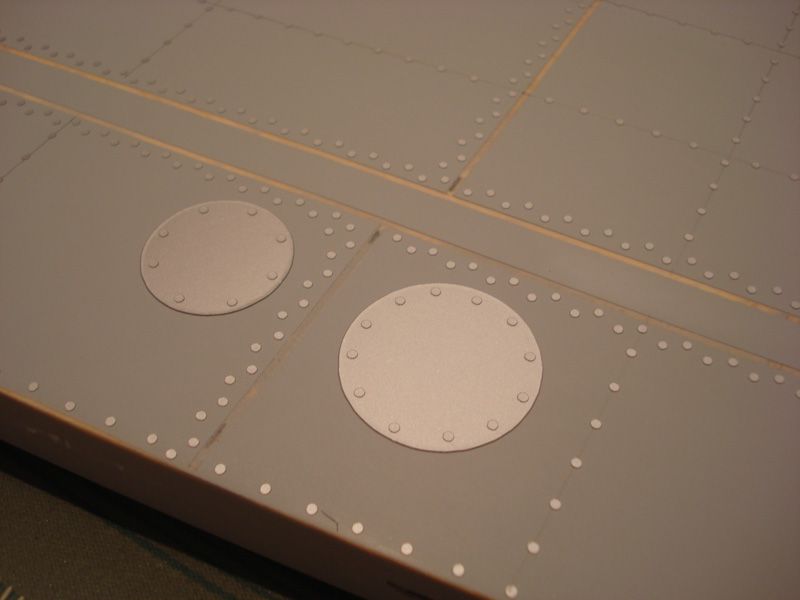
Than I start to use again my Corel drawing about Zero, and measure lines for rivets. I use my product rivets, which is 1,8 mm in diameter. On some lines I add one row, on other lines I used two rows, some time parallel some time staggered...
Design depend how it was on real Zero...

Some pictures...
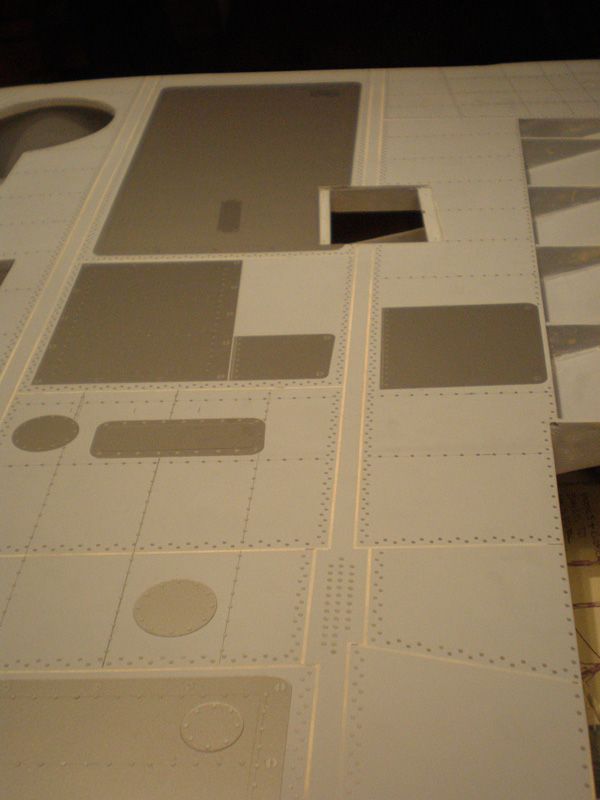
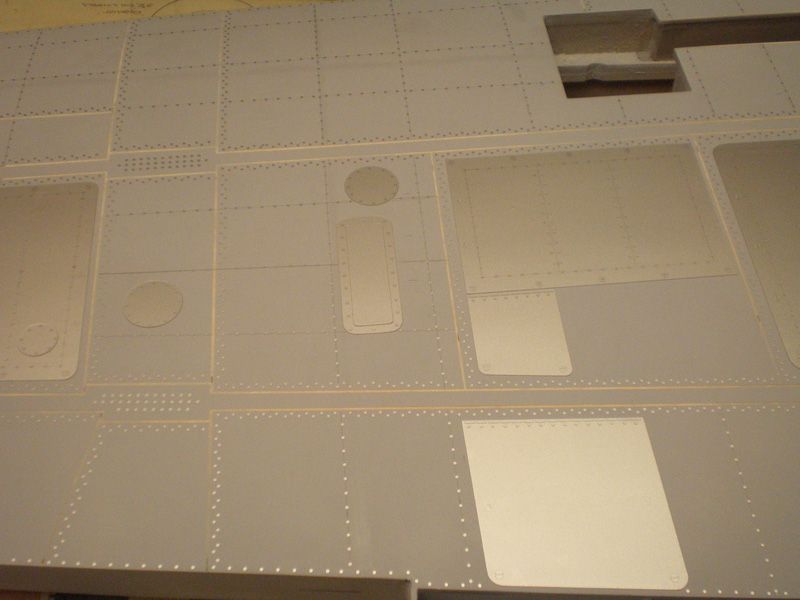
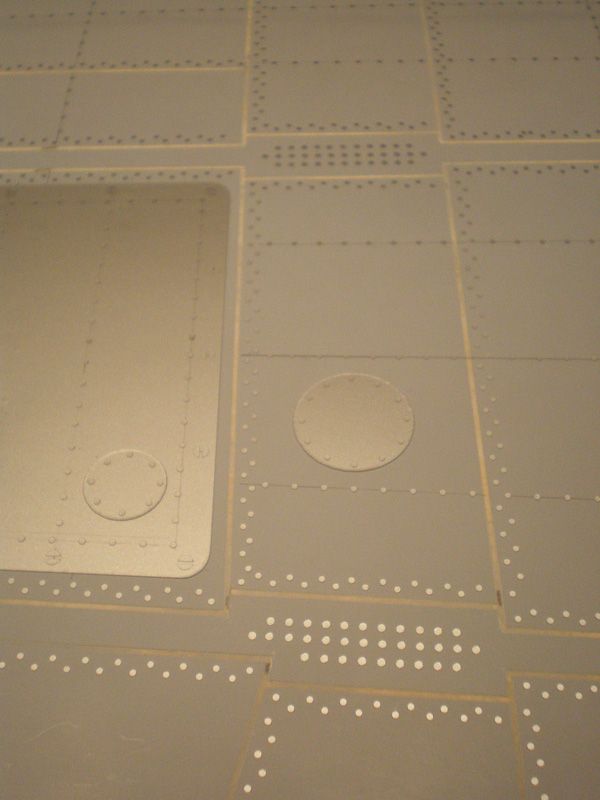
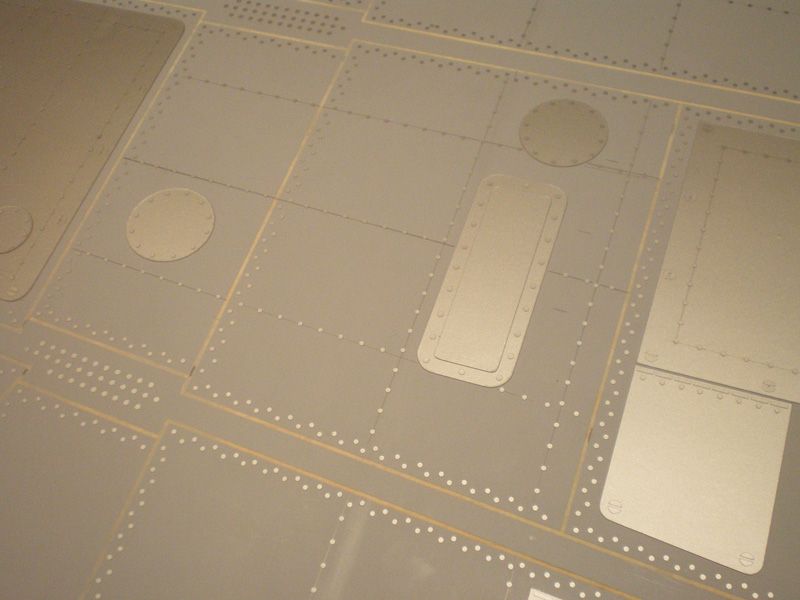
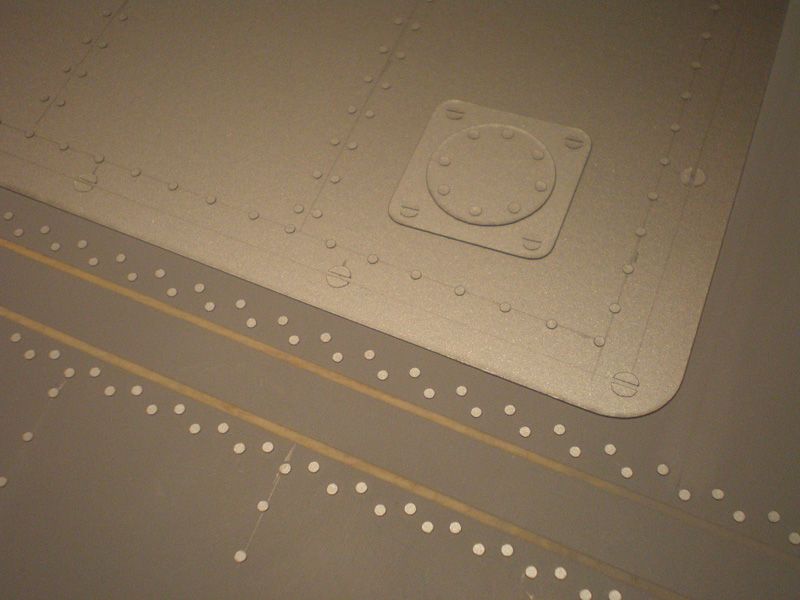

Don't forget, rivets (circles) are 1,8 mm in diameter!!!!!
After this project I'll offer my Detail Set for Zero.
Detail Set, like all detail sets I offer, will have all small details, like cover, lid, panel, screws... for wing, fuselage and tail section.
I'll have paint masc also, for this model.
Of course, all that products can be scaled on smaller or bigger size, depend of model size. I must made model first, that is where am I now, to can made files for all that parts and details.
Unfortunately without model I can't made it, so on my web page are products just for model I made before...
Hope that later this year, I'll have Sets for Ziroli Stuka. My friend made it, and I'll help him in finishing stage...
Best regards from Serbia
Mirce
Sorry Trevor because I wasn't give you answer, I can't see it until now. Carbon tubes are 5 mm outer diameter and 3 mm inner...
David, thank you for care about me... I'm OK, but in last, little more than two months I was working on my Galeb G2 jet project, which is right now most important for me, because I want to offer it like kit.
I'm not sure that you read about it in jet section of RC Universe, but in case that haven't opportunity to see it here is a link: http://www.rcuniverse.com/forum/m_10...mpage_6/tm.htm
Zero was on shelf for few months, but few day ago, when I take Galeb to my friend in paint shop, I start working again on it. Here is little up date...
Zero wings was ready for panel lines in March this year. But, as I told, working on jet model was reason I don't do panel lines until now.
For panel lines I used my Mirce Finish Set, which include 1,2 mm wide lines made from Oracal foil.
Details how to apply lines I find in book: Aero Detail 7 - Mitsubishi Zero.
I have that book in PDF...
As always I import drawing in my Corel program, scale it on size of model, in this case 3 meter of wingspan, and have all measure, distance, detail size...
First step was to apply panel lines...
As you can see, I used high tech toll for straight line - thread...
Wings are huge..
Next step was to apply filler. I used again Body 360 - gray filler. I used it every time and have, as always, great result with it...
On surface was added 5 layers of filler, first and last was on all surface, and middle three was just over panel lines. So much layers give thick filler layer... Bad part of story is that you need 4 - 5 canisters for huge wing like this...
In meantime I waited until the filler is dry, I add acrylic filler on fuselage. I always add filler on all surface and sand it down. That is good way to made perfect smooth surface...
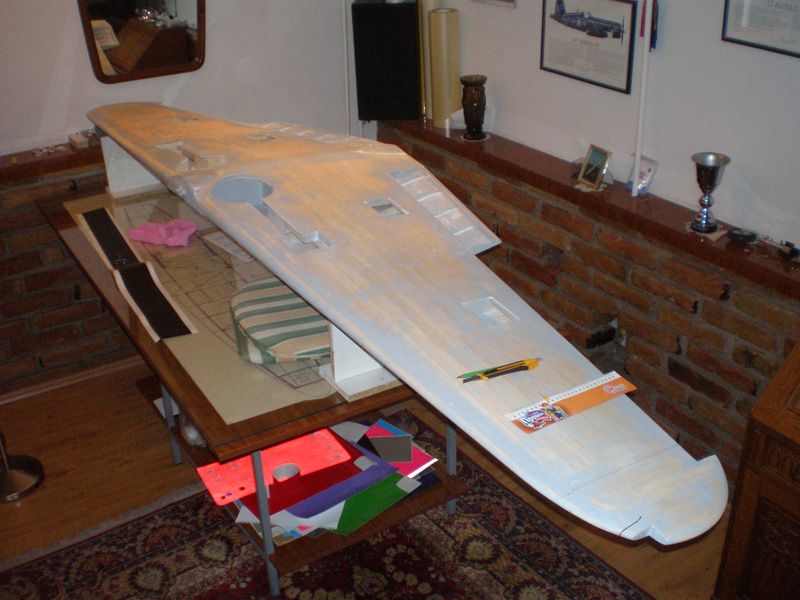
Next day, filler on wing was dry, so I start remove panel lines...
Edges are sharp and thick...
Fuselage are sand and ready for panel lines...
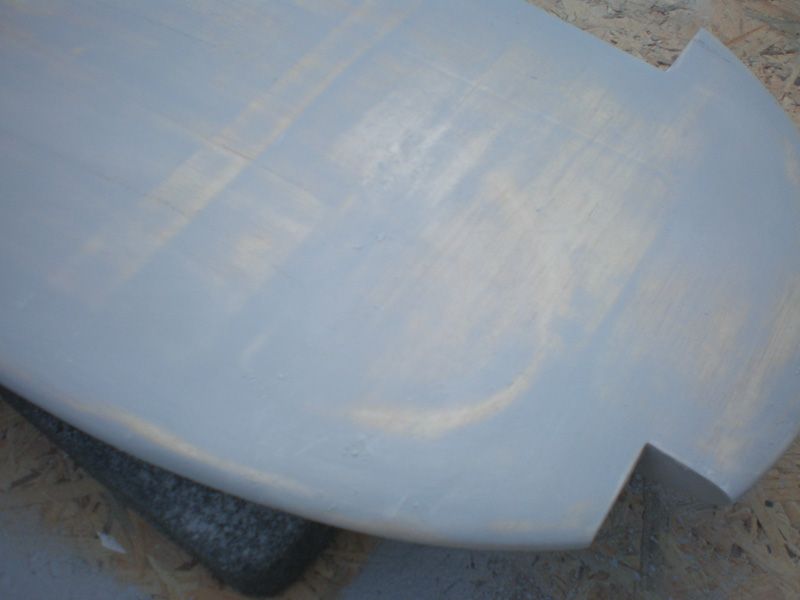
Wing is now ready for final sanding, before rivets and other small details. I made sanding in two stages, first just smooth sanding with 180 grade sand paper, just to remove "orange peel" from filler...
Before...
And after...
Than water sand paper grade 600 - 800. You can use it immediately but in that case you will need to sand much more...
Important thing is to wash paper and clean surface with wet rag... Also change water and sand paper from time to time...
For this wing I need 3 -4 hours to made that final sanding.
After that, I wipe all surface with cotton rag and alcohol to clean all dust and maybe some grease stains...
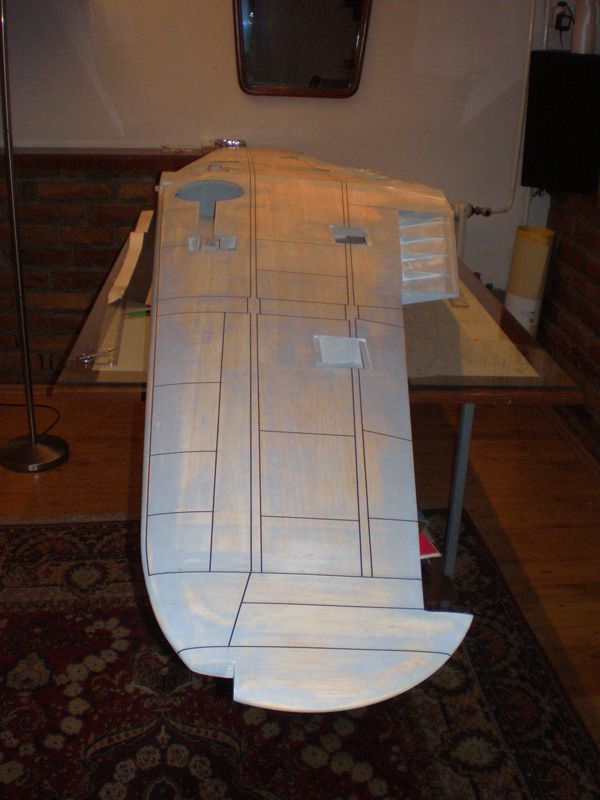
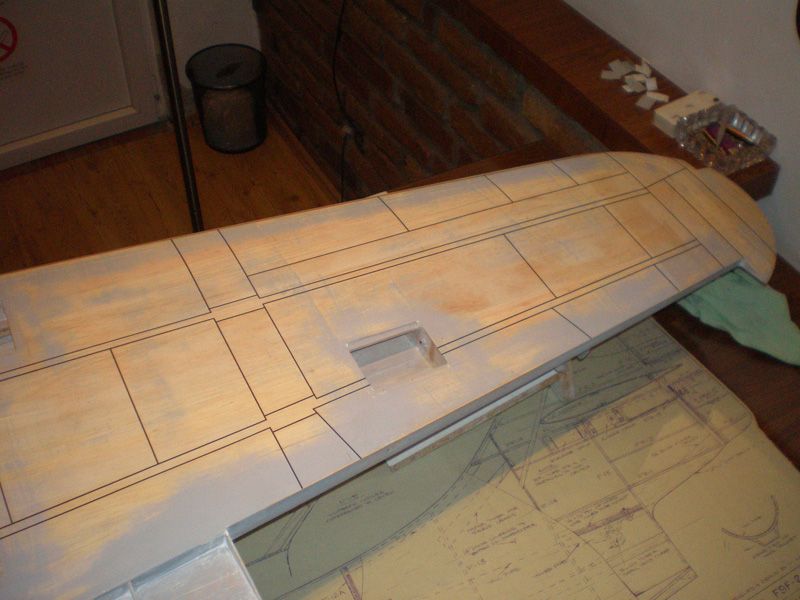
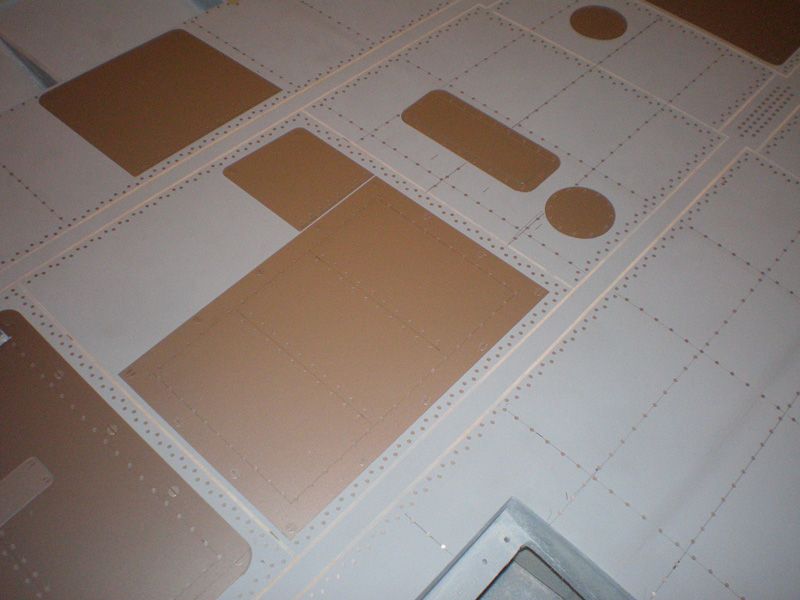
Than I start to use again my Corel drawing about Zero, and measure lines for rivets. I use my product rivets, which is 1,8 mm in diameter. On some lines I add one row, on other lines I used two rows, some time parallel some time staggered...
Design depend how it was on real Zero...
Some pictures...
Don't forget, rivets (circles) are 1,8 mm in diameter!!!!!
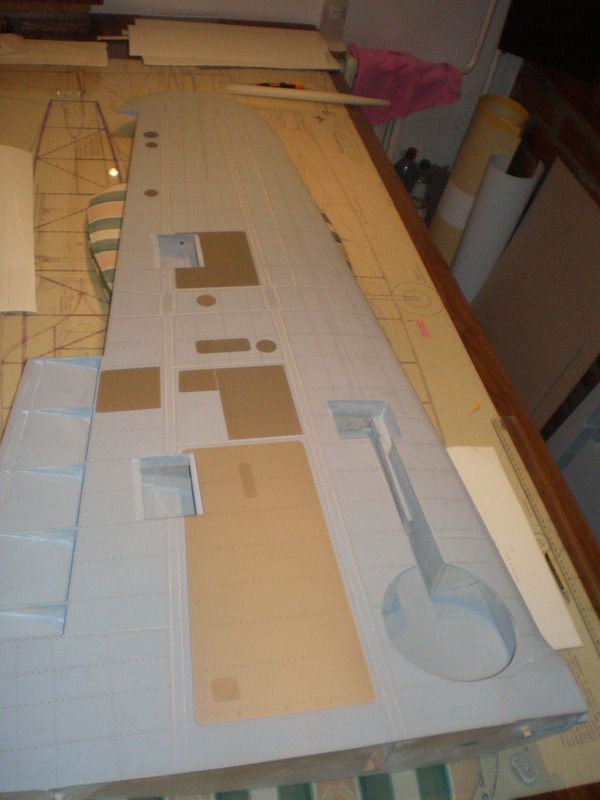
After this project I'll offer my Detail Set for Zero.
Detail Set, like all detail sets I offer, will have all small details, like cover, lid, panel, screws... for wing, fuselage and tail section.
I'll have paint masc also, for this model.
Of course, all that products can be scaled on smaller or bigger size, depend of model size. I must made model first, that is where am I now, to can made files for all that parts and details.
Unfortunately without model I can't made it, so on my web page are products just for model I made before...
Hope that later this year, I'll have Sets for Ziroli Stuka. My friend made it, and I'll help him in finishing stage...
Best regards from Serbia
Mirce
06-01-2013, 05:33 PM
#92
Join Date: Apr 2006
Location: Carrollton
Posts: 1,698
Likes: 0
Received 0 Likes
on
0 Posts
Hello Mirce,
I'm glad you are doing well. I figured you were working on your jet. I don't spend very much time in the Jet forum here on RCU, and I'm not sure why not. Even though I'll never be able to own a jet, I do enjoy watching any type of plane being built, especially when they are being built by a true craftsman. I think I'll read through your Jet thread to see what you've been up to.....
BTW, your Zero is looking GREAT ! ! ! ! I just wish I had half of your building skills........
Take care,
David
06-01-2013, 05:41 PM
#93

Very nice Mirce. You are a true master at scale.
I see in your detail a rivet seam where the flaps and ailerons come together. That is where I plan to separate the wings on mine. I will build the center section as one piece, and have plug-in outer sections. I also want to build the folding tips and make them electric with the help of Down and Locked.
Hope we can get these in the air together some day.
06-02-2013, 12:28 AM
#94
Thread Starter
Thank you guys...
Garry, I have same idea about separate wing in center section and outer panels. In that case, center section can be always attach on fuselage and that will be much easier for manipulation with model, because it will be on wheels all the time.
Unfortunately, Zero is from the end to the end of flaps wider than my trailer, so I can't put it inside in that configuration. If I need to take down center section every time, than it's same for me, to be wing in two or three pieces.
But, you are right, center panel is better option...
I hope too that some we will flight our Zero's together... That will be great, my friend...
David, my building skill is probably same like yours, maybe I have just more time for building... So, everybody want something what can't have, you want my skill and I want to have "modelers market" and events, as you have there in USA...
I'm glad that you enjoyed in my building. More news about this project soon...
Right now I'm going to pick up my jet model Galeb from my buddy who paint it in first color - white. Can't wait to see it live...
New pictures about that project will be tonight in jet section of RCU...
All the best from Novi Sad, Serbia
Mirce
06-02-2013, 06:40 AM
#95
Looks great as usual Mirce. Love to watch as you progress. Looking forward to seeing you back in the states! Love the jet you're building too.
All the best,
Scott
All the best,
Scott
06-02-2013, 02:10 PM
#96
Thread Starter
Thank you Scott. You are kind as always...
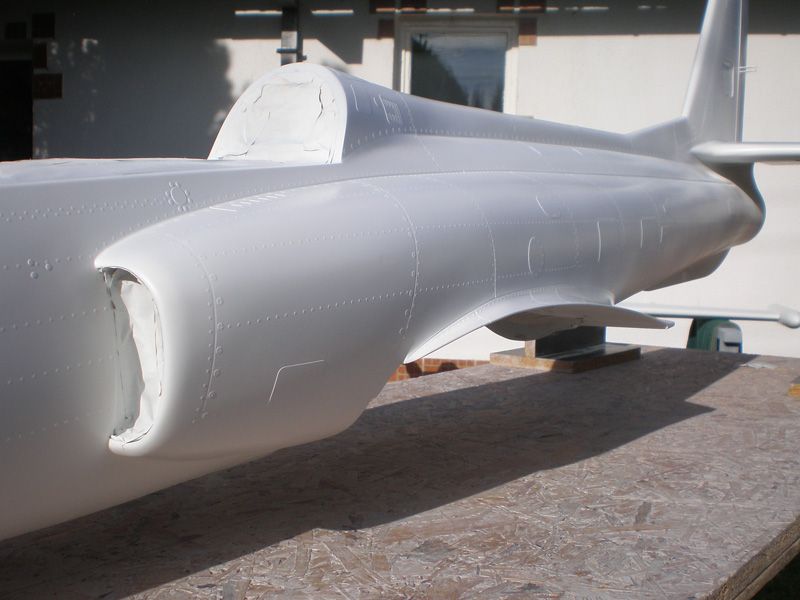
Because you mentioned jet, I want to show you, my warbird pilot friends, few pictures from yesterday, of my Galeb G2. It come back from my friends paint work shop. He apply first color - white...
Zero will be in same color too, so just to have some "visions" how it will look one day...

OK, OK...
If you want to see more pictures, check my web site or RC Universe jet page - Galeb G2...
Regards from Serbia
Mirce
Because you mentioned jet, I want to show you, my warbird pilot friends, few pictures from yesterday, of my Galeb G2. It come back from my friends paint work shop. He apply first color - white...
Zero will be in same color too, so just to have some "visions" how it will look one day...
OK, OK...
If you want to see more pictures, check my web site or RC Universe jet page - Galeb G2...
Regards from Serbia
Mirce
06-24-2013, 04:20 PM
#97
Thread Starter
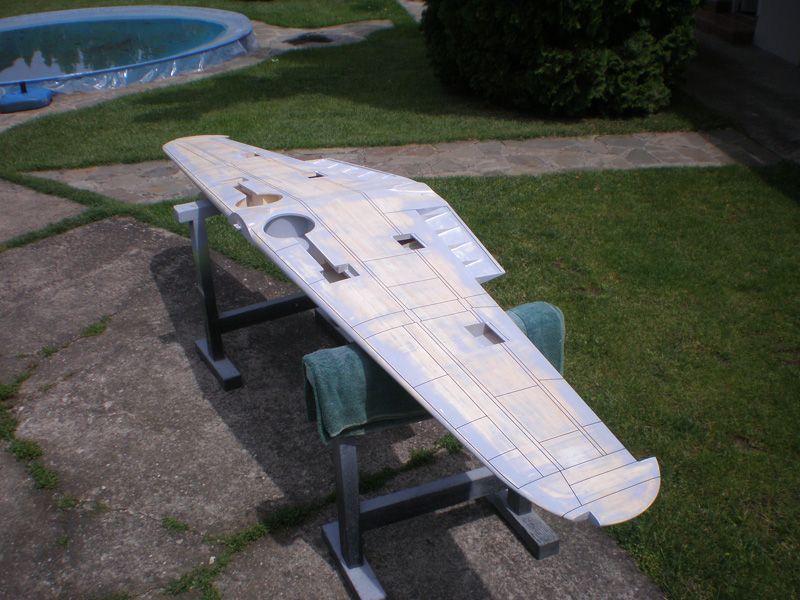
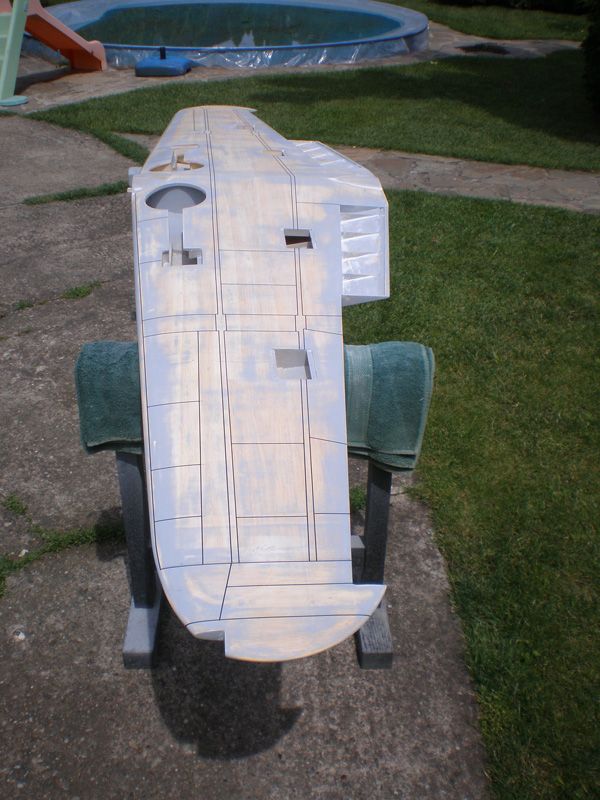
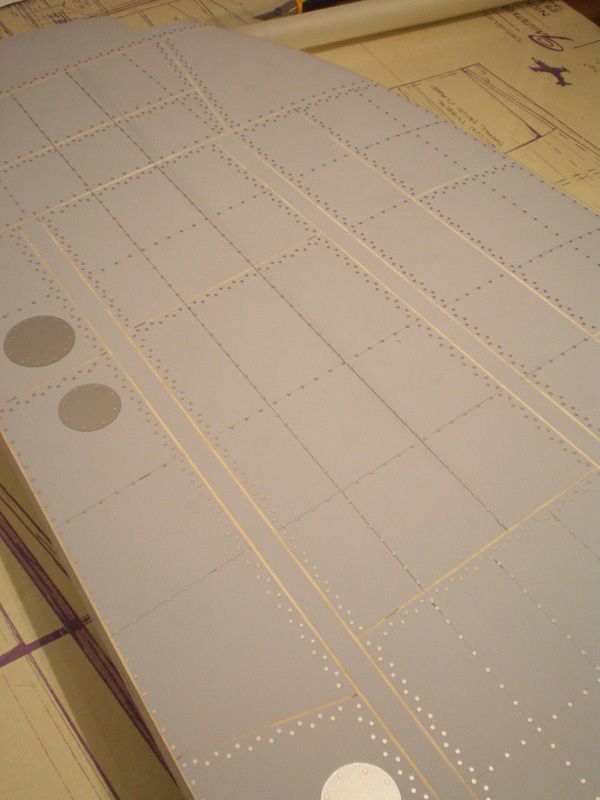
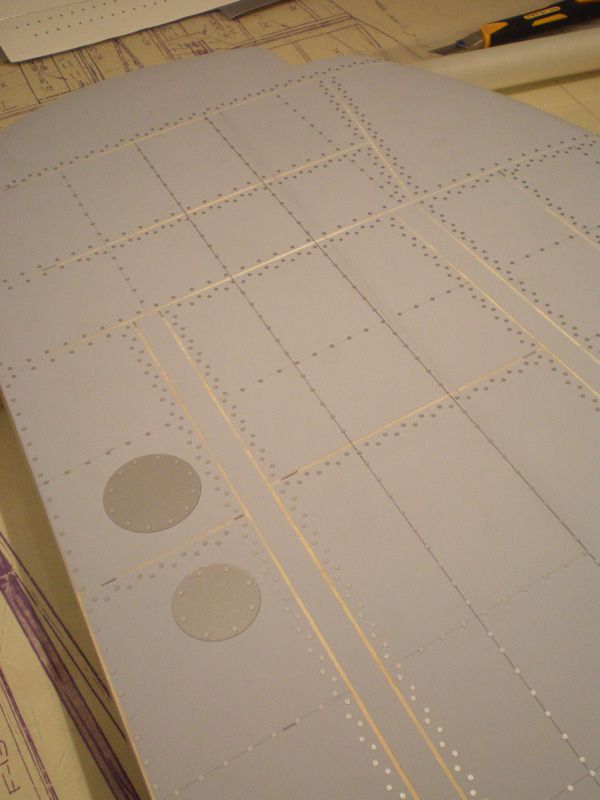
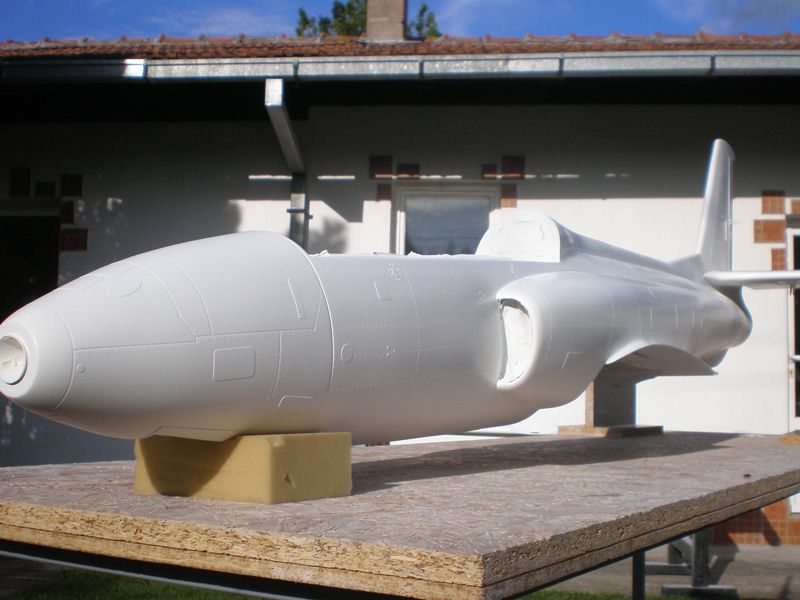
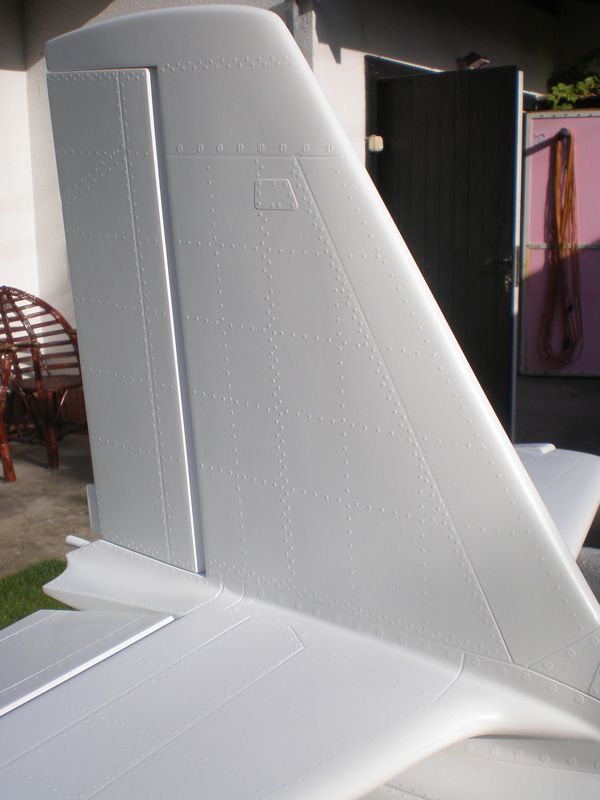
After small pause in this thread, here is Zero again. In meantime I almost finish work on paint job on Galeb which is now on painting clear cote. That give me time to work a little on upper wing side. Bottoms are finished...
Because picture tell 1000 words, here they are...

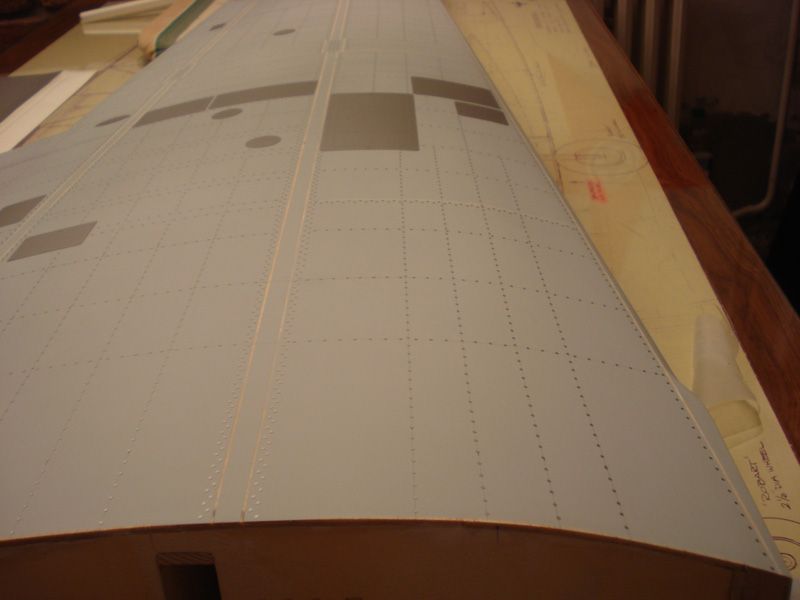
In next few days other wing half will be finish also and than I will start with applying panel lines on fuselage...
Regards from Serbia
Mirce
Because picture tell 1000 words, here they are...
In next few days other wing half will be finish also and than I will start with applying panel lines on fuselage...
Regards from Serbia
Mirce