


150% enlarged WingontheWeb HO-229
 11-17-2012, 08:39 PM
#126
Very impressive. I understand the negative aspects. Same with machine tooling. Cannot exceed 90 degrees. An are would be where the engine radius meets the wing.
As this is one of my favorite German planes, and considering the amount of work you are putting into this, I hope your customer will bring (or maybe you) a model to market. I think that this particular design has more historical importance than many have realized. What a great model to have.
I look forward to the flying of this model.
 11-17-2012, 09:21 PM
#127


ORIGINAL: vertical grimmace
Very impressive. I understand the negative aspects. Same with machine tooling. Cannot exceed 90 degrees. An are would be where the engine radius meets the wing.
As this is one of my favorite German planes, and considering the amount of work you are putting into this, I hope your customer will bring (or maybe you) a model to market. I think that this particular design has more historical importance than many have realized. What a great model to have.
I look forward to the flying of this model.
I agree with ya.. This is a project financed by myself and the guy in the last photo. We have been splitting everything 50/50 for the materials aspect, and providing our own electronics/power systems. We do plan to bring it to market but probably not in large volume. It will essentially be a made to order thing after the first 3 or 4 are sold. The price range per unit is pretty much narrowed down, we are just waiting to get the first two molded so we know exactly how much materials and consumables we go through so we can set the pricing exact.
Thomas
11-17-2012, 10:39 PM
#128

My Feedback: (106)
Ok Invert. Get out the Vid Cam time. Ha. Would be nice to see the first few steps on the lite first few layers of cloth. This bird is gonna be unreal. Keep up the good work.
P. S. know how hard it is to video and lay-up at the same time so understand if ya don't.
P. S. know how hard it is to video and lay-up at the same time so understand if ya don't.
 11-24-2012, 06:22 PM
#130
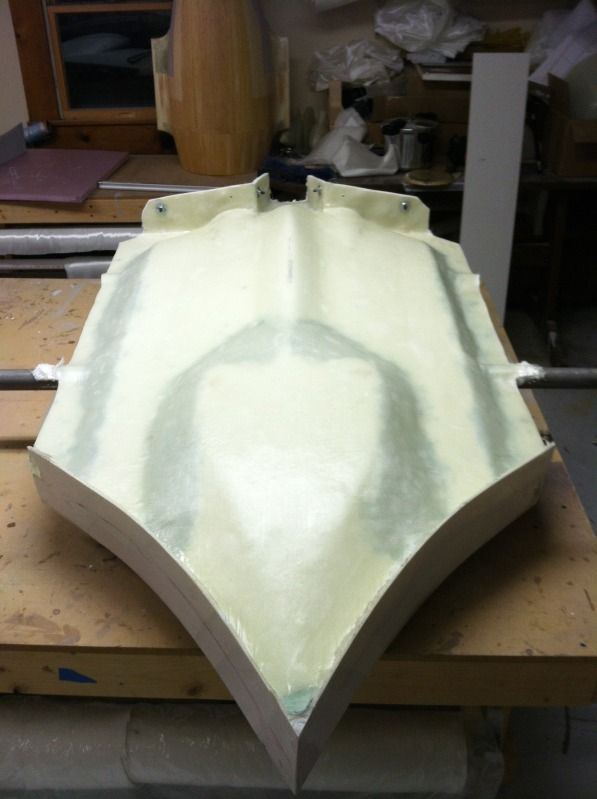
Top is molded. Tomorrow we will pop the partings planes around the inlets off and mold those, so the top will be completely molded by the end of the weekend. Next weekend, we will be doing the bottom. So by Dec. 1 we will have the center section completely molded.
Once completely molded, the mold will sit for 7 days to fully cure and while that happens, I will begin working on the internal structure "masters" so we can easily copy-cut multiples of the same parts.
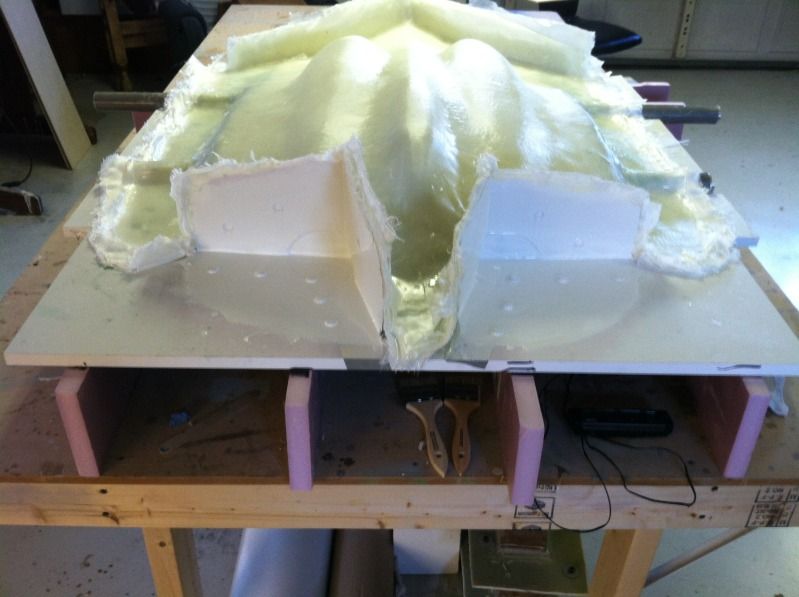
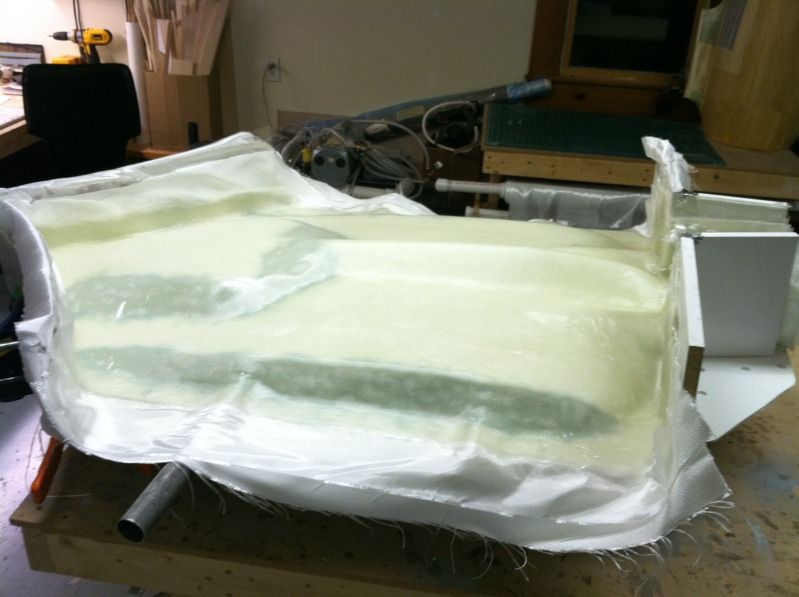
Beginning of the molding process, the first layer of white surface resin has been applied:
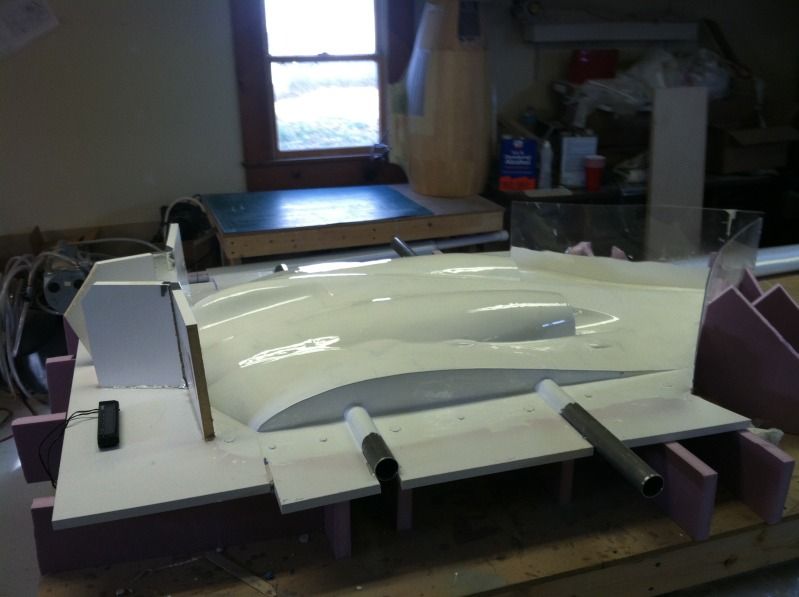
13 hours of work later, The top is nearly done (just the inlets left).


Once completely molded, the mold will sit for 7 days to fully cure and while that happens, I will begin working on the internal structure "masters" so we can easily copy-cut multiples of the same parts.
Beginning of the molding process, the first layer of white surface resin has been applied:
13 hours of work later, The top is nearly done (just the inlets left).
11-25-2012, 07:16 AM
#134

Looking quite impressive Thomas, I'm sure you would find a market for it easily, if that's what you choose to do. Can't wait to see the first one fly. Do you expect to have to use thrust tube extensions like some of the smaller ones use?
Casey
Casey
11-25-2012, 08:26 AM
#135
Casey,
We to not have to use the extension tubes, but that is an open ended question.
Personally, i feel no one really knows what is going on with the hortens and the need for the extension tubes.
Some say its bc of the fan exhaust swirling, some say they act as vertical fins, some say its an air pressure issue over the bat tail.... The theories go on and on. To make matters even more interesting, no one has experimented (that i know of) to find out why the edf models need the extension tube.
We plan to do a good bit of experimenting to test some of the theories. Once the testing is done, hopefully we will know the exact reason why and be able to eliminate the extension tubes.
11-25-2012, 04:06 PM
#136
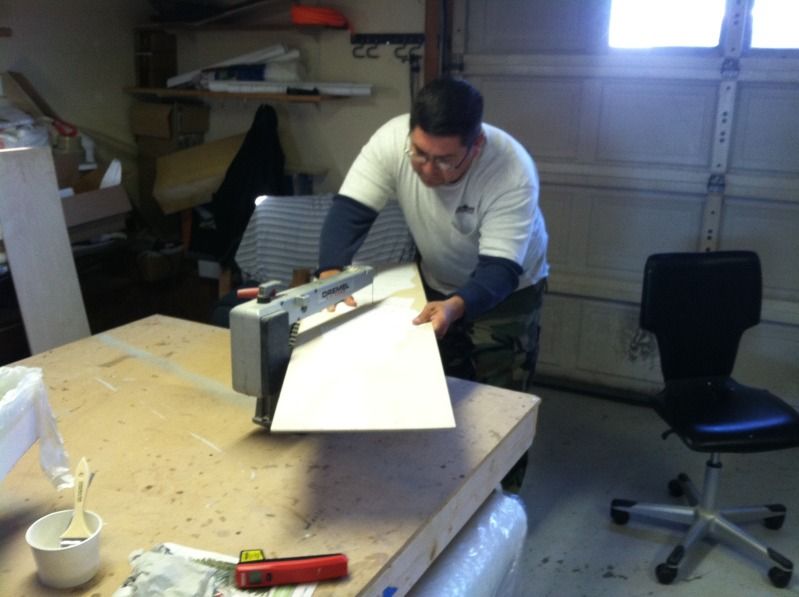
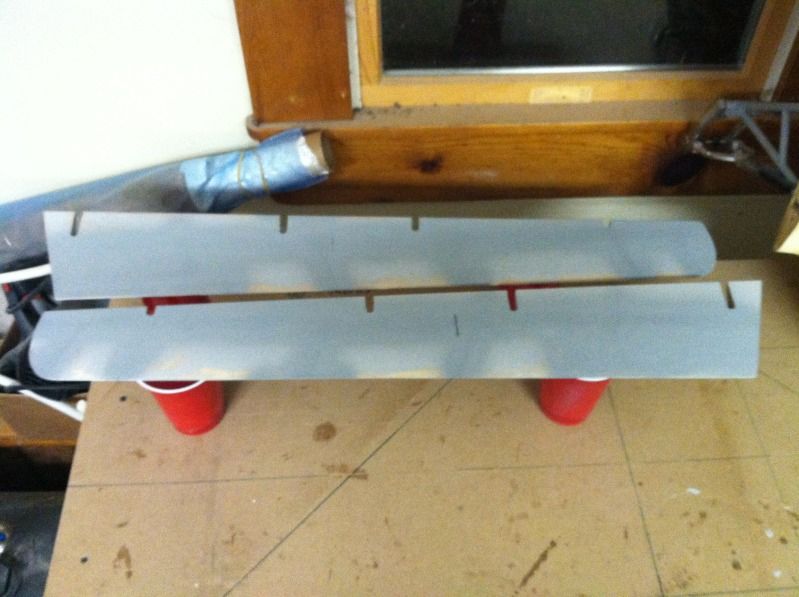
Templates were cut out and glued to some plywood:
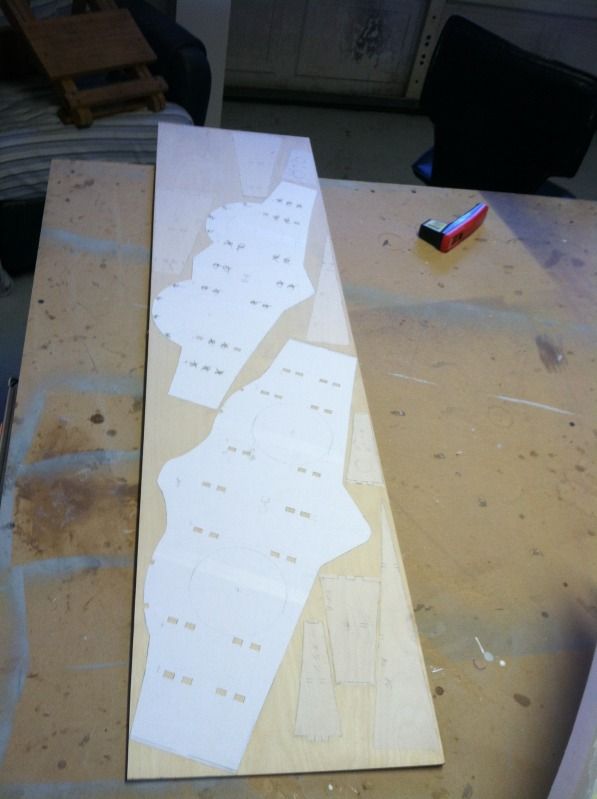
Then my buddy Tom got to cutting out parts while I was doing the inlet molds:
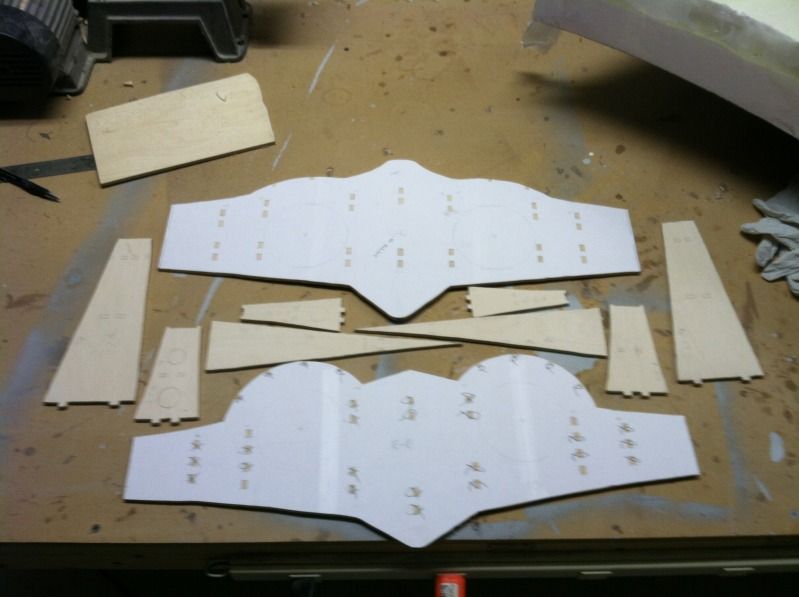
Parts cut to shape. All that is left, is to make the wing tube notch's and figure out the lightning hole/battery tray arrangement:
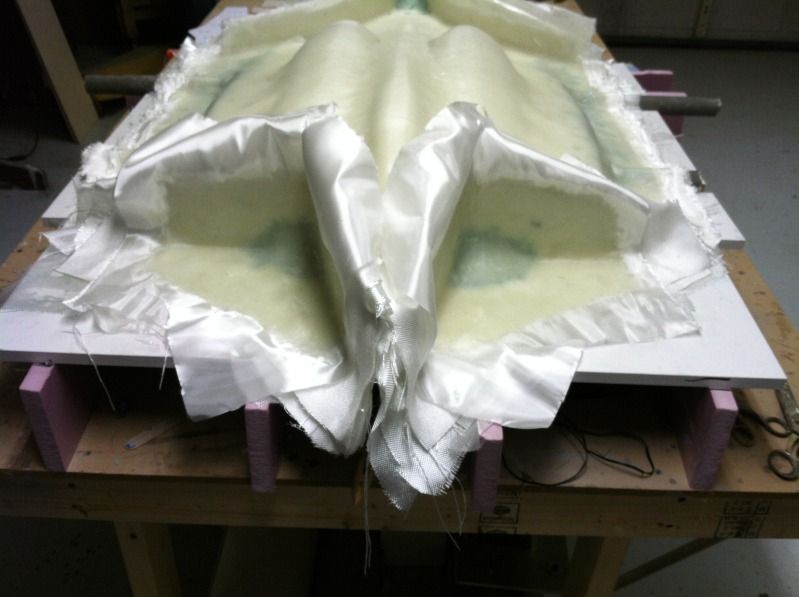
Inlet molds with the first coat of surface resin applied:
Top half of the inlet molds completed:
Then my buddy Tom got to cutting out parts while I was doing the inlet molds:
Parts cut to shape. All that is left, is to make the wing tube notch's and figure out the lightning hole/battery tray arrangement:
Inlet molds with the first coat of surface resin applied:
Top half of the inlet molds completed:
11-26-2012, 06:41 AM
#138
ORIGINAL: invertmast
Casey,
We to not have to use the extension tubes, but that is an open ended question.
Personally, i feel no one really knows what is going on with the hortens and the need for the extension tubes.
Some say its bc of the fan exhaust swirling, some say they act as vertical fins, some say its an air pressure issue over the bat tail.... The theories go on and on. To make matters even more interesting, no one has experimented (that i know of) to find out why the edf models need the extension tube.
We plan to do a good bit of experimenting to test some of the theories. Once the testing is done, hopefully we will know the exact reason why and be able to eliminate the extension tubes.
Also, I agree Glazier on the potential market for a fiberglass kit of the Ho-229! Personally, I would be very interested.
11-28-2012, 07:01 PM
#139
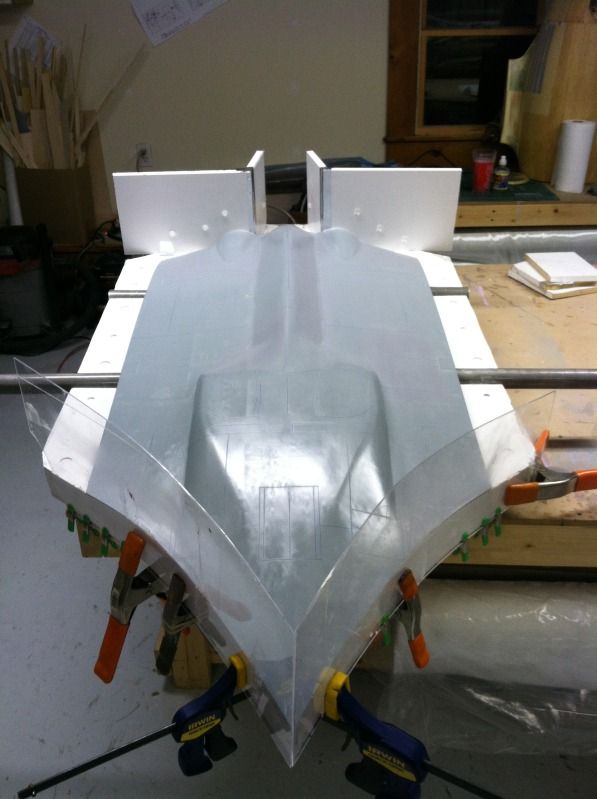
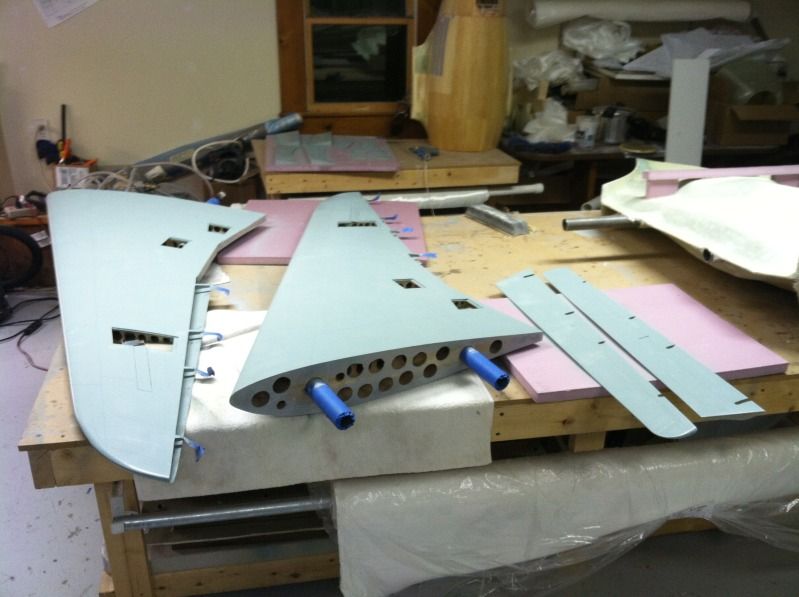
Flipped the mold and trimmed the flanges today, then waxed the entire thing and put in the inlet parting planes.. We are ready to start the molding of the bottom on saturday.

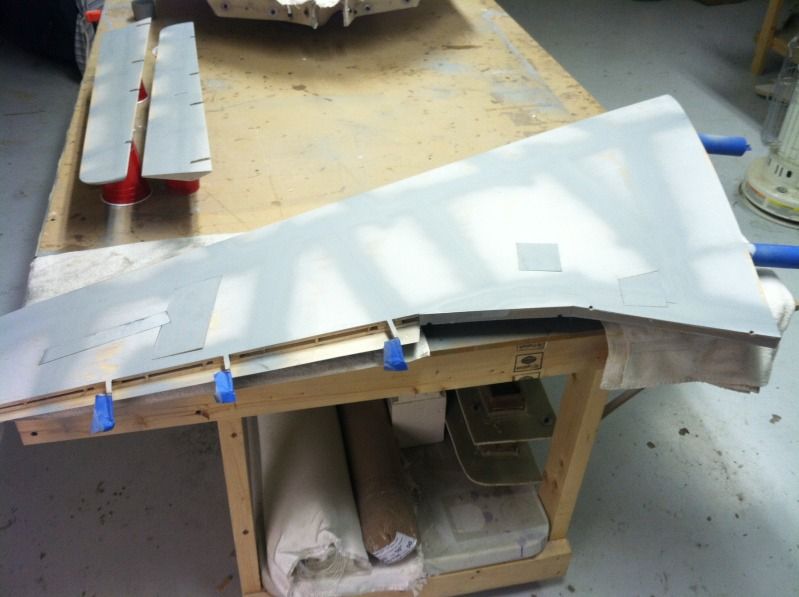
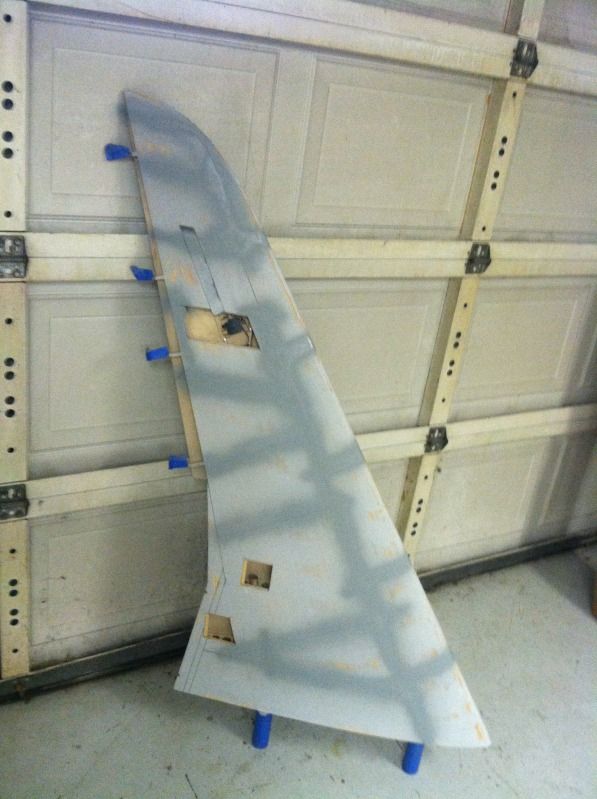
I also have 3/4 of the panels lines drawn onto the outer wing panels. All that is left, is the panel lines on the bottom of one wing panel:
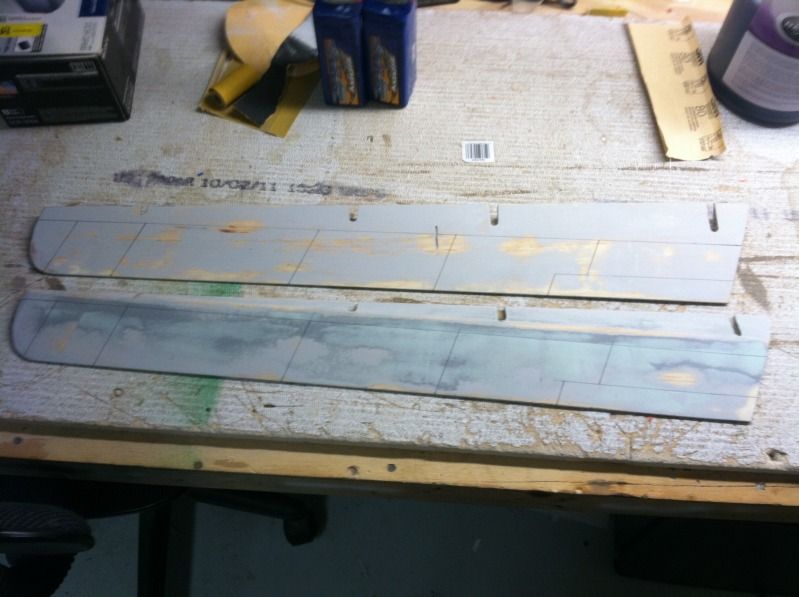
I also have 3/4 of the panels lines drawn onto the outer wing panels. All that is left, is the panel lines on the bottom of one wing panel:
11-28-2012, 07:20 PM
#140
ORIGINAL: IL2windhawk
Good luck with the tests! Hopefully the larger size of the aircraft will help to add stability. If the cause of the problem is unknown, what are the symptoms? Is the instability in the yaw axis? Maybe a gyro tied to your spoilers would help.
Also, I agree Glazier on the potential market for a fiberglass kit of the Ho-229! Personally, I would be very interested.
ORIGINAL: invertmast
Casey,
We to not have to use the extension tubes, but that is an open ended question.
Personally, i feel no one really knows what is going on with the hortens and the need for the extension tubes.
Some say its bc of the fan exhaust swirling, some say they act as vertical fins, some say its an air pressure issue over the bat tail.... The theories go on and on. To make matters even more interesting, no one has experimented (that i know of) to find out why the edf models need the extension tube.
We plan to do a good bit of experimenting to test some of the theories. Once the testing is done, hopefully we will know the exact reason why and be able to eliminate the extension tubes.
Casey,
We to not have to use the extension tubes, but that is an open ended question.
Personally, i feel no one really knows what is going on with the hortens and the need for the extension tubes.
Some say its bc of the fan exhaust swirling, some say they act as vertical fins, some say its an air pressure issue over the bat tail.... The theories go on and on. To make matters even more interesting, no one has experimented (that i know of) to find out why the edf models need the extension tube.
We plan to do a good bit of experimenting to test some of the theories. Once the testing is done, hopefully we will know the exact reason why and be able to eliminate the extension tubes.
Also, I agree Glazier on the potential market for a fiberglass kit of the Ho-229! Personally, I would be very interested.
The stability issue is from what I can find figure out, is yaw instability. I have my own thoughts on the issue's and i'm not entirely sure its related to the EDF's air exhaust. I personally think the tube extensions are acting more like a vertical fin. I say this, b/c i've done allot of research as of late on the entire fleet of horten wings and the general consensus is they were all well behaved and only had yaw issues at low static margin's.. So if the full-size 229 had decent yaw stability, it is probably related to speeds flown. The full-scale was intended to have a take-off and landing speed of 90mph. At 90mph, I have no doubt the airplane was very stable.
So my thoughts, are that the turbine version HO-229's exhaust plume's speed acts like a vertical fin. Since the EDF's don't have near the exhaust plume velocity as a turbine, they need the thrust tubes to make up for it. So if you can fly the EDF 229 quick enough, you could possibly eliminate the thrust tube extensions.. The question is, how fast is fast enough, and how slow is to slow..
Another thing that has me thinking the above, is the characteristics of the EDF models when they became uncontrollable without the use of the thrust tubes. They resemble a twin engine aircraft with the critical engine inoperative and reaching there Vmc speed, in that the model rolls and yaws towards the inoperative engine..
As far as sticking a gyro on the drag rudders, thats not possible. The way they are programmed, one drag rudder is on the rudder channel and the other is on an Aux channel and they are mixed together. The rudder channel has its atv as 100% to the left and 0% to the right. so when left rudder is selected, the left drag rudder extends and the right one does nothing. When right rudder is selected, through the mix the right drag rudder extends, but the left rudder does nothing.
I decided to do it this way for 2 reasons.
1- It gets rid of any springs or rubber bands needed to keep the drag rudders closed
2- It allows us to use the drag rudders as speed brakes by extending them both (another mix in the radio that is activated by a slider on the transmitter).
The only down-side to it is, you can't use a single gyro for yaw stability, unless they make a gyro that allows 2 servo's to be plugged into and setup to operate the same as the radio programming (so far I haven't found one). so in order to use a gyro, you've got to have 2, one for each drag rudder and that is only possible if you can eliminate the deflection to one direction.
11-28-2012, 11:07 PM
#143
Thanks for explaining your thoughts about the yaw instability. That was really interesting how you described the turbine wash as having a stabilizing effect. Makes sense.. as the aircraft moves through the undisturbed air, the wake behind it influences the free stream around the vehicle, and the thrust wash acts like a v-stab. I hope your right! If so, it's sort of like solving a mystery surrounding the Horton design.
I have a ~70" Klingberg wing that I love to slope soar. Its incredibly fun to fly and quite stable at high speeds. It has tiny little tip-mounted v-stabs (~3" tall). Just a random thought, but if you have doubts about stability, you could fairly-easily install retractable v-stabs. They might help during the test flight phase, if only to get her up to speed and altitude before you retract them. And then they would always be there afterwards for emergency recovery if your plane departed controlled flight. Like I said, it doesn't take much to stabilize my 70" wing, even at landing speeds.
I have a ~70" Klingberg wing that I love to slope soar. Its incredibly fun to fly and quite stable at high speeds. It has tiny little tip-mounted v-stabs (~3" tall). Just a random thought, but if you have doubts about stability, you could fairly-easily install retractable v-stabs. They might help during the test flight phase, if only to get her up to speed and altitude before you retract them. And then they would always be there afterwards for emergency recovery if your plane departed controlled flight. Like I said, it doesn't take much to stabilize my 70" wing, even at landing speeds.

 12-02-2012, 05:15 PM
#145
Center section is completely molded now! Wed. is the big day that we will pop the mold apart and remove the plug. My partner in crime (Tom) is going out of town next weekend, so while he is out of town, i'm going to take the opportunity to lay up the gear door and canopy frame molds. I'll also make up the vacuum form for the clear canopy, and clean and wax the molds.

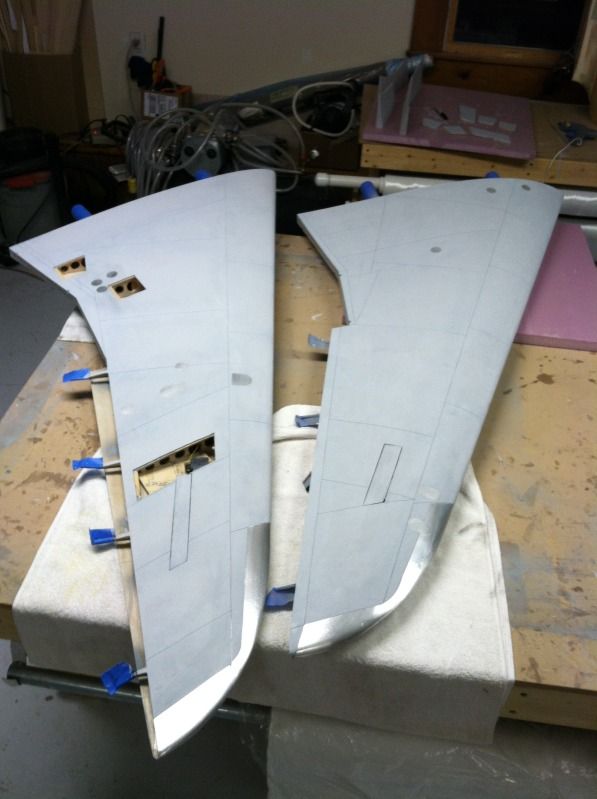
Also, at some point through the madness of the past 3 weeks, I ended up loosing the servo hatch's. So instead of just spending the 2 hours or so to make up new ones, I proceeded to tear the shop apart and search for them everywhere over the next three days... Not going to admit defeat, I finally gave up and spent 2 hours and made new better ones. lol
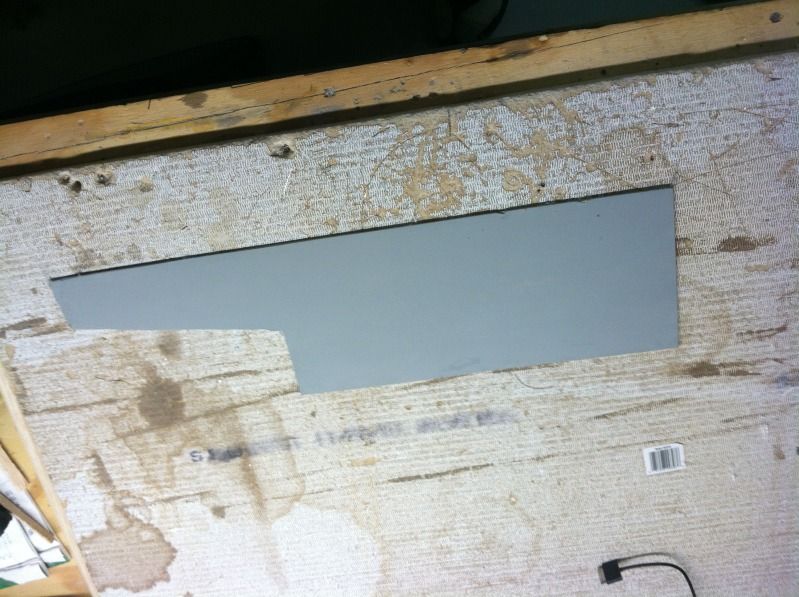
hatch material blank (3/32" balsa glassed on both sides with 2oz glass).
Then once all the hatch's were cut to size and fit, there holding tongues attached, they where placed in there openings. Then all the panel (I mean seam) line tape was applied and a couple of coats of filler primer sprayed over them. I'll put another coat of primer over the seam line tape, and then a cover coat of warbird colors primer, then I'm ready to add color! All thats left on the wing panels other than paint, is flap and elevon servo mounts.. I could have these things ready to fly in about a week or 2.
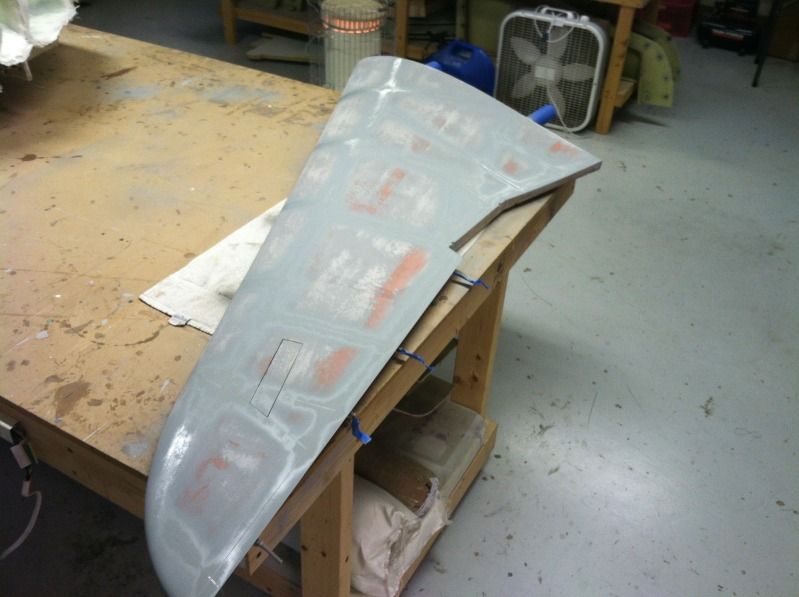
the elevon seam line tape was applied and painted to:
Also, at some point through the madness of the past 3 weeks, I ended up loosing the servo hatch's. So instead of just spending the 2 hours or so to make up new ones, I proceeded to tear the shop apart and search for them everywhere over the next three days... Not going to admit defeat, I finally gave up and spent 2 hours and made new better ones. lol
hatch material blank (3/32" balsa glassed on both sides with 2oz glass).
Then once all the hatch's were cut to size and fit, there holding tongues attached, they where placed in there openings. Then all the panel (I mean seam) line tape was applied and a couple of coats of filler primer sprayed over them. I'll put another coat of primer over the seam line tape, and then a cover coat of warbird colors primer, then I'm ready to add color! All thats left on the wing panels other than paint, is flap and elevon servo mounts.. I could have these things ready to fly in about a week or 2.
the elevon seam line tape was applied and painted to:
12-03-2012, 06:09 PM
#146
Since we can't split the molds till Wed. (I like to give them a full 3 days to fully cure) I had to find something to do....
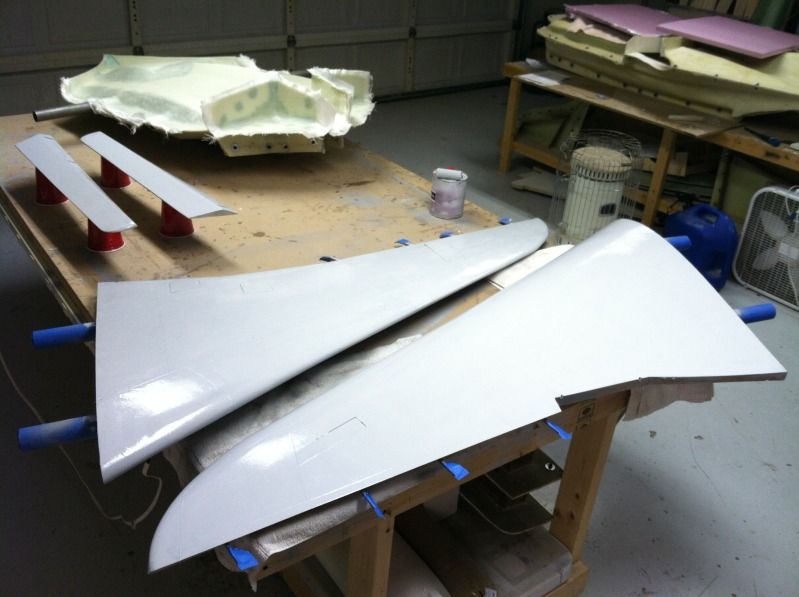
So, the outer wing panels, elevons and flaps were all primed for the last time. Gotta hit these with some 320 grit sandpaper and then i'll start spraying colors..
I also went ahead and trimmed all the flanges on the molds (where I could get to, IE not around the wing tubes). I also drilled the holes for the holding bolts around the inlet lip flanges and bolted those together.
Tomorrow i'll probably sand the outer panels and maybe spray the bottom wing panel with color.. The top side camo i'm still debating on how to paint..
12-04-2012, 06:49 PM
#150
I had plans to paint when I got home.. but I forgot i needed to do some flite-metal panels and the wingtips....
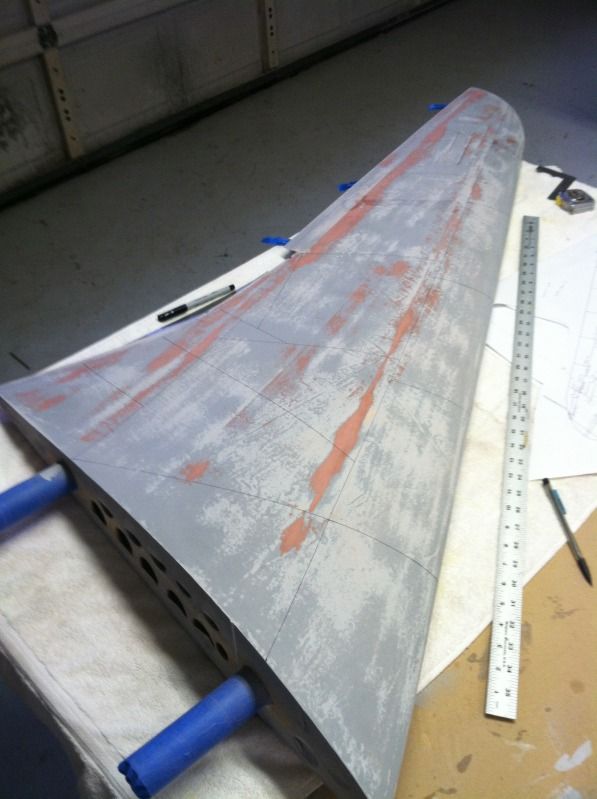
So, made the flite-metal panels for the top and bottom outer wing panels:
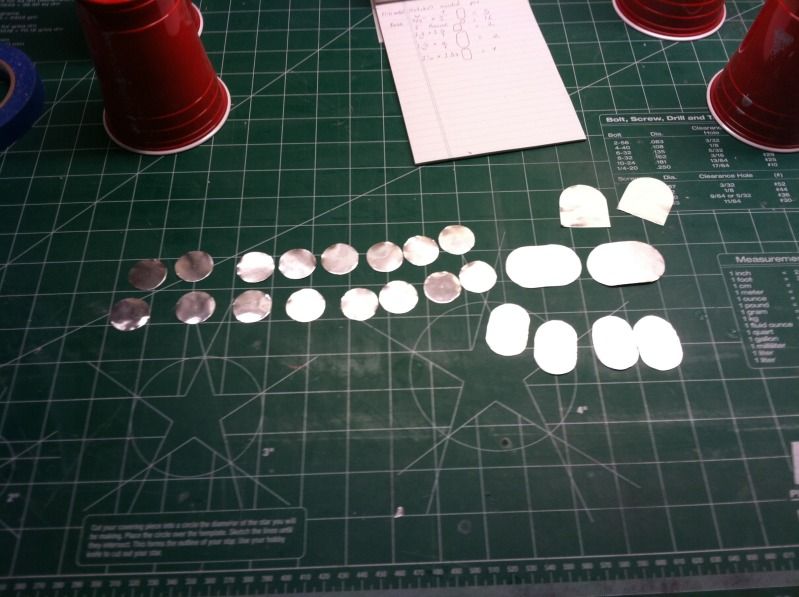
Then sanded the wing panels with some 320 grit, and pulled all the seam line tape:

Then I installed all the flite-metal panels... something i didn't realize until recently, apparently the wing tips and the curved portion of the wings were metal on the full size.. sooo they got flite-metal'd as well. After the thing flies, i'll cut out the nav lights and make up some lenses and install the light:
Then I made dinner....
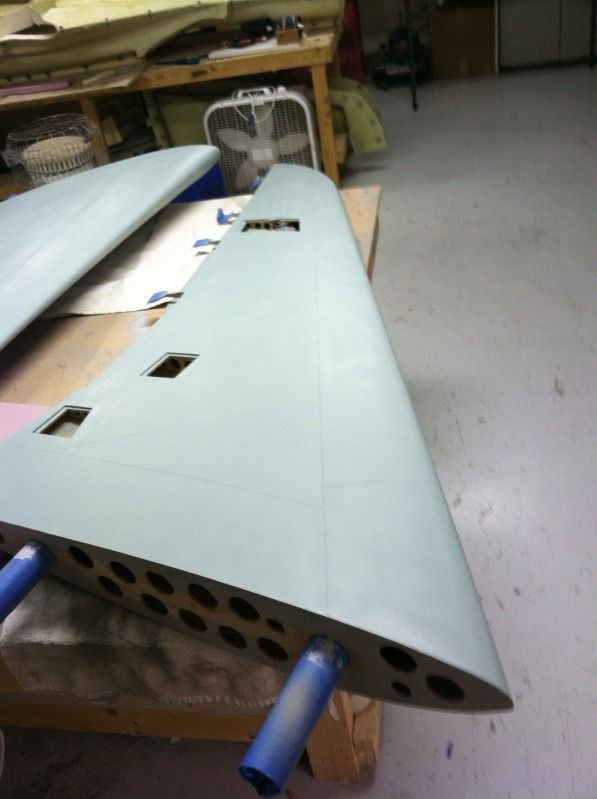
Then came back out and sprayed the RLM-76 color on the bottom of the wing panels, elevons, servo hatch's and the flaps... I've said it before and I will say it again.... I LOVE WARBIRD COLORS! Everything i painted tonight took THREE OUNCES! of paint. I have never had such a light color cover so well with so little paint, unless it was WBC. This stuff is awesome! I bought a quart of the RLm76 and i'm not even half way through it yet and this is the 2nd airplane i've painted.. and on the first plane, i mixed up 8-10ounces of paint and never sprayed 3/4 of it!
And in this photo you can just Barely make out the seam lines:
Tomorrow we split the mold and I'll start spraying the color on the top of everything but the flaps.. As these still need their TE trimmed to the final curve.
There really is no "scheme's" to choose from for this thing since it was still in the R&D stage.. so the wonderful Flight-sim crowd has come up with some cool ones.. The one i'm going to sort of replicate, is a winter camo scheme.. what I mean by sort of, is i'm going to use the late war summer Camo colors (like whats on my FW-190) and over-spray them with a white wash and wear the white-wash to give a scheme that looks similar (but different) to this:

So, made the flite-metal panels for the top and bottom outer wing panels:
Then sanded the wing panels with some 320 grit, and pulled all the seam line tape:
Then I installed all the flite-metal panels... something i didn't realize until recently, apparently the wing tips and the curved portion of the wings were metal on the full size.. sooo they got flite-metal'd as well. After the thing flies, i'll cut out the nav lights and make up some lenses and install the light:
Then I made dinner....
Then came back out and sprayed the RLM-76 color on the bottom of the wing panels, elevons, servo hatch's and the flaps... I've said it before and I will say it again.... I LOVE WARBIRD COLORS! Everything i painted tonight took THREE OUNCES! of paint. I have never had such a light color cover so well with so little paint, unless it was WBC. This stuff is awesome! I bought a quart of the RLm76 and i'm not even half way through it yet and this is the 2nd airplane i've painted.. and on the first plane, i mixed up 8-10ounces of paint and never sprayed 3/4 of it!
And in this photo you can just Barely make out the seam lines:
Tomorrow we split the mold and I'll start spraying the color on the top of everything but the flaps.. As these still need their TE trimmed to the final curve.
There really is no "scheme's" to choose from for this thing since it was still in the R&D stage.. so the wonderful Flight-sim crowd has come up with some cool ones.. The one i'm going to sort of replicate, is a winter camo scheme.. what I mean by sort of, is i'm going to use the late war summer Camo colors (like whats on my FW-190) and over-spray them with a white wash and wear the white-wash to give a scheme that looks similar (but different) to this: