


150% enlarged WingontheWeb HO-229
 09-16-2012, 08:47 AM
#26
Senior Member

Great build this one's on my bucket list and I'm glad to see someone else building
in WOOD I'll be followingthis one for sure best of luck with the build!
Bruce
in WOOD I'll be followingthis one for sure best of luck with the build!
Bruce
 09-19-2012, 06:21 PM
#27

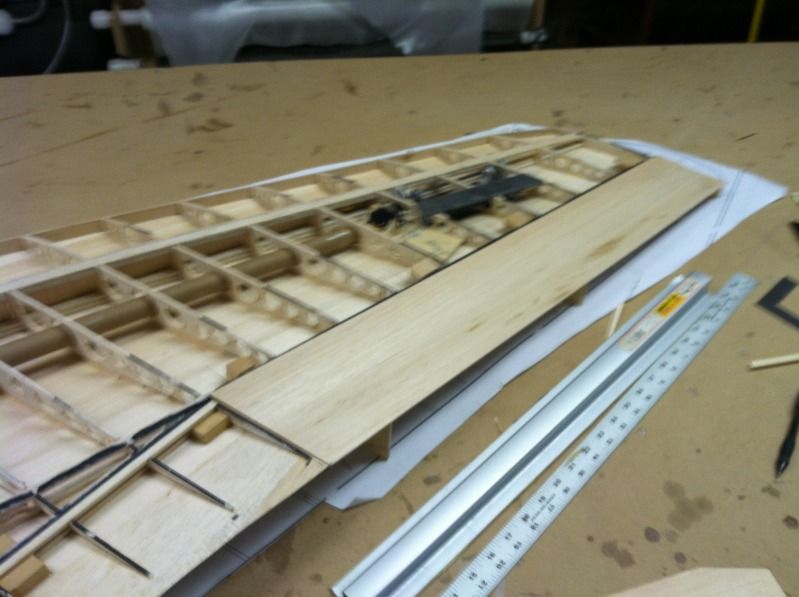
Well, both wings halves are sheeted on the top side and glassed around the upper drag rudder opening. That area will have 2 layers of glass so the opening edges stay nice and crisp.
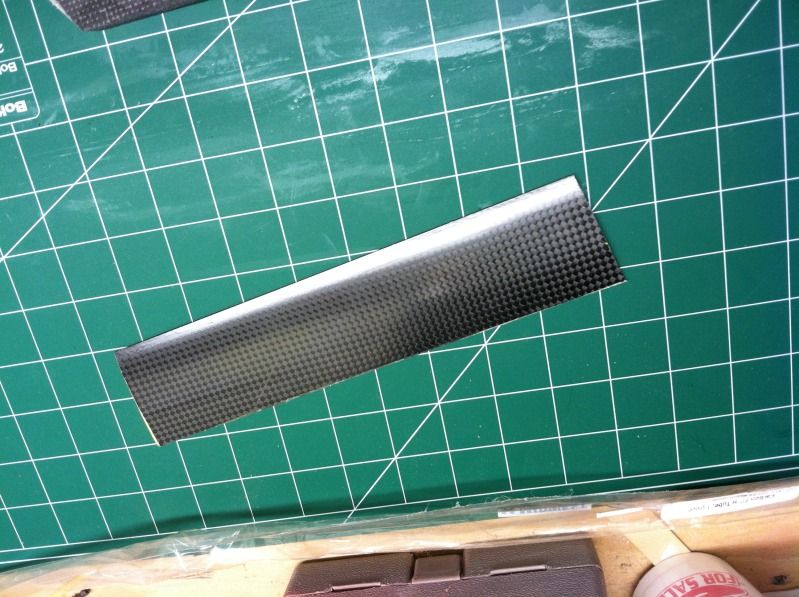
I also decided the carbon and 1/8" ply was a bit overkill and heavy for drag rudder pieces. So, i made a lamination of glass/carbon/3mm airex/carbon/glass. This 12"x24" panel is 1/3 the weight of the ply and carbon piece and stronger. So the blanks for the drag rudders were cut from this. So drag rudder construction will be next.
I also removed one of the wing panels from the building table. It was only 14oz in weight. Not bad for a 52"x36" wing panel. Once they are completely sheeted, sheer webbed and the drag rudders install, i expect each wing panel to be right around 1 1/2 pounds. The goal for the airframe weight is 5lbs, so we are on track to meet that or come very close.
09-20-2012, 08:01 PM
#28
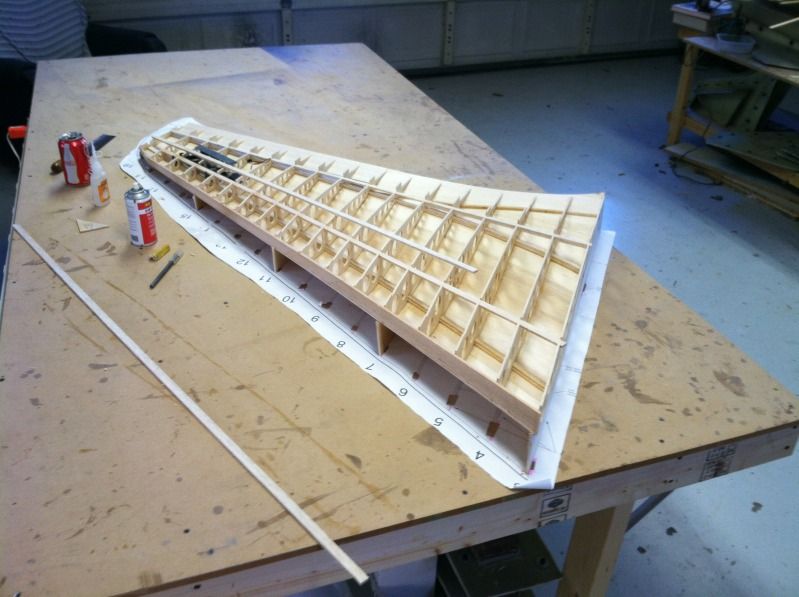
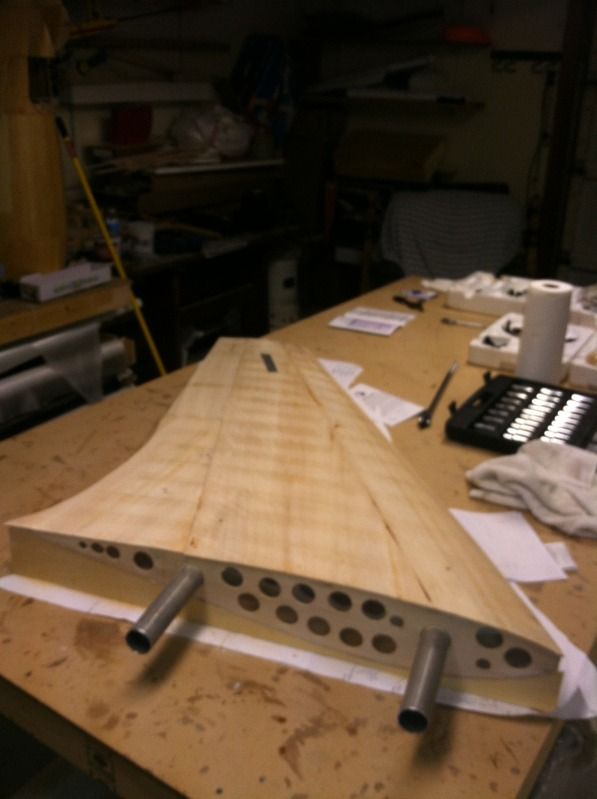
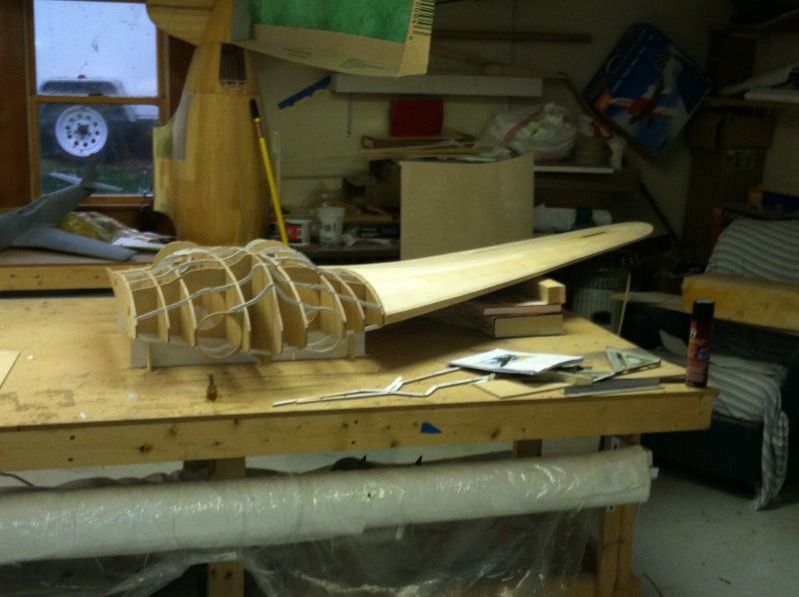
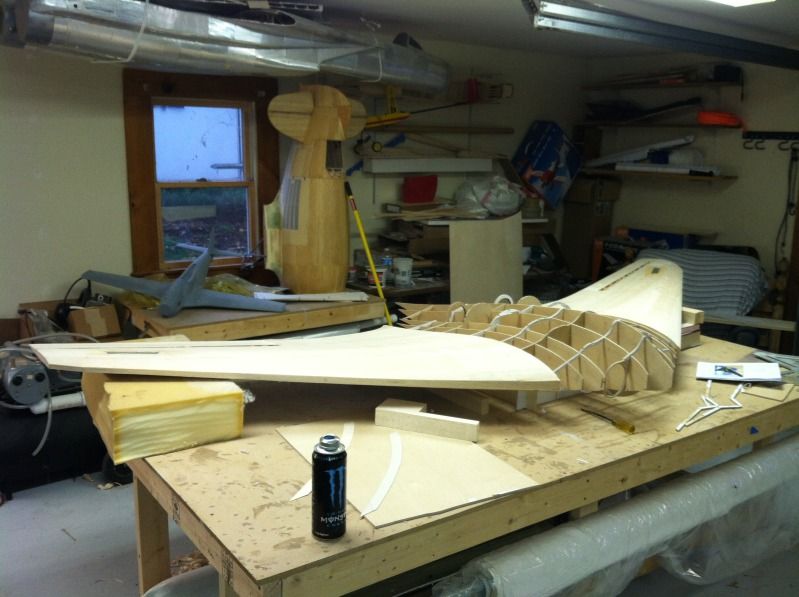
Outer wing panel tops sheeted and ready to be removed from the table:
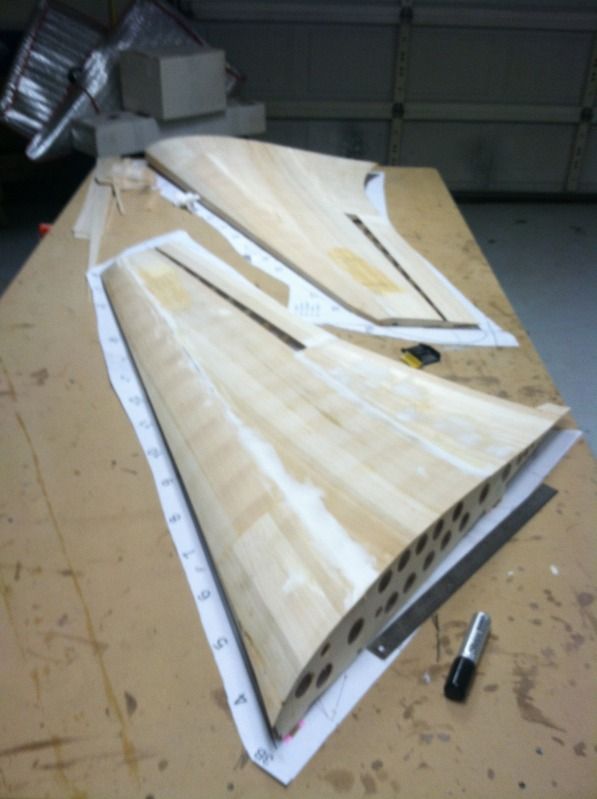
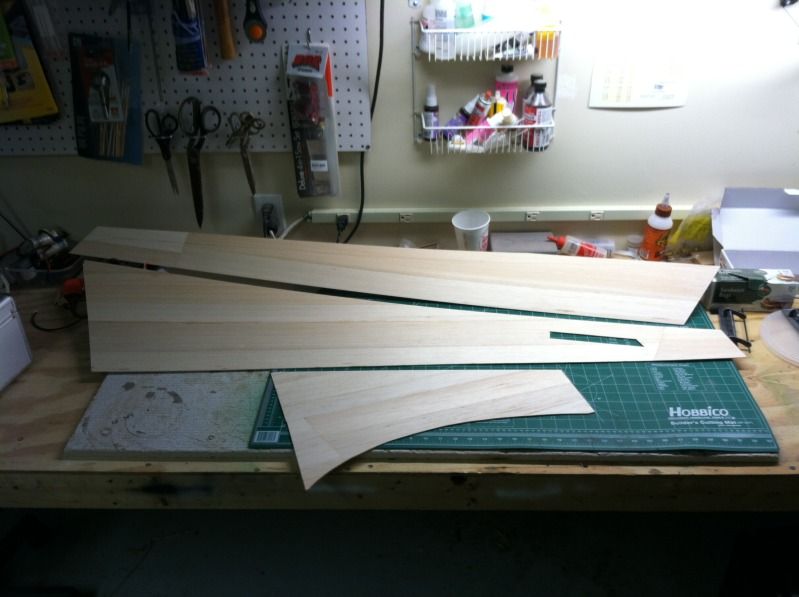
I also made up all the drag rudder parts for both airplanes. All of these parts (38 total) only weight in at 4oz! Thats 1oz per drag rudder assembly per wing panel per plane. Not to shabby, and the parts are SUPER strong.
I've also been working on my little speed 400 speed demon as well. The wing is in the vacuum bag getting its paint job and carbon outer skin glue to the wing cores, and the fuse paint is drying. Here's a shot of the fuse, and the carbon-ized horizontal stab (this is essentially what the wing will look like)

 09-20-2012, 08:15 PM
#30
That makes two... three.. Of us! Now if my buddy would get back from vacation to finish the center section parts, So i can get started sheeting that. Its going to be awesome seeing two of these things together!
I gotta get started on the CAD drawings for the scale nose landing gear strut too... ohh joy
I gotta get started on the CAD drawings for the scale nose landing gear strut too... ohh joy
09-24-2012, 05:46 PM
#31
Bit more work while i'm at home sick with something my wife and son gave me... lol
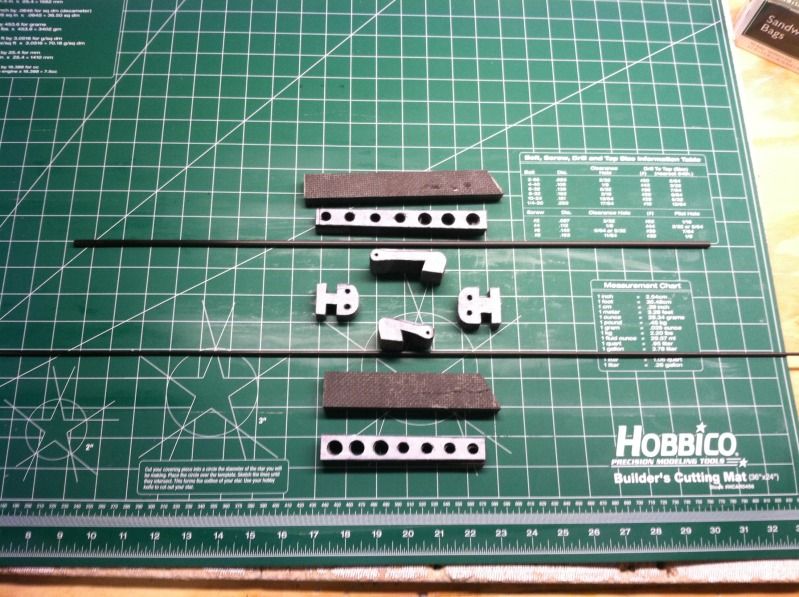
Got the drag rudders constructed:
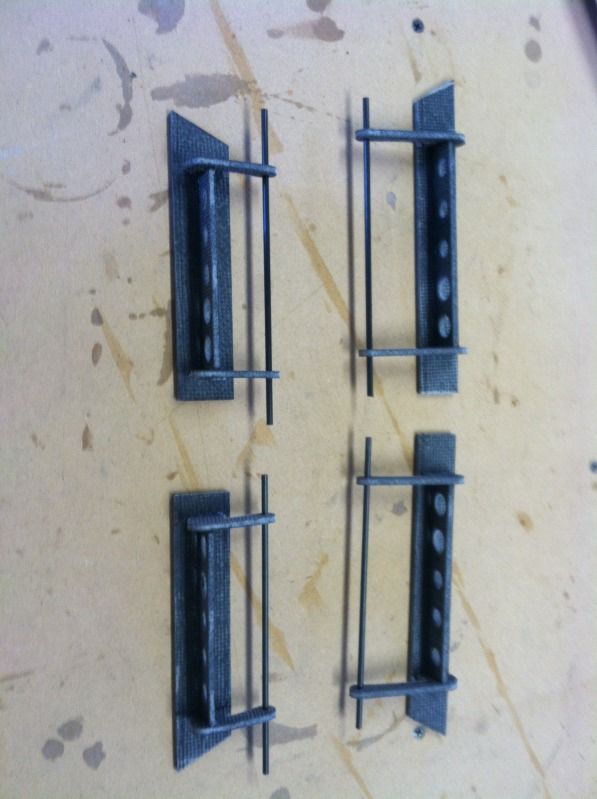
Then started the install of them into the wing.. I have to say, if this was the original sized one, i'd be cursing a storm! These things are pretty complex even at this scale and I can't imagine putting them in a smaller wing.
I plan to have these directly attached (no slip joint style pushrods) to the drag rudders and then program the radio so that they only move in one direction. IE, when left rudder is commanded, the left drag rudders pop out and vice versa.
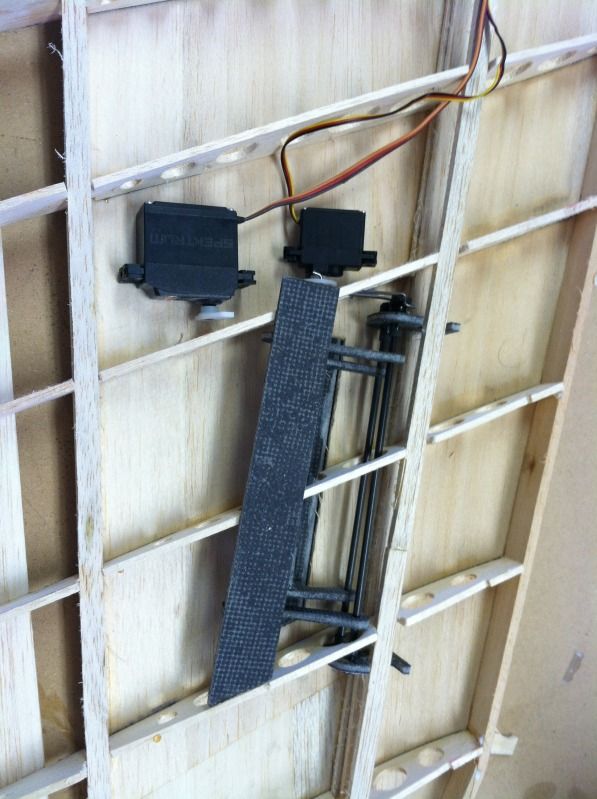
Since the mockup worked well and proved my theory on actuating them will work, I glue the sheeting jigs down on the table so I could begin prepping the bottom of the wing for sheeting.
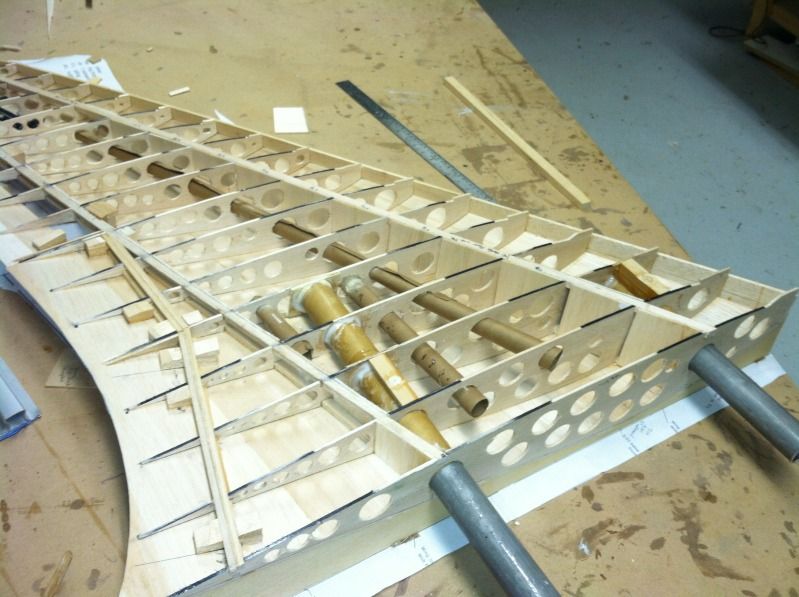
Then I remembered i need the wing tubes and sockets in order to sheet the bottom of the wing. I ordered these things a week ago and still hadn't received them. An hour after calling the vendor, they ended up on my door (apparently the post office was waiting for someone with a big enough vehicle to deliver them, haha).
So, now that I had wing tubes and sockets (and engine stand-offs for another project), I needed to enlarge the 1.5" diameter holes in the wing ribs for the wing tubes so that the sockets could fit. So to do this, two layers of 80 grit greatplanes sticky back sandpaper was wrapped around the end of one of the aluminum tubes:
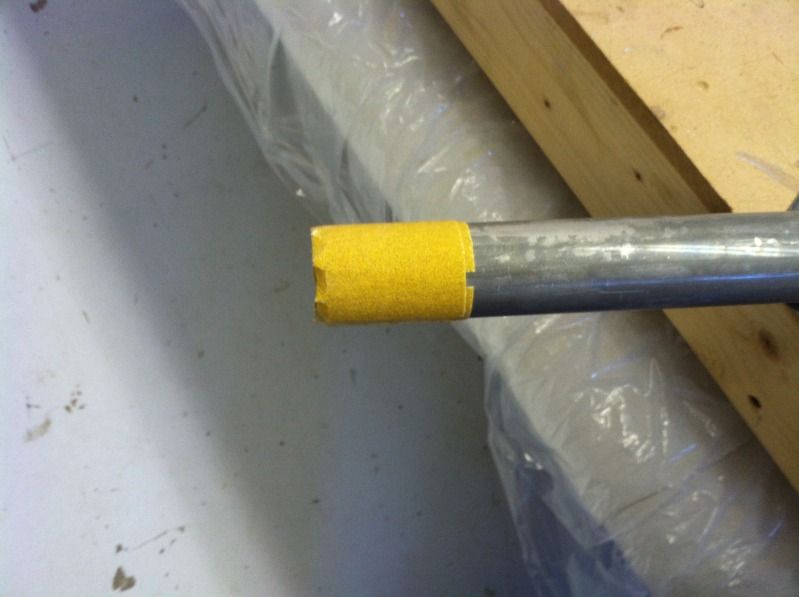
Then the fancy shmancy gritty sandpaper tube tool (patent pending!) was used to enlarge the 1.5" holes to fit the sockets:
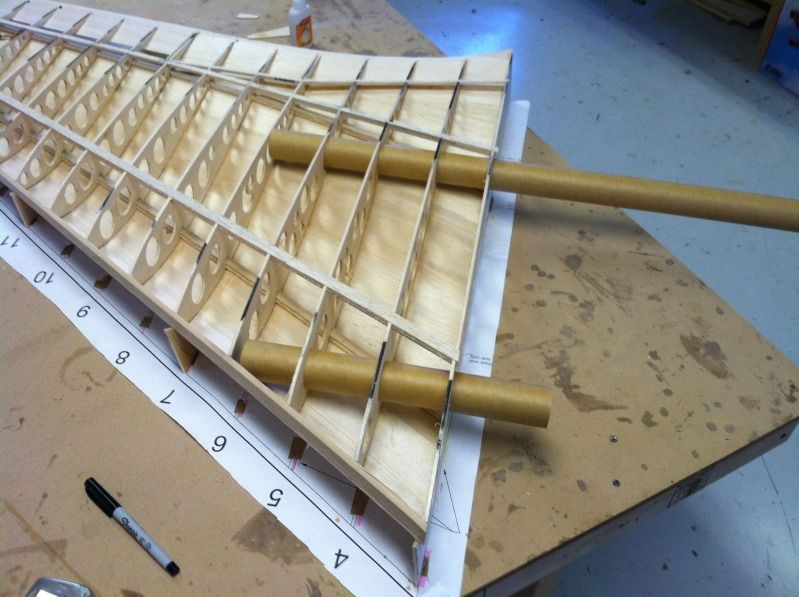
Then I cut a 18" (rear spar) and 12" (fore spar) section of wing tube from the 60" long wing tube and test fit them into the wing sockets:
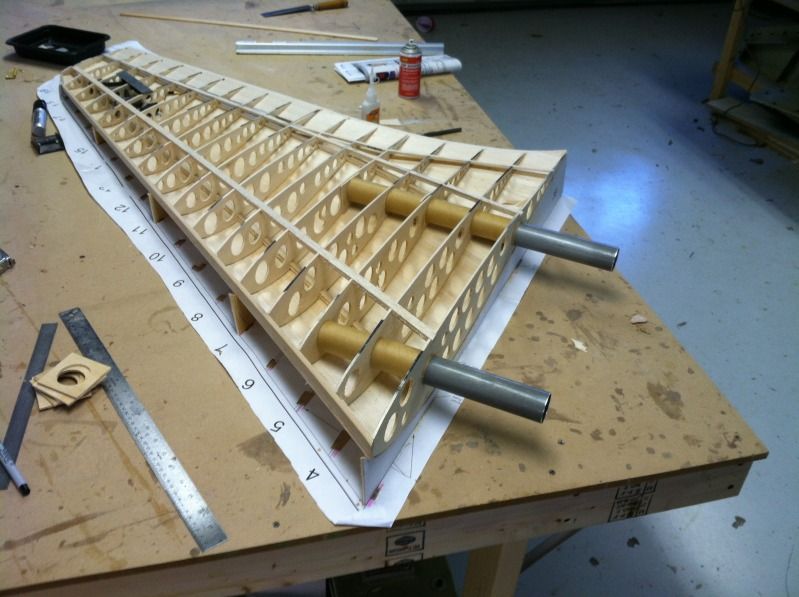
Then some 2 1/2" x 2 1/2" ply squares with a hole in the middle for the wing socket (these are doublers for the balsa wing ribs) were made up and modified to fit in the wing. Then about an hour of checking, fitting, adjusting, checking, etc etc etc I got the tube sockets aligned and ready to be installed so they were epoxied in place. I also used some brown packing paper to make up the servo extension conduits. Each plane will have over 20 FEET of servo wiring in them!
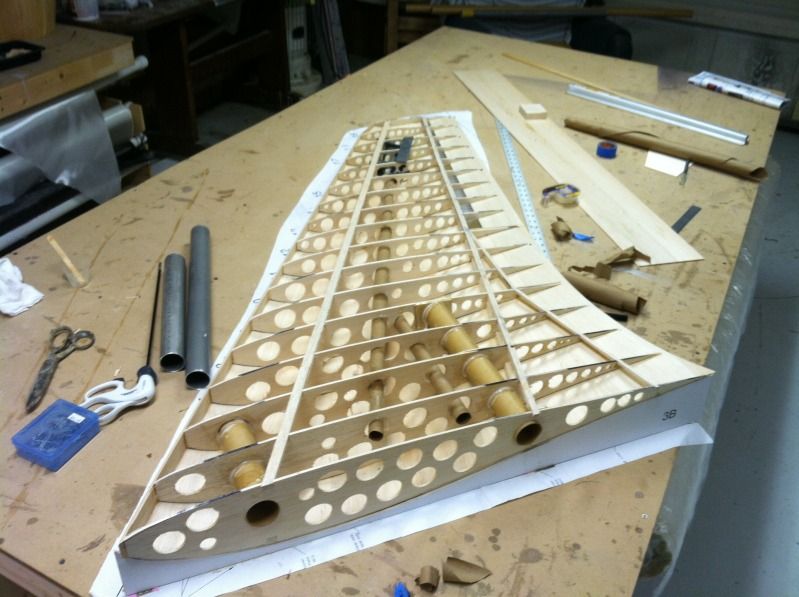
I then installed the sheer webbing on the front of the front spar. I will probably sheer-web the rear spar as well, maybe...
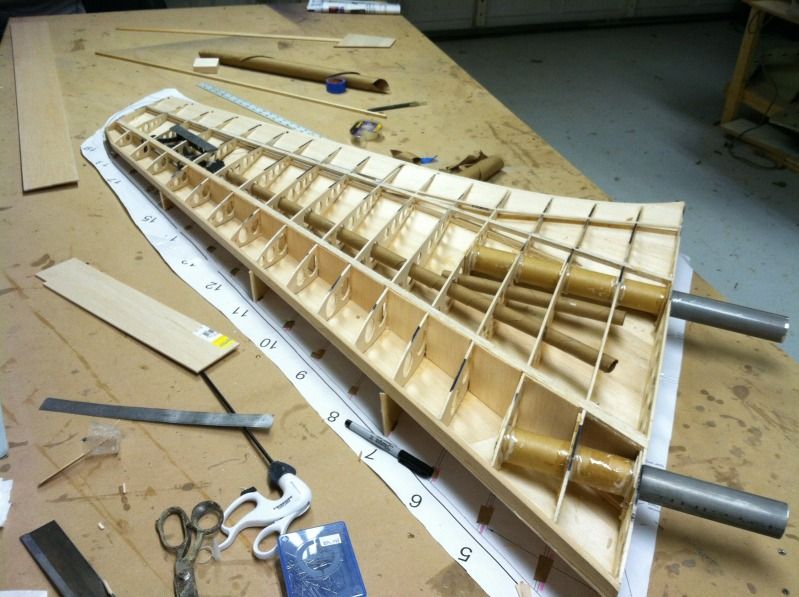
Other than finishing the drag rudder install and some sheer webbing between the wing tube sockets and bottom wing sheeting, this wing is ready for sheeting!
Got the drag rudders constructed:
Then started the install of them into the wing.. I have to say, if this was the original sized one, i'd be cursing a storm! These things are pretty complex even at this scale and I can't imagine putting them in a smaller wing.
I plan to have these directly attached (no slip joint style pushrods) to the drag rudders and then program the radio so that they only move in one direction. IE, when left rudder is commanded, the left drag rudders pop out and vice versa.
Since the mockup worked well and proved my theory on actuating them will work, I glue the sheeting jigs down on the table so I could begin prepping the bottom of the wing for sheeting.
Then I remembered i need the wing tubes and sockets in order to sheet the bottom of the wing. I ordered these things a week ago and still hadn't received them. An hour after calling the vendor, they ended up on my door (apparently the post office was waiting for someone with a big enough vehicle to deliver them, haha).
So, now that I had wing tubes and sockets (and engine stand-offs for another project), I needed to enlarge the 1.5" diameter holes in the wing ribs for the wing tubes so that the sockets could fit. So to do this, two layers of 80 grit greatplanes sticky back sandpaper was wrapped around the end of one of the aluminum tubes:
Then the fancy shmancy gritty sandpaper tube tool (patent pending!) was used to enlarge the 1.5" holes to fit the sockets:
Then I cut a 18" (rear spar) and 12" (fore spar) section of wing tube from the 60" long wing tube and test fit them into the wing sockets:
Then some 2 1/2" x 2 1/2" ply squares with a hole in the middle for the wing socket (these are doublers for the balsa wing ribs) were made up and modified to fit in the wing. Then about an hour of checking, fitting, adjusting, checking, etc etc etc I got the tube sockets aligned and ready to be installed so they were epoxied in place. I also used some brown packing paper to make up the servo extension conduits. Each plane will have over 20 FEET of servo wiring in them!
I then installed the sheer webbing on the front of the front spar. I will probably sheer-web the rear spar as well, maybe...
Other than finishing the drag rudder install and some sheer webbing between the wing tube sockets and bottom wing sheeting, this wing is ready for sheeting!
09-25-2012, 08:07 PM
#33
Still sick... But laying on the couch or web resting makes me feel worse, so out in the shop we go!
First up was getting that crazy contraption they call drag rudders finished.. Thankfully, this side is done, but I have to do it all over again.. JOY.. ughh

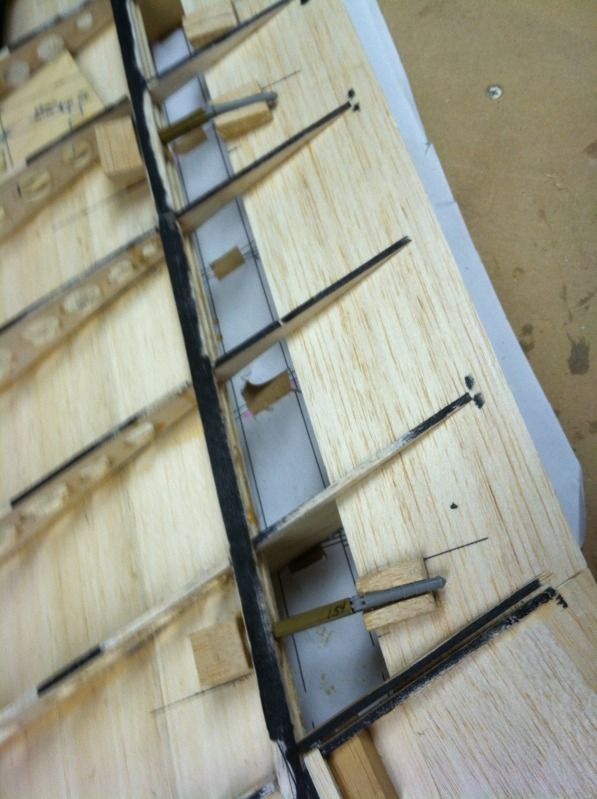
Then after a few hours (like 3 or 4) I got all the hinge and control arm hard points installed.. There are allot in this wing and took forever! In this photo, you'll notice the hinge blocks for the elevons are pre-slotted for the hinges. This should make life a little easier come time to hinge this thing. The blocks in the wing were also pre-drilled.
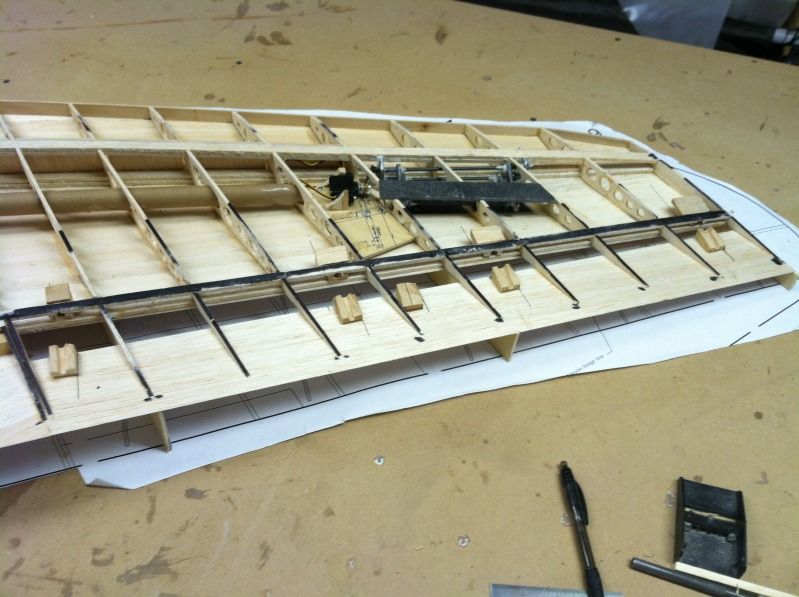
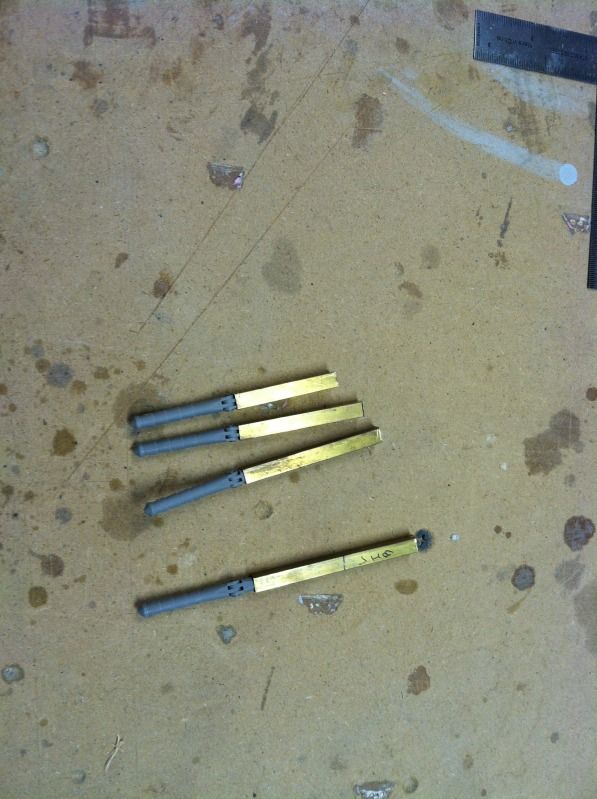
Then I made up the Robart hinge point extensions. These are 5/32" square brass tubing pieces. The robart hinge points will be hysol'd in these and then these hysol'd into the wing panel. I used this same technique on my FW-190 and it worked well, so instead of cutting out all of the custom hinge's that are on the plans, I decided to do it this way.. much easier!
Then the wing was ready for sheeting, or so i thought.. I still have a few hinge hard points for the outer flap to install (i'm beginning to hate hinges..)
Since the elevon was ready for sheeting, it was sheeted:
And then the rest of the wing sheeting pieces for this wing panel was made up. The central section of sheeting was a bit difficult due to having to put the cutout for the lower drag rudder in exactly the right place.
And a short little video showing that the drag rudders actually work. The top drag rudder (the one on the bottom) wasn't hooked up b/c it can't open completely due to the table being in the way:
First up was getting that crazy contraption they call drag rudders finished.. Thankfully, this side is done, but I have to do it all over again.. JOY.. ughh
Then after a few hours (like 3 or 4) I got all the hinge and control arm hard points installed.. There are allot in this wing and took forever! In this photo, you'll notice the hinge blocks for the elevons are pre-slotted for the hinges. This should make life a little easier come time to hinge this thing. The blocks in the wing were also pre-drilled.
Then I made up the Robart hinge point extensions. These are 5/32" square brass tubing pieces. The robart hinge points will be hysol'd in these and then these hysol'd into the wing panel. I used this same technique on my FW-190 and it worked well, so instead of cutting out all of the custom hinge's that are on the plans, I decided to do it this way.. much easier!
Then the wing was ready for sheeting, or so i thought.. I still have a few hinge hard points for the outer flap to install (i'm beginning to hate hinges..)
Since the elevon was ready for sheeting, it was sheeted:
And then the rest of the wing sheeting pieces for this wing panel was made up. The central section of sheeting was a bit difficult due to having to put the cutout for the lower drag rudder in exactly the right place.
And a short little video showing that the drag rudders actually work. The top drag rudder (the one on the bottom) wasn't hooked up b/c it can't open completely due to the table being in the way:
 09-26-2012, 06:31 PM
#36
Thanks man! Its a pretty complex build in that their is allot of stuff left up for the builder to determine. Especially when it comes to flap hinging, etc. Then again, maybe it is just that way on this build b/c we have enlarged the thing so much to where everything needs to be beefed up a bit.
The 90% complete wing panel weights in at 2.8lbs. Completely on track for 3.5lbs per outer wing panel completed, painted and ready for flight!
The 90% complete wing panel weights in at 2.8lbs. Completely on track for 3.5lbs per outer wing panel completed, painted and ready for flight!
09-27-2012, 06:58 AM
#37
Member
Join Date: Aug 2011
Location: Texas TX
Posts: 70
Likes: 0
Received 0 Likes
on
0 Posts
"Its a pretty complex build in that their is allot of stuff left up for the builder to determine."
Well, there goes the chance of me ever doing this one...right out the window! Great work as usual, Thomas!!
Well, there goes the chance of me ever doing this one...right out the window! Great work as usual, Thomas!!
09-27-2012, 08:10 AM
#38


Join Date: Mar 2002
Location: Smithfield,, VA
Posts: 1,013
Likes: 0
Received 0 Likes
on
0 Posts
ORIGINAL: invertmast
Thanks man! Its a pretty complex build in that their is allot of stuff left up for the builder to determine. Especially when it comes to flap hinging, etc.
Thanks man! Its a pretty complex build in that their is allot of stuff left up for the builder to determine. Especially when it comes to flap hinging, etc.
Dash
09-29-2012, 07:53 PM
#39
Well after a day or 2 of building a plug, molding and then trimming and fitting a cooling baffle on my 35% Extra 260, And doing some maintenance / fine tuning on other airplanes in the fleet, I have finally gotten back onto the HO-229.
I started working on this thing about 3-4pm today. It is amazing how much faster the second wing progress' after you have learned it all on the first wing. So, the second wing panel is nearly ready for sheeting. All that is left, is to do the elevon hinging holes, profile the leading edge of the ribs and the sub leading edge, install the drag rudders and the servo mounting plate for the drag/elevon servo.
First up, install the hinge hard points:
Then attach the sheeting jigs to the table and then the wing to the jig:
Then Main spars, shear webbing, servo conduits, and more hinge hard points:
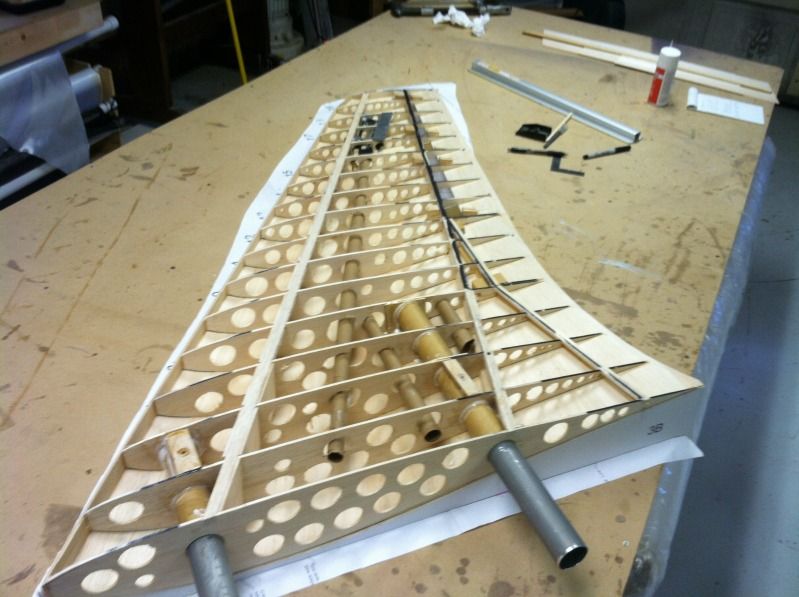
Then align and glue in the wing tube sockets. The white paste you see is epoxy and cotton flock mixture. This makes a very strong and light glue, plus you can make it as thick or runny as you need it:
And then the wing tube anti-rotation/attachment bolt blocks and hardpoint (1/2" hardwood dowel inset into the hard balsa blocks) are epoxied to the wing tubes:
And, I had a wild hair and thought, what the heck.. thats the inspiration for this photo!
So, a couple of hints for the guys building these things:
1. Do NOT install the lower forward wing spar when you are initially framing up the wing. If you do, you will have to remove it later in order to set the correct washout in the sheeting jigs.
2. When you install the Flap sub-spars, install them per the plans. THEN install another pair that is butted up against the TE side of the first set. Don't glue the two sub-spars together though. Actually, better yet, would be to install the upper one about 1/4-3/8" aft of the top sub spar, and the bottom ones about 1/8" aft. Reason for this, is it gives you a more robust edge, so when you go to separate the flaps from the wings, if gives you a known edge to cut to AND gives the flaps some more structure.
3. Use the dubro "snap on" style ball-links for the drag rudders instead of the Z bends like what I show in this build. The ball-links will give you a straighter linkage, and will be easier to remove/install if you ever have to remove/replace the drag rudder servo.
4. I'll add more later, but the above three are pretty much the major ones.
I started working on this thing about 3-4pm today. It is amazing how much faster the second wing progress' after you have learned it all on the first wing. So, the second wing panel is nearly ready for sheeting. All that is left, is to do the elevon hinging holes, profile the leading edge of the ribs and the sub leading edge, install the drag rudders and the servo mounting plate for the drag/elevon servo.
First up, install the hinge hard points:
Then attach the sheeting jigs to the table and then the wing to the jig:
Then Main spars, shear webbing, servo conduits, and more hinge hard points:
Then align and glue in the wing tube sockets. The white paste you see is epoxy and cotton flock mixture. This makes a very strong and light glue, plus you can make it as thick or runny as you need it:
And then the wing tube anti-rotation/attachment bolt blocks and hardpoint (1/2" hardwood dowel inset into the hard balsa blocks) are epoxied to the wing tubes:
And, I had a wild hair and thought, what the heck.. thats the inspiration for this photo!
So, a couple of hints for the guys building these things:
1. Do NOT install the lower forward wing spar when you are initially framing up the wing. If you do, you will have to remove it later in order to set the correct washout in the sheeting jigs.
2. When you install the Flap sub-spars, install them per the plans. THEN install another pair that is butted up against the TE side of the first set. Don't glue the two sub-spars together though. Actually, better yet, would be to install the upper one about 1/4-3/8" aft of the top sub spar, and the bottom ones about 1/8" aft. Reason for this, is it gives you a more robust edge, so when you go to separate the flaps from the wings, if gives you a known edge to cut to AND gives the flaps some more structure.
3. Use the dubro "snap on" style ball-links for the drag rudders instead of the Z bends like what I show in this build. The ball-links will give you a straighter linkage, and will be easier to remove/install if you ever have to remove/replace the drag rudder servo.
4. I'll add more later, but the above three are pretty much the major ones.
09-30-2012, 07:44 PM
#40
Well.. the other wing is getting closer to being done. All that is left, is installing the drag rudders and sheeting the bottom of this wing panel. Then, this wing panel will be at the same stage as the other. I suspect that I will have both of these wing panels done by the end of the month and ready for glassing. It'd be sooner, but i have to go to Puerto Rico for a week for work.
10-07-2012, 07:53 PM
#41
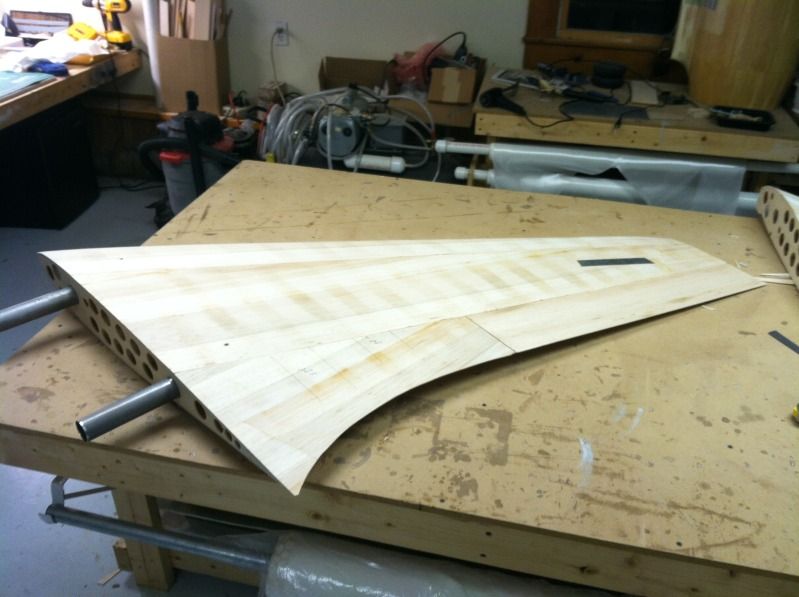
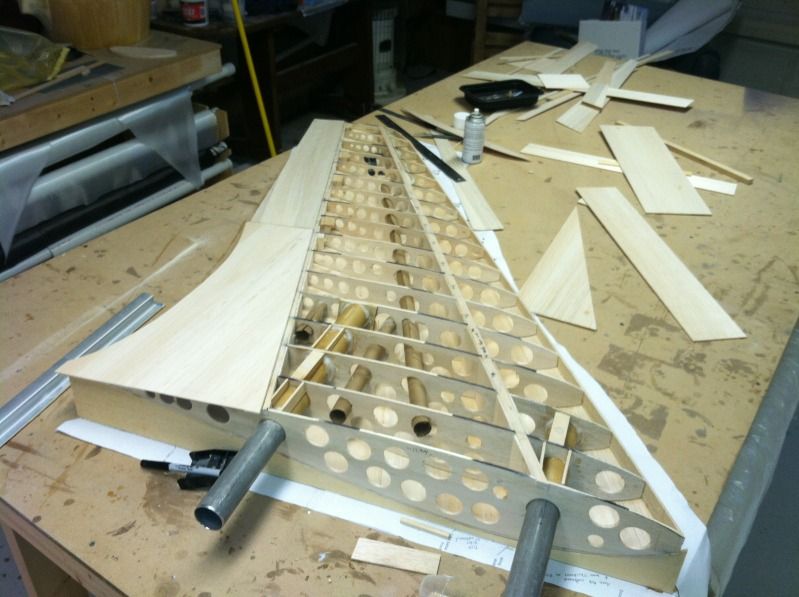
The left wing is now completed to the same stage as the Right wing panel:
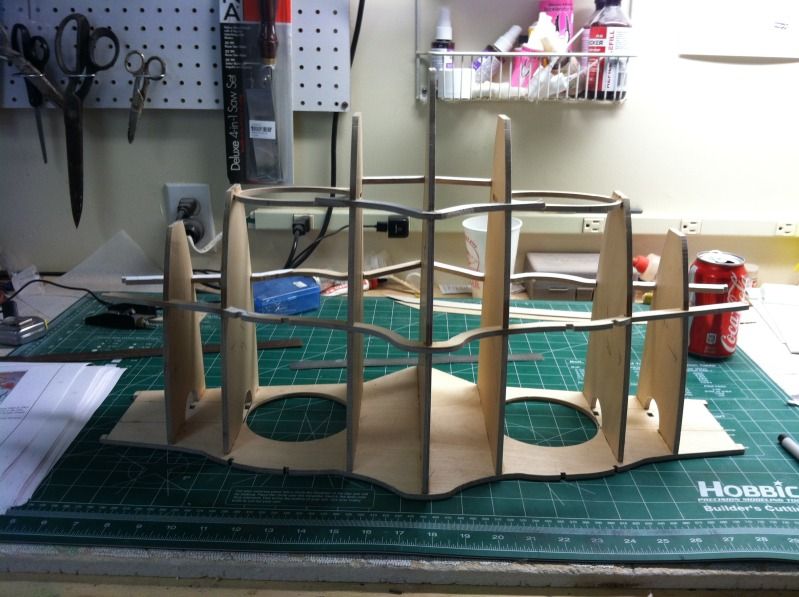
Then my buddy called and said he busted his last bandsaw blade and didn't have any extra's and asked if he could come over to help cut out the rest of the parts for the center section... so of course I couldn't say no! So, here is the center section and all of its pieces fit together... There is NO glue in this assembly, it is just all tabbed and set together.
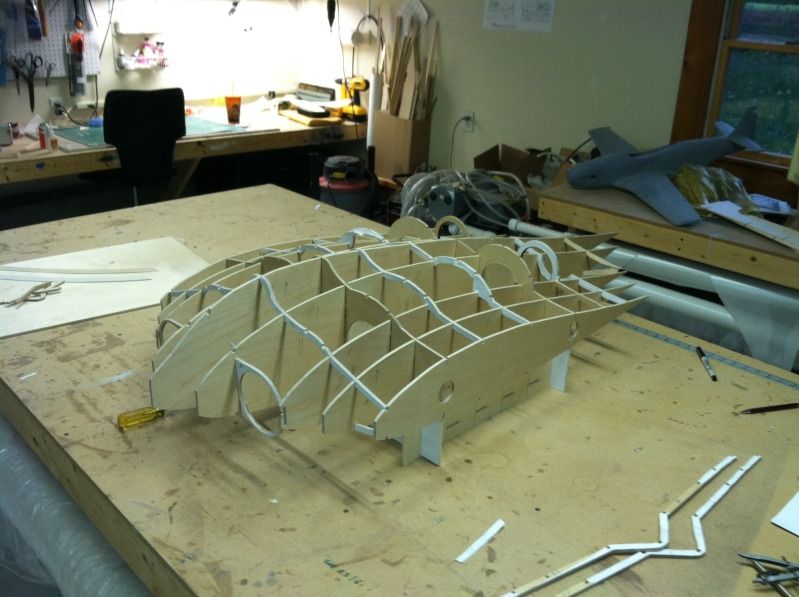
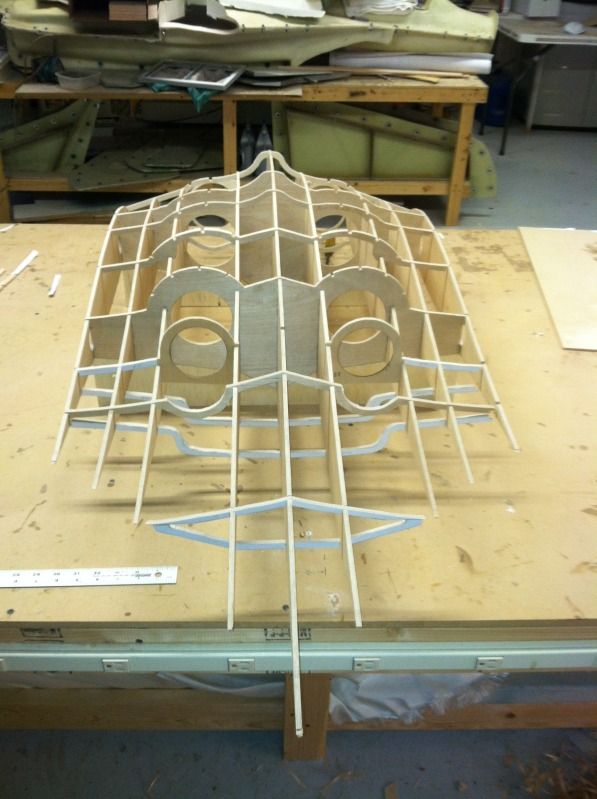
Once we saw that, we had to do a mock up photo.. so i pulled the wing tubes out of the left wing panel (I made sure to make index marks between the wing root rib and the tube so it is easier to re-install the tubes later), then we mocked up the left wing panel the the center section:
And of course, once we did this, we HAD to do the same with the other wing (this wing also had its wingtip and leading edge installed and rough shaped as well)
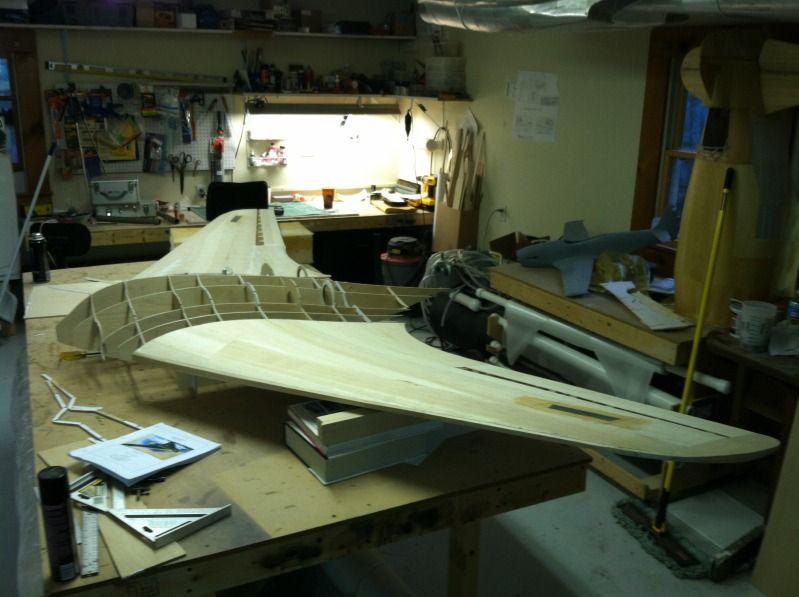
*HOLY CRAP, this thing is HUGE... again, that is a 4'x8' table!
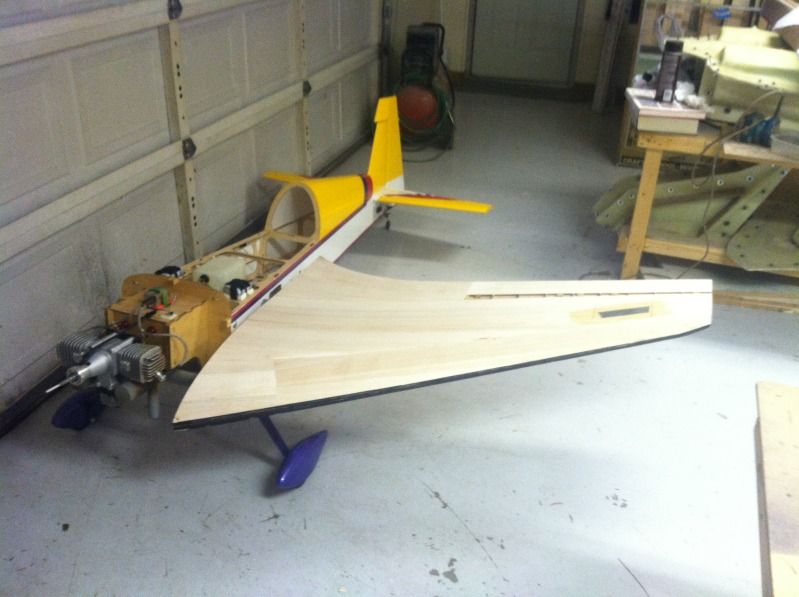
A shot from the front... it definitely has that Horton look!
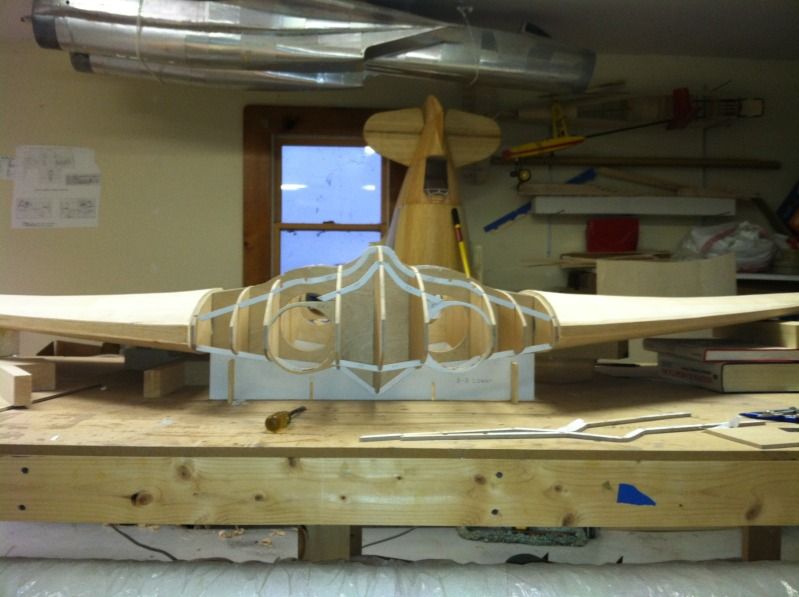
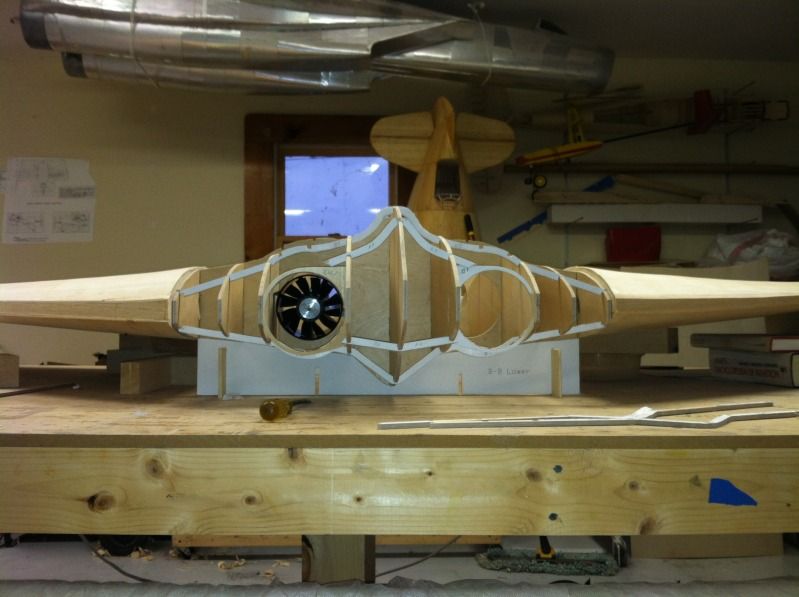
And another with one of the Changesun 90mm 12blade EDF units mocked up into place. We quickly spoke about possibly doing twin 120mm setups, but after pricing them, and realizing it would add about 3-4lbs of weight over the dual 6s 90mm EDF setups, it was decided the weight and increased cost (nearly 3 times as much!) was not worth it. Afterall, we have the possibility of doing 8,10 or 12s lipo with the 90mm setup as well.
Then my buddy called and said he busted his last bandsaw blade and didn't have any extra's and asked if he could come over to help cut out the rest of the parts for the center section... so of course I couldn't say no! So, here is the center section and all of its pieces fit together... There is NO glue in this assembly, it is just all tabbed and set together.
Once we saw that, we had to do a mock up photo.. so i pulled the wing tubes out of the left wing panel (I made sure to make index marks between the wing root rib and the tube so it is easier to re-install the tubes later), then we mocked up the left wing panel the the center section:
And of course, once we did this, we HAD to do the same with the other wing (this wing also had its wingtip and leading edge installed and rough shaped as well)
*HOLY CRAP, this thing is HUGE... again, that is a 4'x8' table!
A shot from the front... it definitely has that Horton look!
And another with one of the Changesun 90mm 12blade EDF units mocked up into place. We quickly spoke about possibly doing twin 120mm setups, but after pricing them, and realizing it would add about 3-4lbs of weight over the dual 6s 90mm EDF setups, it was decided the weight and increased cost (nearly 3 times as much!) was not worth it. Afterall, we have the possibility of doing 8,10 or 12s lipo with the 90mm setup as well.

 10-08-2012, 07:07 AM
#46
Dude.. that is the worst plane I've ever seen you do..For someone of your skills, I'd hate to see you suffer, knowing how poor of a job you did on it..How about this.. send it to me so I can save you the embarrassment from everyone laughing at you at the field.. As a friend, I'll take that bullet for you. 
Did that work....lol
Seriously, beautiful work my friend! It always amazes me how fast you build these birds.
Did that work....lol
Seriously, beautiful work my friend! It always amazes me how fast you build these birds.
10-08-2012, 07:26 AM
#47
Lol ram! Close, but that wasnt sincere enough. Haha. I will have center sections avail though 
You can see 4 of my projects in the last few pics. The horton, geebee R2, flite metalling the little P51 and the BIG F14
You can see 4 of my projects in the last few pics. The horton, geebee R2, flite metalling the little P51 and the BIG F14
10-09-2012, 07:41 PM
#50
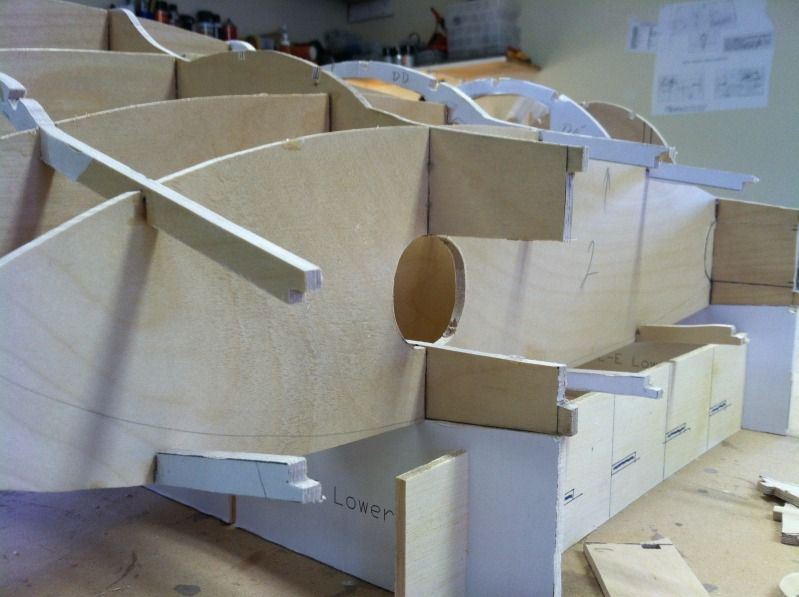
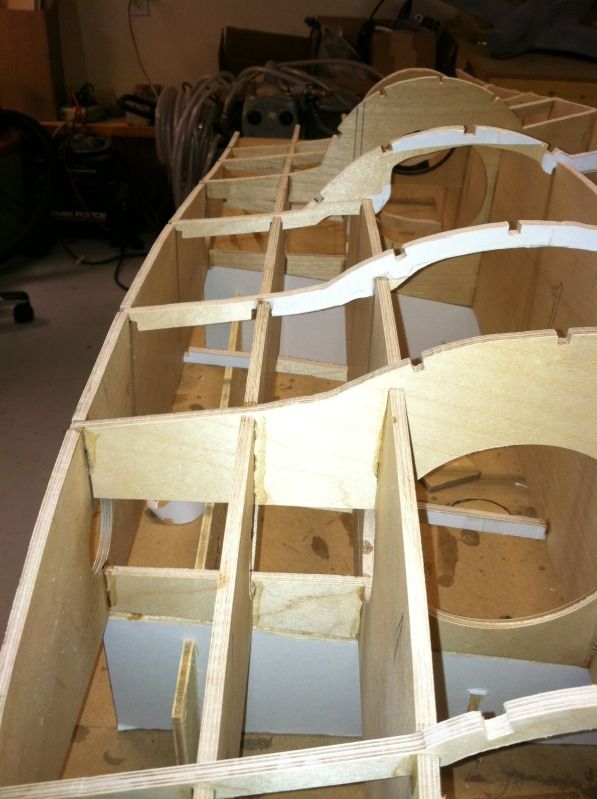
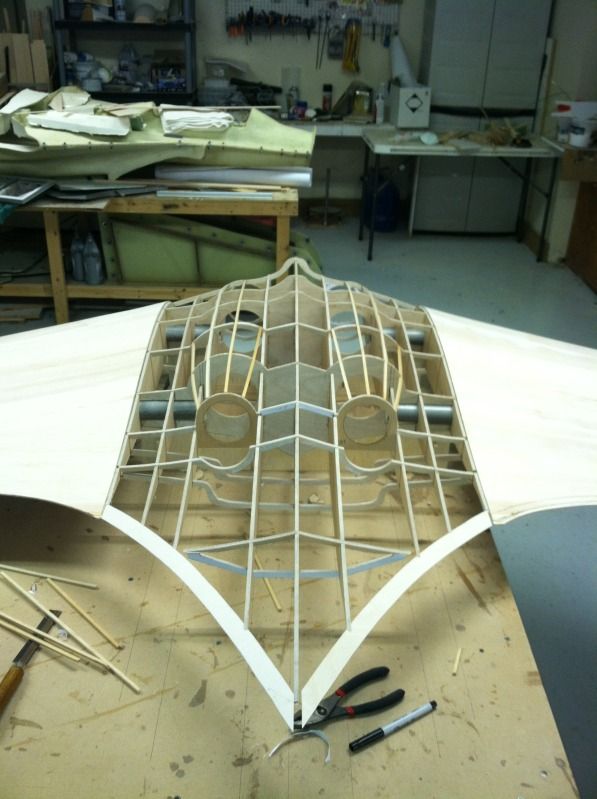
Did some more work today... First up was modding the center section parts to accept the wing tube sockets. I had already modified Rib 3A by using the outer wing panel rib #3's to position the wing tube holes. Sections CC and EE needed slotted for the sockets, and the other ribs needed 1/2 rounds cut out of them in the applicable area's. Since these socket slots in the carry through spar bulkheads were where the slots for the interlocking ribs where, they were only partially cut or tack glued back into position so as to make assembly of the parts easier.
Then i glued all the nose ribs to the forward carry through spar.
Then the center rib sections where glued to the rear carry through spar, then this sub-assembly glued to the forward carry through spar once it was placed in the jig and and determined to be straight. Then all of the aft rib segments were glued into position, along with all of the other side-to-side bulkhead segments:

Then the forward wing tube socket segments were removed:
Then the rears:
Then the actual wing tubes in the outer wing panels needed shortening 1" each, so these were pulled out, shortened, de-stressed, then redrilled/tapped and re-installed. Then both wing panels were slid into position in the center section.
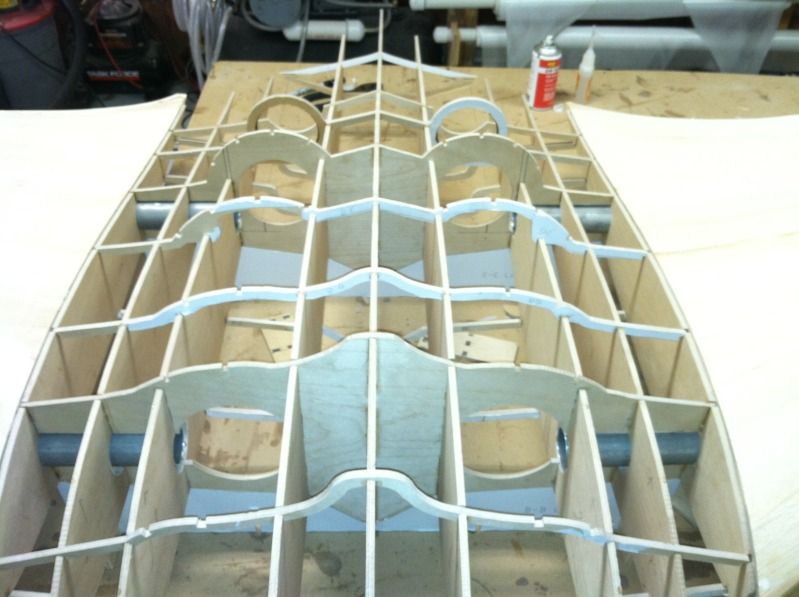
Then the nacelle's had their longerons glued into position to get the top of the center section ready for sheeting and strip planking. This thing will be sheeted with 1/8" balsa, so the sheeting/strip planking will be a bit different compared to the smaller version:
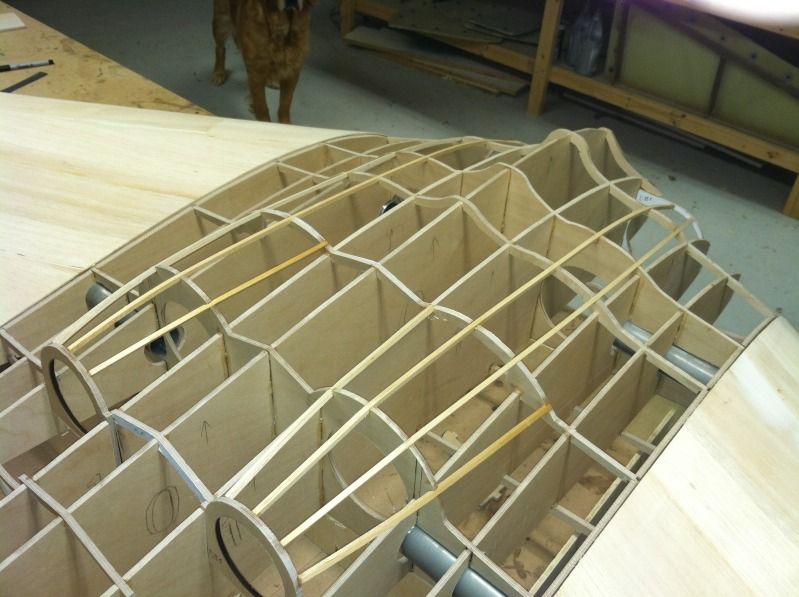
Then the 1/32" ply trailing edge pieces were test fit. I'm not planning on installing these until the top of the fuselage is sheeted and then flipped over, as they are a pain in the butt to keep straight right now:
Sheeting begins tomorrow, hopefully.. And now you guys know why we are doing a mold/molded center section for the flying versions. I bet all this plywood weights close to 10lbs, granted we could probably eliminate 6 of it with lightning holes, but I'm betting the composite center section will be closer to 2 to 3lbs.
Then i glued all the nose ribs to the forward carry through spar.
Then the center rib sections where glued to the rear carry through spar, then this sub-assembly glued to the forward carry through spar once it was placed in the jig and and determined to be straight. Then all of the aft rib segments were glued into position, along with all of the other side-to-side bulkhead segments:
Then the forward wing tube socket segments were removed:
Then the rears:
Then the actual wing tubes in the outer wing panels needed shortening 1" each, so these were pulled out, shortened, de-stressed, then redrilled/tapped and re-installed. Then both wing panels were slid into position in the center section.
Then the nacelle's had their longerons glued into position to get the top of the center section ready for sheeting and strip planking. This thing will be sheeted with 1/8" balsa, so the sheeting/strip planking will be a bit different compared to the smaller version:
Then the 1/32" ply trailing edge pieces were test fit. I'm not planning on installing these until the top of the fuselage is sheeted and then flipped over, as they are a pain in the butt to keep straight right now:
Sheeting begins tomorrow, hopefully.. And now you guys know why we are doing a mold/molded center section for the flying versions. I bet all this plywood weights close to 10lbs, granted we could probably eliminate 6 of it with lightning holes, but I'm betting the composite center section will be closer to 2 to 3lbs.