


150% enlarged WingontheWeb HO-229
 10-28-2012, 07:22 PM
#101


Here is a couple days of work culminated into this post..
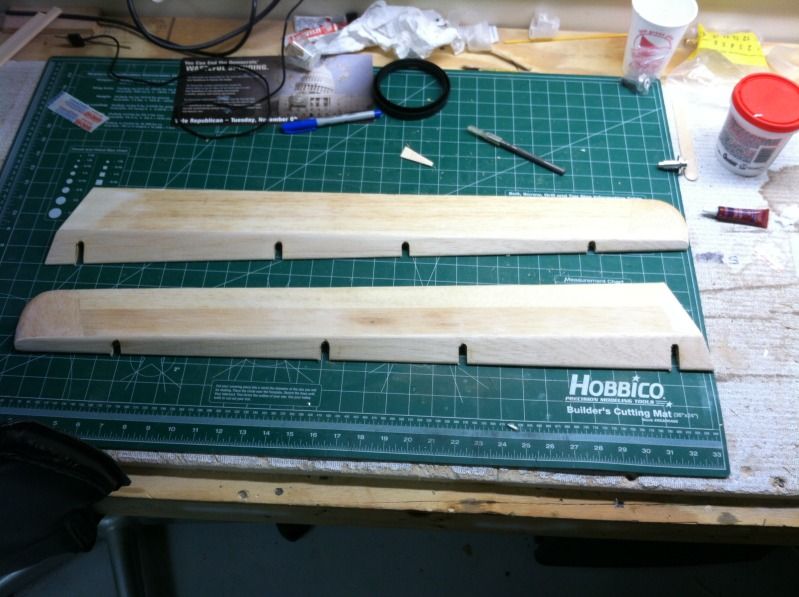
Cut free the elevons from the wing panels.
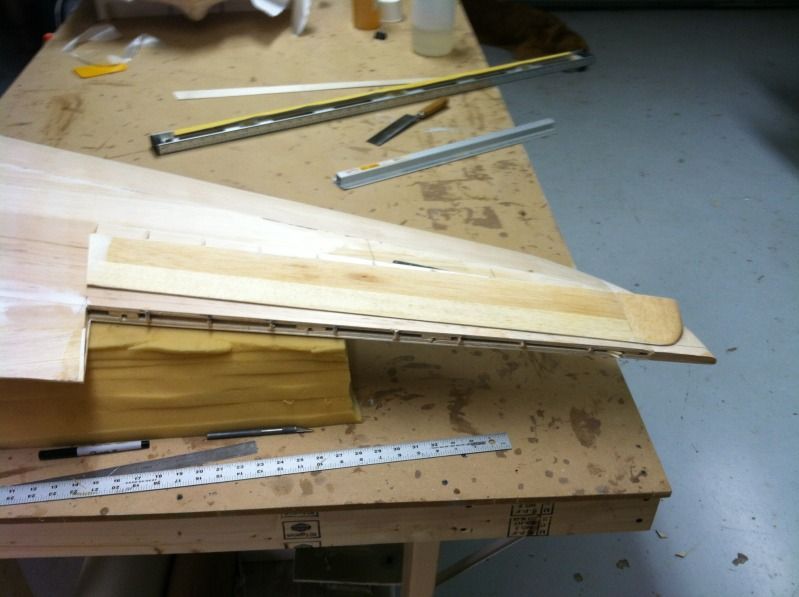
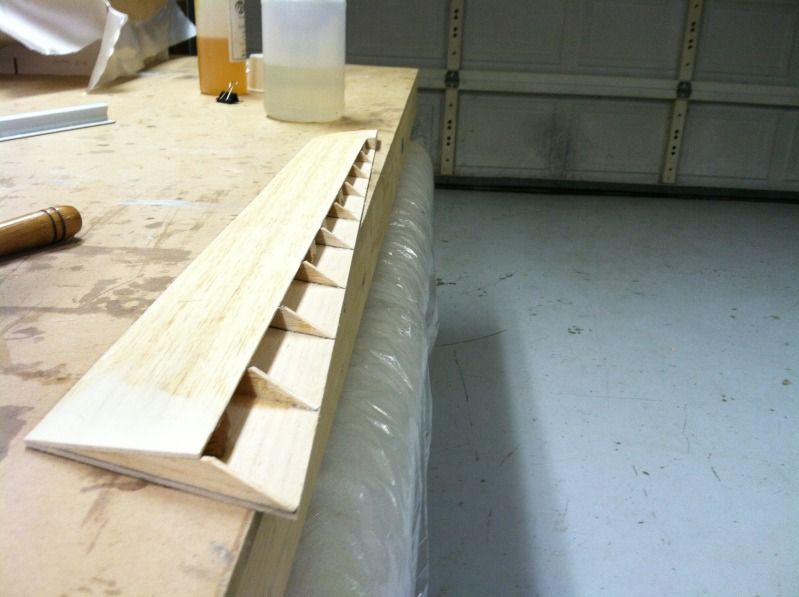
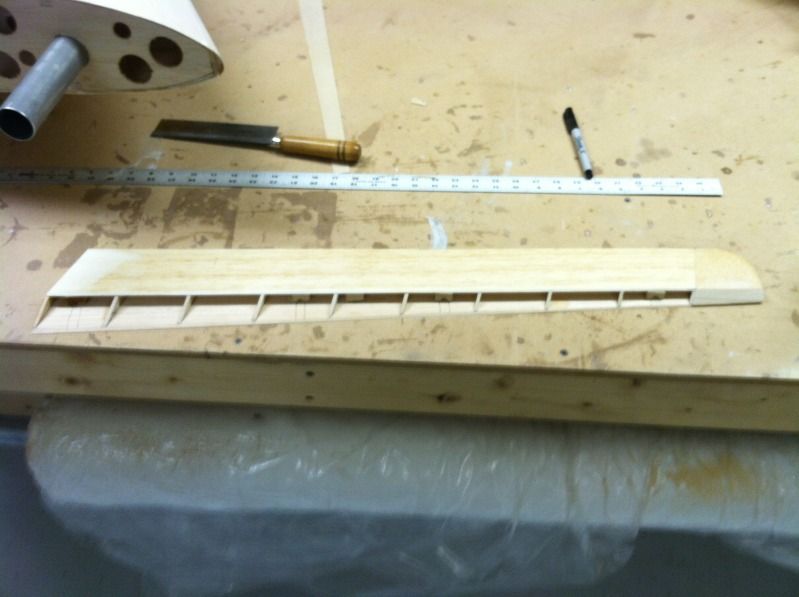
Then I trimmed the LE of each elevon to there triangular shape:
Then I installed the gap seals for the elevon hinge lines and glassed the top surface of the outer wing panels:

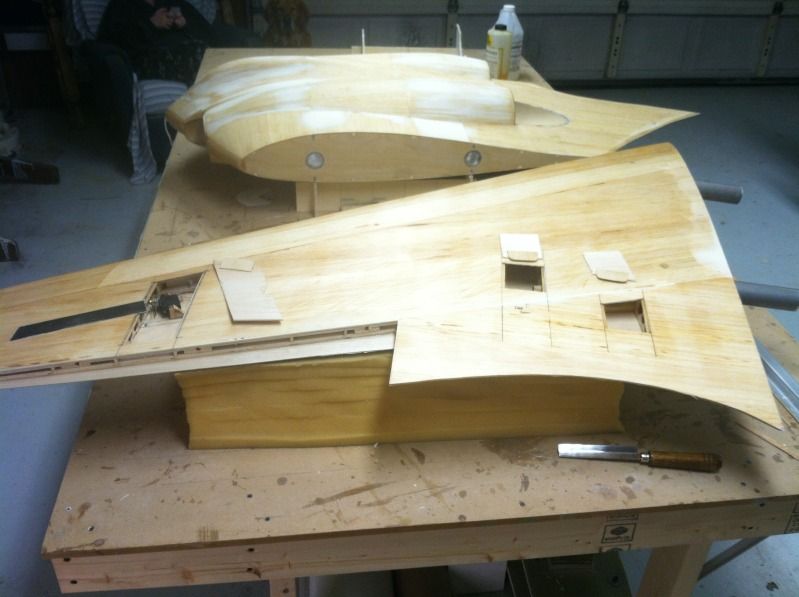
Then the glassed piece of 1/32" ply was cut to shape and glued to the exhaust exit bulkheads:
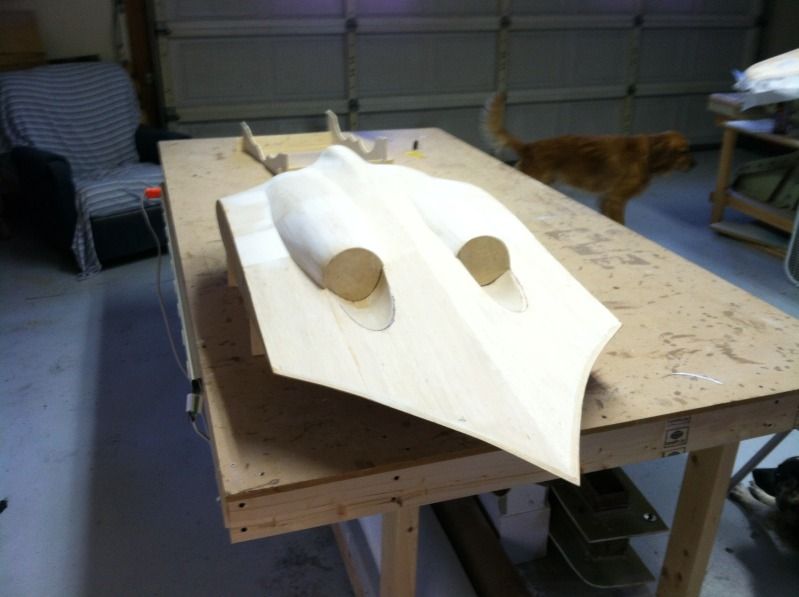
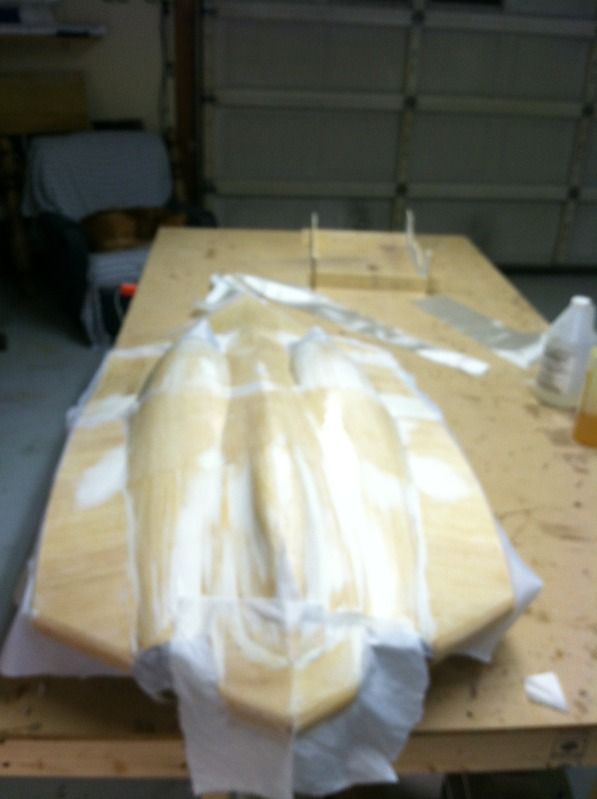
Then the glass cloth for the center section was cut. This was done in four pieces. The first piece did the aft "triangle" portion of the center section, then 2 pieces where cut for the indentation of the exhaust, and the last did everything else:
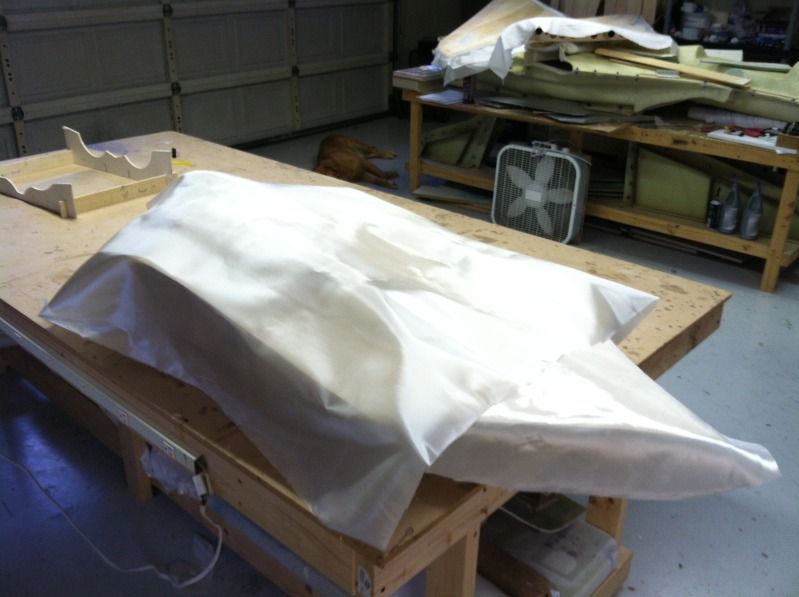
Then I glassed it and placed the peel ply on:
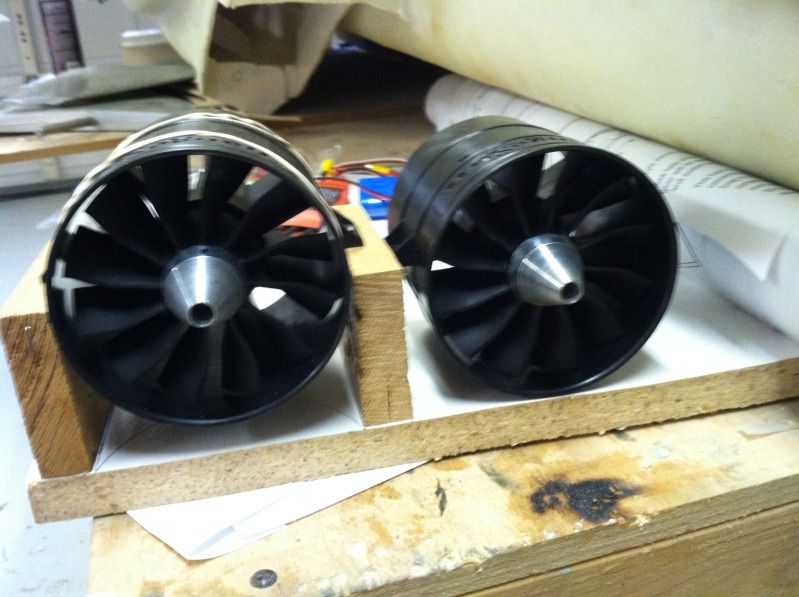
I also received the stuff for the power system, so I started assembling and dynamically balancing those. I've still got the balancing to do, but they are close to being ready for install:
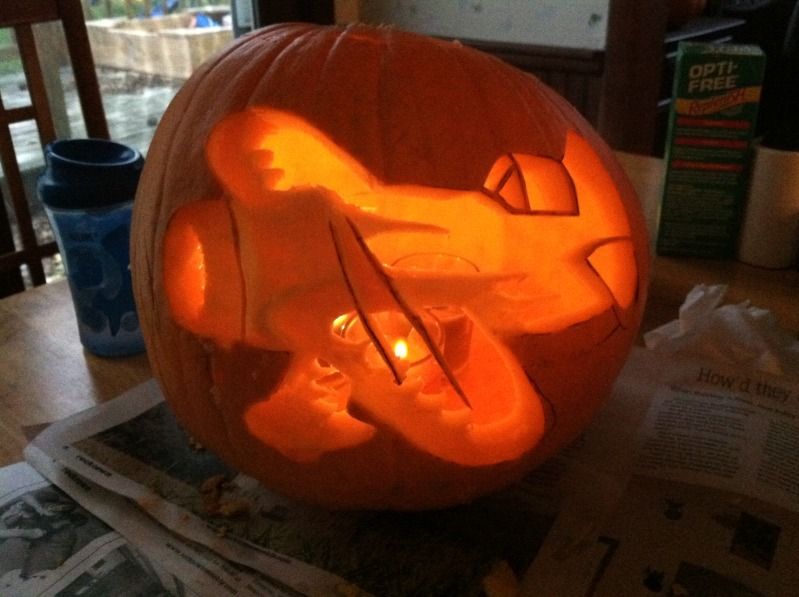
I also carved a pumpkin for Halloween this afternoon for my son:
Cut free the elevons from the wing panels.
Then I trimmed the LE of each elevon to there triangular shape:
Then I installed the gap seals for the elevon hinge lines and glassed the top surface of the outer wing panels:
Then the glassed piece of 1/32" ply was cut to shape and glued to the exhaust exit bulkheads:
Then the glass cloth for the center section was cut. This was done in four pieces. The first piece did the aft "triangle" portion of the center section, then 2 pieces where cut for the indentation of the exhaust, and the last did everything else:
Then I glassed it and placed the peel ply on:
I also received the stuff for the power system, so I started assembling and dynamically balancing those. I've still got the balancing to do, but they are close to being ready for install:
I also carved a pumpkin for Halloween this afternoon for my son:


 10-28-2012, 08:26 PM
#104
I have heard of using peel ply. I am curious as to how this is used and what the benefits are? I have some lightweight dacron from aircraft spruce that they advertise as peel ply, but it also works well as a fabric for covering open structures. In fact, to get the feel of the stuff, I covered an entire Sig Kadet SR. with it this last winter and it worked great. Any new ideas or tips on glassing are always welcome, and I will be interested to see how this progresses.
10-28-2012, 08:32 PM
#105
Basically with peel ply... Glass like normal, but instead of scraping off all the excess resin, place the peel-ply down on the surface while the resin in still wet. Wait for the resin to cure. Then peel the peel-ply off. No need to sand or do a 2nd layer of resin. Just use some high-build filler primer.
10-30-2012, 09:32 AM
#108
Peel'd all the peel-ply off the center section and wing last night. Gotta cap the inlets and cut the flaps and servo access hatch's free from the outer wing panels and then I can start spraying primer.
Also installed and shaped the Elevon leading edges and cut the hinge slots.
Also installed and shaped the Elevon leading edges and cut the hinge slots.
10-30-2012, 07:36 PM
#109
I don't do to much work on the RC stuff Mon-Fri as I try to use this time as famiily time and doing my house-hold chores so I get the weekend mostly free.. So tonights progress is:
All of the servo hatch's for both outer wing panels are cut out, lined with 3/16" square balsa "ledges" on the sides, then a 1/16" ply tongue is glued to the leading edges of the hatch's. I soak the edges of the wing skins and the hatch with thin CA to to strengthen them, then sand the edges with 220 grit. Thats all the prep they get before paint. I haven't decided on if these will be attached with a magnet or screws, but most likely they will be a pair of #2 screws on the aft edges of each hatch.
Then I put some primer on the center fuse section in the area's which the peel-ply typically doesn't conform to very well. these are the inside and outside edges and any area's which have allot of compound curves to them. The primer shows me where I need to place the first round of filler.
I am going to concentrate on getting the TE flaps on the outer wing panels cut out through the rest of the week. Then i will cap those with their LE's and the wing TE's (probably 1/64 or 1/32" ply), that way I can glass these area's and the elevon's LE. Then its on to lots of primer, filler, sand, prime, fill, you get the idea. I suspect paint the outer wing panels will be 90% completed and ready for final equipment install by the end of the year, and the center section molded by then as well.
11-02-2012, 07:59 PM
#110
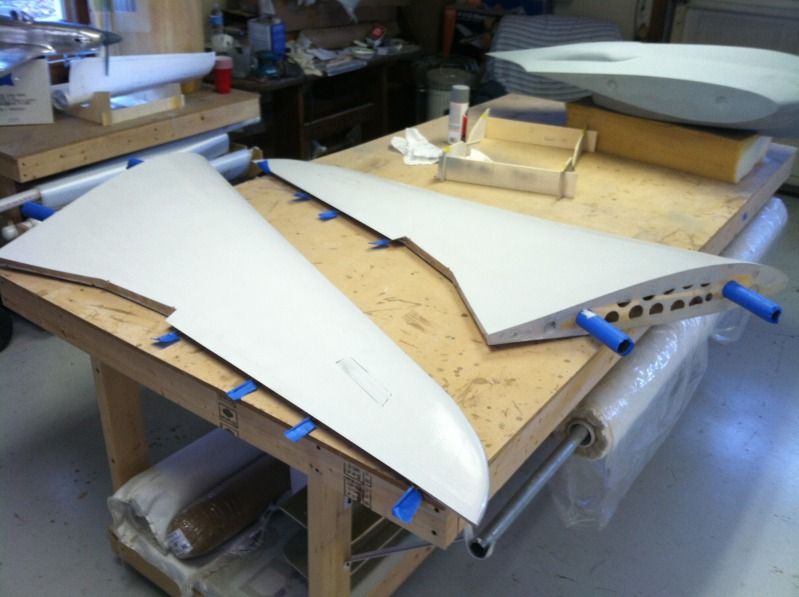
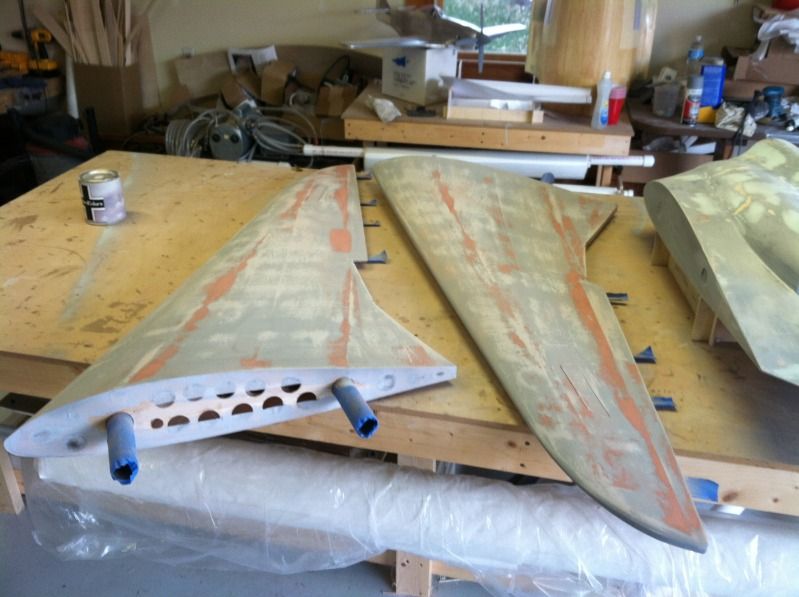
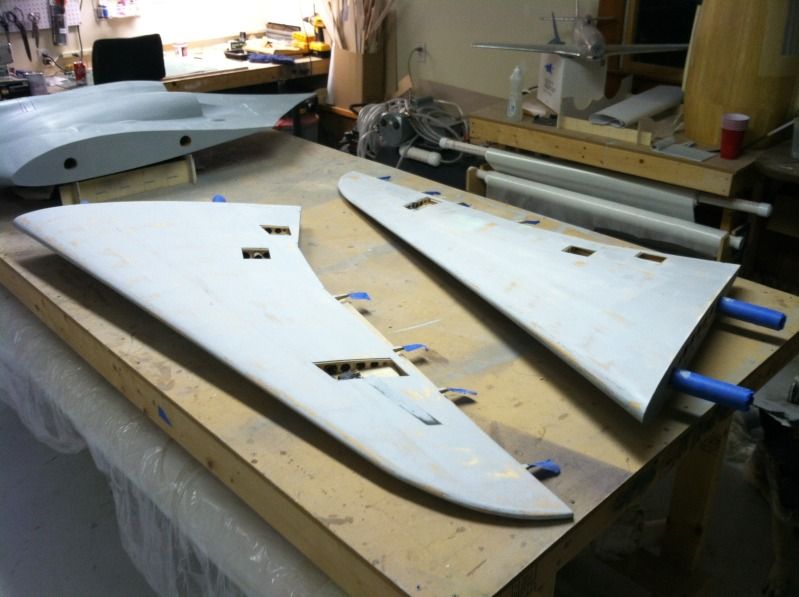
Flaps are cut free, hinged, and the ends capped with some 1/64" ply. I chose ply as I am thinking of keeping the ply edges "natural" to show the nature of the wooden wings of the full-scale.
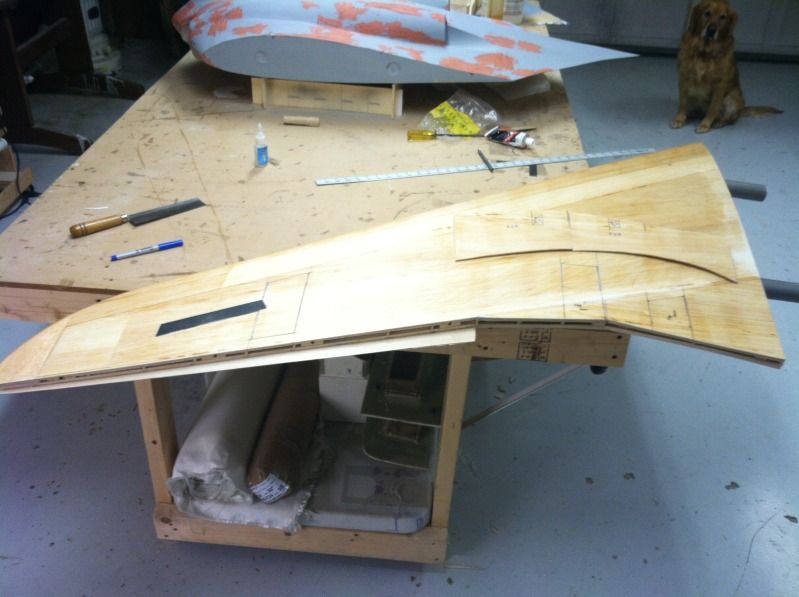

This picture shows the inner flap down (angled to the left), center flap up (angled to the right) and the elevon centered. Due to the angle of the hinge-lines between the inner and central flap, there deflection is limited due to the central ribs hitting each other..
So now, other than some flap servo mounts, painting, gluing in the frise aileron hinge standoff's and glassing the root rib. The outer wing panels are DONE with construction
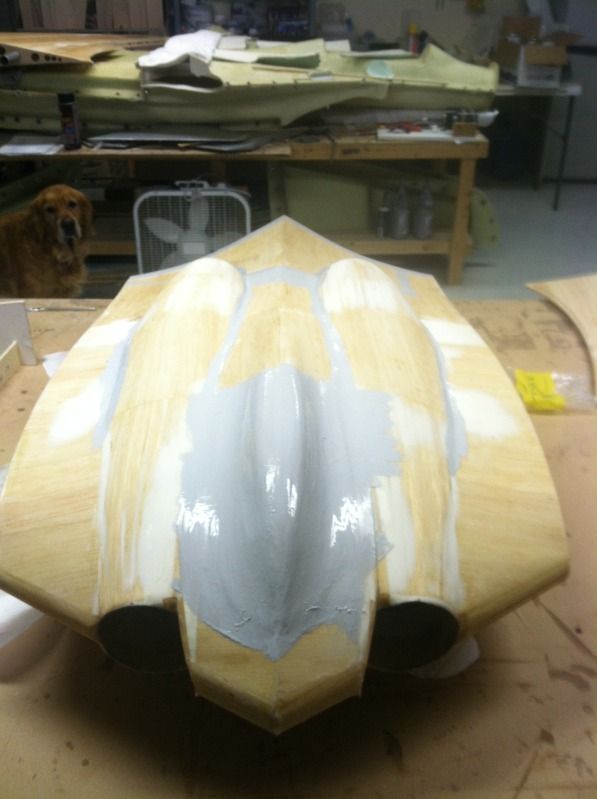
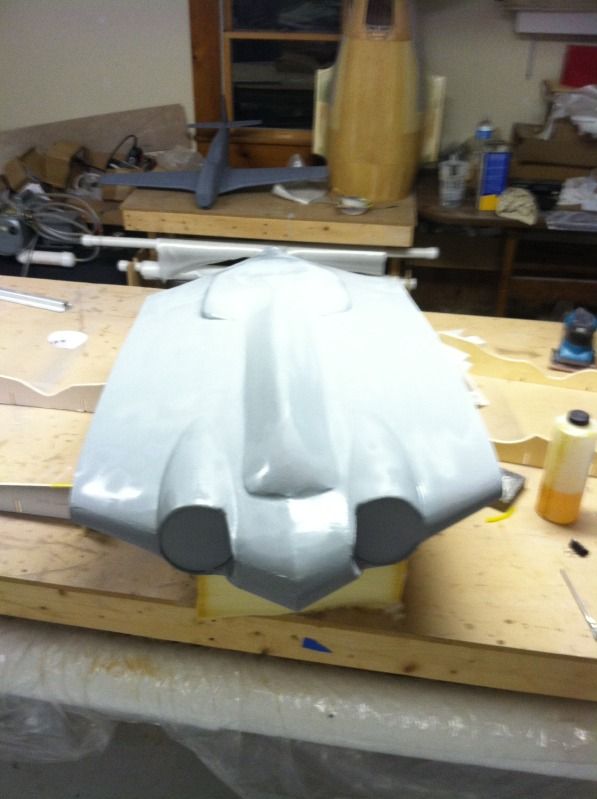
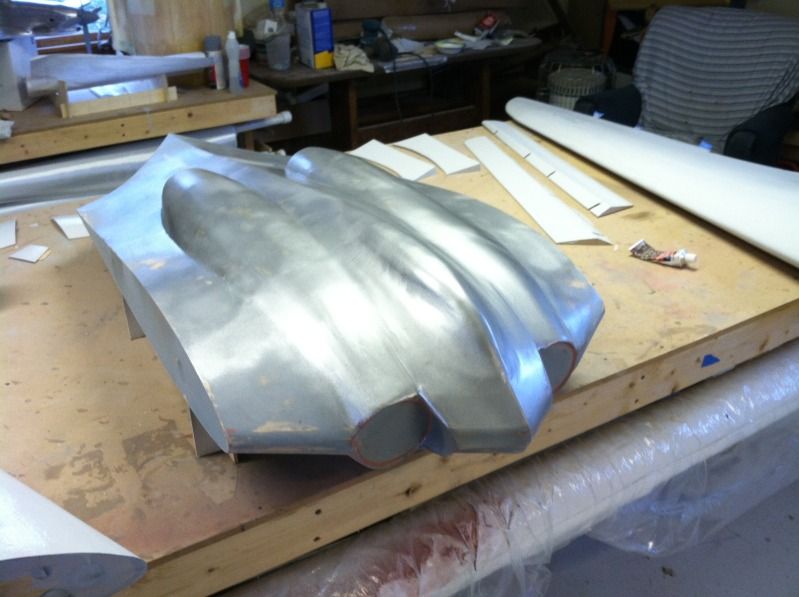
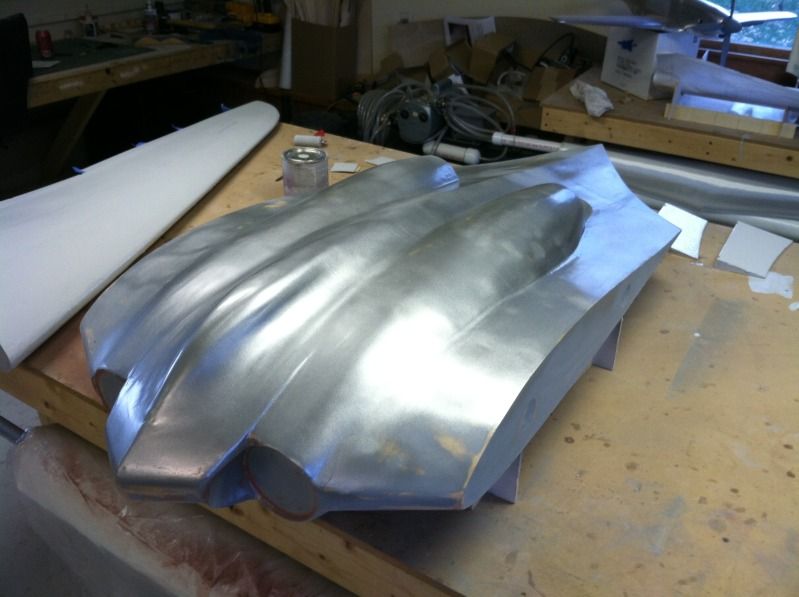
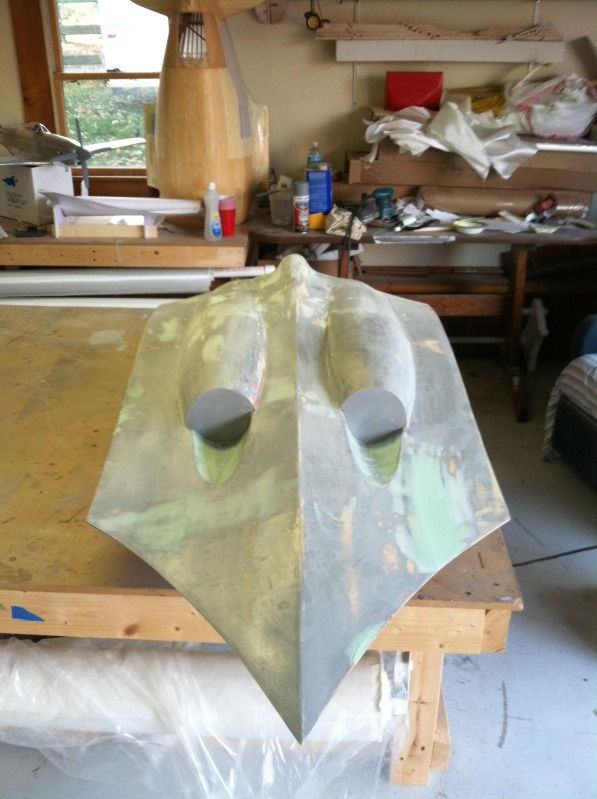
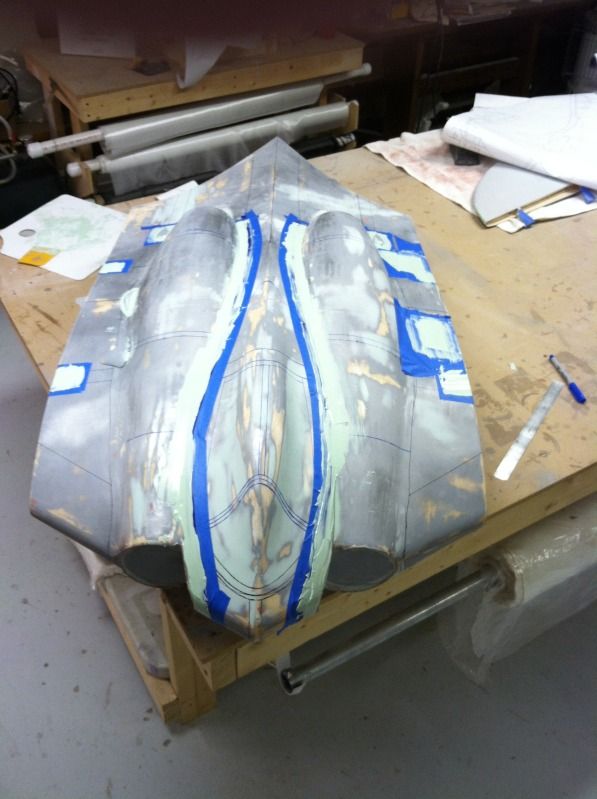
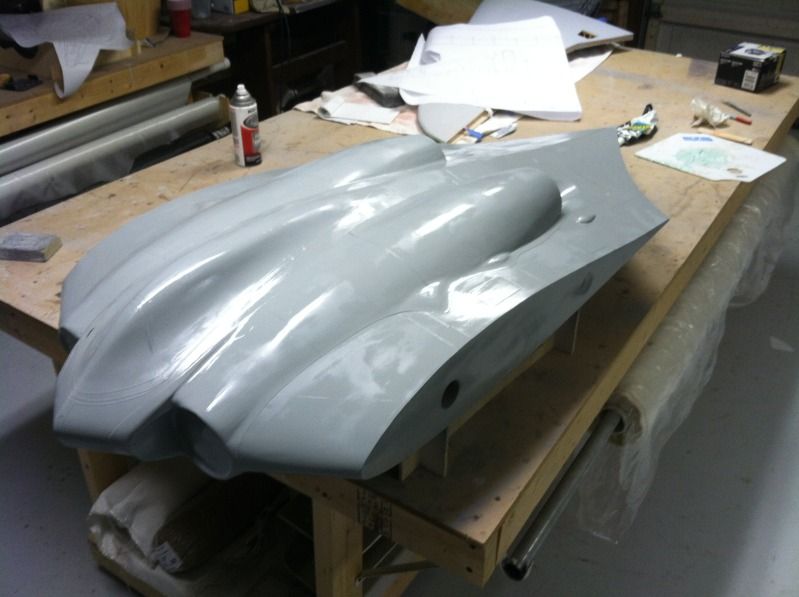
I also sprayed a good thick coat of primer on the Top of the center fuselage section, then spread the 3M red glazing putty over any area's of pin-holes and other imperfections. Its amazing how ugly it gets during this process:
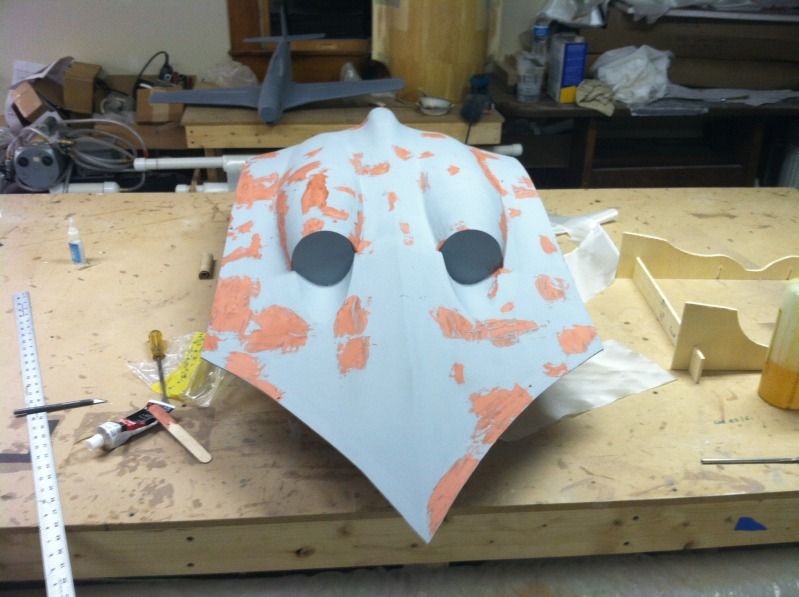
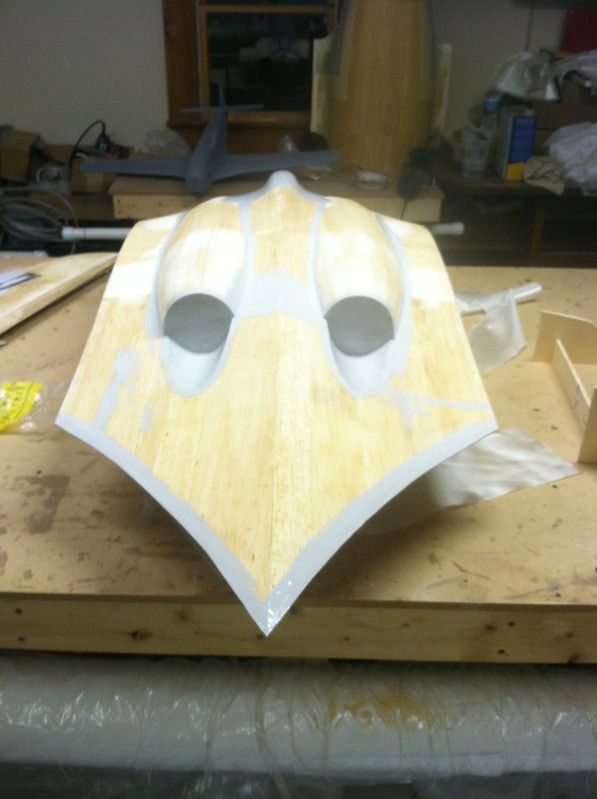
Then installed the inlet plugs pieces and sanded the thing, then sprayed the 2nd coat of primer on:
Once the 2nd coat of primer on the top dried, I flipped the center section over and put the first coat of primer on the bottom:
Now I have to flite-metal a 40" P-51 display model for a guy, so all I will be doing on the Horten over the next few days is glassing the last few area's of exposed balsa and gluing in the elevon hinges.
This picture shows the inner flap down (angled to the left), center flap up (angled to the right) and the elevon centered. Due to the angle of the hinge-lines between the inner and central flap, there deflection is limited due to the central ribs hitting each other..
So now, other than some flap servo mounts, painting, gluing in the frise aileron hinge standoff's and glassing the root rib. The outer wing panels are DONE with construction
I also sprayed a good thick coat of primer on the Top of the center fuselage section, then spread the 3M red glazing putty over any area's of pin-holes and other imperfections. Its amazing how ugly it gets during this process:
Then installed the inlet plugs pieces and sanded the thing, then sprayed the 2nd coat of primer on:
Once the 2nd coat of primer on the top dried, I flipped the center section over and put the first coat of primer on the bottom:
Now I have to flite-metal a 40" P-51 display model for a guy, so all I will be doing on the Horten over the next few days is glassing the last few area's of exposed balsa and gluing in the elevon hinges.
11-08-2012, 07:31 PM
#111
Not a whole lot has been done... except..
That Stupid P-51 is flite-metal'd and DONE...
Center section bottom portion on the HO-229 has had some filler applied and is ready to be sanded..
The outer wing panels are 100% complete, minus servo mount's and servo hatch mounts. All of the top portions of the flaps, elevons and outer wing panels have there first coat of primer as well!
And a few of the lil mustang (yes I know the exhaust stacks are to low, the front chin scoop is shaped wrong, the canopy is wrong, it doesn't have the correct size/shape ventral fin, the wing fillets are wrong, the gun ports are wrong... Yes I know ALLOT of it is wrong. I didn't build it, i just had to flite-metal it and did the best I could with what I was given..)
11-09-2012, 07:28 PM
#113
Got some more done....
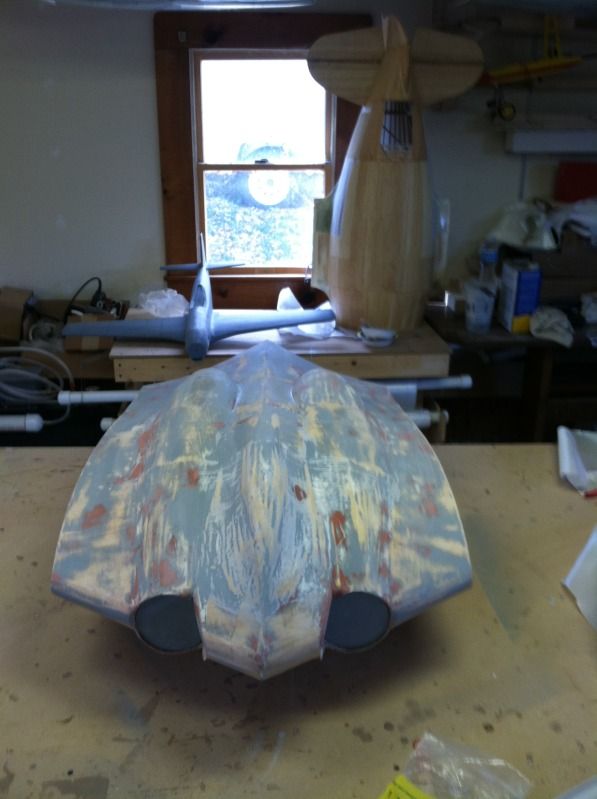
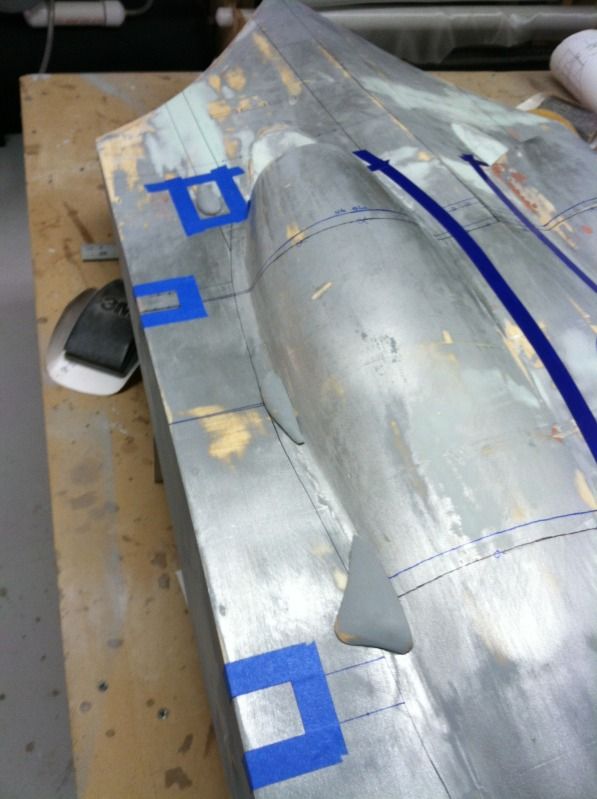
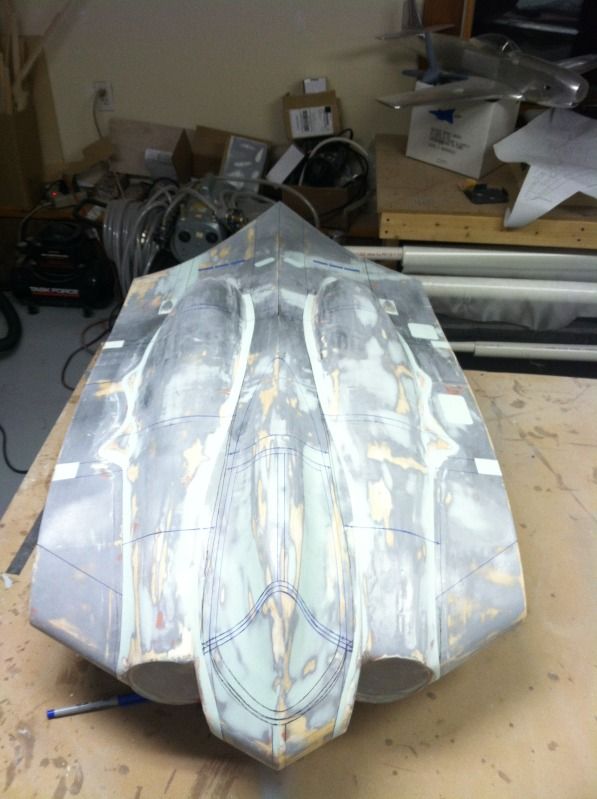
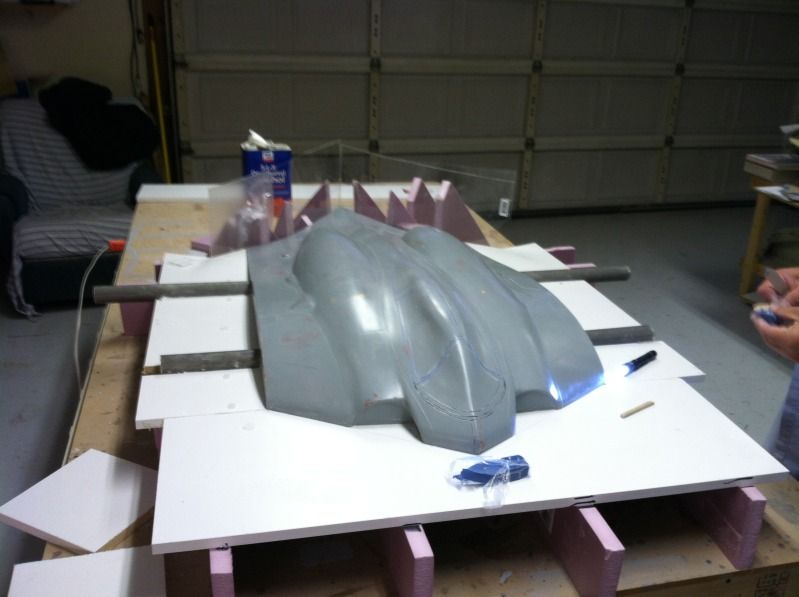
Sanded the outer wing panels, then put another coat of primer on them. I also sanded the first coat of primer on the bottom of the center section. Then flipped it, sanded the top of the center section. The center section is Nearly ready for panel lines. One thing I have started doing lately for plugs and area's that are going to be molded for vacuum form fixtures, is spraying the surfaces with a metallic silver paint. This greatly helps you find any area's that still need some filling and sanding..

Sanded the outer wing panels, then put another coat of primer on them. I also sanded the first coat of primer on the bottom of the center section. Then flipped it, sanded the top of the center section. The center section is Nearly ready for panel lines. One thing I have started doing lately for plugs and area's that are going to be molded for vacuum form fixtures, is spraying the surfaces with a metallic silver paint. This greatly helps you find any area's that still need some filling and sanding..
11-10-2012, 08:55 PM
#114
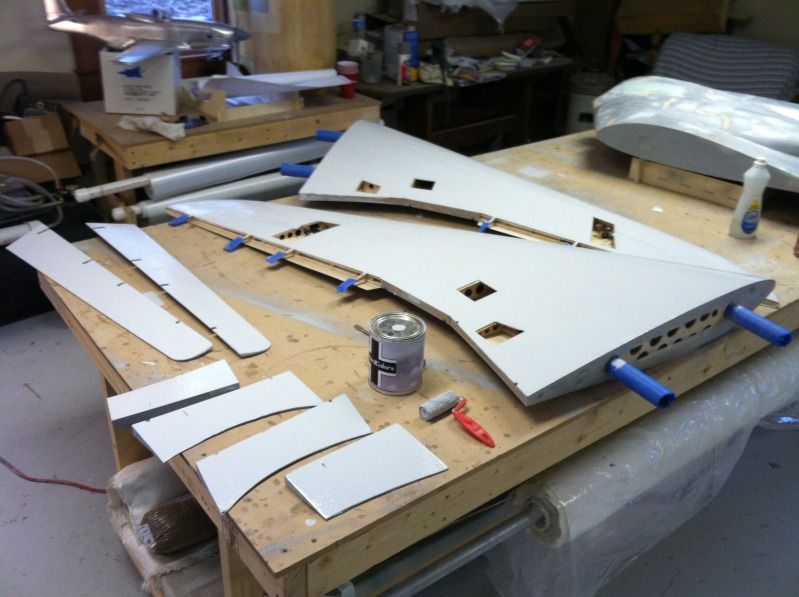
Man is my arm sore! A whole lotta sanding today. Top of the outer wing panels, flaps and elevons are ready for panel lines and hatch's.
Then I flipped them all over and put the first coat of primer on the bottom:
Then I got started on sanding the top of the center section:
At first:
Then after some filling and sanding, then more filling and sanding. And of course, about 5 hours later i'd find a spot that needed a little bit of filler (and it had to be in the canopy area!)
Then I started laying out the position of the panel lines on the top:
OH, if anyone is interested in a 1/4 scale Precendent "stampe" kit (NIB) or a NIB Sig Morrisey Bravo kit I have one of each for sale!
11-12-2012, 07:31 PM
#115
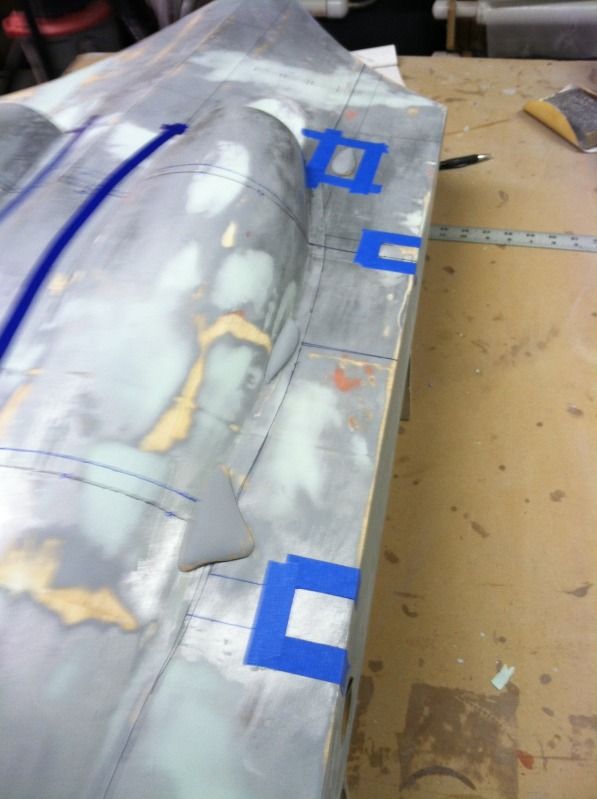
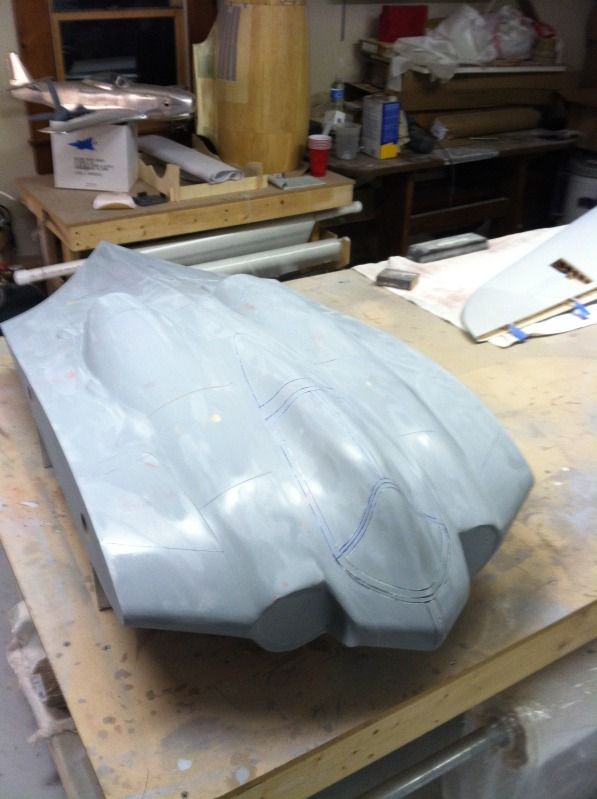
Top side panel line positions are all drawn on. Now to flip it over and do the bottom... tomorrow.
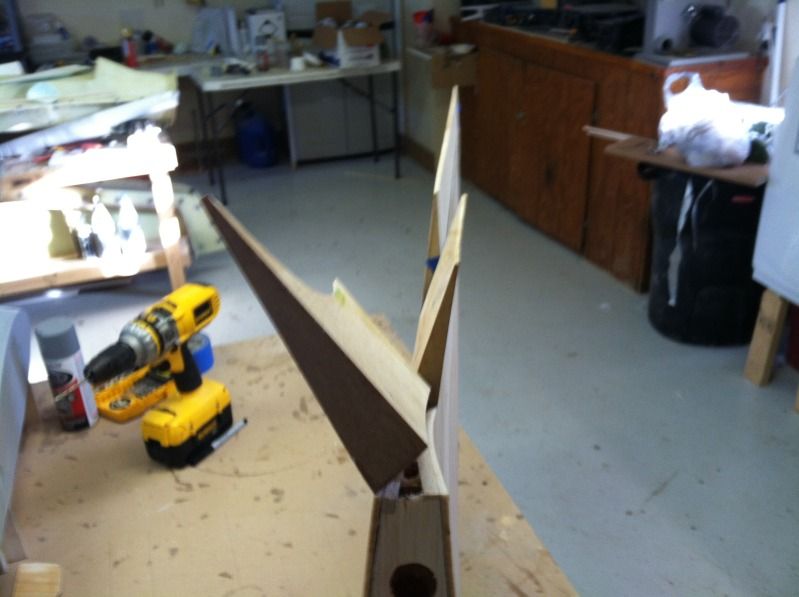
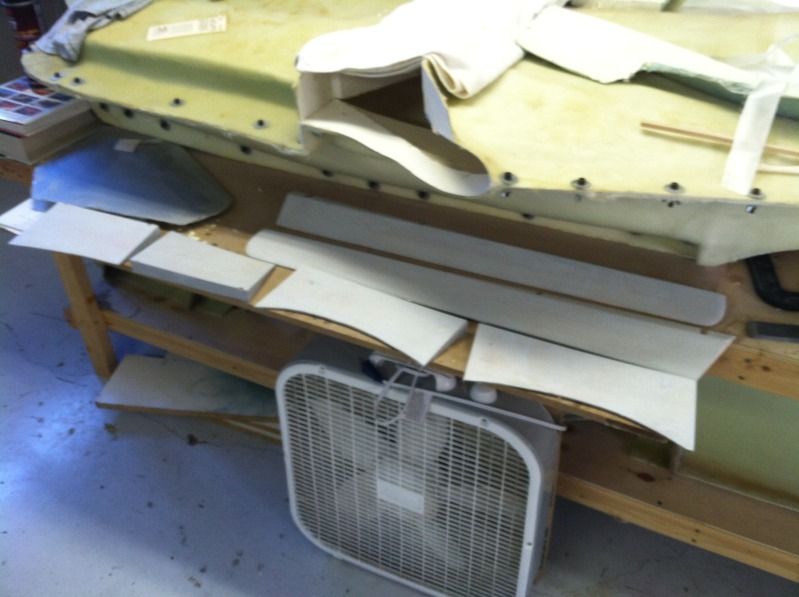
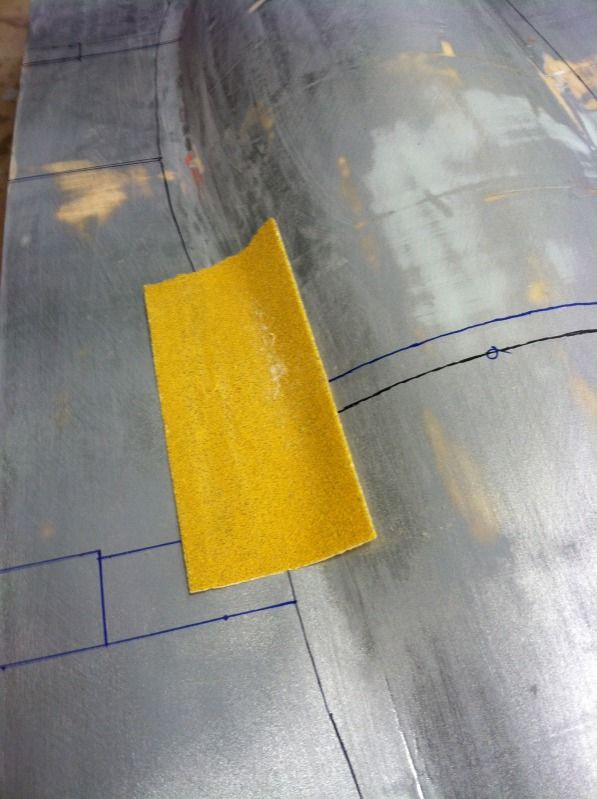
Also noticed during the panel line placement, that a few bulges were missing from the top of the center section. Since its a plug, may as well go ahead put these into position so they are always there. Using the 3-views on the plans, I made the bulges into triangle's to get the rough dimensions of it. Then just eyeballed the curved shape of the actual shape of the bulges onto the paper template. Then cut these bulges out of 1/2" thick balsa:
Then I stuck a piece of 80 grit sticky back paper in position and started sanding down the 1/2" blanks to conform to the shape of where they go:
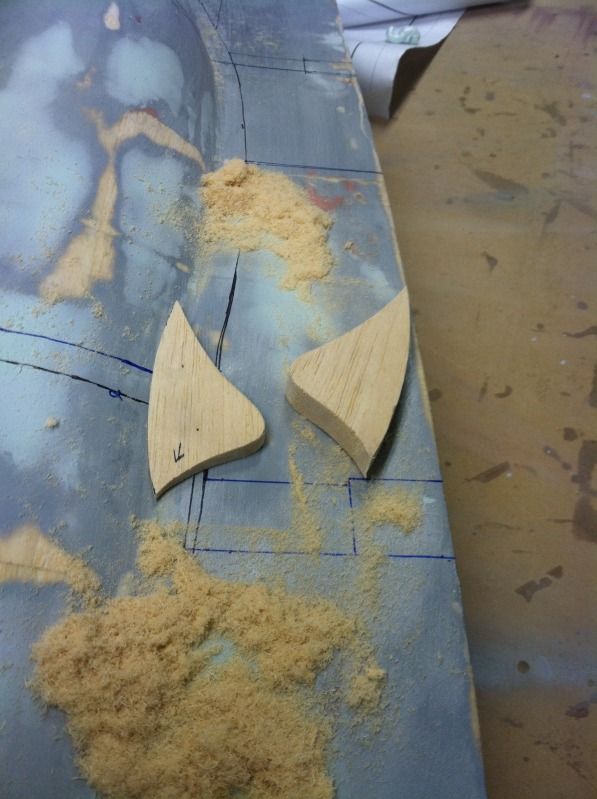
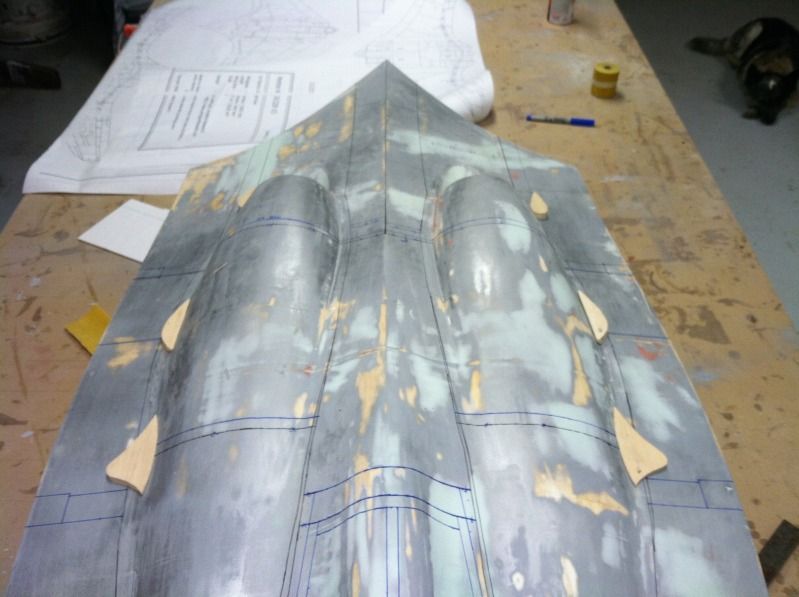
Then all six bulges where rough sanded to fit into there positions. I'll sand them to there final shape tomorrow, then glass them, prime, sand, prime, sand, etc etc. once they are nice and smooth, i'll glue them to the center section and use some body filler to flare them into the rest of the center section:
Also noticed during the panel line placement, that a few bulges were missing from the top of the center section. Since its a plug, may as well go ahead put these into position so they are always there. Using the 3-views on the plans, I made the bulges into triangle's to get the rough dimensions of it. Then just eyeballed the curved shape of the actual shape of the bulges onto the paper template. Then cut these bulges out of 1/2" thick balsa:
Then I stuck a piece of 80 grit sticky back paper in position and started sanding down the 1/2" blanks to conform to the shape of where they go:
Then all six bulges where rough sanded to fit into there positions. I'll sand them to there final shape tomorrow, then glass them, prime, sand, prime, sand, etc etc. once they are nice and smooth, i'll glue them to the center section and use some body filler to flare them into the rest of the center section:
11-14-2012, 06:48 PM
#116
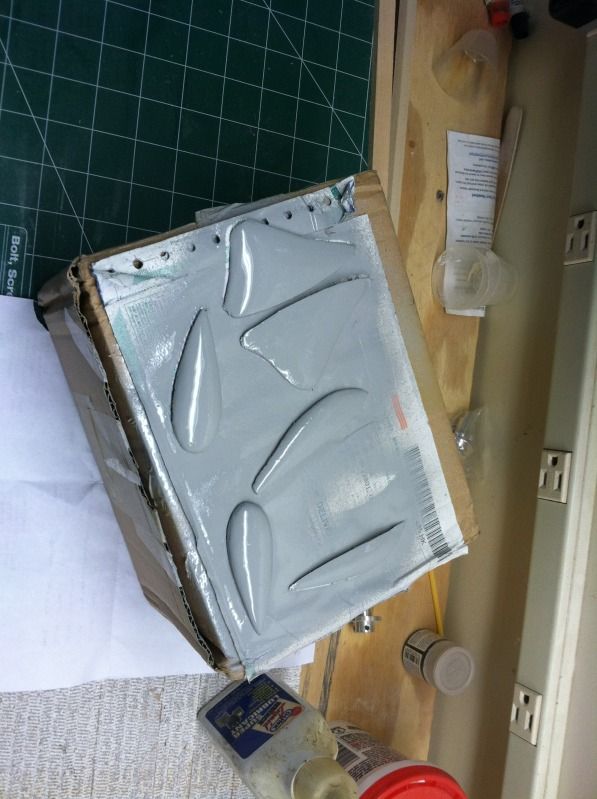
More progress... It seems all this little stuff takes forever to get what appears to be little progress:
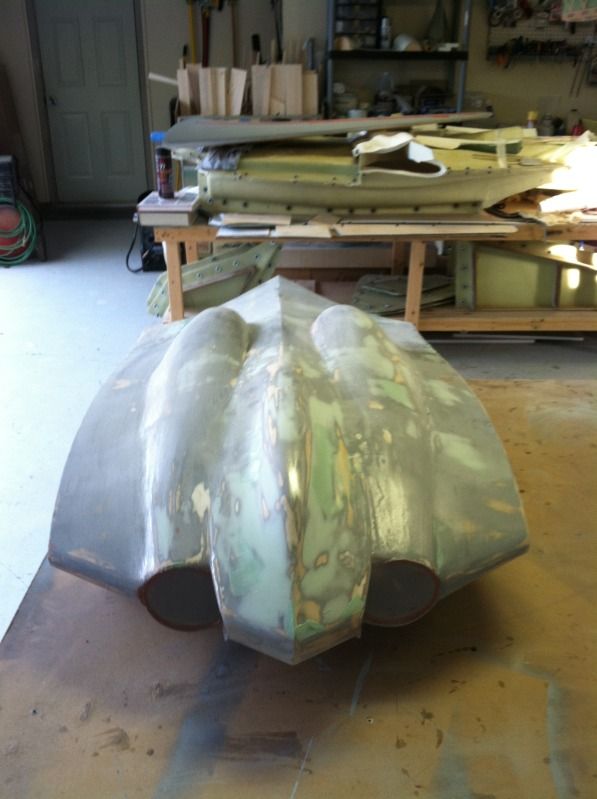
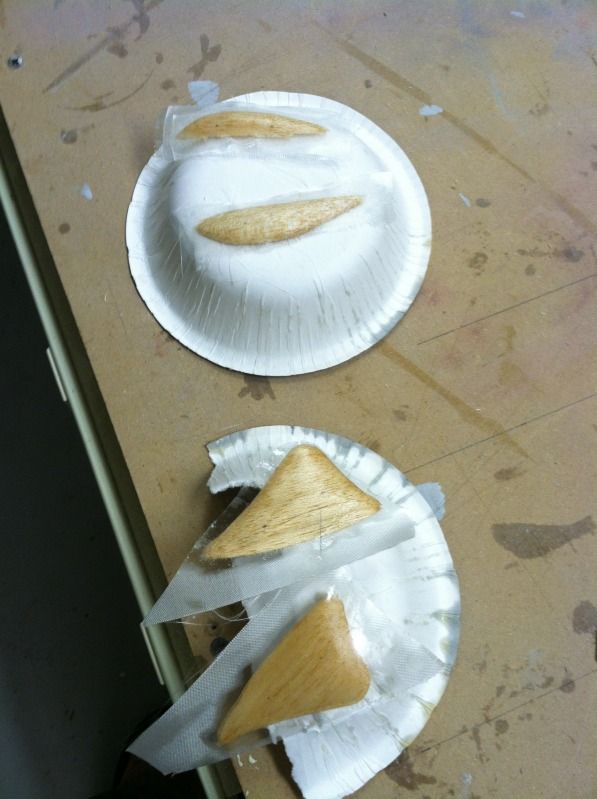
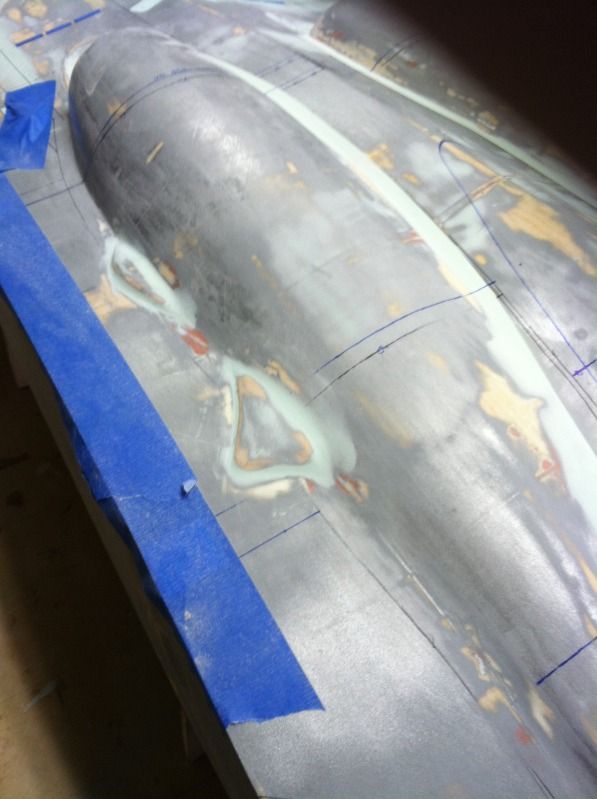
Last night I glassed the bumps/bulges, then primed them today. The smaller bulges where glassed with 2 pieces of 3/4oz glass, while the larger ones were glassed in 1 layer of 2oz. The primer is a high-build Filler primer out of a rattle can. Instead of fully pressing the nozzle, I Just barely press it so the paint kind of spits and splatters out. This helps to get a really thick coat of blob'd paint out to fill the glass weave a bit.
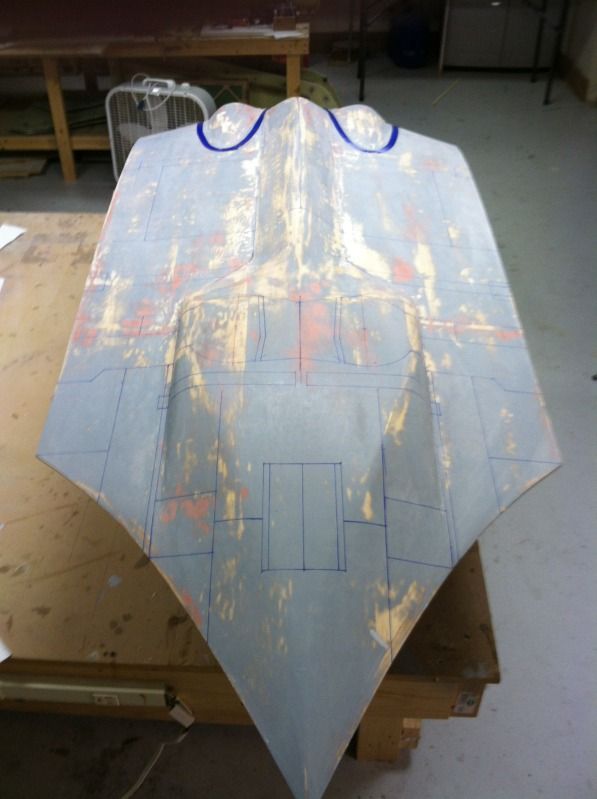
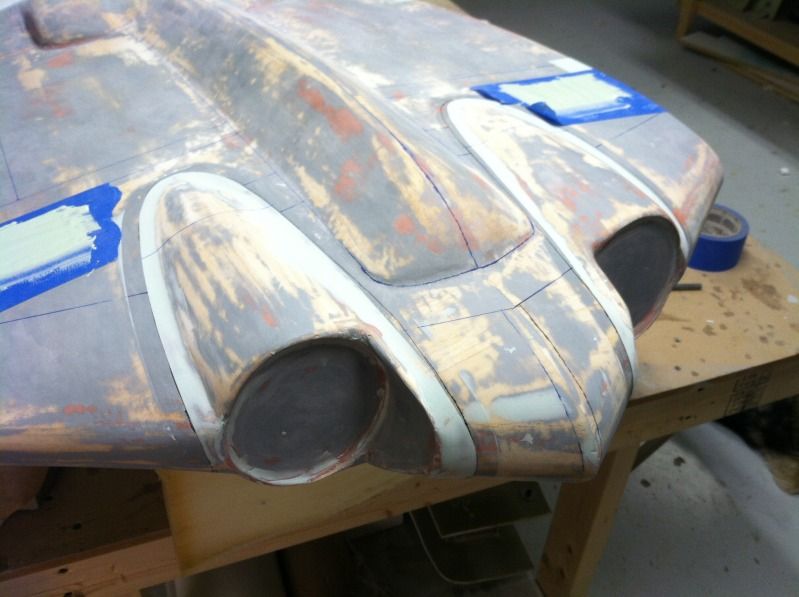
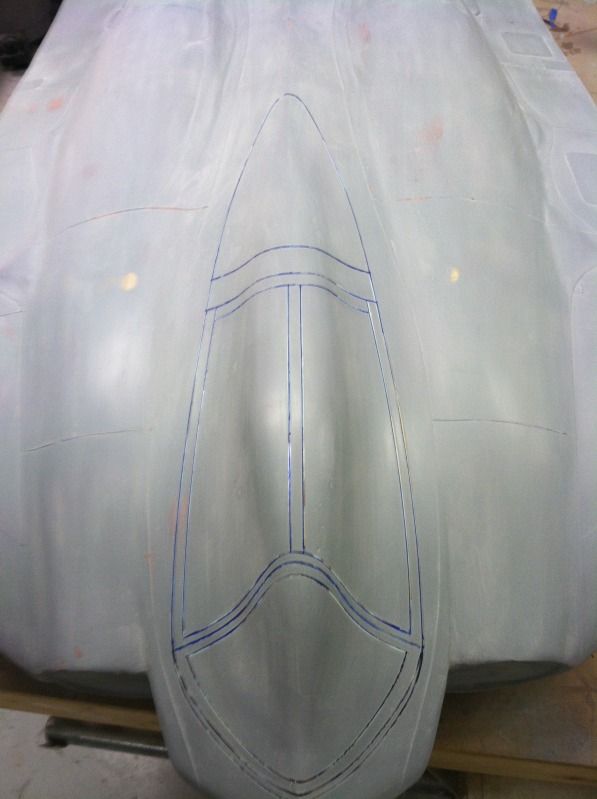
Then while waiting for the primer to dry, I flipped the center and put on all the panel lines. The bottom (at this point) is now to the same stage as the top of the center section. Nose wheel tire wheel be 6" in diameter and the mains will be around 4 1/2 to 4 3/4". The Gear door outline is 5 1/8". The center-line of the position of the strut also allows for about 1" of depth for the retract mechanism, so the retracts will have to be a low profile version.
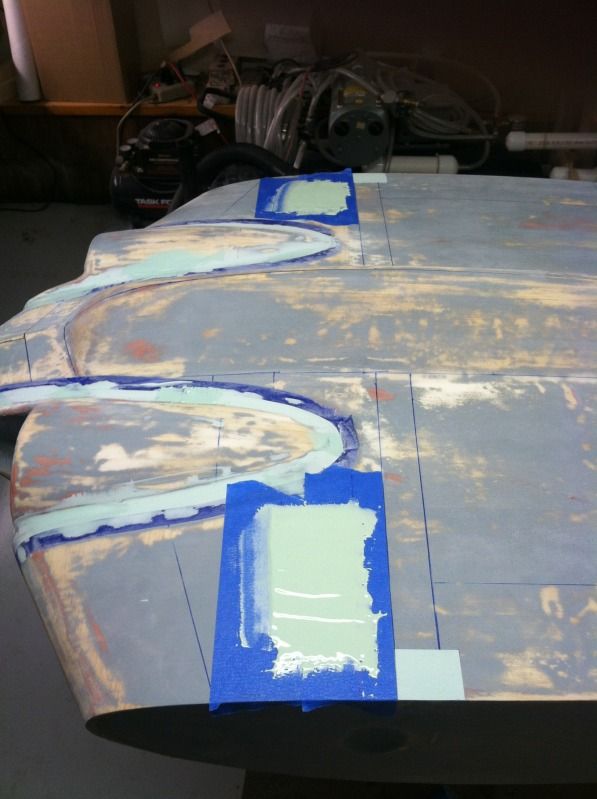
In the previous photo, you can also see the blue vinyl painters tape around the engine inlet bulges on the bottom. Since basically every curved surface around the turbines on the full-scale was metal, These were Most likely made to sit directly on top of the plywood center section skin. Since its a plug and you only have to do it once, you may as well do it right the first time. so, 2 layers of the vinyl painters tape was used to build up a ledge. This ledge thin had body filler placed beside it. Once it dries, its sanded smooth and then the tape is removed. You are left with a nice raised panel line edge.
The same technique is used for access hatch's as well. The nice thing about the tape, is you can vary the thickness of the panel edge by adding or subtracting tape layers.

Tomorrow I get to install all the bulges on the top, then do the raised panel edges on the top of the engine fairings and a few access panels as well. If I'm able to get all that done by a decent hour, i'll also put down all the panel line tape so I can spray more primer on Friday. Hopefully all the painting will be done by Saturday afternoon, that way we can start building parting planes on Saturday/Sunday! Then this thing will get molded the week after Thanksgiving. Then while it sits for a week to fully cure, i'll finish my outer wing panels (including paint), then I can completely concentrate on getting a few center sections molded up..
Last night I glassed the bumps/bulges, then primed them today. The smaller bulges where glassed with 2 pieces of 3/4oz glass, while the larger ones were glassed in 1 layer of 2oz. The primer is a high-build Filler primer out of a rattle can. Instead of fully pressing the nozzle, I Just barely press it so the paint kind of spits and splatters out. This helps to get a really thick coat of blob'd paint out to fill the glass weave a bit.
Then while waiting for the primer to dry, I flipped the center and put on all the panel lines. The bottom (at this point) is now to the same stage as the top of the center section. Nose wheel tire wheel be 6" in diameter and the mains will be around 4 1/2 to 4 3/4". The Gear door outline is 5 1/8". The center-line of the position of the strut also allows for about 1" of depth for the retract mechanism, so the retracts will have to be a low profile version.
In the previous photo, you can also see the blue vinyl painters tape around the engine inlet bulges on the bottom. Since basically every curved surface around the turbines on the full-scale was metal, These were Most likely made to sit directly on top of the plywood center section skin. Since its a plug and you only have to do it once, you may as well do it right the first time. so, 2 layers of the vinyl painters tape was used to build up a ledge. This ledge thin had body filler placed beside it. Once it dries, its sanded smooth and then the tape is removed. You are left with a nice raised panel line edge.
The same technique is used for access hatch's as well. The nice thing about the tape, is you can vary the thickness of the panel edge by adding or subtracting tape layers.
Tomorrow I get to install all the bulges on the top, then do the raised panel edges on the top of the engine fairings and a few access panels as well. If I'm able to get all that done by a decent hour, i'll also put down all the panel line tape so I can spray more primer on Friday. Hopefully all the painting will be done by Saturday afternoon, that way we can start building parting planes on Saturday/Sunday! Then this thing will get molded the week after Thanksgiving. Then while it sits for a week to fully cure, i'll finish my outer wing panels (including paint), then I can completely concentrate on getting a few center sections molded up..
11-15-2012, 11:45 PM
#117
Mooorreee progress
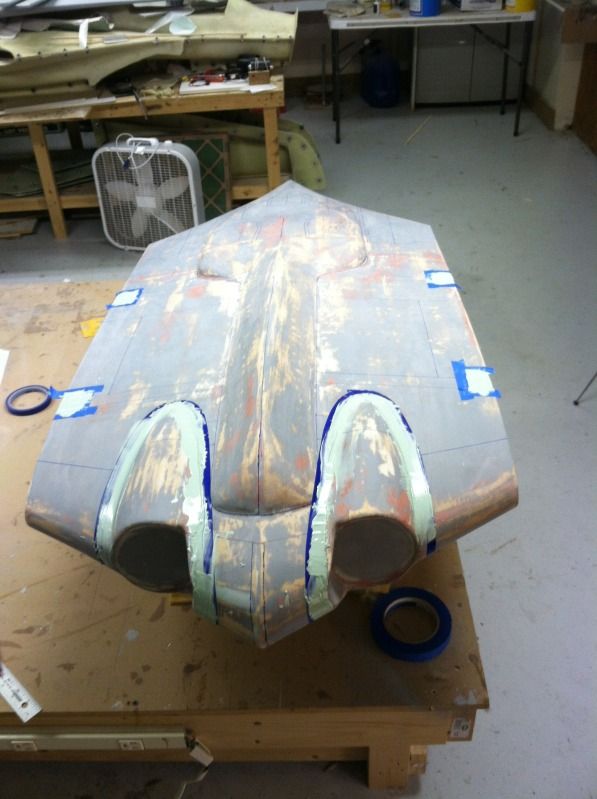
Glued the Bulges and built up the flanges and access panels with tape. Also did the same for the upper engine cowling panel edges for the inner edges. The outer edges can't be done until the flange around the bulge aft of the engine exhaust is done as the flanges only have about 1/16 to 3/32" between each other.
Then mixed up some body filler and spread it around:
Then sanded that down and pulled the tape up:

Then fared the bulges on the outside edges of the engine fairings in:
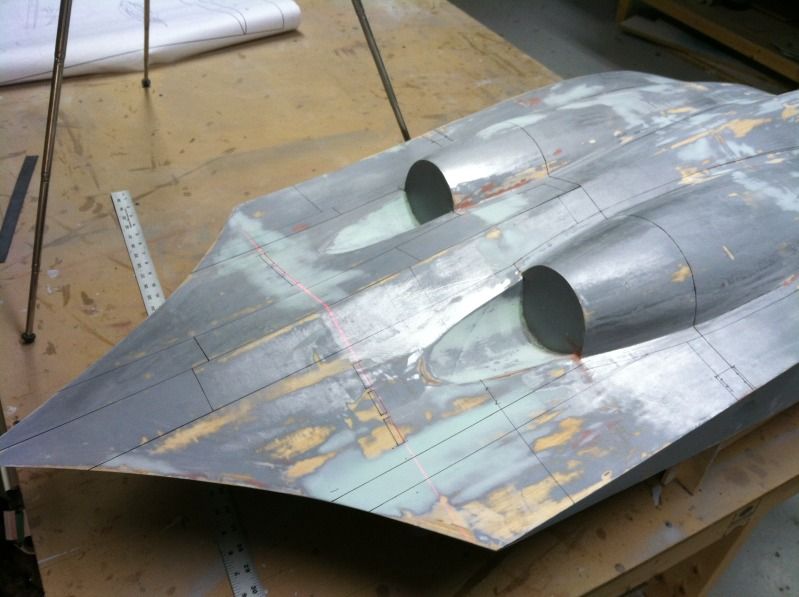
Then I did the same for the outside flange edges of the engine fairings. I also made up some tape pieces to put in the exhaust cooling vents and placed them down. Then spent a few hours putting down all the 1/64" panel line tape down. For the canopy frame, I used 1/16" tape to define it more.
Then put a light coat of primer down on the panel line tape, let that dry for a bit and then put down a few coats of primer. Gonna flip it over in the Am and do the same to the bottom. Saturday we do parting planes!
I love this part of builds. The detail really makes the airplane really start to come to life. I have pretty much made up my mind that i'm going to flite-metal the metal portions on my HO-229
Glued the Bulges and built up the flanges and access panels with tape. Also did the same for the upper engine cowling panel edges for the inner edges. The outer edges can't be done until the flange around the bulge aft of the engine exhaust is done as the flanges only have about 1/16 to 3/32" between each other.
Then mixed up some body filler and spread it around:
Then sanded that down and pulled the tape up:
Then fared the bulges on the outside edges of the engine fairings in:
Then I did the same for the outside flange edges of the engine fairings. I also made up some tape pieces to put in the exhaust cooling vents and placed them down. Then spent a few hours putting down all the 1/64" panel line tape down. For the canopy frame, I used 1/16" tape to define it more.
Then put a light coat of primer down on the panel line tape, let that dry for a bit and then put down a few coats of primer. Gonna flip it over in the Am and do the same to the bottom. Saturday we do parting planes!
I love this part of builds. The detail really makes the airplane really start to come to life. I have pretty much made up my mind that i'm going to flite-metal the metal portions on my HO-229
11-16-2012, 09:05 AM
#118
Senior Member
Join Date: Aug 2003
Location: Bogota, COLOMBIA
Posts: 322
Likes: 0
Received 0 Likes
on
0 Posts
It's very generous of you to take the time to document so much, always thinking about us. Great to see a craftsman process
11-16-2012, 11:23 AM
#120
The blue filler is kinda like bondo, but better.
There are two different types i use. The first is made by evercoat and is called easy sand. And like it says, its easy to sand.
The other is called dolphin glaze. It is easier to sand than bondo, but slightly harder than easy sand.
There are two different types i use. The first is made by evercoat and is called easy sand. And like it says, its easy to sand.
The other is called dolphin glaze. It is easier to sand than bondo, but slightly harder than easy sand.
11-16-2012, 03:46 PM
#121
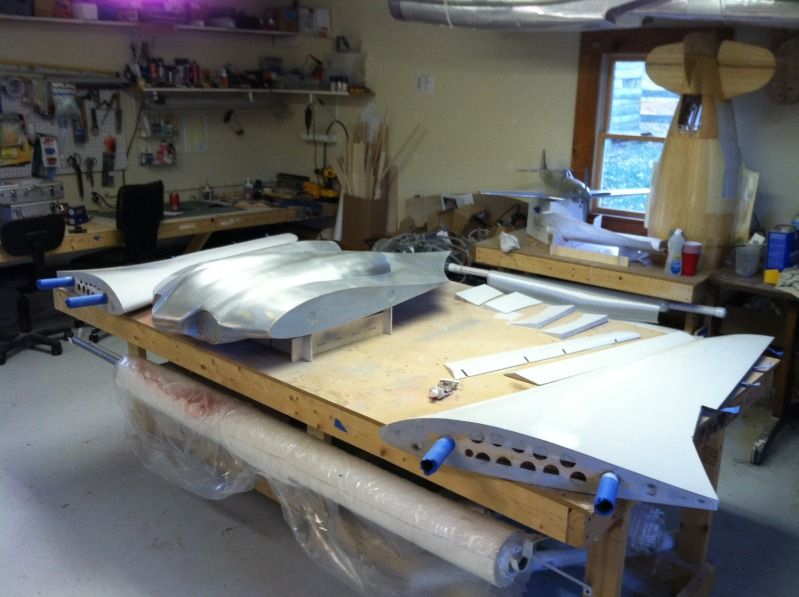
Lots of sanding today, but finally got the outer wing panels ready for panel lines and the final coat of primer, then color..
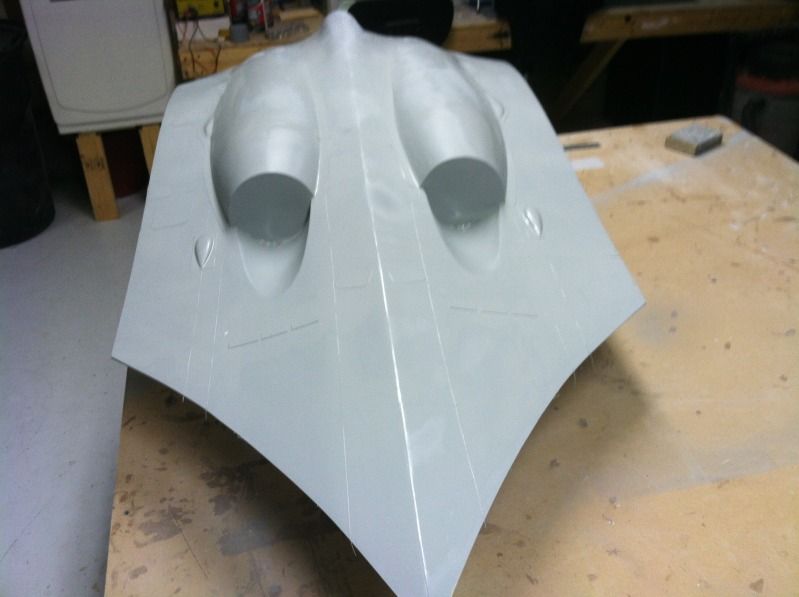
Also finished up the center section and wet-sanded it. Its ready to be molded once its waxed and the parting planes built:
The canopy/access hatch (their will only be this one, other than the gear doors) is pretty BIG. I know most people like hatch's so they can install everything easily, but I don't want to ruin the lines of this thing with needless hatch's (this may change). The canopy hatch is larger enough that the fan units can be installed through it, and the batteries can be installed and removed as well. To make routing wires and airlines through the center section easier, i'll pre-install some paper conduit tubes.
11-17-2012, 04:29 PM
#122
Parting Planes are done, plug and planes all waxed.. We are molding tomorrow!!!!!!
So a few have asked about the entire parting plane thing and how to figure out how to position them.. So here's some babble about the mystery of them...
All parting planes do, is give you a surface to build a flange for the mold segments to join together. So there are a few terms we need to know. Positive draft and negative draft. A Positive draft is what you want to keep as it allows you to remove the plug and parts from the mold. Negative draft is bad... In the way that it locks your plug/part into the mold segment to where they are extremely difficult if not impossible to remove.
So positive = good, negative = bad
A good example of a negative draft mold, would be a round cowling with a deep lip at the front that is larger in the center (when viewed from the side) of the cowling than the rear of it, and it only being molded in one piece. The "fat" center and lip would make it nearly impossible to remove the plug/cowl from the mold. If you make it in 2 pieces, it would still be very difficult, as the lip on the front of the cowling would make it difficult to separate the two halves. This is when you would need to do a 3 piece mold. One piece would be the front of the cowling and the lip, then the aft portion of the cowling would be molded in 2 pieces. In order to remove the plug/part, you'd pop the front segment of the mold off, then the two other halves and you have your part.
Now the real fun part. You want your parting planes to be put in a position that will keep a positive draft for the section of the part you are molding. For wings, this is pretty easy, you center them on the leading edge and on the trailing edge. For fuselages, it can become Very complex depending on the shape of the fuselage. The biggest thing to keep in mind, is that you must have a positive draft all of the time, you can get away with a very very very slight negative draft at times, but its not recommended.
That should answer most of the questions, anymore feel free to ask:
Back to the Horten:
First up, i waxed the center section 3 times. Then we took-off to Home Depot to pickup some melamine shelf boards, some clear lexan, rubber furniture bumpers and some insulation foam panels, about $60 in total.
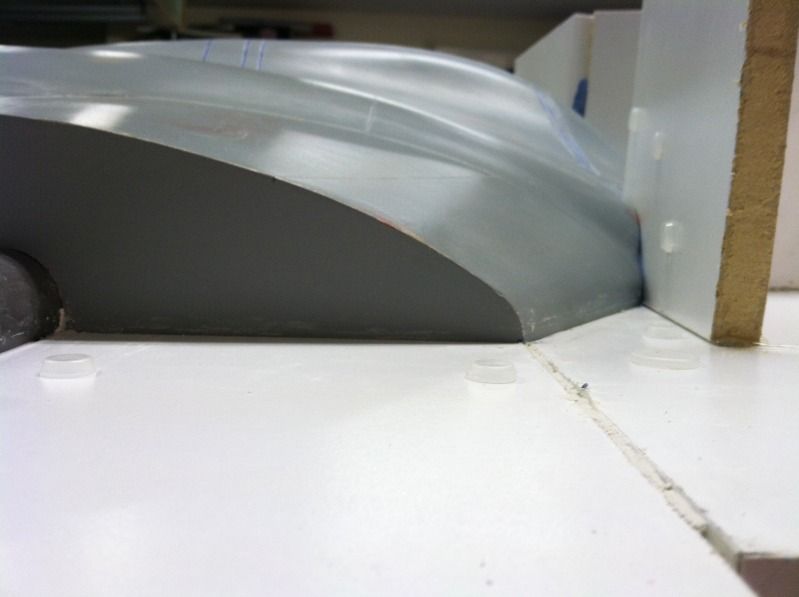
I measured from the table top to the center of the tip rib's trailing edge. Then i took this measurement and subtracted the thickness of the shelf board. This tells me how tall the parting plane supports need to be. So with that measurement, i ripped a bunch of foam strips, then placed them around the center section. They are hot-glued to the table. The side pieces but up against the tip rib to keep the plug from moving side to side, and the front portions but up against the inlet lips:
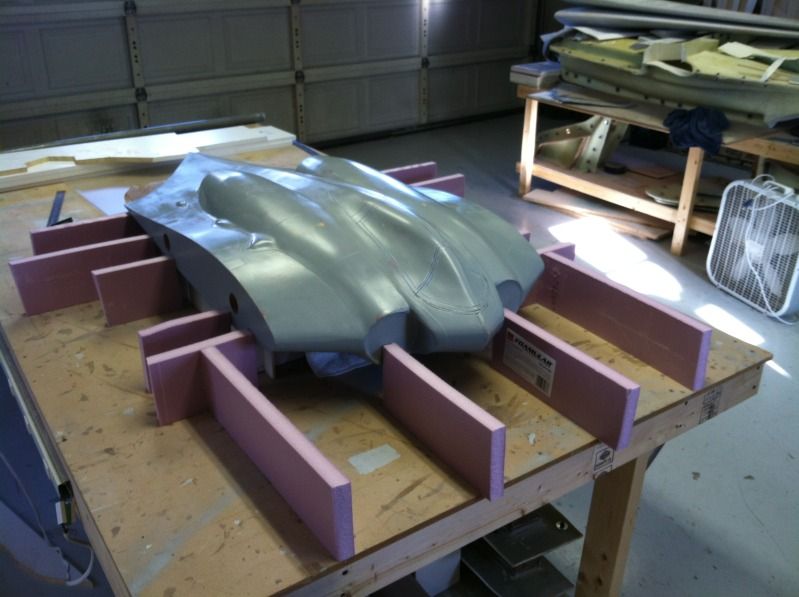
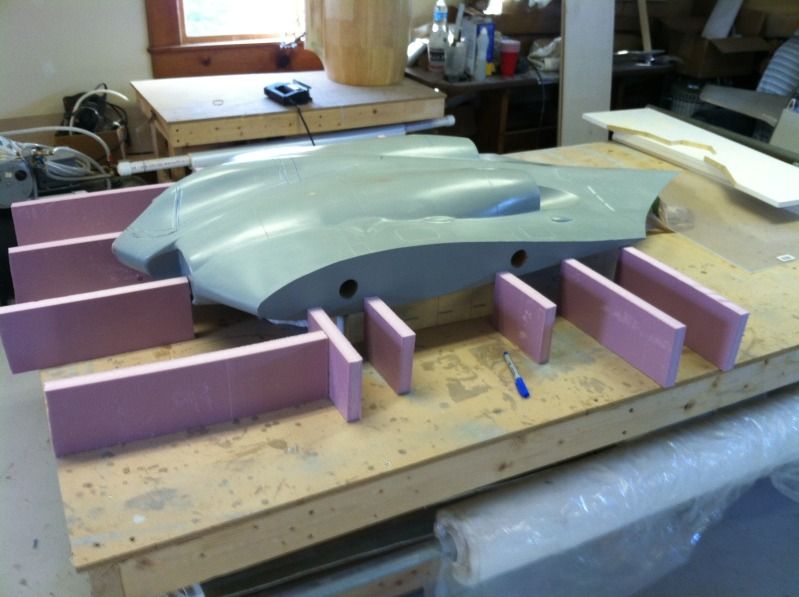
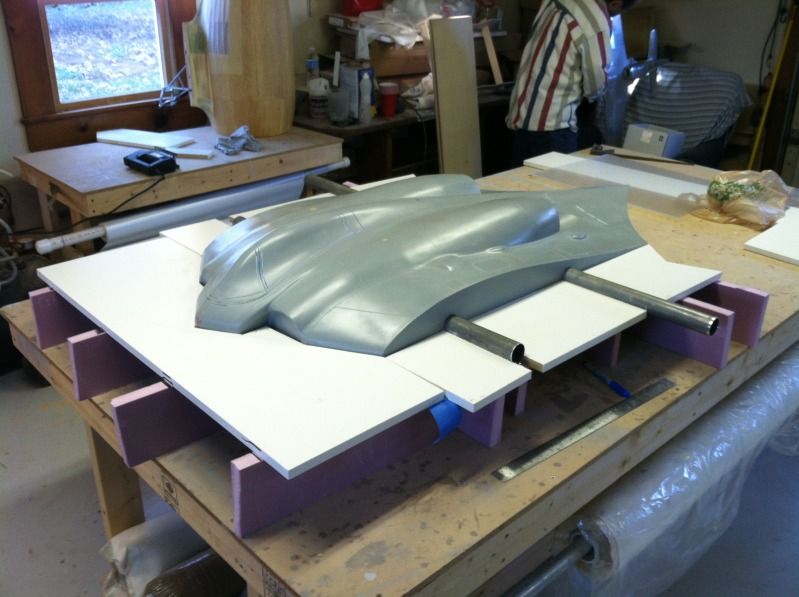
Then we took the sheets of melamine and cut the front one to go around the leading edge of the wing. Any gaps between the board and the plug where filled with non hardening modeling clay. Then the side pieces were cut to fit between the front one and the wing tubes and the trailing edge. Again, the boards are all hot-glued to the foam supports

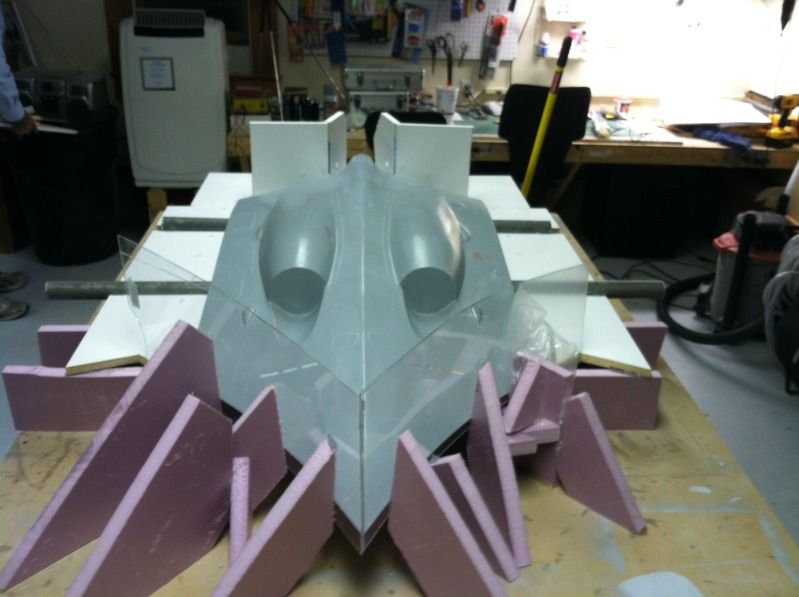
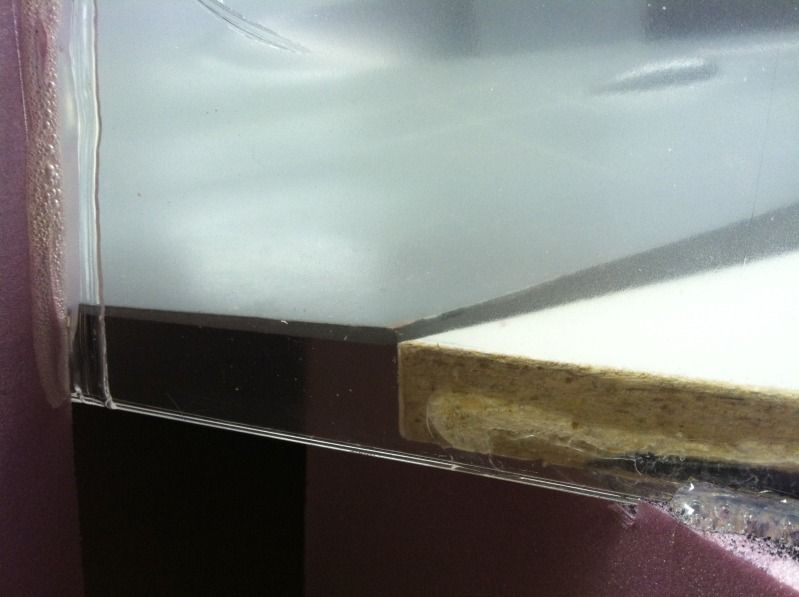
For the bat-tail area, since its not entirely straight when viewed from the side, we had to figure out something to do. So we got some .093" lexan plastic and cut it to fit vertically. the plastic flex's to follow the contour of the bat-tail and then foam triangles where hot-glued to the plastic and the table to keep the plastic pressed against the bat-tail.
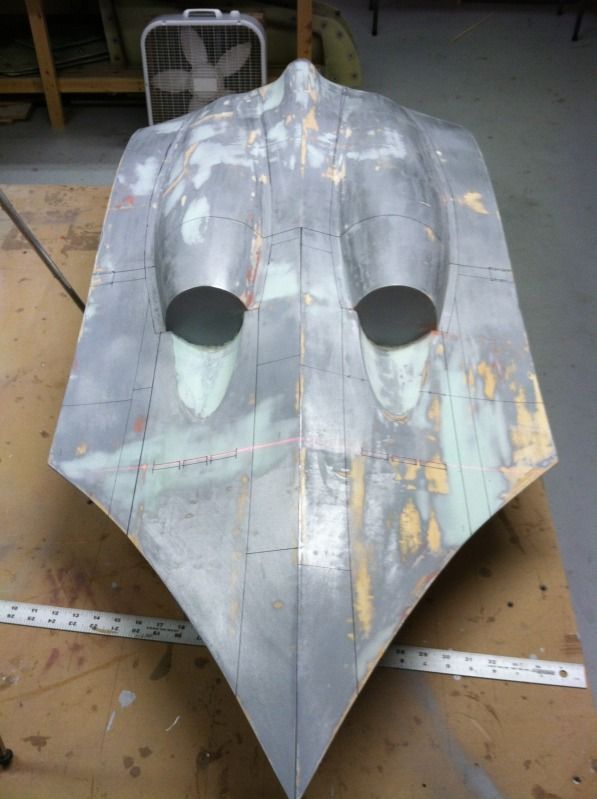
Here is what the parting planes look like against the leading edge and trailing edge:
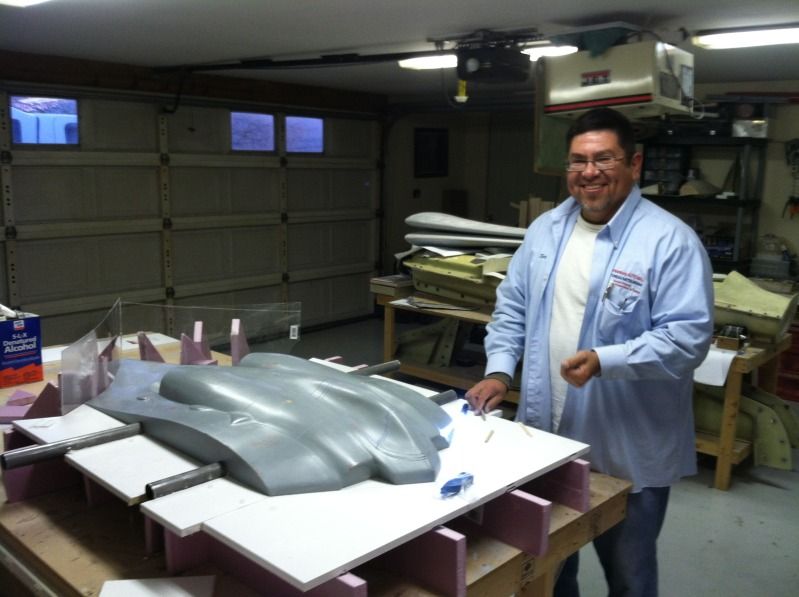
And my partner in crime with this project helped as well. All together, this is a full days project for one person, with both of us working on it, we got it done in right about 3 hours:
So a few have asked about the entire parting plane thing and how to figure out how to position them.. So here's some babble about the mystery of them...
All parting planes do, is give you a surface to build a flange for the mold segments to join together. So there are a few terms we need to know. Positive draft and negative draft. A Positive draft is what you want to keep as it allows you to remove the plug and parts from the mold. Negative draft is bad... In the way that it locks your plug/part into the mold segment to where they are extremely difficult if not impossible to remove.
So positive = good, negative = bad
A good example of a negative draft mold, would be a round cowling with a deep lip at the front that is larger in the center (when viewed from the side) of the cowling than the rear of it, and it only being molded in one piece. The "fat" center and lip would make it nearly impossible to remove the plug/cowl from the mold. If you make it in 2 pieces, it would still be very difficult, as the lip on the front of the cowling would make it difficult to separate the two halves. This is when you would need to do a 3 piece mold. One piece would be the front of the cowling and the lip, then the aft portion of the cowling would be molded in 2 pieces. In order to remove the plug/part, you'd pop the front segment of the mold off, then the two other halves and you have your part.
Now the real fun part. You want your parting planes to be put in a position that will keep a positive draft for the section of the part you are molding. For wings, this is pretty easy, you center them on the leading edge and on the trailing edge. For fuselages, it can become Very complex depending on the shape of the fuselage. The biggest thing to keep in mind, is that you must have a positive draft all of the time, you can get away with a very very very slight negative draft at times, but its not recommended.
That should answer most of the questions, anymore feel free to ask:
Back to the Horten:
First up, i waxed the center section 3 times. Then we took-off to Home Depot to pickup some melamine shelf boards, some clear lexan, rubber furniture bumpers and some insulation foam panels, about $60 in total.
I measured from the table top to the center of the tip rib's trailing edge. Then i took this measurement and subtracted the thickness of the shelf board. This tells me how tall the parting plane supports need to be. So with that measurement, i ripped a bunch of foam strips, then placed them around the center section. They are hot-glued to the table. The side pieces but up against the tip rib to keep the plug from moving side to side, and the front portions but up against the inlet lips:
Then we took the sheets of melamine and cut the front one to go around the leading edge of the wing. Any gaps between the board and the plug where filled with non hardening modeling clay. Then the side pieces were cut to fit between the front one and the wing tubes and the trailing edge. Again, the boards are all hot-glued to the foam supports
For the bat-tail area, since its not entirely straight when viewed from the side, we had to figure out something to do. So we got some .093" lexan plastic and cut it to fit vertically. the plastic flex's to follow the contour of the bat-tail and then foam triangles where hot-glued to the plastic and the table to keep the plastic pressed against the bat-tail.
Here is what the parting planes look like against the leading edge and trailing edge:
And my partner in crime with this project helped as well. All together, this is a full days project for one person, with both of us working on it, we got it done in right about 3 hours:


