


Hangar 9 60cc Corsair
 04-28-2016, 08:07 PM
#2301
Junior Member
Join Date: Sep 2014
Location: San Antonio, TX
Posts: 7
Likes: 0
Received 0 Likes
on
0 Posts
It is time to get this thing built. I cleared the work bench and put this plane ahead of 2 other builds. The motor is a Saito FG84r3 with the Ray English modifications, Keleo exhaust, Keleo motor box and Beila 3-blade 22 x12 prop. I went with the electric Robarts for this plane and the Spektrum AR 9110 powersafe receiver. Pilot will be a Bestpilots Pappy Boyington which is suppose to arrive tomorrow.


 04-28-2016, 08:32 PM
#2302

I am using the FG84 for mine. I am going to start without Ray's mods as the engine seems to run good from the factory and haven't seen the issues reported by others. Will report back once I have more runs on the engine. So far it is awesome though! Plus I am a mile high so we will see what that does for it 
Adam
Adam
#1 is going to be hot as it'll be lean. #2 and #3 will be cold because they are fat. The transition will be atrocious with the engine turning somewhere in the area of 700 RPM less that it should be at full throttle for a given prop.
I know that the mods from Ray are spendy, but if you've already spent this much money on a project, why not do it right and have a model you'll enjoy because it's fun to fly and you don't have to worry about not having decent engine power when you need it?
I strongly suggest that you watch Fred Culbertson's videos of his Corsair Maiden with the unmodified engine and the first flight with the engine having Ray's modifications and the Keleo exhaust ring.
04-29-2016, 04:23 AM
#2303

Join Date: Apr 2016
Location: San Antonio, TX
Posts: 47
Likes: 0
Received 0 Likes
on
0 Posts
Wfahey, saw what you did there Bill, our corsairs are going to look great on the ramp. Can't wait. This has been a great thread and have picked up a lot of great pointers. Will keep the group appraised of motor select and install etc. Over on the Evolution thread, Maxxum has recommended an OS carb for the 7-77, have one on the way and a CH Electronics adapter. This increases power output...we'll see.
04-30-2016, 06:50 AM
#2304
Member
Join Date: Jul 2014
Posts: 58
Likes: 0
Received 0 Likes
on
0 Posts
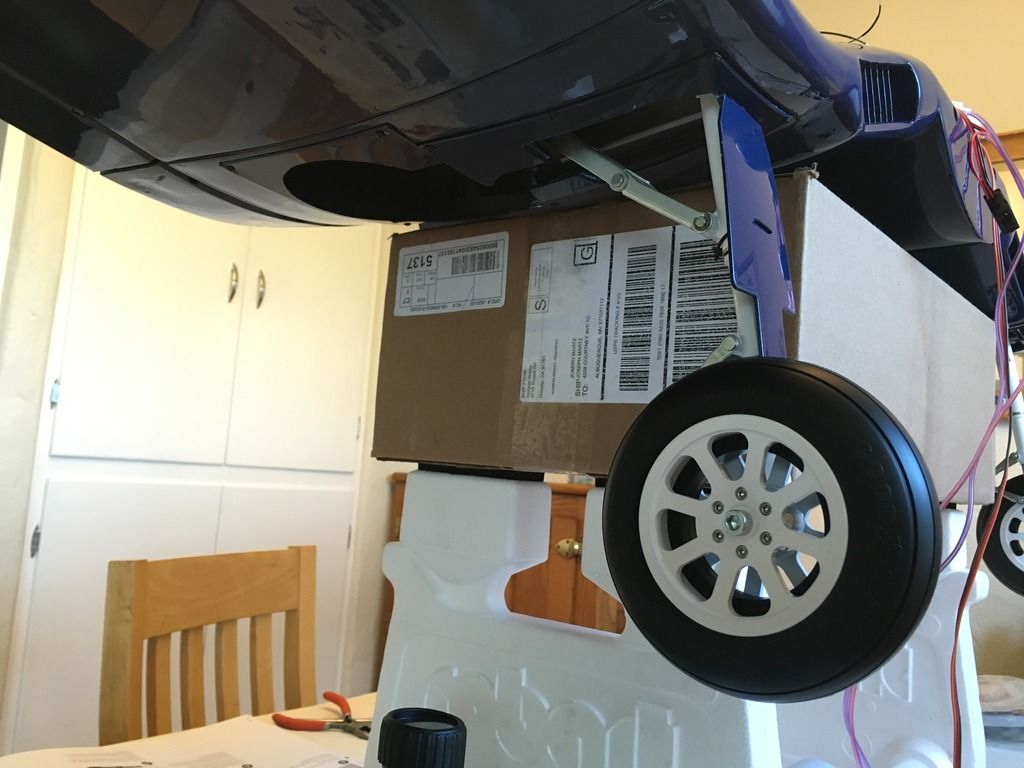
Making some progress on my F4u build. Here's the function testing of the retracts. Wing built very smoothly, especially the flaps. Dual servo, and set the throws to eliminate torque on the flap linkages. Will power this with an EME 70 Twin with auto-start. No need to save weight in the nose, mind as well make it functional with a starter system.
Thanks for all the suggestions here. Next step is reinforcing the firewall per earlier recommendations.


Thanks for all the suggestions here. Next step is reinforcing the firewall per earlier recommendations.


Last edited by diablo2112; 04-30-2016 at 08:52 PM.
05-01-2016, 12:48 PM
#2306
Member
Join Date: Jul 2014
Posts: 58
Likes: 0
Received 0 Likes
on
0 Posts
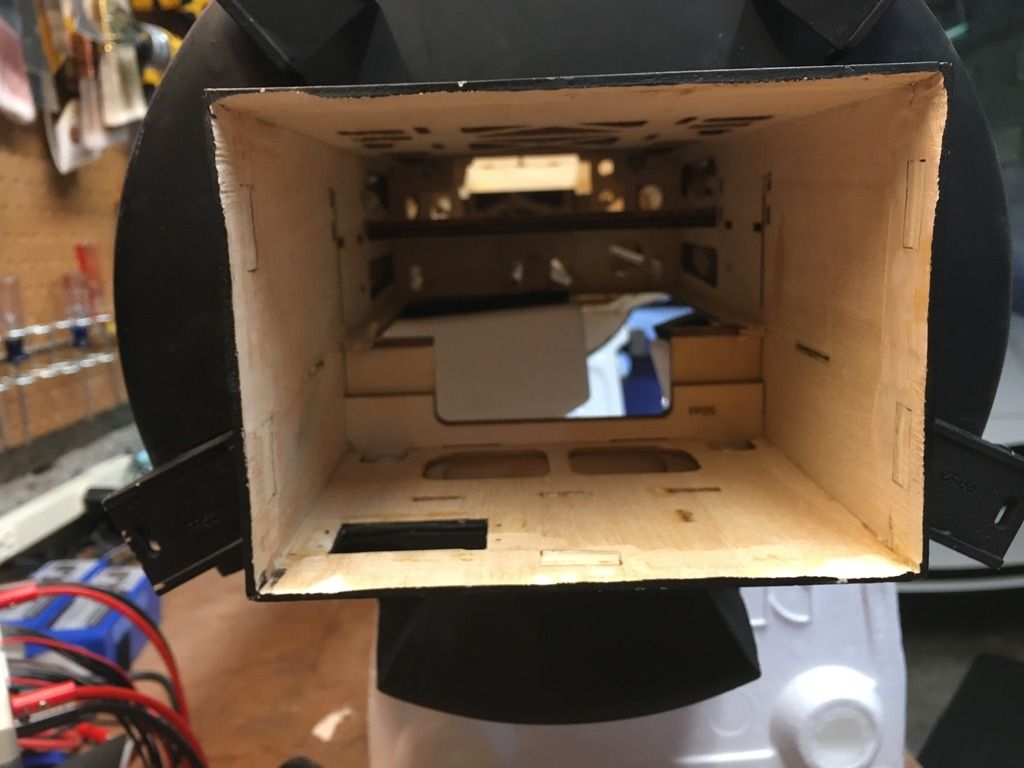
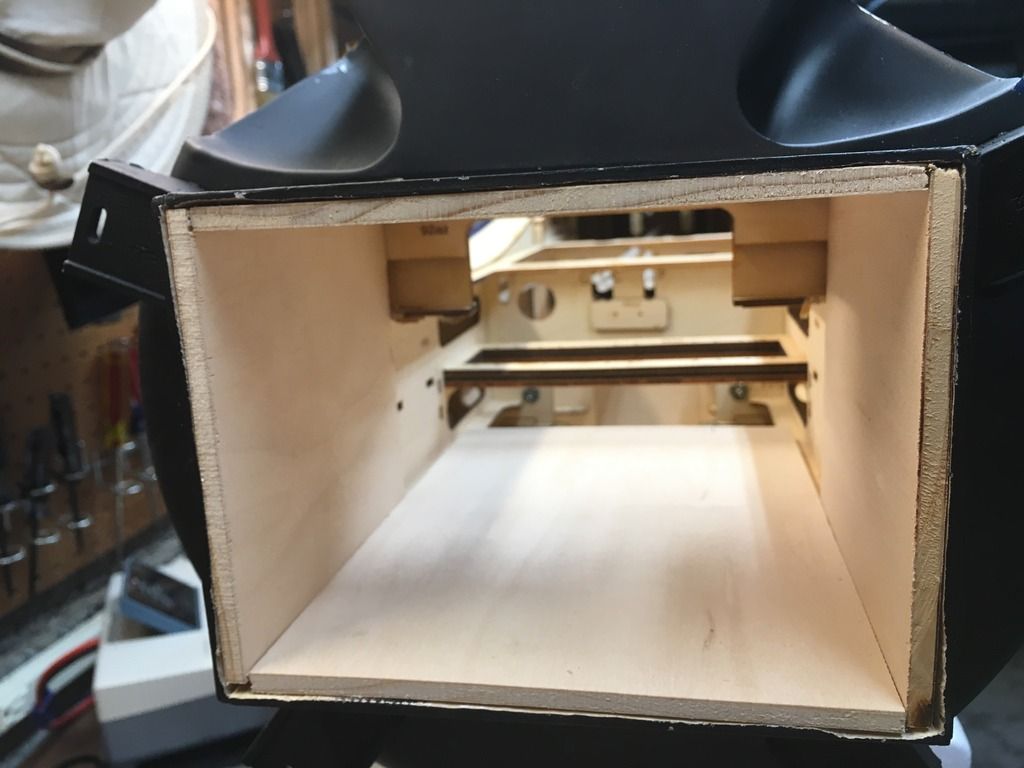
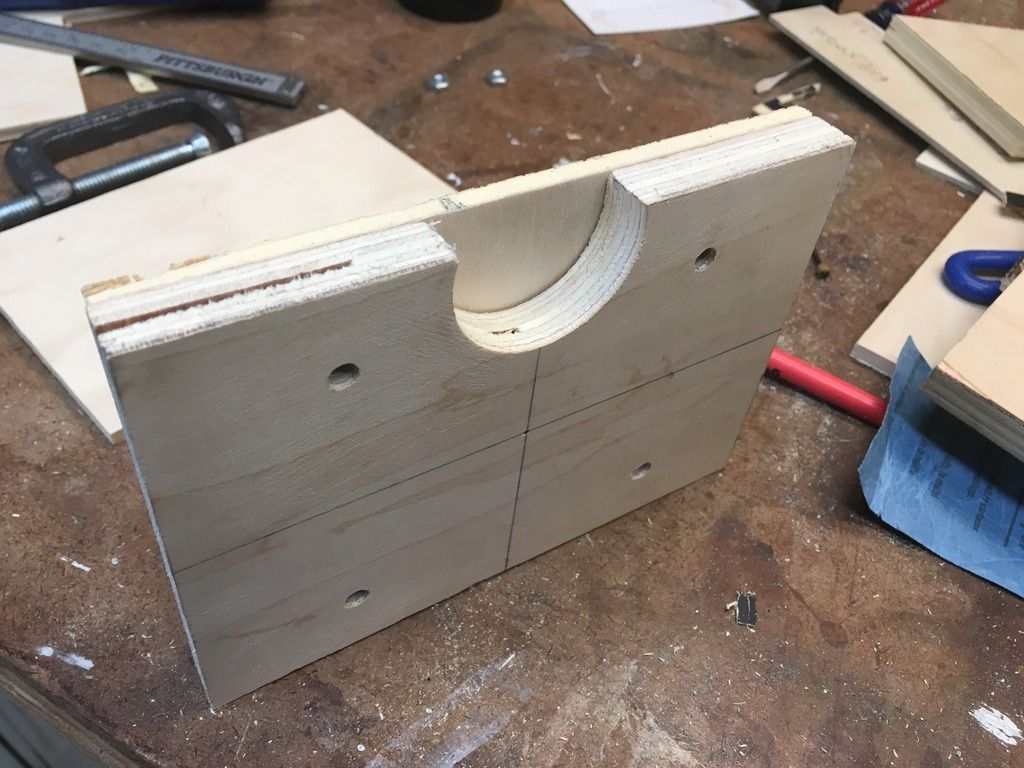
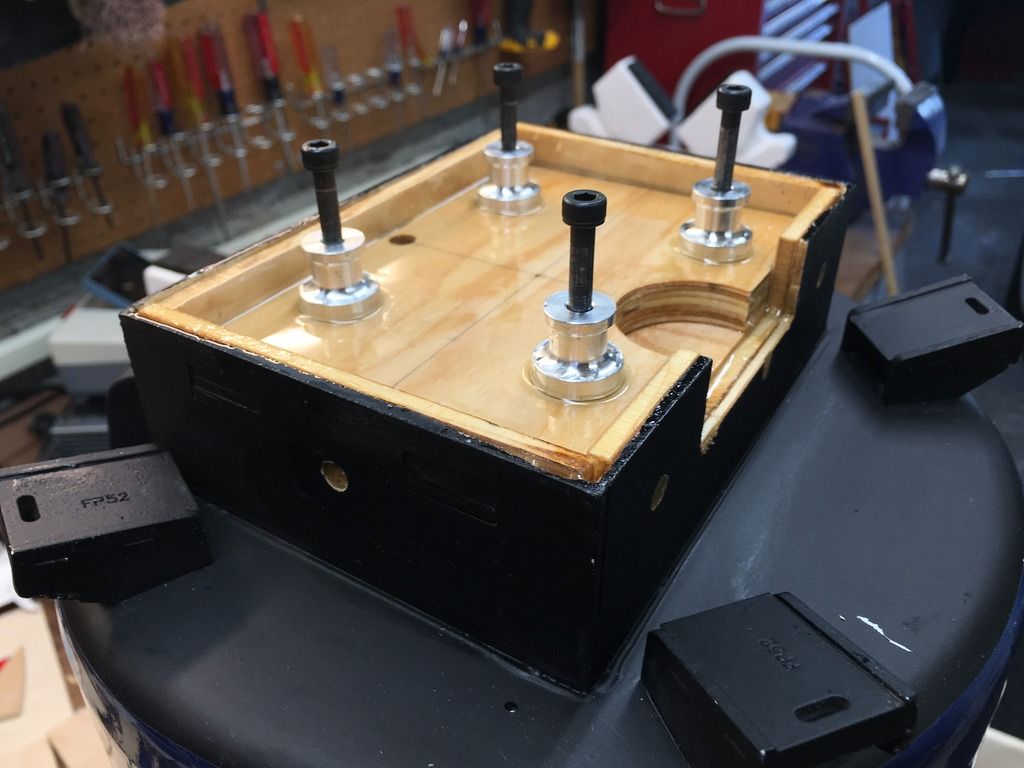
Continuing my build. I ripped out the stock firewall and installed a much reinforced version. The stock firewall is amazingly flimsy; just the skinniest of brittle ply on all 4 sides. IMHO, it's completely and totally inadequate.
I ripped this out, lined all 4 sides of the interior with 1/4" cabinet-grade ply extended far back into the fuselage (including a new sturdy tray for the fuel tank), then constructed a thick (almost 1") firewall. I used dowel rods to pin this to the reinforced sides, in addition to corner bracing on the interior. Coated it all with thinned epoxy for fuel proofing, and viola, new firewall. The cutouts in the firewall accommodate the electric starter on the EME 70 twin that will be installed in this model.
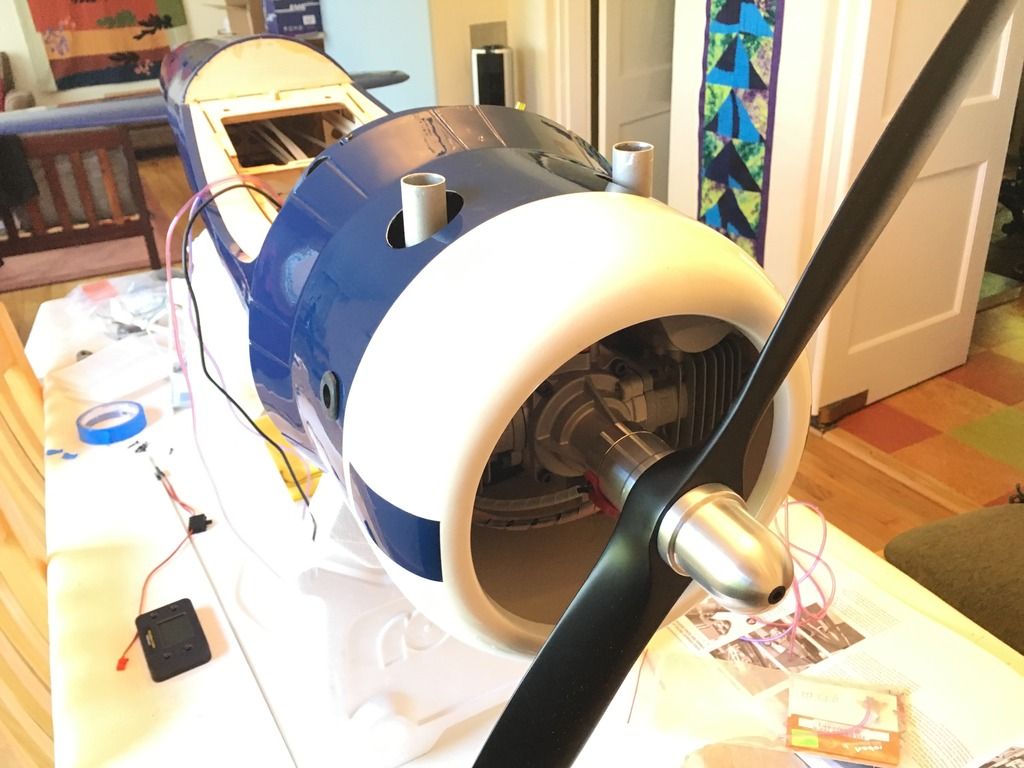
I choose to eliminate the thrust angle on the motor mount, in order to fully enclose the EME70 in the cowl without cutouts. I'll have to add a bit of rudder trim to compensate.
Here's a few pics to help others, if they so wish.

I ripped this out, lined all 4 sides of the interior with 1/4" cabinet-grade ply extended far back into the fuselage (including a new sturdy tray for the fuel tank), then constructed a thick (almost 1") firewall. I used dowel rods to pin this to the reinforced sides, in addition to corner bracing on the interior. Coated it all with thinned epoxy for fuel proofing, and viola, new firewall. The cutouts in the firewall accommodate the electric starter on the EME 70 twin that will be installed in this model.
I choose to eliminate the thrust angle on the motor mount, in order to fully enclose the EME70 in the cowl without cutouts. I'll have to add a bit of rudder trim to compensate.
Here's a few pics to help others, if they so wish.


Last edited by diablo2112; 05-01-2016 at 12:50 PM.
05-02-2016, 11:29 AM
#2308

Join Date: Apr 2015
Posts: 5
Likes: 0
Received 0 Likes
on
0 Posts
Has anyone done the Morris Mini motor intake modification? Looks like the mod that Ray does but you install it yourself. http://www.morrisminimotors.com/#!sa...rsion-kit/co0y
Interested to see if it works or not.
Adam
Interested to see if it works or not.
Adam
05-02-2016, 05:17 PM
#2309
Member
Join Date: Jul 2014
Posts: 58
Likes: 0
Received 0 Likes
on
0 Posts
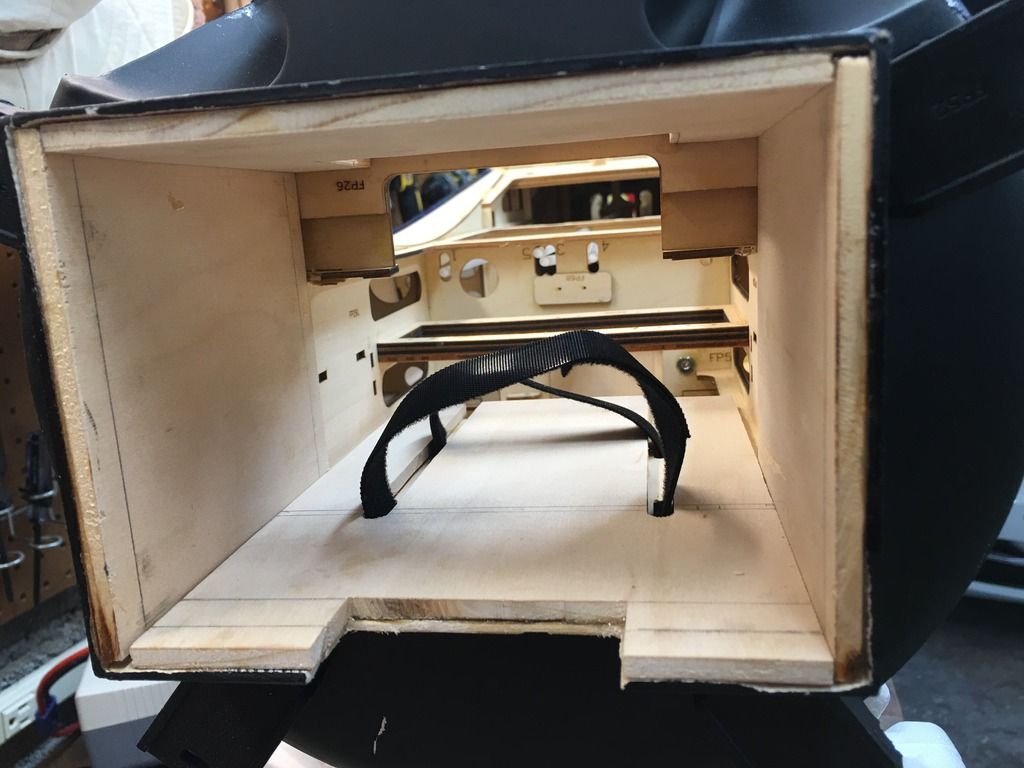
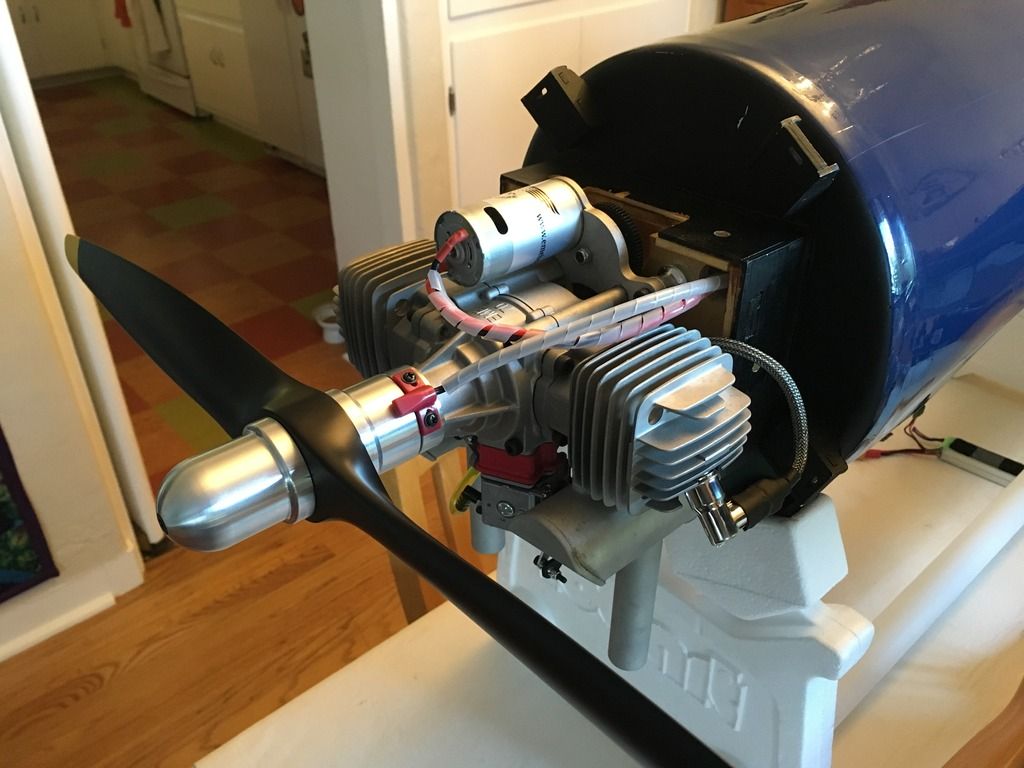
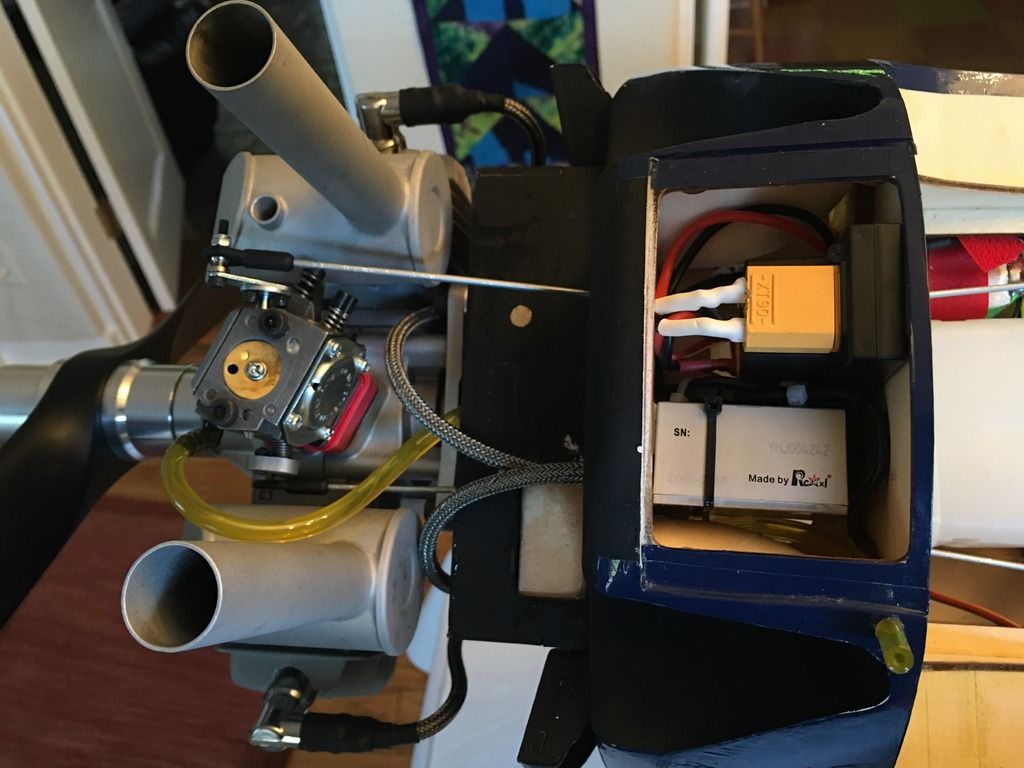
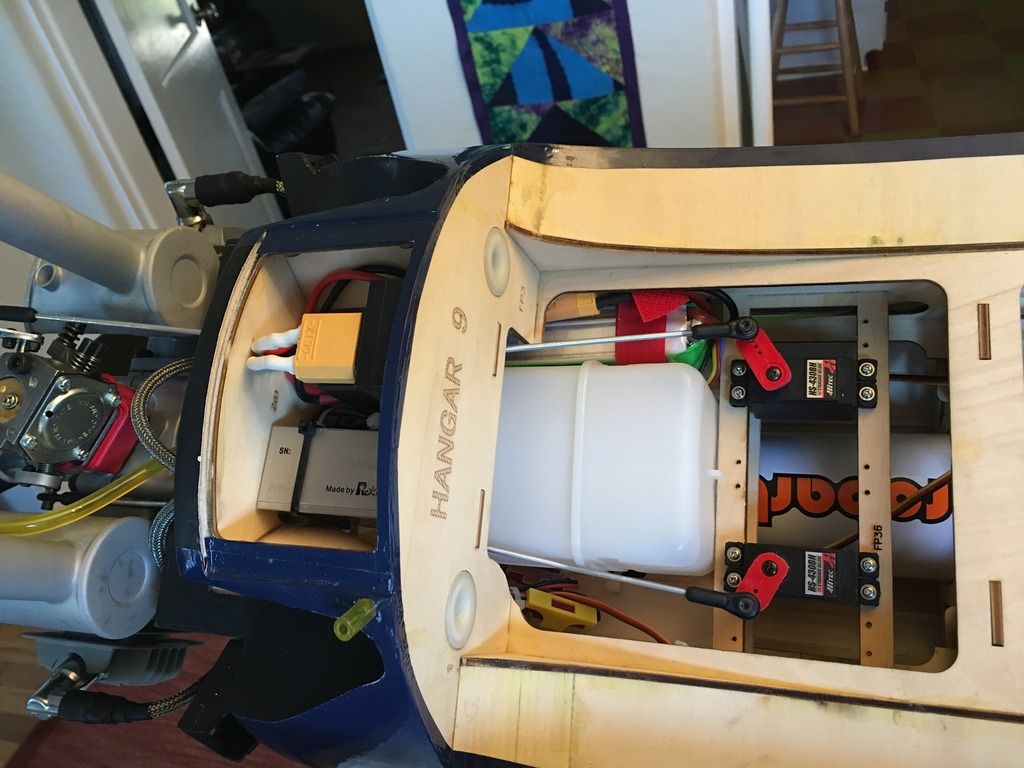
Contributing a few more build pics to the collection here. Many ways to fit all the gear in, here's how I did it. The big XT90 and relay in the chin box is for the autostart system. Throttle and choke servos have been moved away from the firewall, to lower the chance of failure due to excessive vibration.


Last edited by diablo2112; 05-02-2016 at 05:22 PM.
05-12-2016, 04:39 AM
#2311
My Feedback: (48)
I use the EME 70cc with electric start on several planes. It is my favorite combination with plenty of power for this size aircraft. Even have it on a Ziroli Zero at 92inches and flys strong. The electric start is simple, reliable and great to have. Power draw is amazingly small for starter. It will spoil you quickly.
05-12-2016, 06:47 AM
#2312
Member
Join Date: Jul 2014
Posts: 58
Likes: 0
Received 0 Likes
on
0 Posts
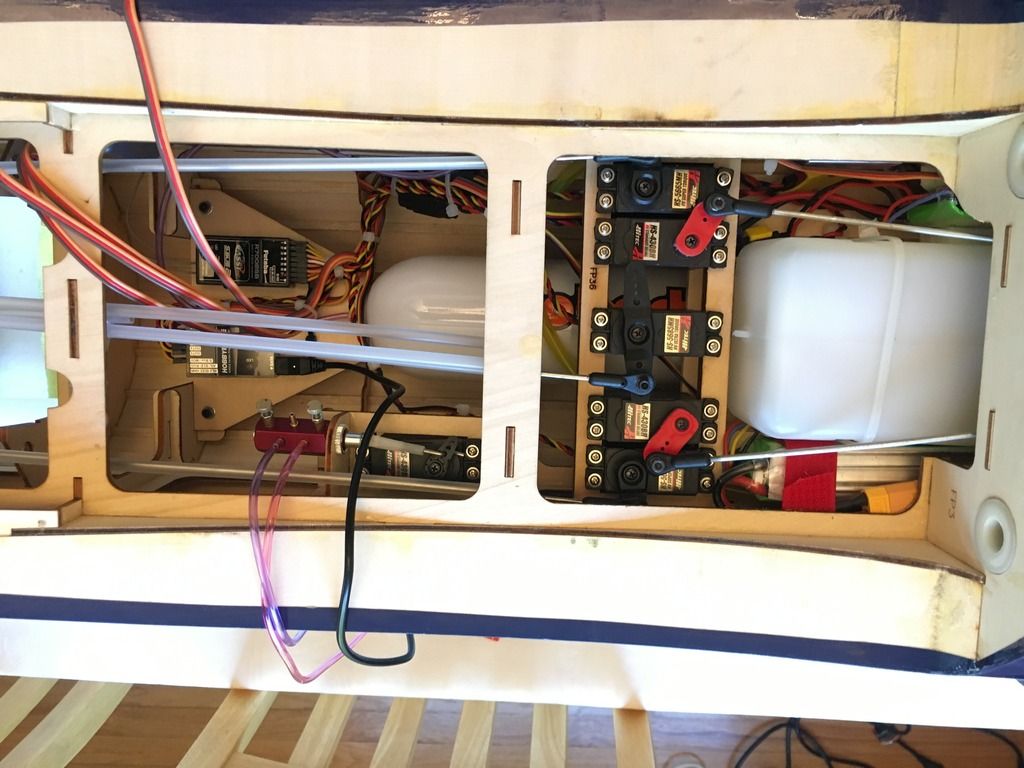
The electric start is just amazing! So easy to use. I also have a remote choke, and remote optical kill switch. Wired it all up through a nice panel that separately energizes the radio (2S 5000 mAh) and ignition/start (3S 2700 mAh). Will be able to charge the batteries without removal of the center wing section.
The radio install has been really easy and straightforward. I have this on a Futaba 18SZ with R7008SB receiver. I set the receiver in mode 4, which puts channels 1-8 on the S.Bus and channels 9-16 on the direct outputs. I use S.Bus to send primary flight controls (including Aer2 and Ele2 channels) to a Hobby Eagle A3 Super II 3-axis gyro. Not that I intend to use the gyro much, but just as importantly, this acts as an S.Bus decoder. I plug Aer1, Aer2, Ele1, Ele2, and Rud channels in the A3. I also use channel 5 to switch gyro modes, and channel 8 for gyro gain. That's 7 of 8 channels from 1-8 on the S.Bus. Other channels are:
9 - throttle
10 - choke
11- starter motor
12 - ignition kill
13 - pneumatic retracts
14 - flaps 1
15 - flaps 2
16 - ordinance release
For all that complexity, the Futaba 18 SZ and R7008SB are ideal. I don't need to bind a second receiver, and the A3 is a great little box for both S.Bus decode and gyro functionality. It's all working smooth. Here's a few more pics.
BTW, this project has been a godsend. As I recover from cancer surgery a few weeks ago, this has been my distraction while I get better. I can't tell you literally how life-saving my love of RC models has been, and a huge distraction through all this. Thanks to everyone here, I couldn't do this without your advice and ideas.


Last edited by diablo2112; 05-12-2016 at 06:55 AM.
05-12-2016, 09:14 AM
#2314
Join Date: Apr 2016
Location: San Antonio, TX
Posts: 47
Likes: 0
Received 0 Likes
on
0 Posts
Diablo 2112 superb work, looks great!!! Wishing you a speedy recovery. Putting the finishing touches on my Corsair. Just finished the sliding canopy and working to install the Evo7-77. Keep up the great work and kick that cancer in its a@@.
Bill
Bill
05-12-2016, 10:06 AM
#2315
Member
Join Date: Jul 2014
Posts: 58
Likes: 0
Received 0 Likes
on
0 Posts
Bill,
Thanks so much, really, for the encouragement. I was diagnosed with tongue cancer 4 weeks ago. No risk factors (I don't smoke or drink). 50 years old. My career has been as a nuclear scientist, and I have a long occupational history of exposure to radiation, so that's probably the cause. It's stage IV (spread to my lymph nodes), but all my doctors say both treatable and curable. Had a good portion of my tongue removed in surgery. Stage IV cancer sounds scary, but treatments are really good today. The very best treatment has been Hangar 9. I have a 60cc P51 Mustang on standby, for when I finish this project. I still have about 3 months of treatment/therapy ahead, and just love building my RC models. Keeps my mind off everything else.
Sorry to sidetrack from the thread, I'll have more build pics coming as I make progress. Are you re-building the firewall as part of your Evo 7-77 install?
Joe M.
Albuquerque, NM
Last edited by diablo2112; 05-12-2016 at 10:08 AM.
05-12-2016, 04:10 PM
#2316
Join Date: Apr 2016
Location: San Antonio, TX
Posts: 47
Likes: 0
Received 0 Likes
on
0 Posts
Joe M. You sound strong so I'll know you'll do well. I recently completed the H9 60cc Mustang. Went with the Evolution 62ccGX motor. Haven't flown it yet, waiting for the right conditions. You keep pressing!
Bill
Bill
05-12-2016, 04:15 PM
#2317
Join Date: Apr 2016
Location: San Antonio, TX
Posts: 47
Likes: 0
Received 0 Likes
on
0 Posts
Joe, leaving the firewall as is. Made a 3/4 inch spacer out of plywood I laminated together that will mount the motor to the firewall to provide correct distance to the front of the cowl. Will have to remove the outer trim on the firewall to mount the spacer flush. Believe this will be a strong solution.
Bill
Bill
05-14-2016, 06:47 AM
#2318
Member
Join Date: Jul 2014
Posts: 58
Likes: 0
Received 0 Likes
on
0 Posts
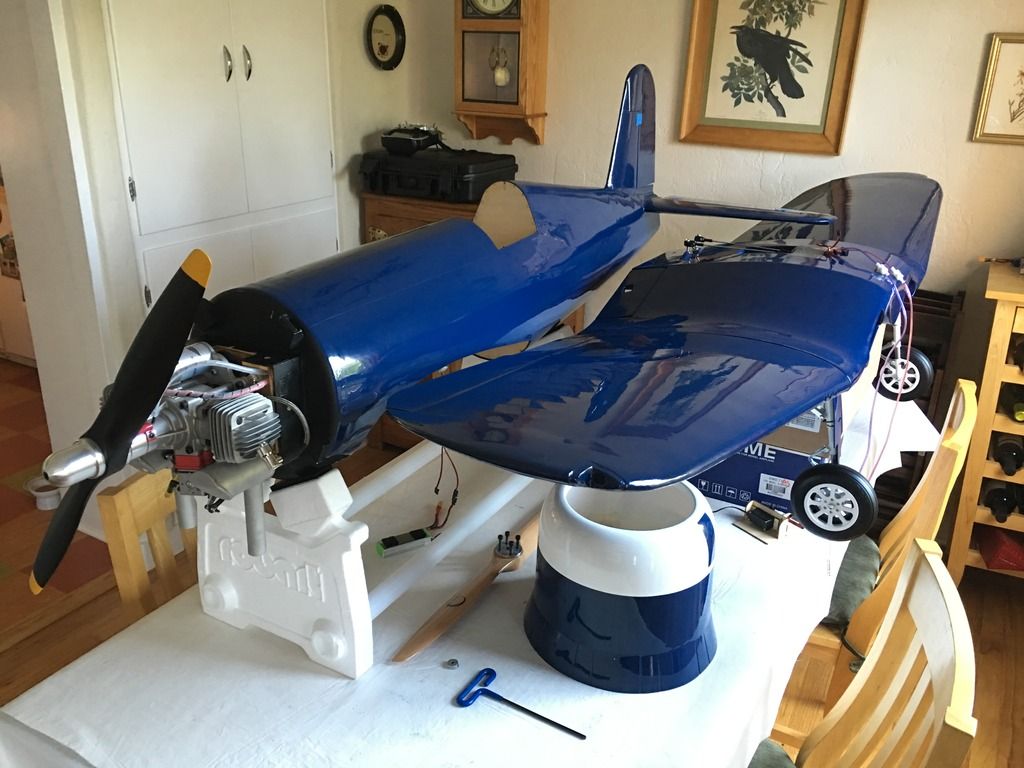
Nearing completion of assembly. Did an initial CG check on the build. Overall weight was 27.0 pounds before balancing, and I calculated I needed to add 3 pounds to the nose to bring the CG to the rear of the suggested range (5.3" from the leading edge).
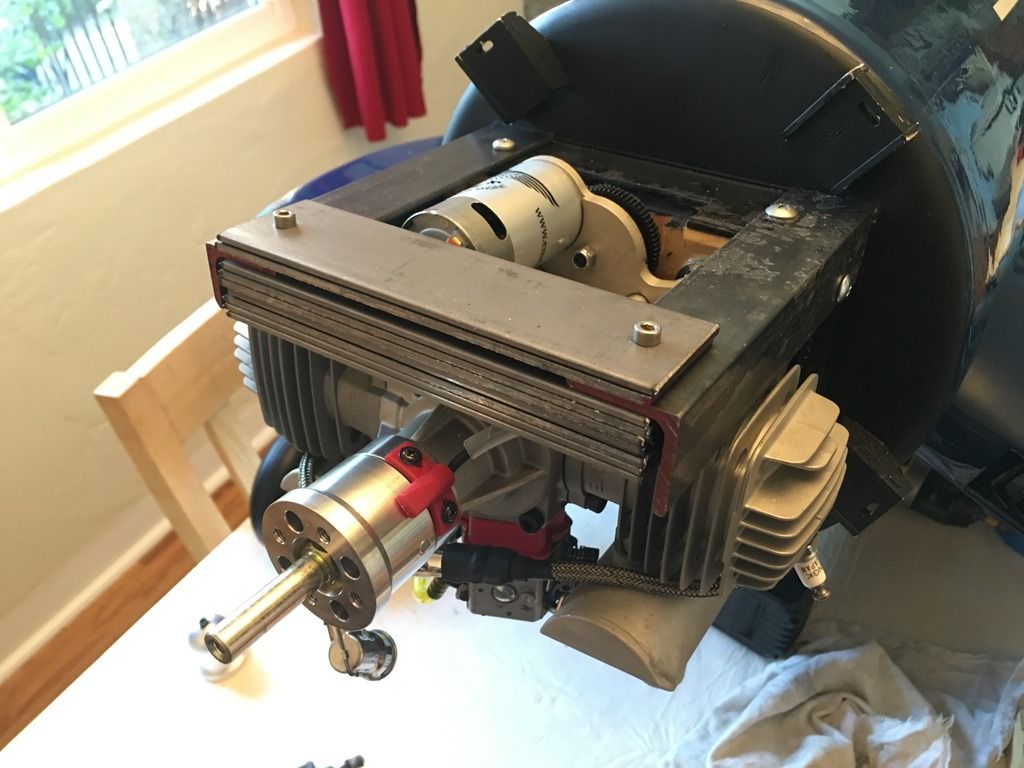
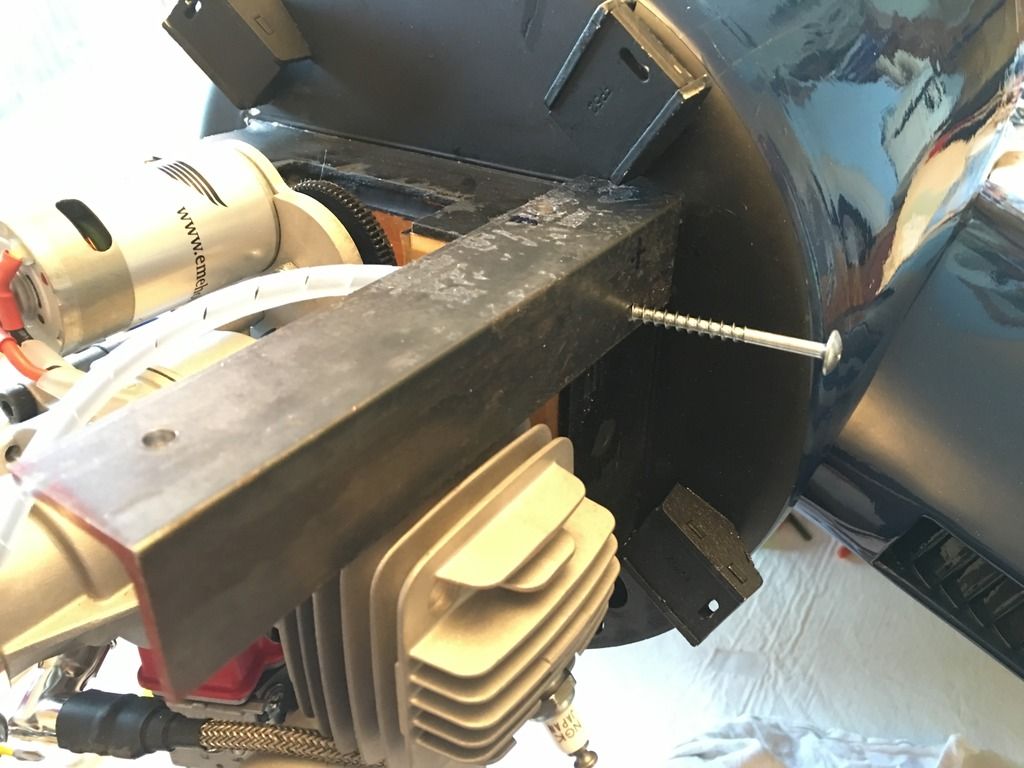
How to do this? I didn't like the idea of adding weight directly to the fiberglass cowl, as this can come loose. Adding weight on the firewall is inefficient, as you want to leverage mass as far to the front as possible. A bit of head scratching, and I fabricated the following from angle iron.
This is 3.4 pounds of sheet steel. Each shim weighs 0.25 pounds, and they can easily be added/removed to fine-tune the CG. This mount places the shims 15" in front of the CG point, about as far forward as you can possibly get. The angle-iron mounts (which weigh 1.1 pounds themselves) were attached to the firewall with 4" lag screws into the 1" thick firewall itself.
Overall weight is 30.5 pounds, and the CG is exactly 5" from the leading edge, gear up no fuel.


Last edited by diablo2112; 05-14-2016 at 06:59 AM.
05-14-2016, 07:00 AM
#2319
Senior Member
Join Date: Nov 2005
Location: Frisco,
TX
Posts: 485
Likes: 0
Received 0 Likes
on
0 Posts
Diablo,
I might suggest some baffling to get some air moving across the tops of the jugs. A few years back, I had a dead stick on a Meister P-47, DLE-111 on the maiden. The heads were hidden behind the roll-in of the cowl and weren't getting any air. Since then, I always add a cut-out on cowled planes like this. Here's a pick. The cracks are from a wheels up landing when the 1st gen electrics wouldn't extend all the way.
Nick


 05-14-2016, 04:12 PM
#2324

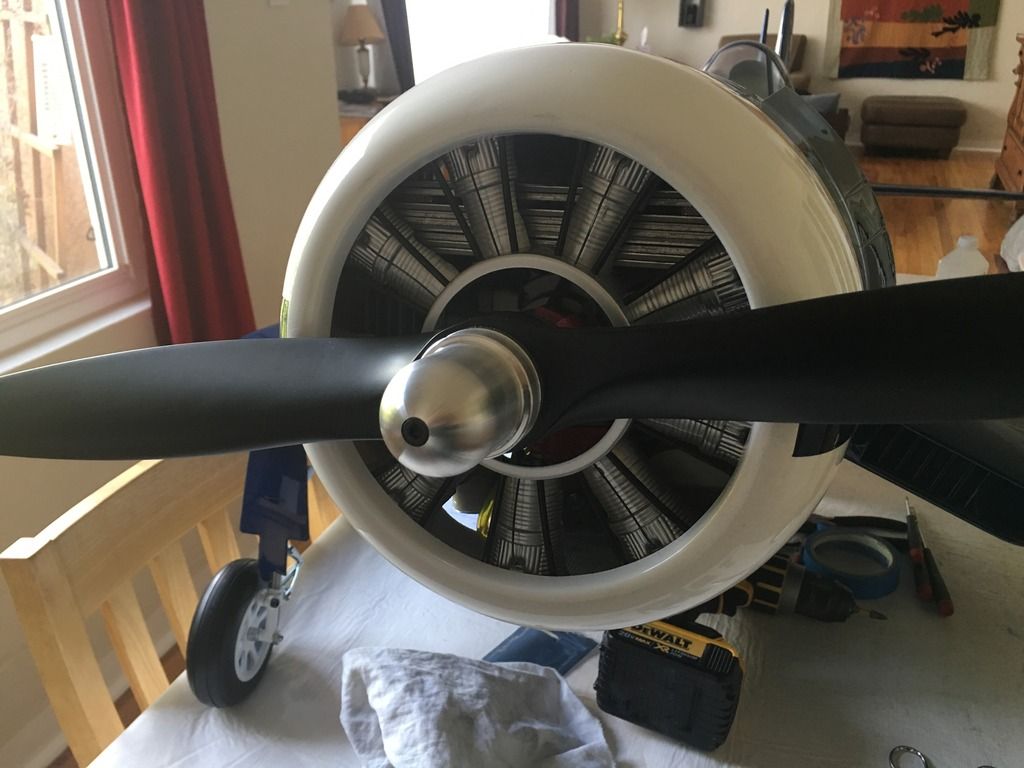
Absolutely beautiful Diablo! I can't wait to start on mine. I'm wanting to do the eme 70 twin, but I'm on the fence. Relocating the firewall will be a little much for me, and I don't want to cut the cowling either. I guess a few more pics from others would help. EN5573, can you post more pics with the cowling installed? I'm just wanting to see how much cowl had to be removed.
Diablo, good luck with your recovery. I'm sure your next project, H9 P-51 I believe, will be fun to watch and turn out to be another gorgeous airplane.
Diablo, good luck with your recovery. I'm sure your next project, H9 P-51 I believe, will be fun to watch and turn out to be another gorgeous airplane.
05-14-2016, 05:54 PM
#2325
Absolutely beautiful Diablo! I can't wait to start on mine. I'm wanting to do the eme 70 twin, but I'm on the fence. Relocating the firewall will be a little much for me, and I don't want to cut the cowling either. I guess a few more pics from others would help. EN5573, can you post more pics with the cowling installed? I'm just wanting to see how much cowl had to be removed.
Diablo, good luck with your recovery. I'm sure your next project, H9 P-51 I believe, will be fun to watch and turn out to be another gorgeous airplane.
Diablo, good luck with your recovery. I'm sure your next project, H9 P-51 I believe, will be fun to watch and turn out to be another gorgeous airplane.
Hi Spitfire66
I did not cut fire wall or cowling. I converted spark plugs to 1/4 with 90 deg plug boots..put 1/8 spacers on cowling mounts,so all fits inside cowling without cutting anything.
will post more detail pic tomorrow. I am currently flying mine with a 22X10 3 blade WWII prop. fly's fantastic! Diablo2112..Nice job on your build! you will love that motor plane combo!
Thanks,Vincent