


Sculpting a WWII Japanese pilot 1/5 scale
 08-19-2013, 11:34 AM
#26

Thread Starter
My Feedback: (14)

Join Date: Sep 2004
Location: Olathe,
KS
Posts: 322
Likes: 0
Received 0 Likes
on
0 Posts
Whew! Had a minor catastrophe with this sculpt! I was using a twisted thick guage wire as a sculpting stand. The wire slowly wallowed itself around inside the head, essentially creating a small cavity that then started to crack and cave in! Oh @#%$!!
This all happened right through the goggles. So most of that had to be redone. Poor Sakai had to endure pretty extensive "brain surgery" to repair the damage. But we are now back on track. Now instead of small wire to hold the head, I decided to use a 3/8" drill bit, screwed into the clay. Hopefully that will prevent any unwanted movement inside. You may say this pilot figure is formally "screwed in the head"! Lol.


Below I have started putting in the leather texture. This texture detail really helps when painting the figures! Paint the area black and then dry brush with a brown/rust color and "Presto!" you got leather! Also, all details are on pretty much. Seems, stitching etc. I try to make the item being depicted LOOK like the material it is representing through form and texture. That way with even just a single coat of paint, it should look like the real item. I'll even go so far as to say I try to give it "character". For example, instead of just making a rounded helmet, I strive to make it look like real leather. To give it the character that leather has. Where the straps tighten around the head, the leather would bunch up, and I try to sculpt that. This I think adds interest and a little artsy-fartsy "visual tension" to the subject. This all goes along with my philosophy for making the pilots... if your plane looks real, shouldn't the pilot?

I've had people ask me what kind of tools do I use. A lot of them I make myself. This one (above) is a wire taken from those little needle threading tools, shaped in a square loop and secured to a bamboo skewer. Really works well at removing small amounts of clay cleanly and precisely. Note where I removed the clay on the goggle strap.


Note the itty-bitty vents above on the goggles! I almost went cross-eyed getting those aligned.
This all happened right through the goggles. So most of that had to be redone. Poor Sakai had to endure pretty extensive "brain surgery" to repair the damage. But we are now back on track. Now instead of small wire to hold the head, I decided to use a 3/8" drill bit, screwed into the clay. Hopefully that will prevent any unwanted movement inside. You may say this pilot figure is formally "screwed in the head"! Lol.
Below I have started putting in the leather texture. This texture detail really helps when painting the figures! Paint the area black and then dry brush with a brown/rust color and "Presto!" you got leather! Also, all details are on pretty much. Seems, stitching etc. I try to make the item being depicted LOOK like the material it is representing through form and texture. That way with even just a single coat of paint, it should look like the real item. I'll even go so far as to say I try to give it "character". For example, instead of just making a rounded helmet, I strive to make it look like real leather. To give it the character that leather has. Where the straps tighten around the head, the leather would bunch up, and I try to sculpt that. This I think adds interest and a little artsy-fartsy "visual tension" to the subject. This all goes along with my philosophy for making the pilots... if your plane looks real, shouldn't the pilot?
I've had people ask me what kind of tools do I use. A lot of them I make myself. This one (above) is a wire taken from those little needle threading tools, shaped in a square loop and secured to a bamboo skewer. Really works well at removing small amounts of clay cleanly and precisely. Note where I removed the clay on the goggle strap.
Note the itty-bitty vents above on the goggles! I almost went cross-eyed getting those aligned.
 08-19-2013, 11:40 AM
#27
Thread Starter
My Feedback: (14)
Join Date: Sep 2004
Location: Olathe,
KS
Posts: 322
Likes: 0
Received 0 Likes
on
0 Posts
I took a little break from sculpting and actually did some RC flying at the Norther Alliance Military Fly-In outside of Owatonna last weekend. That is a fly-in to NOT be missed! Awesome planes, awesome pilots and absolutely the most friendly place you'll ever want to fly! Great people up there.
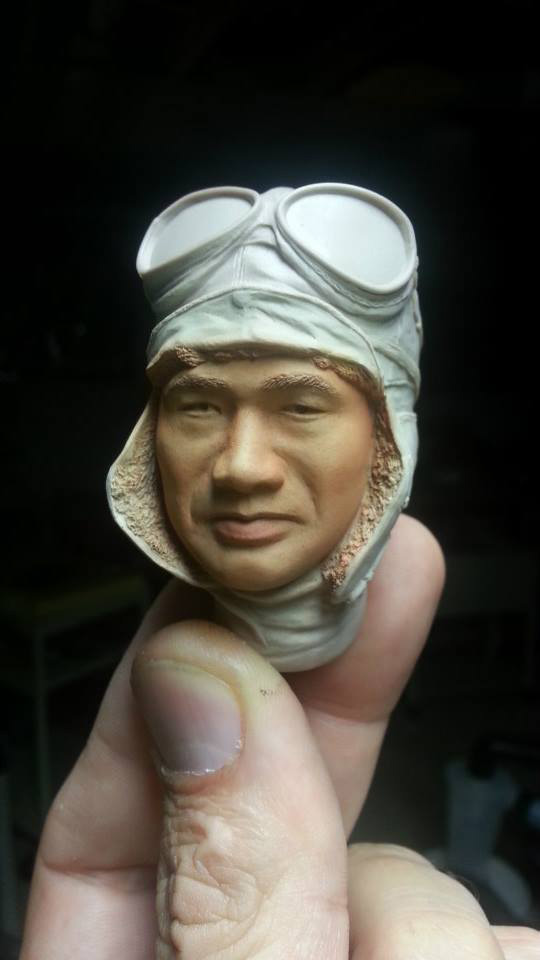
After that refreshing time away... back to the clay, which to me is a lot of fun too! I did the final touching up of the head and cured the clay in the oven. The Sculpey clay gets plenty hard following the instructions, but I have had it crack on other pilots. I found online if you cook it at a higher temp - and dis-colorization isn't an issue, and its not with my pilots since I am casting from the clay- then this will make the piece much more durable. So don't be alarmed at the darkened color of the head it just got cooked hotter to make it harder
.
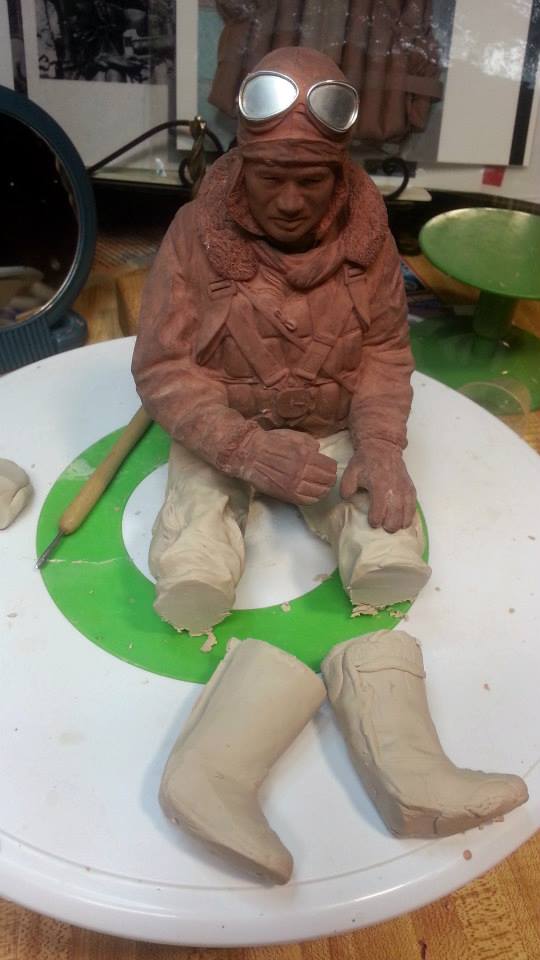
Here is the start of the upper body. I realized that at this stage I need to cure/harden the head to be able to move forward. Head positioning is paramount to the sculpt, so you can't go to far with the body until seeing how it all fits together. Yeah, I freaked out at first when seeing how dark the face is, but when moulds are made, it won't matter. I like how the expression on the face exudes confidence! That will look cool peering out from the cockpit!
Check out the Kapok Imperial Japanese Life vest! This isn't easy to sculpt to get right. I kept plugging away at it.

 For some reason links in the vest kept reminding me of vienna sausages?! Lol! It is a little challenging to sculpt the "links" of the vest so they look "stuffed", but I think I'm getting there. The little silicone tipped sculpting "brushes" are awesome for this.
I was debating to put in the parachute pack since it looked like towards the end of the war, they didn't seem to really wear them much. If you were a kamakazi, I guess you really didn't need it! On a historical note, the Japanese really didn't have a dedicated rescue system for their pilots. I've read were they saw their pilots parachute down off-shore just a couple of miles, but had no way to retrieve them! So a chute was only going to prolong meeting your ultimate fate. Many Allied pilots report Japanese pilots bailing out of burning aircraft in their chutes only to then jump out of the harness to fall to their deaths. Whereas the Allies had the PBY-Catalinas scouring the seas for missing aviators and had a much greater chance of surviving a bail-out in the Pacific theater. I think I will add the chute harness, they wore them during Pearl Harbor and will add more "bling" to the figure.

And even though it won't be seen much, if at all, I do detail out the backs.
After that refreshing time away... back to the clay, which to me is a lot of fun too! I did the final touching up of the head and cured the clay in the oven. The Sculpey clay gets plenty hard following the instructions, but I have had it crack on other pilots. I found online if you cook it at a higher temp - and dis-colorization isn't an issue, and its not with my pilots since I am casting from the clay- then this will make the piece much more durable. So don't be alarmed at the darkened color of the head it just got cooked hotter to make it harder
.
Here is the start of the upper body. I realized that at this stage I need to cure/harden the head to be able to move forward. Head positioning is paramount to the sculpt, so you can't go to far with the body until seeing how it all fits together. Yeah, I freaked out at first when seeing how dark the face is, but when moulds are made, it won't matter. I like how the expression on the face exudes confidence! That will look cool peering out from the cockpit!
Check out the Kapok Imperial Japanese Life vest! This isn't easy to sculpt to get right. I kept plugging away at it.
I was debating to put in the parachute pack since it looked like towards the end of the war, they didn't seem to really wear them much. If you were a kamakazi, I guess you really didn't need it! On a historical note, the Japanese really didn't have a dedicated rescue system for their pilots. I've read were they saw their pilots parachute down off-shore just a couple of miles, but had no way to retrieve them! So a chute was only going to prolong meeting your ultimate fate. Many Allied pilots report Japanese pilots bailing out of burning aircraft in their chutes only to then jump out of the harness to fall to their deaths. Whereas the Allies had the PBY-Catalinas scouring the seas for missing aviators and had a much greater chance of surviving a bail-out in the Pacific theater. I think I will add the chute harness, they wore them during Pearl Harbor and will add more "bling" to the figure.
And even though it won't be seen much, if at all, I do detail out the backs.
08-25-2013, 07:03 PM
#28
Junior Member
My Feedback: (2)
Join Date: Jun 2008
Location: Bedford,
IN
Posts: 14
Likes: 0
Received 0 Likes
on
0 Posts
So glad to see you chose Saburo. I really enjoyed Samurai!, I've got it on my shelf now and highly recommend anyone interested to read it. I wish I could have met him.
I've just picked up an Aerotech KI.84. Though it's technically incorrect, I may have to utilize him as the pilot anyhow. Can't wait to see him done! Even if I don't put him in the Hayate, He may just have to hang out in my hangar anyhow!
I've just picked up an Aerotech KI.84. Though it's technically incorrect, I may have to utilize him as the pilot anyhow. Can't wait to see him done! Even if I don't put him in the Hayate, He may just have to hang out in my hangar anyhow!
08-26-2013, 11:49 AM
#29
Thread Starter
My Feedback: (14)
Join Date: Sep 2004
Location: Olathe,
KS
Posts: 322
Likes: 0
Received 0 Likes
on
0 Posts
Hey RCB1, glad you approve. I look forward to having you as a customer! I really like the process of sculpting one of these and sharing the progress. It keeps the motivation going! Thanks a bunch! The work continues on the torso with sculpting in the folds of fabric on the arms. I usually lay out little "tubes" of clay to plan out the folds, then squint. If it looks believable, I'll smooth 'em in. The gloves are started by pressing the clay into the molds of a previous pilot - in this instance Best Pilots Sailor Malan's gloves - and that quickly gives me a good start.
After getting the main structure knocked out, its time to start working from the innermost areas to the outermost with the details. You can see the parachute strap release buckle with a pic I used as reference (Yay Google Image search!). With the dime for reference it is "itty-bitty". I shape it out of the clay and then heat it to harden the piece so it won't get smooshed as work progresses. The tool I'm using is home made from wire from a needle-threader "thingy" attached to a bamboo skewer. You can't buy that tool in an art store! In fact, the tools I've created for myself, I use much more than anything I've purchased in an art supply store.
Speaking of tools, there is a picture of me using my "fur-maker" brush (Sounds like something for sale on late-night TV!) Which is comprised of brass wires from a wire brush super-glued in an artist's brush handle. Just twirl that around in the clay and instant fur collar! Also used it on the fur trim for the gloves. I then go back in and give the "fur" some direction, but its a pretty effective tool.
Note the texture on the parachute straps, and the scarf. I think this is pretty close to the real thing and should really do a lot of work for me and my customers when we paint the figure with washes and dry-brushing.
08-26-2013, 11:51 AM
#30
Thread Starter
My Feedback: (14)
Join Date: Sep 2004
Location: Olathe,
KS
Posts: 322
Likes: 0
Received 0 Likes
on
0 Posts
I had a heck of time finding reference for how the straps go on the back of a Japanese pilot. Lots of reference show them in the same configuration as most Allied chute packs. But none matched what I saw in the Pearl Harbor raid pilots briefing below with the straps gathered at the top of the shoulders. Anyway, I like something different and just sculpted what I thought I saw and hopefully it is historically correct. If anyone has more info to share how the straps go on this, let me know ASAP!
Gloves are now Japanese with fur trim and adjusting strap.
So, the Torso is very close to complete with the parachute straps, textures, fur-lined gloves. Just have to finish up the stitching on everything and then on to the legs!


Gloves are now Japanese with fur trim and adjusting strap.
So, the Torso is very close to complete with the parachute straps, textures, fur-lined gloves. Just have to finish up the stitching on everything and then on to the legs!
08-30-2013, 07:42 AM
#32
Thread Starter
My Feedback: (14)
Join Date: Sep 2004
Location: Olathe,
KS
Posts: 322
Likes: 0
Received 0 Likes
on
0 Posts
Thanks Kevin, Glad you enjoy following!
The Torso on Saburo has been hardened/cooked/fired with good results! Yay! Due to the discoloration, photos don't show the detail very well, so that will have to wait until we get to a cast piece. Now it is on to the legs and just wanted to share with you guys my thought process on those. The realism of the pilot figure is not only in the face, details, and shape but also- and perhaps most importantly - the POSTURE of the pilot in the cockpit. How many pilot figures do you see in cockpits that sit ram-rod straight or GI Joe figure that is kind of sprawled all over the cockpit? These aren't the natural way humans sit. We lean forward much more than we think we do. Also, take into account that most WWII aircraft were tail-draggers. While on the ground, with the whole airplane is at an incline with the seat is leaning back. The pilot would actually lean forward even more.
Keeping that in mind, (and yes I actually think of these things! Anyone know a good therapist? Lol) I try to position the pilot so he is leaning forward to look natural on the ground in a tail-dragger aircraft but not too much so he looks okay while flying by straight and level. You guys do fly straight and level once in a while right?
So here is Saburo, positioned in a cockpit mockup tilted back to simulate a tail-dragger on the ground. Then he is "hunched" forward enough to look natural on the ground and will also look great in the air. (The legs are donated by Best Pilots Sailor Malan) So a little critical juncture here to get that right and then on to finishing up this sculpt with the legs!

 09-03-2013, 09:57 AM
#36
Thread Starter
My Feedback: (14)
Join Date: Sep 2004
Location: Olathe,
KS
Posts: 322
Likes: 0
Received 0 Likes
on
0 Posts
Great John, I should have them about ready to ship out the end of next week!
Now on to the homestretch with the legs and boots! [Whoah! That trick posted with BIG pictures. Hey, works for me....]
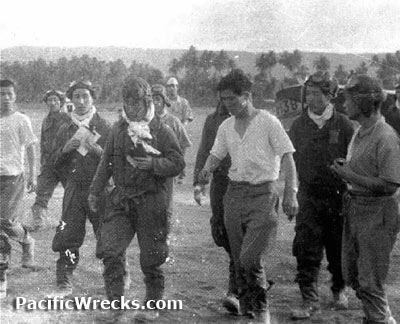

From the references, the flight suit legs had a baggy look to them Along with pockets on the sides. Above is Saburo after his epic 4+ hour flight with a severe head wound. He insists on doing a flight debrief before passing out from exhaustion. He's just flown 4+ hours after being shot in the head with a 50 cal. bullet!
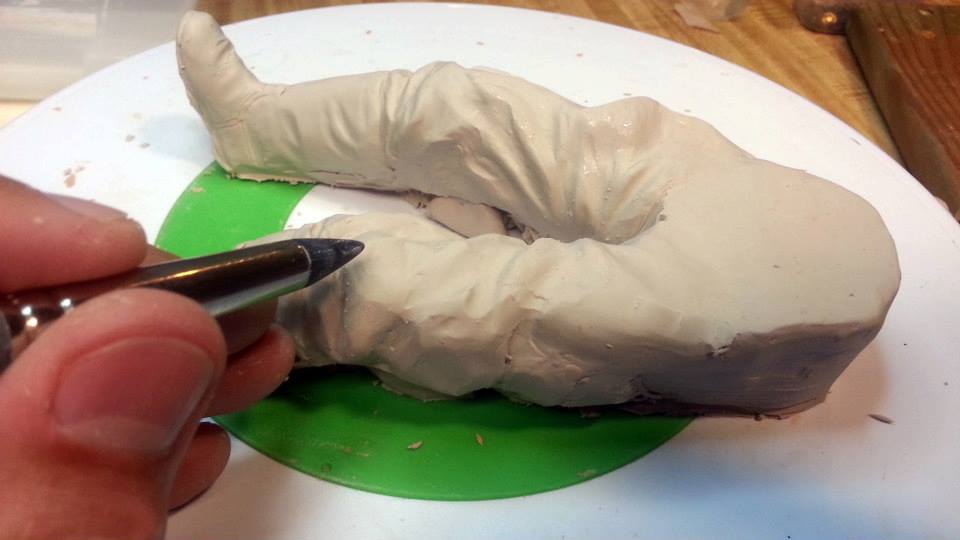
Knocking in the basic shape.
No, its not Capt. Dan from Forest Gump! Its just easier to sculpt the boots without them attached to the legs. I'll get those back to you in about 8 hours Subaro! (He looks a little incredulous!)
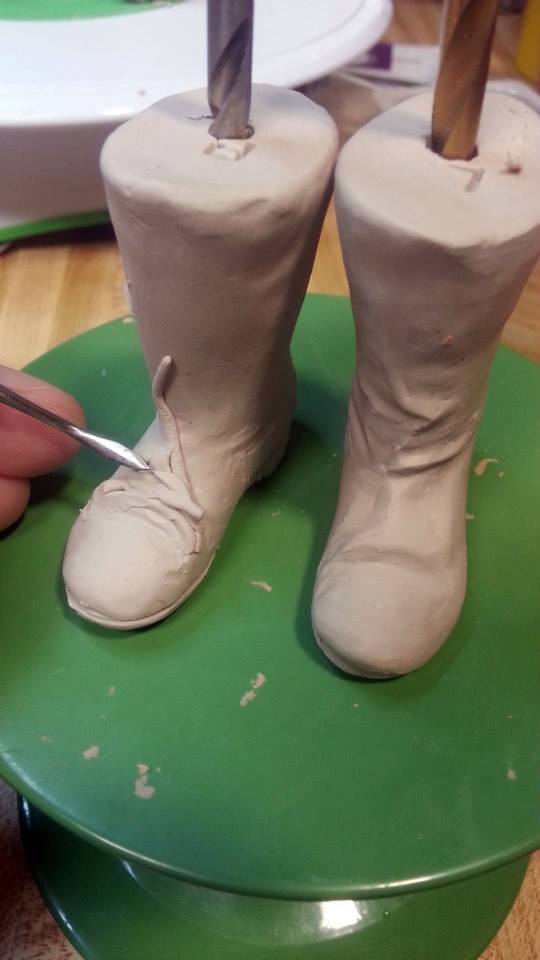
Boots are always a challenge because you have to sculpt two and the second one is a mirror image of the first. Note I marked them R & L so I wouldn't get confused when first sculpting them out! I've found that it is really quick to layout the creases/folds by putting down little tubes of clay to get a quick visual if it looks natural. Then just smooth them into the object. Of course quick is a relative term. The boots took about 8 hours to do!
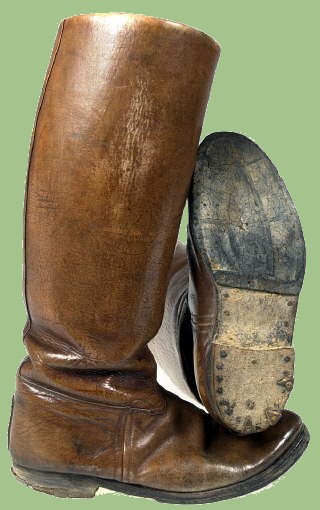
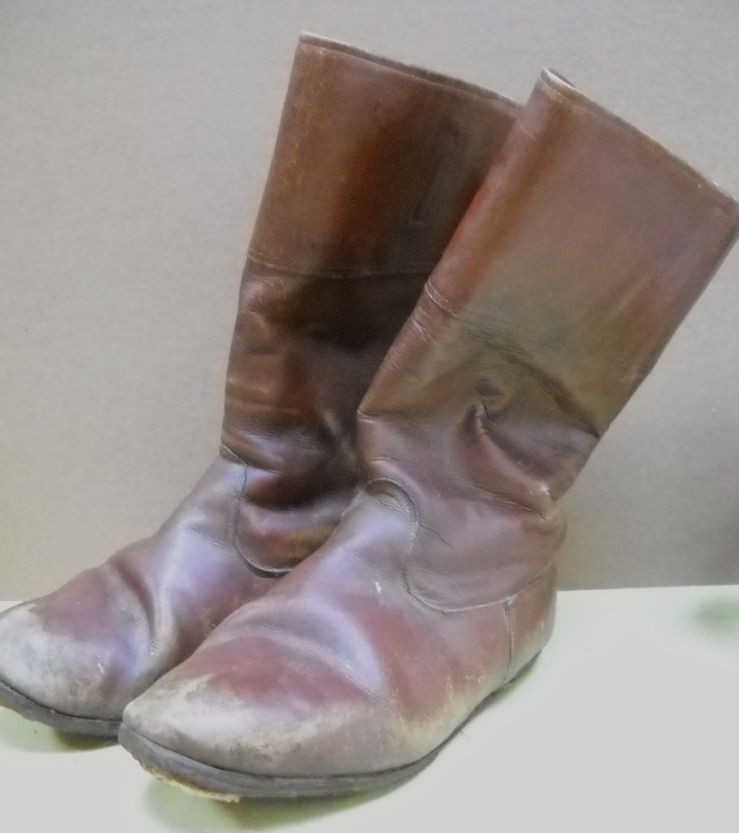
Givin' the pilot a little Soul... er, Sole. I did a little research on Japanese boot soles and the pic on the right is all I could find. Not the exact boot, but close enough. The soles of the boots won't ever be seen in the cockpit, but hey! makes me feel good the detail is there!
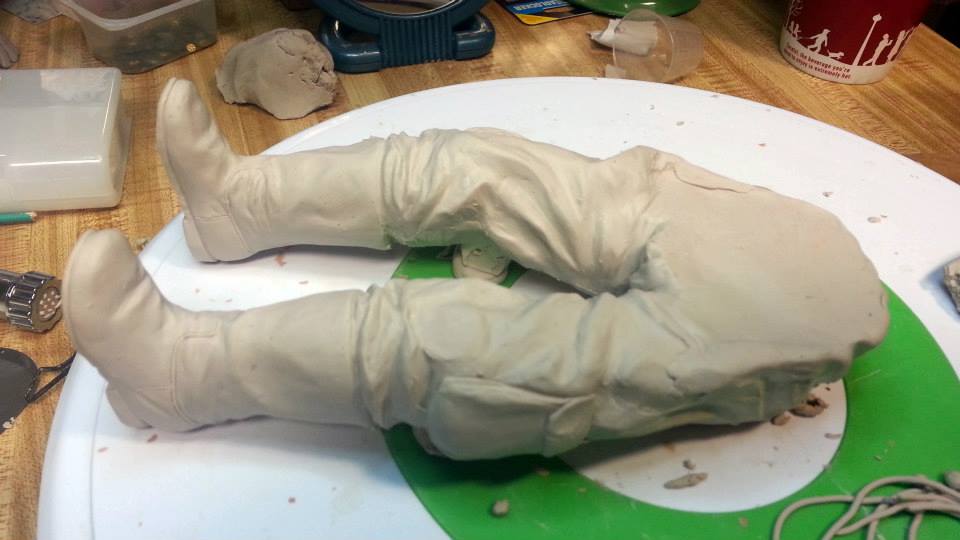
All right, here is the just about completed bottom half. Still some texture and stitching to complete. I like how the pant legs definitely look tucked into and bunched up from the boots. Note side pocket on pant leg. Gotta make buttons for those yet!
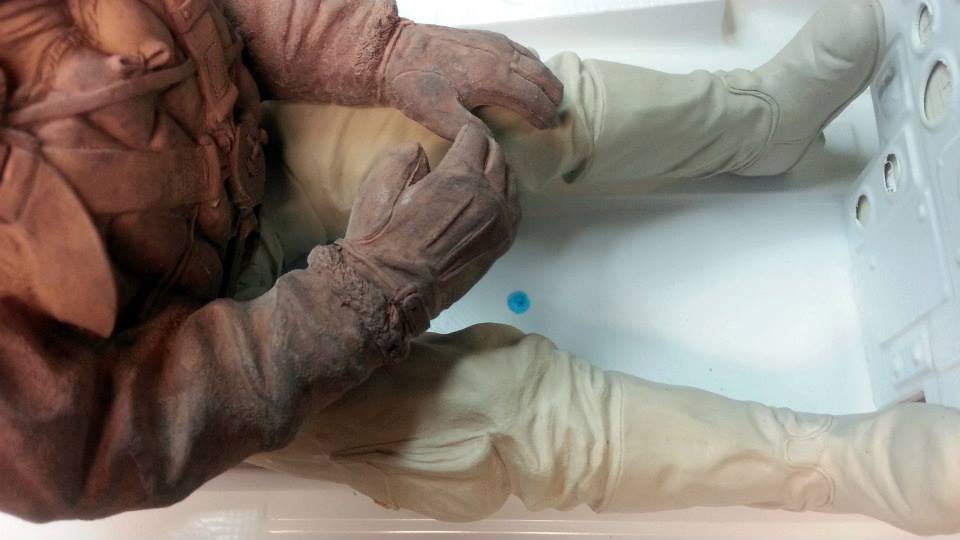
The finished torso setting on the legs. Looks like the positioning is going to work well. The blue dot is a reference for the joystick in my generic mockup cockpit. That was the target for the right hand placement. Pretty much right on the money!
Now on to the homestretch with the legs and boots! [Whoah! That trick posted with BIG pictures. Hey, works for me....]
From the references, the flight suit legs had a baggy look to them Along with pockets on the sides. Above is Saburo after his epic 4+ hour flight with a severe head wound. He insists on doing a flight debrief before passing out from exhaustion. He's just flown 4+ hours after being shot in the head with a 50 cal. bullet!
Knocking in the basic shape.
No, its not Capt. Dan from Forest Gump!
Its just easier to sculpt the boots without them attached to the legs. I'll get those back to you in about 8 hours Subaro! (He looks a little incredulous!)Boots are always a challenge because you have to sculpt two and the second one is a mirror image of the first. Note I marked them R & L so I wouldn't get confused when first sculpting them out! I've found that it is really quick to layout the creases/folds by putting down little tubes of clay to get a quick visual if it looks natural. Then just smooth them into the object. Of course quick is a relative term. The boots took about 8 hours to do!
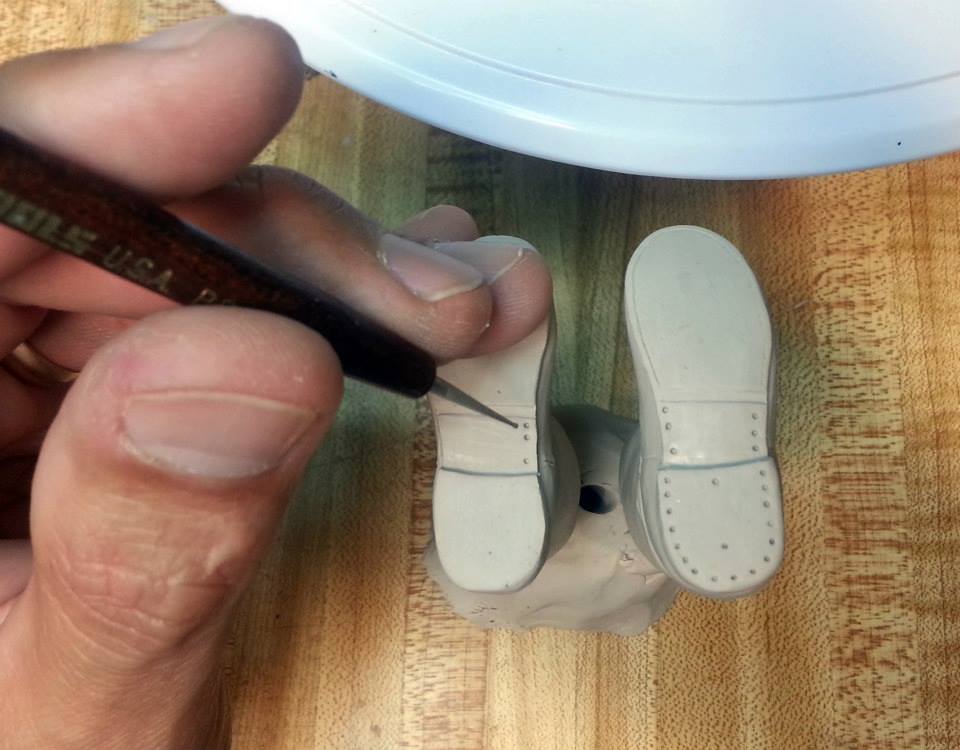
Givin' the pilot a little Soul... er, Sole. I did a little research on Japanese boot soles and the pic on the right is all I could find. Not the exact boot, but close enough. The soles of the boots won't ever be seen in the cockpit, but hey! makes me feel good the detail is there!
All right, here is the just about completed bottom half. Still some texture and stitching to complete. I like how the pant legs definitely look tucked into and bunched up from the boots. Note side pocket on pant leg. Gotta make buttons for those yet!
The finished torso setting on the legs. Looks like the positioning is going to work well. The blue dot is a reference for the joystick in my generic mockup cockpit. That was the target for the right hand placement. Pretty much right on the money!
09-03-2013, 12:18 PM
#38
Senior Member
Join Date: Sep 2007
Location: Waterford, MI
Posts: 268
Likes: 0
Received 0 Likes
on
0 Posts
I have 1 ref pic for you if it helps in any way. This is the mannequin at the Dayton Air Force Museum. A group of us go almost every year. Somewhere I have a few other views but I'm sure you have used lots of ref pics in your version.....please feel free to use if it helps.

09-05-2013, 06:06 AM
#39
Thread Starter
My Feedback: (14)
Join Date: Sep 2004
Location: Olathe,
KS
Posts: 322
Likes: 0
Received 0 Likes
on
0 Posts
Thanks Aluminum overcast for the reference. I do have some shots of that, but not that angle. As for different sizes...one of these days!
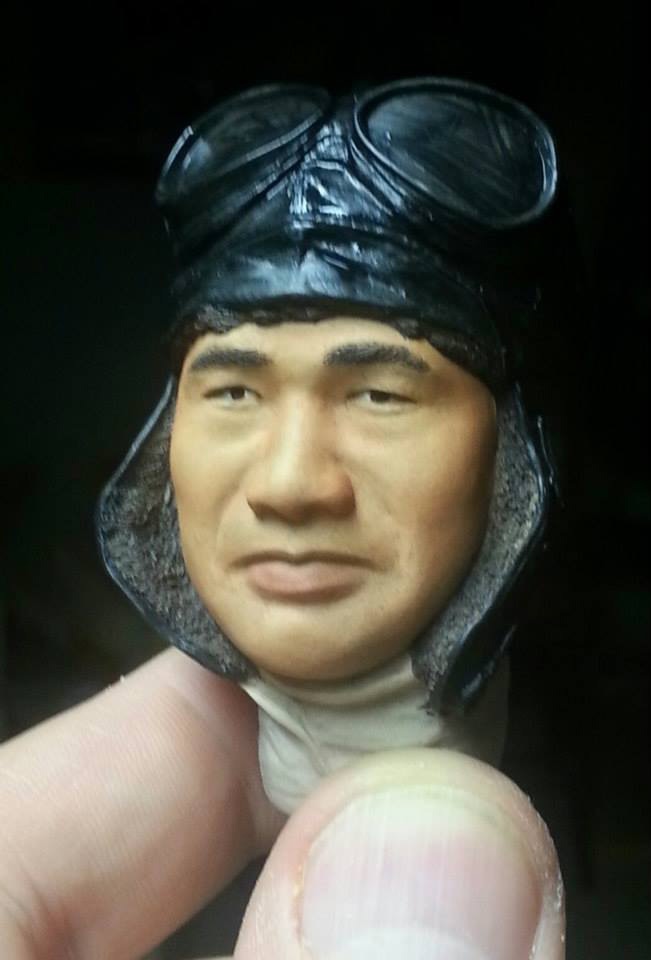
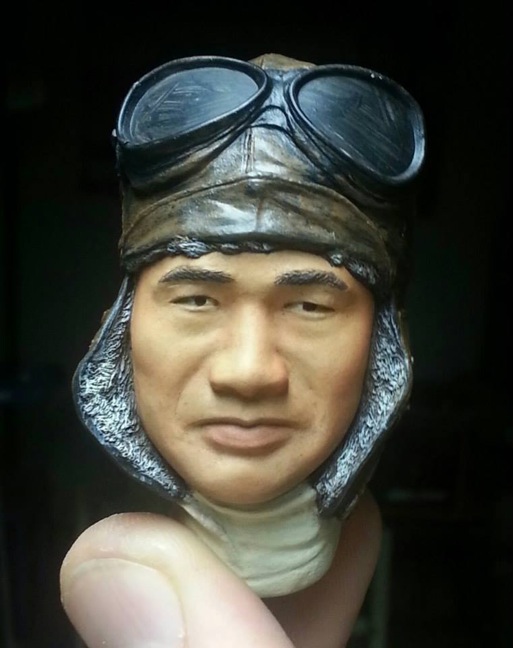
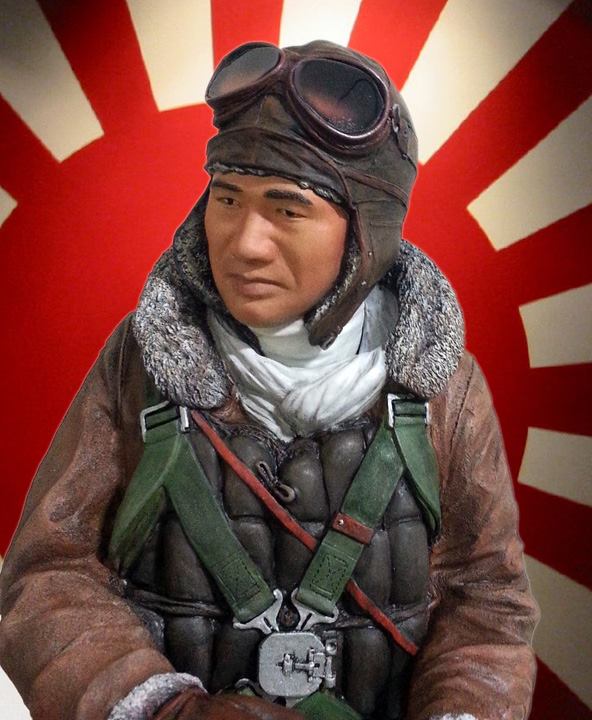
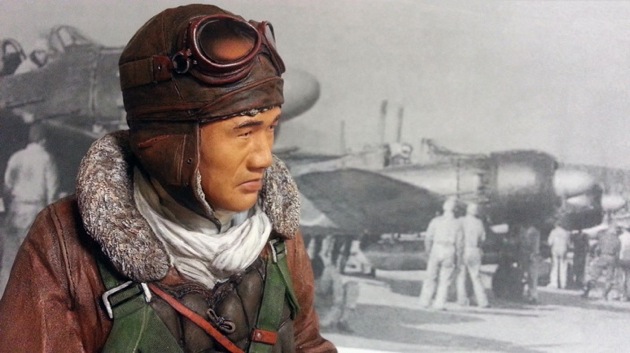
Last night, I had some orders to attend to. Thank you Best Pilot customers! And at about bed time, Saburo's hollow-cast, monotone, unpainted head was calling out to me to paint him. I thought, well, I'll just airbrush the flesh tone on him and finish him up tomorrow night. When I started painting... I just couldn't quit! After the flesh-tone color went down, the effect was startling to me... it was like he could almost talk! It was pretty dramatic after looking at him in monotone for so long. I'll let the photos do the talking...
Needless to say, I went to bed late!
09-09-2013, 11:49 AM
#43
Thread Starter
My Feedback: (14)
Join Date: Sep 2004
Location: Olathe,
KS
Posts: 322
Likes: 0
Received 0 Likes
on
0 Posts
You guys viewing the threads and commenting on the work is really a big boost to me. Thanks so much.
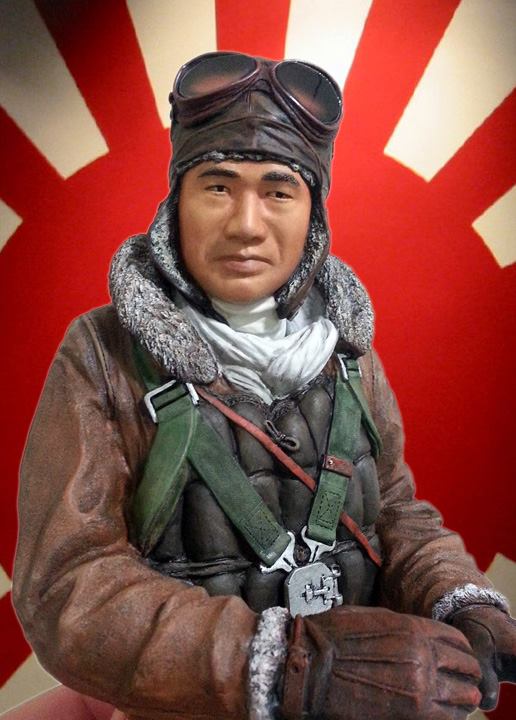
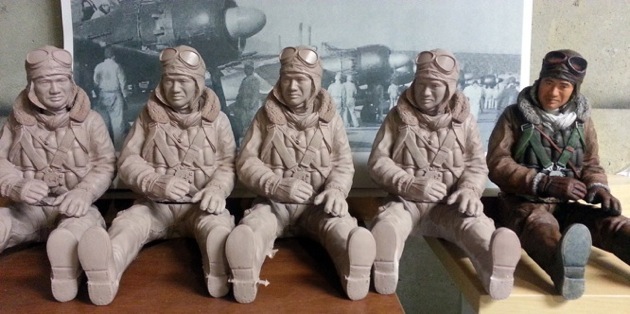
Well, this weekend was very productive with the mould made for the torso, which of course I couldn't let set still! So I fired up the resin and professional rotocasting equipment casting several torsos. Then went to it with the paints trying to obtain colors that are as historically accurate as I can get. Here is the result of the first one painted:
I have to say that the little leather strap was the "cherry on top" for the torso. That little dash of color really sets off the whole ensemble.
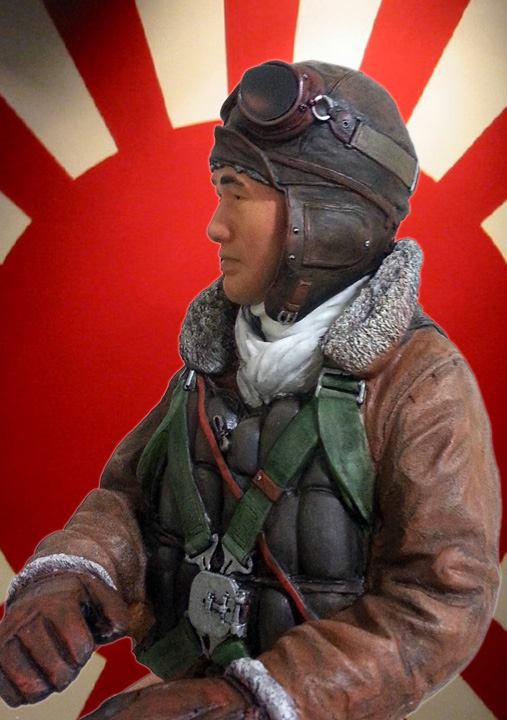
More to follow when I get the leg moulds completed.
Well, this weekend was very productive with the mould made for the torso, which of course I couldn't let set still! So I fired up the resin and professional rotocasting equipment casting several torsos. Then went to it with the paints trying to obtain colors that are as historically accurate as I can get. Here is the result of the first one painted:
I have to say that the little leather strap was the "cherry on top" for the torso. That little dash of color really sets off the whole ensemble.
More to follow when I get the leg moulds completed.
09-09-2013, 12:08 PM
#44
Senior Member
My Feedback: (93)
Join Date: Feb 2002
Location: Mason,
MI
Posts: 874
Likes: 0
Received 0 Likes
on
0 Posts
Another fine pilot to add to my collection. I just happen to have a Yellow Zero kit ready for Saburo.
By the way, If any of you have not read his book it makes an interesting read.
By the way, If any of you have not read his book it makes an interesting read.
09-11-2013, 09:00 AM
#45
Thread Starter
My Feedback: (14)
Join Date: Sep 2004
Location: Olathe,
KS
Posts: 322
Likes: 0
Received 0 Likes
on
0 Posts
Thanks a bunch guys for all of the support during this "build"!!!
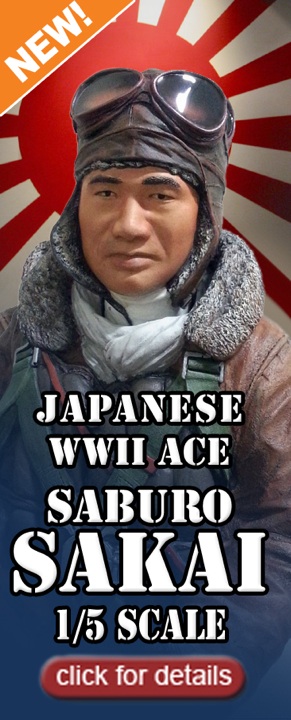
Okay, leg moulds are done and I am ready to take orders!
Go tohttp://www.bestpilots.typepad.com and click on Saburo

He is available unpainted or with the famous Best Pilots "4-D" Paint Job.
What is the Best Pilots 4-D paint job? When I paint them I use 4 "dimensions" of paint. Each item gets at least 1) Base coat, 2) A "shadow-wash" to bring out detail, 3) Dry-Brush to bring out highlight detail & 4) Dead Flat lacquer to preserve and protect!
I can't wait to see him in your awesome aircraft!!!
Okay, leg moulds are done and I am ready to take orders!
Go tohttp://www.bestpilots.typepad.com and click on Saburo
He is available unpainted or with the famous Best Pilots "4-D" Paint Job.
What is the Best Pilots 4-D paint job? When I paint them I use 4 "dimensions" of paint. Each item gets at least 1) Base coat, 2) A "shadow-wash" to bring out detail, 3) Dry-Brush to bring out highlight detail & 4) Dead Flat lacquer to preserve and protect!
I can't wait to see him in your awesome aircraft!!!
09-11-2013, 04:13 PM
#46
 09-12-2013, 12:27 PM
#47
Thread Starter
My Feedback: (14)
Join Date: Sep 2004
Location: Olathe,
KS
Posts: 322
Likes: 0
Received 0 Likes
on
0 Posts
Thanks Peter. A quarter scale, quarter scale. I hope to some day. Its a lot easier on the eyes to sculpt!
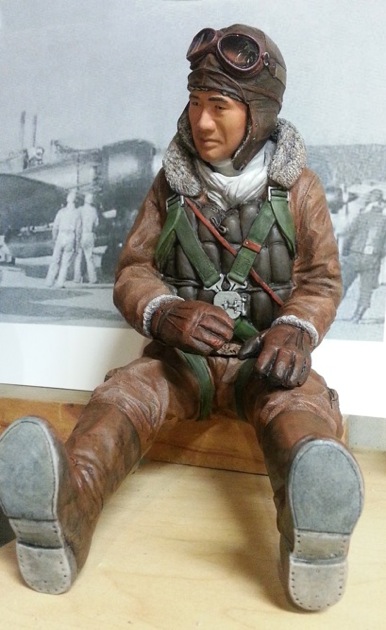
With the moulds for the legs complete, Saburo Sakai is now a full-figured pilot from his flight helmet to his boots.
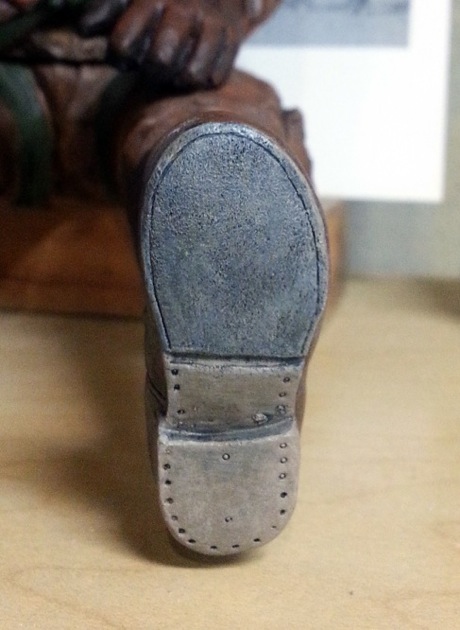
Just an oddball thing, but the reference I had showed the heals light colored and the sole black? Most other boots I've done have been the opposite?? When in doubt always go with the historical reference!
Now this part of the pilot will rarely be seen, but Hey! Some guys make rudder pedals that are never seen either and the soles of these boots will look awesome then they meet those hidden rudder pedals!
So production has started and I was excited to see one of the first orders for Saburo is going to Tokyo!
And this shot above I wanted to share with you guys as a big thank you for following along! Its been a LOT of work, but it is something I really love to do and I am thrilled and honored that you guys like my work enough to make it a part of your hobby!
Although the build/sculpt is complete, I'll be putting updates of Saburo in cockpits around the world and I might even have some that will put a custom face in the pilot!
With the moulds for the legs complete, Saburo Sakai is now a full-figured pilot from his flight helmet to his boots.
Just an oddball thing, but the reference I had showed the heals light colored and the sole black? Most other boots I've done have been the opposite?? When in doubt always go with the historical reference!
Now this part of the pilot will rarely be seen, but Hey! Some guys make rudder pedals that are never seen either and the soles of these boots will look awesome then they meet those hidden rudder pedals!
So production has started and I was excited to see one of the first orders for Saburo is going to Tokyo!
And this shot above I wanted to share with you guys as a big thank you for following along! Its been a LOT of work, but it is something I really love to do and I am thrilled and honored that you guys like my work enough to make it a part of your hobby!
Although the build/sculpt is complete, I'll be putting updates of Saburo in cockpits around the world and I might even have some that will put a custom face in the pilot!
09-12-2013, 01:33 PM
#48
Banned
My Feedback: (1)
Join Date: Jun 2002
Location: Brisbane, Queensland, AUSTRALIA
Posts: 7,744
Likes: 0
Received 2 Likes
on
2 Posts
very cool mate though those boots need some spit polishing . . . .

When I was in rookies with the RAAF we had to spit polish our GP boots and dress shoes every night, talk about a chore!!
Wonder when RCU will have more of the "smiley's available? Also miss the feature of seeing who is online.")
When I was in rookies with the RAAF we had to spit polish our GP boots and dress shoes every night, talk about a chore!!
Wonder when RCU will have more of the "smiley's available? Also miss the feature of seeing who is online.
07-24-2014, 09:05 PM
#50
I Love mine! I can't say enough about how Sabaru makes the plane come alive! Worth every penny!
PS Lyle, you need to sign and number these pieces of art...someday, they will be collectors items, I'm sure!
thanks!
Casey
Last edited by glazier808; 07-24-2014 at 09:53 PM.