


Ziroli p-47 92" blown up to 110"
 09-17-2014, 01:52 PM
#326

Repairs (cont)
Engine:
Engine shipped today so I should get it on Monday. Looks like the carb was the problem as it was rebuilt. Got off cheap as it was only $313 ($60 of that was for shipping).
Landing lights:
Went looking for some Xenon lights and found these (pictures) at autozone. They are LED's but very bright (90 lumens). Comes with batteries and button so you can check them at the store (blinding light). Should also work well on the B-25.
 09-23-2014, 12:28 PM
#327
Repairs (cont)
Wing bolts:
One wing bolt was stripped (not due to the crash). Hysol'ed a wooden dowel in the hole and drilled/tapped it. Wing and belly pan secured to the wing.
Fuel tank:
Clunk straightened in tank and installed back into the fuse and overflow line put back into new bottom sheeting of fuse.
Engine:
The Moki arrived yesterday and mounted to the fire wall.
 09-24-2014, 12:04 PM
#329
Yo Scott,
Yep, and Mac's place.
================
Repairs (cont)
Moving surfaces:
Connected all the wires/hoses between the wing and fuse and checked that all still works OK.
Engine:
Since the servo arms on both throttle/choke servos were broke, I replaced both servos (will keep them for non critical stuff). Installed new HS-645's for the choke/throttle and adjusted them while separate from the fuse.
Wrapped some electrical tape around the ignition connection. Ignition, regulator and battery mounted on the back of the removable fire wall.
Prop:
Put one bolt on each side of the hub and tightened them just enough to snugly hold the blades but still rotate them. Used a protractor set at 16 degrees to get the blades aligned.
Engine test:
With choke/ignition on and half throttle, the engine sputtered after several turns.
Choke off and throttle on idle, she started up quickly.
RPM's at 1000/3900. Throttle trim wouldn't shut the engine off so I'll have to take off the engine/fire wall and make some manual adjustments (wouldn't stop even using servo adjustment and sub trim: probably why I could only get 1000 and not 800 for low rpm's).
Only one run up but cylinders head temps from 135 (low cylinders) to 165 (top cylinders).
Used 87 octane, Klotz synthetic techniplate KL-310 (50:1, 2.6 oz per gallon) and 2oz per gallon of sea foam.
Last edited by samparfitt; 09-24-2014 at 12:17 PM.
09-24-2014, 02:43 PM
#330
Engine not stopping:
Initially, I thought the servo arm was hitting the side of the hole in the fire wall, which it was. Then the carb control arm was hitting the fuel intake tubes. Finally, I noticed that the carb's butterfly arm was moving but not the butterfly. I had to take the engine off the fire wall and the carb off to investigate it. It turns out that the carb butterfly shaft comes in two pieces: the main shaft where the butterfly is screwed to, and then the outer shaft that is threaded and screws into the other shaft. The outer shaft unscrewed when the servo arm pushed the butterfly to the close position.
I put some blue locktite on the threads and that should hold it. Fortunately, I had the carb arm oriented so the butterfly opens when screwed in so the engine shouldn't die in the air by accident, should the screwed shaft loosen: the engine just doesn't stop when idle is applied. Something, anyone with a Moki may want to check as having the arm loosen while throttling up could soon turn into a dead stick

CORRECTION: I must of been brain dead on the last paragraph about arm orientation: it won't make any difference as opening the butterfly will always be in a clockwise rotation, thus always tightening the screw.
This is a new Moki. I also have an old Moki but I'm not sure if the butterfly shaft is one piece or two. I'm guessing it is one piece since I remember the control arm being inside the engine mount, which means that the shaft is very short and, thus, probably one piece. Being mounted on the F4U, I'm not about to take it apart to find out.
Picture shows the shaft partially unscrewed.
To remove the carb, the high/low needles need to be removed and the throttle idle screw needs to be screwed all the way in (or remove), plus the clear vacuum tube needs to be removed from the festo fitting(push in on the blue collar to release the clear tubing). Remember to draw the high/low slot screws orientation to the carb base plus screw them in first, before removing them, to get the turn count. They both look identical but I still labeled each one, just to be safe. Mine were High: 1 1/3 and Low: 1 1/4 turns.
Last edited by samparfitt; 09-24-2014 at 03:50 PM.
09-25-2014, 09:28 AM
#331
Engine:
Throttle trim setting.
I called Dave the tech at TBM about the engine not stopping when the throttle trim is down and he said the butterfly is probably not seating correctly and I should loosen the screw holding the butterfly, turn the shaft to close and then tighten the screw as this will center the butterfly in the carb.
As the Brits say, he was 'spot on'. All is good in the universe again

Amazing how much difference just an 1/8 turn on the low end needle makes. Previously, when I was trying to slow the rpm's down on idle, the engine really puts out a lot of carbon. With the low end properly set, the engine doesn't emit much carbon (meaning unburned black oil).
09-25-2014, 09:42 AM
#332

My Feedback: (16)
Join Date: Apr 2002
Location: Macedon,
NY
Posts: 301
Likes: 0
Received 0 Likes
on
0 Posts
Sam glad to see your bird on it's gear. And your engine problem solved. Keep up the great work. John T. Spitfire brotherhood #110, Corsair brotherhood #96, Mustang Brotherhood #55.
10-01-2014, 06:20 AM
#333
thanks, John.
============
Final repairs:
Cowl:
Put the 3 baffles back that broke loose.
Had to replace the control rod on the right aileron as it had a small bend in it.
Finally put a pilot in the cockpit. 1/5 scale but most of those pilot were not too tall, anyway! Even at 1/5 scale, I had to cut a 45 degree cut on the back of his knees so his feet would fit in the cockpit (seems like the cockpits are always to short!). Glued some blue foam to his seat to raise him to appropriate height, put some velcro on the foam and chair so he is removable. Painted the seat velcro green so it blends in with the chair.
Took her apart and put her in the trailer for her trip to Rally of the Giants and 12 O'clock high.
Last edited by samparfitt; 10-01-2014 at 06:23 AM.
10-01-2014, 10:37 AM
#335
[QUOTE=samparfitt;11862970]


On the third flight, checking tach before take off, at about 50’ high after take off, the engine went to idle, I kept the plane straight and level, gear up, and guided the plane to a flat landing. I couldn't see the last 50' (or so) of the landing,
1200' long x 275' Wide runways are hard to hit from 50' up ... that's why R/C runways have to be twice as long as needed.
Pilot stations are placed in the middle of the runway cause most pilots (with the exception of most jet pilots) land and take
off in front of them selves because they lack the skills to land closer to the run way end. U don't see full scale landing and
Taking off from the middle of the runway. Why do most R/C pilots do it?
Just a simple observation not a statement of any ones fling ability or lack there of.
Last edited by HoundDog; 10-01-2014 at 10:39 AM. Reason: added disclaimer
10-01-2014, 10:57 AM
#336
Take offs: I like to taxi to the end of the runway and usually take the full runway before taking off to 1) insure the plane has flying speed and 2) more scale. I then attempt to keep the plane straight with a shallow climb to mimic full size planes, retracting the gear just after takeoff.
Landings: Landings should be at the beginning of the runway (as you mentioned). From a distance, I have trouble determining flying speed (although my throttle setting should be good enough): thus, to eliminate the possibility of a snap (which has happened to me in the past) I keep the speed up until I can see the planes speed (which is usually in front of me), thus, I'm landing in the middle of the runway (assuming I'm standing in the center). I suspect other pilots have the same problem that land in front of them (or they do it out of habit). I usually try to stand on the 'short end' of the runway so, when I land, I have more runway to use.
Last year, I tried landing short and porpoised and damaged the wing: this is not a good incentive so I land in front of me to avoid such problems. I find there are far fewer problems landing too fast than landing too slow. This is one part of my flying that bothers me since it is not scale, but the alternative can get me into trouble.
I go through 30-35 gallons a year which is a lot of scale flying. With all those hours you would think that I would have mastered landing at the beginning of the runway. On the other hand, if you fly that much,. you better do what's comfortable and stay within your limits or you'll need a trash bag to pick up your plane. With that much flying, I try to keep my parameters short as, it's difficult to not do something stupid, at least once, during such a long flying season. I have pre-planned 'exit' procedures for when 'defecation hits the fan'; usually they save me but, with only seconds (or less) to think/react, sometimes results aren't always what you want!
I can have as many as 5-6 planes at a flyin. I like to fly them 'round robin', ie one after another and do that 2-3 times a day. It's not easy to know the flying characteristics of each plane when flying that many each day: thus, land in the middle of the field after I see the plane's flying speed.
All but one of my planes have retracts. They are big and heavy and, though bigger planes fly more realistically, they also crash more realistically. As with the full size, I must make every landing perfect or a gear will be ripped out, or worse. Thus, again, I do what's necessary to insure a successful flight (at my age, I never say 'watch this').
Flying large, heavy warbirds requires more runway. I've seen excellent pilots land large warbirds in a very short distance. I only consider myself an average pilot, thus I'm comfortable only with a runway 600' or longer (depending on which plane that I'm flying). I find the very long runways more relaxing as I can just use throttle management and let gravity do it's work and land the plane (with no movement of the elevator).
It would probably be best to get a cheap warbird and practice short landings with it but, being the cheap SOB, I'd rather spend the money on good stuff!
Those are my excuses (and I'm sticking with them!).
Last edited by samparfitt; 10-01-2014 at 11:36 AM.
10-01-2014, 04:24 PM
#337
We all have the same problems of determining how our plans are reacting to our in puts when coming toward us believe me it doesn't get any better with age. Great looking Jug great work. U went to Fondy and the Minnesota. Did U happen to run into a guy that had a 1/3 scale Fokker DVII with Swastikas on it also a Zerolie 92" P-47 and a 100+" F4u with about 38000 rivets. His name is Matt.
11-03-2014, 11:12 AM
#340

Hey Sam,
That plane sure is a beauty. I got some really good shots of it at 12 O Clock High. I am writing the article for Fly RC and I am including this in the article. If I have any questions I'll send you a private message.
Here are couple of shots from that weekend.
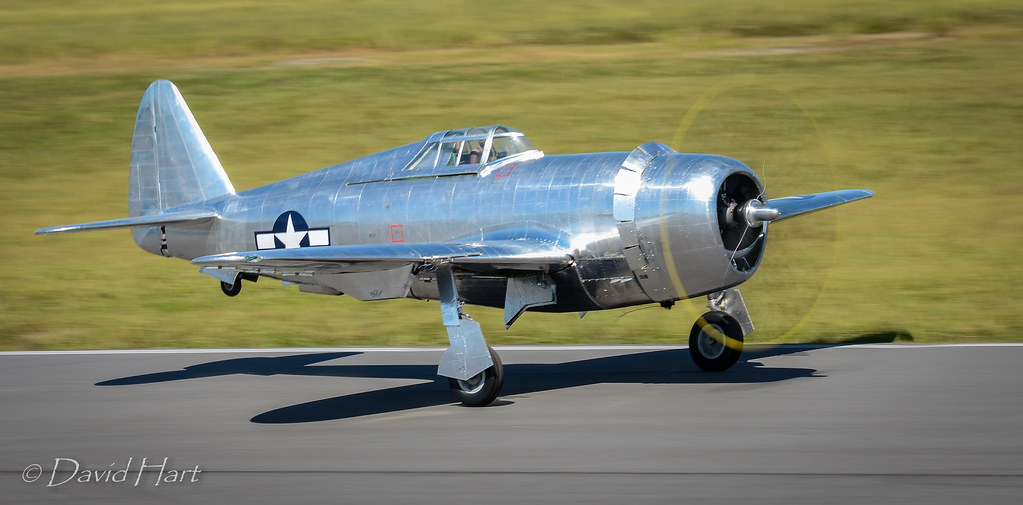 DSC_1945 by dwhart24, on Flickr
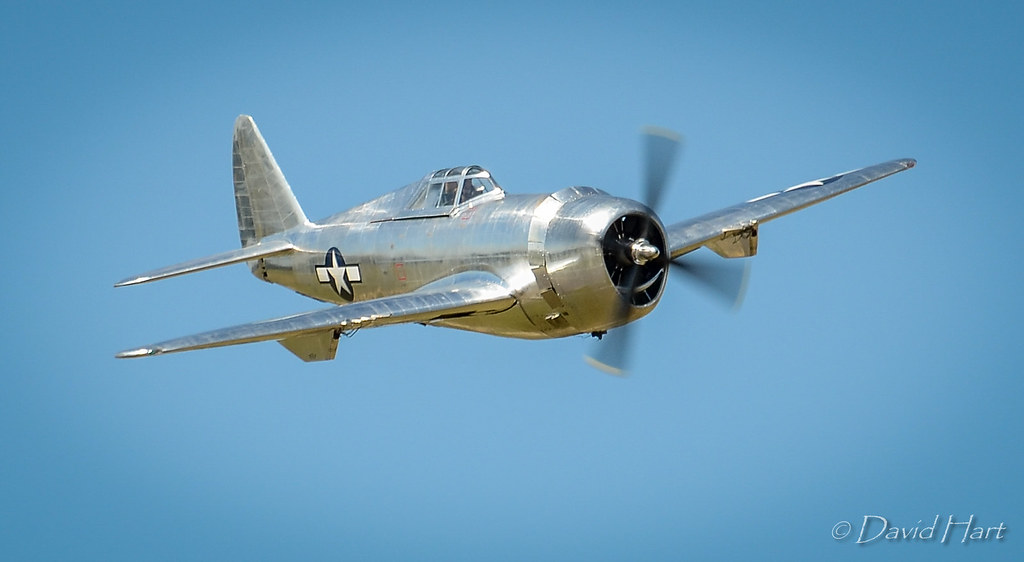 DSC_2009 by dwhart24, on Flickr
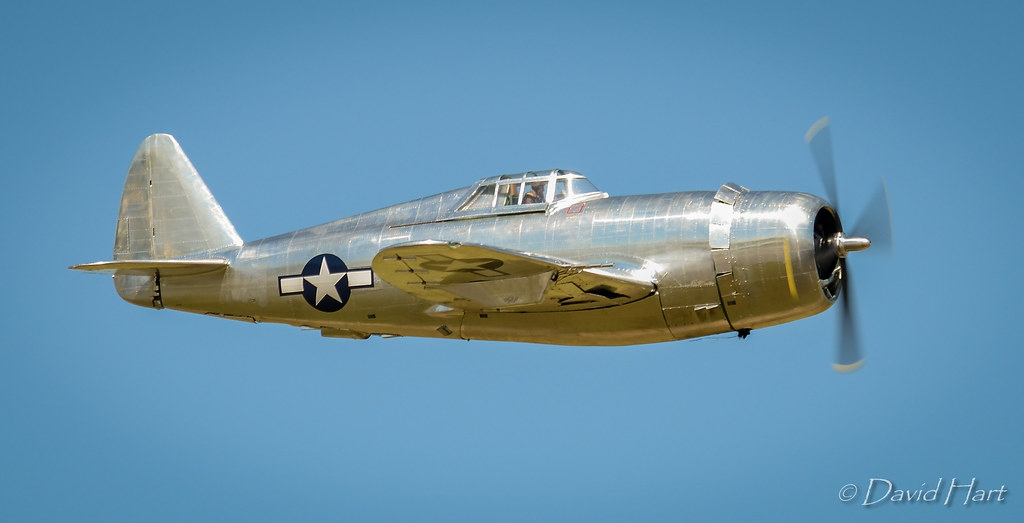 DSC_1984 by dwhart24, on Flickr
That plane sure is a beauty. I got some really good shots of it at 12 O Clock High. I am writing the article for Fly RC and I am including this in the article. If I have any questions I'll send you a private message.
Here are couple of shots from that weekend.
DSC_1945 by dwhart24, on FlickrDSC_2009 by dwhart24, on FlickrDSC_1984 by dwhart24, on Flickr
 11-07-2014, 12:37 PM
#344
PM:
MOKI 250:
After about 8 flights at Mac's and Frank's, after the last flight, the next morning, the engine would not start. There's 'clunk' sound when the engine is turned over. Called John (tech man) at TBM and he says from the blade striking the ground from the previous dead stick landing, the planetary gear (front of the hub) is probably damaged. Just sent the engine to them via UPS.
11-20-2014, 05:26 PM
#345
Hey Sam. Here is a link to my photos from the event if you want to check them out.
https://www.flickr.com/photos/462023...7647060319383/
https://www.flickr.com/photos/462023...7647060319383/
11-21-2014, 02:46 PM
#347
Hey Sam. Here is a link to my photos from the event if you want to check them out.
https://www.flickr.com/photos/462023...7647060319383/
https://www.flickr.com/photos/462023...7647060319383/
11-22-2014, 06:01 AM
#348
12-15-2014, 10:03 AM
#349
Junior Member
My Feedback: (2)
Join Date: Apr 2004
Location: St.Clair Shores,
MI
Posts: 18
Likes: 0
Received 0 Likes
on
0 Posts
G. Samuel I have an older Ziroli' 104" wing without flaps. Do to a crash rebuilding center section of wing. Have no plans anymore. But made temple's of all parts, My question is :My Aileron are 26" long how large are the flaps on your plans. I have 18" left on wing. Thanks Dave.
12-15-2014, 10:38 AM
#350
Junior Member
My Feedback: (2)
Join Date: Apr 2004
Location: St.Clair Shores,
MI
Posts: 18
Likes: 0
Received 0 Likes
on
0 Posts
G. Samuel I have an older Ziroli' 104" wing without flaps. Do to a crash rebuilding center section of wing. Have no plans anymore. But made temple's of all parts, My question is :My Aileron are 26" long how large are the flaps on your plans. I have 18" left on wing. Thanks Dave.