


CMP 50cc Zero


 02-23-2014, 10:48 AM
#4
The engine is DLE 55. I made a scale exhaust system, because this Zero needs much weight in the nose. I use cowl, but I had to take it down for the measuring and this pictures.
02-23-2014, 12:07 PM
#5

Thread Starter
My Feedback: (51)
Join Date: Jan 2002
Location: Kirkland,
WA
Posts: 552
Likes: 0
Received 0 Likes
on
0 Posts
I meant that it looks like you're mounting your cowl without using the inner ring.
It looks like you used the motor box and stand-offs. Did you cut the motor box down?
It looks like you used the motor box and stand-offs. Did you cut the motor box down?
02-23-2014, 12:18 PM
#6
Sorry, I had a problem with the language. Now I understand, the inner ring is "a part" of fuselage. A do it on every airplane, it easier for me. The cowl hangs on the six screws. At the first picture you can see my Dauntless. I made a new motor box, you can see it in the picture.
02-23-2014, 12:38 PM
#7
Thread Starter
My Feedback: (51)
Join Date: Jan 2002
Location: Kirkland,
WA
Posts: 552
Likes: 0
Received 0 Likes
on
0 Posts
Yes!!! I see what you're doing with the cowl. That's a great idea. So it looks like you used the provided motor box but cut it down to get the correct stand-off.
I'm building this with no instructions so your pictures and info is a great help to me. Don't worry about the language thing either. Your English is way better than my Czech.
Any chance of you taking a picture with the cowl on? I'm a little confused because it looks like there will be open vents between the fuse and cowl. I'm guessing that's where those goofy exhaust stacks they give you go.
You've got some great looking planes in your shop. Looks like a Stuka and ME 109 on the wing rack.
02-24-2014, 08:13 AM
#9
I offset the thrust 1,5� down and 2� to the right. The vents in the cowl I made opened, because this is the way how to make more space for the air flow. I can send you more pictures, but I�ll be at home on the Friday.
 03-20-2014, 01:01 PM
#11
Thread Starter
My Feedback: (51)
Join Date: Jan 2002
Location: Kirkland,
WA
Posts: 552
Likes: 0
Received 0 Likes
on
0 Posts
OK Guys,
I've got the fuse all done and most of the wings. Today's question is how did you attach the wing? I know I'll be drilling two holes through the trailing edge into the fuse but I'm not quite sure how to do the leading edge.
Did you make a one piece wing?
Pictures of wing mounting and retract install would be great.
03-20-2014, 01:11 PM
#13
Thread Starter
My Feedback: (51)
Join Date: Jan 2002
Location: Kirkland,
WA
Posts: 552
Likes: 0
Received 0 Likes
on
0 Posts
How about a close up of the leading edge?
Did you use the supplied wheel well liners for the gear or make your own? Did you use the gear doors? the way they come cut they will never lay flush with the wing.
Did you use the supplied wheel well liners for the gear or make your own? Did you use the gear doors? the way they come cut they will never lay flush with the wing.
03-20-2014, 01:18 PM
#15
Thank you.
I use ESM pneumatic retract which is given to ESM La-7. The wheels are bigger so I made new gear doors.
Can you explain this question please? : How about a close up of the leading edge? ( I have language problem, sorry)
I use ESM pneumatic retract which is given to ESM La-7. The wheels are bigger so I made new gear doors.
Can you explain this question please? : How about a close up of the leading edge? ( I have language problem, sorry)
Last edited by Prekin; 03-20-2014 at 01:23 PM.
03-20-2014, 01:59 PM
#17
Thread Starter
My Feedback: (51)
Join Date: Jan 2002
Location: Kirkland,
WA
Posts: 552
Likes: 0
Received 0 Likes
on
0 Posts
Yes, those pictures were exactly what I was looking for. I'm thinking about making my wing one piece for simplicity's sake. All of my other warbirds are one piece already.
thanks for the info!! I'll post some pictures when she's done.
thanks for the info!! I'll post some pictures when she's done.
03-31-2014, 08:25 AM
#19
Thread Starter
My Feedback: (51)
Join Date: Jan 2002
Location: Kirkland,
WA
Posts: 552
Likes: 0
Received 0 Likes
on
0 Posts
Here's the almost completed project. Still need to balance it but then we fly. If she's a "flyer" I'll add the gear doors and other scale details.
I only needed to add 8mm to the standard DLE stand-offs to get the proper distance from the firewall. Looks like you needed a lot more Prekin. i wonder if they changed the kit.
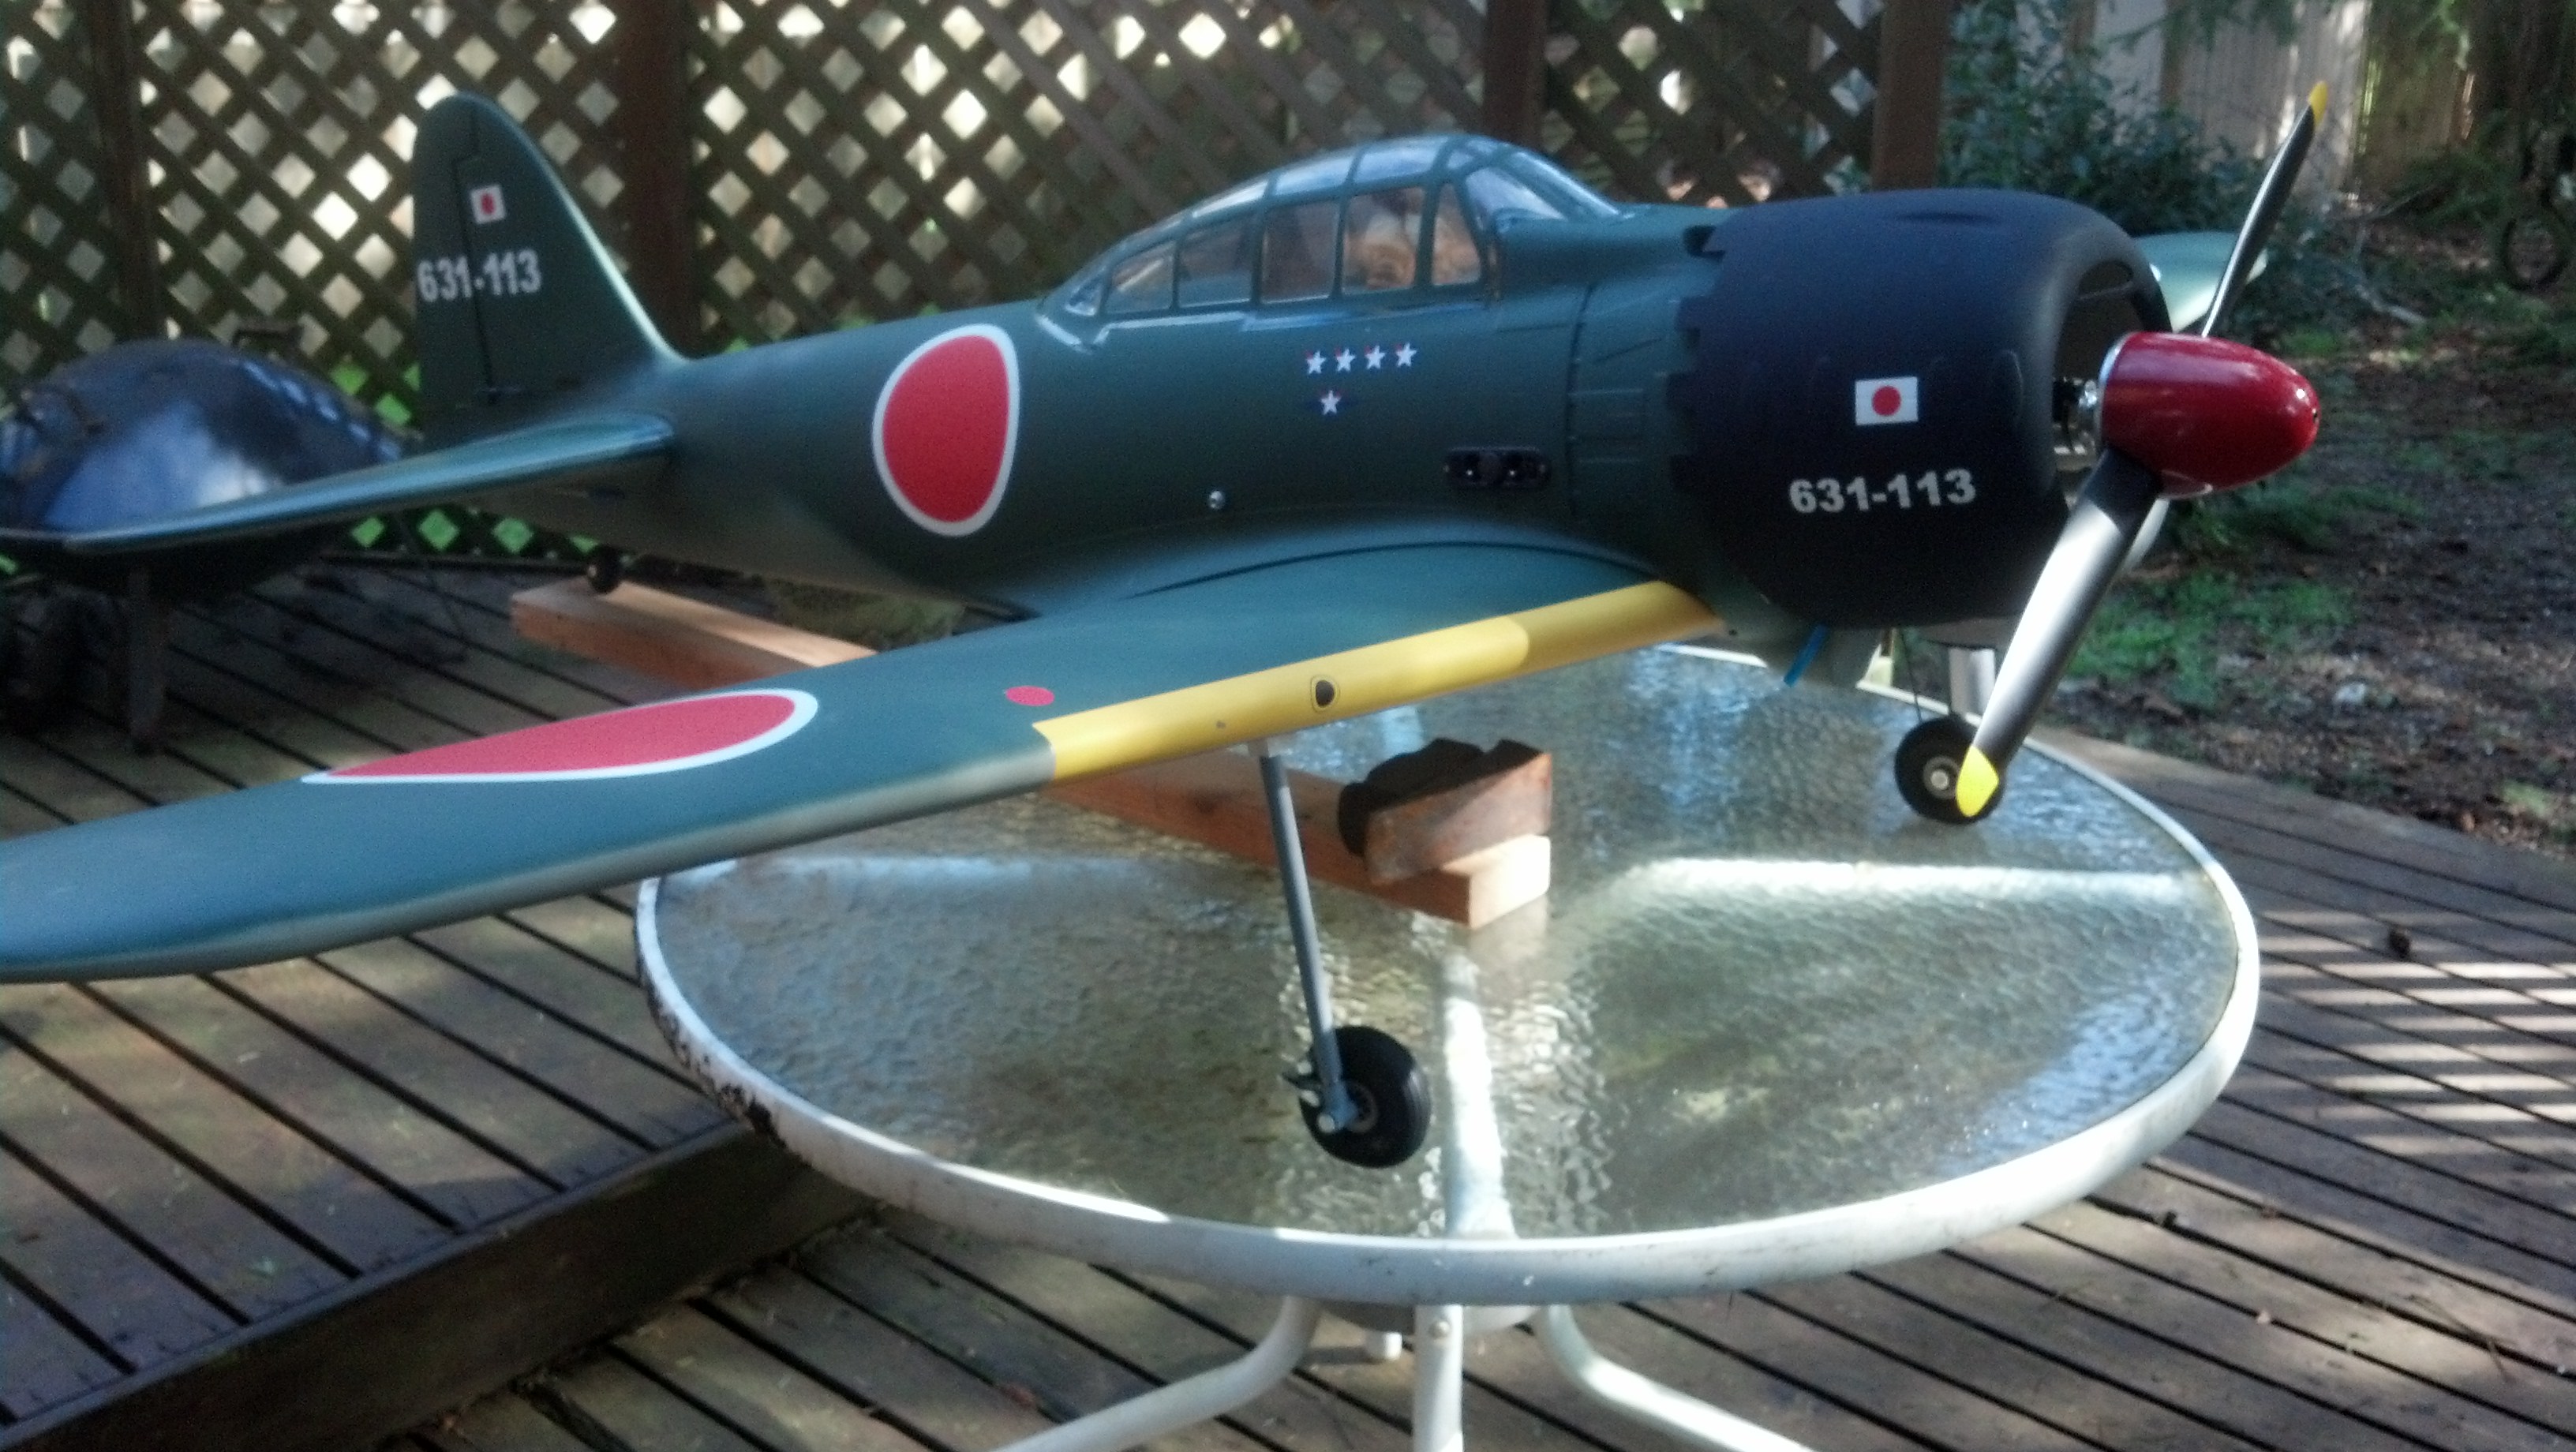
I only needed to add 8mm to the standard DLE stand-offs to get the proper distance from the firewall. Looks like you needed a lot more Prekin. i wonder if they changed the kit.
 Don�t afraid. Some weathering is allways good and nice. But you can do it after the maiden flight.
03-31-2014, 09:04 AM
Don�t afraid. Some weathering is allways good and nice. But you can do it after the maiden flight.
03-31-2014, 09:04 AM
#22
Never you can be sure  But this location is from CMP manual. There one general rule. CG is in the first third of MAC (middle aerodynamic curve), we can say, that is very close to the 1/3 of depth of the root rib.
But this location is from CMP manual. There one general rule. CG is in the first third of MAC (middle aerodynamic curve), we can say, that is very close to the 1/3 of depth of the root rib.