


2014 Winter Build = 13 foot Vought SB2U Vindicator


 10-22-2014, 11:31 AM
#29
Well, I waited over a week for the tubes to show up. I now have the center section framed up, most of the top sheeting on, the sub-leading edge on, the tube sleeves installed, the front and rear wing bolts plates in and sheeting on the bottom to prevent twist. I plan to add a few more sheets to the bottom just to stop the section from twisting and thenmove on the to outer wing panels.
JQ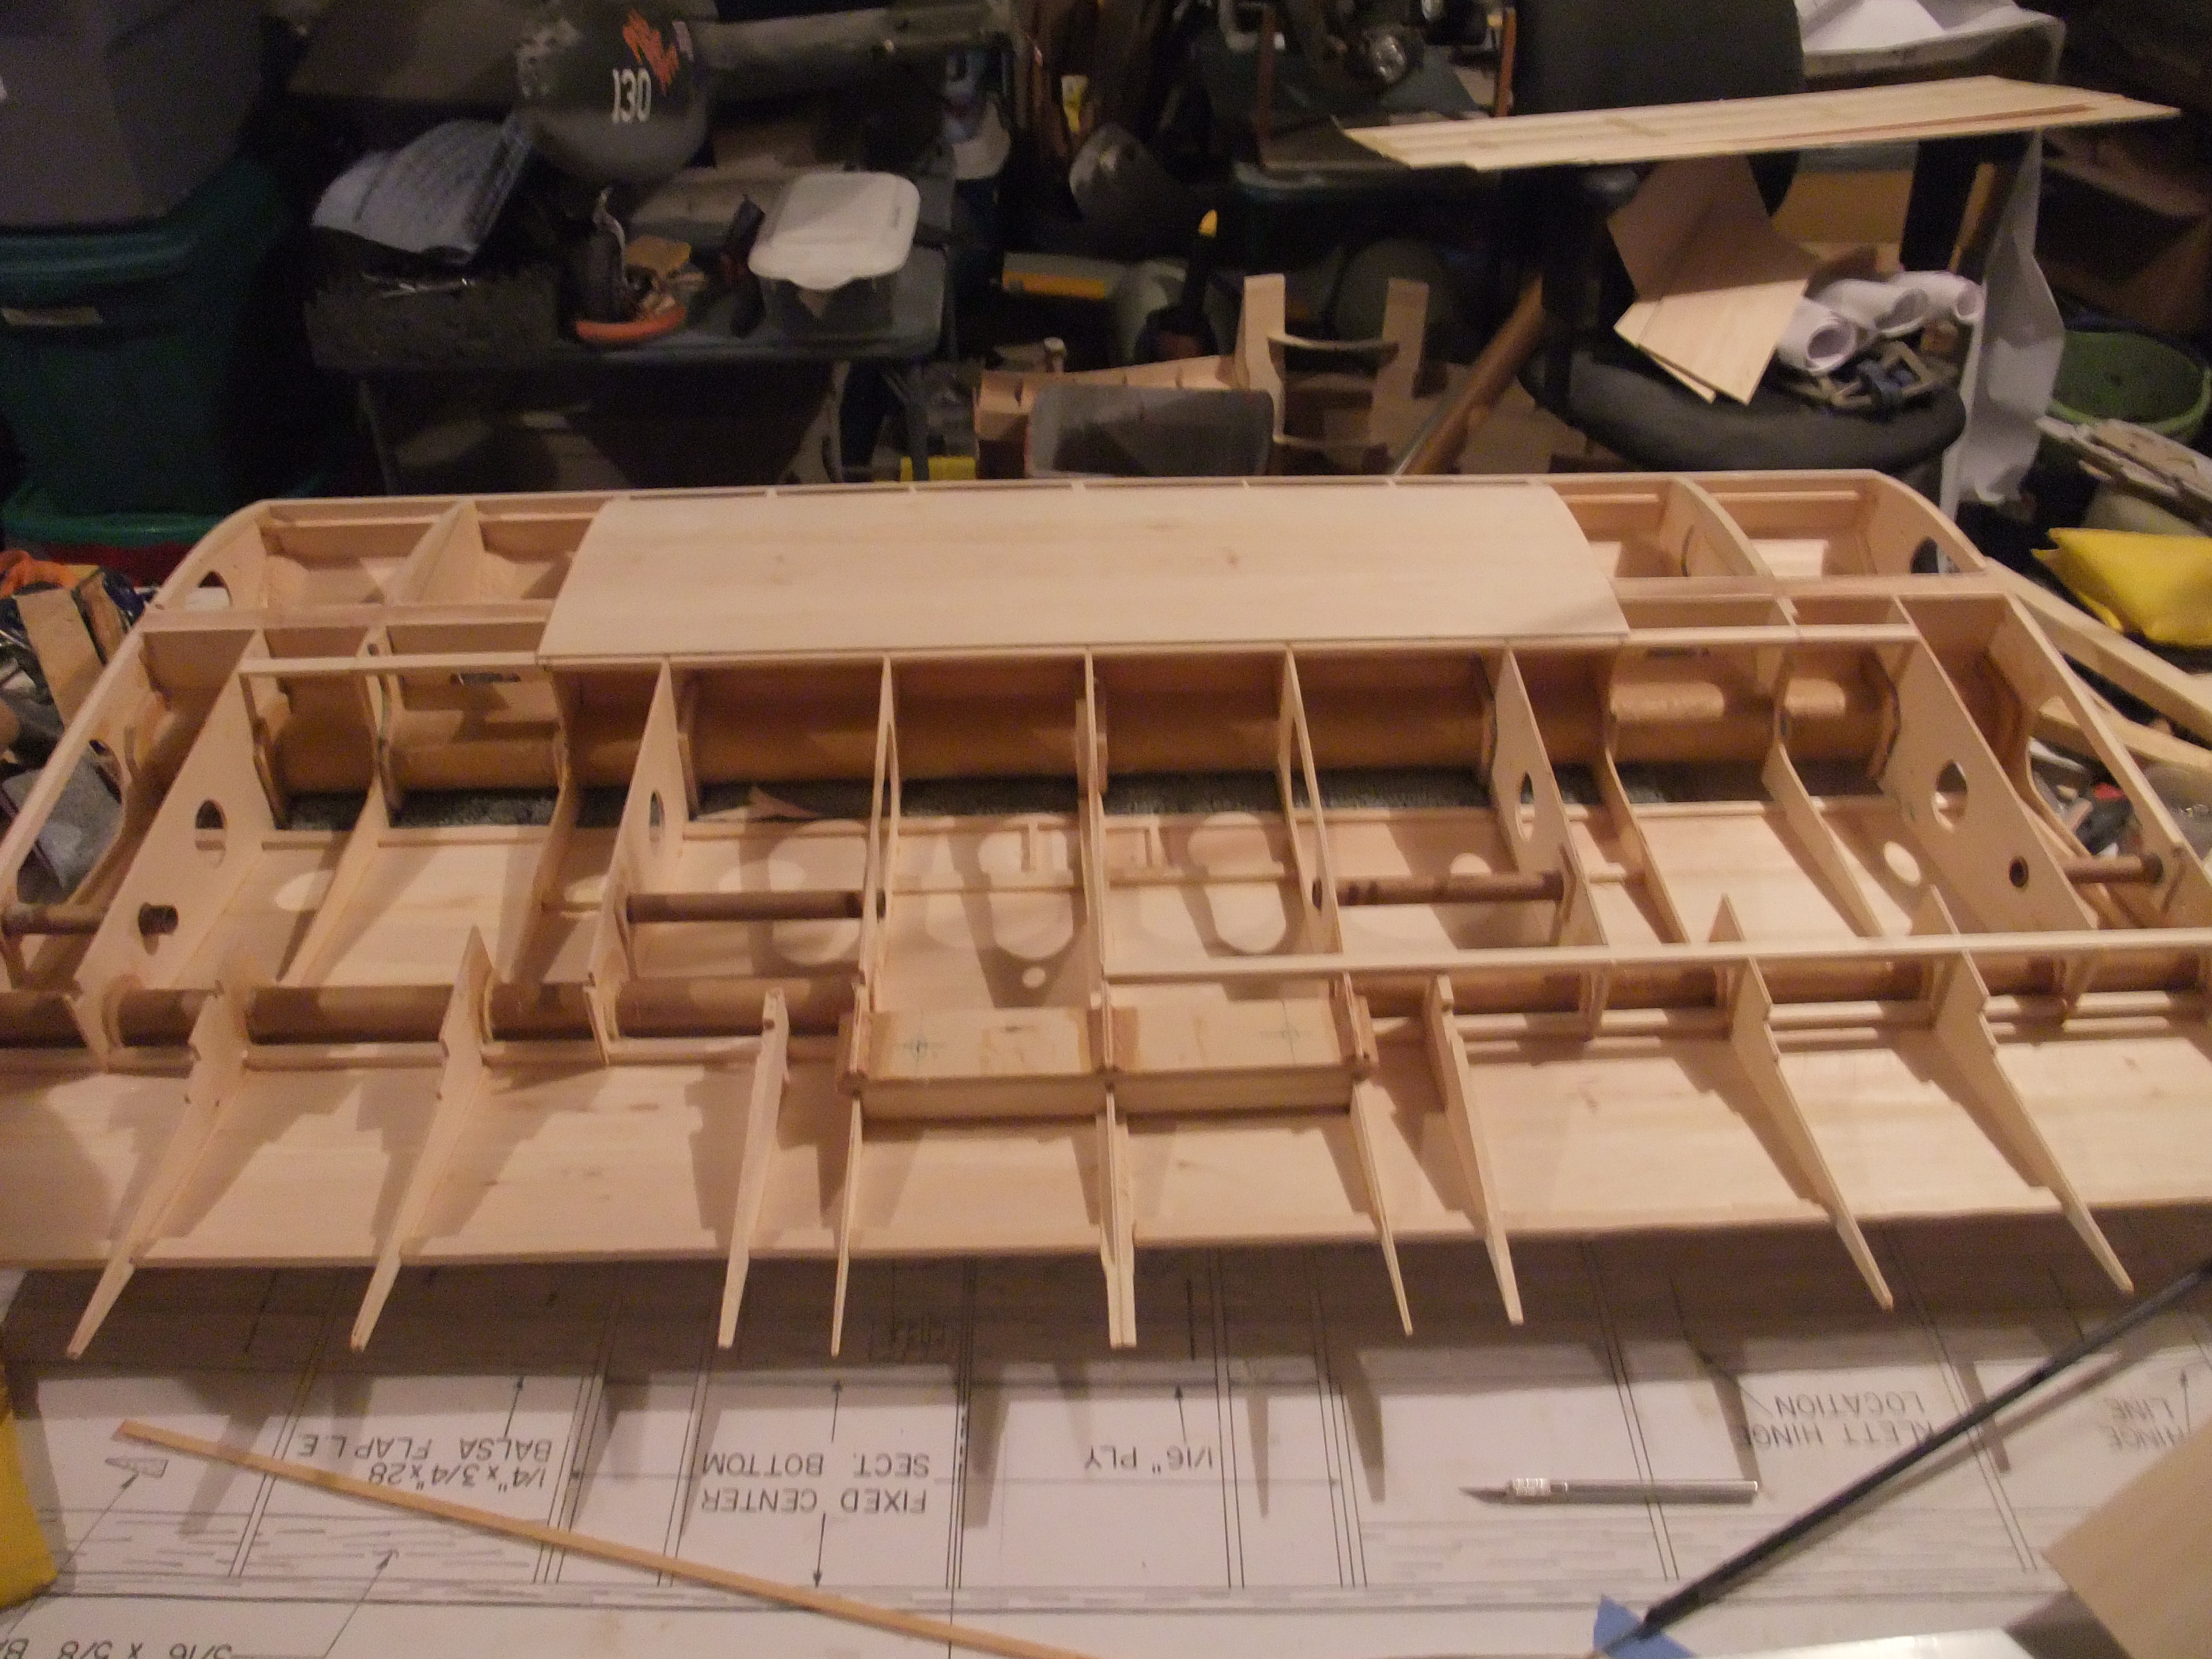

JQ
10-22-2014, 02:12 PM
#32


Join Date: Sep 2005
Location: Mesa, AZ
Posts: 1,456
Likes: 0
Received 0 Likes
on
0 Posts
I tell my builders to not glue in the tubes or sleeves till the components are ready for sheeting. then you can slide the wings on and let them find their natural center. Tack them first and see that you can remove the wings and get them back on without any forcing. Then finish with the epoxy!
10-27-2014, 04:51 AM
#33
I tell my builders to not glue in the tubes or sleeves till the components are ready for sheeting. then you can slide the wings on and let them find their natural center. Tack them first and see that you can remove the wings and get them back on without any forcing. Then finish with the epoxy!
JQ
10-29-2014, 01:19 PM
#35
I have begun the outer wing panels. The plans call for no washout, but I am adding 1 degree...never hurts. As you can see there are a lot of ribs in these outer panels. Wouldn;t need them all but used 1/8 balsa as they WILL help support the sheeting. The wing tube will tie into the first 7 ribs, all of 1/8 birch ply.
JQ


JQ
Last edited by F4u5; 10-29-2014 at 01:35 PM.
10-31-2014, 09:58 AM
#37
Arrgghhh! I hate when I see this. After dry-fitting the ribs to the spar, I have found that some of the ribs are too long in the planform view. About 7 ribs...some vary 1/16 and one as much as a 1/4 inch too long. I went back to the original blue prints (not scaled up) and sure enough...same situation; so I know they did not stretch when I blew them up.
For example, on the standard blue print plans, rib 19 measures 7 9/16 inches long along the chord line. When you look at/measure the planform view, the rib is only 7 3/8 long along the chord line. So, of course this error will repeat in larger variation on the enlarged plans. Not a real problem as I will just trim the trailing edges of the 7 ribs in question. However, I have never understan how the person drawing the plans cannot catch this. I know this is a common problem on Pepino plans from the 3 I have looked at (2 built). Go figure.
JQ
10-31-2014, 06:25 PM
#40
My Feedback: (60)
Join Date: Dec 2001
Location: Litchfield Park,
AZ
Posts: 7,677
Likes: 0
Received 25 Likes
on
23 Posts
Arrgghhh! I hate when I see this. After dry-fitting the ribs to the spar, I have found that some of the ribs are too long in the planform view. About 7 ribs...some vary 1/16 and one as much as a 1/4 inch too long. I went back to the original blue prints (not scaled up) and sure enough...same situation; so I know they did not stretch when I blew them up.
For example, on the standard blue print plans, rib 19 measures 7 9/16 inches long along the chord line. When you look at/measure the planform view, the rib is only 7 3/8 long along the chord line. So, of course this error will repeat in larger variation on the enlarged plans. Not a real problem as I will just trim the trailing edges of the 7 ribs in question. However, I have never understan how the person drawing the plans cannot catch this. I know this is a common problem on Pepino plans from the 3 I have looked at (2 built). Go figure.
JQ
For example, on the standard blue print plans, rib 19 measures 7 9/16 inches long along the chord line. When you look at/measure the planform view, the rib is only 7 3/8 long along the chord line. So, of course this error will repeat in larger variation on the enlarged plans. Not a real problem as I will just trim the trailing edges of the 7 ribs in question. However, I have never understan how the person drawing the plans cannot catch this. I know this is a common problem on Pepino plans from the 3 I have looked at (2 built). Go figure.
JQ
 11-03-2014, 04:33 AM
#41
Luckily I stocked up on Sam's Octoberfest....enough to get me thru to Christmas
Chad, I am looking forward to that Macchi!
Got the left outer panel all sheeted, so today I will attempt to get the wing tubes all aligned and fitted for the left side...then on to the other wing panel. Making good progress; these plans are not the best I must say.
JQ
Chad, I am looking forward to that Macchi!
Got the left outer panel all sheeted, so today I will attempt to get the wing tubes all aligned and fitted for the left side...then on to the other wing panel. Making good progress; these plans are not the best I must say.
JQ
11-04-2014, 08:31 AM
#45
Well....nobody is perfect. I just found a big whoops. When I had the wing together and on the stand, it looked like I had way too much washout. Instead of the 2 degrees I wanted to add. I added 4 by mistake. The ony thing I can figure is that when I took the measurement, I was just not paying attention and measured at a simulated grain line on the rib sheet instead of the chord line. The wing root sits at +1 degree incidence, so this means I will have 3 degrees washout at the tip in level flight. Not too awful, but I think I can twist the outer panel a half inch at the tip chord line and get it back to 2 degrees. I have been struggling deciding if I scrap the panel and re-do or try to twist it out a bit. I willtry the twist. If no good, I can always build another. Man, sometimes late nights don't pay off.
JQ
JQ

 11-04-2014, 07:53 PM
#49
Join Date: Sep 2005
Location: Mesa, AZ
Posts: 1,456
Likes: 0
Received 0 Likes
on
0 Posts
LOL!!!, I hear you, I am that way to about my designs. If I can not find or get enough data to say they are true scale, and design a model that someone could take to the master scale level, I pass!