


125% (1/4 scale) Anderson TA-152H
 03-27-2015, 01:50 PM
#251

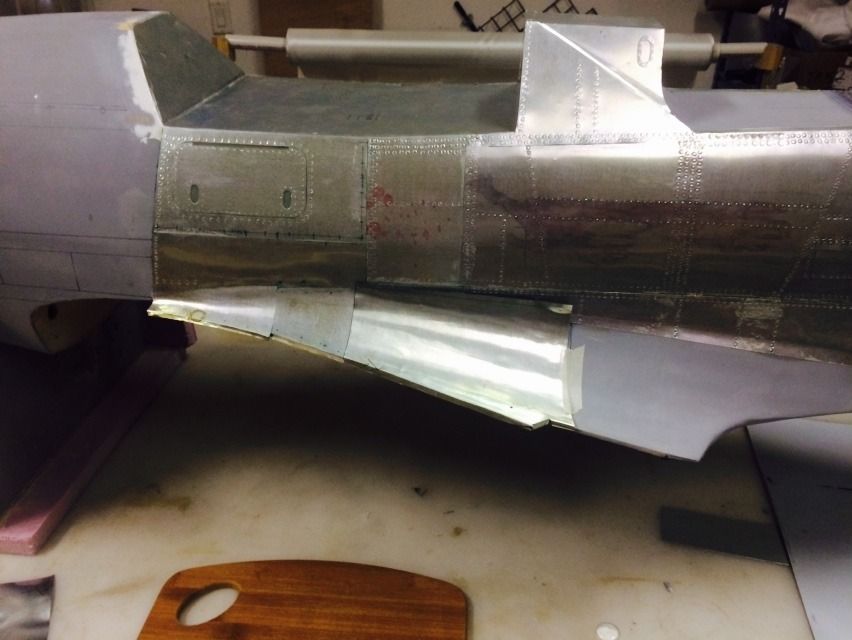
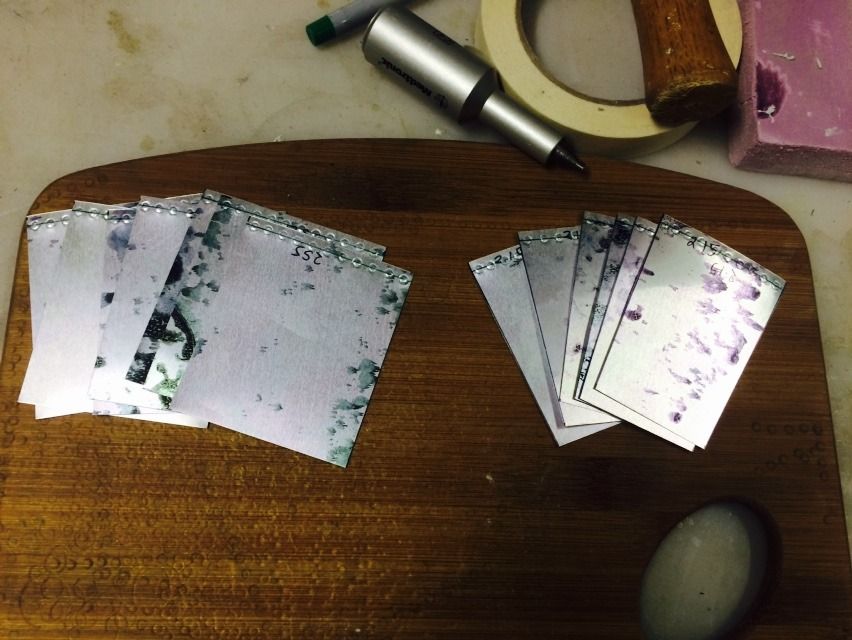
I took a few hours away to make a few more panels. 2 more of the upper wing fillet panels were done, they were surprisingly easy.
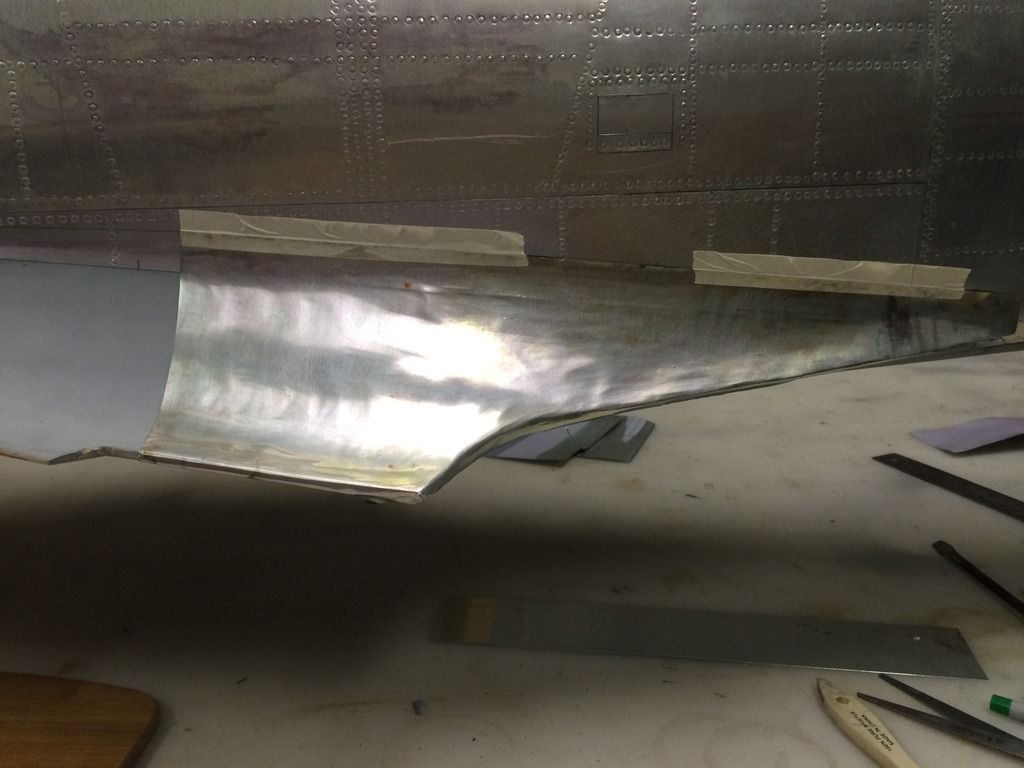
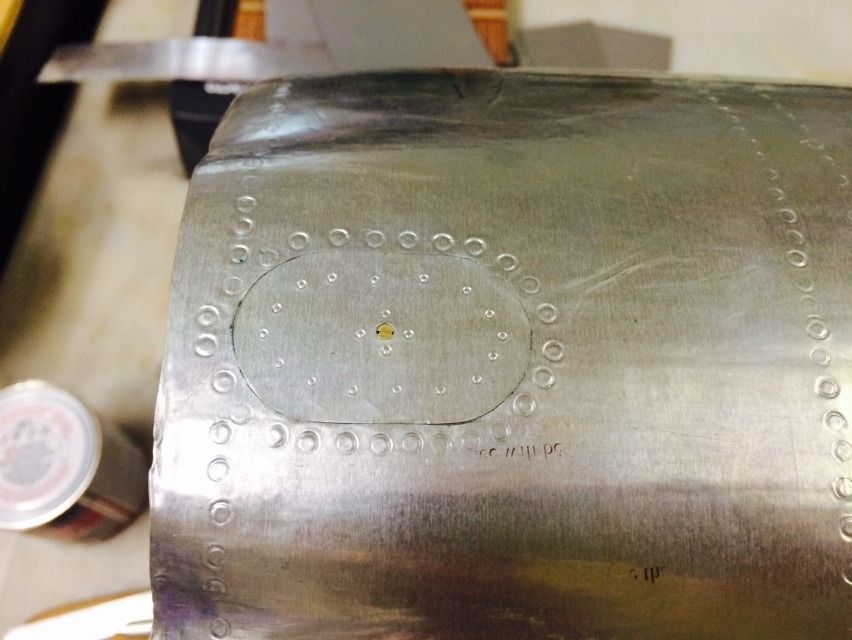
I also attached the panels that were done other than the after central fillet panels, they need trimmed to shape first. This is the panel held on by masking tape.
I also (as marmbrust put it) screwed around and added some more screws to some panels:


I also attached the panels that were done other than the after central fillet panels, they need trimmed to shape first. This is the panel held on by masking tape.

I also (as marmbrust put it) screwed around and added some more screws to some panels:

 03-27-2015, 03:28 PM
#252
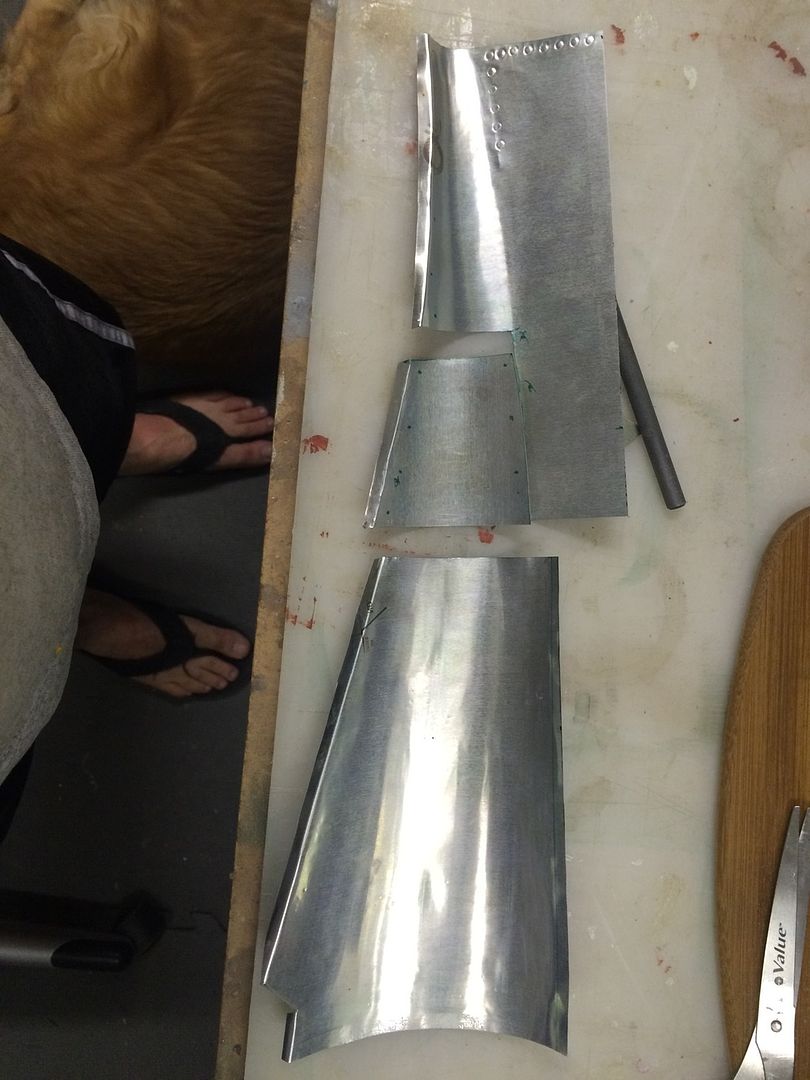
Everyone was busy doing their own thing, so i snuck back out for an hour and got another panel done. Yea, one hour for one panel...
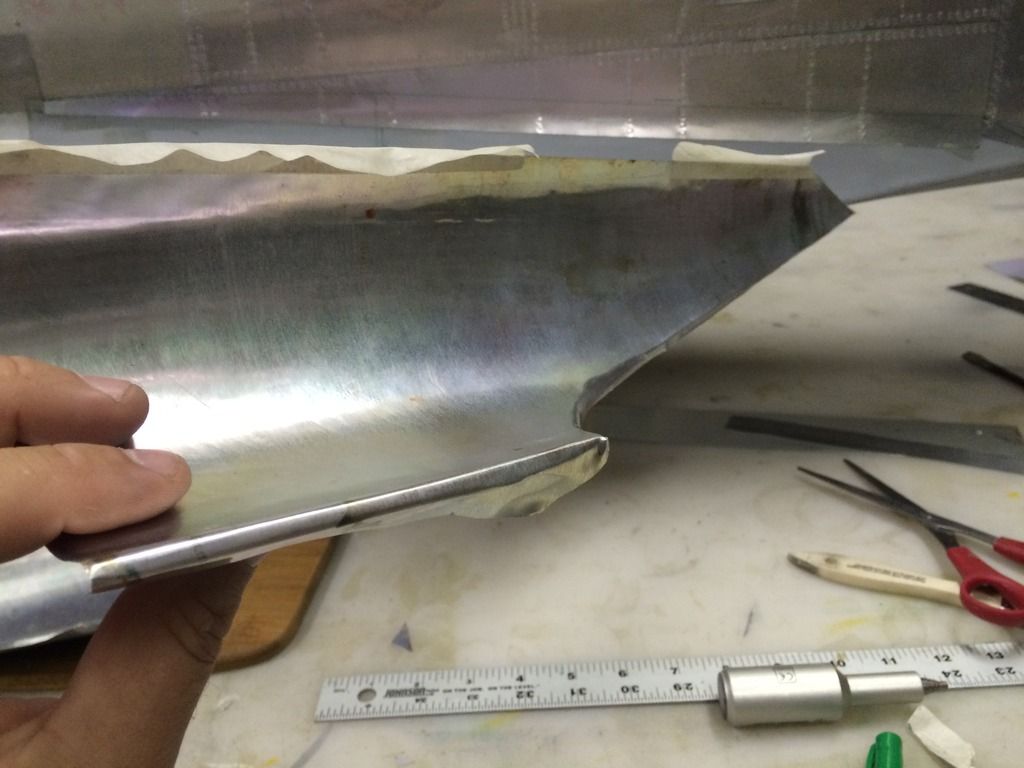
This is one piece of metal and it wraps around the TE curve of the fillet and to the bottom surface of the fillet as well.
[URL=http://smg.photobucket.com/user/Flamed04R6/media/TA152H/E87BF3C4-1992-473B-94BD-55A30348681B_zpseuw7brav.jpg.html]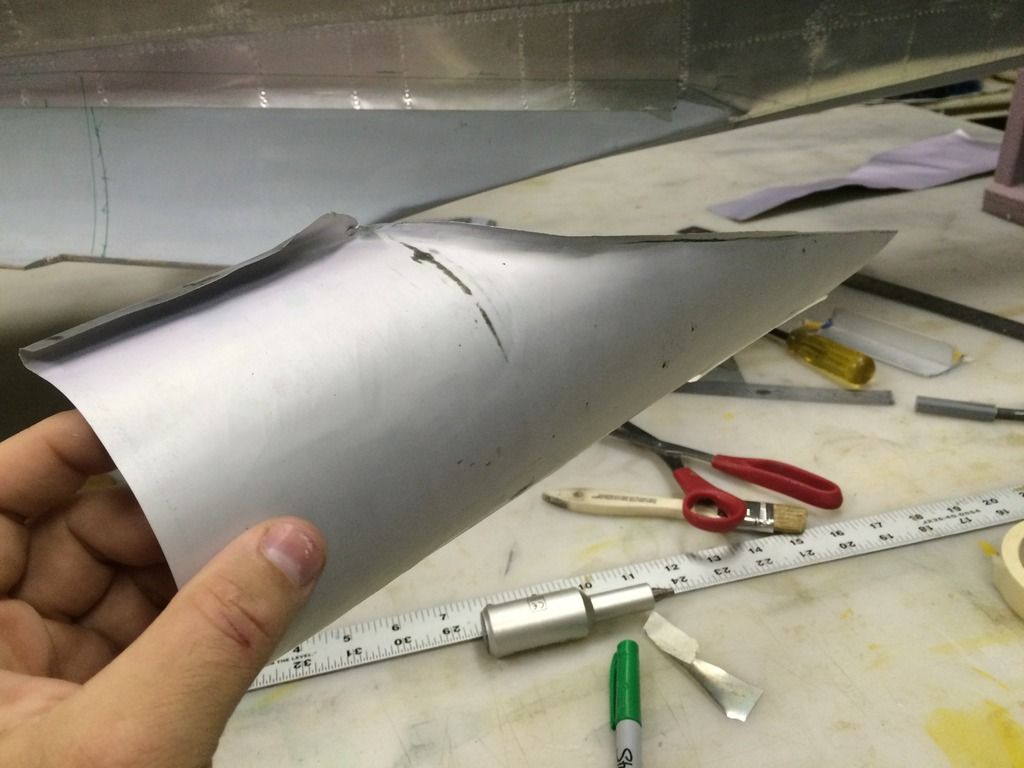 [/UR]
[/UR]
This is one piece of metal and it wraps around the TE curve of the fillet and to the bottom surface of the fillet as well.


[URL=http://smg.photobucket.com/user/Flamed04R6/media/TA152H/E87BF3C4-1992-473B-94BD-55A30348681B_zpseuw7brav.jpg.html]
[/UR]

 03-30-2015, 04:21 PM
#254
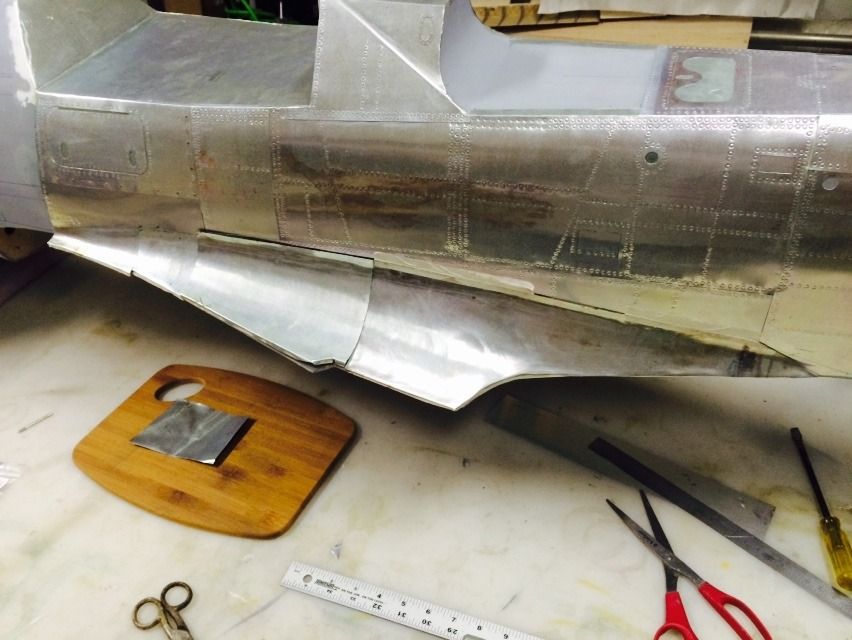
Bottom three panels and the big hatch are done. Ive got the lower two wing fairing panels to do and the fuselage aft of the firewall is complete other than the canopy and gun hood. Ive got a big of work to do around the supercharger scoop before i can detail that area.
 03-30-2015, 04:25 PM
#255
Looking sweet. That is a lot of work! So what about the wings? You are just finishing them like normal as working models correct? Got the little scoop today. Along with a color chip book. Nice to see my approved, legal colors were in there, and are a shade that I like. Some of these colors vary tremendously, and some do not look very good. RLM 74, 75, and 76 going on my version.
03-30-2015, 04:52 PM
#256
Looking sweet. That is a lot of work! So what about the wings? You are just finishing them like normal as working models correct? Got the little scoop today. Along with a color chip book. Nice to see my approved, legal colors were in there, and are a shade that I like. Some of these colors vary tremendously, and some do not look very good. RLM 74, 75, and 76 going on my version.
The wing panels that are framed up currently will be the test wings, but ill end up building a new set. Once i get to that point, i may or may not litho the wings and fully mold them, it depends on the popularity of the model.
Good to hear the scoop arrived, i printed it at a lower layer height so it should be fairly quick and easy to finish for paint. The stuff doesnt sand well, so just smear red bondo spot putty over it and sand it smooth.
03-30-2015, 05:02 PM
#259

My Feedback: (7)
Join Date: Dec 2008
Location: Owatonna,
MN
Posts: 226
Likes: 0
Received 0 Likes
on
0 Posts
Invertmast,
I love the craftsmanship. I'm curious everyone is always so concerned about weight in their builds. I don't believe I've seen someone do a metal makeover like you are doing right now. Is the weight difference negligible or I suspect the power-plant you use will compensate for the extra? Just wondering how your looking at it.
Z
03-30-2015, 05:04 PM
#260
Invertmast,
I love the craftsmanship. I'm curious everyone is always so concerned about weight in their builds. I don't believe I've seen someone do a metal makeover like you are doing right now. Is the weight difference negligible or I suspect the power-plant you use will compensate for the extra? Just wondering how your looking at it.
Z
I love the craftsmanship. I'm curious everyone is always so concerned about weight in their builds. I don't believe I've seen someone do a metal makeover like you are doing right now. Is the weight difference negligible or I suspect the power-plant you use will compensate for the extra? Just wondering how your looking at it.
Z
03-30-2015, 05:13 PM
#263
Yea im not really marketing this towards joe public, id like for it go be on a competitive level with Sist. I know my landing gear design is more accurate and scale than their's and i believe the surface detailing is on par or better. Im just doing something completely out of the ordinary and doing something no one else has done at this size.
03-30-2015, 05:40 PM
#264
Yea im not really marketing this towards joe public, id like for it go be on a competitive level with Sist. I know my landing gear design is more accurate and scale than their's and i believe the surface detailing is on par or better. Im just doing something completely out of the ordinary and doing something no one else has done at this size.


 04-01-2015, 04:37 PM
#266
Stab panels are done:

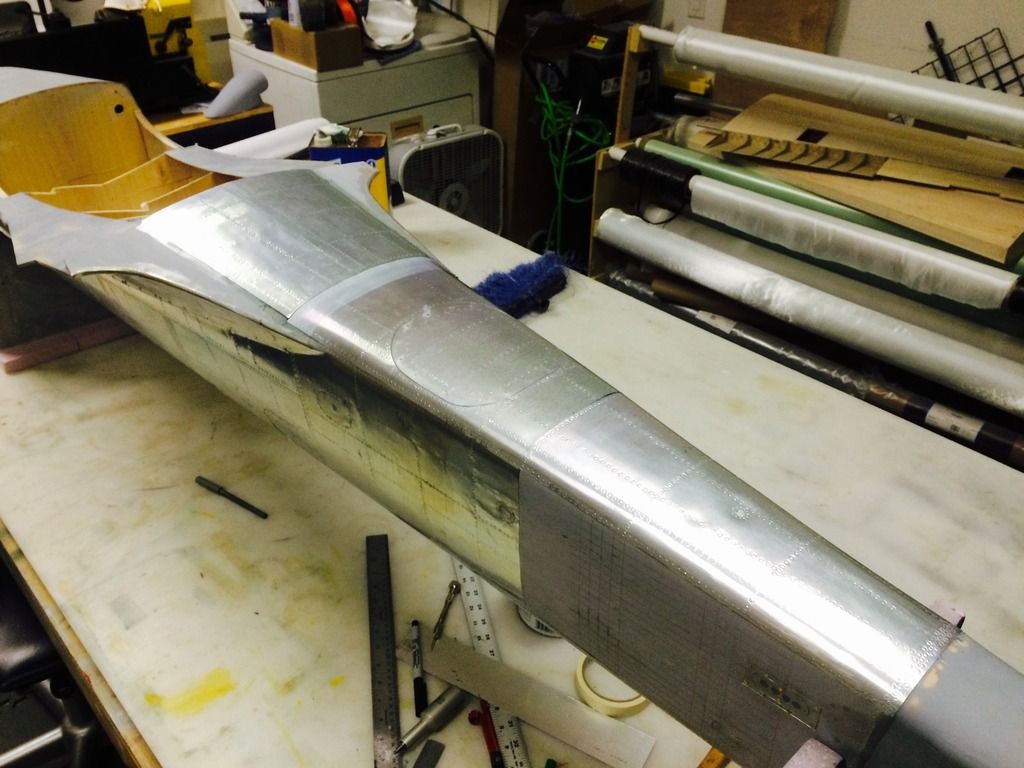
And the intermediate cowling panels are done as well.
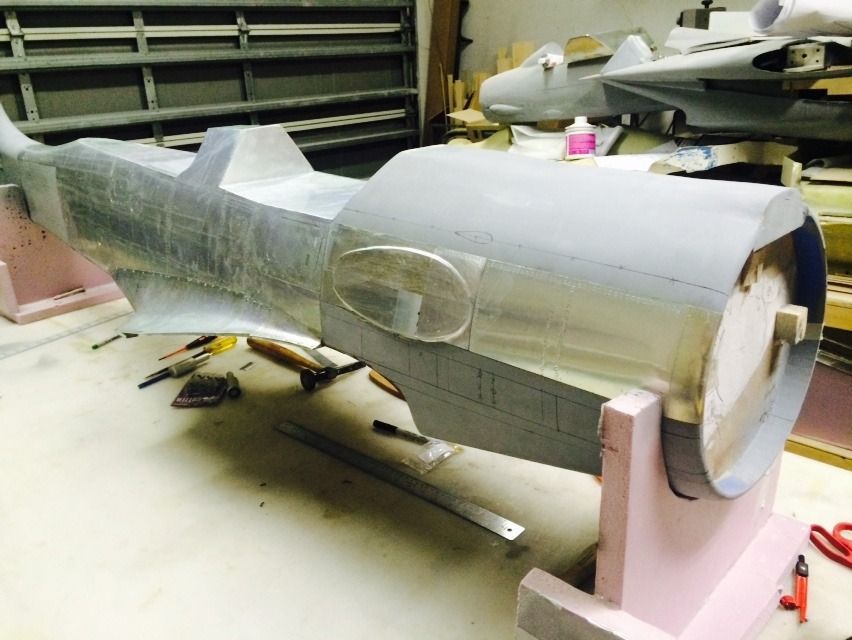
The upper cowling panel is in the process of being annealed. I used up all the butane in my mini torch, so its busy settling after its refill. Ill hopefully get that panel done after the kiddos go to bed.

And the intermediate cowling panels are done as well.


The upper cowling panel is in the process of being annealed. I used up all the butane in my mini torch, so its busy settling after its refill. Ill hopefully get that panel done after the kiddos go to bed.

 04-03-2015, 09:53 AM
#268
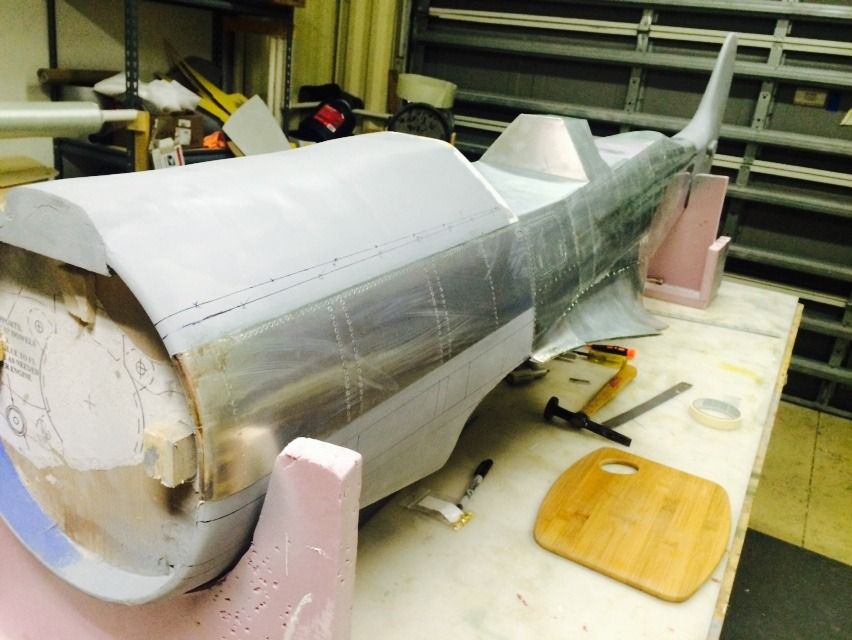
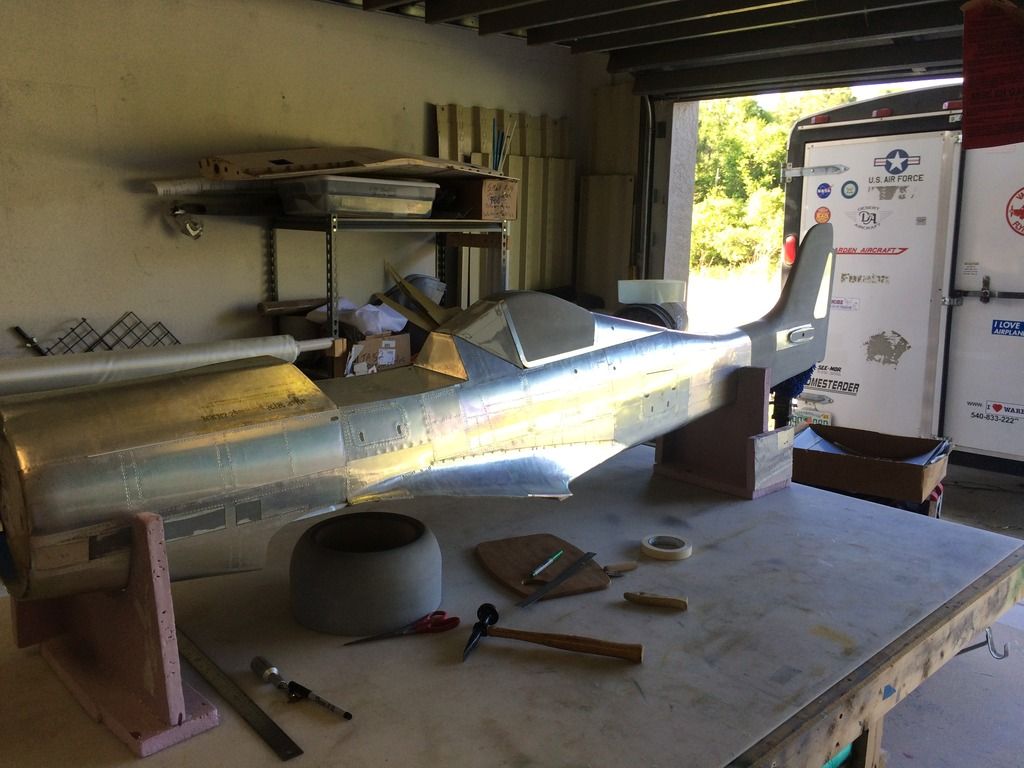
I finished up this morning what i started last night. The last few big panels are on. You'll also notice the forward exhaust fairing panel is also in place. As far as the main fuselage, the only items left are the exhaust opening panels, stab fillets and vertical stab access panel and the fuse will be done. I hope to get all that done day.
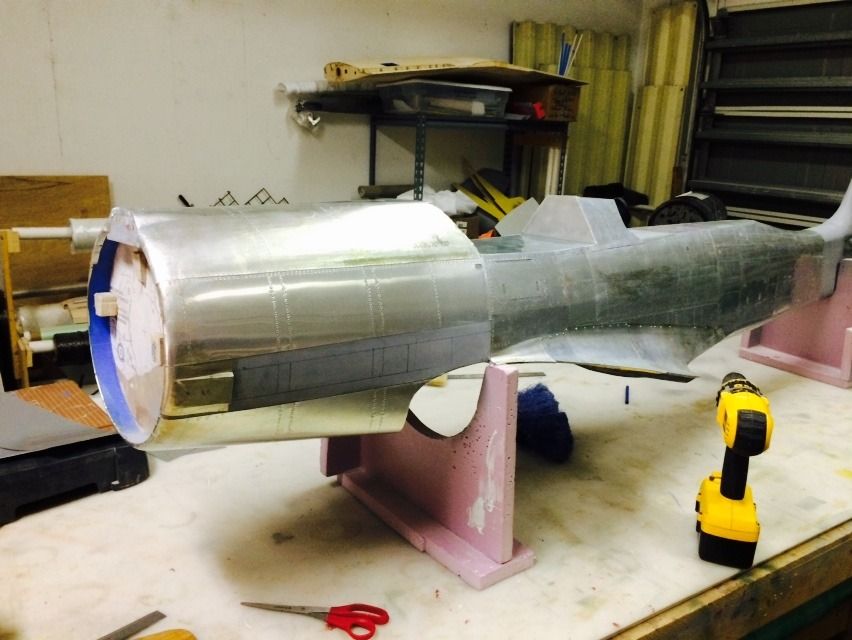

I also mocked up all the canopy parts and gunhood on for a picture. I hope to get the canopy and fairing and the cowling done this weekend so i can begin making parting planes next week.


I also mocked up all the canopy parts and gunhood on for a picture. I hope to get the canopy and fairing and the cowling done this weekend so i can begin making parting planes next week.
 04-03-2015, 10:53 AM
#269

My Feedback: (5)
Thomas,
I'm VERY impressed with your work. Sure hope the "pulls" from the buck are as nice as your detail work! If the finished "kit" meets or surpasses Sist detail (and it's looking very good at the moment) I'll be setting aside a spot for one of your Ta's in the build schedule. You've made mention and shown pictures of your printed landing gear examples. Does this mean you will be providing "scale" operating gear with your kits, or will Sierra's fit the planned wings? If so are you going to be doing the machine work on the gear or sub'ing it out to another machinist?
I'm enjoying your thread a great deal. Thanks for all the nifty tech on display. BTW what thickness are you using for your sheeting (lithoplate?). Looks like it take compound curves nicely.
A fan.
Regards,
langerl


 04-03-2015, 03:13 PM
#271
Thomas,
I'm VERY impressed with your work. Sure hope the "pulls" from the buck are as nice as your detail work! If the finished "kit" meets or surpasses Sist detail (and it's looking very good at the moment) I'll be setting aside a spot for one of your Ta's in the build schedule. You've made mention and shown pictures of your printed landing gear examples. Does this mean you will be providing "scale" operating gear with your kits, or will Sierra's fit the planned wings? If so are you going to be doing the machine work on the gear or sub'ing it out to another machinist?
I'm enjoying your thread a great deal. Thanks for all the nifty tech on display. BTW what thickness are you using for your sheeting (lithoplate?). Looks like it take compound curves nicely.
A fan.
Regards,
langerl
I'm VERY impressed with your work. Sure hope the "pulls" from the buck are as nice as your detail work! If the finished "kit" meets or surpasses Sist detail (and it's looking very good at the moment) I'll be setting aside a spot for one of your Ta's in the build schedule. You've made mention and shown pictures of your printed landing gear examples. Does this mean you will be providing "scale" operating gear with your kits, or will Sierra's fit the planned wings? If so are you going to be doing the machine work on the gear or sub'ing it out to another machinist?
I'm enjoying your thread a great deal. Thanks for all the nifty tech on display. BTW what thickness are you using for your sheeting (lithoplate?). Looks like it take compound curves nicely.
A fan.
Regards,
langerl
Scale Ta152 landing gead have been designed and i am hoping to get the first gear set in my hands by late May, my plan is to have the first model flying no later than October of this year.
All of the gear is CNC cut and is outsourced to proffessional machine shops so the quality is top notch.
The scale gear will require a slight redesign of the wing to provide a little more installation room which will begin once i start doing layups and have time to devote during cure cycles.
Sierra gear will also fit in the "stock" wing.
The litho varies from .004 to .009" in thickness. It doesnt conform all that well, ive just worked with the stuff enough to know how to convince it to shape
 04-04-2015, 03:32 PM
#272
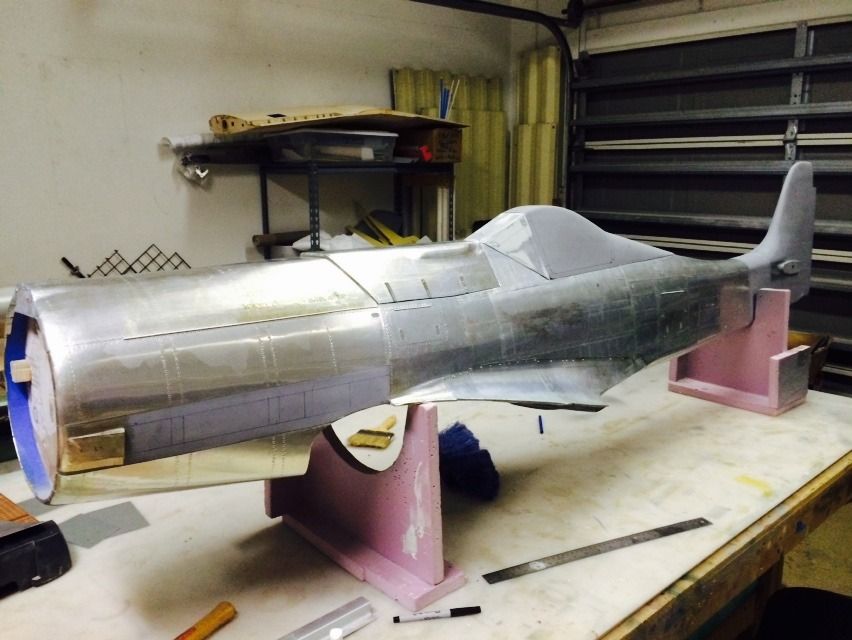
Fuselage is DONE!
Canopy would be to, but i ran out of #0 slotted countersunk screws.

Heres the canopy frame prior to adding all 120 screws... Which involved drilling each hole with a pin vise, the counter sinking each hole, then redrilling the holes in the 3D printed portion, then screwing the screws in. Its worth the effort though!
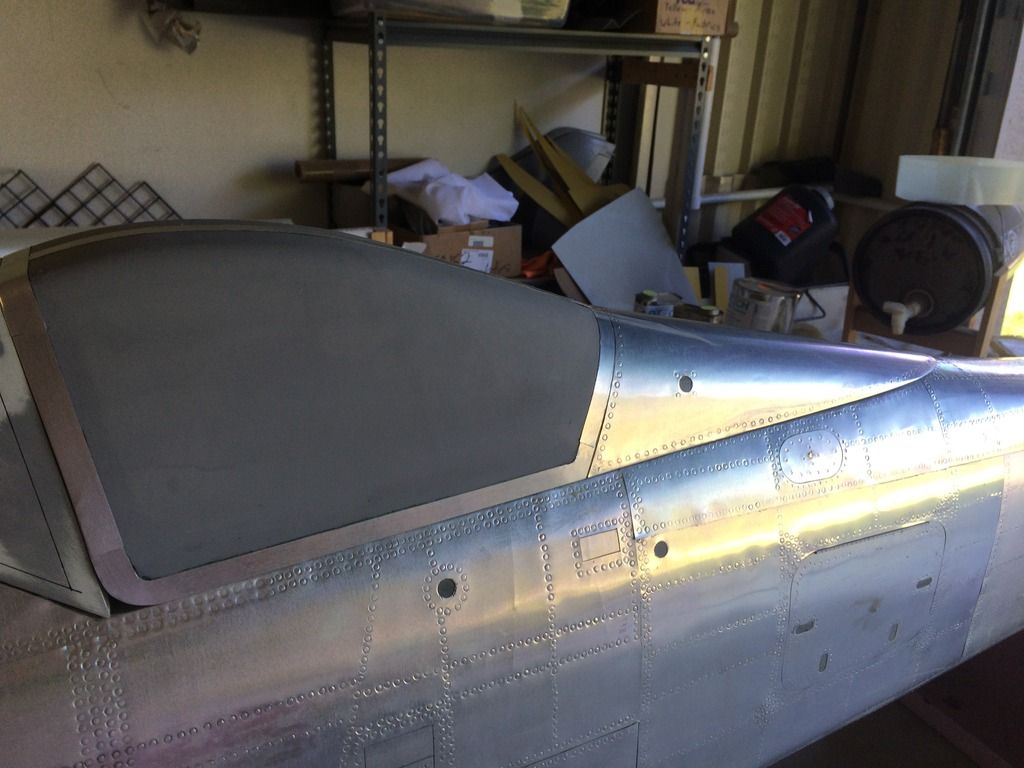
After putting the screws in:

Canopy would be to, but i ran out of #0 slotted countersunk screws.


Heres the canopy frame prior to adding all 120 screws... Which involved drilling each hole with a pin vise, the counter sinking each hole, then redrilling the holes in the 3D printed portion, then screwing the screws in. Its worth the effort though!

After putting the screws in:
 04-05-2015, 12:22 PM
#274
The cowl flap panels have been cut and detailed. Of all the photos i have of the cowl flaps, there appears to be very little riveting on them, so these only have them along the front where the hinge panels would be.
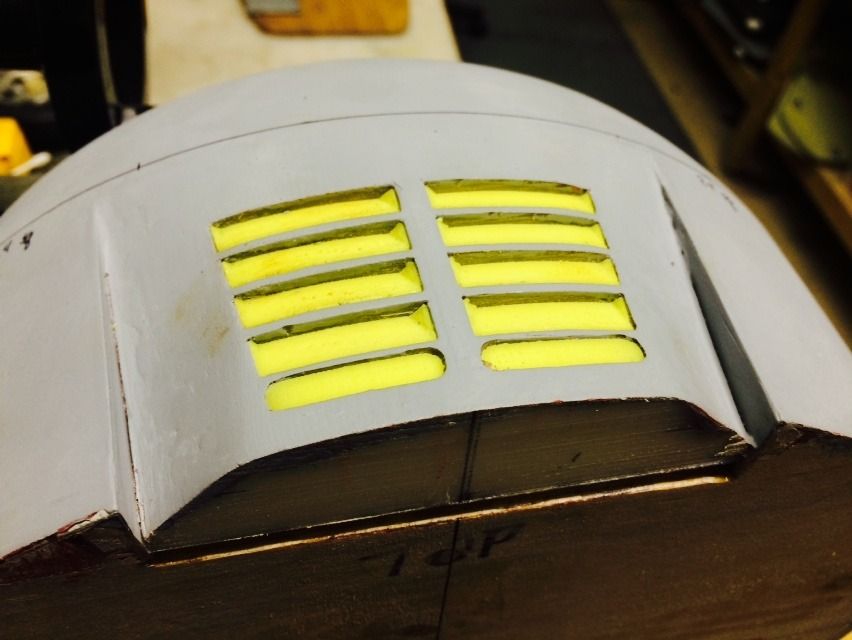
The top cowl vent panel has always been a "good enough" because i was having a real hard time getting the louvers of it drawn in CAD when i originally printed it. I originally was just going to infull the holes with body filler and sand that to shape, but that was going to really suck. So last night i took an hour or two to draw the inserts for the louver panels and printed them this morning and installed them. Im currently waiting for two correction pieces to finish printing and then i can make the litho panel for this area.
The decision was made to also go ahead and do the stabs in all composite as well. So once i begin molding the gun hood, canopy and cowling, ill glass the horizontal stabs and get those ready for litho detailing.

The top cowl vent panel has always been a "good enough" because i was having a real hard time getting the louvers of it drawn in CAD when i originally printed it. I originally was just going to infull the holes with body filler and sand that to shape, but that was going to really suck. So last night i took an hour or two to draw the inserts for the louver panels and printed them this morning and installed them. Im currently waiting for two correction pieces to finish printing and then i can make the litho panel for this area.

The decision was made to also go ahead and do the stabs in all composite as well. So once i begin molding the gun hood, canopy and cowling, ill glass the horizontal stabs and get those ready for litho detailing.
