


125% (1/4 scale) Anderson TA-152H


 04-07-2015, 03:58 PM
#277
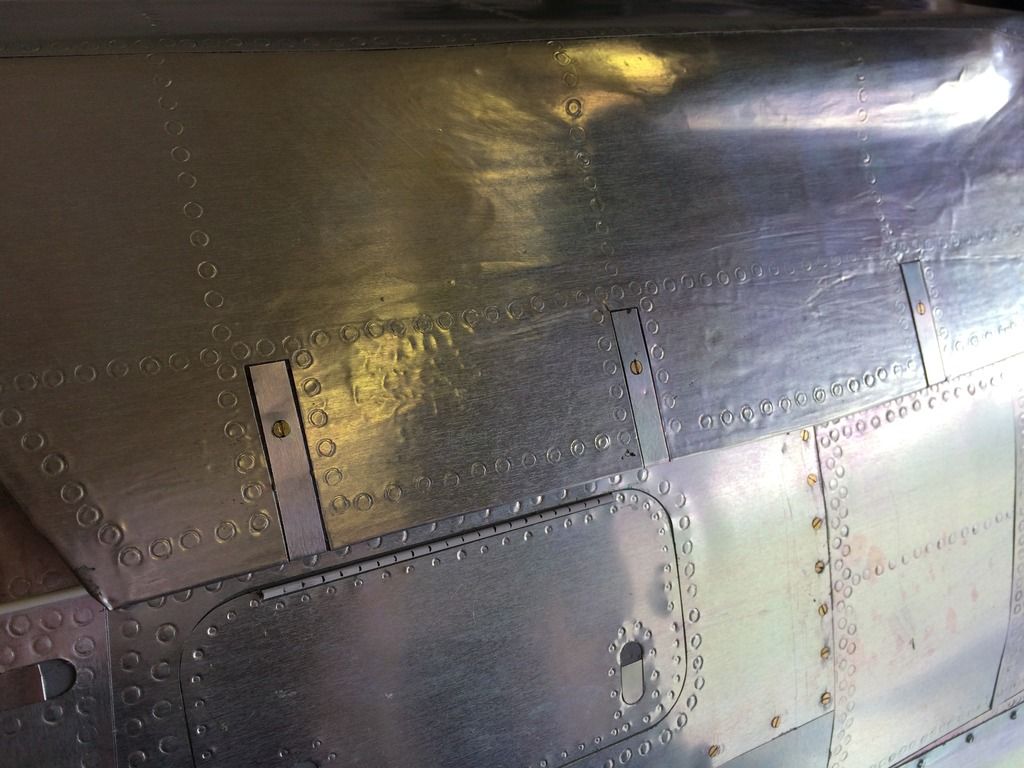
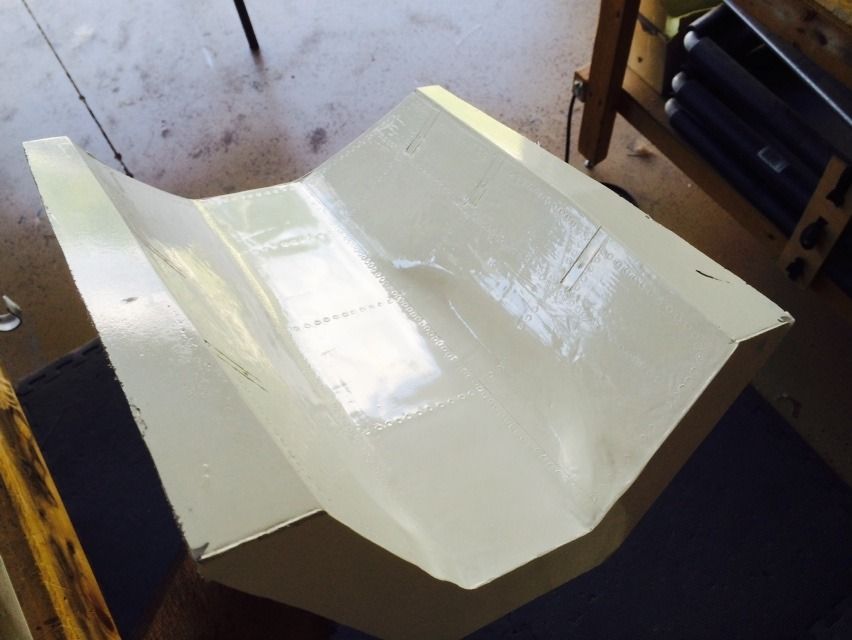
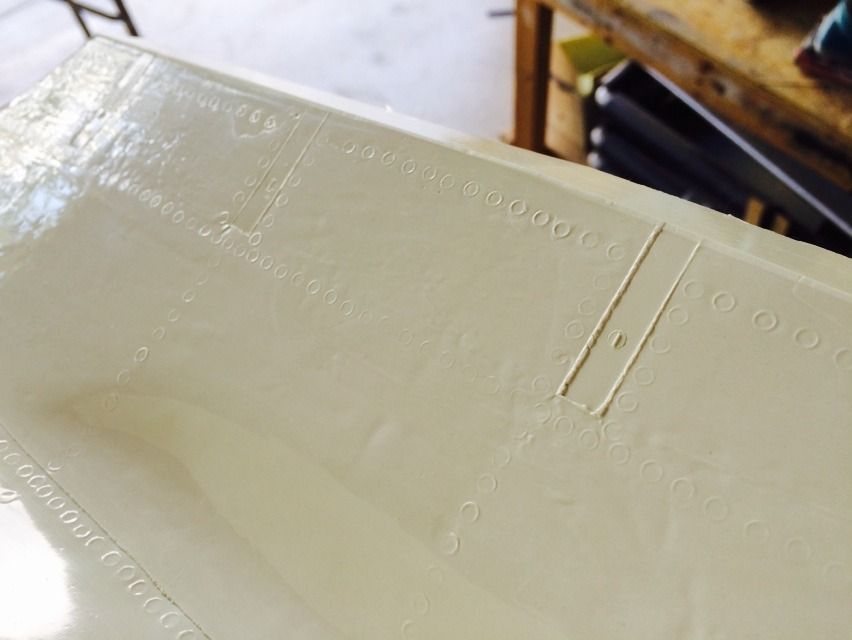
Since i finished the fuse, the panels that had latches on them have been empty and its been driving me nuts. So after some research, i determined what the latches should reasonably look like and filled in the latch cutouts with faux latch panels.

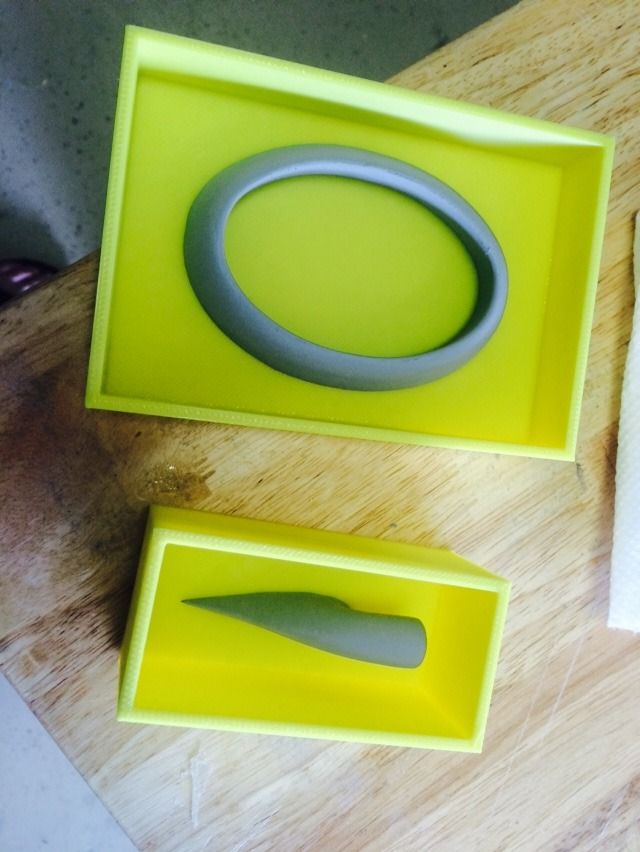
I also 3D printed up the silicon mold boxes for the supercharger scoop lip and cockpit air scoop.
I then did three costs of partall paste #2 was on the cowl, supercharger scoop and gunhood plugs.
Then i cut out the parting planes for the SC scoop, spinner and gunhood on the CNC router and built up some parting planes.
The gunhood and SC scoop and parting planes then got one final coat of wax, then a layer of PVA was sprayed. After the pva dries (about an hour), the first coat of epoxy surfacing resin was put on. Then i cut up all the glass layers for these molds. Their is roughly 50oz of glass going onto each mold segment.


I also 3D printed up the silicon mold boxes for the supercharger scoop lip and cockpit air scoop.

I then did three costs of partall paste #2 was on the cowl, supercharger scoop and gunhood plugs.
Then i cut out the parting planes for the SC scoop, spinner and gunhood on the CNC router and built up some parting planes.

The gunhood and SC scoop and parting planes then got one final coat of wax, then a layer of PVA was sprayed. After the pva dries (about an hour), the first coat of epoxy surfacing resin was put on. Then i cut up all the glass layers for these molds. Their is roughly 50oz of glass going onto each mold segment.
 04-07-2015, 06:48 PM
#278
Senior Member
Hello Invertmast, I love the detail and look of the litho plate over the fuse. I intend to use litho in the production of a plug in the future and am curious on the glue your using. Can you please inform me what glue it is and any recommendations or advice when using it. If you prefer send a P.M. if you don't want to clog up your thread with technical questions.
Thanks in advance Trent Smith.
Thanks in advance Trent Smith.
04-07-2015, 08:06 PM
#279
Hello Invertmast, I love the detail and look of the litho plate over the fuse. I intend to use litho in the production of a plug in the future and am curious on the glue your using. Can you please inform me what glue it is and any recommendations or advice when using it. If you prefer send a P.M. if you don't want to clog up your thread with technical questions.
Thanks in advance Trent Smith.
Thanks in advance Trent Smith.
 04-08-2015, 11:48 AM
#281
Its AFTERNOON!
So, Gunhood mold is plopped off the hood and parting planes, trimmed to shape, cleaned and now i'll let it sit for a day or 3 while i finish the S/C scoop cowl and canopy. Work next week is going to put a damper on my progress, so i'll focus on fuselage parting planes on the 1-2 hours a day I might be able to sneak outside and do something.
So, Gunhood mold is plopped off the hood and parting planes, trimmed to shape, cleaned and now i'll let it sit for a day or 3 while i finish the S/C scoop cowl and canopy. Work next week is going to put a damper on my progress, so i'll focus on fuselage parting planes on the 1-2 hours a day I might be able to sneak outside and do something.

 04-08-2015, 03:20 PM
#282
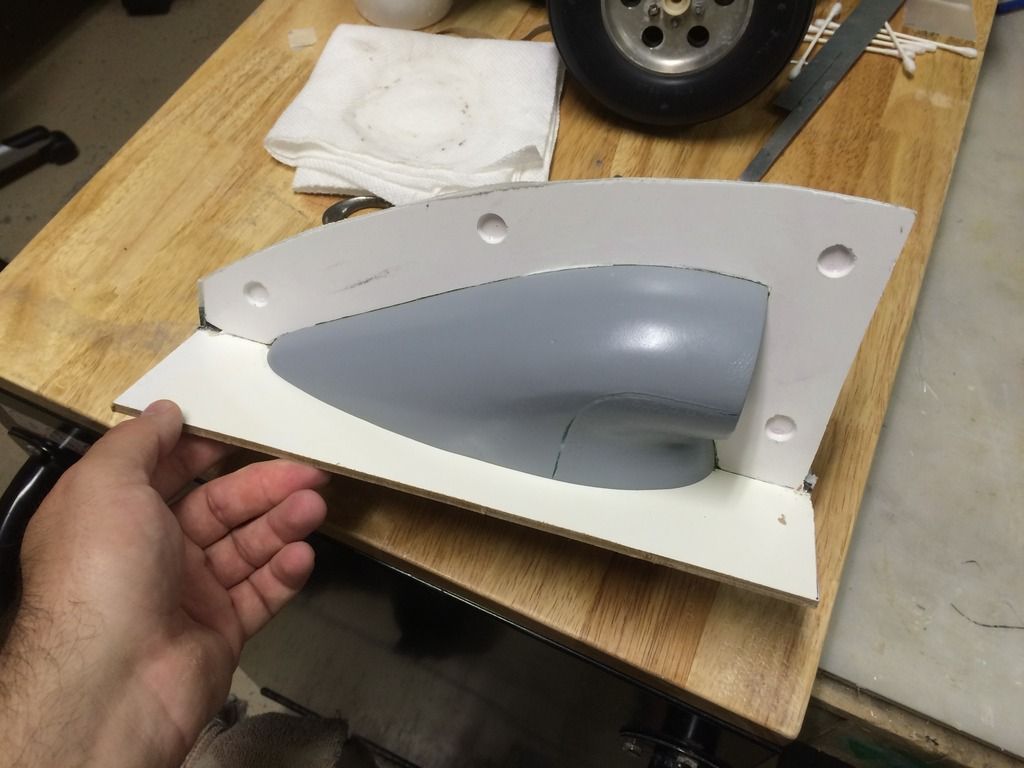
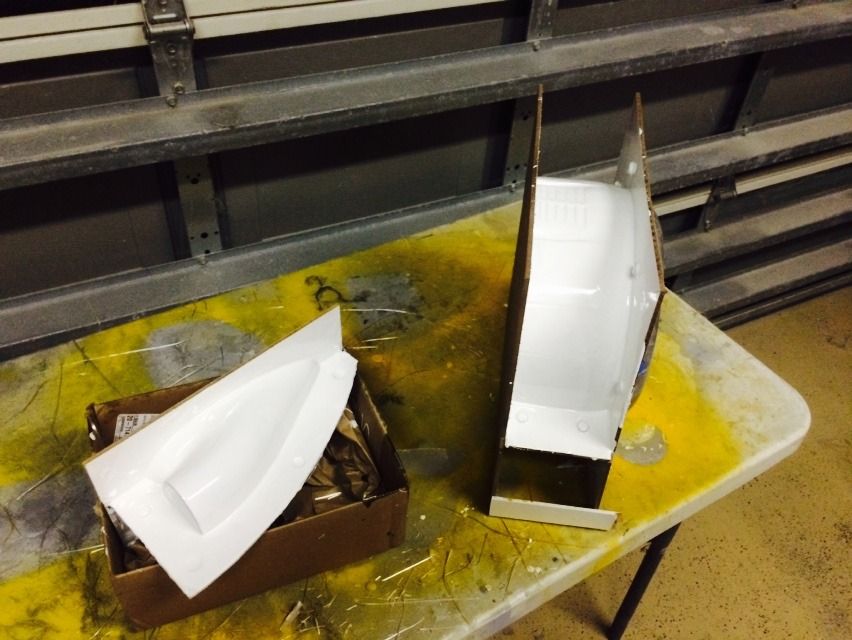
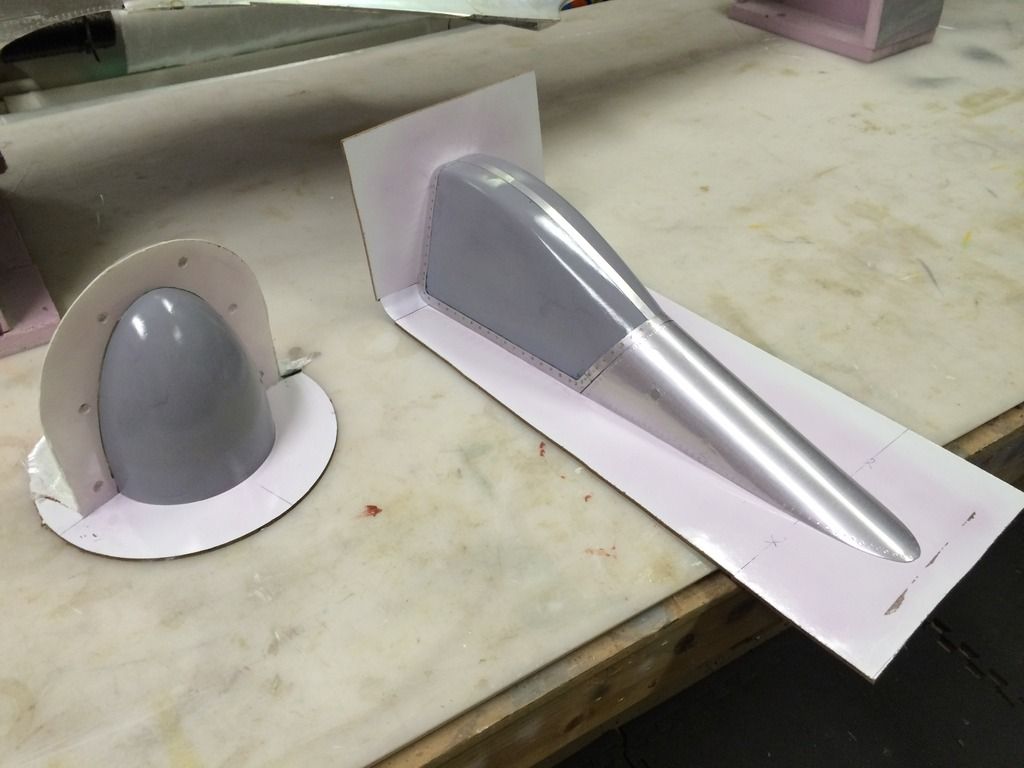
Heres the supercharger scoop after trimming and wax to prep it for molding the other half.
Then the cowl parting planes were made. Due to the louvers on the top, this wont come apart as a one piece mold, ao a two or three piece mold is needed. I may do a two piece mold, i just need to look at it and see how that would work out.
Then the first coat of surface resin was applied to the firsf part of the cowl mold and the other half of the supercharger scoop.

Then the cowl parting planes were made. Due to the louvers on the top, this wont come apart as a one piece mold, ao a two or three piece mold is needed. I may do a two piece mold, i just need to look at it and see how that would work out.

Then the first coat of surface resin was applied to the firsf part of the cowl mold and the other half of the supercharger scoop.
 04-08-2015, 07:15 PM
#283
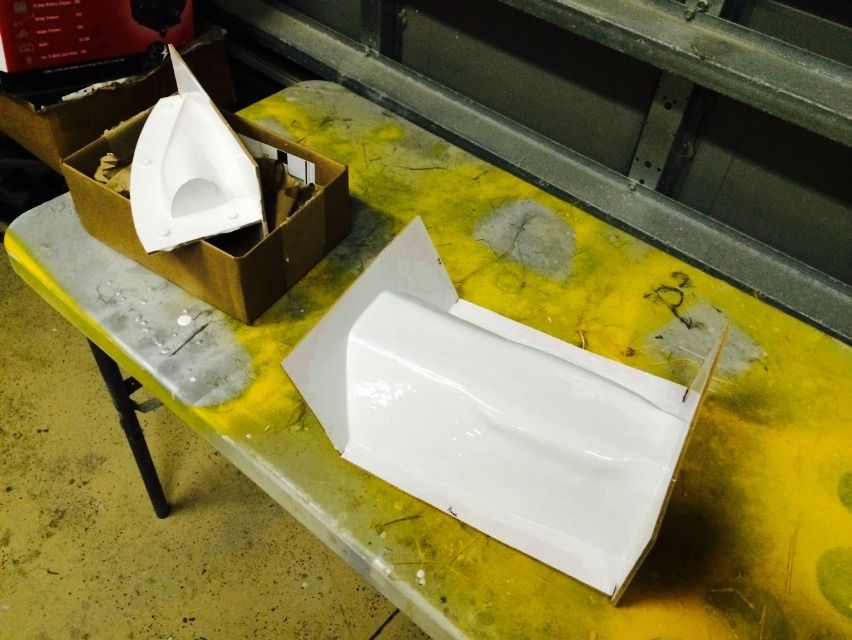
Mold #2 and a third are done.

Hopefully my order of counter sunk slotted screws arrives tomorrow. If so, i hope to get the canopy detailing finished and get its parting planes done. This will allow me to finish the cowl mold and do the canopy mold as well. Friday is a work night, so nothing will get done then. Saturday I will possibly layup a cowl, gunhood, supercharger and a canopy frame/fairing.

Hopefully my order of counter sunk slotted screws arrives tomorrow. If so, i hope to get the canopy detailing finished and get its parting planes done. This will allow me to finish the cowl mold and do the canopy mold as well. Friday is a work night, so nothing will get done then. Saturday I will possibly layup a cowl, gunhood, supercharger and a canopy frame/fairing.

") 04-09-2015, 01:39 PM
04-09-2015, 01:39 PM
#285
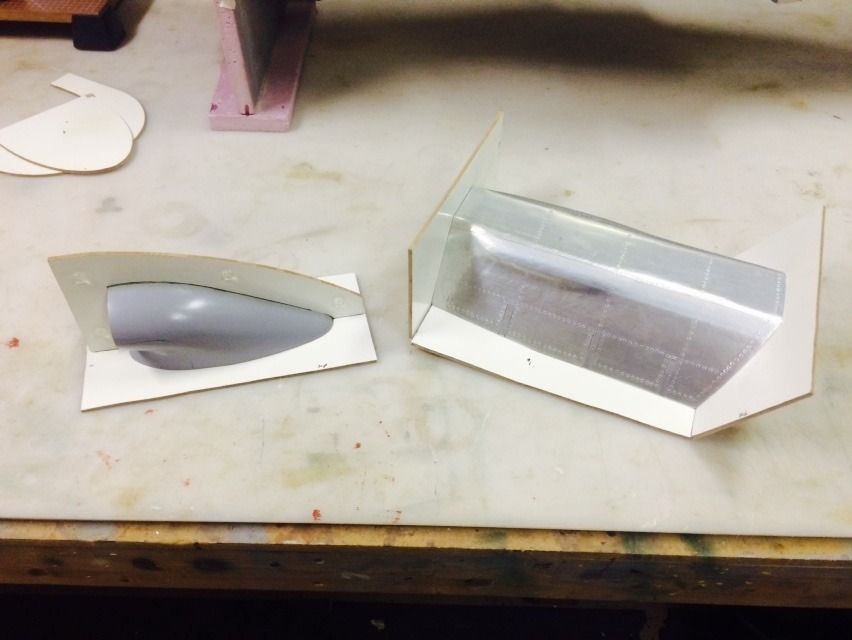
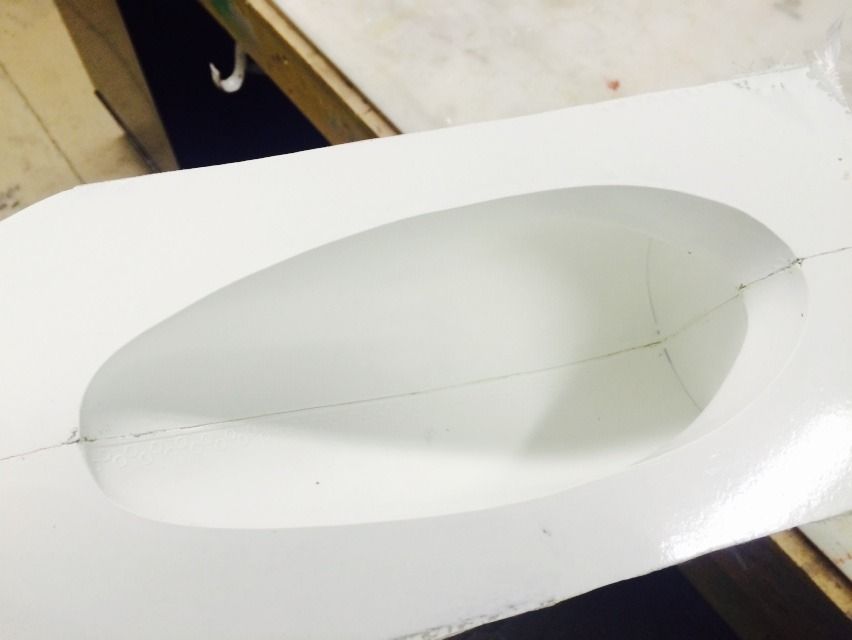
The supercharger scoop mold was split, the plug removed, mold cleaned of wax and pva and put back together. Here you can see the innard of it.
I then made up the parting plane for the spinner, waxed it and sprayed the first half of the spinner and final segment of the cowl with PVA for molding. They currently have the first coat of surface resin on them.
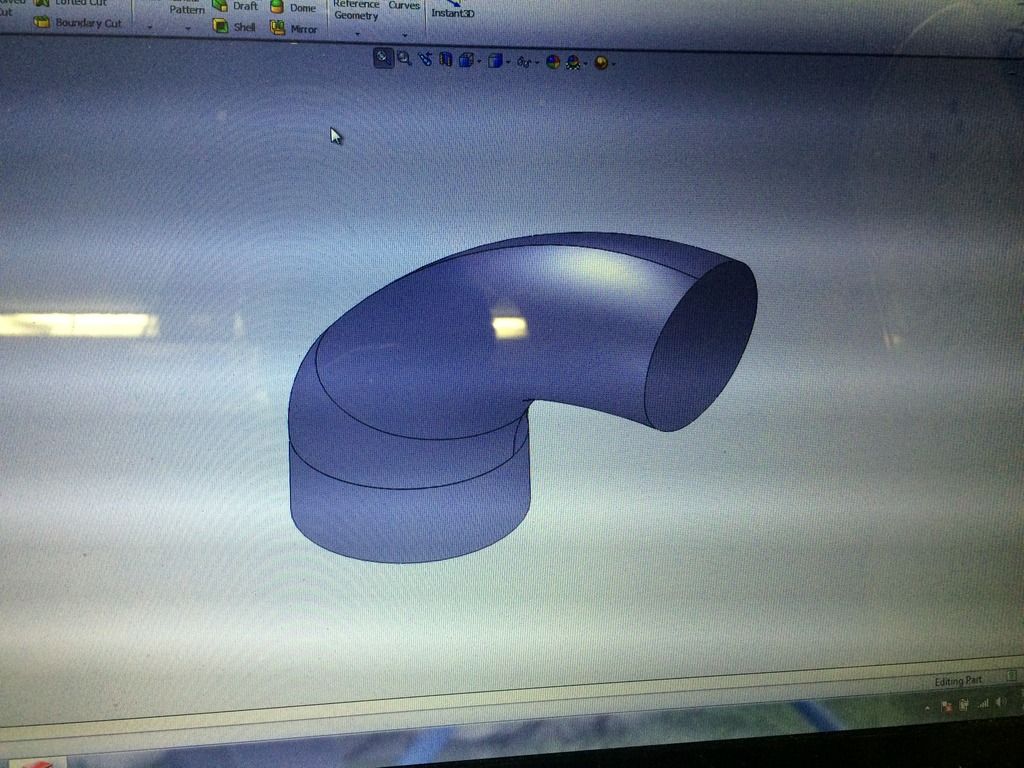
While the PVA dried, i drew up the supercharger scoop duct in solidworks and got it started on the printer. This duct will feed the inlet side of a 70mm edf unit for supplemental engine cooling.
My microfastener order also arrived so i finished detailing the canopy plug. Once i pickup some Ca at the hobby shop tomorrow on the way to work, ill get the canopy frame molded on saturday. Prepping all of the done molds will happen saturday as well as possible layups of the first parts. I also need to finish prepping the horizontal stabs for glassing so i can get those glassed and start the detail of those.

I then made up the parting plane for the spinner, waxed it and sprayed the first half of the spinner and final segment of the cowl with PVA for molding. They currently have the first coat of surface resin on them.

While the PVA dried, i drew up the supercharger scoop duct in solidworks and got it started on the printer. This duct will feed the inlet side of a 70mm edf unit for supplemental engine cooling.

My microfastener order also arrived so i finished detailing the canopy plug. Once i pickup some Ca at the hobby shop tomorrow on the way to work, ill get the canopy frame molded on saturday. Prepping all of the done molds will happen saturday as well as possible layups of the first parts. I also need to finish prepping the horizontal stabs for glassing so i can get those glassed and start the detail of those.
04-09-2015, 01:39 PM
#286
The supercharger scoop mold was split, the plug removed, mold cleaned of wax and pva and put back together. Here you can see the innard of it.
I then made up the parting plane for the spinner, waxed it and sprayed the first half of the spinner and final segment of the cowl with PVA for molding. They currently have the first coat of surface resin on them.
While the PVA dried, i drew up the supercharger scoop duct in solidworks and got it started on the printer. This duct will feed the inlet side of a 70mm edf unit for supplemental engine cooling.
My microfastener order also arrived so i finished detailing the canopy plug. Once i pickup some Ca at the hobby shop tomorrow on the way to work, ill get the canopy frame molded on saturday. Prepping all of the done molds will happen saturday as well as possible layups of the first parts. I also need to finish prepping the horizontal stabs for glassing so i can get those glassed and start the detail of those.
 04-11-2015, 01:49 PM
#288
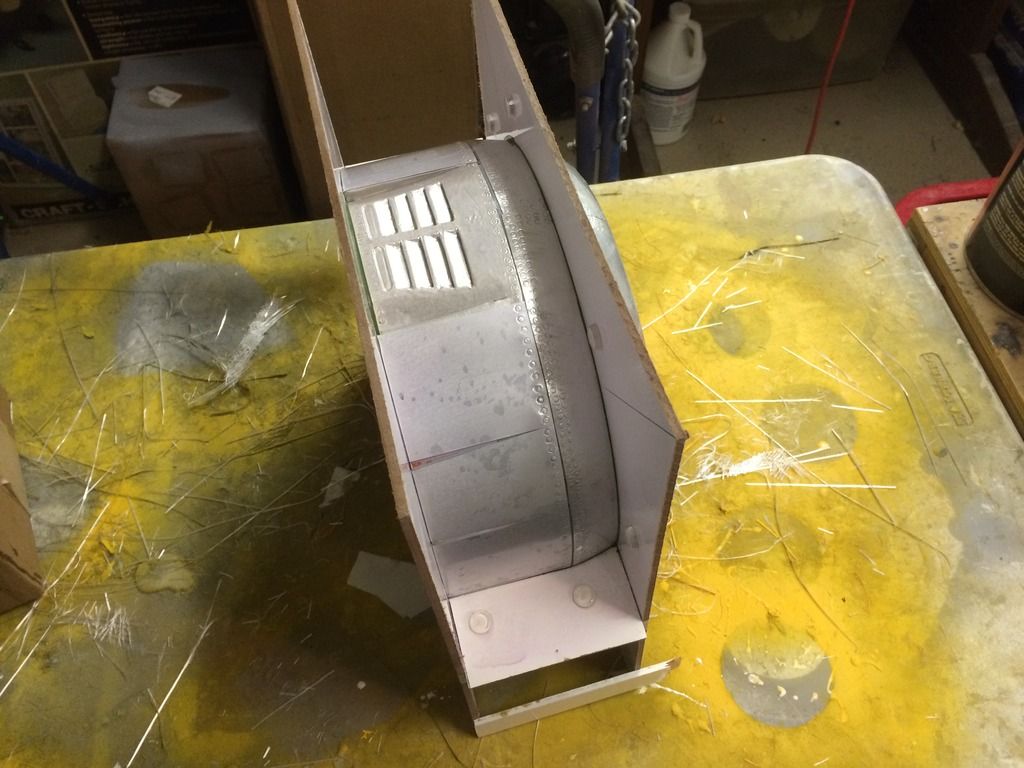
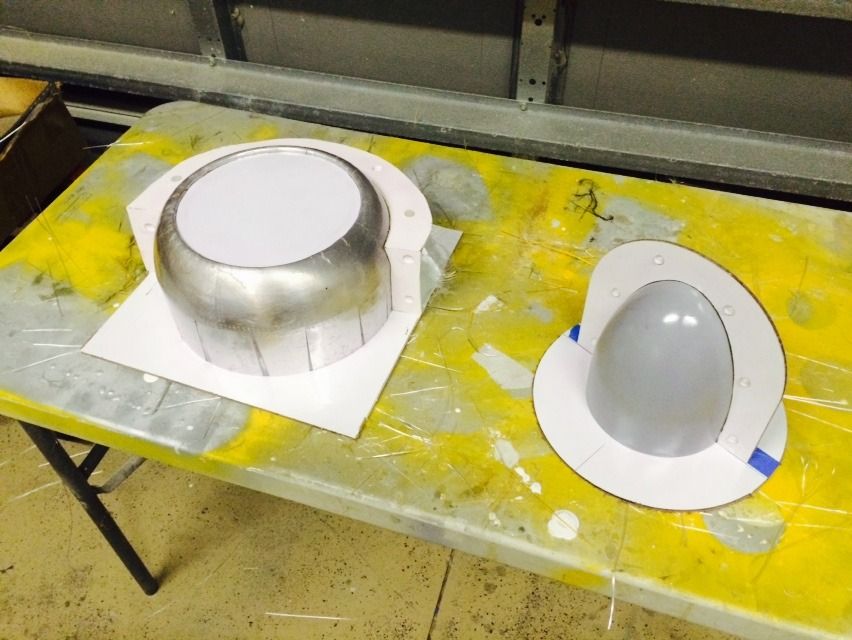
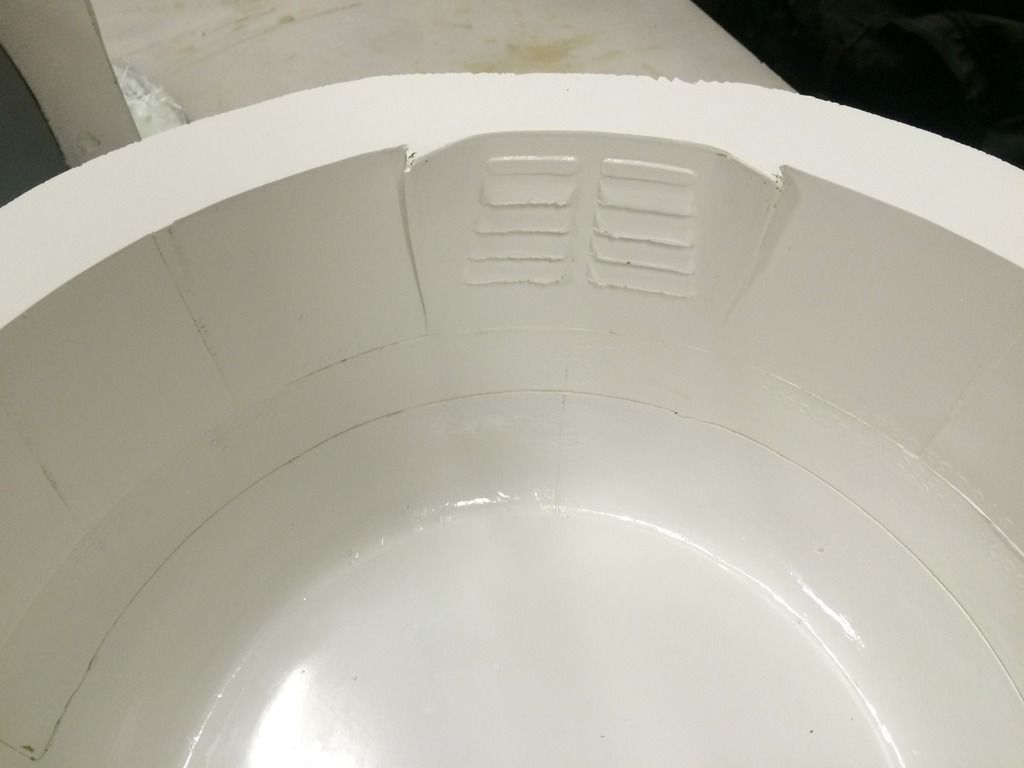
I trimmed the cowl mold and first half of the spinner mold today, then popped the cowl plug from the mold. Unfortunately i knew i should of done a three piece cowl mold. There is a very small negative draft that locked in the plug. Fortunately i was able to get the plug out without damaging the mold. I do believe that the fiberglass/carbon cowls wont be a problem getting out since they will be a little flexible.
Overall the mold turned out very nice in the area of the upper vents.
I also got the canopy plug parting planes built up, everything waxed and the pva sprayed. Ill do these two molds tonight and tomorrow ill do some layups to a few items after prepping everything with frekote.
Overall the mold turned out very nice in the area of the upper vents.

I also got the canopy plug parting planes built up, everything waxed and the pva sprayed. Ill do these two molds tonight and tomorrow ill do some layups to a few items after prepping everything with frekote.


 04-11-2015, 07:04 PM
#292
I have been working on detail items in preparation for final primer. Litho hatches, and fliteskin etc. The one area wrong on the Andersen plans, which makes correcting, especially later as I did not account for it, is that louver behind the cowl on top. I sort of cheated it, as I did not modify my firewall when framing the fuse initially. I think I got it close enough, and it certainly is close enough to not get dinged in static scoring.
It is nice to see someone else really getting after this design. Other than work, this is all I am doing right now in prep for this flying season. Still on pace for a May maiden.


Jose threw in the little scoop along with my order for the bg scoop! Thanks Jose : ) So I ended up using his.
It is nice to see someone else really getting after this design. Other than work, this is all I am doing right now in prep for this flying season. Still on pace for a May maiden.
Jose threw in the little scoop along with my order for the bg scoop! Thanks Jose : ) So I ended up using his.
04-11-2015, 07:38 PM
#294
Yah Invert, it looks like that is correct from the photos from the Zoukei-mura book, of the 152 H-0 from the museum. From plane to plane though, there are differences, as though each one was a one off. If you look at all of the photos you have of the GH+KT version that I am building, the scoop is all kinds of goofy looking. The 3 view I am using shows the typical scoop used on all of the other versions, thankfully, as I would not want that silly thing on my plane! lol
Also, in the Monogram TA 152 book, it specifically state the tail wheel retract was ordered to be locked down until further notice as it would jump out of the track, as you figured. Nothing to do with the hydraulics. And on that note, the TA 152 had a ton of problems. Of course from being rushed into service. The windscreen washer would not clean away the glycol, but smear it around making visibility worse! I will use this as documentation for the super glue I got all over my canopy! jk.
Also, in the Monogram TA 152 book, it specifically state the tail wheel retract was ordered to be locked down until further notice as it would jump out of the track, as you figured. Nothing to do with the hydraulics. And on that note, the TA 152 had a ton of problems. Of course from being rushed into service. The windscreen washer would not clean away the glycol, but smear it around making visibility worse! I will use this as documentation for the super glue I got all over my canopy! jk.
04-11-2015, 07:46 PM
#295
Haha. Yea its crazy all the stuff they had to deal with late in the war... Good for us in the long run.
With the composite wing, im actually going to try and replicate the tailwheel retraction mechanism. With cnc machines now, it should be essy to duplicate and have it work reliably.
With the composite wing, im actually going to try and replicate the tailwheel retraction mechanism. With cnc machines now, it should be essy to duplicate and have it work reliably.
04-11-2015, 07:55 PM
#296
One thing is for sure, This has been a fun aircraft to research. Such an interesting design, and I actually have been surprised to find out as much info on it as I have.
The aircraft at Wright Patterson, the sole survivor, Green 4, was actually in combat, and credited with kills! For sure, if you decide to do that aircraft, it has an interesting history. Of course, you need to finish it in it's wartime livery.
The aircraft at Wright Patterson, the sole survivor, Green 4, was actually in combat, and credited with kills! For sure, if you decide to do that aircraft, it has an interesting history. Of course, you need to finish it in it's wartime livery.
04-11-2015, 08:10 PM
#297
Yea green 4 is a unique airframe. Im half tempted to do it in post war colors just bc of the history involved with it, but the color profile it had during the war is still very unique and what i will probably end up going with, albeit in a more weathered state than you would expect a "new" airplane to be, bc i have doubts that they put asthetics high in the totum and the donor 190 they used to make it probably only got the work necessary to repair any structural issues and the mods necessary for the 152 upgrade.
04-11-2015, 08:19 PM
#298
Also, Green 4 was an H-0 variant, not that it matters much. They never got the pressurised cockpit to work with them.
Weathering is something I have not been seeing with the completed RC models. To me, it is almost mandatory. That is really where the "impression" part comes in, and really separates your model apart from the rest at events. Not to mention the fact, it is a lot of fun! I love going after my models with my airbrush, and weathering is where the personality of the plane really comes into it's own. Having been a serious plastic model builder as a kid, RC scale modeling dovetails perfectly with that previous endeavour. Many of the techniques used with plastics work well with our RC scale models.
Look at the prototype GH+KS. There are some great models in that scheme, and it looks very nice. If I were not doing V30-U1, That would probably be my second choice.
04-11-2015, 08:32 PM
#300
That is the whole reason for creating the "depth" that we do with Litho and flight metal, the burning of the the rivets and panel lines. This creates the "vessel" to receive the shading from the washes and airbrushing.
I saw a trick on one plastic build where the guy used two shades of the same color for shading around panels. That works well, along with the pre shading of panel lines, especially with the lighter colors.
I am wondering, what have you found on the bare metal finish on the bottom of the late war aircraft? I do not have any 3 color view docs of a TA 152 showing this. I do for the D series though.