


3W Bearcat with Moki 300
 10-17-2019, 04:29 AM
#276

My Feedback: (7)
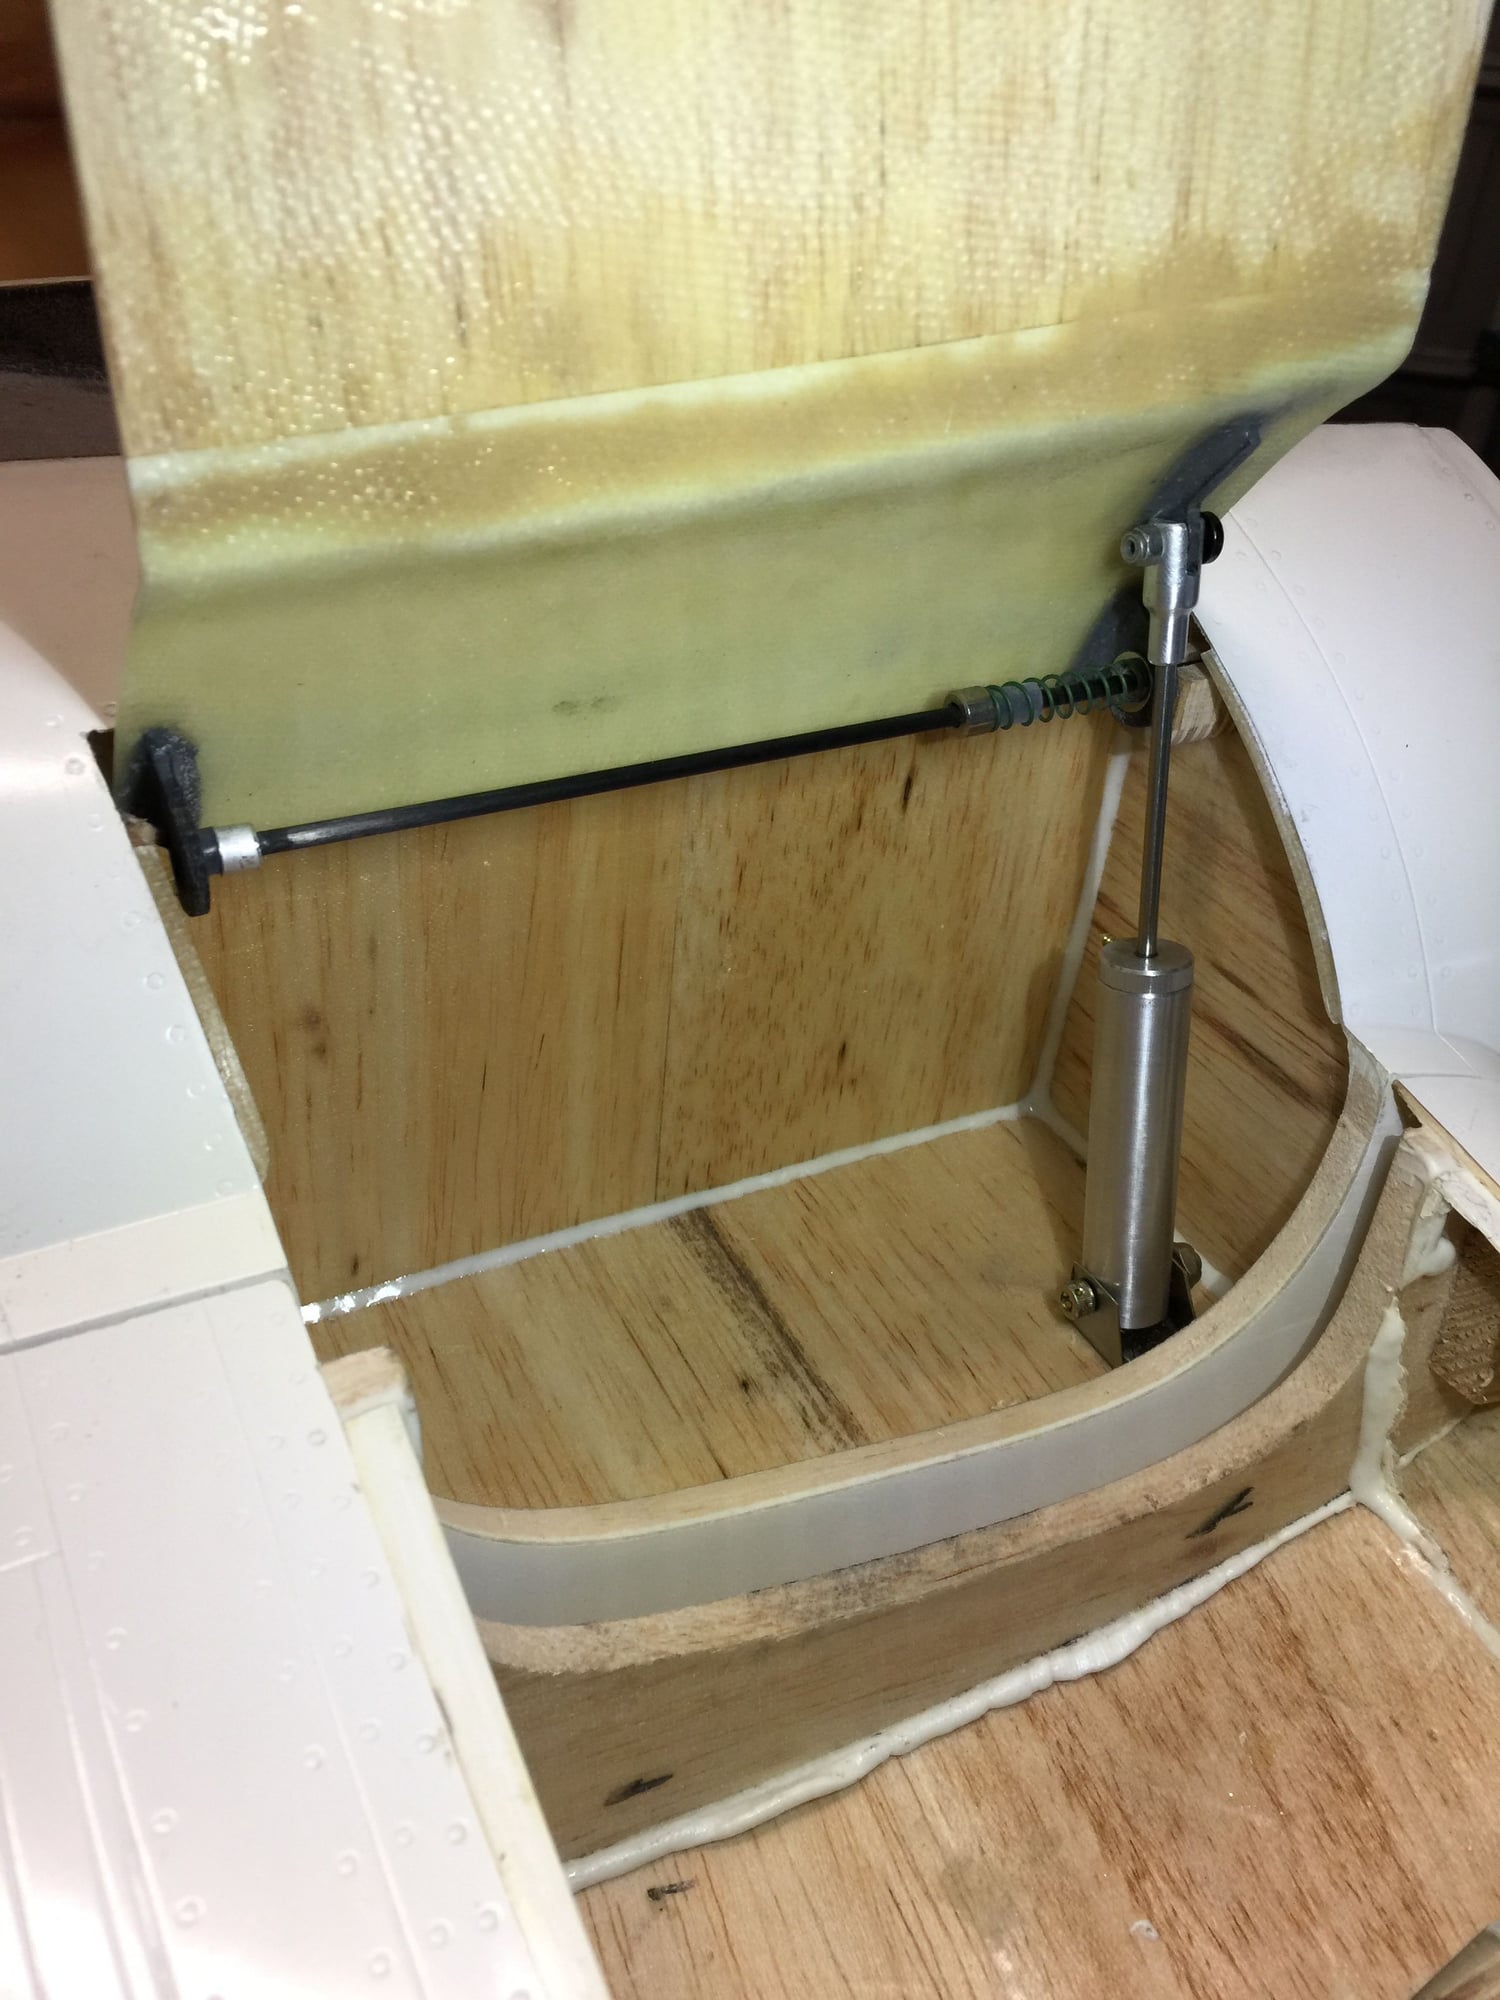
I couldn’t find door cylinders online to fit my inner gear door needs so I had Sierra Giant Scale make me a set: 1/2X2 inch. They’re perfect. Darrell at Sierra does beautiful work.
if you look closely you can see where I mounted this cylinder first. It was too close to the hingline allowing flex. Bottom picture shows how new position results in much better triangulation.
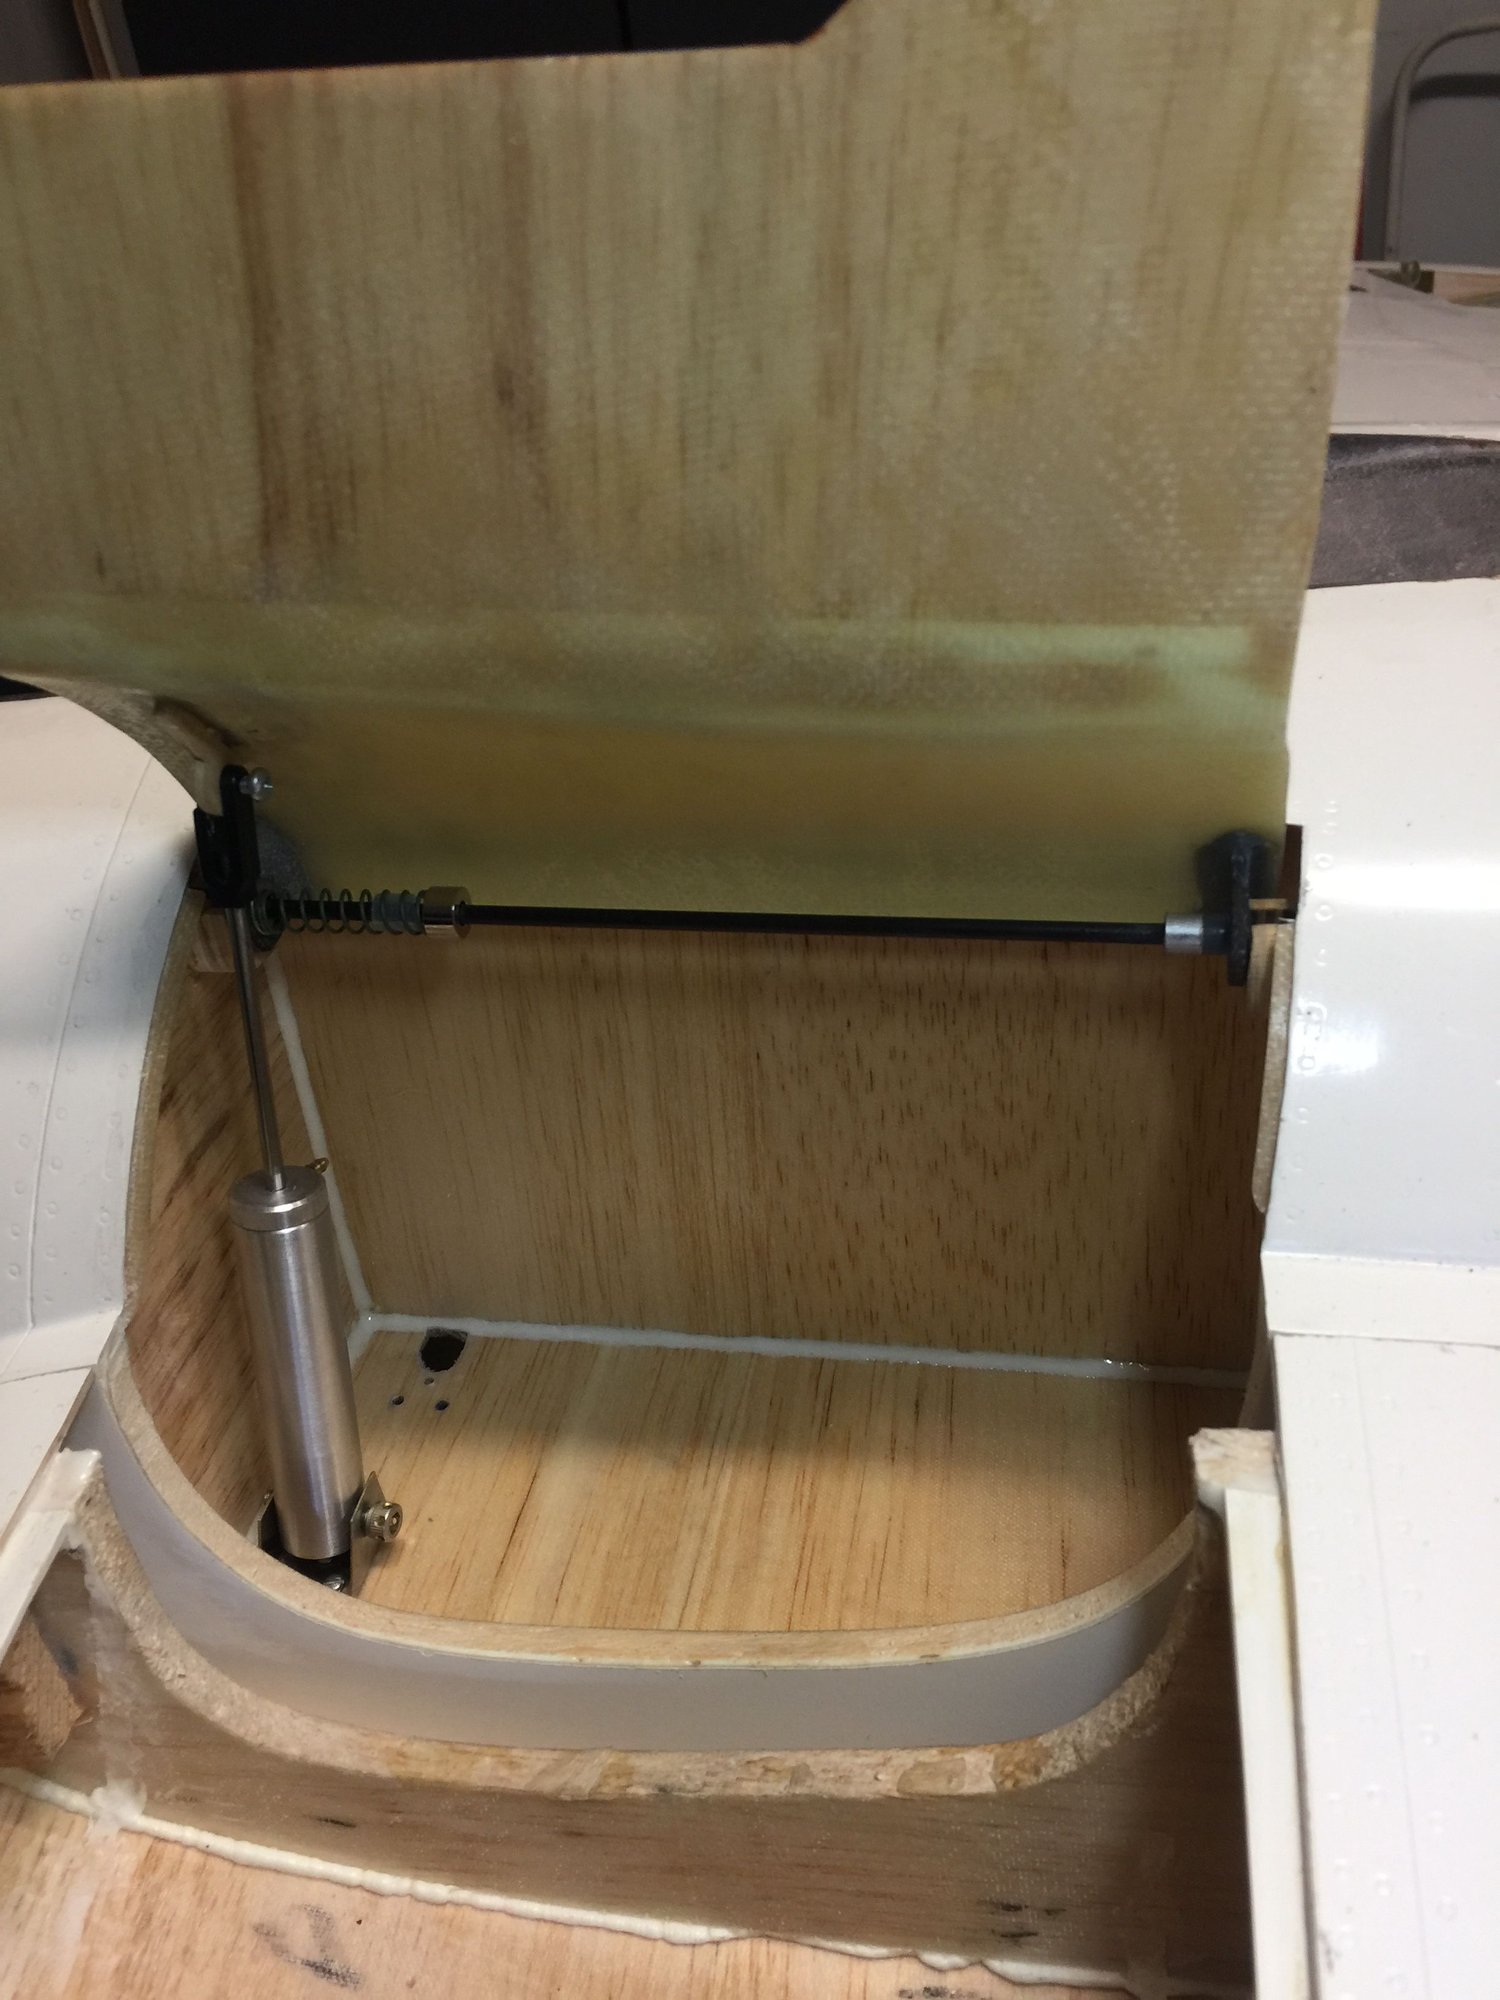
if you look closely you can see where I mounted this cylinder first. It was too close to the hingline allowing flex. Bottom picture shows how new position results in much better triangulation.
Last edited by mitchilito; 10-17-2019 at 04:32 AM.


 02-17-2020, 10:31 AM
#280
My Feedback: (7)
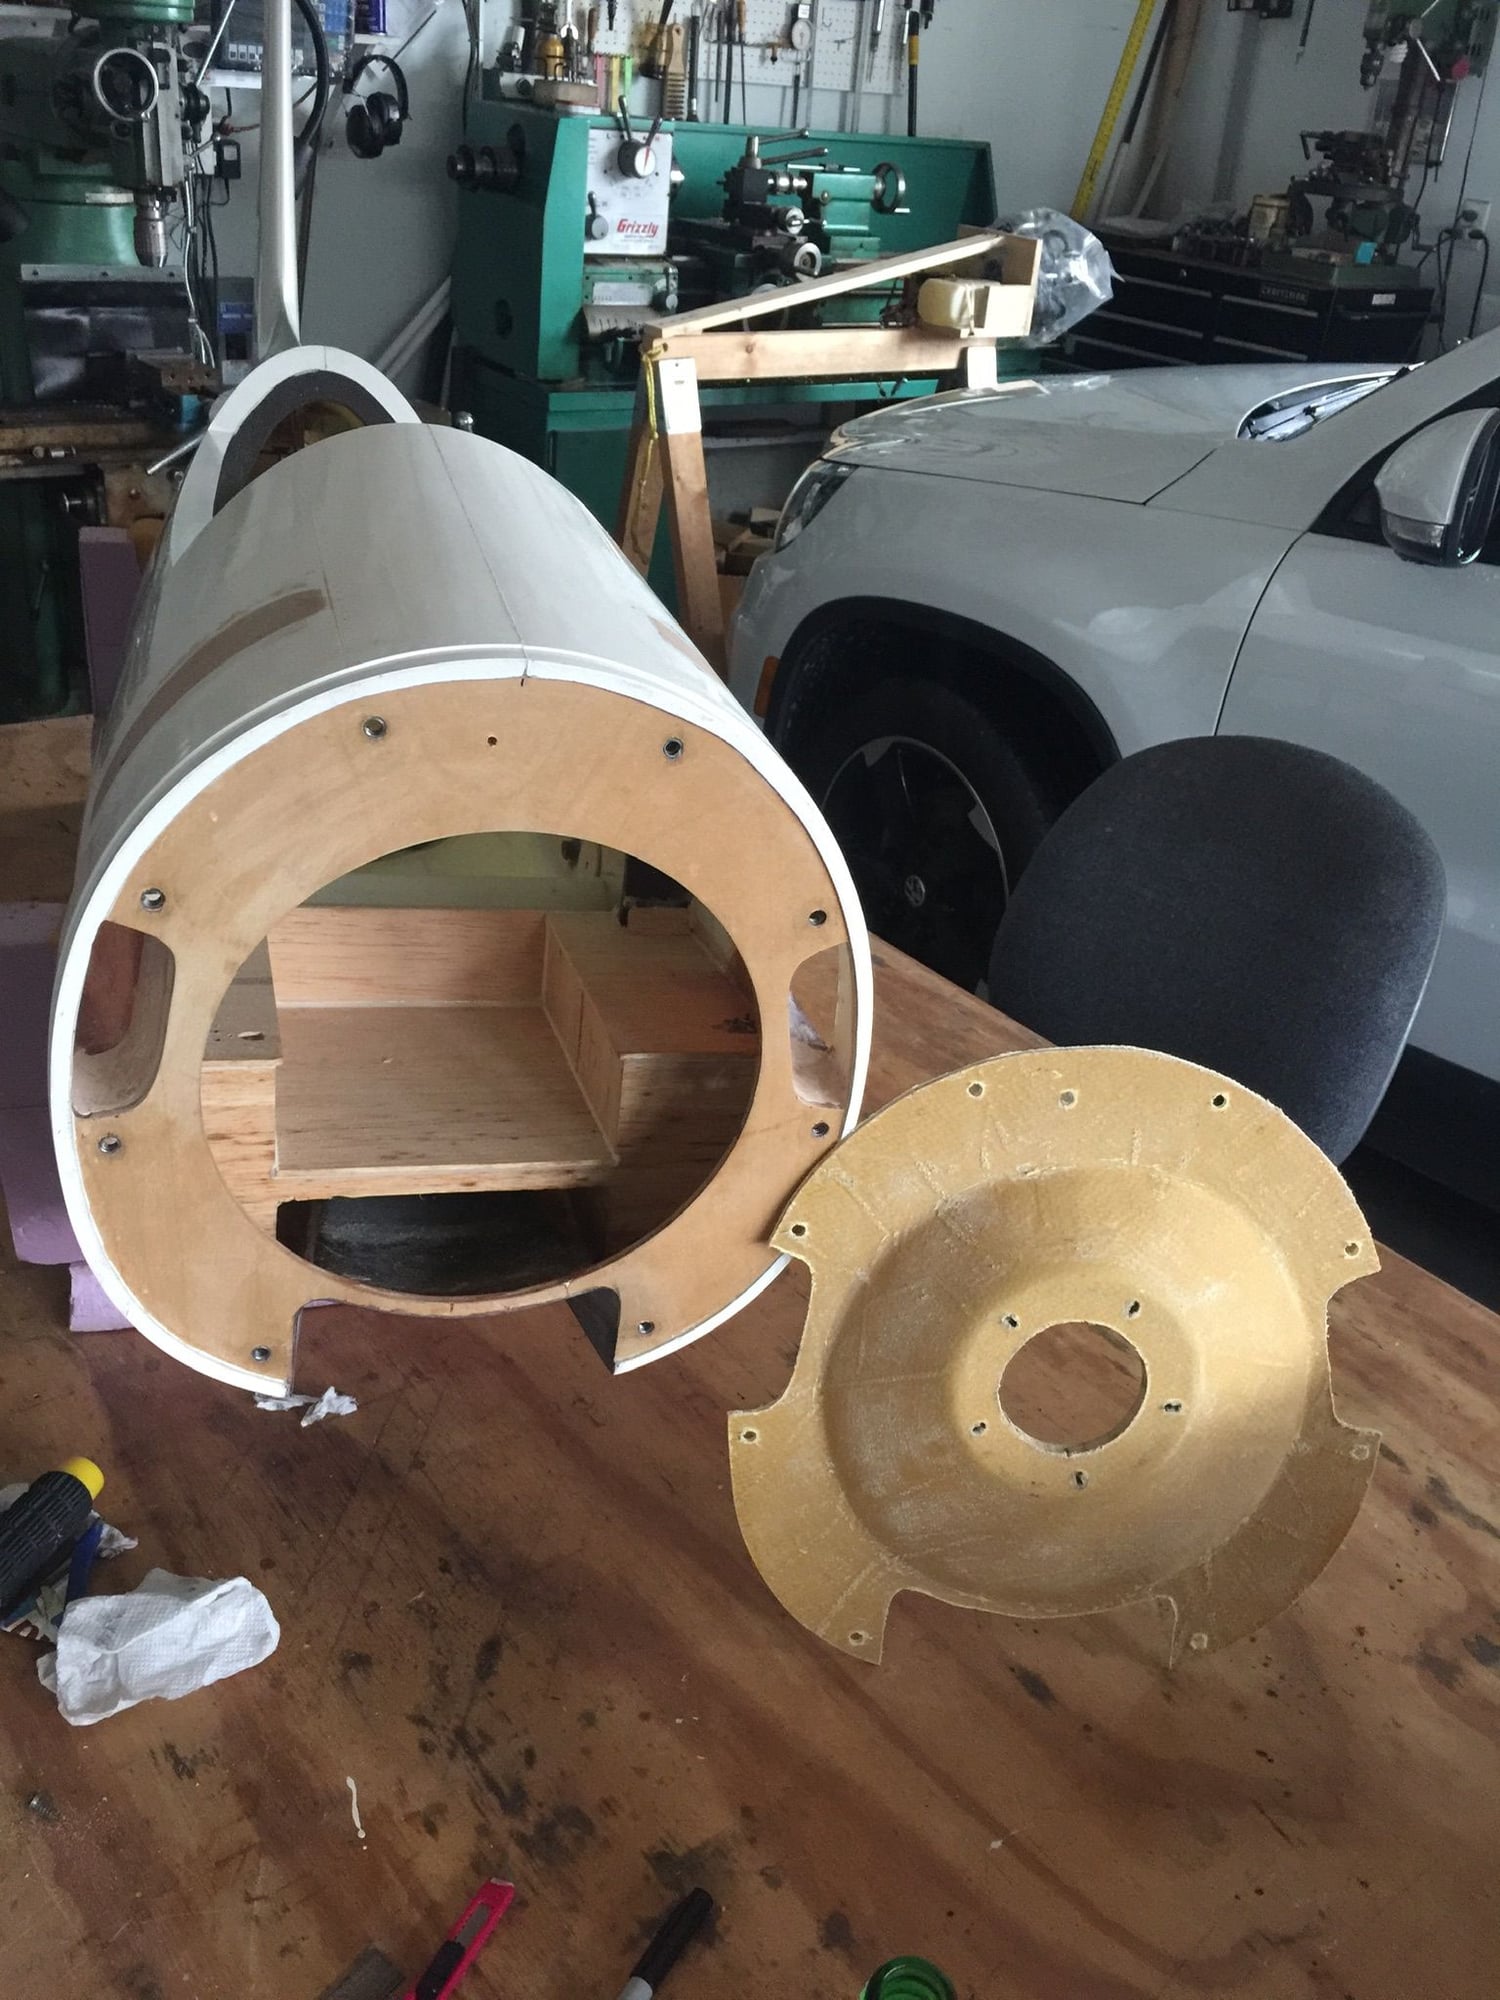
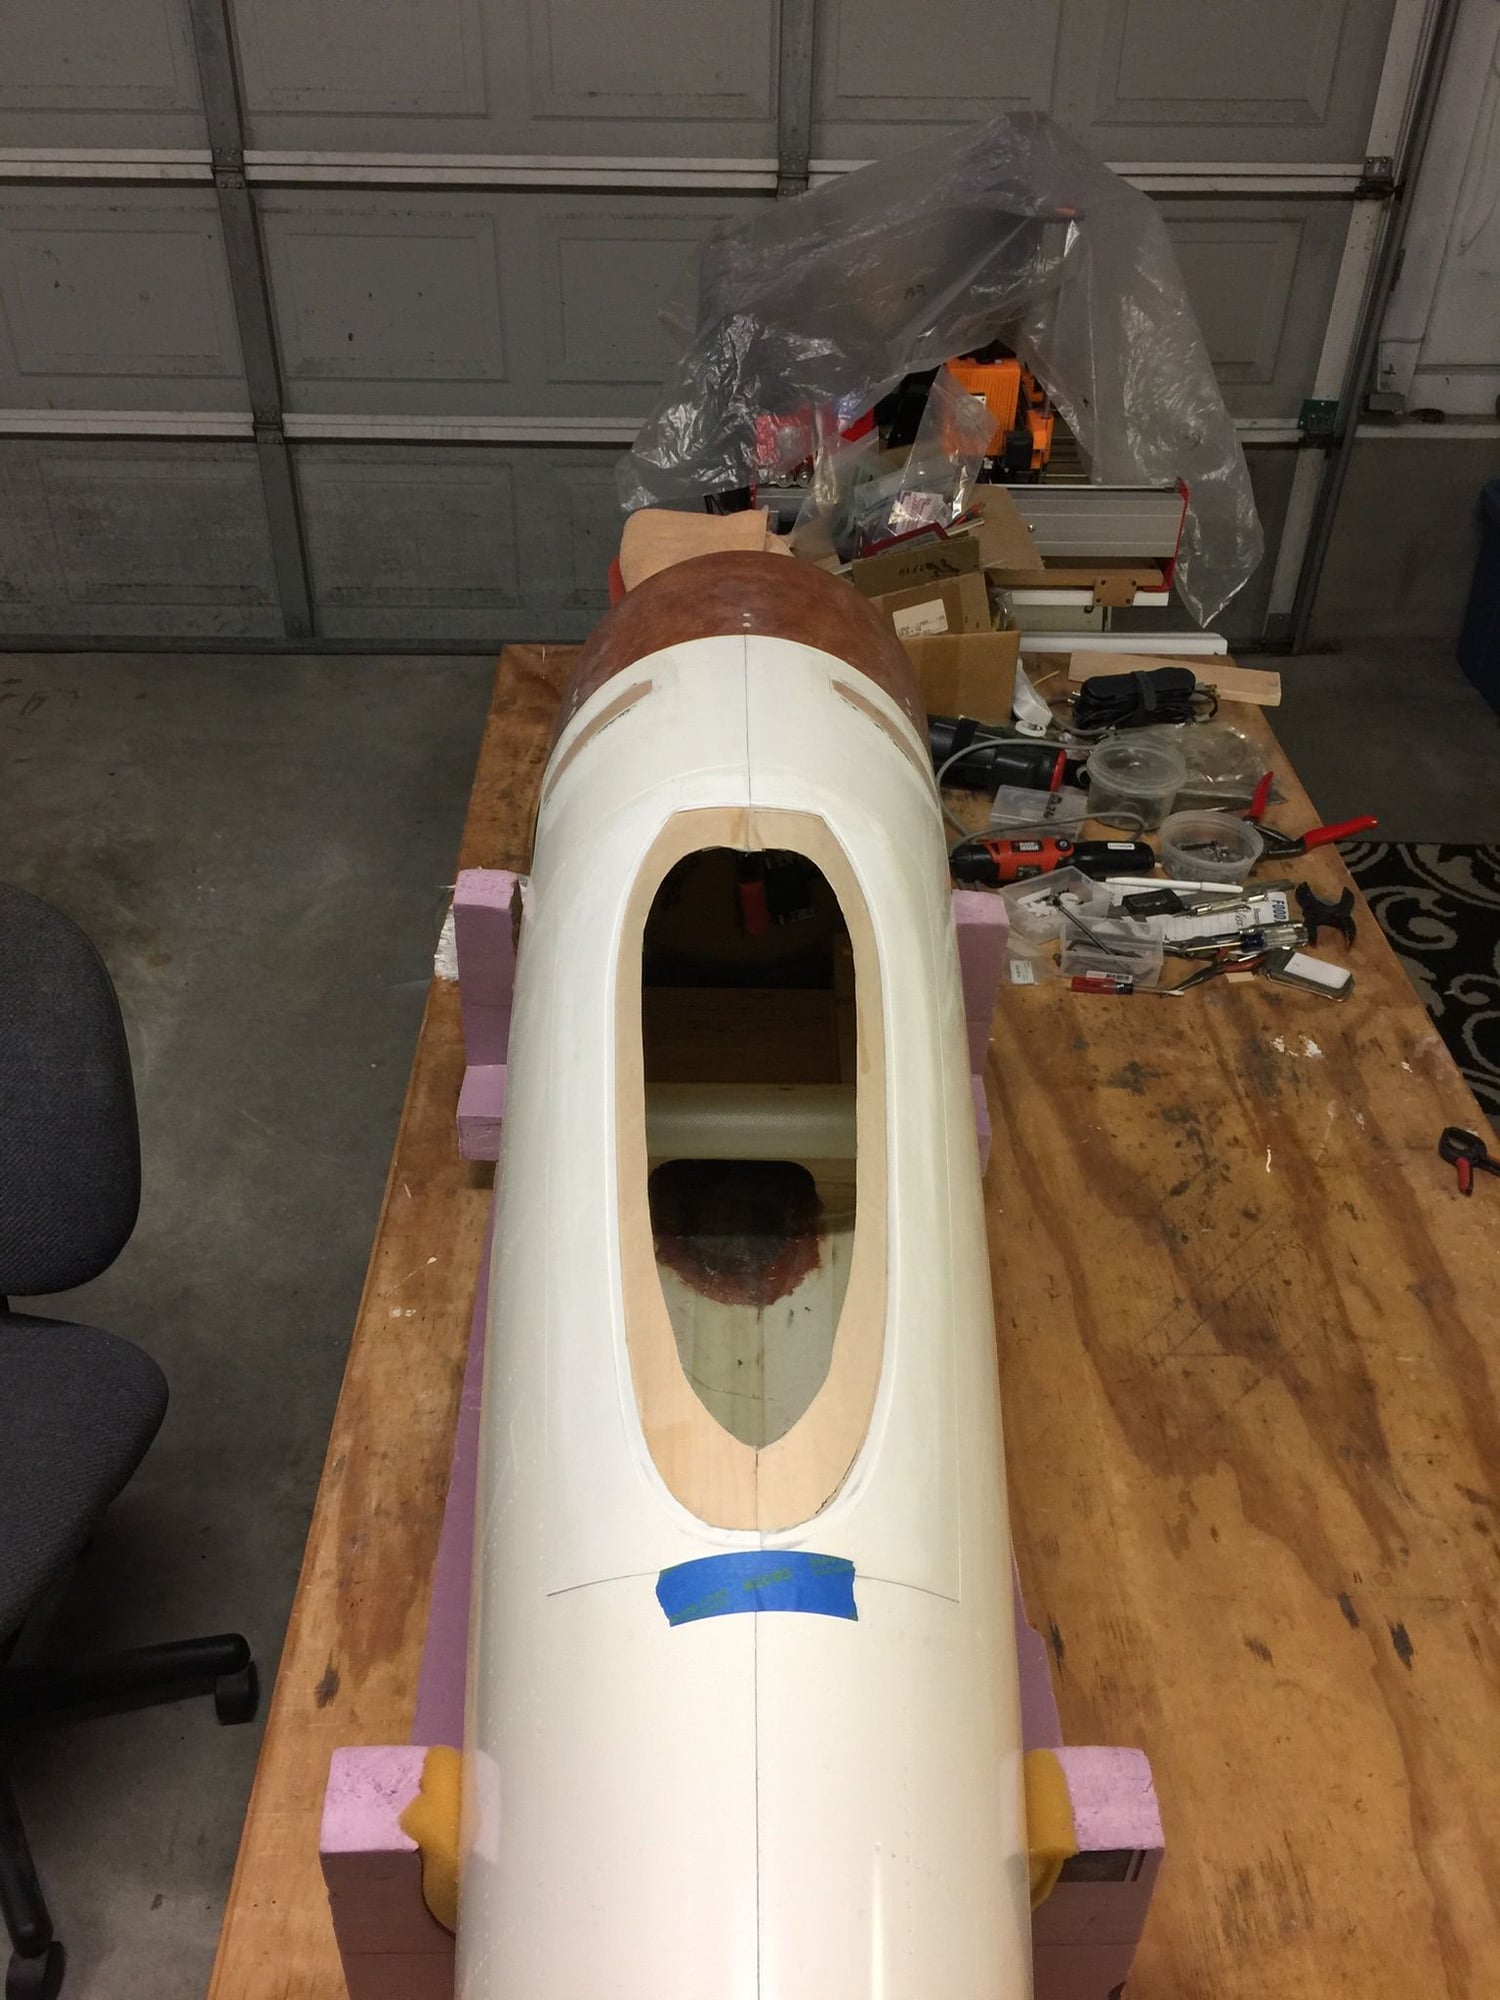
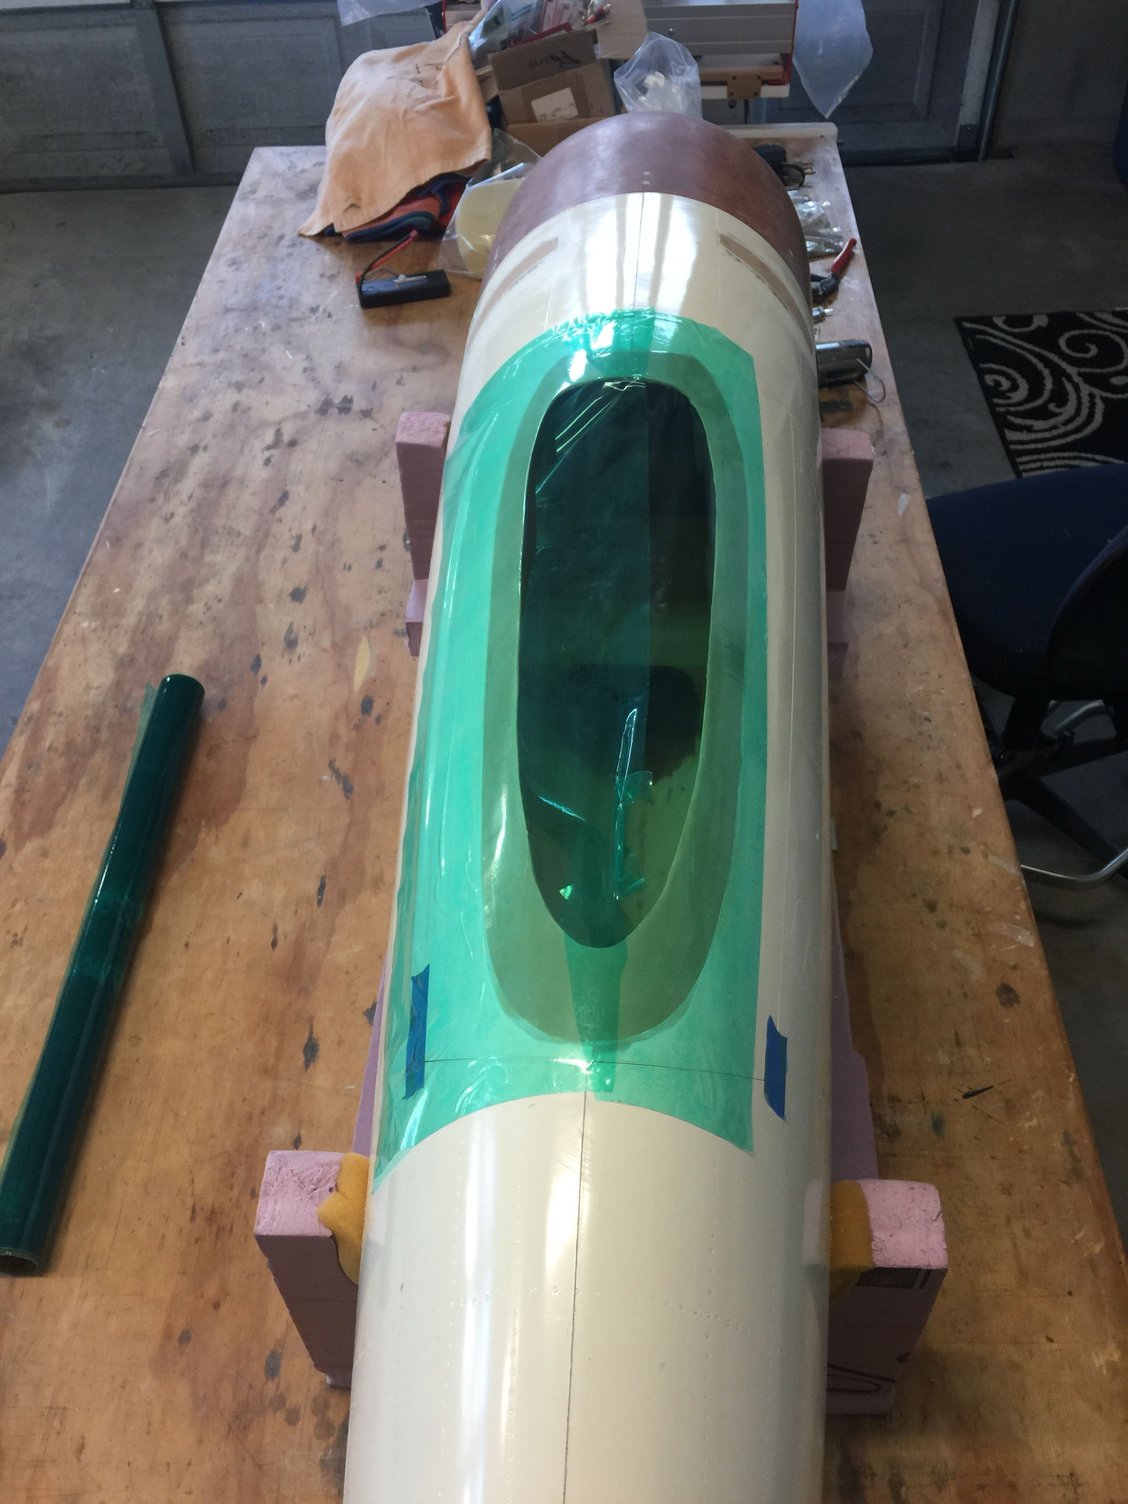
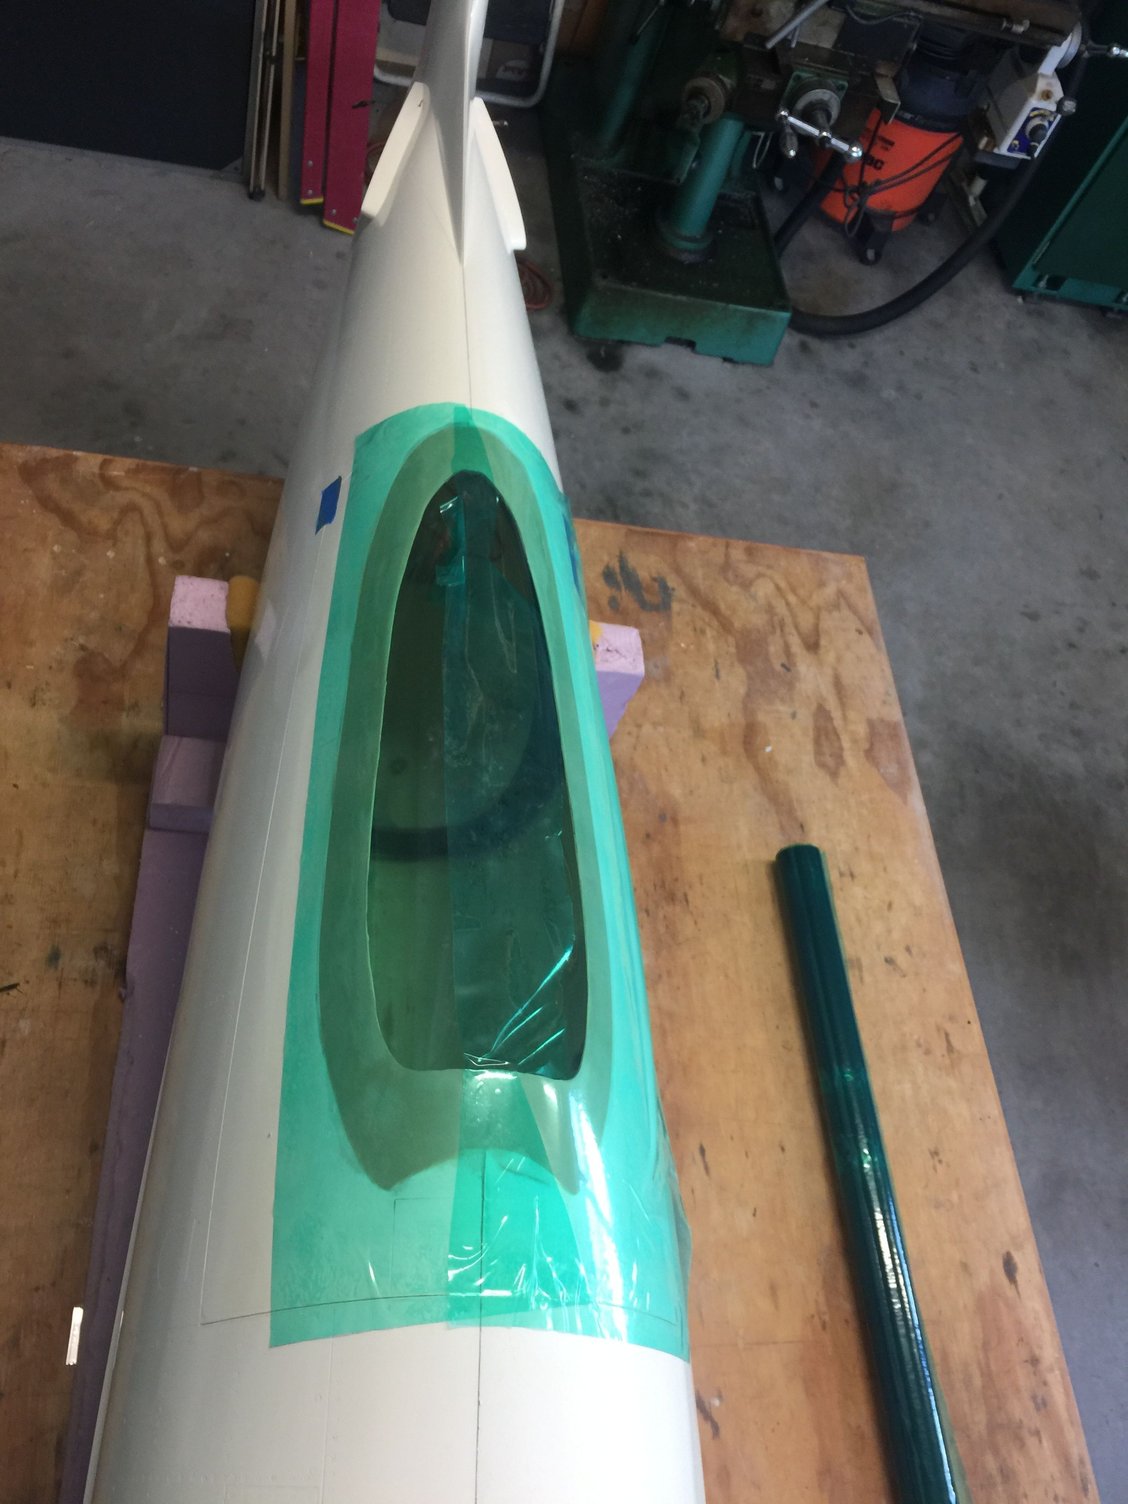
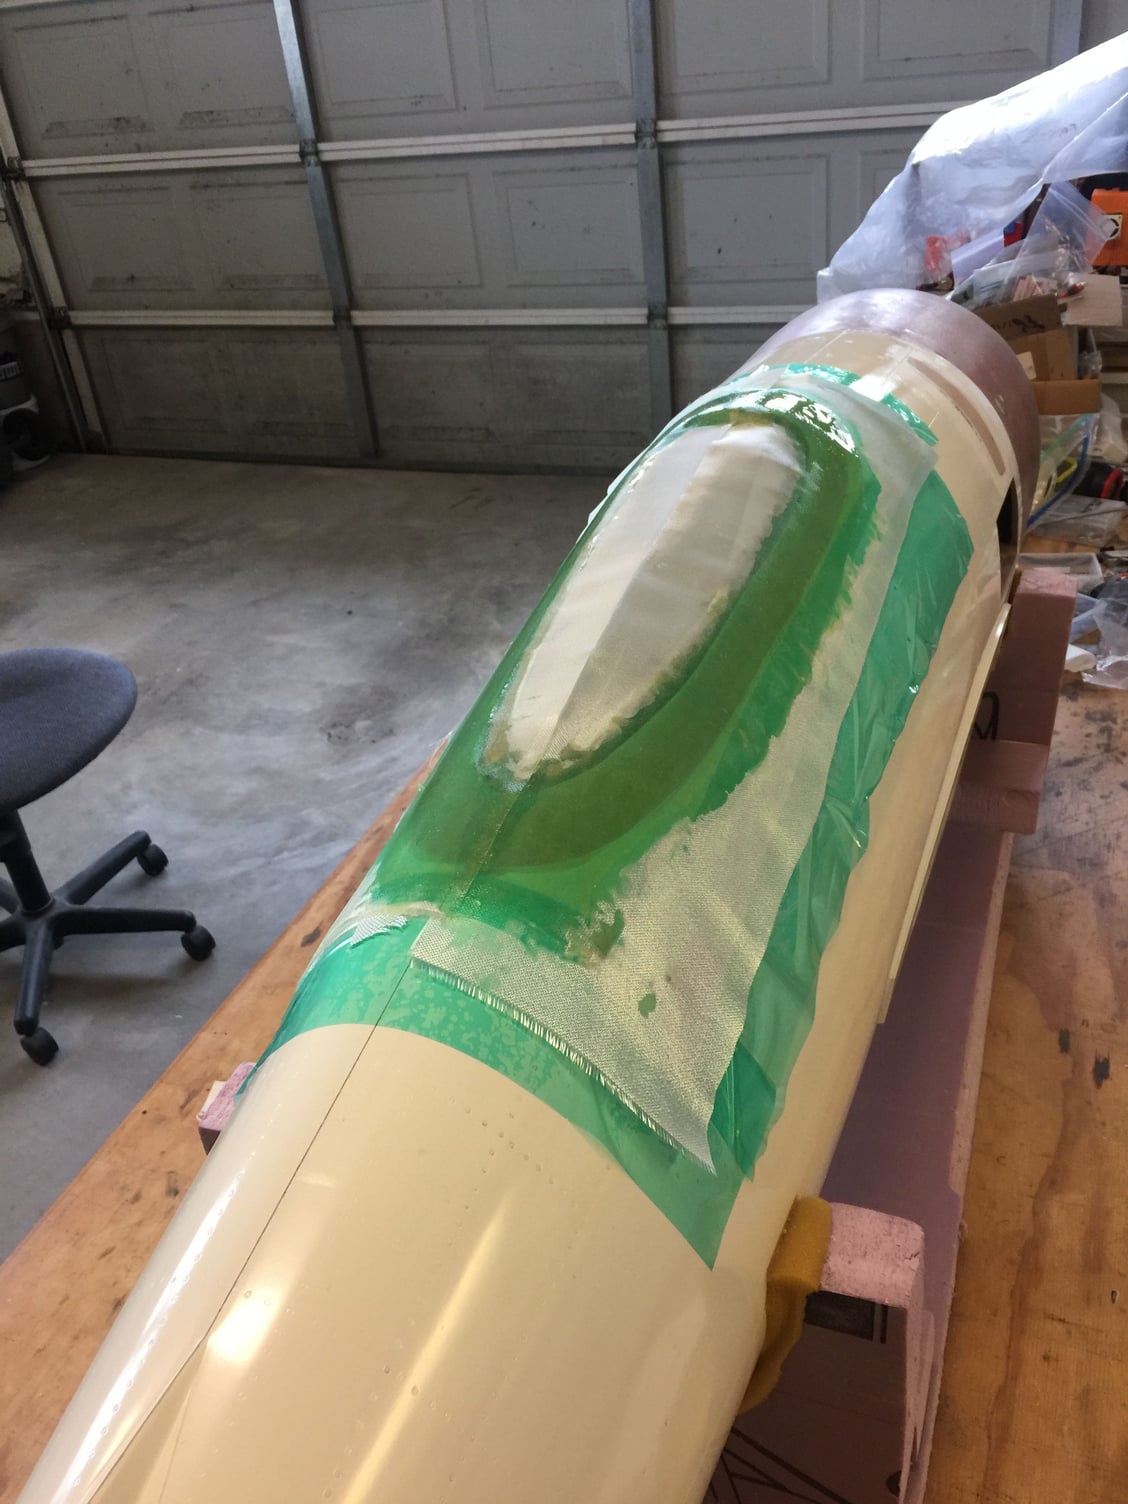
Well, after 4 years the day has finally arrived. It’s time to close the hole in the fuselage for the smaller canopy. I have been dreading this literally for years! Didn’t really know how to approach it but I think I figured it out: I used some very nice 1/32 basswood sheet to back up the hole. I covered this wood with release tape then glued it in place.

 02-27-2020, 12:12 AM
#287
My Feedback: (21)
Reading your build brought back some fond memories. I lost mine on the third flight due to aileron flutter. It was the first time I really ran it at full throttle (3W-155 four cylinder). I saw the aileron buzz & the wing immediately exploded. Make sure all your control horns have extreme gluing surface area. There just isn't sufficient structure in any of the control surfaces. Awesome flying airplane up till then! Landed like a trainer.
02-27-2020, 04:33 AM
#288
My Feedback: (7)
Yep, these airframes are famous for flutter problems. Then to compound the problem 3W drills holes in the base of the hinges in the wing weakening them drastically. Crazy.
I’m going to take a number of steps to prevent flutter in general, including sealing the surface gaps, counterbalance etc.
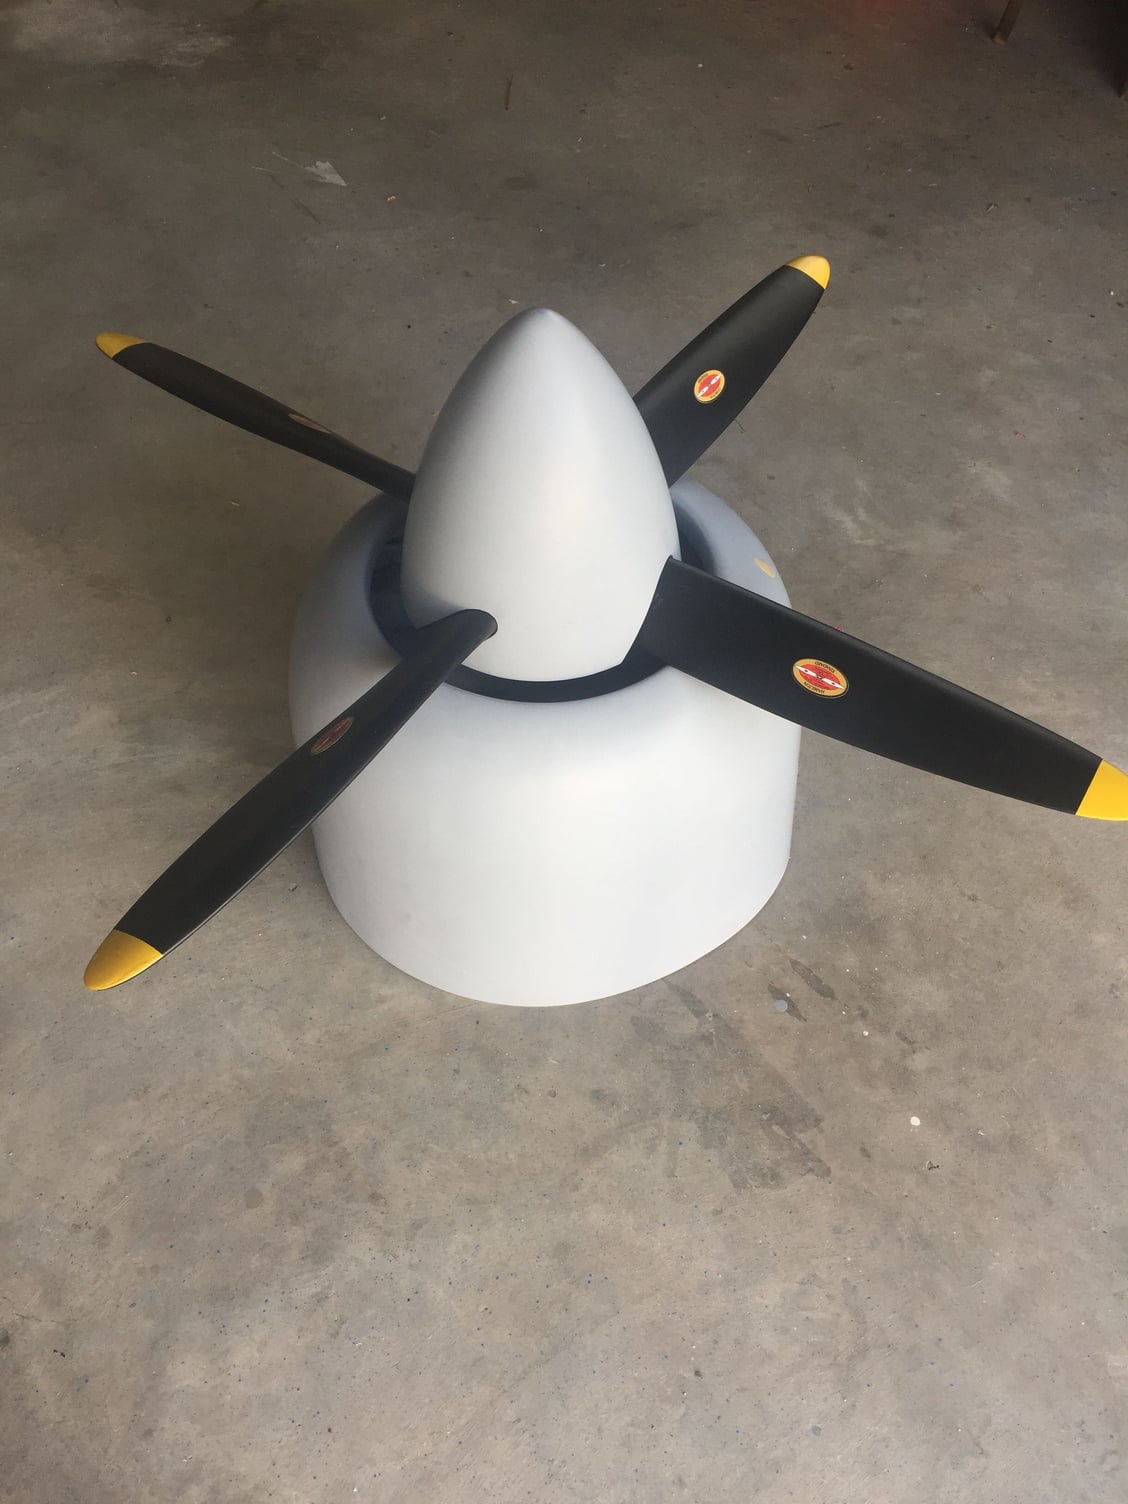
Its going to be FAST with the Moki 300. Although probably not faster than your setup was. Main thing holding the Moki back is getting the right prop on it for max speed and my gorgeous SL 4 Blade is a beautiful compromise.
I’m going to take a number of steps to prevent flutter in general, including sealing the surface gaps, counterbalance etc.
Its going to be FAST with the Moki 300. Although probably not faster than your setup was. Main thing holding the Moki back is getting the right prop on it for max speed and my gorgeous SL 4 Blade is a beautiful compromise.
Last edited by mitchilito; 02-27-2020 at 04:36 AM.
 03-04-2020, 04:53 AM
#290
My Feedback: (7)
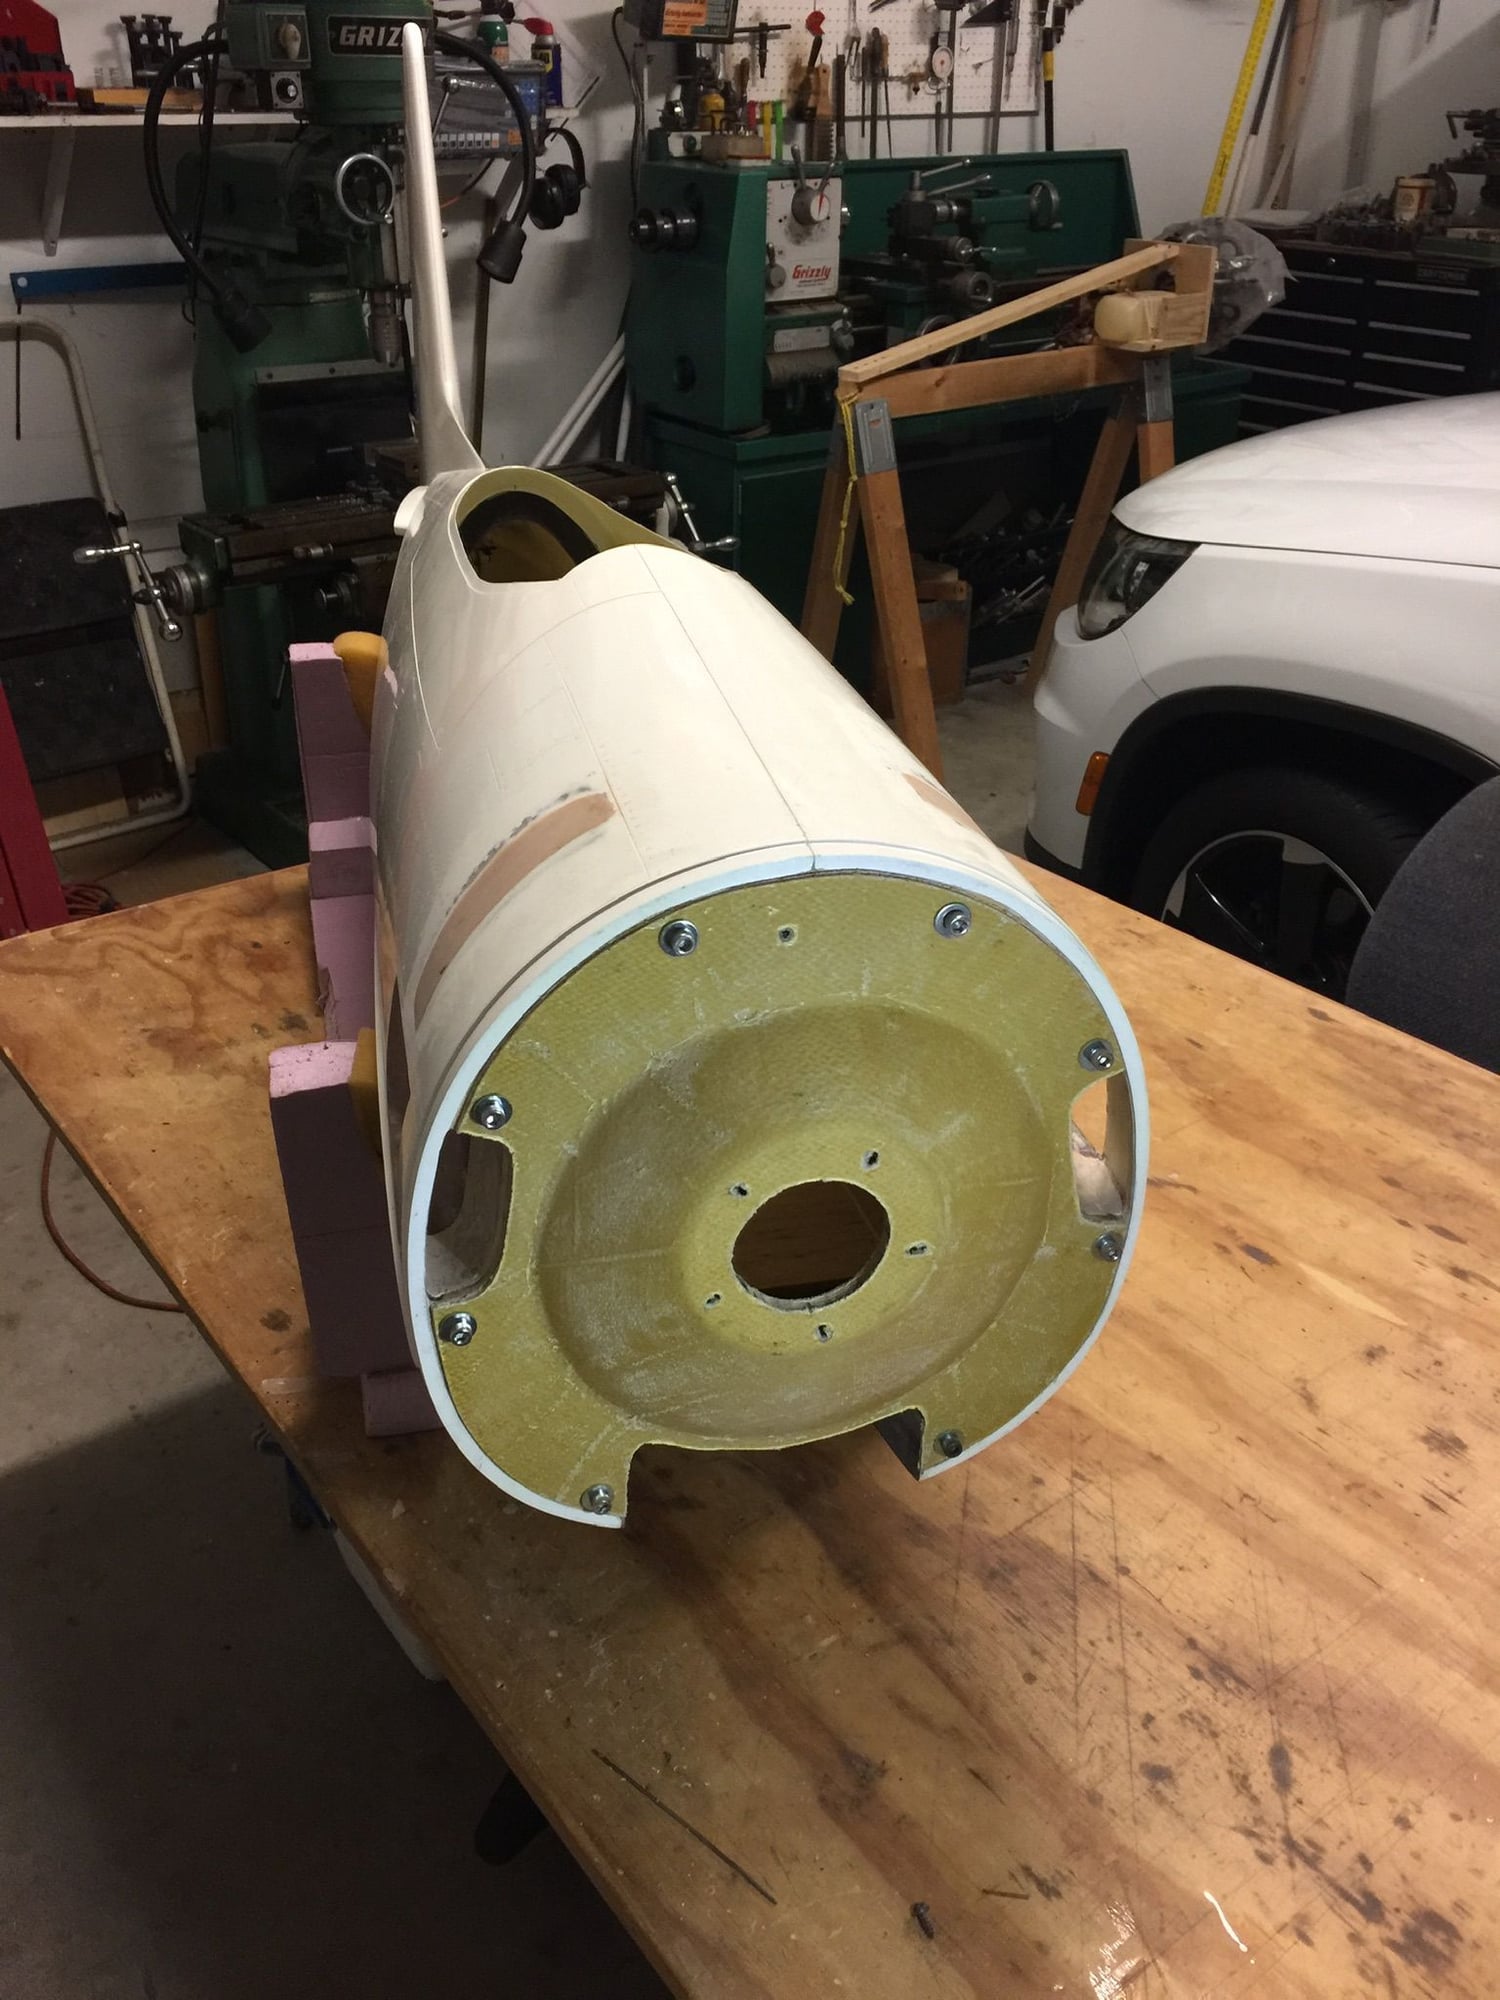
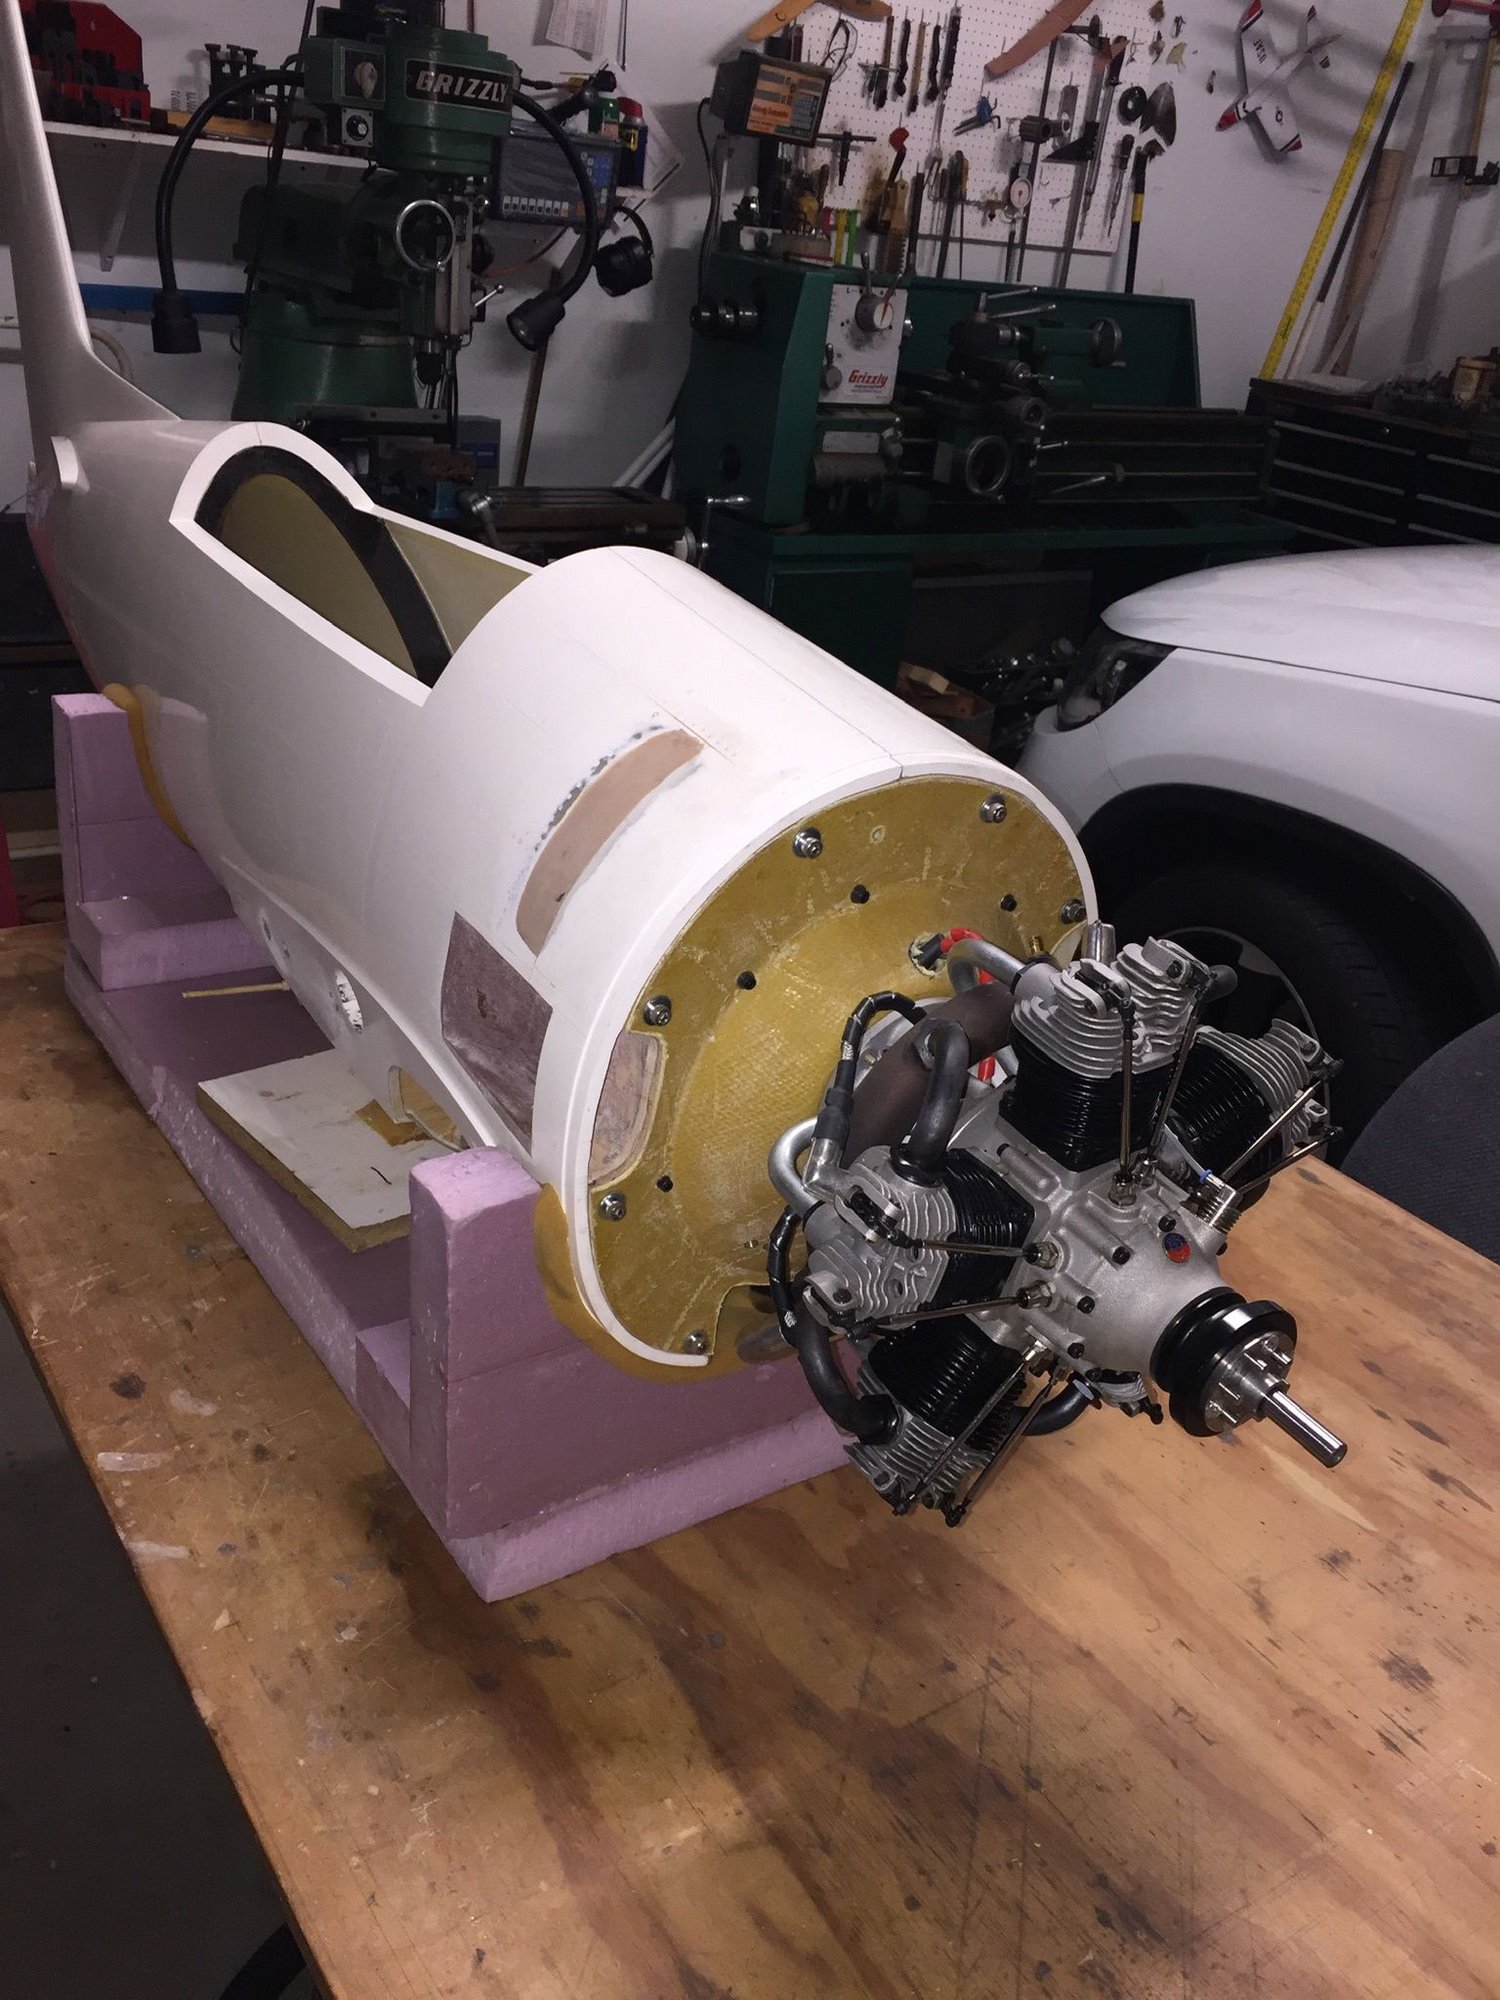
Took a break from spinner work to install a bulkhead in back (the one on top). With the motor on and holding the plane in the cradle I could flex the tail more than I liked. Detlef said this would happen!! This aircraft with this engine is going to be FURIOUS at speed so it’s best not to take any chances.
This small bulkhead is made from the same material as the rest: carbon-sandwiched foam. Super light and amazingly strong when installed. (Actually, the tailwheel bulkhead is carbon sandwiched ply).
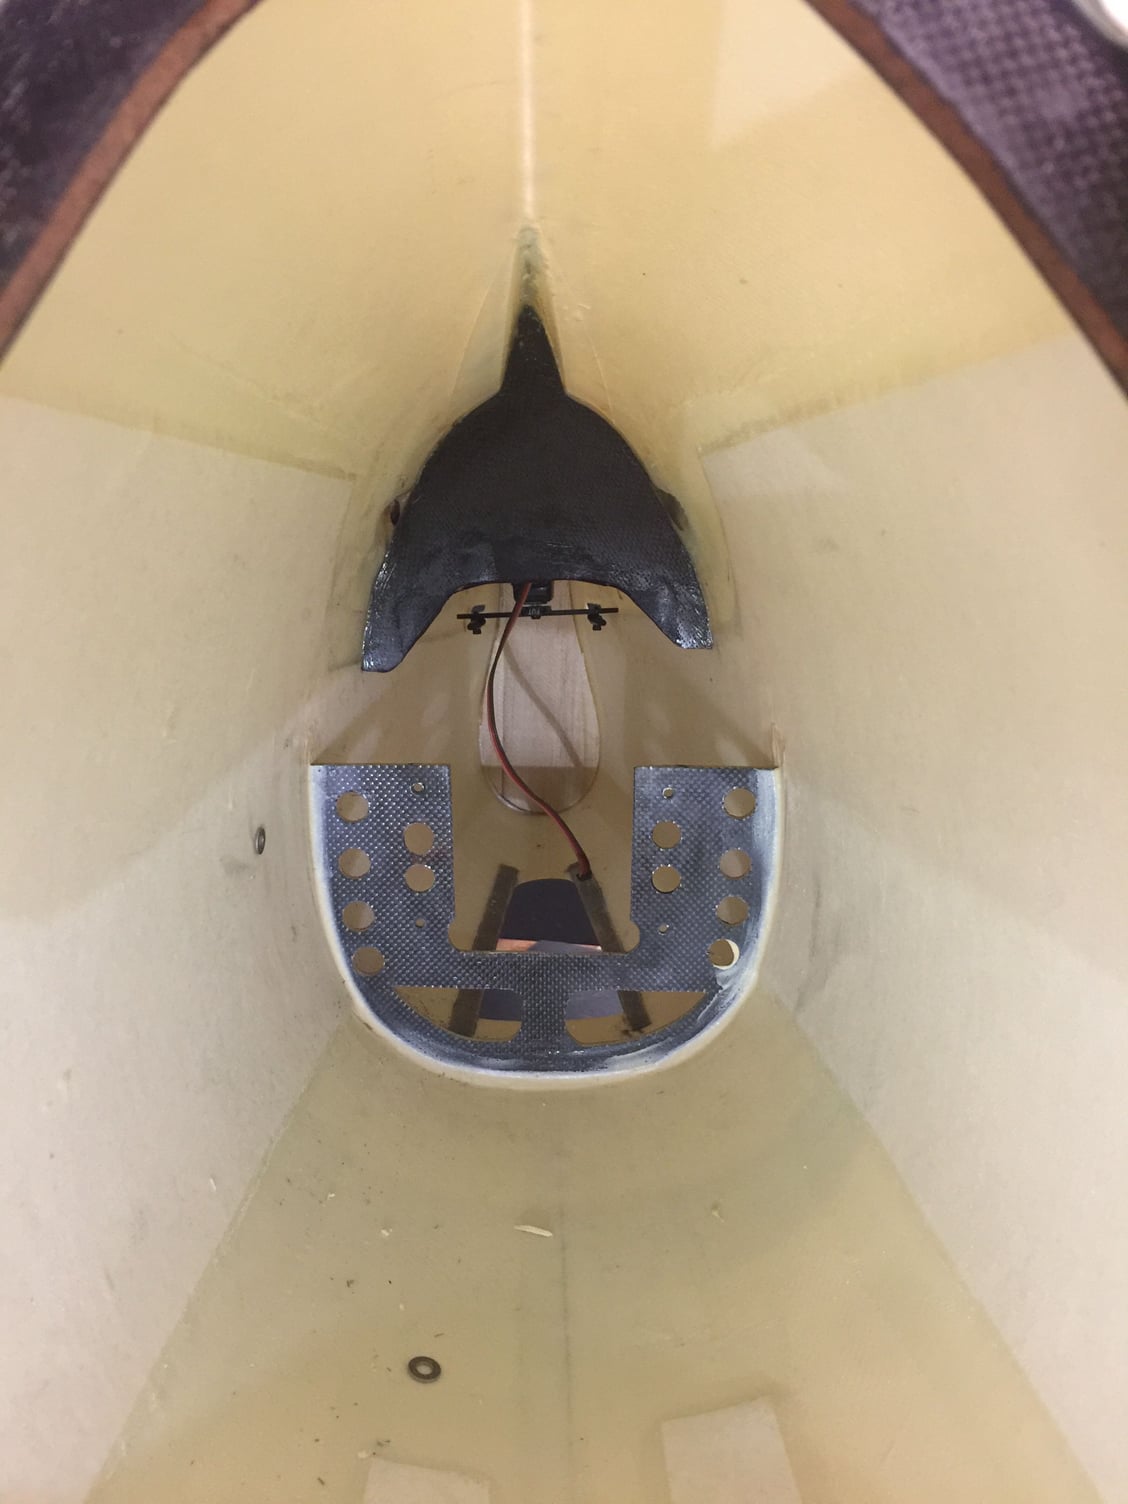
This small bulkhead is made from the same material as the rest: carbon-sandwiched foam. Super light and amazingly strong when installed. (Actually, the tailwheel bulkhead is carbon sandwiched ply).
Last edited by mitchilito; 03-04-2020 at 05:03 AM.
03-04-2020, 05:00 AM
#291
Nice work Mitch.
What a mess with the spinner...poor lathe
I was not too lazy with the main gear
After some calculating and testing I defined the 2 springs for the mains and made some test versions before I finally placed an order.
Today the ordered springs came, and so we can slowly reach the end of the Assembly stage.
I am going to paint mine all White- simply because I like the look very much
Last edited by Detlef Kunkel; 03-04-2020 at 05:06 AM.
 03-29-2020, 04:19 AM
#294
My Feedback: (7)
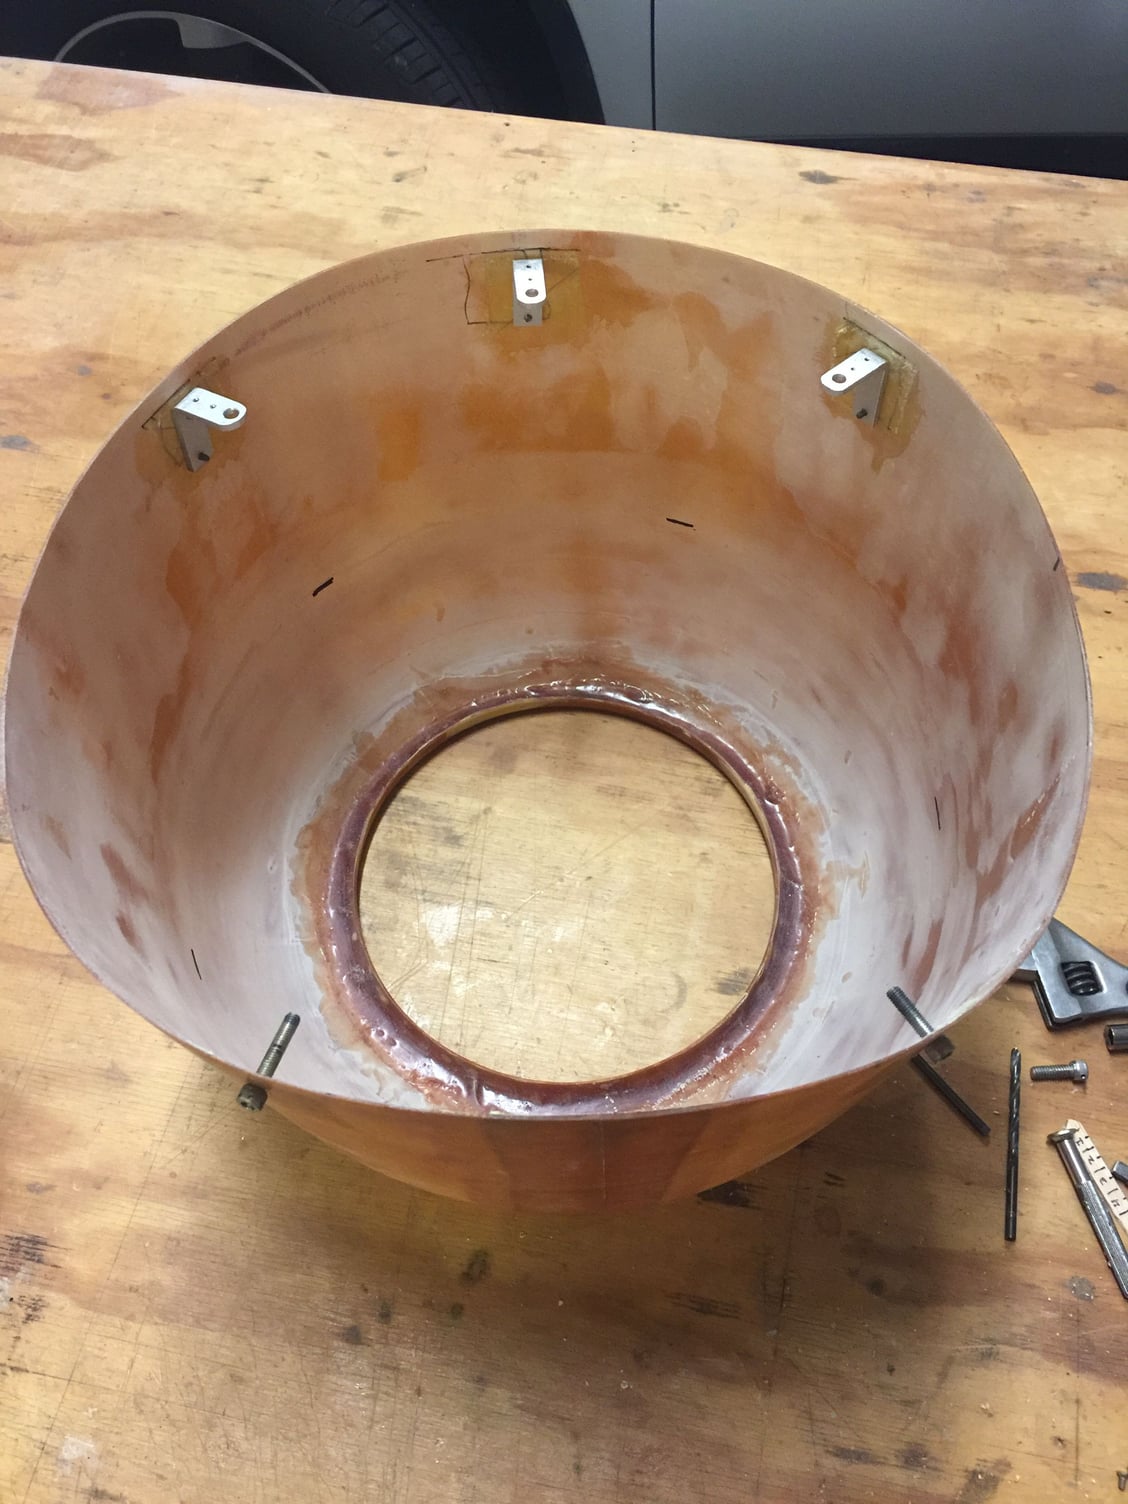
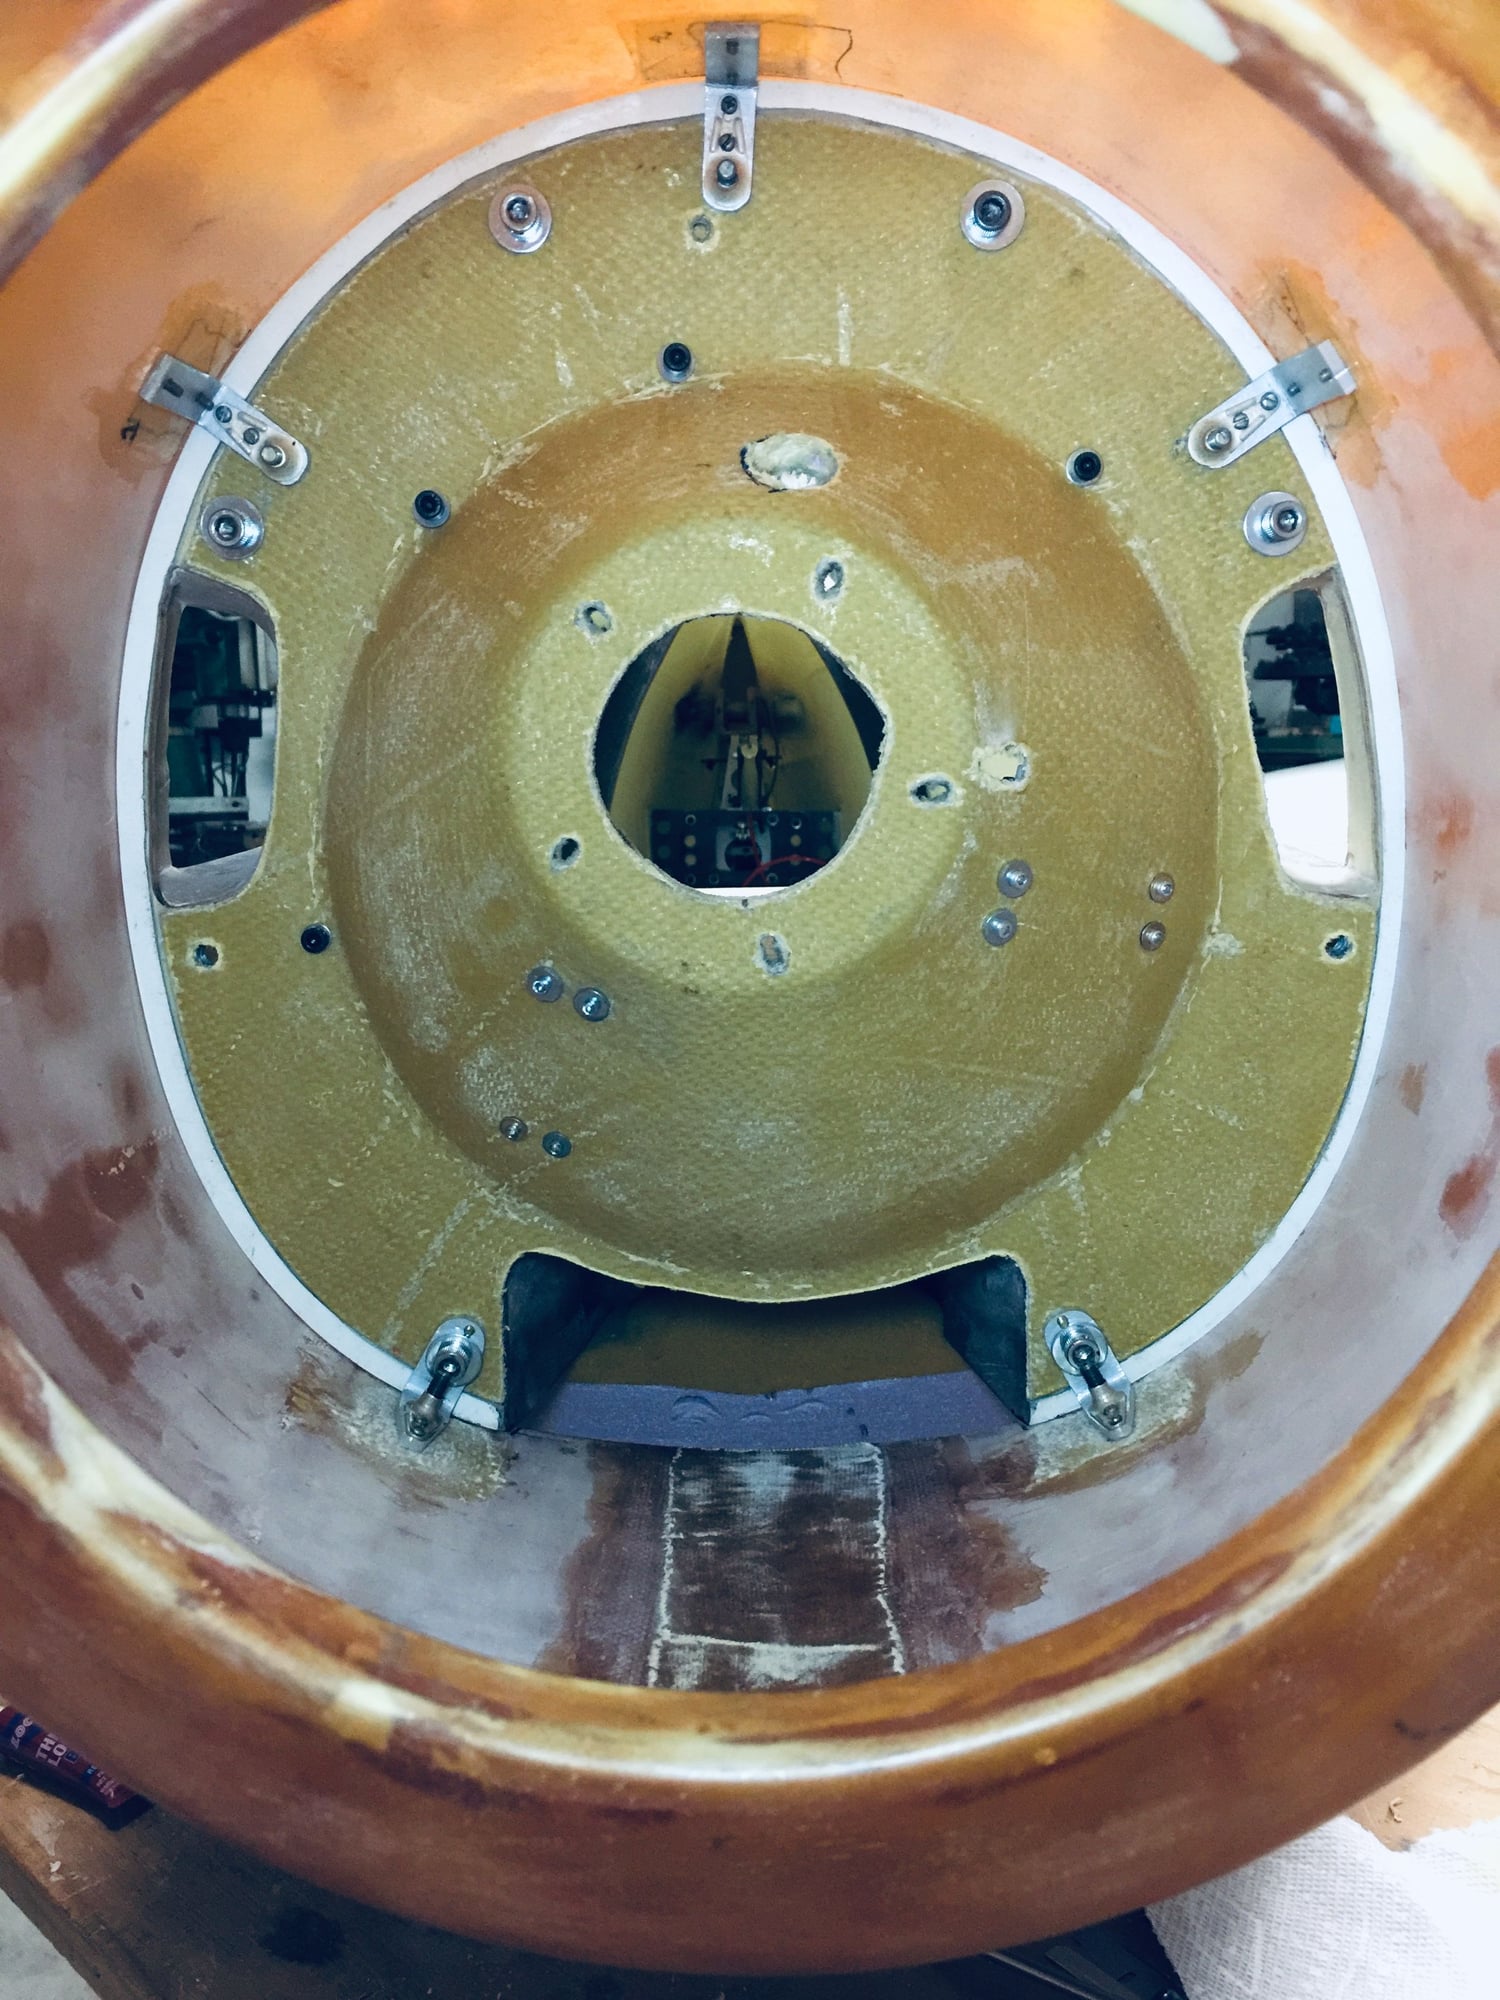
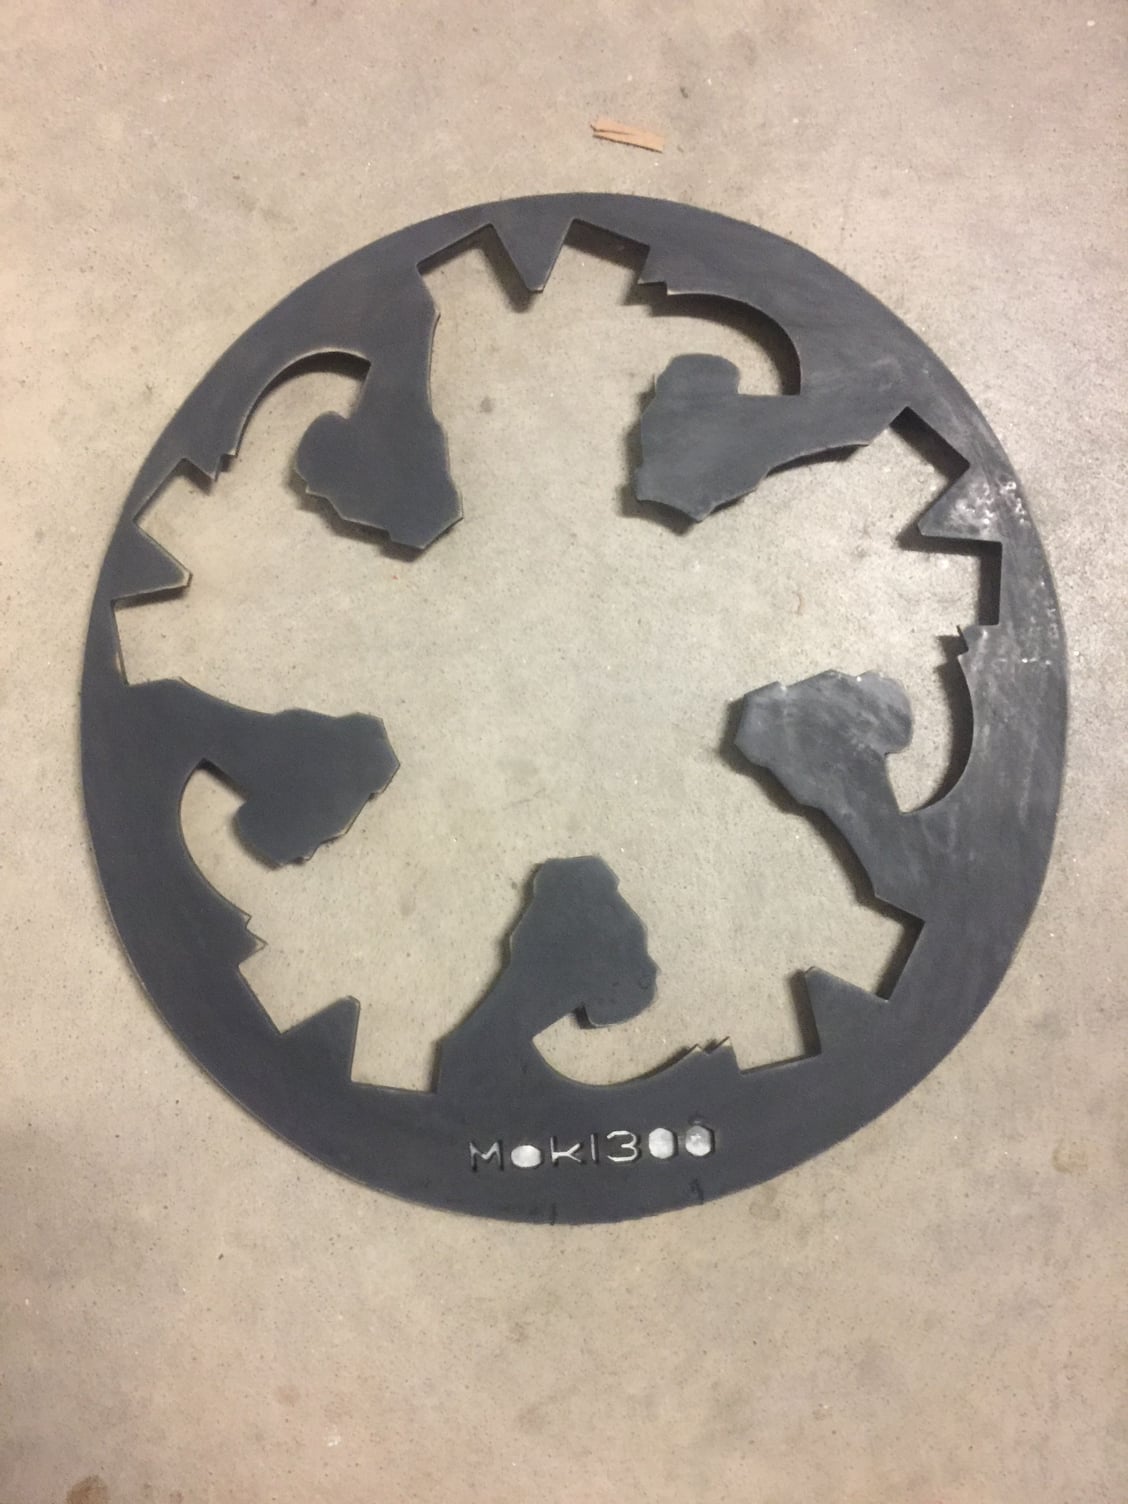
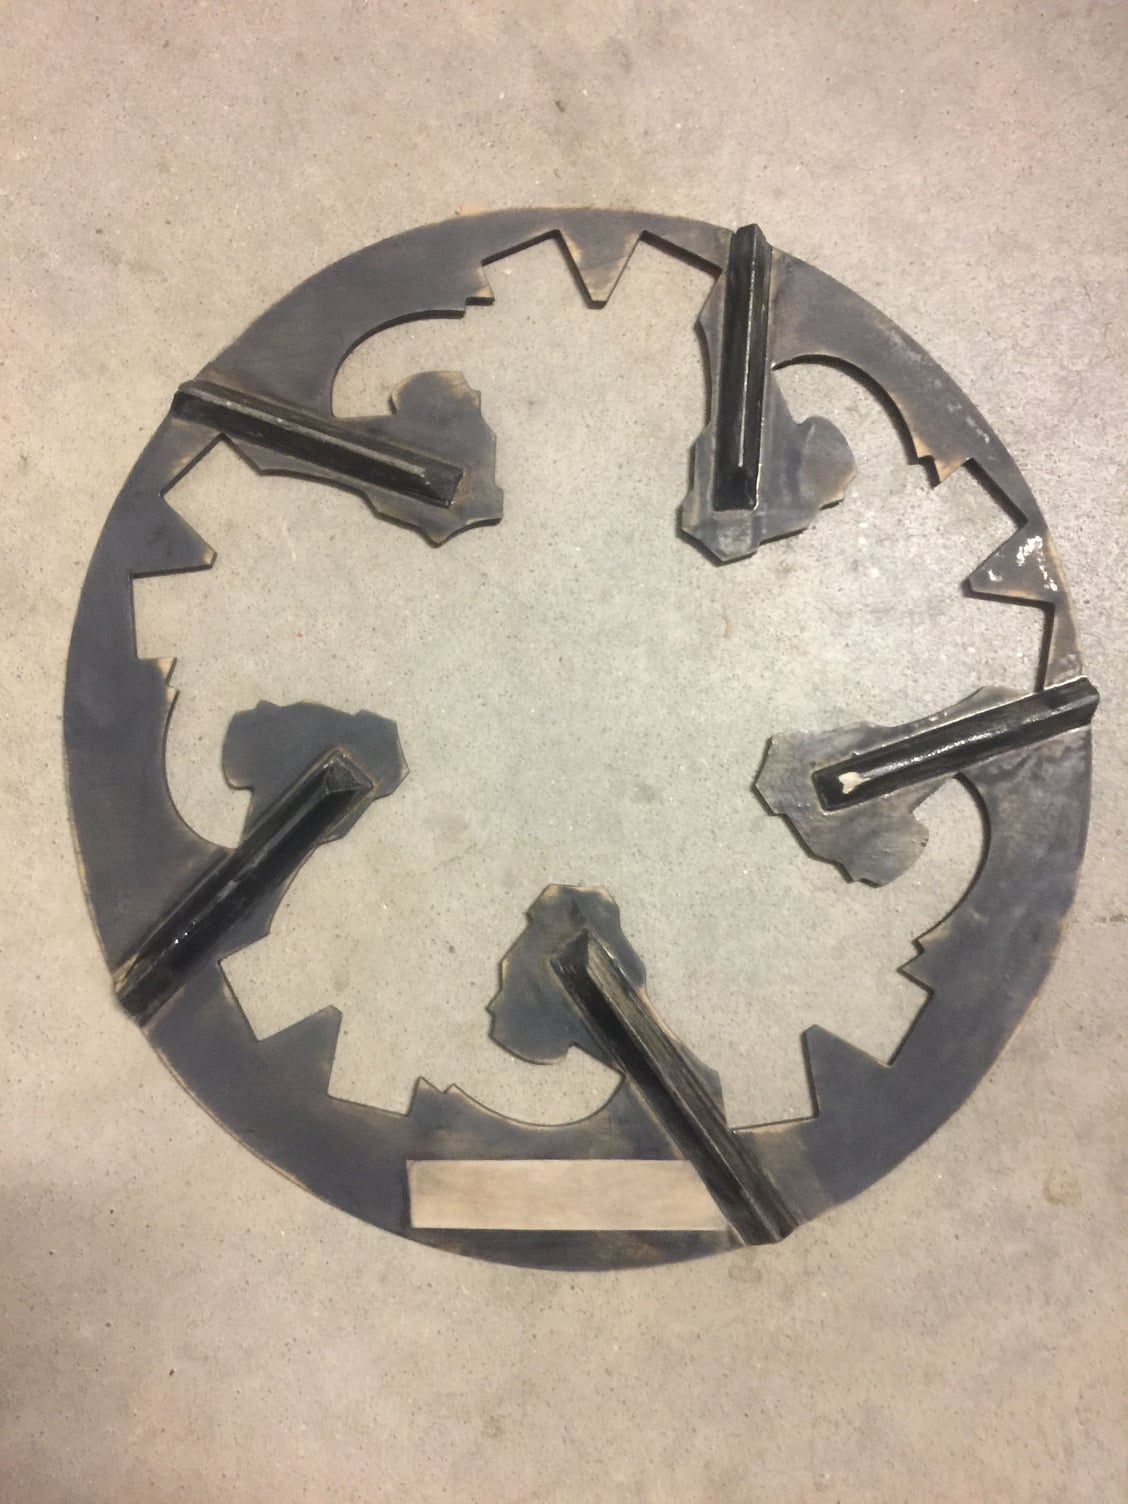
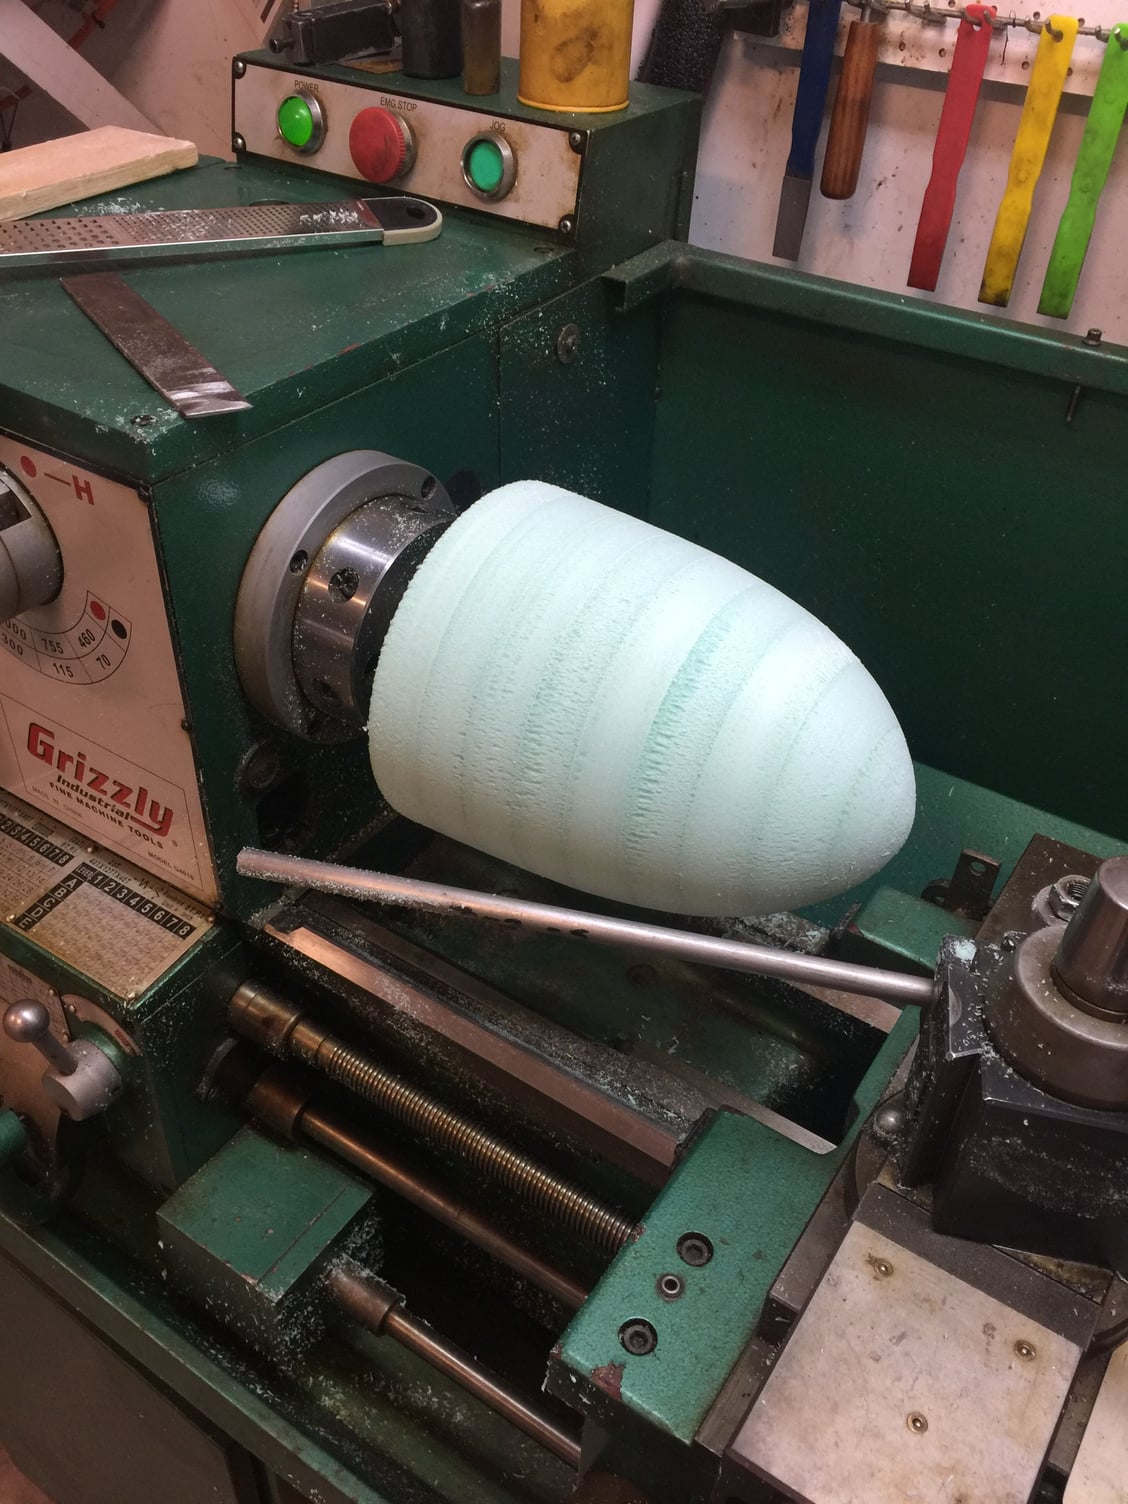
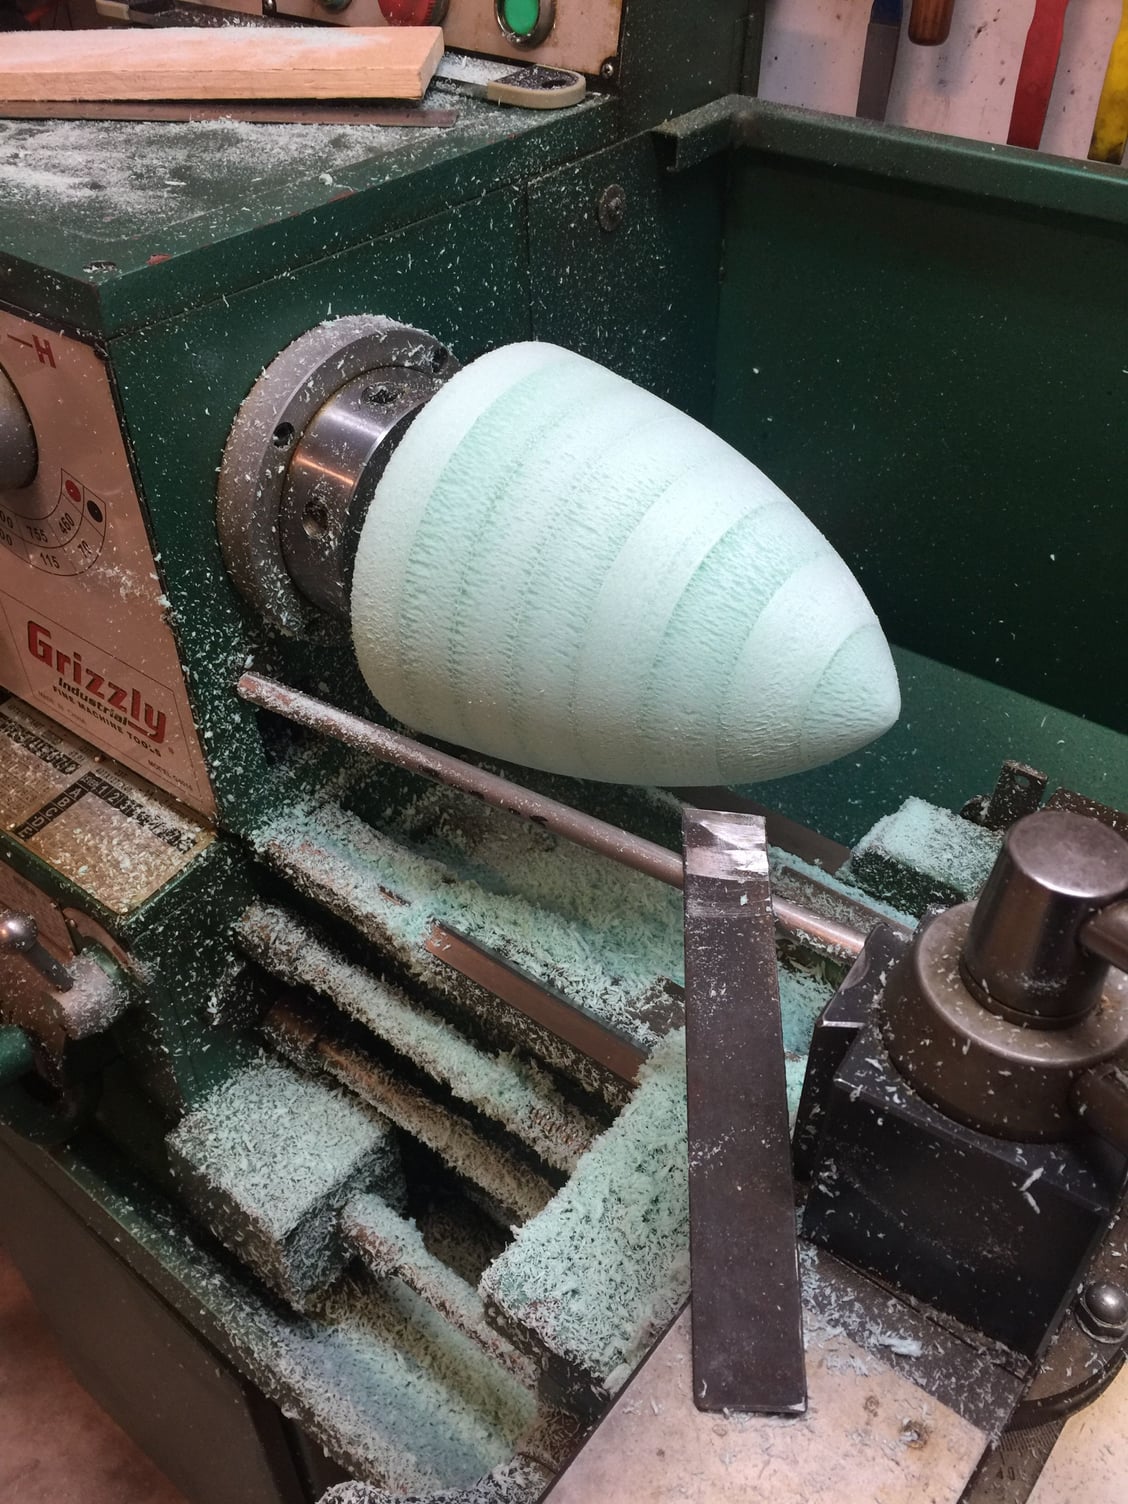
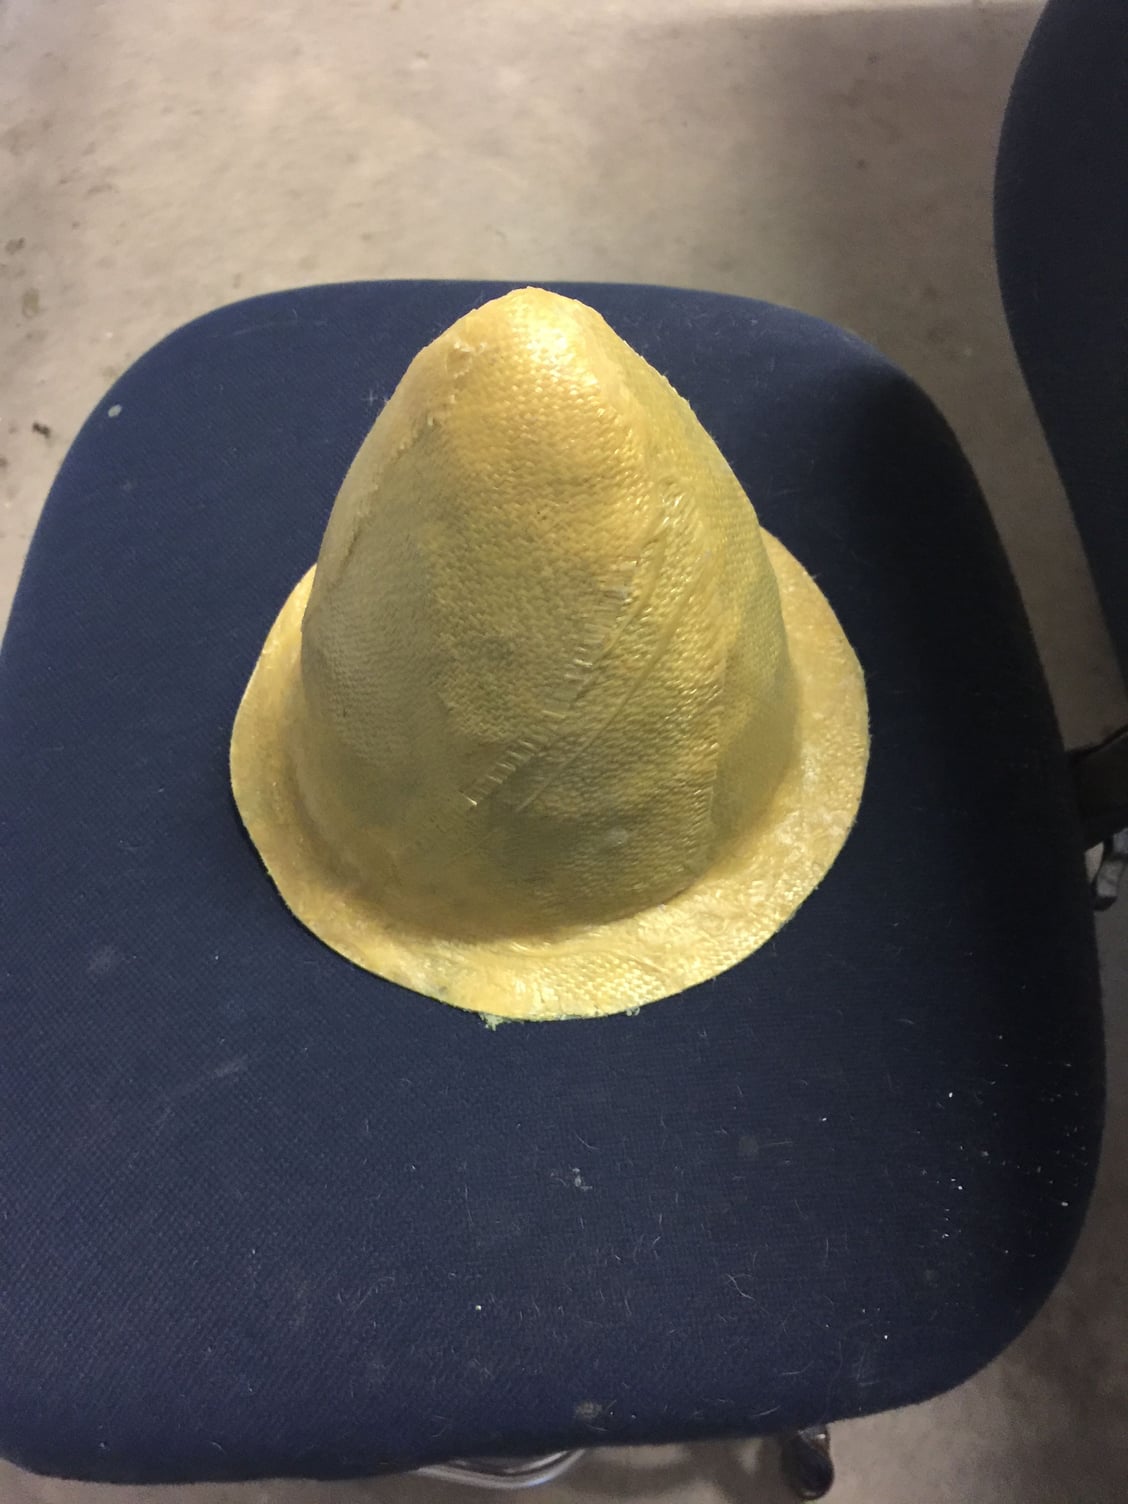
I ordered 6 oz bias cut carbon cloth and cut in to 1/4 wedges. I then laid them in place dry and wet them out with a brush. There’s just no way I could do a vacuum layup on this component. An important final step on every layup is to repeatedly scrape the brush dry and blot the layup until no more resin will come out. Yields surprisingly good results. This whole process would not be possible without the supple bias cut cloth.

04-03-2020, 04:32 AM
#295
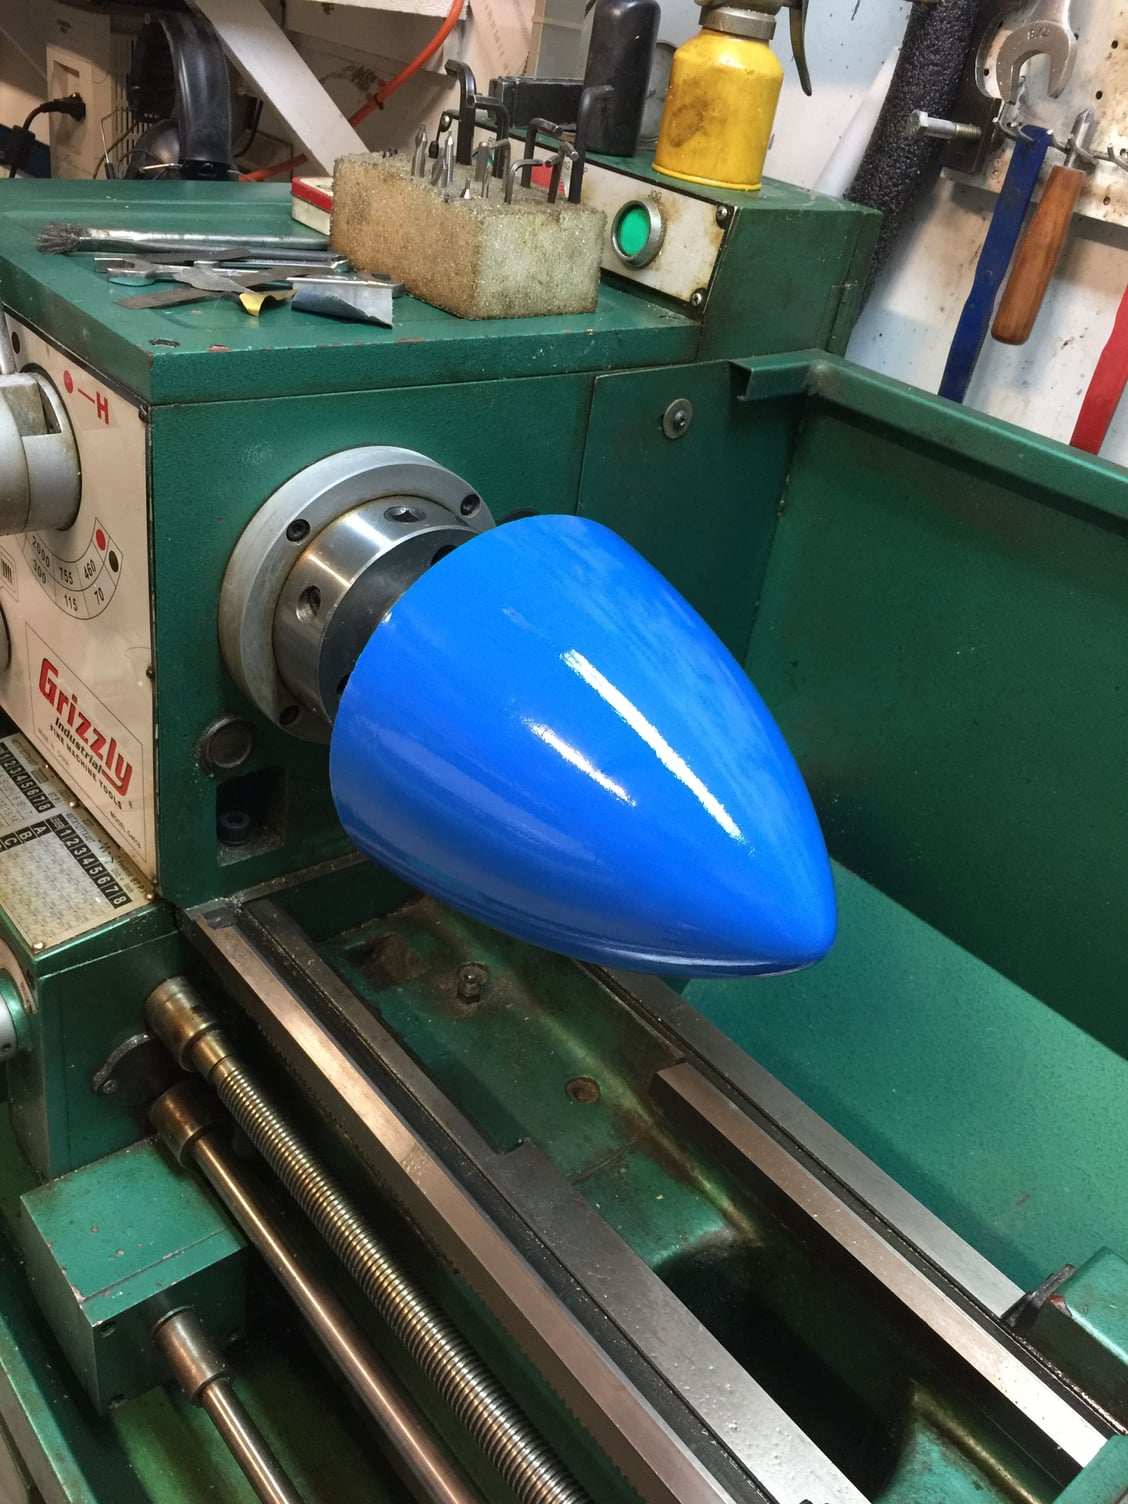
My Feedback: (7)
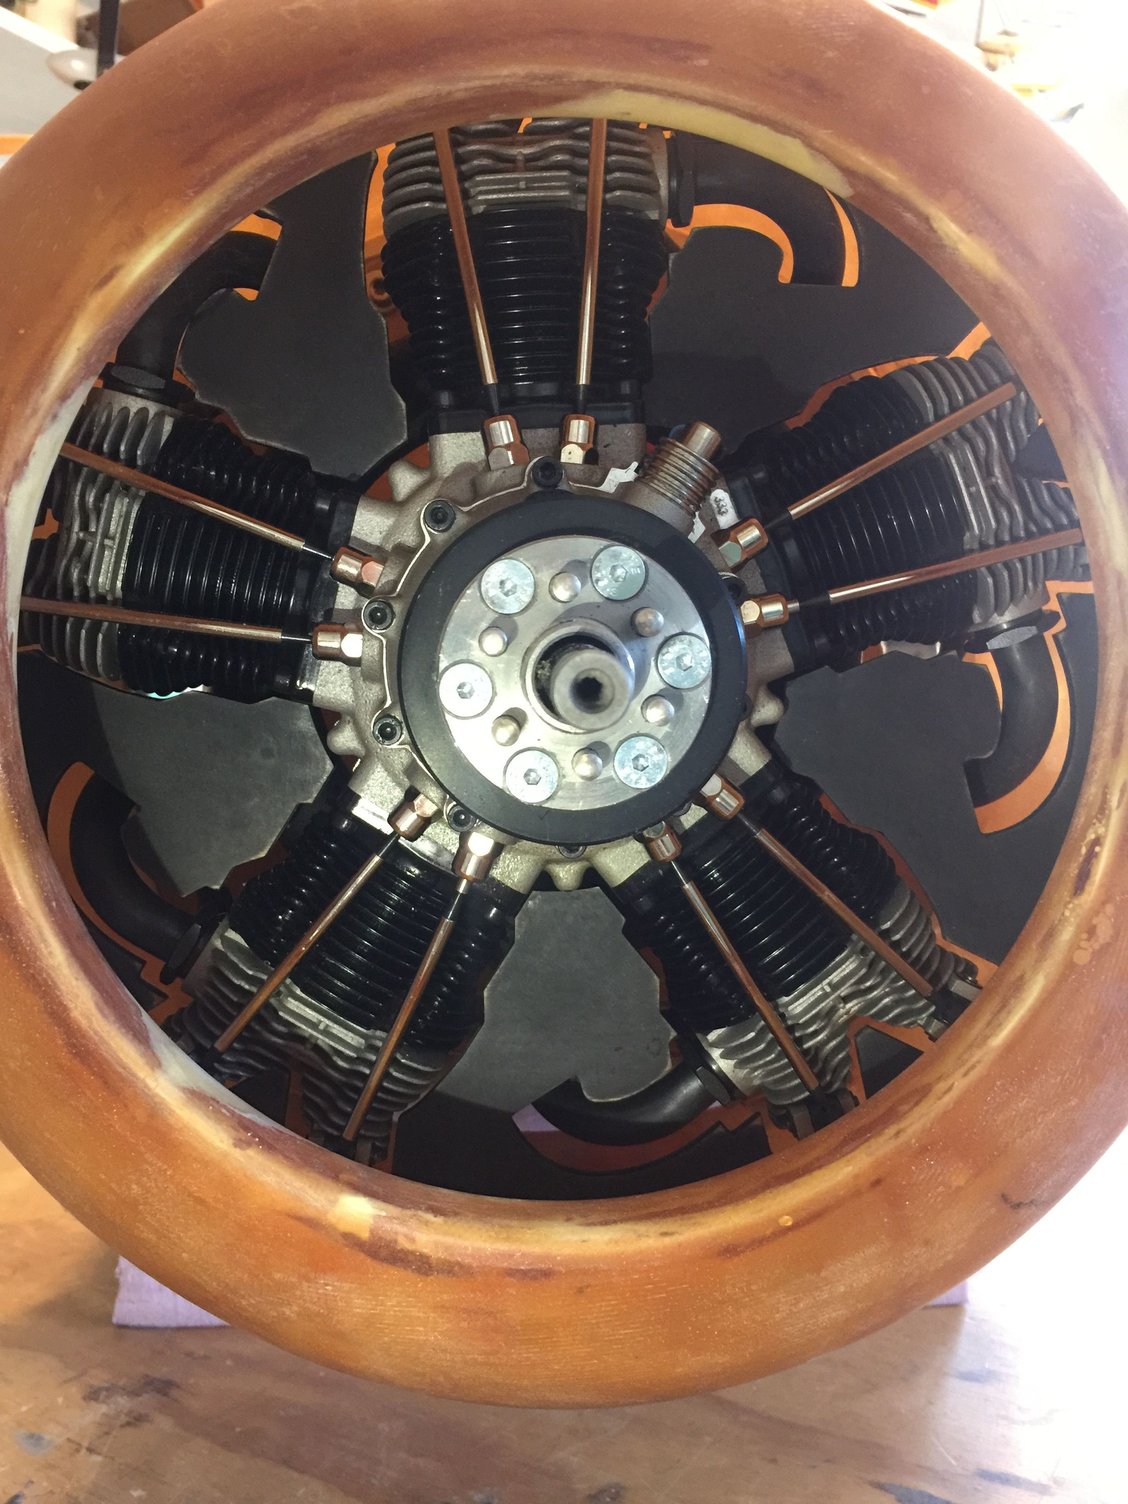
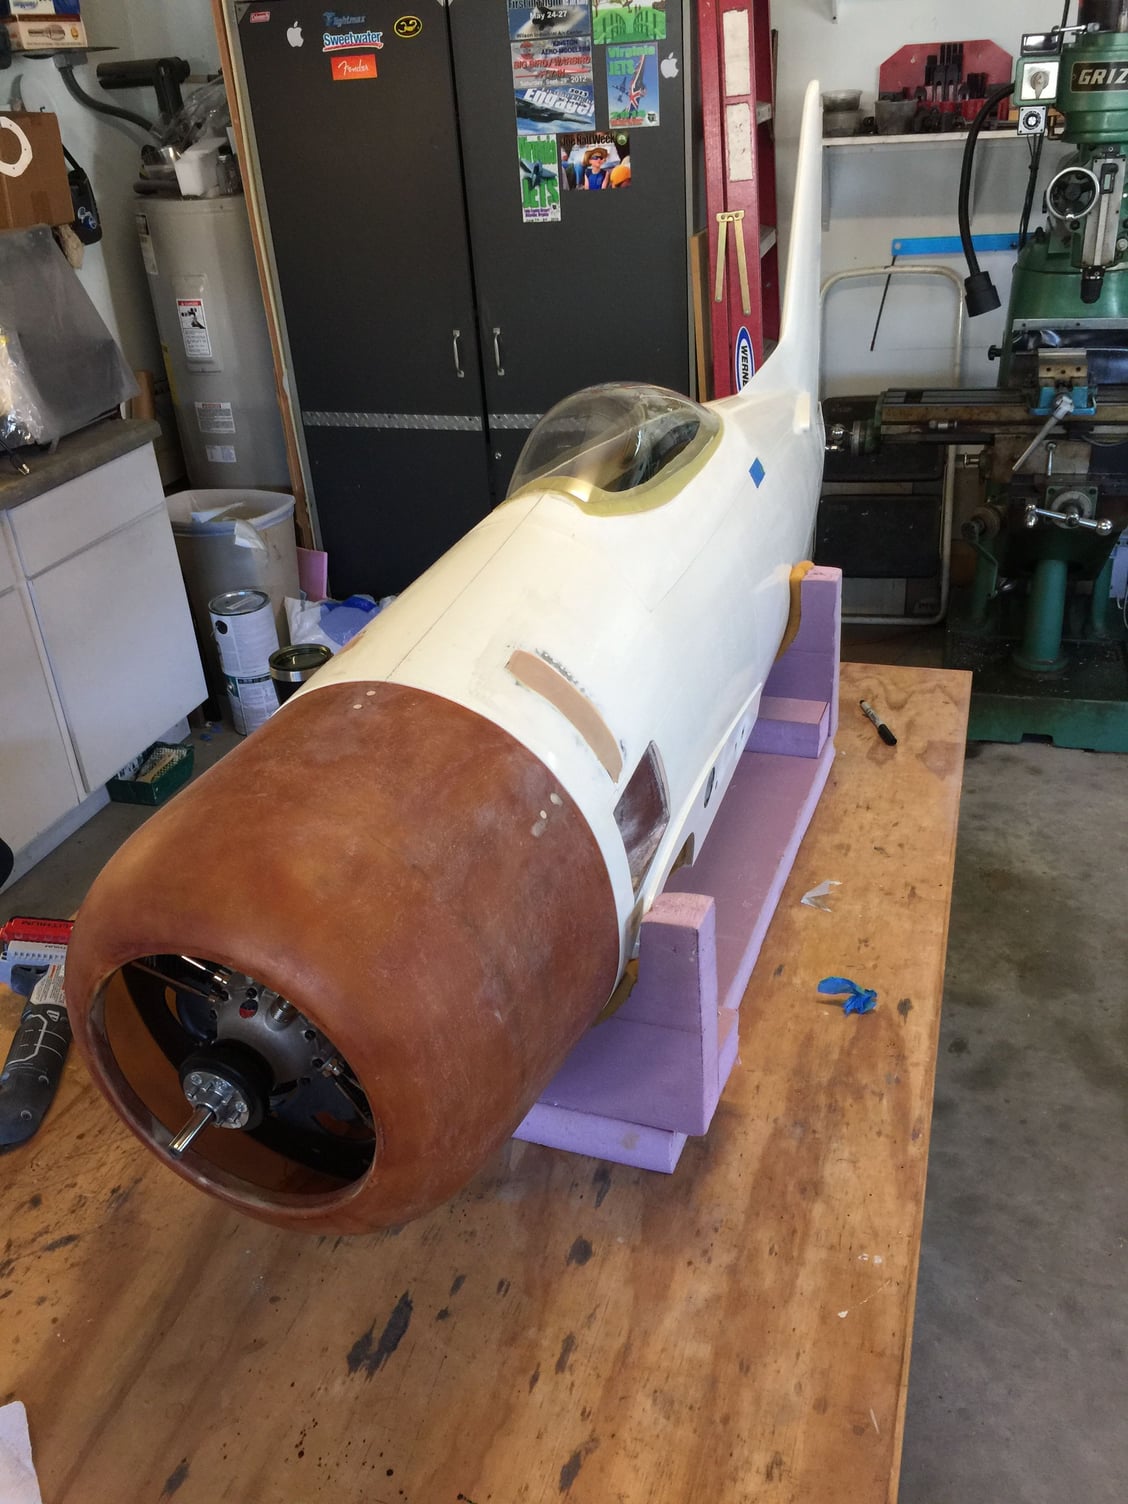
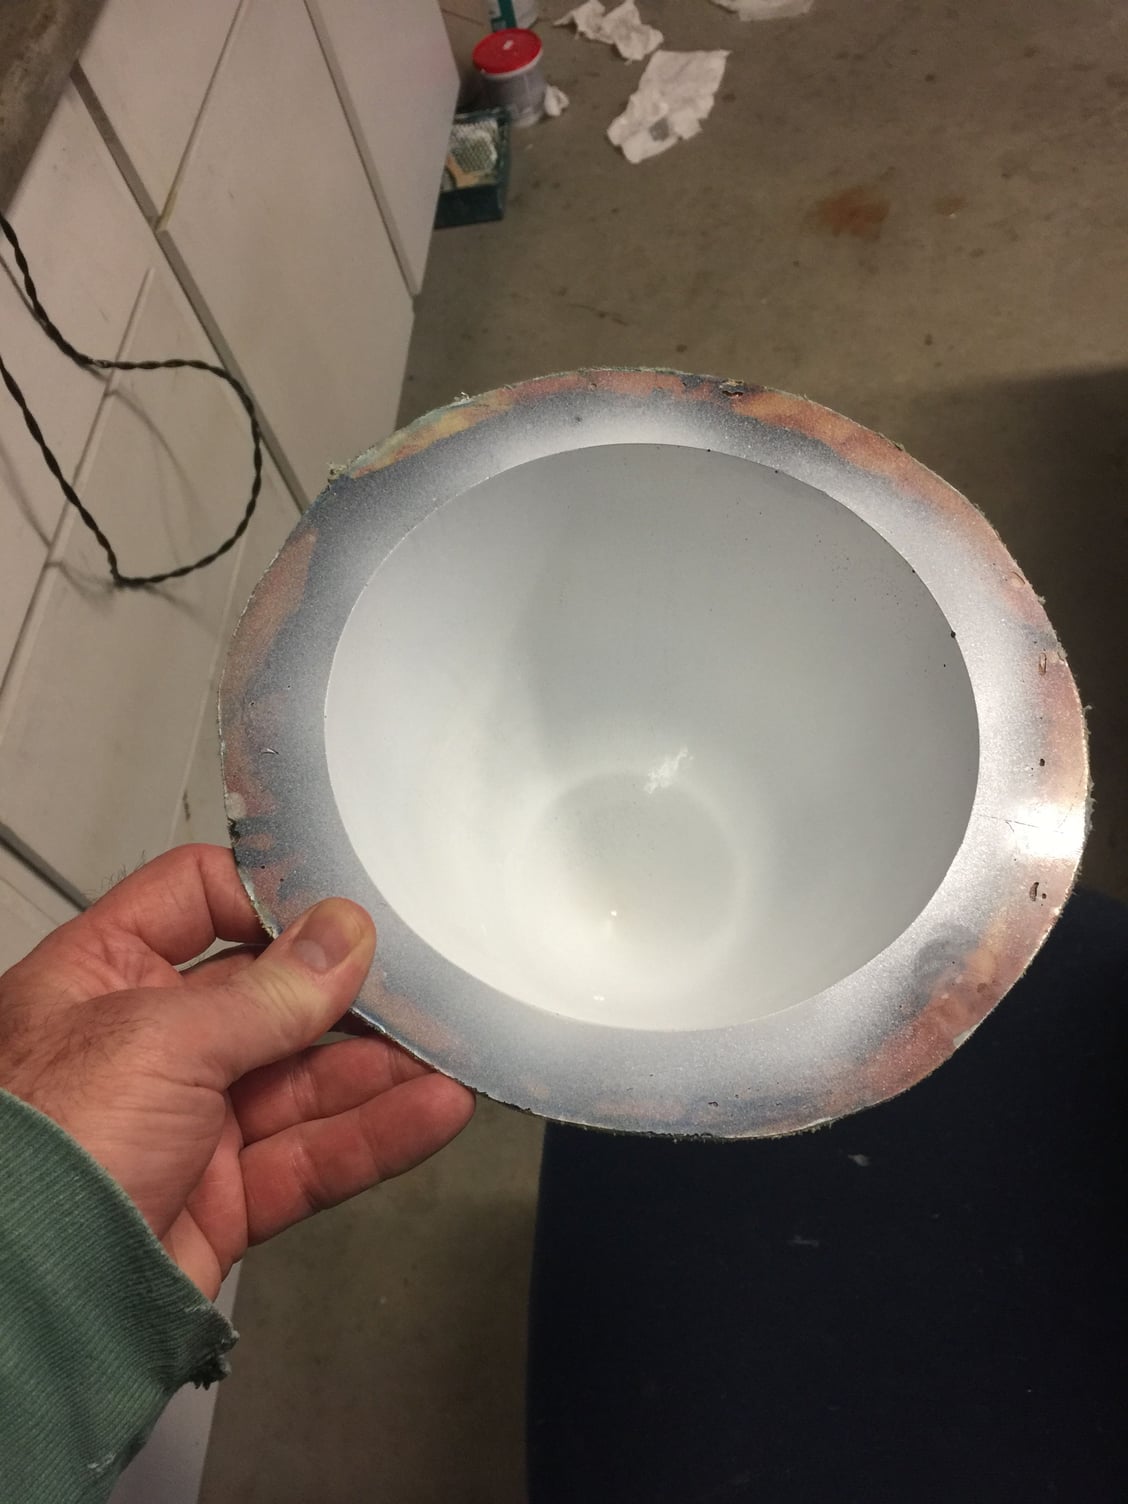
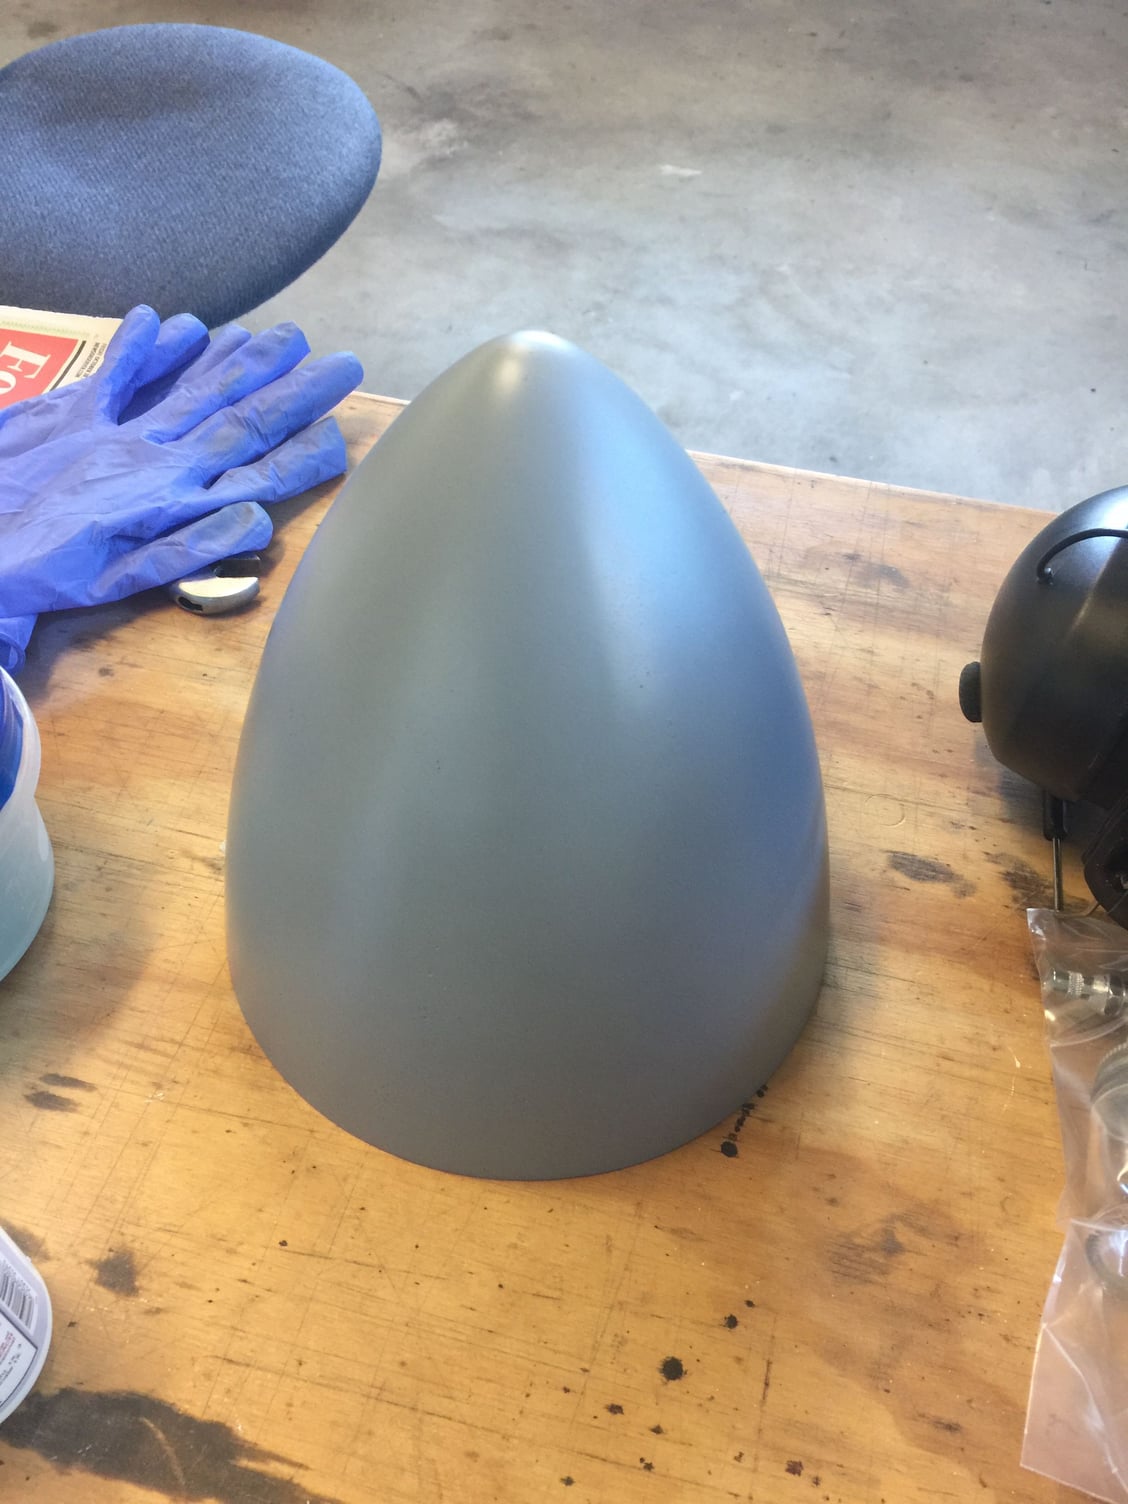
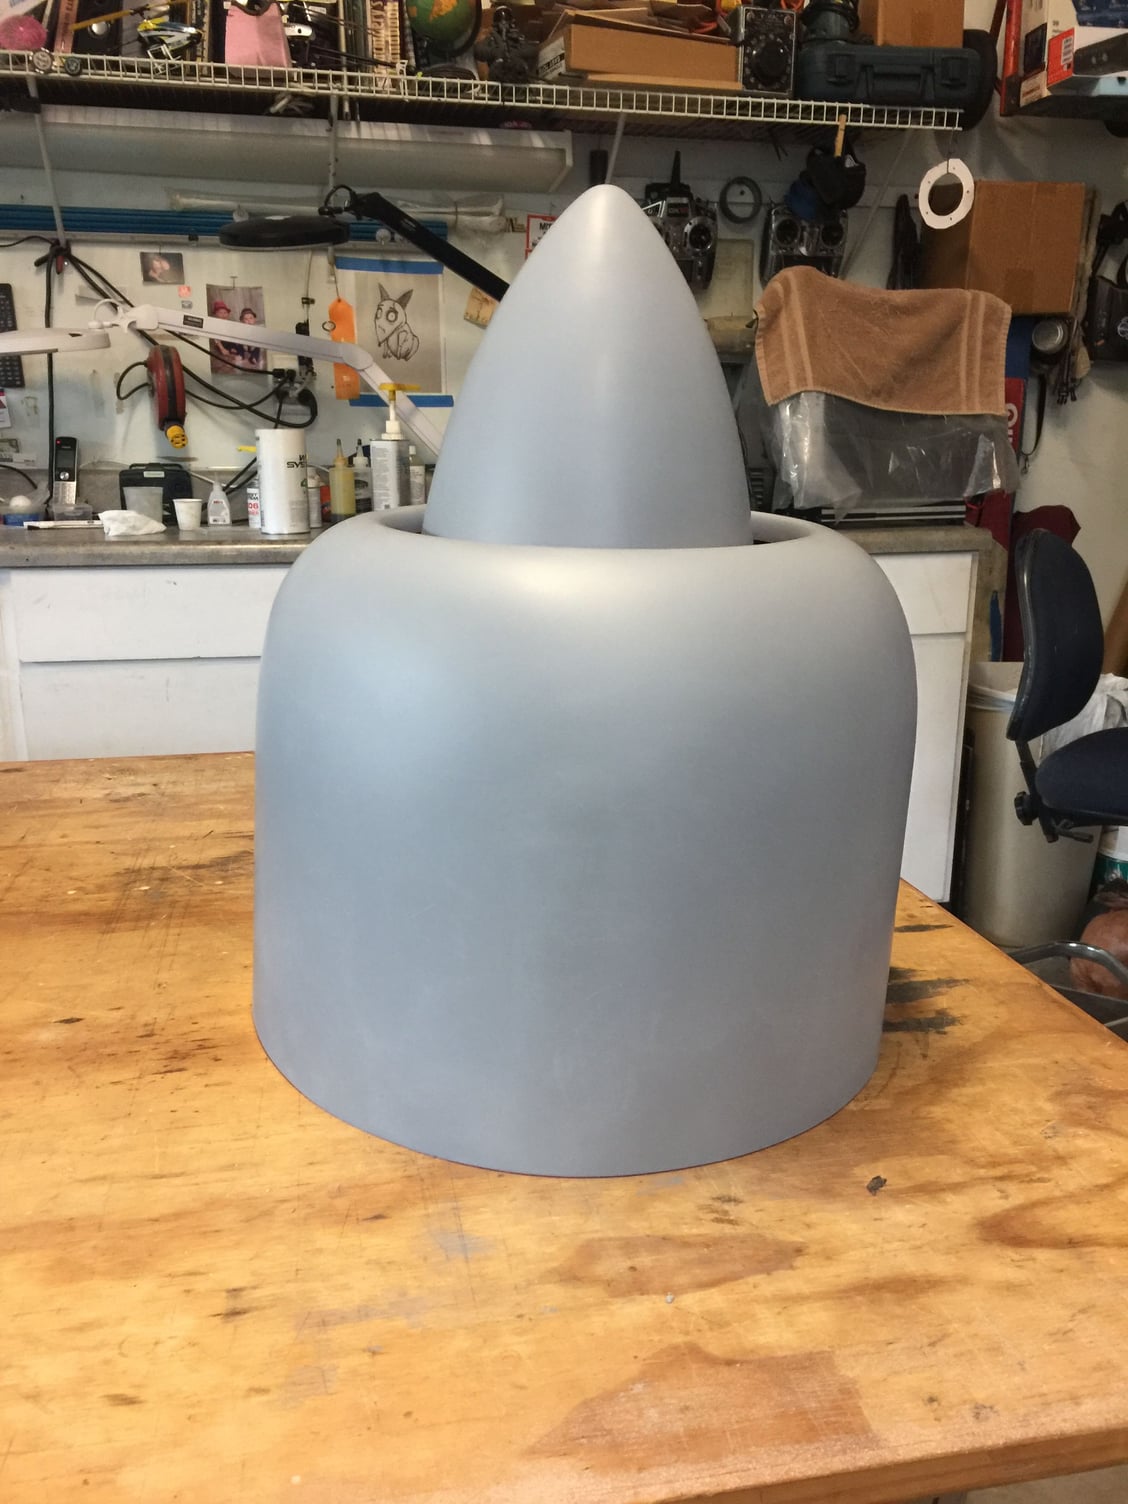
I’m pretty happy with the outcome. Took some wet sanding to get smooth and a bunch of pinhole work yet to do. It’s huge but only weighs 7 ounces. FYI- starting from outside in: 2 layers 3oz bias glass then 3 layers 6oz bias carbon. I think that’s just right, structurally. Around 2mm wall thickness.
Last edited by mitchilito; 04-03-2020 at 04:59 AM.
 04-07-2020, 10:35 PM
#299
I am not too lazy either.
Found the time to paint the U/C. One will stay all metal, the other guy will paint his one White, too.
Lots of sanding, shaping, rounding all edges, covering all functional surfaces, etch primer applied and then a little darker toned white coat.
I didnt count the parts, must be over 30 or so
This U/C is soo sexy in White
Last edited by Detlef Kunkel; 04-07-2020 at 10:48 PM.